David Holman
-
Posts
4,359 -
Joined
-
Last visited
-
Days Won
117
Content Type
Profiles
Forums
Events
Gallery
Blogs
Everything posted by David Holman
-
Whisper it quietly, but I have also pored long and hard over that area and it is one of several where Northport Quay might be. Others are Broadhaven, to the east of Belmullet and any number of potential harbours along the coast between there and back to Sligo! Have also wondered, had anyone wanted a link from Sligo to Ballina, then a short line from the Burma Road (say Swinford to Foxford) could make an interesting model. Another thought is to use the Sligo quayside branch, extending it along the shore to Strandhill that way. Whatever - for me, this sort of engineering is very much part of the fun. It also, as you say, creates the reasons for a railway being built - the traffic and revenue, both passenger and freight, which of course equals the models that can be made. With 2mm scale offering a different perspective in terms of how space can be used, it sounds a fantastic project.
-
Rice's Westport Quay is just one many clever ideas from the design guru. Have always liked his pier terminus in the Scottish section of his light railway book that is worth a look.
-
Know nothing of the prototype, but very nice models!
-
N Scale Ballywillan, Co Longford.
David Holman replied to Kevin Sweeney's topic in Irish Model Layouts
Likewise! What did you use for the roof? -
Only if sprinkled with Chinchilla dust! Fantastic work Eoin - thanks for sharing.
- 26 replies
-
- 3
-

-

-
- lathe work
- machines
- (and 1 more)
-
Query relating to a model train I found in thrift store
David Holman replied to Mike's topic in General Chat
Any chance of pictures? -
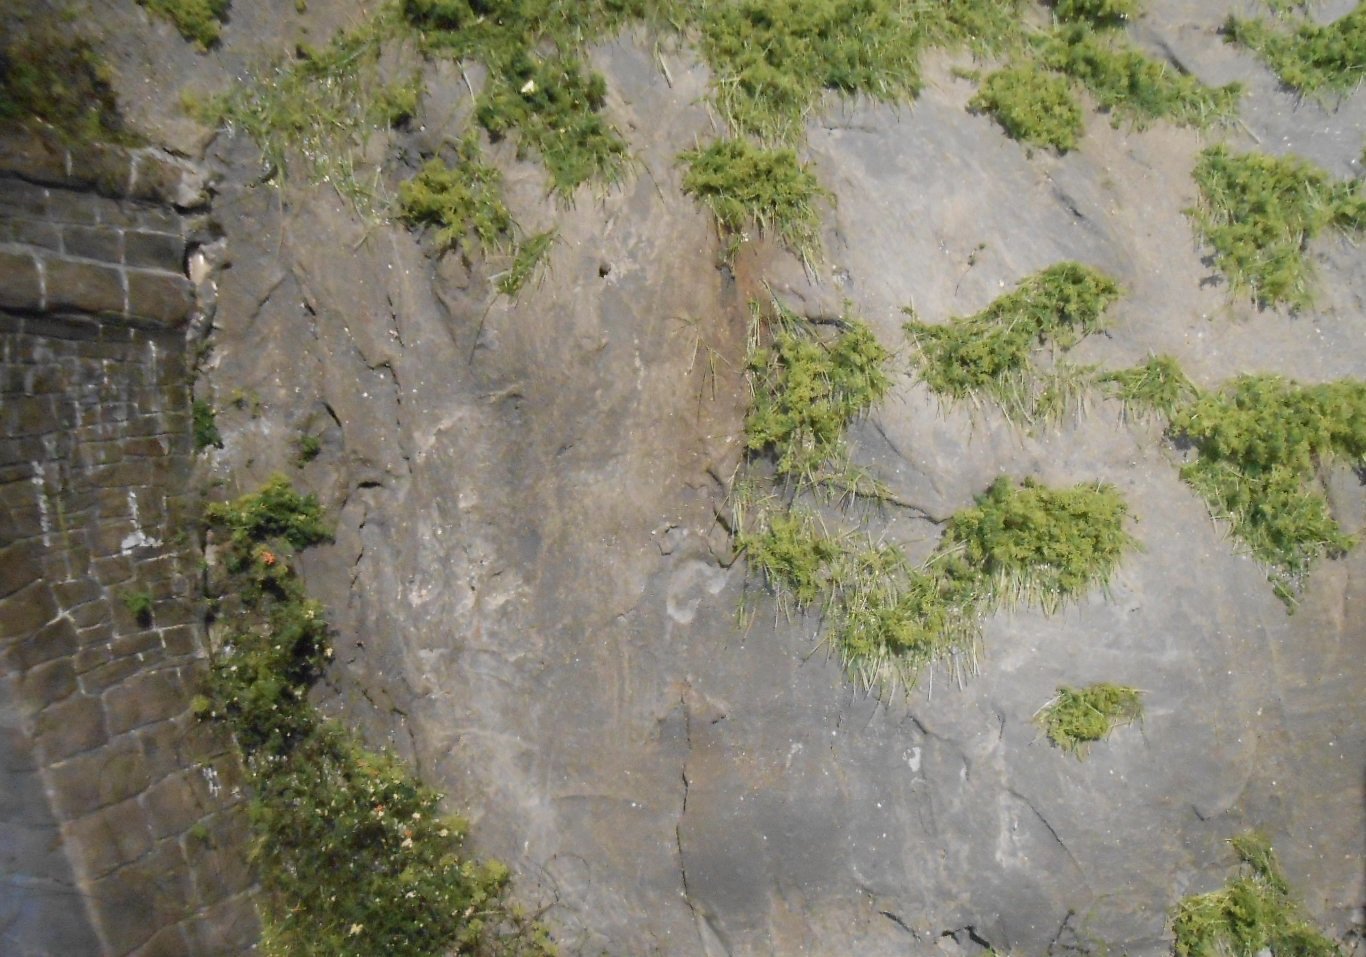
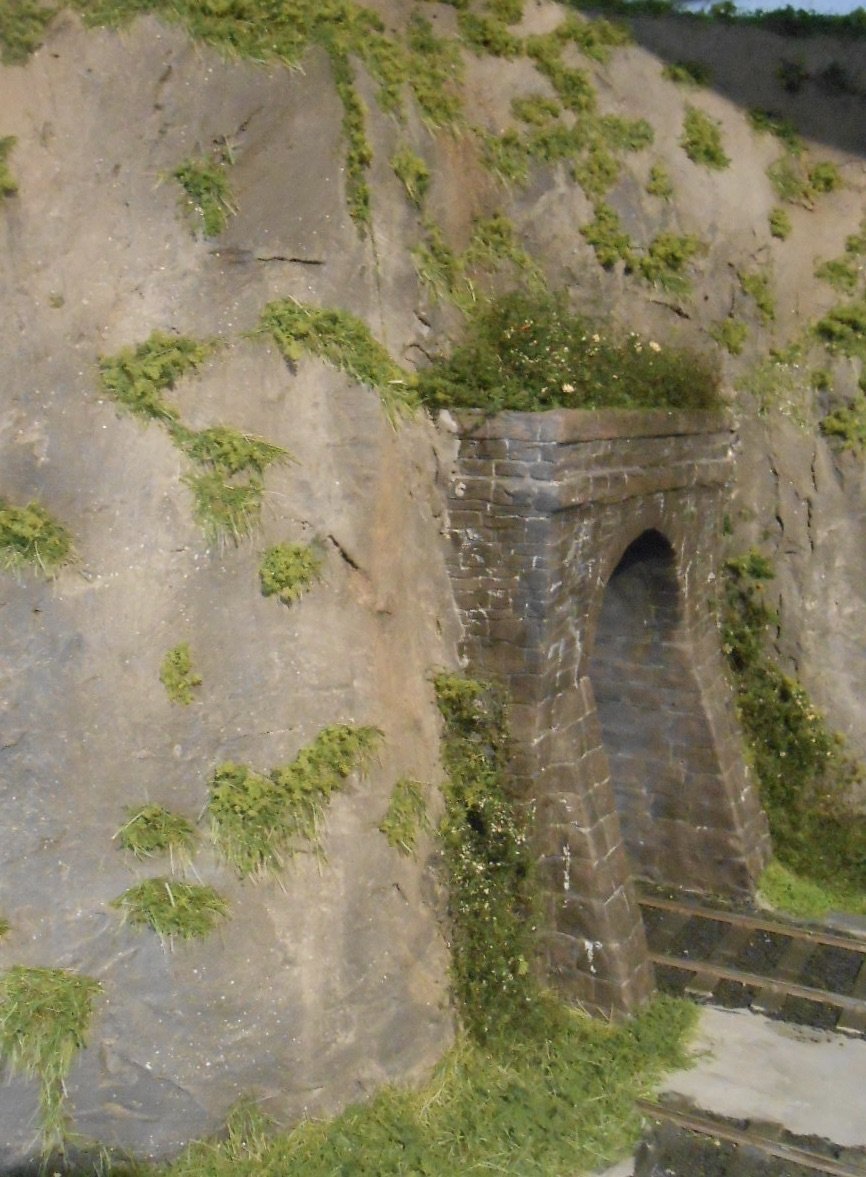
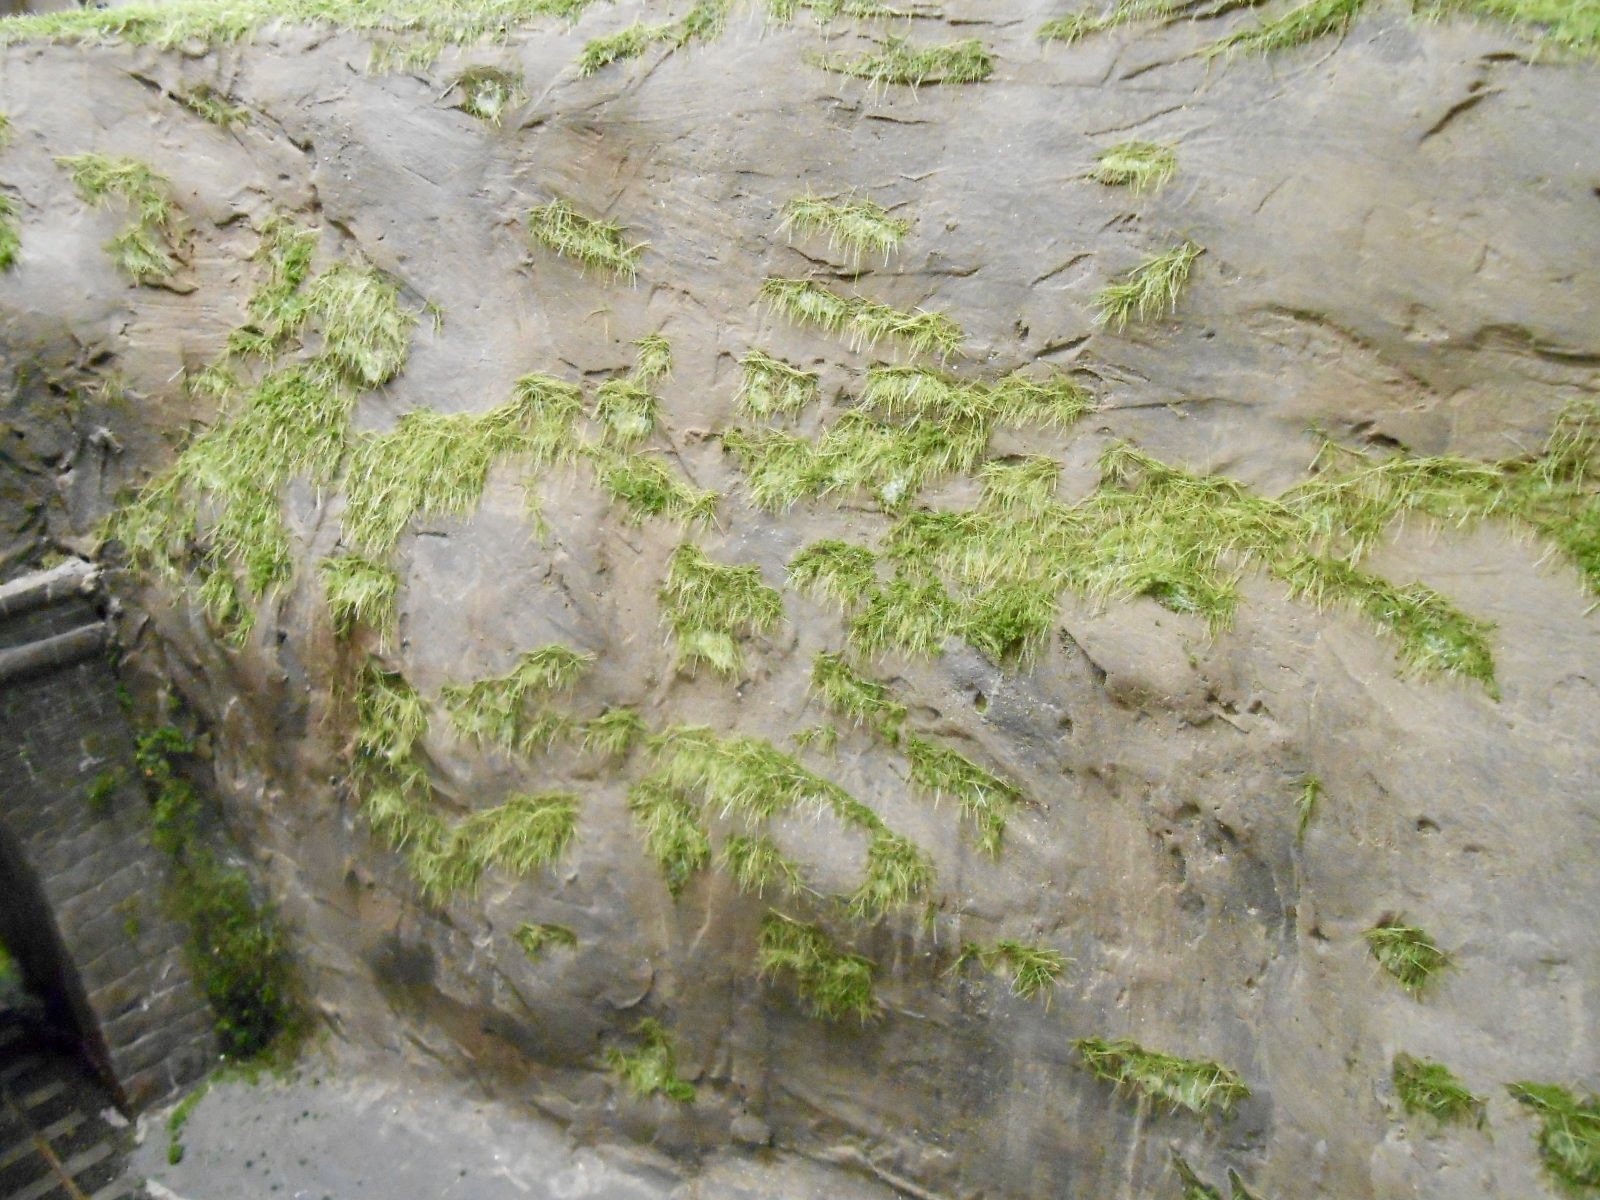
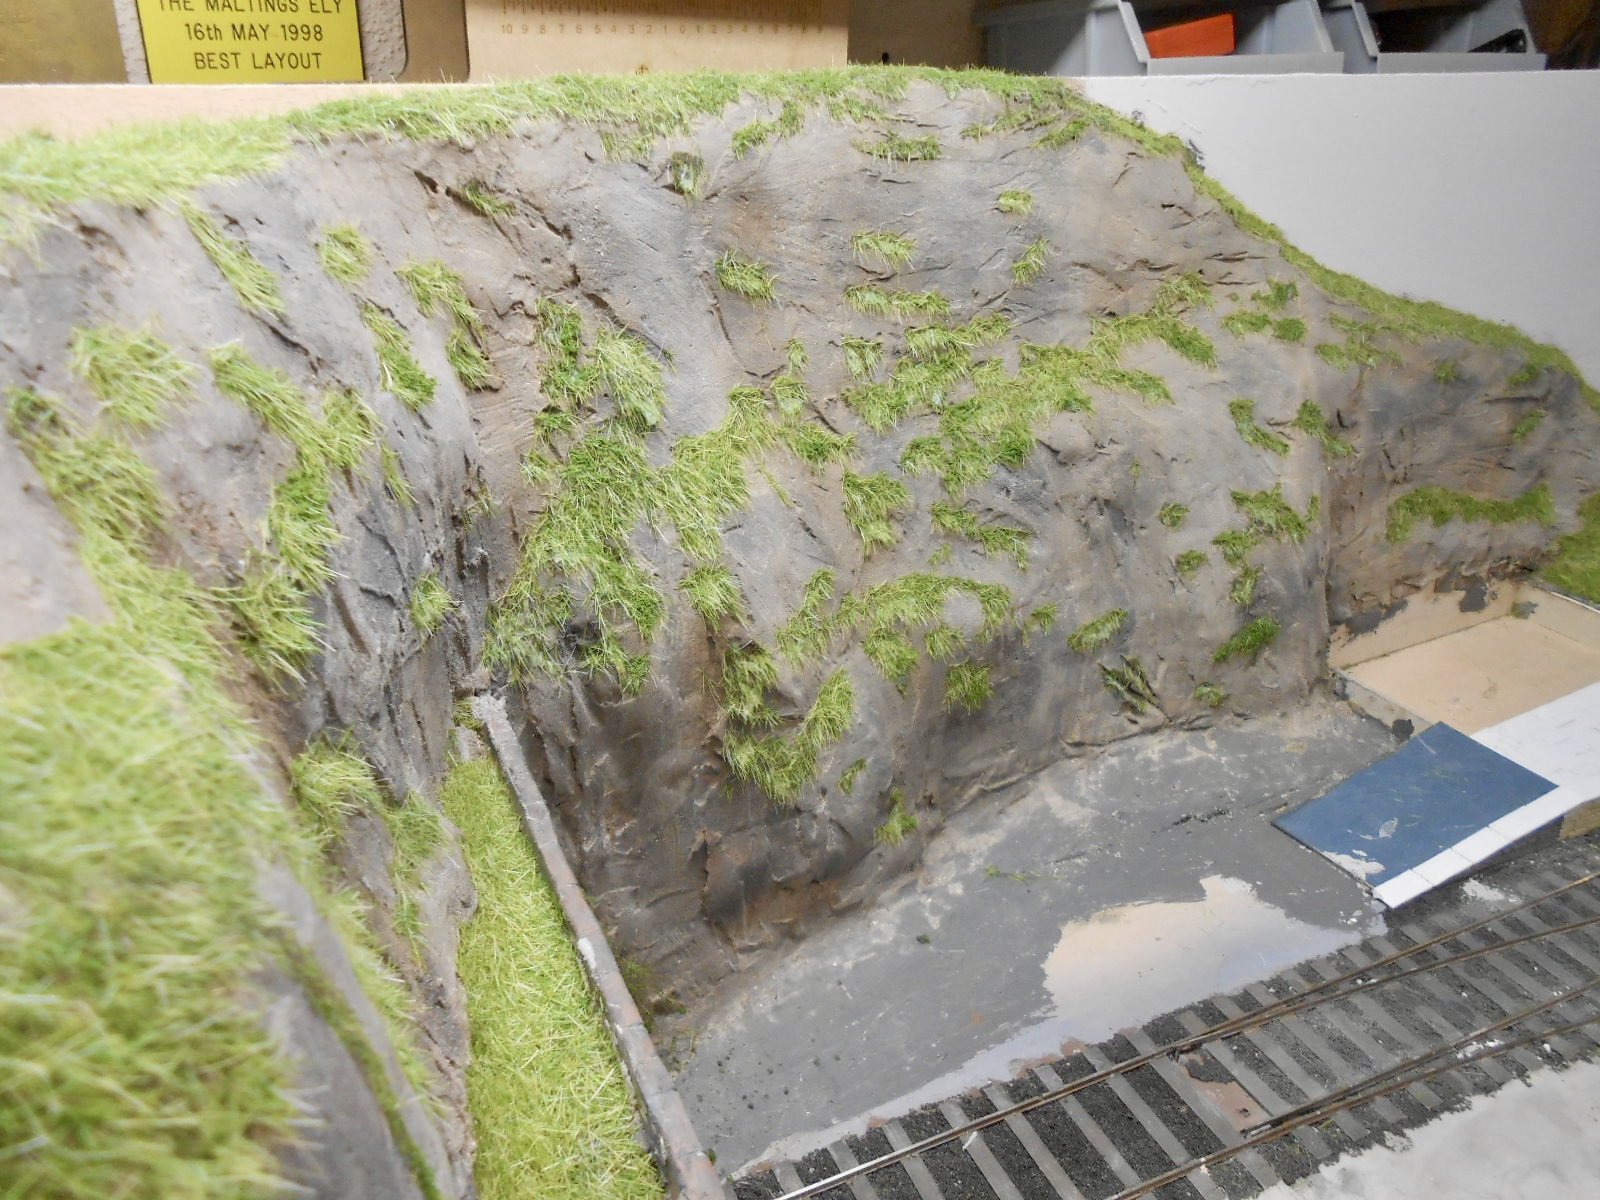
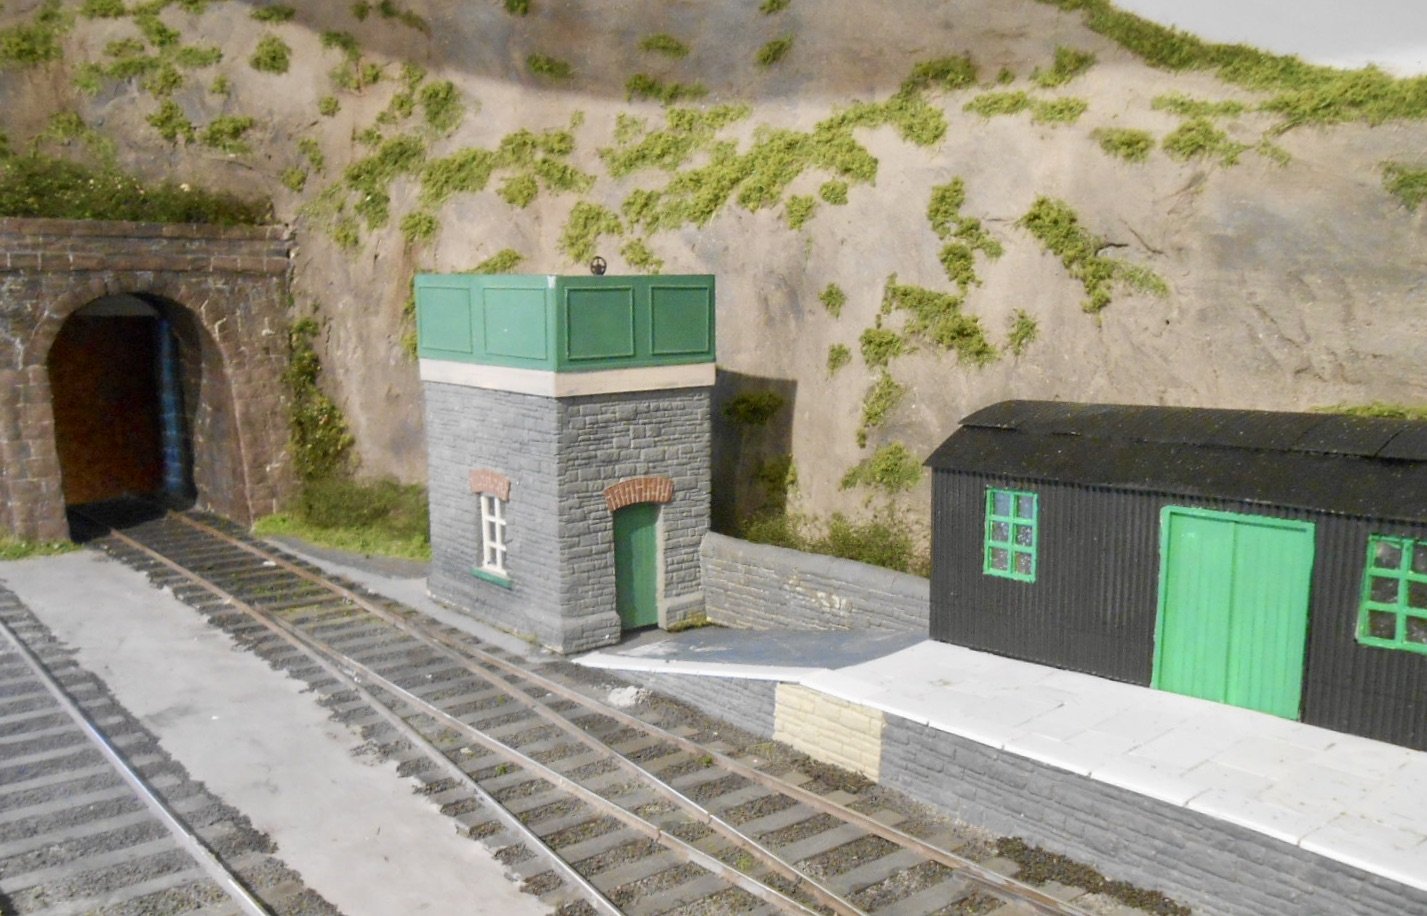
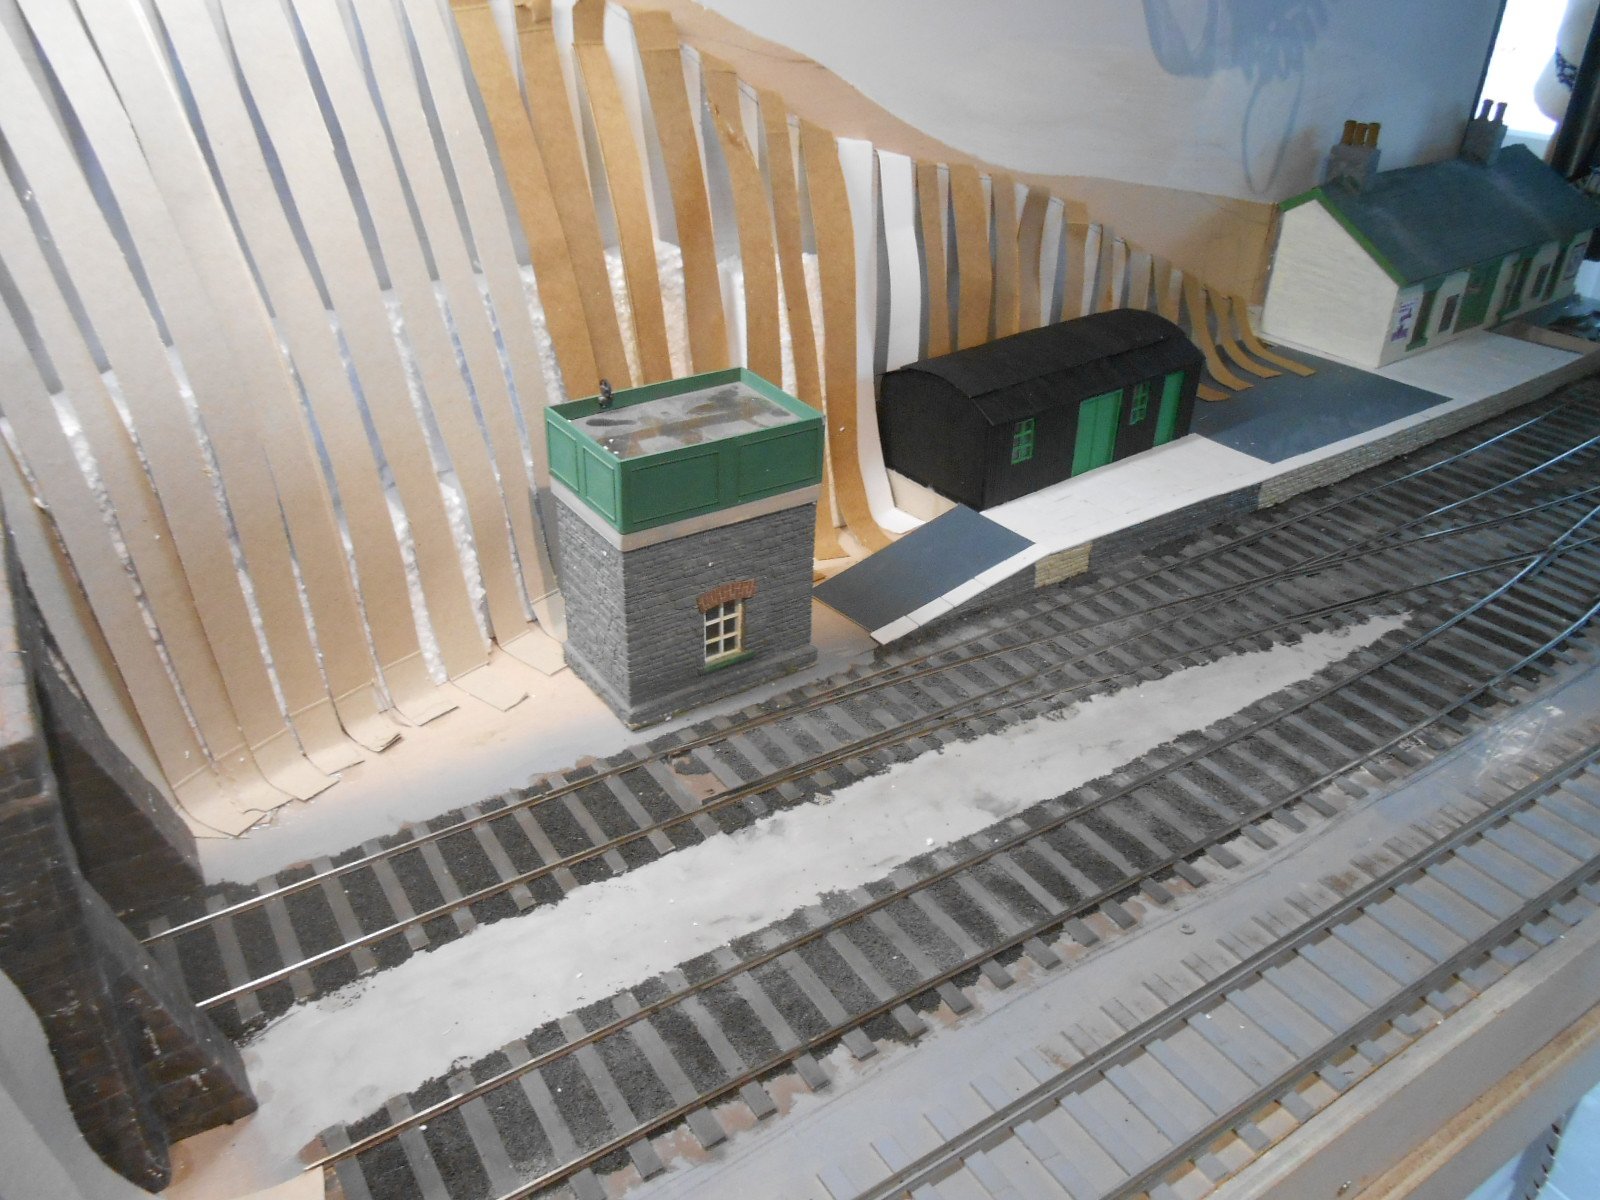
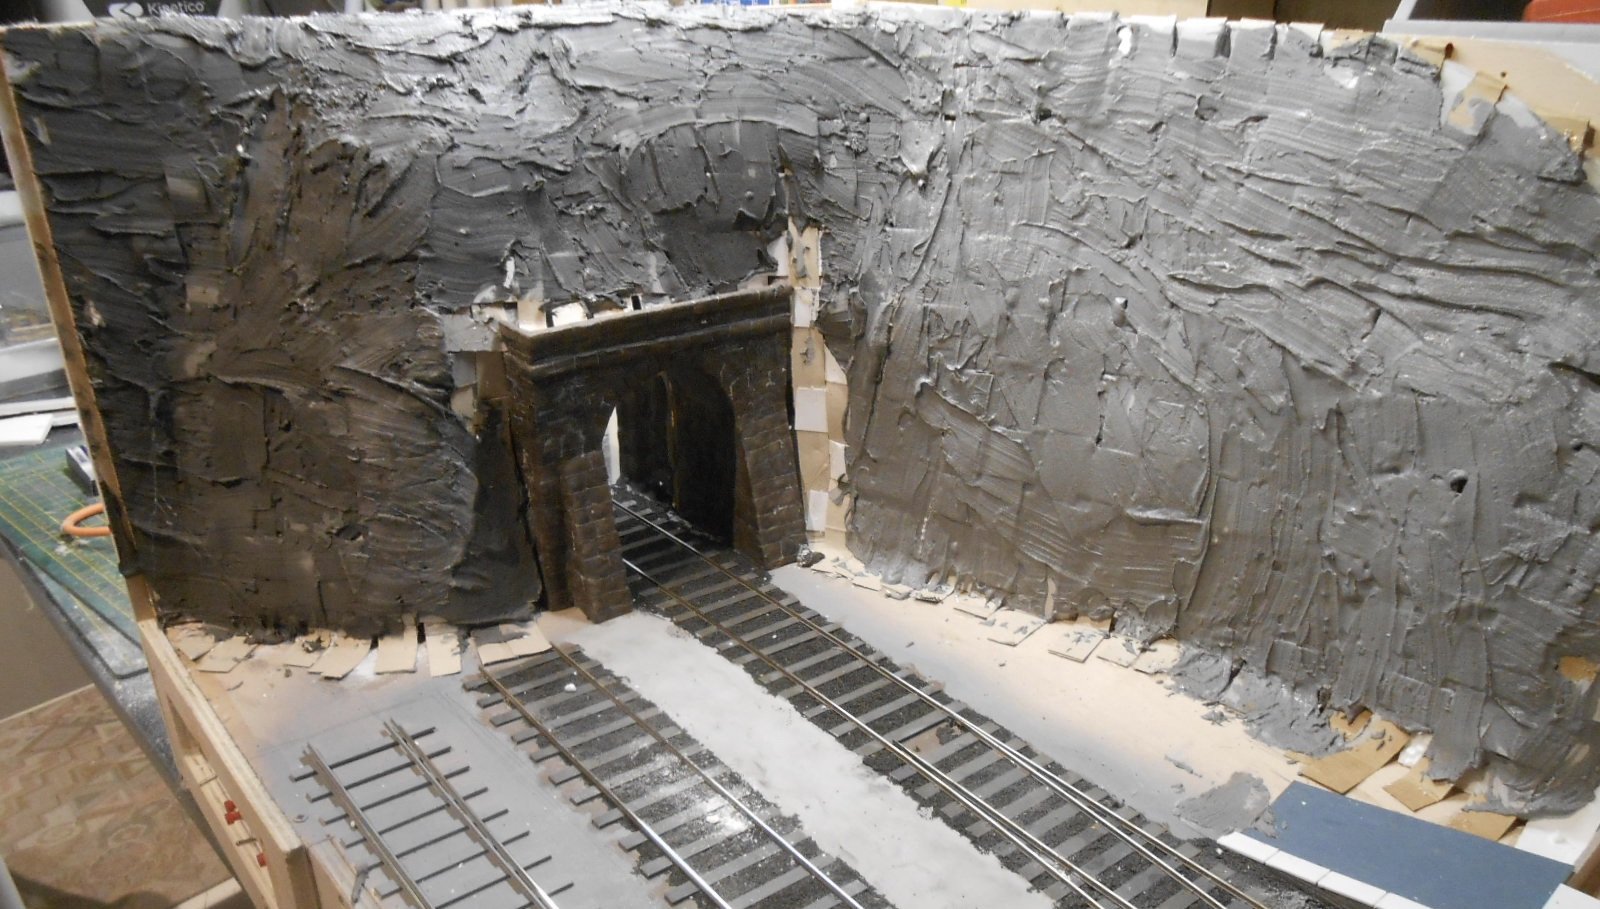
Carried on this weekend with the tunnel portal/cliff face/headland section. The first job was to try and get the rock face looking less like a sculpted piece of filler, so after some sanding down, began with a coat of grey acrylic, followed [when dry] by a wash of diluted browns. Looking at photos, it seemed this resulted in a lack of texture, so out came the weathering powders and while the paint had yet to dry, brushed these on liberally. I've bought several weathering kits over the years and for scenic work, my go to is two large tubs - one a fairly coarse grey-brown [which may well be fire ash judging by the smell when wet] and the other a finer grey powder. This certainly improved matters, but my now much depleted Freestone Models weathering kit helped add various beige and brown tints to the rock, resulting in what seems like a nice variety now. Looking at pictures, it seems that even the steepest rock faces can be well covered with foliage, as plants seem to find a home in the smallest crevices, while larger ledges can have quite a variety. So out came the static grass machine, loaded with 5mm and 7mm long fibres in a range of greens. Undiluted PVA glue was carefully painted on to all the likely looking spots and foliage what gradually built up. At first, all seems good, but leaving it all overnight to dry, the coverage still looked rather sparse and flat compared to what I was envisaging. So, more grass fibres were added and then this was built up by adding Woodlands Scenics 'crumb' of various shades and grades. For small areas, I lightly brush PVA across the tops of the grass fibres and then sprinkle on the crumb. For larger areas, I spray on cheap hair lacquer and again add the crumb - often using the finest grade into which I mix yellow or white 'flower' grains. The latter helps spread things out, rather than have the flowers in big clumps. The last bit of foliage [thus far anyway] is the creation of brambles and dog roses using 'Postiche' or artist's hair. Teased out, sprayed with lacquer and heavily sprinkled with fine crumb as before, it is very effective. This is as far as I can go for now until I have bought some more materials and am wondering if the rock faces could do with even more foliage as they still look a bit bare to me in some of the pictures.

- 257 replies
-
- 16
-
-
Not come across this maker before - they look nice models and getting the overall shape right when producing castings can't be easy. An excellent tip with all road vehicles is to file a small 'flat' (my spell checker suggested the word 'goat's for some reason) on the bottom of each tyre. It makes the vehicle sit properly on the ground and for such a small action, makes a real difference.
-
When sound is done well, it certainly adds an extra dimension too. Real presence here!
-
Brookhall Mill - A GNR(I) Micro Layout
David Holman replied to Patrick Davey's topic in Irish Model Layouts
There is something very masochistic about applying glazing! -
Looking good thus far JB, especially the low level photos. While I don't take my pictures from any great distance, I have learned that the cropping tool on the laptop is really helpful in creating a well balanced scene.
-
N Scale Ballywillan, Co Longford.
David Holman replied to Kevin Sweeney's topic in Irish Model Layouts
So, 25 metres, approx 80 feet, so 160mm above the layout in N. Not a lot when you think about it to get that view. -
Great to see the latest update - it's a fine layout!
-
N Scale Ballywillan, Co Longford.
David Holman replied to Kevin Sweeney's topic in Irish Model Layouts
Scenery is easy when you can do buildings like yours, Kevin. Messier, but far less precise! By all means use a drone to build your backscene, but have a think about the viewing angle you want for your layout, as the horizon may be lower than you think. There are plenty of books and articles to guide you with scenery. Static grass machines are really effective in 4 and 7mm scale, but you may find that Woodland Scenics fine crumb is just as effective in 2mm scale. -
N Scale Ballywillan, Co Longford.
David Holman replied to Kevin Sweeney's topic in Irish Model Layouts
Love it when research discovers local colour like this! -
Thanks Ken - if only! Considering it is a photo of a photo on a tablet screen, it works pretty well.
-
Sublime!
-
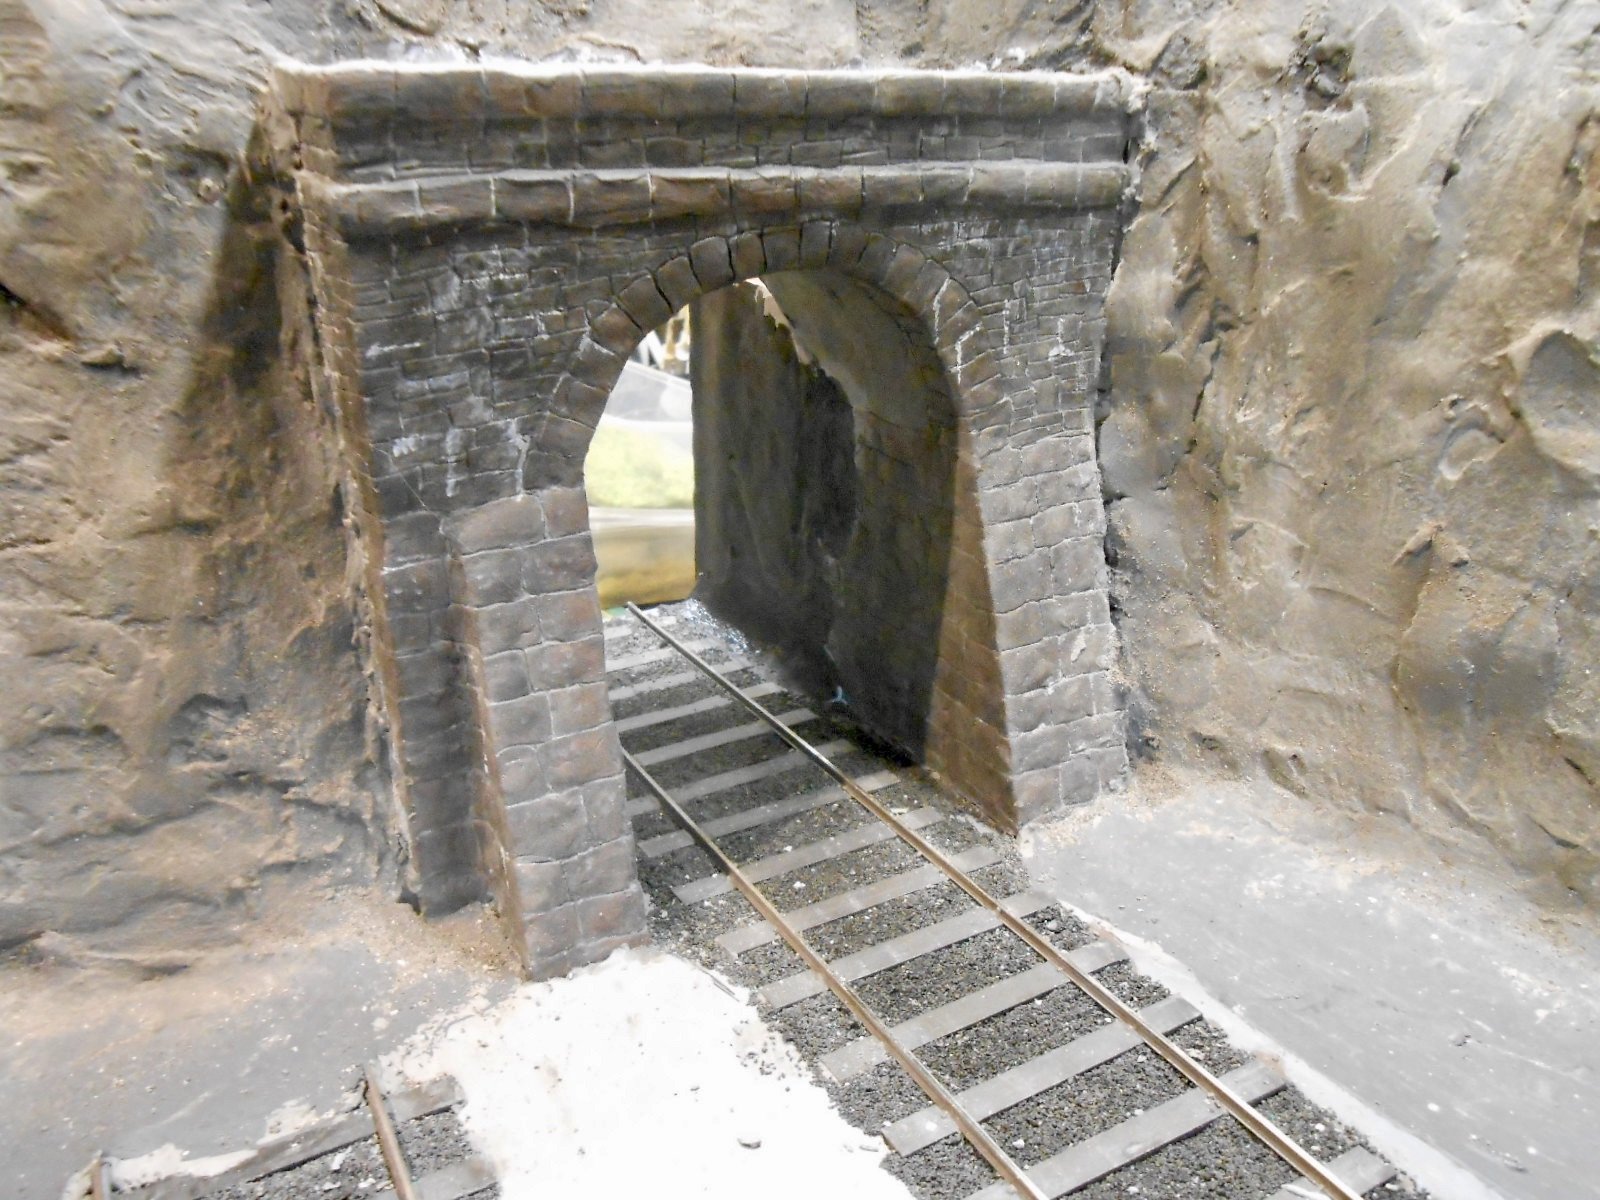
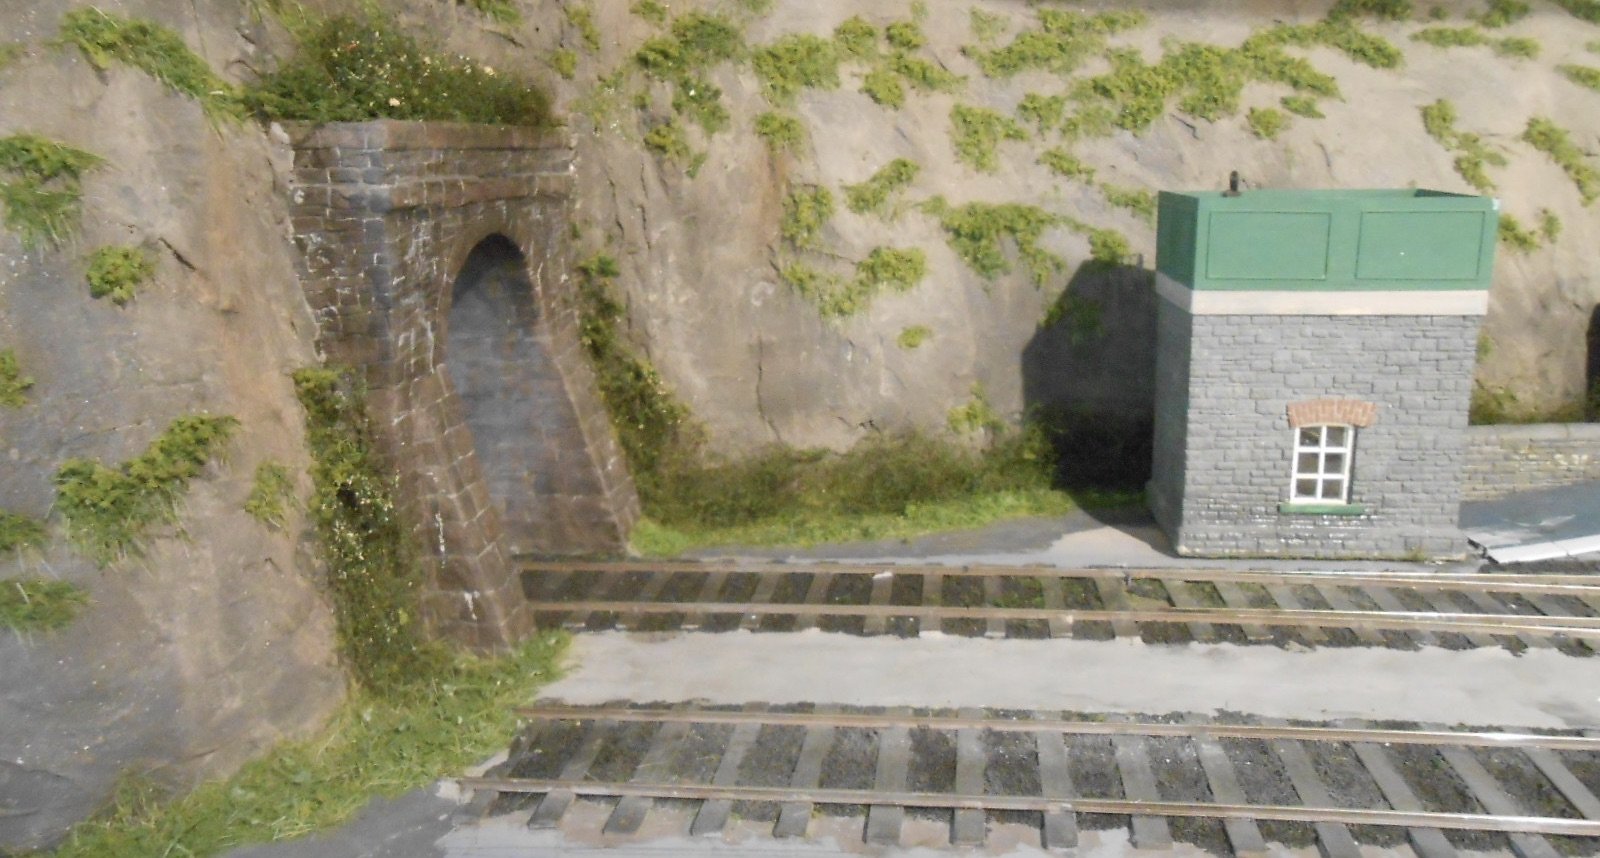
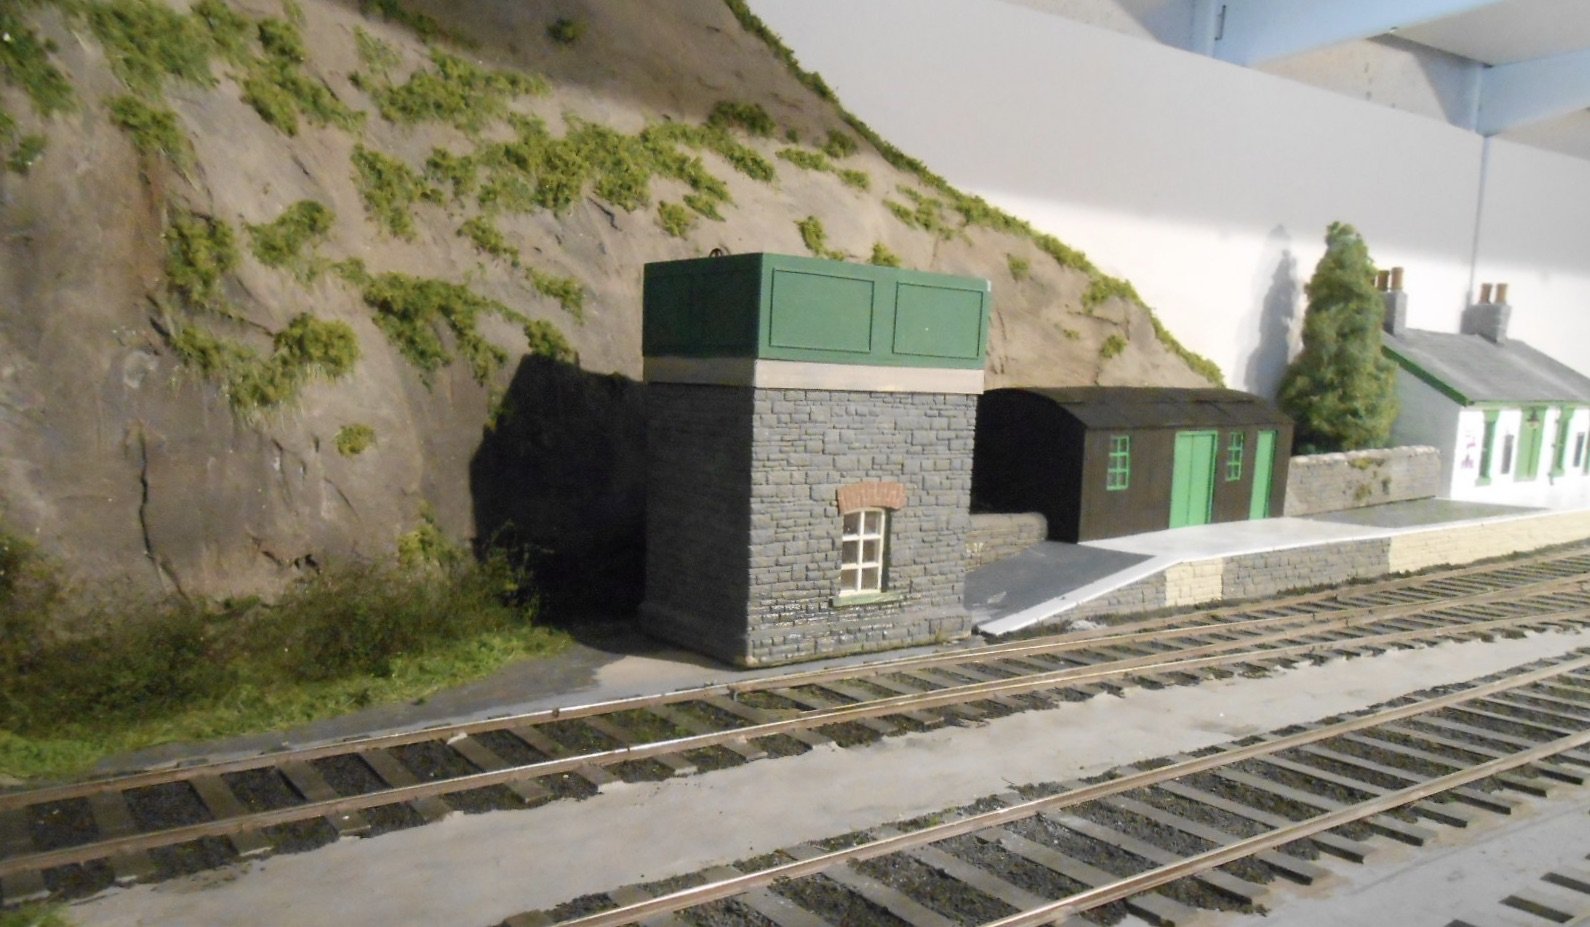
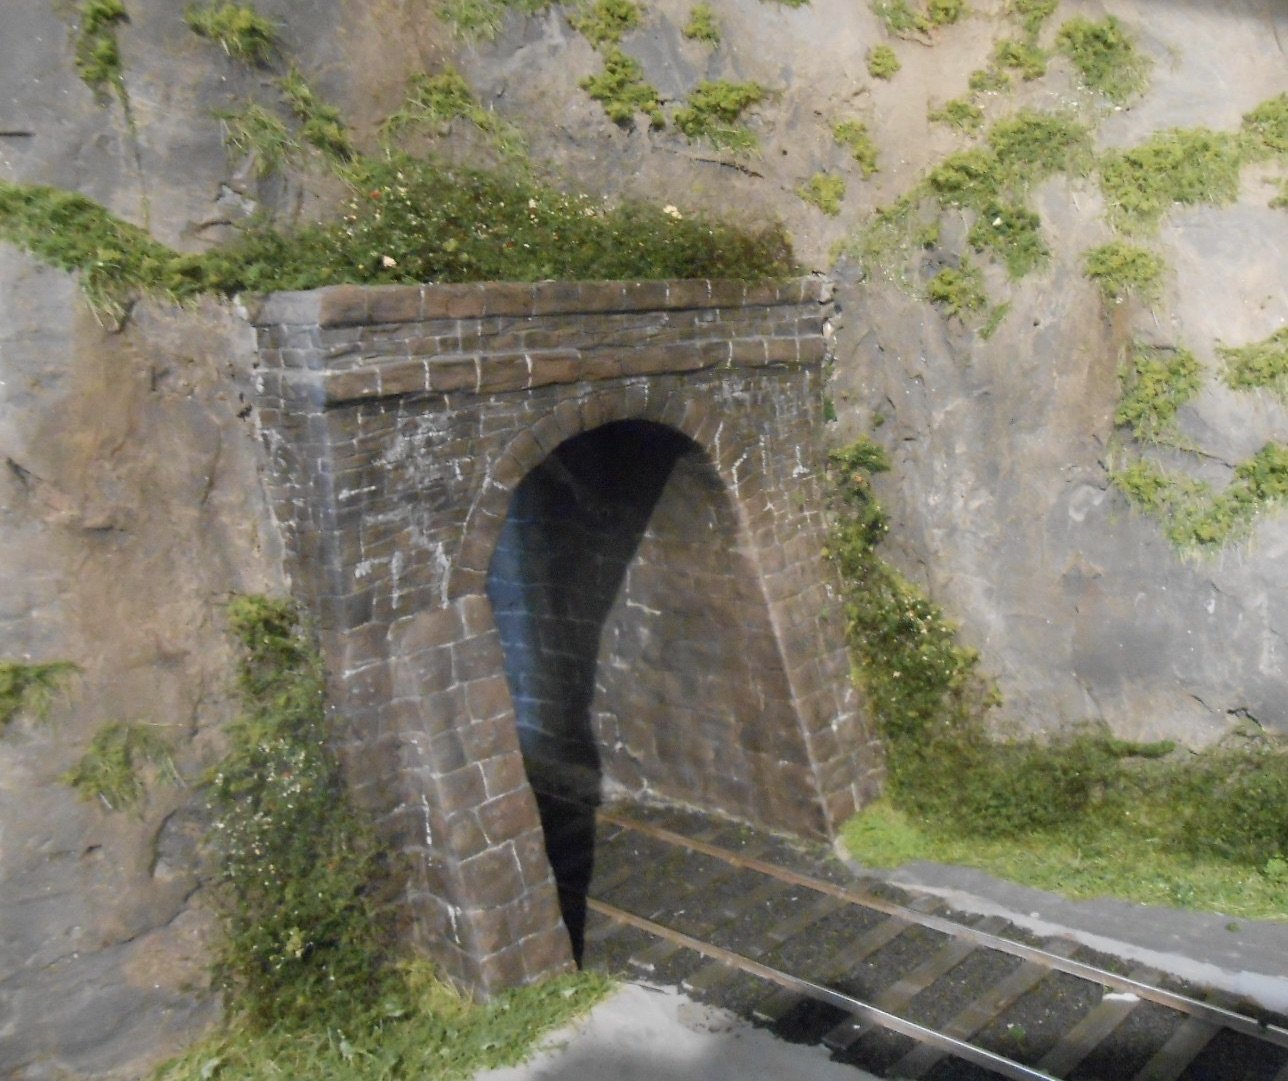
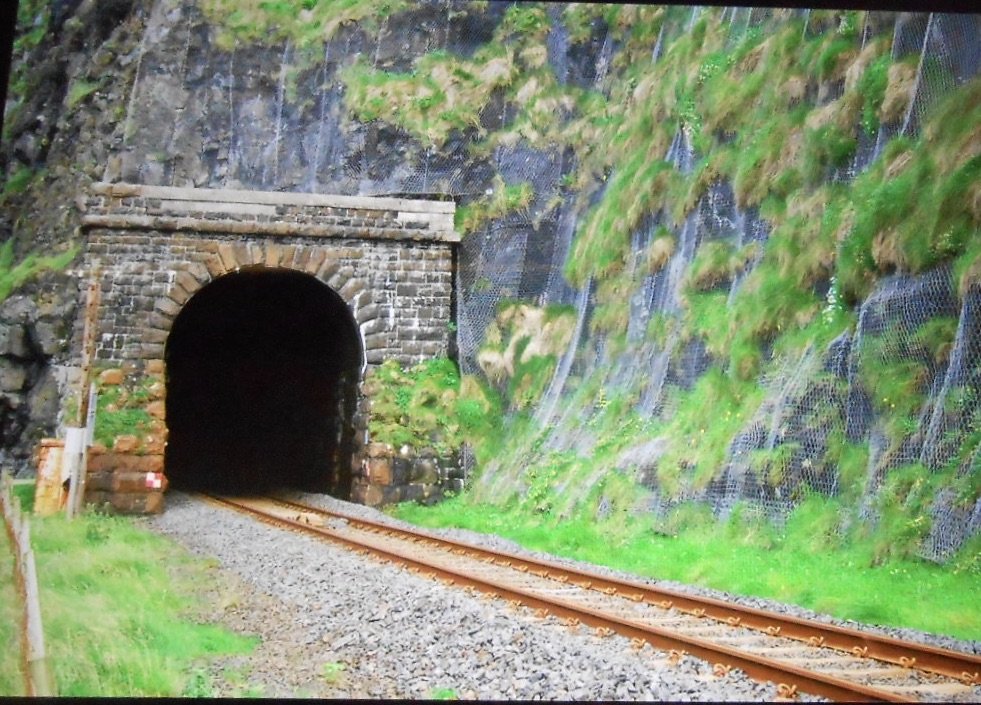
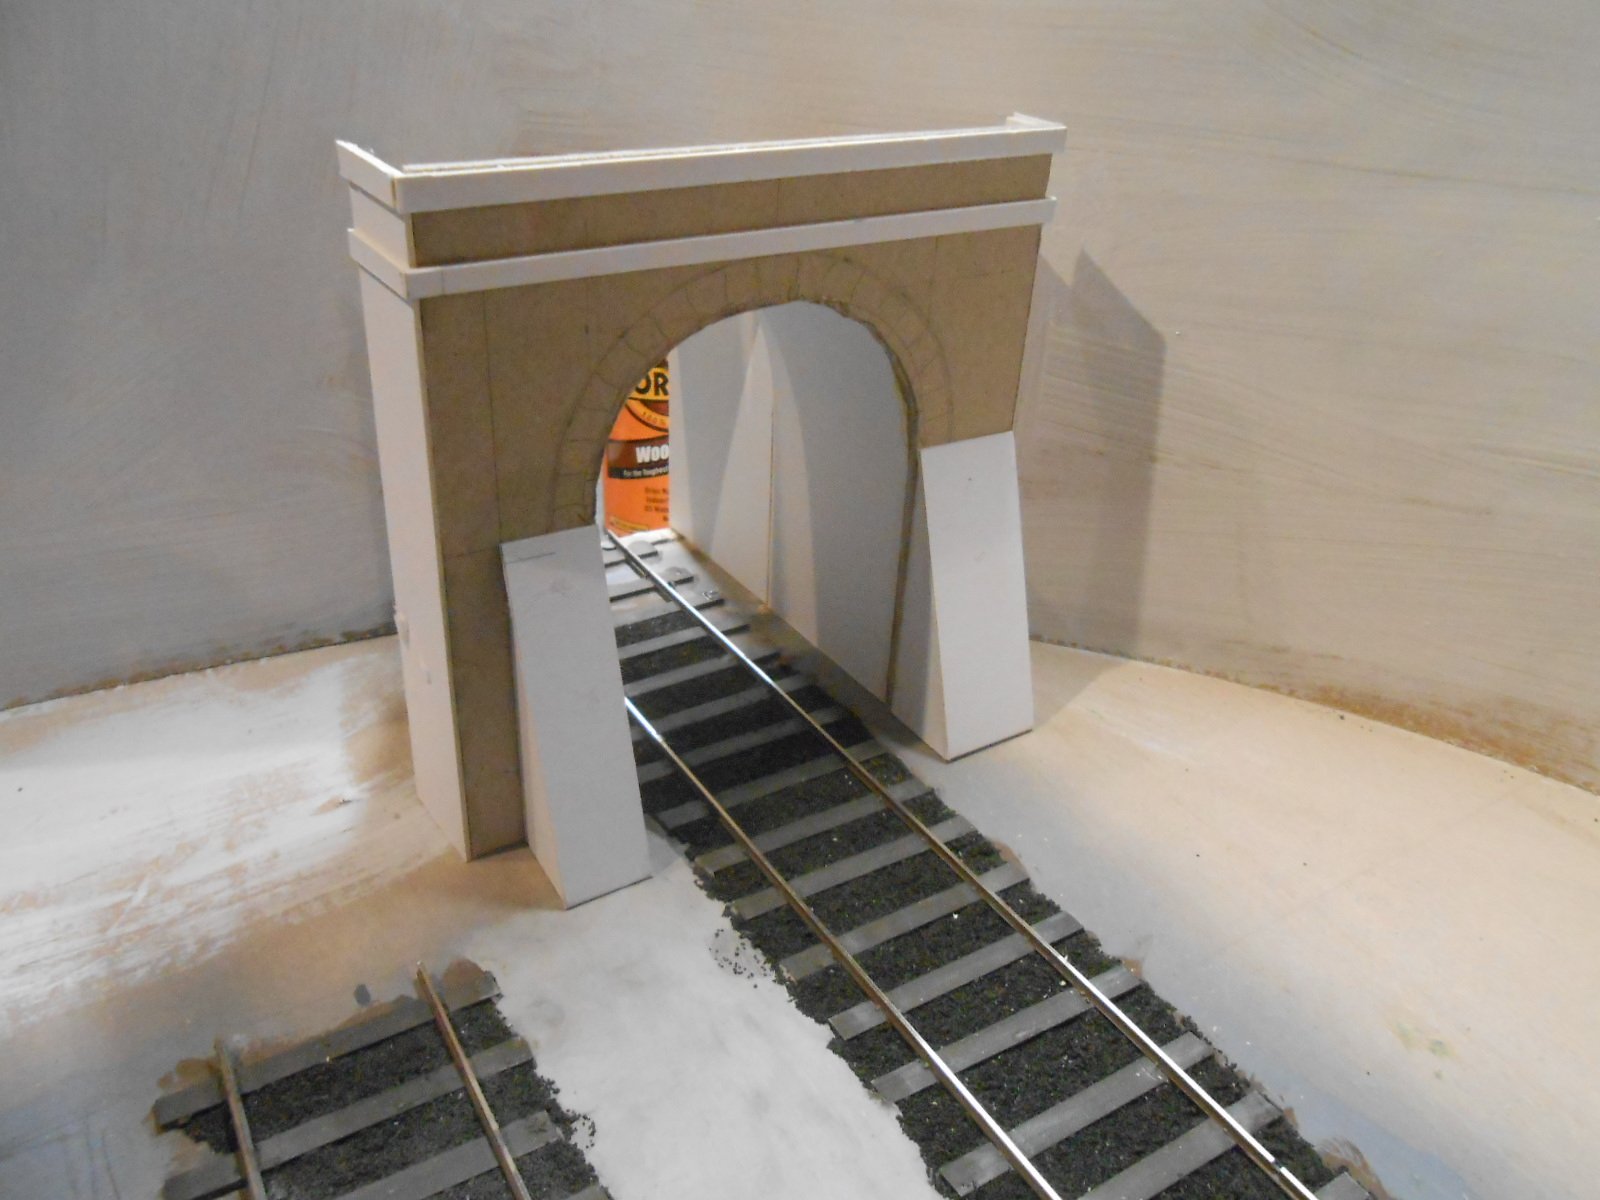
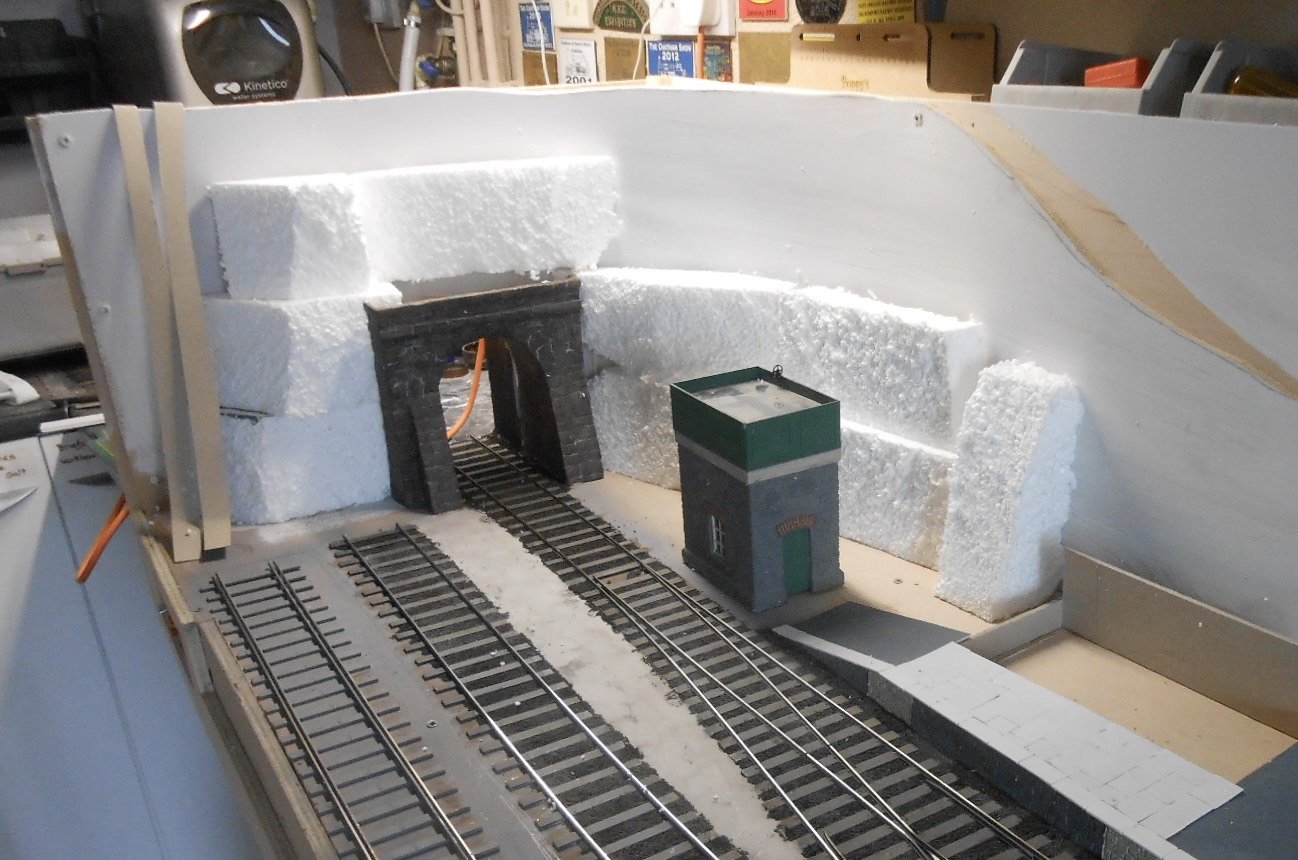
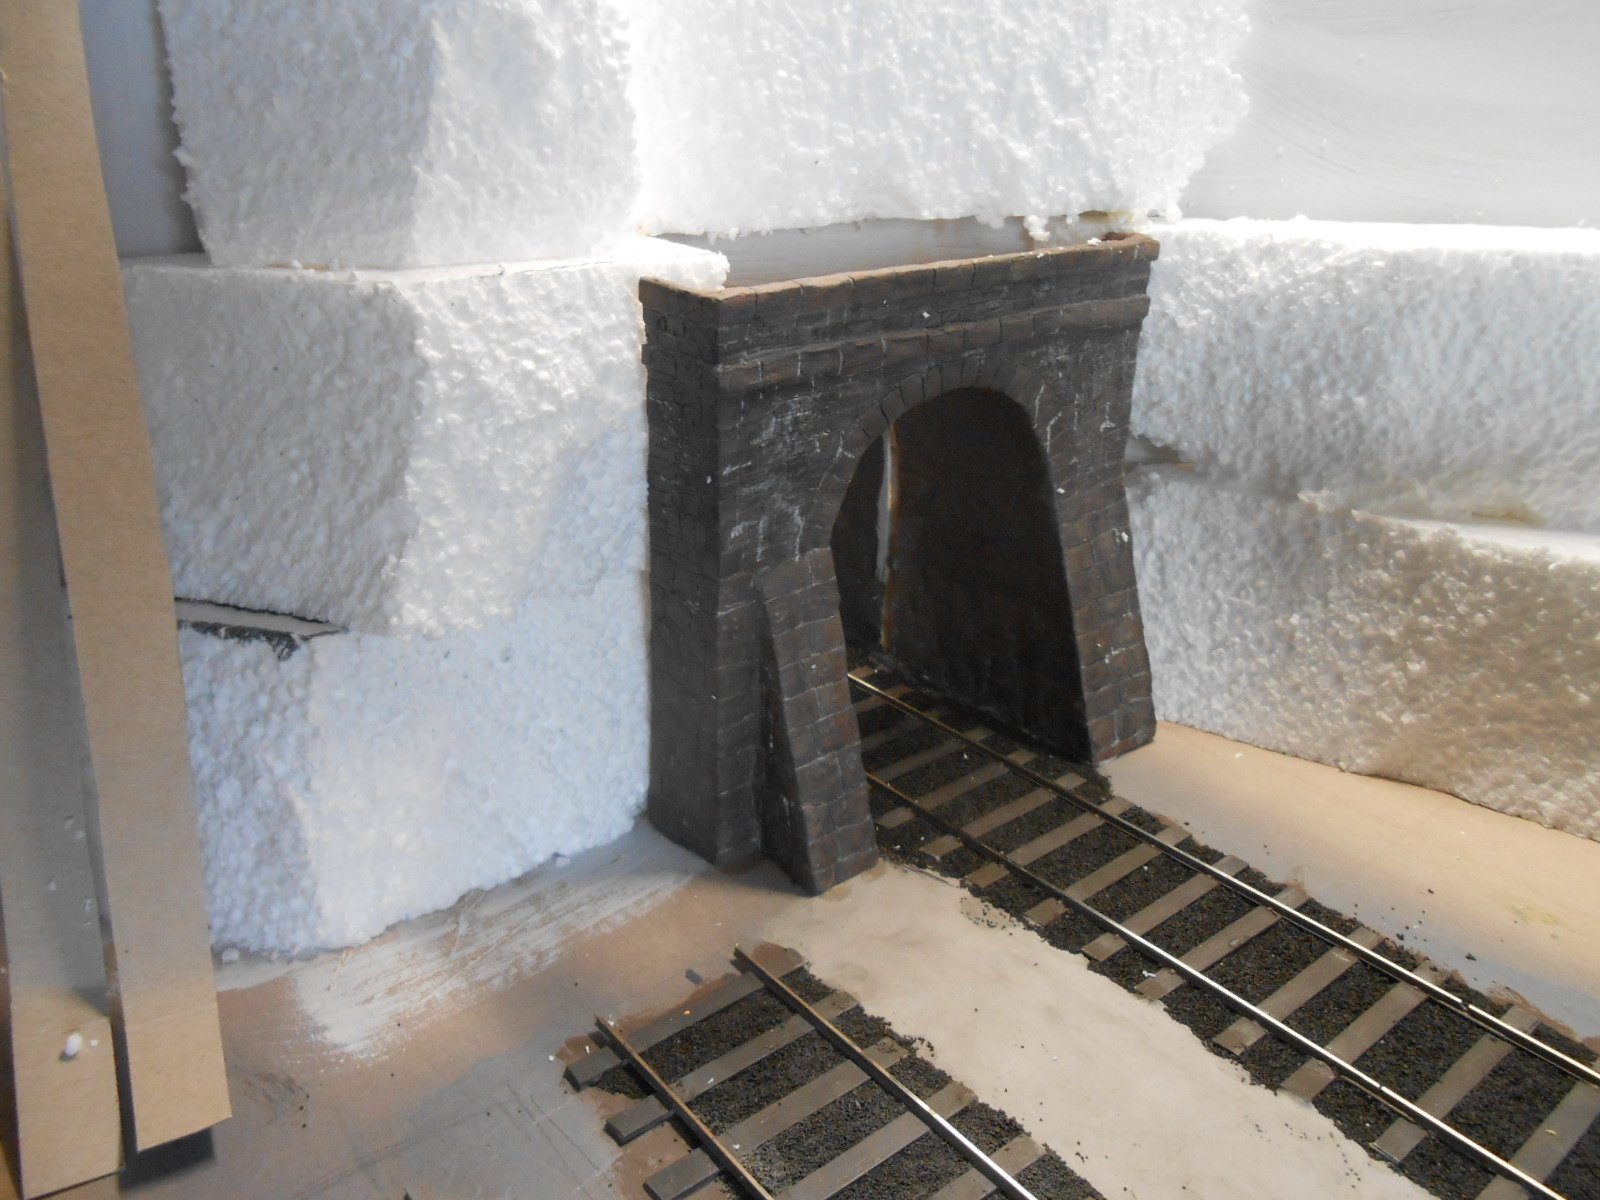
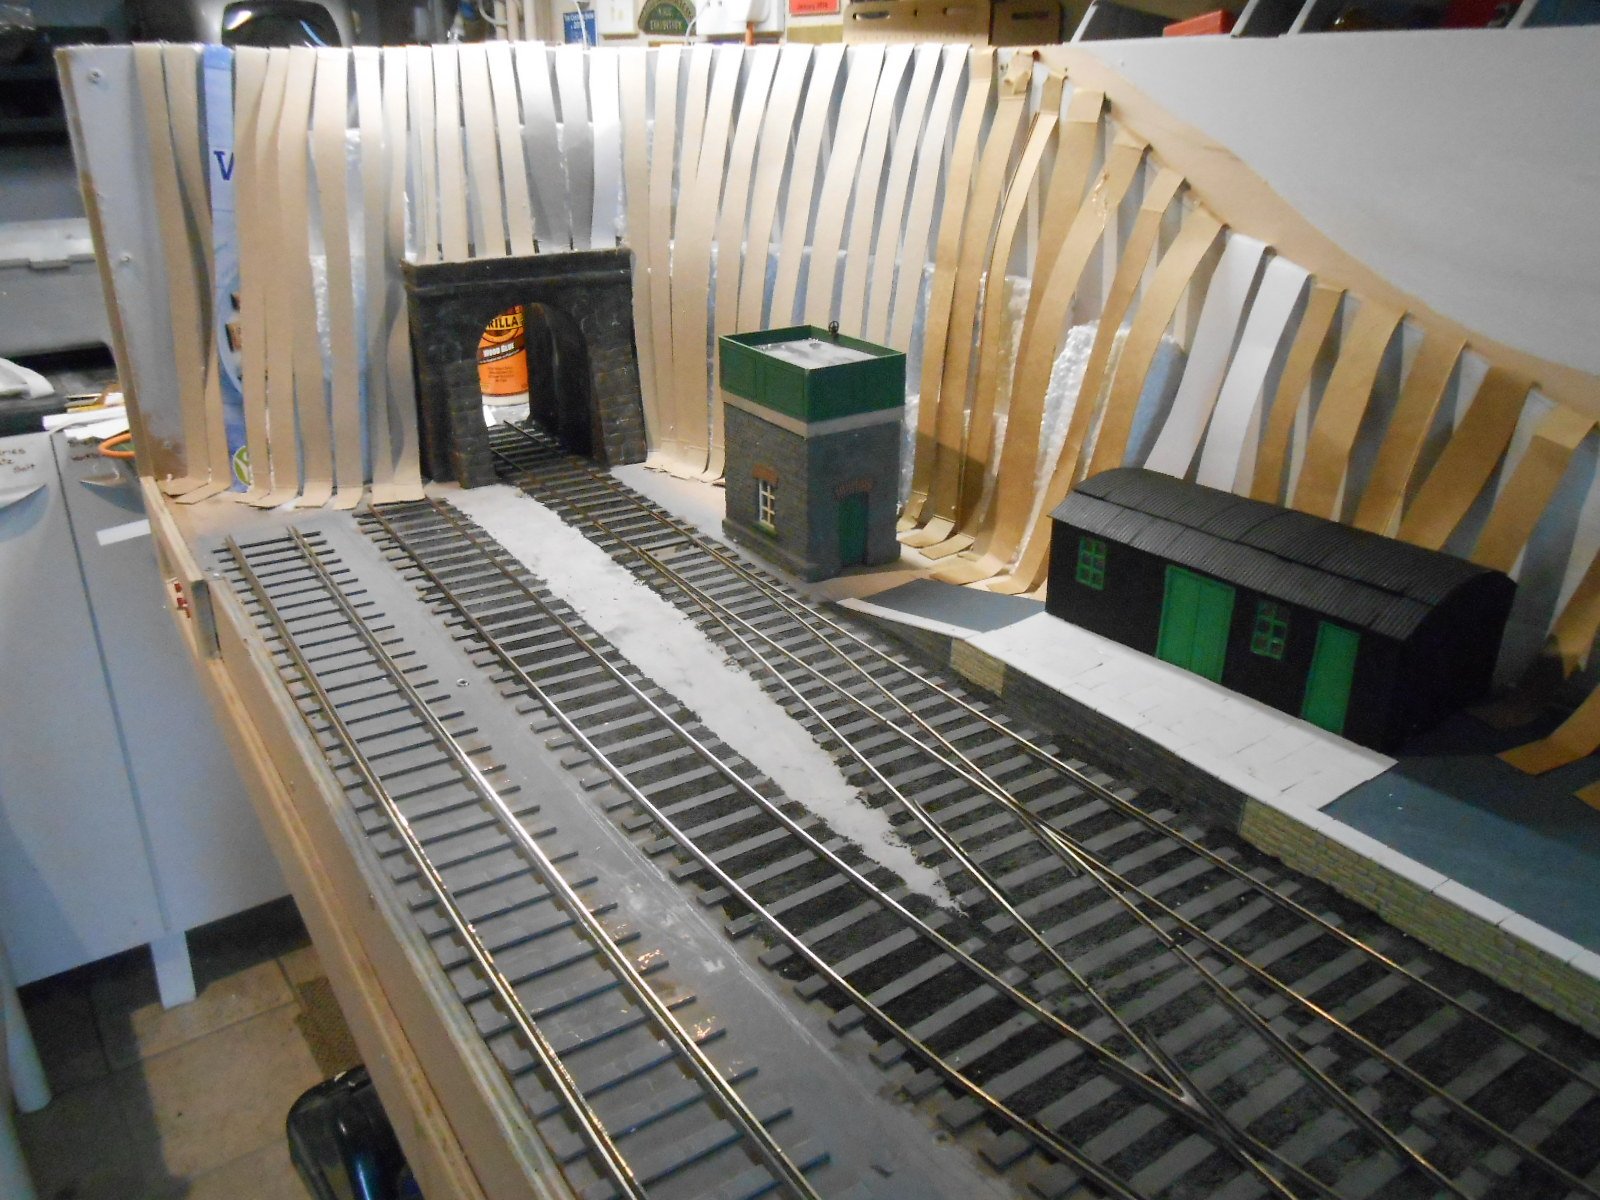
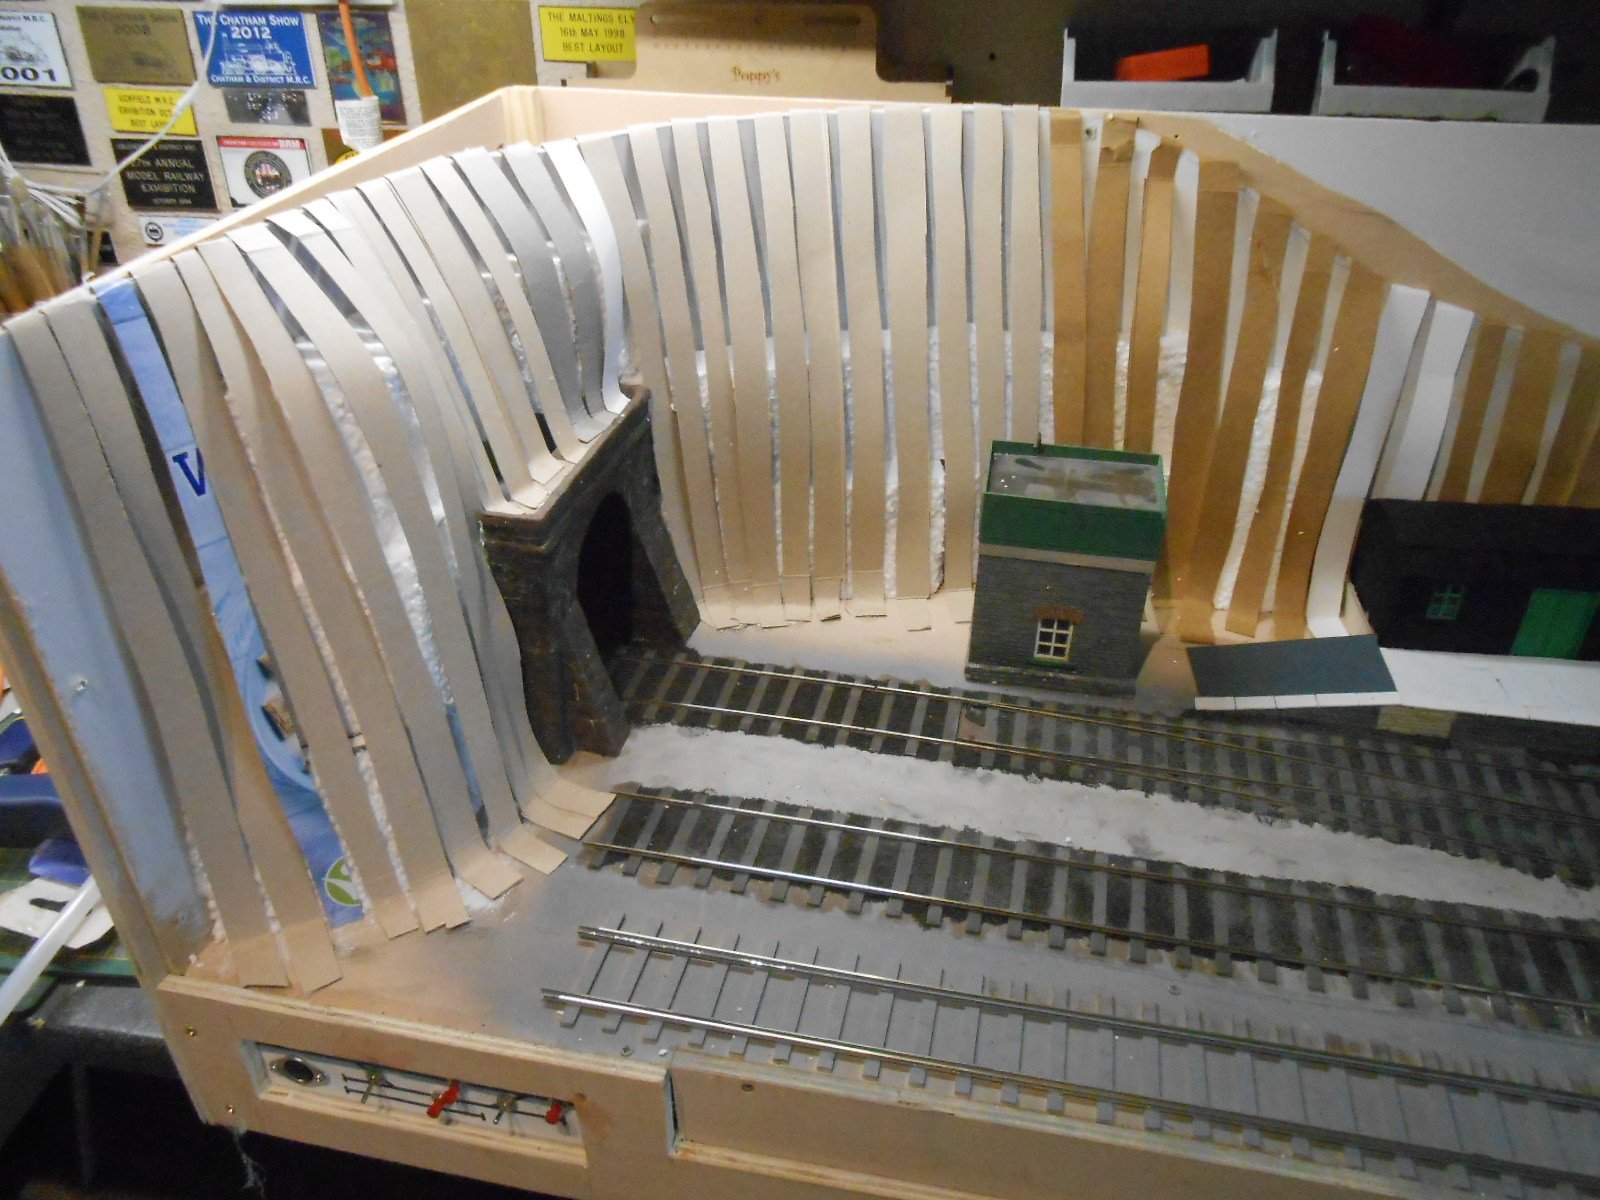
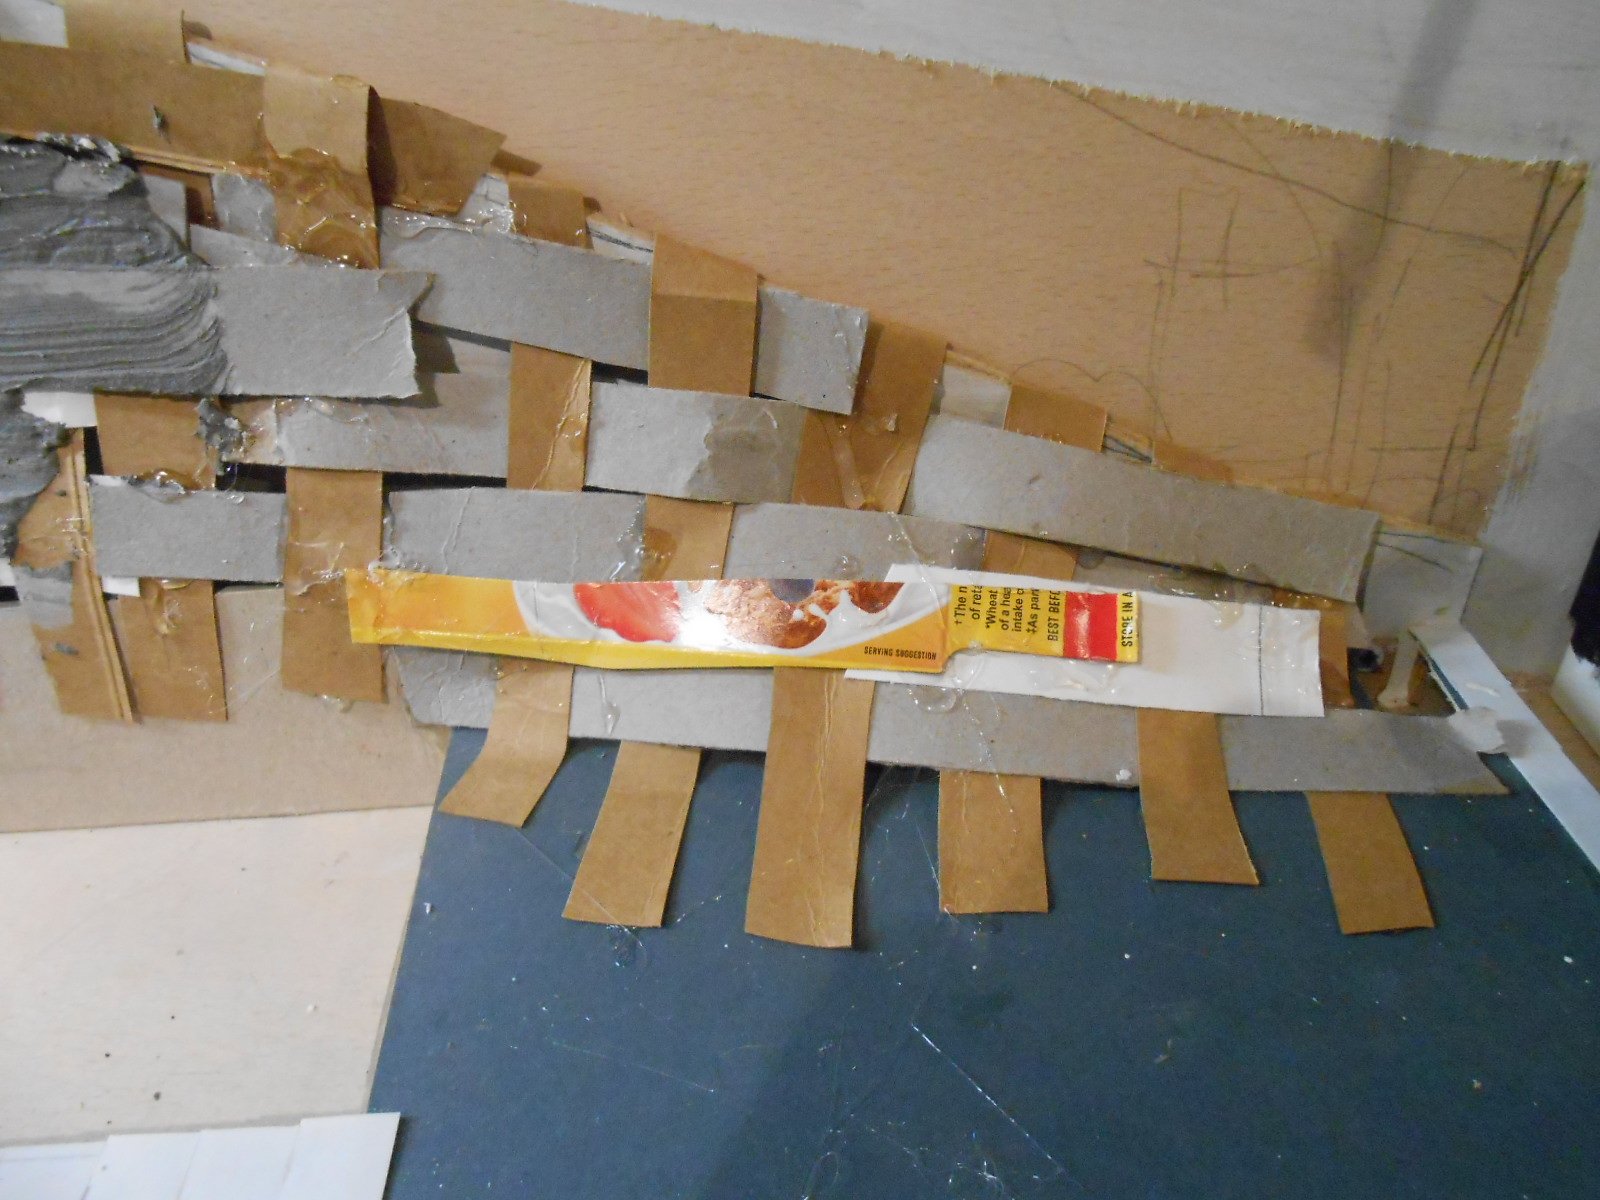
Tunnel Vision Still flitting about, as the muse takes me and decided it was time to 'block in' the left hand side of the layout, where it exits into the fiddle yard, so that means a tunnel mouth. An internet search of Irish railway tunnels found me the tunnel at Downhill, which suits my situation nicely as it goes through a headland, with very steep sided cliff faces around it - ideal for my limited space. First job seemed to be creating the actual portal, a fairly straightforward task, using grey and mounting board, which was then covered in DAS and scribed for the stonework. I used grey DAS, which gives a decent base colour and applied it in fairly thick, uneven layers which I left as a rough finish in the hope of giving the walls a bit of texture. However, after scribing the stones, they still looked a bit flat, so added further small blobs of DAS to thicken them up a bit. The model was then given multiple light washes of acrylic - a mix of greys and browns, followed by a further wash of 'null oil', a wonderfully named Games Workshop tint, which is essentially black. The topography is built around a few blocks of expanded polystyrene [forgotten how messy this stuff is] which were then overlaid with a cardboard weave, make from strips of cereal packet. All those of a certain age will have done this in primary school, including a fair few unfortunate souls in my own time as a teacher. In this case, I used a hot glue gun to fix the strips in place, starting with the verticals, then weaving the horizontals in afterwards. This gives a reasonable structure on which to apply a shell, which is a stiff mix of powdered filler, PVA and black acrylic. Several thin layers of this are needed, but hopefully the photos will give an impression.
- 257 replies
-
- 12
-
-
N Scale Ballywillan, Co Longford.
David Holman replied to Kevin Sweeney's topic in Irish Model Layouts
Very much the way to go. Start small and create something that satisfies in a reasonable length of time. And enjoy, of course! -
Looks a bit like that round here. Storm Eunice the culprit and very much 12" to the foot. ...
-
Might not be my scene, but not difficult to recognise the skill and effort that has gone on here.
-
N Scale Ballywillan, Co Longford.
David Holman replied to Kevin Sweeney's topic in Irish Model Layouts
Railway modelling is clearly good for you! -
If Irish models are niche, where does that put GT3? Well done with the A - there is something almost indefinable about it and there are few, if any rtr models of this quality.
-
Irish Railway Models A Class Re-wheeled to 21mm
David Holman replied to JohnMcGahern's topic in Irish Models
Wonderful stuff John. Converting the A class to 21mm really has gilded the lily. Love the pragmatism too - if it works, don't fix it. The track work just looks splendid. -
Great stuff Sean, I think. Just wish I understood it... Well out of my league, but will do my best to follow, nevertheless.