David Holman
-
Posts
4,359 -
Joined
-
Last visited
-
Days Won
117
Content Type
Profiles
Forums
Events
Gallery
Blogs
Everything posted by David Holman
-
Years ago, pre DCC, there was the Pacific Fast Mail system. Locos had a cam on the axle to create synchronised chuffs. While there were on board speakers, some folk used tweeters for this and had bigger bass woofers fixed under the layout. No doubt as an audio engineer, you'll know that the human ear doesn't pick up direction from low frequency sound. The best example I saw of this was on an American outline layout at a show in Holland. It was 0 gauge and just had two locos - a Challenger 4-6-6-4 and a three unit diesel, each of which had a PFM unit. These were hooked up to the mother and father of HiFi systems, which included two, two metre high speaker stacks. Needless to say, when either loco moved (and especially the diesel), the earth and many of your internal organs moved! Richard Chown's legendary Castle Rackrent system used PFM units in a more conventional way. Food for thought perhaps? Try an internet search for more info.
-
Don't know much about the prototype, but the model looks great!
-
If you like the challenges of programming and running multiple locos, then DCC is great. I tried it because it seemed to offer better running qualities and simpler electrics - neither of which are necessarily true. My layouts are all one of two trains on scene maximum, so the multi engine thing isn't necessary. Fine control and the introduction of braking, coasting, sounds etc seemed very tempting and was interesting - for a while. However, I soon found that simply turning a dial to move a train was all I needed. My locos are all kit or scratchbuilt in metal, so need fine tuning to work well. A DCC chip introduces an extra set of variables to knowing why something isn't running well and will certainly not compensate for dirty track, poor pick ups etc. Brass loco bodies and DCC chips are not good bedfellows either. The chip has to be fully insulated or it is all too easy to fry it - been there, got the T-shirt. Several of them in fact. Sound is great, but again has its limitations, I found. Cost to begin with at over £100 per loco, while the downloaded manual for a Tsunami sound chip runs to well over 100 pages, a lot to learn. At exhibitions, have heard too many steam locos with sound that is little better than sand paper rubbing together and/or the model does not behave like a steam loco which only puffs when the regulator is open. Diesel sound seems to work best, not least because the lack of smoke/steam is less noticeable. However, well remember a 7mm scale diesel depot layout, where the owner had something like 20 Heljan locos ticking away on idle, at full volume, creating what was best described as white noise and doubt if any self respecting shedmaster would want to waste all that fuel. All in all, I spent several hundred pounds only to find DCC is not for me, hence my cautionary tale. If you like tinkering with electronics and programming the features, then it will be good fun, but it is not a universal cure all and requires the same attention to detail as any other branch of our hobby. As with anything else, you pays your money and makes your choice.
-
N Scale Ballywillan, Co Longford.
David Holman replied to Kevin Sweeney's topic in Irish Model Layouts
Superb in any scale and hard to believe it is in 2mm. One of Angus's 5p pieces maybe? Well done! -
First of all, suggest you try and find someone with DCC (e.g. Visit a club or show) to find out if it really is for you. I've tried various systems and owned both a Lenz and Prodigy. They all have their merits and foibles! In the end, decided DCC is not for me, because I found it all a bit of a faff, so try before you buy, because you may find it is not for you. Don't forget, you are adding in significant extra costs to every loco (plus points and switches too), especially if you want sound. DCC is definitely not plug and play either. To get the best out of it, every loco needs fine tuning and if that is part of the fun, then great. However, it can get frustrating at times. In my experience not systems will work with all chips, which can also get expensive. Sometimes, the simpler way is best.
-
3D printing has much to commend it in many areas, as we are seeing. However, would argue it is not yet the answer to everything, so would emphasise to keep requests to what works and is worthwhile. Arguable that platform walls are easy enough to make from card or plastic, so why not save your money for something more challenging to make? Steam loco bodies maybe? As with etched kits, once drawn in one scale, they are fairly easy to do in a different one, but beware because there may not be enough room for a chassis and mechanism, while you will also need plenty of weight over the driving wheels if the model is going to perform. A 3D print is never going to be ready to run, because it will need wheels, motor, couplings etc etc. so will certainly make some demands of your modelling skills, which is great because it is all about self improvement. The moral is therefore think about what you can do now and what you'd like to see available that matches tbhis. There are already thousands of unmade kits around already without adding 3D prints to the collection. Robert's stuff, above, seems exactly what is wanted. Everything in the picture might appear to be simple, but try making a chair from scratch, let alone a dozen of them! Lovely stuff.
-
N Scale Ballywillan, Co Longford.
David Holman replied to Kevin Sweeney's topic in Irish Model Layouts
Hello - that is rather nice! Are you sure it is 2mm scale?? -
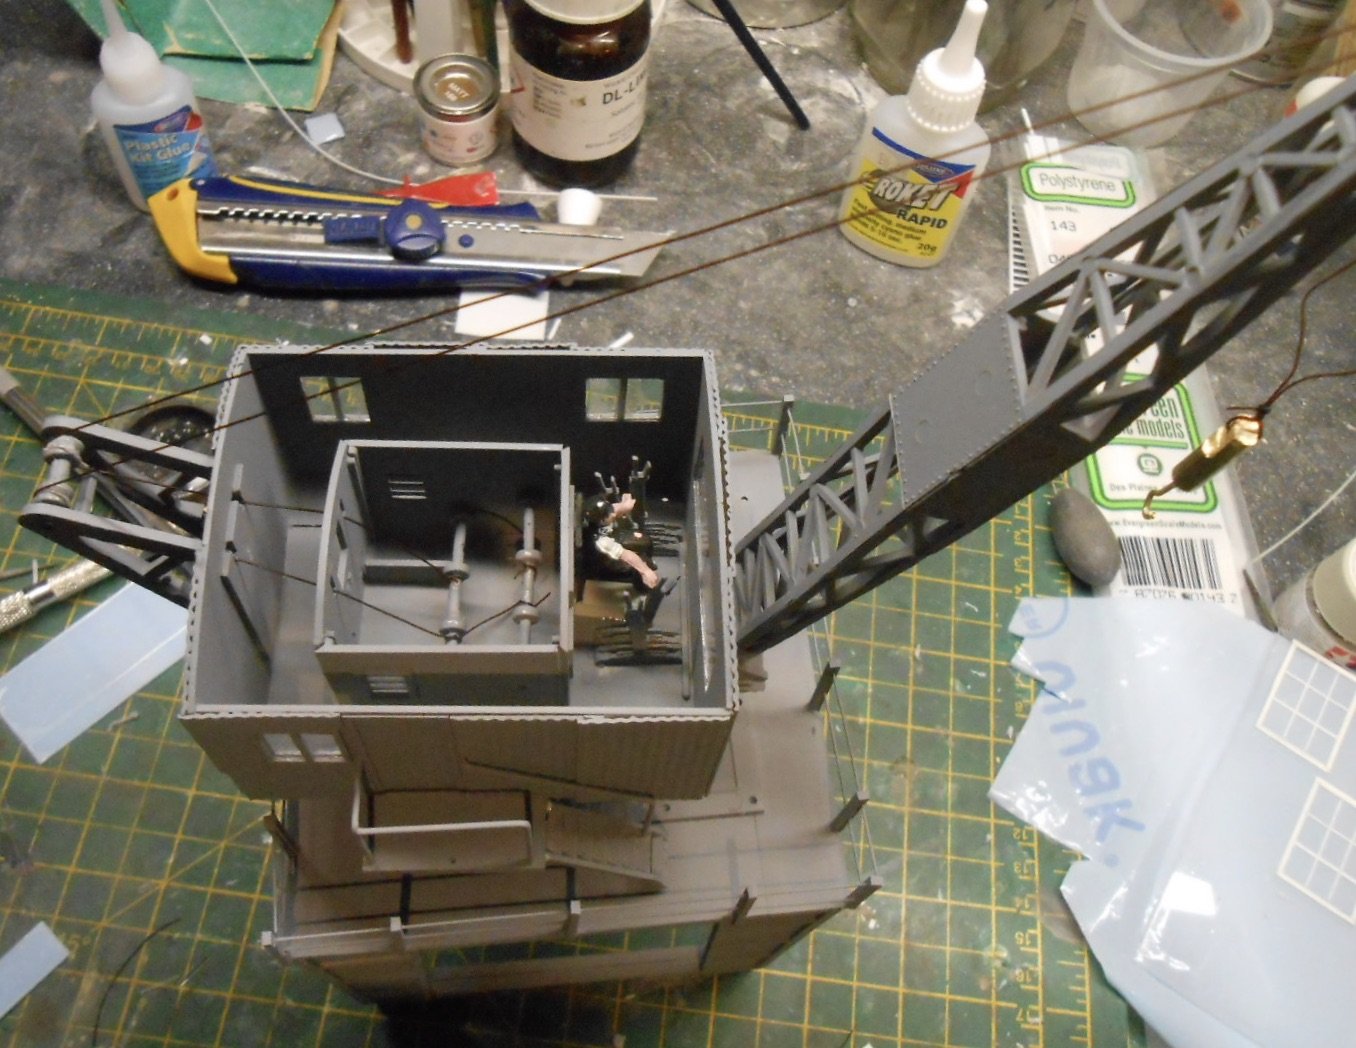
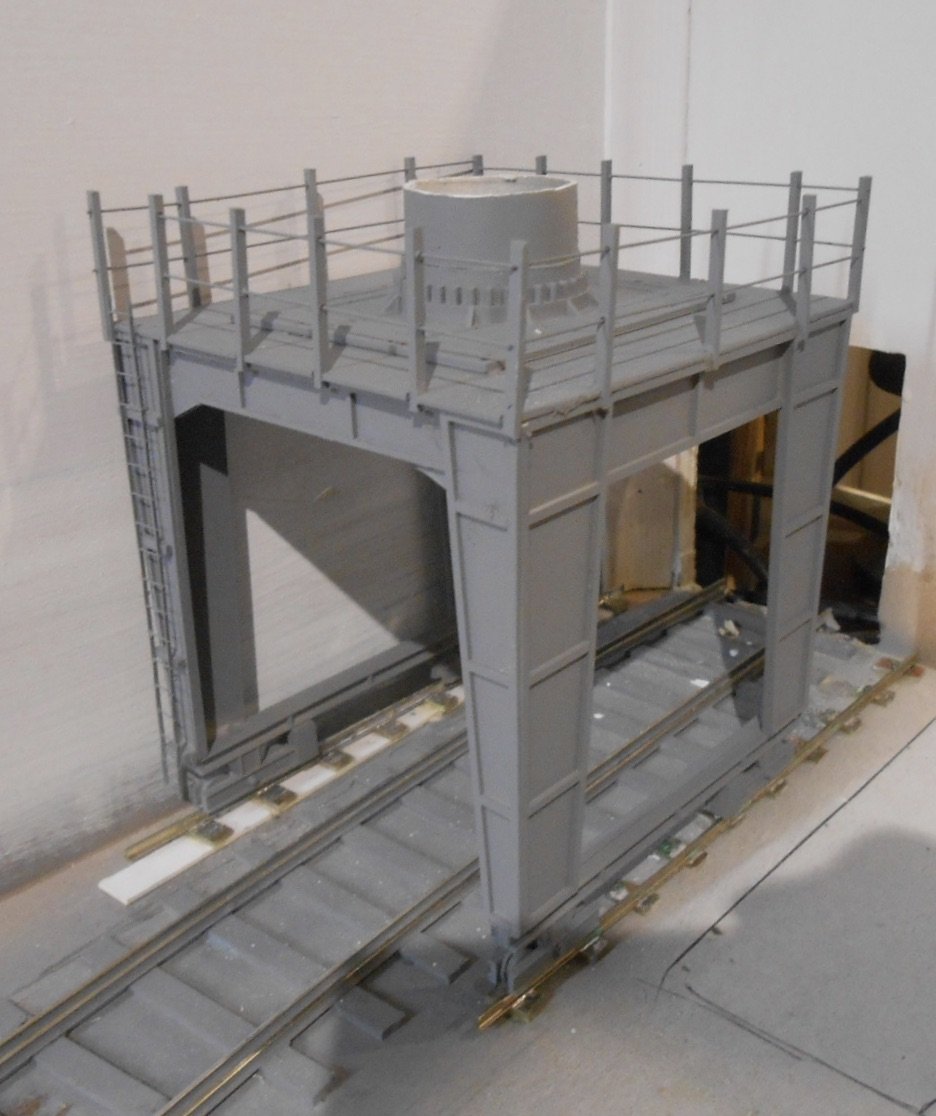
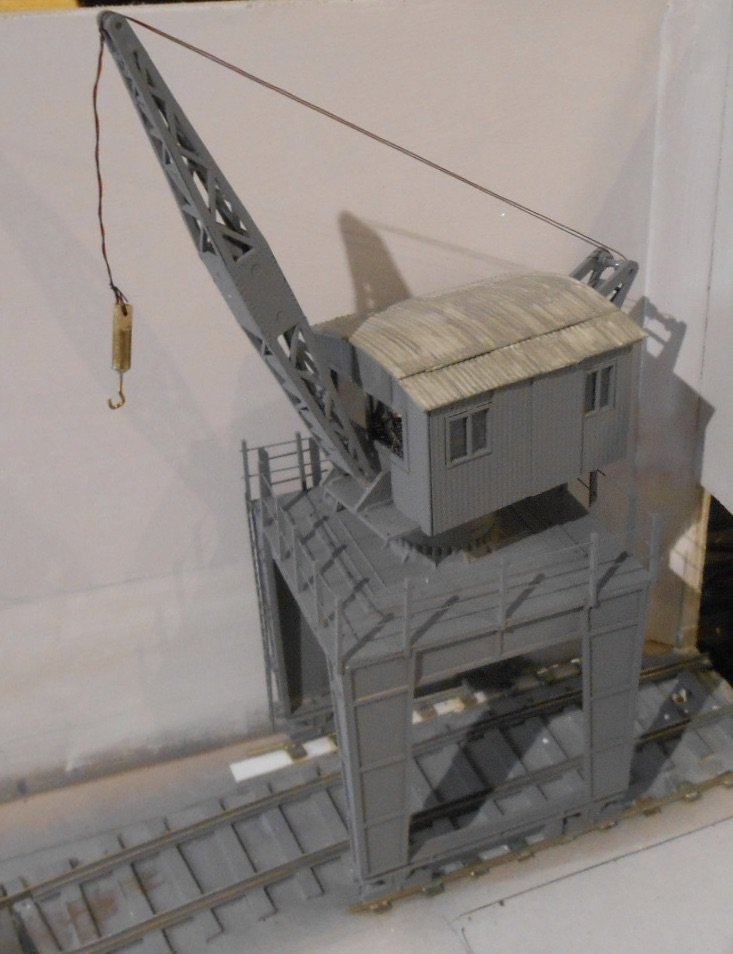
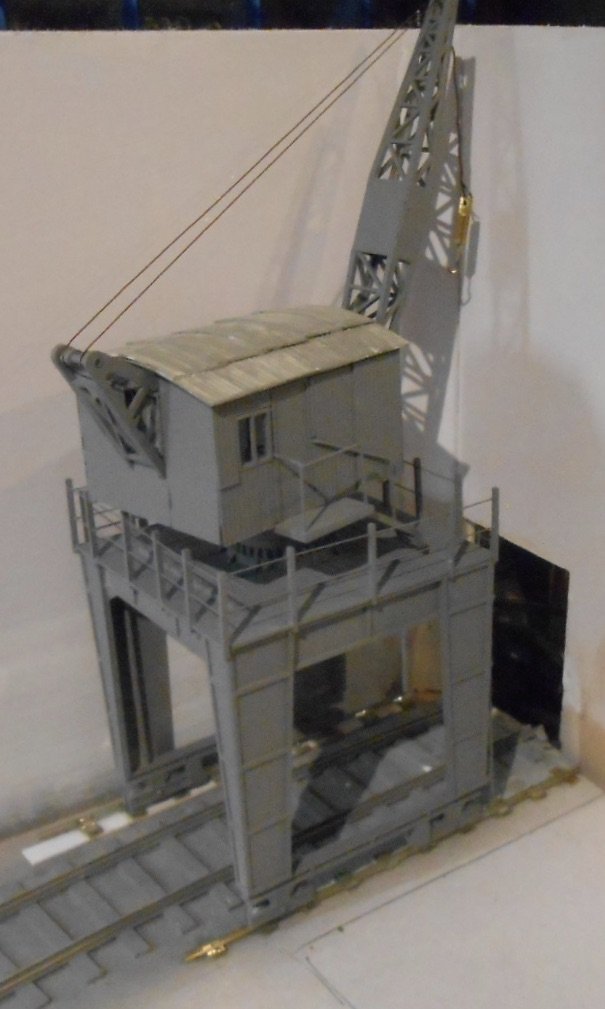
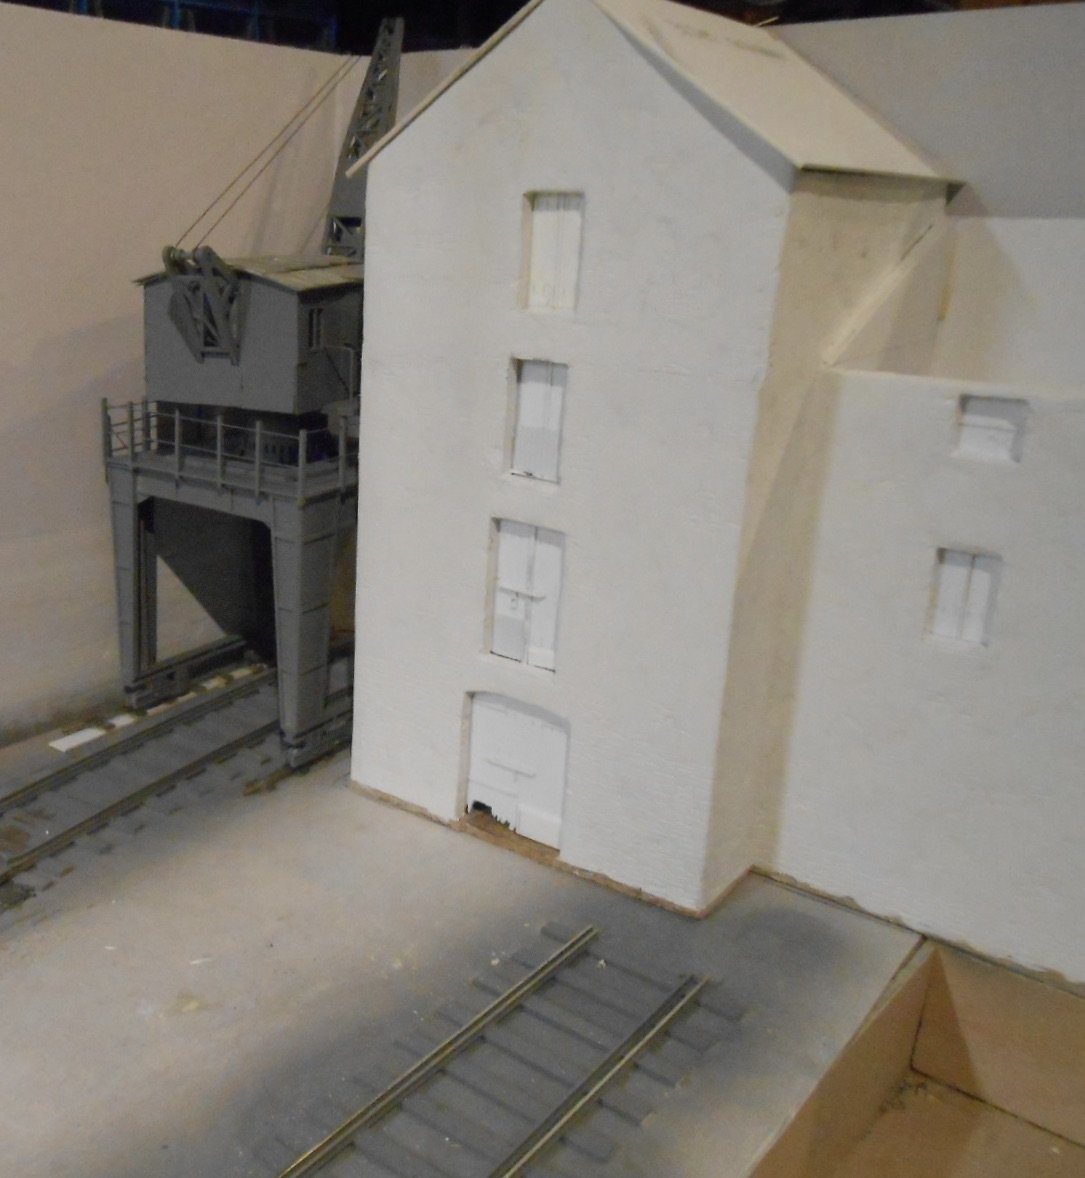
I've been tinkering with the crane, on and off, over the last fortnight and thought I was getting on quite well. Unfortunately, in trying to work out how the cables and hoist gear was rigged, I came across a lengthy thread on RMweb, which shows that the Airfix/Dapol crane kit is, well, wrong... It is all to do with luffing, apparently, which to the uninitiated like me, means the jib needs to be able to move up and down via a supplementary set of cables, separate from the ones to the lifting hook. All to do with the angle of the dangle when lifting cargo from a ship's hold. Anyway, for me, it was a case of 'do I scrap the whole thing and start again', or persevere onwards? Given that Northport Quay is very much a cameo and the crane is really just a view blocker, half hidden behind the warehouse anyway, I decided to plod on. There is another issue though, because am fairly certain this type of crane would have been powered by electricity, so a model isn't really appropriate for the early 20th century. 1950s should be ok, though by all means tell me I'm wrong! I won't mind, because it has been an amusing little project to adapt and reconfigure the old Airfix mouldings. After making new legs and a larger cabin, it was obvious the platform needed some safety railings and this meant raising the cabin on a piece of tube made from several layers of 20thou plastic sheet. Inside the new cabin, I fitted part of the Airfix one, to act as a kind of engine room - maybe diesel power? I also added some white metal levers from a signal box kit, together with a seated driver. The outside of the cabin has been clad in Slater's corrugated iron sheet, some of which also forms the roof. Thus far, the model has been sprayed with rattle can primer and given these things seemed to be mainly grey anyway, it could be that some weathering coats on top of this are all that is required. By and large, it looks the part, though far from prototypical - but as I said earlier, the layout is very much a cameo, so liberties are most certainly being taken.

-
Not sure anything exists in the larger scales, unless custom built. The nearest to 'off the shelf' I can think of are the Alphagraphix Tyrconnel range. They do a good selection of 7mm scale, etched brass, six wheel coaches, plus several ex MGWR locos such as a J26, J18/9 and G2 2-4-0. However, Alphagraphix also do card kits, which are really cheap [less than £5], of the 6w coaches, plus one or two locos as well. An online search will take you to the website.
-
True, though a back scene should work just as well, if you have the space.
-
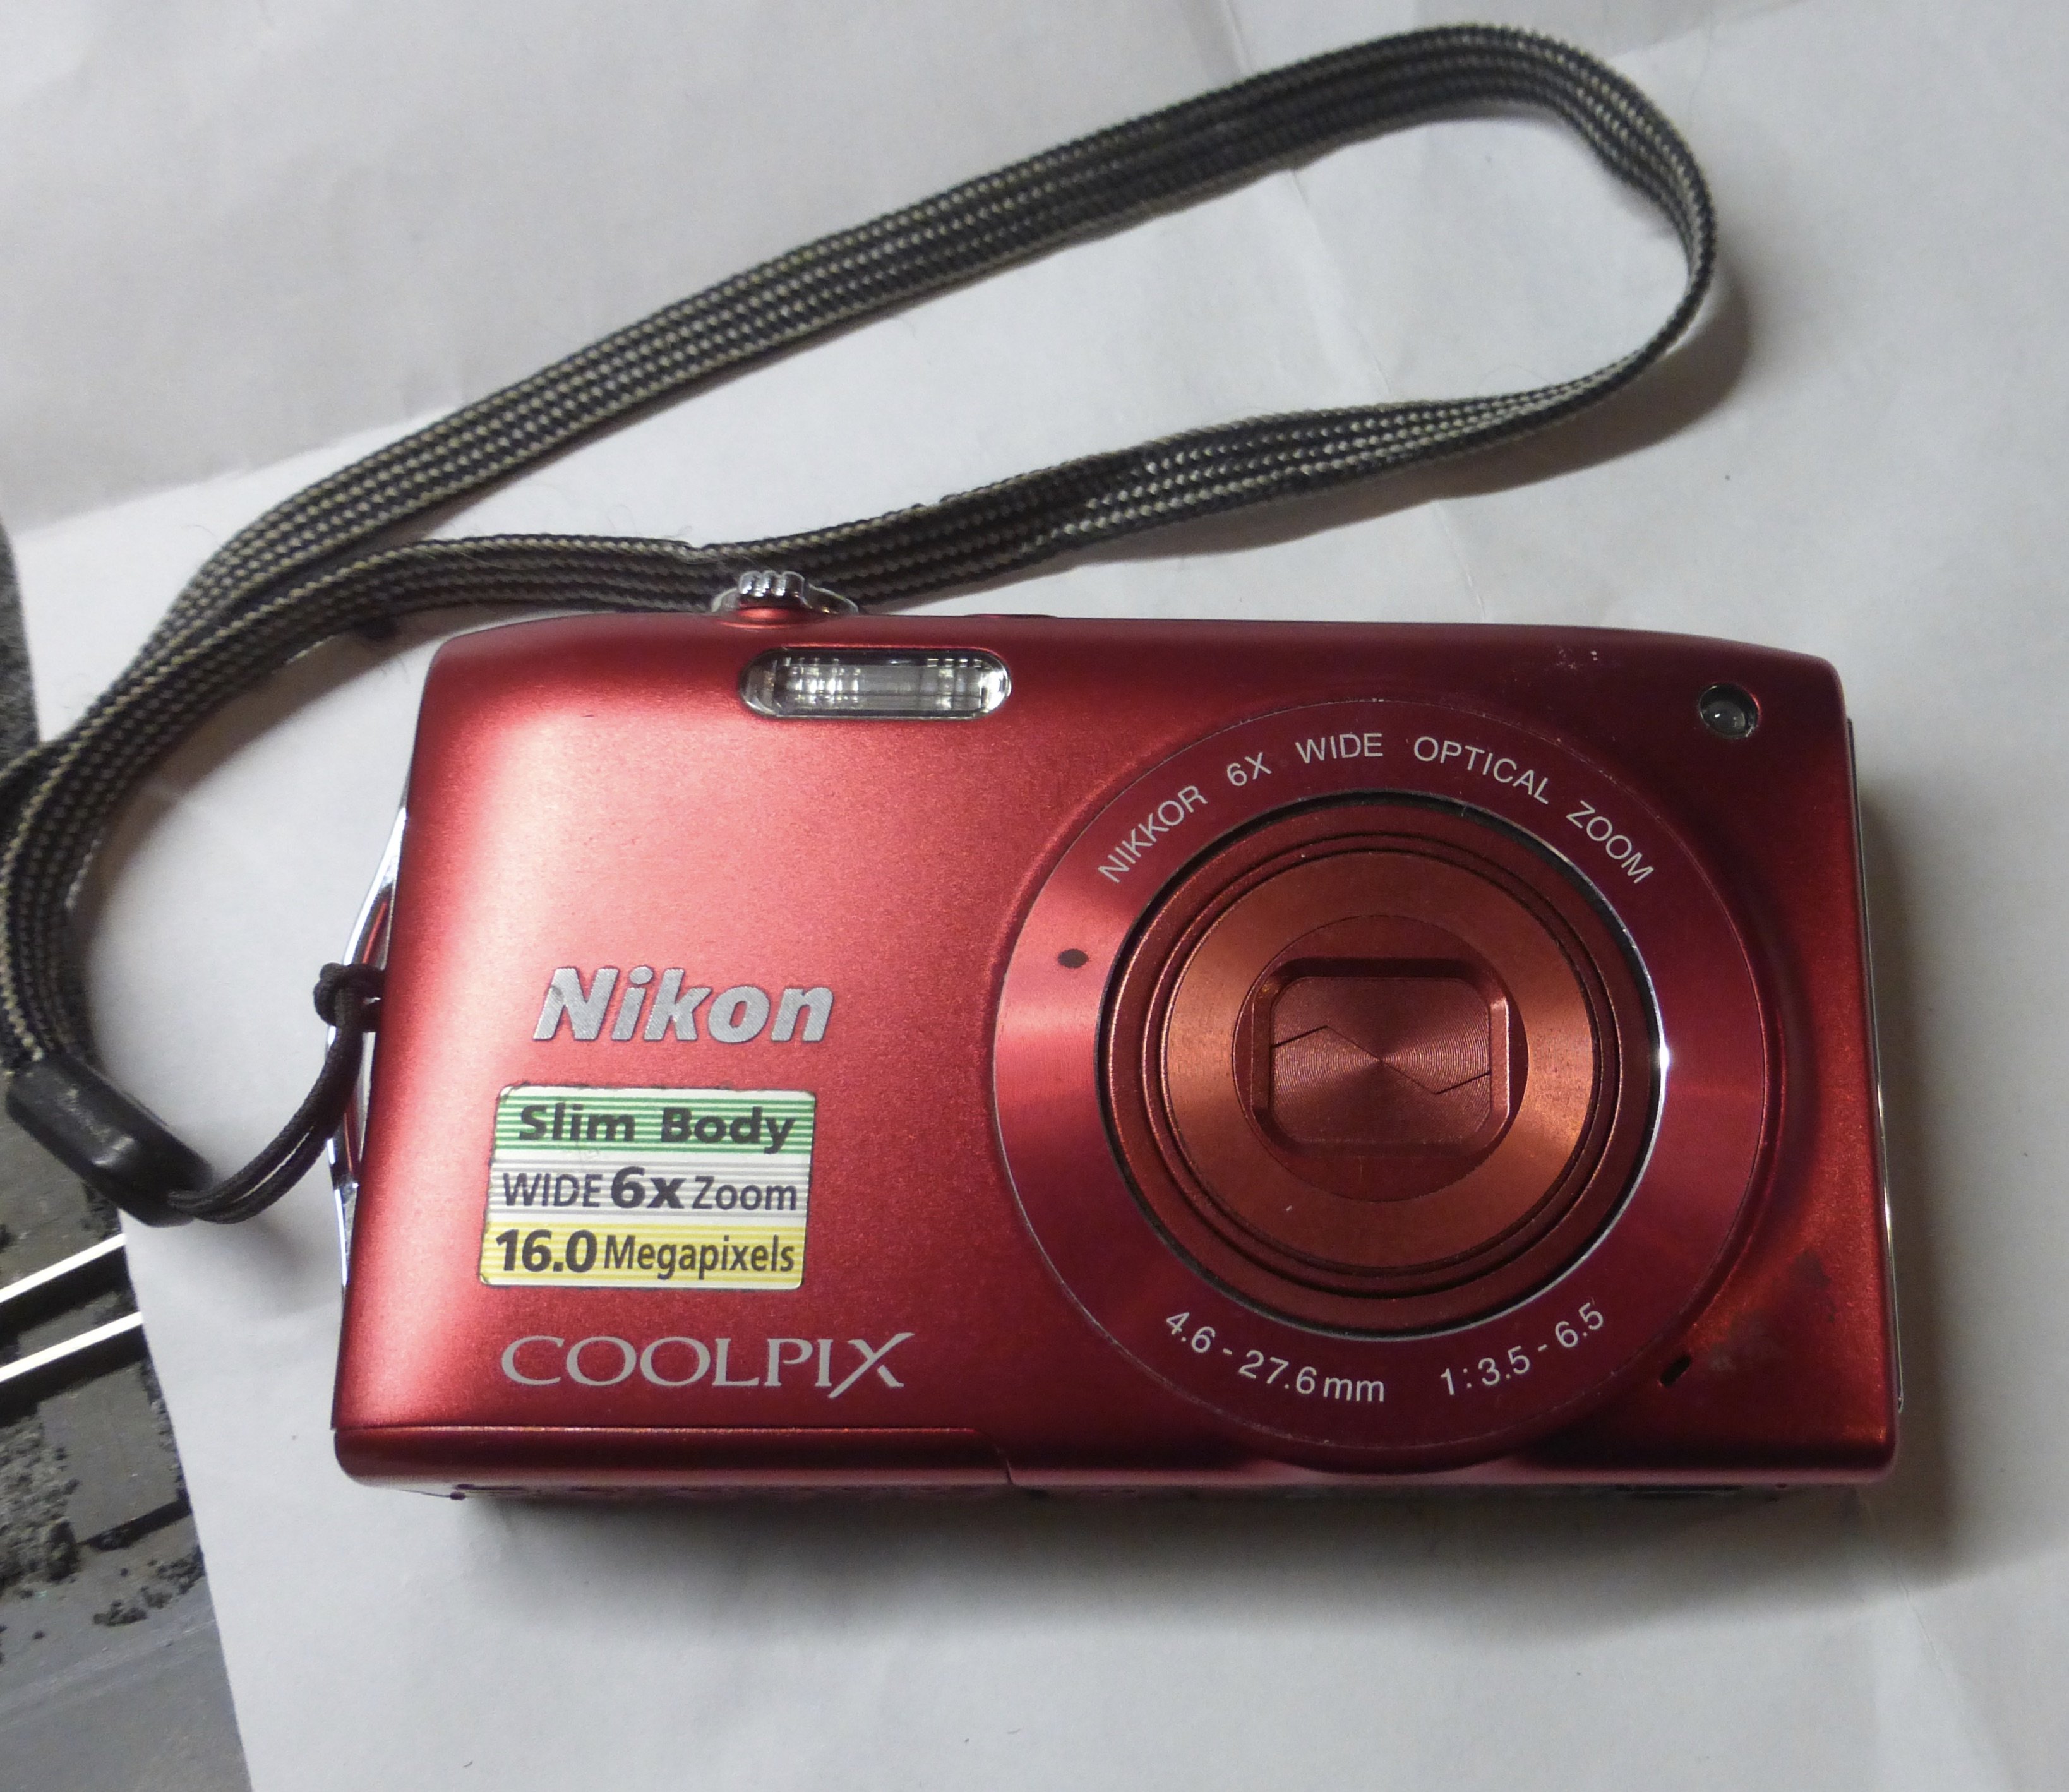
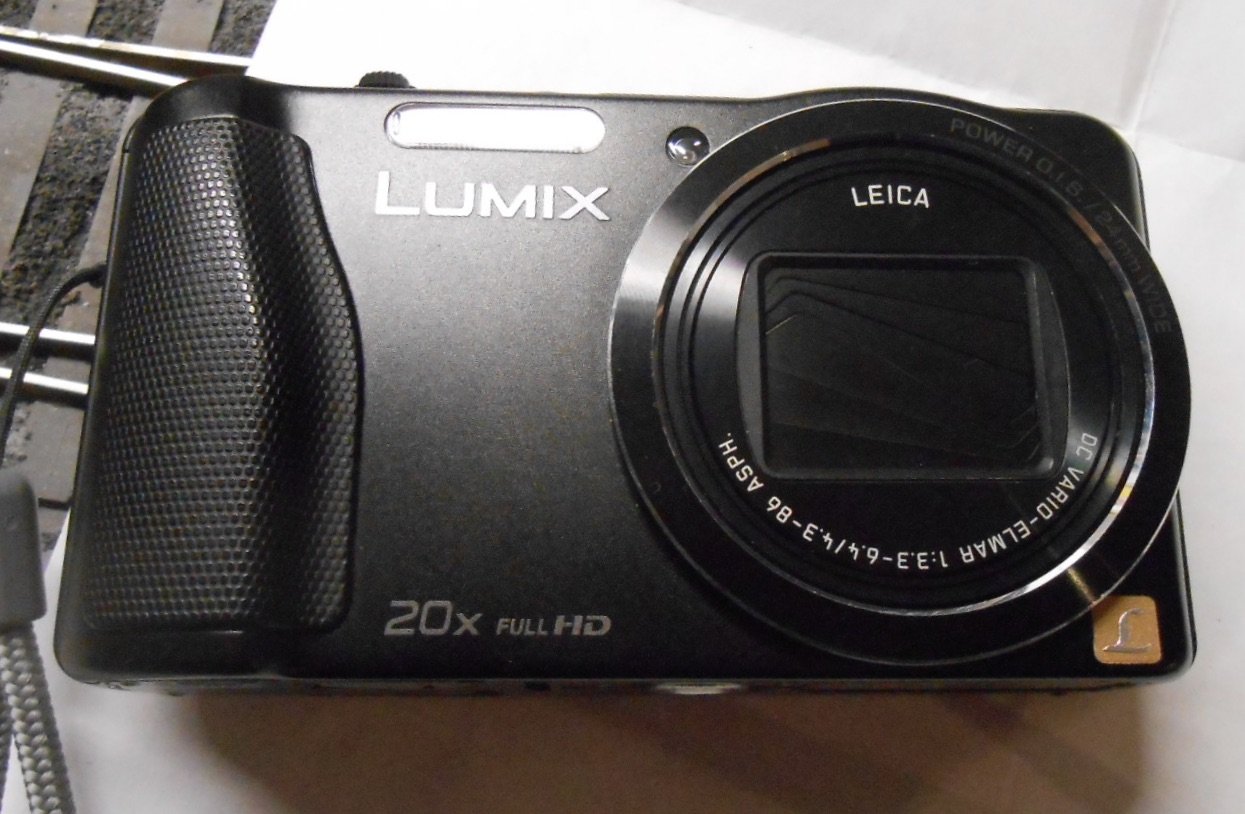
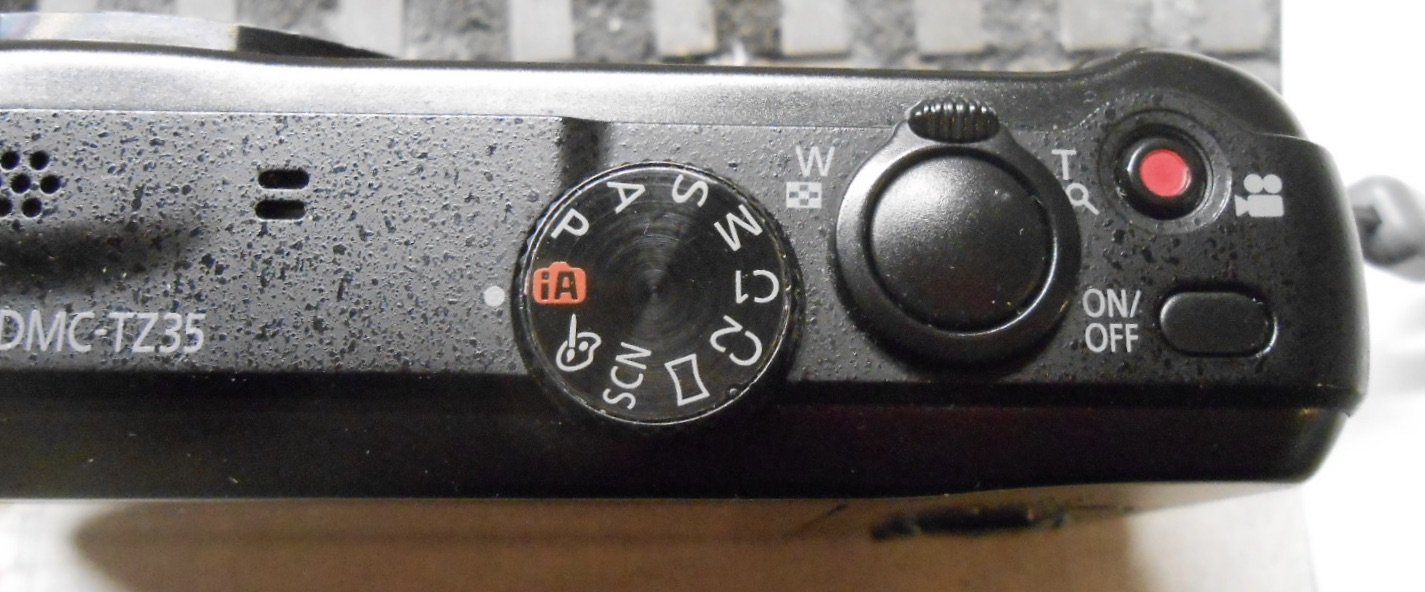
Not bad at all, JB! However... Below are two of my three cameras. The Coolpix is what I use for general 'proof reading' photos of models and for this forum, where minimising the megapixels makes for easier uploading. Equally, with a 6x zoom and 16megapixels, it dwarfs my first digital camera for little cost. Pretty much automatic though, so for more detail work [and holiday snaps], I use the Panasonic Lumix. 20x zoom and 15 megapixels, it still fits in the palm of your hand - unlike my beloved Canon SLR 'film' camera which sadly lies unused in the drawer. Note the magic word 'Leica' on the Lumix though - a proper piece of glass for the lens. Do mobile phones have such things? The third picture is of the control on the Lumix - a dial which allows you to stick with the all too good automatic settings, or be more creative by varying aperture and speed settings. An SLR it ain't, but am almost ashamed to say it will nevertheless do pretty much all I ask of it, though it did cost me £200. One more thought - given that a one megapixel photo will still look ok blown up to A4, you have to wonder about the other 15 million AND how on earth do they fit them all [and hundreds more] on a memory card little bigger than a postage stamp? Amazing....
-
At a show a few years ago, someone asked if they could leave one of those little cube video cameras on my layout. It was placed at the end of the platform and filmed several trains over about 15 minutes. As for cameras, the ones in mobile phones seem to get ever more clever. However, though the processor can make up for a multitude of sins, ultimately, a piece of glass (ie the lens) is crucial. Would have thought a proper camera, even a cheap one, will have a better lens than most phones. My Nikon Coolpix cost me £50, while mobile phones with decent cameras cost ten or twenty times that and can't help thinking that choosing a dedicated tool for the job will always bring better results.
-
Some of C L Fry’s models of early railways
David Holman replied to jhb171achill's topic in Irish Models
All the more remarkable! -
Some of C L Fry’s models of early railways
David Holman replied to jhb171achill's topic in Irish Models
Impressive! When were these models built? -
Yep, that's a Wow alright.
-
Thanks JB, though your layout also has much to be proud of, while for me, the story telling adds another layer. Lighting does make a difference though and LED strip is very effective. Cool white seems to work best for cloudy days and warm white for sunny ones. Get the maximum number of LEDs per metre, because that minimises shadows. Ideally, you want a strip about 5-10cm in front of the front edge of the baseboard and another along the middle. The one along the front edge stops shadows from the middle strip forming. With my own photos, two LED strips like this mean I can use at least 1/60th of a second exposure and avoid using flash. Where you place the camera can be important too. Getting it down to natural eye level can be very effective -often, just placing it on the baseboard surface is all that is needed. Ultimately, a camera with manual overide, so you can set a small apertures and a long exposure (five seconds or more), seems to work best.
-
When I've had the privilege of my layouts being photographed for magazine articles, the likes of Tony Wright and Andrew Burnham both prefer using natural light, small apertures and long exposures, for maximum depth of field. Proper cameras of course, with big lenses and lots of megapixels. For photos on this forum, I have a little Nikon Coolpix, set to just 2 mega pixels and rely on cropping on the laptop to get the scene I want. Needless to say, the expert's photos are exponentially better....
-
A full review is in this month's RM, where it says the A hauled 25 (!) Pullmans around the Peco loft layout, which includes gradients of 1 in 40. Probably a fair bit more that the prototype...
-
A little stunner.
-
He does indeed. Roger's Alphagraphix J26 is a lovely kit. My first Irish loco, it was built and painted in just 40 hours and was a treat to make.
-
Suspect that a Leinster kit that has been breathed on by Eoin will be a bit special. Also noticeable how complete the kit shown was, including chimney dome and other bits. They real!y were good value if you were prepared to put the work in and back in the day, that was indeed what we had to do, learning a lot in the process.
-
Far from sure about that chimney! However, Leinster kits didn't come with any fittings or castings. Really cheap too and some decent models resulted.
-
Interesting! My thoughts too...
-
Saw a GWR 0-6-0 in a local junk shop only this morning. However, can only echo Mayner's comments. Chassis building may sound scary, but is one of those things that are really worth having a go at. However an interim step may be to replace the wheels on the Terrier chassis. Remember though, the axle diameter may not be the same on your replacements, while the crank pins on the coupling rods could have the same issue. You've then got to find a way of fixing the doner chassis to the kit's bodywork. Which is why that, ultimately we end up making up the chassis as well, because it is actually less fuss.
-
The Bandon tanks had 5'2" drivers ( two and a half to be precise), with an even spacing. The suggestion has always been to choose model wheels slightly smaller than that, to cope with the fact that flanges are larger than scale, unless modelling in P4 of course. Hence that probably means locos with 5' or 5'1 driving wheels. A trawl through my 1960 edition of the Observer's Book of Railway Locomotives reveals the following: GWR 22xx ' 5'2 SR Q, Q1 LSWR 700 SECR C 5'2 SECR 01 5'2 LBSCR C2x, E4, LMS Ivatt 2-6-2T, 2-6-0 LNER J6, J11, J35, J39, J21, J36 BR standard 2-6-0, 2-6-2T Quite a few of these are/have been available as rtr, so fingers crossed you can find one without paying a fortune. Good hunting!