David Holman
-
Posts
4,359 -
Joined
-
Last visited
-
Days Won
117
Content Type
Profiles
Forums
Events
Gallery
Blogs
Everything posted by David Holman
-
With the body working out well, it would be a shame to get the chassis so out of proportion. If the wheelbase for the bogie is right, can you substitute correct sized wheels? Romford or Alan Gibson will no doubt have the right size, though guess the real problem will be axle diameter. At least the bogie wheels don't need quartering. Does the kit not come with a chassis? Probably the most daunting aspect of loco building, but also the most satisfying because once you've got over that hurdle your options immediately become wider for everything else. Easy for me to say, having built dozens, but at least it is a simple 0-6-0. Alternatively, if the wheel spacing is right, can you substitute larger drivers? Gibson ones don't need quartering, so might be an option of the chassis can take their 1/8" diameter axles. Most of all though, I just applaud you for having a go at something that isn't straight out of the box ( however good these are) and expanding your modelling skills along the way. Wish my first loco body kit looked as good, so all power to your efforts!
-
British locos and stock that can be disguised as Irish
David Holman replied to Westcorkrailway's topic in Irish Models
The standard RCH tank wagon is one of very few common to both sides of the water and lasted from the early 1900s into the 1960s. -
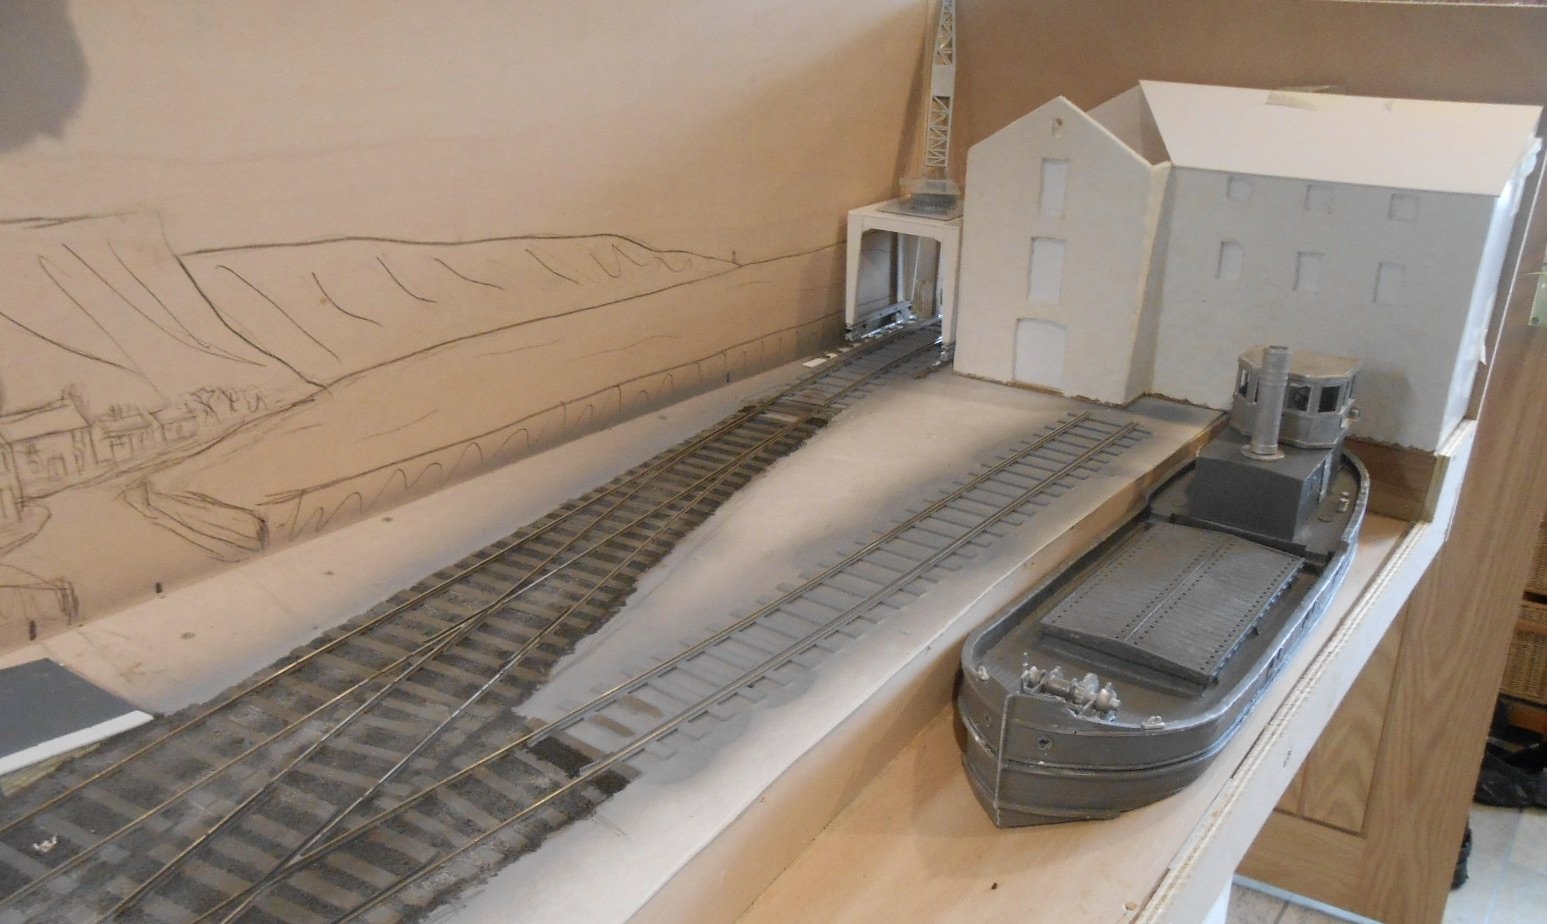
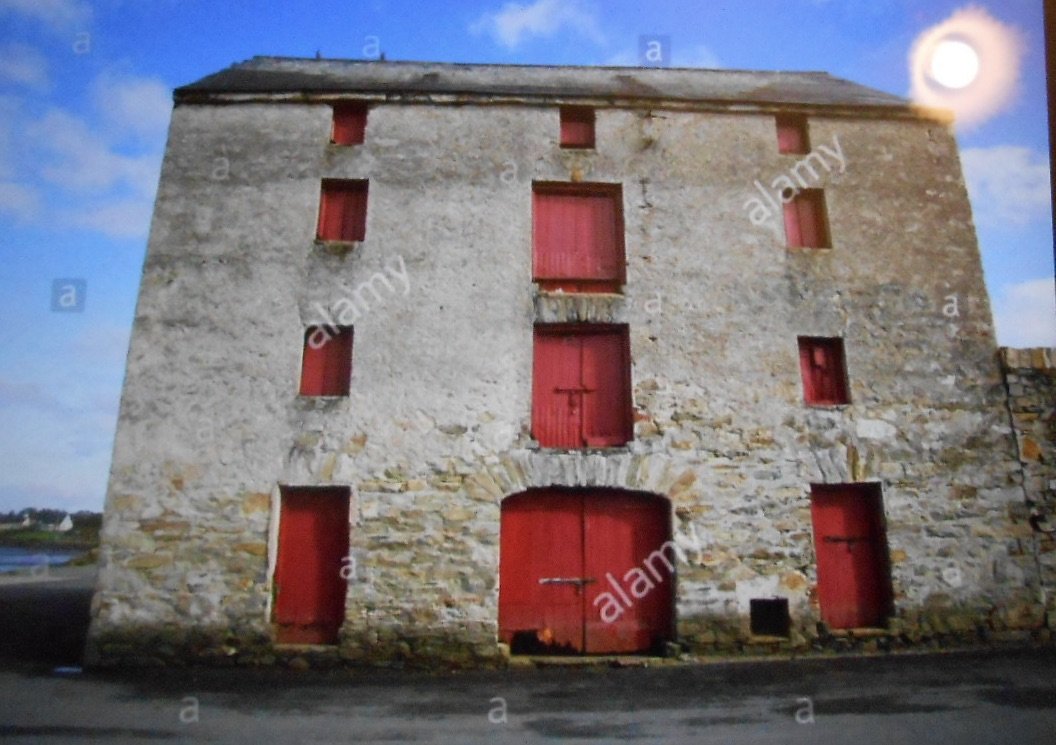
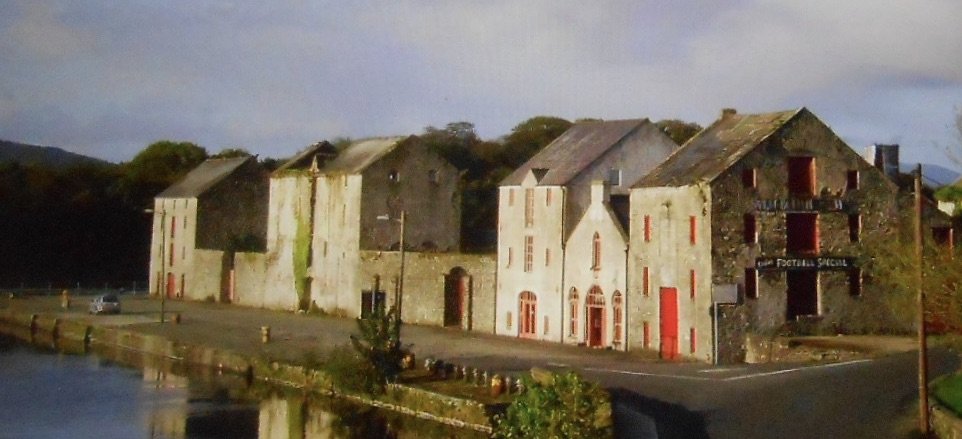
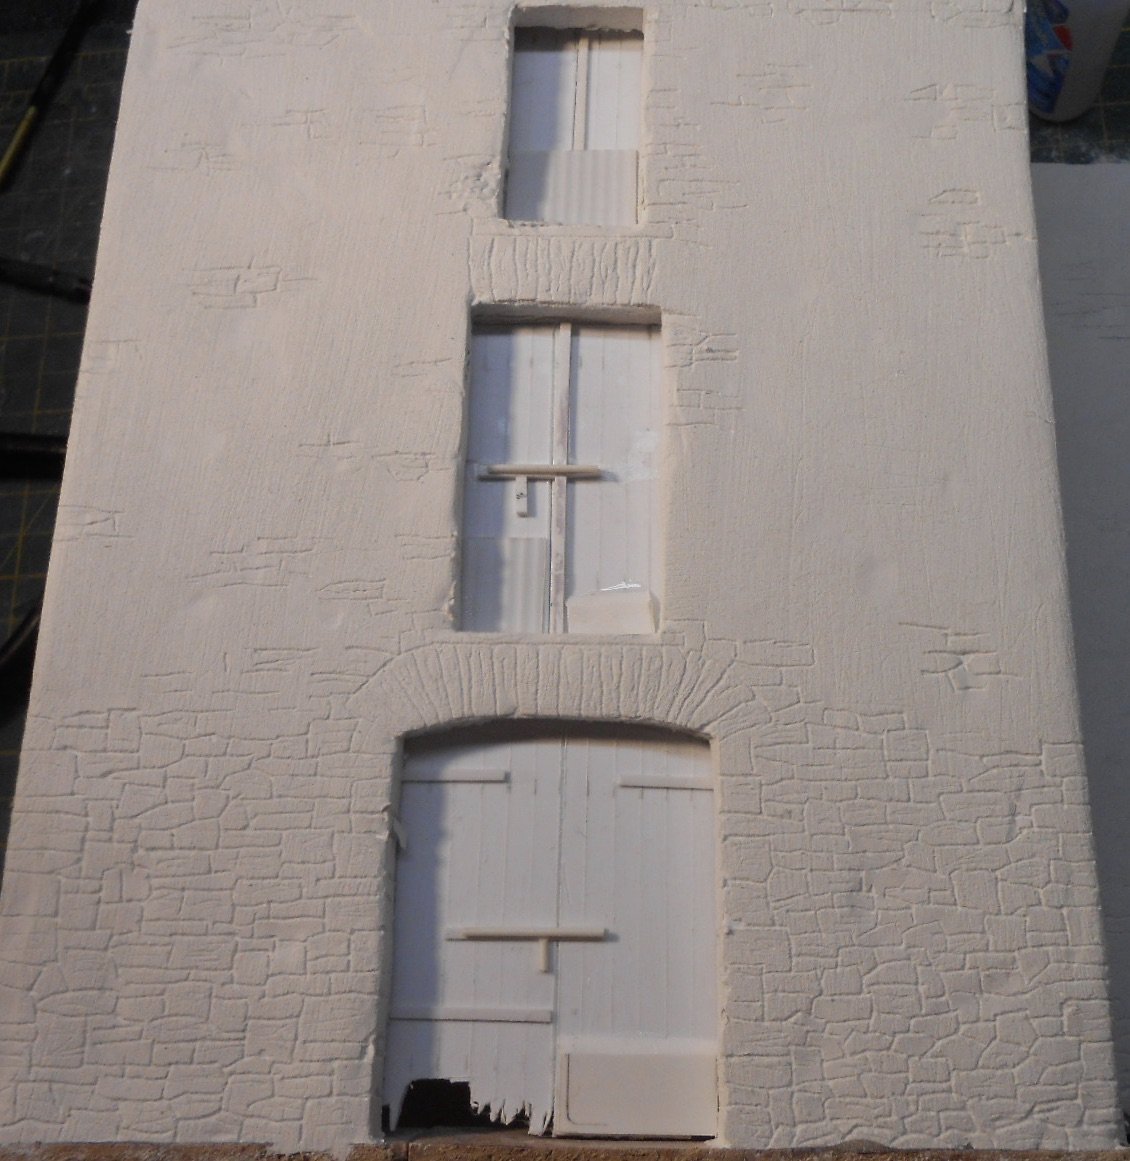
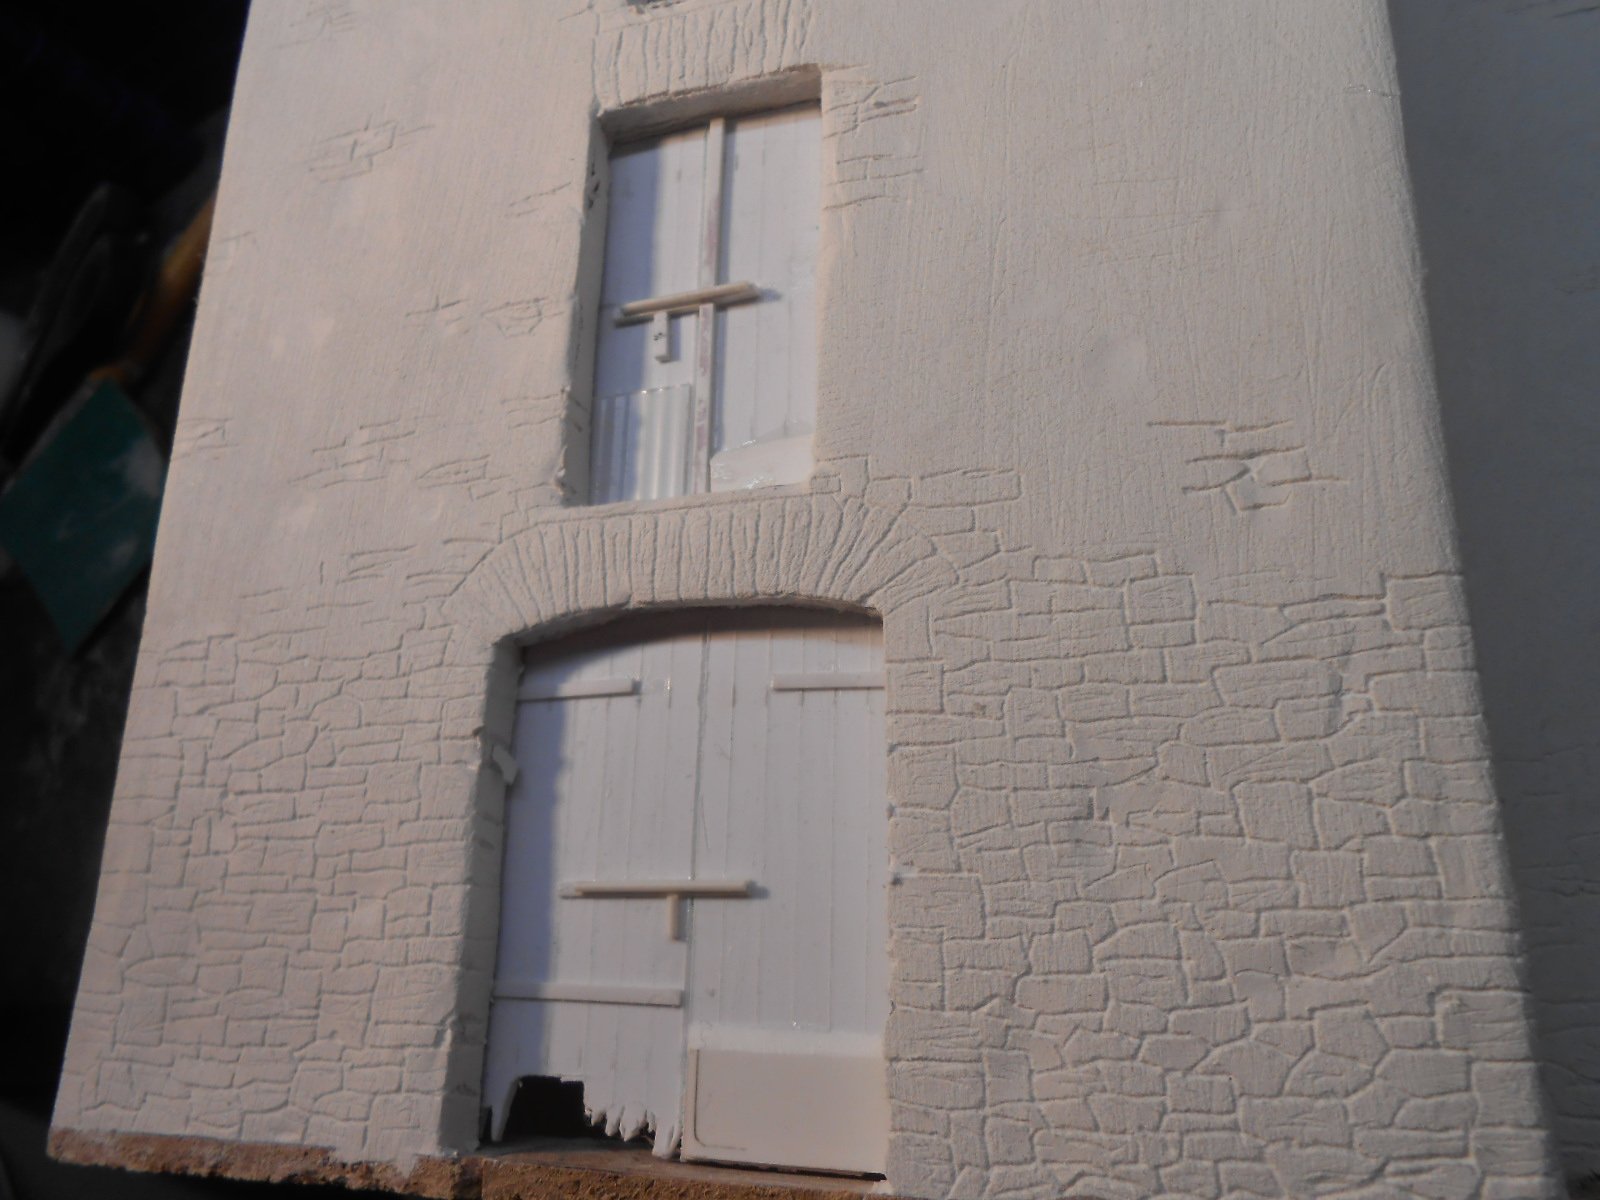
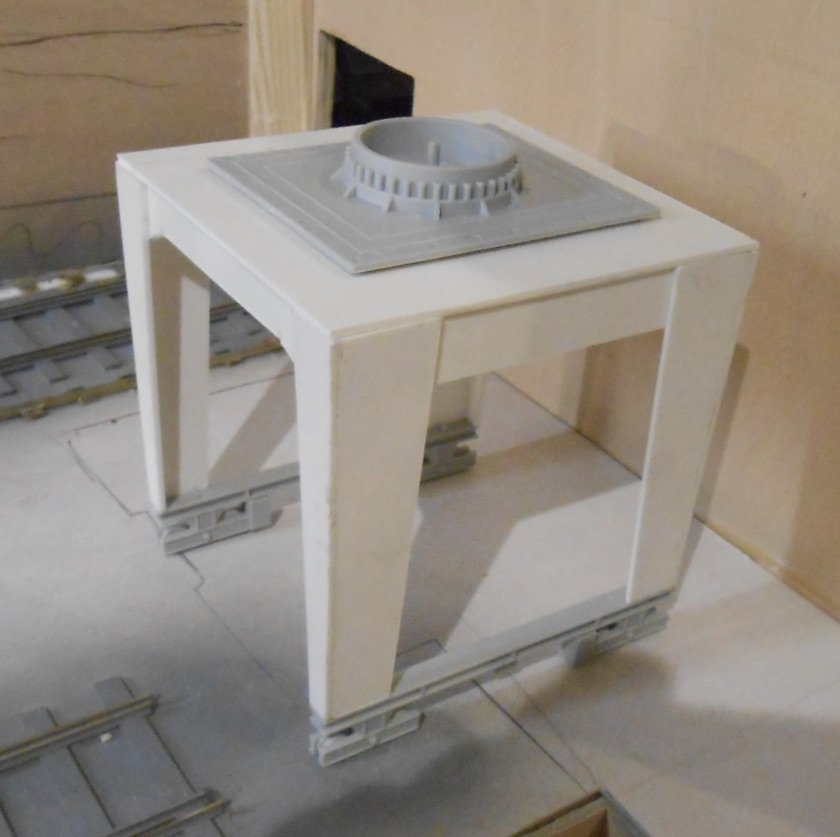
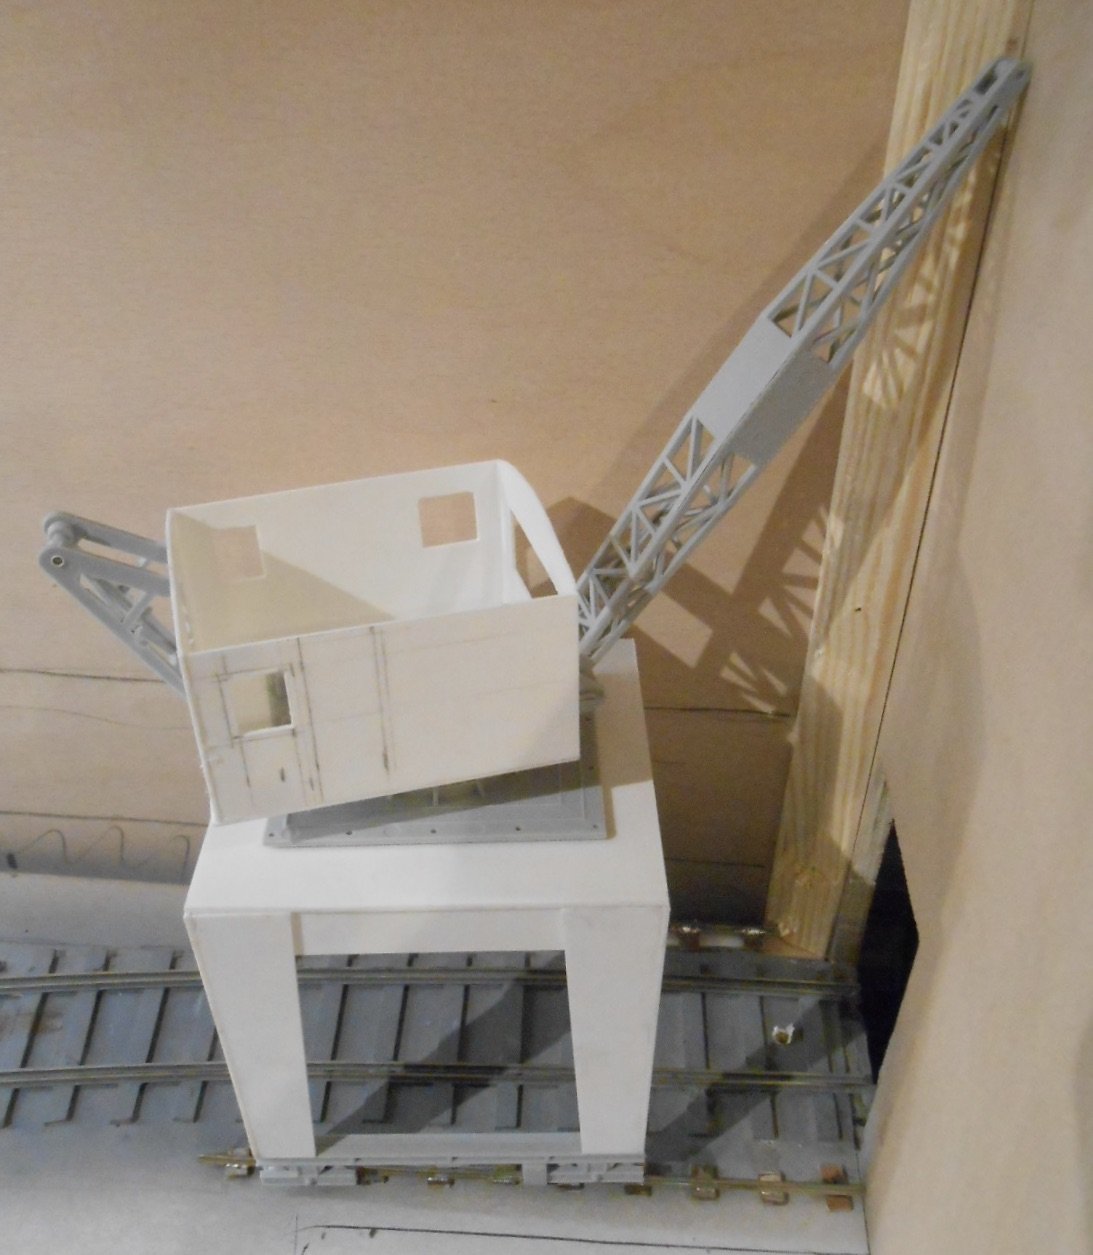
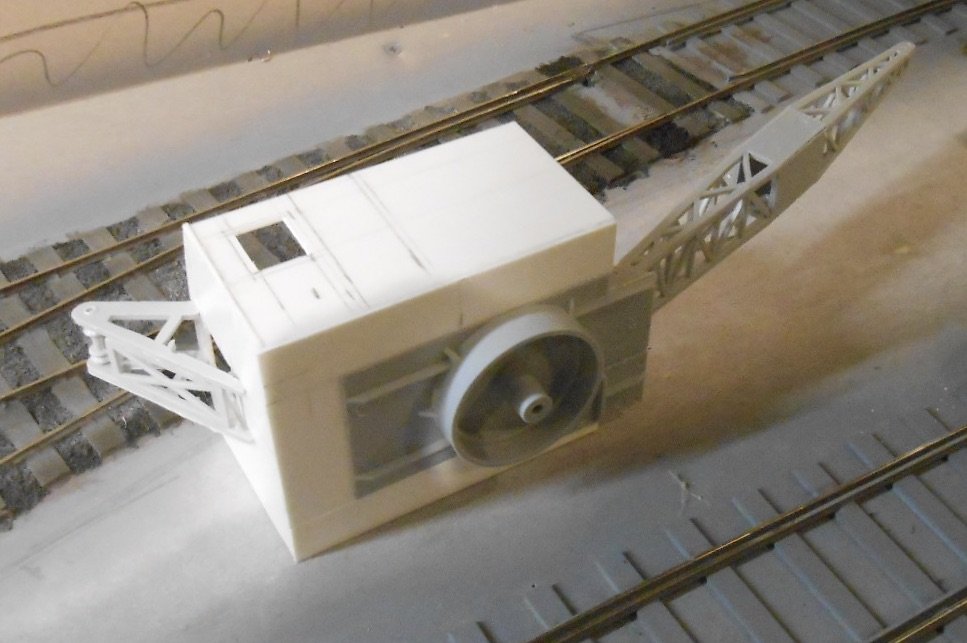
Following the muse One of the many nice things about our hobby is that you don't have to follow convention, or even your own plans. Thus it has been over the last week or so, when after doing the ballasting & in particular working on the baseboard joint, it felt like it was time to do something different. So, I split the boards to gain a bit of space and have been focussing on the right hand one, in particular the right hand end of this. There are two main structures here, the travelling crane [more of which anon] and the warehouse. The first and third pictures show that this has grown a bit, with the gable end section gaining an extra storey as I felt more height would balance the scene better. This was then rendered with DAS clay, like the rest of the model and, once dry, the process of scribing in the stonework started. Inspiration comes from the rather splendid set of buildings on Ramelton Quay, not far from Letterkenny, photos of which I found via an internet search. They appear to be built from random stone & then cement rendered, only for some of the latter to crumble away. DAS is ideal for this sort of work. I don't worry much about applying it flat or smooth, for though I do sand it back, I also leave humps and hollows which help create variety. The hollows in particular are where I've scribed the stonework, plus along the base of the building, as per the prototype. The tools required are minimal, just a scribe and an old toothbrush - the latter essential to see where you are going. The building [a warehouse on my layout], also has some very nice looking doors, which have clearly seen better days. The ground floor one is both patched and very worn at the base, while the upper ones appear to have been repaired with corrugated iron. All fairly easy to do with plastic sheet and strip and certainly a lot simpler than making windows. As for the crane, I had this in mind as a way to hide the square corner at this end of the layout. A full scratch build was a possibility, but then I remembered the Dapol [ex Airfix kit]. This must be at least 50 years old, probably more, but represents the sort of thing I am interested in, standing high on long legs and running on rails set about 4-5 metres apart. Thus far, I've used the wheel units, along with the the cabin base and boom. The two legs have been made from 60thou plastic sheet, with the crane cabin from 40thou. A lot more detailing is required, but it seems to fit the scene, though the corner of the back scene will need some sanding to make a small radius curve. As things stand, I've got four structures of different kinds under way [crane, warehouse, platform store and the Puffer], so plenty of variety if/when I get bored with more mundane things!

-
Hardly a distraction when you now have a fine scene to display models against. Something for others to emulate, methinks.
-
Was going to suggest the same thing. Great work and turning into a fine looking model.
-
Sort of, but there is the usual issue in that it seven planks to the Irish wagon's six. Seems to a rule that Irish open wagons have an even number of planks, whereas GB ones tend to be odd.
-
We ask our stock to go round ridiculously tight curves. Bogie and four wheelers are usually fine, but six wheels, and indeed longer wheel bases cause problems. Some sort of flexible chassis is therefore essential. In 7mm scale, the Alphagraphix 'Cleminson' type works a treat. Flangeless centre wheels may go some way to solving the problem, but one of the outer axles may need to rock and/or pivot to go round tighter curves.
-
G Farish Black5 tender pickup query_TDR hunslet build
David Holman replied to Pete00018's question in Questions & Answers
Looking at that photo shows how far N Gauge has come in the last few years, particularly in terms of wheels and chassis. Below the footplate, that Black Five isn't pretty....- 2 replies
-
- 2
-

-

-
- black 5
- tralee dingle hunslet
- (and 2 more)
-
Excellent!
-
It is indeed and one of the reasons I chose to back date some of my models to the 1900s.
-
Robinson's 4-4-0s for the WLW must be one of the most elegant of all such types, right up there with the SECR D class. They just seem to personify Edwardian elegance. The former is on my list, albeit some way down at the moment! When I bought the last two remaining SLNCR 'small tank' kits from Adrian Rowlands (North Star Models), he also offered me an S. Not part of my plans and still isnt, but nevertheless get a twinge of regret from time to time. Meanwhile, Mrs H bought me a book on the history of Aston Martin for Christmas, by Ben Collins, aka The Stig. Decent read, especially the chapter of the 1959 DBR1 which Caroll Shelby won, after Stirling Moss wore out the Ferraris in the lead Aston. Utterly beautiful car and got as far as wondering about building a kit. A 1/12 model can be had for six hundred quid or so (!), though a 1/24 is a more reasonable £120. One day... You need at least two and a half million for the real thing, by the way.
-
new year new layout 1990s container terminal and tmd
David Holman replied to Sean's topic in Irish Model Layouts
Sounds like you are going to have fun, so keep us posted! -
Impressive. Very impressive!
-
I think it is all a matter of perspective. Hand made track and 21mm gauge requires the learning of new skills and clearly takes more time than just using ready to run. However, if something closer to fidelity is what you want, then that is the price you pay. Or indeed, invest in someone else's skills to do it for you. On the other hand, going the extra mile may not be your thing and with so many quality models now available anyone who is happy to compromise on track gauge can still create their own bit of Irish railway. I happen to like building things, so am happy going broad gauge, not least because it is a bit different from the norms of railway modelling and in 7mm scale there is not going to be a rtr model appearing just as I complete my next kit or scratchbuild. If operating is your thing, then the maybe rtr is better. However, if you want to develop your skills and aim for something more accurate, then 21mm gauge looks increasingly achievable. Like learning to play a musical instrument, things can seem daunting at first, but start simple and skills do develop.
-
new year new layout 1990s container terminal and tmd
David Holman replied to Sean's topic in Irish Model Layouts
While the track plan seems ok, angling it across the baseboard, as per the first photo, is always better visually. If you can run to Peco code 75 track and points that will also make a difference - if not, operating the layout at eye level will help hide the narrow gauge and heavy rail section. Likewise inset track as per the front siding. If there is room at the right hand end of the layout, having one of the sidings, or the headshunt going off scene adds a multitude of possibilities. It could be just a single siding, or it could lead to several. Either way, just 30-50 cm allows you to add all sorts of wagons to serve whatever you fancy. As for the turntable, Frizinghall Models do a hand cranked mechanism (essentially bits of Meccano), which works very well and includes getting power to the track. -
Continue to enjoy the story telling, which bring the photos to life. As for backscenes, sometimes 'less is more's and a lot depends on what you want to convey. Portrait and close up photography often uses a large aperture to make the background out of focus, so a plain backscene can do the same, with the eye being drawn to what is in the foreground - which may well be the trains. A very pale or white sky backscene is very easy to create of course. Vestigial scenery can be painted on, or a decoupage technique could be used by cutting and pasting to add features on a low horizon.
-
Sorry Mick, dont know what ACC is and when I tried looking it up got everything from Aberdeen City Council to Automatic Cruise Control and many places in between! The thing about PVA is that it doesn't stick to cling film - or more likely it is the other way round - so guess that if you do a test with say a couple of bits of wood clamped together, with cling film and ACC, that will tell you.
-
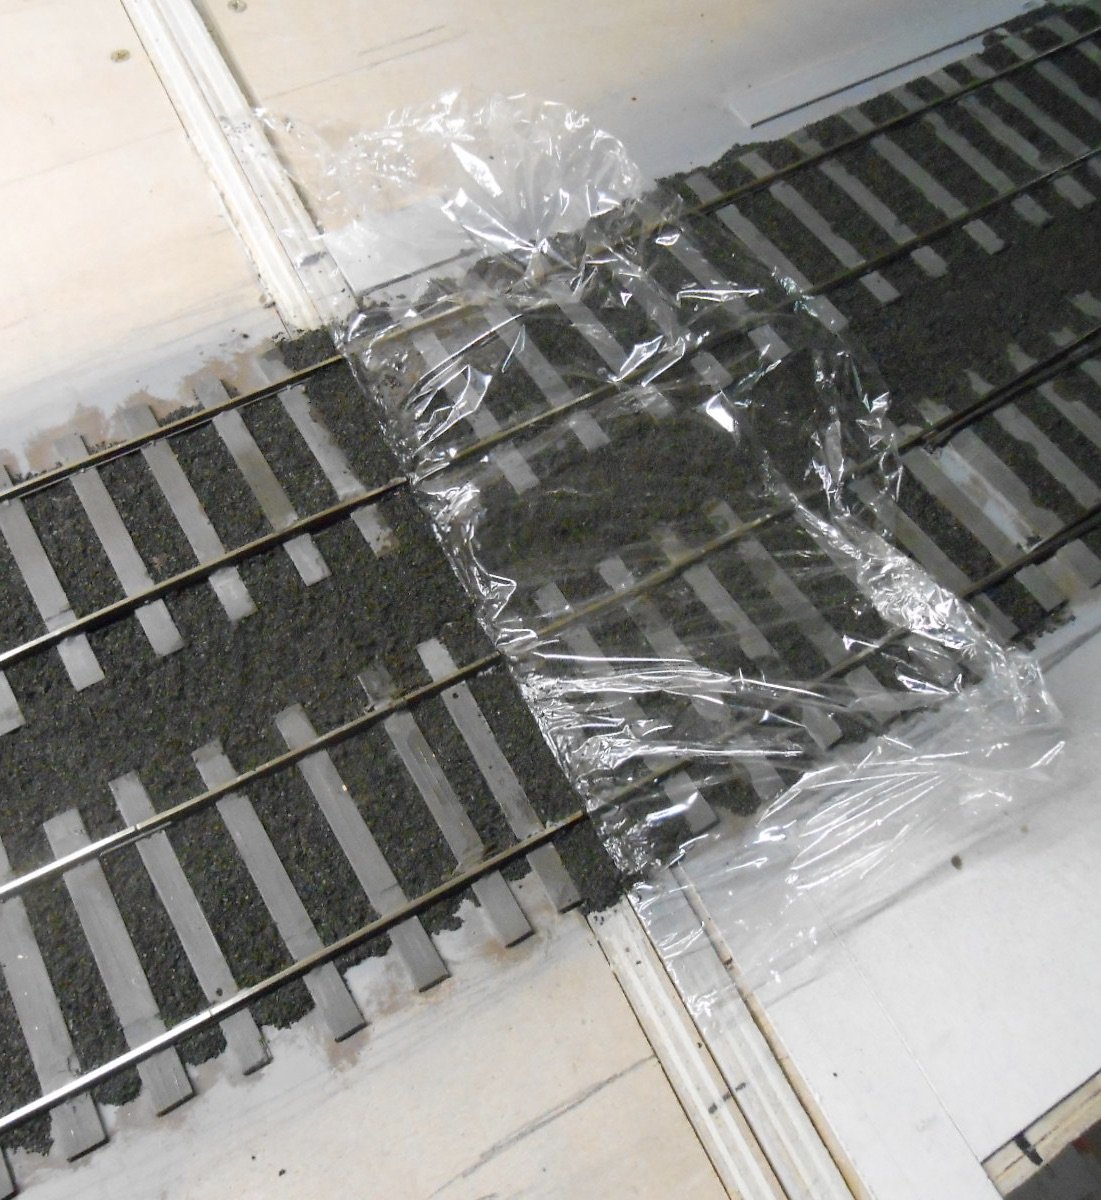
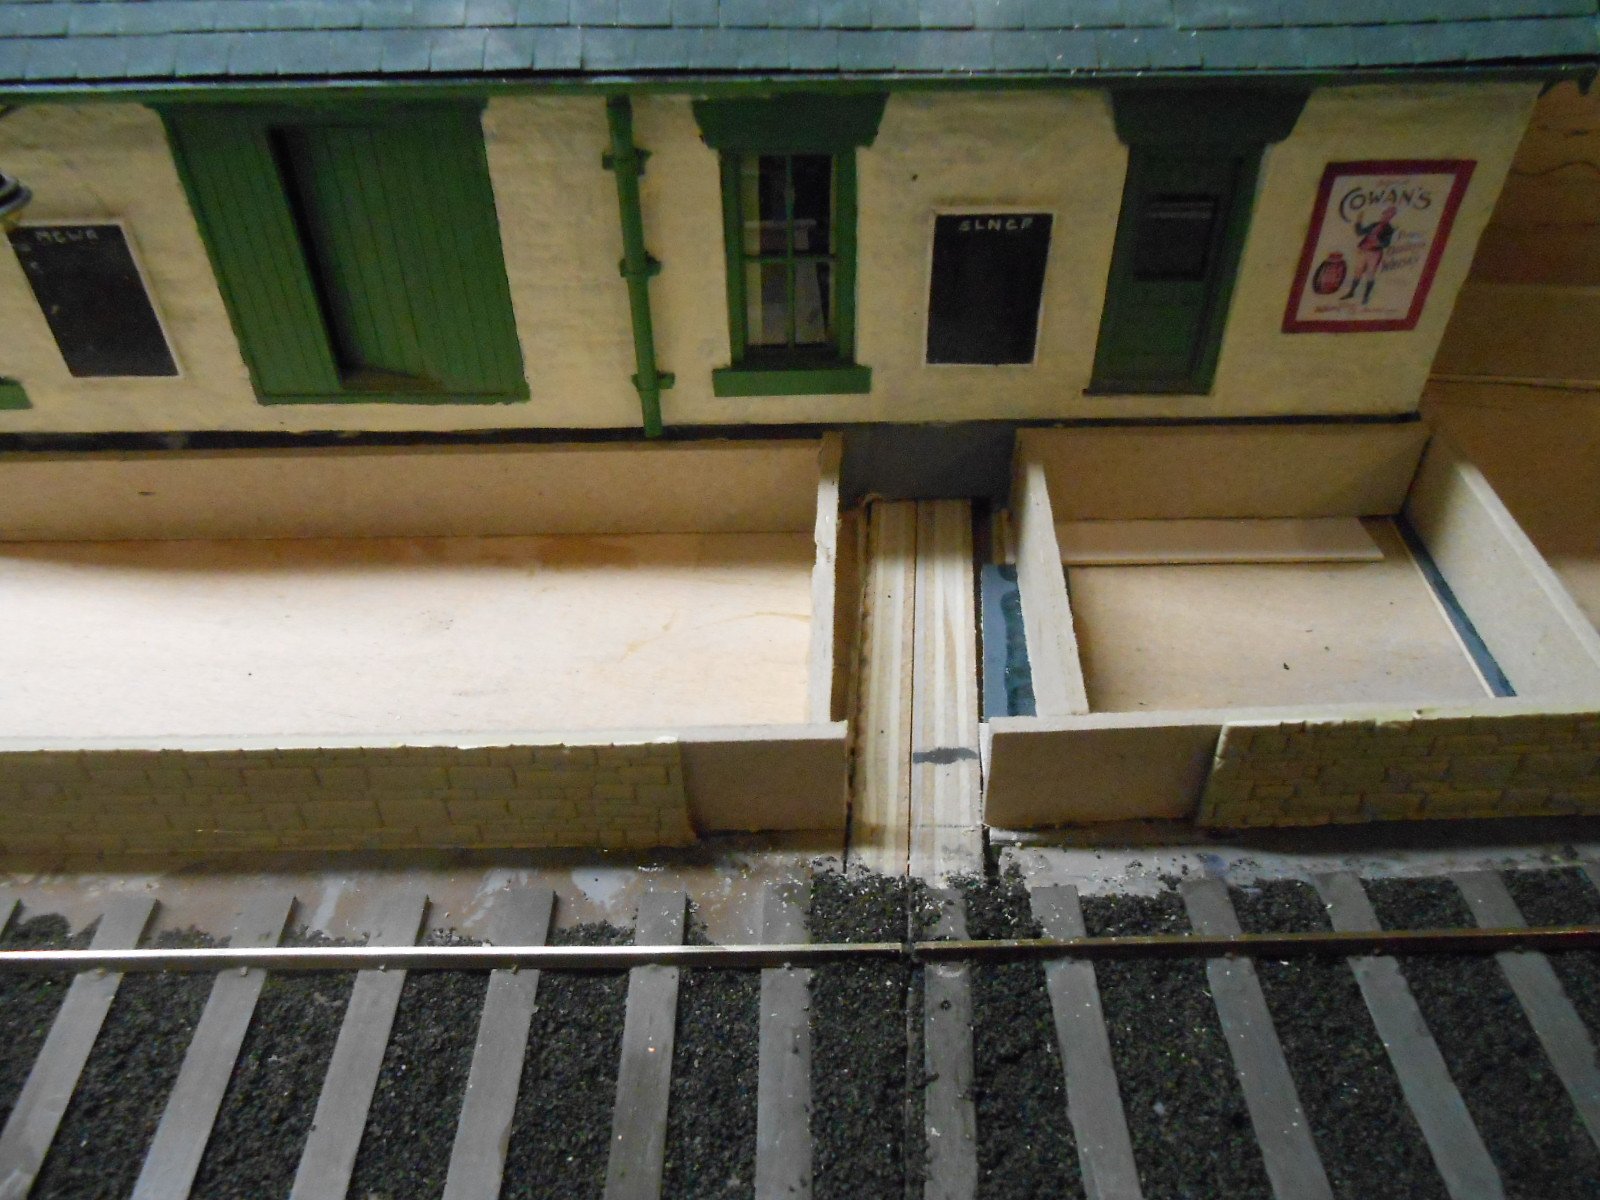
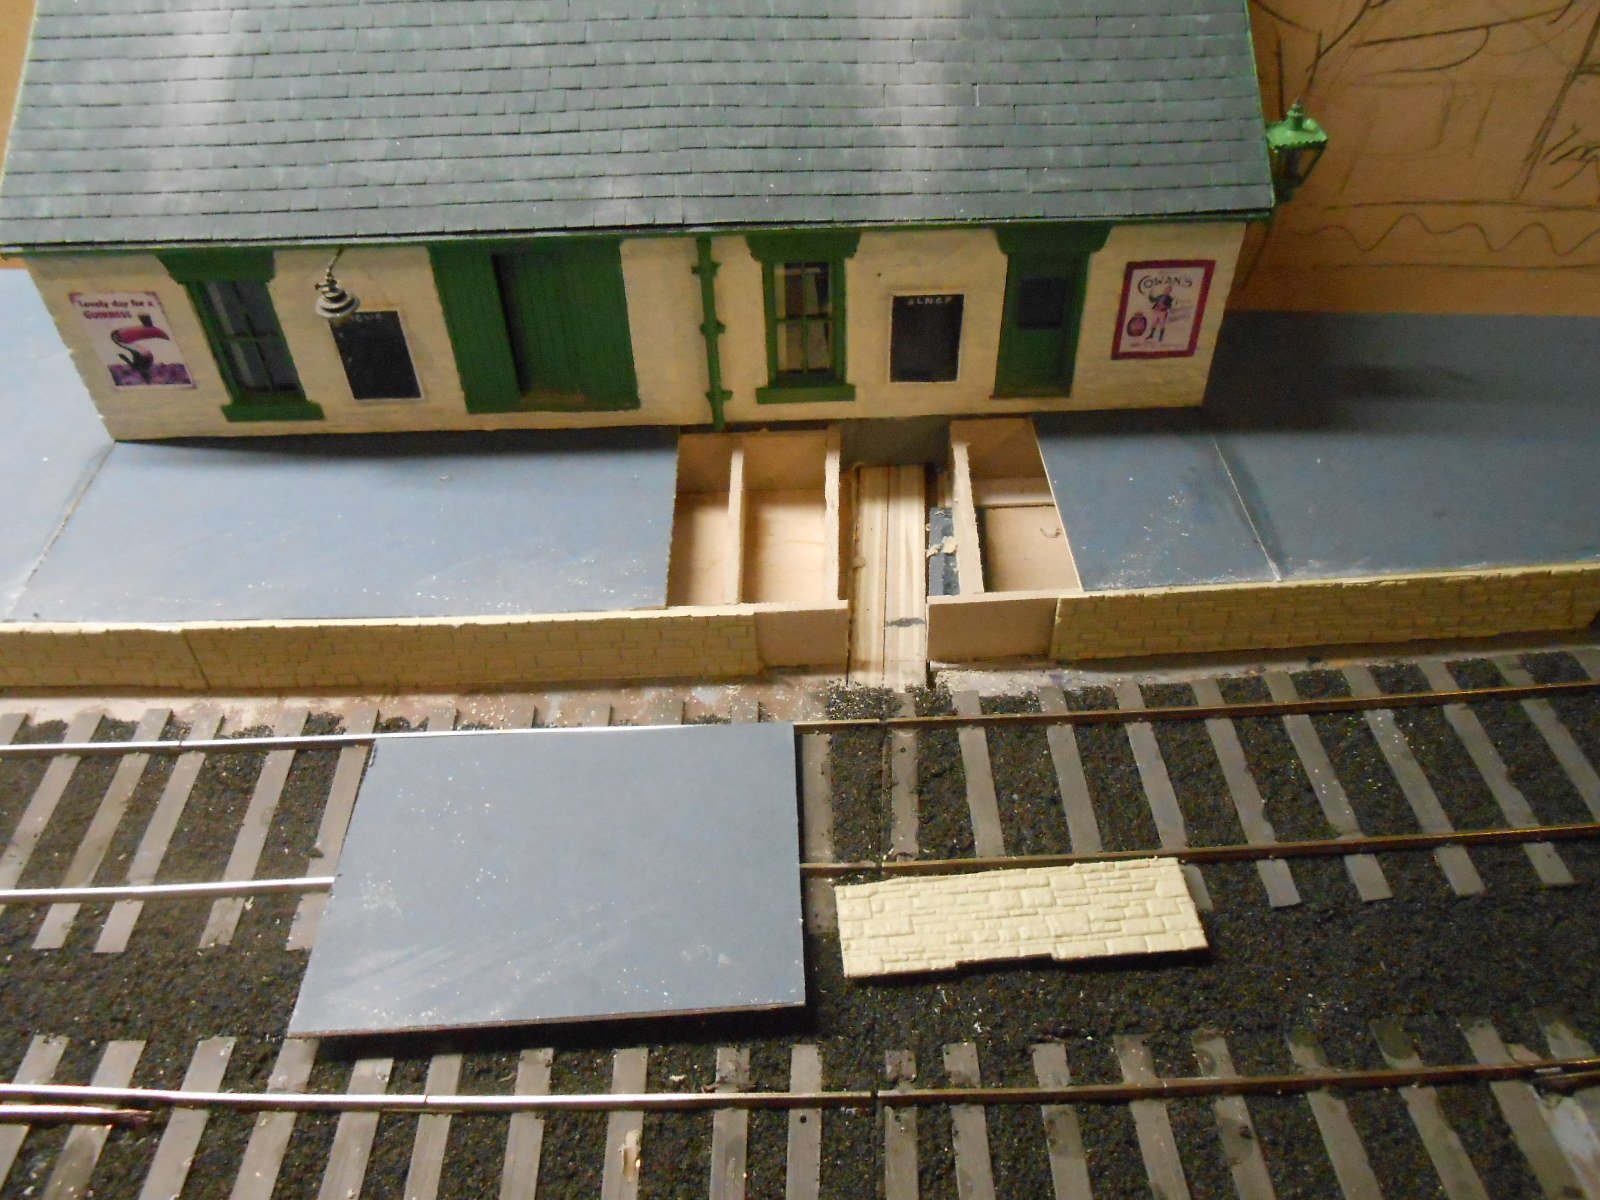
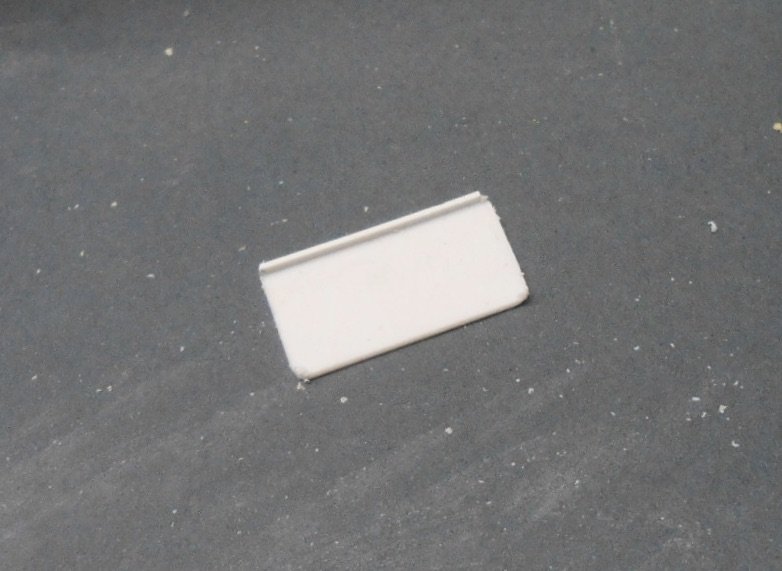
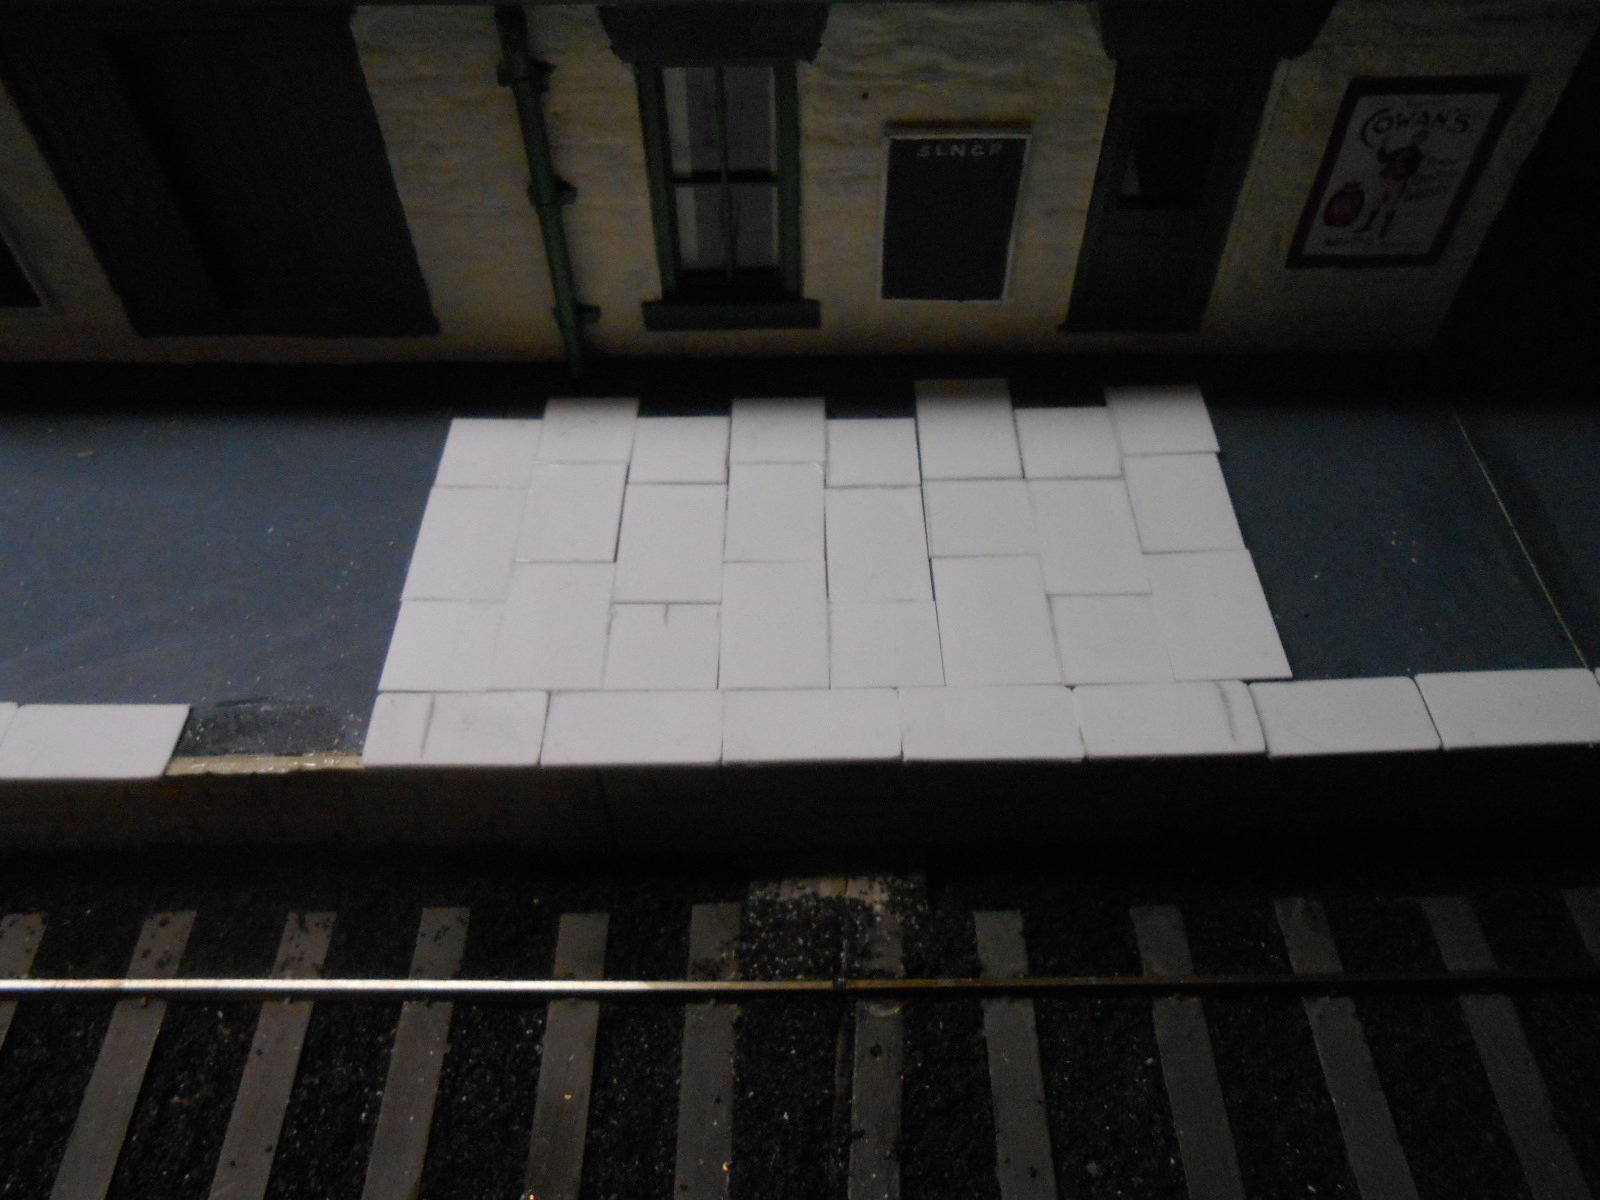
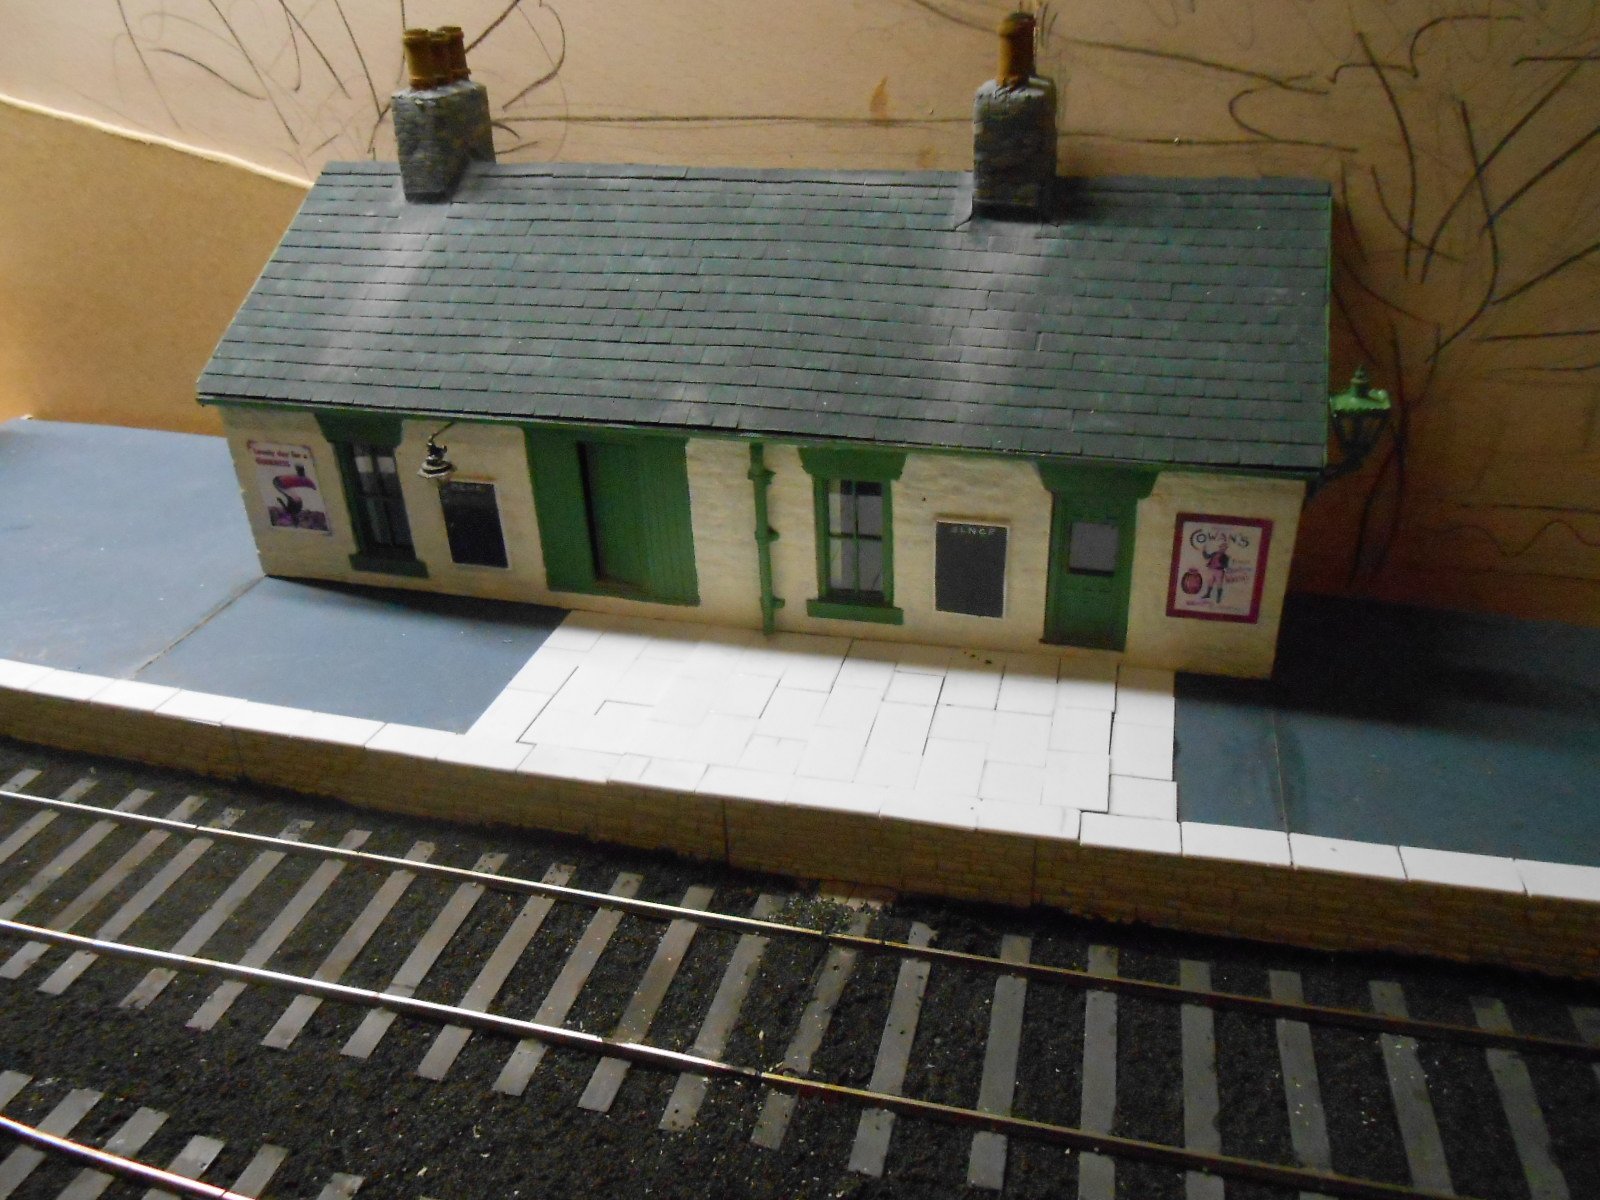
Attempting a bit of subterfuge Attention has turned to the baseboard join area. Only the one, so it makes sense to try and hide as much of it as possible. Step one is the ballasted track, where I've used a trick taught me by Gordon Gravett. As with the baseboard surface itself, a sheet of clingfilm is sandwiched between the boards, which are then done up as tight as possible. A couple of teaspoons of ballast are then mixed with undiluted PVA and spooned over the join, then pressed into place, either side of the clingfilm. Allow to set overnight & then separate the boards and remove the clingfilm. Step two involves the platform. For this, I've created a removable section. The platform wall has been made of a subframe of 'greyboard', which is twice as thick as mounting board. I've also used strips of greyboard as the foundation of the platform itself. The platform wall is covered with a layer of Wills stone sheet. Intended for 4mm scale, I find it looks ok in 7mm. My supplies are running low, but managed to find enough pieces to cover the wall - albeit in a range of finishes! The removable section is about 7cm long and I then glued a slightly longer length of mounting board to this, which forms part of the platform surface. Coping stones have been made from 20thou plastic sheet, with a piece of 20x30 thou micro strip glued to one edge to make it look thicker. More 20thou was cut to represent paving slabs, then likewise glued to the mounting board and like the coping stones, arranged to overlap either side. This then forms a single removable piece which [hopefully] will disguise the baseboard join, by breaking up it up across the whole width. It may be necessary to add a couple of heavy white metal figures on each side to hold it down, but fingers crossed, that shouldn't be a problem.
-
Amen to all of that Phil. Gauges are the only items to make track building different in 5'3 compared to 'standard' gauge, or any other for that matter. Rail and sleepers can be bought from any number of sources and you don't even need to do much soldering either, especially if you go for C&L. They do kits where the vee and blades are already machined, so all that is needed is to slide the chairs on to the rails and fix them to the sleepers with Daywat. On the other hand, it only takes an hour or so to file the rails (bull head easier than flat bottomed) and a complete point can be done in a couple of hours or less. Very much looking forward to seeing how you get on and hopefully to see others follow too.
-
Make mine a C class, in 7mm scale, 36.75mm gauge
-
Interesting - always wondered what the numbers meant! In 7mm narrow gauge, No5 seems to be the one to go for, though most narrow gauge stock doesn't have any buffers, of course.
-
Murphy Models 141/181 21mm re-gauge and pointwork
David Holman replied to Mayner's topic in Irish Models
While I applaud anyone willing to use P4 standards, I also fear it is the biggest barrier to more folk going broad gauge. Irish EM, or similar is as Mayner says, a far more pragmatic approach. You can do 4mm fine scale, without needing P4 wheels or clearances, as Andy Cundick has shown with Valencia Harbour. My Fintonagh model, though 7mm scale, used 21mm track and 4mm, finescale clearances, which means one millimetre flangeways in the point frogs/crossings. In other words, exactly the same clearances as on Peco code 75. I use standard 4mm wheels too. EM gauge track is less than 0.7mm narrower than 'dead scale', but looks so much better than 00, especially using code 100 rail. Irish EM, which Templot has track plans for on line, is 20.2mm, clearly light years better than 00, even with code 75 track. I can certainly understand why folk would want to stick with 00, especially if there is lots of stock and a big layout already available. Equally, with new models, especially diesels, easily converted to 5'3, along with innovations in 3D printed track bases, the time has never been better to convert - especially if you are planning a new project. Come on in - the water's lovely! -
Fabulous pictures in their latest RM advert. No wonder they are so popular.
-
Photos of re-wheeled 121 and A Class to 21mm plus shunting video
David Holman replied to JohnMcGahern's topic in Irish Models
Great to see such high quality rtr models in the correct gauge! Now you need to tell everyone how you did it. -
They certainly look better in 4mm than 7mm, Ken!