David Holman
-
Posts
4,359 -
Joined
-
Last visited
-
Days Won
117
Content Type
Profiles
Forums
Events
Gallery
Blogs
Everything posted by David Holman
-
Possibly, though you might want to paint the track first and even before that indulge in plenty of trial running. Faults are easier to deal with before everything is covered in ballast.
-
An impressive start, Adrian. Sensible approach too, so deserves to do well. Love the weathering on the depot floor and intrigued by the DAS clay. Use it myself, but how did you get from the rails being completely covered over to the neat channels in the later photos?
-
Not sure, to be honest. I think I picked a few up at one of the Reading trade shows, but several years ago, so could be anyones!
-
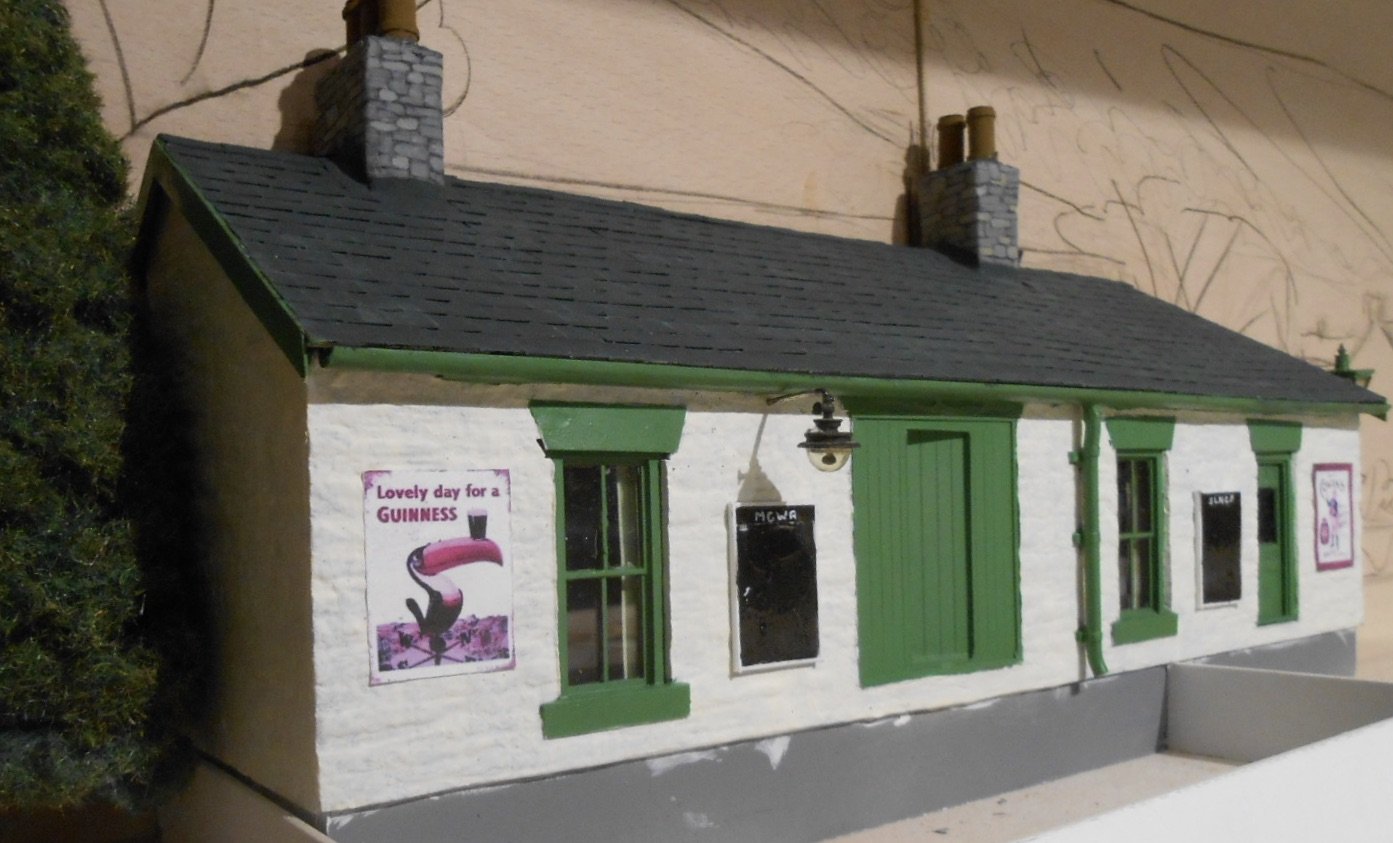
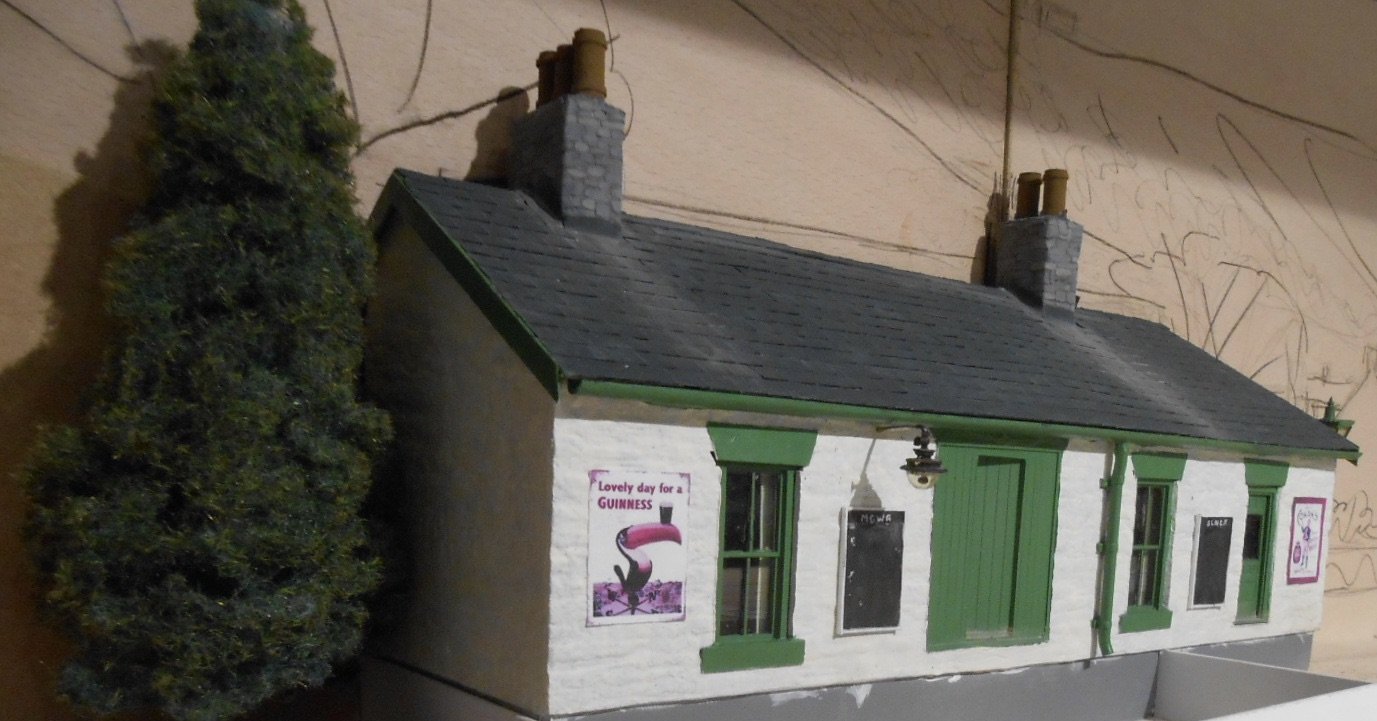
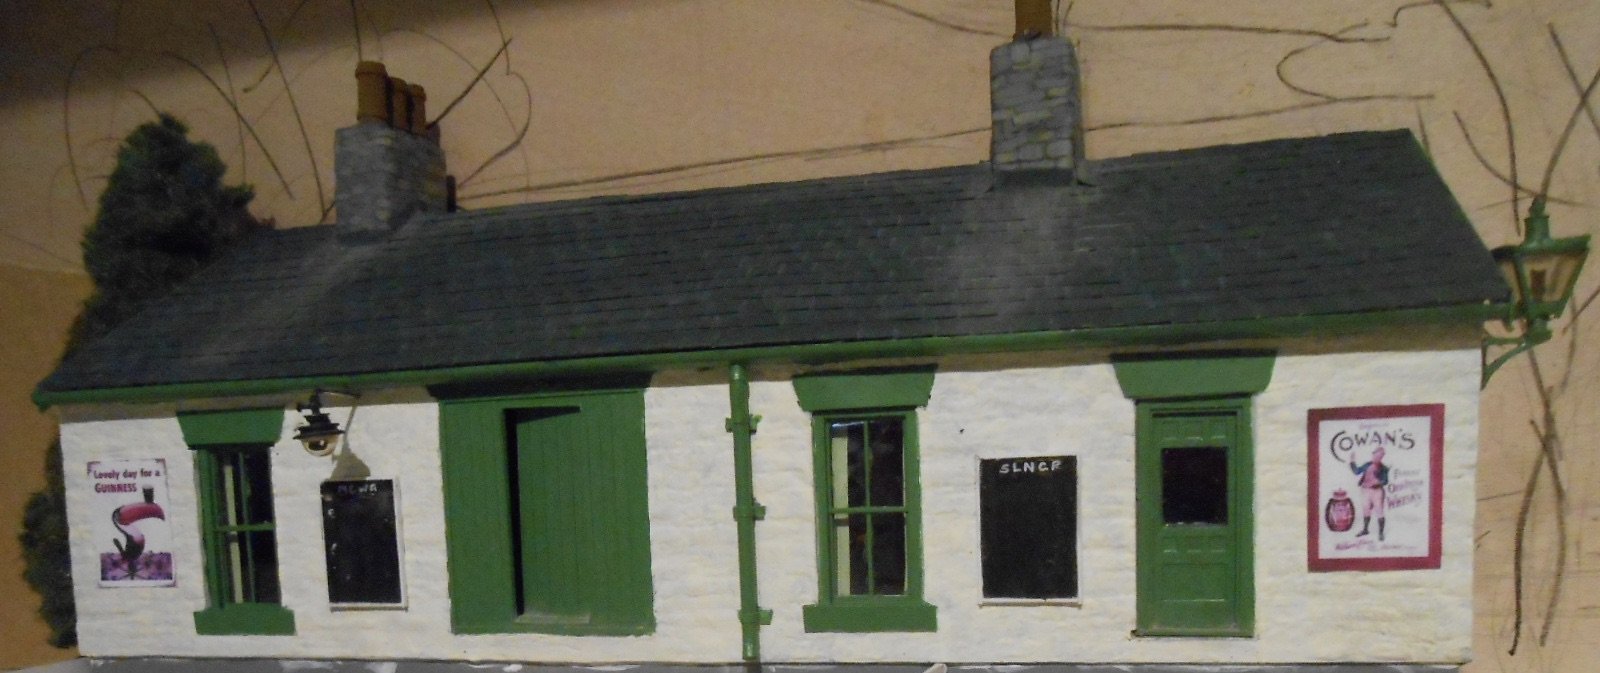
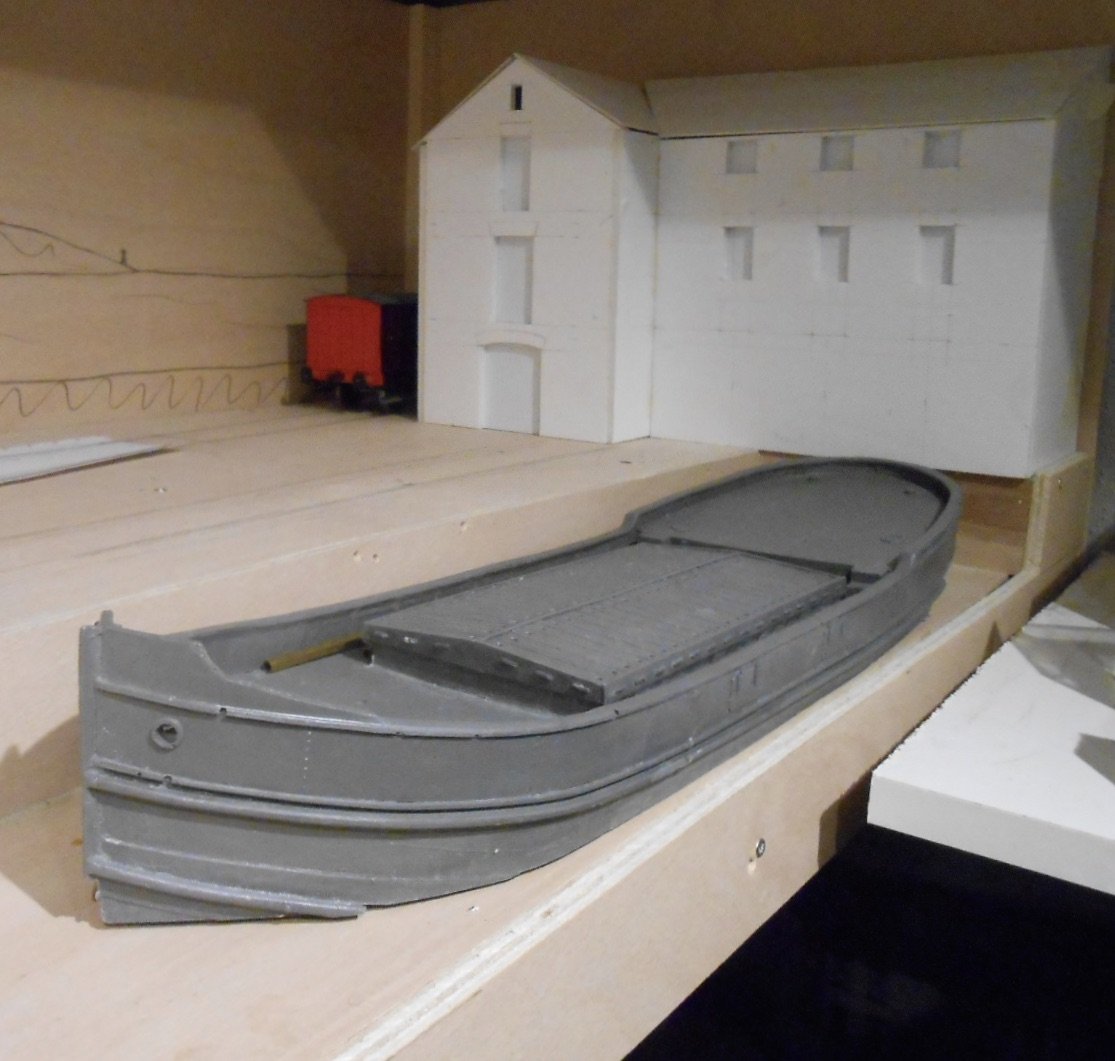
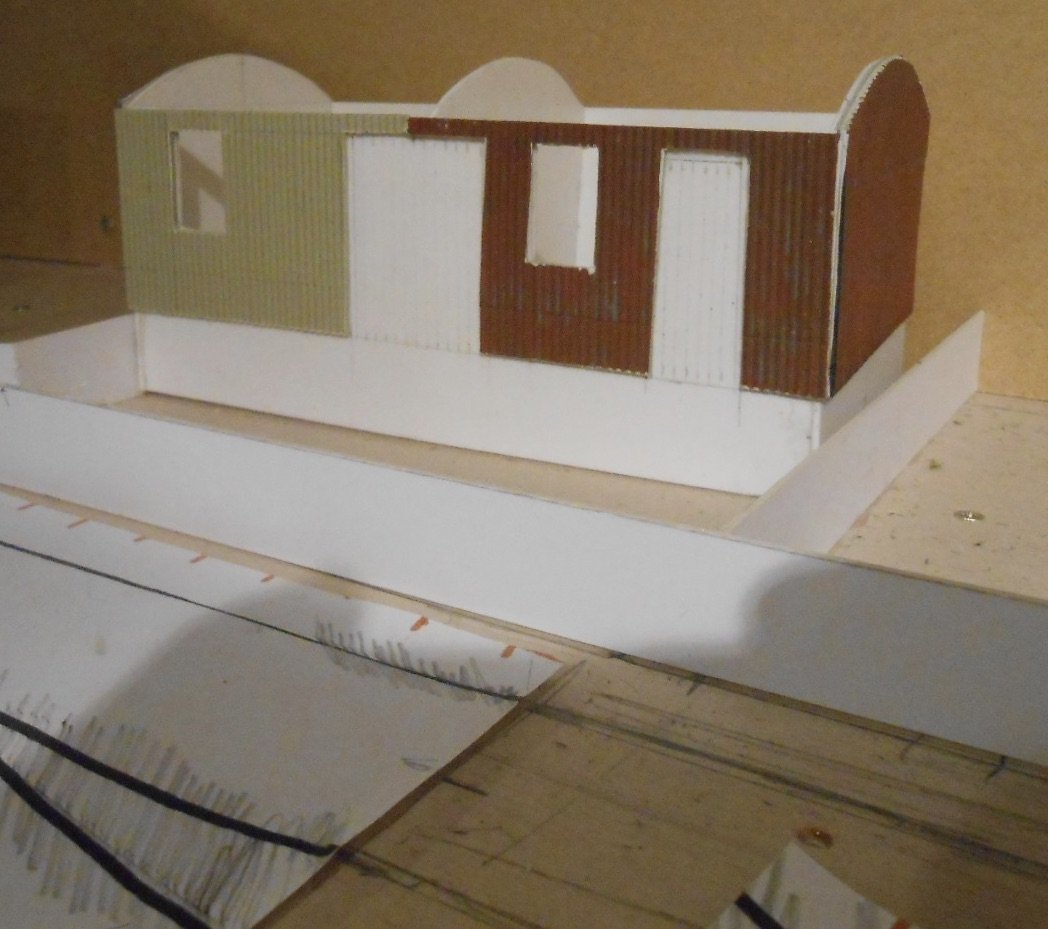
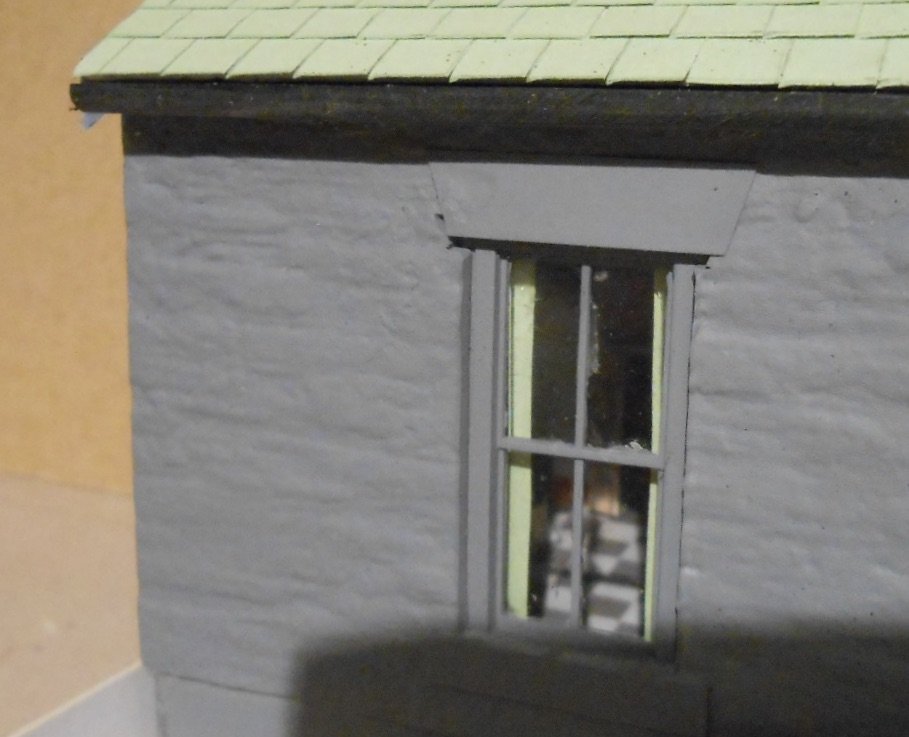
Still no sign of my track materials, which should have been here this weekend, so am continuing with making buildings - at this rate I'll have a trackless diorama! Anyway, the station building is largely complete now, with the roof and walls painted, along with a couple of lamps, posters and noticeboards. I've lettered one of these MGWR and the other SLNCR, as [wherever Northport Quay actually is], both companies had a hand in building the line, while the GSWR and WL&WR also have running rights. Well, that's my story, anyway. A bit of work with weathering powders completes the picture. A conifer, temporarily pinched from Belmullet, shows how the missing part of the gable end is easily hidden. Thoughts then turned to the warehouse at the right hand end of the layout. Its main purpose is to hide the headshunt exit on to the pier, so it needs to be big enough to do this. Casting around for ideas, an internet search of 'old Irish warehouses' turned up a rather nice group in Ramelton, County Donegal. As well as their modern conversions, there are also good photos of the buildings in original condition, with some nice close ups of the doors and windows. Not sure, but I think they were once part of a brewery, but am sure there are folk on this forum who can confirm. So, with this for inspiration, have drawn out something based on Ramelton Quay, which has now been transformed into into a basic shell using foam board. In front of the warehouse can been another project as, in a moment of weakness, I ordered a Langley Models kit of a Clyde Puffer. Not cheap, but then in size not far removed from a loco kit, so fair enough. There is a large, resin cast hull [nicely detailed], with lots of white metal castings. To begin with, it will probably be a project to take down the Club to work on - not least because there are a couple of folk there who know a lot more about boats than me and the last time I built a ship model was probably an Airfix kit in my early teens. Clyde Puffers were not exactly commonplace in the west of Ireland, but in my bit of fiction, small coasters go from Northport Quay to various off shore islands, as well as venturing inland to serve communities on the larger lakes. Not unlike their actual duties in Scotland, of course and am very much intending that other coastal craft can be built to provide a change of scene from time to time. Finally, also made up the shell of a corrugated iron goods store, based on one that can been seen on the platform at Westport Quay. It uses Wills corrugated asbestos sheets, which though intended for 4mm scale, actually look fine in 7mm. The various colours are because the sheets were rescued from previous projects - waste not, want not!

-
Just goes to show how effective a simple piece of cosmetic surgery can be in changing appearances.
-
Fascinating - though all those louvres would be a real challenge to model...
-
Brookhall Mill - A GNR(I) Micro Layout
David Holman replied to Patrick Davey's topic in Irish Model Layouts
That works well. -
Hopefully not. Marcway Models actually have plenty, but there was a mix up between the shop and the stores.
-
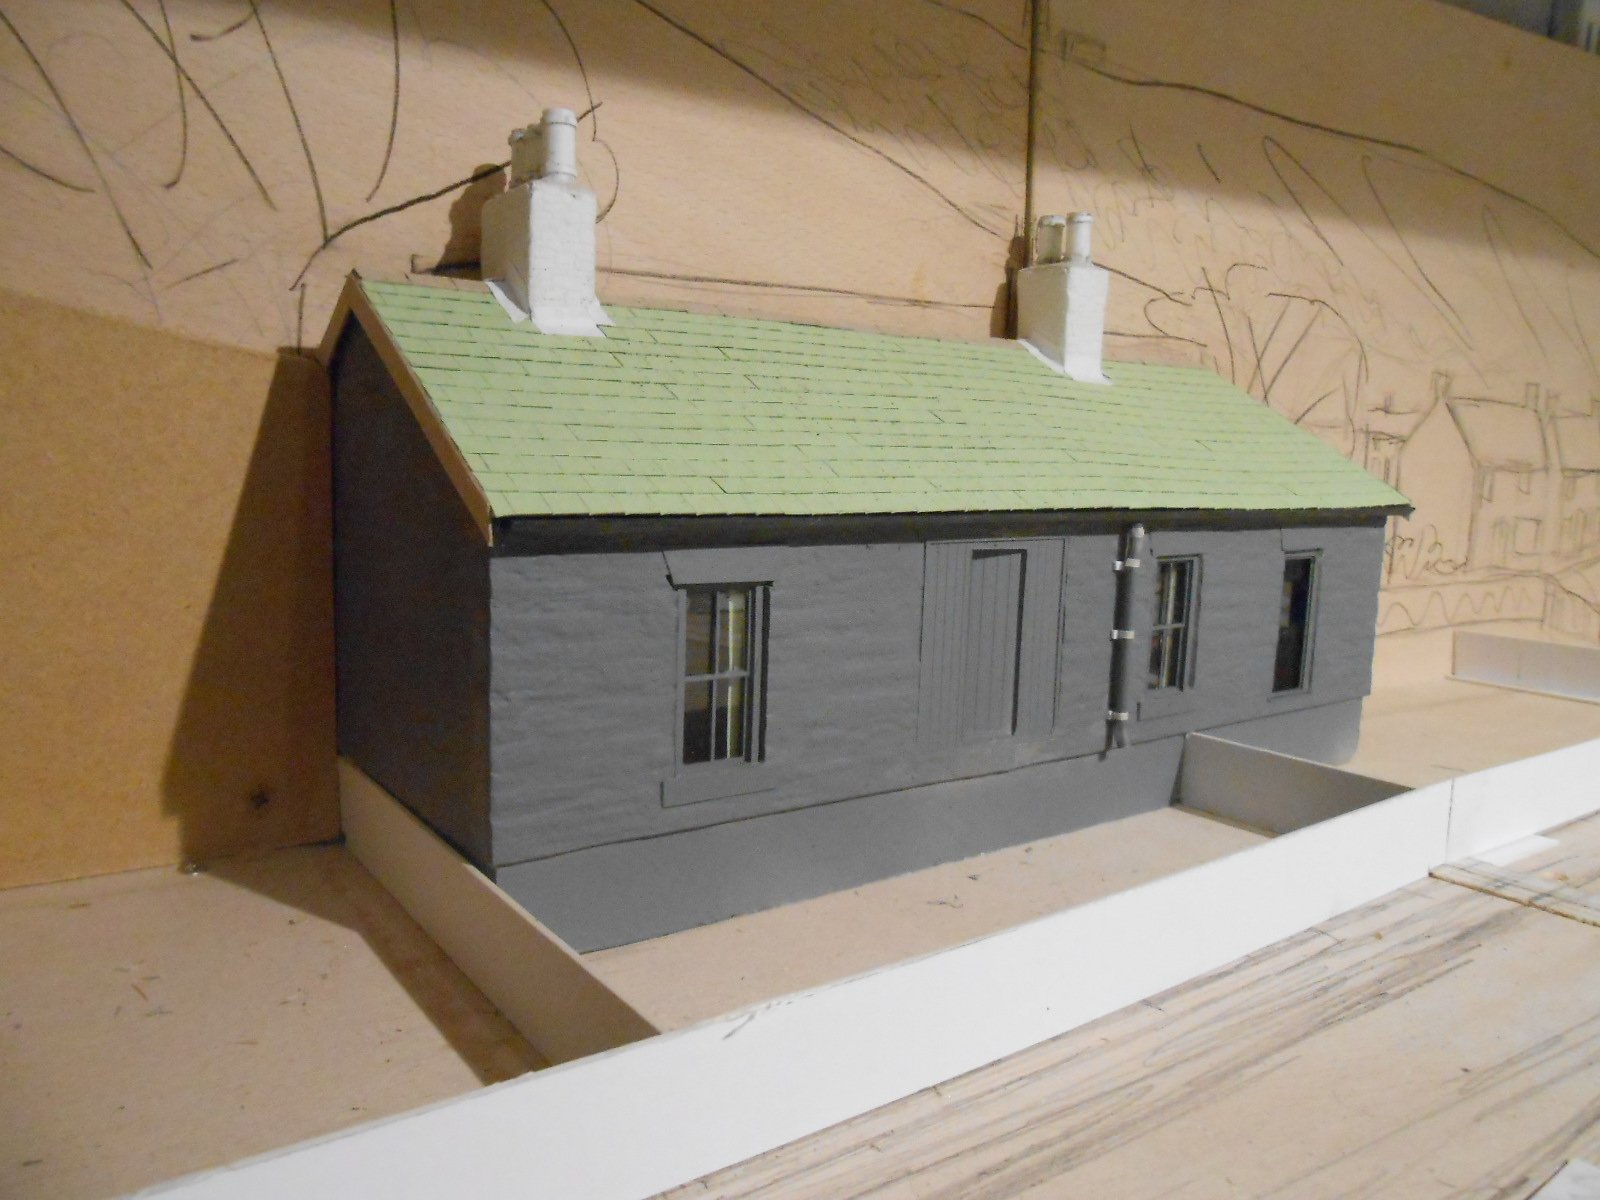
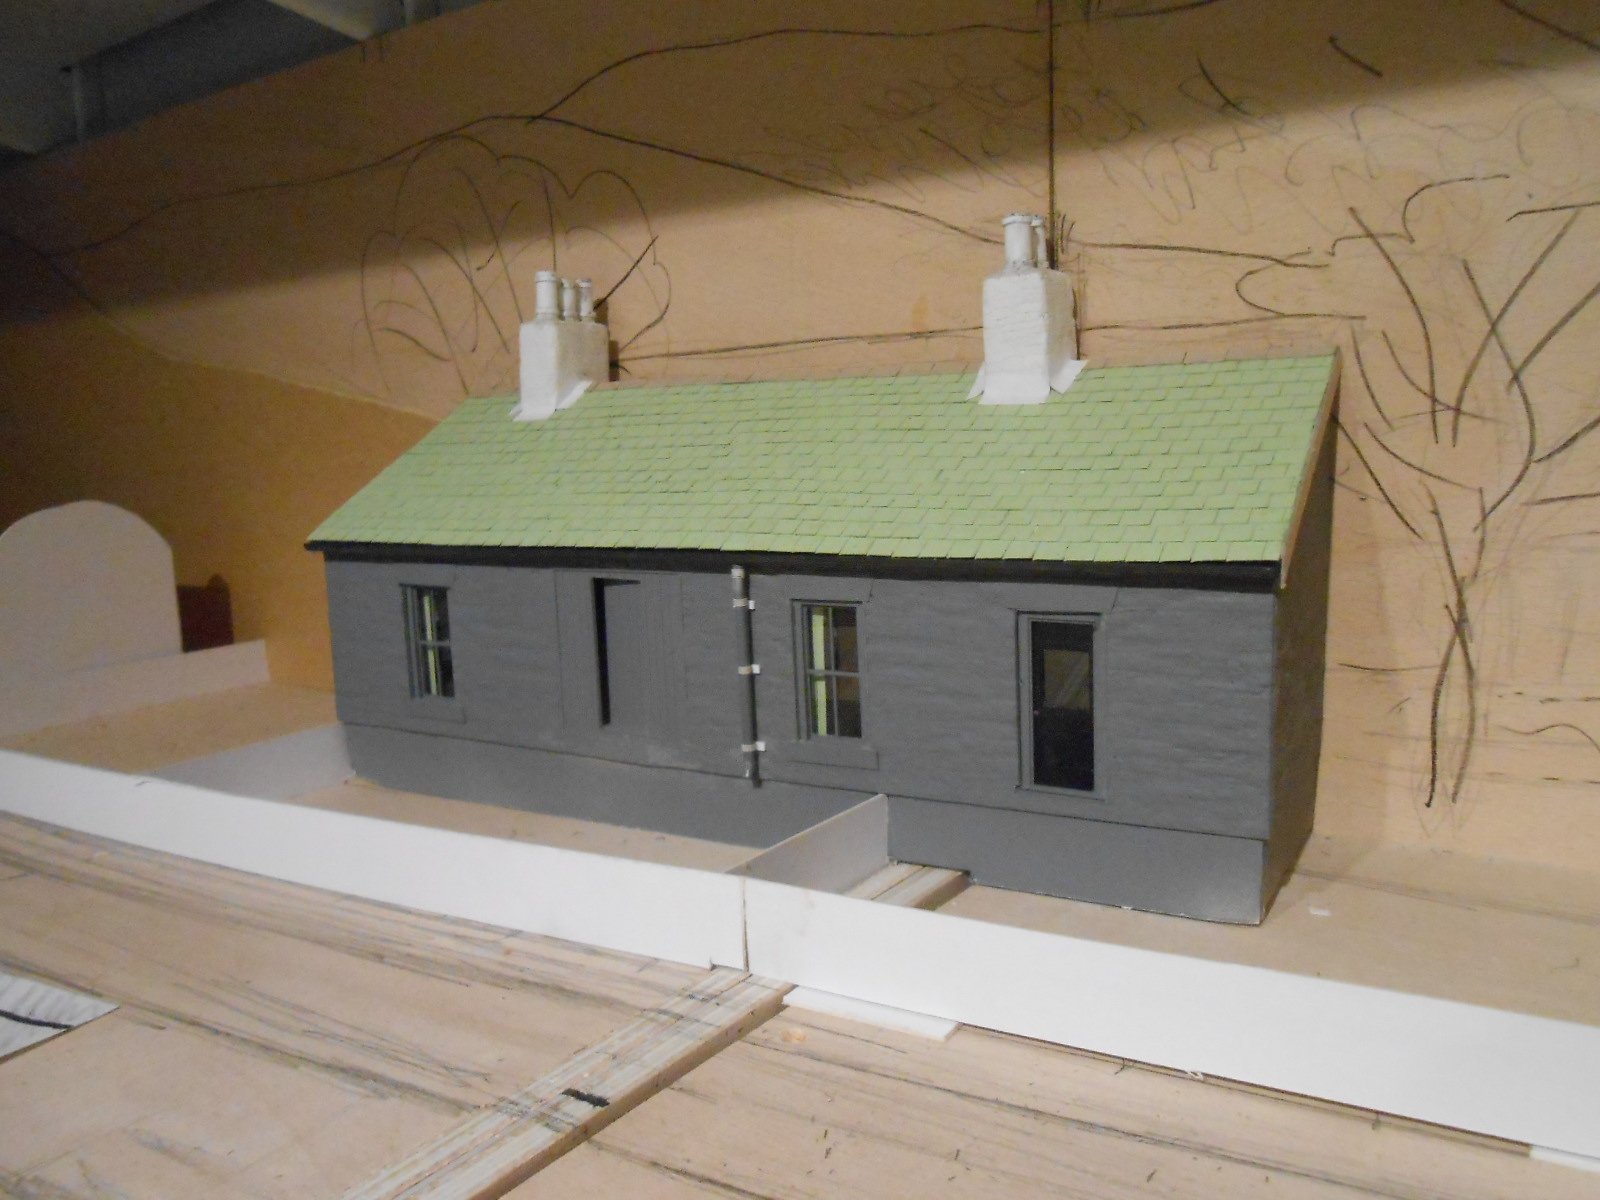
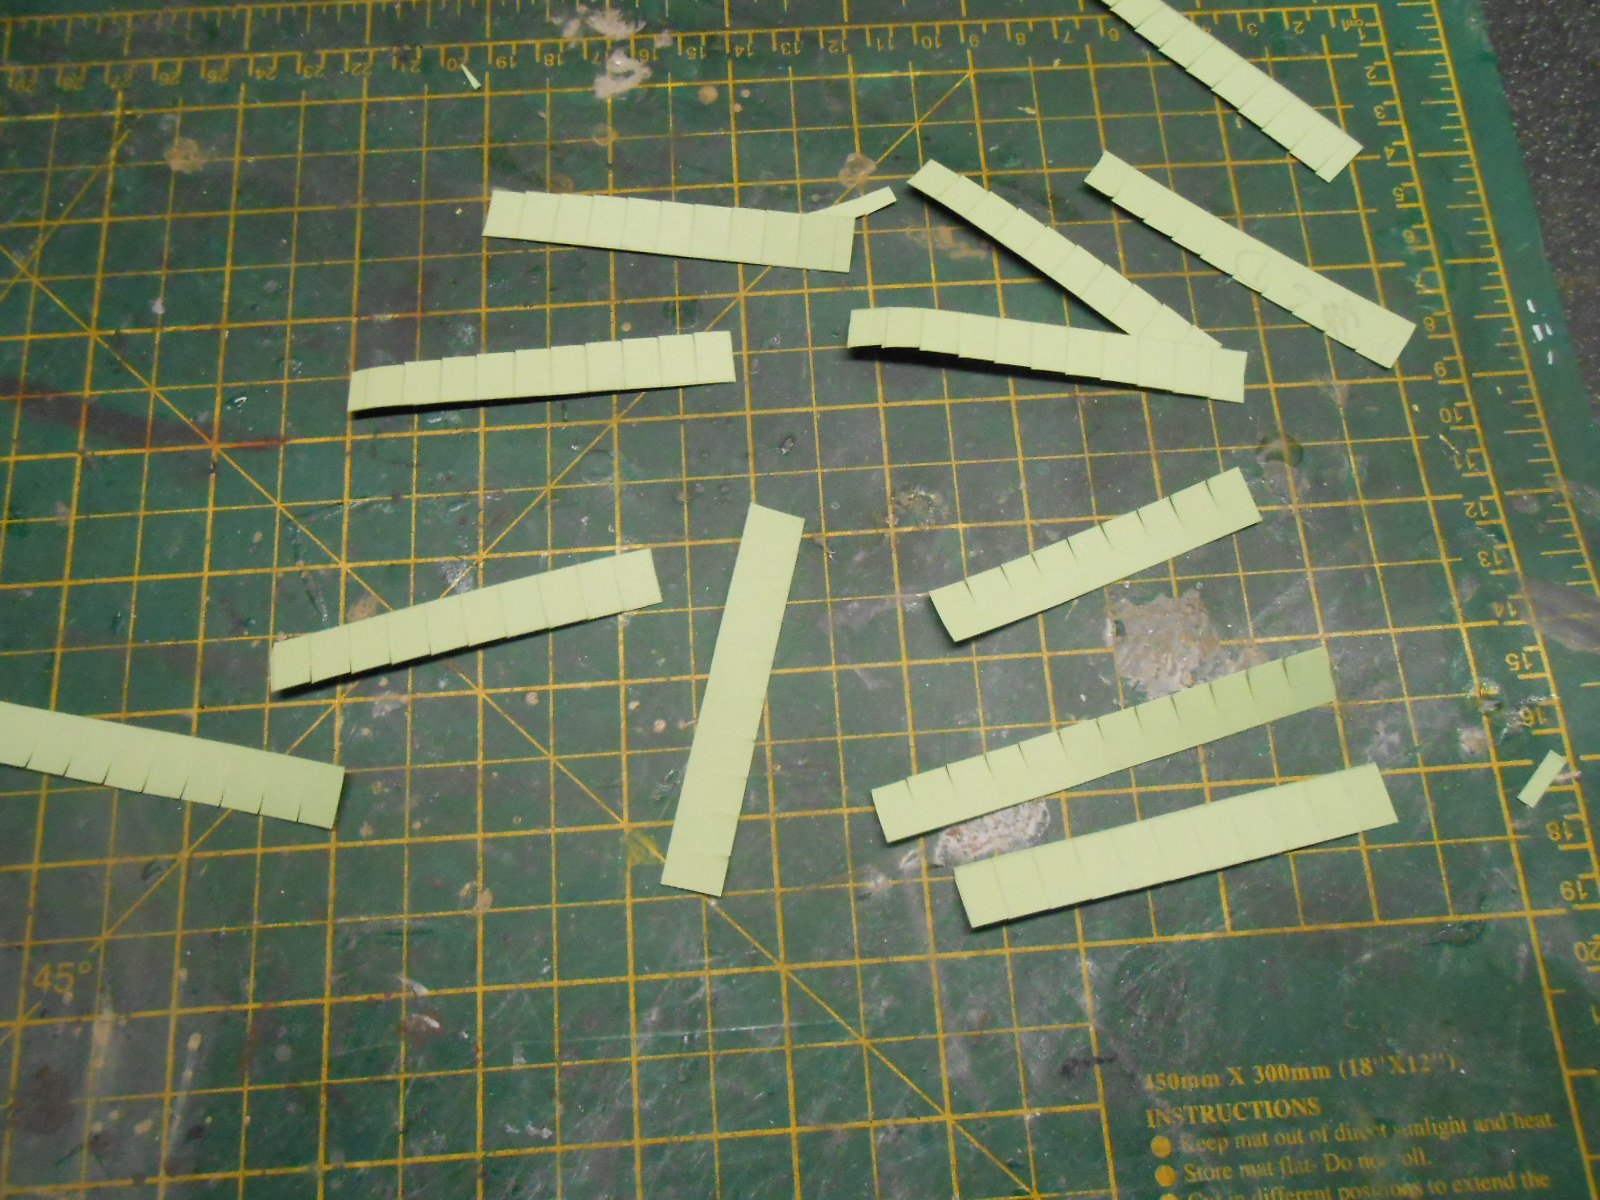
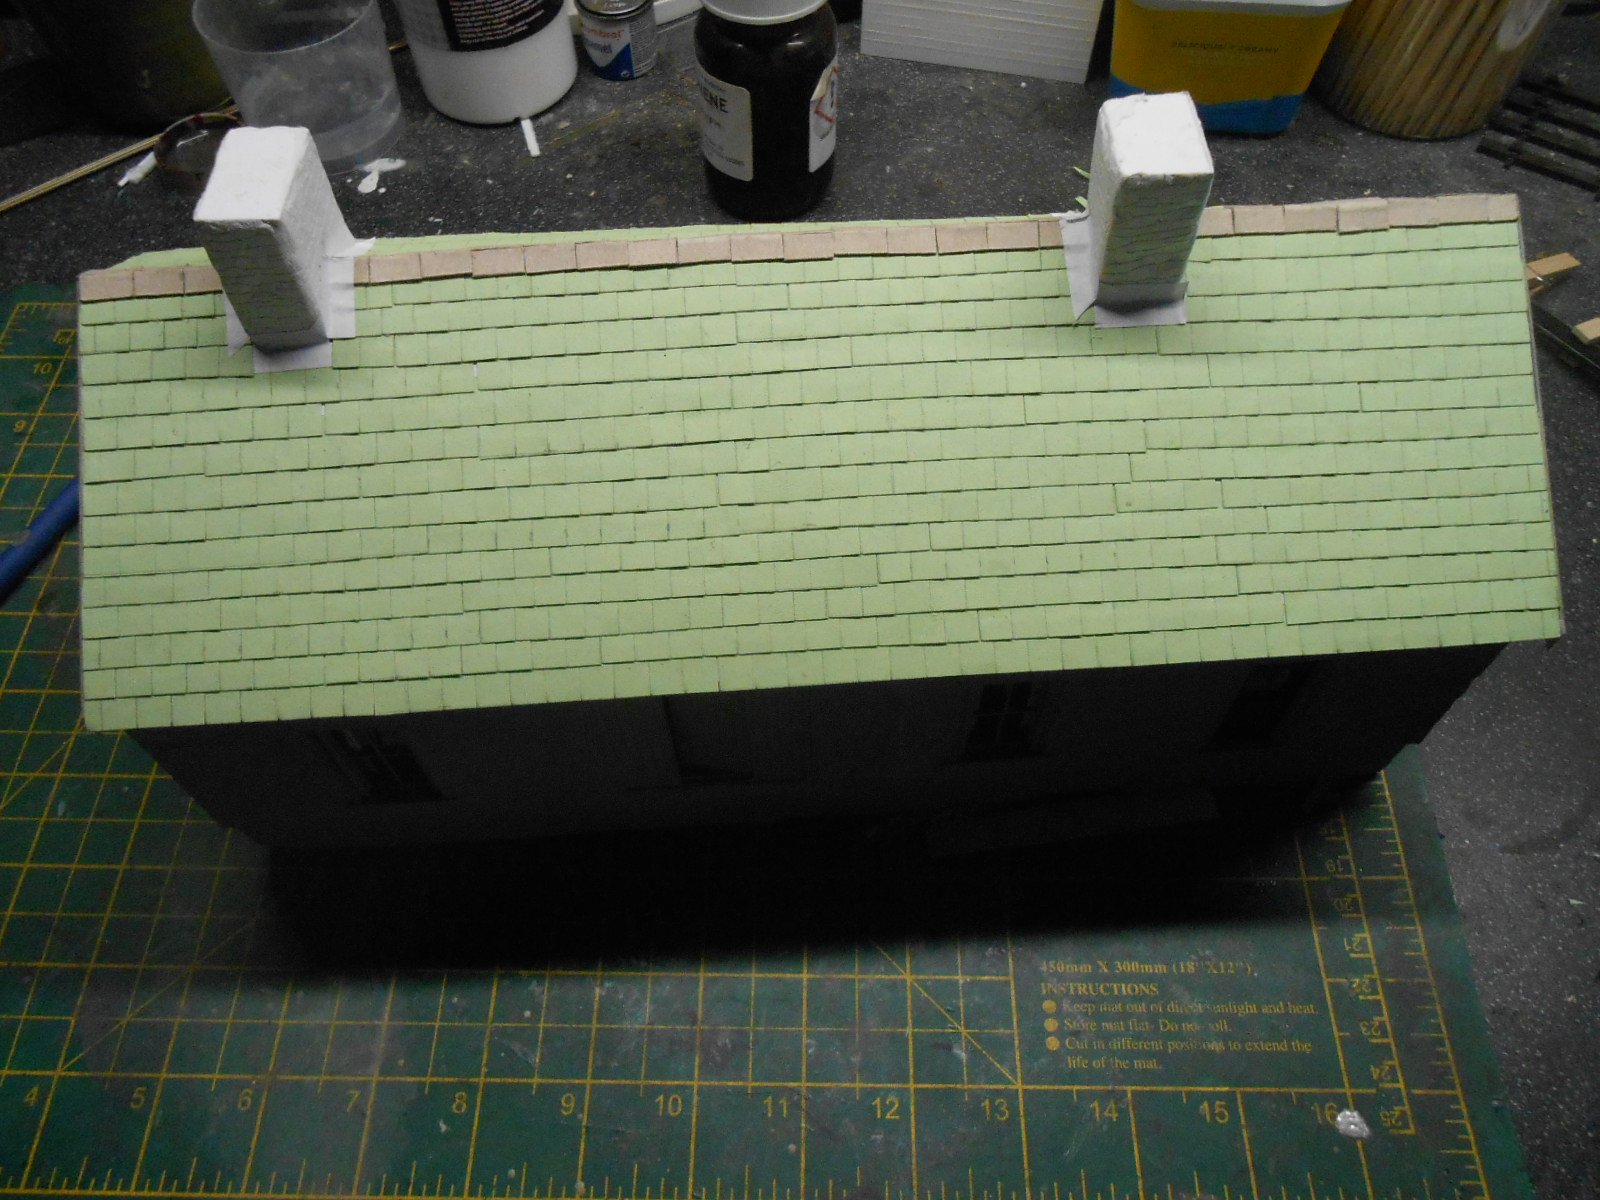
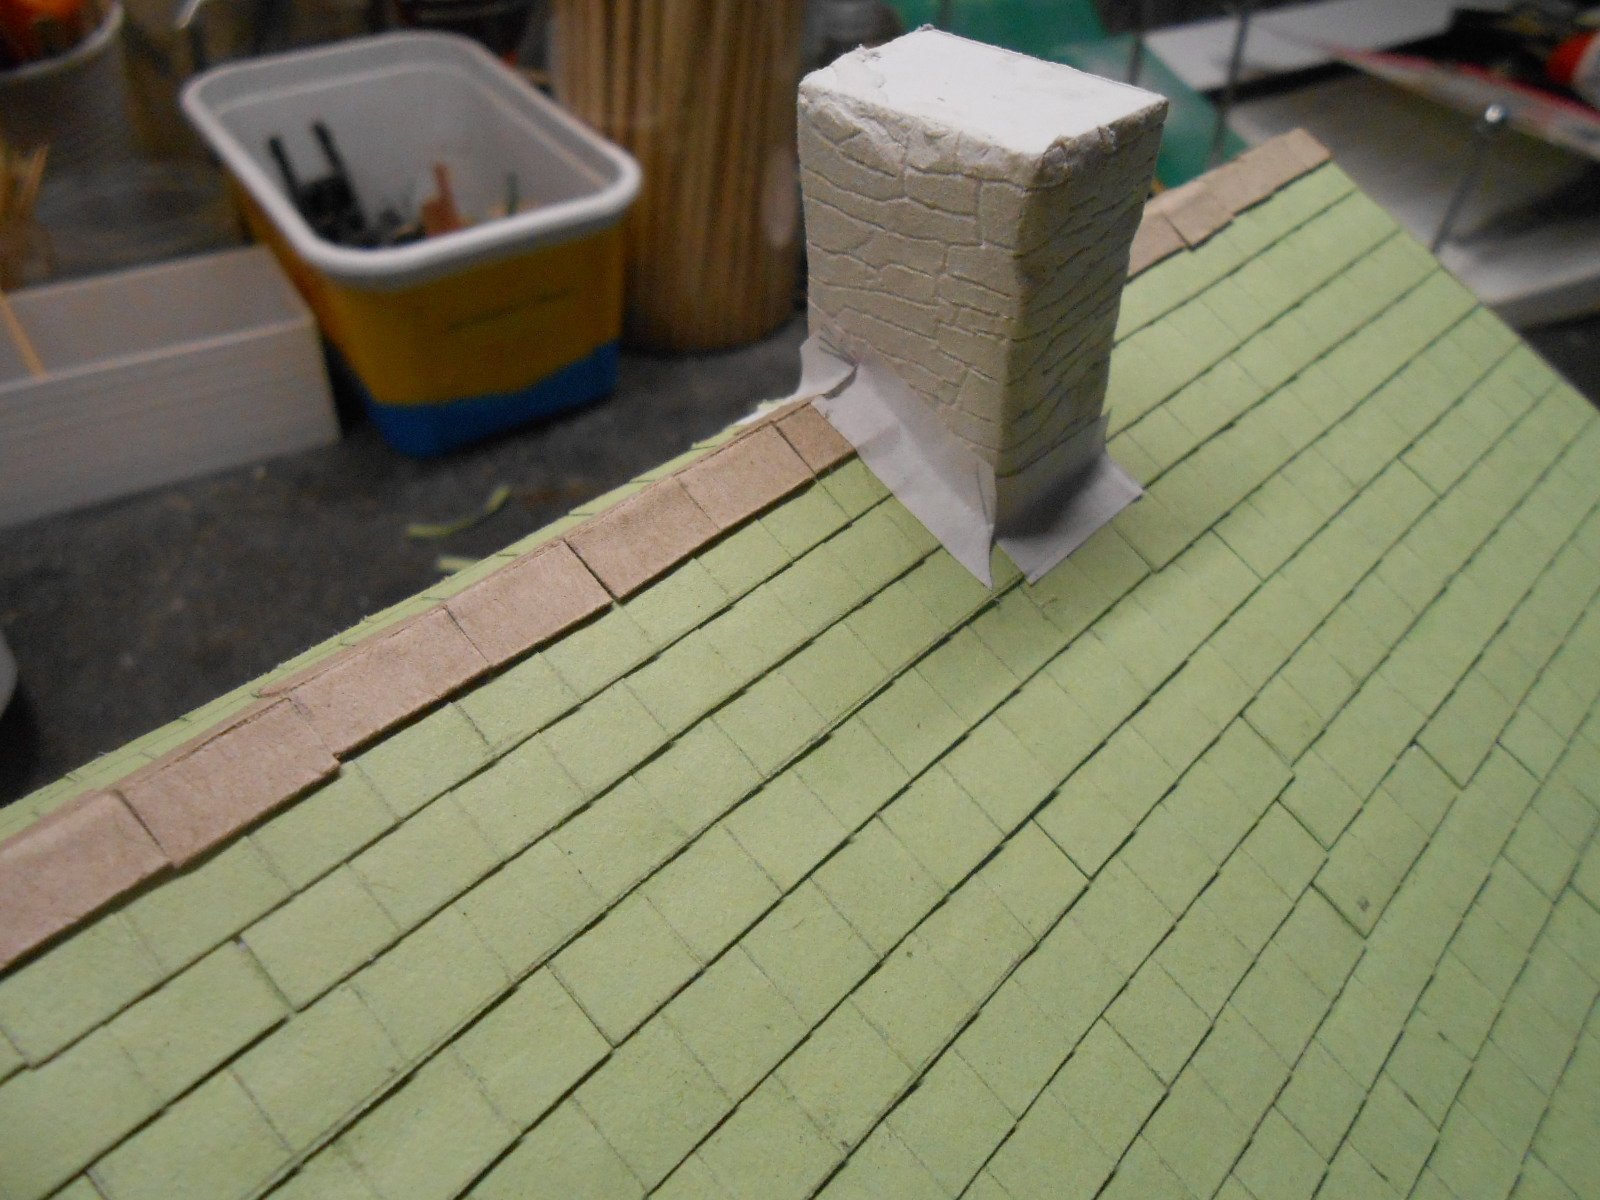
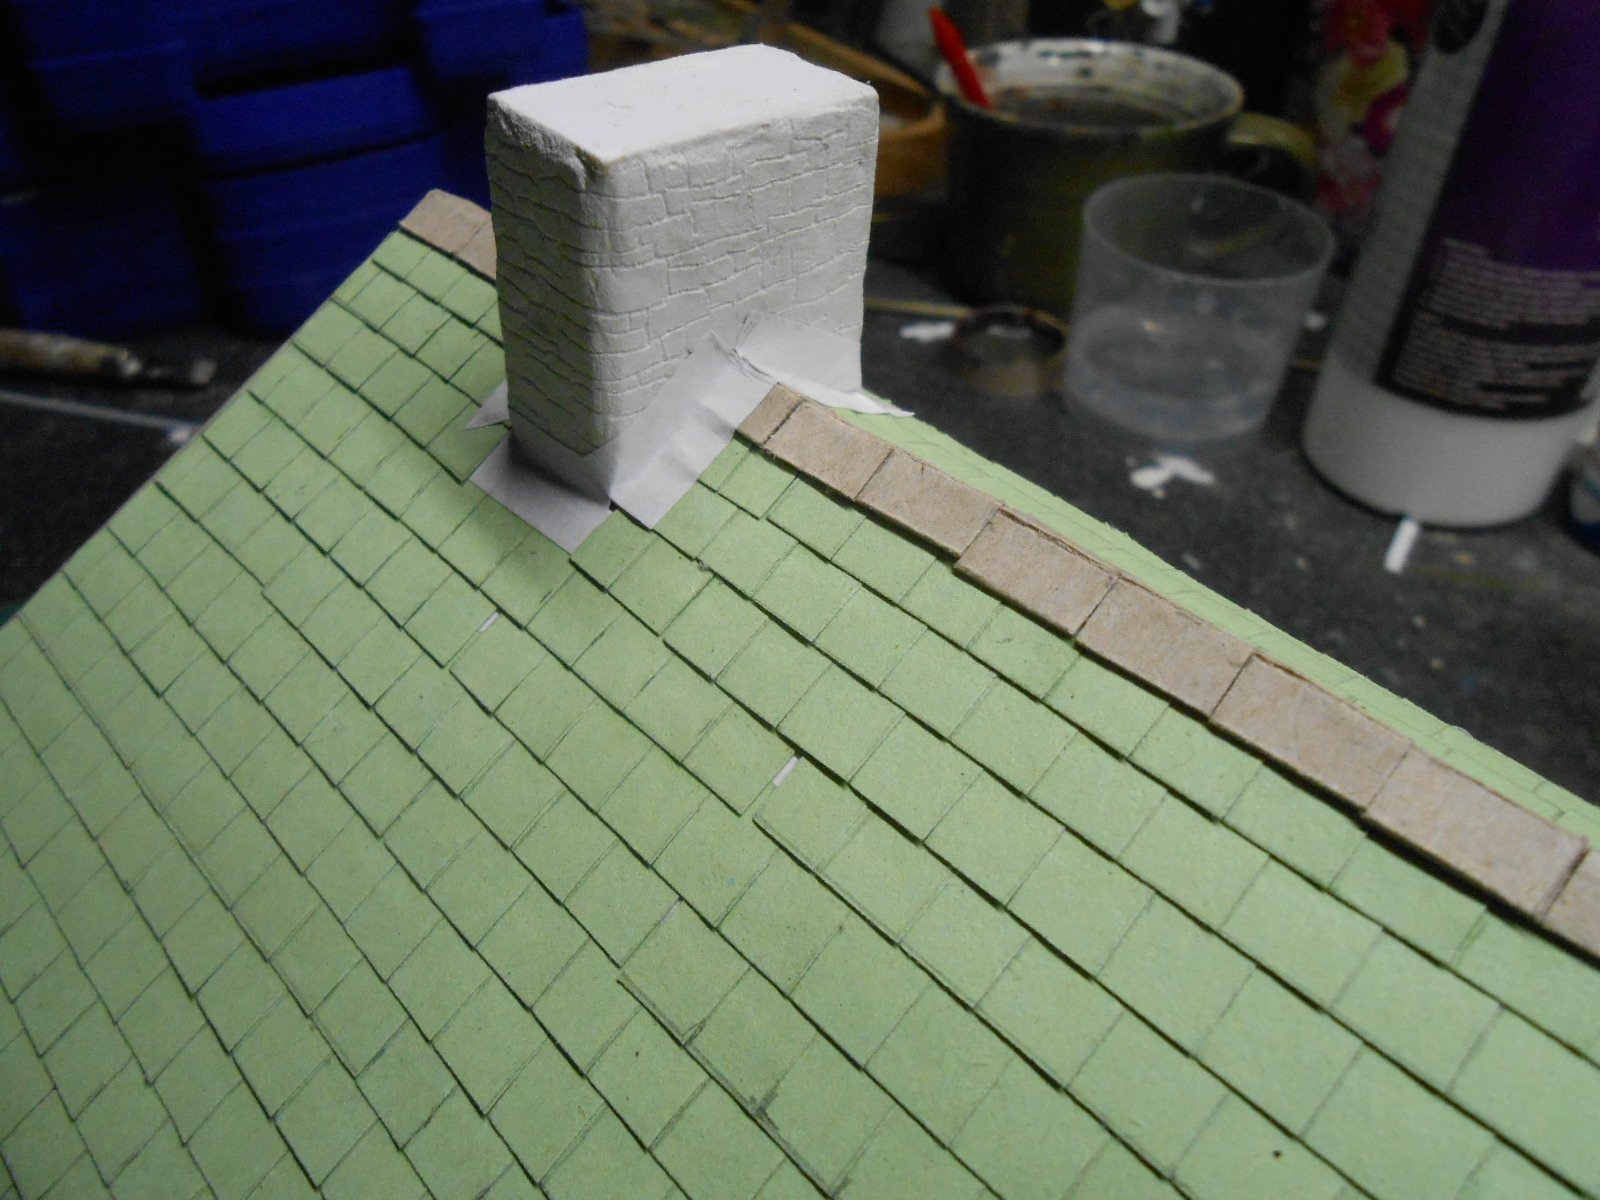
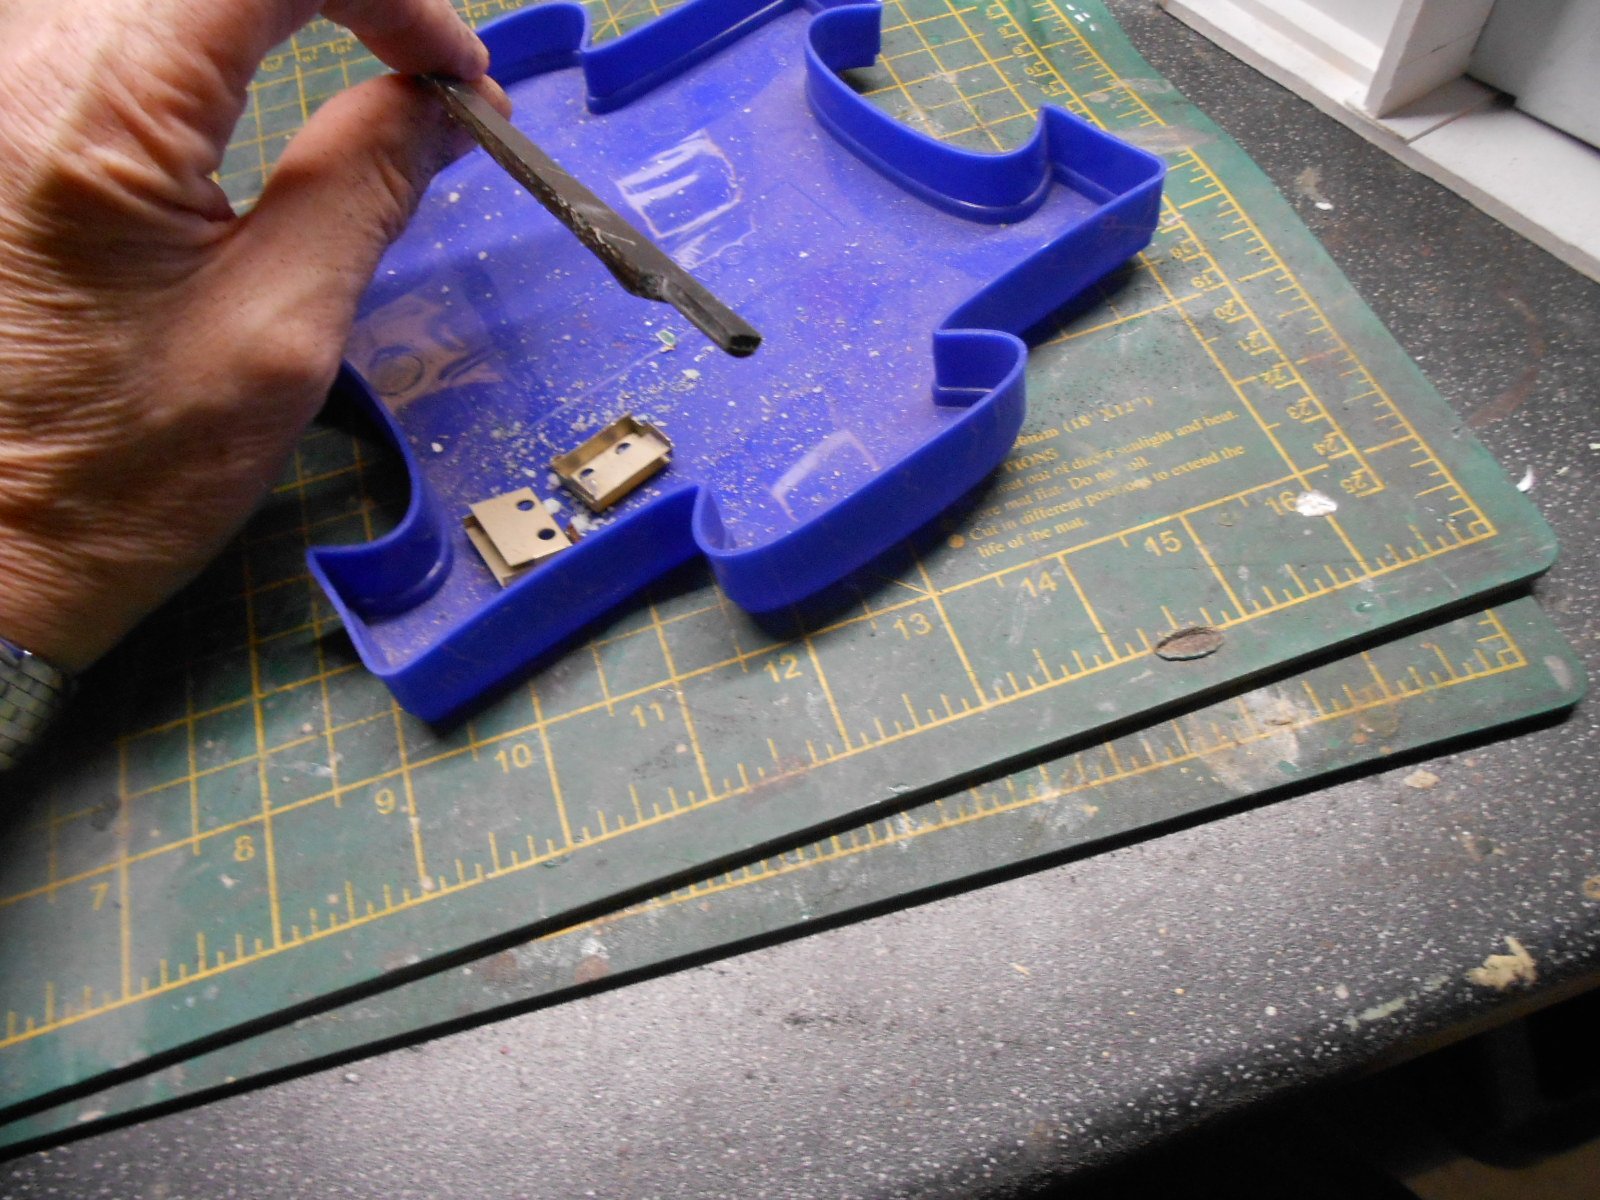
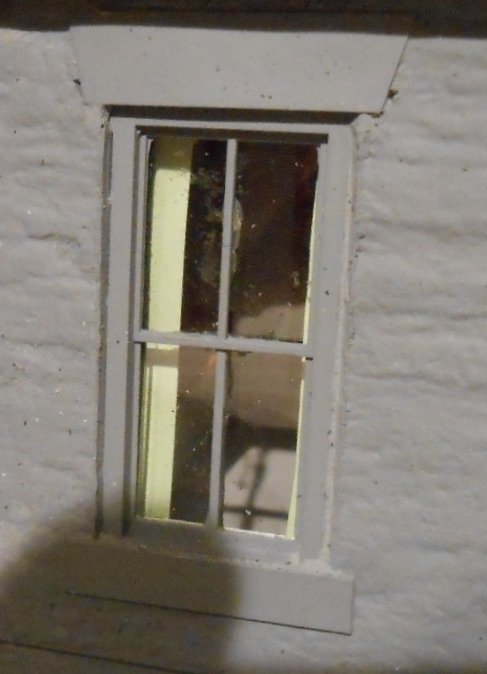
Still no sign of the track building parts [though hopefully here soon], so have been carrying on with the station building, which is now ready to be painted. The pictures below show the walls and windows in grey primer, while the roof tiles are still in plain card. The roof is the traditional thin strips of card, snipped every 7mm to represent individual slates. These are then cut to lengths of between 8 and 12 slates, before being laid on the false roof and fixed with PVA. The ridge tiles are slightly thicker card, from a cereal box, while the chimneys were made from mounting board, covered with DAS clay and, once dry, scribed to represent random stone blocks. Chimney pots are plastic tube with an extra detailing strip of 60thou. Guttering meanwhile is two strips of plastic, laminated together and then filed/sanded to made the front edge rounded. At each end, a short section is filed to represent half round guttering, but most of the straight edge is then fixed to the wall with impact adhesive. The subterfuge is not visible from normal viewing angles. I also added some [very] basic interior detailing. In 7mm scale, windows are often big enough to see into, so it can be important to at least create the impression there is something inside.
-
Probably fine for a home layout, but hard soldering every time for me as my layouts regularly get taken apart (well, at least they used to) and put back together again for exhibitions. Am sure it is all this movement that has the potential to cause problems. The main ones I've had to deal with were broken solder joints on point tie bars, though there are ways to minimise this. The two worst were firstly a single stray strand causing a layout wide short and shut down and, most recently a dry solder joint on the plug/socket for my hand held controller. Both immensely frustrating as you first need to find where the problem is - though generally easy to fix, as long as you remembered to pack a soldering iron that is. I also once had a wire break on an alignment bolt on the fiddleyard. Unfortunately, I'd only got an 18 watt iron with me and spent 20 minutes gently warming up what seemed like the whole layout in an effort to get the solder to run! Nowadays, always take the 100 watt iron with me... Given I have attended over 100 shows, the number of problems has been minimal, but can't help thinking screw joints would increase the chances of something going wrong. A belt and braces approach seems to be best. No experience of snap connectors, but again, should be fine for home use.
-
Excellent news!
-
New Irish Lines now available to subscribers. Numerous contributions from folk of this parish, including yours truly, but perhaps most useful is an article by Andy Cundick, because you get pictures of his work. An all round eclectic mix, as usual very interesting too, not least a 15mm AEC twin railcar. At over 2m long, entire layouts have been built in less space - lovely stuff!
-
Fine combination.
-
Lovely stuff! See to remember Gordon used masking tape for canvas roofs and tarpaulins. Once painted, it has just enough texture, though this was in 7mm scale. As for resin casting, it has worked well for me in 7mm scale, just making masters for a side and an end. Am wondering if 2mm scale vans could be cast as a single, solid, body with an etched underframe and the same for loaded or tarpaulin covered opens?
-
A fine layout, really well conceived. The track laying disguises the narrow gauge superbly too. Will certainly miss this one.
- 490 replies
-
- 1
-

-
- ballyercall
- layout
- (and 1 more)
-
Fantastic work, Ken - these models really look splendid. Presume a floor needs adding too - at least for the cattle wagons! You are taking 3D printing to new levels, as that last photo shows.
-
Looking forward to the next bit of wizardry.
-
Sounds like you've cracked it, Tony. Downhill all the way from here! Just remember, if the solder won't flow, it's not hot or clean enough. My go to iron has always been a 100 watt jobbie, which is great for brass kits, though also have a 25watt for electrical joints and a 50 watt temperature controlled one which now gets used on loco building too. Whatever, enjoy!
-
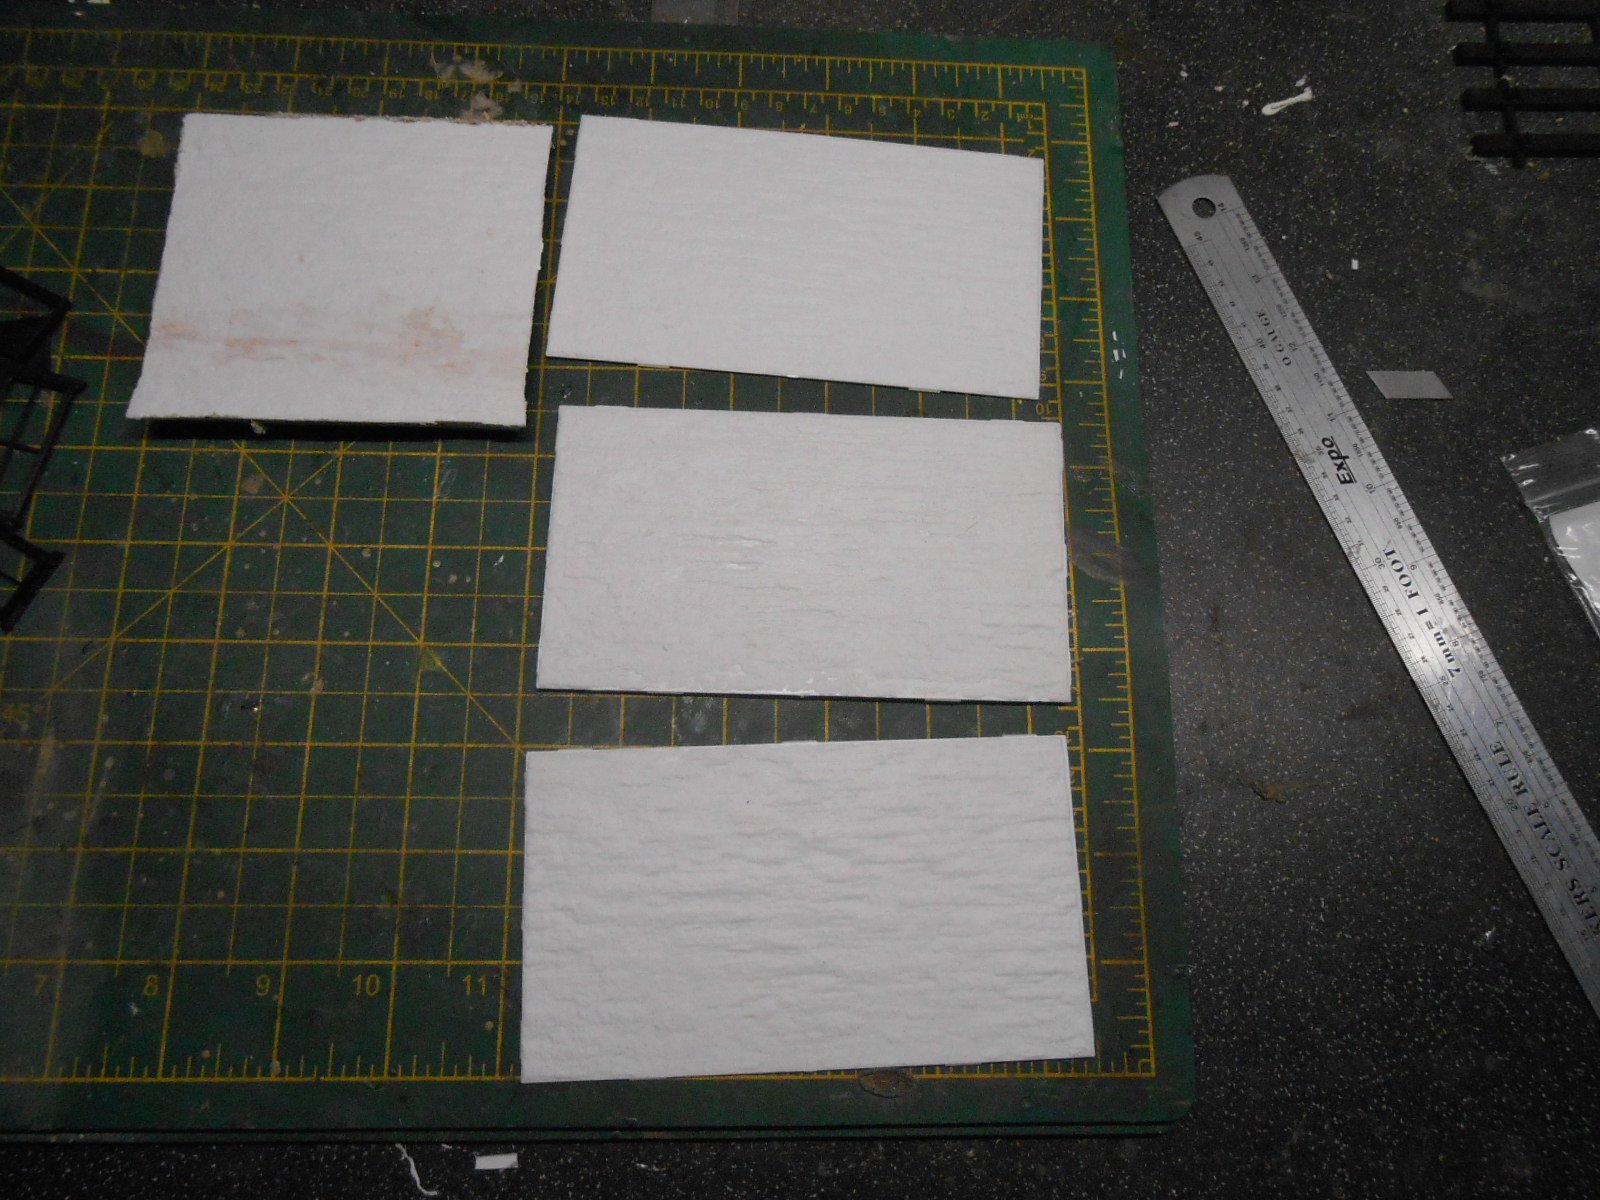
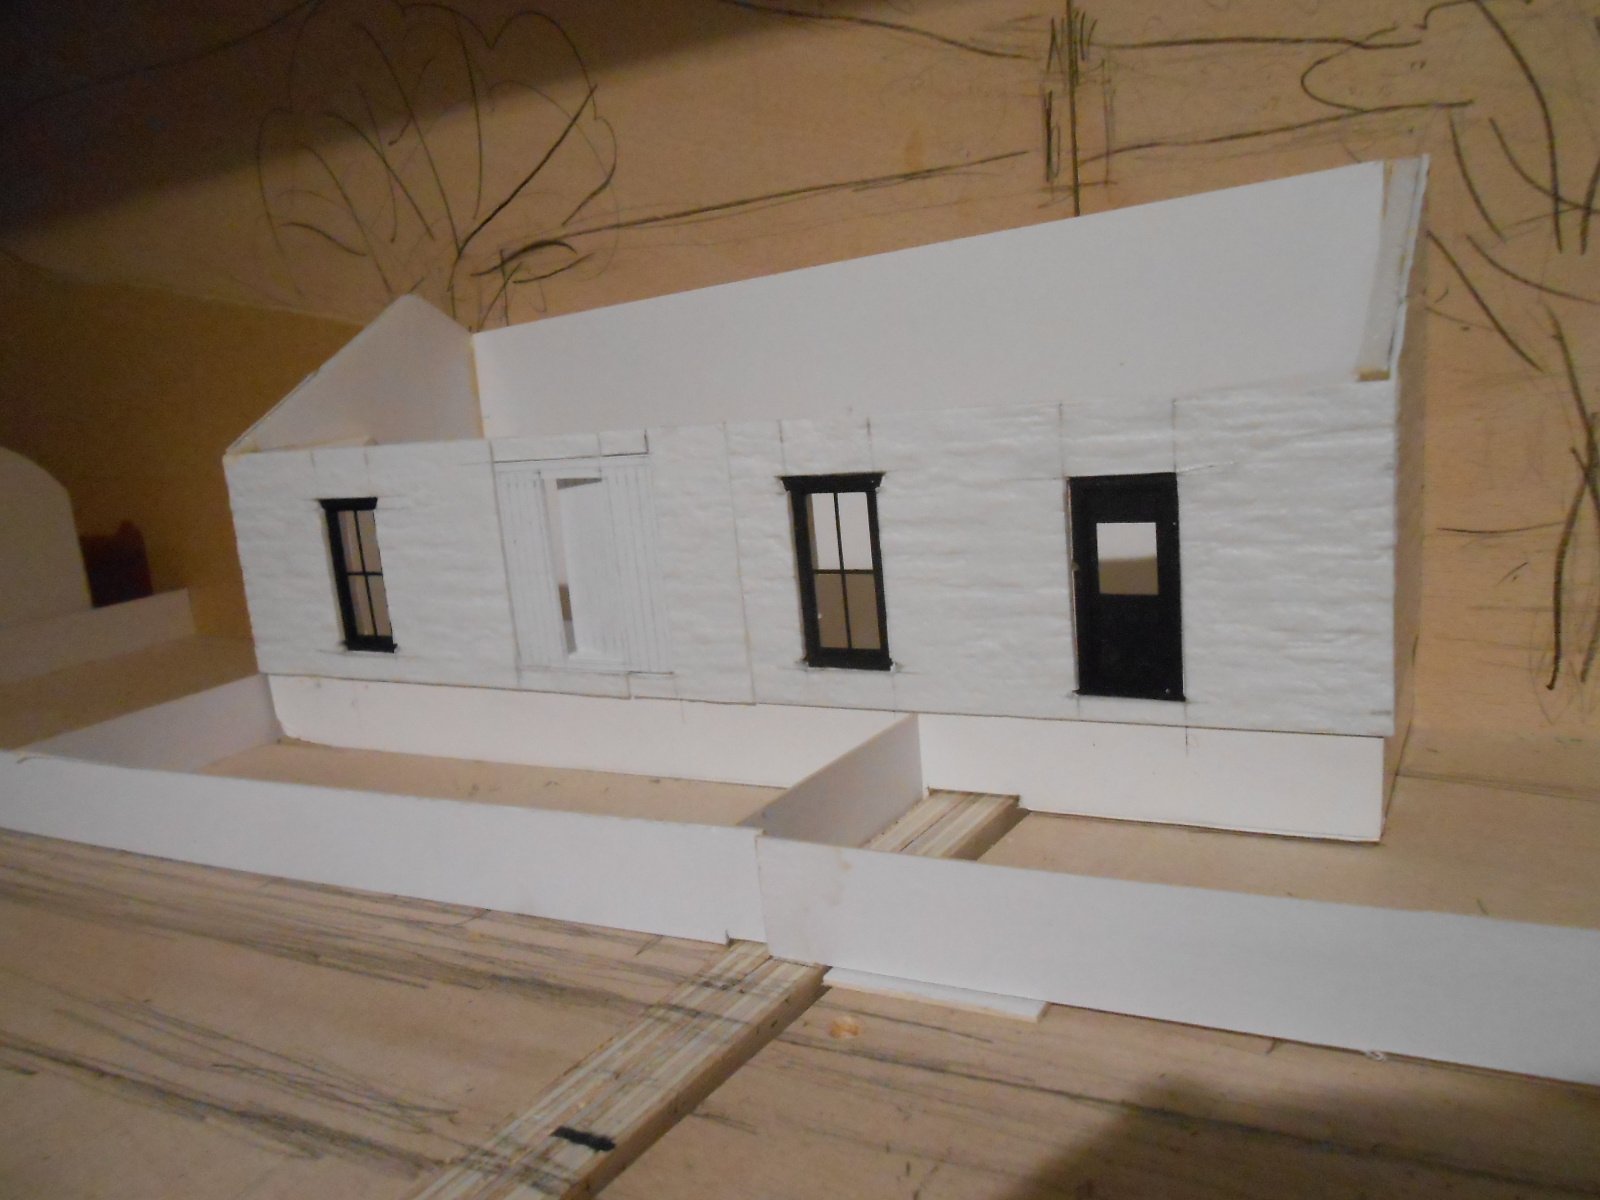
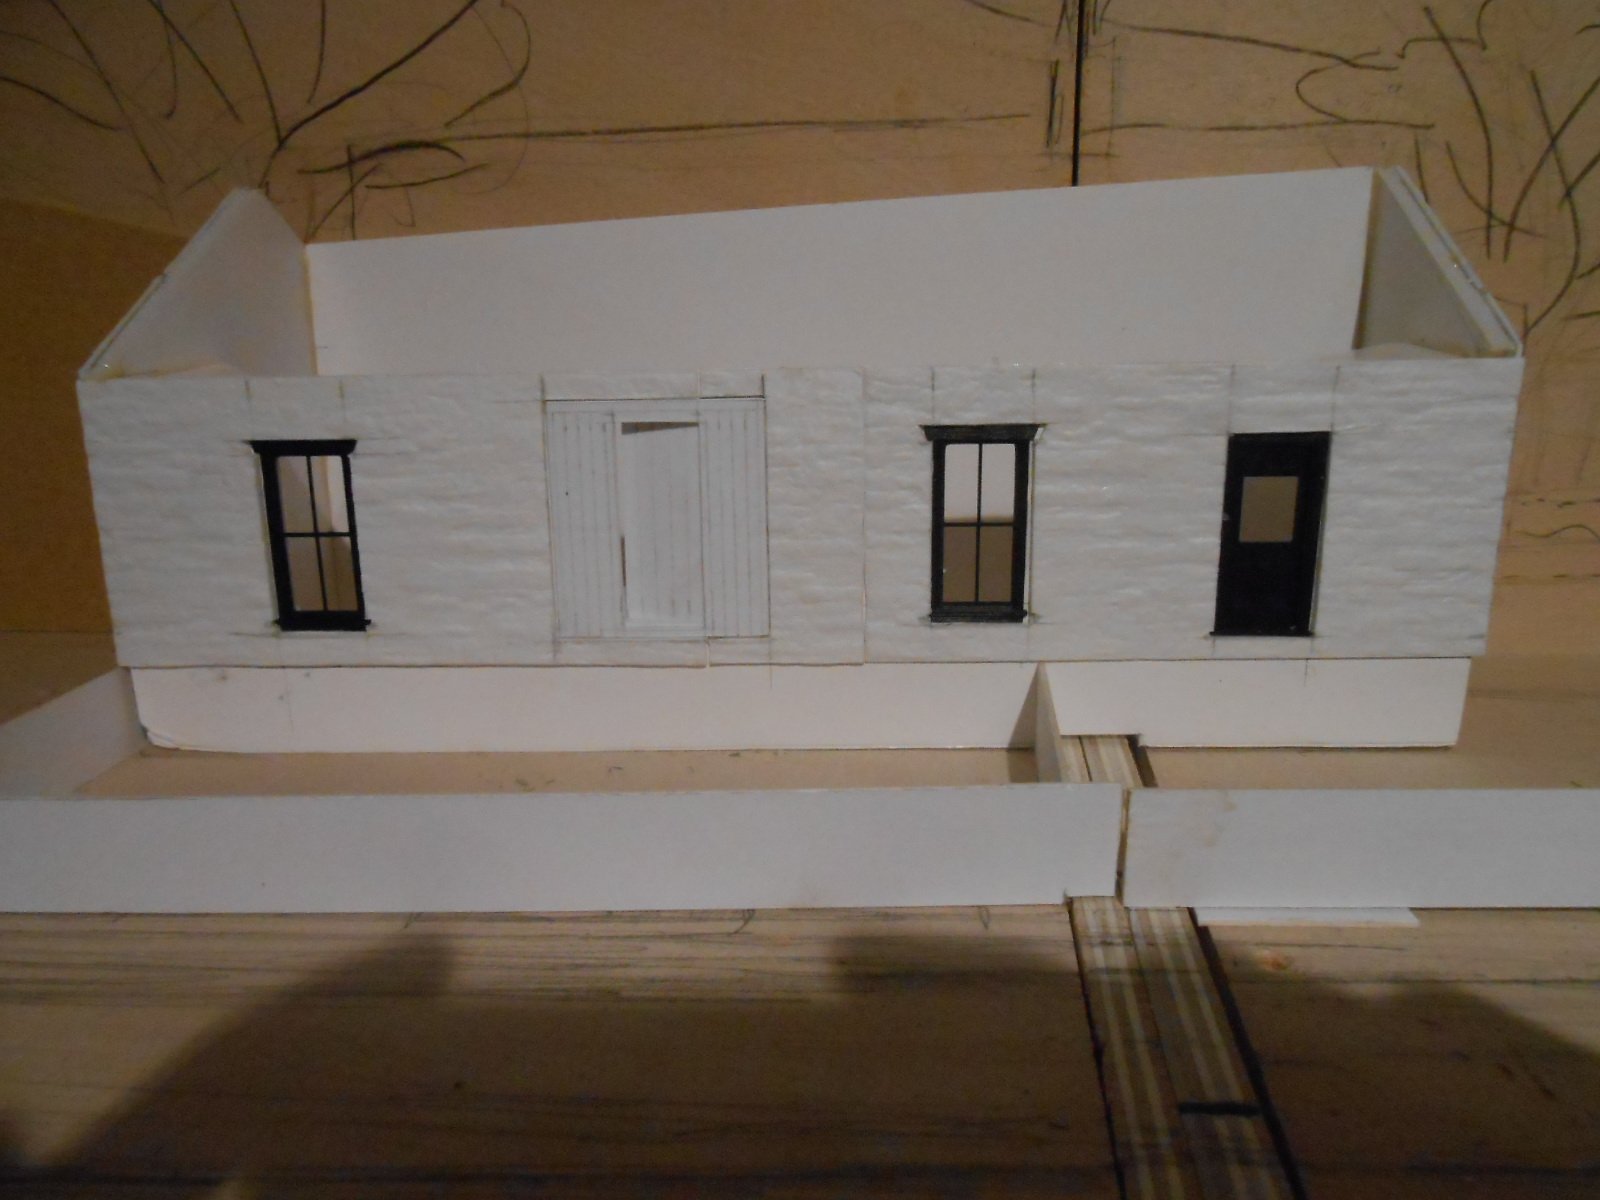
Station Building for NPQ Still waiting for my track building materials, so decided I'd make a start on the station building for Northport Quay. If you've never scratch built anything before, then a building has to be the easiest way to start. Four sides, a roof and some openings for windows and doors, which you can buy if you don't fancy making them. What's not to like? I still have a full sheet of 5mm foam board, so this is the basic material. Easy to cut with a snap off knife, so a steel rule, pencil and some PVA glue are all you need to cut out the four parts and fix them together. The model is based on Westport Quay station, but a mirror image and a gable end, rather than a hipped roof. Two sash windows, two doors are all that is on the platform face, so nothing complicated there. Indeed, a rummage through my 'plastics' spares box [I have ones for etched brass, white metal and brass castings too!], unearthed some Grandt Line windows and doors. Not a perfect match, but this is not an exact model anyway. I also found enough Wills sheets of rendered stonework to cover the foam board shell. Westport Quay appears to be whitewashed in some pictures and plain stonework in others. As the model is intended to be removable, in order to break up the baseboard join, I may well make two versions, so one can painted in pre-grouping colours, to match my 1900s stock & this one in rendered stone. You will see that is it only just over 'half relief', so each end will be disguised by carefully positioned trees. Anyway, the pictures show what can be done in three or four hours, with minimal tools and basic materials. Plenty of detailing to add. I'd really prefer to be making track at the moment, but this should keep me amused in the meantime.
-
Fascinating! Had not come across that, but given the number of sink holes we now hear about, not surprised. There was also the urban myth of dozens of Stanier 8Fs being walled up in disused tunnels after the end of steam, in case of some doomsday scenario. These days, resurrecting them might be considered pretty terrible too...
-
"When I had a roller". Now there's a good throwaway line! Love it - and not surprised.
-
I think you are right. It makes the scene look more open and less cluttered, plus the loop is now a few inches longer too. Glad you like the bench work, though it is less neat underneath, I'm afraid!
-
Try Kitwood Hill Models. Laser cut ply, so really intend for the American market, but easy to put together and adapt. Supply dependent on demand though, so you may have to wait a bit. South Eastern Finecast do a turntable kit, which uses whitemetal castings for the wheels. Found it worked a lot better if these were replaced by ball bearings. Not sure if that meets your needs, but worth checking both websites.
-
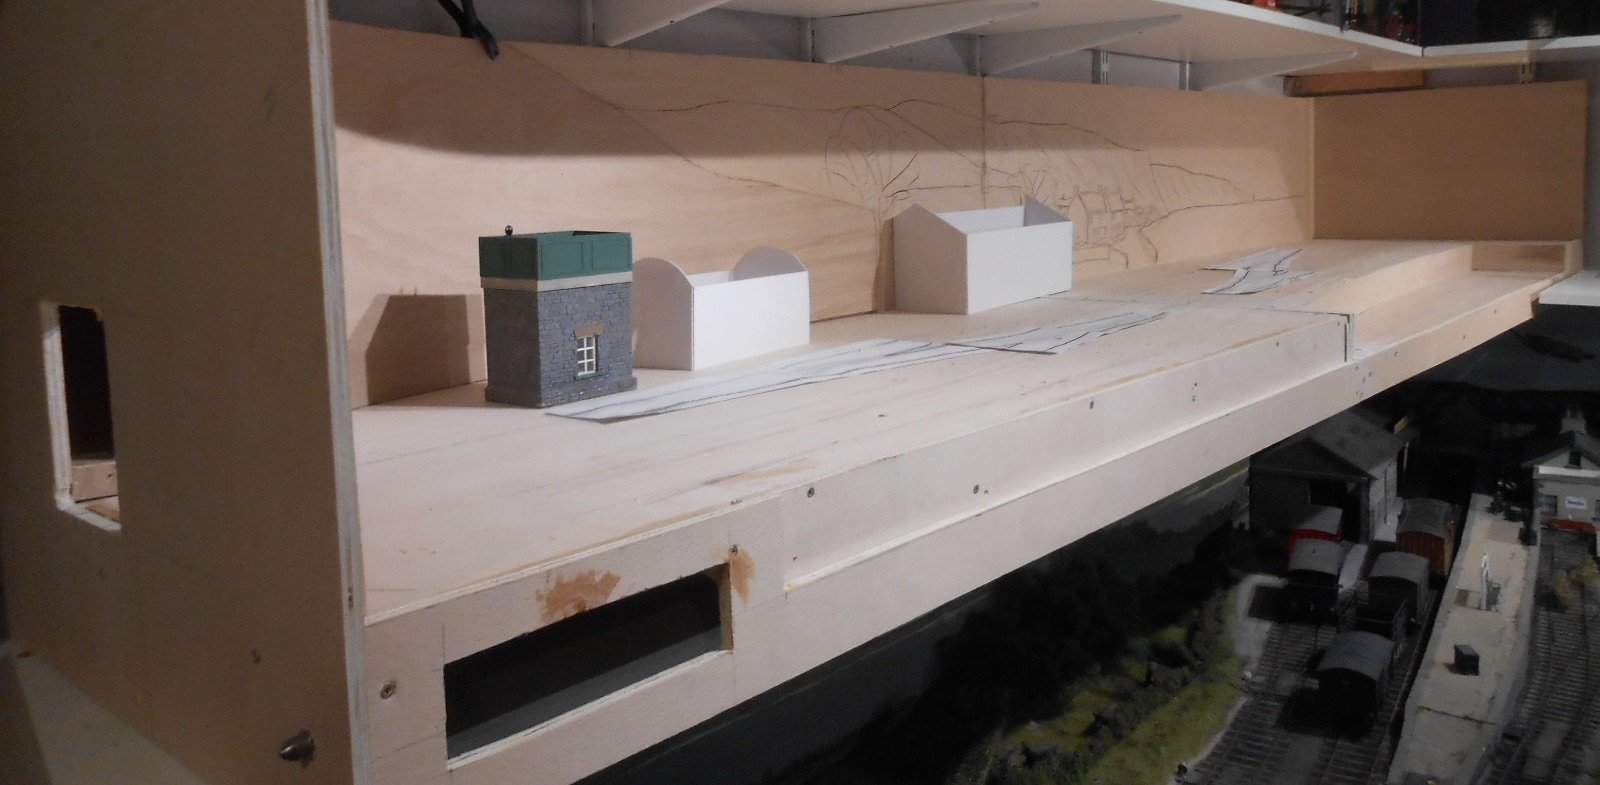
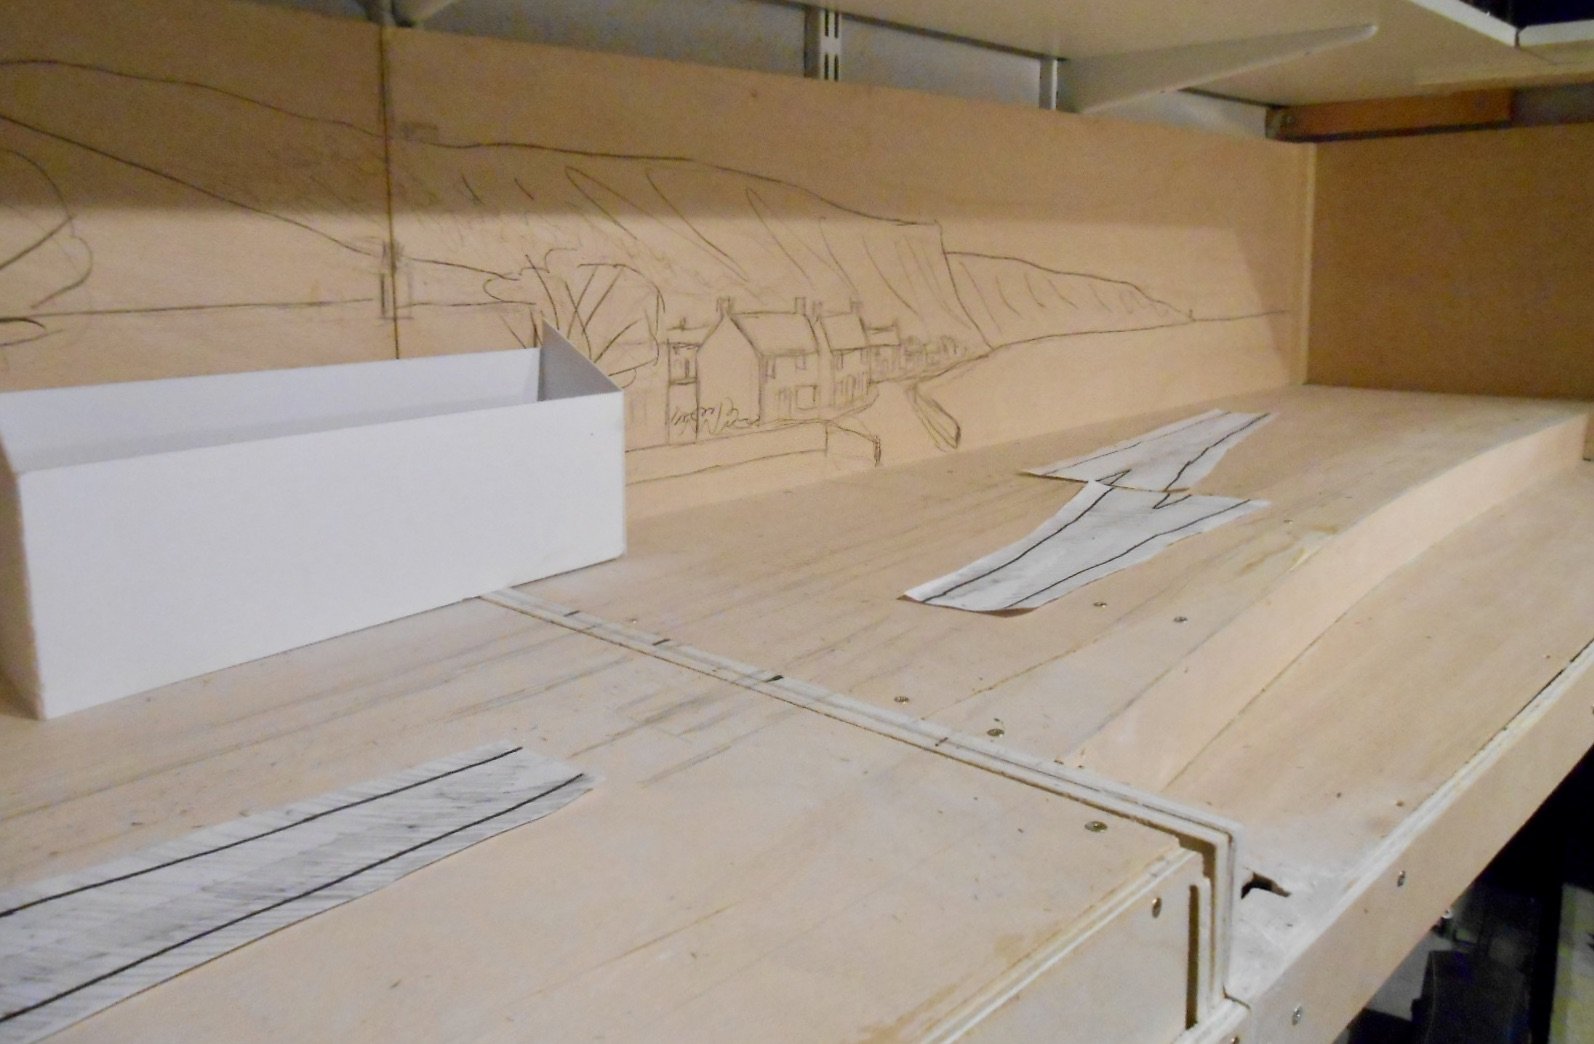
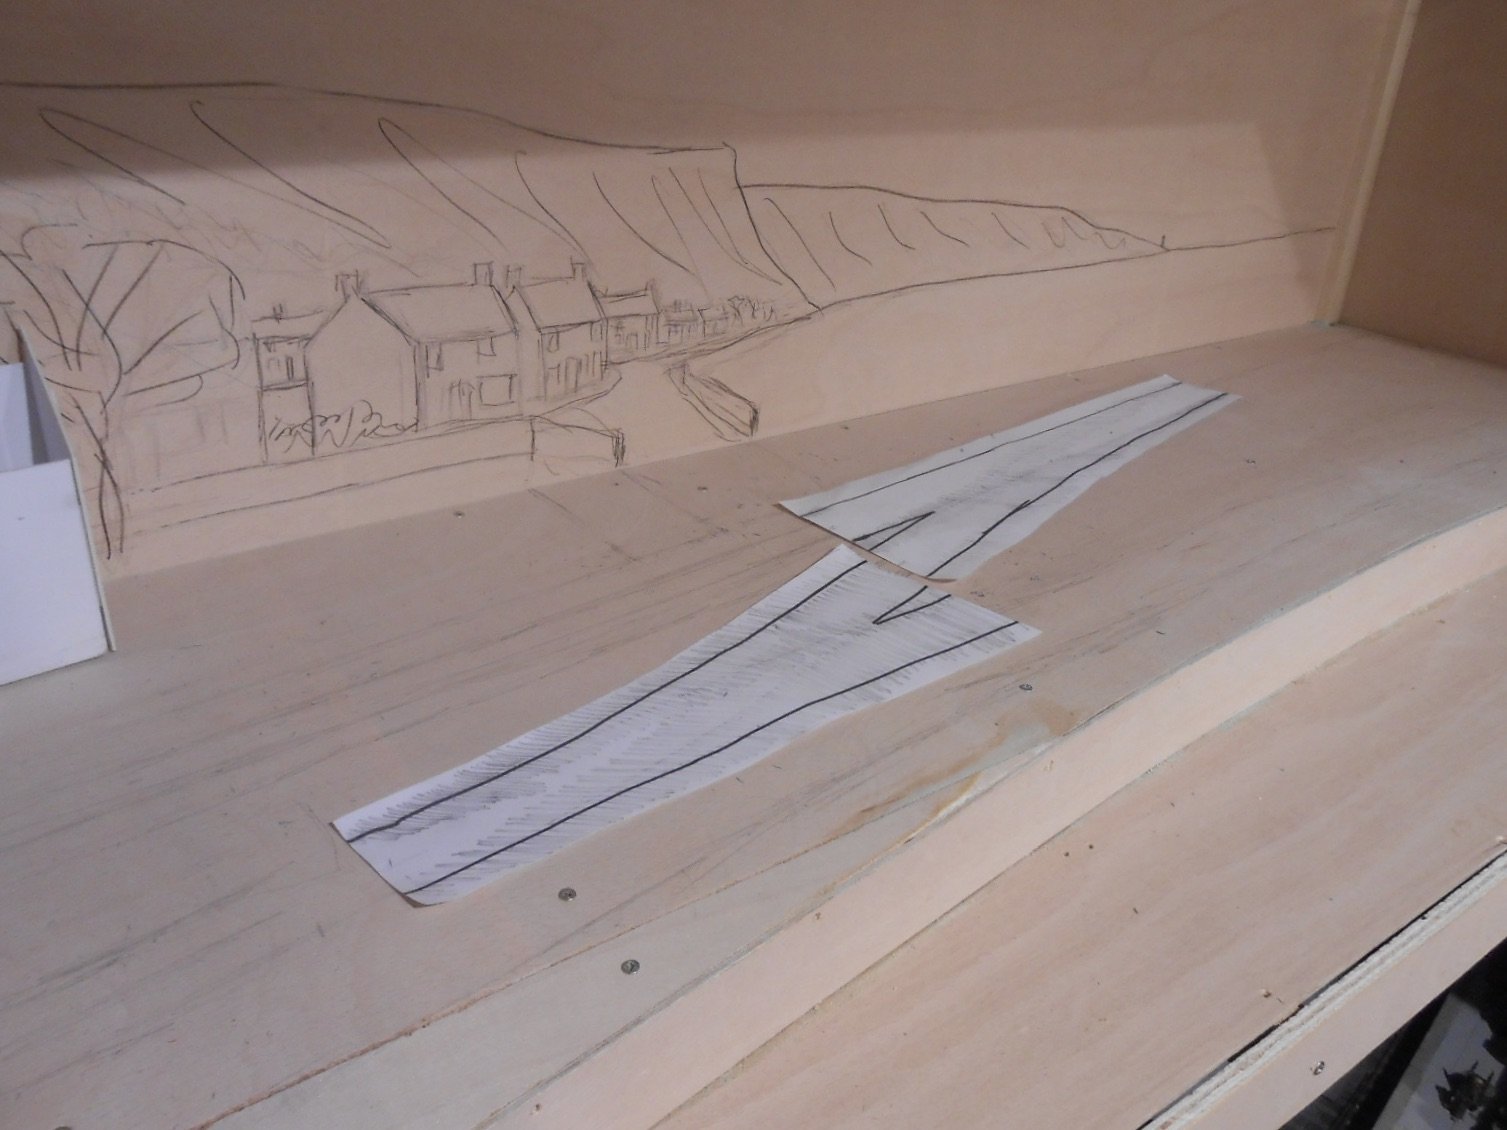
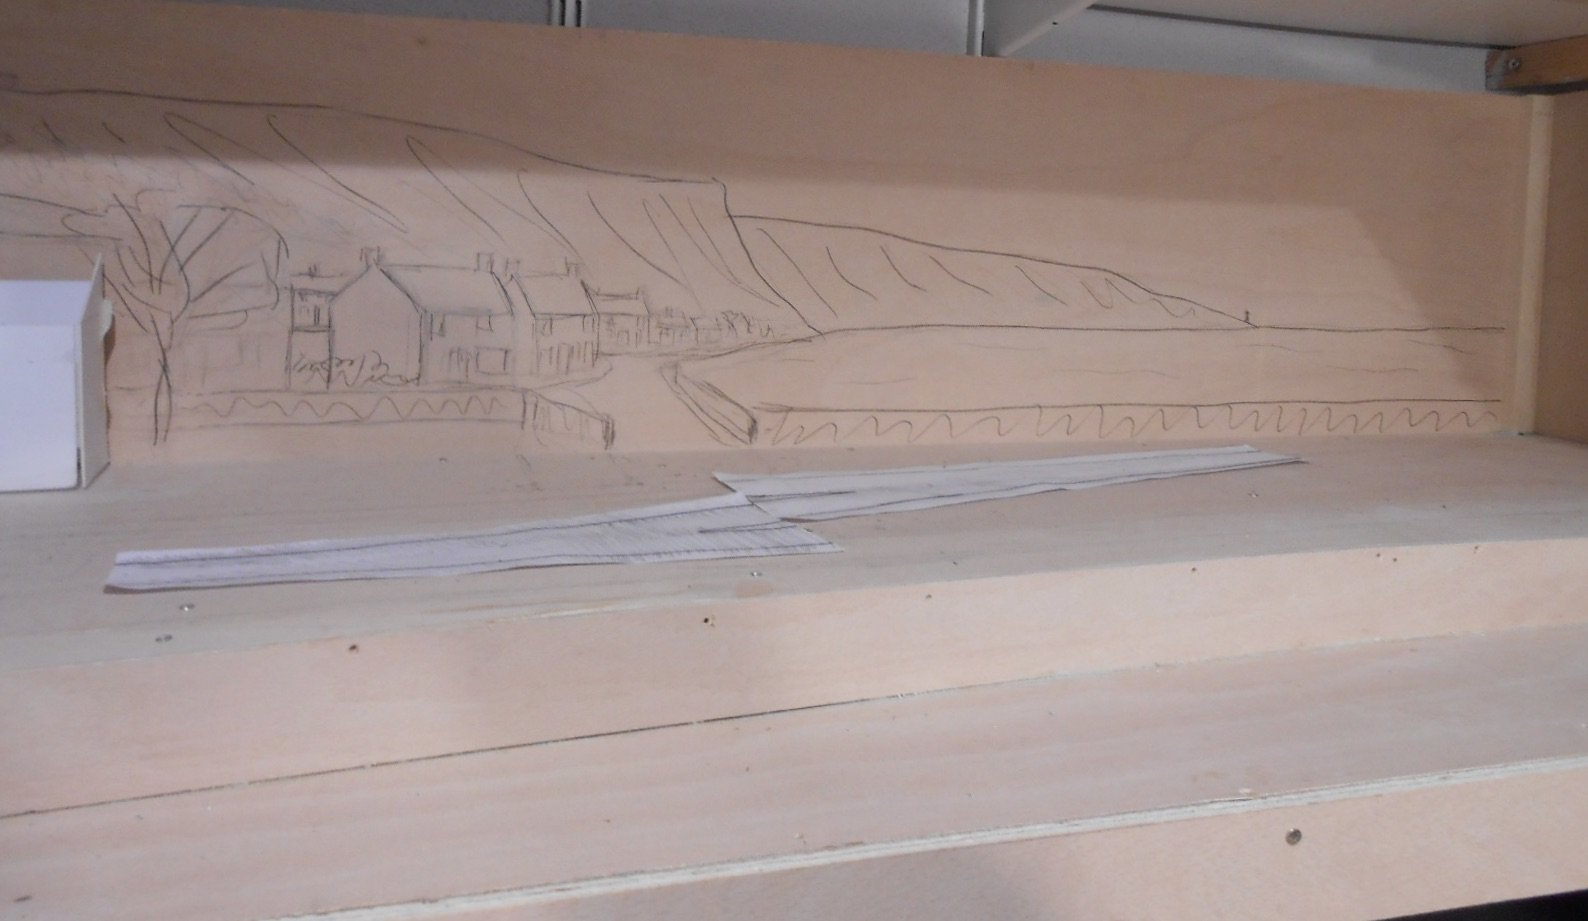
Still waiting for track building materials, so have done a bit more work on the baseboards, cutting out the hole where the control panel will go. Two DPDT switches for the crossovers and three push to make switches for the uncoupling magnets don't take up a lot of room, fortunately. Next, cut and trial fitted the curved 'landscape' piece for the left hand baseboard, along with the holes for the track to exit to the fiddle yard. Today have been having another look at how the track work will fit in and as is so often the case, on the full sized model, things often don't work as planned on the drawing. Here, I've found that there isn't enough room for track for the mobile crane on the right hand baseboard, so have reluctantly decided that this will only run along the left hand board, parallel to the baseboard edge. This will be finished as a harbour wall anyway and leaves the option of maybe adding a second ship on a sub-board at a later date. As the coaster on the right hand board will have its own crane, this omission should be fine. Losing the crane track on the right hand board has at least freed up space to make the platform wider: as with everything else on a small layout, compromises have to be made pretty much everywhere! Playing around like this also helps in deciding how the track will eventually be made and laid. Suspect that much of it will be built in situ, with the platform wall/face actually going in first, as everything else revolves around it. Meanwhile, have also been playing around with what the back scene will look like, in particular trying to make this 7'6 x 1'6 footprint look much bigger. Hence have sketched in a small collection of houses, along with a few trees and bushes - the latter to hide both ends of the station building, along with the baseboard join in the back scene.
- 257 replies
-
- 11
-