David Holman
-
Posts
4,359 -
Joined
-
Last visited
-
Days Won
117
Content Type
Profiles
Forums
Events
Gallery
Blogs
Everything posted by David Holman
-
Inchicore Class J10 Conversion From LNER J72
David Holman replied to murrayec's topic in Irish Models
The standard of work here is quite remarkable, especially the way everything fits together so well. Always enjoy the latest updates. -
Great work and shows how large scale models can be done using standard modelling techniques.
-
Great to see progress. Keep 'em coming!
-
This side of the water, though guessing it was the same in Ireland, time was money for railwaymen, who would aim to spend the absolute minimum on each shunt. On Belmullet, I try hard to follow that rule and keep things as simple as possible. At exhibitions, visitors want to see meaningful action on not stock being aimlessly shuffled about. Moves need to be planned beforehand and there are sequences for operators to follow. It is all about practice and rehearsals. My operators are pretty good - better than me it could be said - but there are a few horror tales of folk not following the sequence and getting into a right old mess! Fine at home, but not when folk have paid good money to see trains running. My next nervous breakdown draws every closer with Uckfield just over two weeks away. Locos have been serviced, paintwork touched up and all wheels cleaned on all stock. However, no matter how much you prepare, experience warns me that taking a layout to a show is always fraught with problems. I just hope nothing too serious occurs...
-
The sequence showing branch line train movements might seem obvious, but such things are increasingly lost in the midst of time and I often come across folk new to model railways who have no experience of how things were. As for things like brake vans at the end of a train and fitted vans at the head and this sort of stuff rightly needs to be shared.
-
Fascinating - very like 12" to the foot in all sorts of ways.
-
Tasty.
-
Fantastic work Phil and will certainly look forward to seeing how the new locos progress too. As for a live steam Kathleen, am salivating already....
-
Thanks John, sensible advice, though was only thinking of doing the CAD on the laptop in the lounge and get Mark to do the printing. Like the idea of doing separate sides and ends to assemble later. That ought to be within my skills and for something like a covered van might make a nice starter project. Good for thought for others too.
-
Fascinating, many thanks Ken! Certainly agree with you 're loco construction, though there was an article in MRJ not long ago where someone described 3D printing a brass dome. Presume that has something to do with resin used but whether it is heavy enough is beyond me. Not surprised to read that it is the drawing that takes the time. Must admit it is something I've been tempted to have a go at, especially as it is a modelling task that can be done in the living room, where solvents, paints and soldering iron are frowned upon in my house for some reason! Also, Mark Clark of Locos and Bits is a Chatham Club member who produces 3D prints, so I wouldn't have to invest in any equipment. Especially like the idea that, once acquired, CAD skills can be used for all sorts of things, including designing your own etches for one off loco kits, plus scenic and so on. Anyway, well done you and I shall continually look forward to seeing what else you come up with.
-
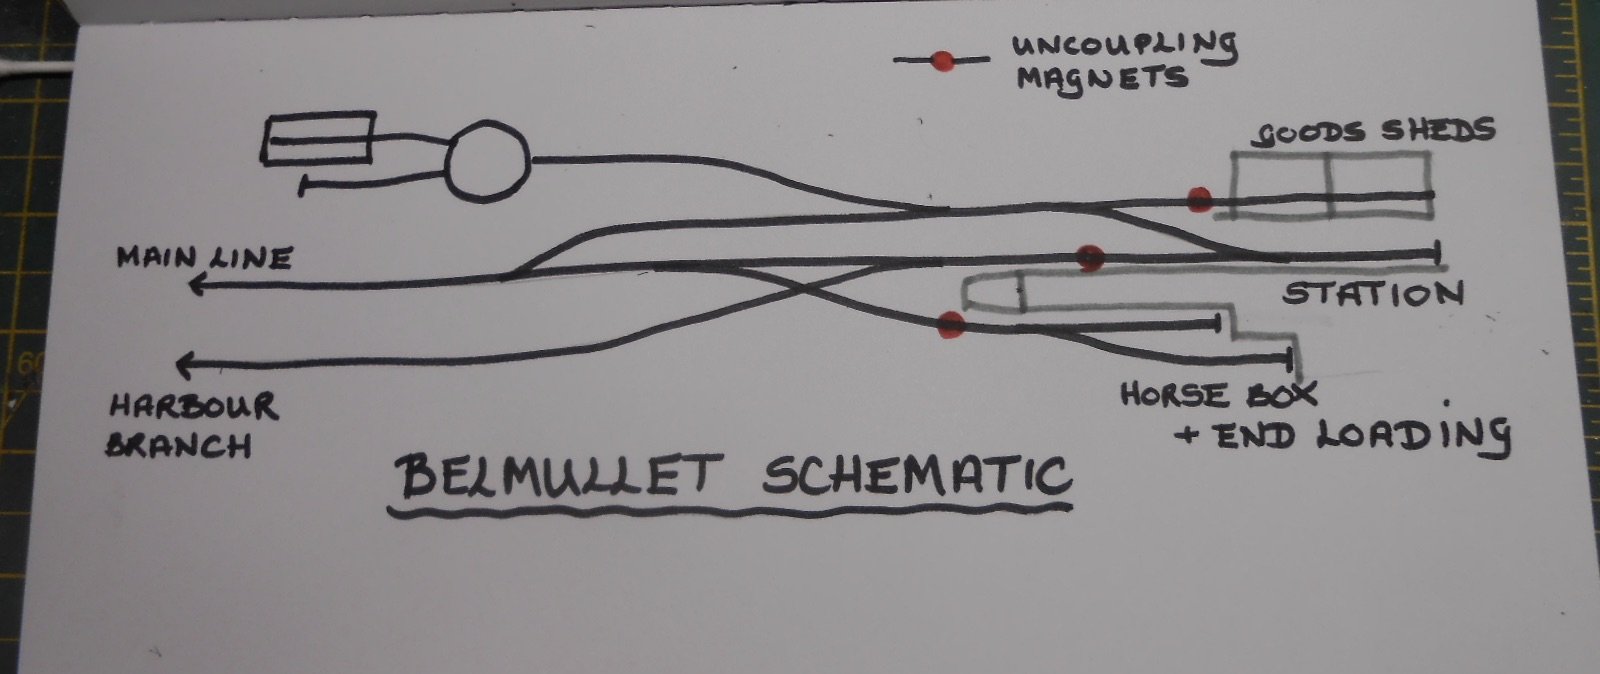
For those of you who like such things, here is a shunting puzzle I have been trying to solve, but without success. Most trains on Belmullet can be operated with Dingham auto couplings and just three strategically placed magnets. Dinghams are 'handed' though, which doesn't work well when both whole trains and locos are turned at each end. However, by having hooks on the locos and loops on the end of the first and last wagon/coach of each train, not only is basic running round achievable 'hands free' but two trains can swap wagons as can a rake of wagons in the goods shed be exchanged with an incoming set. The difficulty arrives with two trains [one for each period modelled], where I want to swap a single wagon from a 'mixed' train with one from either the the bay or end loading dock. At the moment, these trains have either screw or three link couplings, which need to be worked by hand. My question is, could the sequence be done using Dinghams and the magnets? Each train is made up of the locomotive [which will be turned on the turntable], one or two passenger vehicles, a couple of wagons and a brake van bringing up the rear. On arriving in the platform, the loco needs to uncouple and be turned on the turntable. Afterwards, the brake van needs to go to the other end of the train and one of the wagons swapped with one from the bay/loading dock. On return to the fiddle yard, the whole train is turned for the next outing. Note that Dinghams have to be either a hook or loop - you cannot have a hook and loop on both vehicles coupling up as they don't work reliably. Everything I've tried thus far ends up with a mismatch when the whole train is turned and returns the next time. Indeed, am not sure anything IS possible, though one thing that might help is that a pilot loco can be available, though note that locos can only be isolated in the loco shed area, either side of the turntable [ie room for three locos]. A schematic is shown below and additional magnets could be added. No prizes for success, but you would have my eternal gratitude! This message will self destruct in 15 seconds...

- 1 reply
-
- 1
-

-
Great model, full of character. Looks like you are well into 3D printing now, so am wondering how it works out, time wise, compared to scratchbuilding, or indeed resin casting? When I made a WL&W four wheeler for Belmullet, guess it took around 18-20 hours to build the model - before painting, but including the chassis. Similarly,with the exWLW six wheelers for the turf train, one side and one end took 10-12 hours to make the masters, plus another hour on the mould. After casting (one every half hour), assembly with an Alphagraphix chassis took another 6-8 hours, so around 30 hours each model, or 60 for the pair. How does that compare to 3D printing, including CAD and test runs? Am guessing that once perfected, CAD will work out pretty favourably, especially for multiple copies?
-
Can only agree, Rich. Very much deserves a wider audience.
- 490 replies
-
- 2
-
-
- ballyercall
- layout
- (and 1 more)
-
Am sure I won't the only person interested in answers to this. I have a 7mm scale donkey and two wheel cart [both Langley Models], but certainly wouldn't claim any authenticity.
-
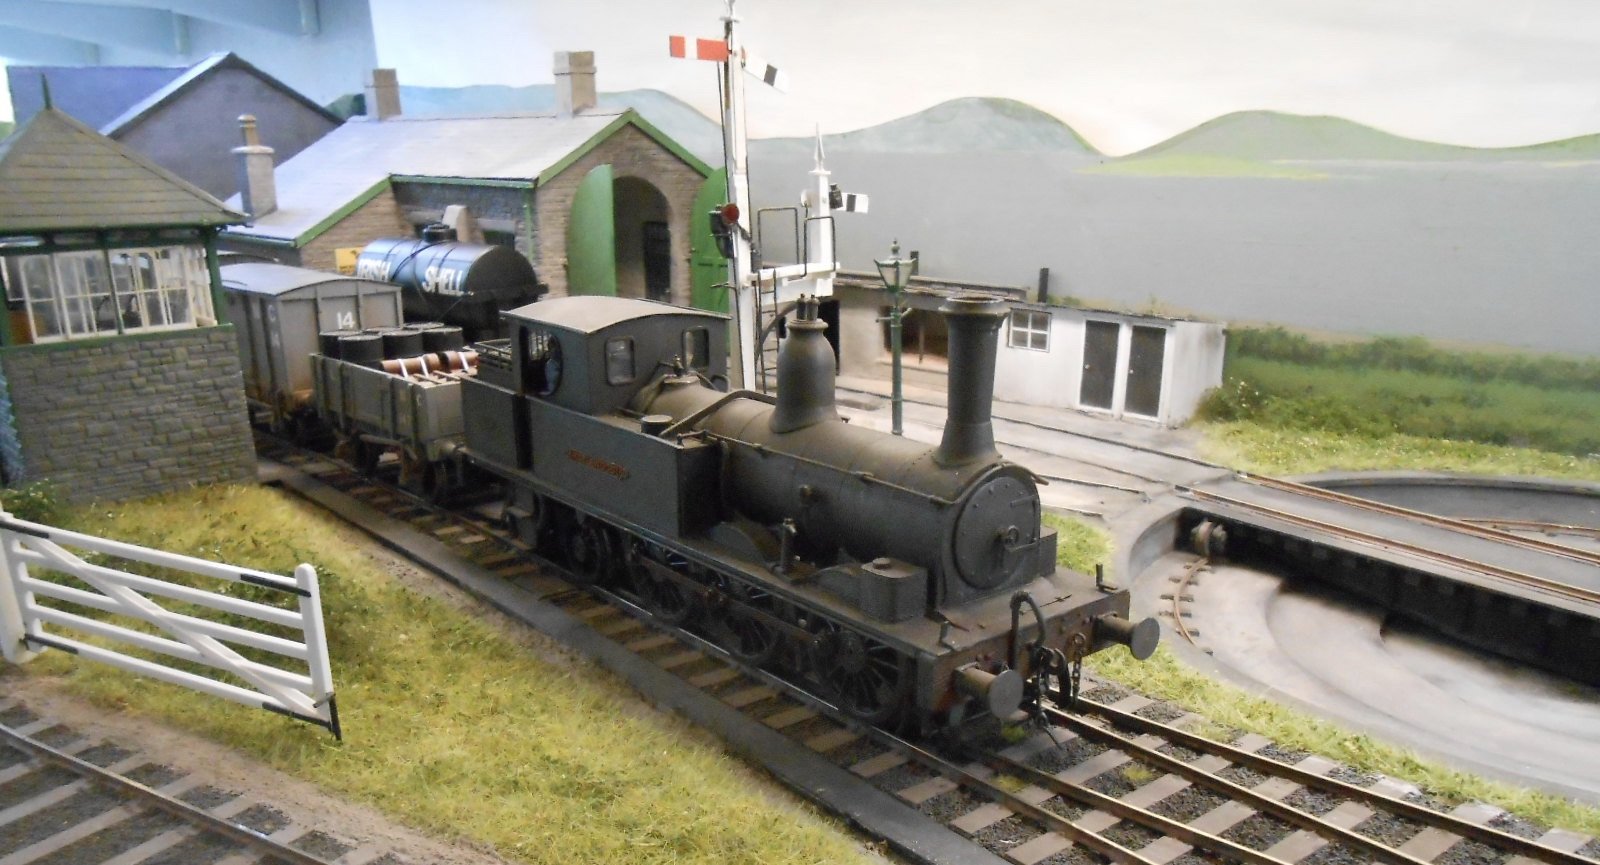
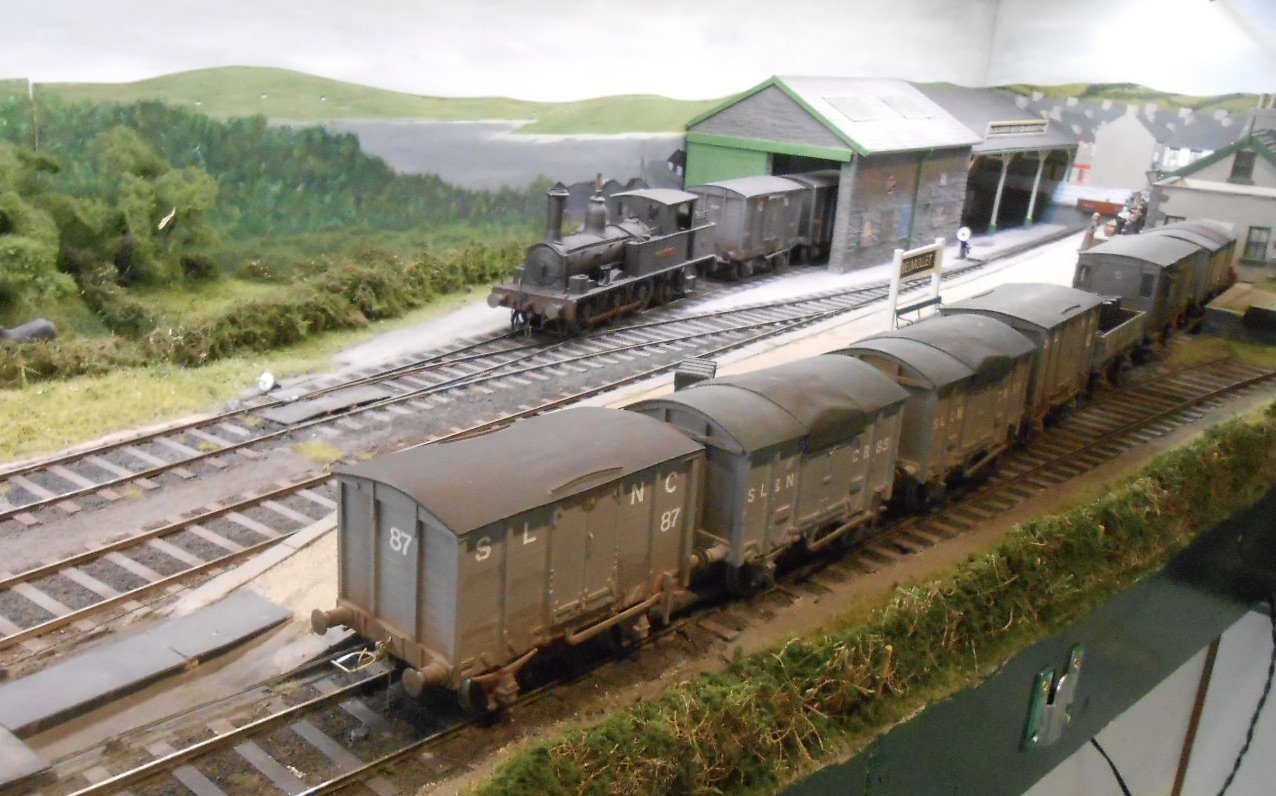
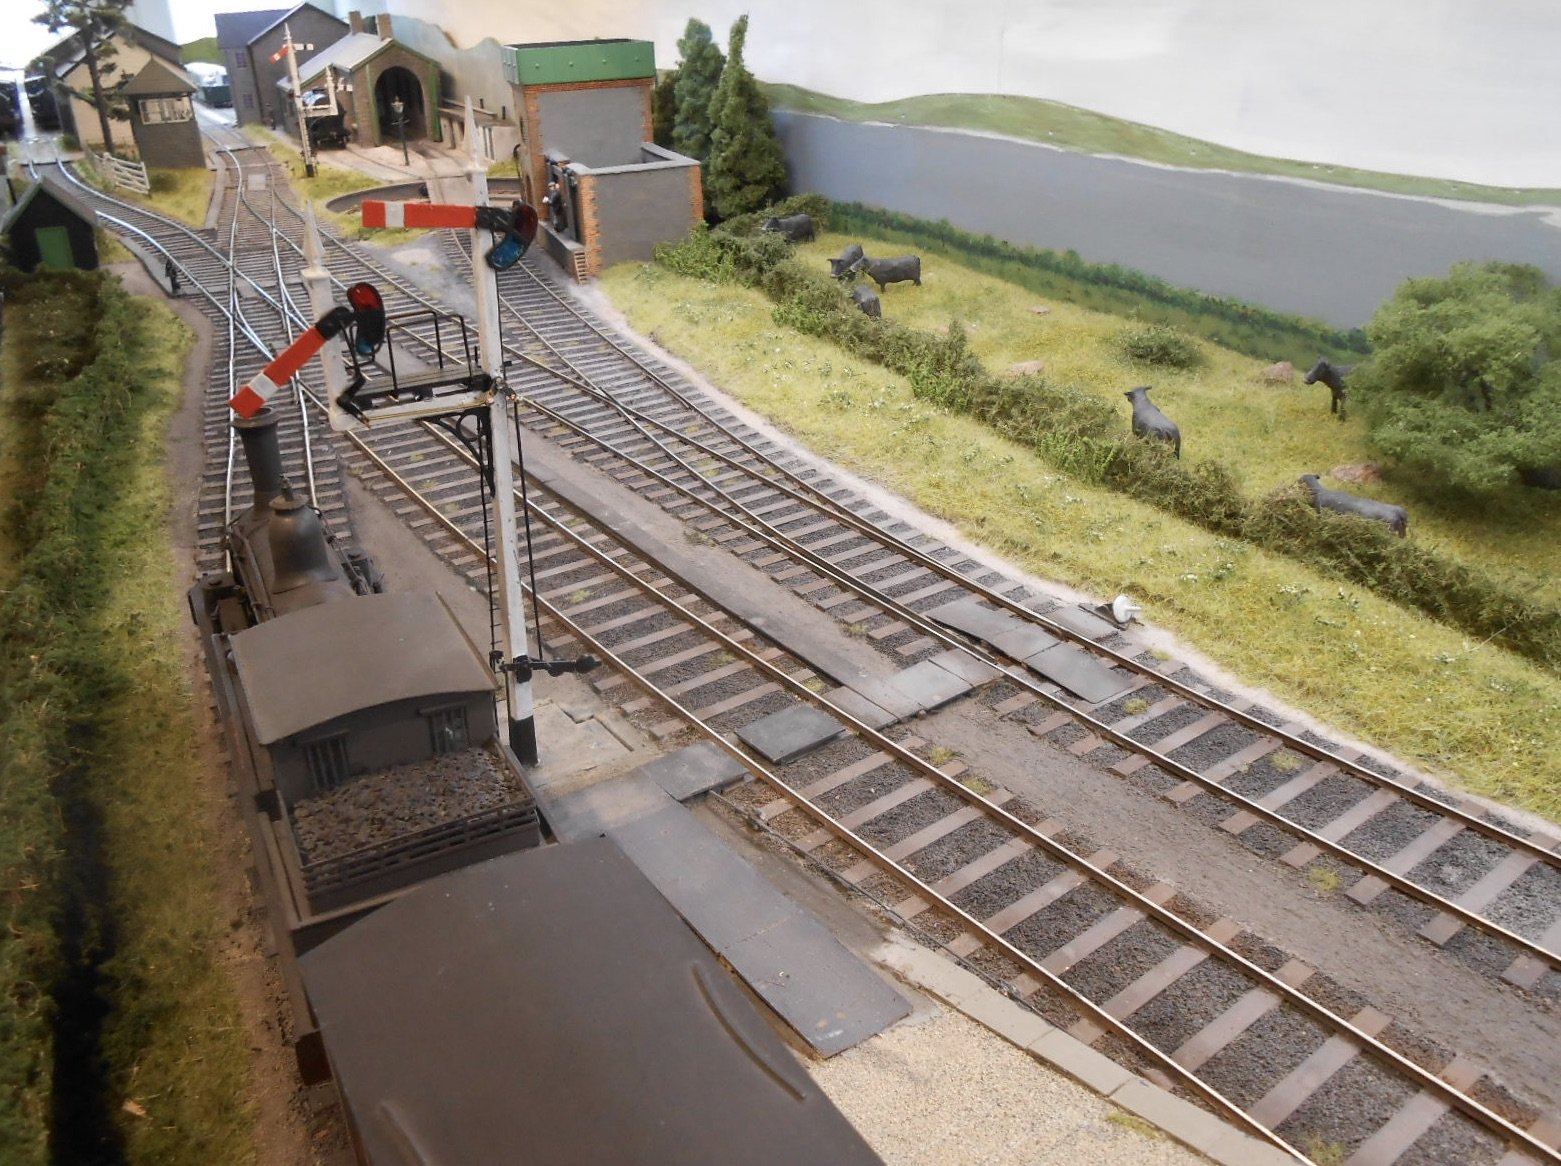
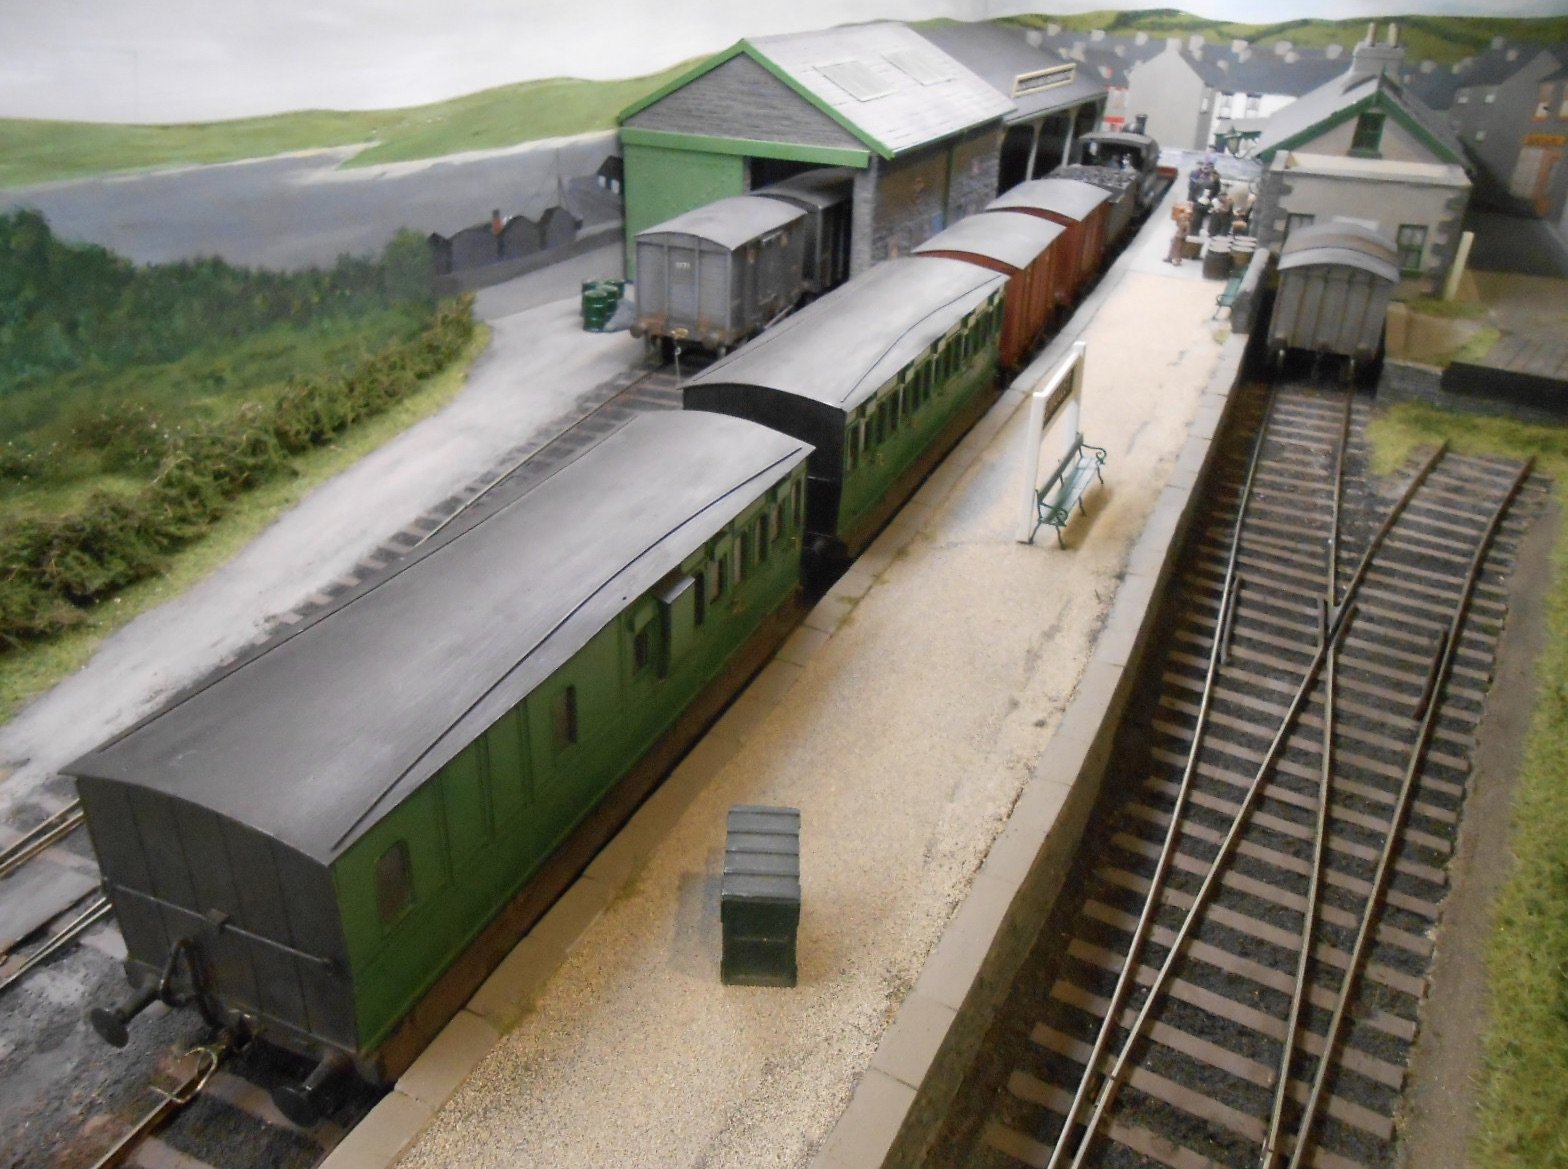
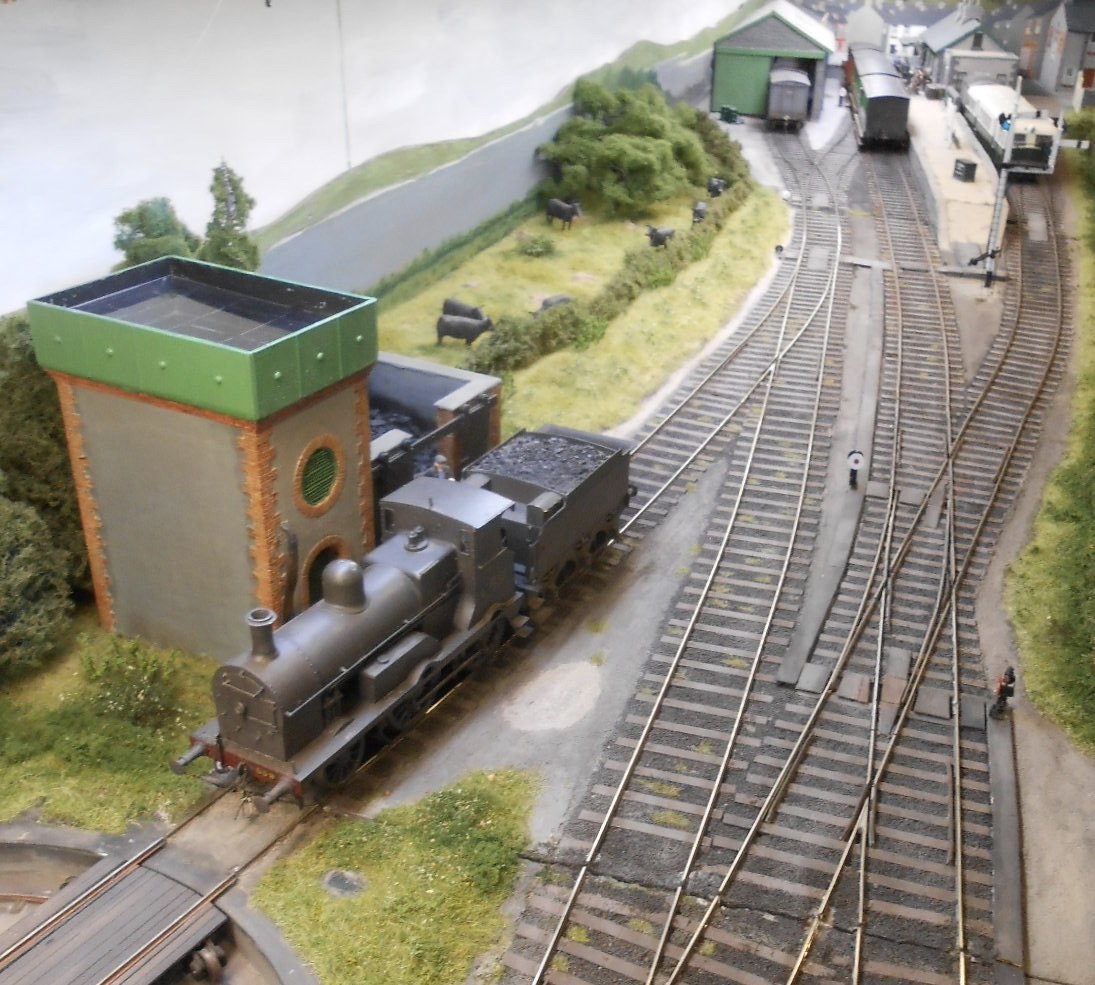
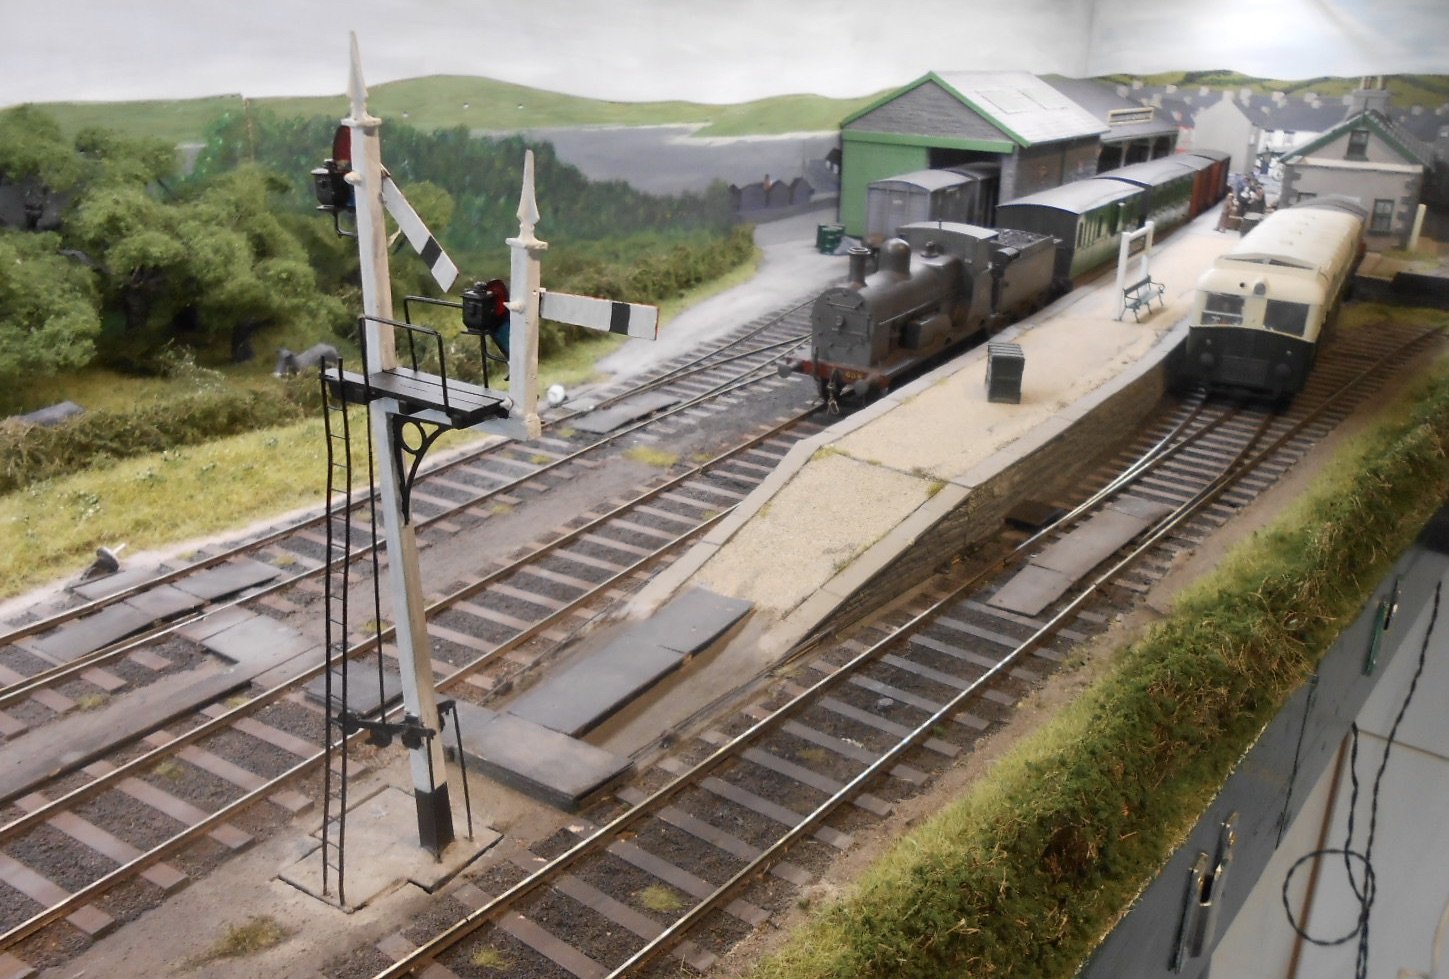
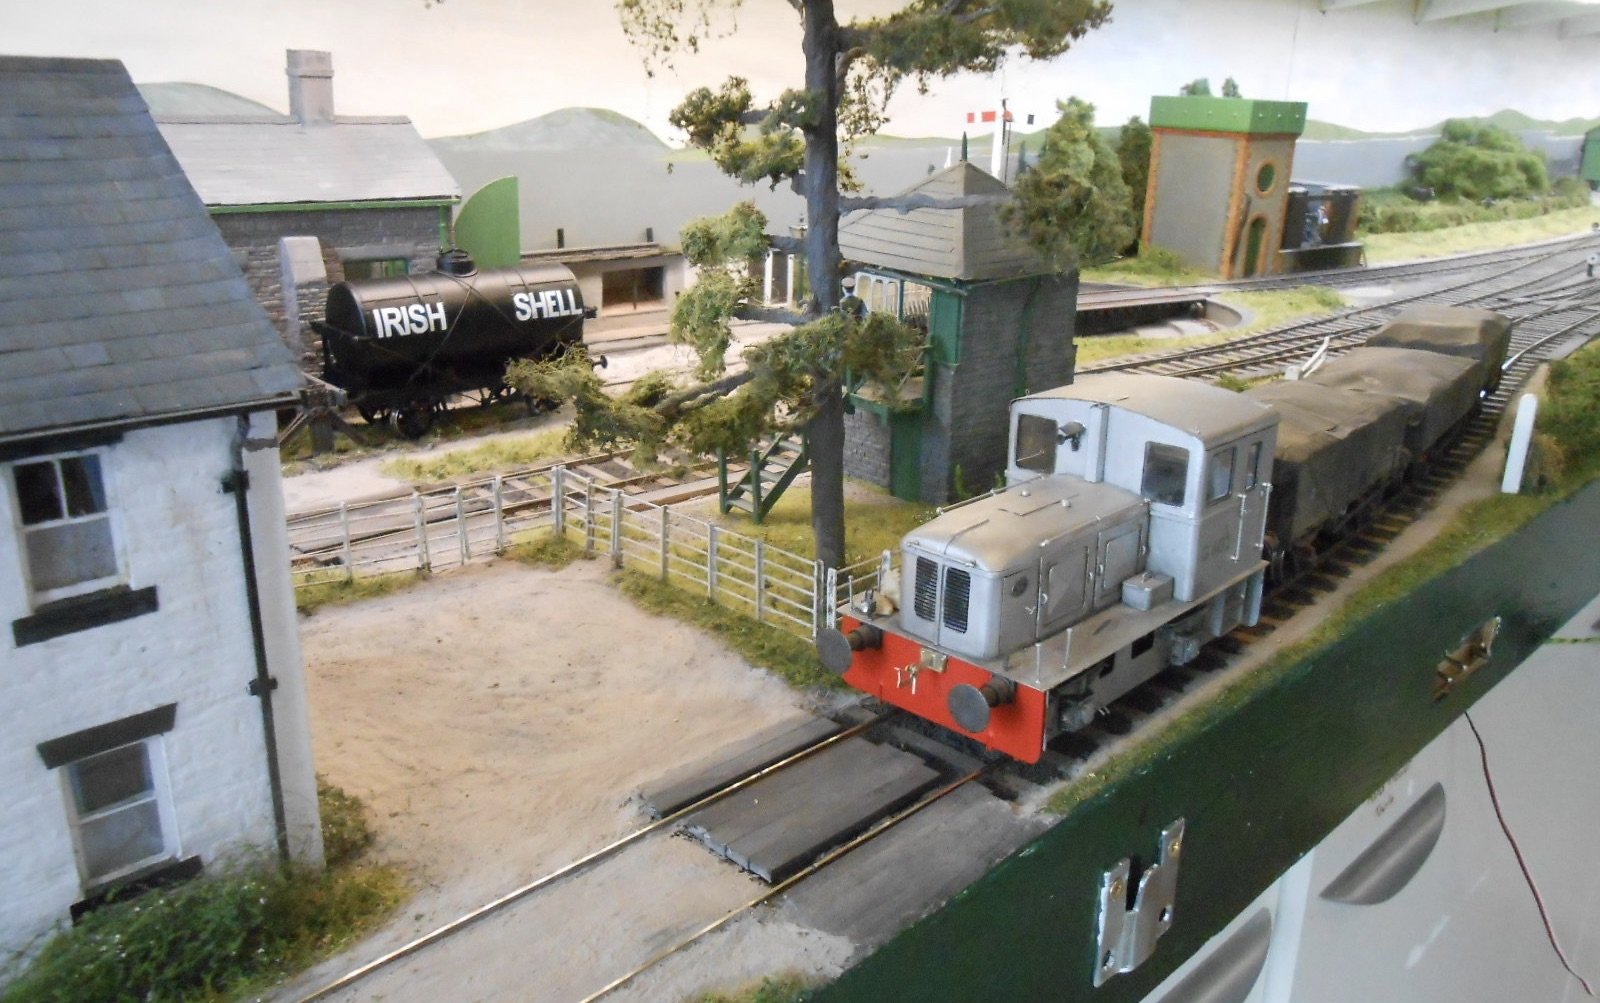
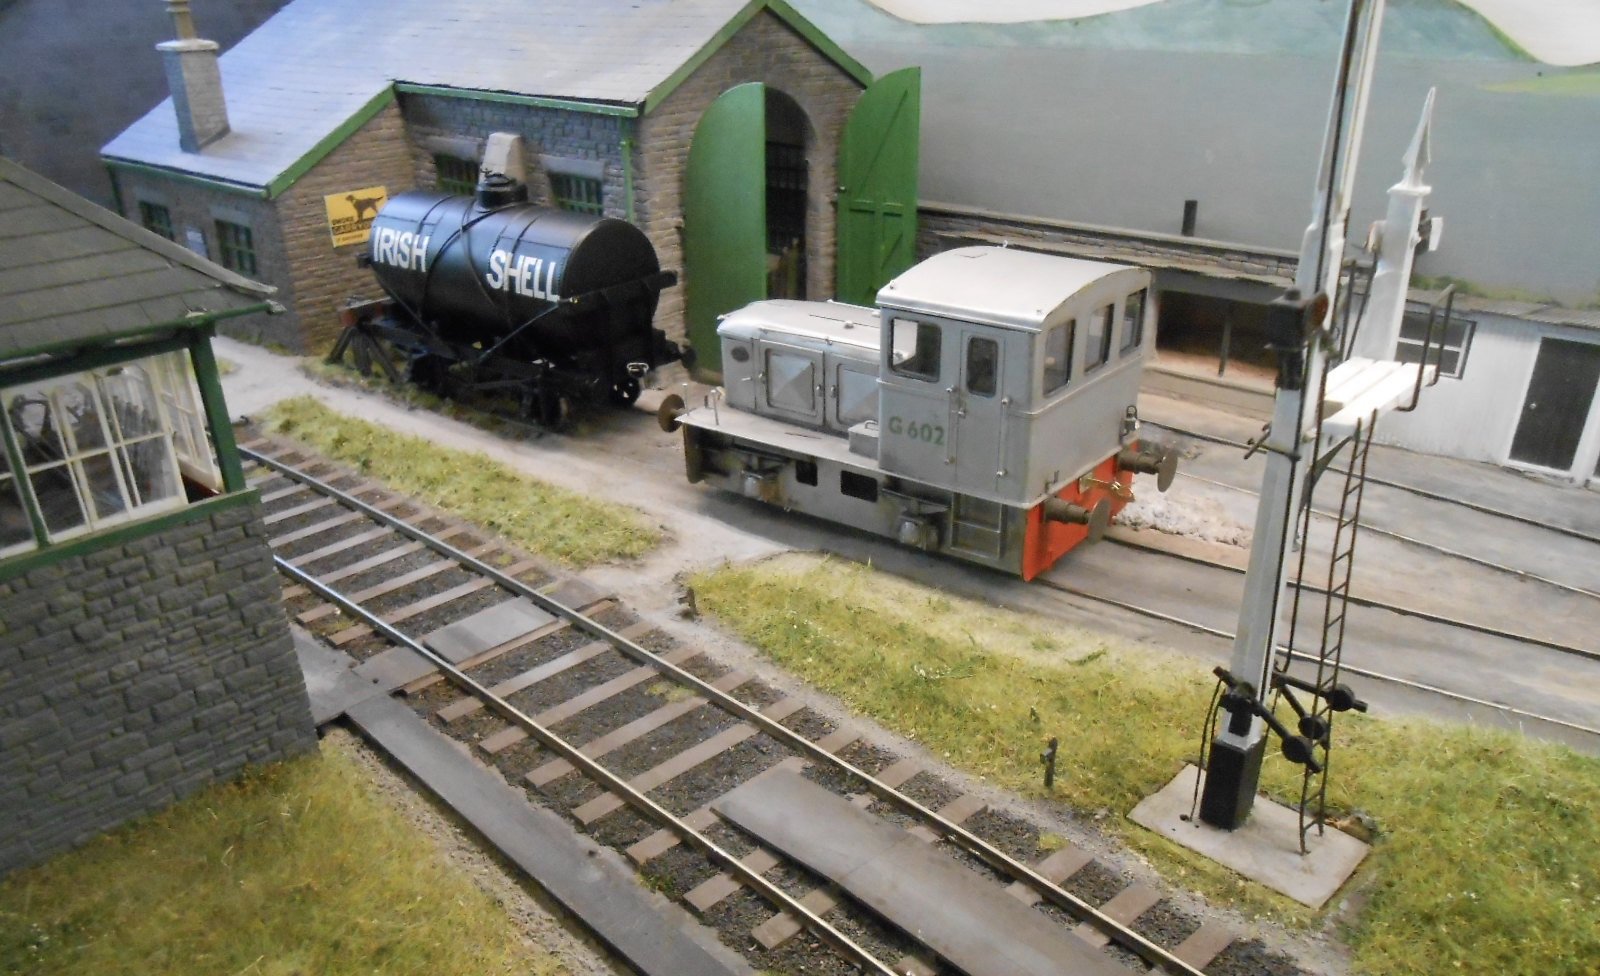
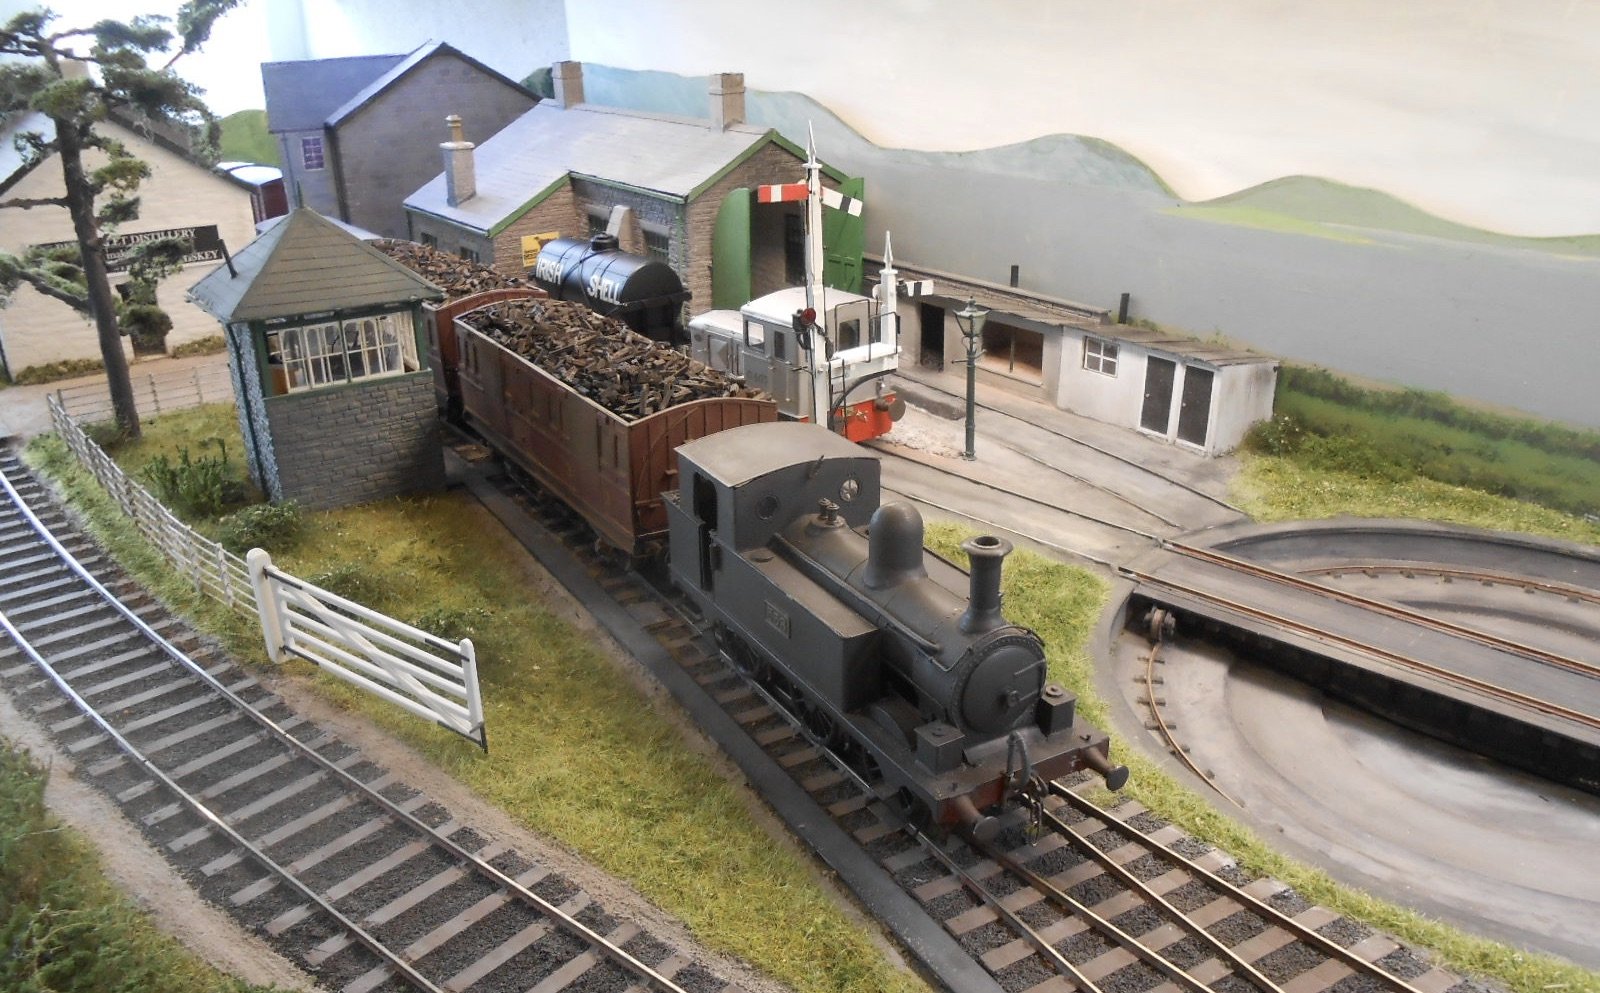
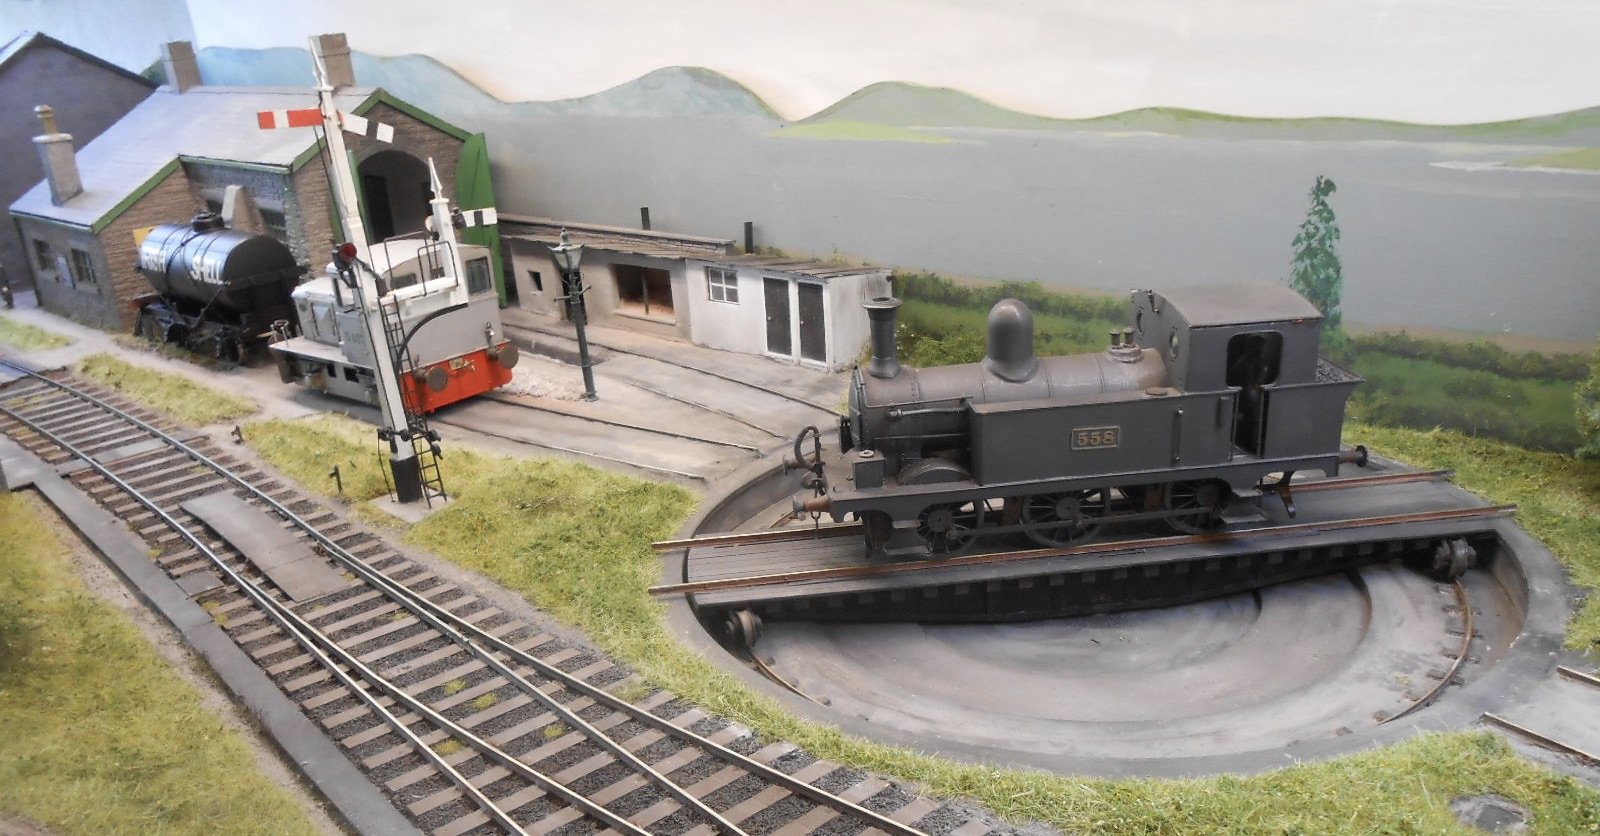
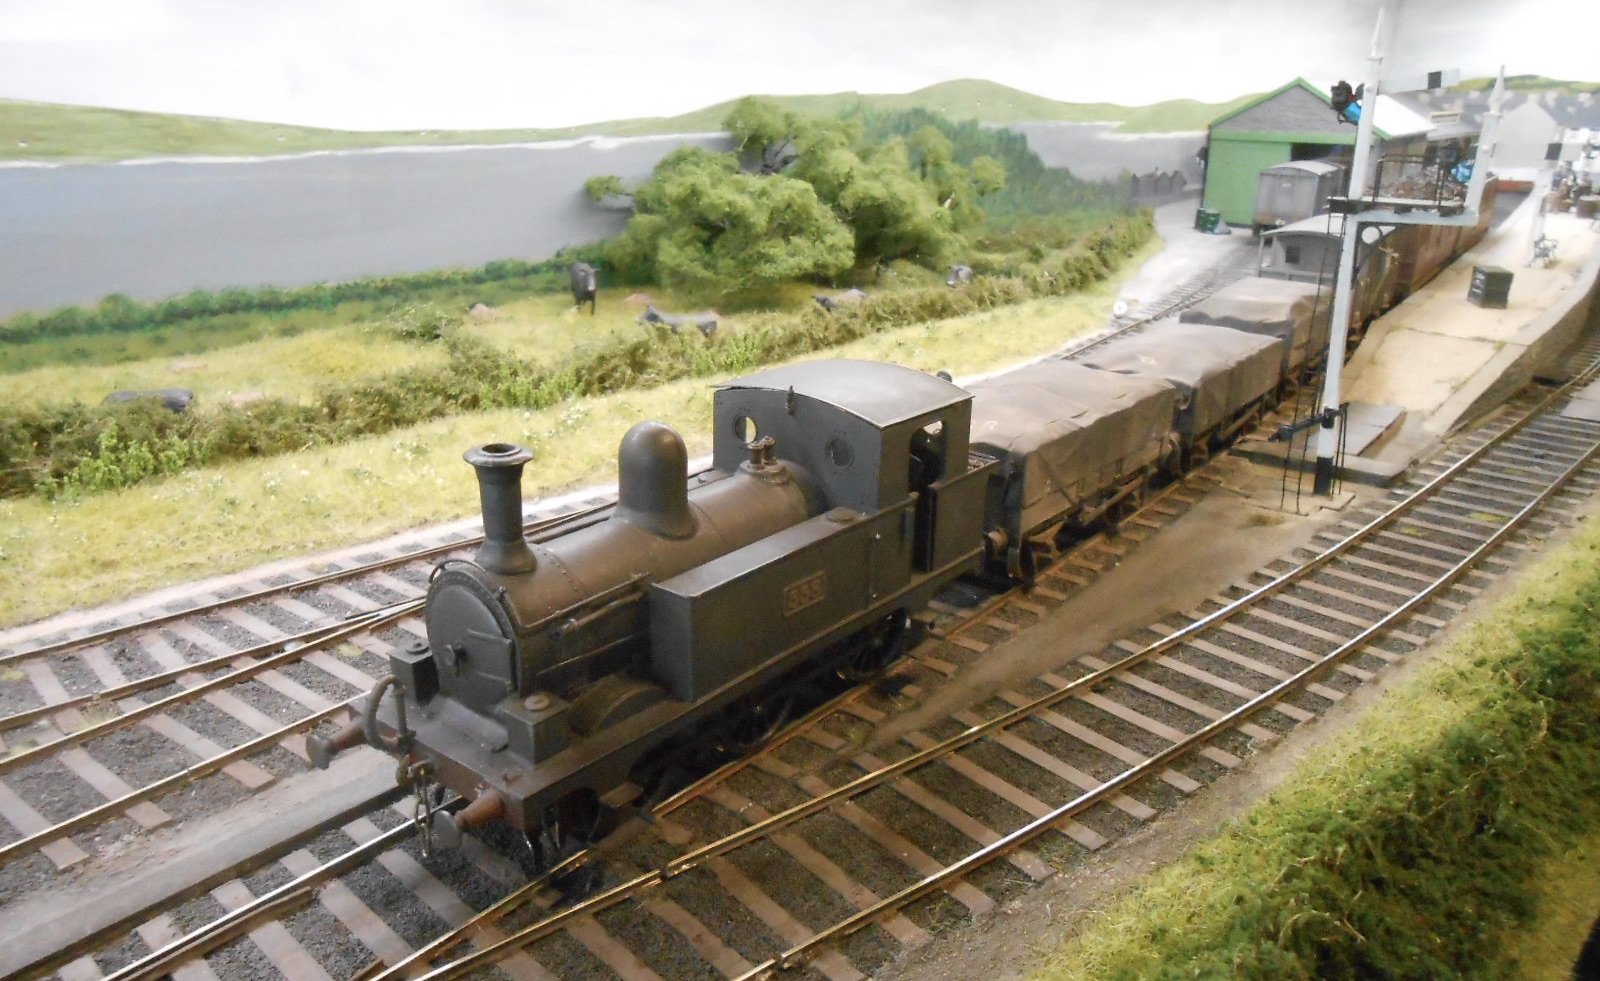
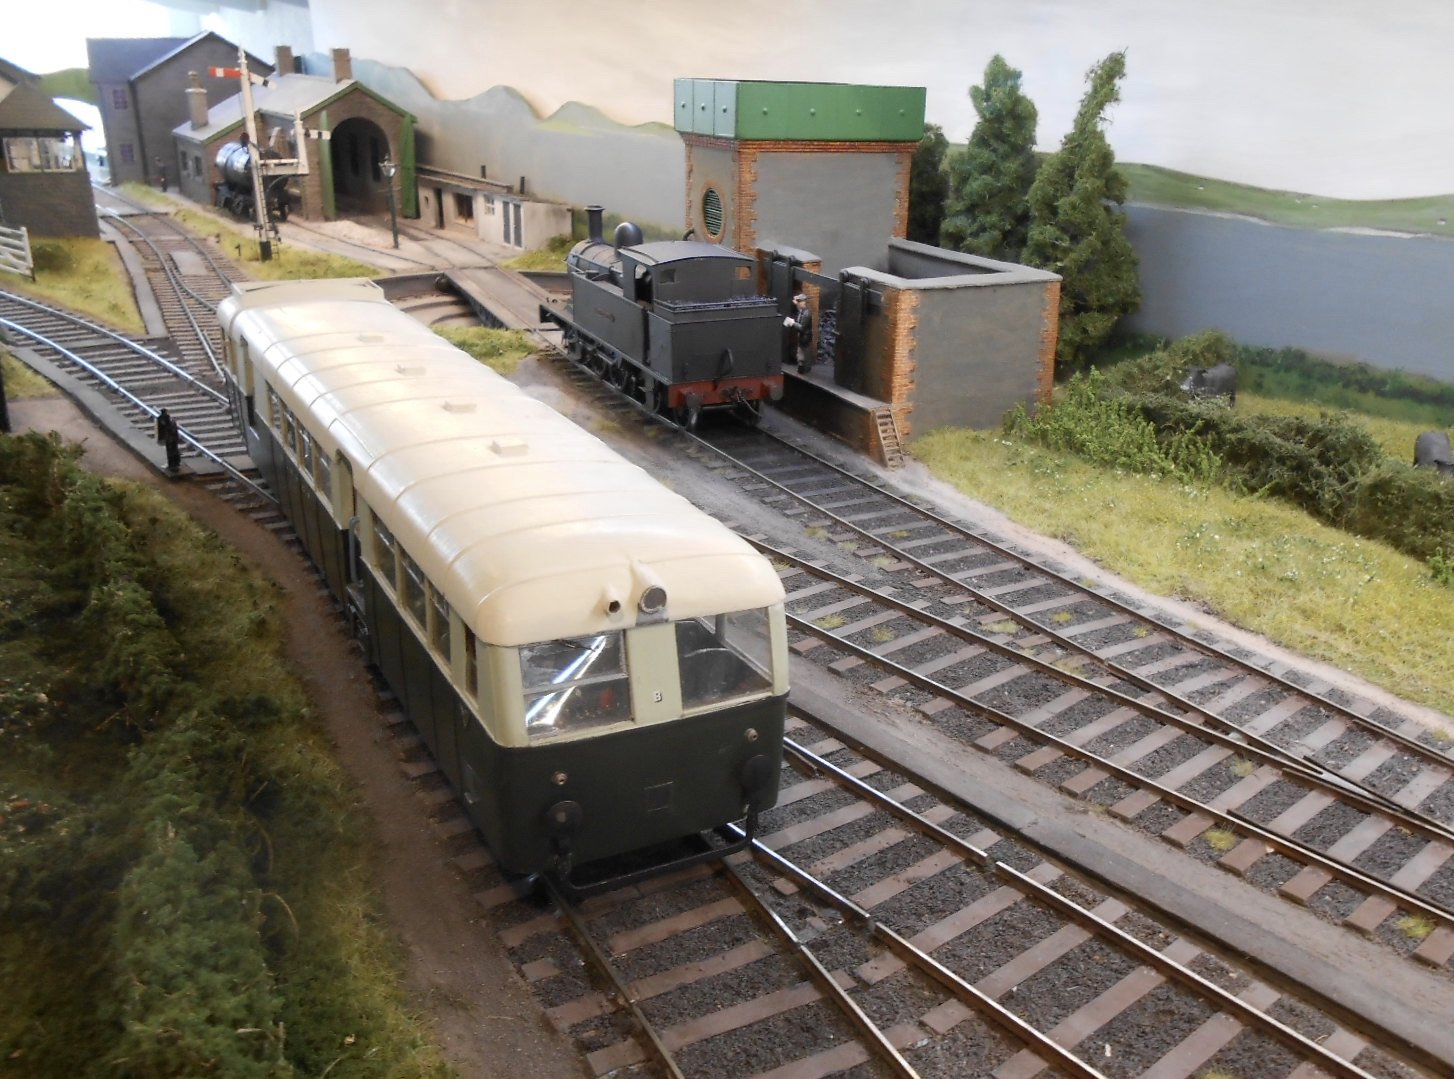
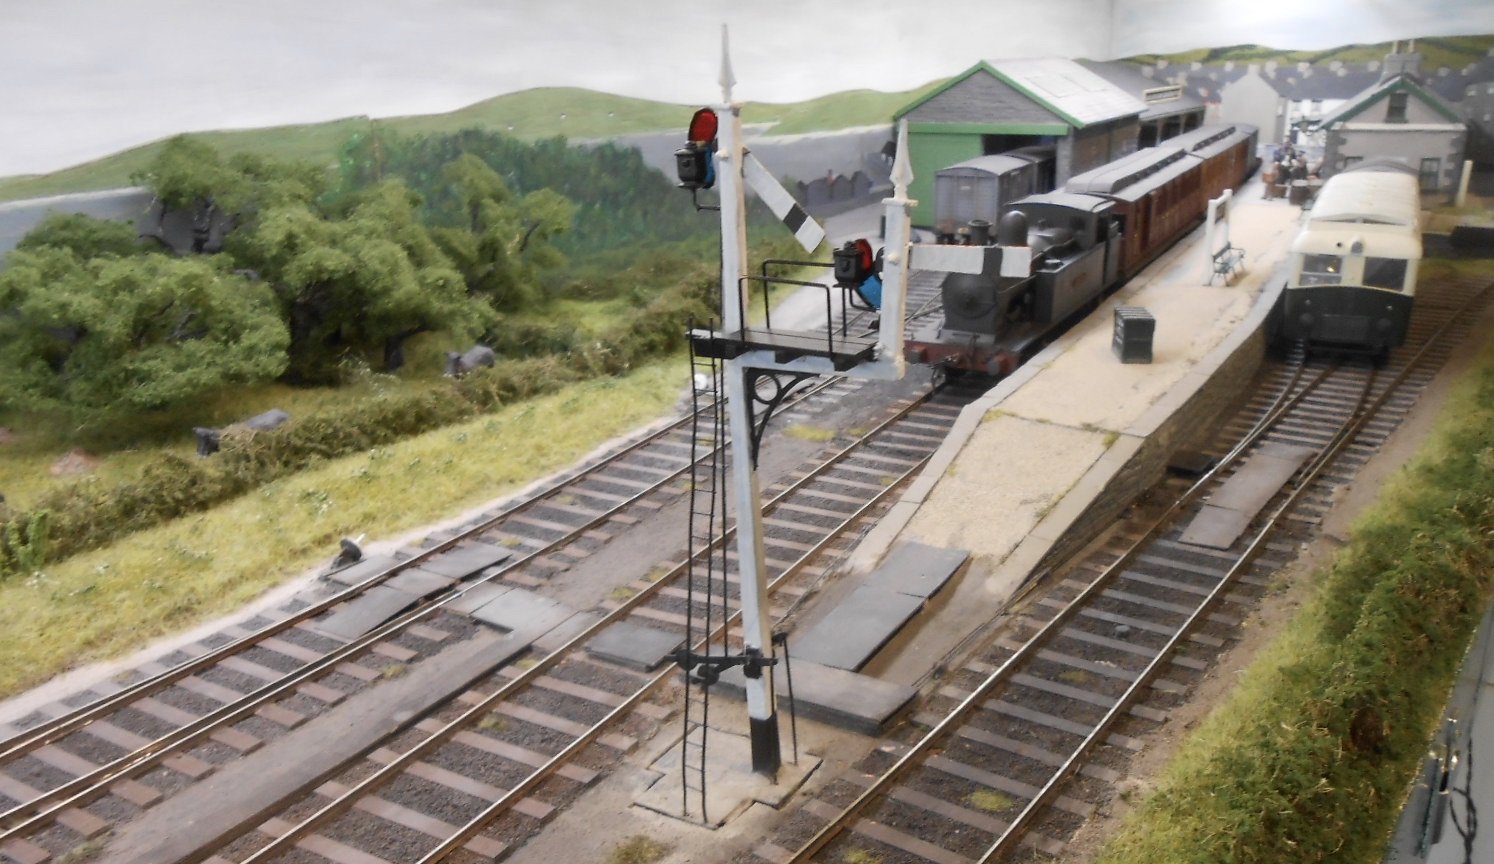
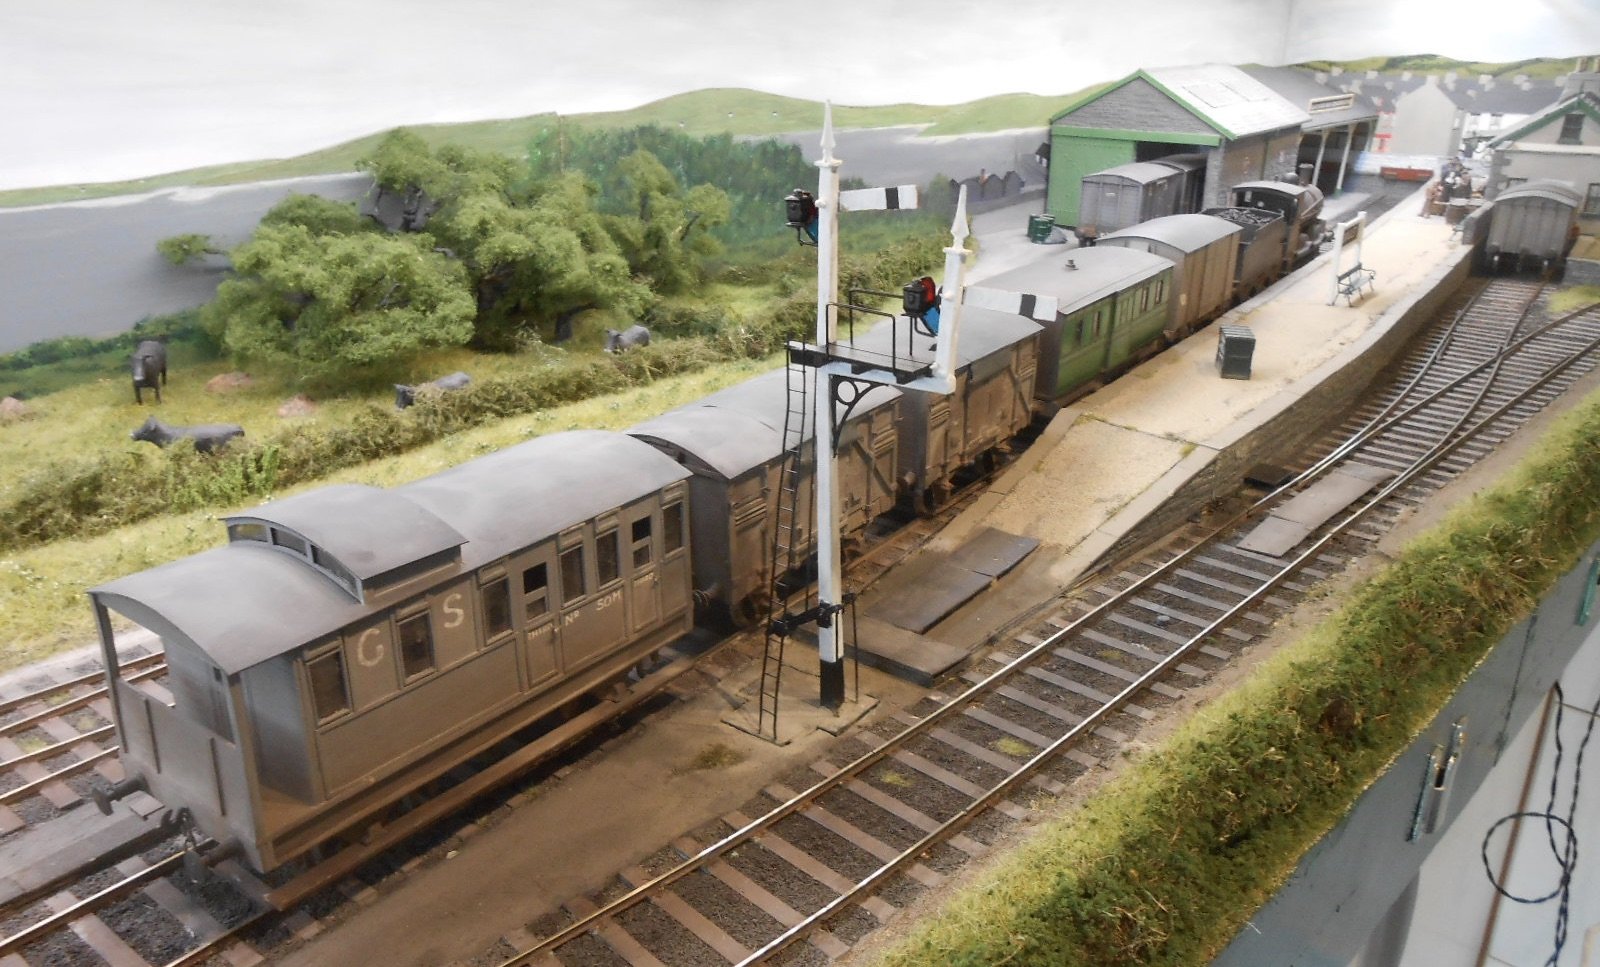
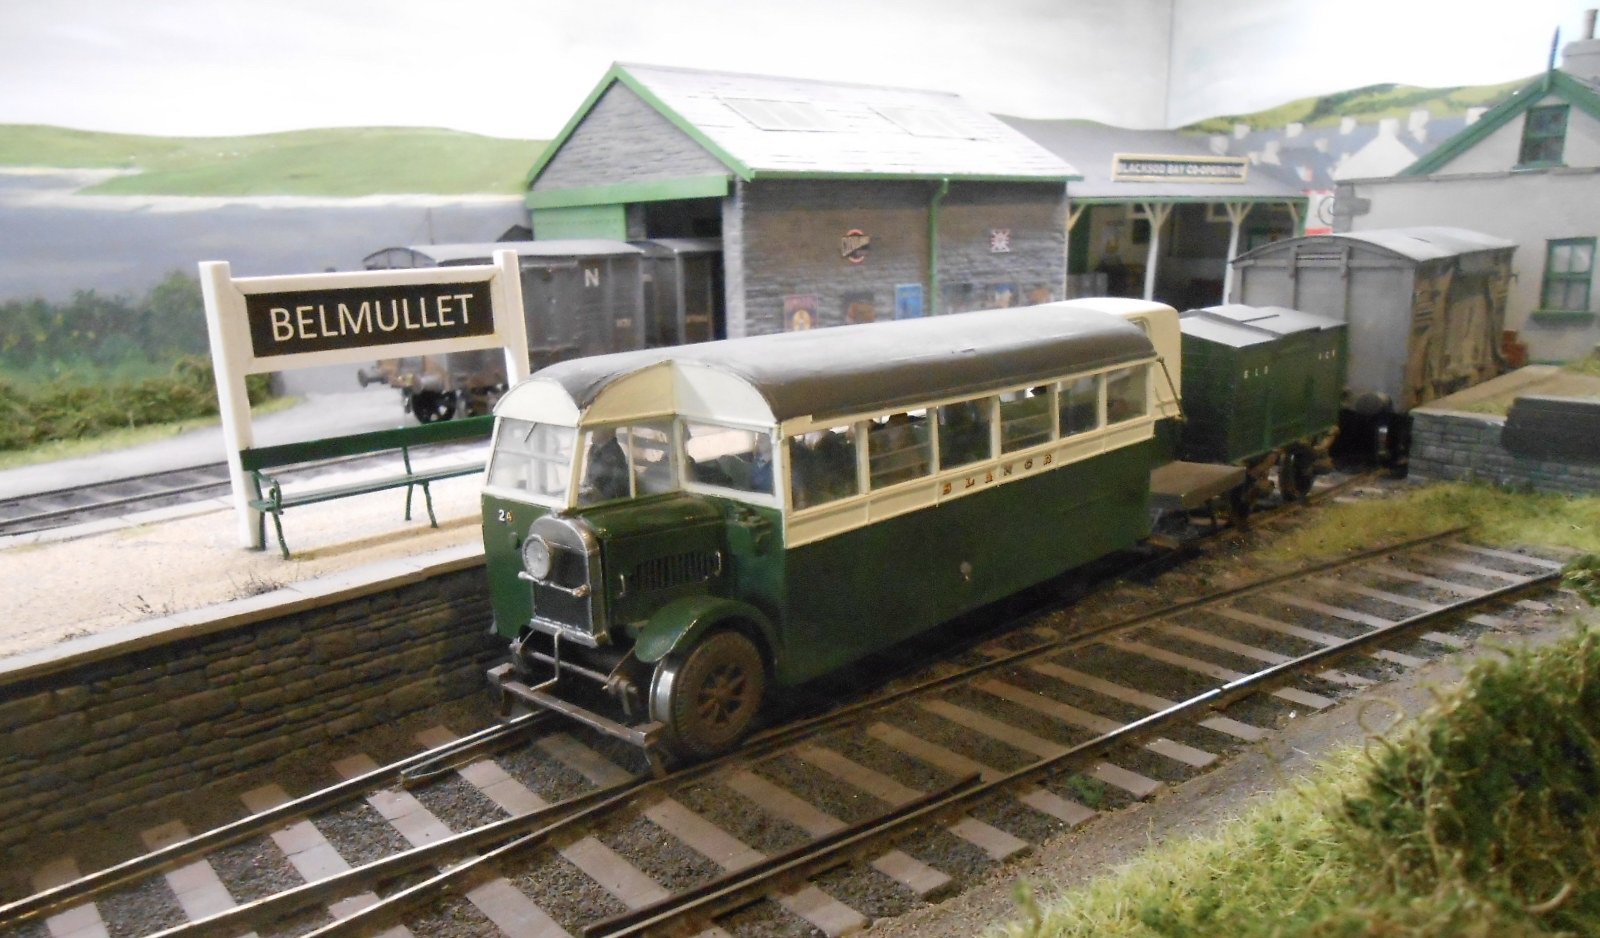
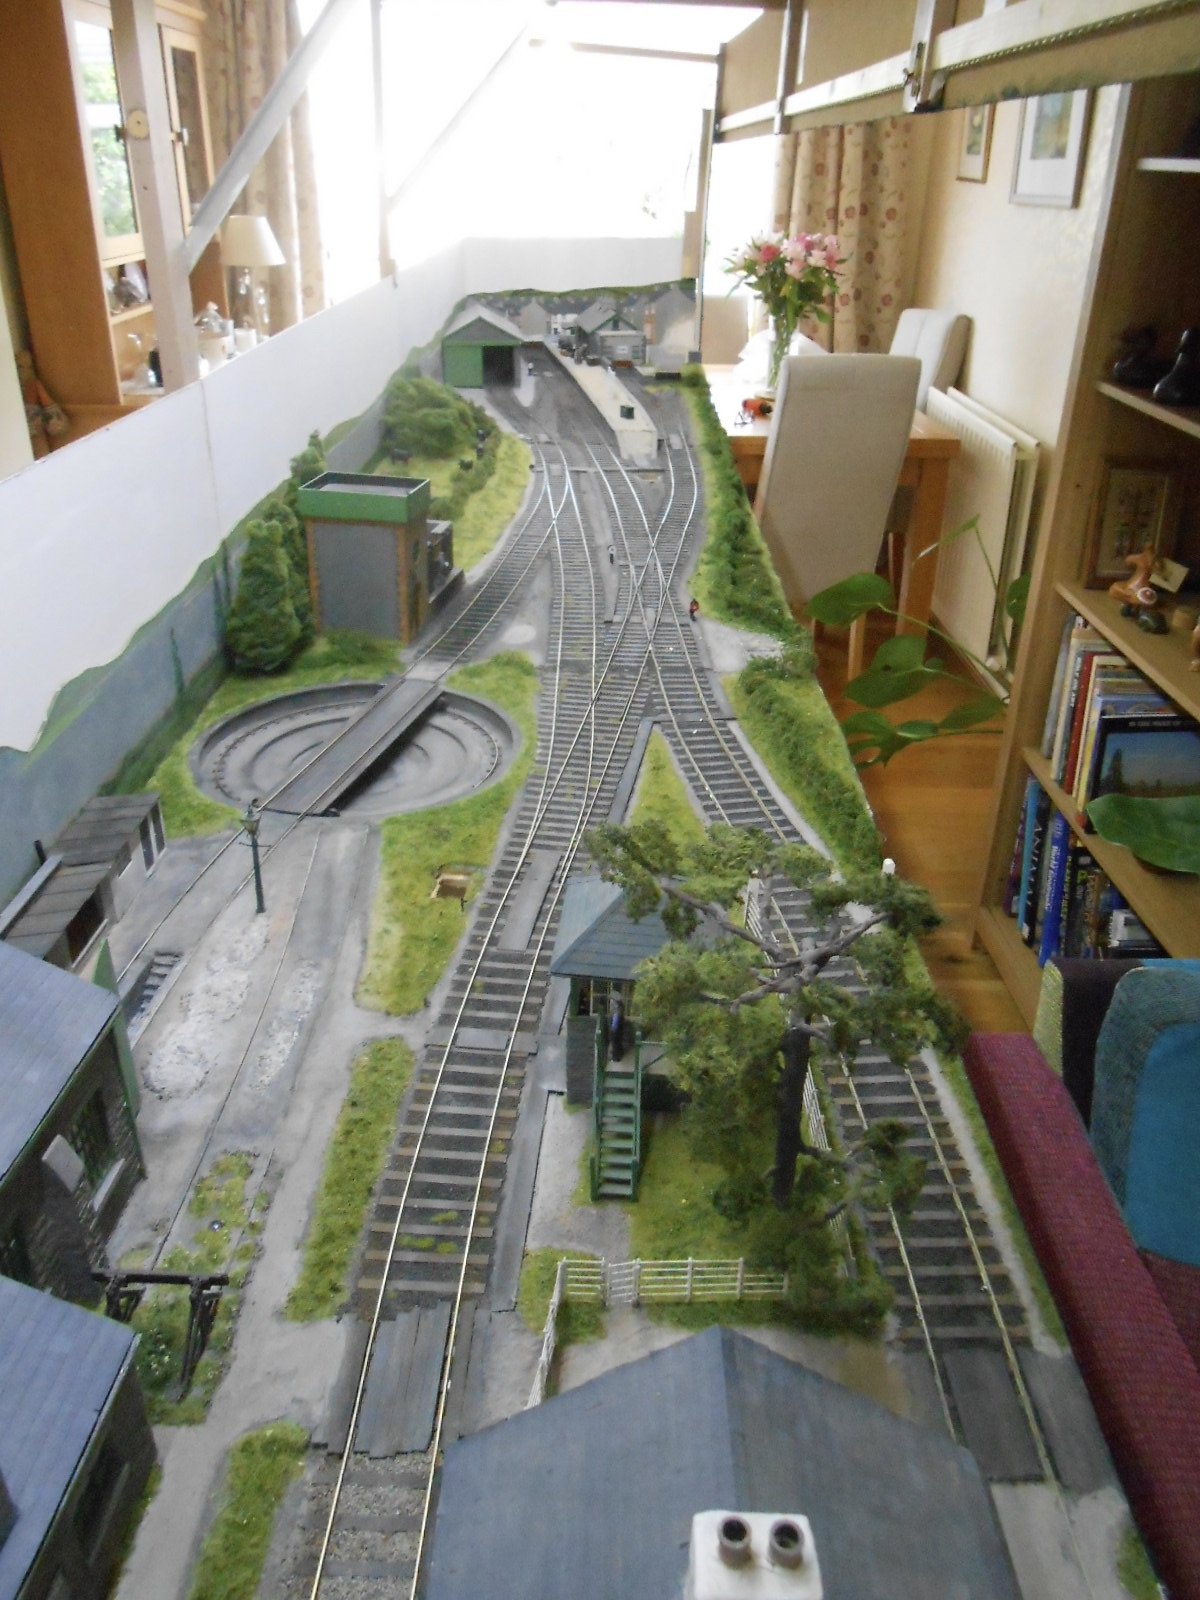
Rehearsals After so much time working with my early 1900s stock, it has been nice to get out the 1950s stuff from the original Arigna Town layout, as part of the first phase of operational practice for Uckfield. So, we have mainly SLNCR stock, alongside 1950s CIE. Most of this has been pretty well 'run in' over 30+ shows, so it has been a pleasure to see how well the locos operate again. When developing an operating sequence to use at exhibitions, I like to keep things fairly simple - so complex shunting moves are [mostly] out and instead we have a steady flow of trains in & out of the station, occasionally aiming to have two on scene at once. I've standardised on Dingham auto couplings, and though these work pretty well, things are complicated by the fact that the fiddle yard is a turntable, while locos also get turned in the station. Hence the Dingham method of having a hook on one vehicle, latching onto a loop on its neighbour doesn't always work and it is very easy to have two loops or two hooks face to face - not good at all... Ultimately, passenger trains work well enough, with a hook on the loco and loops on each of the end vehicles, so electro magnets can be used as uncouplers. The same applies to rakes of freight vehicles - an incoming goods has hooks on each end of the brake van and a rake of wagons can be easily swapped over [three links in between each rake]. Where it all falls down is when you want to shunt individual wagons off a train, in this case the 'mixed fish', where I want the J19 to be able to move the brake van from one end of the train to the other, dropping off a van in the bay and picking up a new one. Despite many furrowed brows [and even more rude words], I have yet to come up with a sequence that only uses magnetic uncouplers, so for this train three links and the shaky hand still rule. Perhaps I'll set a challenge, to see if anyone out there can come up with a solutions. In the meantime, here are a dozen or so photos of what will be on show at Uckfield in a month's time. Trains are as follows: SLNCR goods, with 0-6-4T Hazlewood swapping a rake of wagons in the good shed CIE passenger: G2 2-4-0, two 6w coaches and two fitted vans. This is just an out and back, but given a bit of variety by the railbus/railcar arriving at the same time Turf & tarps. Two trains: first the G class Deutz shunter propels tarpaulin wagons from the distillery, which are then exchanged with ancient 6w coaches converted to carry turf, brought in by the J26 0-6-0T SLNCR passenger: Sir Henry & two bogie coaches, meeting up the the railcar or railbus, as above Mixed Fish: the J19 and various vans, along with an old 'glasshouse' brake van swap a wagon with one in the bay. Hopefully you can see what is going on below.
- 179 replies
-
- 15
-
-

-

-
Given the shortage of HGV drivers, you'd think rail freight to transport hubs would be the way to go, especially when aligned to the climate crisis. Smaller vans (though current local delivery vehicles seem to get ever larger) are better suited to battery power than HGVs, while you'd think there is little to stop freight locos towing multiple battery wagons to give themselves the required range and power.
-
Bit of negotiation always needed beforehand and to be fair, this only happens as a first time set up. It is just too much of a pain to lug everything out of the workshop.
-
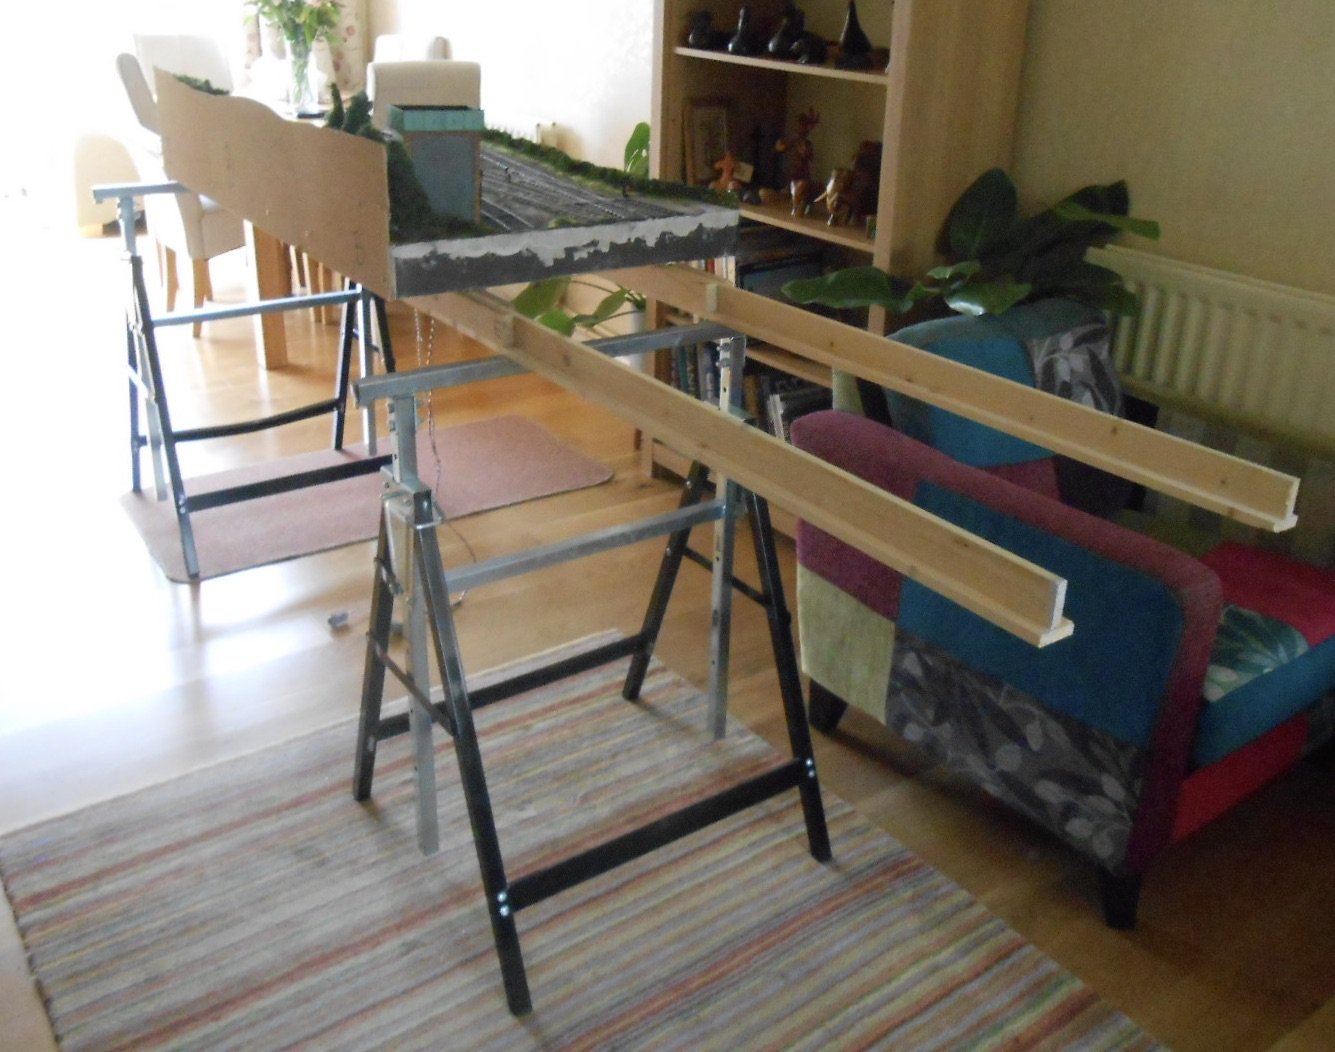
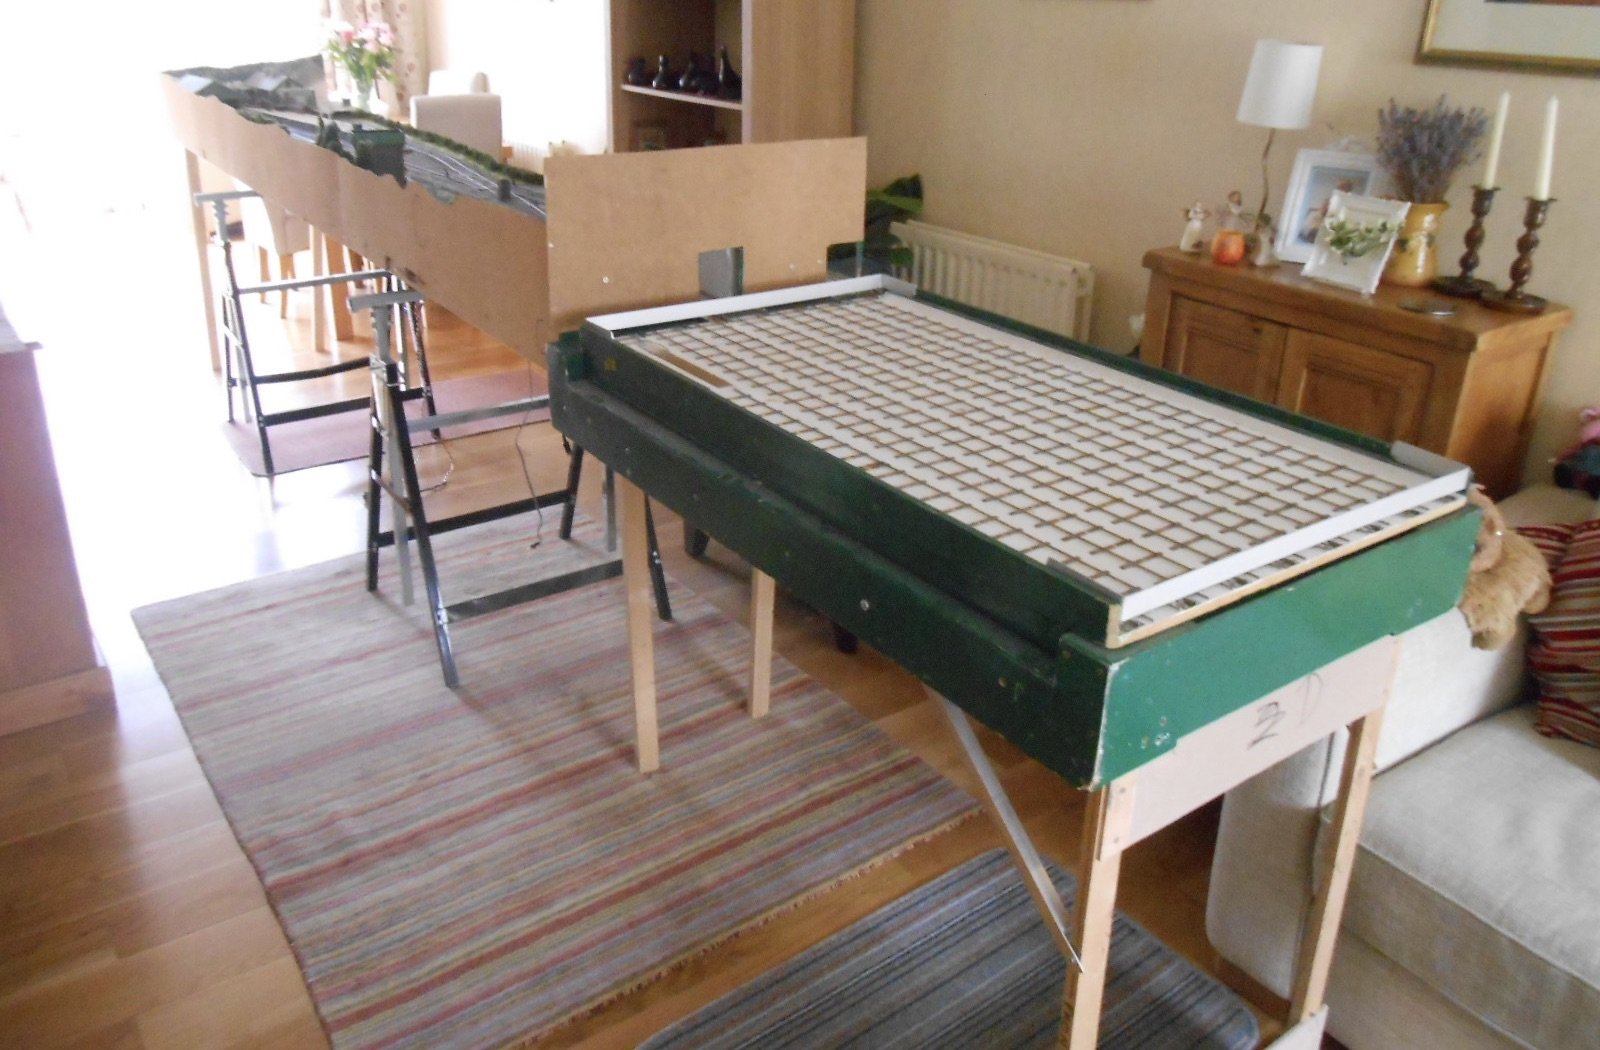
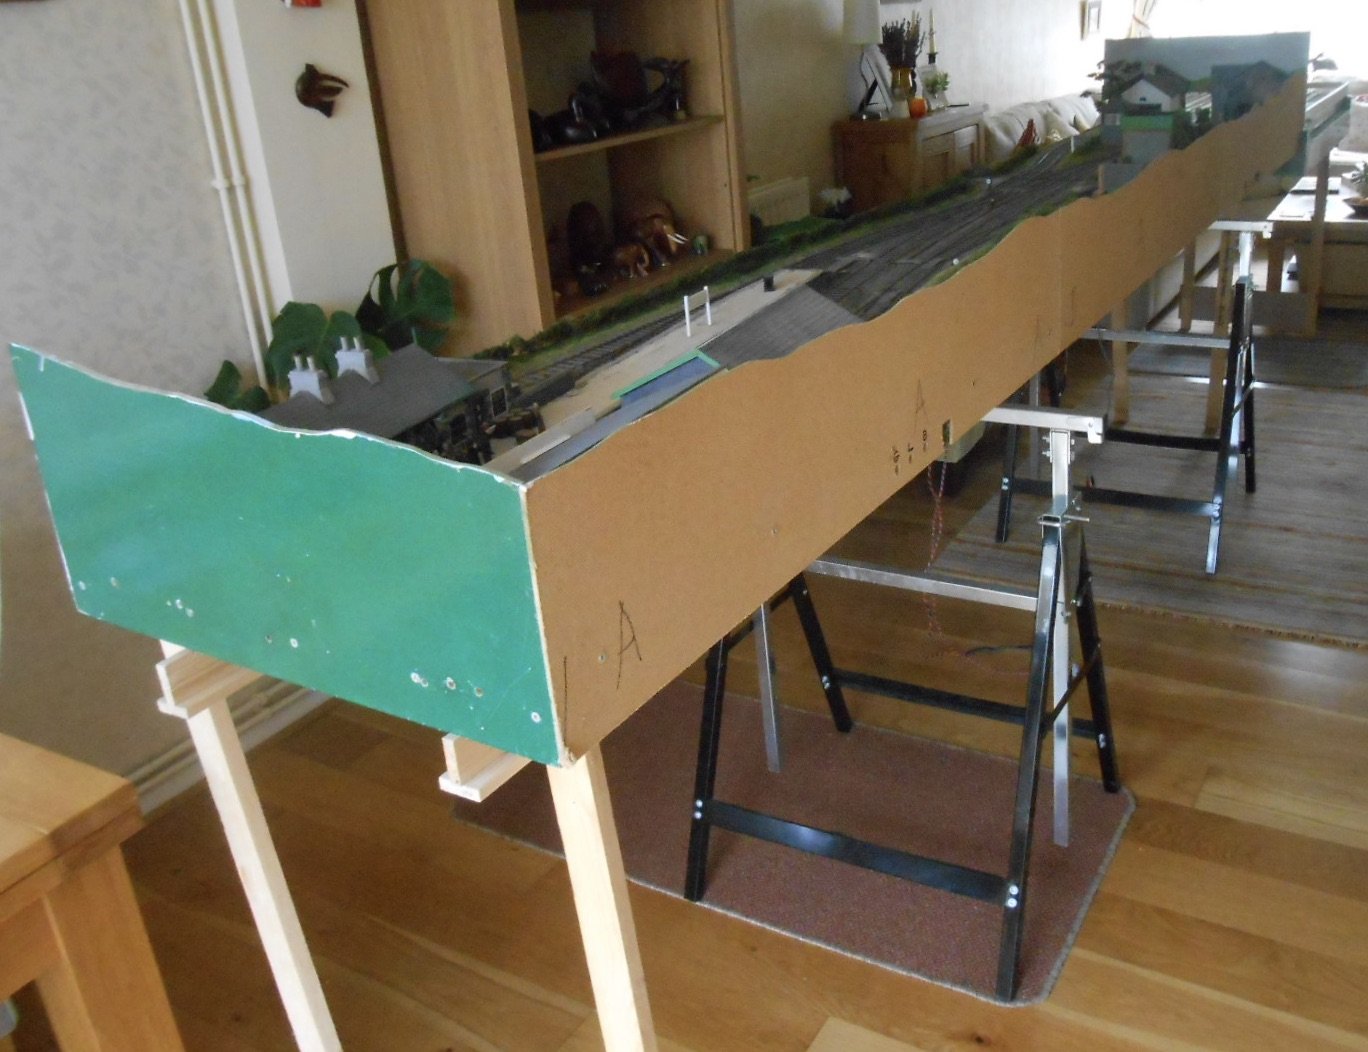
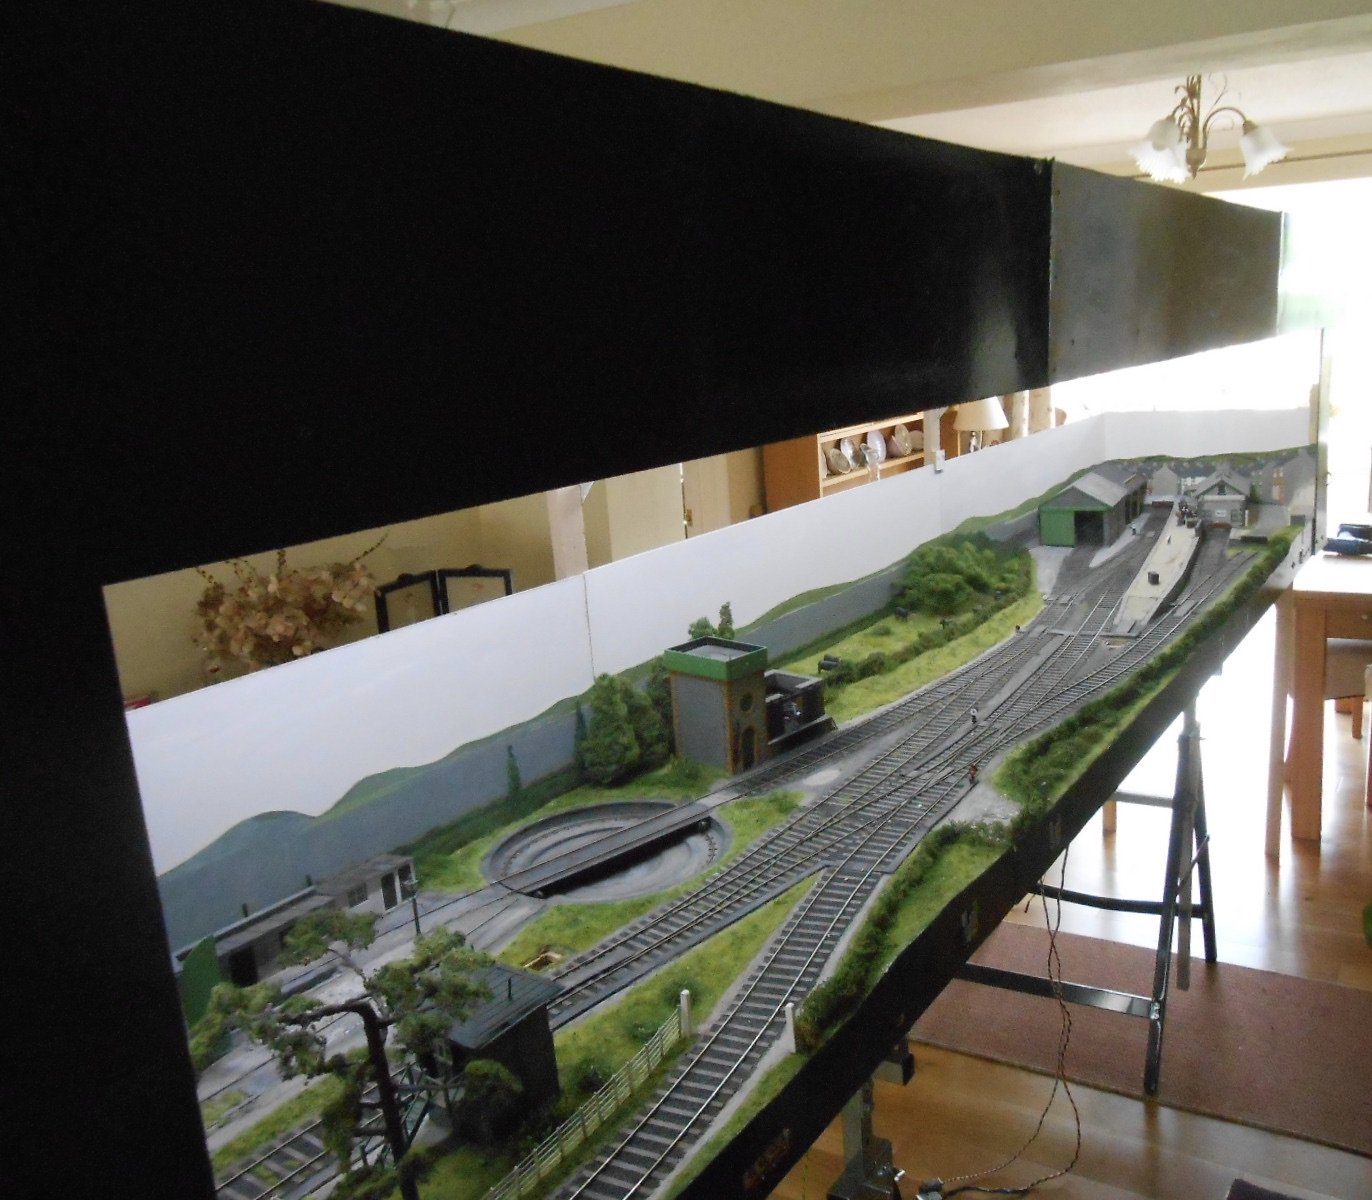
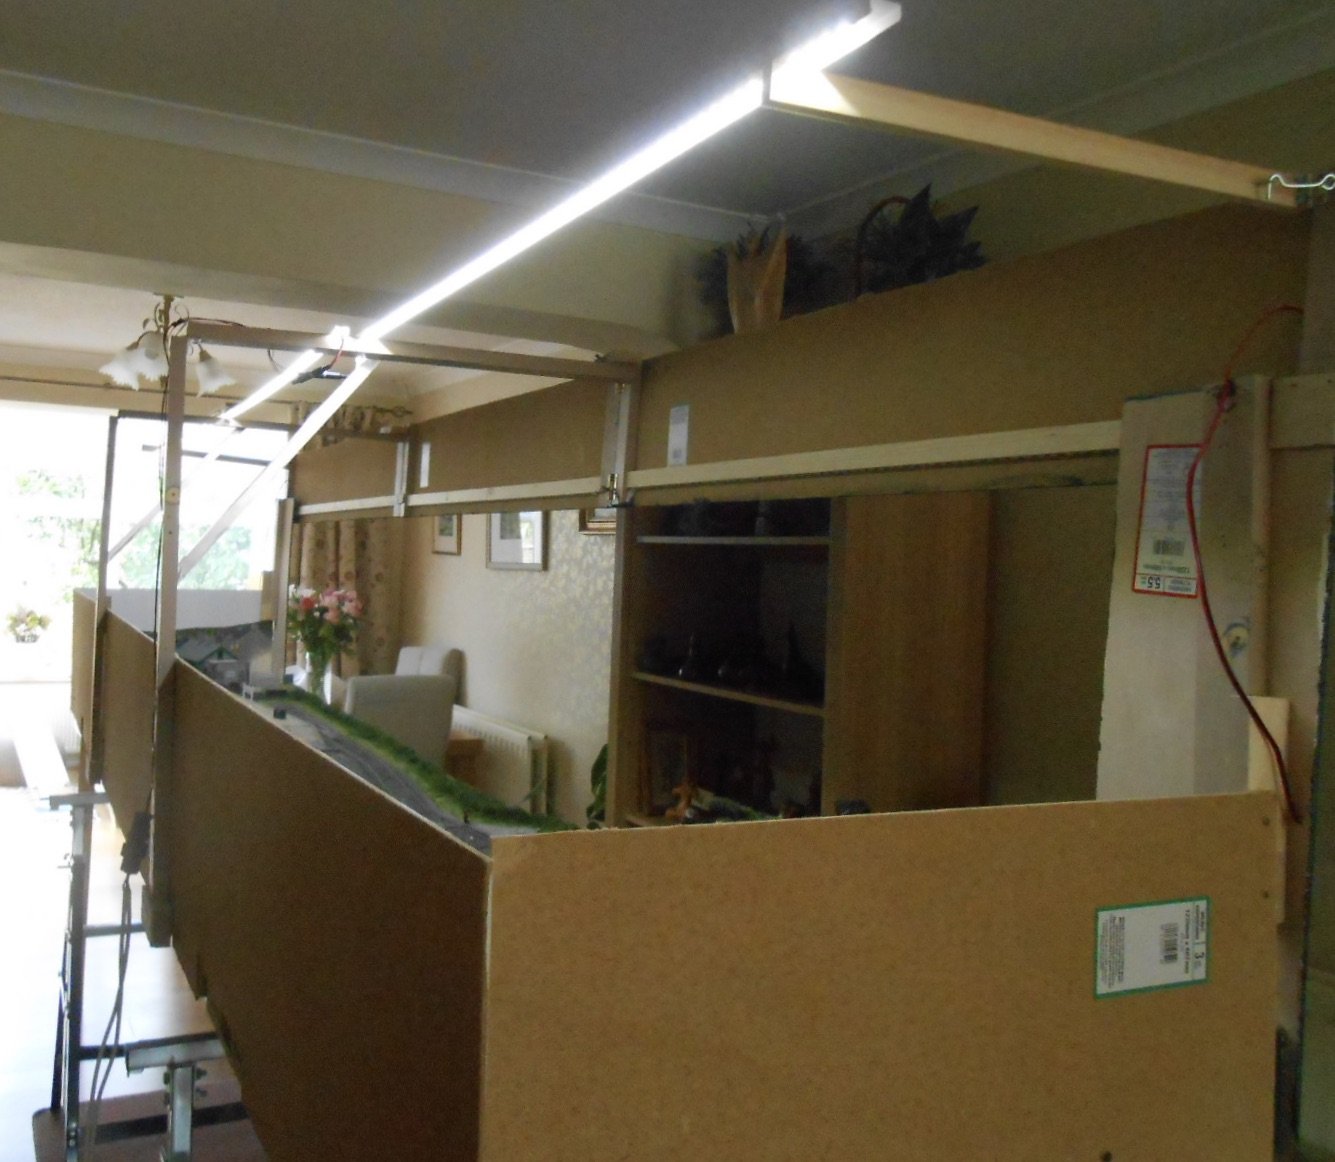
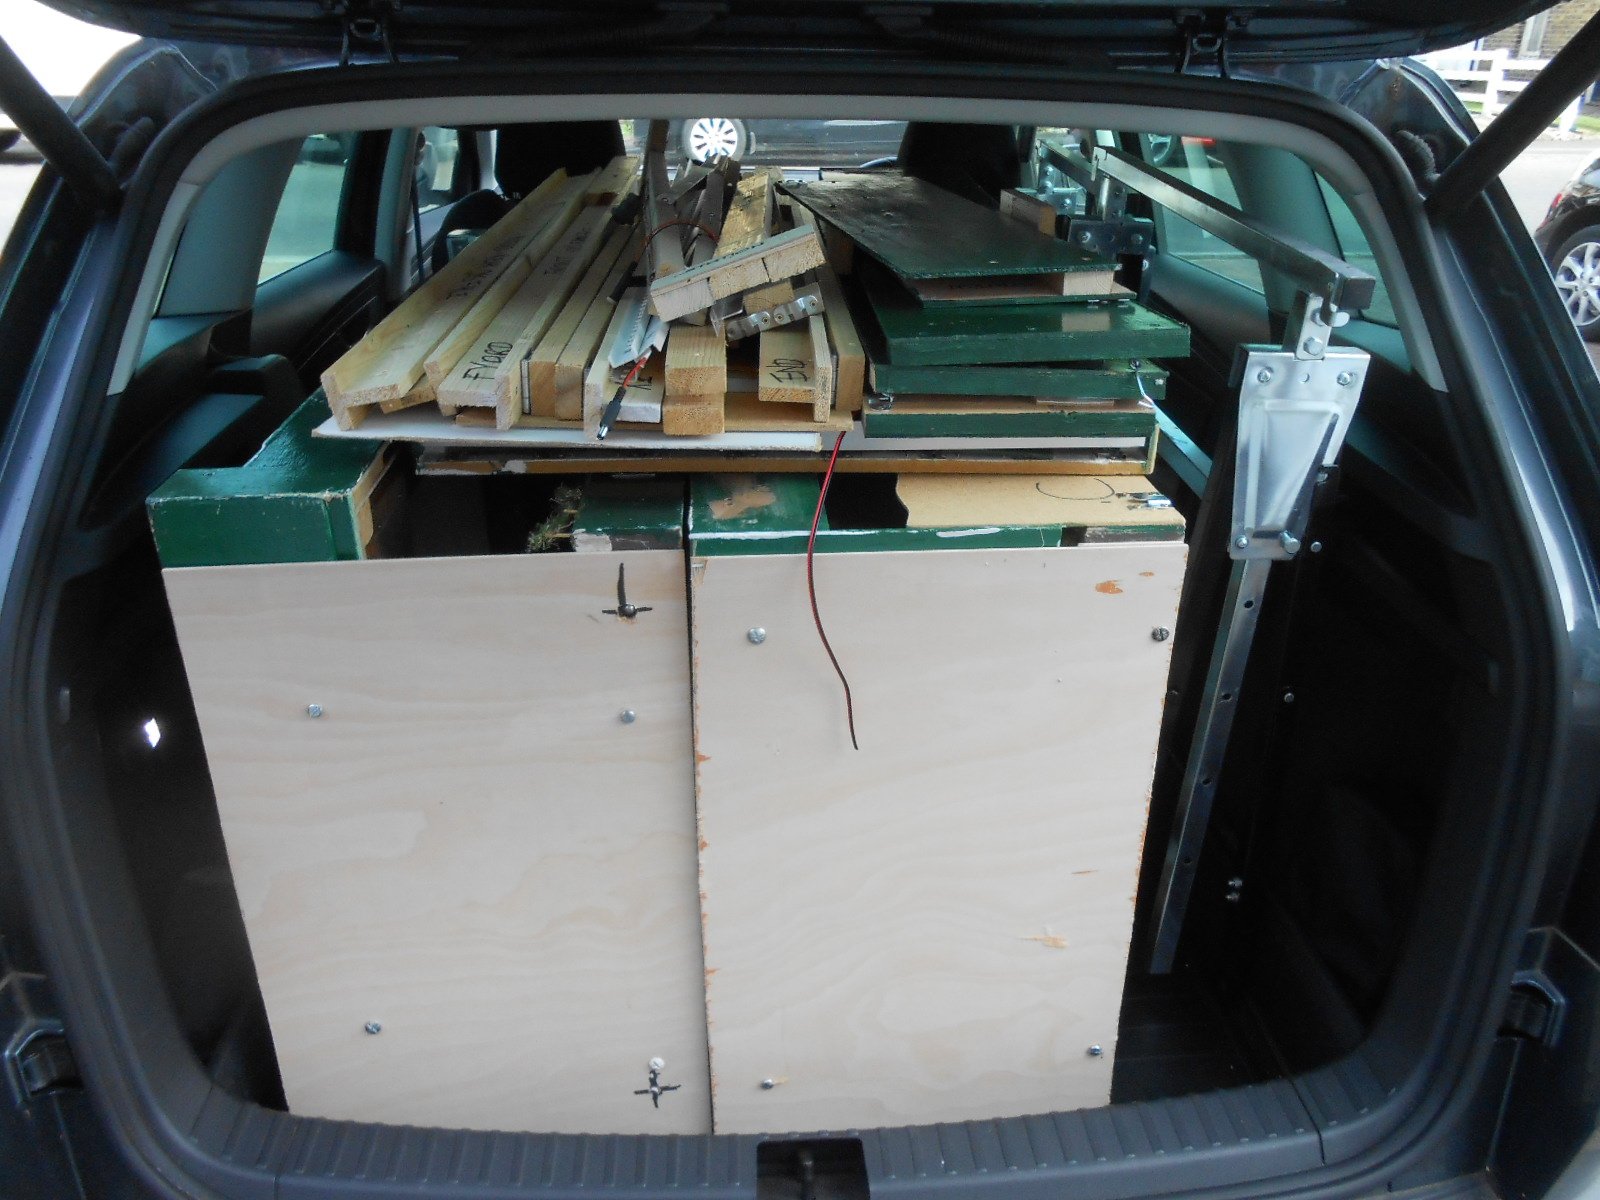
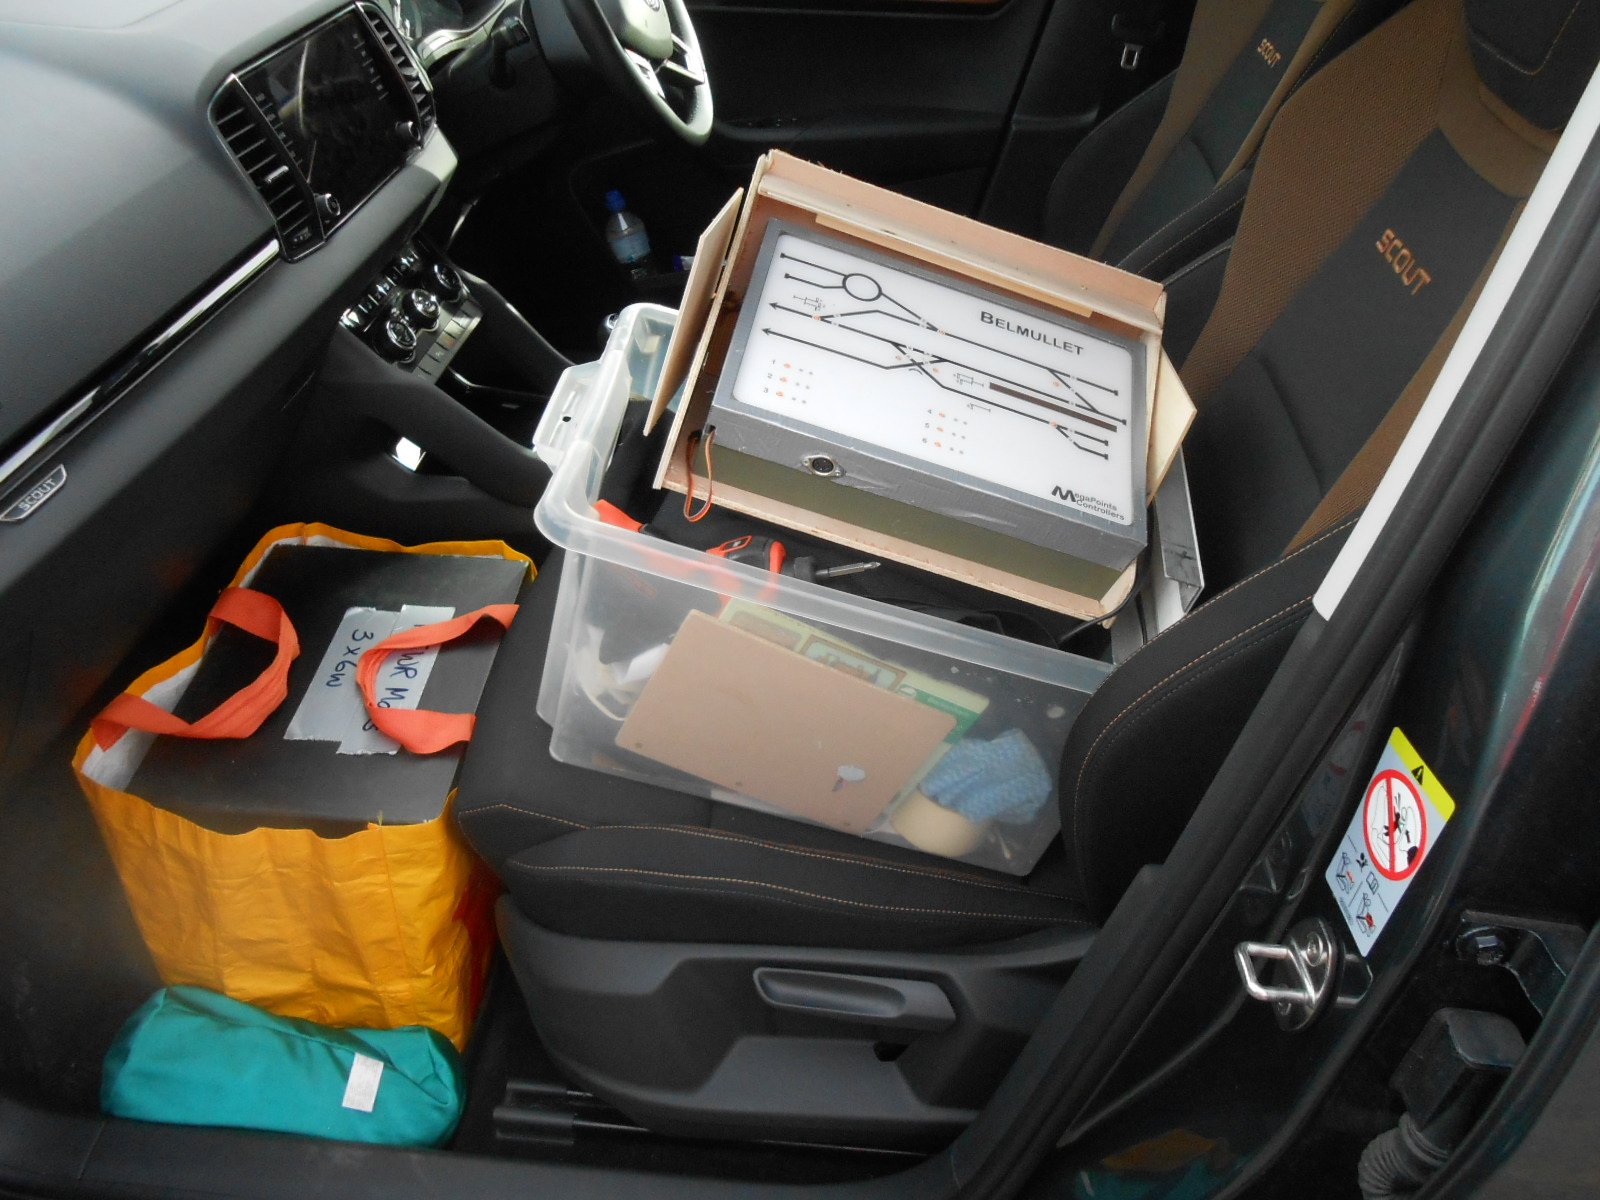
Presentation & Transport Taking a layout to exhibitions is a curious form of madness. You spend hundreds of hours making the thing, only to separate it into parts, load it in a car or van & then bump it across the country to the venue, before [only a few hours later] doing the whole thing again to get home. The last few weeks have been working towards all this, so have included a few photos of what I do, mostly based on many years hard experience and watching what other do too. I think my ideal layout would either be an inflatable one, or maybe like a pop up book - quick to set up and take down, so you are on your way home almost as the last punter departs! The reality is that getting set up inside an hour and being on the way home in half of that is about as good as it gets. Larger layouts can easily take two or three times that, even with a big crew. Setting up Belmullet is as follows: It starts with two adjustable steel decorator's trestles on to which are placed two long [T section] beams. Being over 3.5m long, these break down into shorter sections for transport. The four baseboards are crated up in pairs, using 6mm plywood rectangles. Once separated, the middle scenic board goes on the beams first, followed by the two outer ones. Alignment is by pattern maker's dowels and M6 bolts and wing nuts hold everything together. The fiddle yard board, which has its own fold down legs, is then bolted on. After, the five 'skyboards' are bolted to the back and ends of the scenic sections Lighting comes next. There are two folding brackets covering the two scenic baseboard joints, with a plywood panel on the front at each end. The former go on with quick mount plates, the later are bolted. Three pelmets, with integral LED light strip are fitted with QM plates. then a second strip of LEDs is added above the centre line of the layout. The drapes go on next, to hide the underside of the layout, then three display boards, with info about the layout and models are added to the front. Underneath, all the electrical connections need to be plugged together and likewise the control panel and loco controller All this, along with four large shopping bags holding the stock boxes, plus what I call the 'sundries crate' [full of odds and ends, plus various transformers] and the all important tool box, has to fit in the car. In my case, this is a Skoda Karoq which, once the rear seats are removed, assumes van like proportions. However, as the last few photos show, space it tight!
- 179 replies
-
- 16
-
-
-
-
Fascinating. More please!
-
Seeing these on Patrick's layout got me wondering. When were they introduced in Ireland? Reason being that Parkside do a 7mm scale version and I happen to have one. If they appeared by 1957, I might be able to justify one on Belmullet and this could add another 'transferable' wagon kit, alongside the Slater's tank wagon. Any later than that and will have to wait until my early 1900s stock building become 1960s and that certainly ain't happening any time soon!
-
Make my guttering from sheet plasticard. Use 80thou in 7mm scale, so 40 would be ok in 4. Cut a strip wide enough to just project beyond the roof tiles when the other edge is pressed against the wall. Next, round off the outside edge to look like the guttering. Where the inside edge of the gutter can be seen, cut this to size and round off, but only for a couple of cm. The rest cannot be seen, plus the inside edge of the strip glues nicely to the wall of the building. Downpipes are made from round or square section strip, with joints made by adding thin strips of masking tape, while the fixings on the walls are just more small pieces of plastic strip. Once painted (black for the top of the guttering), such deceptions are very effective and don't take long to make. As for tools and materials, my go to is always Eileen's Emporium, who provide excellent on line service and better still at shows, where an A1 sheet of plasticard can be bought for the same price as A4 in your local shop. Slater's also have a good range of materials and their service is excellent too. For windows, York Model making are hard to beat, especially with the cost of microstrip being so high. It is almost as cheap to buy York Windows as it is to make them yourself in 7mm scale.
-
The Chatham Club's 7mm layout is a double track, two metre diameter circle, which we superelevated by using one millimetre shims and seems to work fine, even when we add the 5m straight section to make it an oval. No points mind, apart from the storage loop. Ignorance is bliss, methinks, having read Robert's excellent notes.
-
Splendid - and nice to see all the scenic section. Good job it is fairly small, otherwise would expect to read of a national shortage of scenic materials! Shows how a combination of artistic skill and careful observation really bring a scene to life.
-
Not in 7mm scale.
-
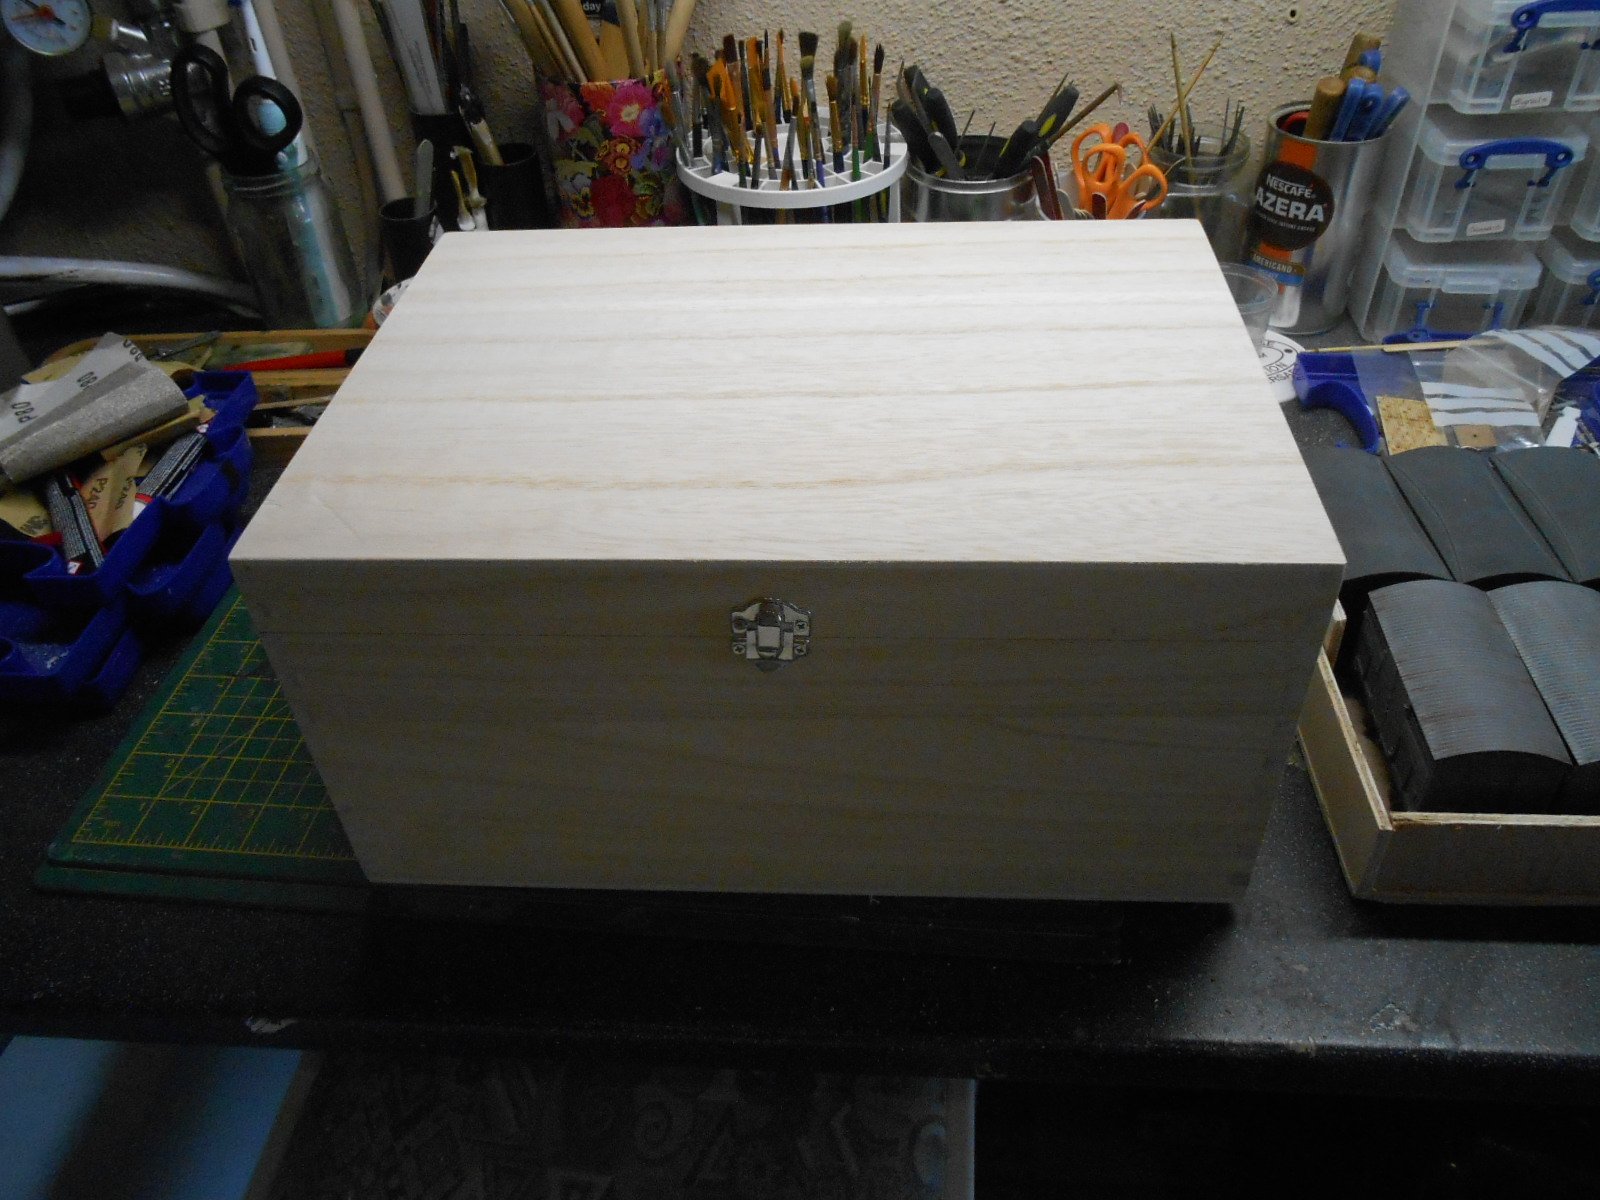
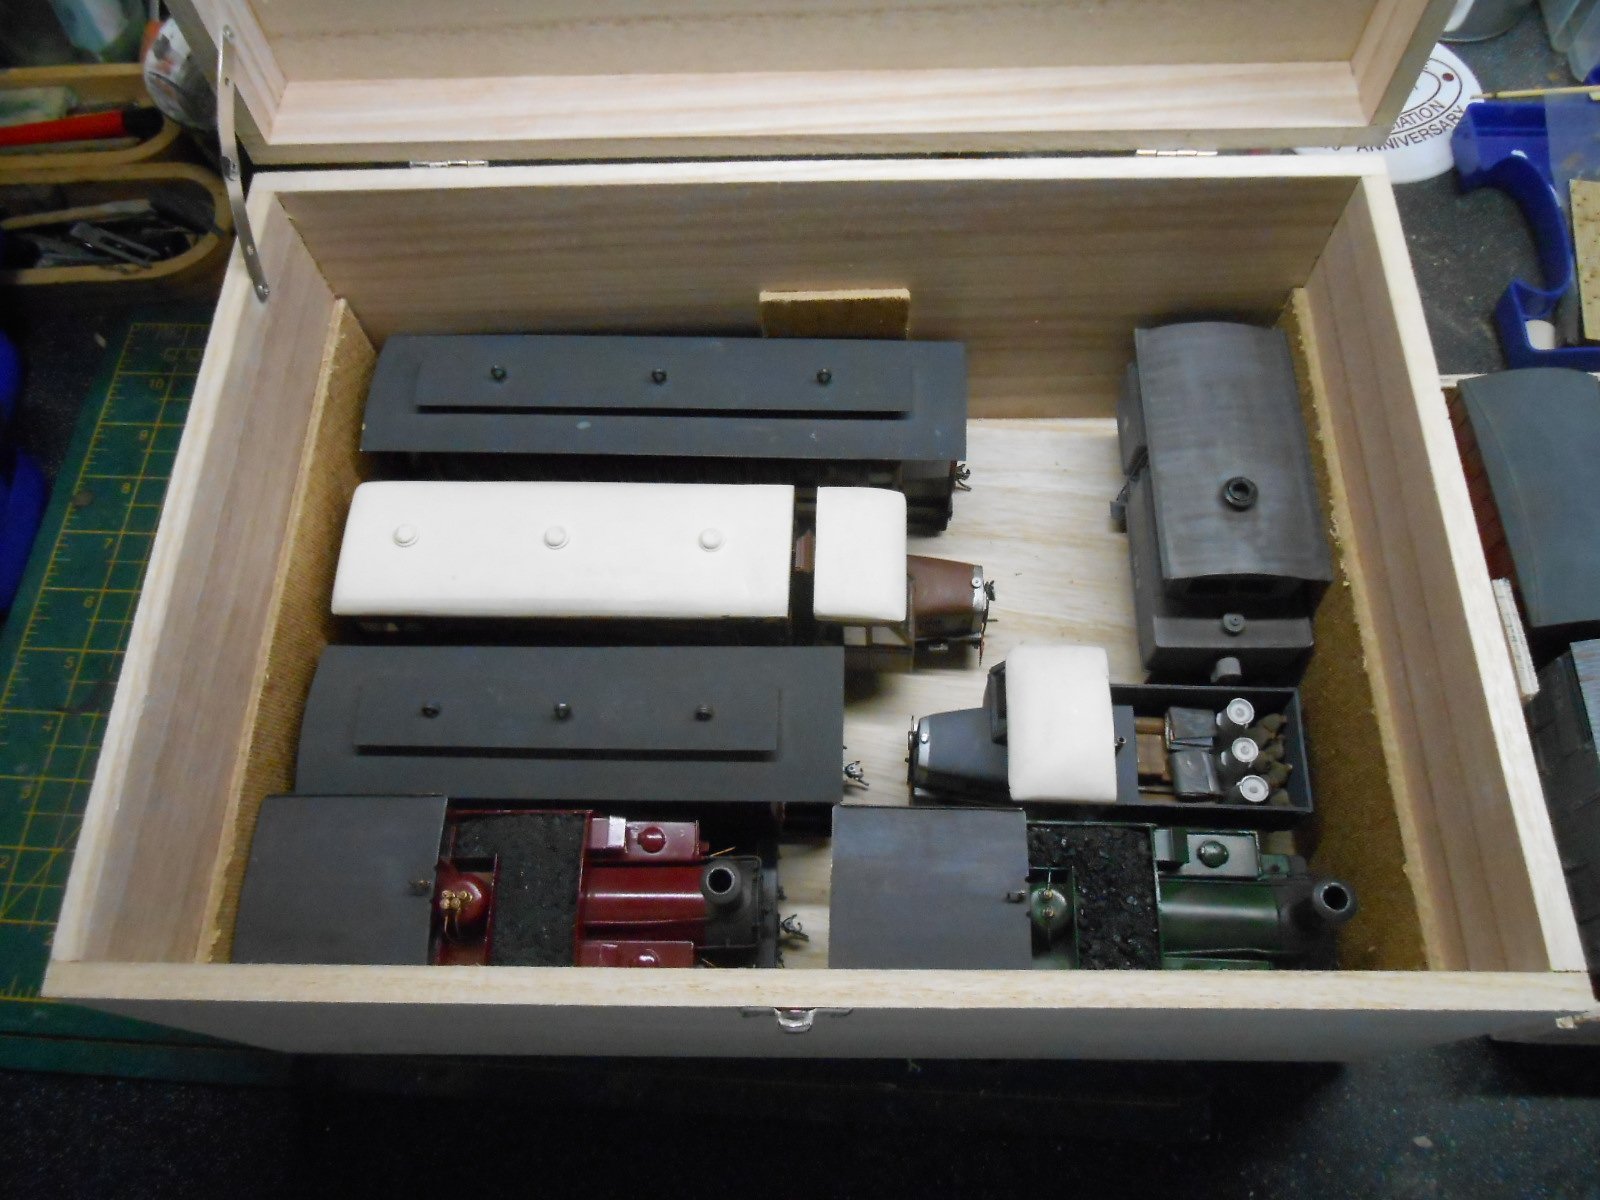
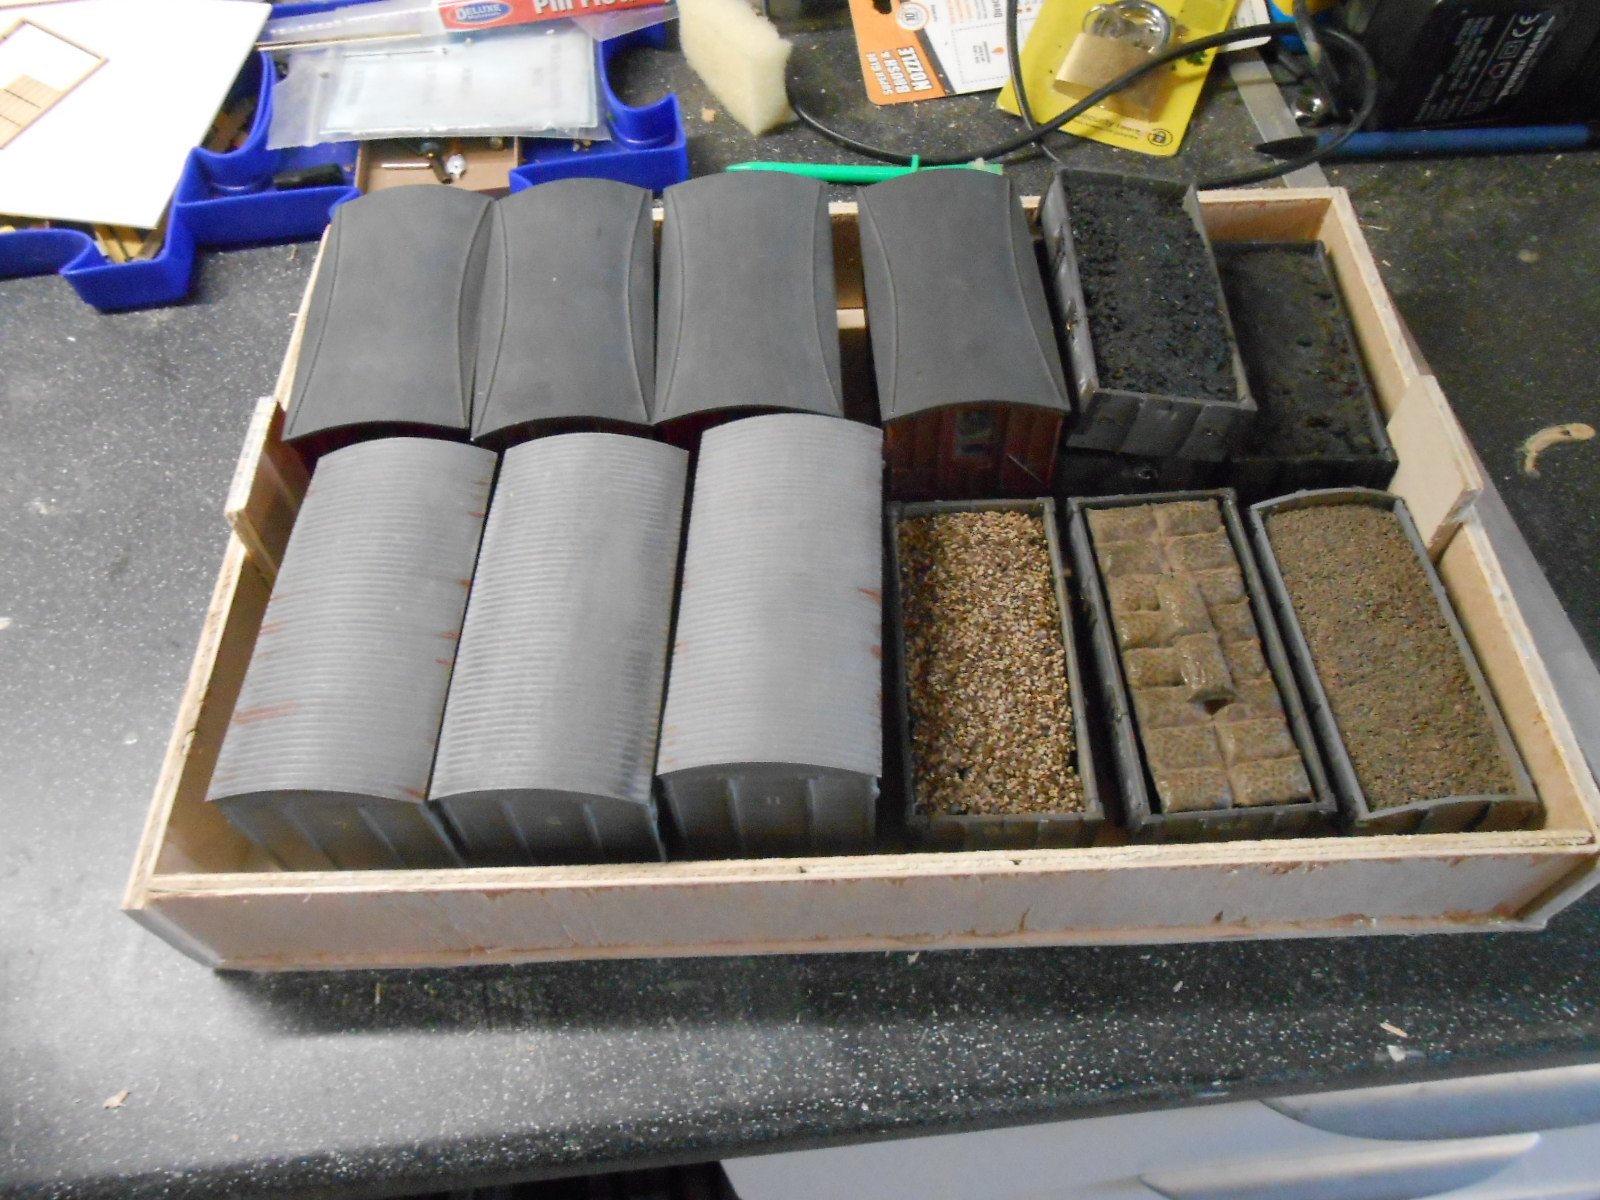
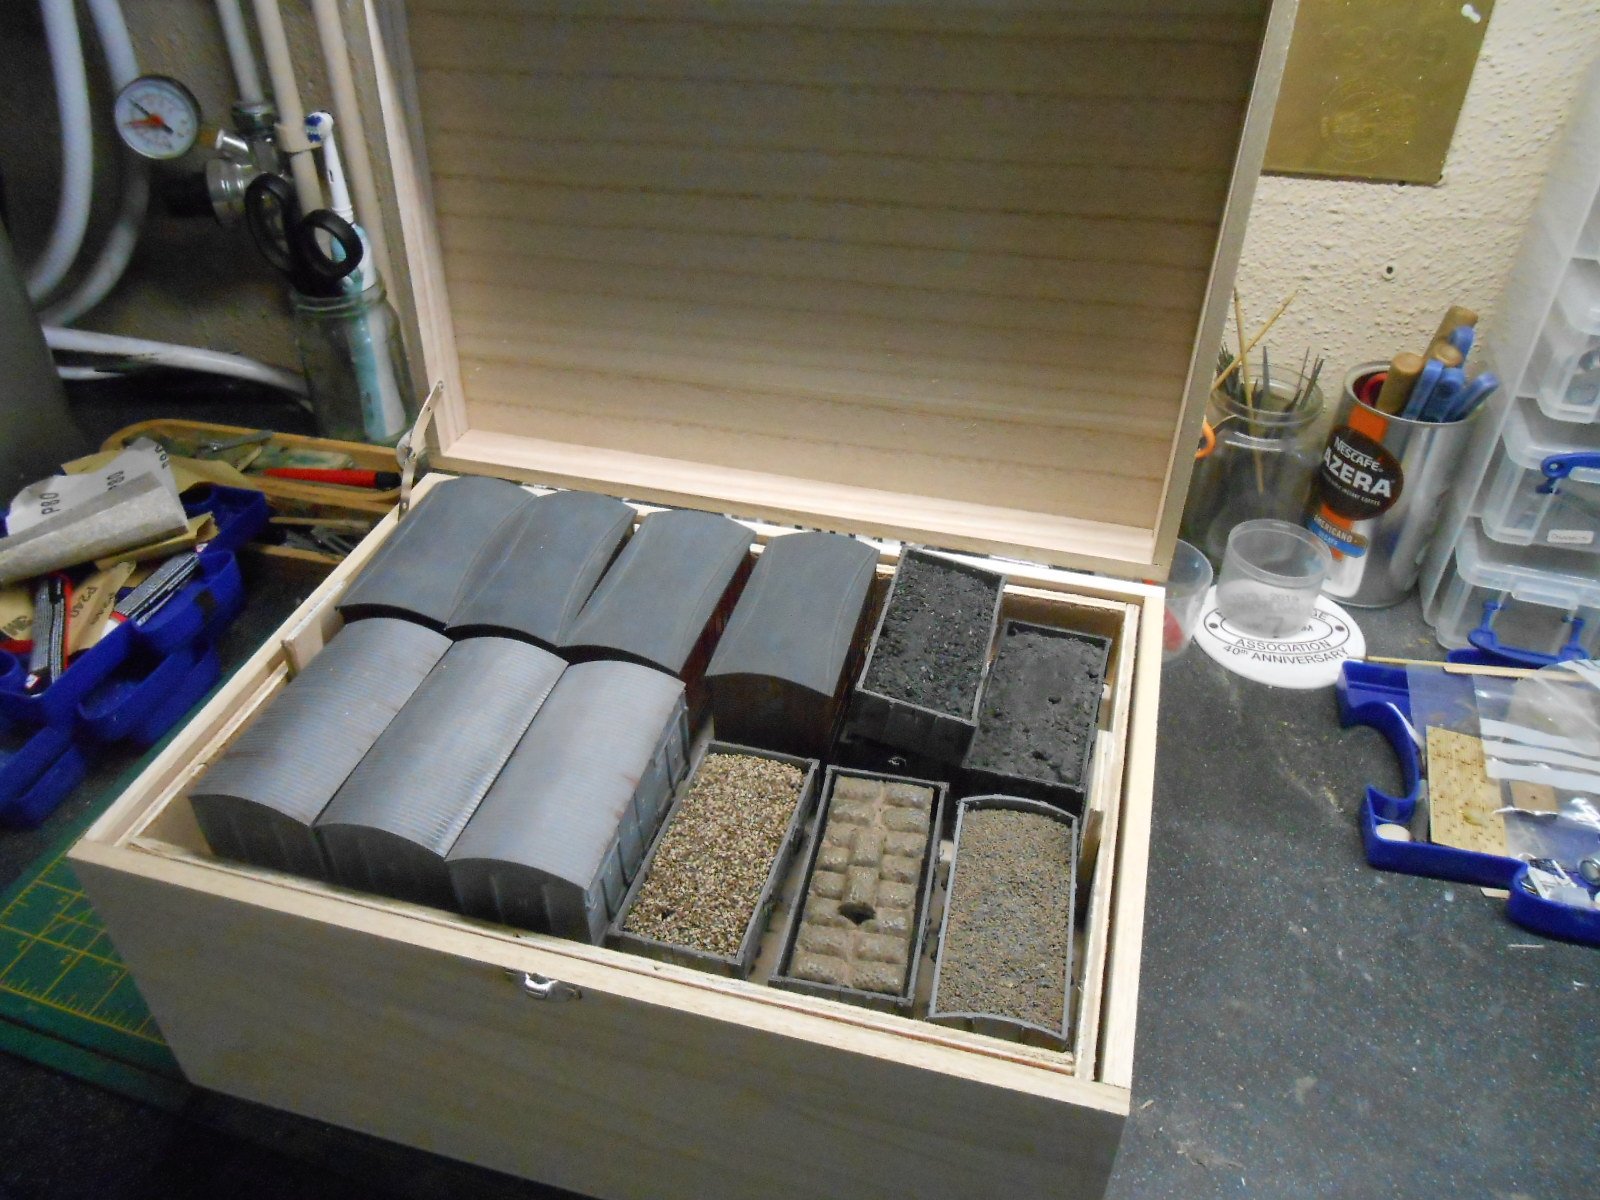
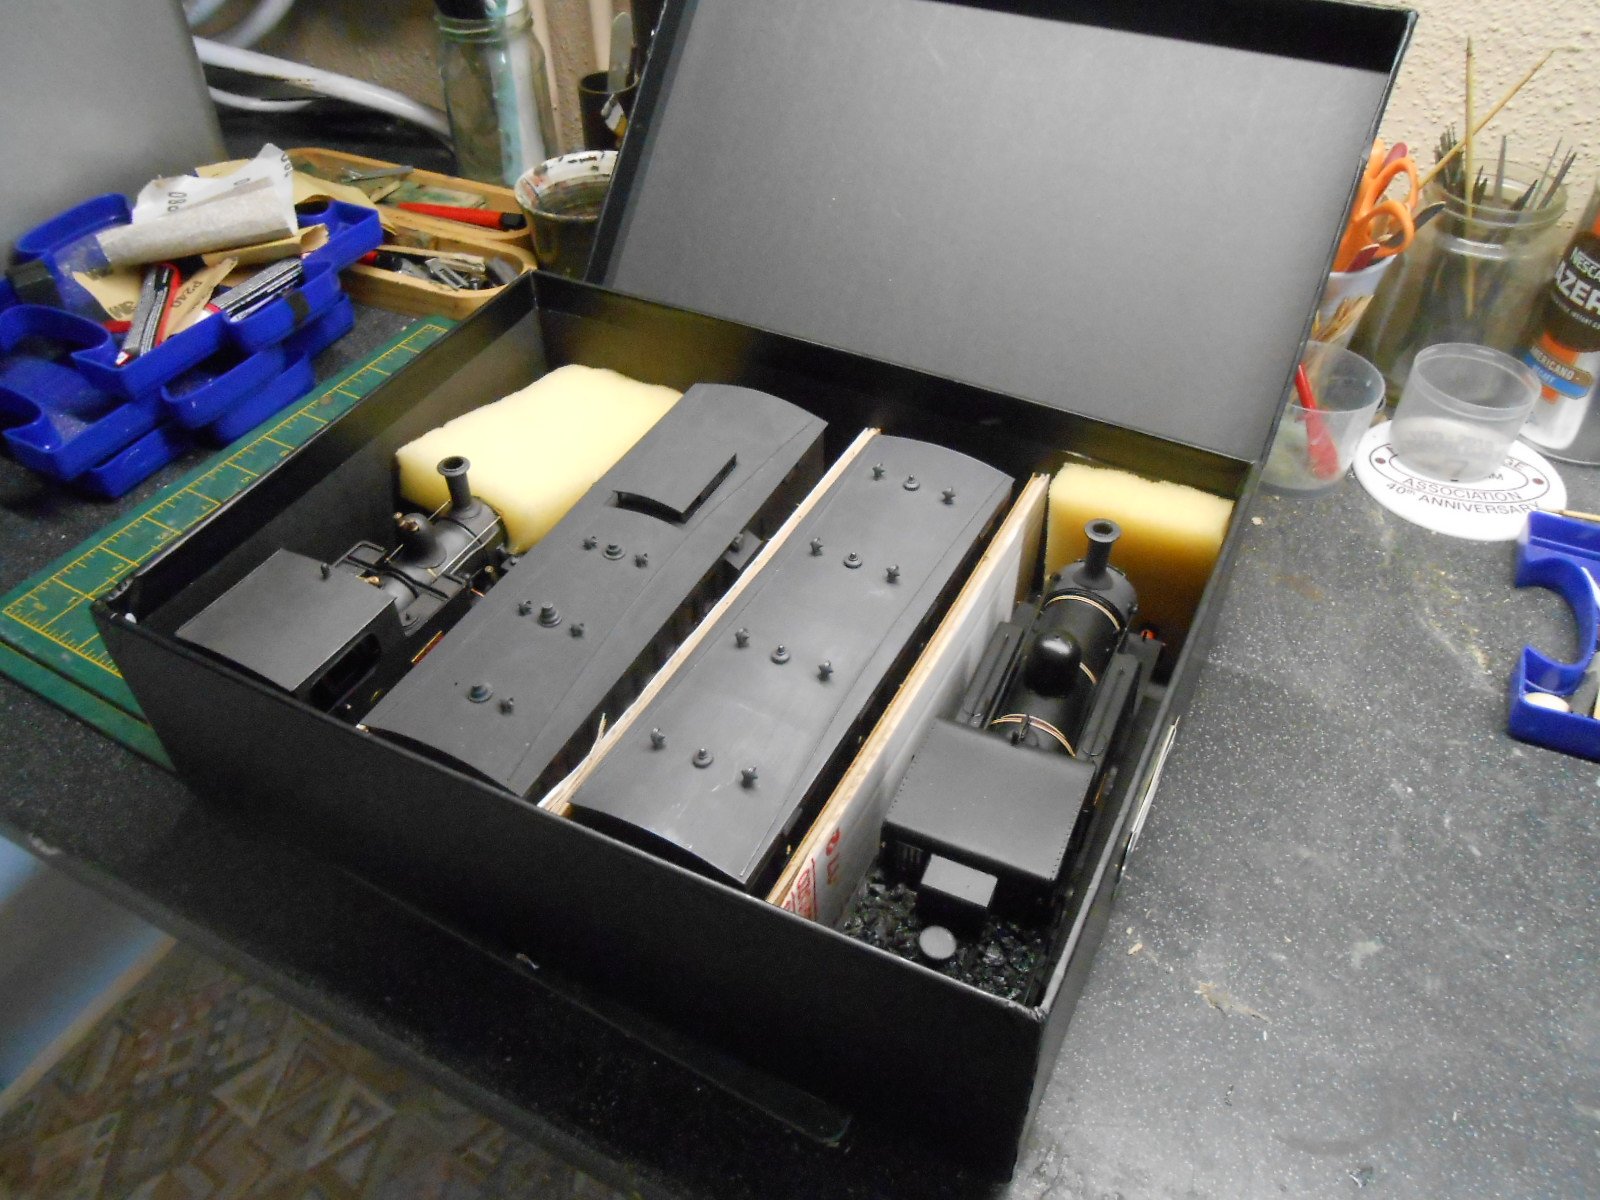
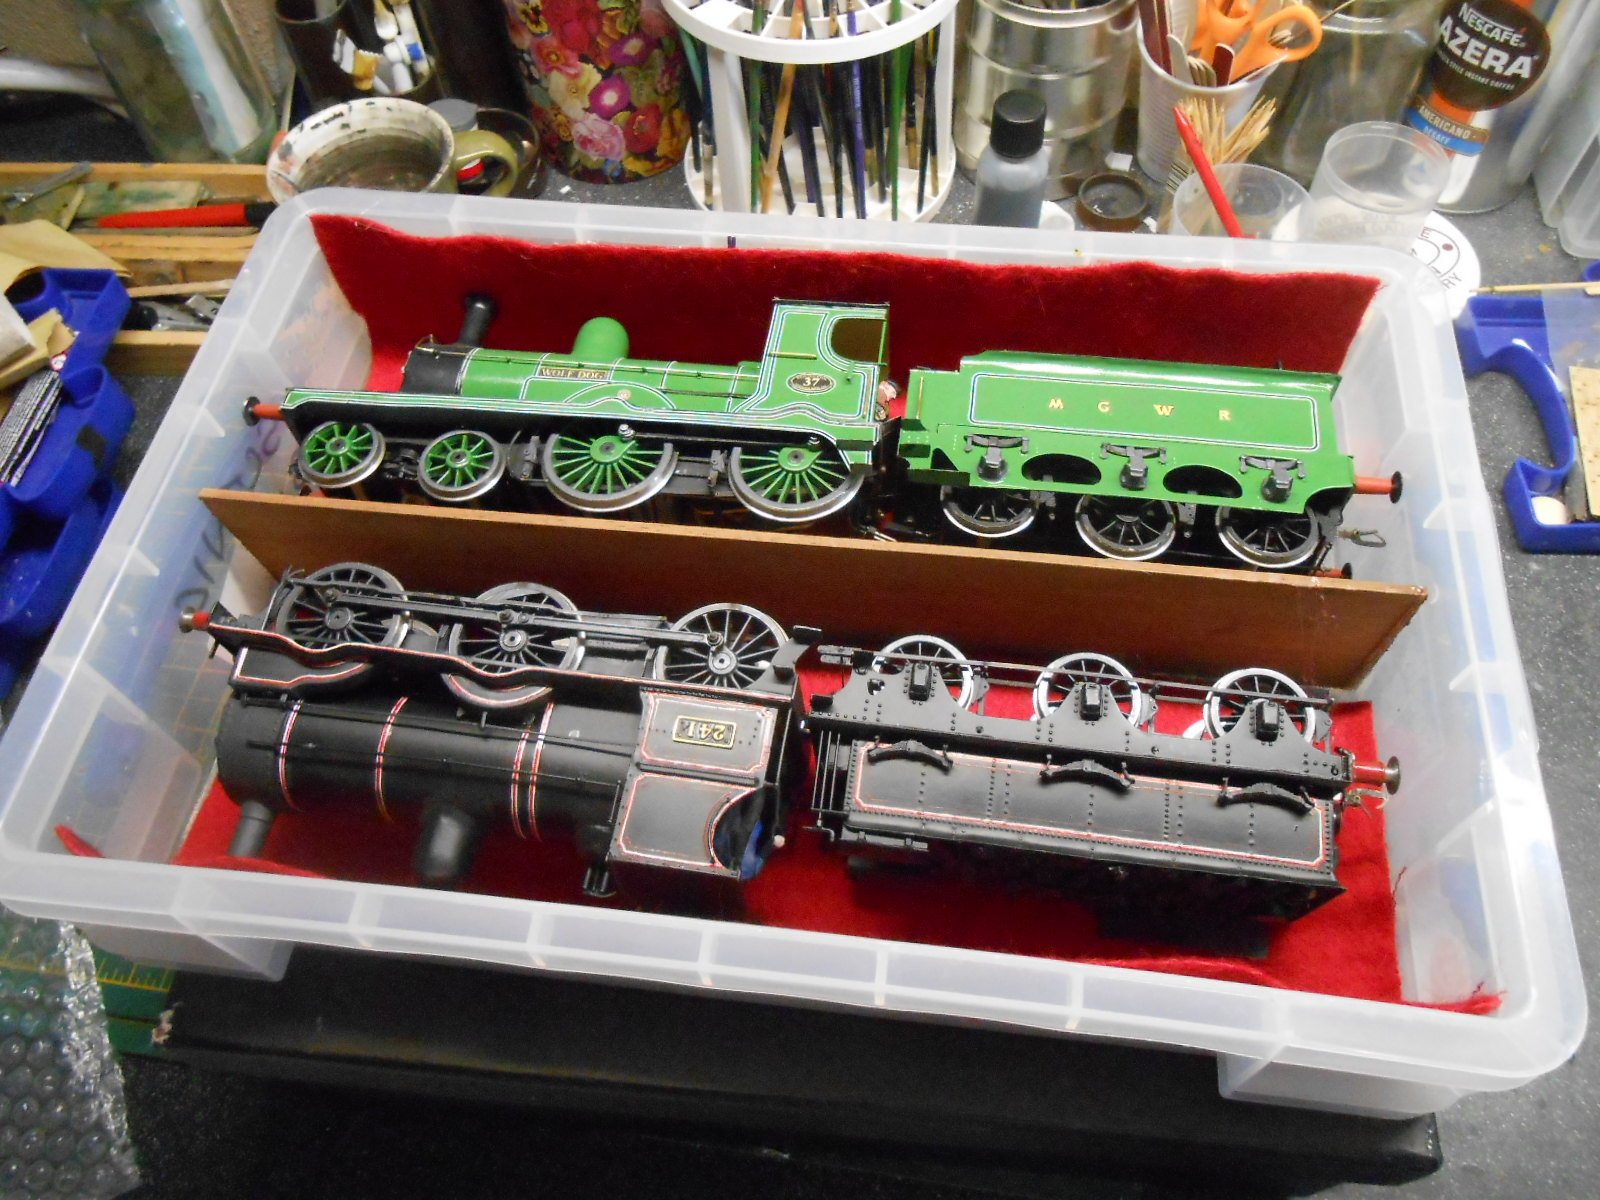
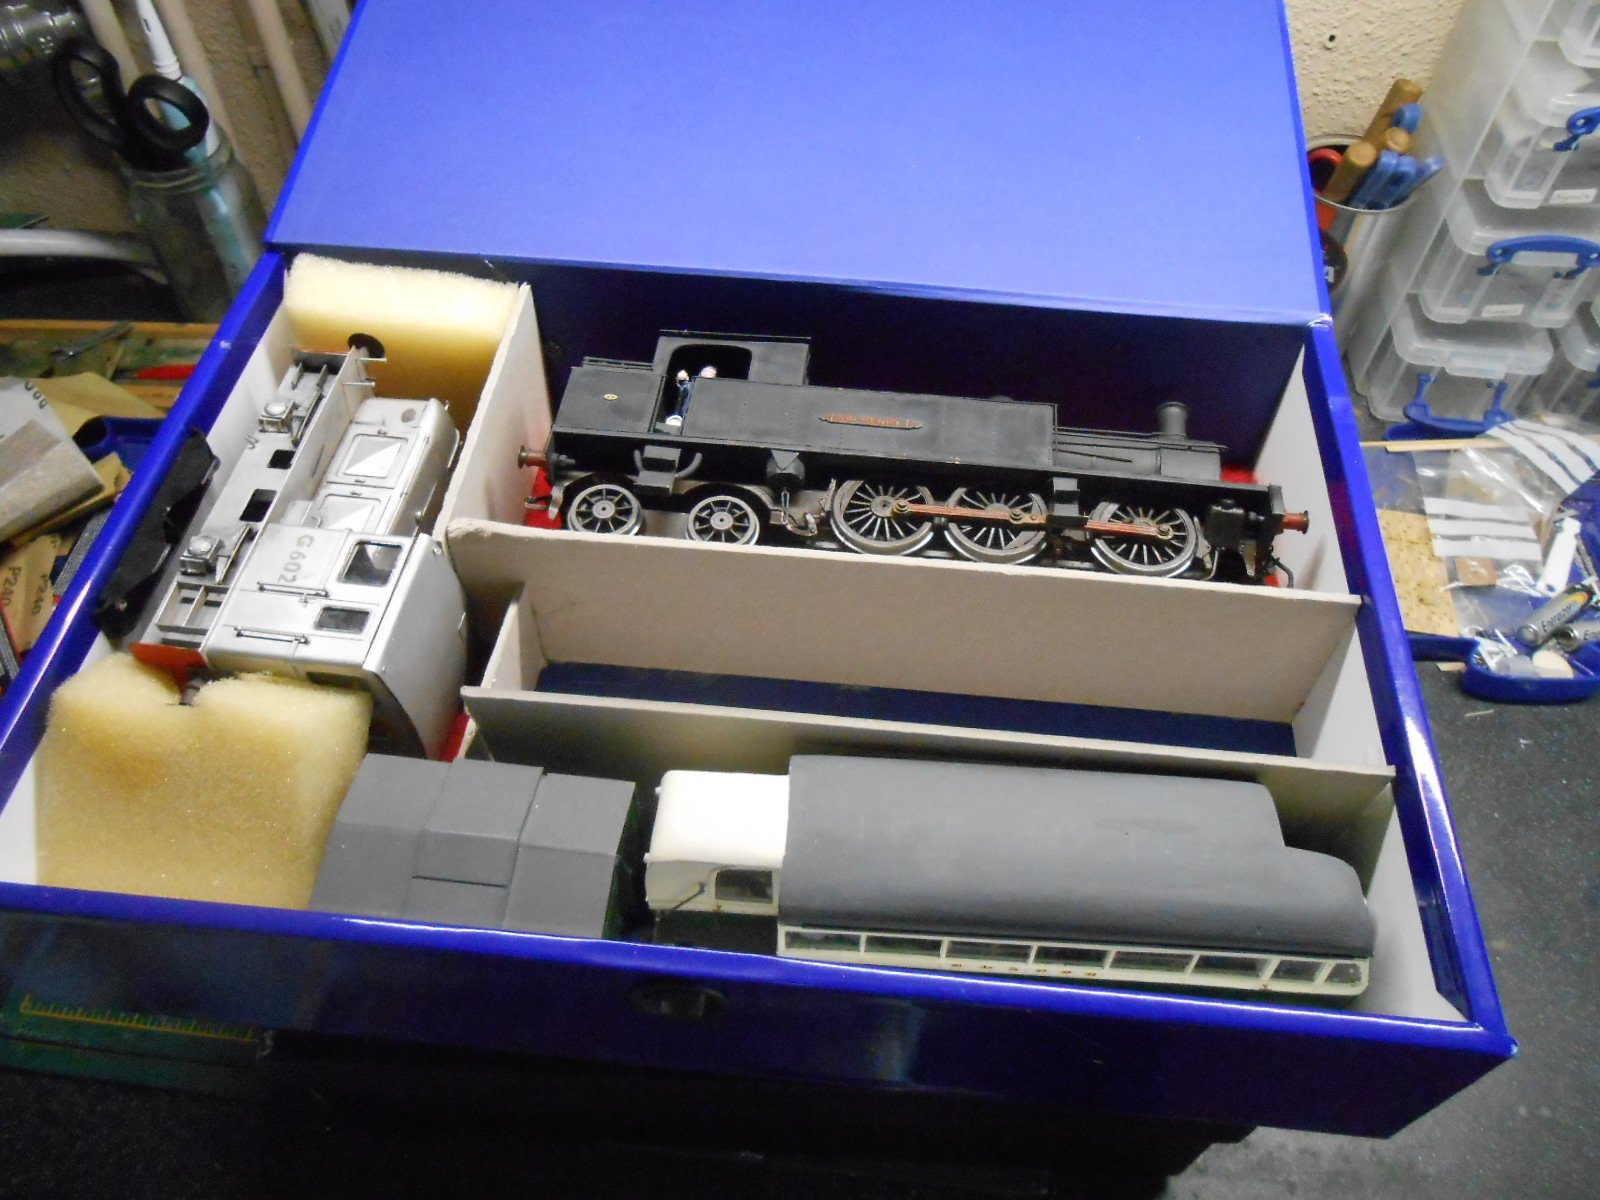
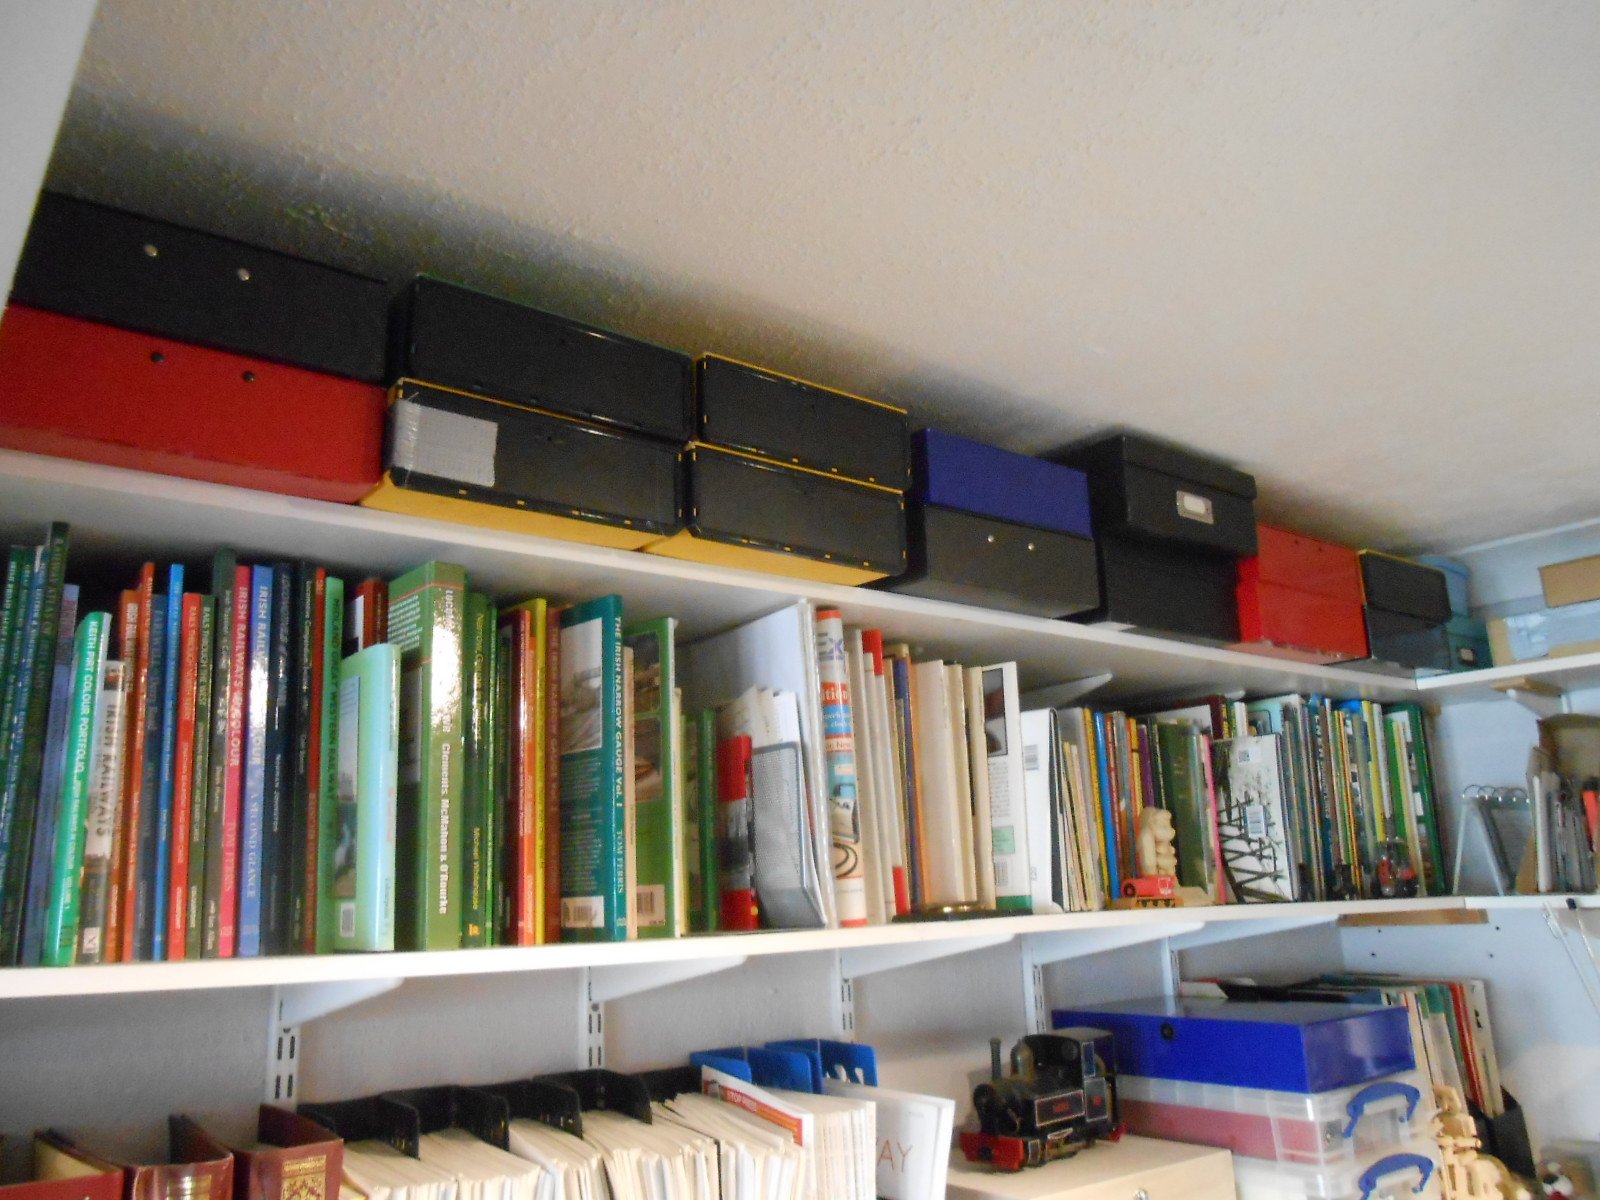
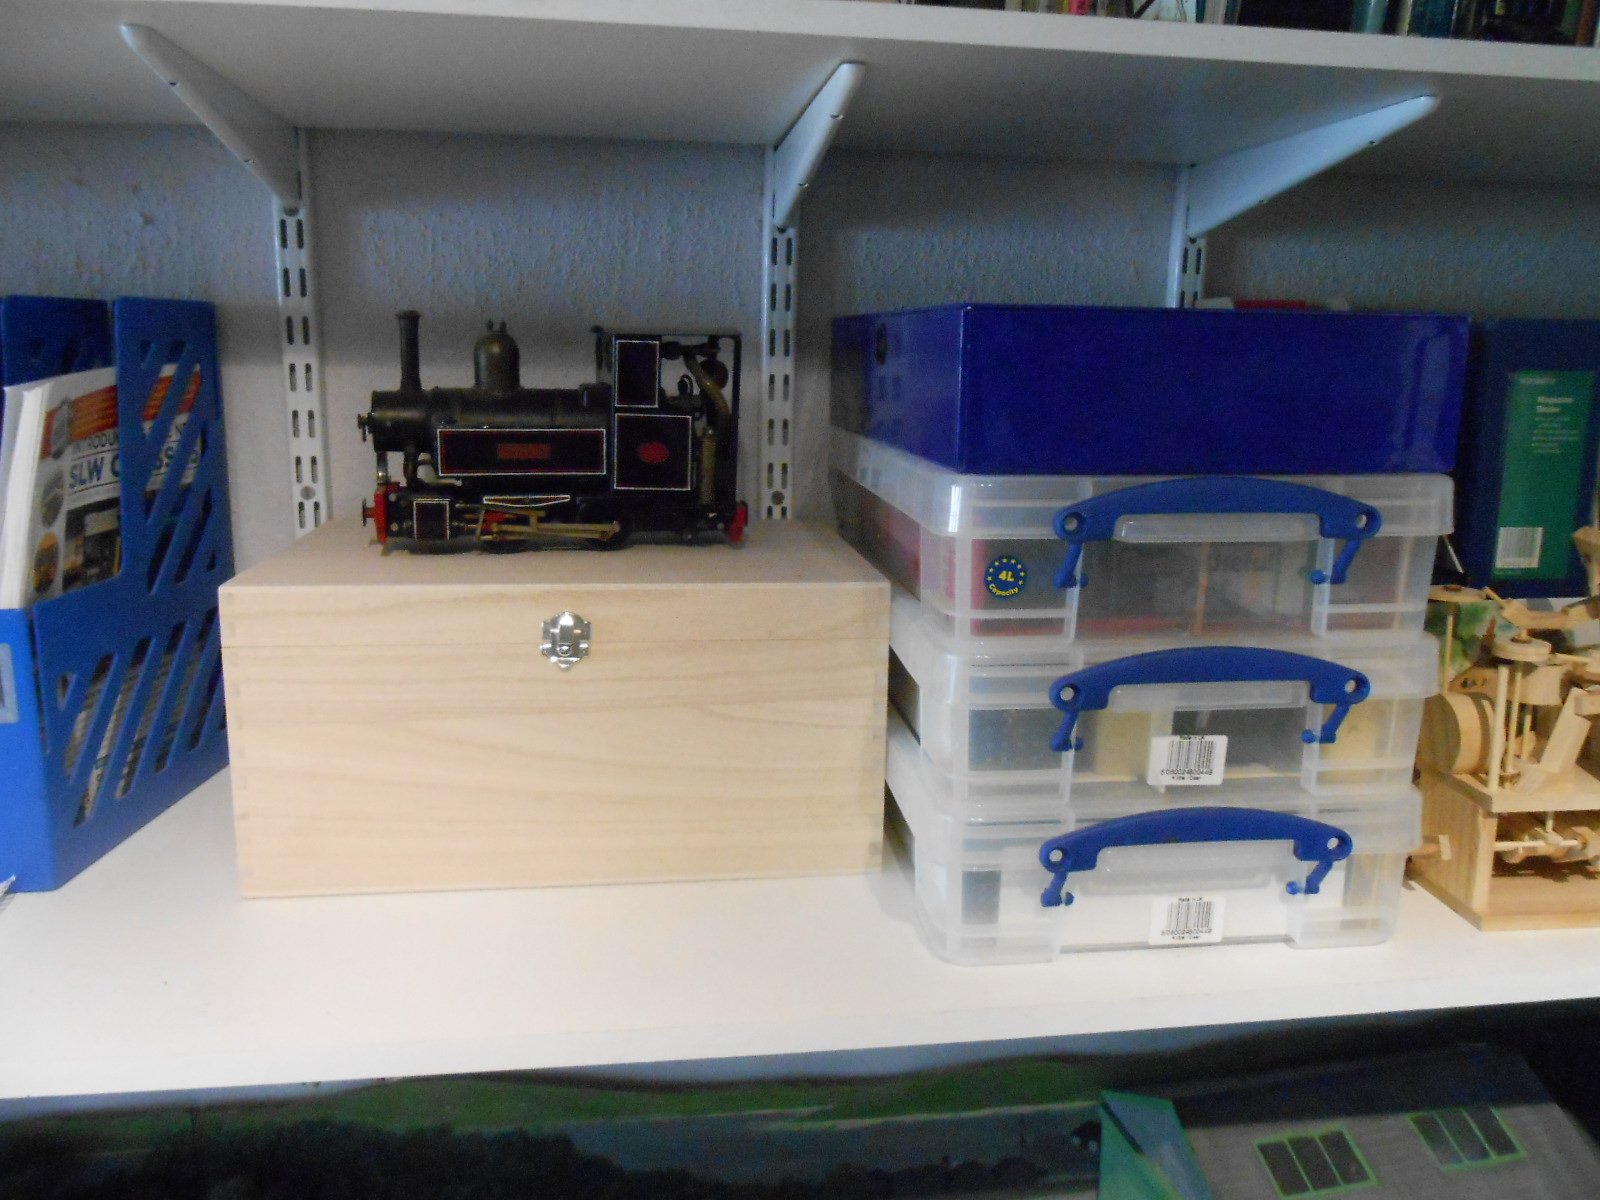
Boxes While nothing much to report of late, have nevertheless been busy trying to get Belmullet ready for its debut at Uckfield in mid October. This has mainly been about presentation, so I've been building what the theatre calls a proscenium arch, or a sort of picture frame in other words. Two side panels, a pelmet, plus three display panels to go along the bottom & all needed priming and painting, along with separate sky boards to go along the back and sides. Hopefully, I've got some LED tape arriving tomorrow, so this can be added and wired up to provide the lighting. Fingers crossed, everything will be ready to be assembled on the layout in a week or so's time. Meanwhile, have been attending to the challenge of providing boxes for all my stock. At exhibitions you can see everything from the sublime [custom made wooden boxes holding stock in neat, foam lined spaces] to the faintly ridiculous - usually a hodge lodge of shoes boxes, ice cream tubs and the like. The former very expensive, the latter often free, though far from ideal... Over the years, I've standardised on foolscap box files [for rolling stock] and 'Really Useful Box Company' four litre/A4 sized plastic crates for locomotives. Both seem to work quite well and you can get four of each into one of those large, reinforced supermarket shopping bags. 7mm scale stock takes up a lot of space & more than once I find myself envying those who model in 2mm scale, where everything would probably fit into a single box - I currently need 16... At various times, I find myself looking around DIY stores for alternatives & recently came across a very nice looking hinged, plywood box in a store called Hobbycraft. After much pondering, decided to try one & have found that, by adding a home made inner tray, I can get all my Fintonagh stock inside in two layers. Anyway, here are a few pictures that should clarify.