David Holman
-
Posts
4,359 -
Joined
-
Last visited
-
Days Won
117
Content Type
Profiles
Forums
Events
Gallery
Blogs
Everything posted by David Holman
-
Long time no see, but very evocative.
-
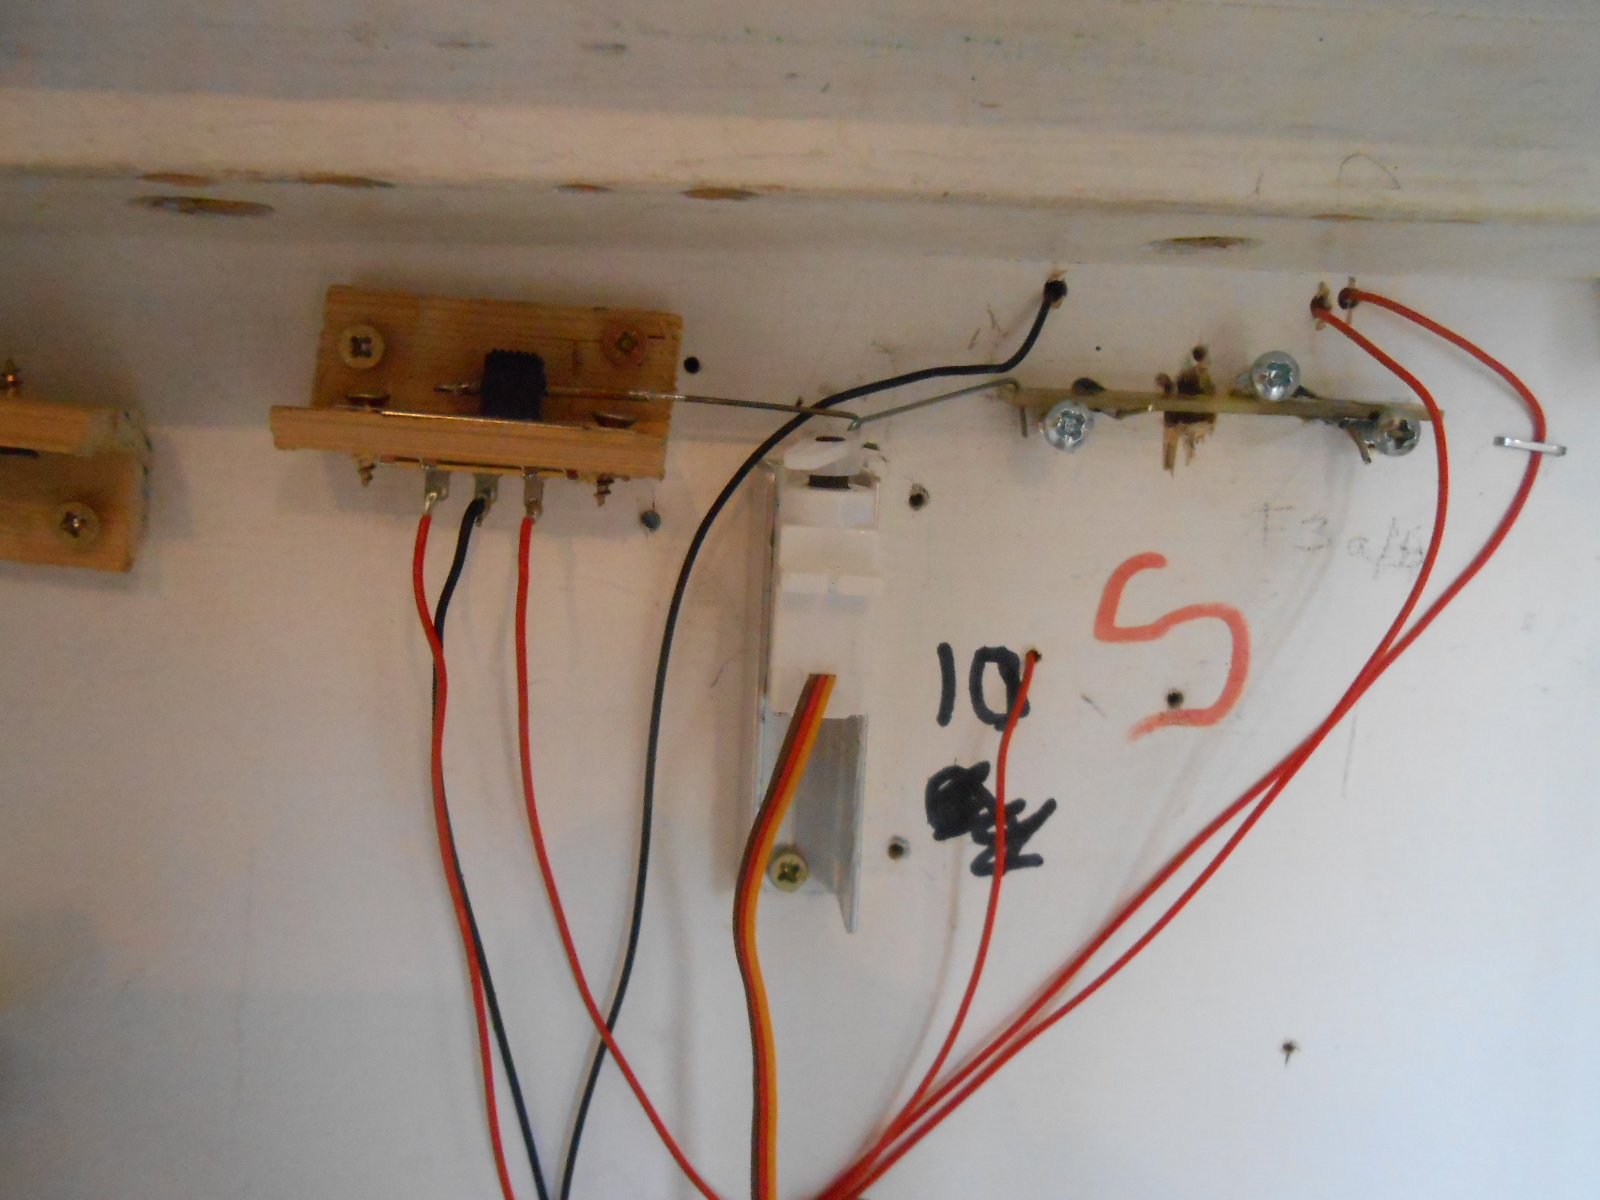
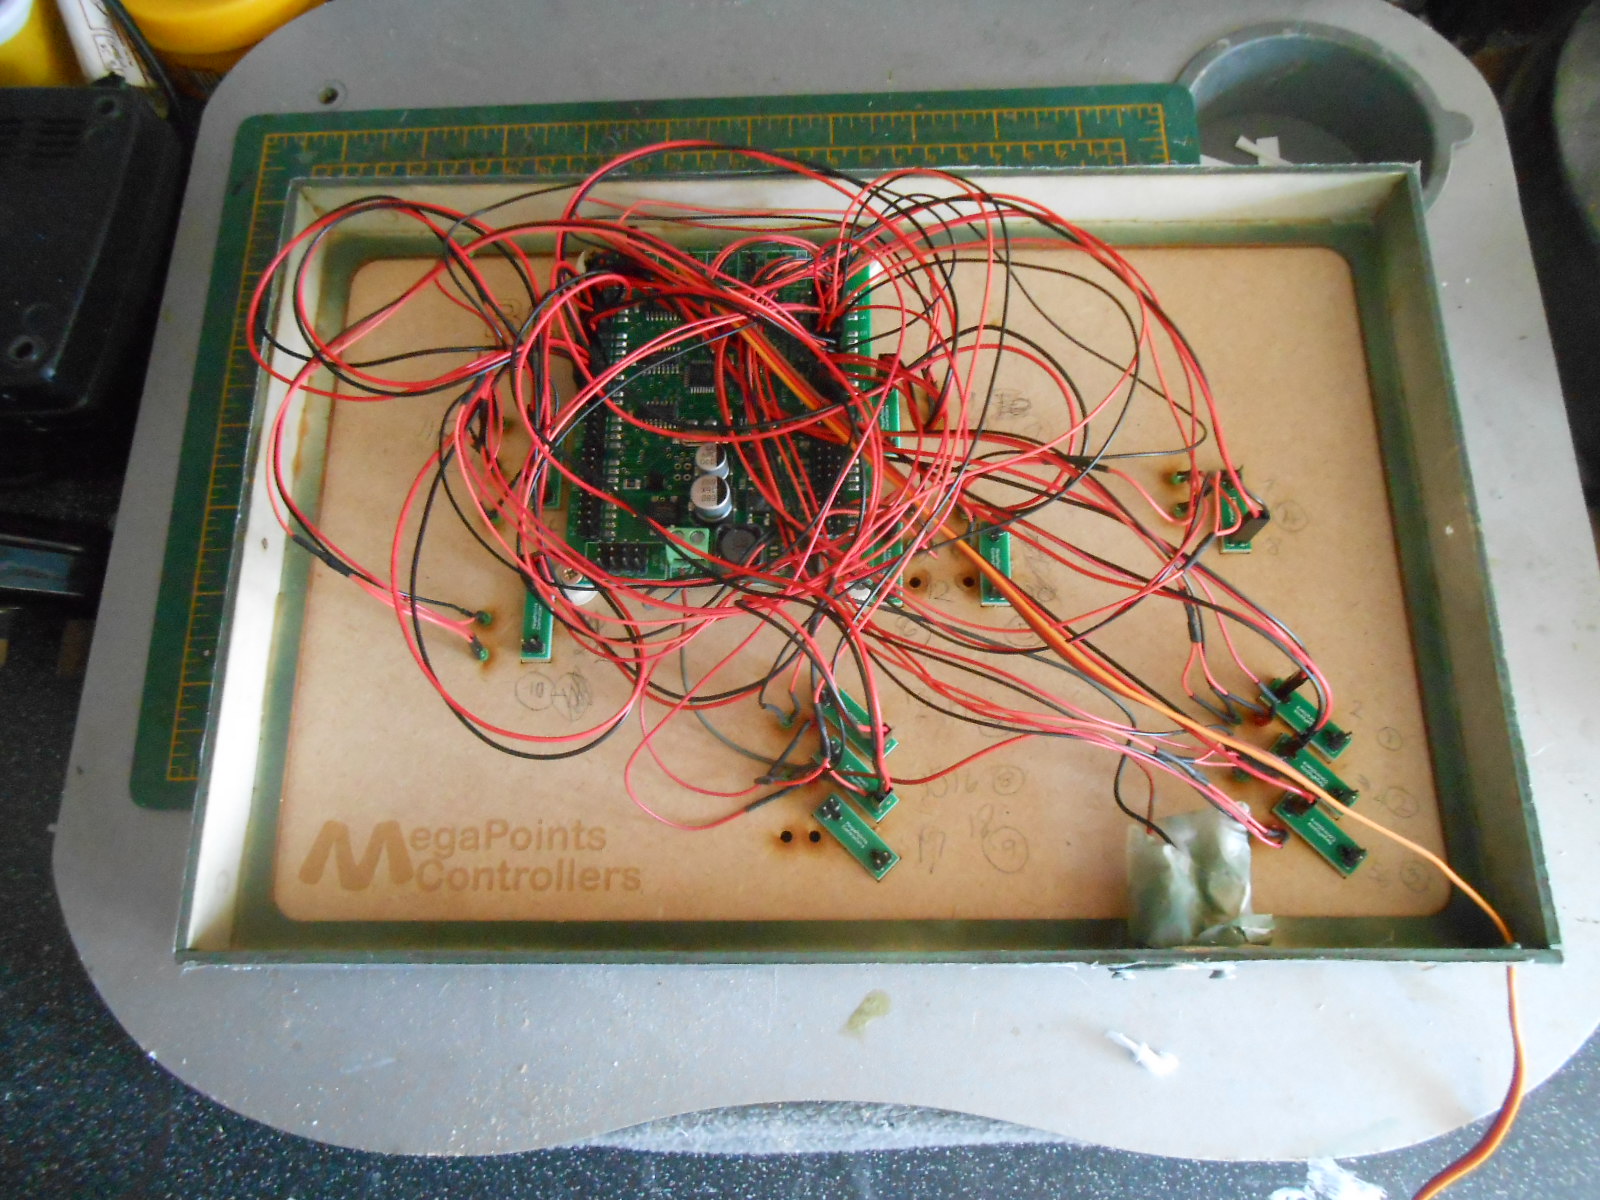
Much faffing about this week, to little visual effect, though hopefully it will have some impact on eventual operation. Belmullet has a provisional invite to this year's Uckfield show in October [though of course nothing is certain yet], so decided it was time to start sorting out presentation and operational aspects of the layout, in the hope that the show will indeed go ahead this time. So, first up, some planning. Belmullet was originally conceived to be front operated, like Fintonagh, but it now seems prudent to move operation to the rear at shows, in order to put a bit of distance to Joe Public. The downside of this is that the train driver will be mostly standing up, though the upside is that [at a pinch], one person could operate the layout on their own, albeit two will be best - one to drive the trains and one to man the fiddle yard and talk to visitors. A compromise to all this is that it will be difficult to fully enclose the scenic section, as the driver/operator will need to see over the back scene, so layout height will likewise need to be lower than planned too. While I'm sure there are alternatives, including using cameras or mirrors, the fact is, I aint no techie - indeed, when I go into a computer store these days, not only do I have no idea what much of the stuff on sale is for, I don't really care either! Perhaps I should, but electrickery holds little interest for me - I'd rather be making stuff. Enabling rear operation has involved duplicating the controls: Baseboard 1 [station end], has the controller socket, plus three 'push to make' switches to operate the uncoupling magnets. Fairly easy to do, as the wiring all goes to/from tag strips, while [unusually for me], I'd even labelled things too. The middle board doesn't have any controls, but Baseboard 3 has the turntable crank, plus three section switches for the loco shed area. The latter were sorted as per BB1; the turntable was adapted by adding an extension & bracket to the other side, along with a hole in the frames for the crank handle. The photos hopefully give an idea of what is going on underneath the baseboards, including one of the Megapoints servo control boards. I've also included photos of the control panel itself - the one of the inside shows the vast amount of wires used, with triple servo leads linking everything to the mother board. The clever bit with the Megapoints system is that just a single [three wire] servo lead links the panel to the layout, with an additional couple of wires taking power from the transformer. No soldering either, it's all 'plug and play'. The final photo shows my latest acquisition, an Alpagraphix kit for an F6 2-4-2T. The idea is to build it in original guise, with a 'waisted' smokebox and oven type doors. Looks like I'll need to turn up a new chimney for it too, among other things, though this is not a priority at the moment as the presentation of the layout needs to come first.

-
Walker Diesel Class F - ECMbuild in 4mm for OOn3
David Holman replied to murrayec's topic in Irish Models
Lovely stuff, which is what Eoin does. Beautifully built with fine paint jobs too.- 136 replies
-
- 1
-

-
- class f
- west clare
- (and 1 more)
-
Amazing to think, that in 2mmFS, one of these vans is a fraction over an inch long. The 5p coin is going to look quite big in comparison! Meanwhile, I continue to be astonished at what is out there. 2mm scale, 3D printed GSWR vans - who'd have thought it?
-
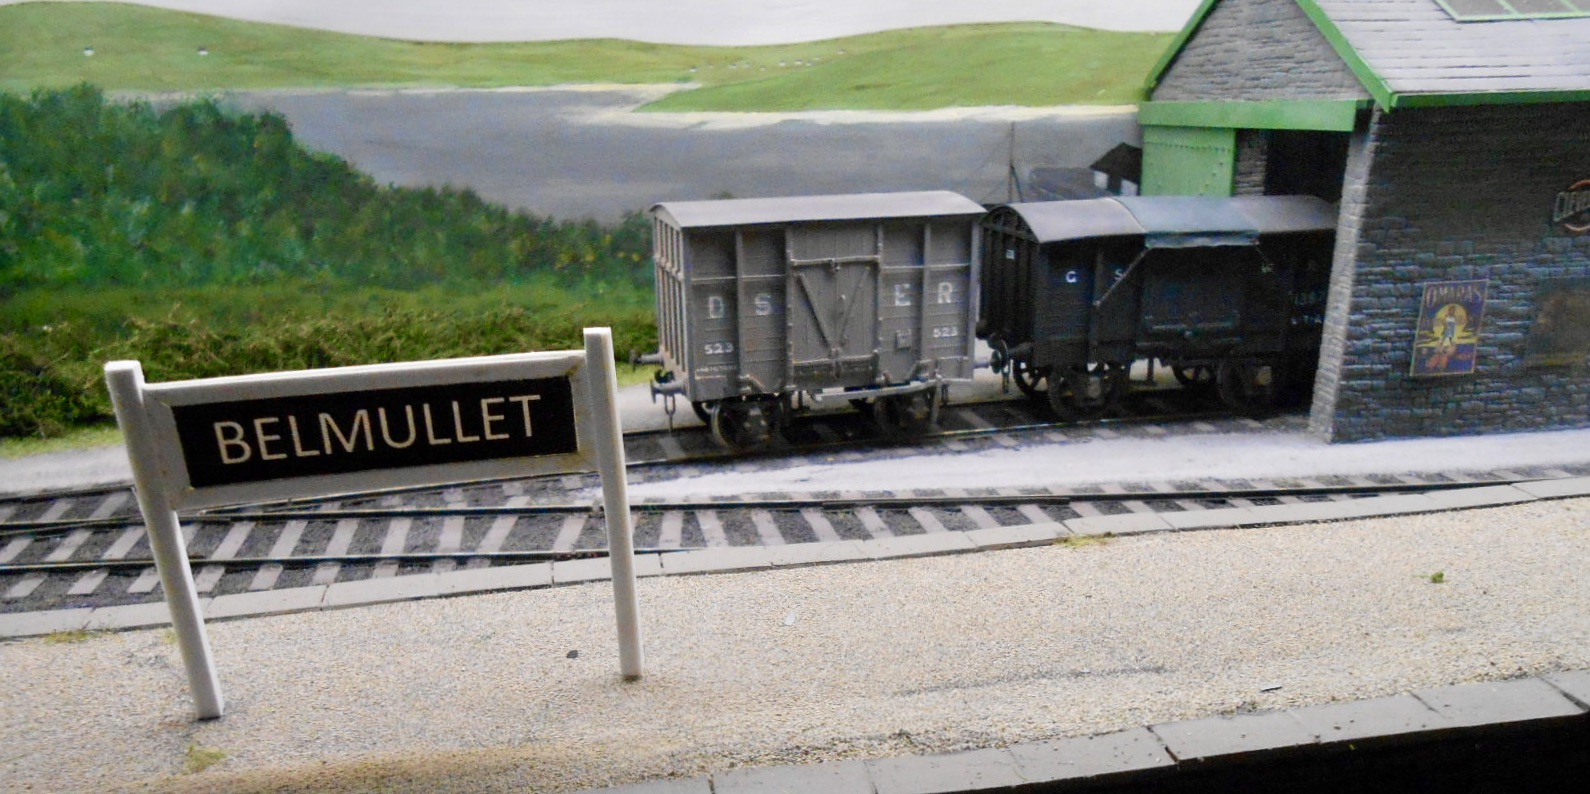
Same page, Angus! No 108, with the DSER van in the top picture and the GSWR one in the lower. Don't worry, I didn't notice it either...
-
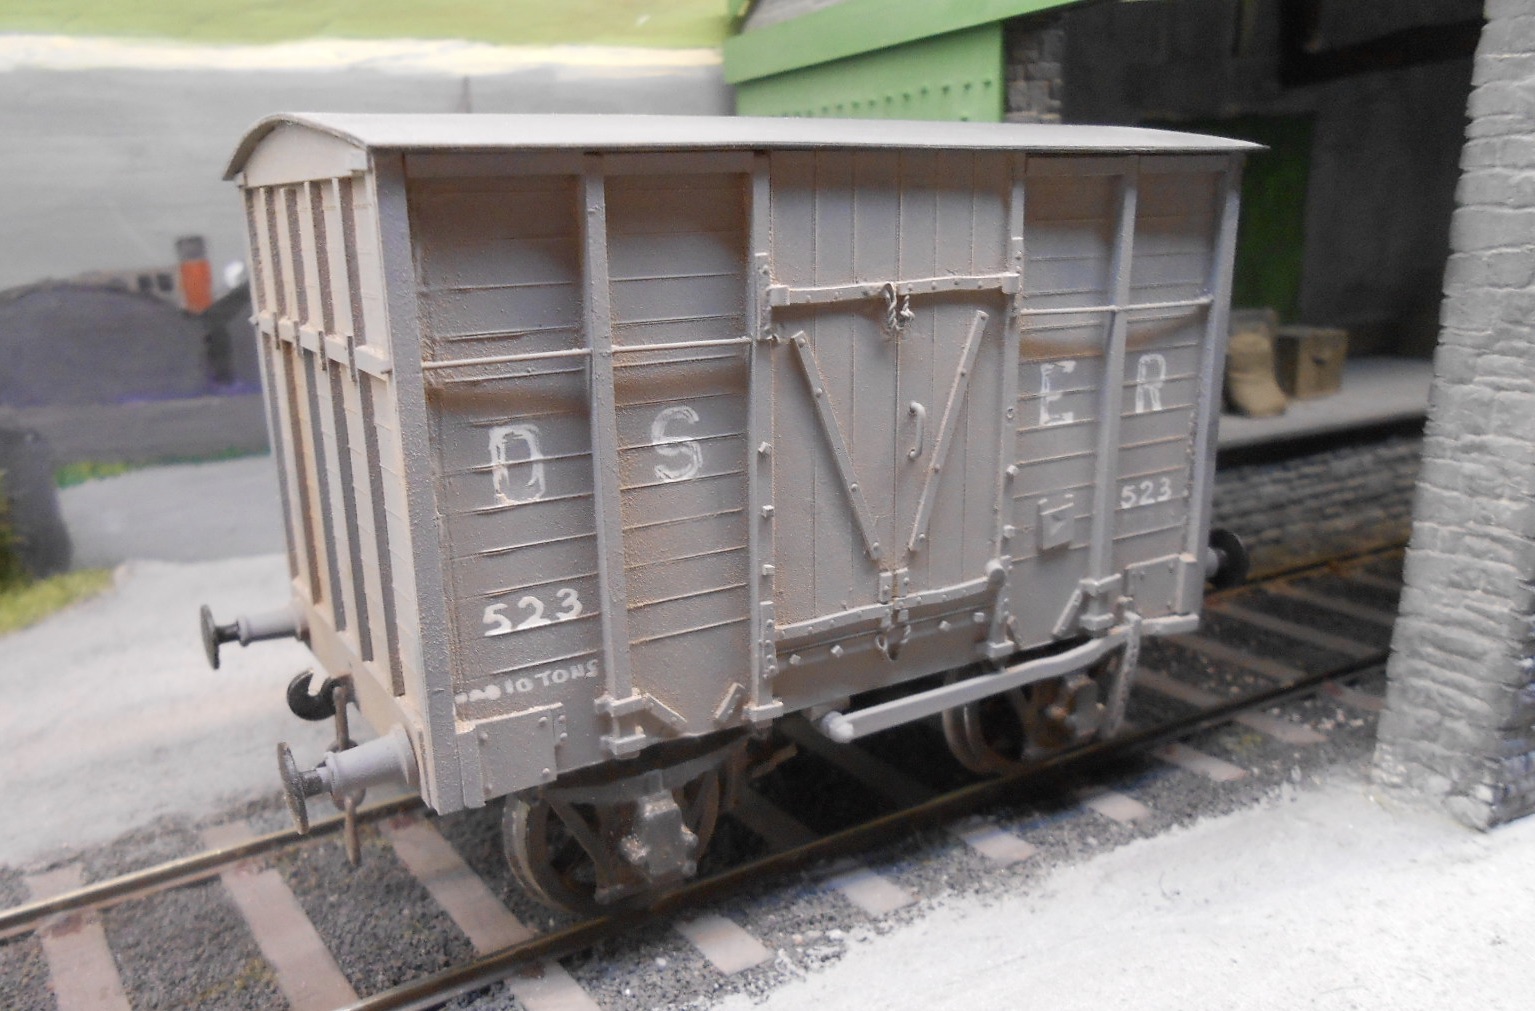
Managed to find enough parts in my stores to build a new wagon this week, the subject being one of those dinky short vans that both the DSER and GS&WR ran. There are nice pictures in Rails to Achill showing one of each. Just 13'6 long, there appears to be many similarities between the two types and just a few detail differences. I've ended up doing the DSER one on the grounds that if it could make it to Achill, it could also reach Belmullet. An interesting plus point of vans like this is that being less only 10cm long, compared to over 15cm for say, an H type van, you can get nine of them v 6 H types in the same space. Construction is the usual Plastikard bodywork, with white metal fittings for W-irons, brakes, buffers etc, while lettering is my usual white ink & a dipping pen. The photos are a small homage to the Achill Island photos. Other work this week has involved necessary chores on the baseboards. Track power on the turntable has become intermittent, but managed to trace the problem to a loose lead, so that was an easy fix. However, more taxing has been getting all the control panel lights to be the right way round. LEDs show both which way the points are set and whether the signals are at clear or danger. The Megapoints system is seriously clever, but I often end up thinking I should have gone for something simpler. Each 'command' circuit board under the layout operates four servos and can be programmed to do certain things, like the amount of travel each servo makes, plus direction and even a degree of signal bounce. There are four push buttons on each board, so a sequence of these gives the desired effect. However, whether its just me or not, getting it all right has proved challenging, though it is hopefully now sorted. I've also decided that it will be prudent to be able to operate the layout from the rear, as well as the front, so have been doubling up the section switches on the loco shed. The push buttons for the uncoupling magnets and the controller socket also need the same treatment.
-
Walker Diesel Class F - ECMbuild in 4mm for OOn3
David Holman replied to murrayec's topic in Irish Models
Another Eoin special, which now begs the question - what's next? Love seeing these projects unfold.- 136 replies
-
- 2
-

-
-
- class f
- west clare
- (and 1 more)
-
Great work - subtle, understated and has that indefinable thing called 'atmosphere'.
-
Very much looking forward to following this. At first, I thought the lost wax castings were whistles and safety valves till I looked closer and realised they are chimneys and domes! That's the difference between 7mm and 2mm scale for you...
-
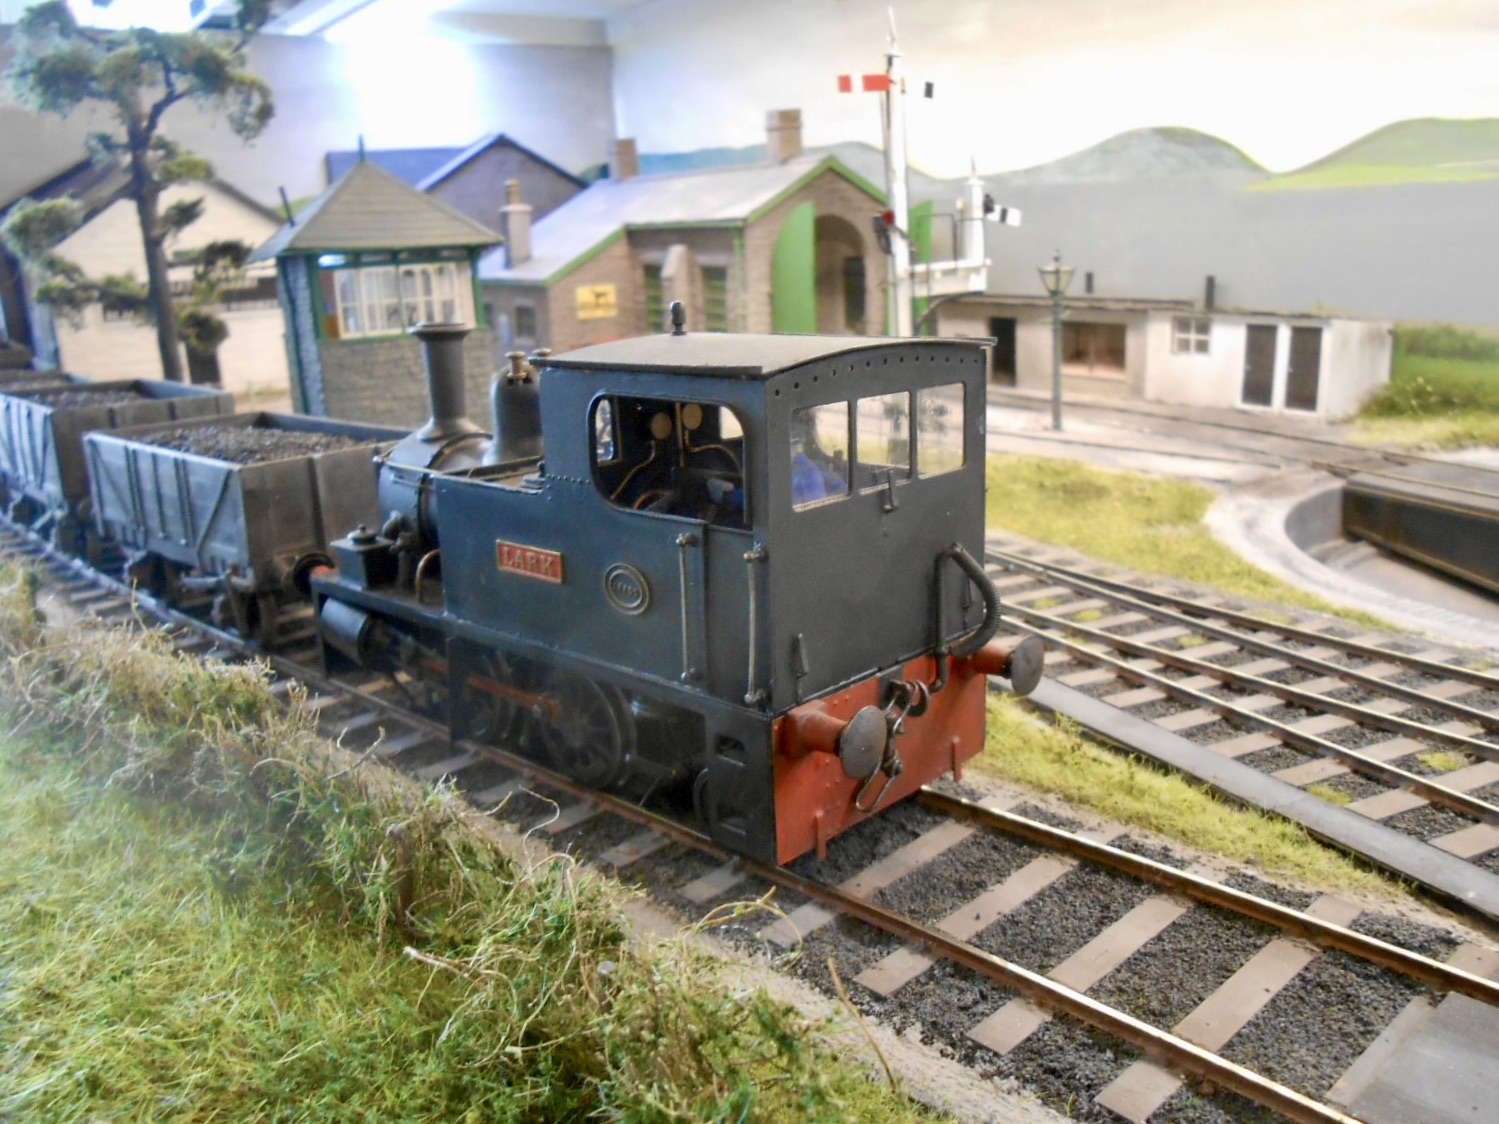
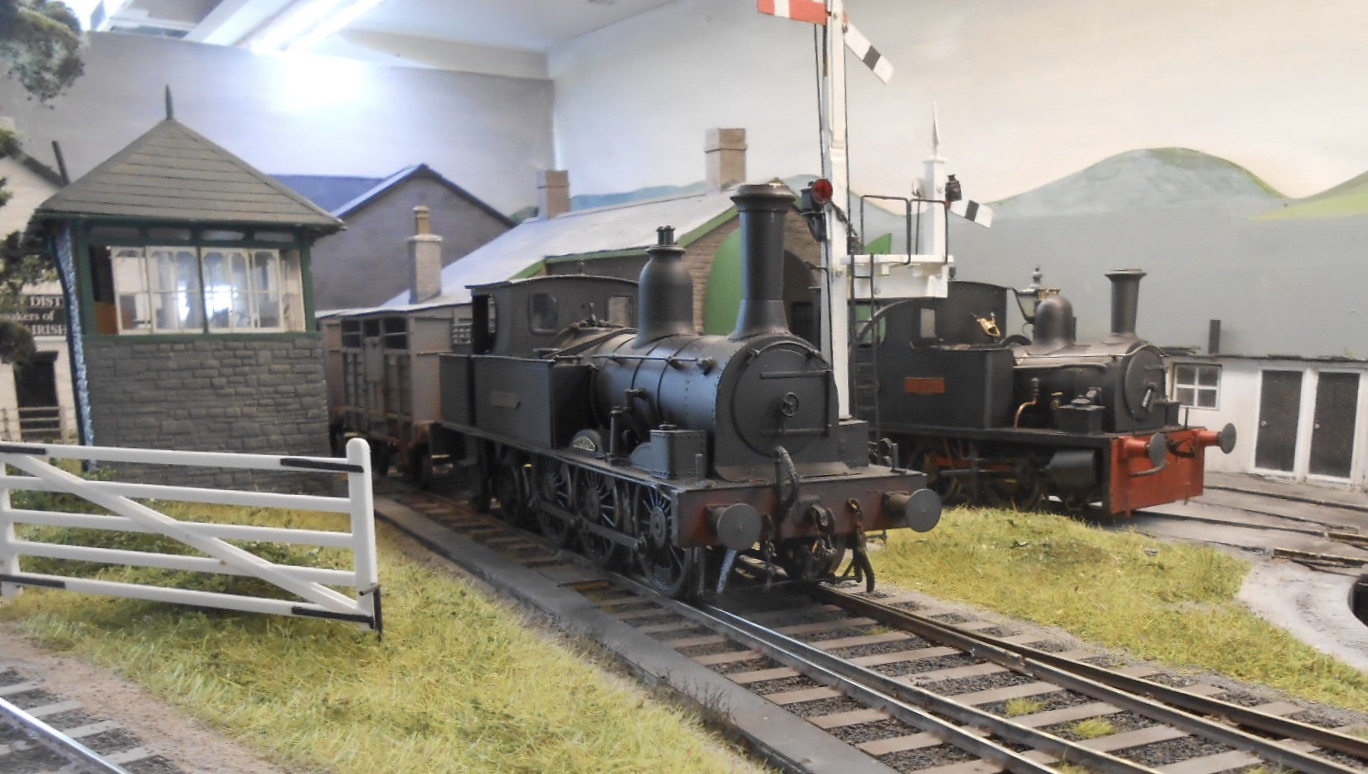
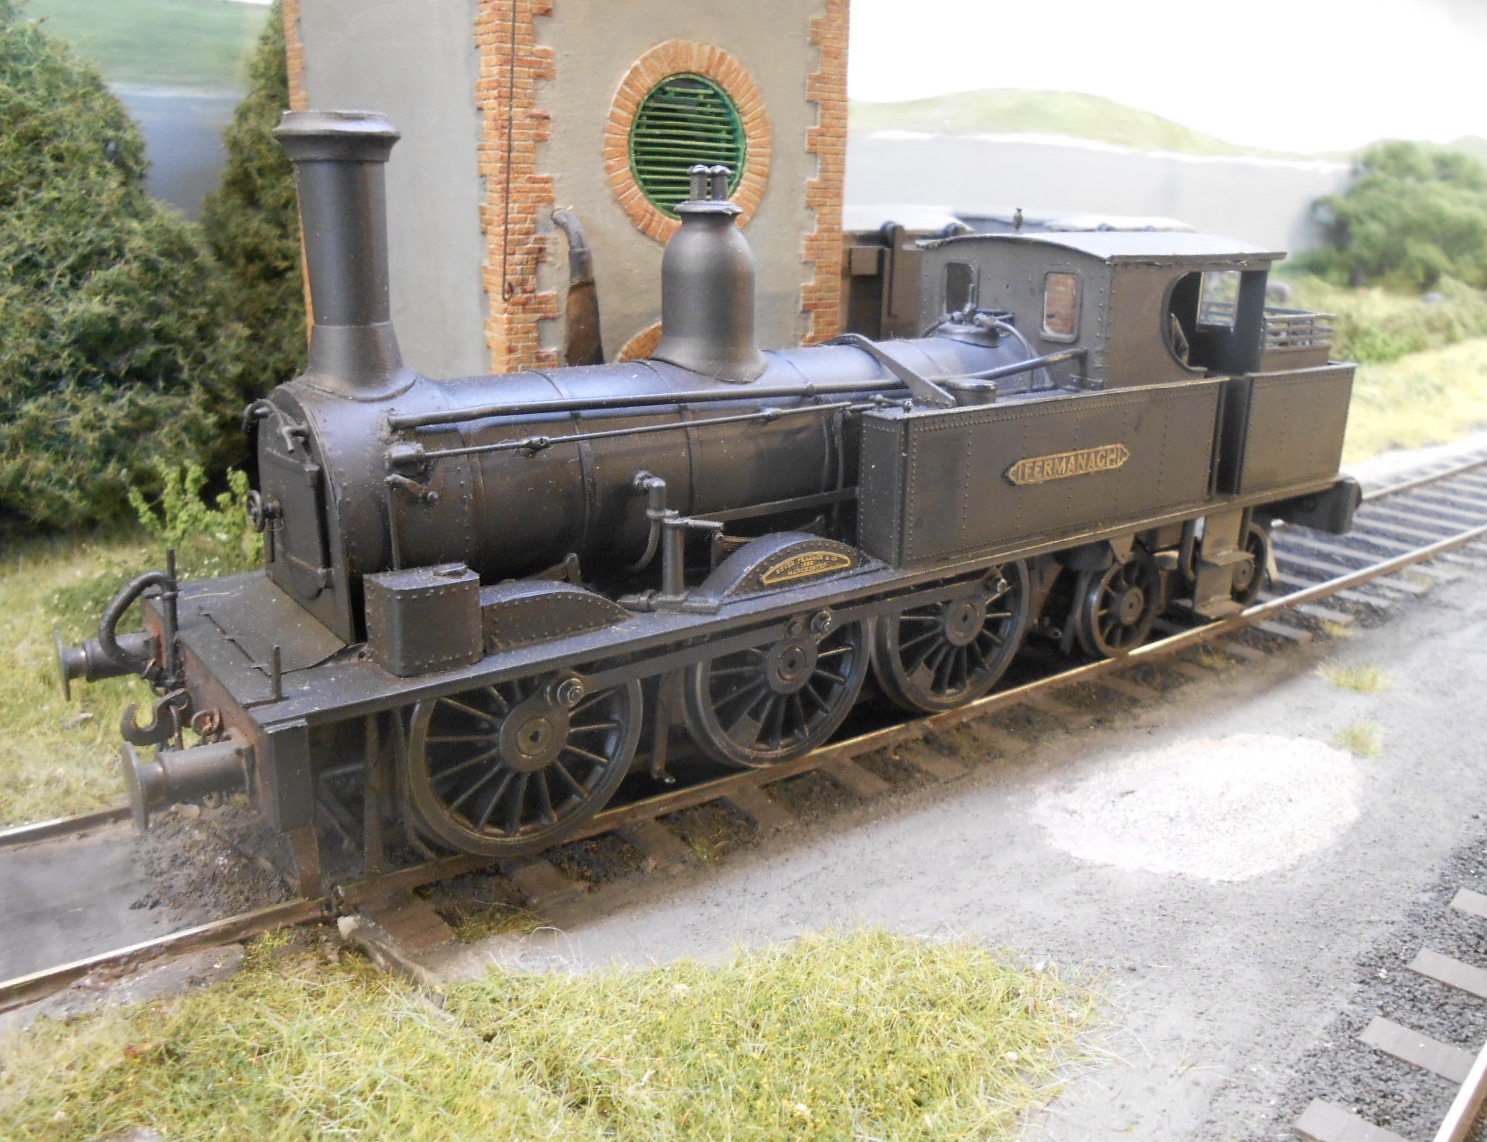
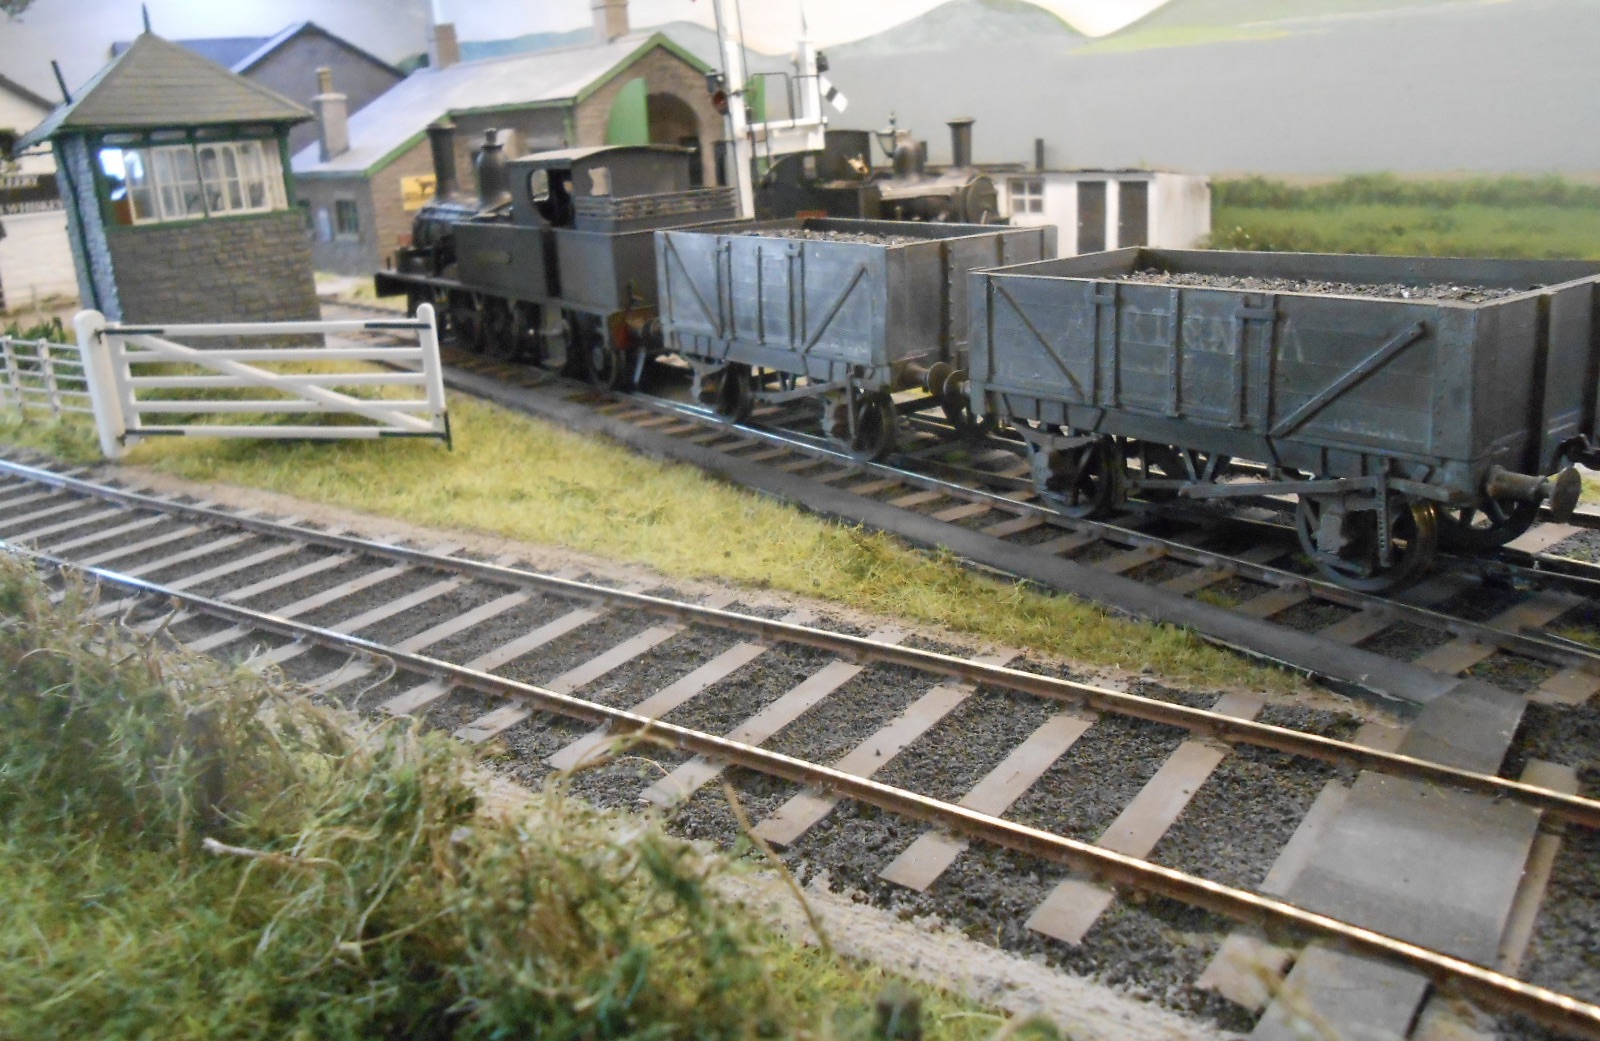
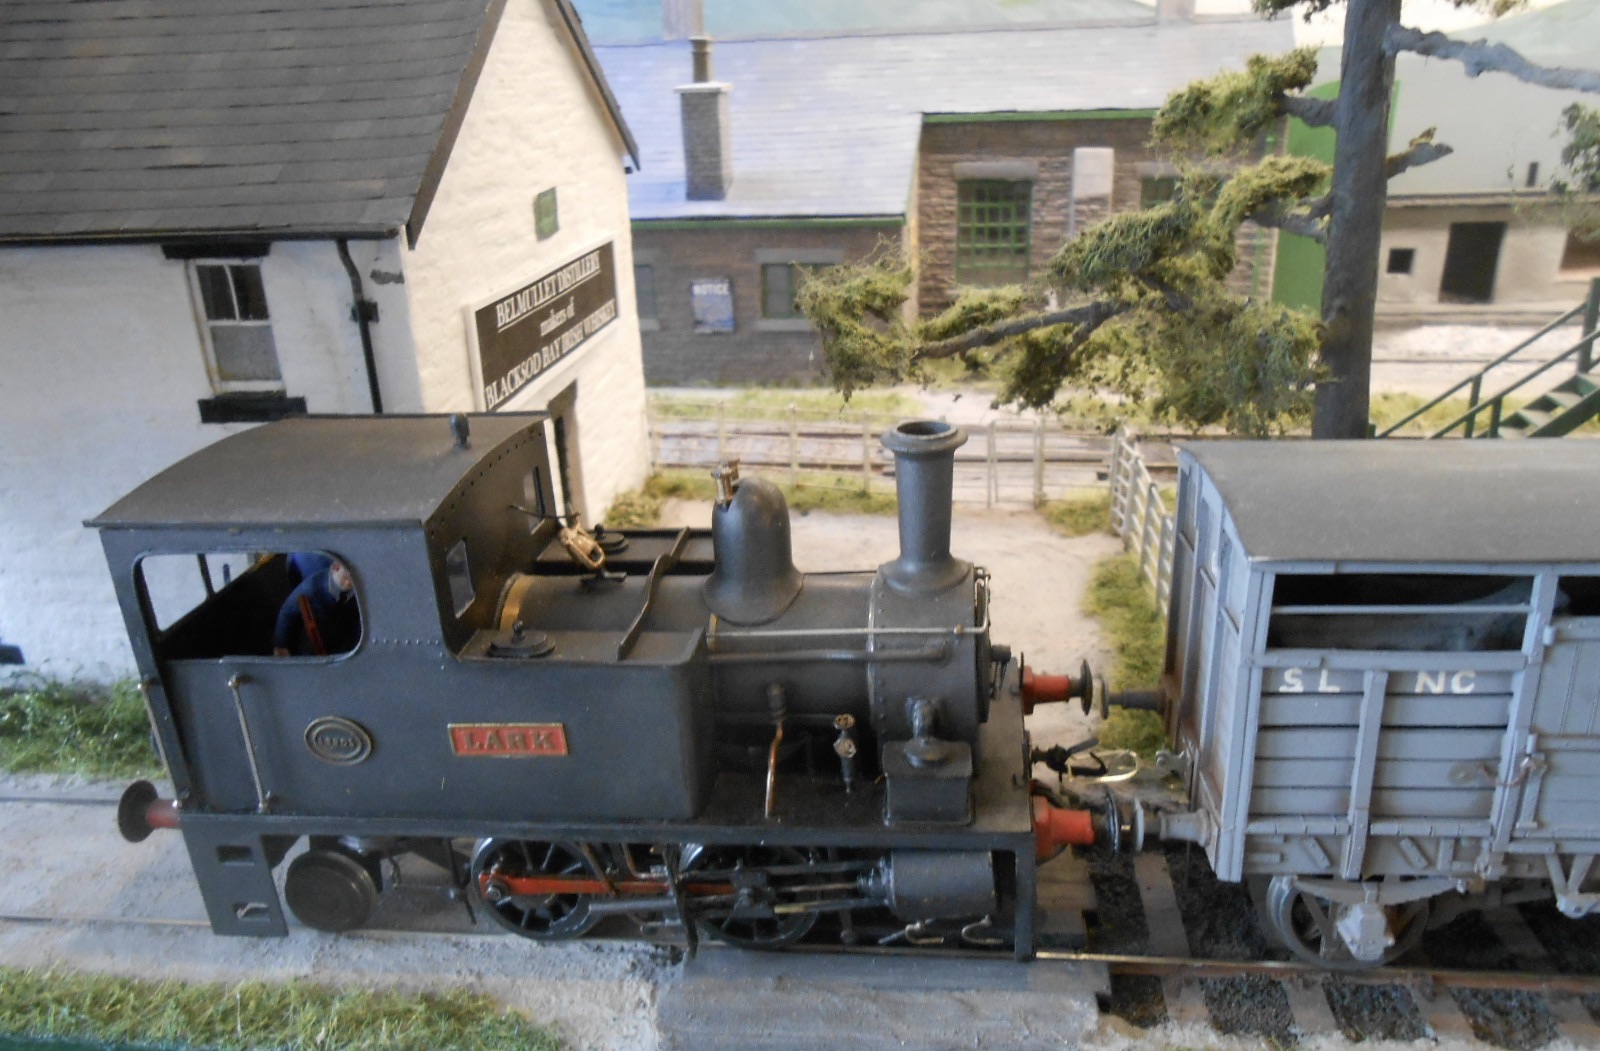
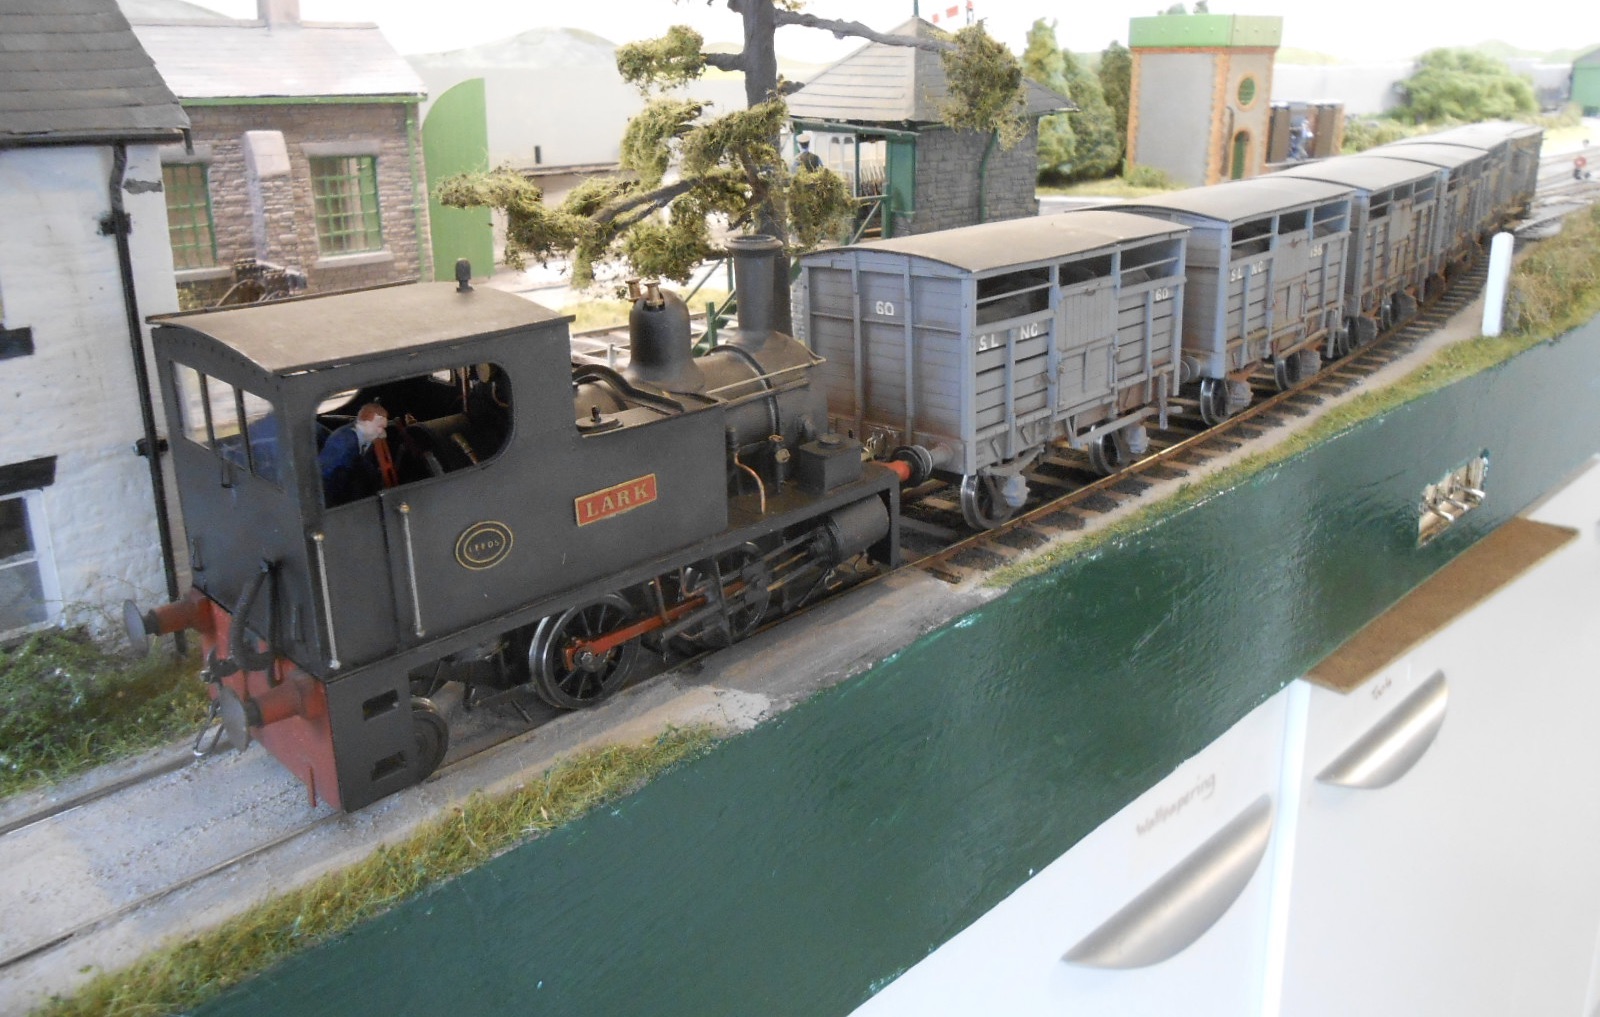
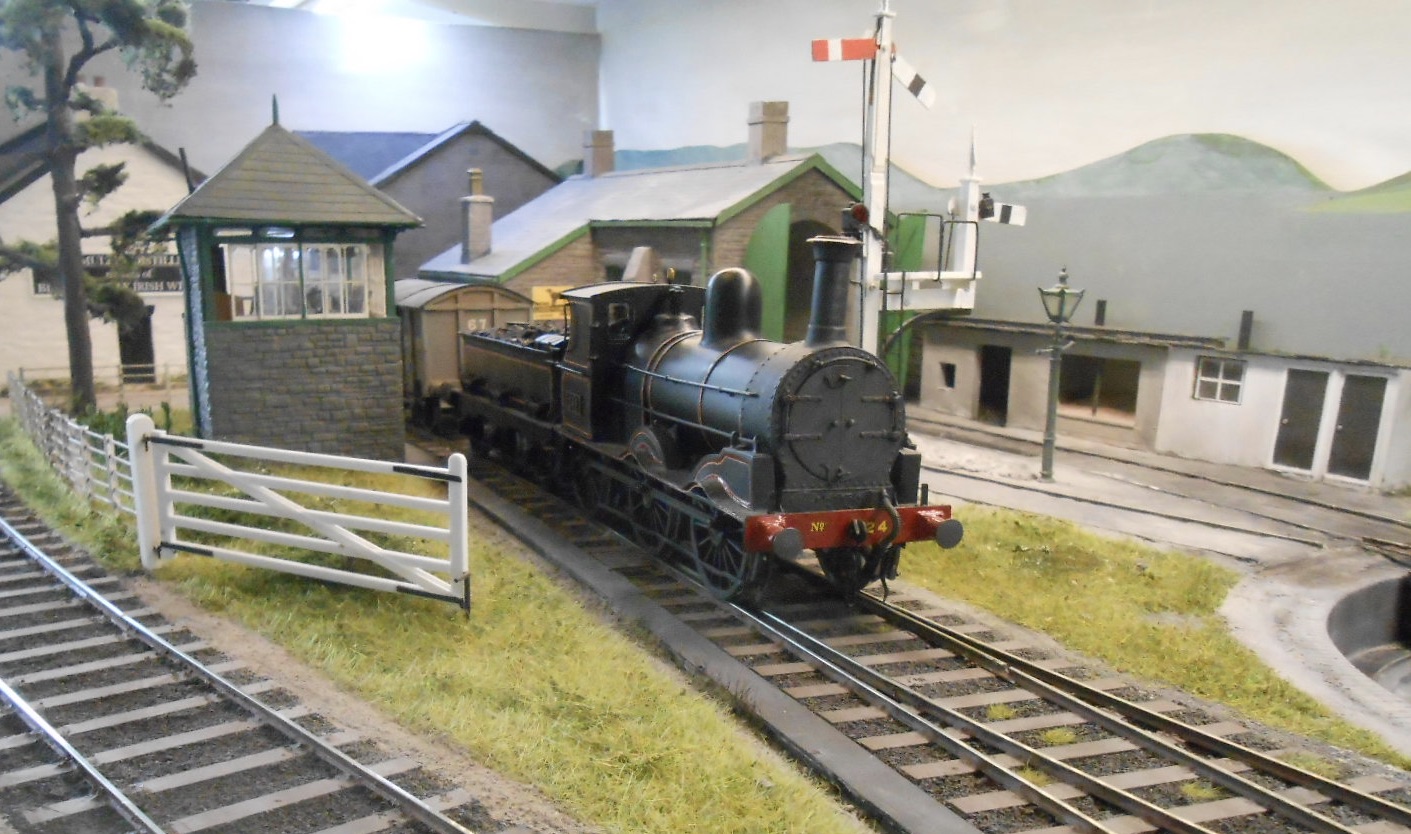
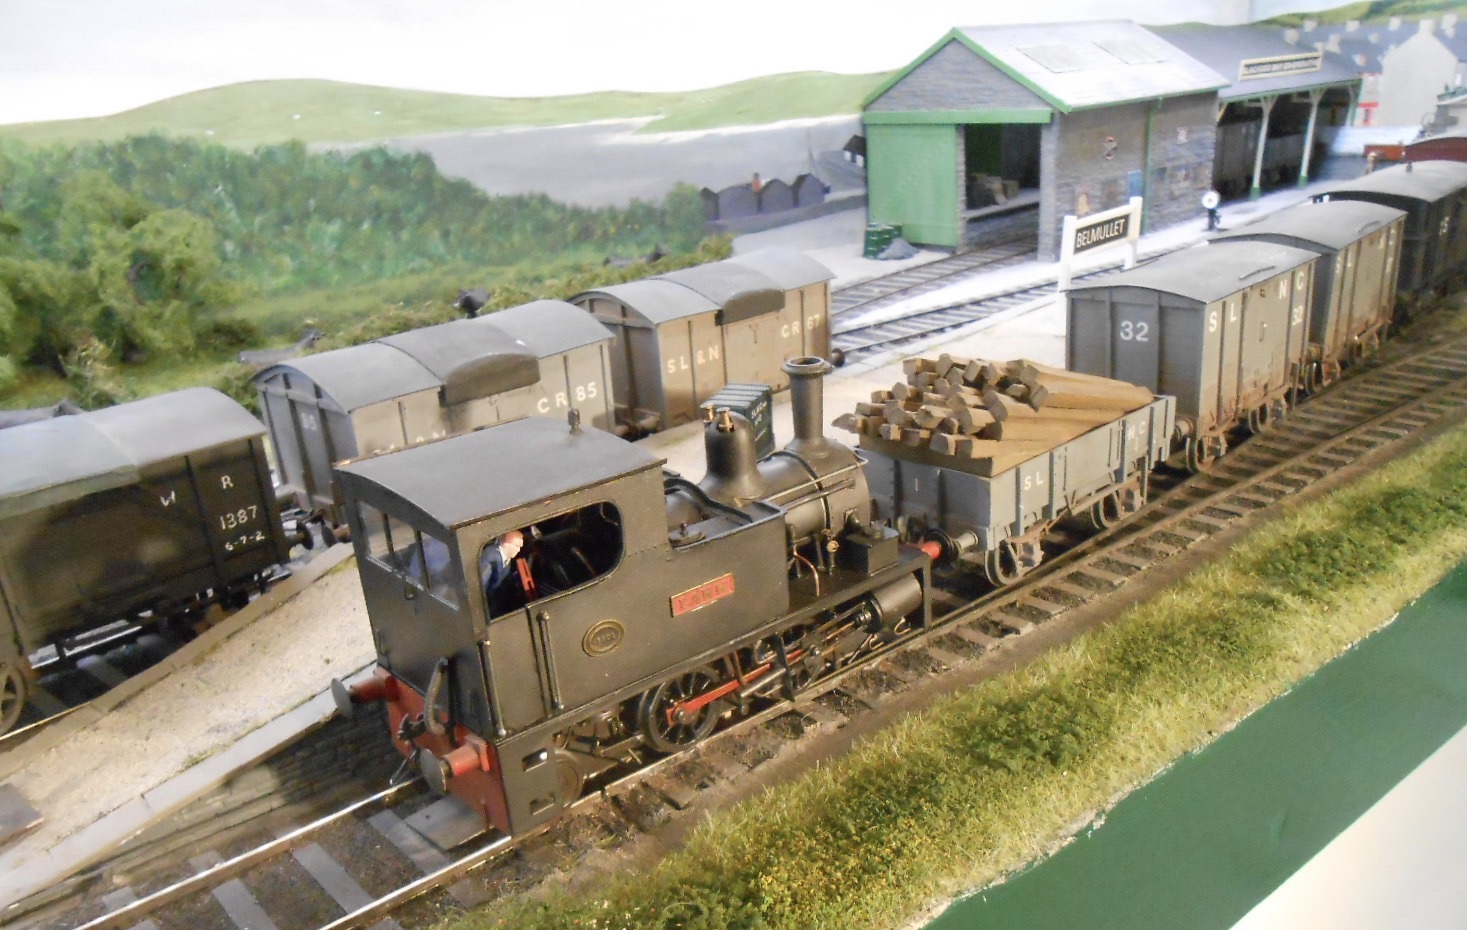
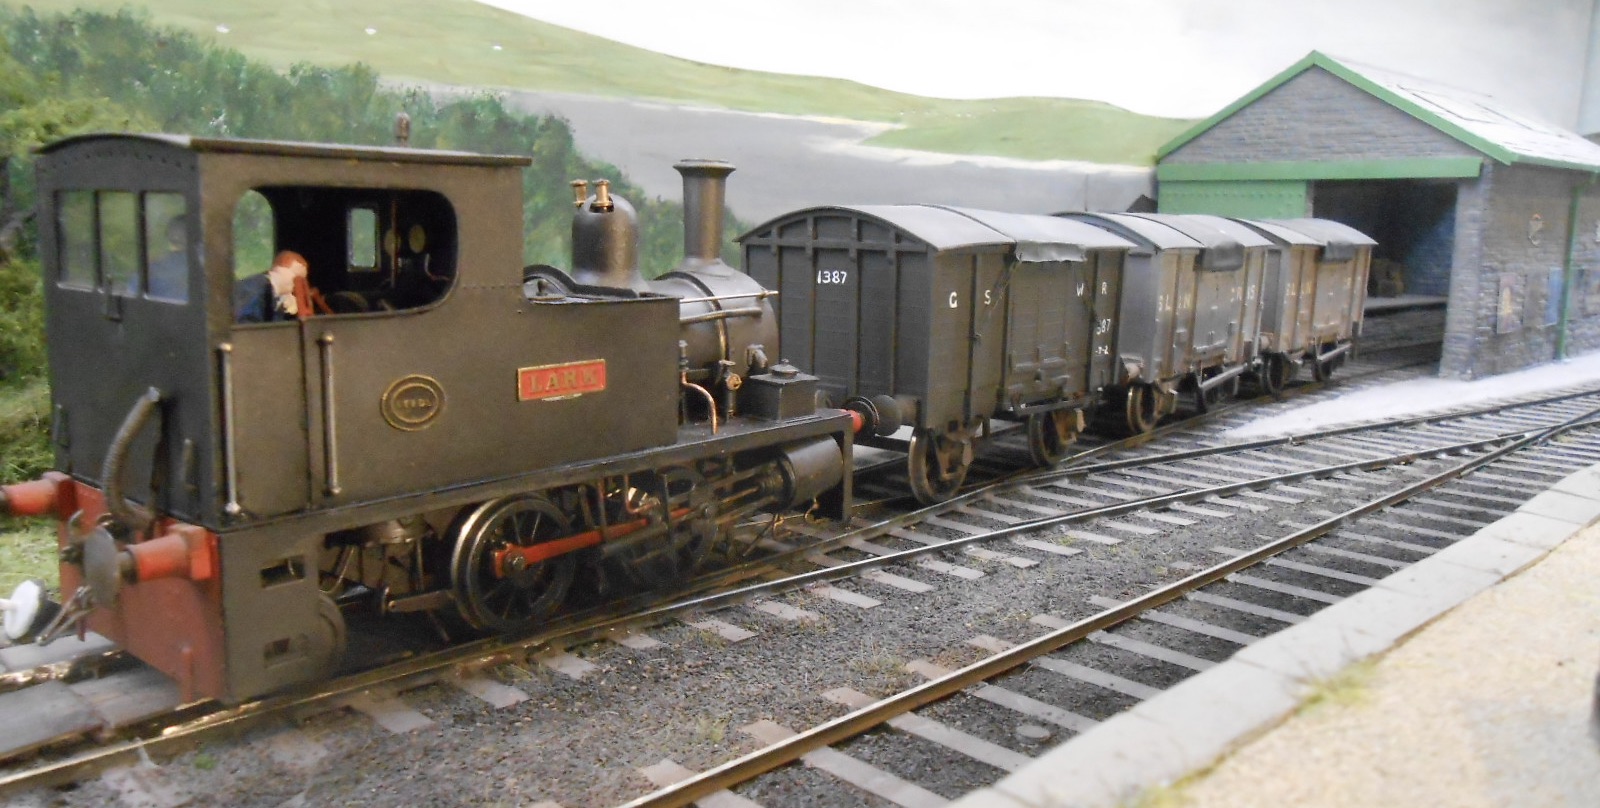
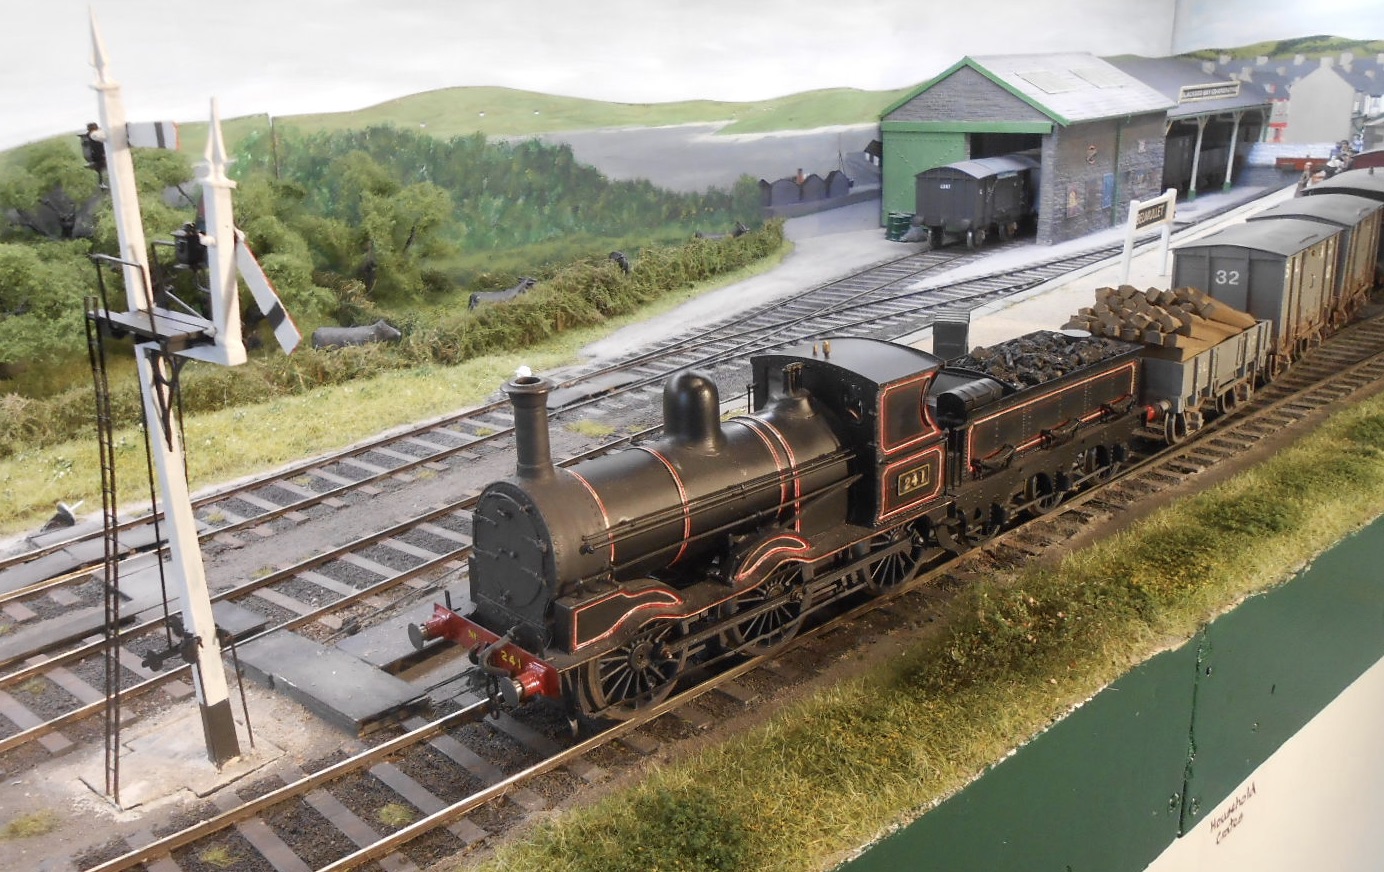
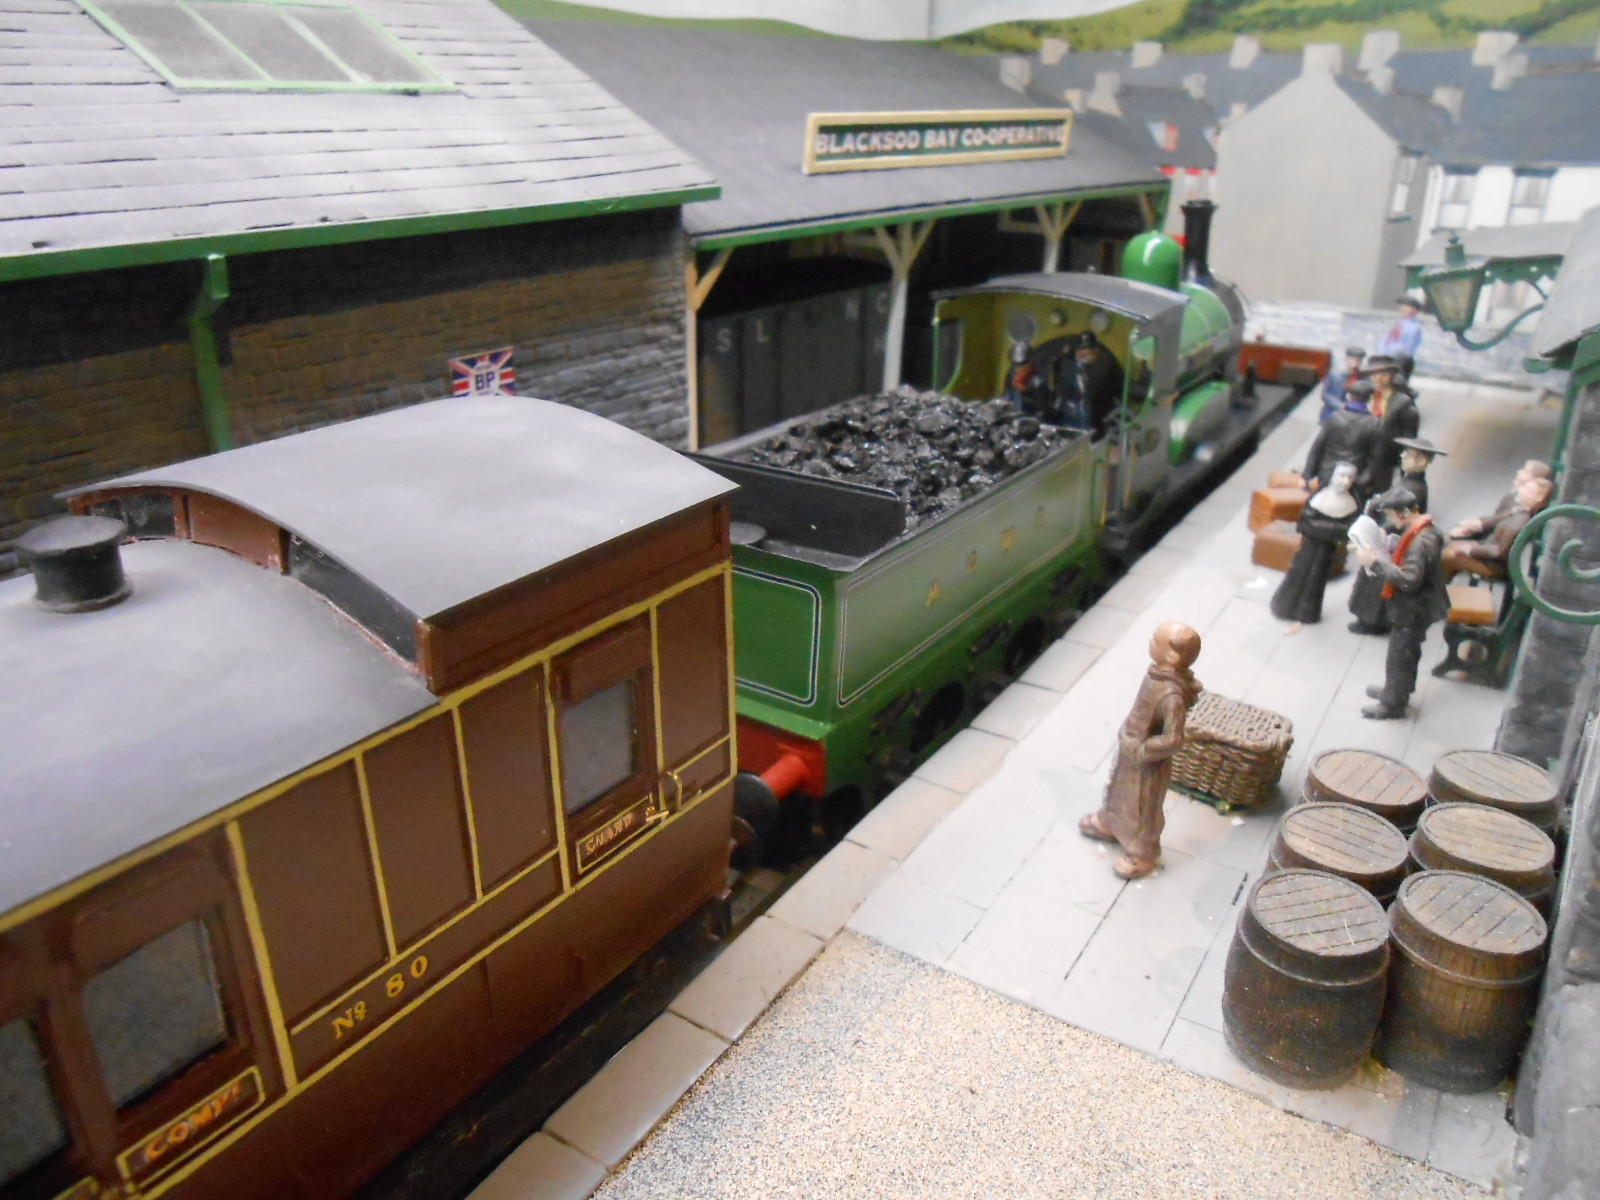
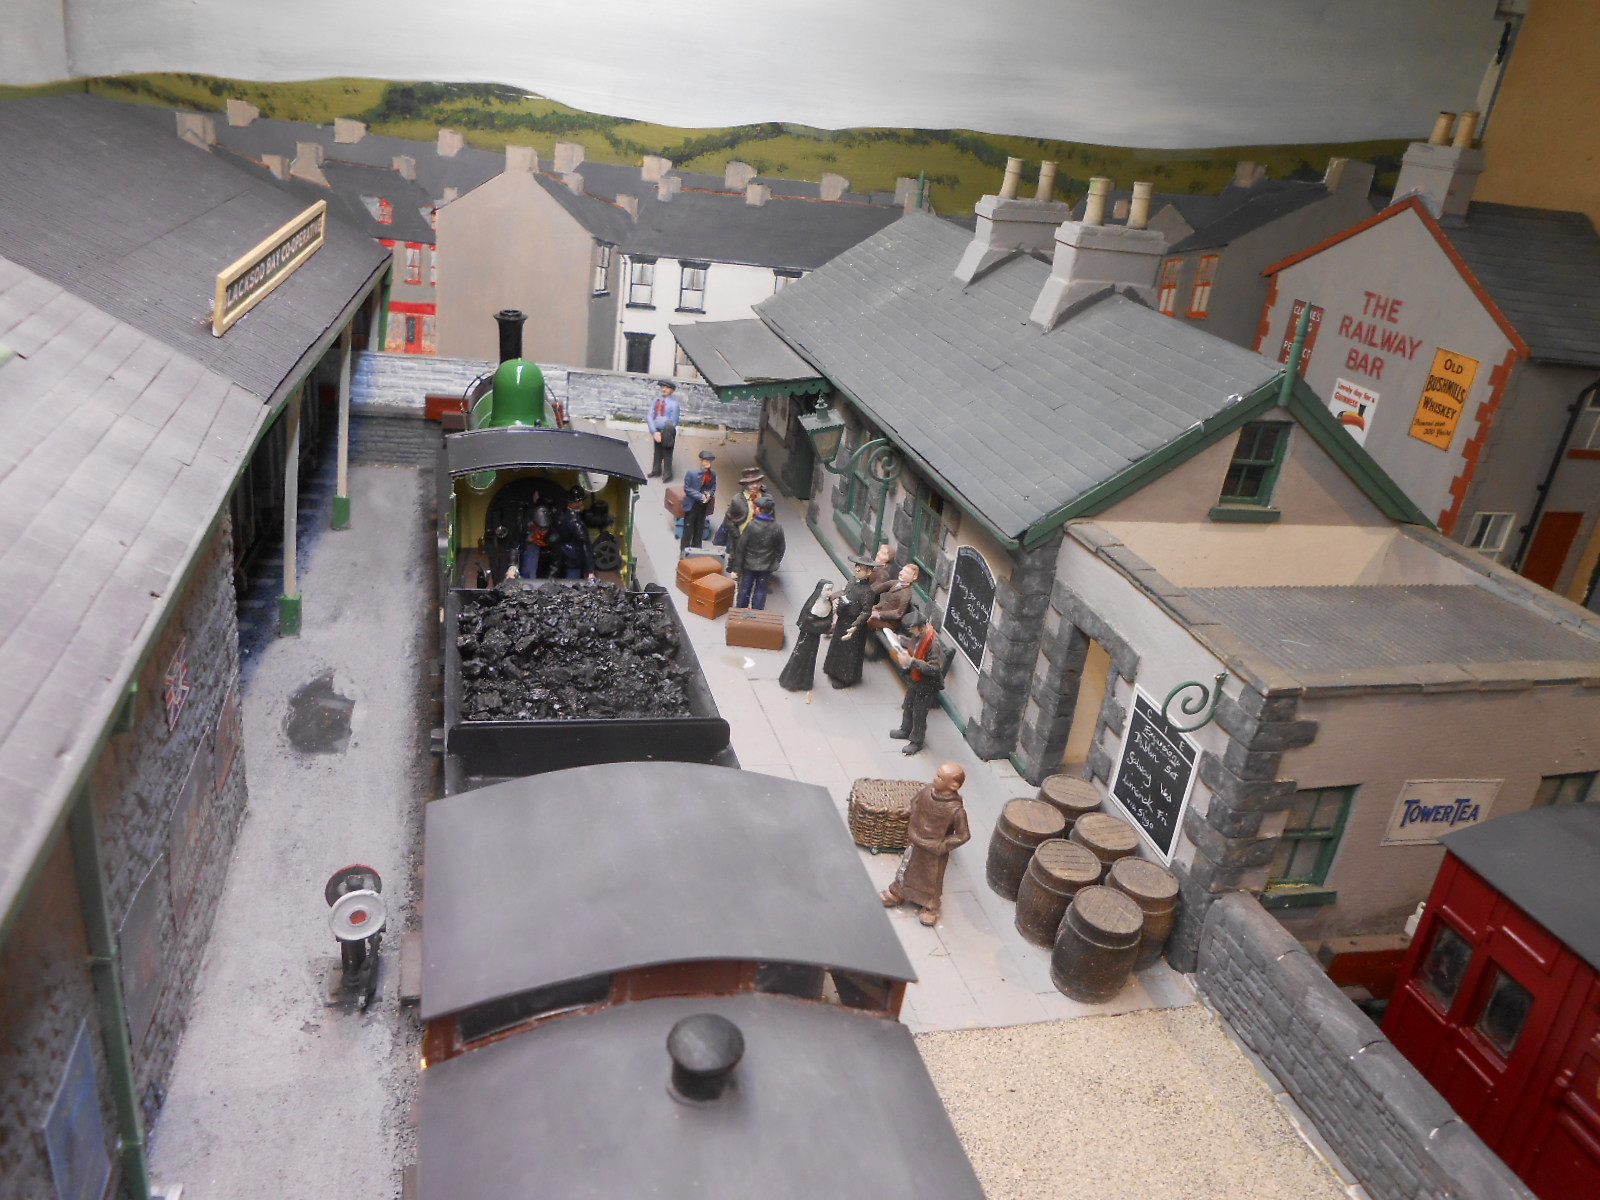
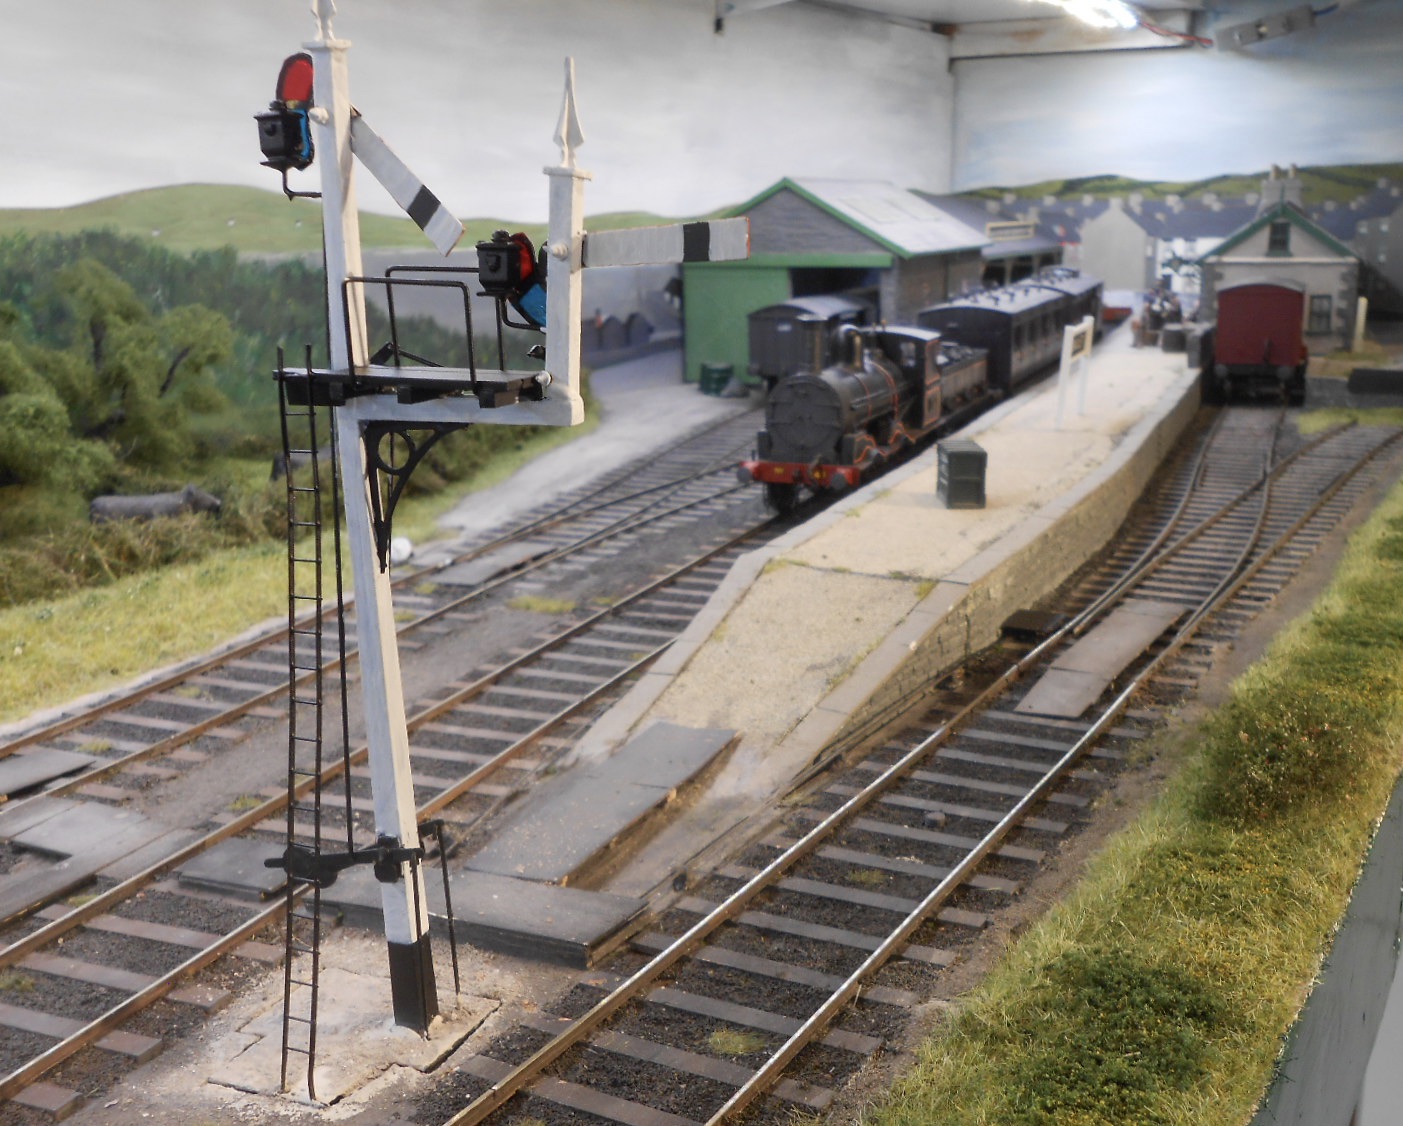
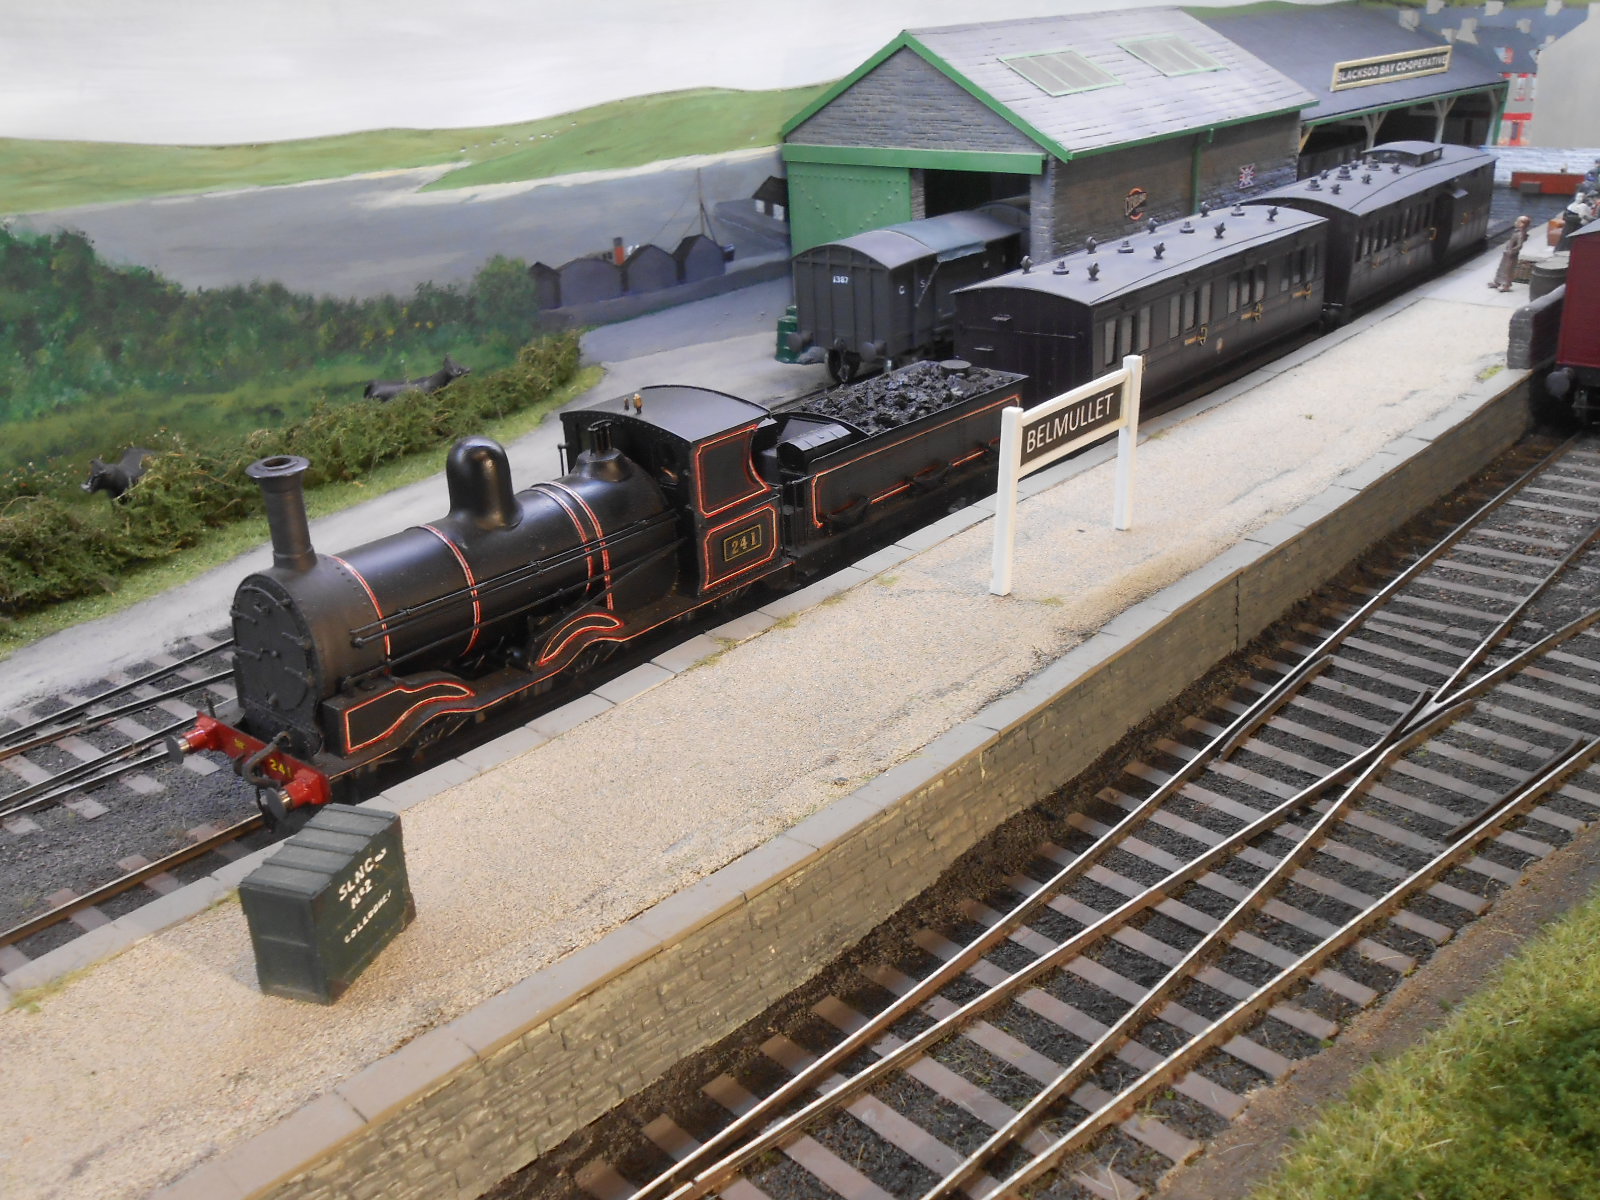
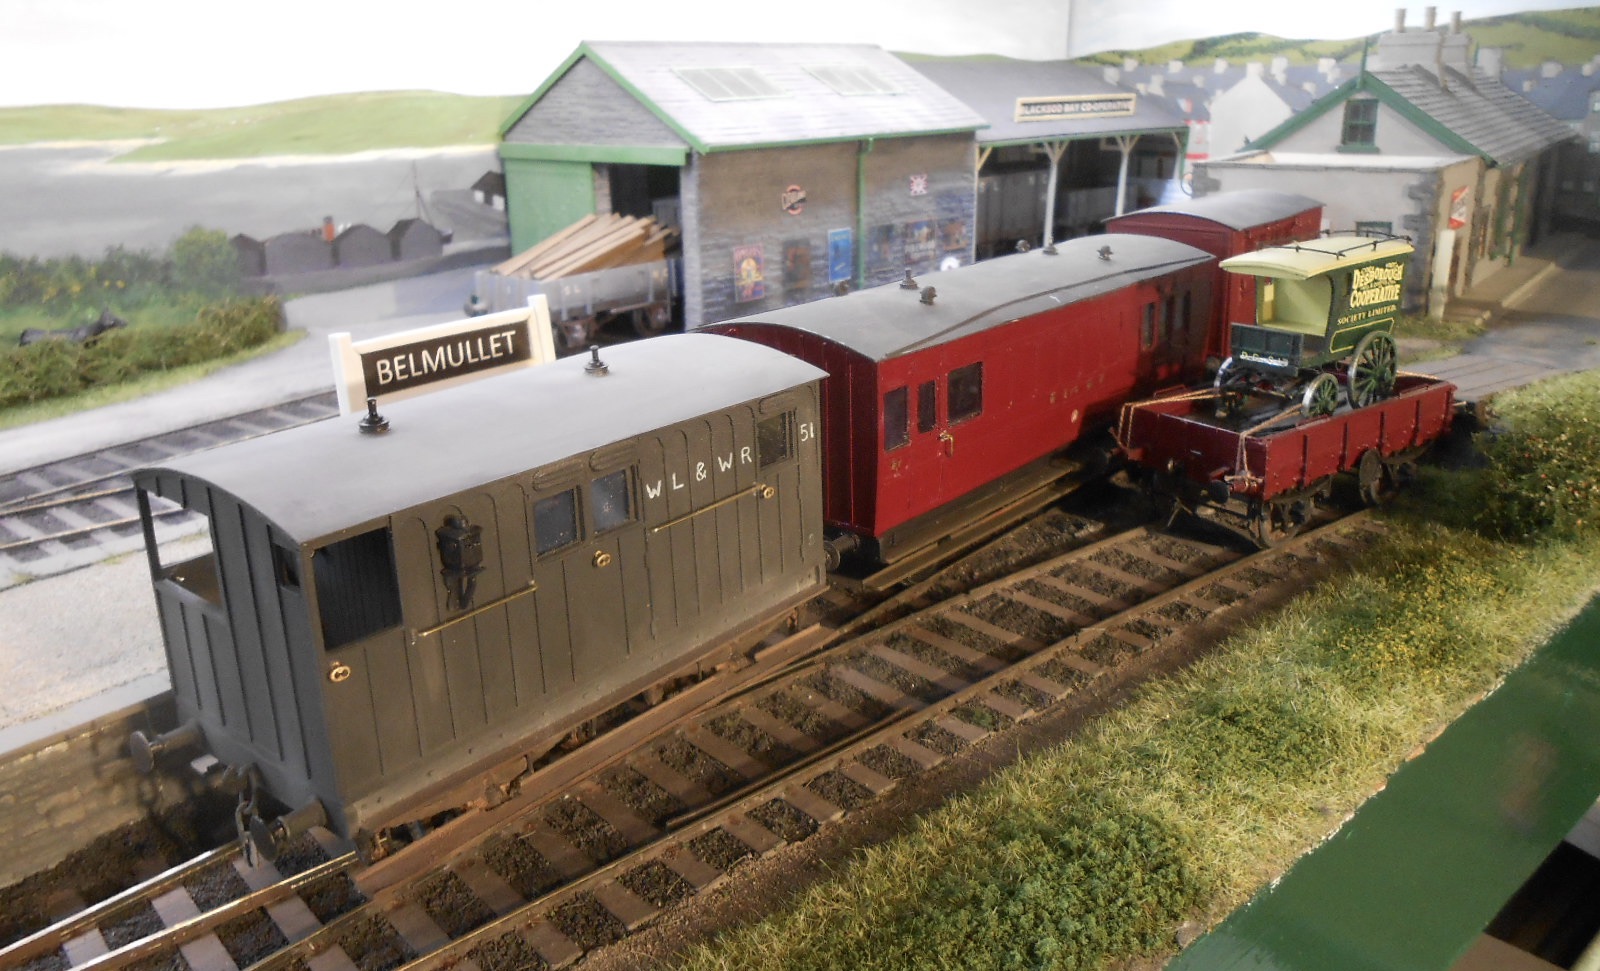
1900s trains It's been a while since I shared some photos of Belmullet, so here are a few photos of the trains I'm assembling for the 1900s period. Whether I'm at home, or at exhibitions, I like my trains to have a real purpose, which in turn helps to assemble rakes that I hope are representative of both the period and local area. Belmullet is imagined to be served by no less than four 'pre-grouping' companies [rather like Sligo], so we have the SLNCR, WL&WR, MGWR and GS&WR. First up is a freight from the Sligo Leitrim. Harbour branch loco 'Lark' [aka Timoleague & Courtmacsherry's St Mologa] brings coal wagons up from the quay, then Small Tank Fermanagh arrives with a rake of cattle wagons. While Fermanagh goes on shed for turning & servicing, Lark shunts the two trains, so that the coal can go back towards Ballina and the cattle vans go down to the harbour. The two rakes rotate, turn and turn about - so it is either coal coming in by sea for domestic use, or arriving from the Arigna mines for use in either the distillery or by local shipping. The second freight is a mixed one, hauled by my Coey 101 class 0-6-0. This serves the station goods shed and is made up of wagons from different companies. At the moment, I'm experimenting with using Lark as the station pilot/shunter. Being small, it is ideal for shuffling wagons about, with the return trip eventually departing from the bay. Currently, most wagons are Sligo Leitrim, but the plan is to build one or two from GSWR, MGWR and WL&WR, plus a DSER short van is also underway. Rails to Achill has a photo of one of these, so I reason it could have made it to Belmullet as well. As for passenger traffic, we have the MGWR Mail Goods, plus a two coach GS&WR train. The 101 is doubling up on this for now, but eventually I hope to build either an F6 2-4-2T or another 4-4-0, maybe one of the 6'6 versions. There is also the WL&WR Mail Goods, but photos of that are on my workshop thread, from last week. Running trains has thrown up a few problems. One of the point motors needs adjusting, for some reason the turntable is not sending power to the track, plus the new signals need linking to the control panel. This will mean getting to the underside of the baseboards, which is always a pain, though with the hope that we may yet be getting back to exhibitions later in the year, there will be further work required to ensure the layout is both presentable and transportable, so the bullet needs biting...
- 179 replies
-
- 19
-
-

-
Bonkers - and I love it. Such delicate work.
-
Jason is right, there is a subtlety to your palette which makes everything look so natural. It is so easy to over do things, but these dioramas look just right.
-
Great piece of creative modelling and makes for an unusual and interesting train. Fine work
-
Now that looks interesting. The thing is, is that a 5p or a 10 p coin? Love the small scale stuff, but definitely sticking to 7mm scale!
-
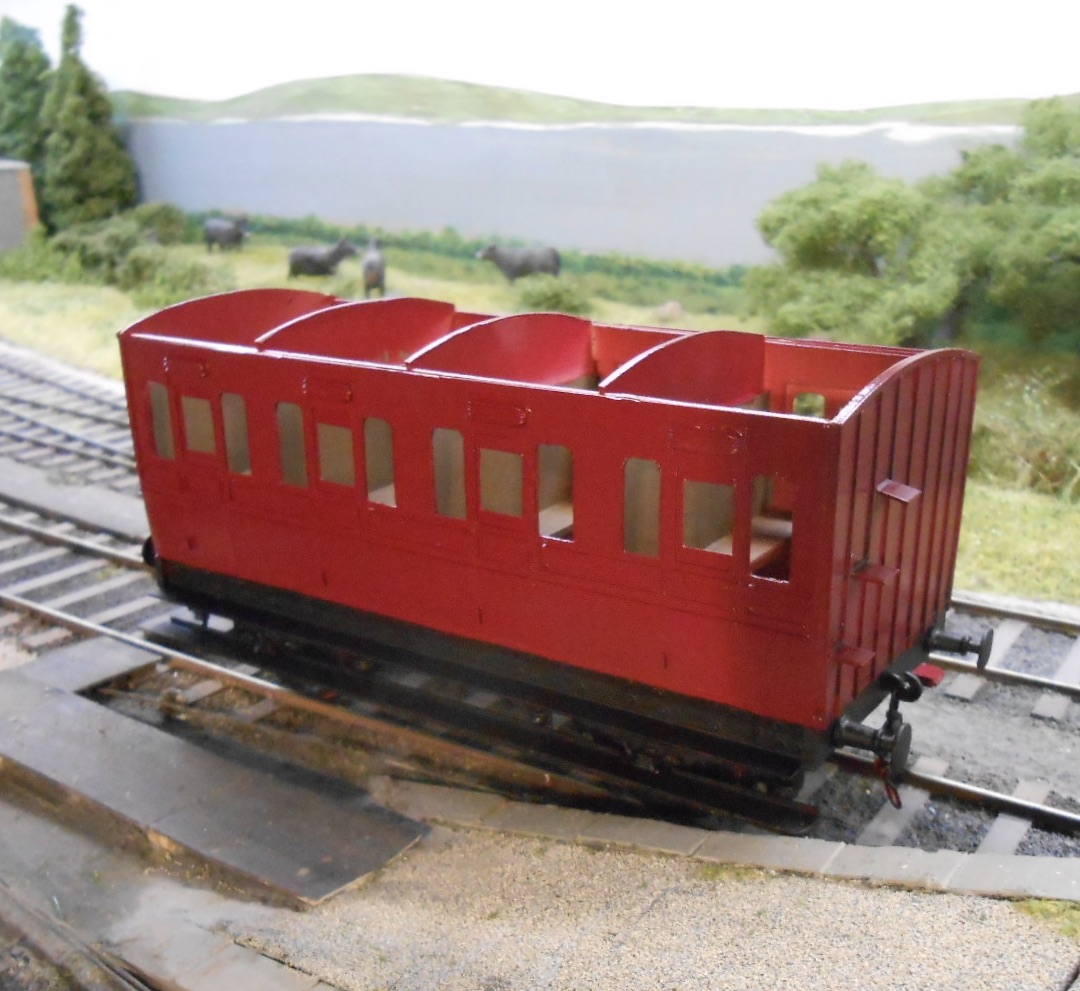
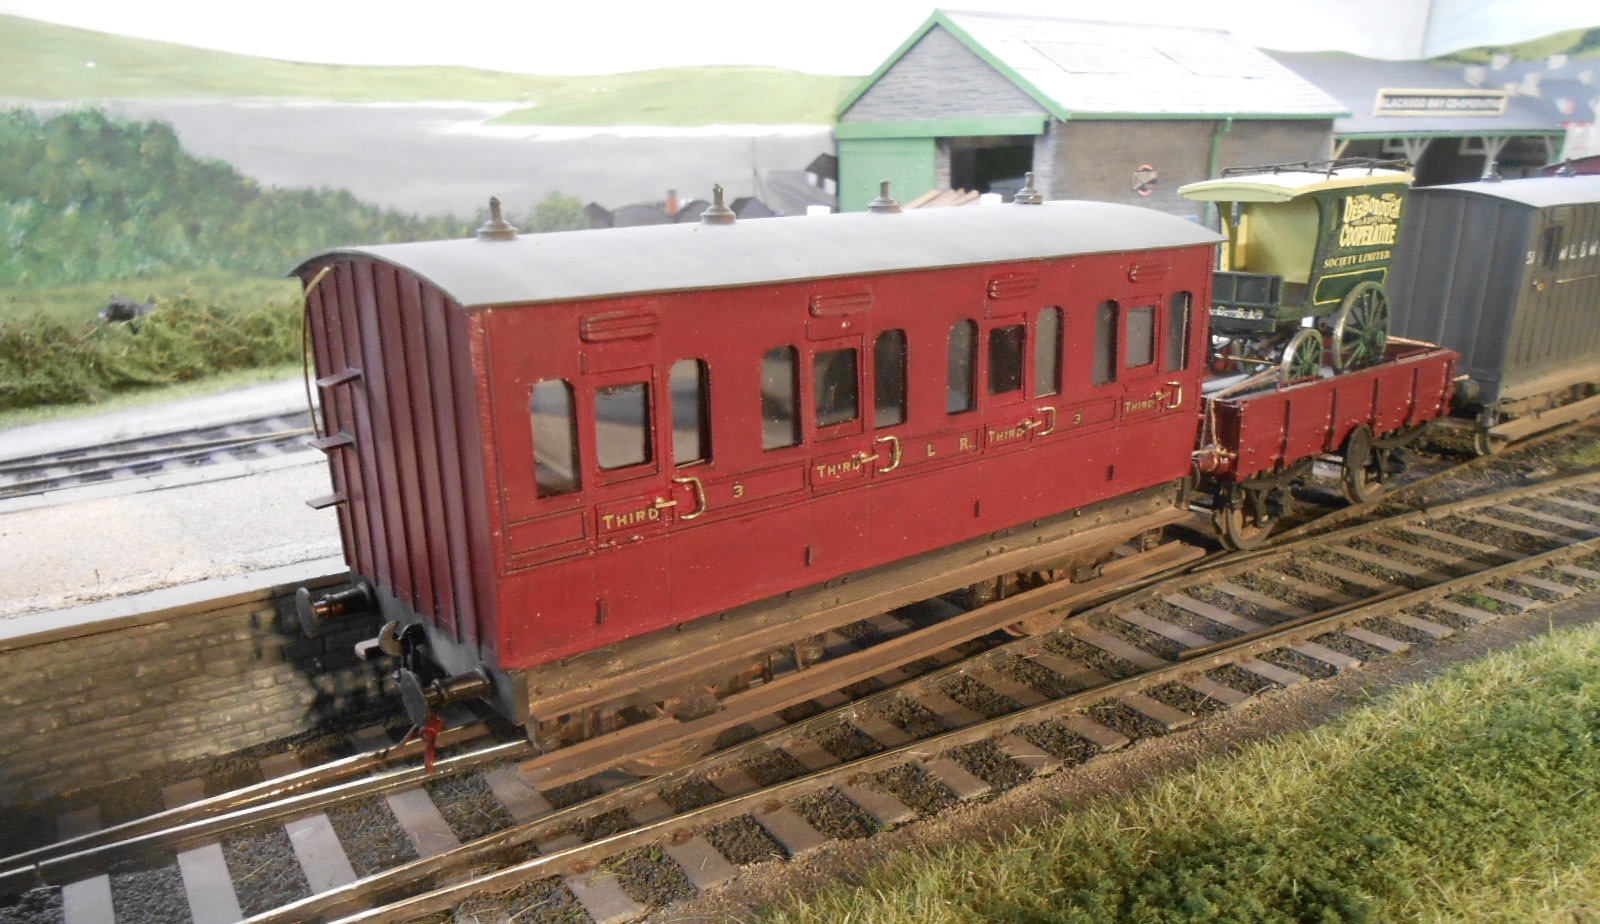
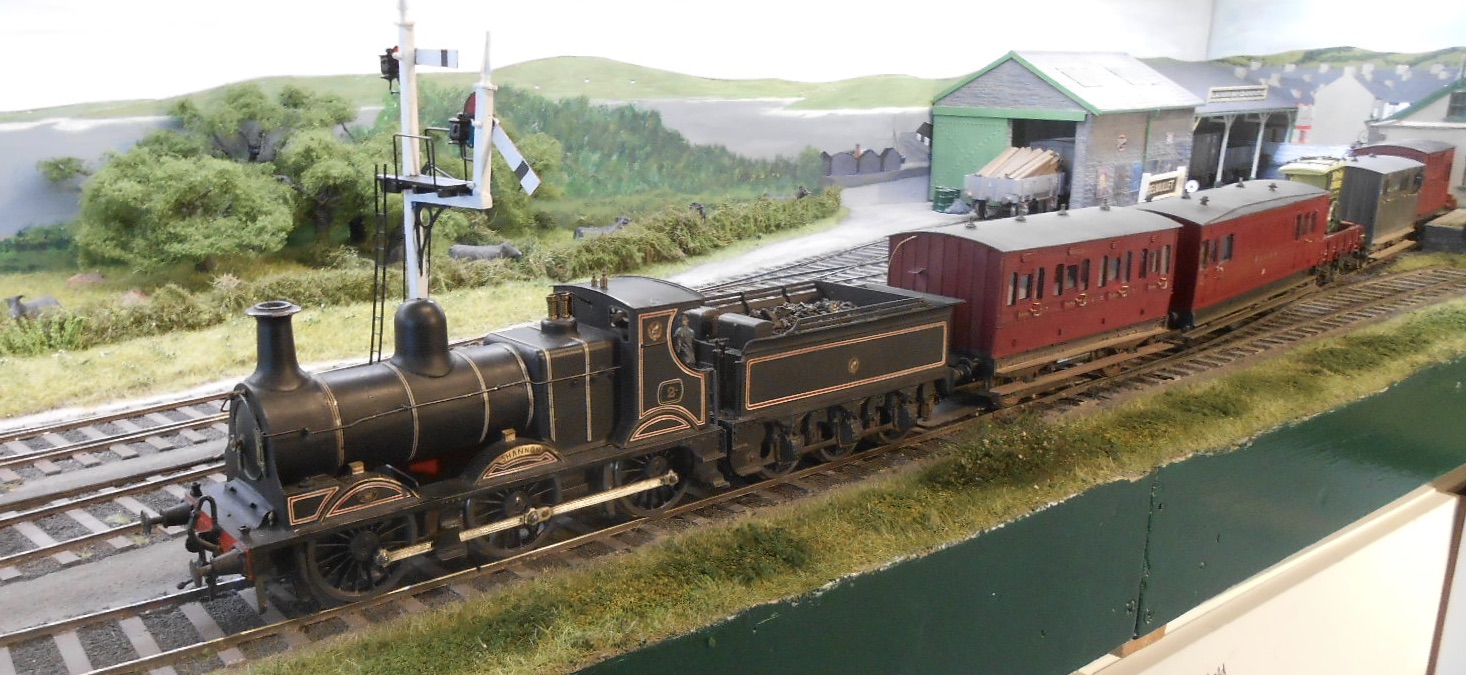
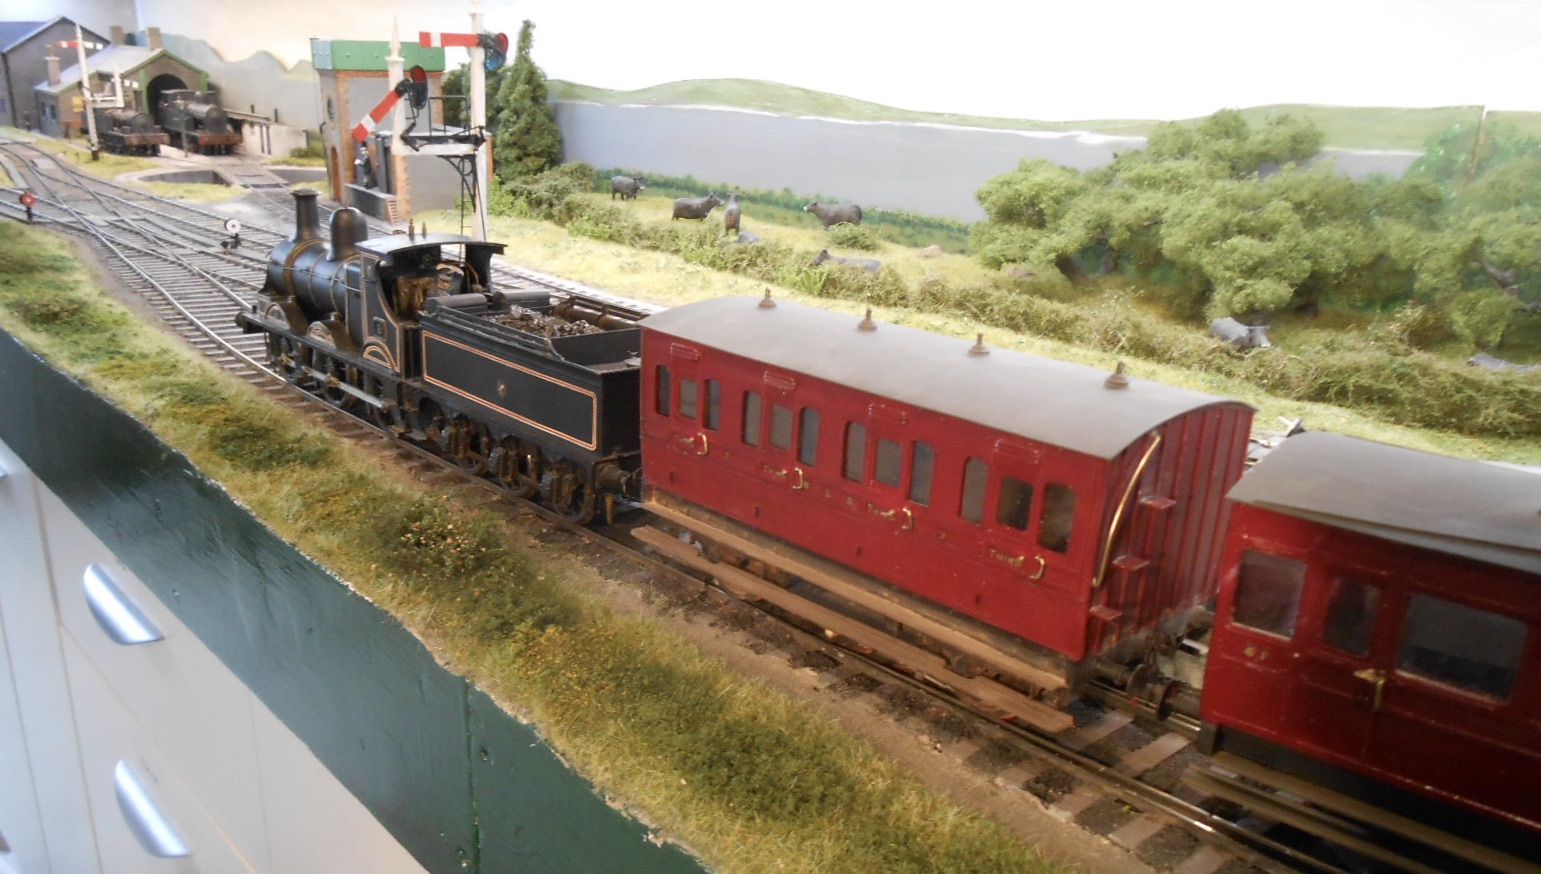
So, WL&WR 4 wheel third is now finished, albeit still lacking its vacuum pipes. Unlike the brake van, it is at least based on a photo of a prototype - No3, as shown in Ernie Shepherd's book. To be honest, it is not my best work, but should pass the two foot rule, and it runs well enough. The first picture shows it in Hycote Ford Burgundy Red, which is a bit too bright for my liking, so this has been toned down with Null Oil - a black wash from the Games Workshop range. This has resulted in a slightly scruffy appearance [which rather matches my workmanship!], appropriate for a coach that hasn't been painted for ten years or more. Lettering is from an HMRS L&SWR sheet The other pictures show it as part of my 'Mail Goods', with 0-6-0 Shannon in charge. There seem to be quite a few photos of trains like this, having a four or six wheeled coach at the head of a long rake of wagons and somehow I rather like this. Not many wagons at the moment, but in the long journey south to Limerick, I guess a fair few will be added along the way.
-
Splendid, as ever. Love the term 'hungry boards', never come across it before, but very apt!
-
Coming on nicely, Noel. Like the lack of uniformity which is what you get in a station, where brake dust and oil accumulate. The baseboard join is disappearing too.
-
The latest issue has just arrived and is quite a tour de force. Articles on 00n3, converting diesels to 21mm gauge, plus one from Andy Cundick on his C class diesel. Excellent stuff!
-
Believe it or not, the 101 on Belmullet was built from the same etch, blown up to 7mm scale. Amazing to think it was done in three different scales, especially as this was well before the days of CAD. I recorded the build in the workshop thread under the heading 'A tribute to Richard Chown'. Got the kit at Guildex as part of the last remnants of his estate, he's had it since the late 90s and somehow never got round to building it. In 7mm scale, it was fascinating to build, with some clever ideas to ensure the curved footplate goes together well. Guess it is likely the original 4mm etch was photo enlarged to 7mm scale and if so, Terry's work must have been very accurate as the fit of parts was really good, so going down to 2mm should be fine. Putting it together another matter, but it should make an exquisite model. Love the 5p picture. I hand lettered mine with a fine nibbed dipping pen, so this is another level entirely!
-
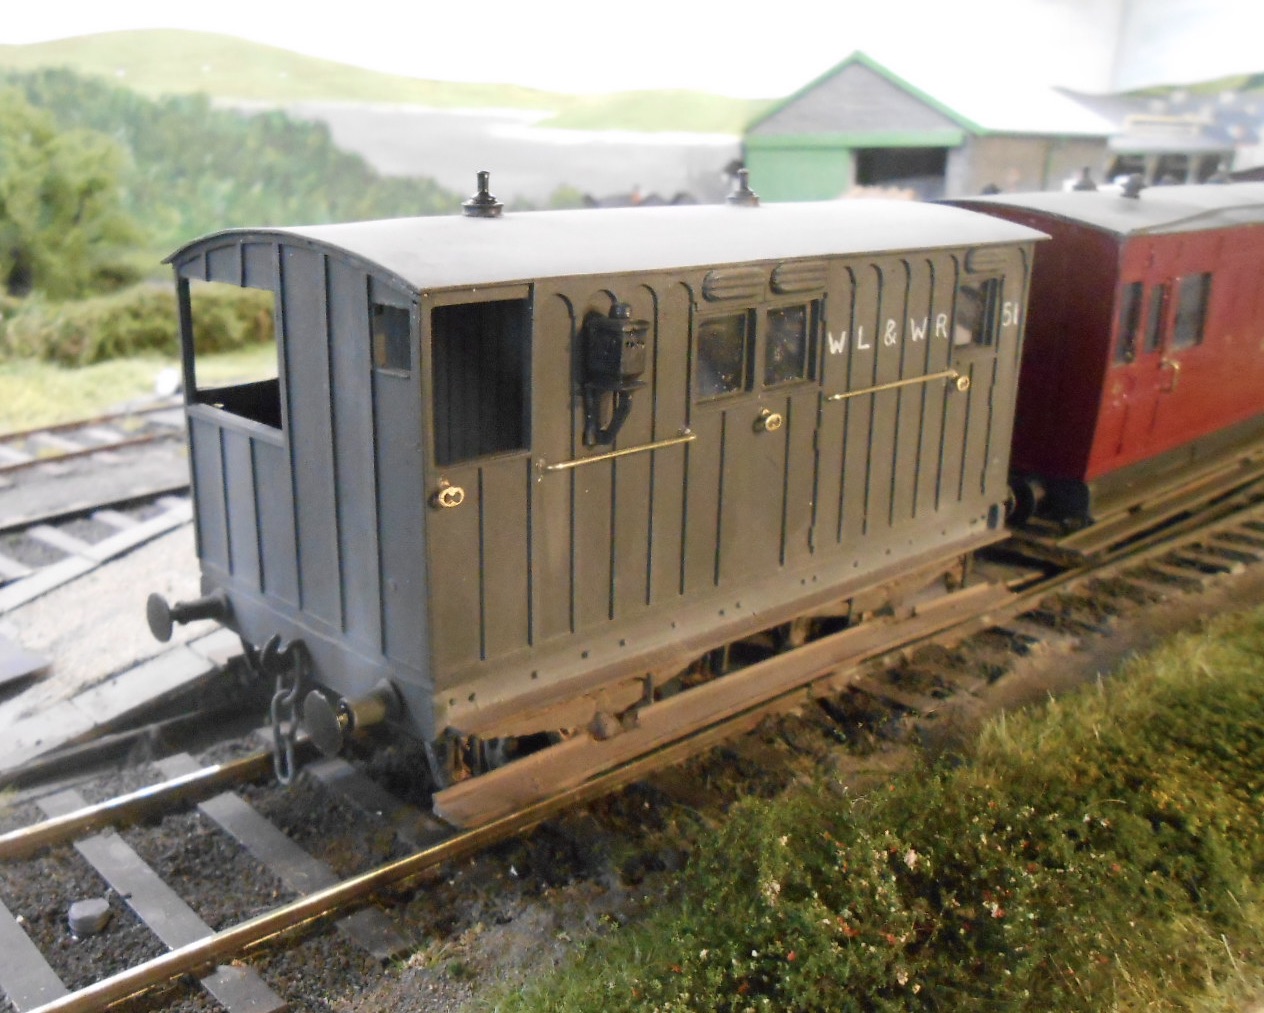
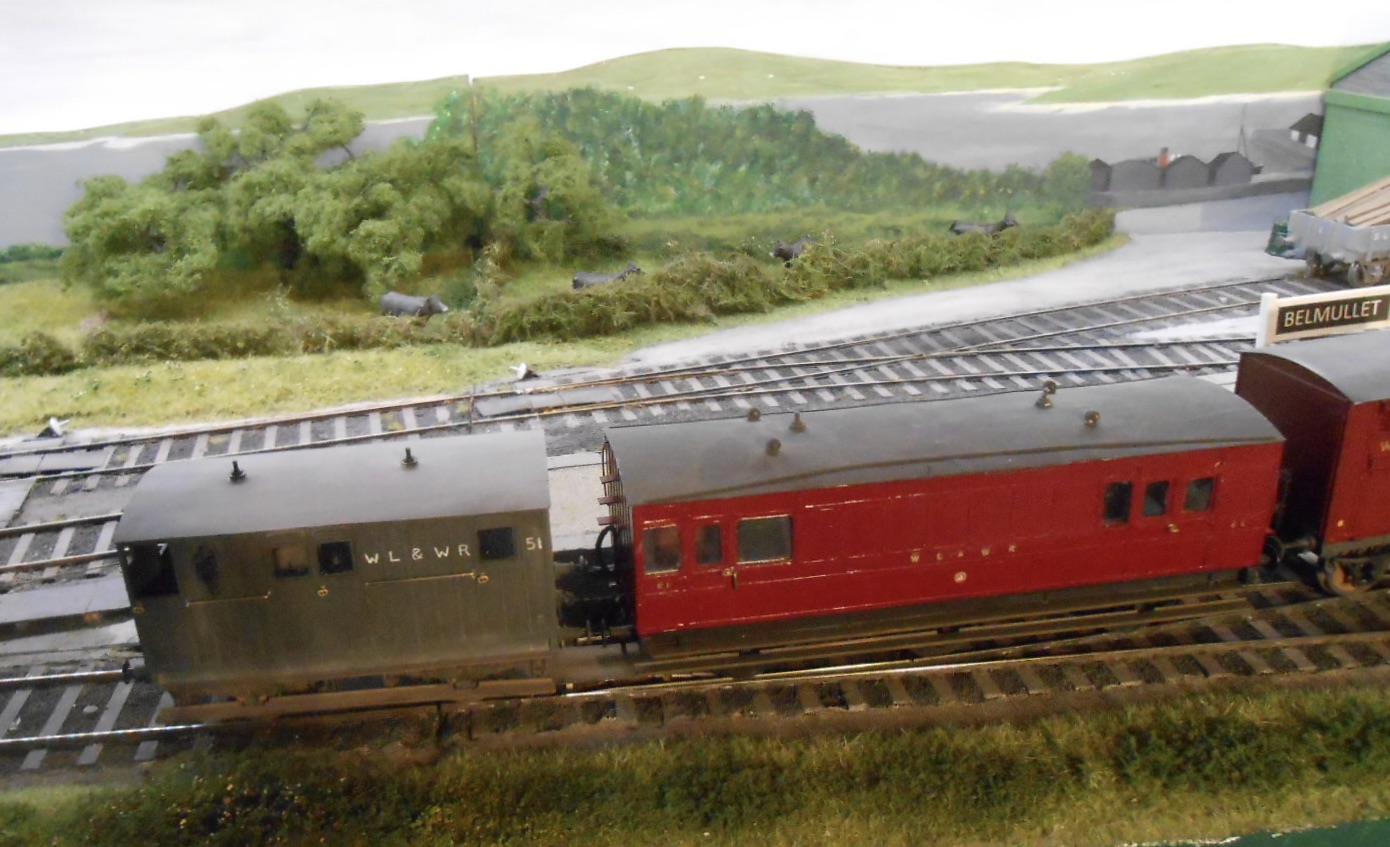
Progress continues on the WL&WR 'mail goods' train for Shannon. Like most rolling stock scratch builds, you think you've got the model nearly finished, but it is the detailing that takes the time. However, the brake van is now just about there. The first picture shows the plastic shells for both the van and the four wheel coach. The brake van though has been painted, lettered and given a bit of light weathering. The nice thing about both models is that they have been made from what I had in stock, so it feels like they haven't cost me anything. They have, of course - a pair of wagon/coach wheels is around a tenner, couplings a fiver and sets of cast buffers and W irons another fiver each, so £25 is about the minimum for a 7mm scale wagon, plus of course a few hours of [mostly] pleasurable work. The rest of the pictures show the brake van with what will be the rest of its train - all WL&W vehicles, with a six wheel full brake, a carriage truck and a horse box. The latter has been reverse modelled from an SLNCR vehicle I built a few years ago, the prototype actually coming from the WLW. It must be said though that the brake van is decidedly dubious in terms of accuracy, being an amalgam of two early types - Dublin & Meath and Waterford & Central Ireland. I thought about painting it in passenger livery, so that the whole train would be crimson lake, but in the end I didn't have any screw link couplings, so it's ended up dark grey.
-
Wonderful information and can only agree about the horsebox - my 7mm scale one is not as sharp as this.
-
Just been looking back at the 5p pictures to remind myself how tiny these wagons are. Little jewels! The two Dublin and Meath brake vans I got from Richard Chown have their wheel centres in varnished wood,meanwhile, am sure it won't be long before our livery guru can advise. Going back to the horse box, when you think how small it is, the smallest error will throw the shape of it completely, which only goes to show what a fine model it is. Keep 'em coming Angus!
-
Interesting. Using 5.5mm/ft gives a scale of 1:55 - a remarkable bit of symmetry. For comparison: 7mm/0 is 1:43 S is 1:64 00 is 1:72 H0 is 1:87 TT/3mm is (approx 1:100) British N is 1:148 Continental N is 1:160 Without wanting to hijack J-Mo 's thread, I hadn't realised 5.5 was bigger than S. Clearly it was a scale designed to make 16.5mm track work with a known prototype gauge and I believe was also used with 12mm track for two foot gauge. Obviously a scratchbuilders scale, anyone know what figures and road vehicles were used? Another potential Irish scale/gauge combination is 6mm scale. It is close to 1:48, which Americans use for 0 gauge, while 32mm, standard 0 gauge track and 18mm EM, track work nicely for 5'3 and 3'. Indeed has much potential for Irish narrow gauge, with plenty of figures and road vehicles available in 1:48, but works less well with loco driving wheels for 5'3 as scaled down from 7mm, the number of spokes no longer match for a given size. Considered it for a while, but easier to stay in 7mm and use 36.75 track. Anyway, am sure J-Mo's stuff is far more interesting than my wittering here!
-
Excellent stuff, keep posting! One dodge I use a lot on my layouts is a siding going off scene into the fiddle yard. On Belmullet, it is harbour branch, for Fintonagh it leads to a transfer siding for broad gauge, while on Arigna Town it was a branch to the coal mines. The point is that the siding can be anything you want and because it goes off scene, no extra modelling/space is needed, though you have the opportunity to build whatever stock you might want to serve it.
-
Object lessons for us all, add in Ken's similar project and there is much inspiration in these small projects.