David Holman
-
Posts
4,359 -
Joined
-
Last visited
-
Days Won
117
Content Type
Profiles
Forums
Events
Gallery
Blogs
Everything posted by David Holman
-
Slater's Plasticard do 7mm scale corrugated sheets, so worth checking their website to see if 4mm available.
-
Tasty. Well done Ken.
-
Ye gods, what is the world coming to? Time was, one use a camera to take pictures, nowadays a phone is pretty much all you need to do anything! Truth is, it's amazing what can be done. My first digital camera did everything my previous SLR could do and more. The Nikon Coolpix I use for model photos on this forum cost me fifty quid, yet has 12 mega pixels and does video. Shouldn't be allowed, especially as it can store over a thousand lower resolution pictures on a memory card the size of a postage stamp. Where does it keep it all??? Keep having fun JB, will look forward to seeing what transpires.
-
My pleasure. Good modelling deserves a wider audience. Martyn Welch does just this in his Art of Weathering book.
-
Subtlety personified and no small task either. Ever thought of doing a small photographic diorama? Just a piece of well ballasted and weathered track, like a siding with some surrounding weeds and a photographer backscene. Remove the tension locks and then pose a wagon. Suspect there could be more than a few who will struggle to decide whether it is a model or the real thing, me included.
-
B165 returning light engine is one of my favourites. It really captures the evening gloom.
-
Somebody's having fun! Was trying to decide what it is that makes the layout so effective and then realised it is simple: Space. Rural termini everywhere were pretty much always spread out because land was cheap, unlike a city terminus. Resisting the temptation to fill the baseboard with track, but at the same time having enough length for what looks like a 20 wagon freight is not something you see very often, but certainly works here.
-
I always lay the track across any baseboard joins and cut the rails afterwards. I use screws, rather than nails at the join, so I can adjust their height to the bottom of the rails. Nevertheless, laying curved track across a baseboard joint is always challenging.
-
No idea what this all means, but certainly looks good!!
-
Site very well alongside the 121. Two quality models.
-
Looks like a nice bit of superelevation there too. What's the radius?
-
At the moment, it is squeak free, but then I always said that was my arm, not the turntable.
-
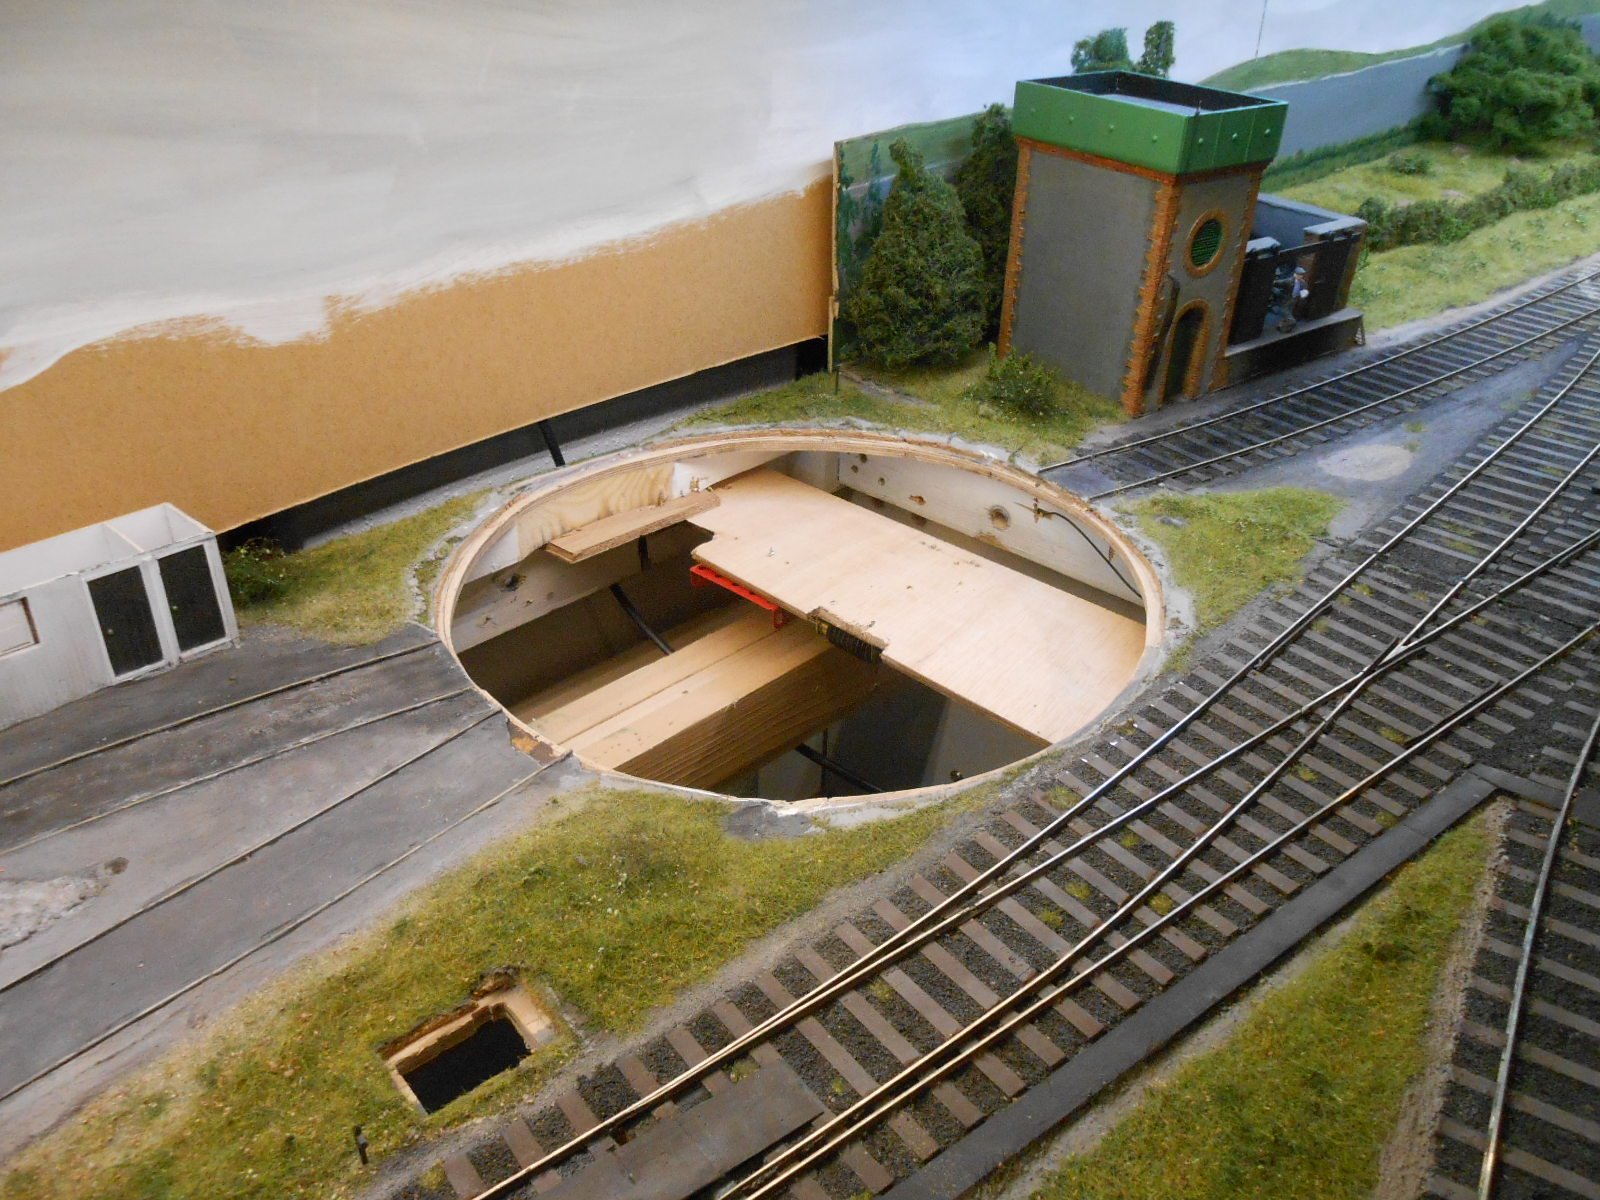
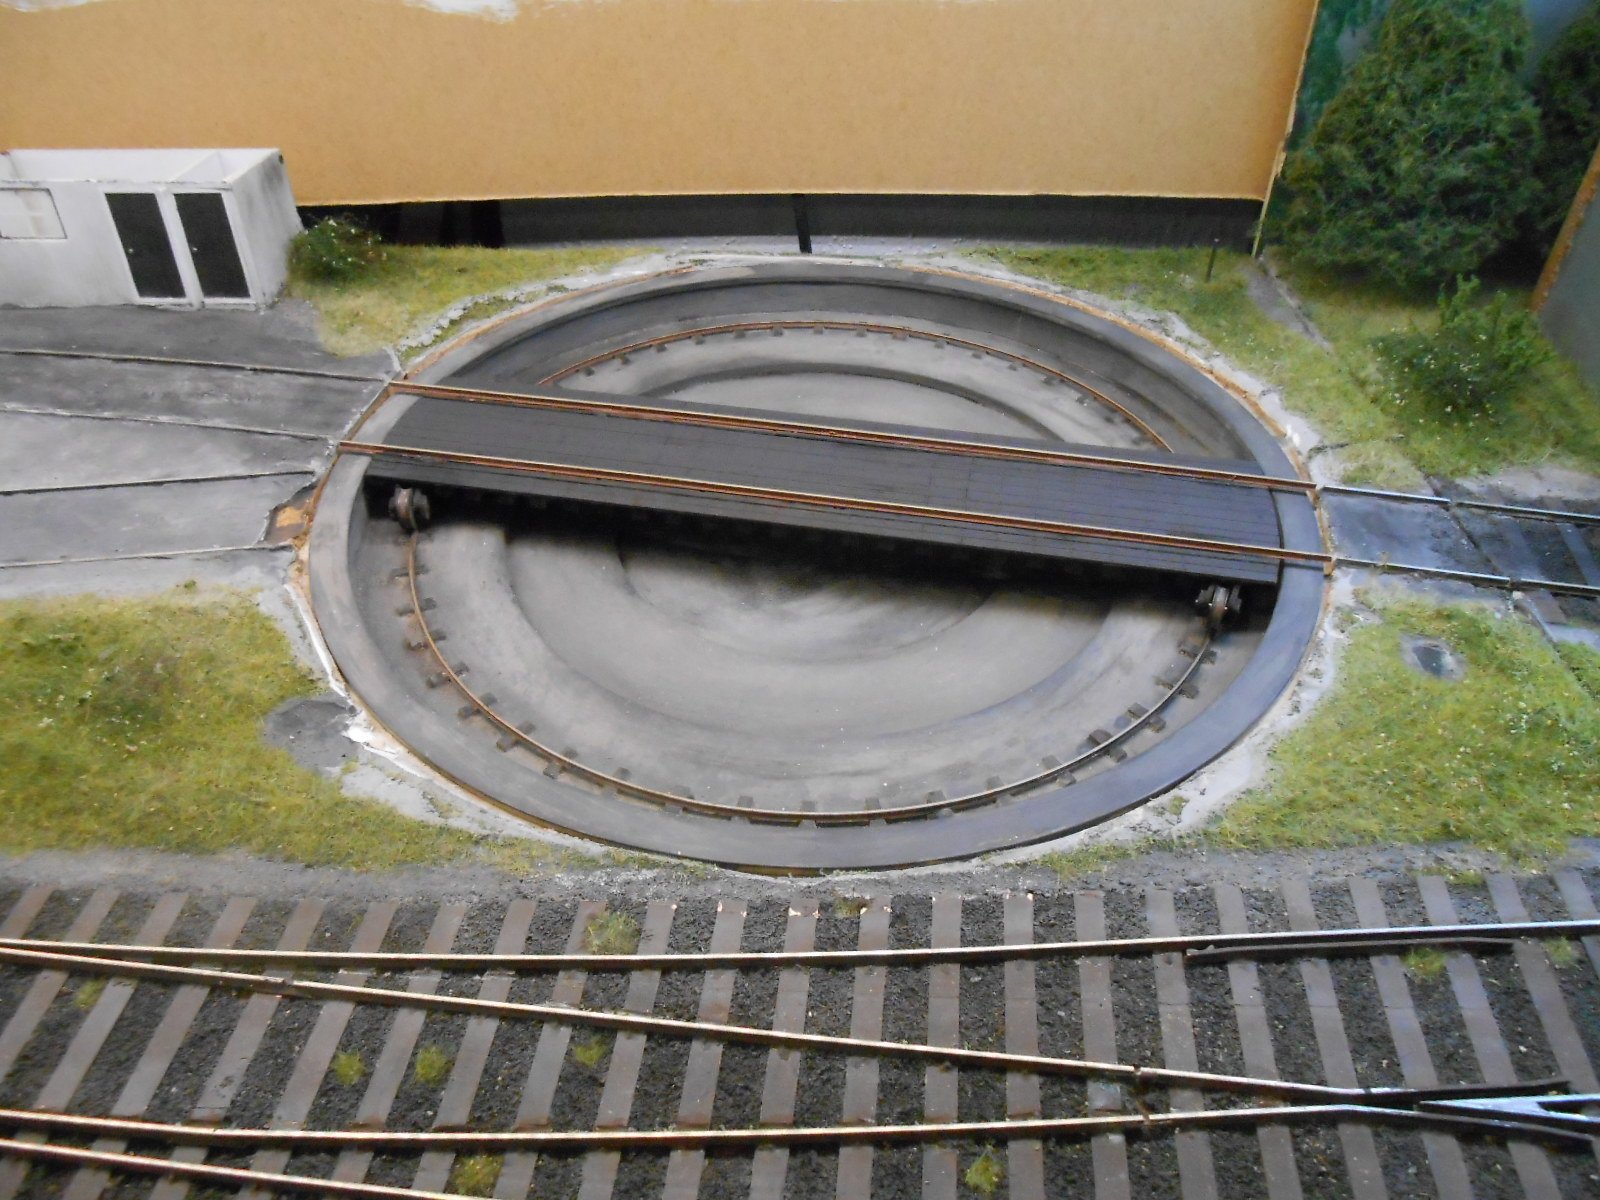
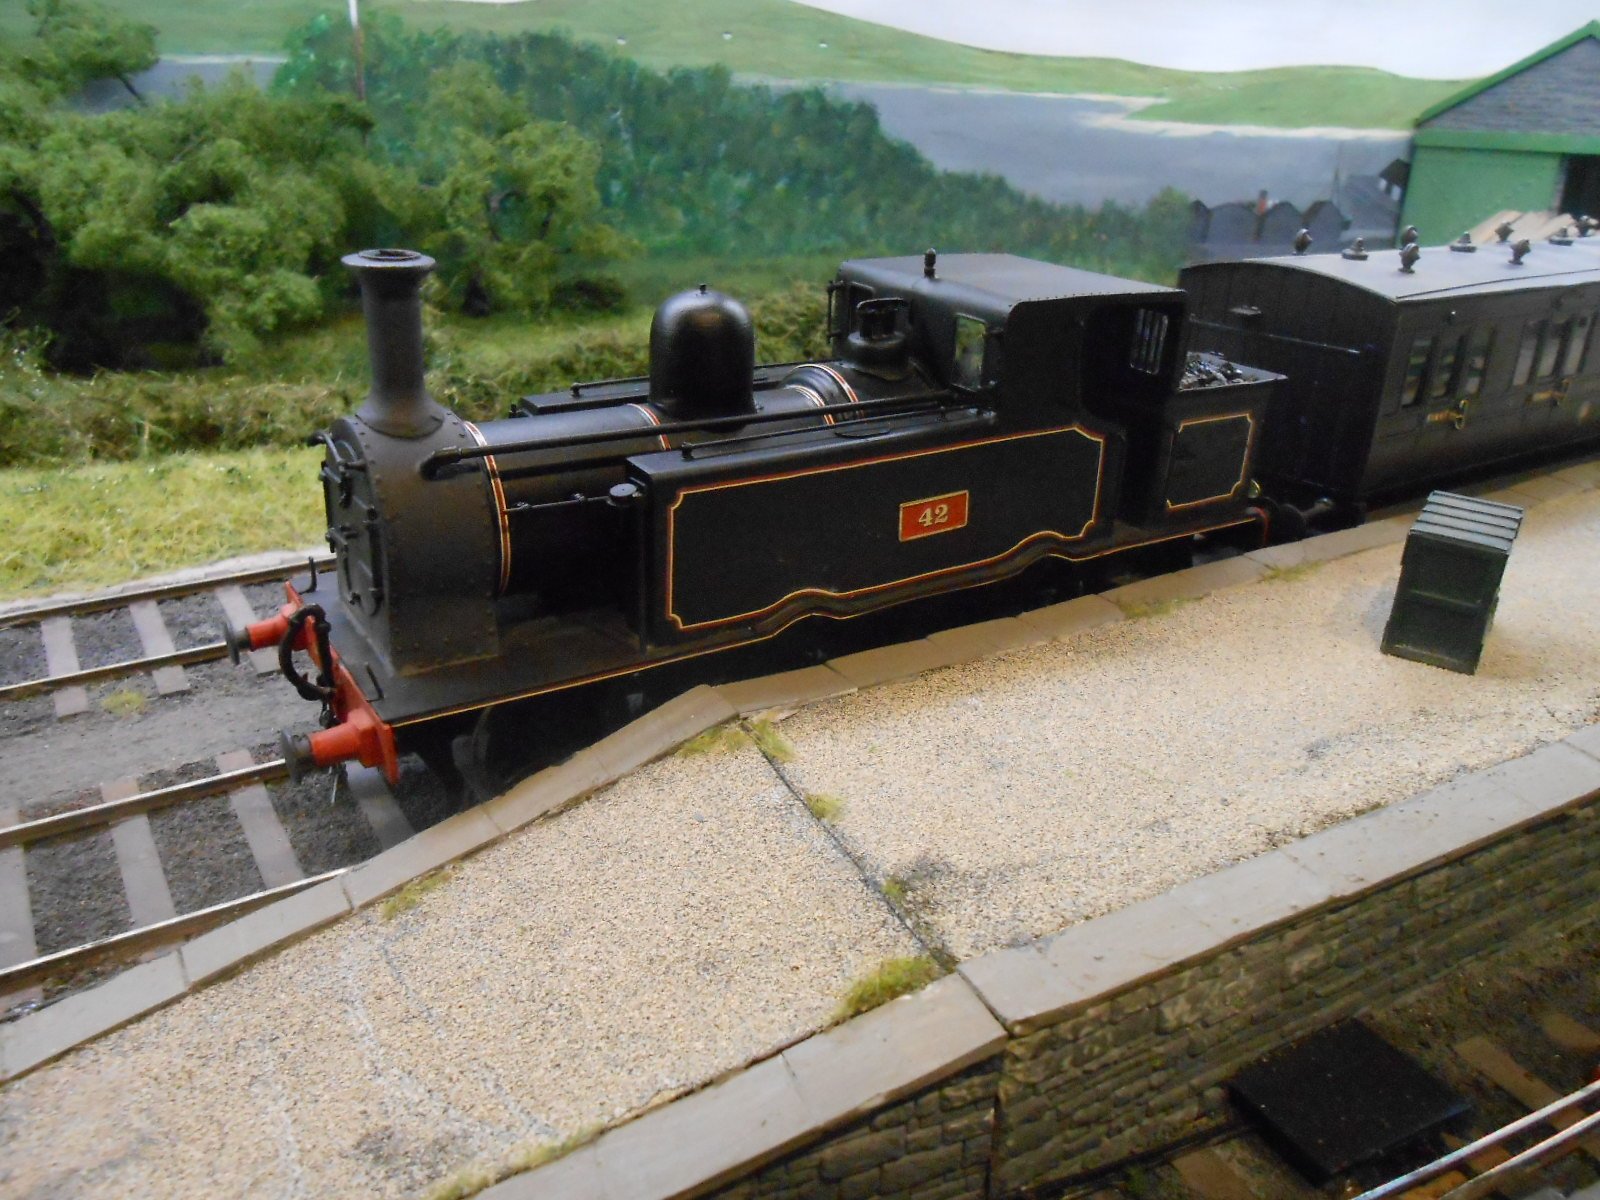
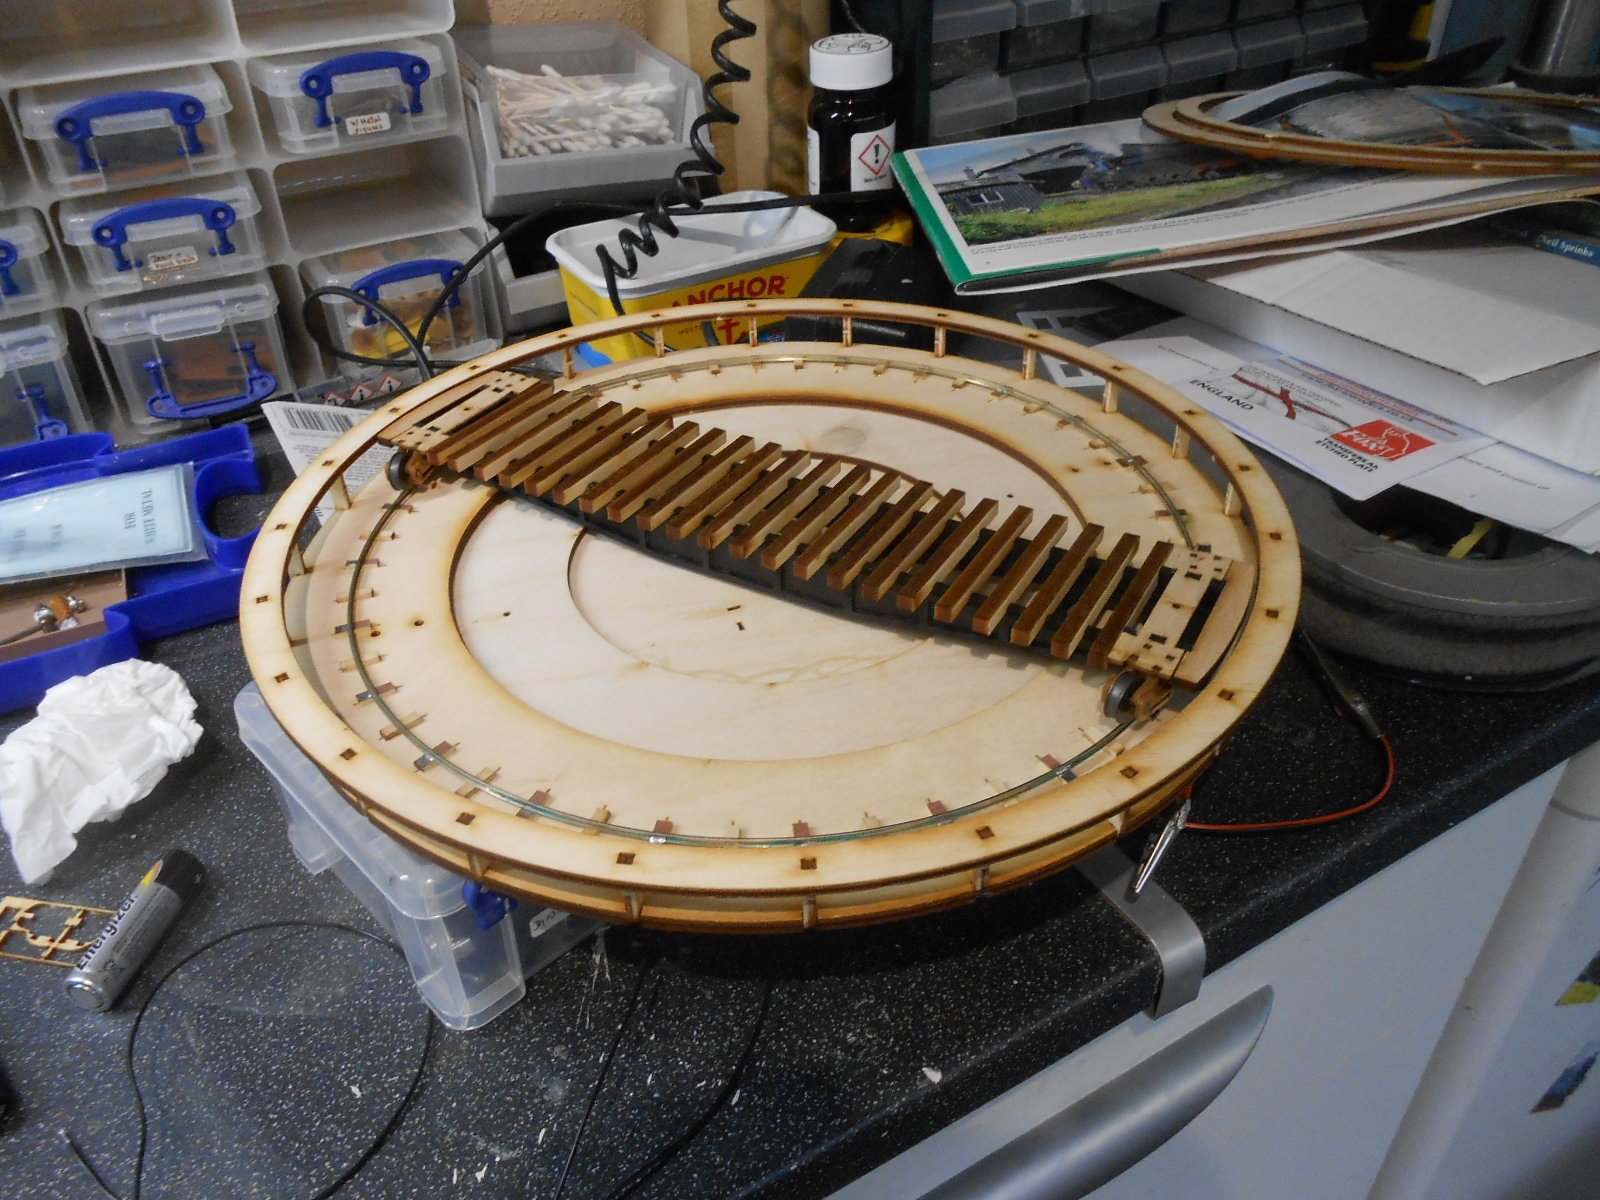
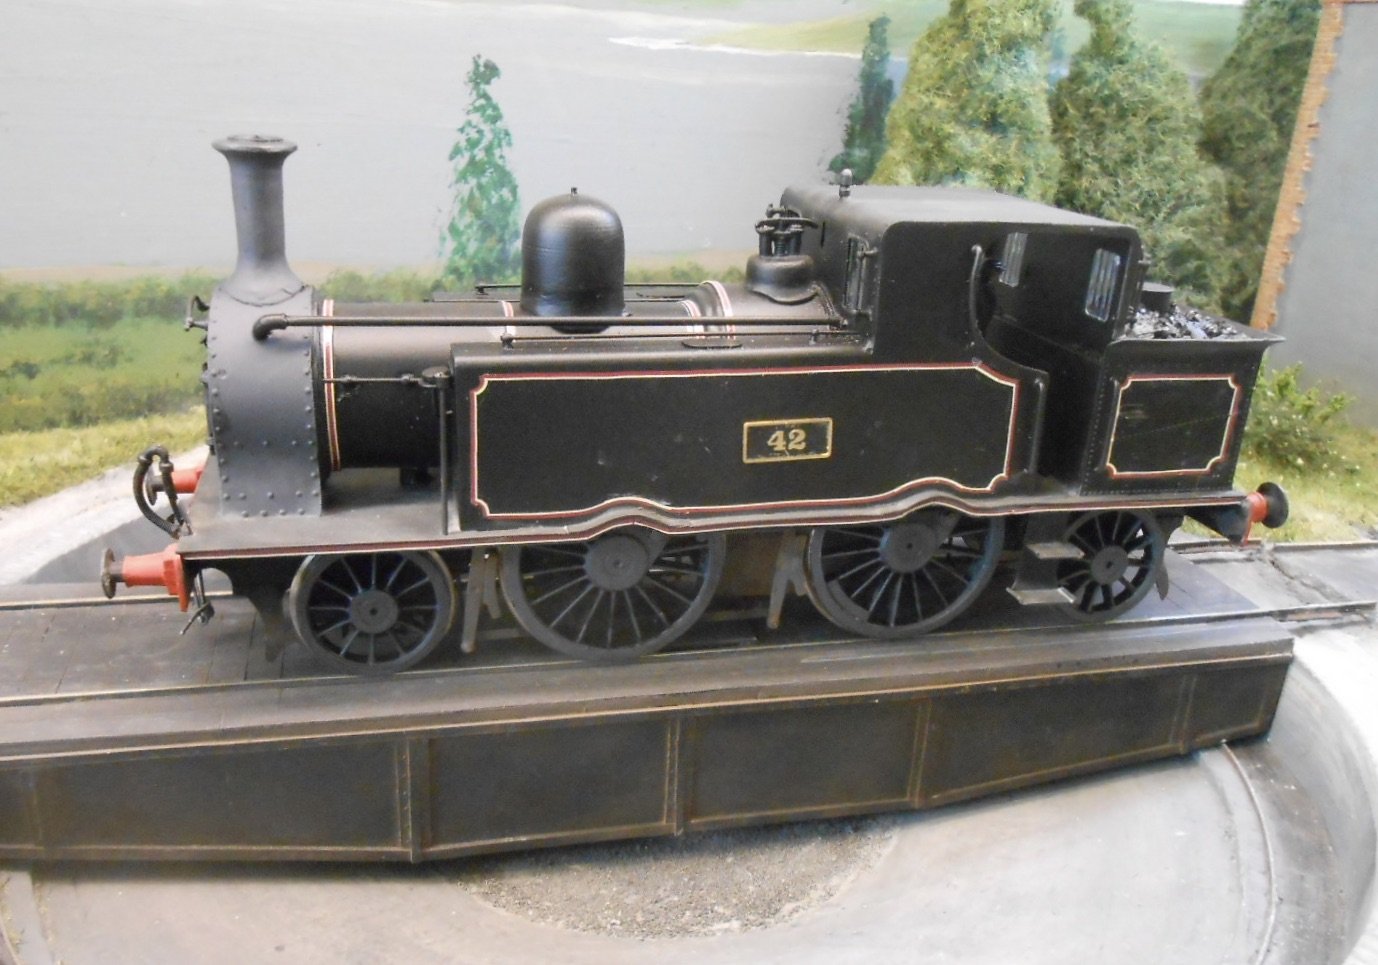
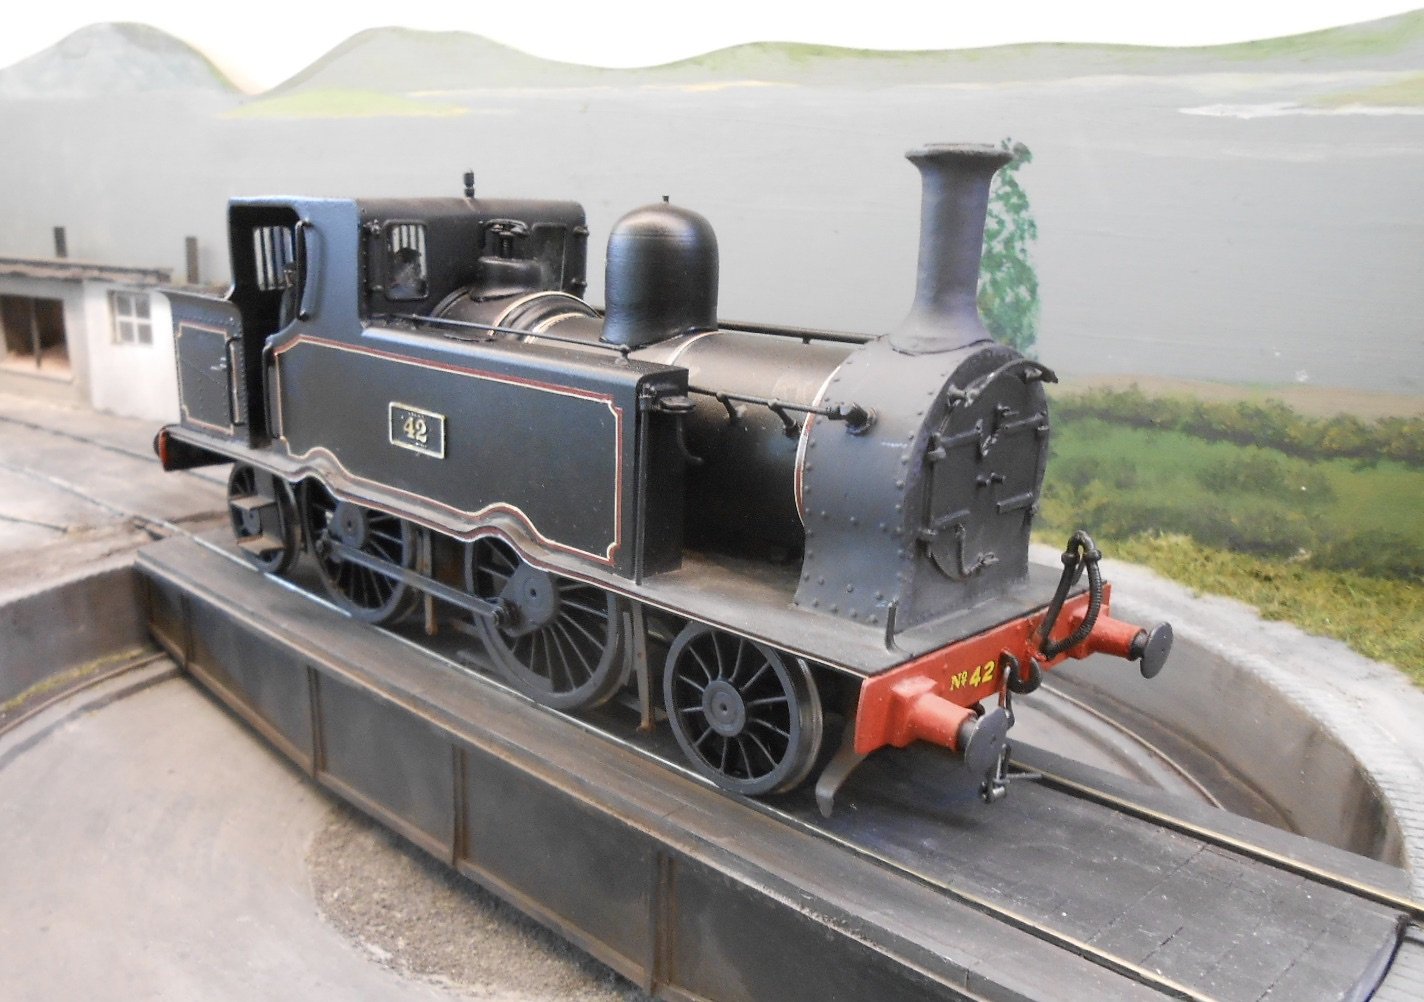
Fitting the turntable has turned out to be much more challenging that just making it. First I had to prise the old one out, then remove the hand cranked mechanism, so the hole in the baseboard could be increased by around 2cm in diameter. A test fit then showed what I'd feared all along, that the motor gearbox projects about 5cm below the baseboard frames - hardly ideal on a layout that is intended to travel to exhibitions. Spent a fair amount of time pondering on how to manage the electrics too, as controls need to be duplicated to front and rear - and be switchable too. Stuff like this really makes my brain hurt and the number of DPDT switches required was growing exponentially, when I suddenly realised that I could use the hand cranked mechanism instead. This doesn't stick out below the baseboard frames and doesn't required any wiring either, so all that is now needed are a trio of DPDT switches to change the polarity of the deck rails. Fortunately the completed turntable sits at exactly the same rail height as the old one, so that makes life easier. Hence most of the work since has been on painting & weathering, though fitting the running rails required a fair bit of trial and error until I was happy. I've gone for 'weathered concrete for the well, blackened iron for the girders and creosoted wood for the decking. The latter is fairly easy to do, but I find weathered concrete a difficult thing to get right, especially when Humbrol 'new concrete' is a highly improbable cream colour! Thus far, have used a couple of washes of diluted 'metal coat gunmetal' to that, adding weathering powders as I've gone along. Much blending in still to do, as you can see. One other photo is of the F6, now with the correct red background [for the early 1900s] to its numberplate

-
Splendid. Lighting is just one more part of the puzzle. Some photographers like to use artificial light, but when I've had photos done of my stuff for magazine articles [mostly Andrew Burnham, editor at Continental Modeller], he has always used natural light, with long exposures and wide apertures - plus a fancy camera too, of course. The great thing these days is we don't have to wait for photos to be developed, only to find only only one or two were any good out of a roll of 36. The simple act of cropping a digital photo can work wonders.
-
I guess the reason the CDR tends to overshadow the Swilly is that things like livery and architecture are seen as better. Red and cream coaches will outdo grey ones most days, while the Swilly's stations were hardly attractive even on a good day. Add in all the quirky railcars and fine tank engines - plus the fact that the Donegal lasted long enough to be regularly photographed in colour & it is easy to see why the Swilly tends to play second fiddle in many people's minds. If only it had stayed open ten years longer...
-
Fabulous photos of the Swilly. What an extraordinary railway it was.
-
As others has said, full of atmosphere. Hard to define and far from easy to create. Colours look right, and no more than we would expect , also calling for great care and observation. Plenty of simple operation, which likewise adds to the atmosphere. Certainly works for me.
-
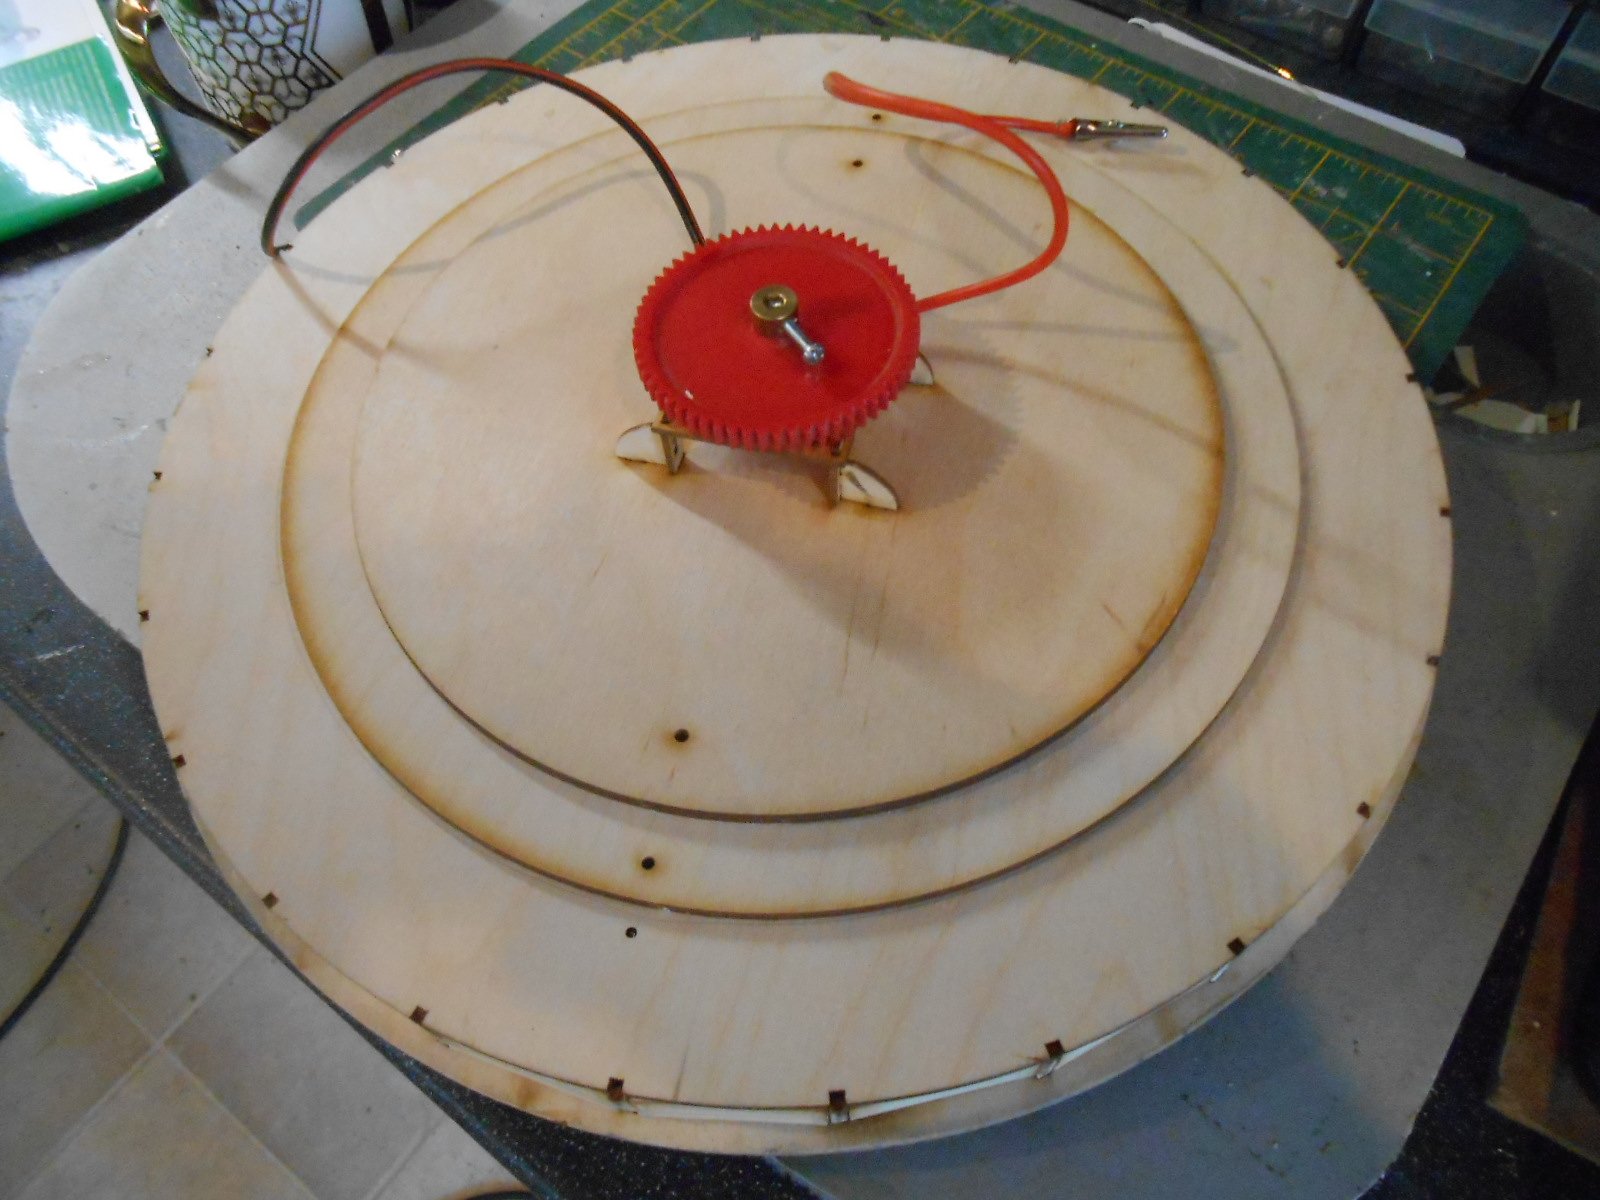
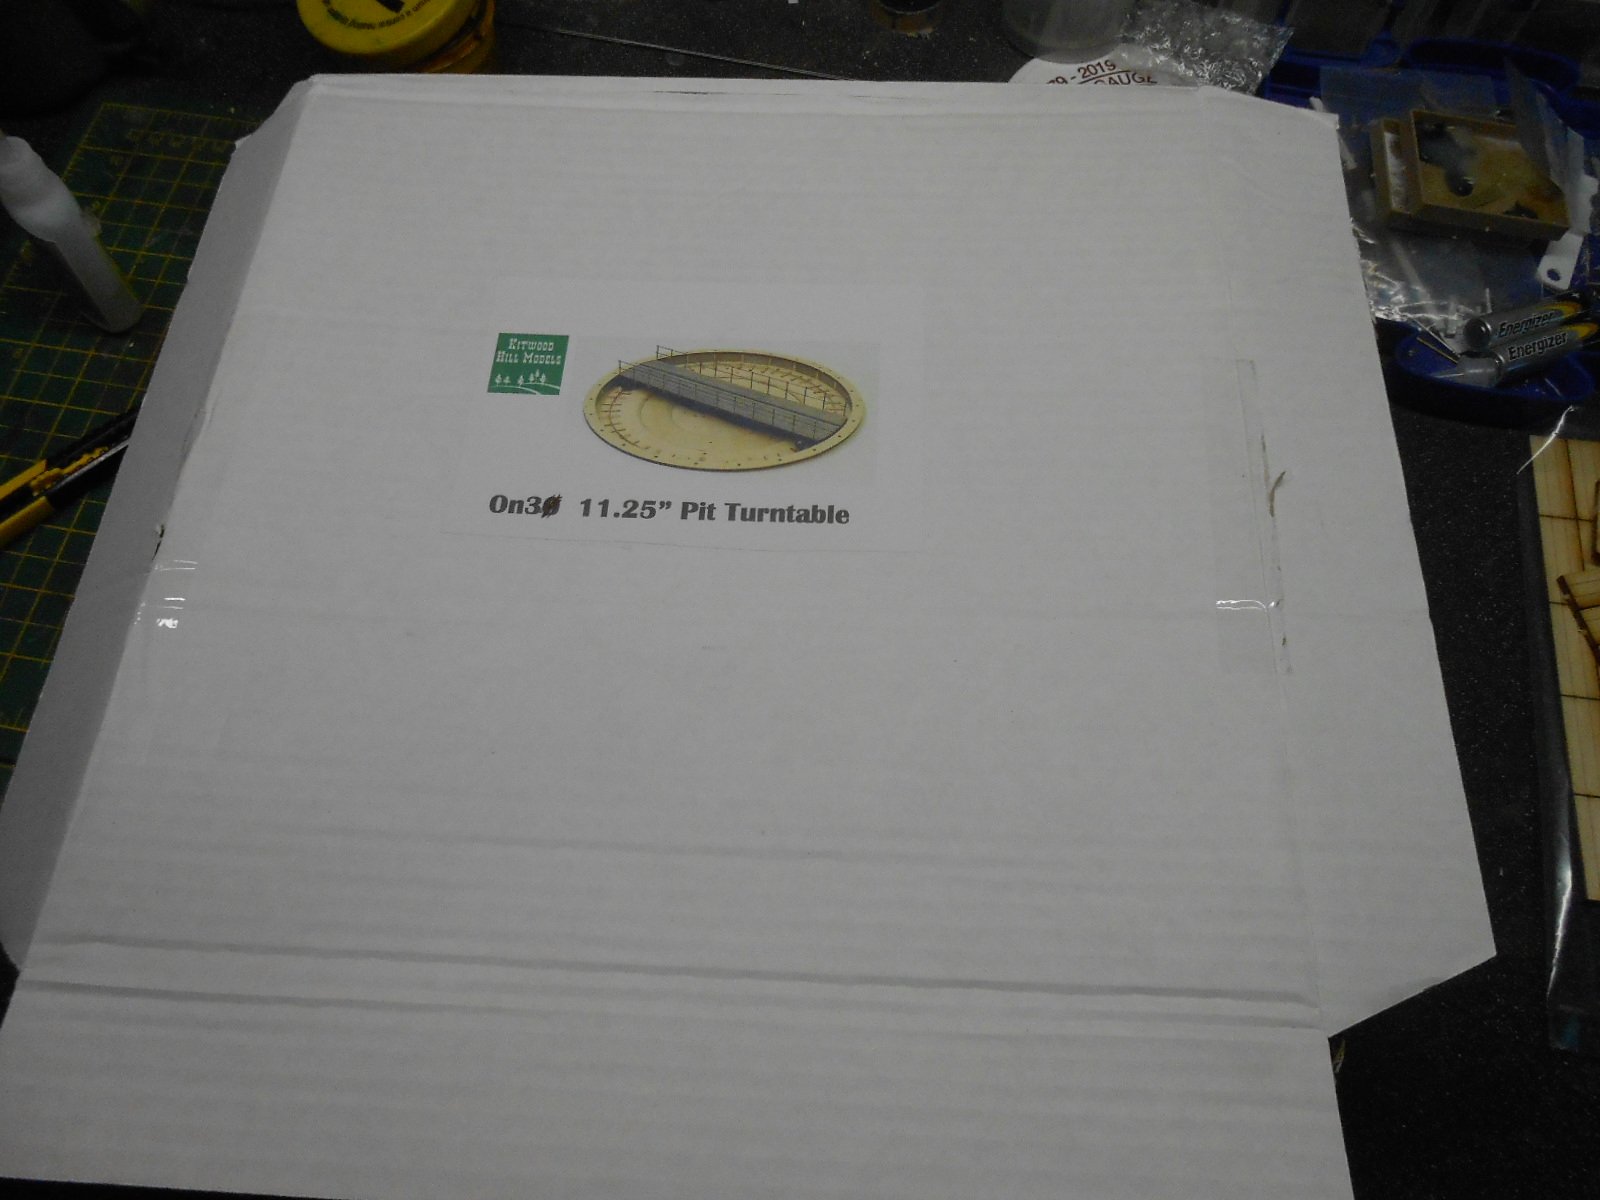
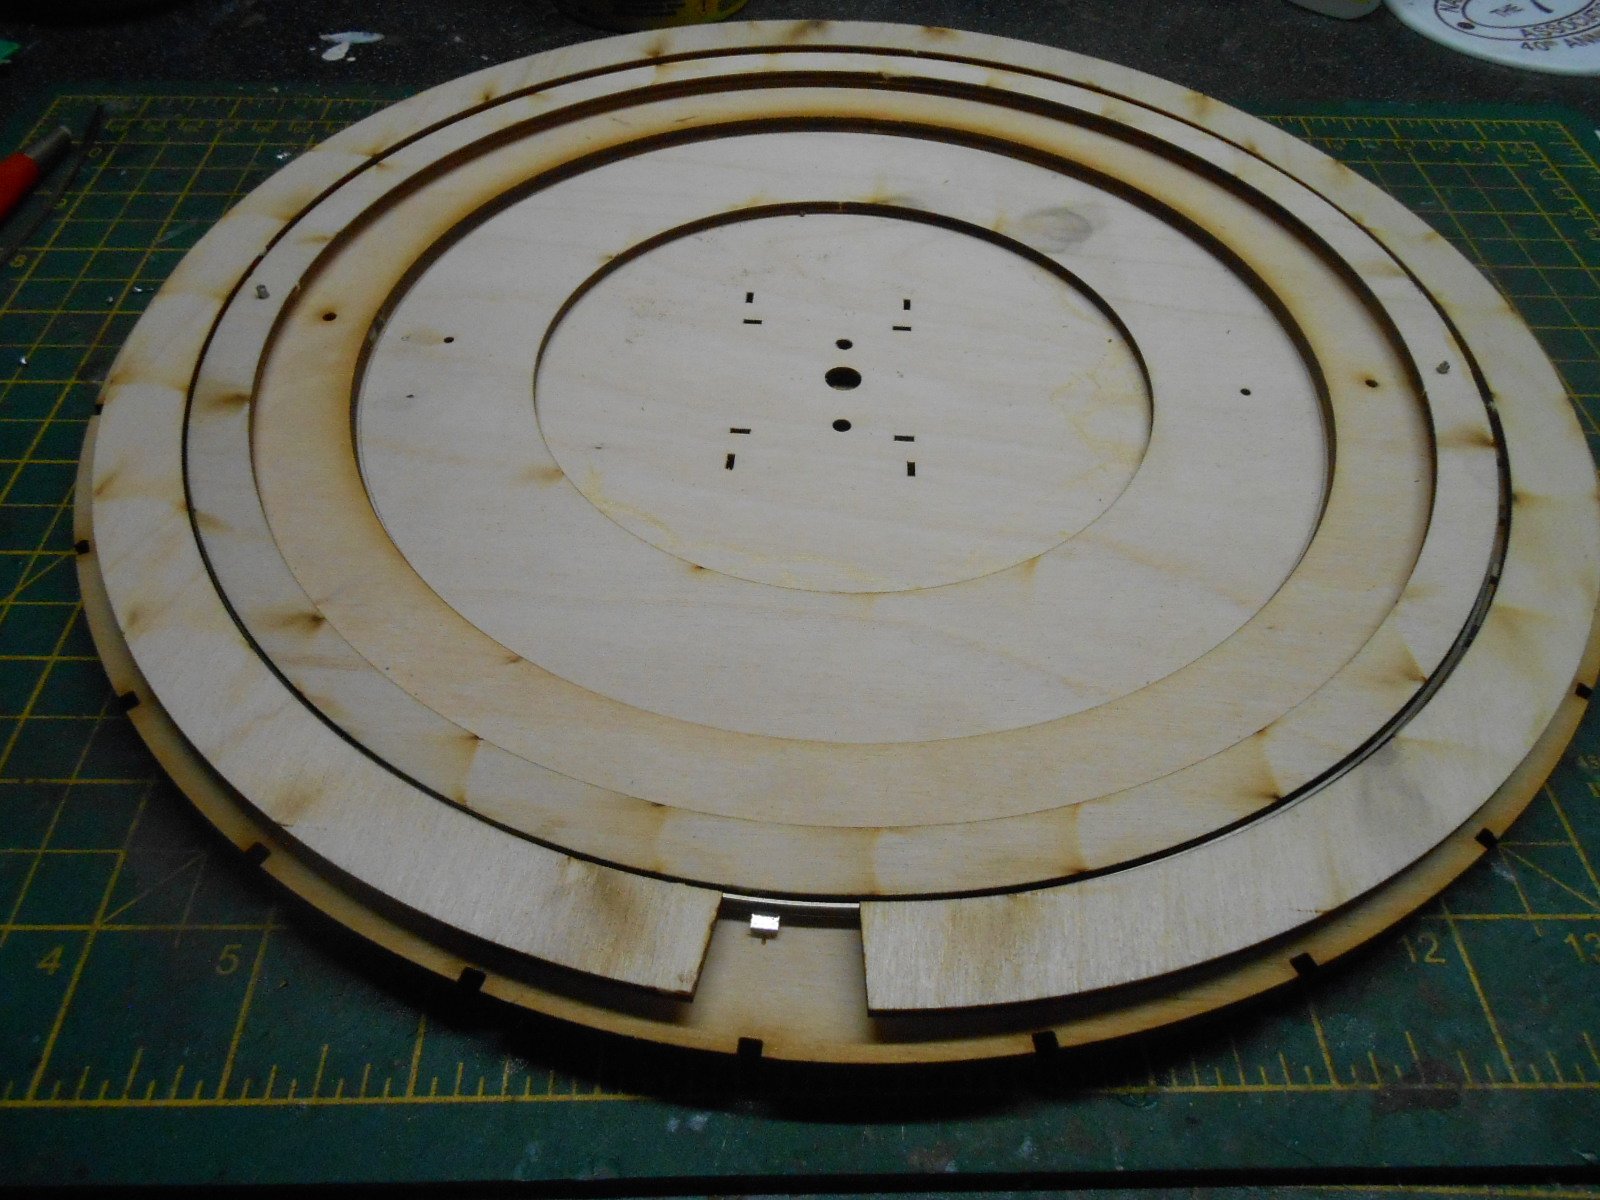
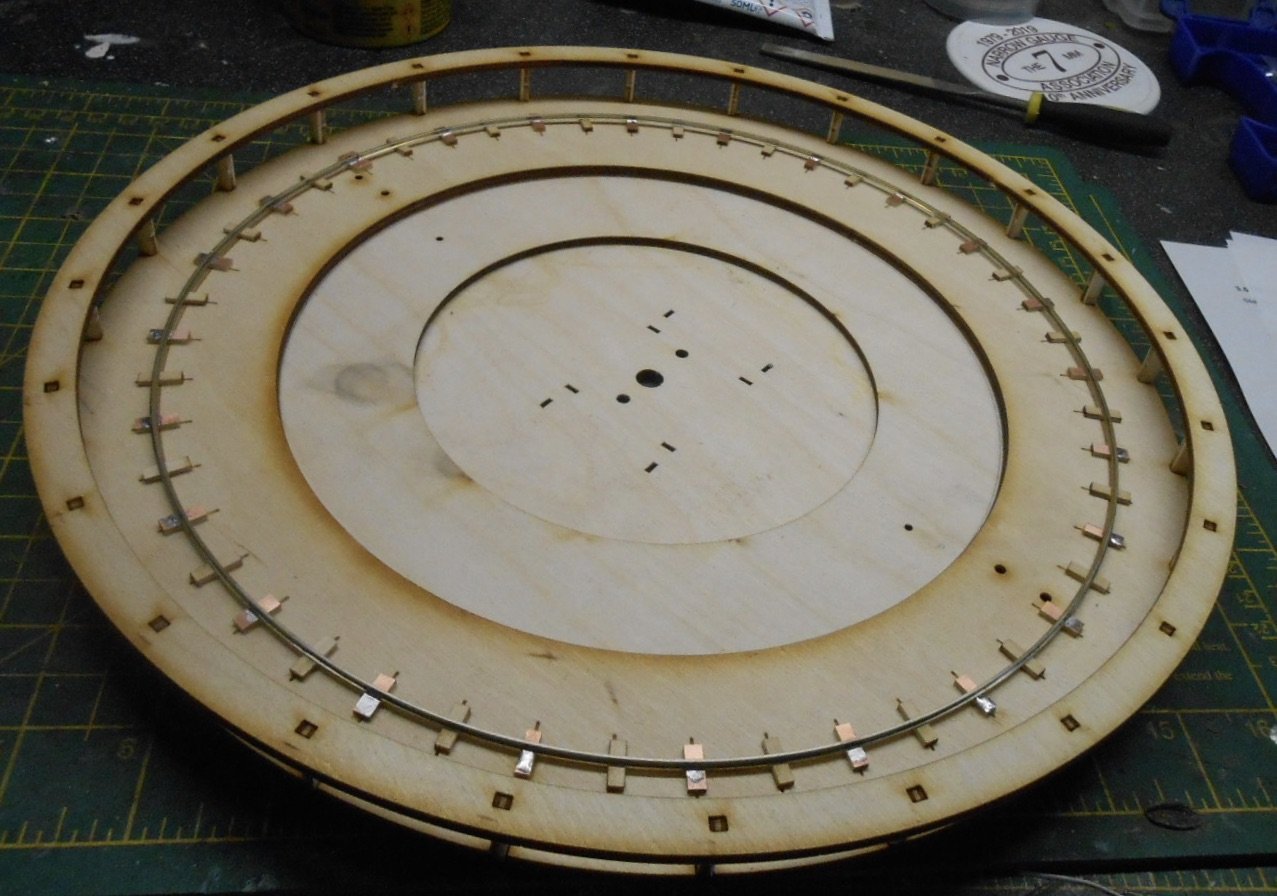
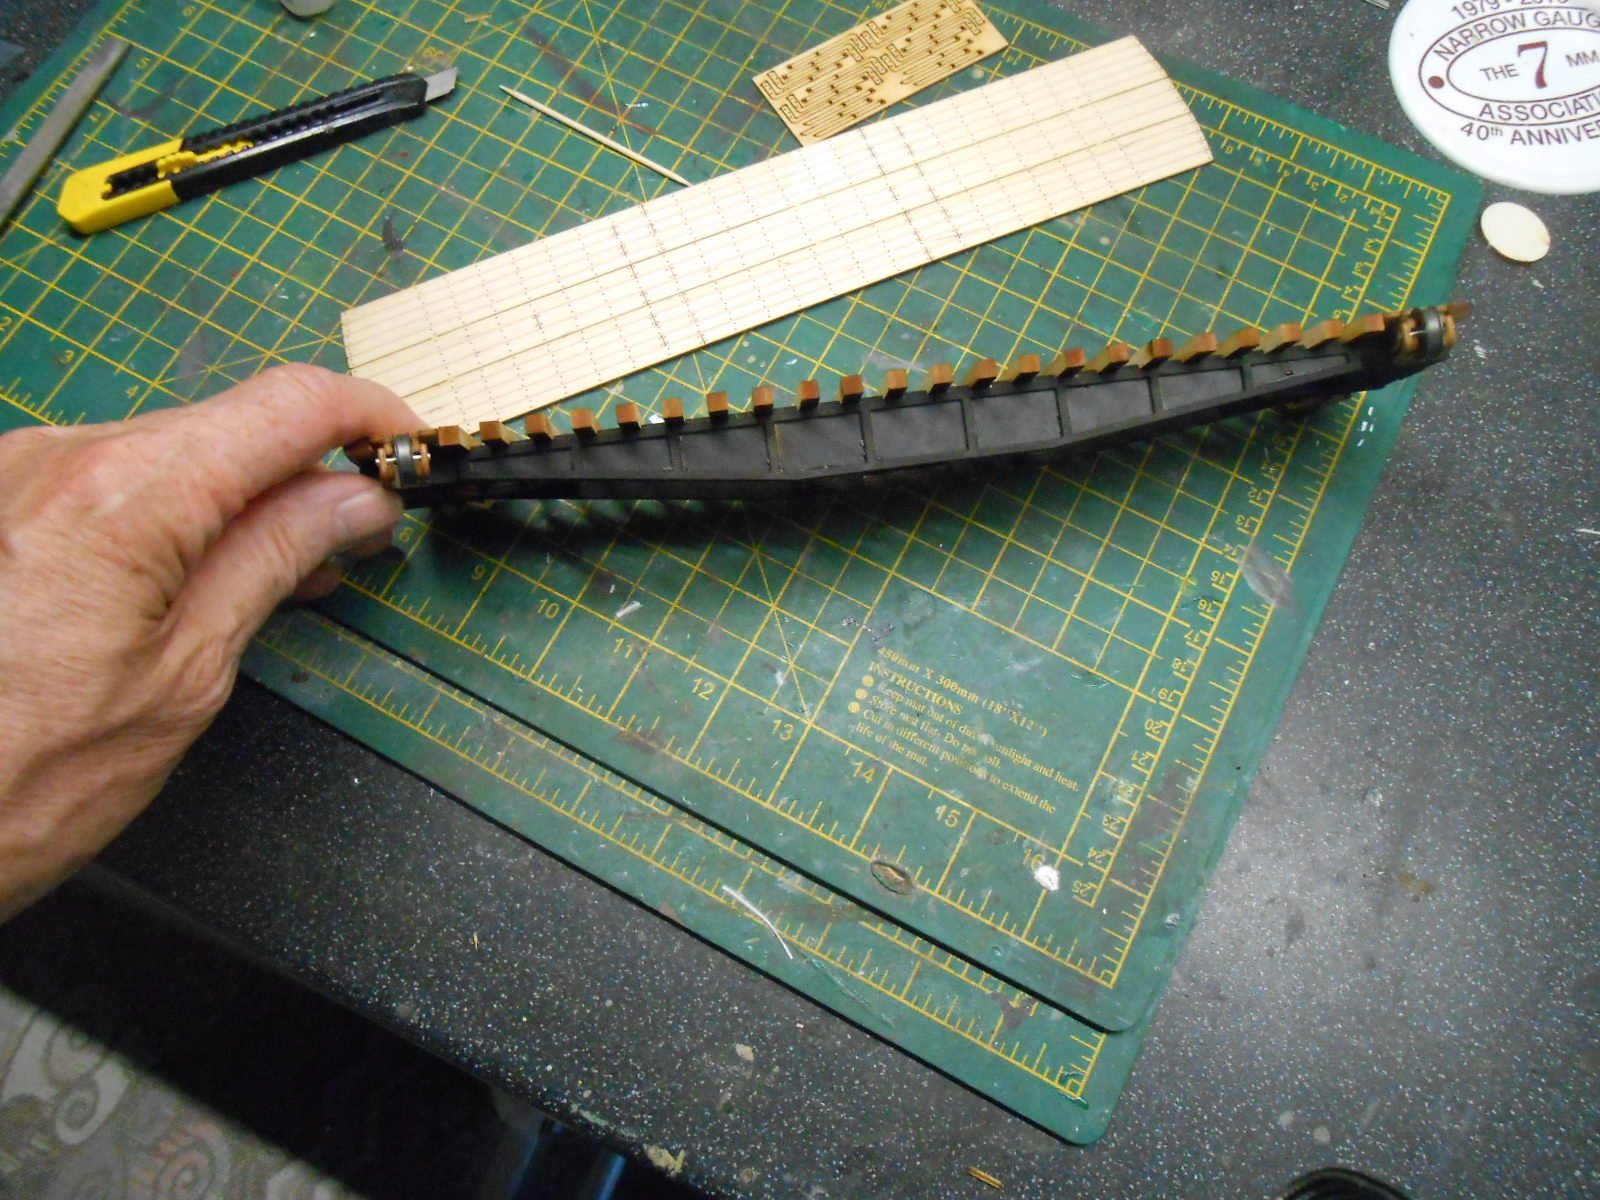
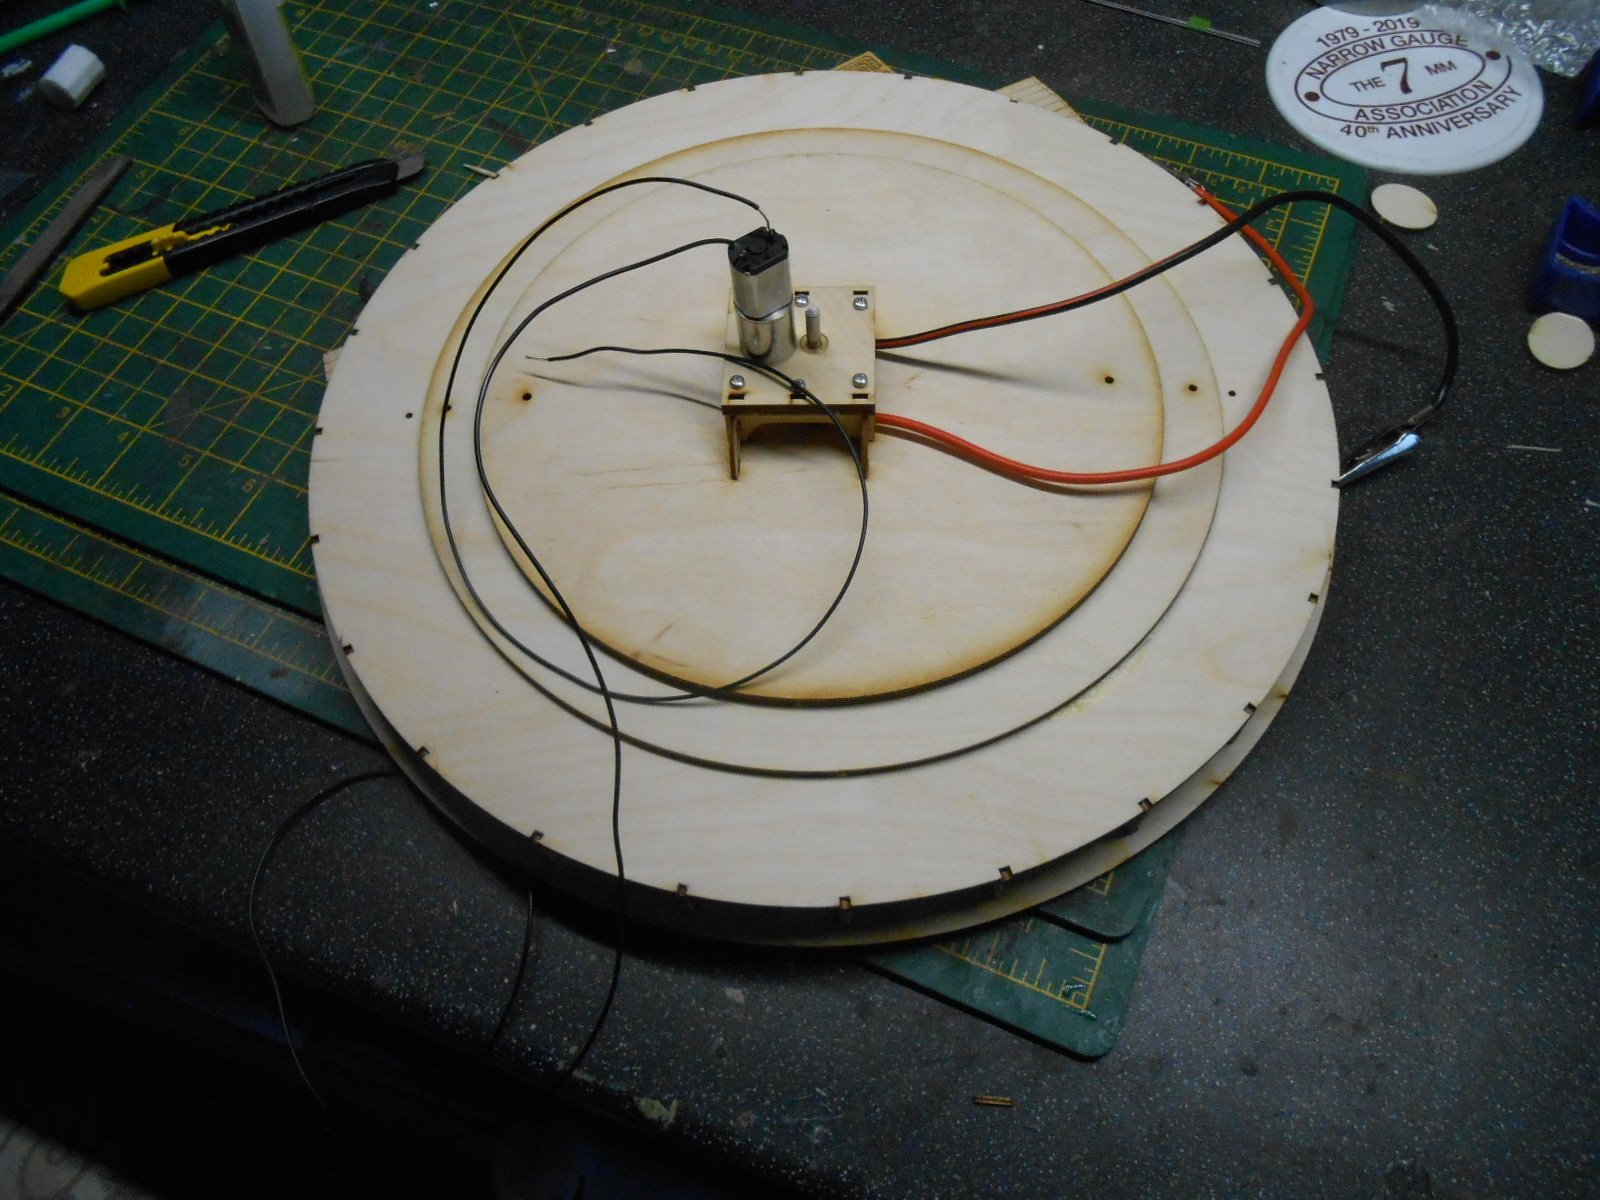
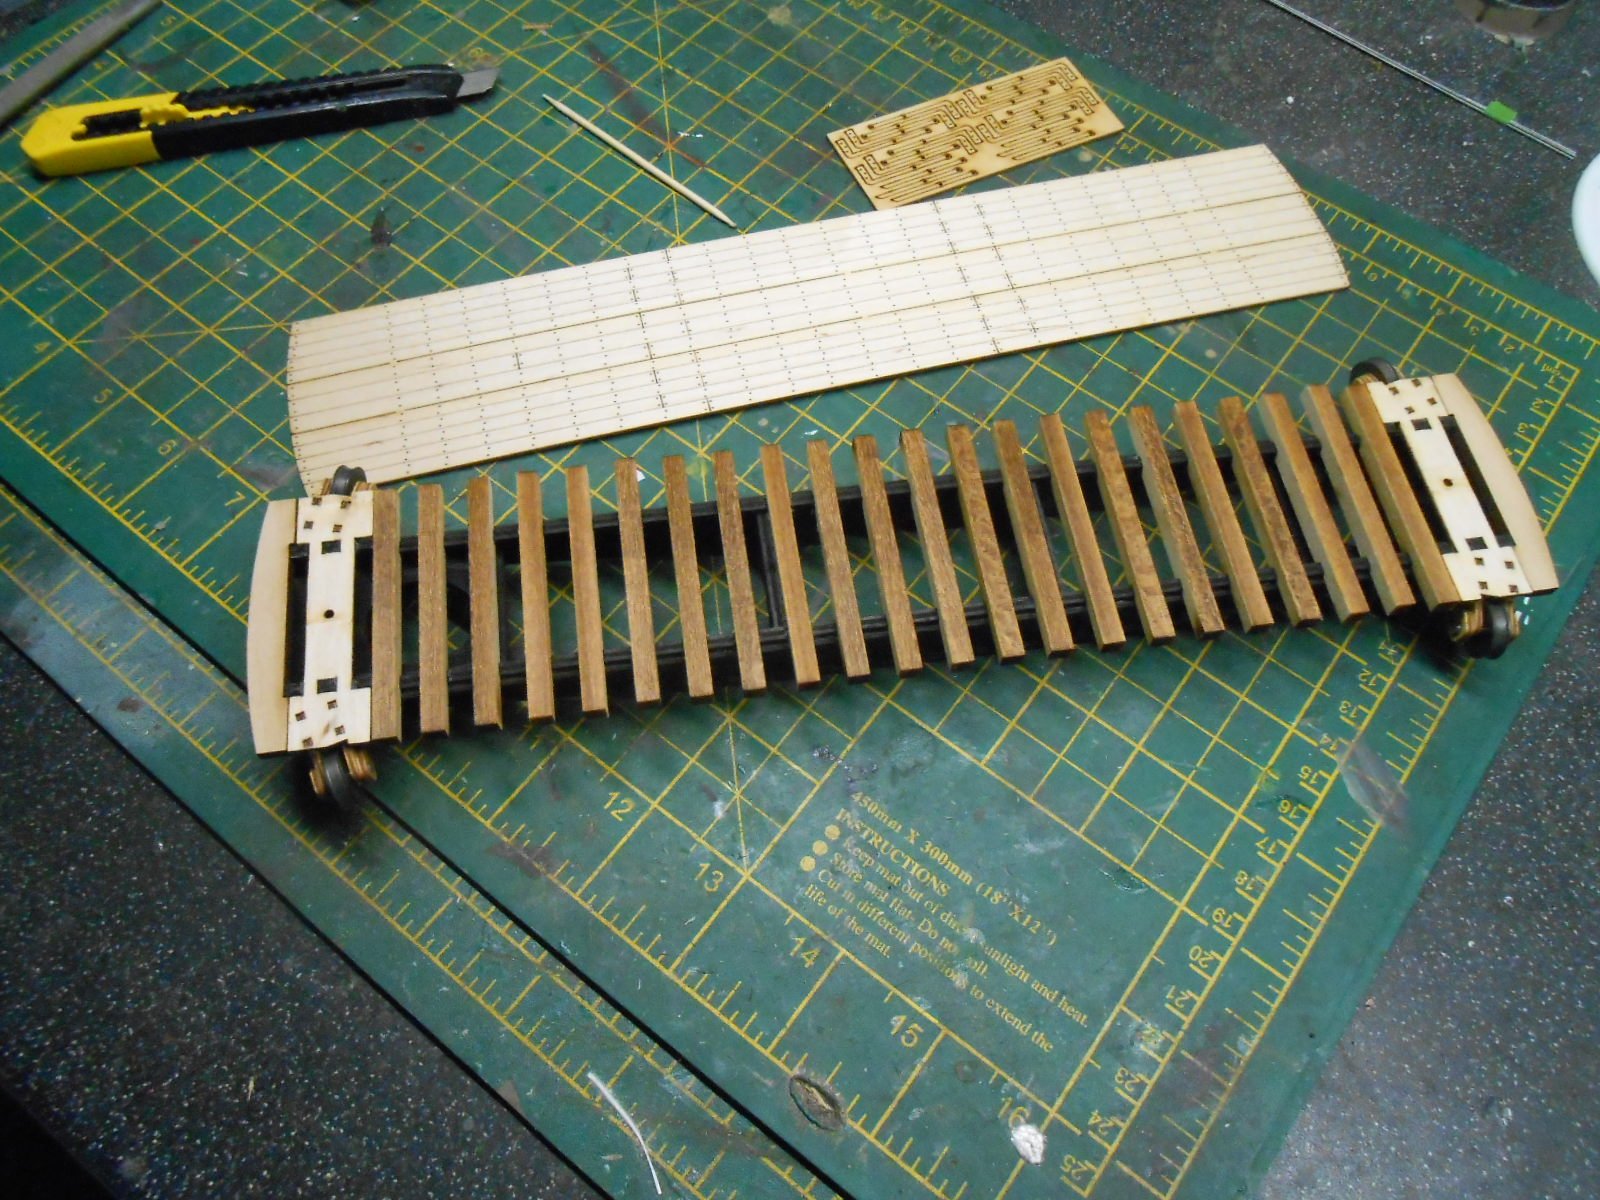
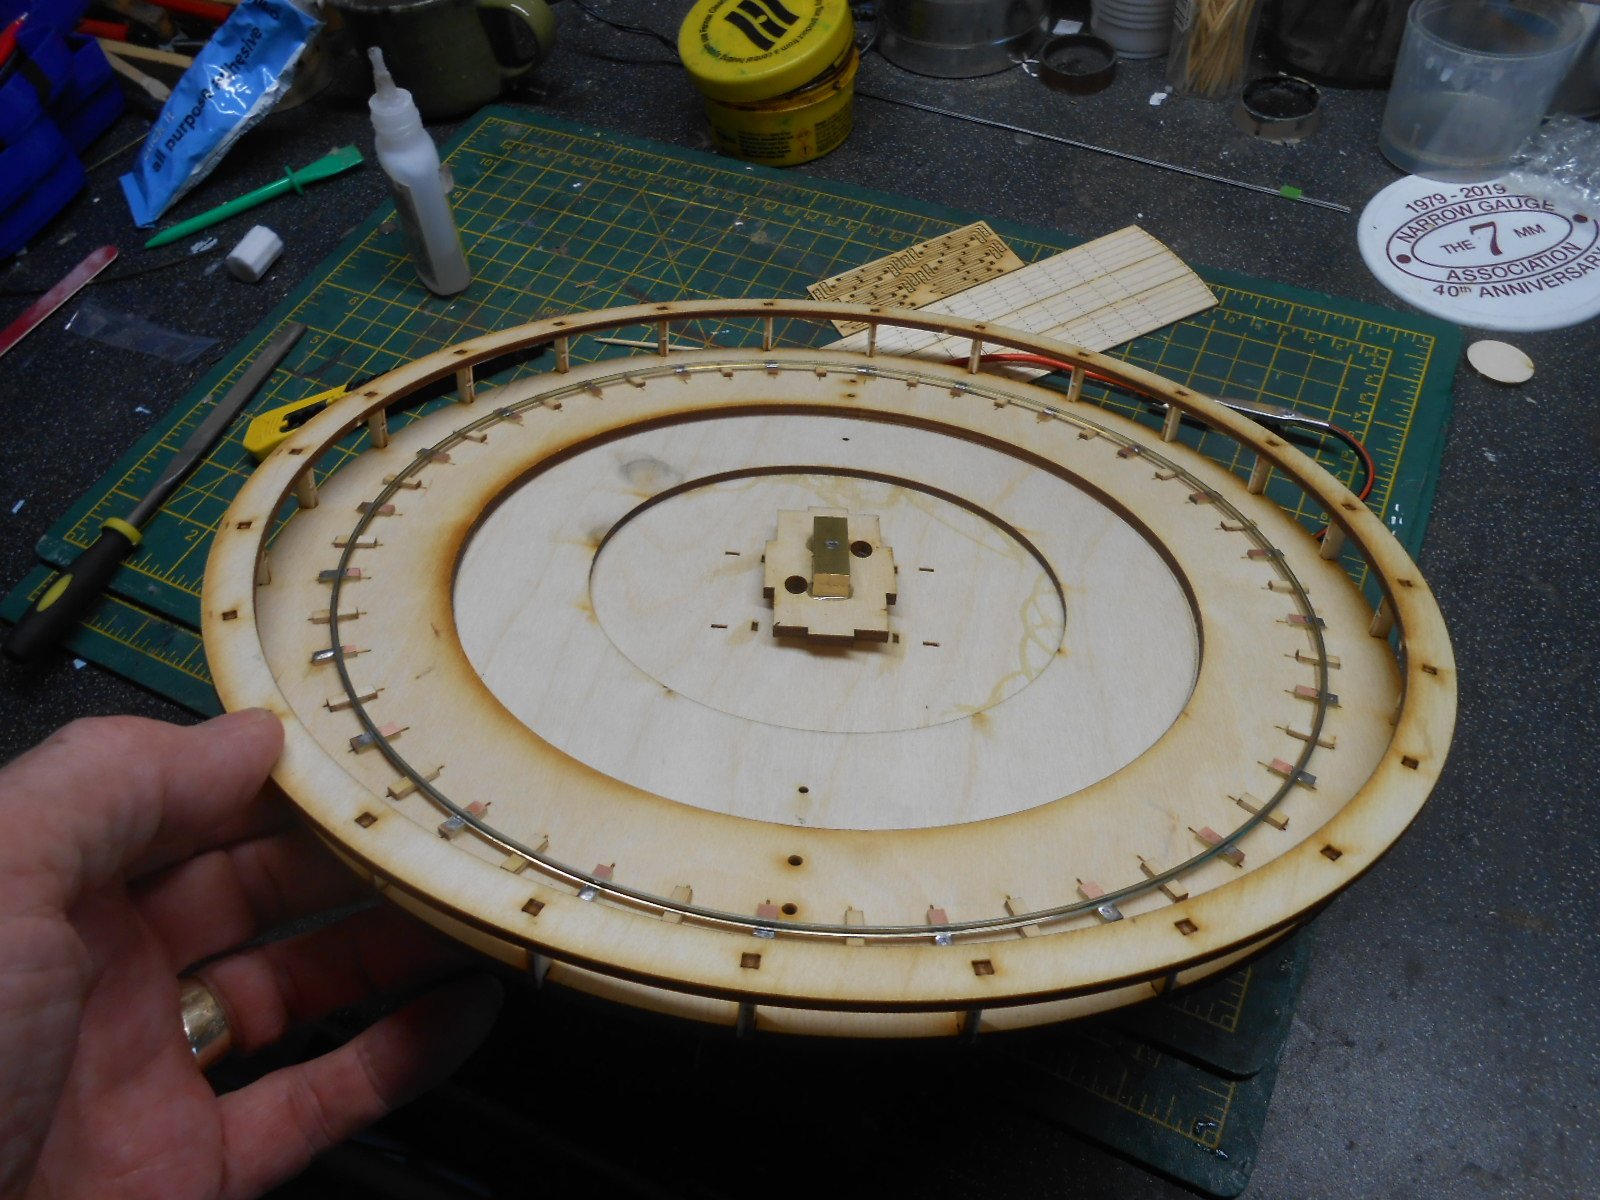
Opening the Pizza box Building the MGWR 'Wolf Dog' threw up an unforeseen problem in that, though its wheelbase fits my South Eastern Finecast turntable, the loco's buffers foul the back scene. The short term solution was to fit extension rails to the turntable, but at a scale two feet long, they looked ridiculous and of course were prototypically impossible. The options were: live with it - tried it for a while but it just looks wrong invest in a Metalsmith turntable kit - all brass, but very expensive and would still need adapting to fit the space scratch build - having built and adapted several turntables, I'm still not confident about making them work, not least because whenever I read articles on the subject, it is not long before my eyes glaze over! Anyway, salvation duly arrived in a 12" pizza box from Kitwood Hill Models. They produce a range of turntable kits made from laser cut plywood, with lathe turned deck wheels, a powerful, slow running motor easily aligned by eye and a host of very clever features to aid construction - all for £75, about twice the cost of an unmotorised SE Finecast kit, but a third of a Metalsmith one. The only real problem with Kitwood Hill is that they seem to like to accumulate enough orders before embarking on production, so a bit of patience is required when ordering, but after that things become very good indeed. Put simply, the kit is a joy to build. Everything fits and I have found myself in constant admiration of the planning and thinking that has gone into it. The well is three separate ply discs, which you assemble with contact adhesive; pretty much everything else is held together with cyano. A very clever jig enables you to solder the bridge track rail to copper clad sleepers: it is two circles of ply, the outer one leaving a small gap, so you can sandwich the rail, gradually moving round to deal with one sleeper at a time. Though my 11.5" version is really aimed at the American Sn3 market, the cross beams on the deck scale out at 8'6 in 7mm scale, while the girders themselves are almost exactly 5'3 apart. Cosmetic overlays enable the girders to look like they are metal, once painted, while there is provision for the well walls to be anything you like, from timber to stone or concrete. A copper clad disc is used, along with some very robust [6amp rated] plunger pick ups to take power to the track. There is no gap in the copper clad - instructions say to us a DPDT switch instead to change polarity when the deck is reversed, something I am more than happy with. The motor unit comes ready assembled with a nice set of 40:1 gears. It sits below the turntable well [under the baseboard] and the idea is to power it from the loco [track] controller, via another DPDT switch, something I have already done with a Peco N gauge turntable on Fintonagh. The deck itself simply slots on to a housing on the copper clad disc in the well & so is readily removable, unlike my SE Finecast one, which relies on captive bolts. The motor is only rated at 3 volts constant [but will take up to six apparently] and have successfully used two AA, 1.5v batteries to turn my heaviest engine without any problems. As I've said, it really is all very clever and beautifully thought out and only took me about six hours to assemble thus far. However, the challenge is now to remove the old turntable and increase the diameter of the hole in the baseboard by about two inches, so wish me luck! After that, a bit of cosmetic work will be needed to make the turntable look more Irish, but the important thing is that, like a loco kit, once you have a working chassis, the rest is just about making it look nice - well that's the plan, anyway.
-
Thanks folks! As well as the obvious prettiness of the prototype,, the fact that the livery is almost BR lined black adds to the attraction. Apparantly, we are most attracted to what we saw in our youth, so (college girls aside), that should put me in the green diesel era, but lined passenger black and Brunswick green likewise do it for me. However, the number plate background should be red, so along with both my Sligo Small Tanks, where the letters should be red, some work with a fine paint brush is called for.
-
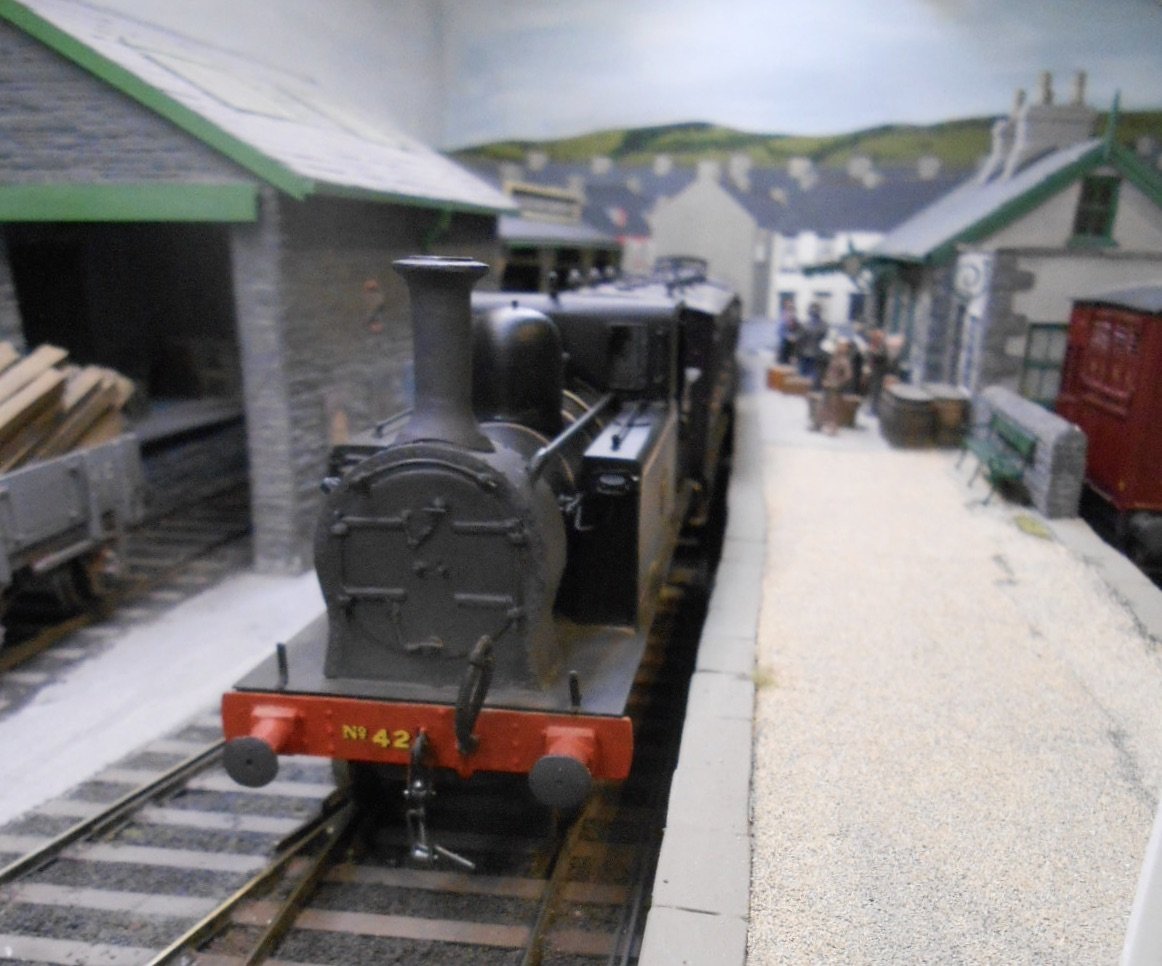
Ye gods, but it is hot! Not exactly modelling weather... Had a week in Northumberland, which the weather did its best to spoil, but in the end it was ok. Beamish museum is rather splendid and though the trams wren't running, the early double decker buses were, as was their replica Puffing Billy. Meanwhile a boat trip around the Farne Islands added a few ticks to my annual bird watching list. Sort of feathered train spotting I guess! Once we got back home, it was a case of trying to finish the F6. Probably went at it too hard with the rest of the transfers as ended up with a migraine, so very much lesson to self to take it easy on these intense bits of work. However, it is done, along with a bit of gentle weathering and coal in the bunker.
-
Do like this section. In 7mm scale a chap called Giles Flavell builds radio controlled lorries and cranes which can actually load, unload and move stuff around. Were that blue unloader (a rather nice model already) actually be able to do the business, then that really would be the mutt 's you know whats
-
Remarkable work all round. Shows how producing models commercially goes way beyond the model itself (as if that wasn't complicated enough), while the idea of some items like the wheels going from UK to NZ, then back to Ireland illustrates the planning and organisation involved.
-
As with all small bits, guess the moral is don't sneeze!
-
Used Templot for my 21mm, 7mm scale points, but only standard LH/RH formations. Likewise, takes about an hour to make one, plus copperclad sleepers make adjustments fairly easy. Not sure it would be the same for printed sleepers, though I know nothing about either process or tolerances...