David Holman
-
Posts
4,359 -
Joined
-
Last visited
-
Days Won
117
Content Type
Profiles
Forums
Events
Gallery
Blogs
Everything posted by David Holman
-
Fascinating, as ever. The T&D tank might be old, but still looks the business.
-
My 7mm scale, 21mm gauge layout Fintonagh, uses code 83 rail - as opposed to the code 100 generally used in 7mmNG. Not much, but visually, it does make a difference in portraying lightweight track. Likewise using code 100 rail on 7mm broad gauge. Indeed, originally used code 100 on a standard gauge 7mm scale light railway project and was once asked at a show if it was broad gauge! The moral of the story has to be that you use finer section rail where appropriate and those folk not able to go proper broad gauge can make 4mm scale track look much better by using Peco code 75 or equivalent, as exemplified by Ballyercal and others recently.
-
Have done a fair few articles for RM over the years and the gap between acceptance and publication can be anything up to a year. Where possible, they like to do some articles that come out just before an exhibition (remember those?), but also like to group things under various themes. Was lucky enough to be given a private tour of the Peco site by Andrew Burnham a few years ago. It has a real 'family' feel about it and the workforce is largely local, but it is also highly professional, with lots of cutting edge equipment alongside old school skills. The RM offices are surprisingly small, but then everything is computer based, with printing and so on off site. Pecorama itself is a delight. The gardens are stunning and the miniature railway is fantastic. Well worth a visit if you are in the area.
- 486 replies
-
- 6
-

-

-
- ballyercall
- layout
- (and 1 more)
-
Went there eight years ago, aiming for the 11am train and arrived slightly late to find nobody around, but the railcar in the platform. The door to the portakabin office was open and so went to ask if trains were running. The lady inside responded in a lovely soft Donegal accent 'Oh yes, I'll get the boys for you'. Two giant young chaps, who could easily have graced the all Ireland rugby front row, ambled out of the shed and took my wife and I up the line and back - we were the only passengers... The setting is fabulous, the railcar simply iconic. If the operation is to survive though, then services need to be reliable. It is a long way from anywhere and while the trip to Fintown is stunning, I sympathise with anyone making the effort only to find it shut. Running a preserved railway is challenging enough, doing so with just a single railcar and diesel tractor seems a bit 'wing and a prayer'; likewise minimal staff. Add in the remote location and however attractive that is, you have to wonder. I wish them well, but without proper funding, suspect the line will always struggle.
-
Depends on the prototype, location and period, Colin. Could be anything from lightweight, flatbottomed rail (say Code 60), through Code 75 bull head, for general purposes, to maybe Code 83, which Peco sell as conductor rail, for modern flatbottomed track. Pretty much anything but Code 100 in fact! Indeed, having just looked at the latest Ballyrecall photos, track work there is an object lesson on how Peco 75, when well ballasted and weathered, can look very effective, even when masquerading as five foot three.
-
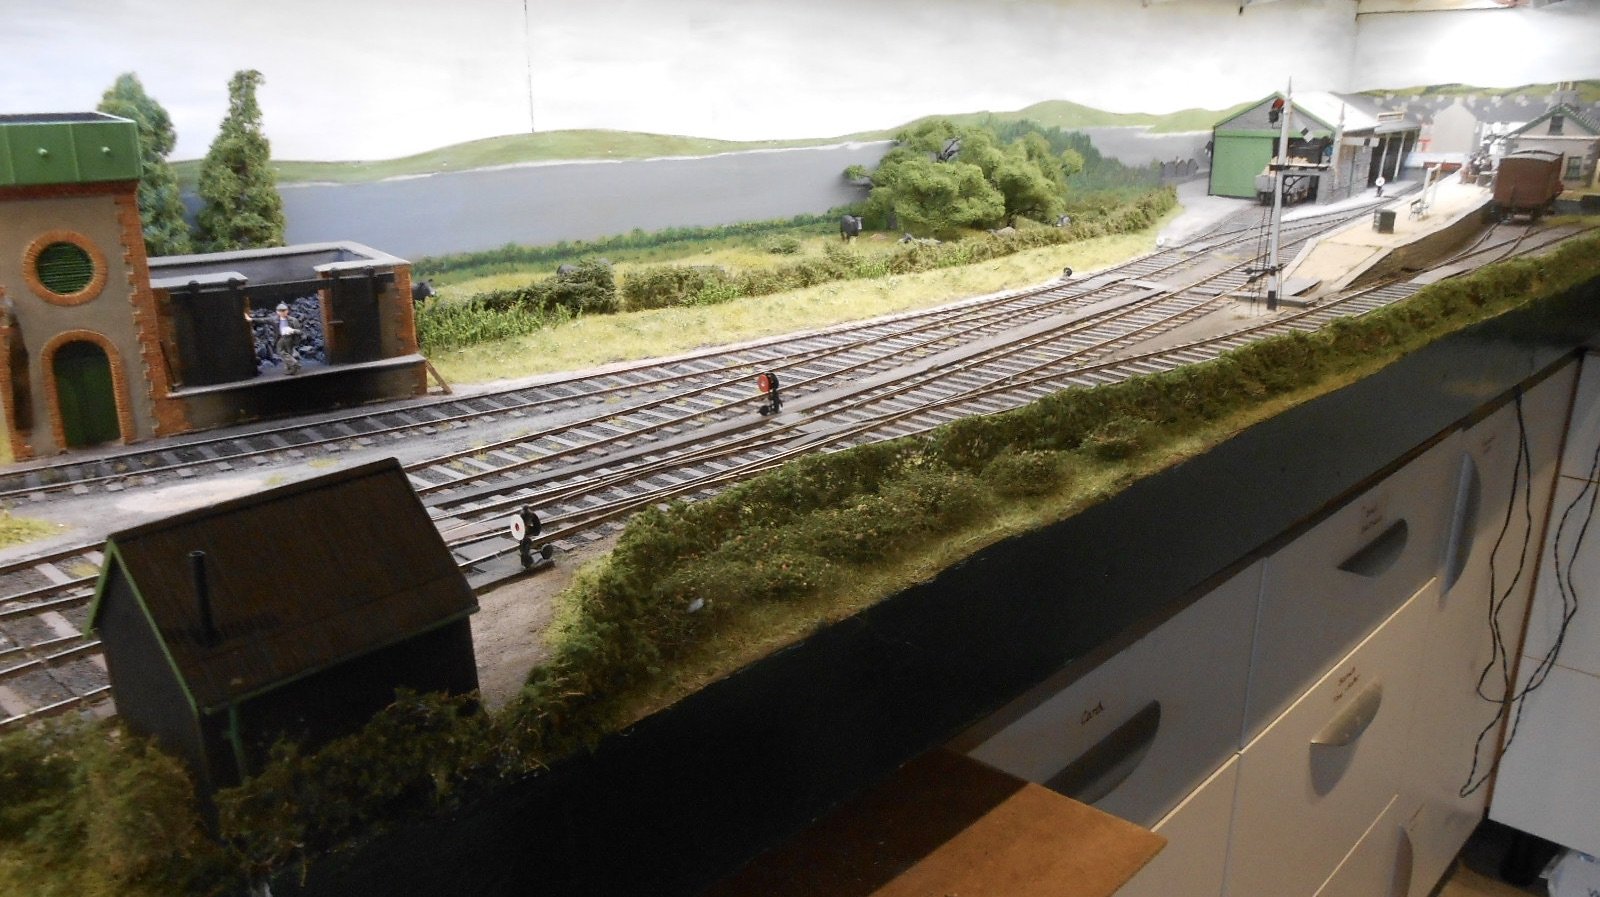
Simple, but so effective. I don't normally like photographic backscenes as they are often too bright, but the colours seem more muted and fade into the distance, so it works a treat.
- 486 replies
-
- 4
-
-
- ballyercall
- layout
- (and 1 more)
-
Take a well versed historian, create a model railway and bring it to life with anecdotal scenes. It's like looking deeper into one of your books, JB.
-
Very fiddly and a pain to do. Not always (often, even) seen on layouts, but makes an important and subtle difference when it is. Fine work.
-
Fine effort Ken, especially when it started looking like it was covered in roofing felt!
-
Yep, keep the post coming!
-
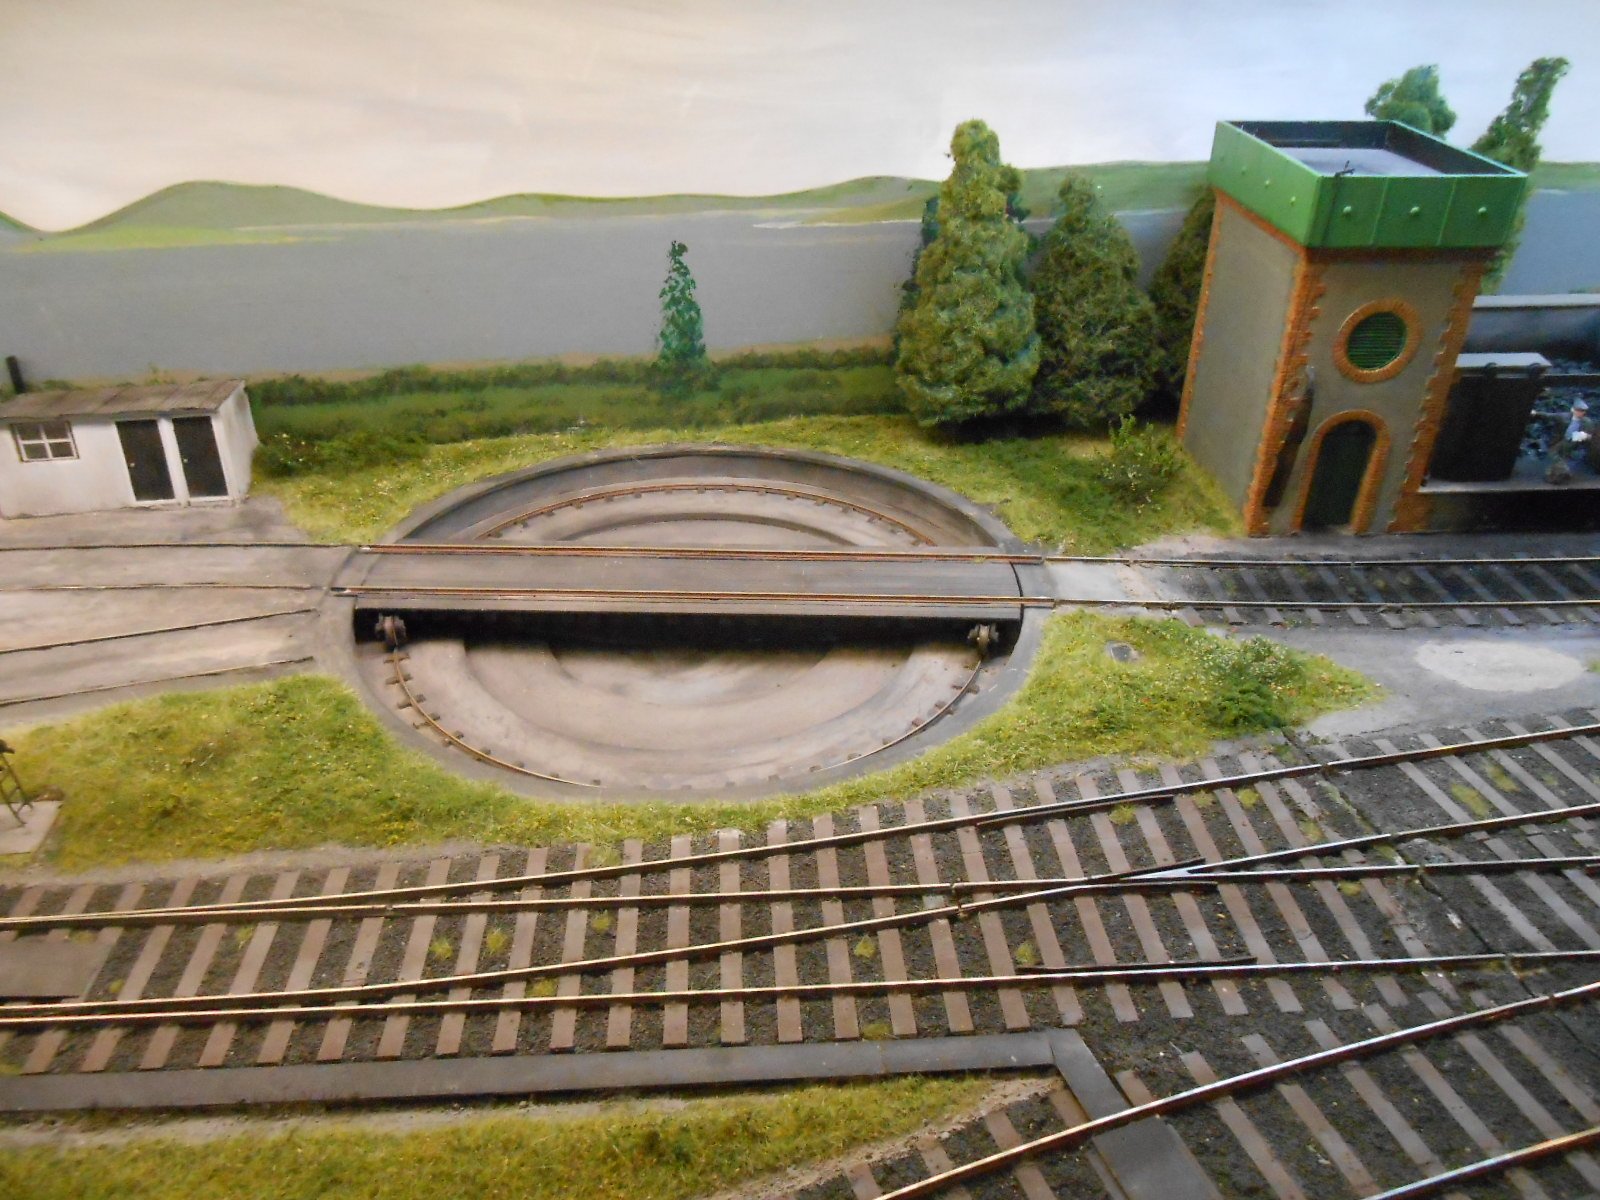
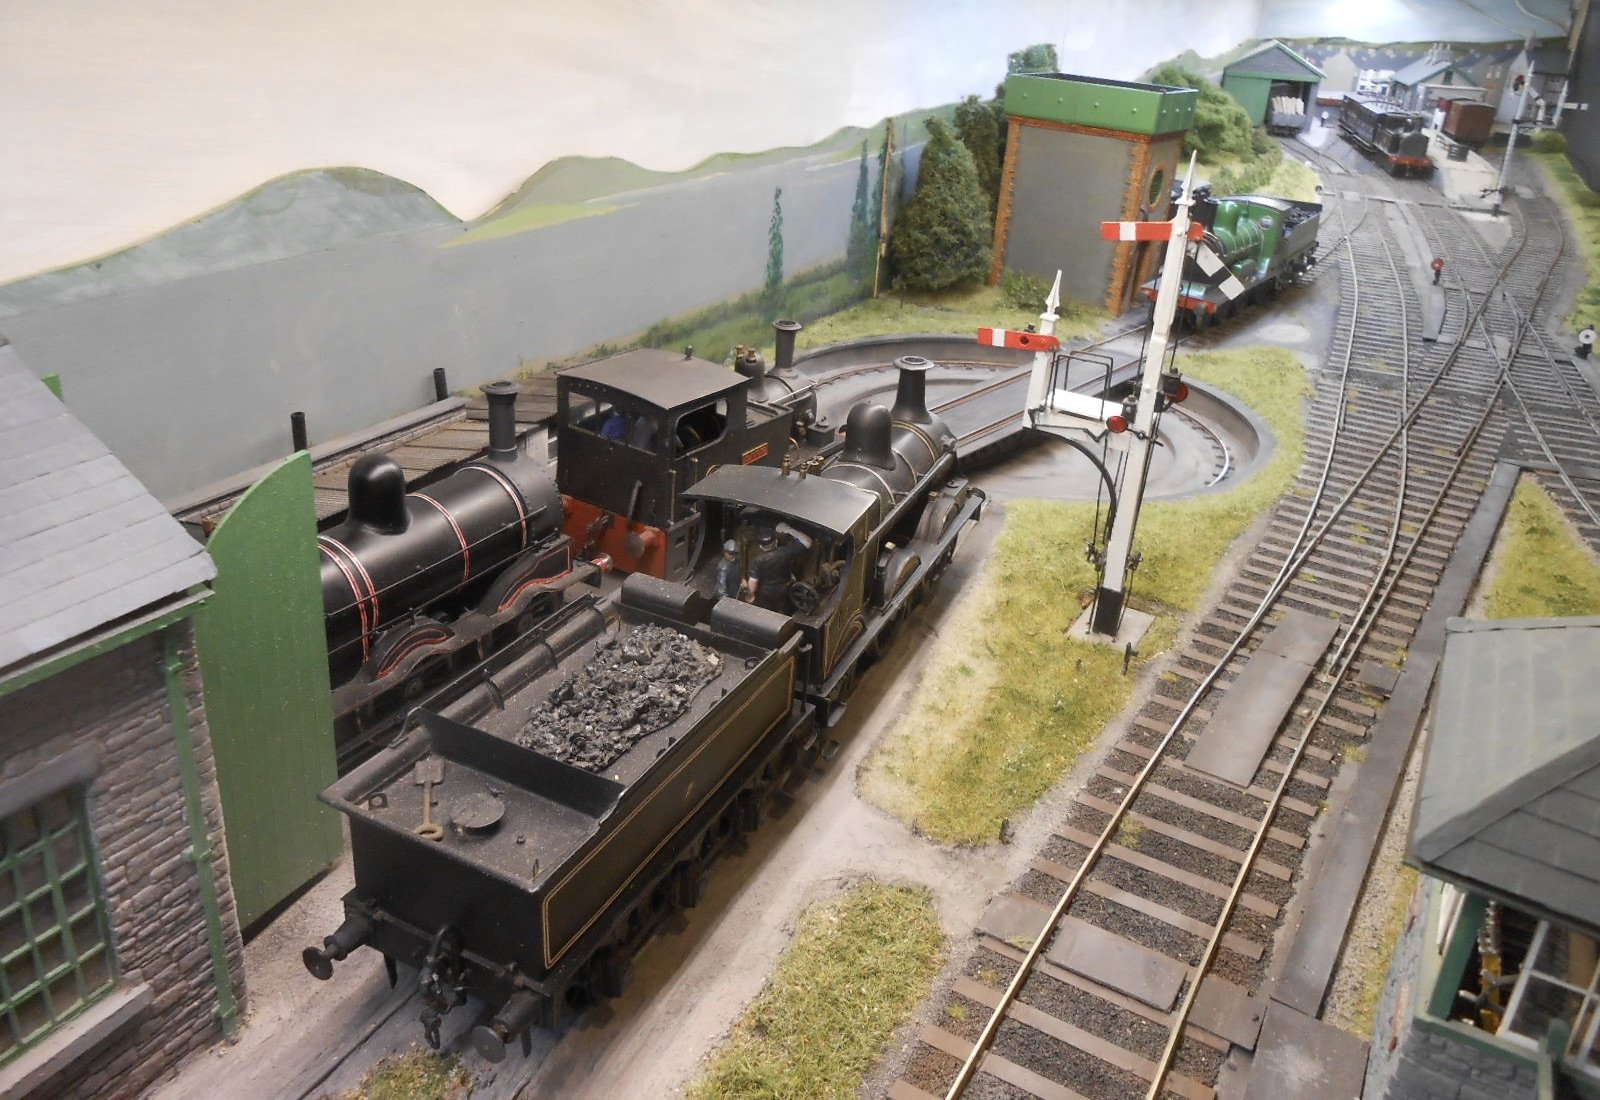
The last couple of weeks have been busy with other stuff, including the need to get Fintonagh ready for the Bexhill Show, but attention now turns to ensuring Belmullet is ready for its debut at Uckfield on 16th & 17th October. At least, that is the plan anyway. Hence, the turntable has been bedded into the surrounding scenery, while I've done bits and pieces to disguise the baseboard joins. In addition, the leading edge of the baseboards has been given a hedgerow border, the latter made from rubberised horsehair covered in scatter material. In order to make the layout presentable, the front will be given a pelmet and side wings to frame the scene, while skyboards will raise the rear scenery by about 30cm. These will all be separate pieces that will need to break down for transport. Speaking of which, I also need to ensure the layout will fit in the car. This is a Skoda Karoq, which has removable rear seats, effectively turning it into a small van. However, with the baseboards crated up in pairs, plus trestles and supporting beams, pelmets, lighting and information boards at the front, some careful planning is needed - especially as, in having the layout with two distinct operating periods, there is quite a lot of stock to take with me too. It is at times like this, I find myself envying Angus and his 5p workbench as I'm looking at around 18-20 A4 box files.

- 179 replies
-
- 21
-
-

-
Mine arrived yesterday and very good it looks too, with plenty of inspiration for layout builders.
-
So, that's what you've been up to. On the strength of Rails to Achill, it goes straight to the top of my wish list. Amazon had three a minute ago. Now down to two...
-
More 3D printed sophistication! Ken, J-mo and now Fergalm. The traditional solution would be to cover everything in clay and then hand scribe all the stones, so love the creative thinking to design a roller - and dare I say, one that could well have a commercial application.As Fine work all round.
-
We seem to be entering a new age. Must confess that until recently, have been sceptical of 3D printing, simply in terms of the quality of models I've seen in the flesh, or in photos. Quietly though,, over the last couple of years, the fruits of CAD in laser cut kits, creating your own etches (Gordon Gravett has been doing this for a while) and now complete, printed models are really proving what can be done. Don't let anyone say it isn't proper modelling either, because for me at least, it is applying new skills to traditional ones. All power to your elbows, Ken!
-
Extraordinary, remarkable, amazing! There was me thinking you were 'just' having a bit of fun with CAD and here you are displaying a finished, painted model on some track and scenery. The Newman system says nothing about propulsion though. Is the slider being moved by hand, or could there be a conventional track and motor bogie beneath? Certainly has the potential for something very different.
-
Might be a bit harder to find a chassis and track for that, though it has been done at least once. There was a circular layout at Expo Narrow Gauge a few years back that came over from France based on the Lartigue.
-
Great to see the layout, not least because there is quality everywhere you look.
-
Proper job(s). The camera is indeed a great proof reader to help spot minor errors. Just like text, I fear the eye sees what it wants to see, especially at first, and discrepancies only get noticed later. As for typos, technology doesn't always help either. The cheap and cheerful Amazon tablet I'm doing this on has some very strange ideas about what I type and eighteen months in, I still find myself improving its vocabulary and expending mine on it. Initial problems included 'hooligan' for my surname. Quite liked that, but it has just changed hooligan to Sullivan's for some reason. It also prefers heartache to headteacher, my former job, which could also be described as apt at times. Anyway, great work Ken and will look forward to seeing what comes next.
-
Remarkable photos - many of which could easily grace another book.
-
And another...
- 266 replies
-
- 12
-
-
-
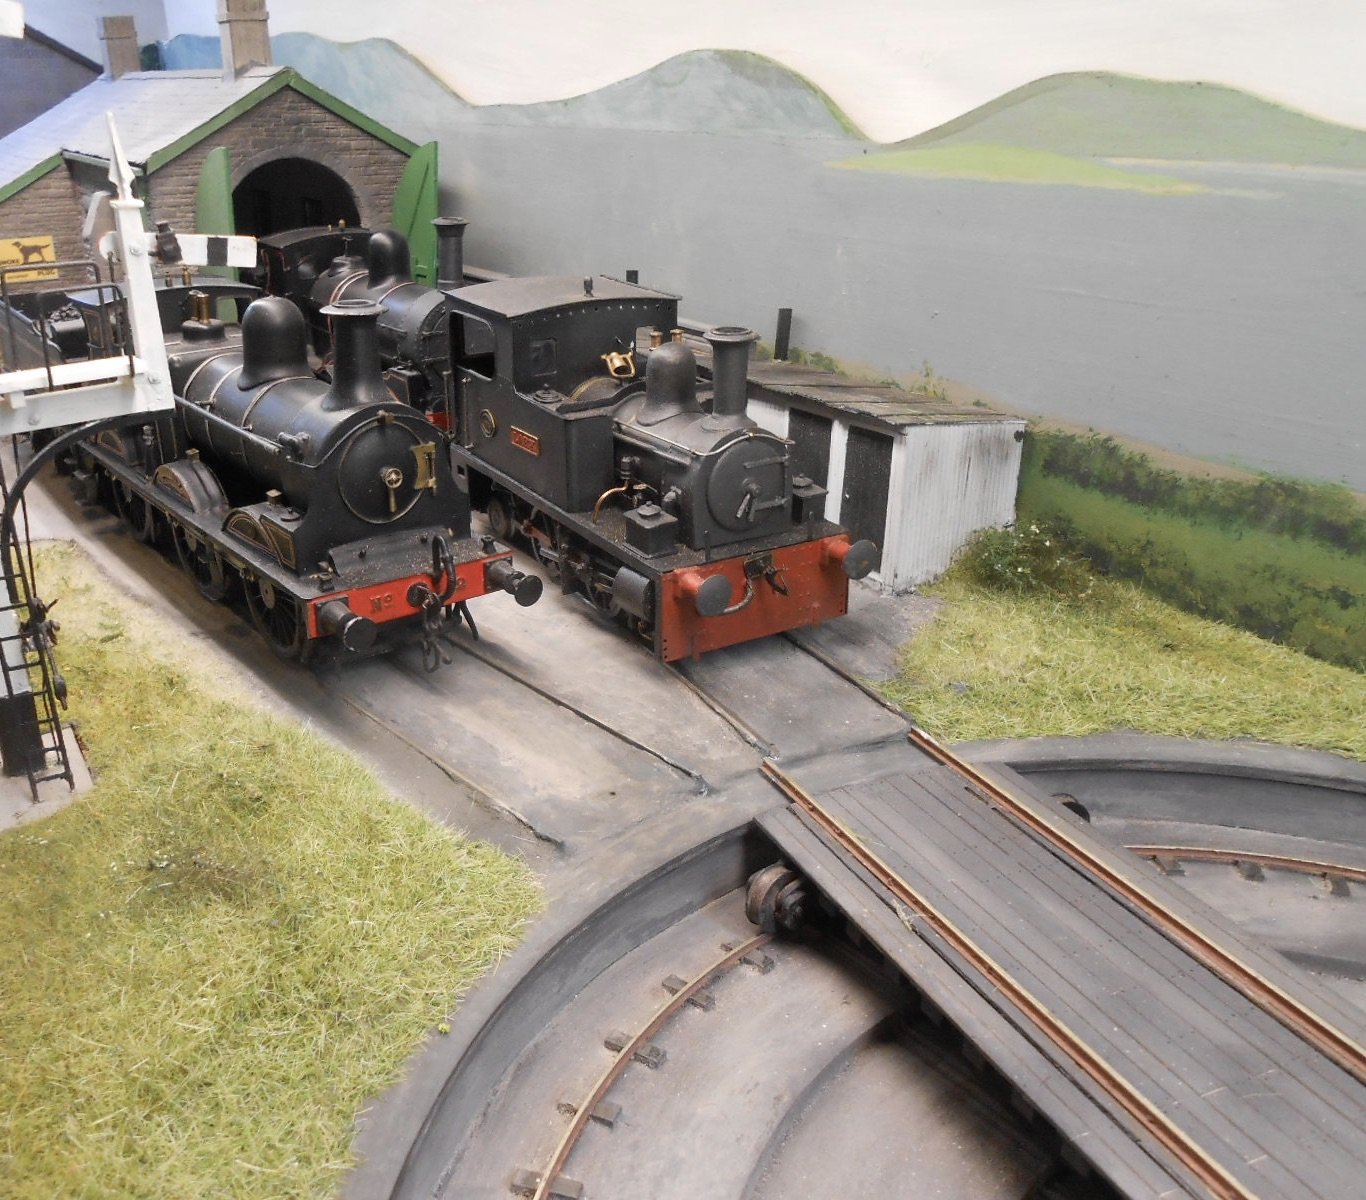
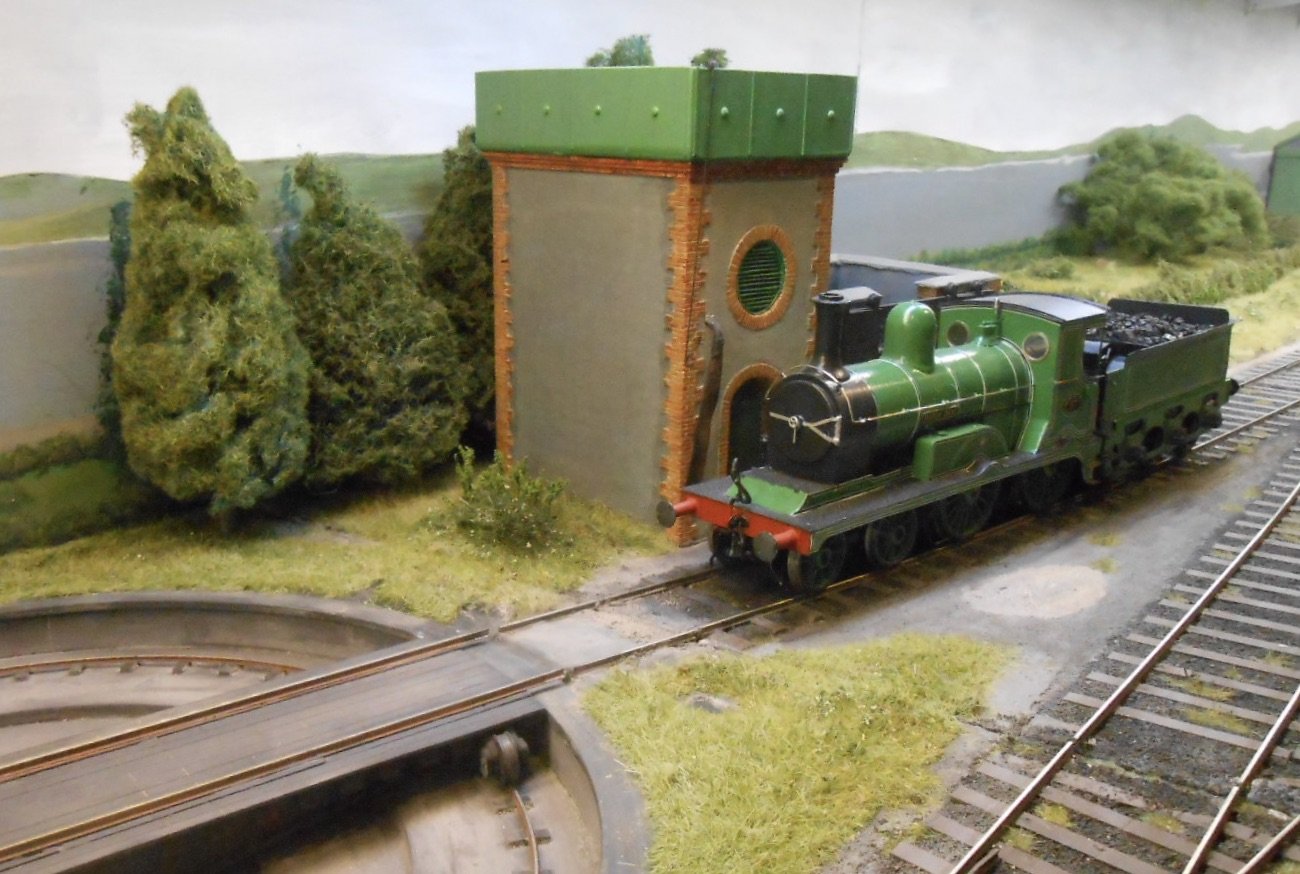
It is either a Sunday, or [as per jhbachill], there are a number of special trains that have just arrived and their locos are on shed for servicing. Either way, a few pictures of the newly installed and bedded in turntable
- 179 replies
-
- 21
-
-
-
Have made the first one public, hopefully and here's the other half of the sequence
- 266 replies
-
- 13
-
-
Damn! Will alter the settings later. However, it is taking about an hour to upload to YouTube. Is there a quicker way? Tried uploading straight to this site, but as well as being slow too, nothing there when it had finished.
-
After a long break, Fintonagh is on the road again next weekend at the Bexhill Show. For those of you who can't get to Sussex, here's a video. Will try to post some more later. https://youtu.be/wbBw9sZIirg