David Holman
-
Posts
4,359 -
Joined
-
Last visited
-
Days Won
117
Content Type
Profiles
Forums
Events
Gallery
Blogs
Everything posted by David Holman
-
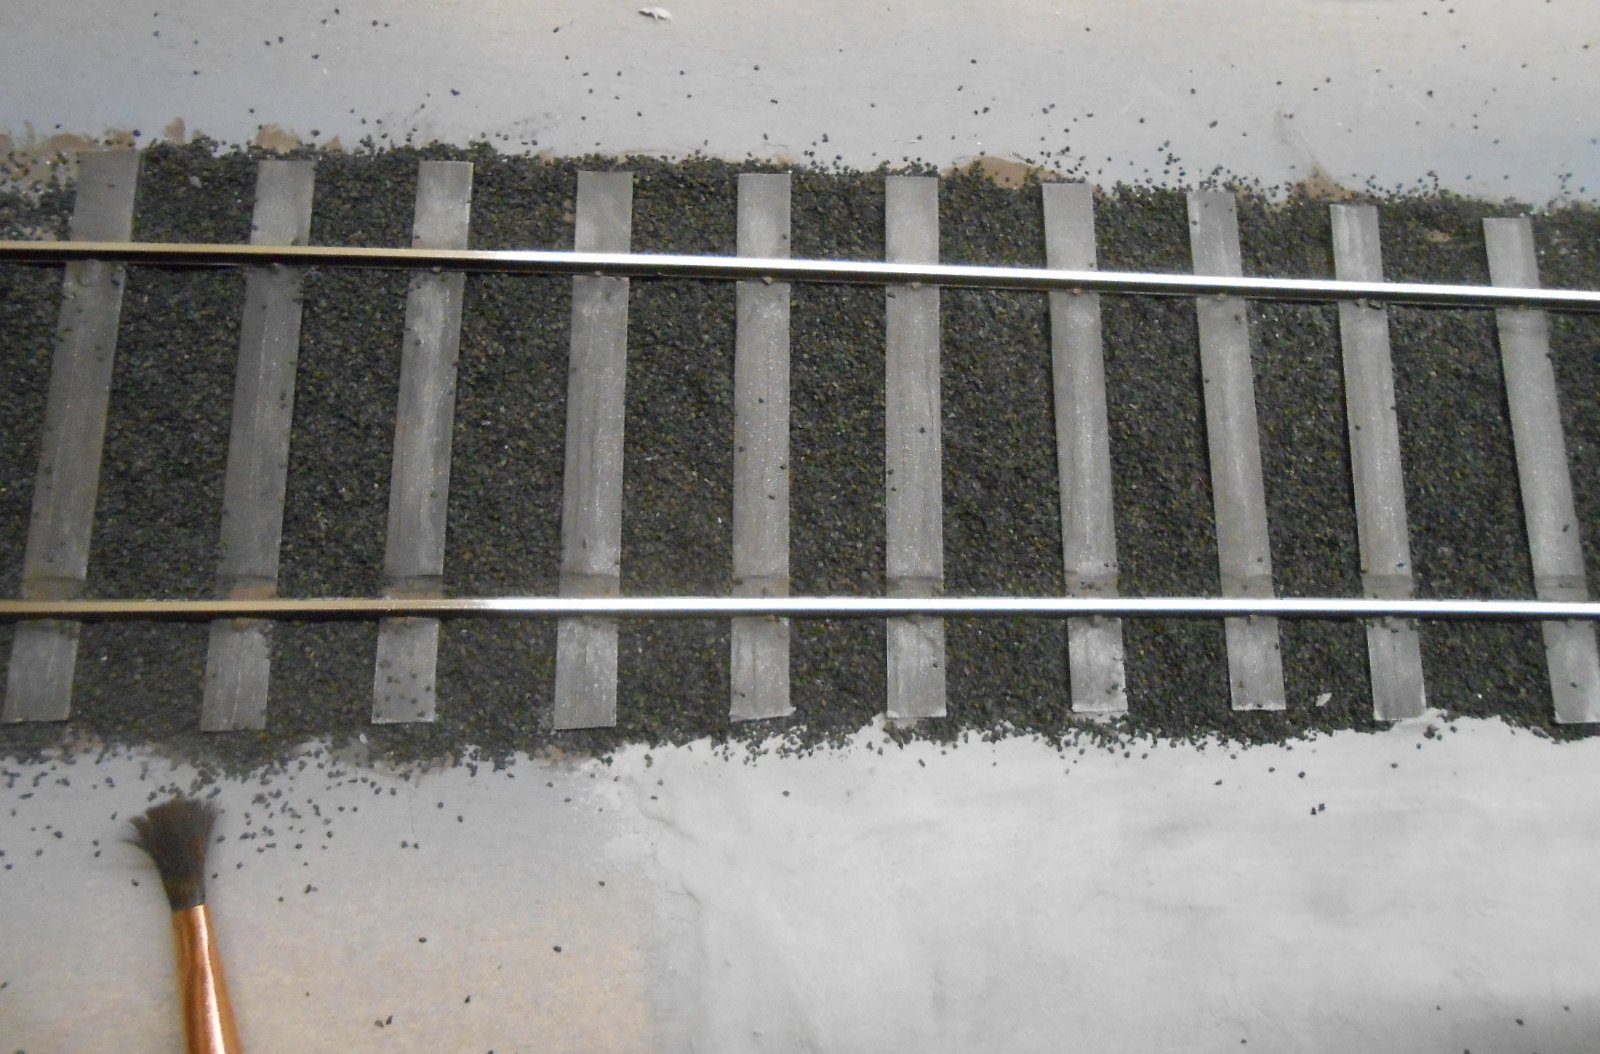
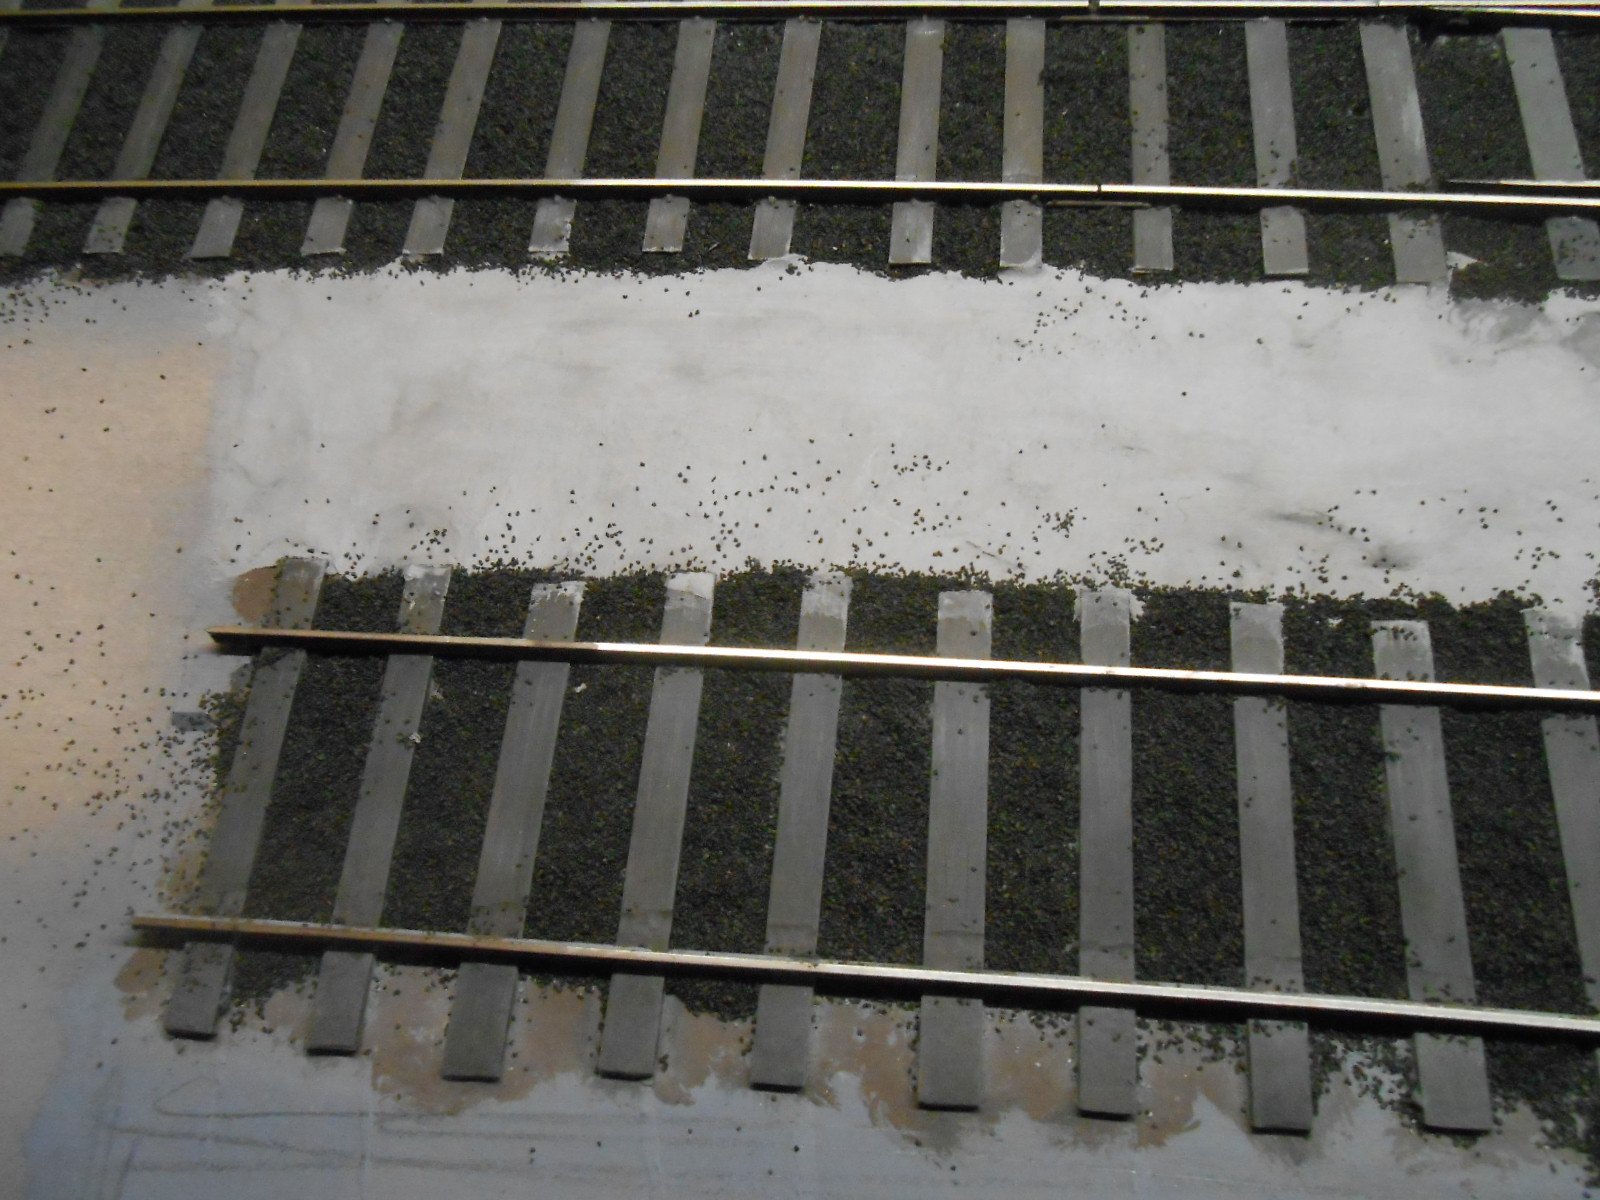
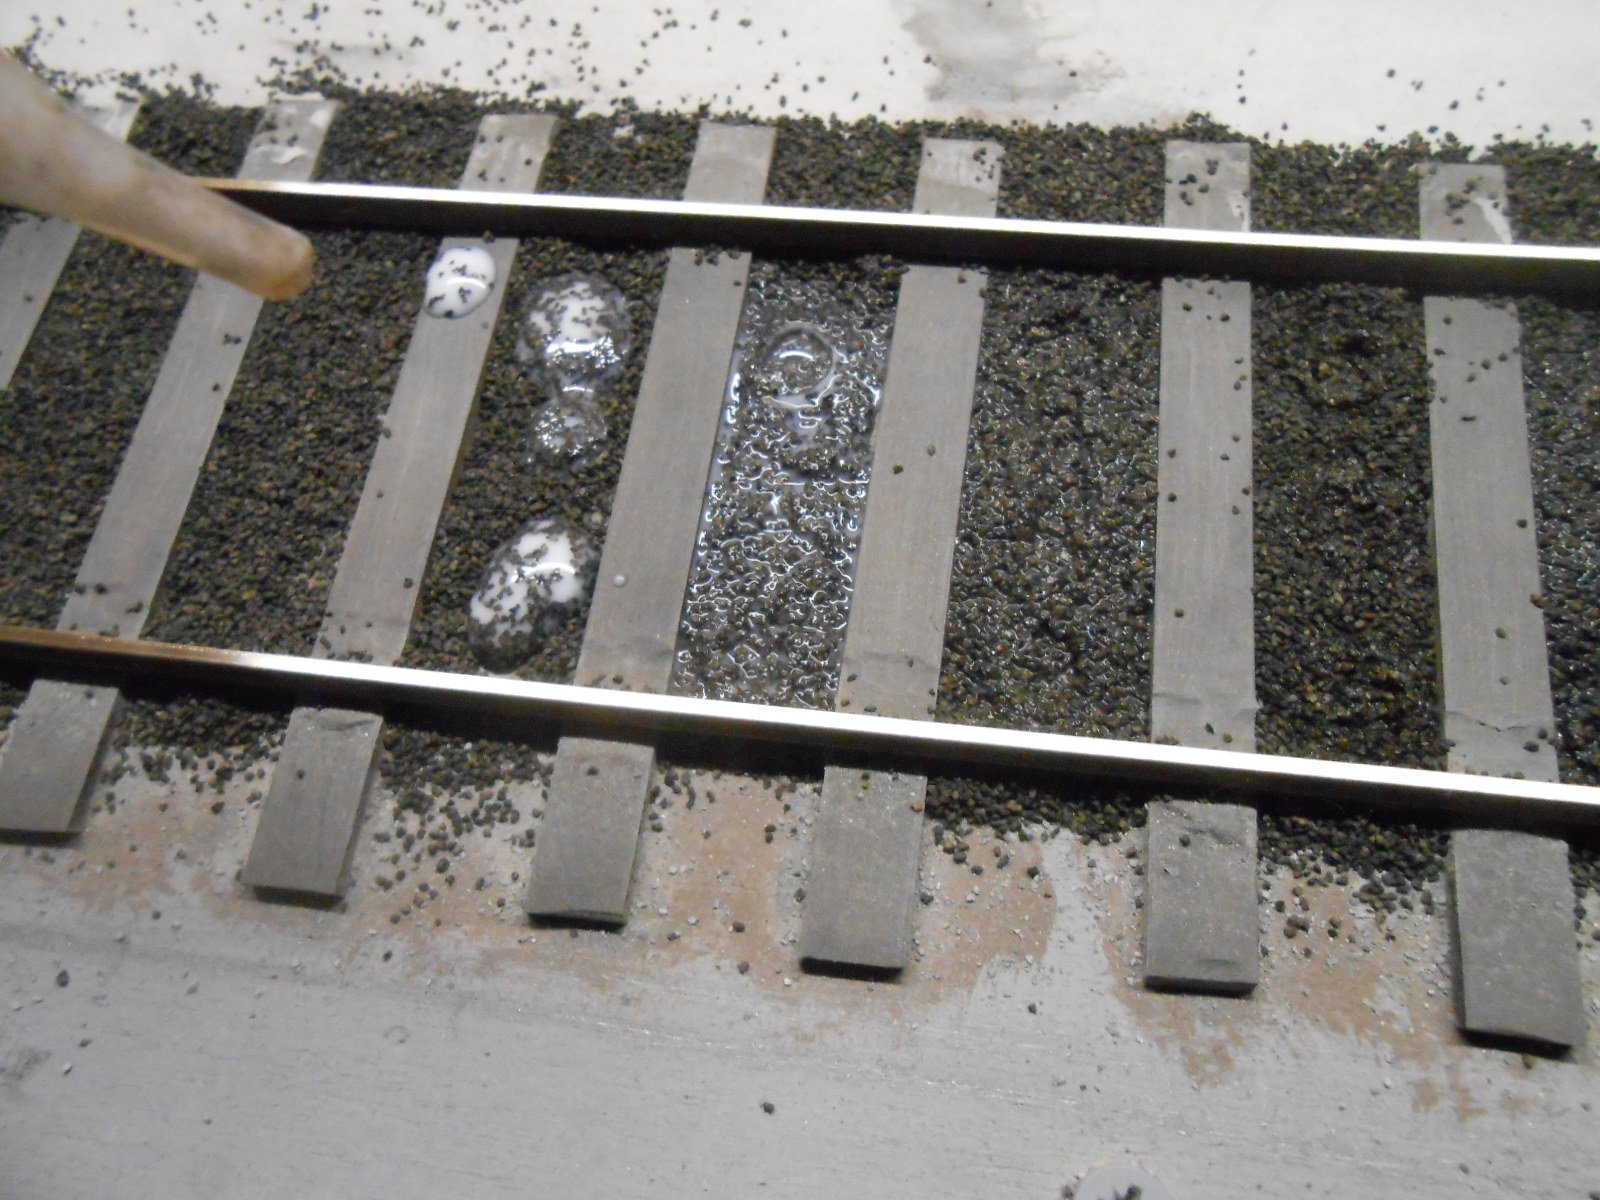
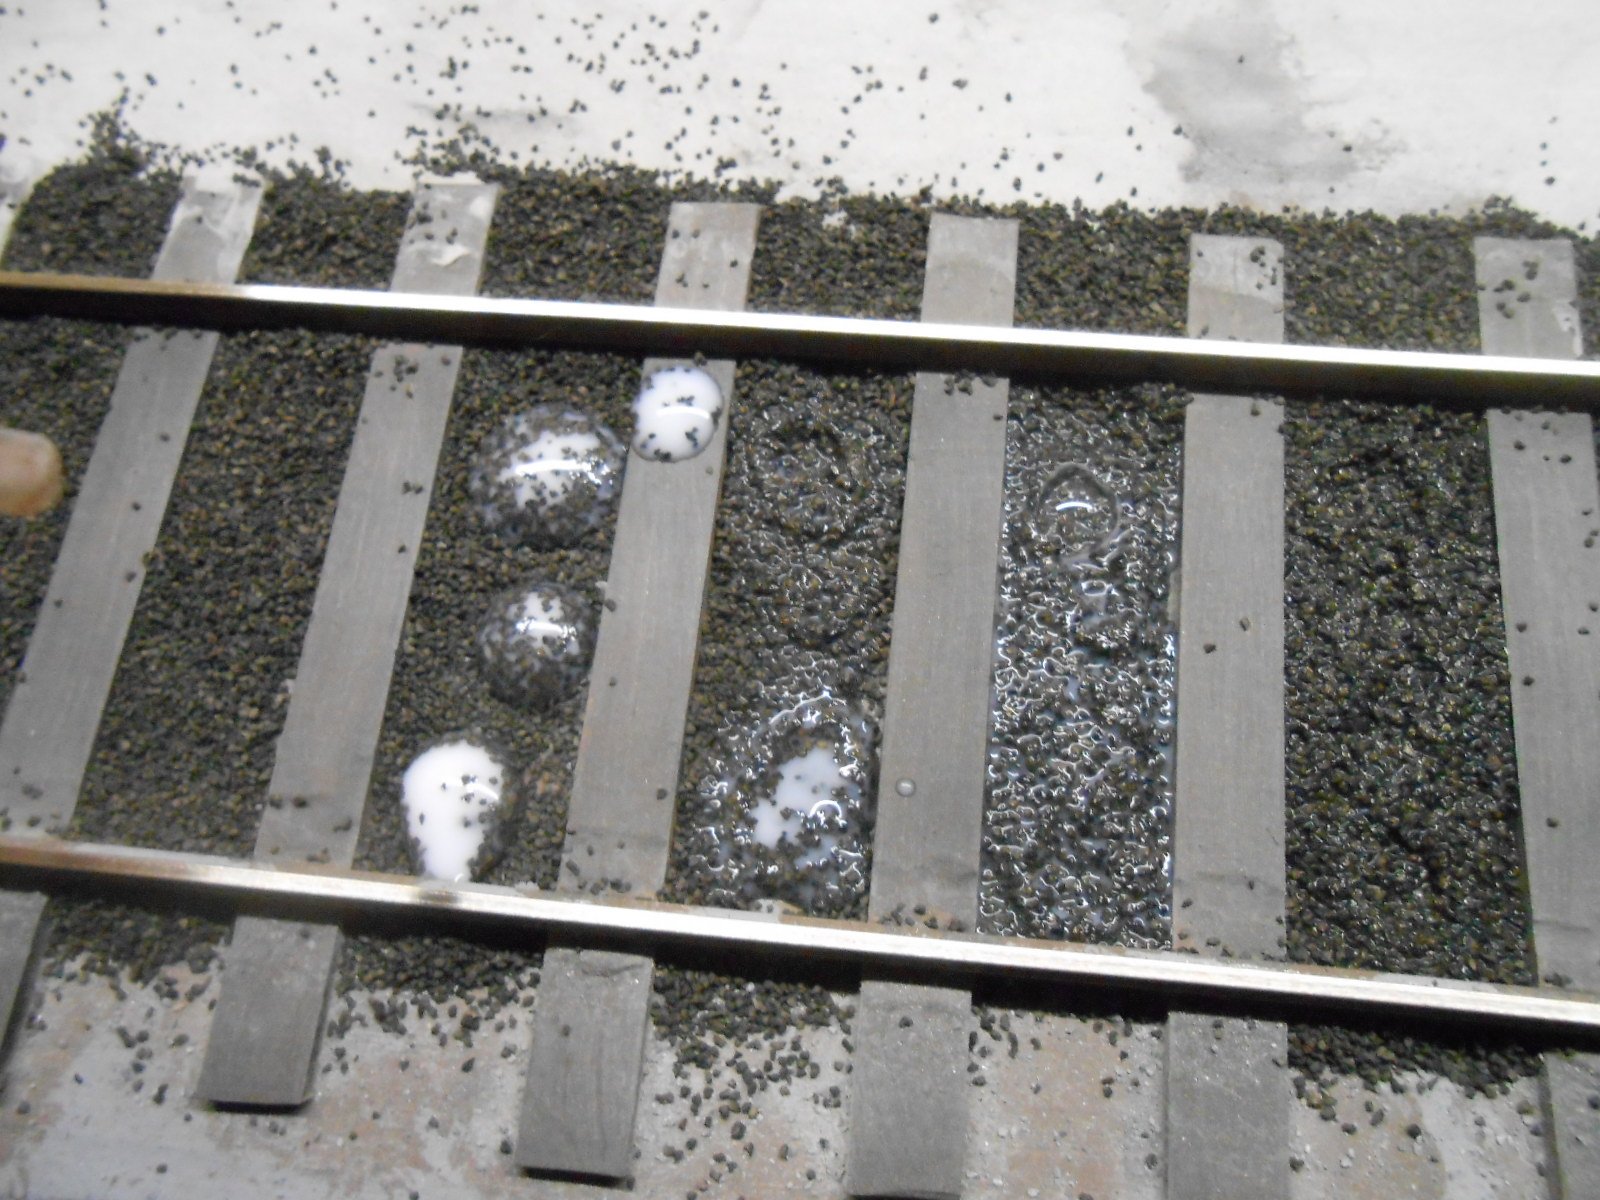
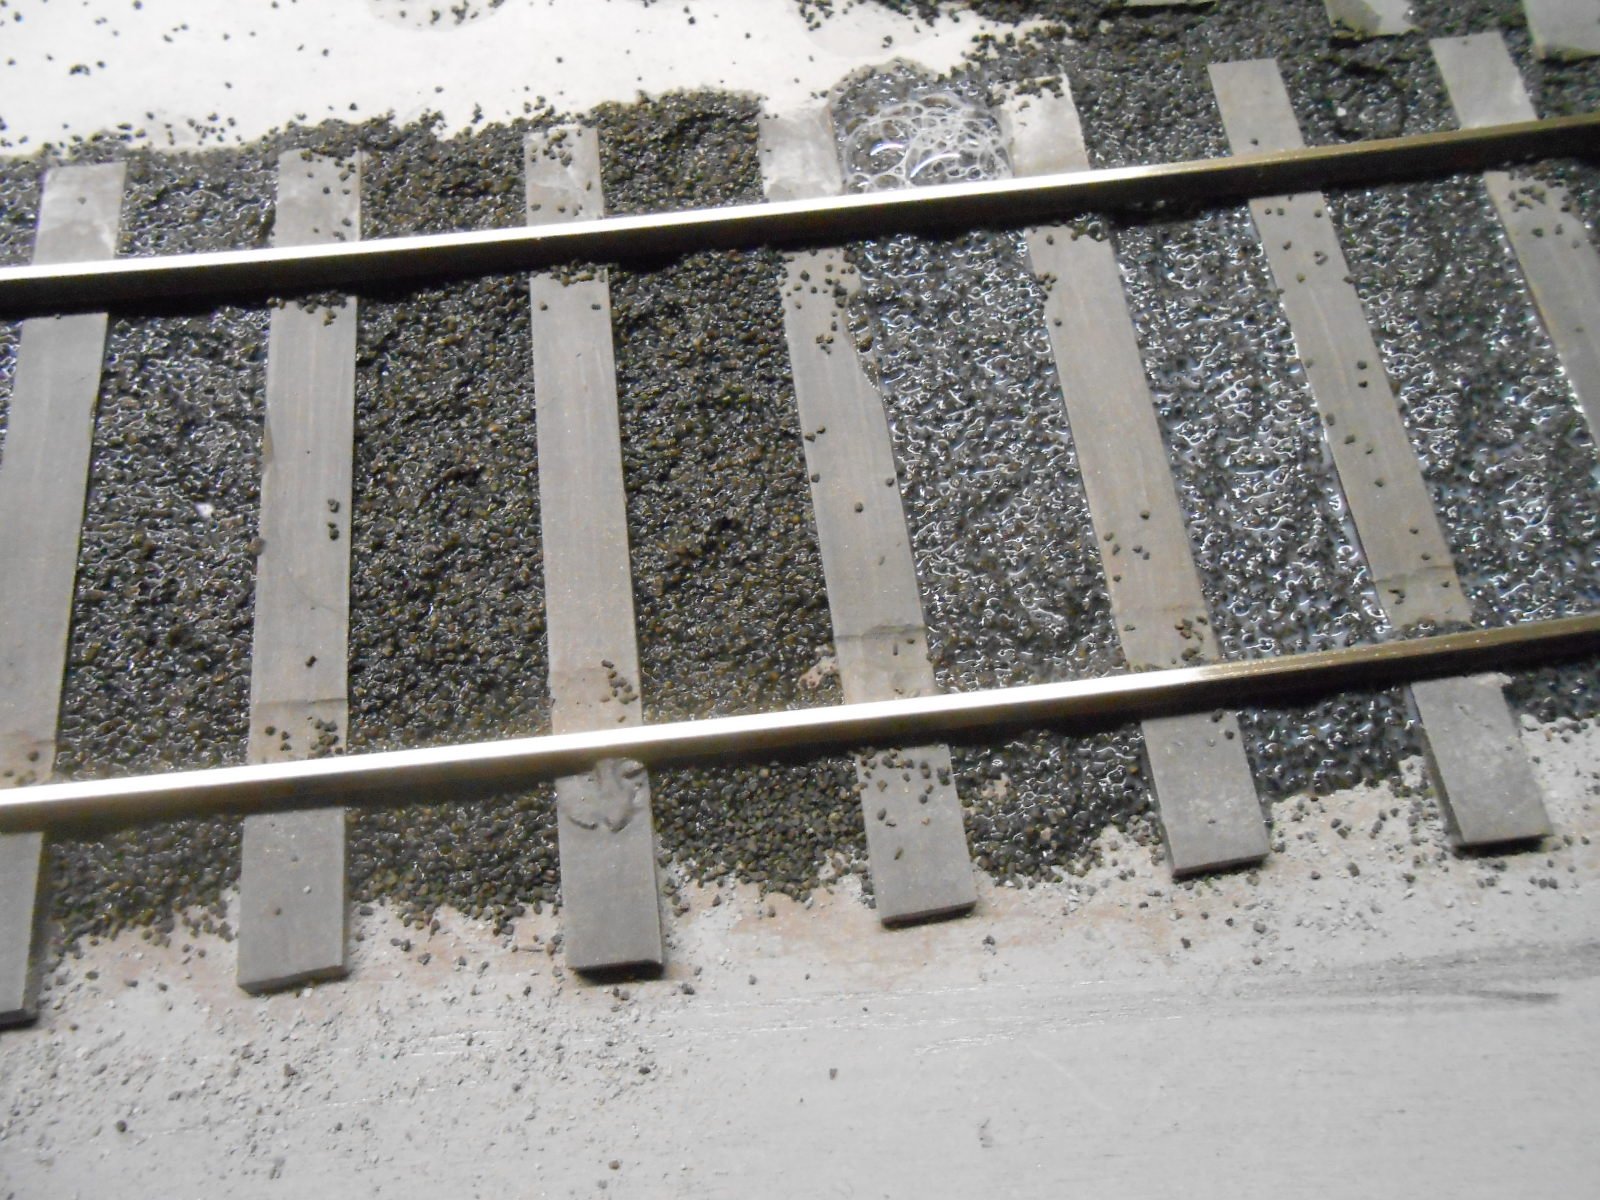
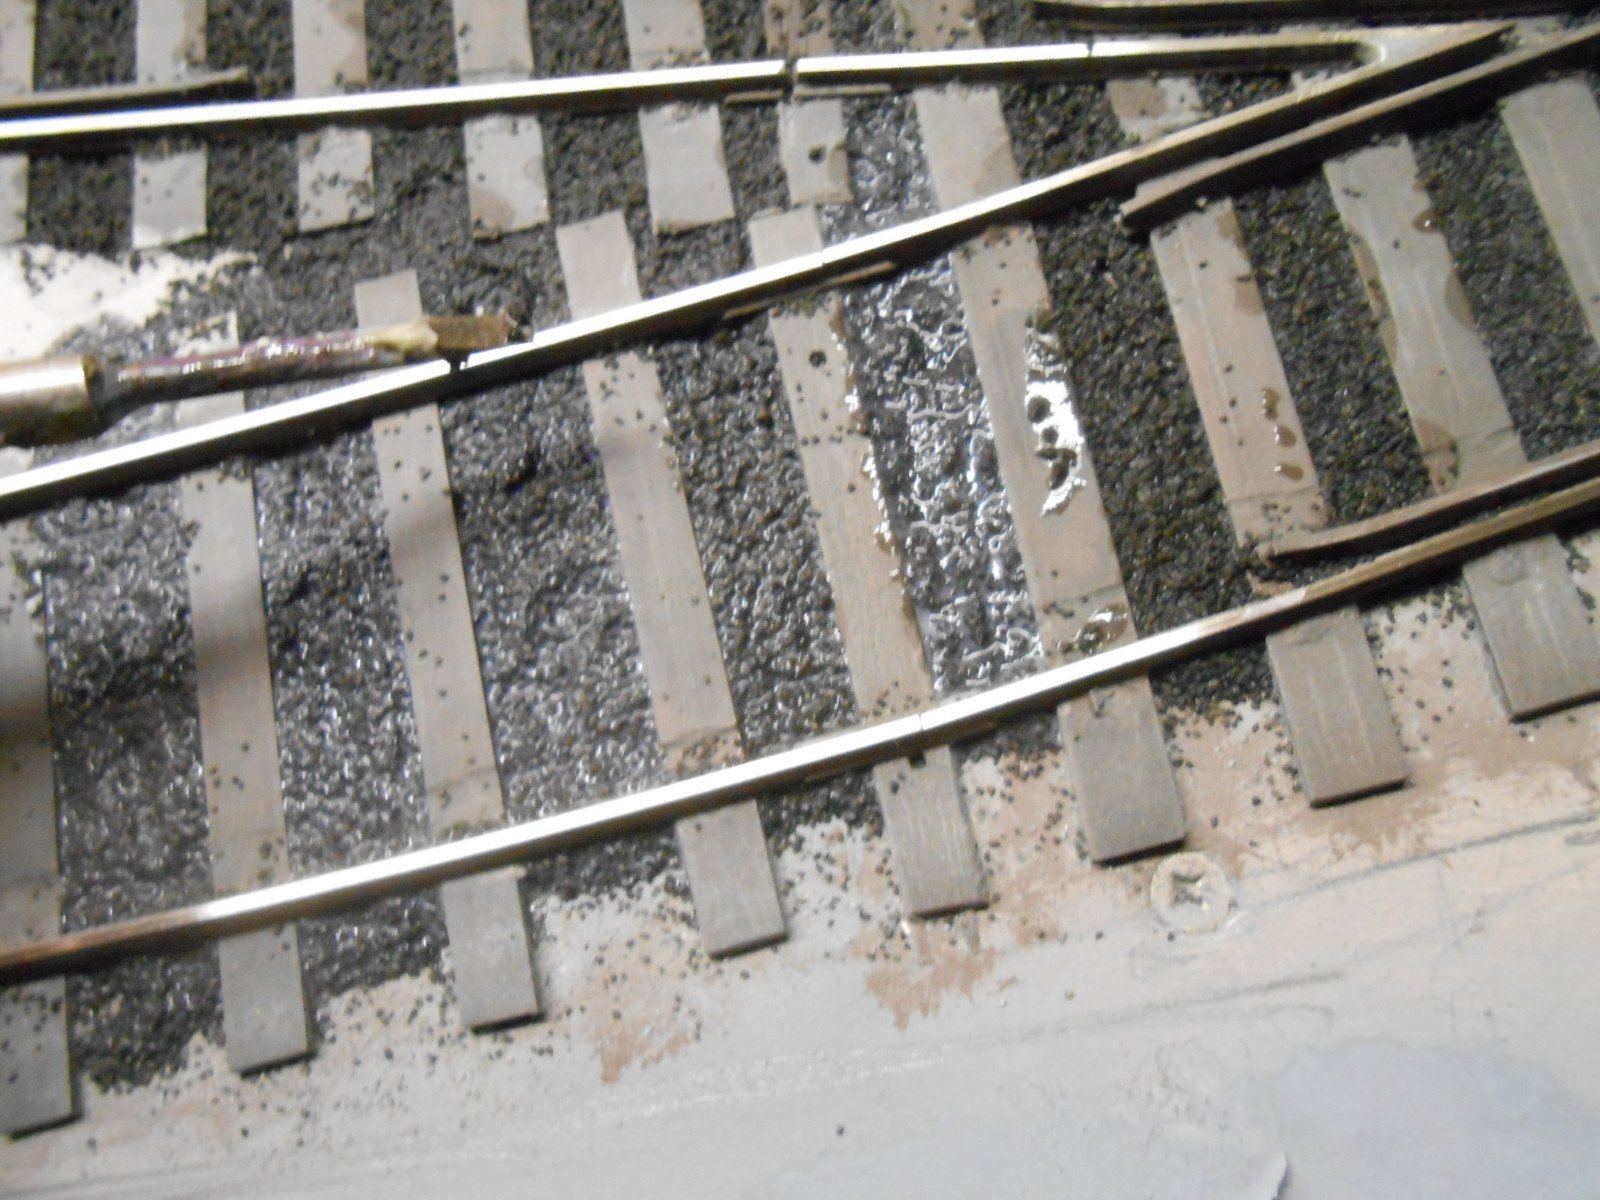
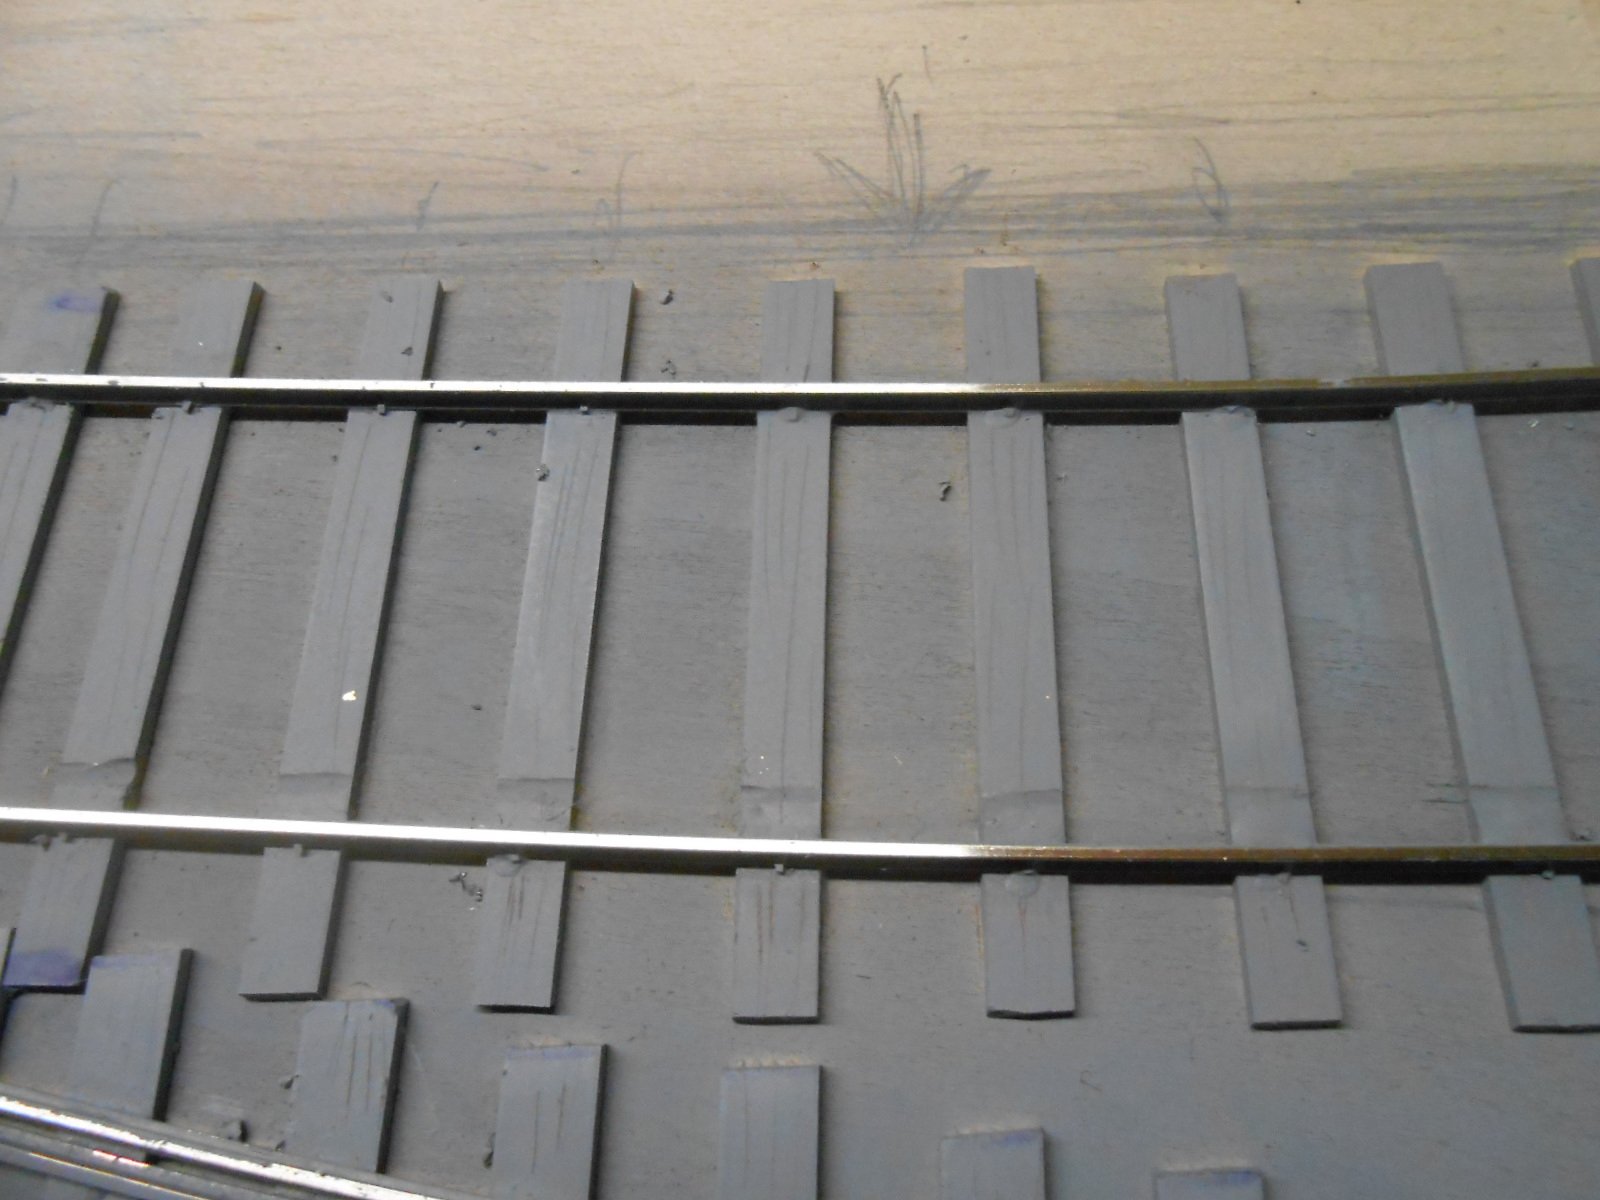
So, now into the multiple phases of detailing the track work. Never entirely sure which bits go first, so as usual, will probably end up doing some parts more than once... This time, decided to paint the track first & began with an overall coat of Precision 'track dirt', which is a sort of a, well, dirty brown colour. Followed this by painting the rails & from here on, my much thumbed copy of 'The Art of Weathering' comes off the shelf. Hard to believe it was written by Martyn Welch nearly 30 years ago, but with its mix of exceptional observation and experimentation, together with which Humbrol paints to use, makes life [fairly] easy. The rails were therefore treated to his 'sidings' mix, which is bauxite [133], gunmetal [53] and matt black, using a fine pointed brush and not worrying overly about fully blending the colours. Hence you get a bit of variation. I then painted the sleepers with a mix of chestnut brown [186] and matt black, plus some gunmetal again, which helps to give the faint silvery sheen you see on well weathered, creosoted, sleepers. Once dry, this was dusted with grey weathering powder, though some areas will be dry brushed with gun metal later too. Martyn also suggests using a very fine brush to add small dots to suggest knots. At this point, used some stone coloured DAS clay to create an impression of the yard surface immediately beyond the ballast, while a thicker layer of this is going to be used to form the stone blocks of the inset track later. And so to the ballasting. Every time I build a new layout, am reminded just how tedious this process is to get right, especially as I generally use Woodlands Scenics 'fine ash', which is probably a bit lightweight, but nevertheless, for me, matches the size of ash ballast in 7mm scale. The first step is to carefully spread it between the sleepers. It gets everywhere of course, so a combination of fingers and fine paint brush get it off the tops of the sleepers. A mixture of PVA, 50/50 with water and the usual drop of washing up liquid is then dripped on to the ballast with an eye dropper. It still tends to form small balls, but these soon dissipate, after which you got round again and drip more on. Finally, I use a small screw driver to poke and flatten the ballast around the sleepers, dipping it in water from time to time, which seems to help. There are probably easier ways, but it is what I do and once the whole lot is dry, further treatment will be needed with weathering powders and so on. Told you it was tedious!

-
Das Clay for surface areas e.g. depots and roads
David Holman replied to dave182's question in Questions & Answers
Got all his books! -
Das Clay for surface areas e.g. depots and roads
David Holman replied to dave182's question in Questions & Answers
Chinchilla dust, from your local petshop, JB. Very fine, and not made from pulverised, freeze dried chinchilla either. The more I look at prototype photos, the more apparent it is to me that, scaled down, surfaces are much smoother than we think. DAS clay is actually paper based I think, but dries in an hour or so when spread thin. To be honest, Polyfilla powder, or Artex, especially when mixed up with a bit of pva, also works well, and you can add cheap water colour paint to it so it is precoloured. And, indeed chinchilla dust or find sand, ballast etc if you wish, though probably best to add such things after it has set. -
Thank you! Order just sent - not surprised as they are very popular and pretty forgiving, while (set up properly) can provide delayed action including on the move. I have thought about S&W couplings more than once, but somehow they look far too like tension locks to me, while I've never liked the versions where a wire is soldered across the buffers. Indeed, don't really like the visual aspect of anything other than screw/three link couplings. The latter are just about ok in 7mm scale (though the former are the spawn of Satan!), but of course not really appropriate on a front operated exhibition layout. If only buckeye couplings had been used from the start of railways, because we'd all just be using Kadees.
-
Well done you!
-
Ordered a pack earlier this week, along with the excellent solenoid uncouplers. Therefore saddened to get my letter and cheque returned today with a note from Trevor Shaw's wife to say he had ceased trading due to ill health. A real shame, not least because have standardised on Dinghams for years. The solenoids are built around an M6 bolt, so easy to screw into the underside of the baseboard and now need to find an alternative, I suppose - unless someone else takes over.
-
Das Clay for surface areas e.g. depots and roads
David Holman replied to dave182's question in Questions & Answers
Funnily enough been doing the DAS this afternoon too. Got some in stone colour, which should help the painting process. Report tomorrow. -
Just goes to show how much fun and satisfaction can be had from even a small project like this. The inset track has turned out well, likewise the freighter. Lots of inspiration here for my project too.
-
Thank you both! I especially like those large section stones at Donaghadee, not least because they would be easy to scribe. The colours of the stones, drying out after a shower make a nice effect too.
-
Interesting! Many thanks.
-
Bought them from Marcway as 18" strips: 6mm for plain track and 7mm for point timbers. Marcway do ready cut ones, but only 8'6 lengths, I found and I wanted 9'. Not sure wire brush would work - the copper clad is surprisingly tough and even the craft knife scoring is disappearing under the paint. To be honest, the treatment is a bit over the top, but on a small layout like this you can indulge things to some extent, because there aren't masses of anything to do.
-
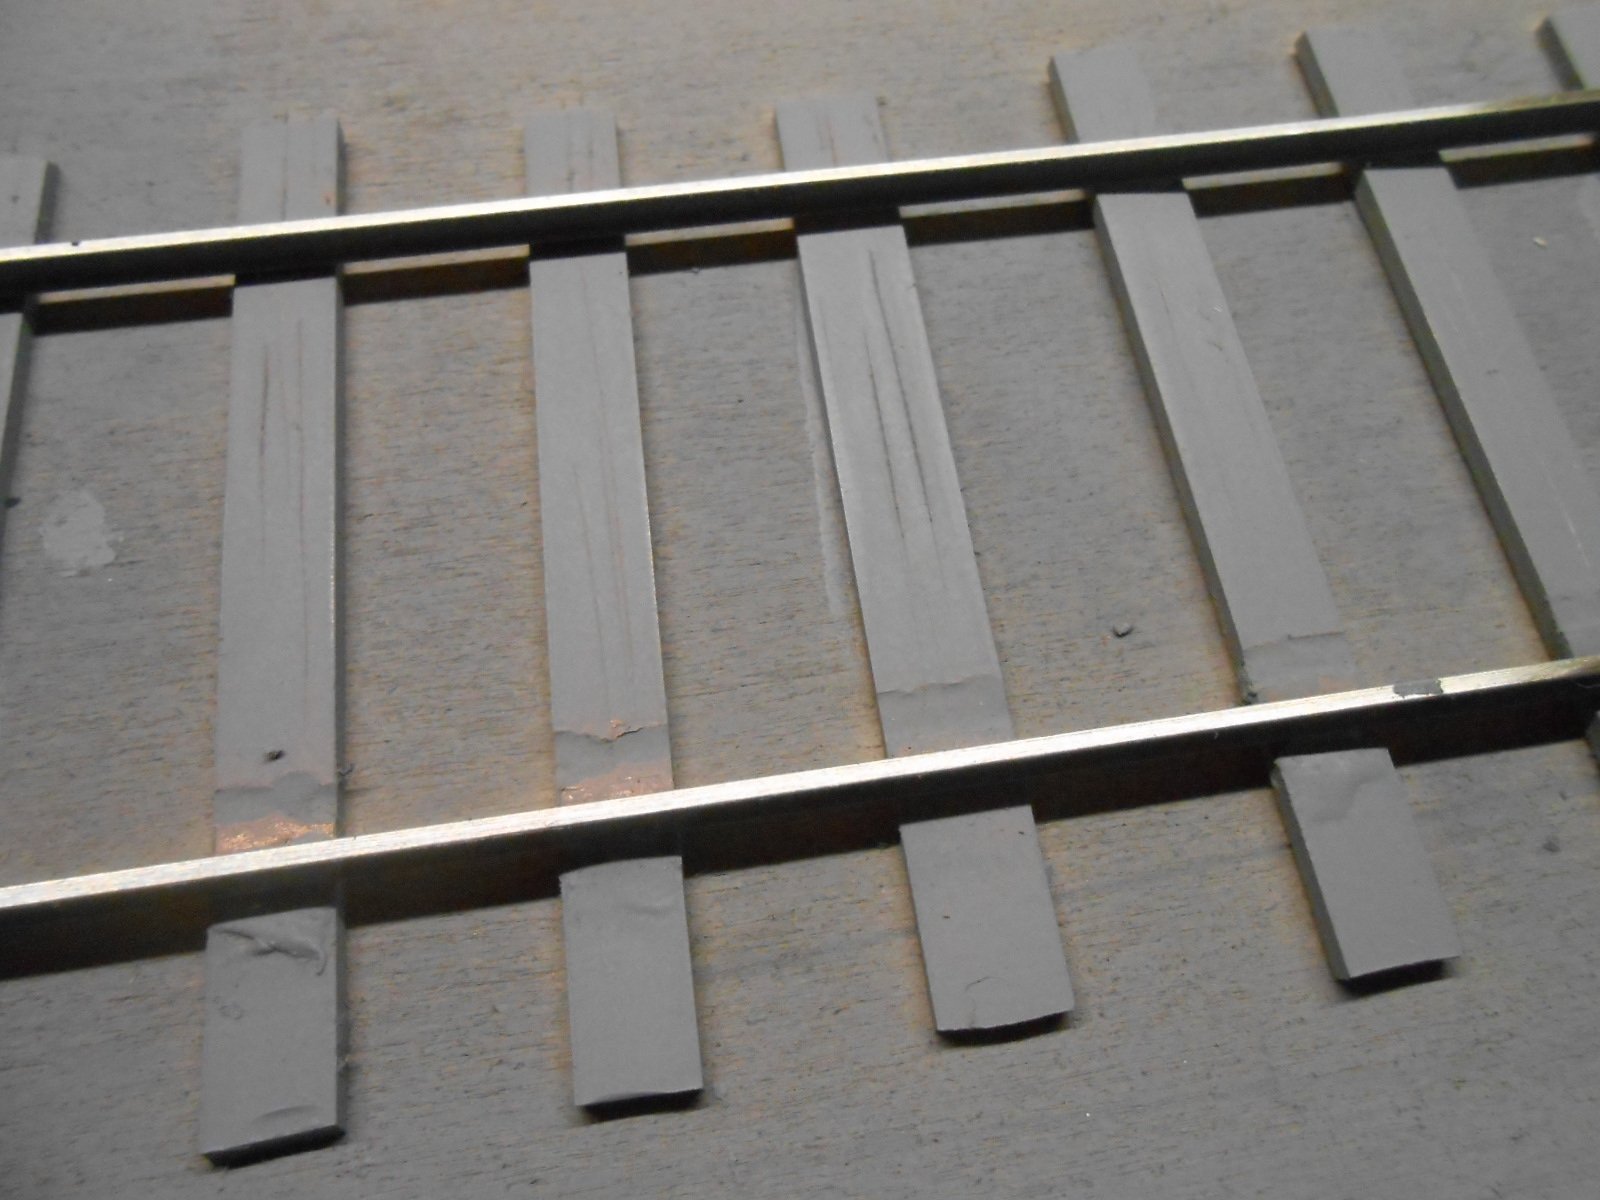
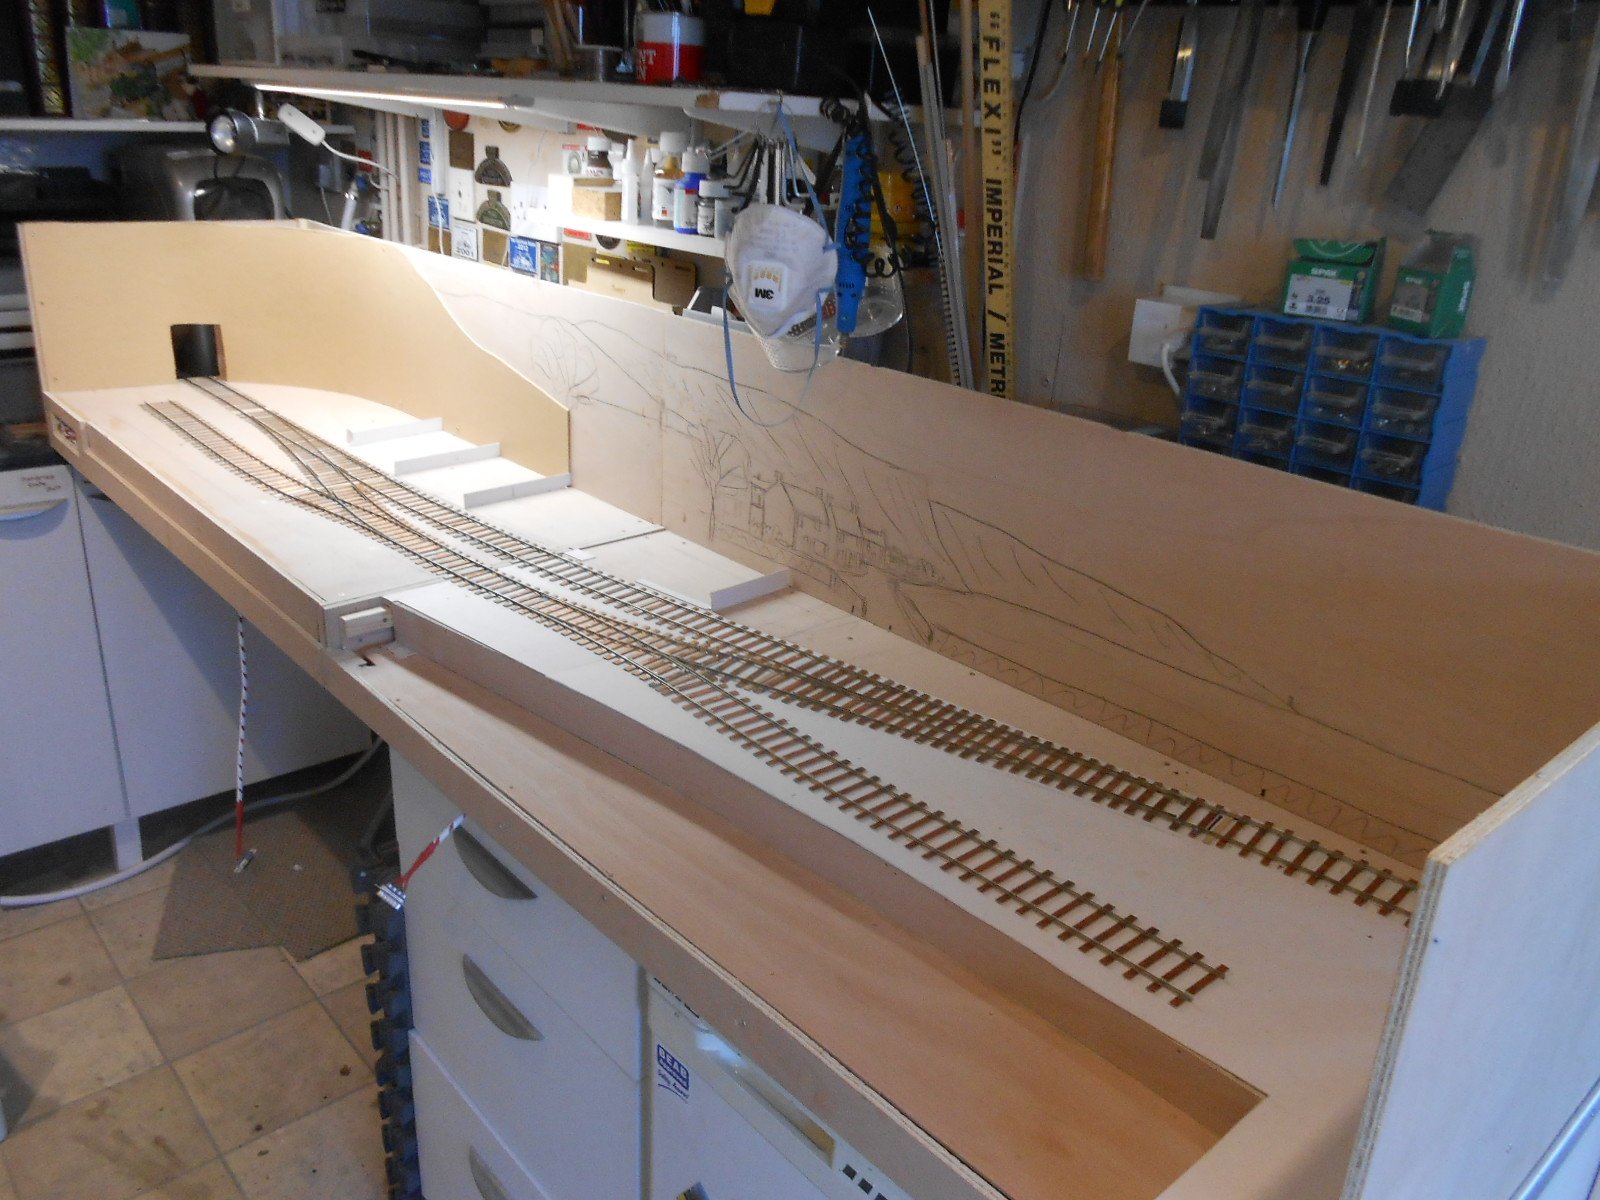
Took a deep breath and decided to move on from construction and wiring. The next steps in model railway construction often cause a few furrowed brows, though I tend to follow the artistic route and start with the background and gradually move forwards. However, model railways being three dimensional things, it is just as apt to work from the bottom up. On Northport Quay, that potentially could mean the water level and harbour walls, but am continuing with the track for now, which means painting, detailing & ballasting. Copperclad sleepers tend to be rather plain, angular things, so have used a craft knife to score their surfaces in places to represent cracks in the timbers. There are some nice photos around of SLNCR lightweight, flat-bottomed, track, including ,'Riley in Ireland', which have been trying to emulate. Have also added representations of the track spikes, using small pieces of 10x20thou micro strip fixed with cyano. Tedium personified! Before starting all this, I added check rails to the two sidings and headhunt to the pier, all of which will feature inlaid track of some sort, as yet to be decided. There is a question about this on the site. Since then have given all the track a coat of spray primer - this is because without it, the copper clad sleepers can easily show through their shininess with wear and tear.
-
Having been poring over online photos of harbour settings, but this far not very successful in identifying inset track. There is quite a bit in the Historic Dockyard, Chatham, but much of it is embedded in concrete and tarmac. Hence am wondering if you good folk out there can offer anything? Wills Scenic do some quite nice setts/cobbled sheets I might use, but what was the situation in Ireland, particularly at the end of the 19th century? Could concrete have been used? Or what about bricks? Am happy to do scribed DAS for the latter, but scribing irregular cobbles might be a nightmare!
-
Soldering Irons for model railways
David Holman replied to Alan564017's question in Questions & Answers
As others have said, depends what you want an iron for. If it is just electrical connections, then a 15-25 watt iron and 240 degree multiple solder will do you fine. However, if you are starting on kit building, then a 40 watt iron, flux of some sort and a mix of 140 and 180 degree solder, plus the 240 is required to cover a variety of tasks.The As ever, start simple, and build up your skills. There are plenty of online tutorials that a quick internet search will help you with. -
Someone's having fun again - and quite right too. Thanks for sharing, JB.
-
Couldn't agree more - there is much to learn both outside as well as within our hobby!
-
Shame indeed. Can only suggest that before any future projects begin, that you spend time thinking about what you want from a model railway, for there is no doubting your skills in scenery and buildings, or indeed baseboards. There are many strands to follow within our hobby, so feel sure there must be several you can enjoy.
-
Very much agree how certain things bring a model to life. The smokebox door hinges and handrails do the same on a steam loco for me. Hadn't realised how much detail there was on the C class bodywork, but adding it makes all the difference and it is great to see it starting to emerge.
-
Yes, shame about Tonbridge, though they may try to do something in May, so will keep you posted. Allypally next, in March - fingers crossed. Get my handrail knobs from Roxey Mouldings. They are Markits ones, and come with long, medium and short shanks. Tend to use short for the smokebox door and medium along the boiler. They take 0.7mm wire. Lots of good stuff in Wargaming - Gordon Gravett first put me on to that. That loco is not only very much in the Quarry Hunslet genre, it is also more than a bit Hornby 'Desmond'. 0n16.5 folk are very keen on these, because replacing the cab and chimney gives a very quick and easy conversion, while the chassis becomes a better slow runner in the larger scale, even if the outside cylinder rods are a bit crude.
-
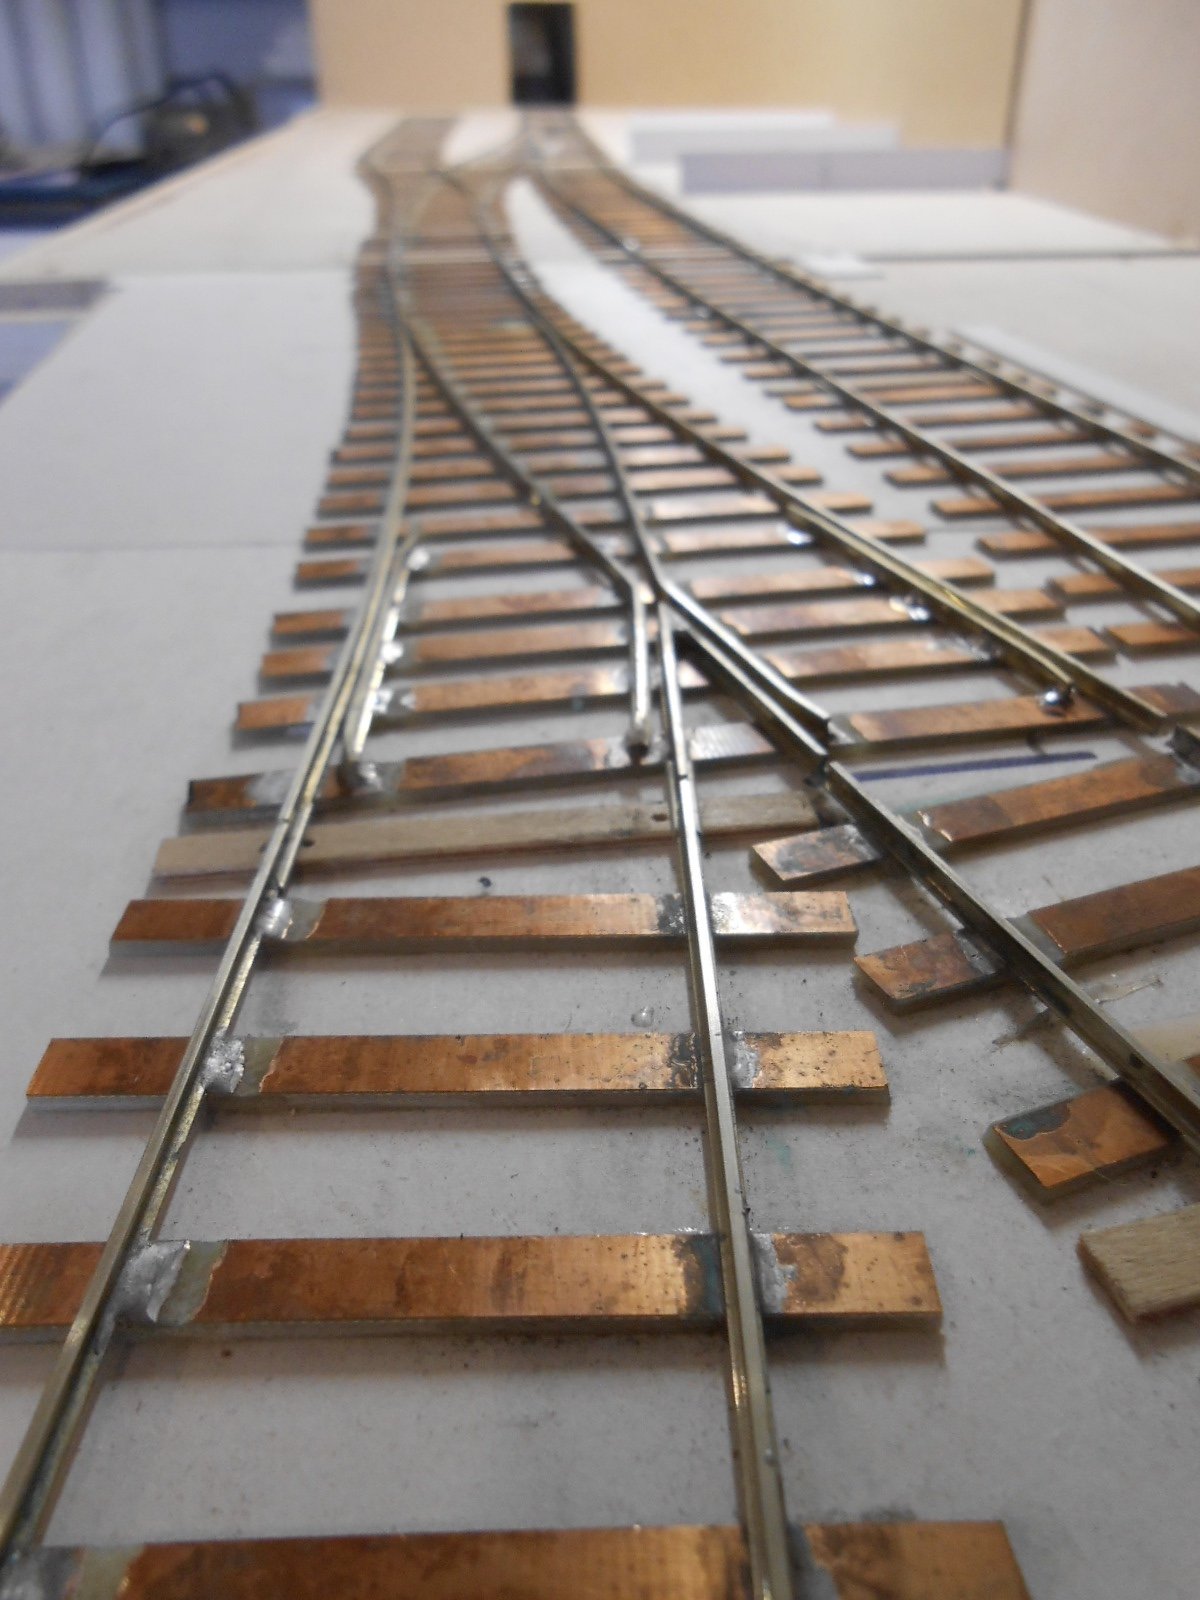
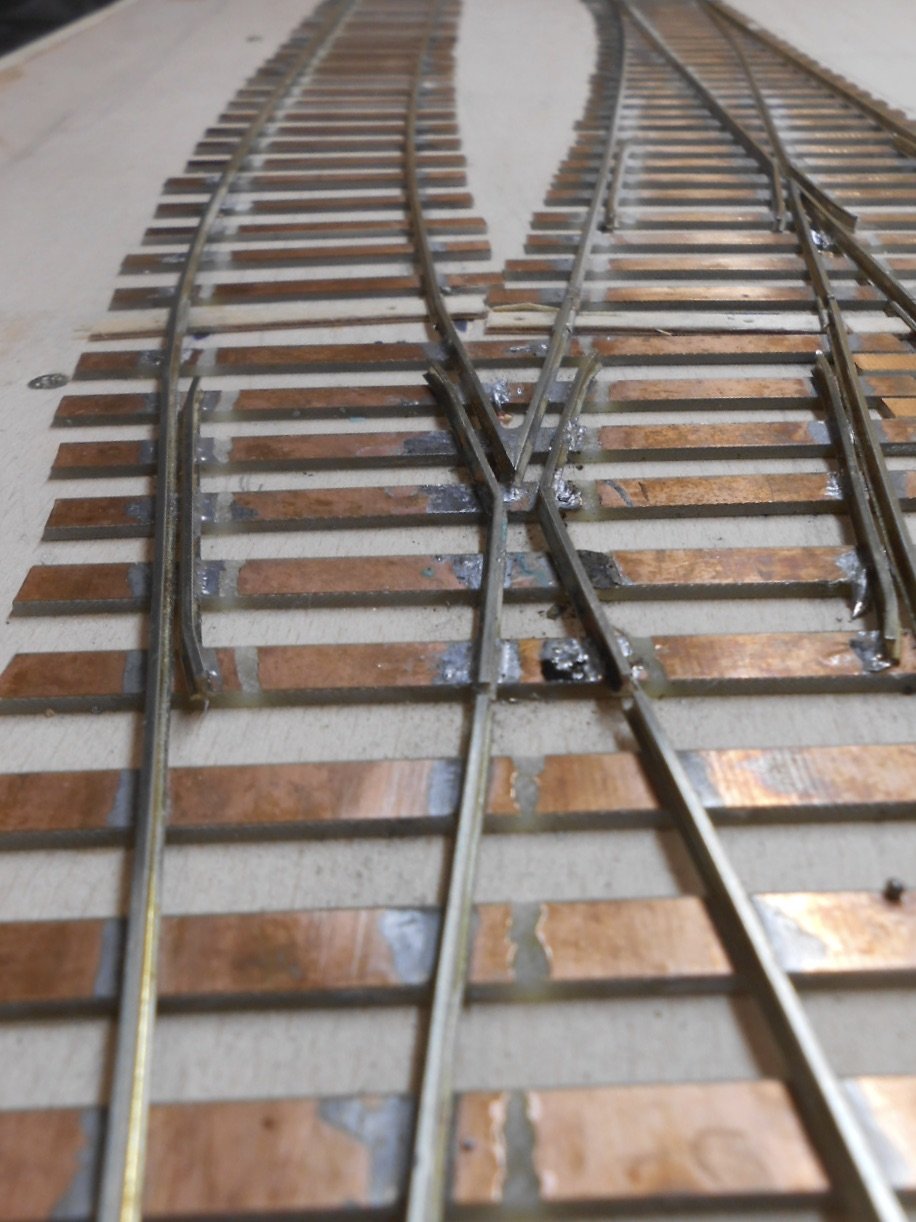
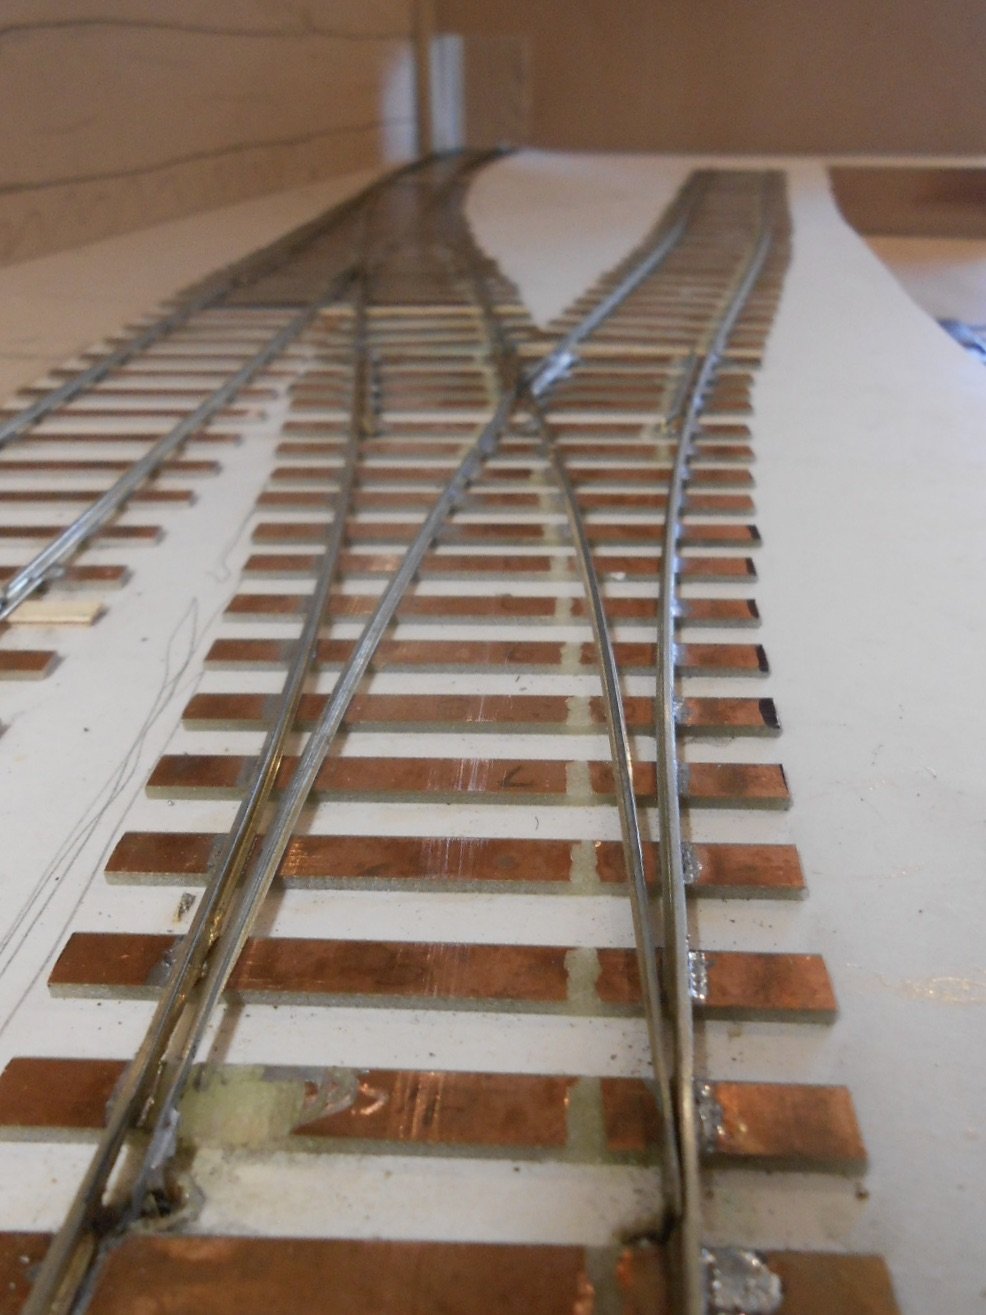
Worth saying that, in the absence of someone to 'proof read' your work, photos are a good substitute. For example, have just noticed that in the third photo up, the alignment of the vee and the wing rails could be better - particularly on the left side. A bit more tweaking still needed, methinks...
-
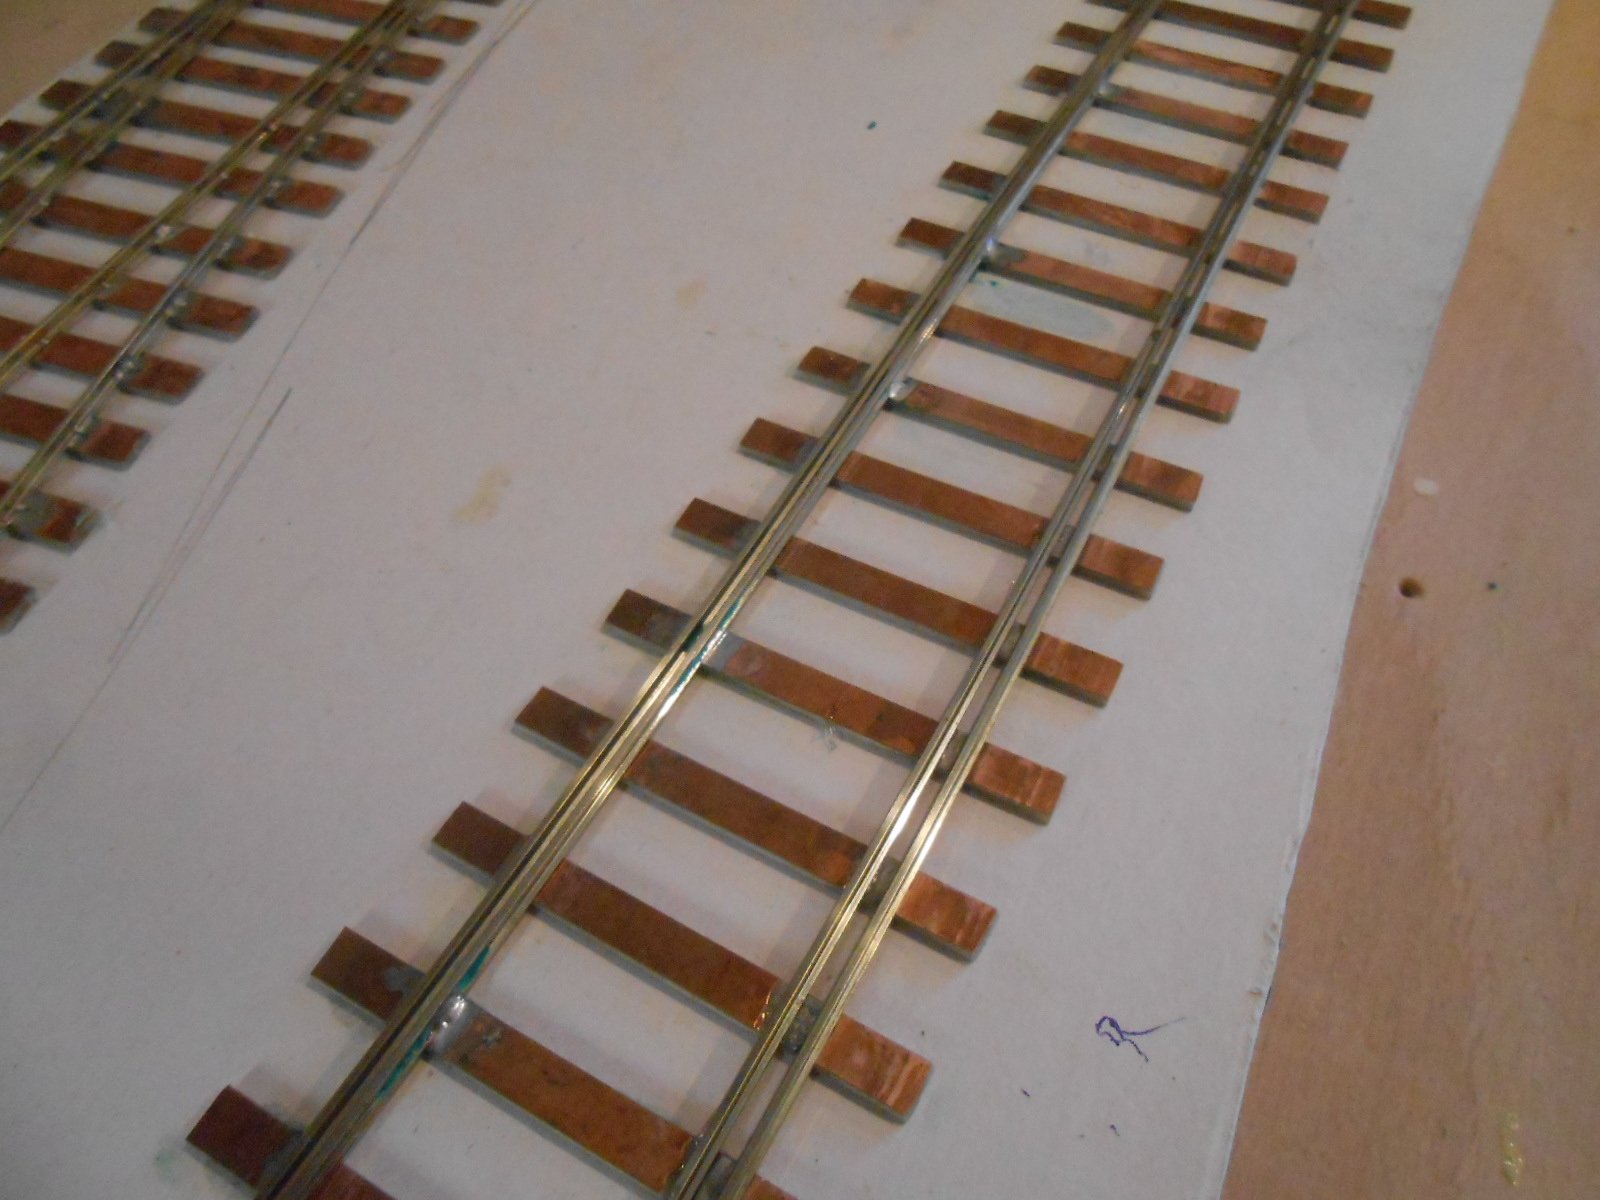
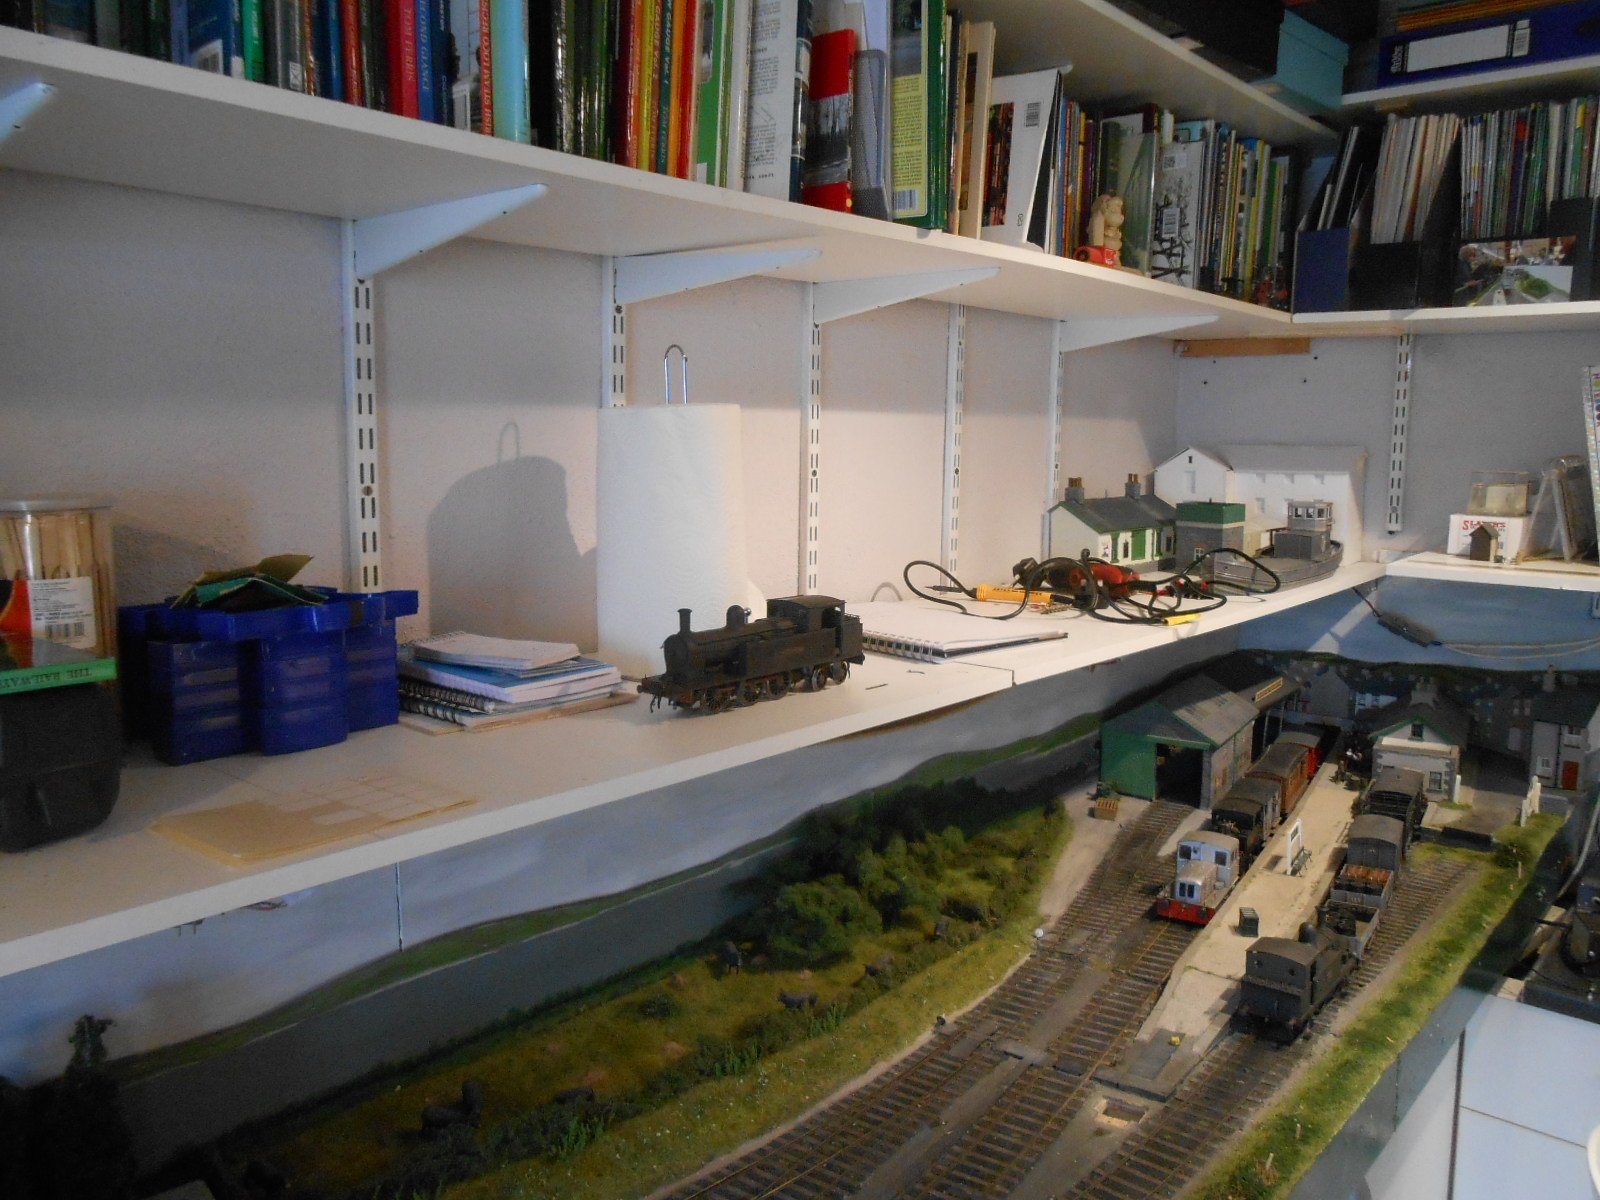
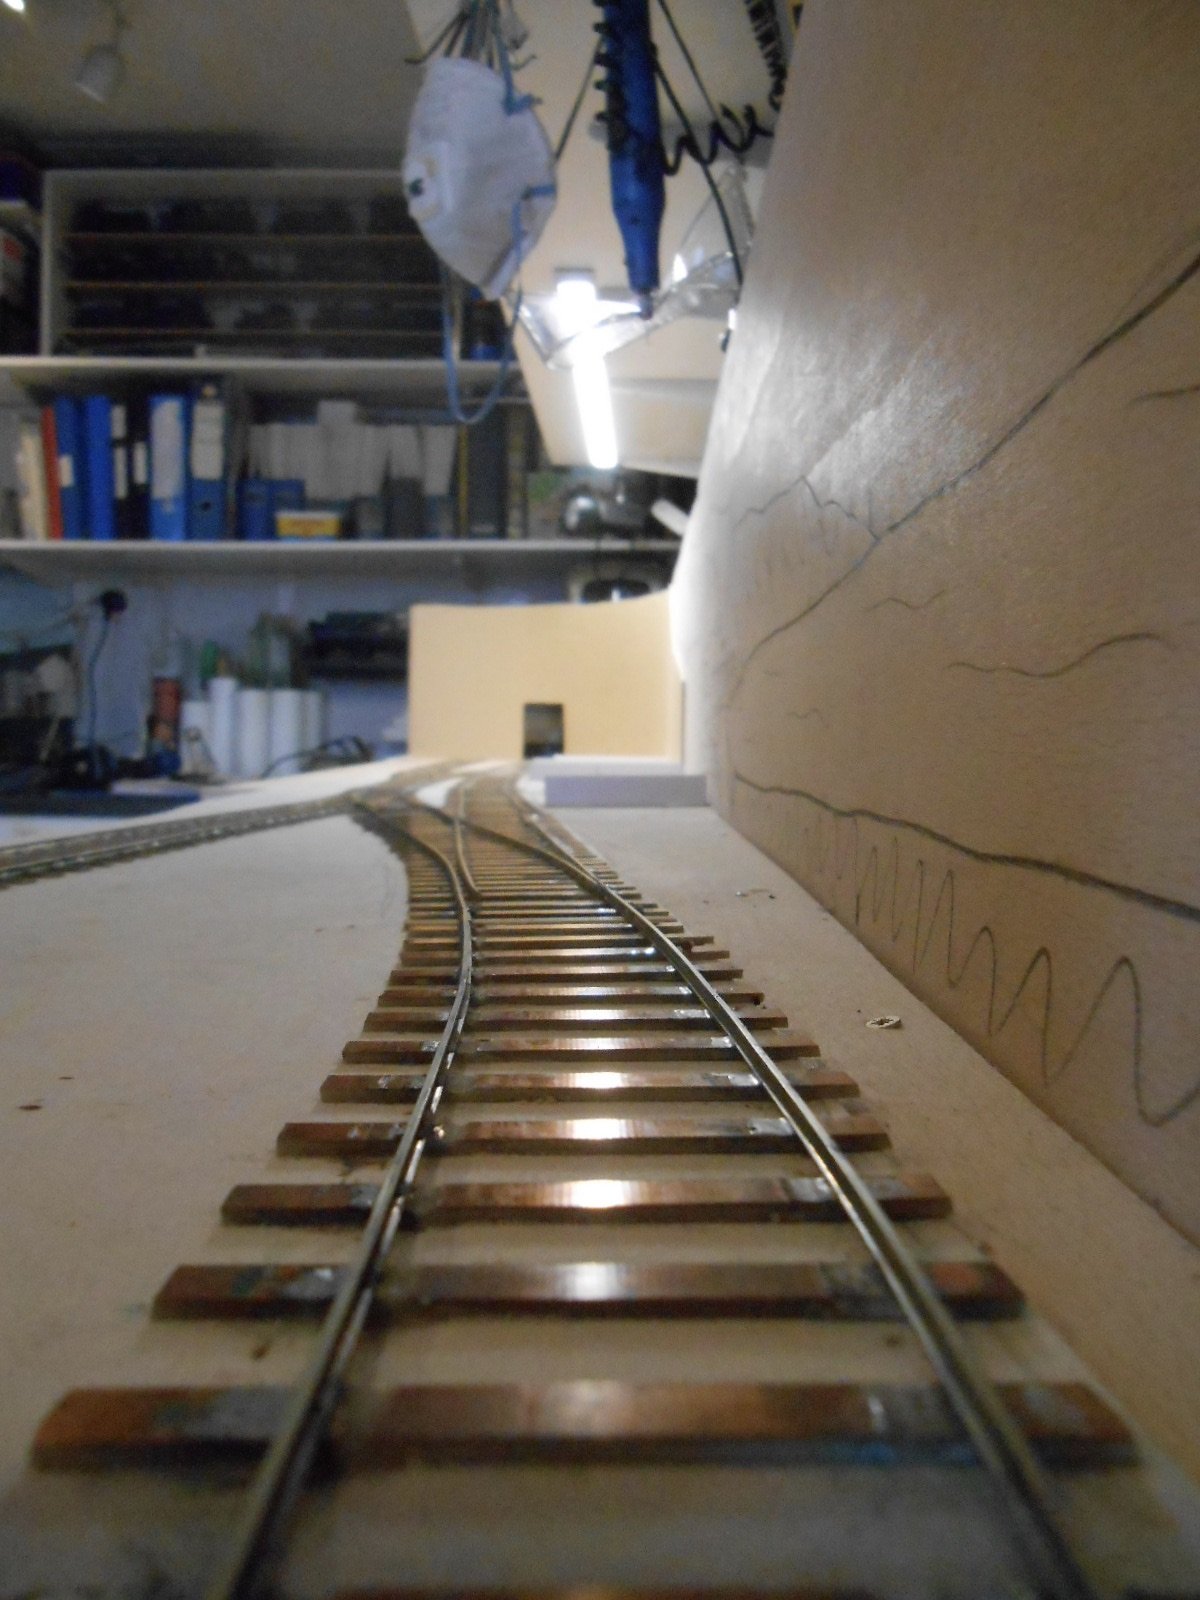
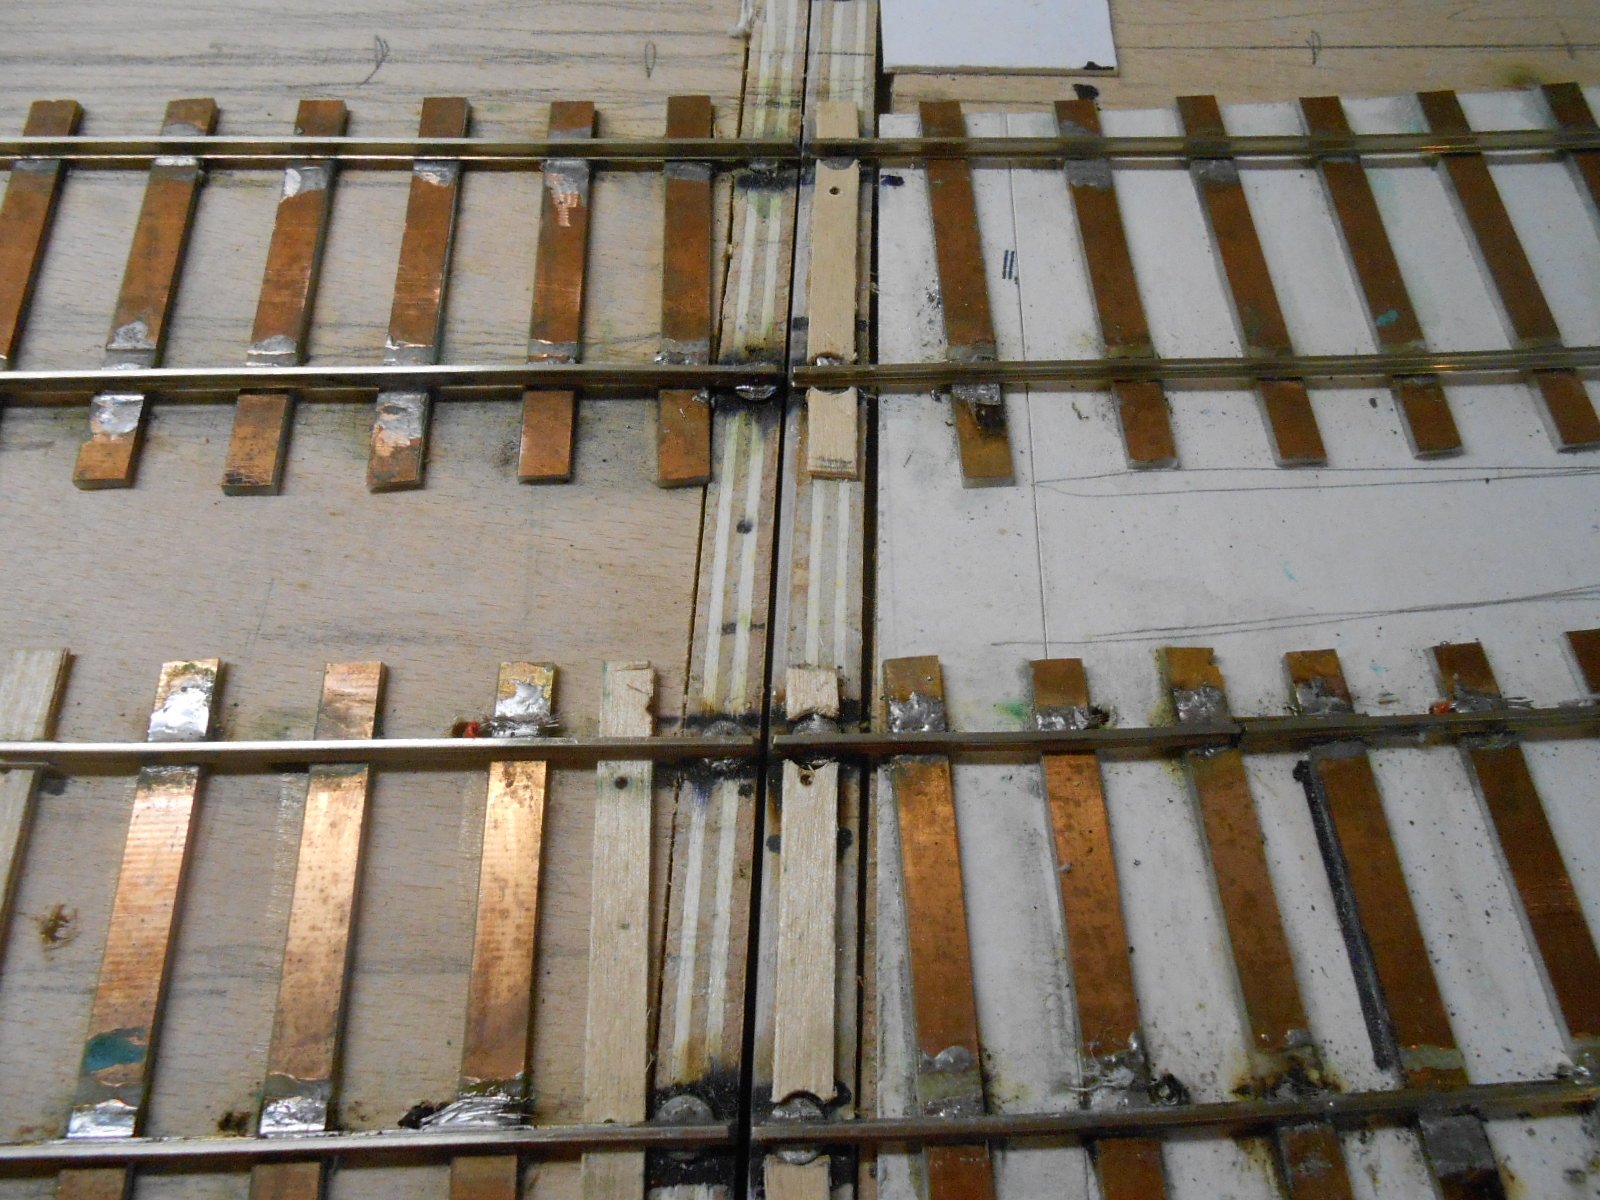
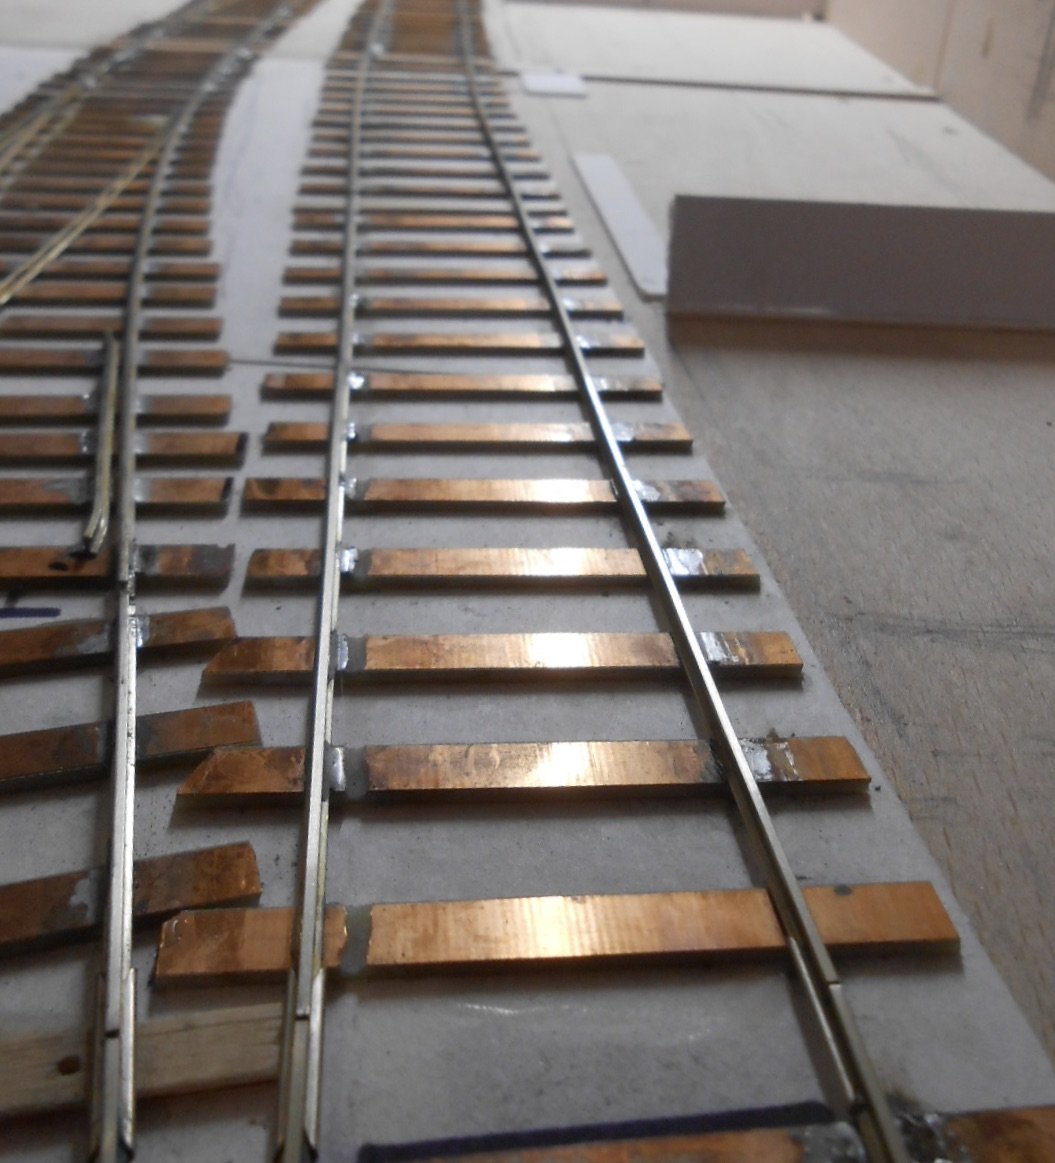
Fettling Have just spent the best part of two full days fettling the track work. Indeed, didn't exactly cover myself in glory with my hand made track as only the RH point behaved as it should. Both the Y points had tight spots, while the LH point blades wouldn't close properly. Some of the plain track wasn't that great either, with the alignment on the headhunt track [leading off stage to the pier], being especially poor. Part of the problem [apart from my own workmanship] stems from the fact that I laid the track [and did the wiring] on each board separately, but when I set the two boards up on my workbench, the faults soon started to become apparent - even before I began testing. Enough said! Below is the shelf where the layout will live, now covered in workbench stuff, to allow me see the track work better. Needless to say, the smaller, shorter wheelbase locos were fine, as indeed was my 4-4-0 Wolf Dog, but the SLNCR 0-6-4Ts and other tender engines really struggled. The only answer was to be really methodical, listing all the faults, engine by engine [in both directions] through each bit of track. This helped identify problems common to several locos at a time and where to look. First up was the LH point at the right hand end of the layout. The point blades would not close flush against the stock rail & discovered the main reason for this was the holes I drilled through the baseboard were not tight enough to the stock rail, so the dropper wires [to the under board tie bar] didn't have enough room to move the blades. A fair bit of work with a needle file mostly cured the problem, but several locos were still derailing! Turned out that the track going off scene was on far too tight a curve, something that became especially clear when I looked through the hole in the sky to see the track at eye level. Good tip this, for checking alignment. In the end, I replaced a full metre of the outside rail, to give smoother run all the way from the platform. The next problems were the two Y points. A vernier gauge showed clearances varied from between 0.5mm too narrow to over 1mm too wide! One of the Y points had the same problem as the LH point, so more work with a needle file, along with adjusting the gauge in several places now has all but one of the locos able to negotiate the whole layout without problems. The remaining culprit is Sir Henry, my SLNCR 'Large Tank', where the problem is not enough play in the coupled wheels, so the solution will be to remove at least one pair of washers on the outer driving wheels. Interestingly, it runs ok in reverse, which at least shows the sprung rear bogie is doing its job. While I was at it, I straightened the dog leg at the entrance to the left hand siding, but decided to leave one or two other kinks in the plain track partly because they don't affect running, but also because they add a bit of character to what is very much a railway backwater, where a scale 10mph is likely to be the top speed. Have also included pictures of the baseboard joins, where I solder the rail ends to screws set into the ends. You can also see the insulation gaps needed with copper clad point track. This morning, I did test runs with some of the rolling stock. Am not worried about any of the passenger/parcels vehicles, as all they will be doing is being pulled in & out of the platform, from the fiddle yard. Goods wagons are another matter, so checked out the shunting moves to both the pier and left hand siding. Fingers crossed, all seems ok, so can now move on to work that is more cosmetic and therefore a bit less stressful!
-
As long as the points are moving, then you can always replace the motors, or perhaps consider wire in tube. The amount of force in a point motor is negligible compared to that of your hand and with no scenery in place, wire tube runs on the surface can easily be hidden, or they could go under the baseboard. Model railways can be a test of patience and at times, resilience too. Rightly or wrongly, I am eternally pessimistic about any moving parts, because there are so many variables. Have spent two full days fettling my new track on Northport Quay, including rebuilding one point and realigning the headshunt. Thus far, nine of my 14 locos will negotiate everything, so more tweaking still required. At times, such things are a pain in the primary orifice. At others, I have been known to wonder why I bother! However, I take inspiration from others in this hobby, including many on this forum. Stuff happens, as the Buddhists say - or something like that. One rule I very much try to stick to is 'stop while you are ahead'. The temptation to keep going rarely works out and many is the time that an extra ten minutes has meant several hours sorting it out later. Stop, have a cuppa, do something else, then sit down and think the problem through. There is always a solution.
-
For me, tension locks spoil many a good model and Kadees are probably as good a compromise as any for modern image and indeed most narrow gauge options.
-
DCC Controller Recommendations - Newcomer
David Holman replied to Keano30's topic in Irish Model Layouts
Have tried both the Gaugemaster and Lenz systems. Both are ok, but not perfect, so sounds like NCE is the one to go for. -
The process might be simple, but still demands plenty of care and skill to execute it effectively. Fine work!