David Holman
-
Posts
4,359 -
Joined
-
Last visited
-
Days Won
117
Content Type
Profiles
Forums
Events
Gallery
Blogs
Everything posted by David Holman
-
Love that little guy!
-
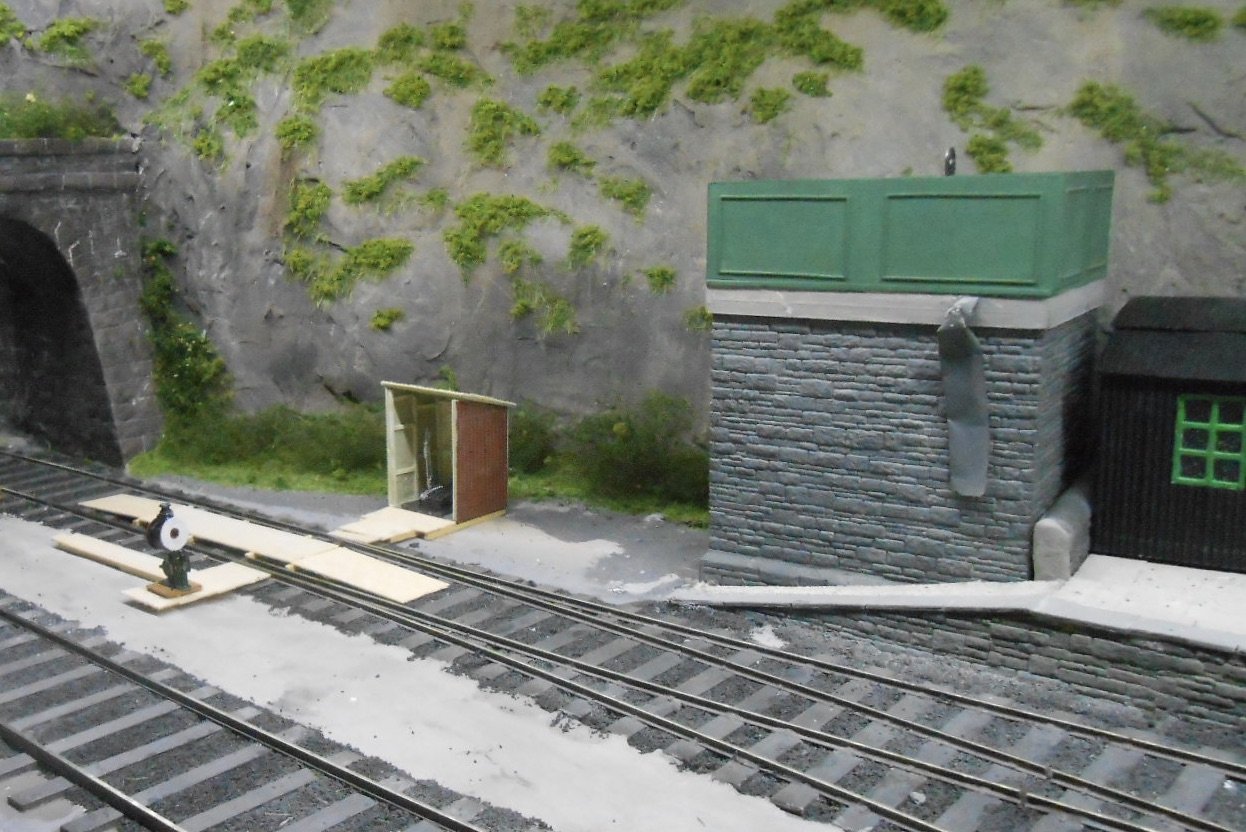
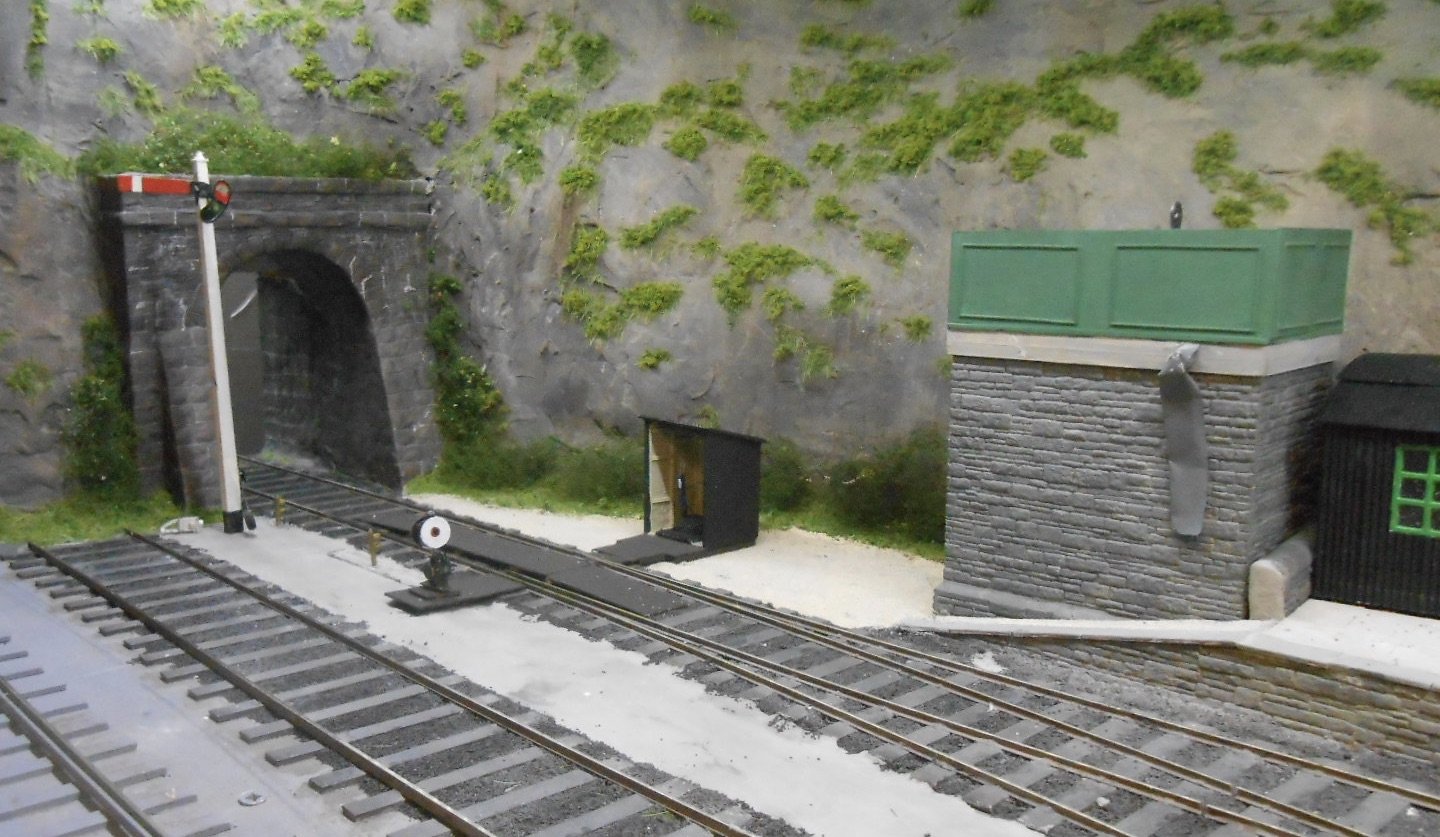
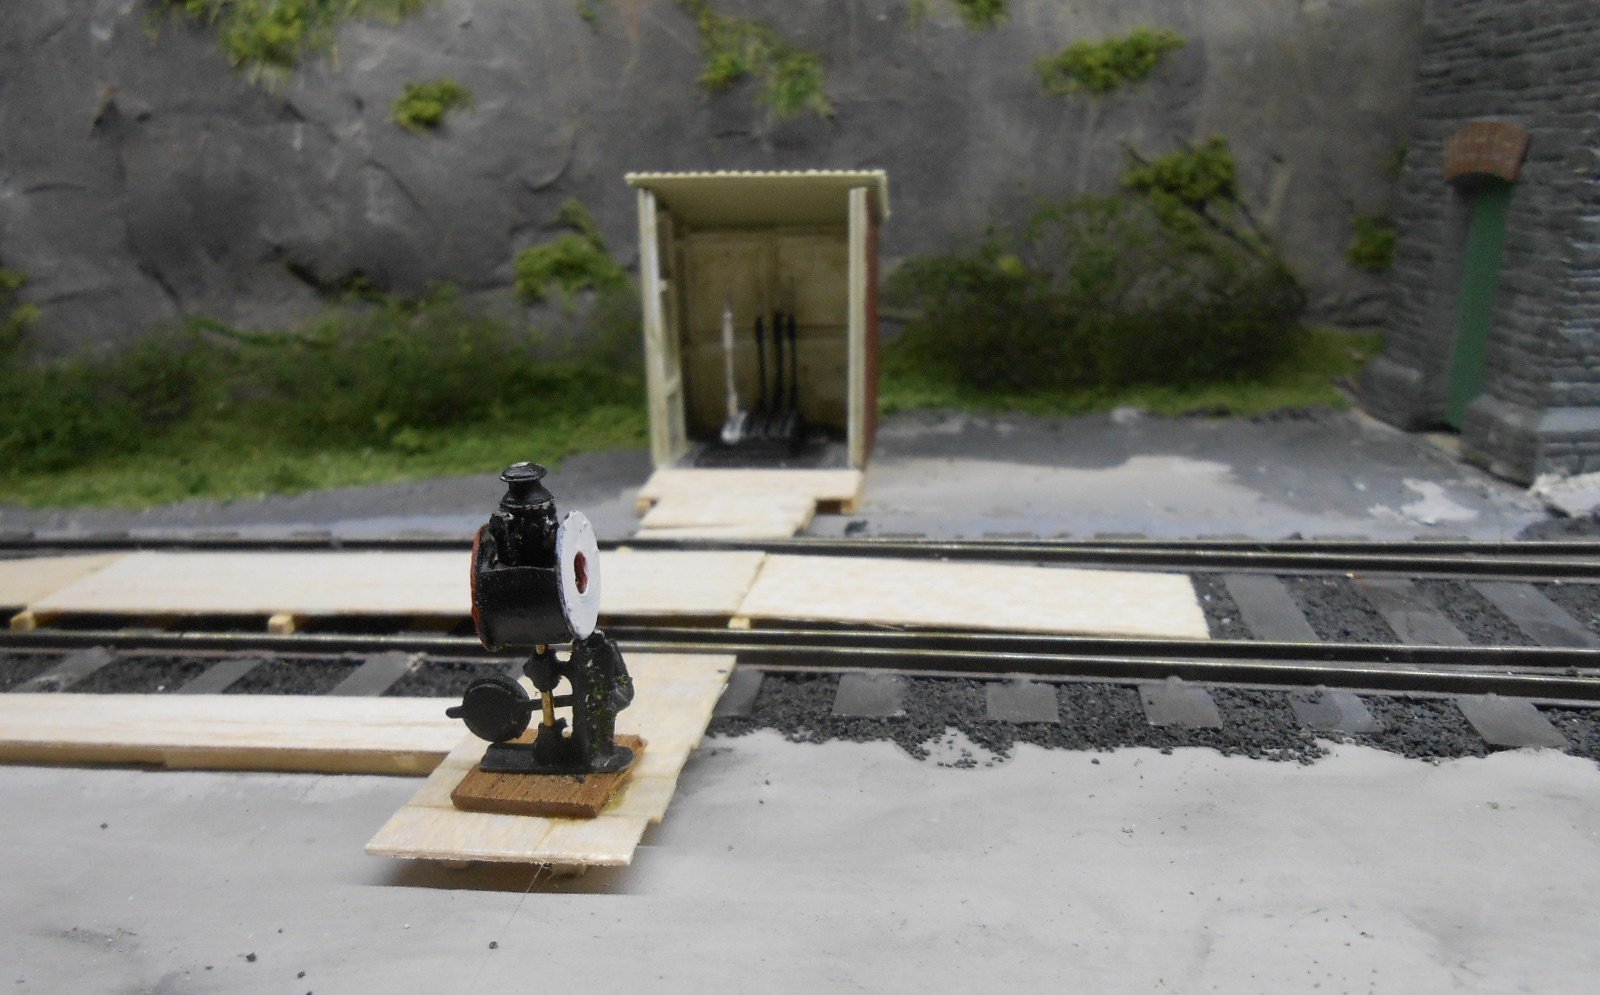
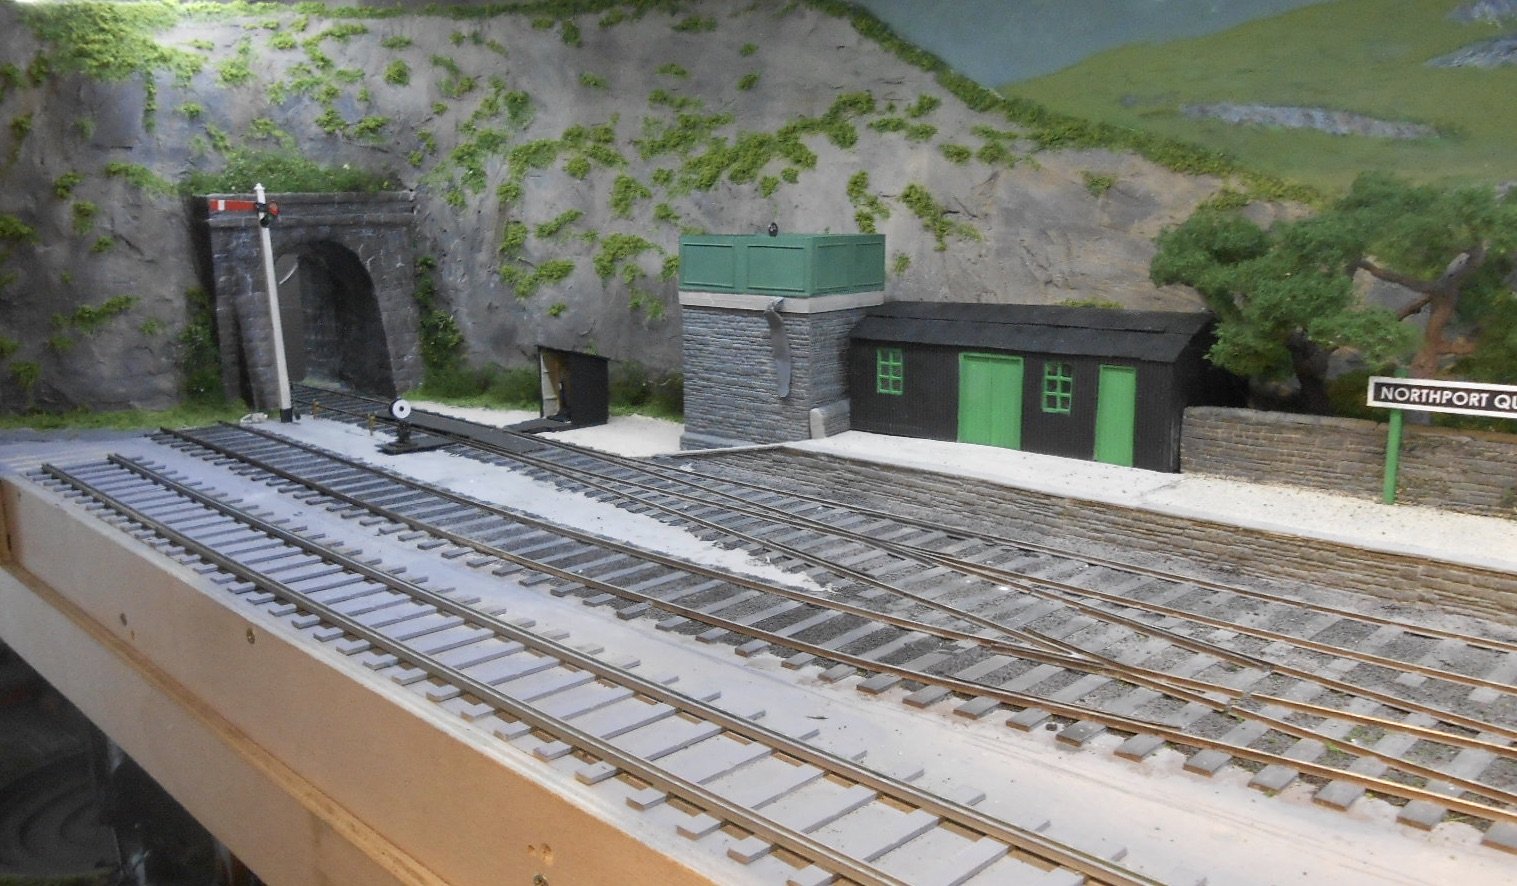
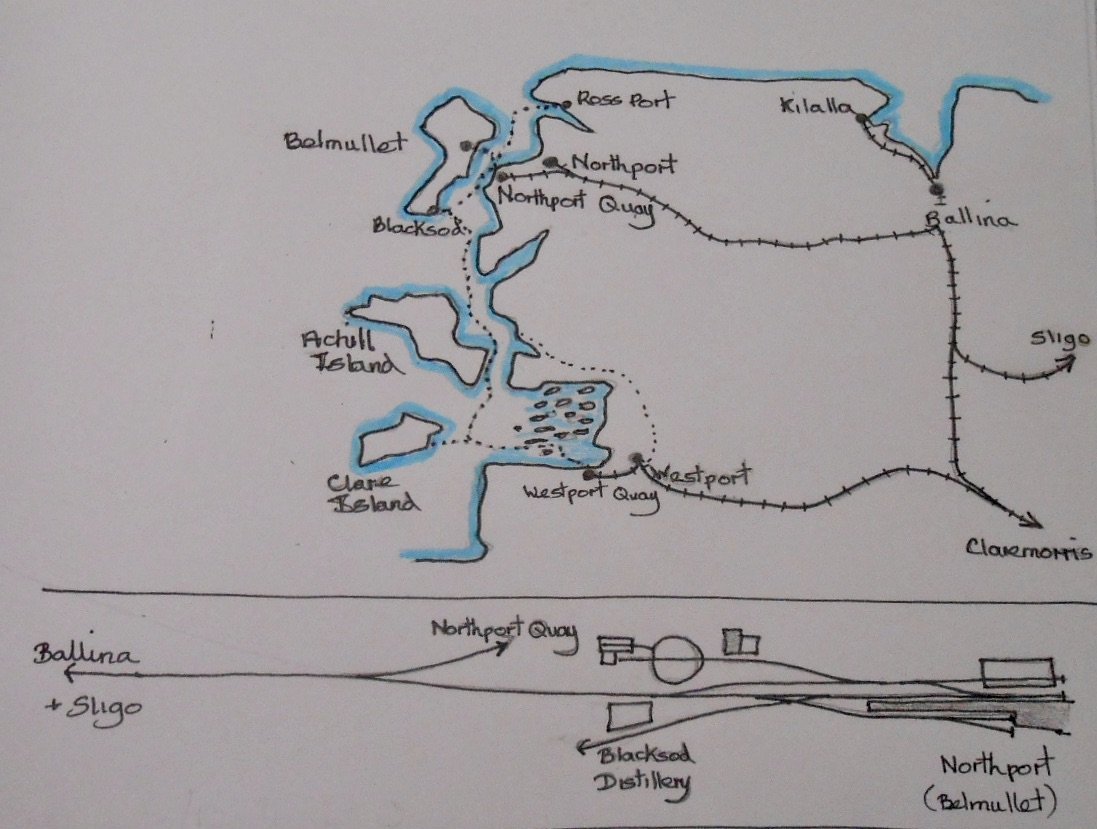
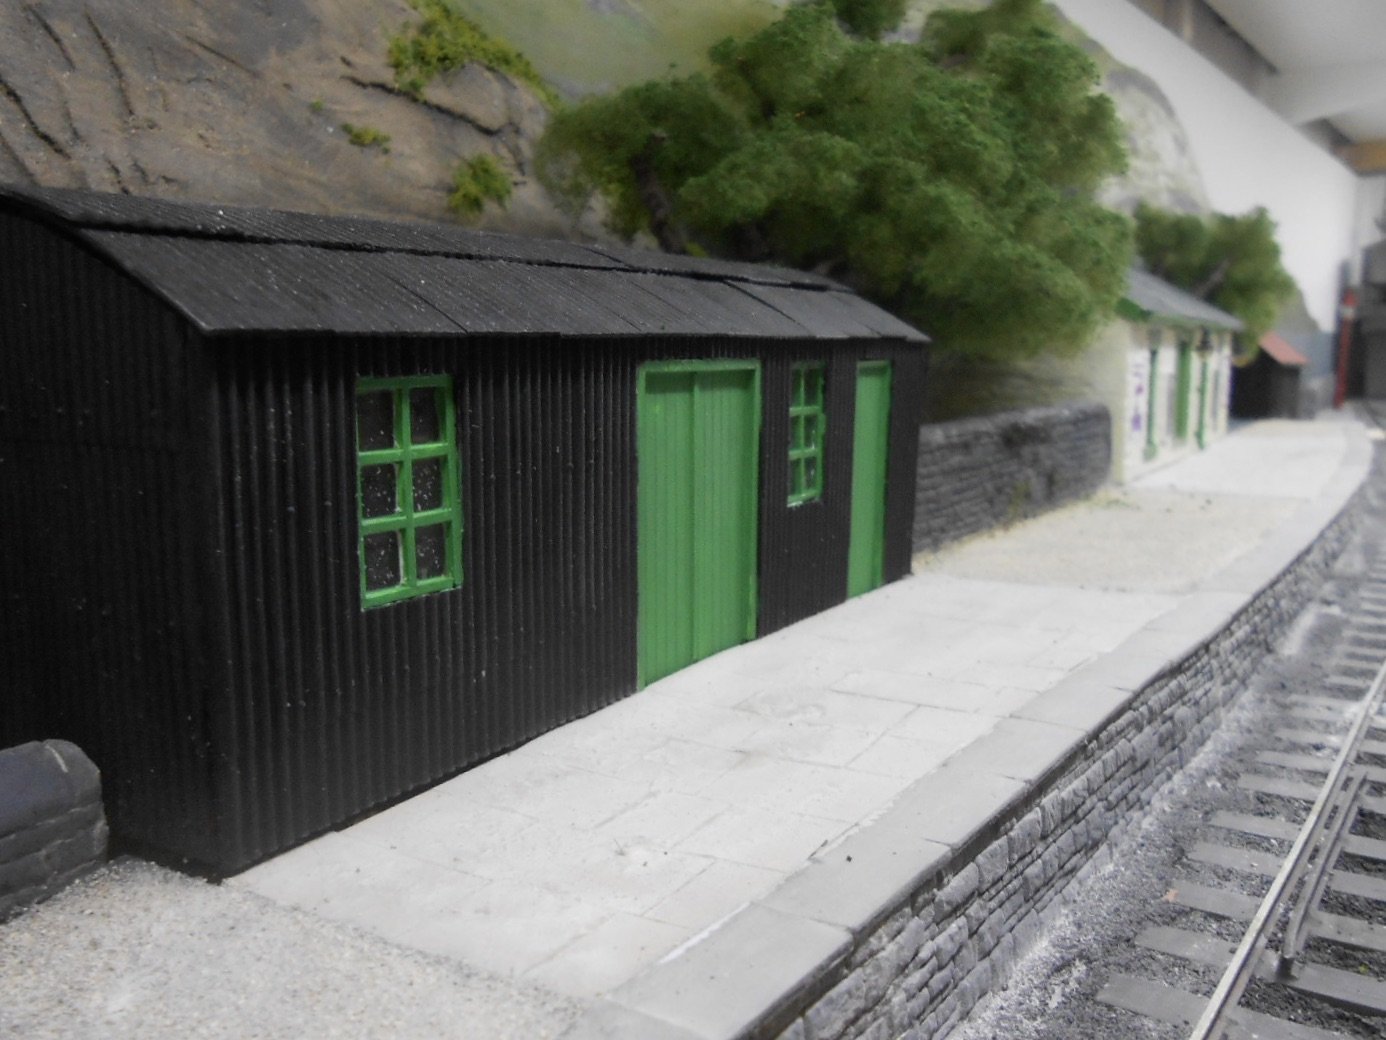
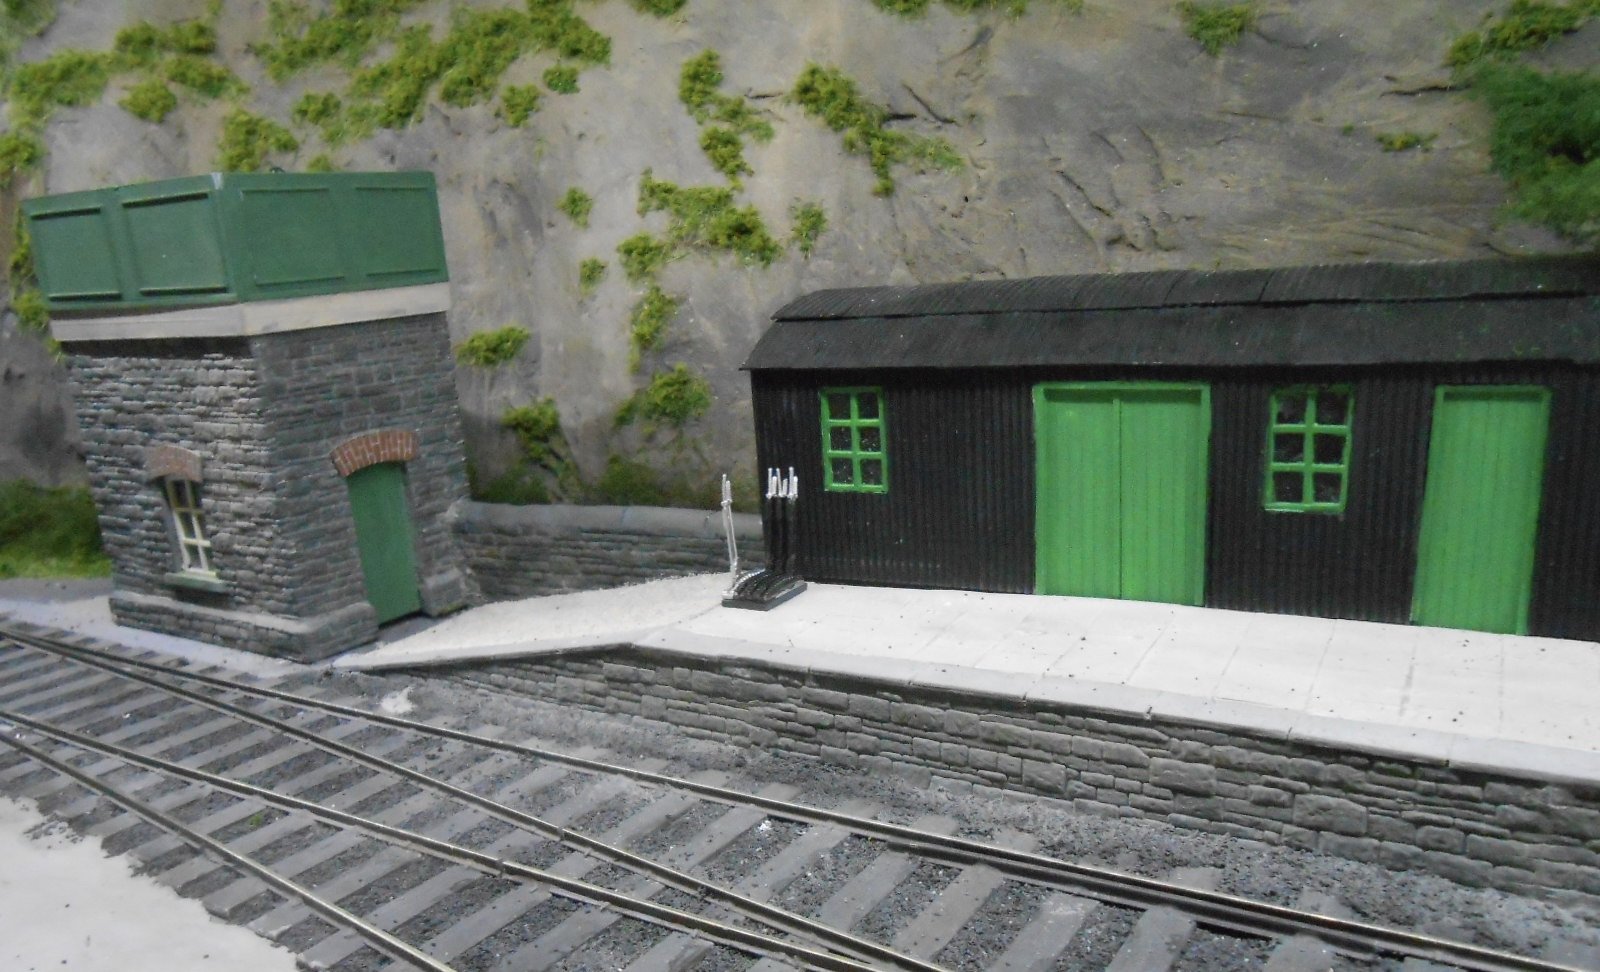
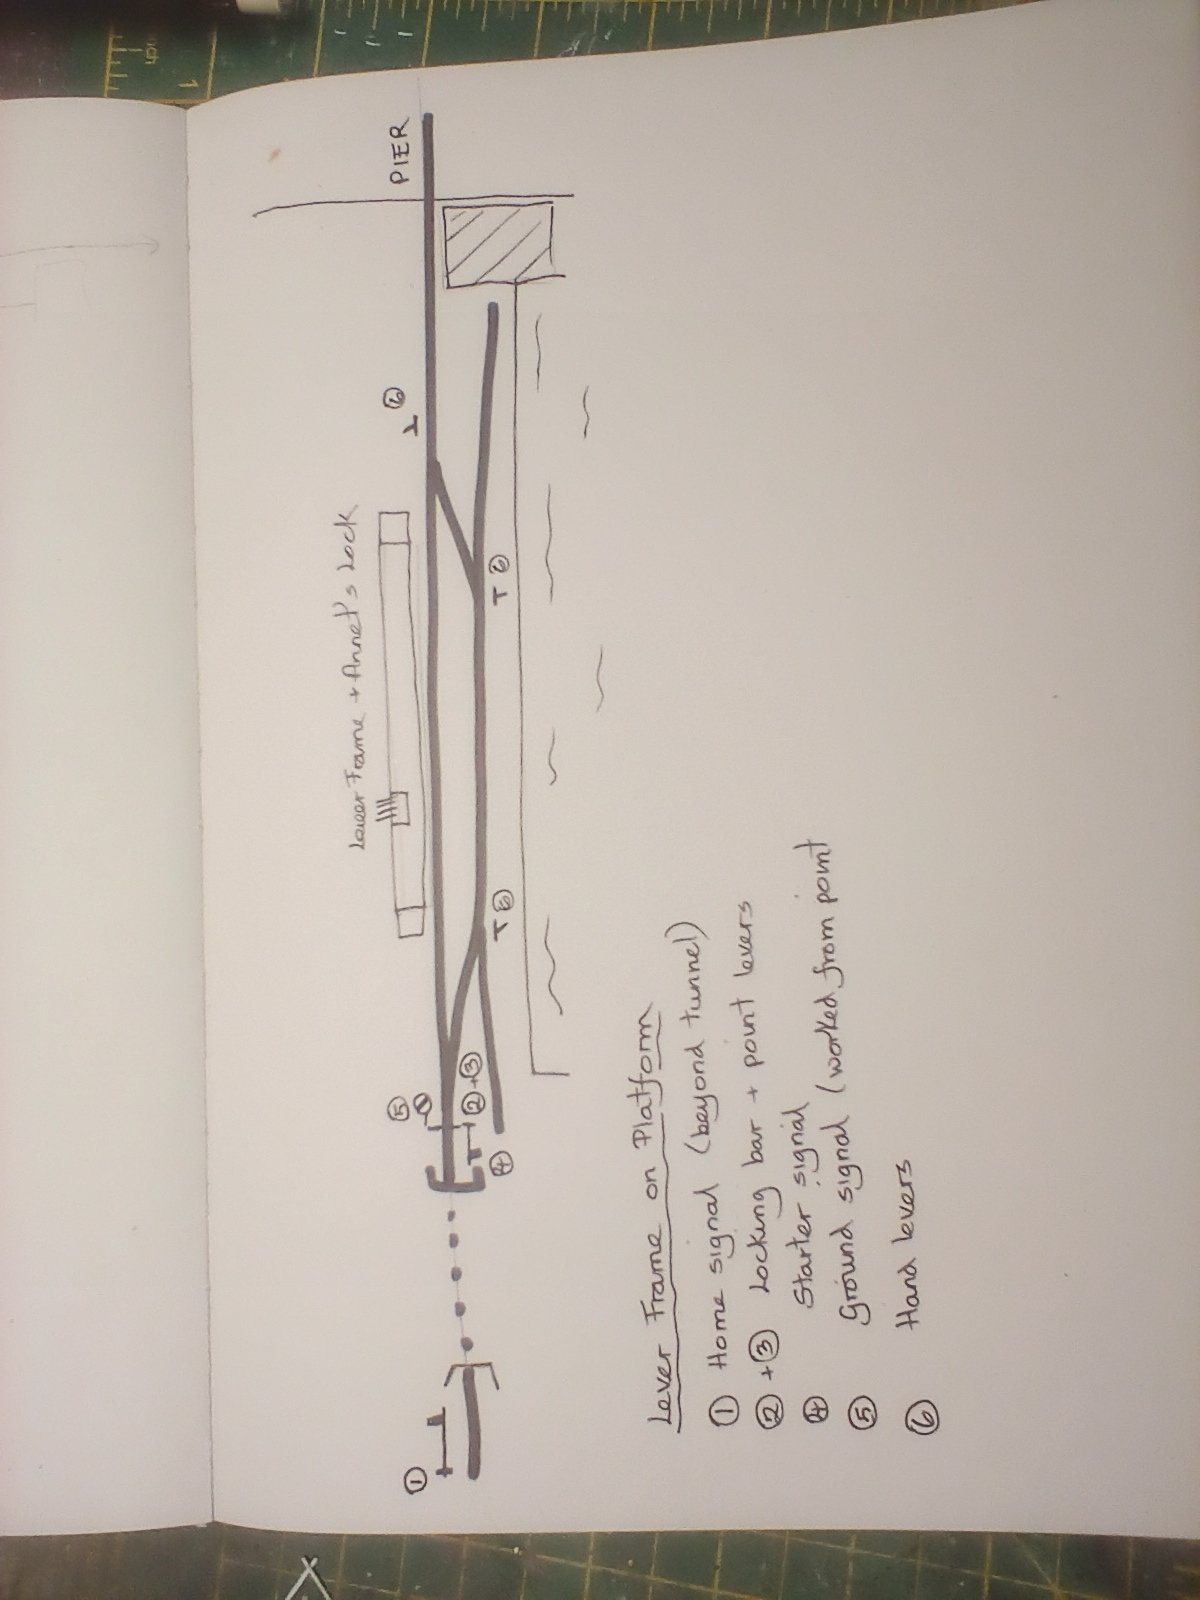
A few furrowed brows and much head scratching later [along with some splinters!], the area between the tunnel mouth and the platform has been rearranged. Thinking about it, the water tower was probably too close to the track and certainly blocked the view along the platform into the tunnel. To correct this, I've cut a section out of the platform ramp and moved the water tower along a bit. In the space this creates, there is now room for a four lever ground frame, for which I'm making simple corrugated iron shelter. There is possibly room for small PW trolley [hand powered], parked at right angles to the track. The practicalities of all this are we have a lever for the locking bar, another for the point, plus one for the home signal [beyond the tunnel] and another for the starter. The latter is one of Richard Chown's, that I picked up at Guildex four years ago and been looking for an excuse to use it ever since. The ground signal by the point is assumed to be moved with the point blades. Nothing is fixed down yet, but the pictures hopefully give an idea of what I'm aiming at. On a completely different front, I've also been brooding over a more exact location for Northport Quay, which up until now has been vaguely deemed to be somewhere between Sligo and Belmullet. However, I also wanted to give a plausible reason for my coaster and have been increasingly drawn to the area between Ross Port, on Broadhaven, through Blacksod Bay, past Achill Island and down to Westport. This section of the coast looks fairly sheltered from the worst Atlantic weather & somewhere that a small coaster might find plenty of work serving both the islands and small mainland communities. Now, I've always been a bit of a geographer & it is clear that glaciation has had a significant impact on this part of the world, so have expanded that theme to produce the sketch map below, where the sea level has risen a few metres [or the land has sunk] to create a slightly altered coastline. This means that Belmullet is now an island, not a peninsula and Achill Sound is likewise too wide and deep to cross by causeway. There is actually a short canal at Belmullet, linking Blacksod Bay with Broadhaven, but under my new scenario, both Achill Island and Belmullet can only be reached by boat, for which my coaster will eventually be ideal. Like as not, there will be steady trade along the whole coast from Ross Port all the way to Westport as shown by the dotted lines on the map. As for the all important railways, I've created the town of Northport, near the coast opposite Belmullet [now on the island] with, like Westport, a short branch to a Quay station and harbour. Note that, like the line from Galway to Clifden, trains would first have to reverse in or out of the station. The railway to Northport runs from Ballina, so there is no need for a line to Achill [sorry JB!], which instead is served by the coasters and ferries. At the moment, this scenario works so well for me that I'm seriously thinking of renaming Belmullet to Northport & I've drawn a sketch of the terminus below the map. All the other elements stay the same with the four companies running into Sligo [MGWR, WL&WR, SL&NCR and GS&WR] all having running powers into Northport. No other changes will be needed to the Belmullet layout [other than a new station nameboard]. So, what could the Ice Age do for your layout...?

- 257 replies
-
- 11
-

-
Inchicore Class J10 Conversion From LNER J72
David Holman replied to murrayec's topic in Irish Models
Somehow been missing the last few posts, so off to write out 'must pay more attention' 100 times. Just sublime. -
new year new layout 1990s container terminal and tmd
David Holman replied to Sean's topic in Irish Model Layouts
Enjoy! -
You may well be right. Changes are being explored!
-
That's the one, Mark. Alongside The Art of Weathering by Martyn Welch, one of the most useful books you can have. Gordon has done two excellent books on modelling trees too.
-
new year new layout 1990s container terminal and tmd
David Holman replied to Sean's topic in Irish Model Layouts
See how it goes - modelling is often all about compromising and perhaps the steep slope can be partially hidden by fencing, a boarding or some such. -
Thanks, that's good to know, though having put the water tank at the end of the platform now limits the view from any signal cabin/hut. Do like the thought though, so maybe the water tank could yet be moved a tad. As per Fagin, the situation is under review!
-
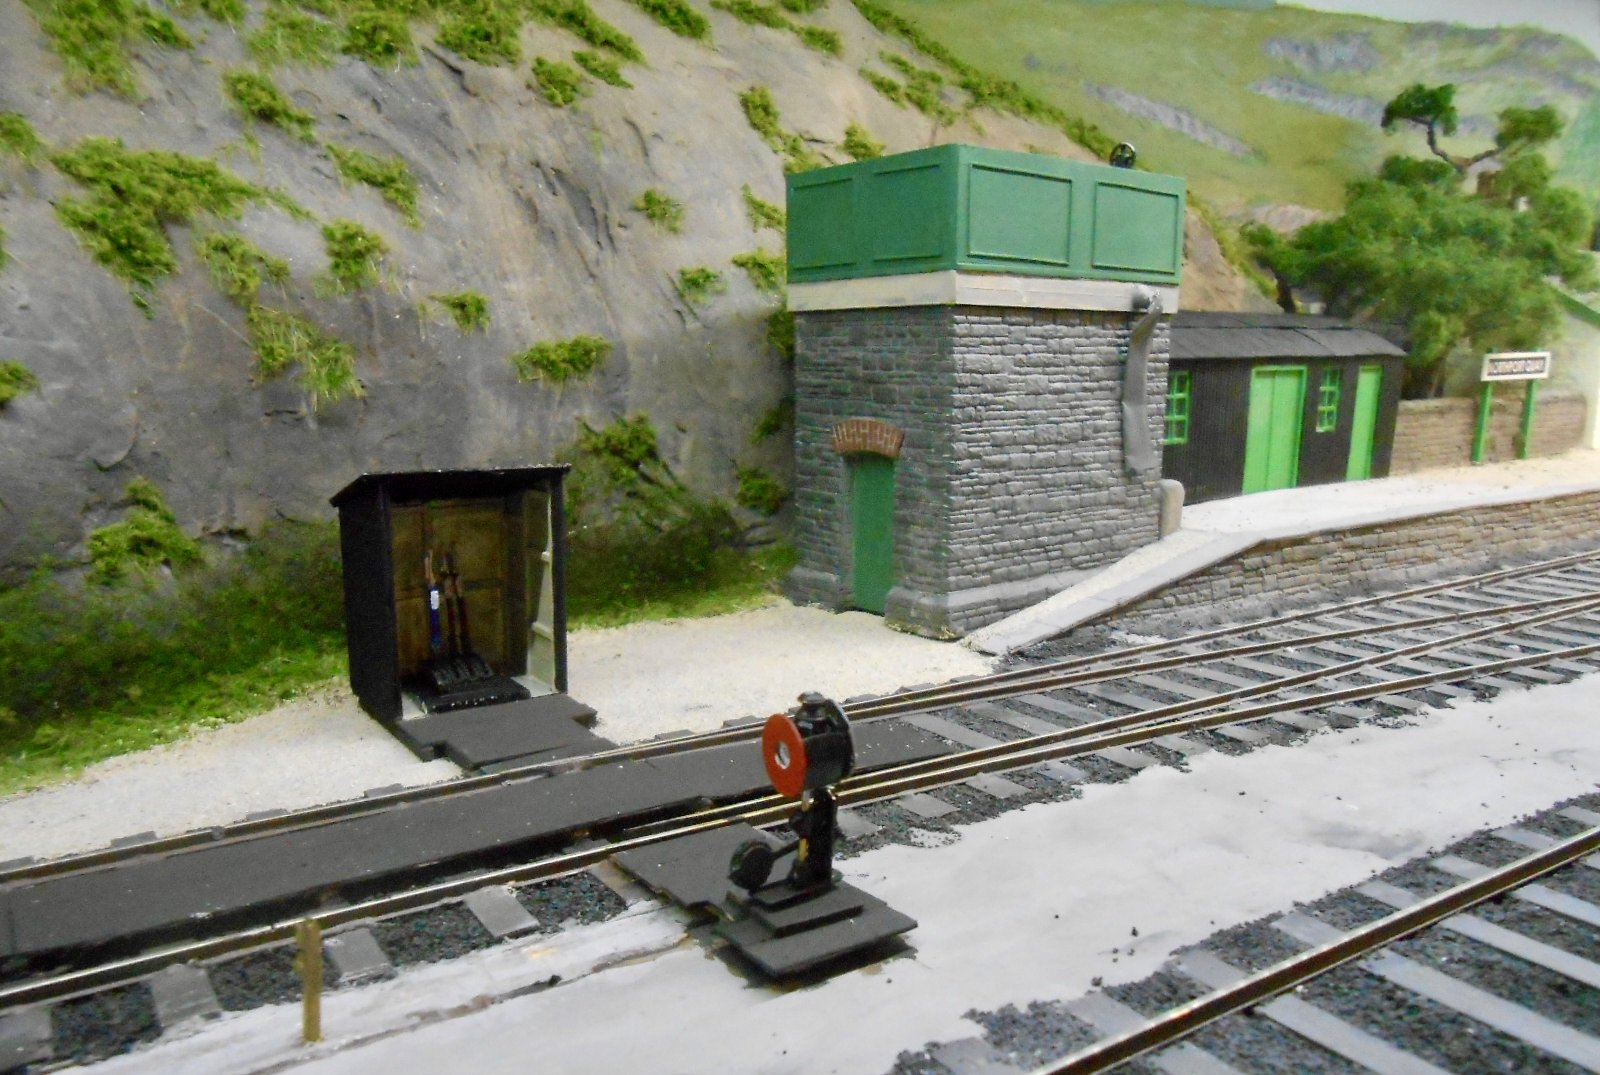
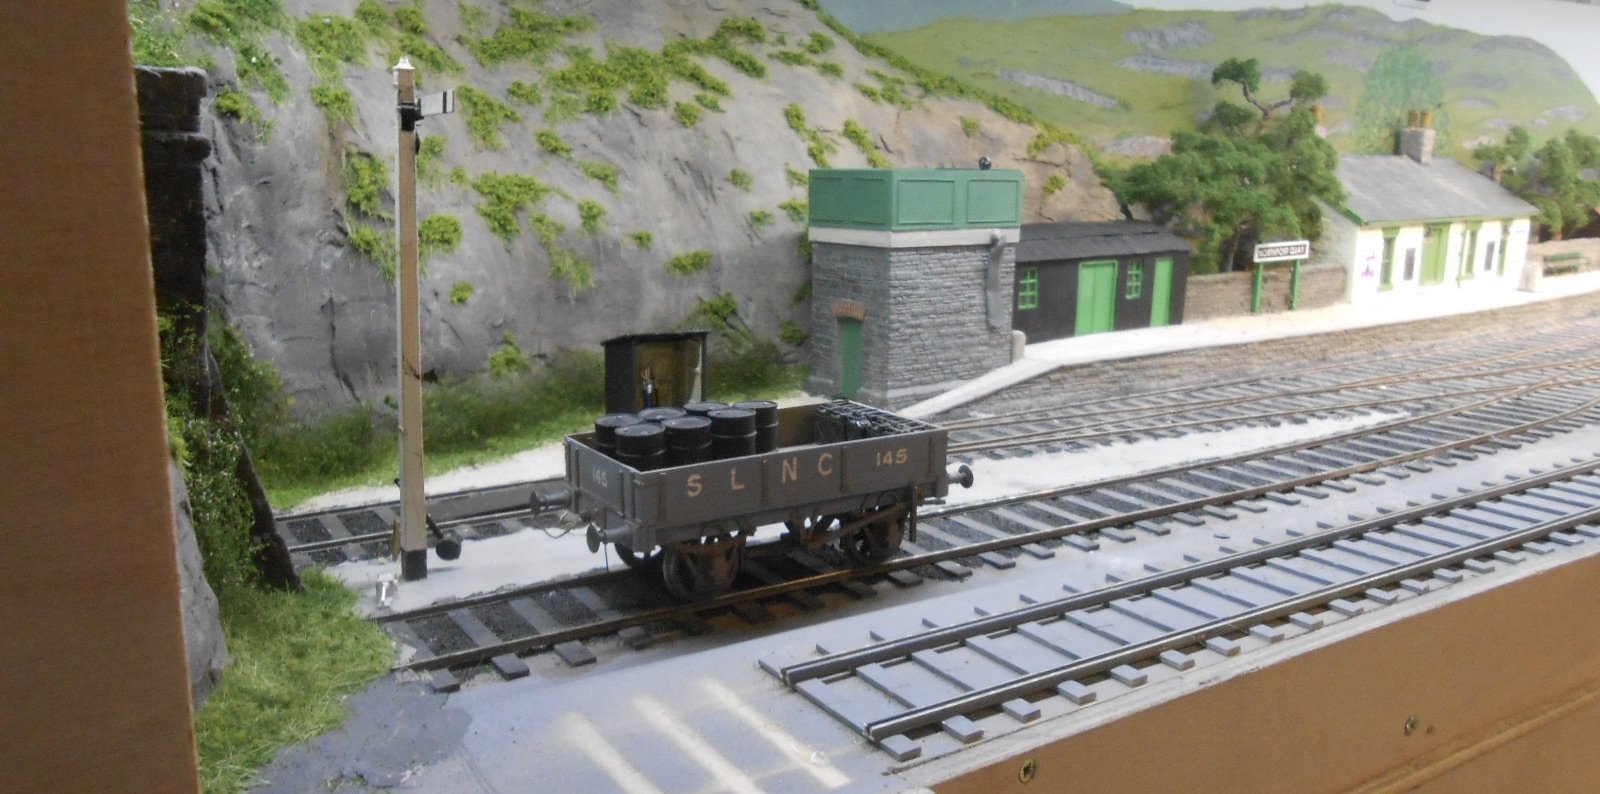
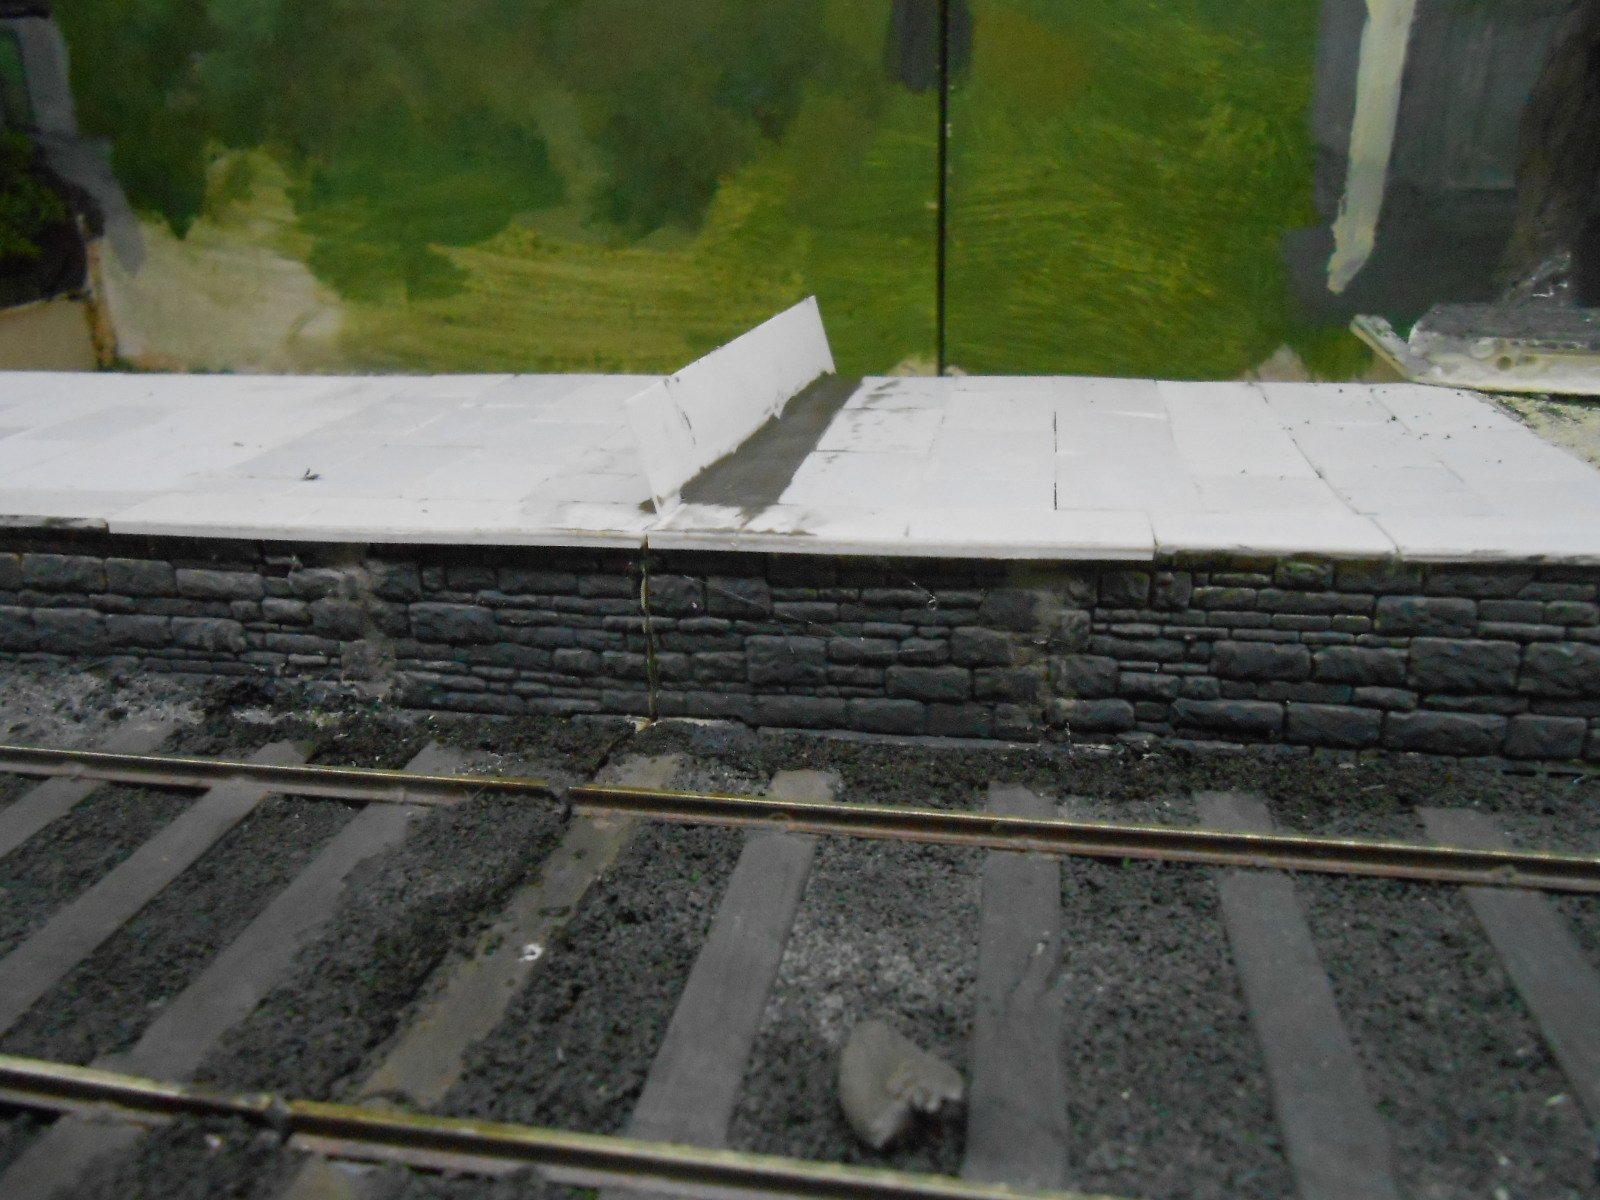
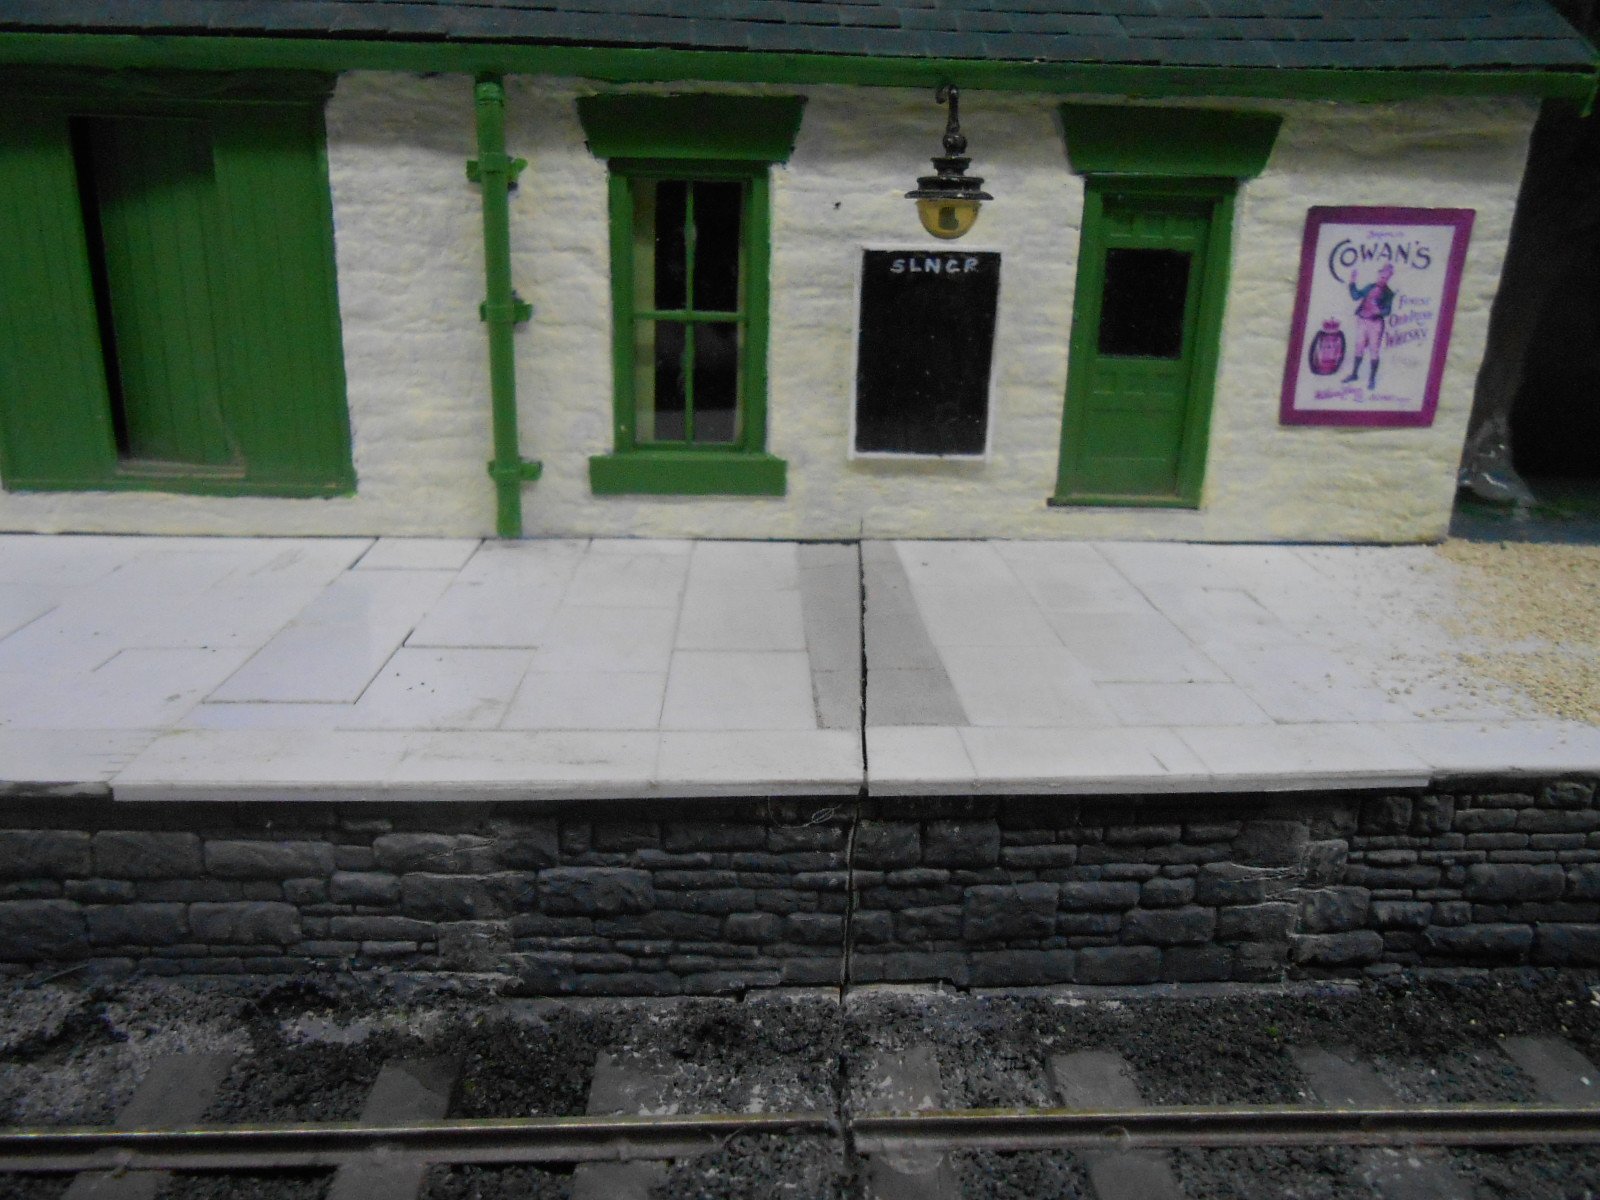
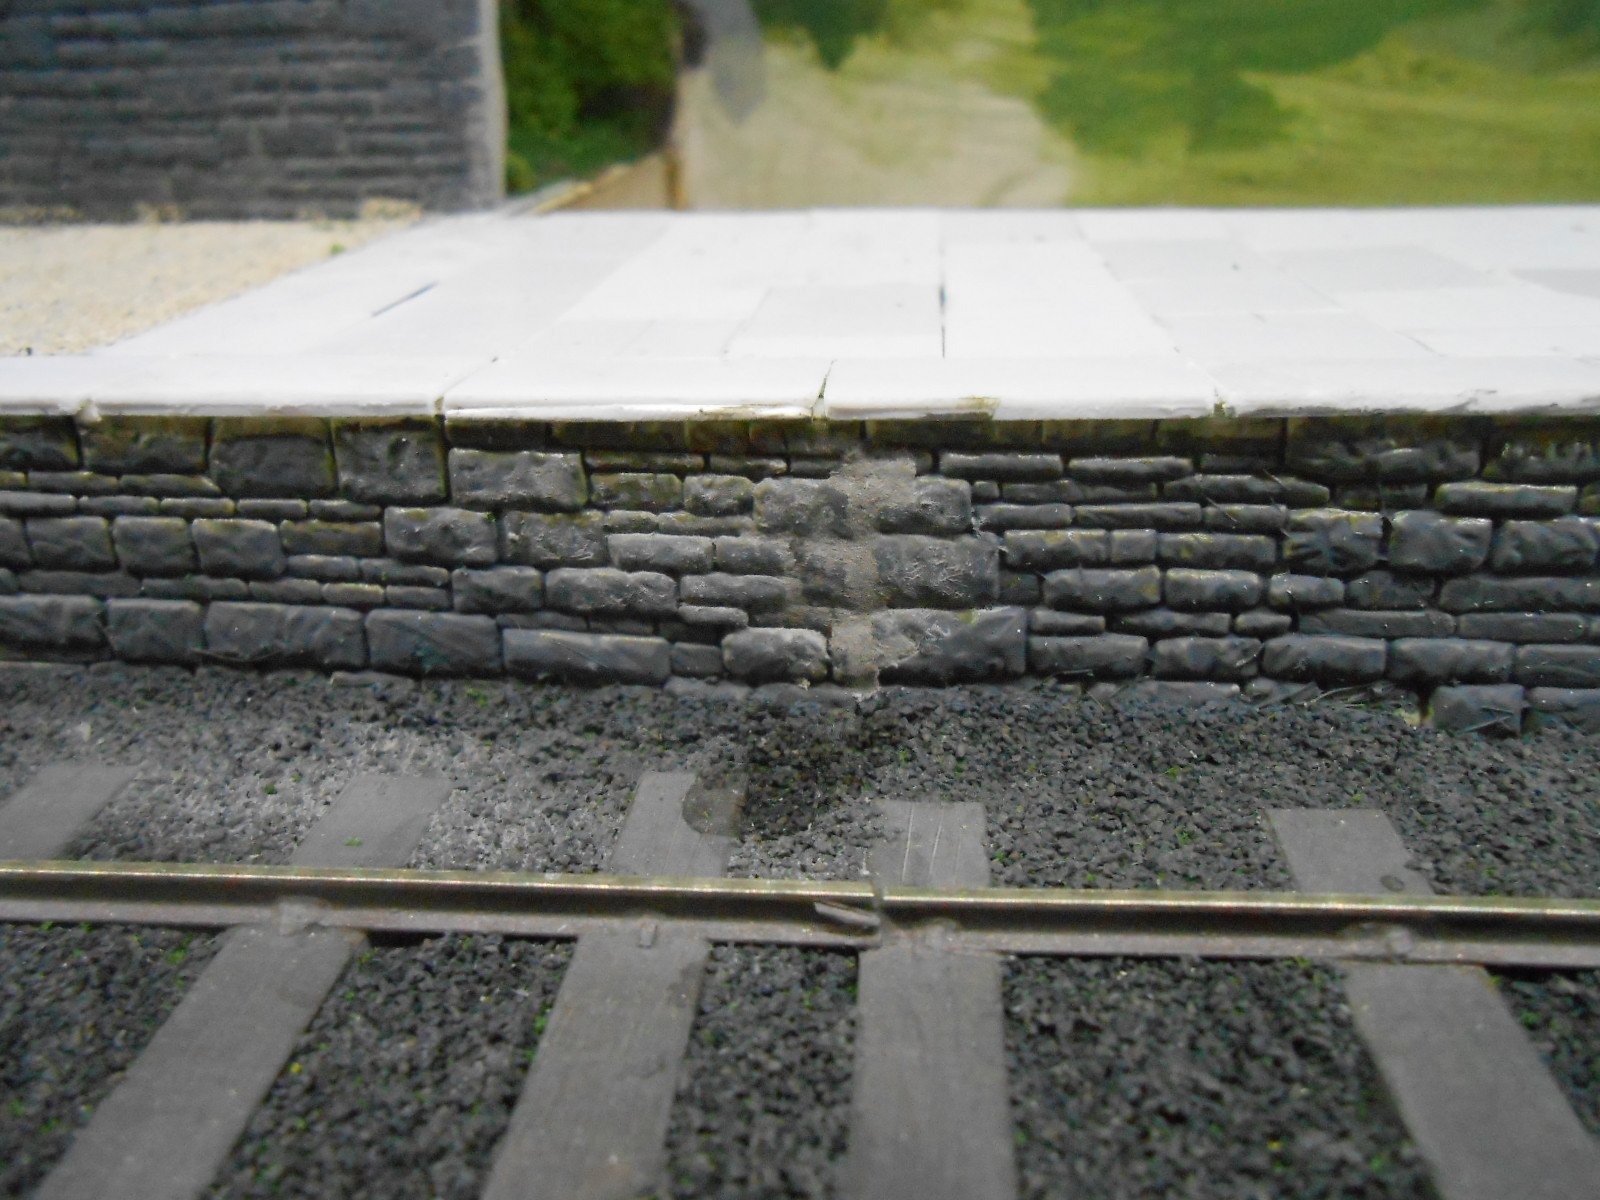
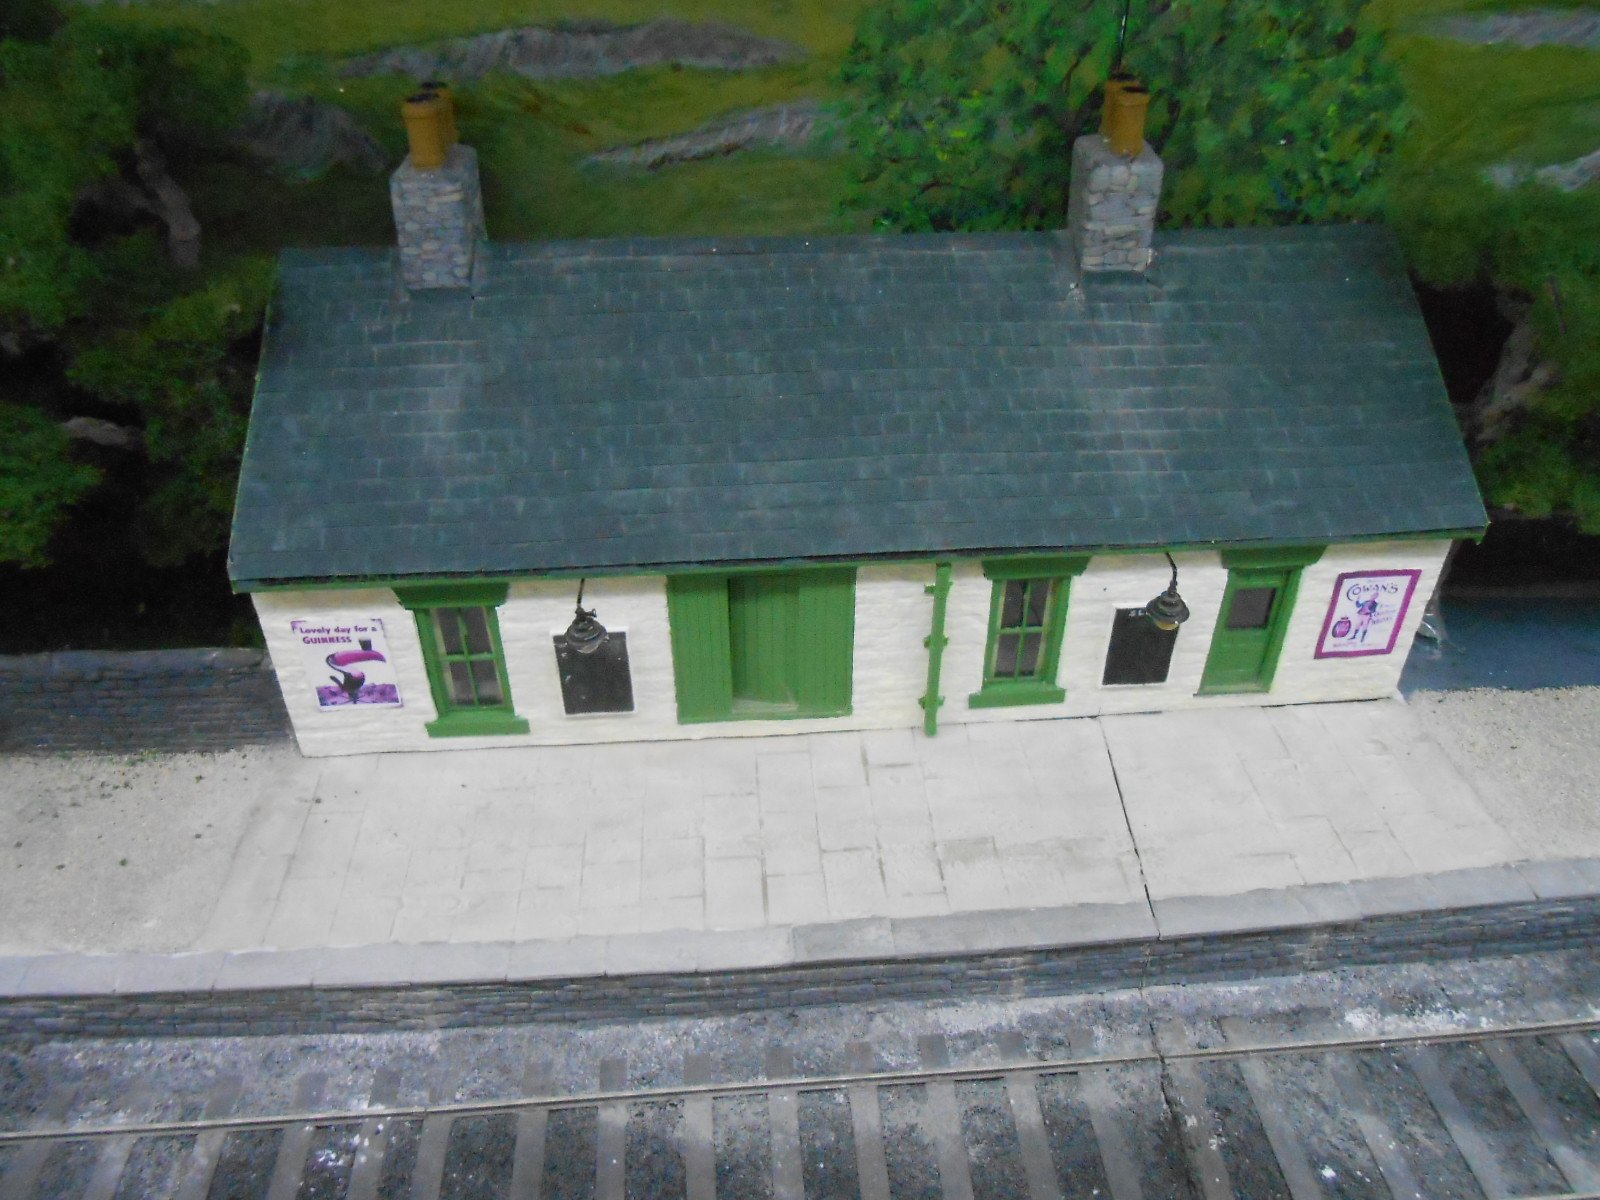
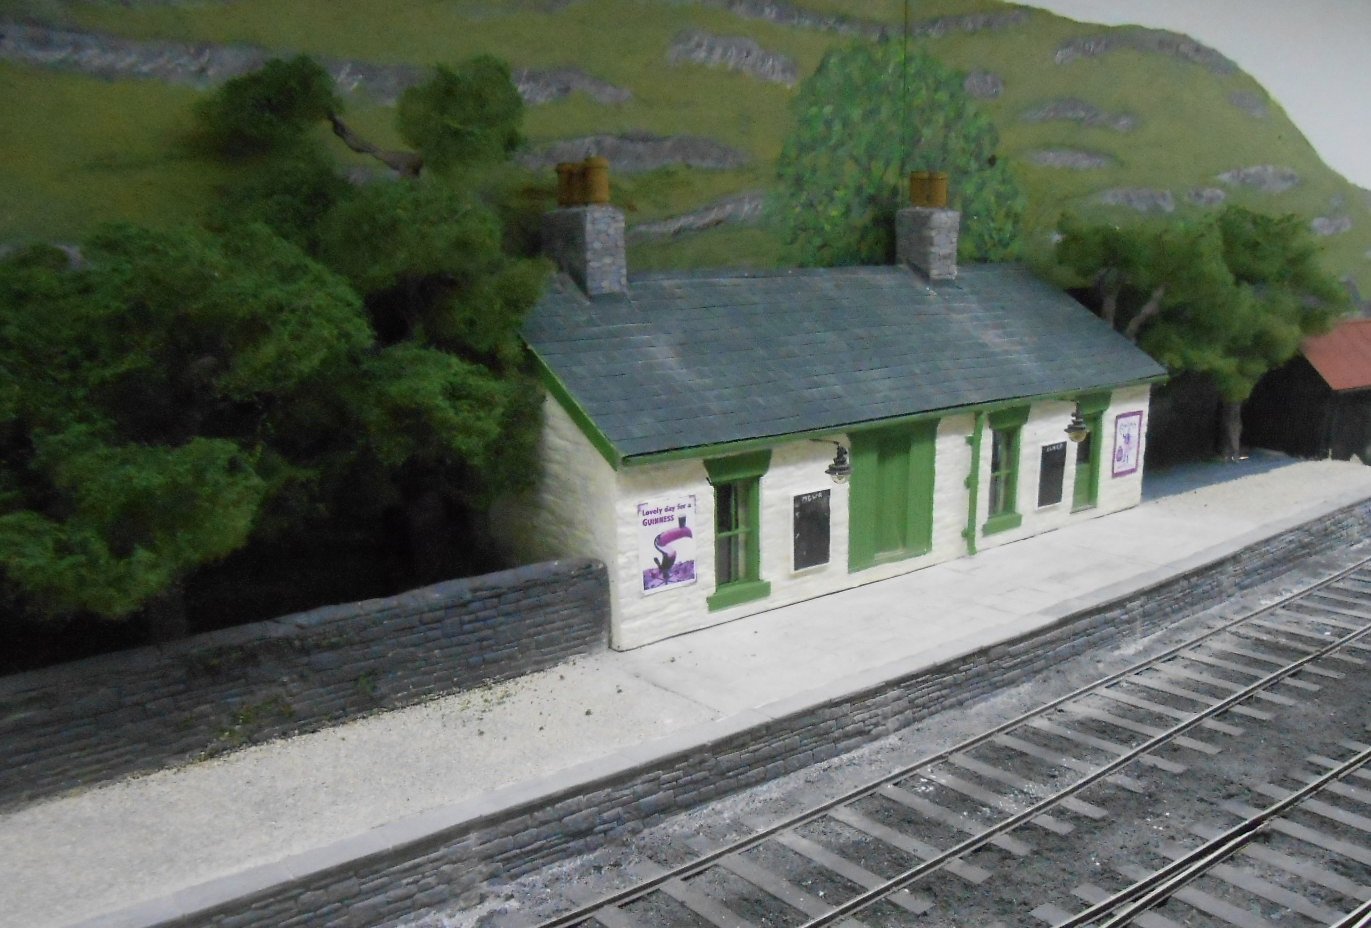
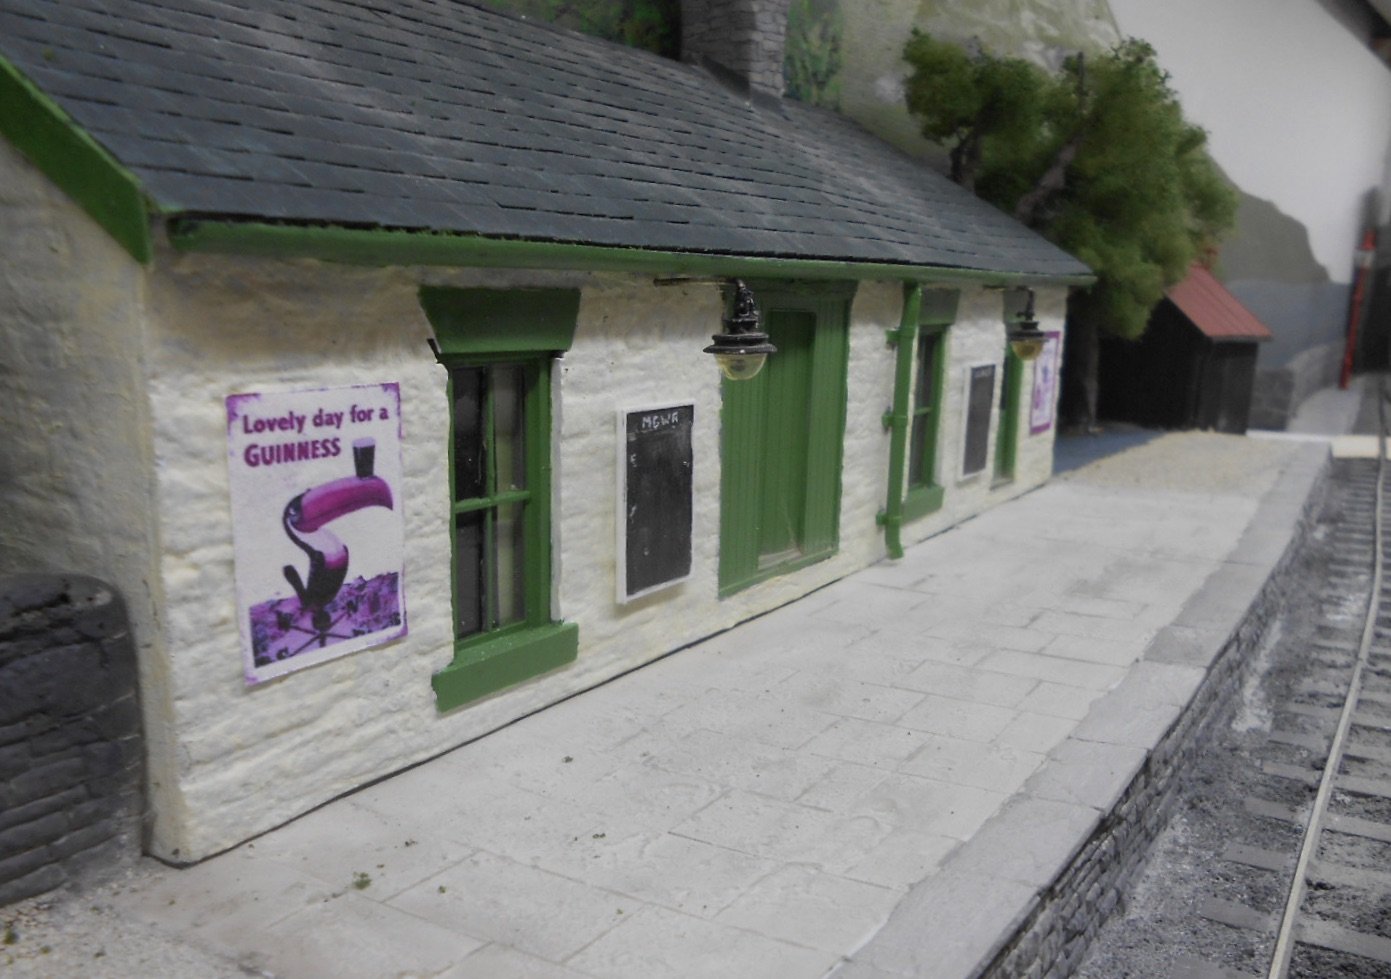
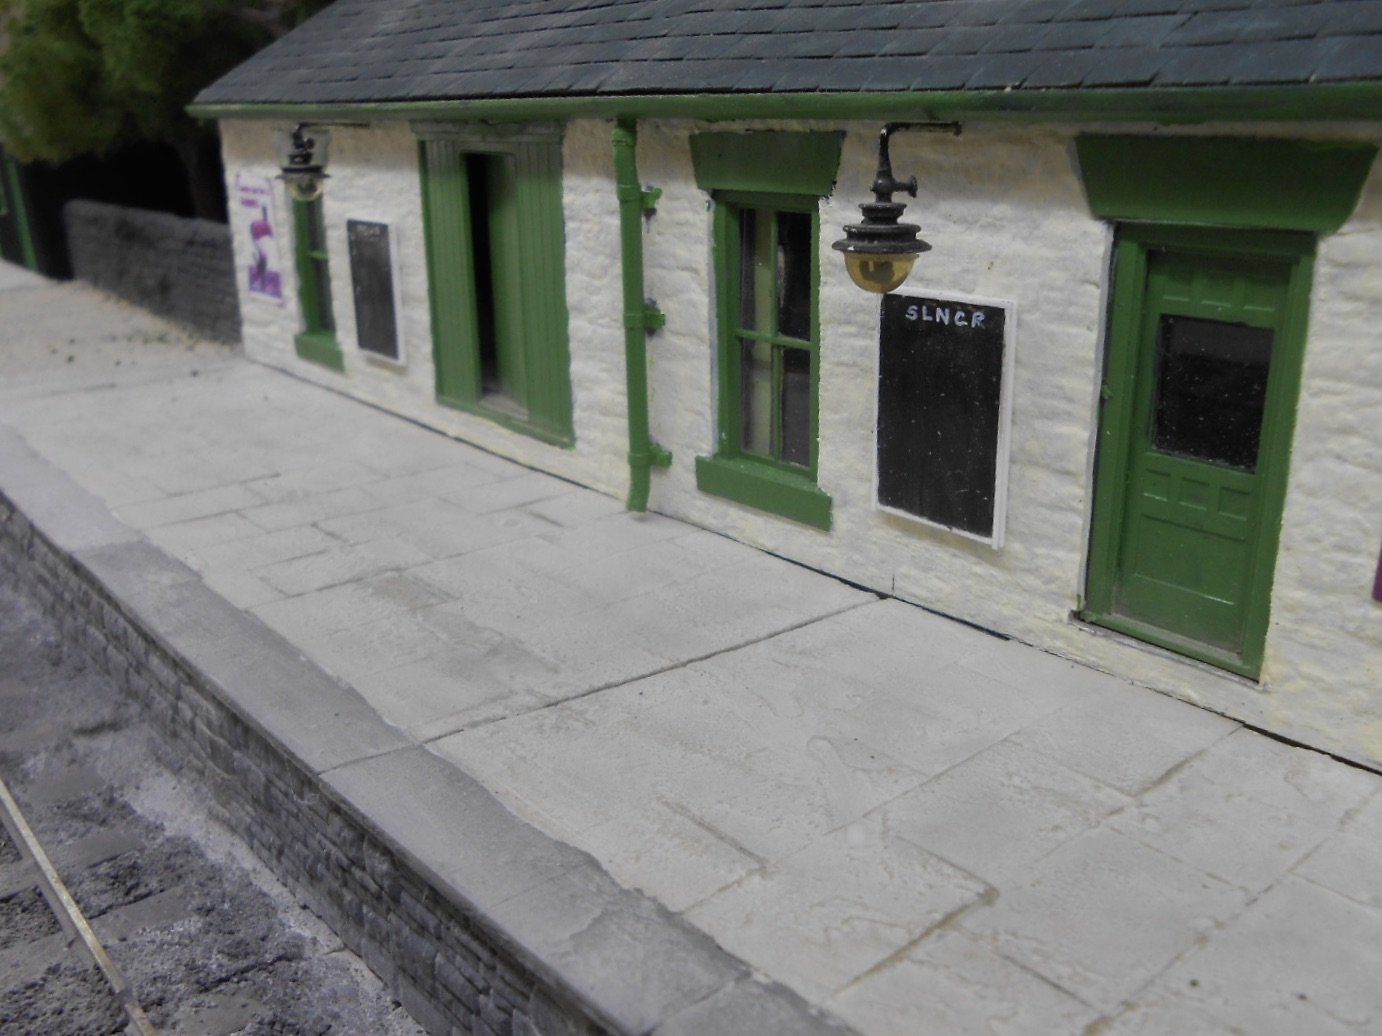
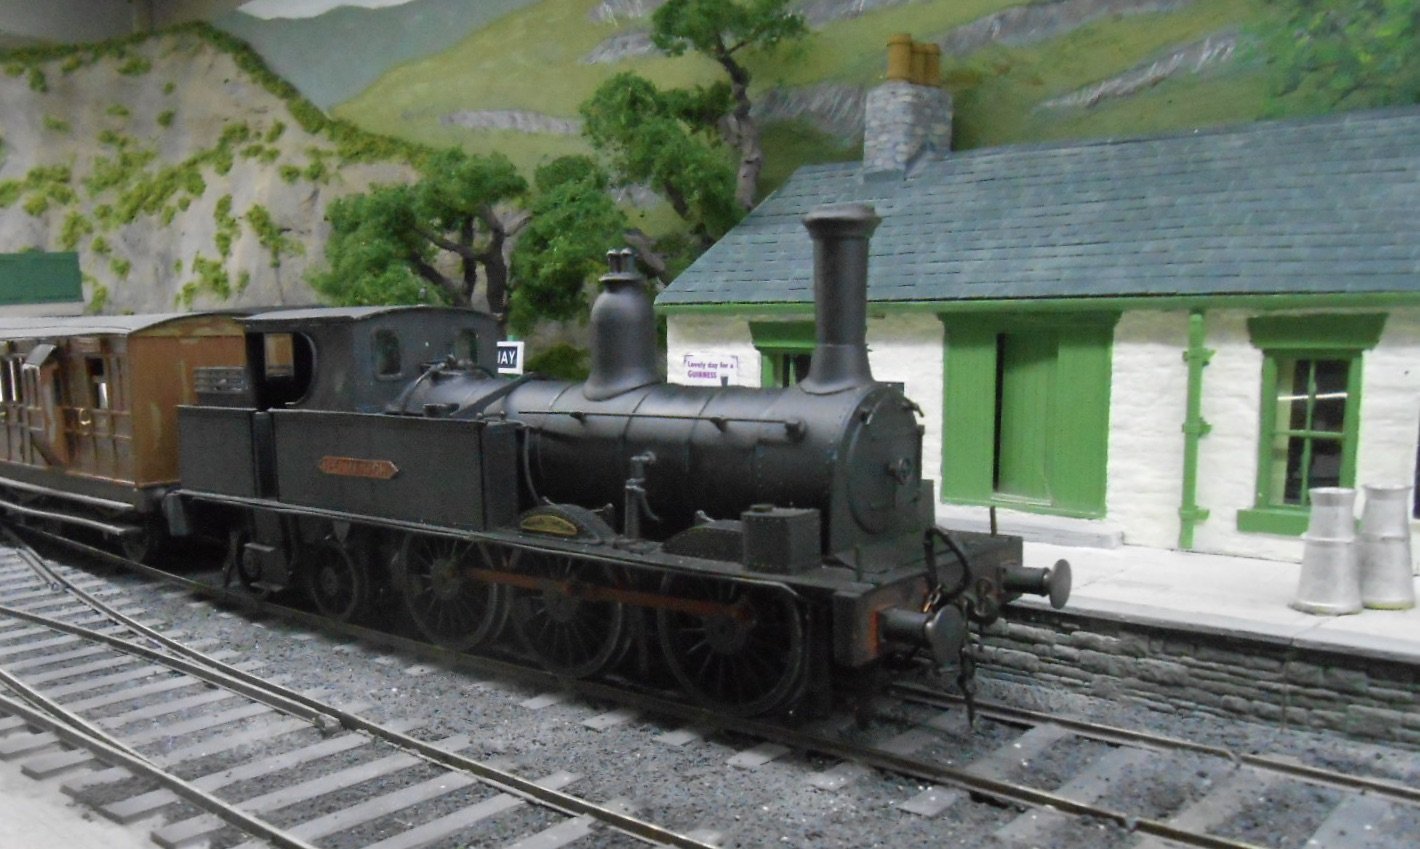
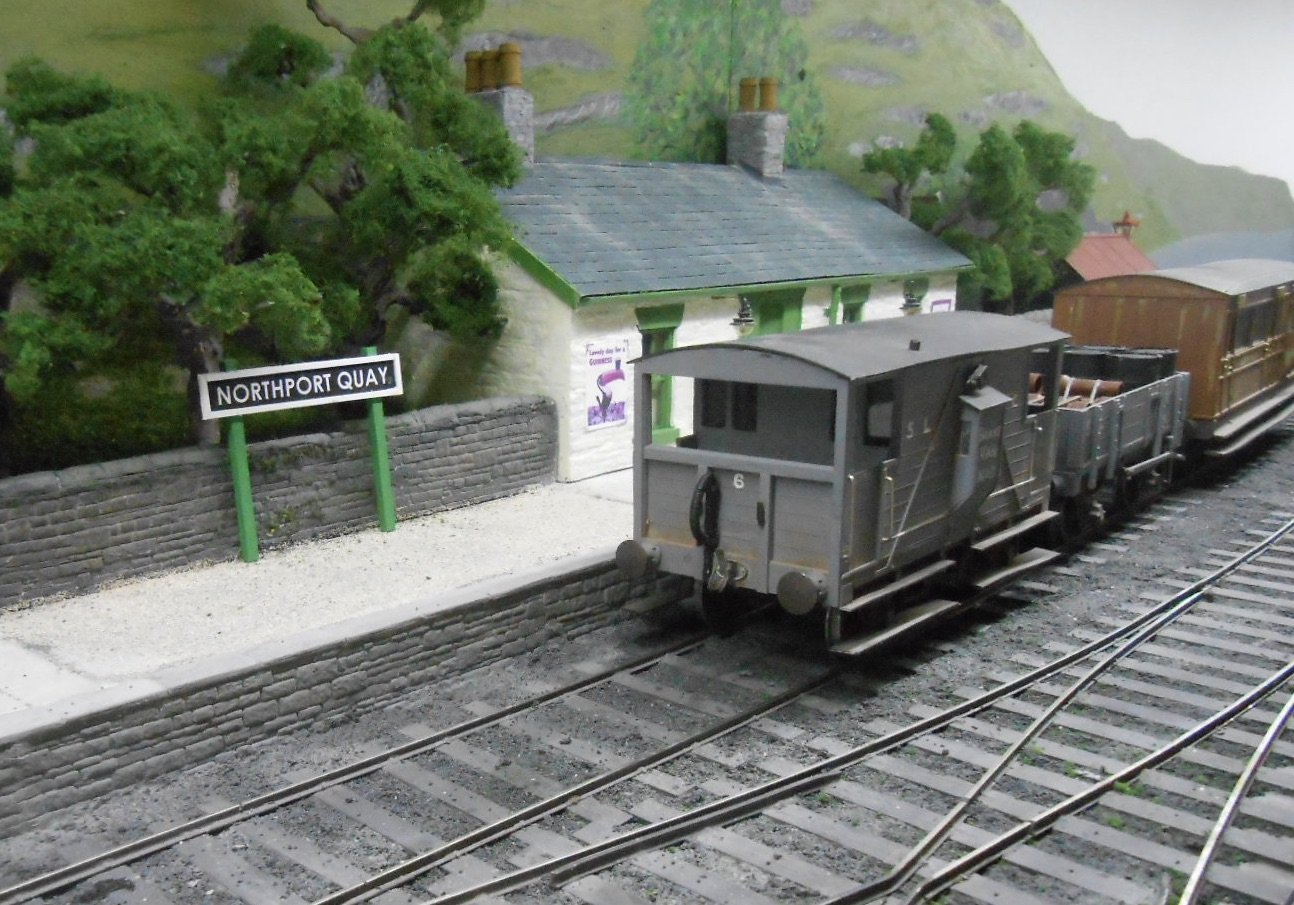
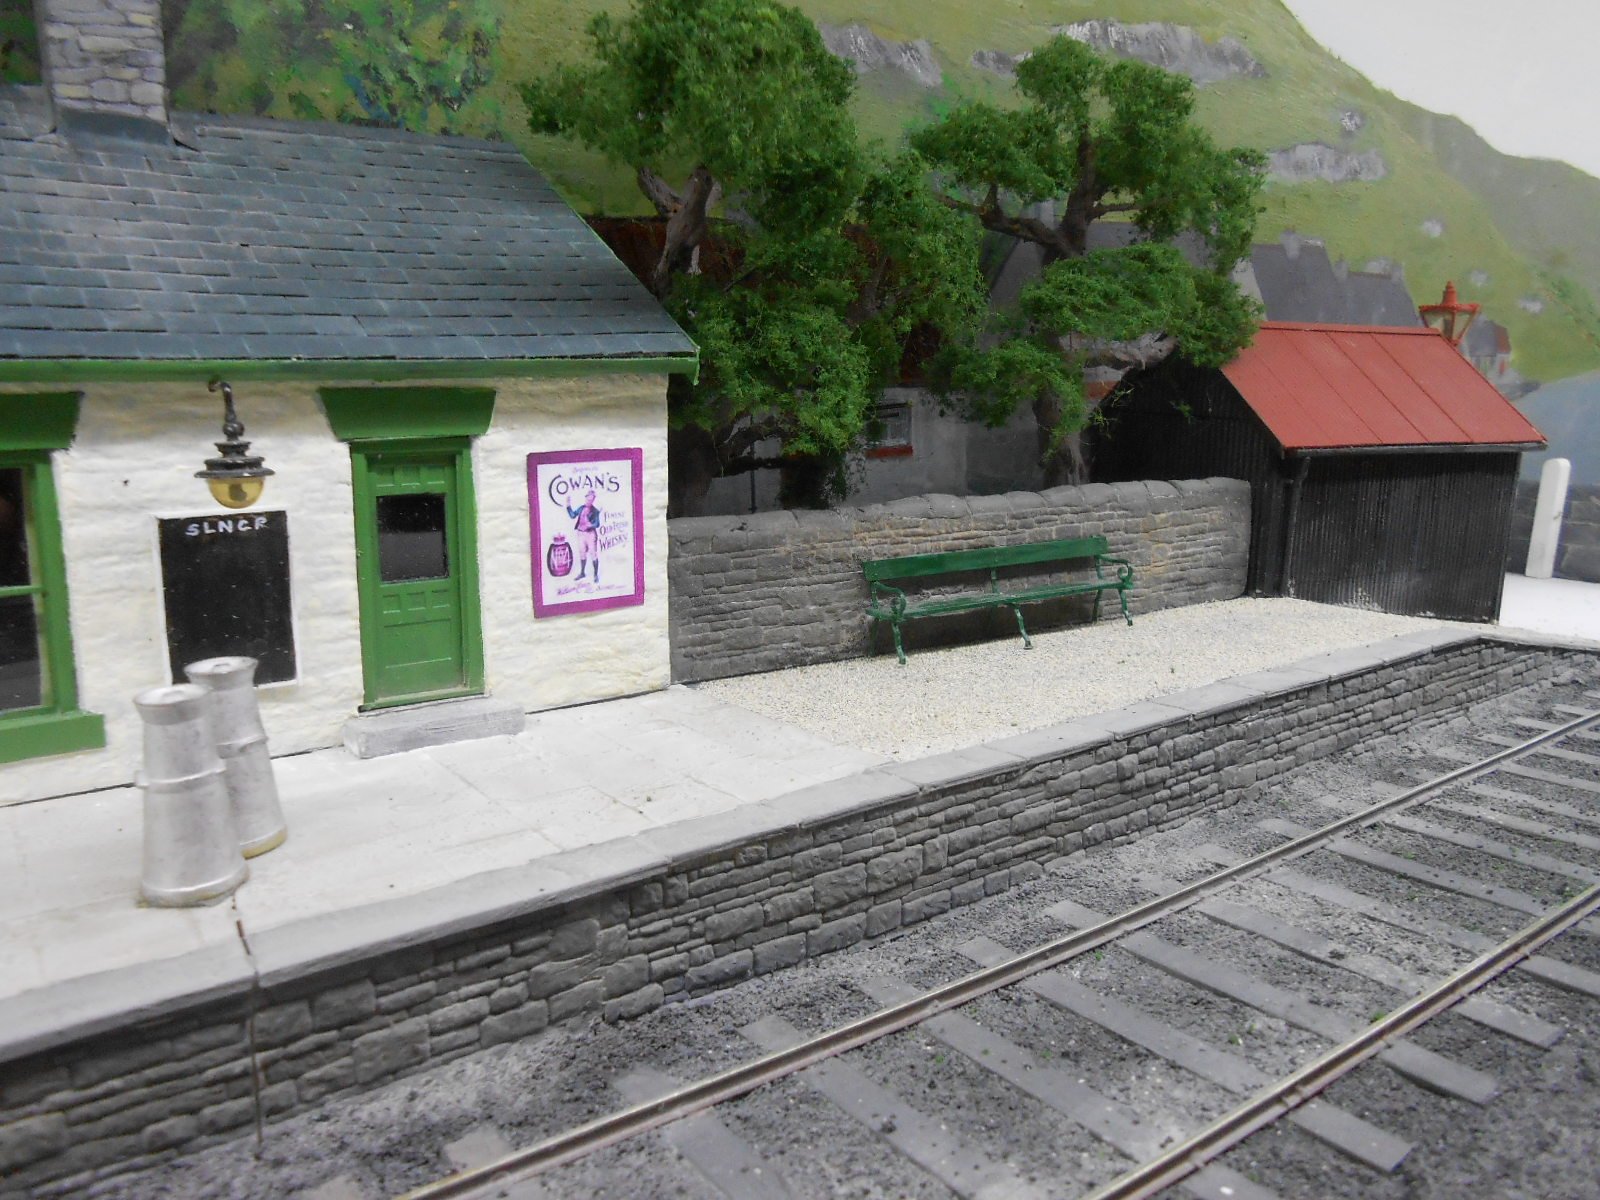
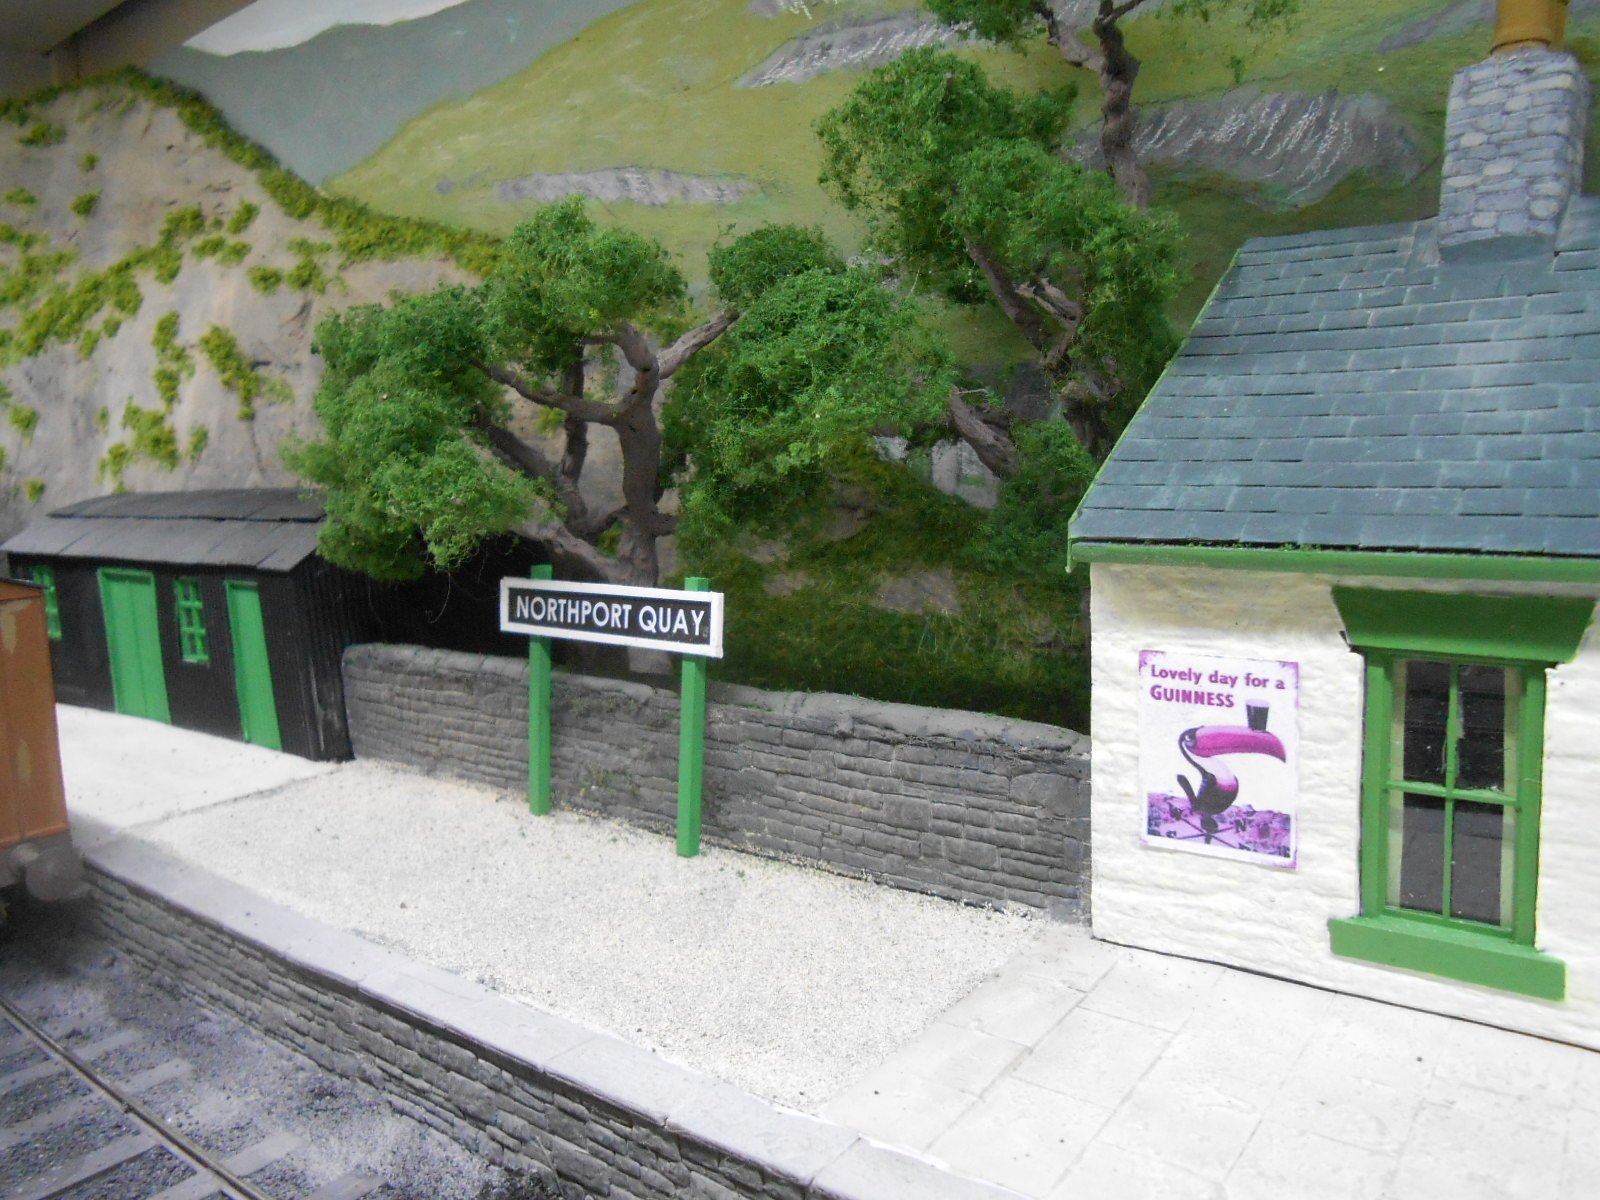
The last couple of weeks, have been spent tidying up the platform area, something I'd been putting off because of concerns about getting colours and textures right. Salvation came in the form of Gordon Gravett's book on Scenics. At the back is a really useful guide on the effect of talc, sand, chinchilla dust, etc on different coloured gloss enamel paint. First though, I needed to address the 'fill in' pieces of the platform, intended to disguise the baseboard joint as it simply wasn't working. The vertical face of the platform was given a new piece, which when scribed and snapped for the joint hides the crack really well. The platform surface was then relaid, but instead of 20thou paving slabs across the gap, I used filler instead, which has subsequently been sanded smooth and scribed to represent the slabs. This part of the surface was then painted with gloss pale grey, mixed with a small amount of gloss tan, then liberally dusted with talc Once dry, the whole lot was vacuumed clean, then gone over with grey weathering powder, making sure this was worked into the cracks between the slabs. The rest of the platform surface was given a coat of gloss black, then covered in chinchilla dust, which provides a nice gravel effect. The coping stones were done slightly different to the main paving slabs, using a darker gloss grey, with the talc again. Meanwhile the platform wall [Wills random stone] needed filling with DAS clay where the separate sheets join together. All the stone wall sections have been painted with a fairly dark grey, the dry brushed with lighter grey and individual stone picked out in places. Another addition has been the station name board, simply made with the lettering done on the computer, printed and then stuck on a sheet of 20thou plastic. This was then framed with 40x60 strip and the two posts made from 125x60 strips laminated together. The last few pictures have a SLNCR flavour, with Small Tank 'Fermanagh' arriving with a short mixed train. Following Mayner's advice, a four lever ground frame has been placed at the end of the platform, though this still needs setting up properly. You may notice the trees have changed too. For some reason the Woodlands Scenics 'crumb' was refusing to stick to their polyfibre, so removed all the foliage and replaced it with the same firm's scenic matting. Whatever the reasons, this seems to stick much better.
- 257 replies
-
- 14
-
-

-
Great atmosphere. Love the b&w pic of the J15.
-
Many thanks John, much appreciated!
-
Such a pretty little engine and now a very pretty model. Especially like the hybrid construction, making the most of new and traditional materials/techniques. Perfect for this sort of project and so effective!
-
Am pondering what, if any, signalling might have been at Northport Quay. One engine in steam would have been the rule, but with a passenger service, at least one point just after the tunnel would have needed a facing lock. The other three points would probably have been worked by hand levers. Am assuming there would have been a home signal, off scene, on the other side of the tunnel, with a starter for a train leaving and a ground signal controlling entry to the loop, probably worked off the point. There's not room for even a small signal cabin, so am thinking maybe a four lever ground frame, on the platform and unlocked by the single line staff, will suffice. Any thoughts welcome.
-
Nothing is sacred these days and there is a scam currently targeting those who advertising in Peco publications, RM and CM in particular. Looks like a fairly basic affair - you have put a small ad in the magazine and somebody from Peco rings you up to say there is a problem with payment and they need your bank details. Not them of course and all a bit pathetic really, but as ever, beware.
-
Straight out of the Beaumont/Carse album!
-
Saw this little gem at Eastleigh today and it is every bit as good as it looks, complete with some subtle and effective weathering.
-
Full of character.
-
Splendid. Well done!
-
new year new layout 1990s container terminal and tmd
David Holman replied to Sean's topic in Irish Model Layouts
Coming on nicely, though would be tempted to ease the ramp up to the bridge. Looks about 30 degrees, which is 1 in 2, or twice as steep as the steepest road in normal use. -
N Scale Ballywillan, Co Longford.
David Holman replied to Kevin Sweeney's topic in Irish Model Layouts
Yep, some little beauties. -
Think you are safe with the goods shed wall
- 309 replies
-
- 2
-

-

-
- mgwr
- 21mm gauge
- (and 1 more)
-
Always something rather satisfying about drawing plans out full size and there is a nice, spacious look to it. Know what you mean about spraymount, picked up a can the other day in The Range and didn't think about the price till the checkout was asking me a tenner for it. Big can though and, a bit like diesel now, will have to be careful how I use it!
-
The Puffer does indeed come with a mast and derrick, while am fairly sure the photo shows a 'Vic'. Victualling ships were built after WW2 as tenders to service large warships parked off shore. Vic 96 is preserved and lives in Chatham Dockyard and very fine she is too. Built as late as 1948, she could pass for anything built in the previous 70 years, with her vertical bow. Am eventually hoping my Puffer will look like similar to the ship above. Future prospective operators note that Northport Quay is already booked to appear at the Uckfield Show in October 2023, after which am hoping it will alternate with Fintonagh at future shows. Not saying Belmullet will never go out again, but it is quite an undertaking to move and exhibit, so will probably just be a home layout. NPQuay is very much designed to be easy to move and transport and as all exhibitors know, layouts all get heavier as we get older... As for back scenes, I do a lot of browsing through photos in books [the Beaumont/Carse volumes are excellent for this] to look for ideas, though good old Google can be good too. Often, it is no single scene that gets chosen, instead I tend to bookmark elements that seem interesting and try to combine them into something that fits the space available. The Blue Anchor signal box and crossing is a great example for development by the look of it.
-
Works for me, though guess it would really as all my Irish projects have been based on a similar premise. Would love to do the Swilly in 7mm scale, or better still 10mm on 0 gauge track. Ain't gonna happen without a lottery win though and as I don't but tickets that limits things even more! Ramelton, with its delightful quayside, definitely looks like it should ghost ave a railway.
-
Thanks folks! Works better in photos, than reality, because photos are only 2D. However, things like the walls, gates, buildings and so on all help to break up the view. Smoke and mirrors really.