David Holman
-
Posts
4,359 -
Joined
-
Last visited
-
Days Won
117
Content Type
Profiles
Forums
Events
Gallery
Blogs
Everything posted by David Holman
-
Northern Ireland lignite traffic
David Holman replied to Bóithre Iarainn's question in Questions & Answers
Even if nothing came of it, nevertheless sounds like a great excuse for a layout. -
CIE 1940s green - best shade of spray paint
David Holman replied to Pete00018's question in Questions & Answers
Check out the car spray paint rattle cans. The Halford ones give much better finish than the model ones and some branches will do a custom version for you. JHB will like as not have the best suggestions, but remember that colour pictures of new paintwork from the 1940s might not be that reliable in terms of time and things got weathered pretty quickly too, so it is about what looks right to you. -
Certainly is, the sky is really effective and a reminder that you don't always paint with brushes!
-
Looks like a scene that is meant to be modelled, as all the key elements are there - loop, view blockers, enough siding space to be interesting, etc. Definitely worth doing.
-
My latest car is a self charging hybrid and have found it a very different experience, but now more used to it am getting 50mpg from a 1.6 petrol engine. The electric motor means it is more economic around town and short runs than on the motorway - the opposite of what you'd expect. Did some research on self charging hybrids, but because they cost a lot more to buy are actually less economical in overall cost, even if you charge them at home every night. Mind you, if fuel keeps going up, who knows?
-
A real beauty, inside and out!
-
Am sure there were industrials like this around Ireland.
-
Don't know this stuff, but suspect it may be rather coarse - most types are at least a scale too big. Tarmac is actually very smooth and the best ways to represent it are either fine wet&dry (at least 600 grit), or talc shaken liberally on to gloss black paint, then smoothed over and vacuumed when dry.
-
Far too many things on the list before I do another Sligo 0-6-4T - Sprite and the pay coach, a GSWR 4-4-0, a WL&W 4-4-0 [and maybe a 2-4-0], the coaster, a steam crane, the C&VB 2-6-0T... ... but you never know!
-
Oops! - really should know better... MRJs 264 and 276
-
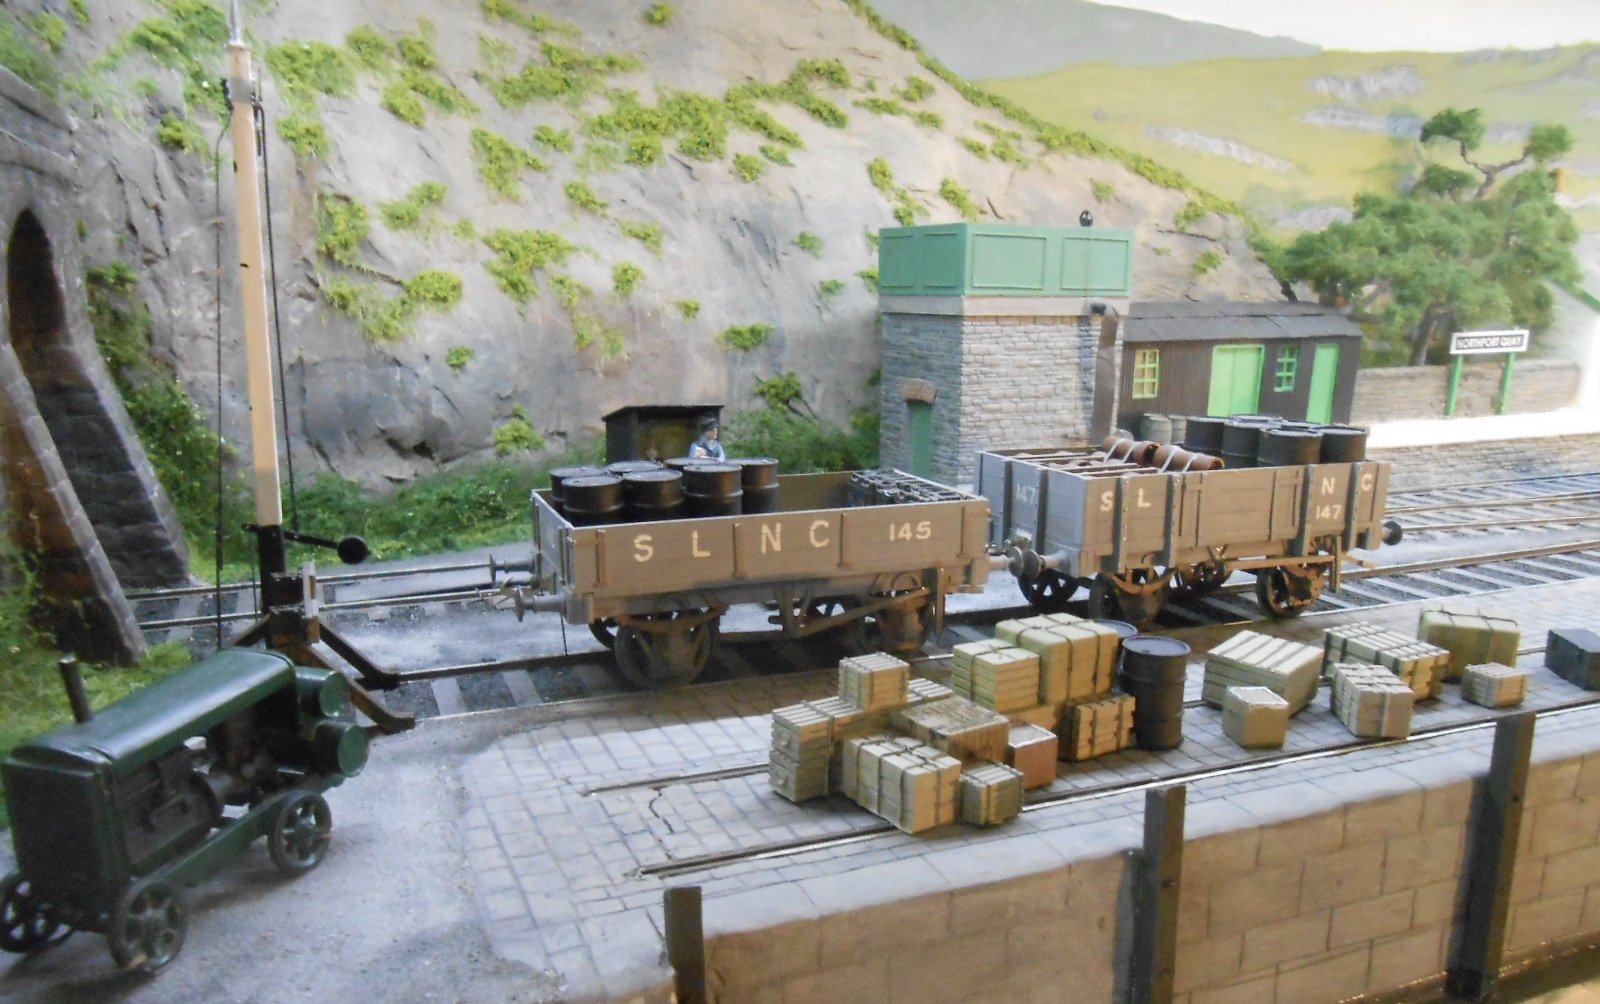
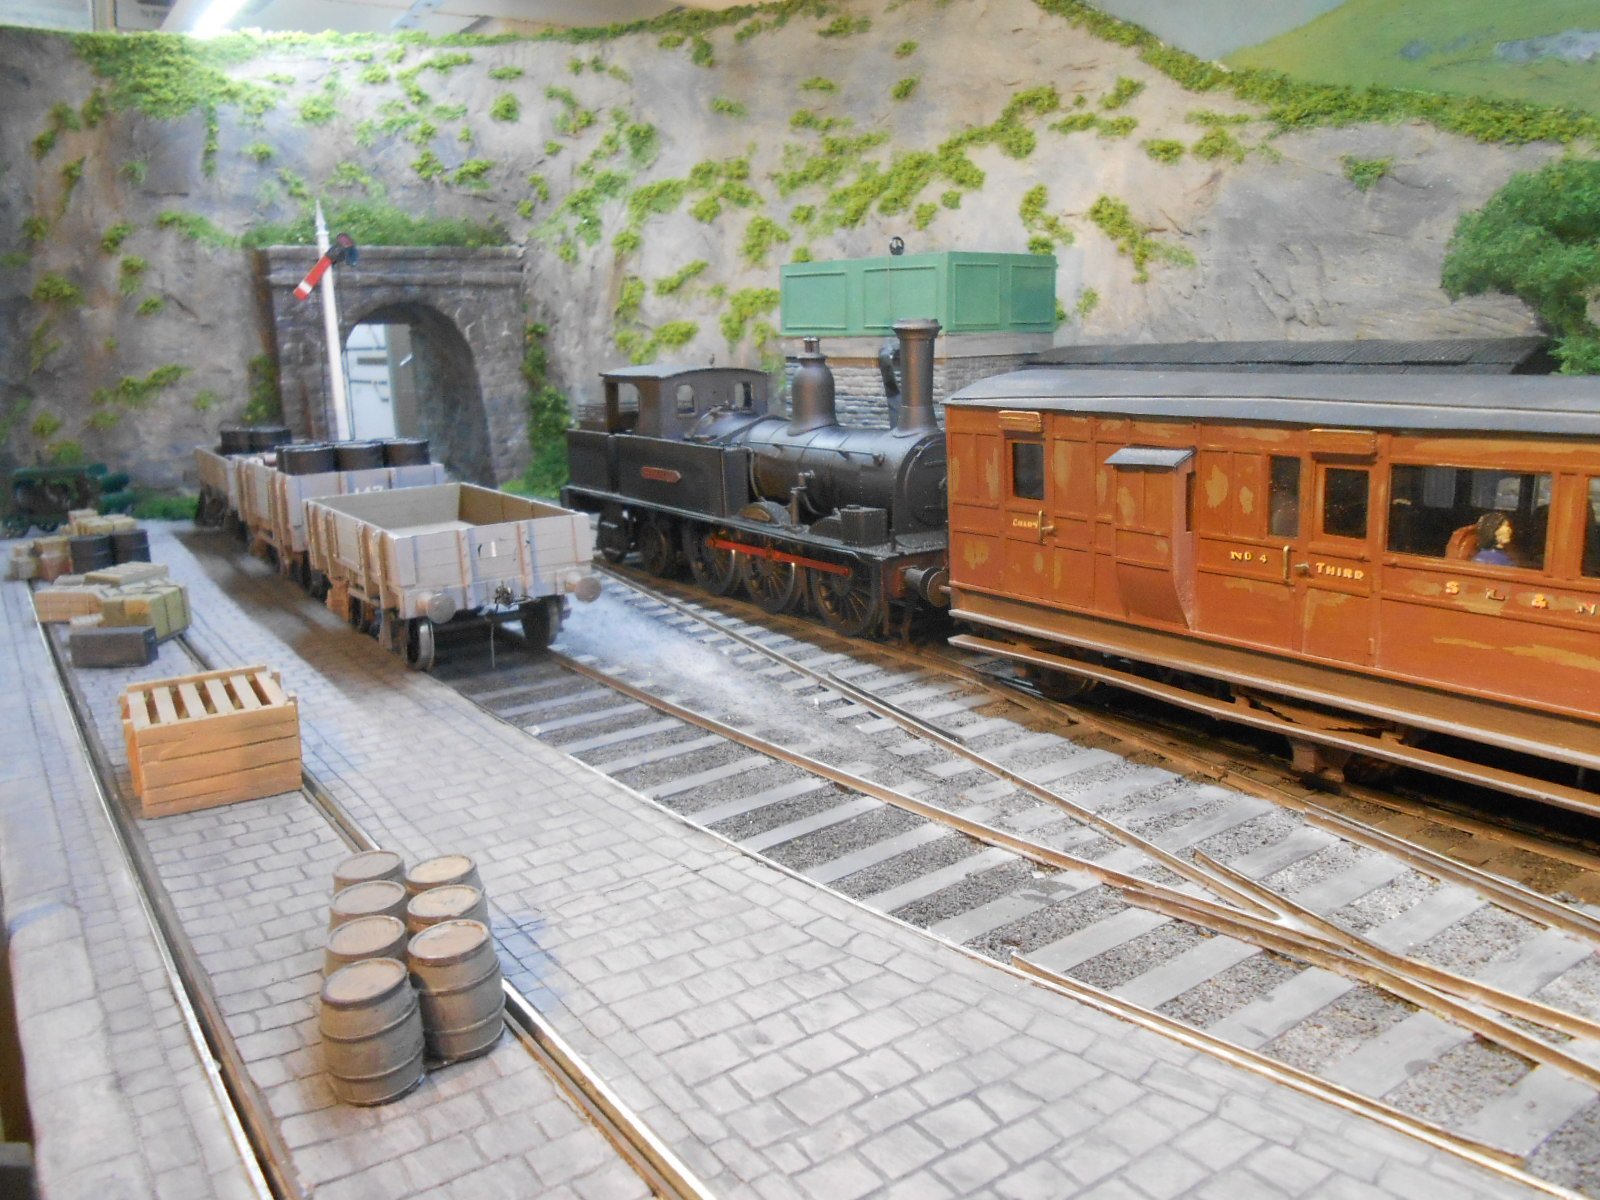
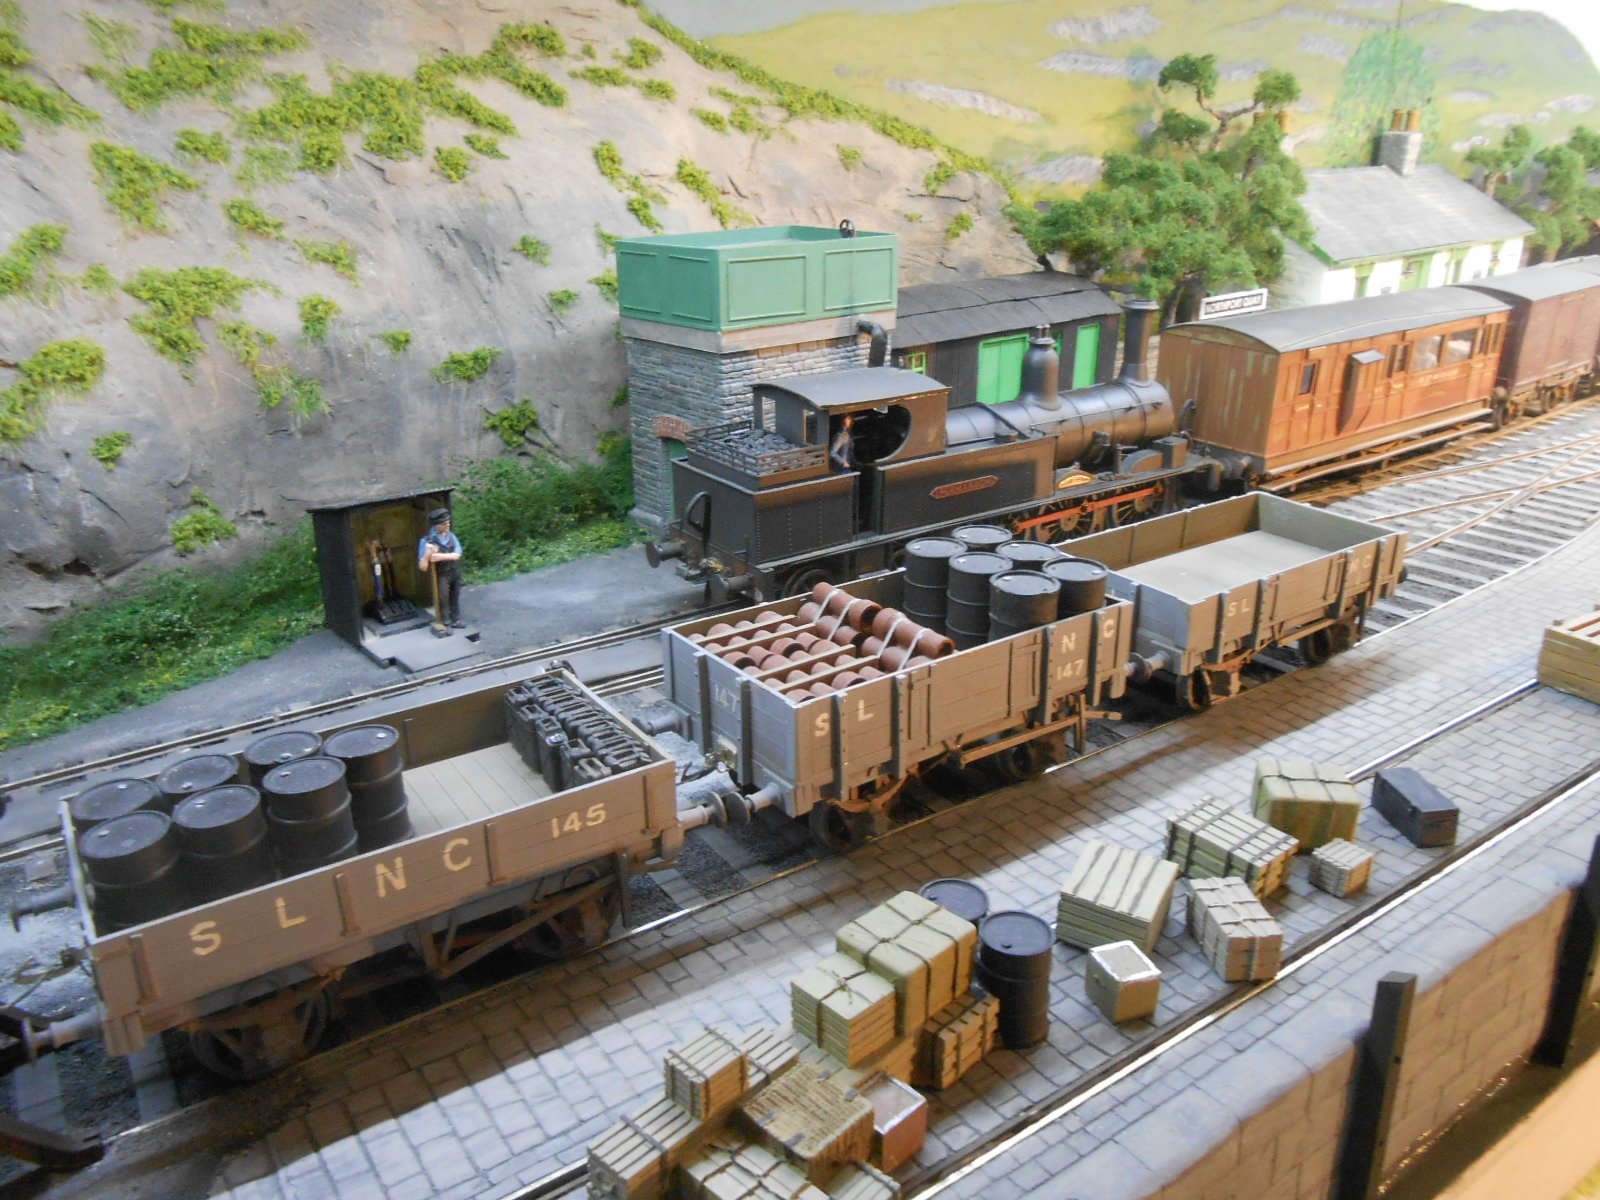
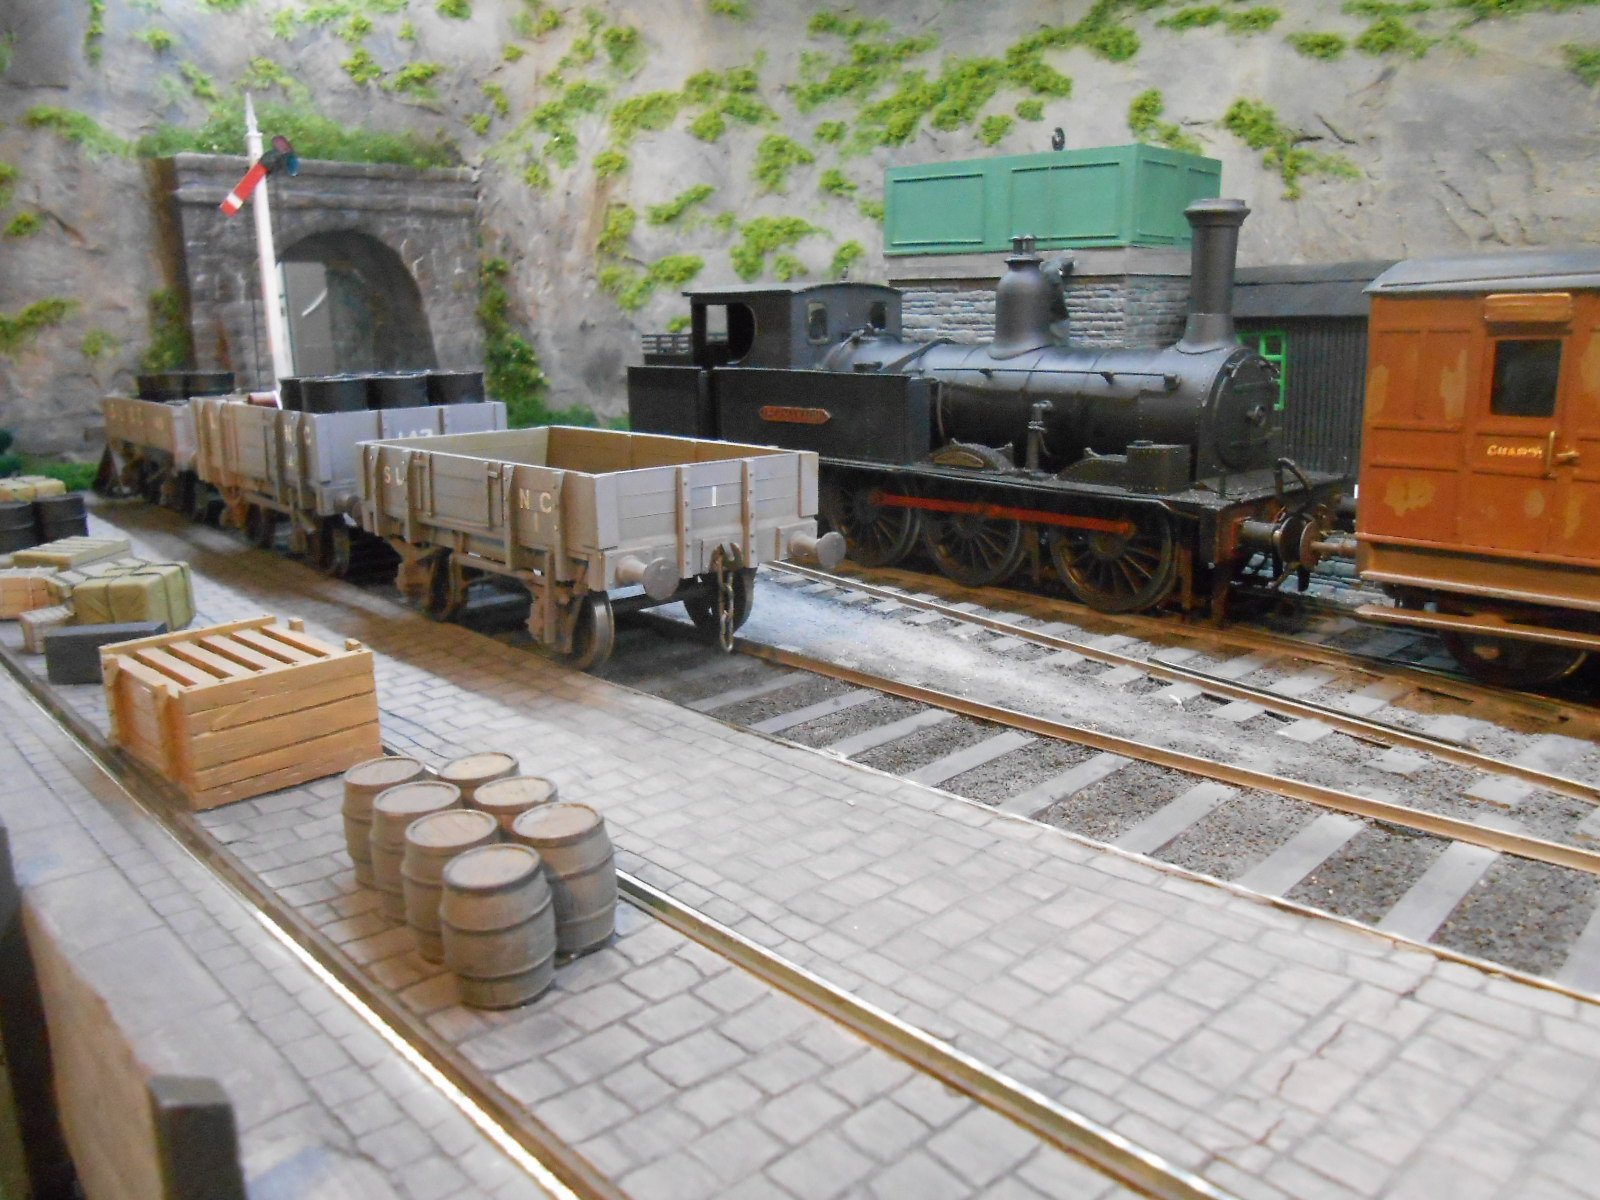
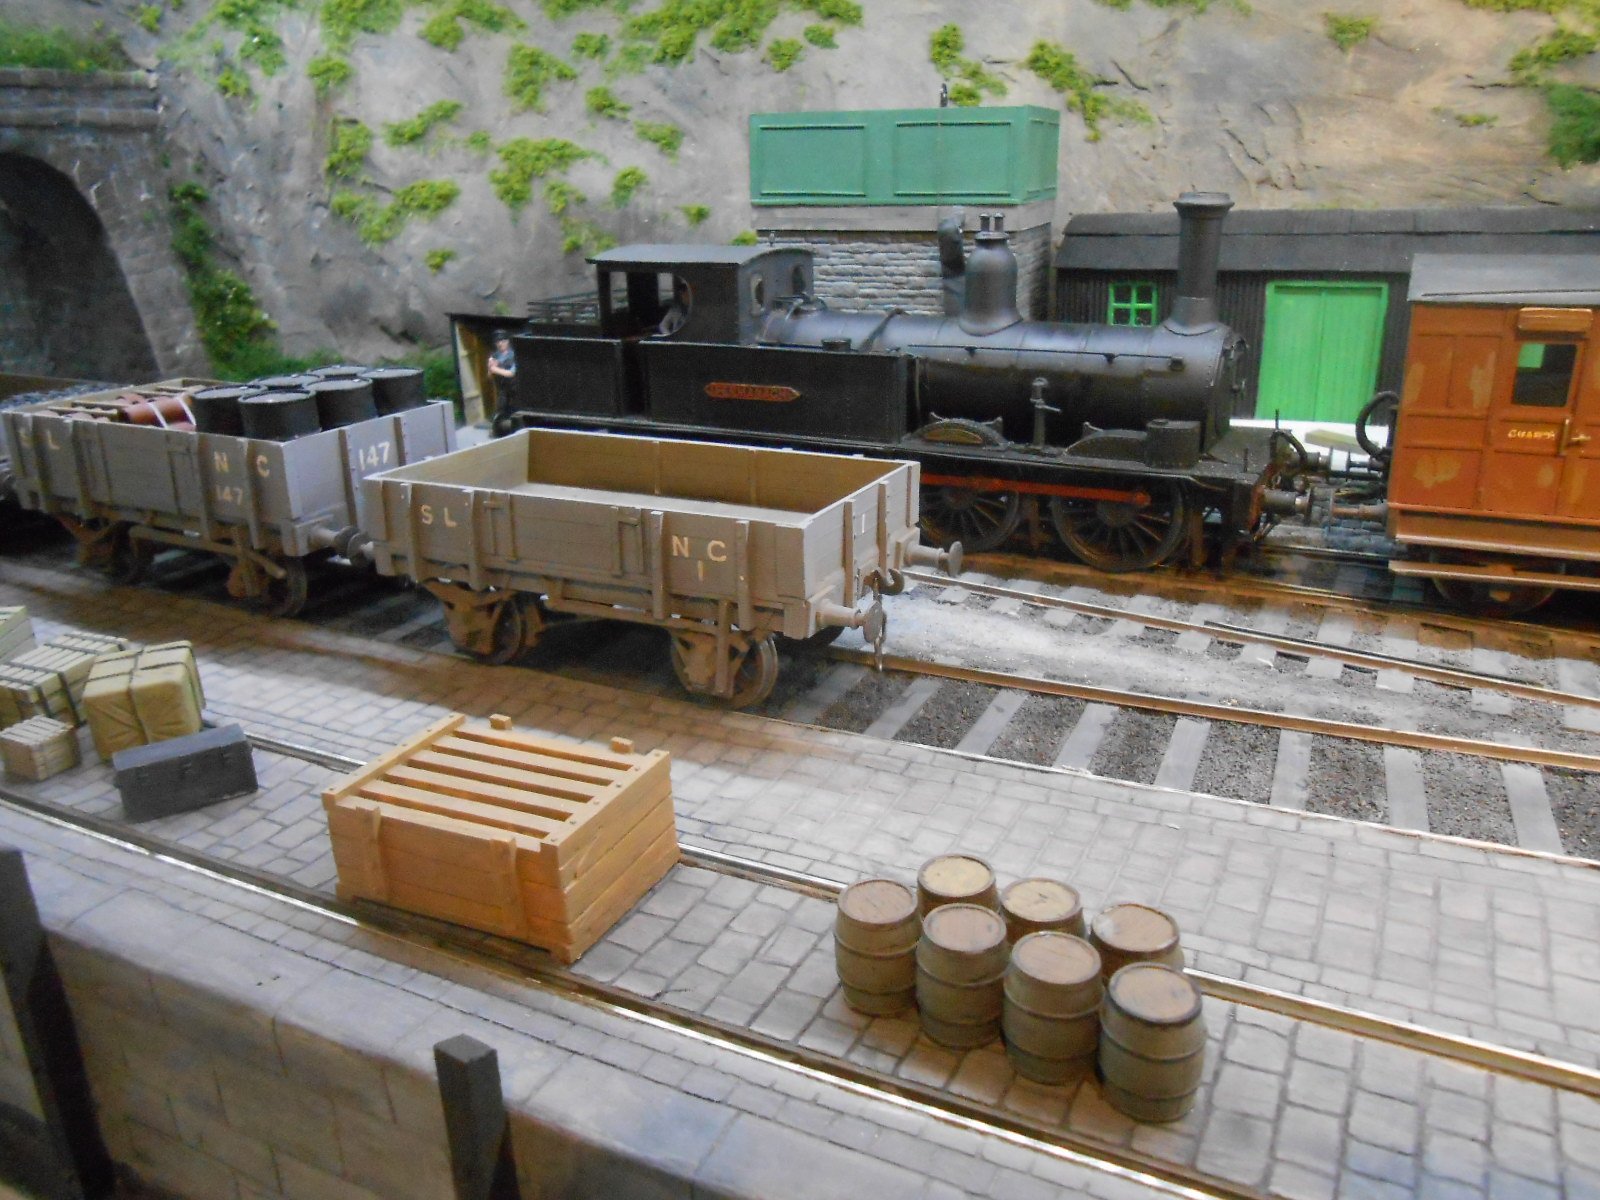
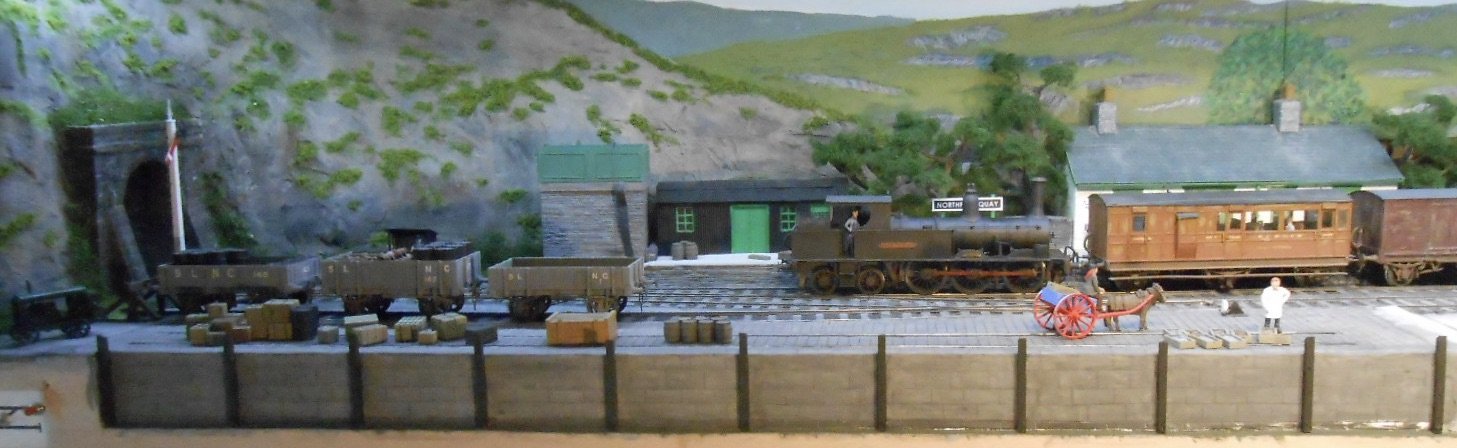
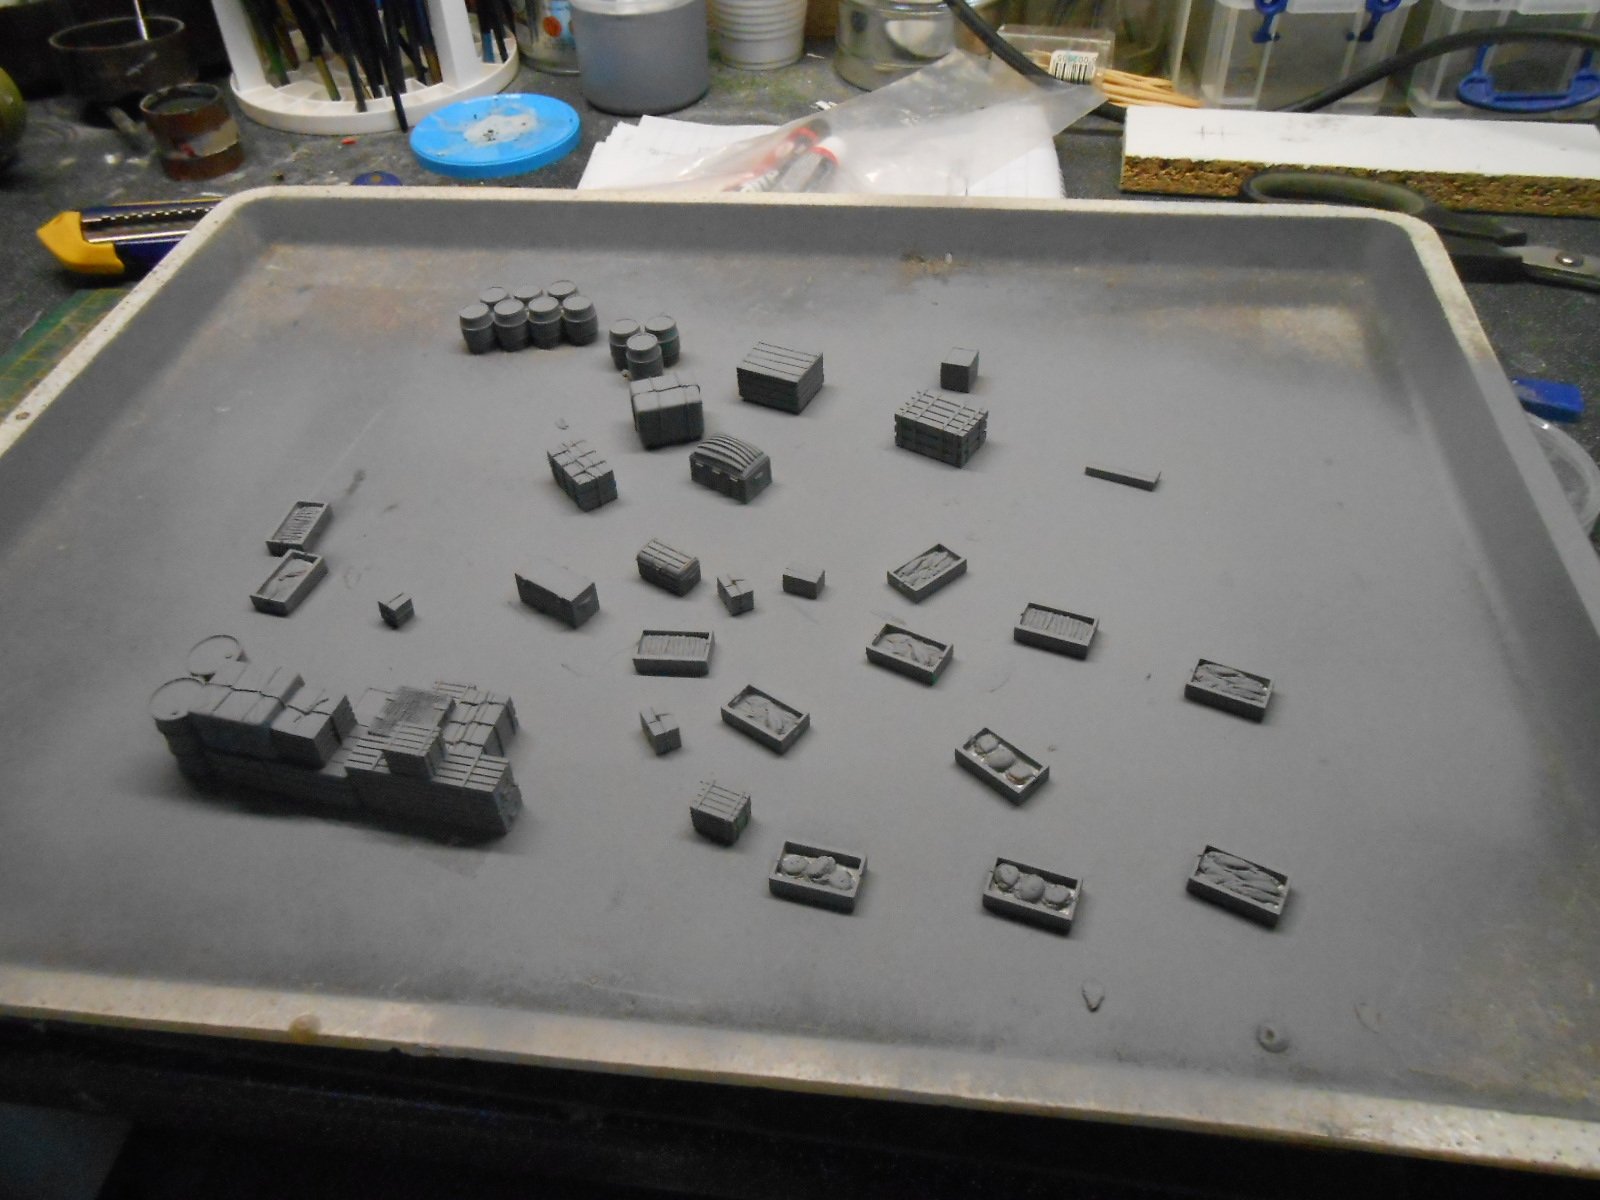
Not sure if this is layout or workbench territory! The painting certainly took place on the workbench, but the work is all about trying to create a busy scene on the quayside and nothing is stuck down yet. Indeed, most of the clutter will probably be focussed on the other board, with a steam powered crane taking centre stage on its own short track on this board. Anyway, have spent a fair few hours over the last few days painting the bits and pieces I ordered from Skytrex. Very nice they are too, including fish boxes, luggage and various sizes of crates, barrels and parcels, plus the all important buffer stop - though in actuality, all this does is protect the cliff face. There have been some useful articles in MRJ of late on creating & painting this sort of stuff, so have been leaning heavily on these [& Martyn Welch's bible on weathering], using artist's acrylics - mainly black, white, ochre and a little burnt sienna. There's also the weighted point lever, with the frame made from plasticard and the weight from two washers sandwiching a piece of brass. Took more time than I'd hoped that bit and one or two rude words in the process. Am still playing around with where things might go & the scene certainly needs a few figures [though no action poses!], plus maybe a road vehicle or two, all of which need to be period related. So, we have a 1950s scene here. SLNCR 'Small Tank' Enniskillen has arrived with a mixed train. The local fishmonger is looking at the morning's catch, while the donkey cart is ready to take some of it off to the village.

- 257 replies
-
- 19
-

-

-
Like the first one. It makes for an interesting hybrid, with clear Irish elements. The small 'side tanks' on the Adam's Radials were more like square splashers and a smaller feature appeared on some 101/J15s, so only need cutting down a bit. Removing the outside cylinders seems to have worked, while 5'7" drivers are about right for a Kerry Bogie. Add a pair of stove type smokebox doors and you've suddenly got a more than plausible new Irish 4-4-0 class! Purists may not like it, but it certainly looks the part to me.
-
Love the Kerry Bogie, such a well balanced design, especially in original condition. Almost as pretty as an Achill Bogie, in fact - though lacking that gorgeous paint scheme.
-
It was always a great place to photo lovely new models, but there's now a real sense of purpose, while the scenics look every bit as impressive as the stock.
-
Great fun, as always.
-
Track cleaning in the fiddle yard? Impressive!
-
Thanks Mark. A few other things I've used are: Y points are great space savers - nothing but in the first p!an The fewer straight lines the better, but keep curves gentle Going diagonally across the baseboards is better than parallel to the sides If you put a frame around the scenic area, you can hide an exit at the front edge with it, as per the first plan and Fintonagh itself Layouts do not have to be big to be interesting. Iain Rice's rule that a train needs to be able to travel three times it's own length on a layout to look 'right' is at the heart of all my plans. However, the 'through' layout plans didn't get built because they need a fiddle yard at each end, which means half the total space is non scenic. Would work better as part of a continuous run. End to end layouts are not ideal at exhibitions - they need extra operators and (because trains spent less time on scene) more stock and bigger fiddle yard to keep things interesting.
-
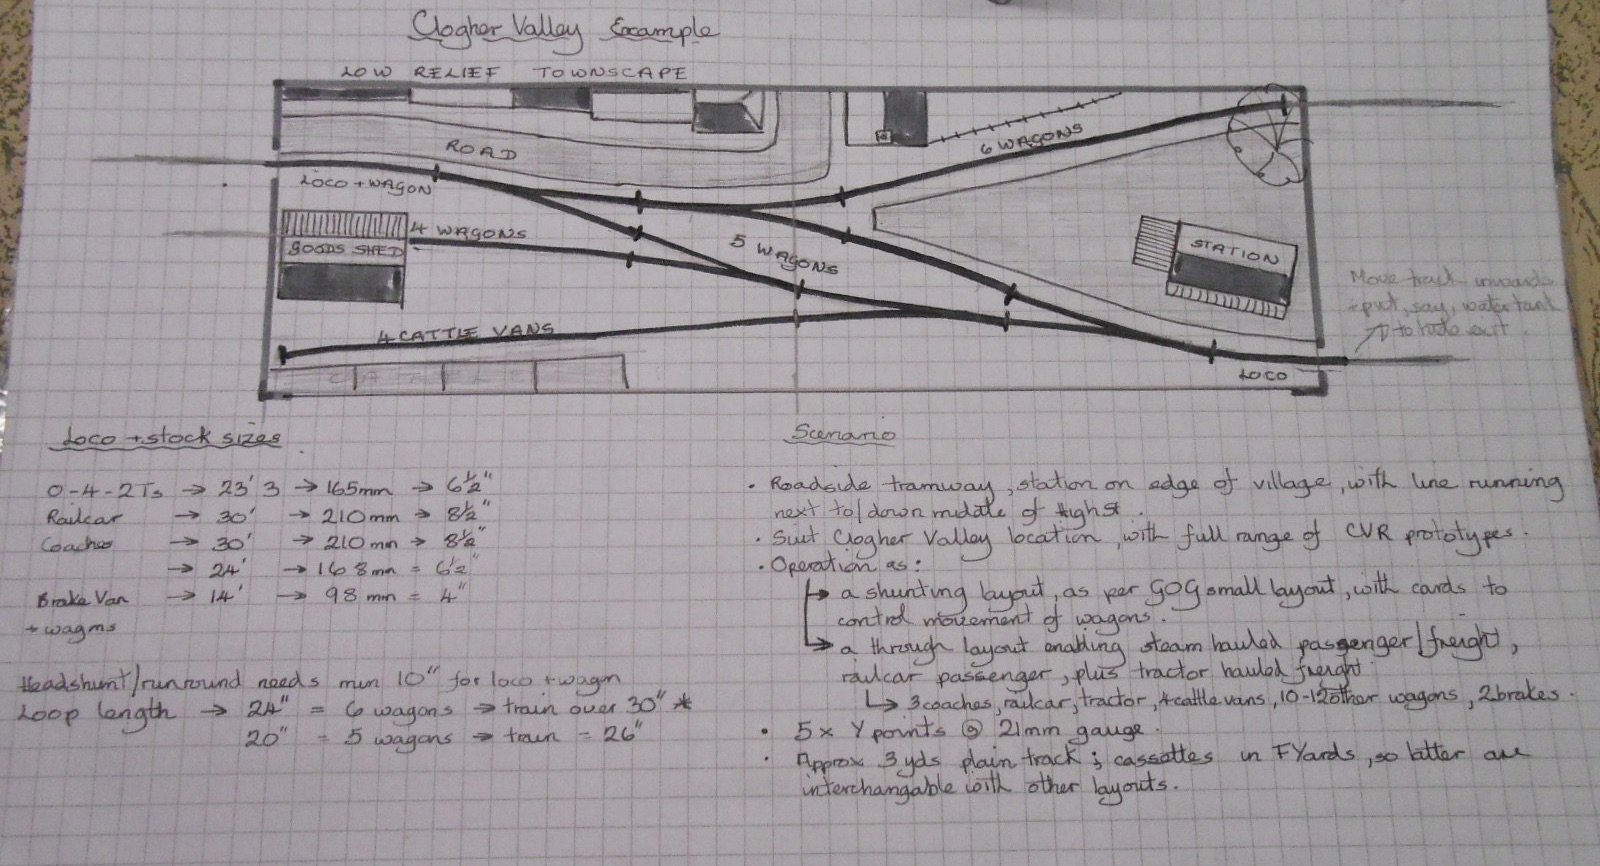
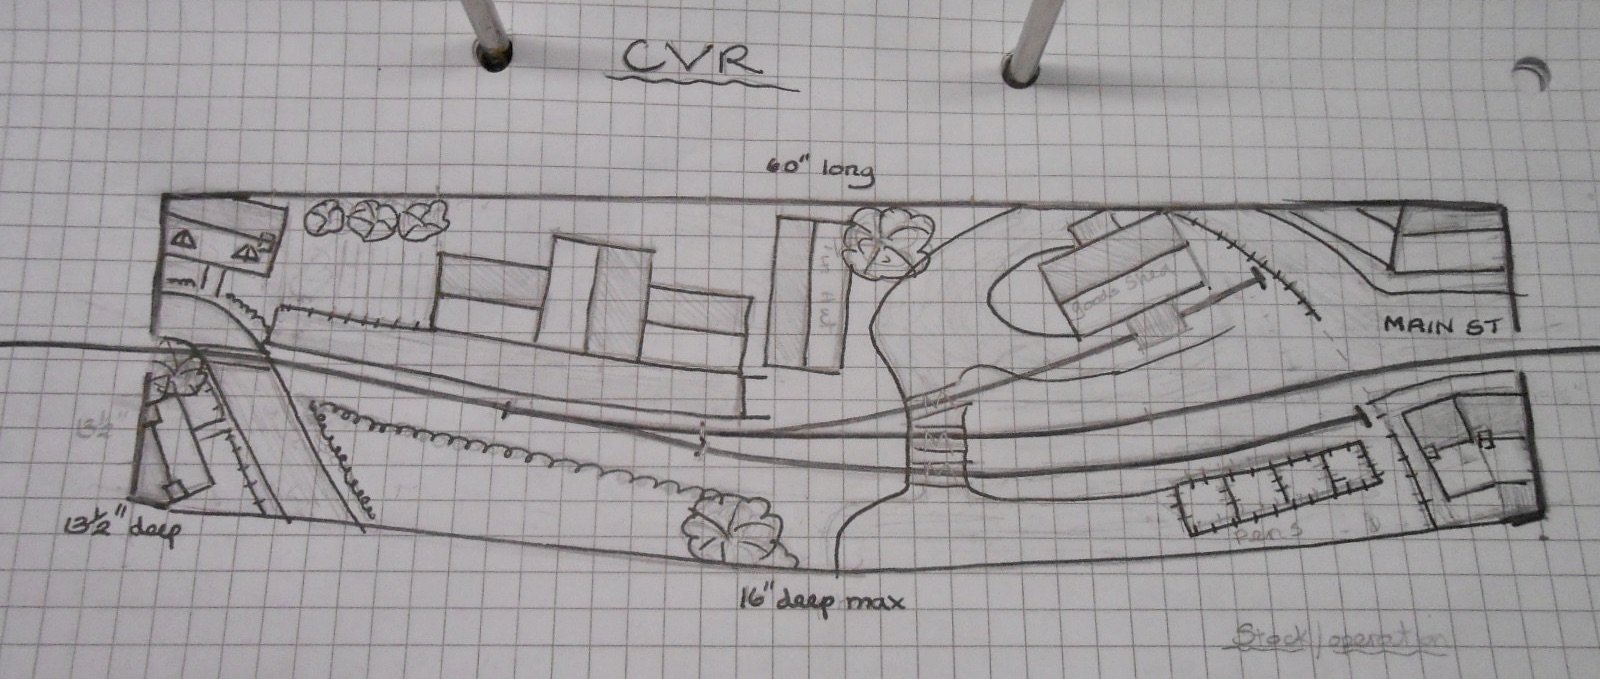
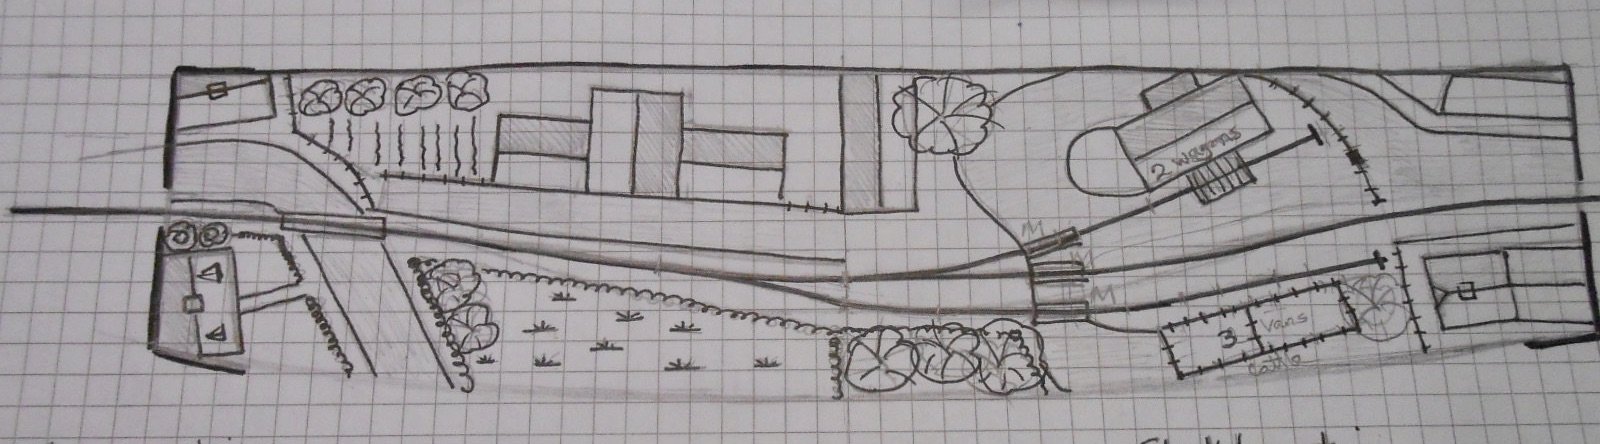
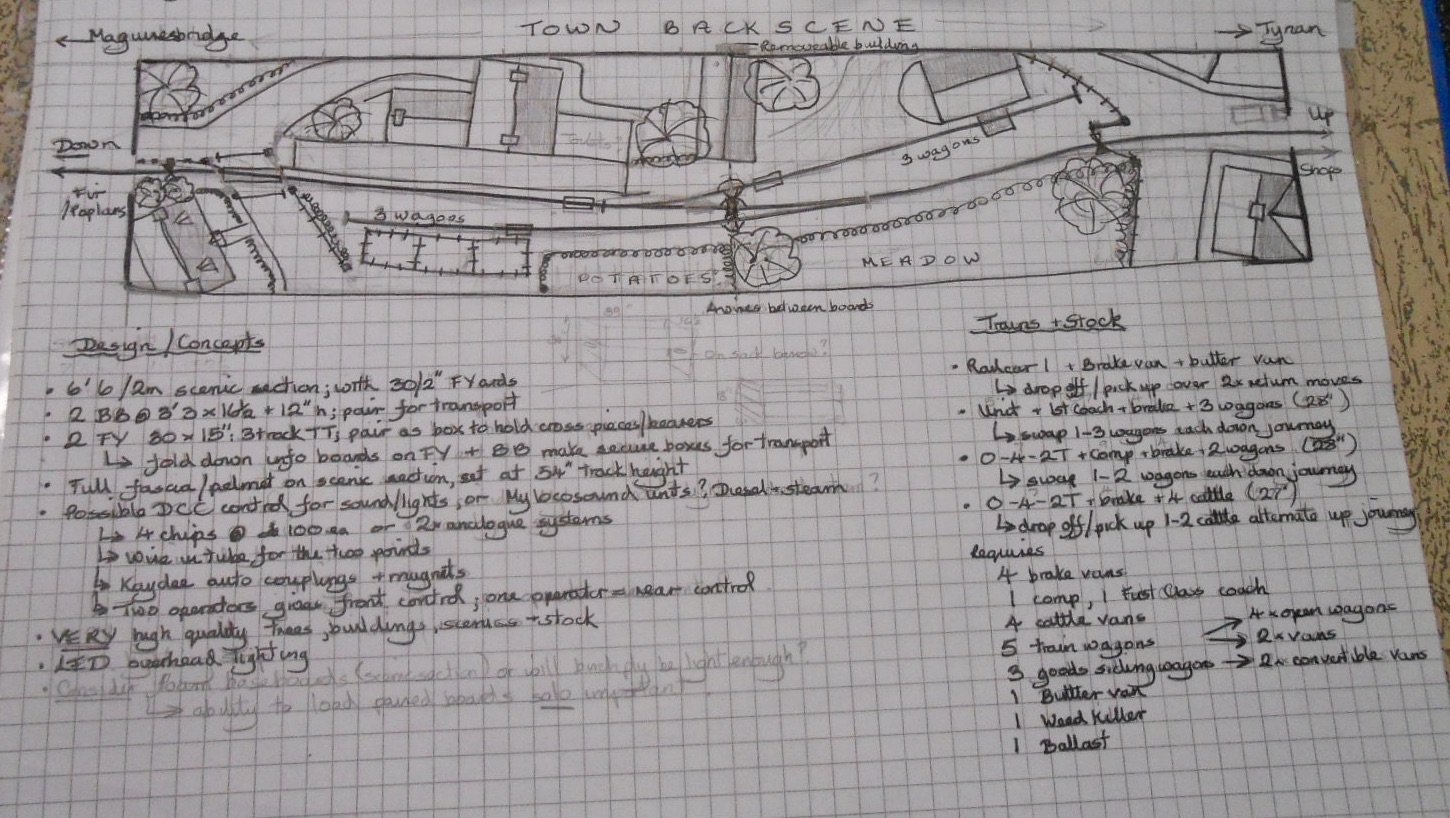
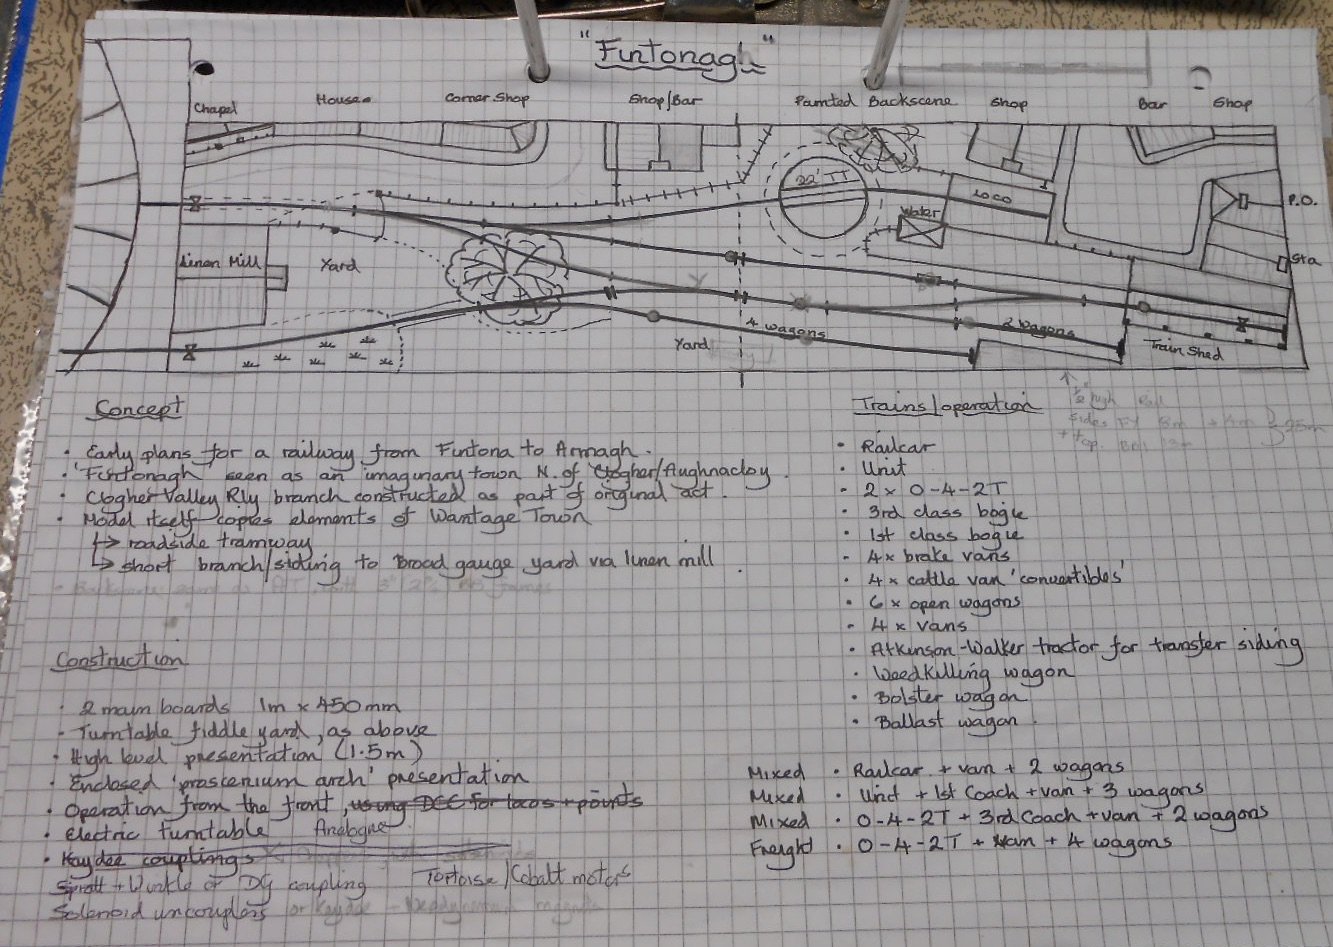
Haven't posted here in a while, but recently came across various track plans I drew while thinking about Fintonagh. Don't know about anyone else, but I find myself doodling lots of these, which can often be very useful, if only in exorcising the idea of starting yet another layout. Perhaps these plans might inspire somebody to build something similar - even it is a case of 'certainly wouldn't do it that way!' First up, an idea for a through station. I was trying to incorporate a bit of CVR roadside tramway and the annotations alongside are typical of the thought processes I go through, aiming to justify the plan's existence, alongside the sort [and amount] of stock needed. Here's another through line, but simpler this time, not least in there is no passing loop. The two sidings could only be shunted by trains going right to left. Next is a similar idea, but with the two sidings going off in opposite directions, means trains could shunt in either direction - though only one siding at a time. Notice how various view blockers hide where the tracks exit the scenic section. As a roadside tramway, over bridges, let alone tunnels were absent on the CVR. I even dabbled with a circular layout, which could have made an interesting exhibition concept, though as the left hand sketch shows, storing all the boards would have been problematic as indeed would setting it up at home. In the end, I devised the terminus scheme that became Fintonagh. The CVR never had a branch line, but Fintonagh is supposed to be a small town somewhere between Fintona and Armagh [hence the name]. There is a semblance of street running as the line exits to the left, while a kickback siding to the front exits to a standard gauge transfer siding. The rest of the track plan is fairly conventional, while the annotations provide insight into the planning process, most of which has actually worked out in practice.
- 90 replies
-
- 10
-
-
-

-
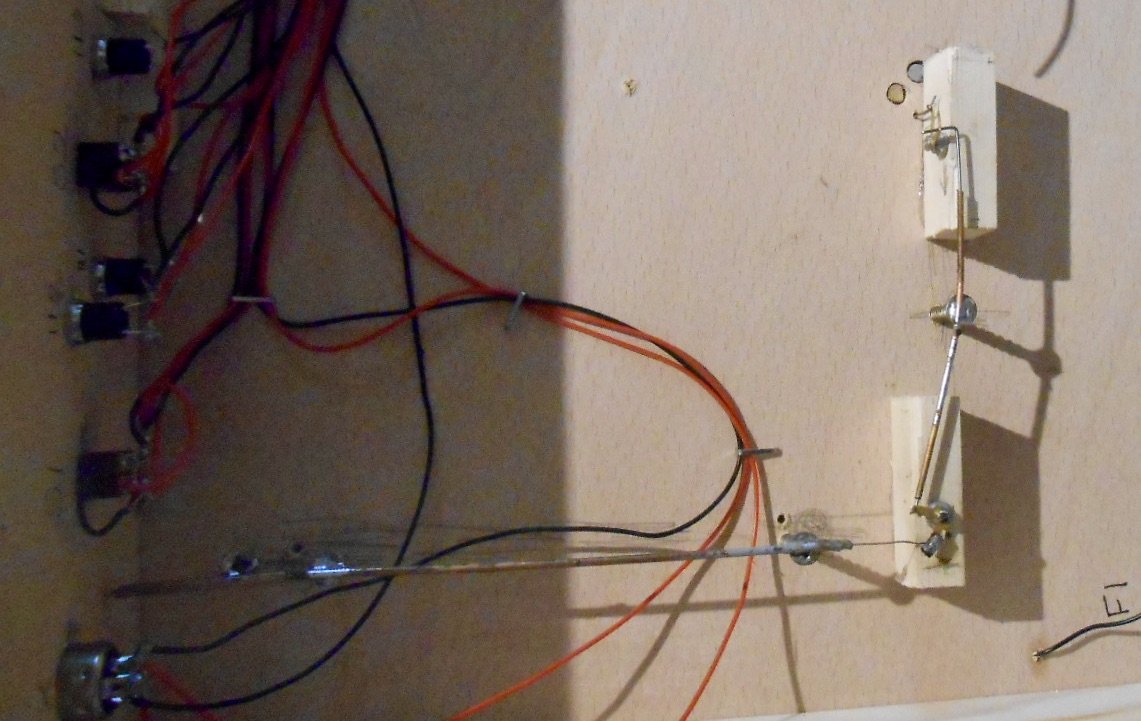
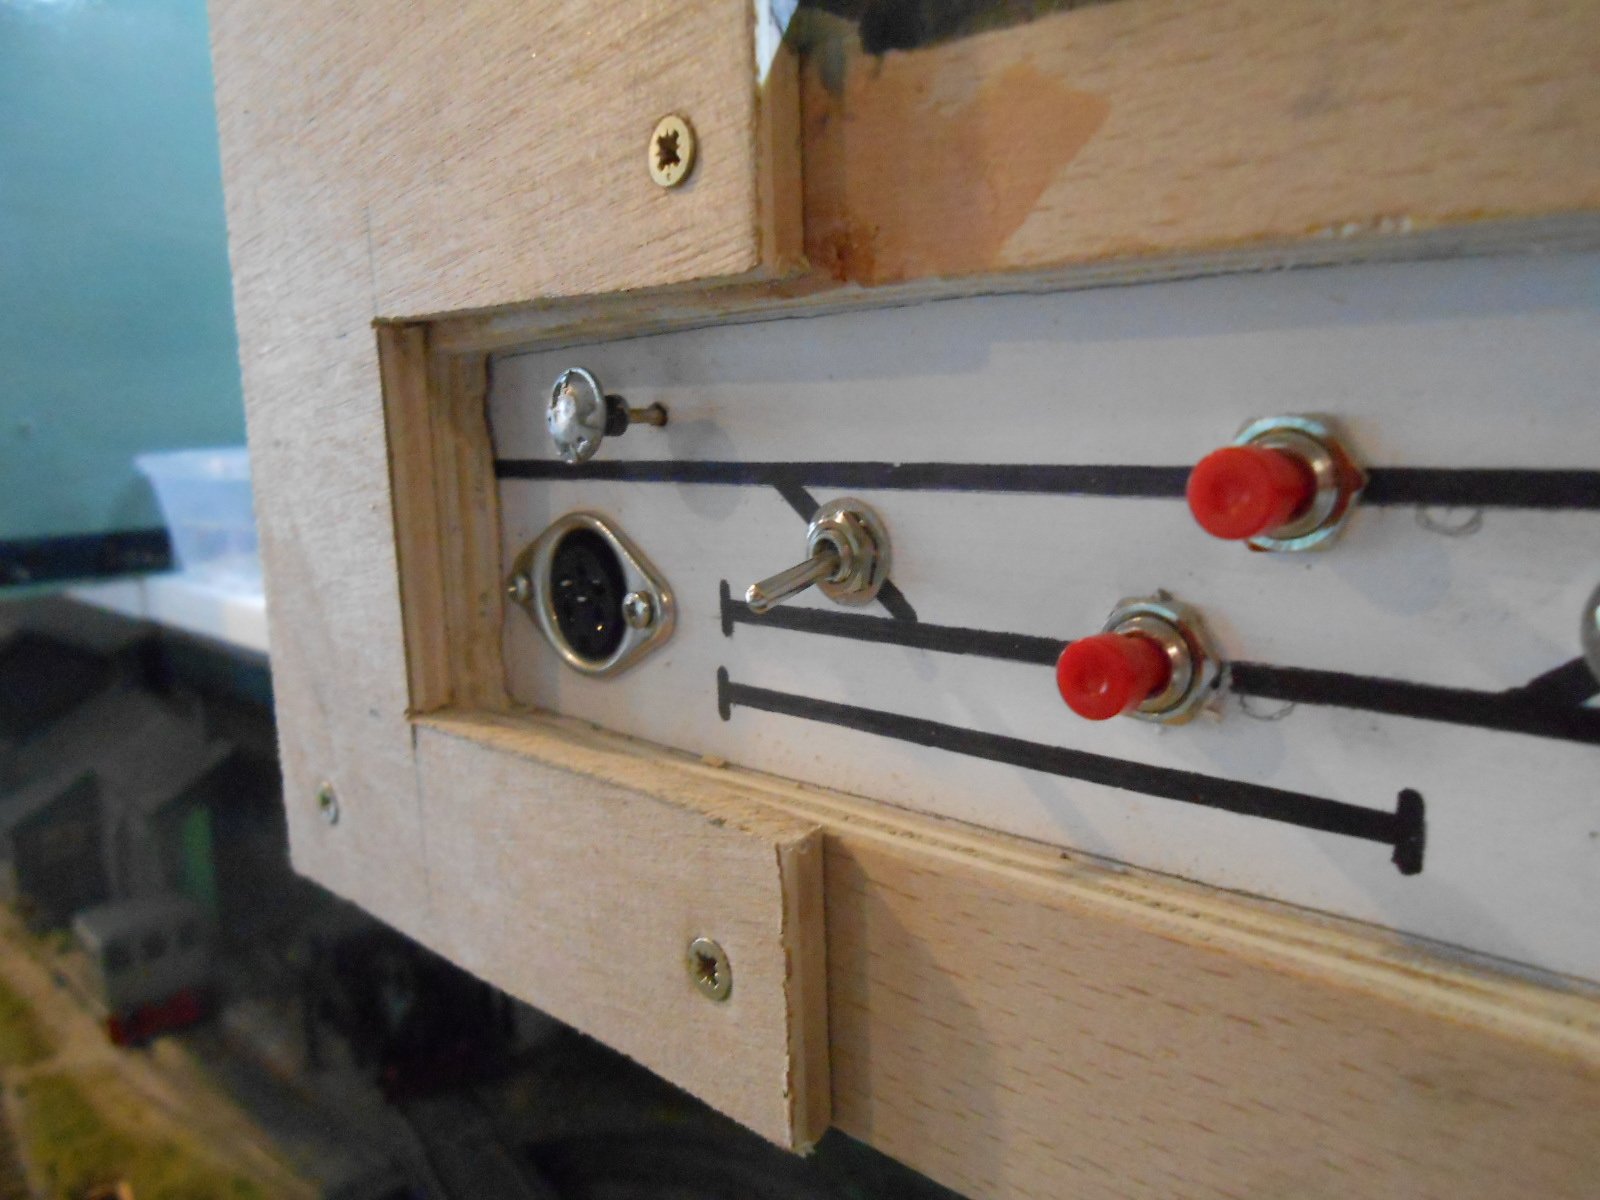
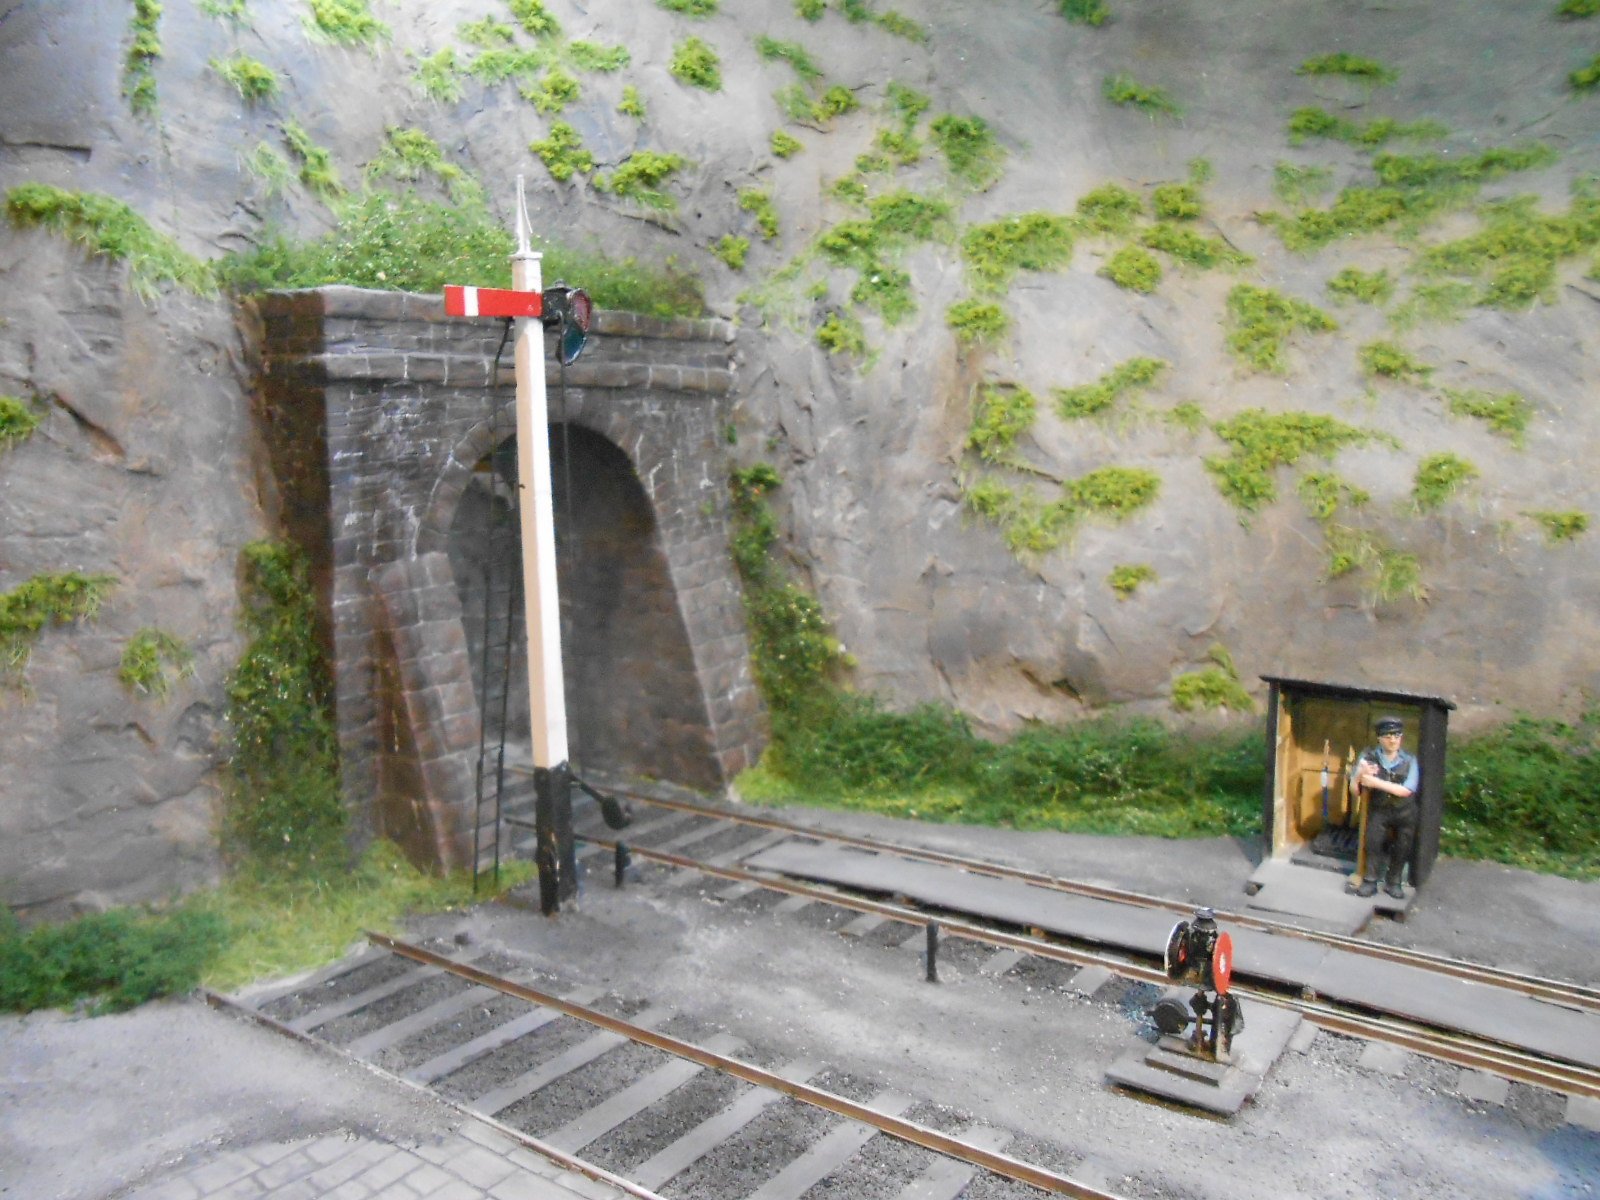
Have wandered back to more specific workbench stuff, after what seemed like too much painting and ground work over the last few weeks. That's the joy of layout building for you - if you get fed up with one strand, there's always something else to do! One thing that had been on the 'to do' list for a while was remote control of the starter signal. I could have gone along the electronic route, with maybe a servo or a solenoid, but it seemed easier to just make it mechanical and looking through my materials boxes, I found there were enough angle cranks and wire in tube to make that happen. As can be seen from the picture, the wire in tube uses two cranks, one to make a right angled turn to go parallel to the track and the other to go vertically up to the signal actuator arm. Only a very small amount of movement is required, so I made a simple knob from a small bolt, by drilling into it so the wire in tube fitted inside. The actual wire itself comes out of the top of the knob and is bent over and soldered in place. [More than] a few rude words got uttered while I was working how long the wire in each bit of tube needed to be, but got there in the end and [fingers crossed] it all works nicely and without the rather small control panel getting too crowded. I also put an order in to Skytrex on Sunday for some all important scenic bits and pieces so was pleased to find a package arriving from the postman this morning. A mixture of boxes, crate, barrels and parcels - some in cast white metal, others in resin. Spent a happy hour trying out some of them on the layout and then gave these a scrub in warm water & washing up liquid before an overall spray of primer. I also ordered a set of white metal buffers, which, after drilling the beam to cope with the wider gauge has been posed on the siding, awaiting painting and bedding in.
-
Depends whether is for an Irish project or elsewhere, I suppose. Early loco names often focused on speed and strength, or something from mythology, so for Ireland check out some of those early kings and chieftains. Another oft used option was to name locos after directors and their families, or indeed loco landmarks, towns etc. Pretty much anything goes therefore as long as it is not something with a modern spelling!
-
Always thought that Swiss and Austrian layouts were very 'train set' in concept, with far too much track. Then I went there and realised that it can actually be like that in places! There has been a school of thought that we tend to model what we saw in our formative years - a nostalgia kick I guess. Still there, but I sense a growing urge to do something different. After all a loop and two sidings is not the same if it depicts a much earlier era, or a light railway, industrial scene, etc. The major manufacturers are starting to feed this, to some extent, but unless you build your own stuff, you are still very much limited by what they provide.
-
Interesting! Have always got a lot of satisfaction from pursuing alternative paths. Guess it boils down to enjoying doing something different - be that lesser known railways or even freelance stuff. Essentially very much at the heart of modelling Irish railways in the steam era. A model of 'Lion' and its Titfield Thunderbolt train is supposed to by out soon, though suspect the price will put off any thoughts of conversion, at least to begin with. Years ago, ace modeller Mike Sharman built a substantial collection of early Victorian trains and there is growing commercial support for stuff from early railways, so well worth pursuing!
-
Really good to see quality models brought to life like this.
-
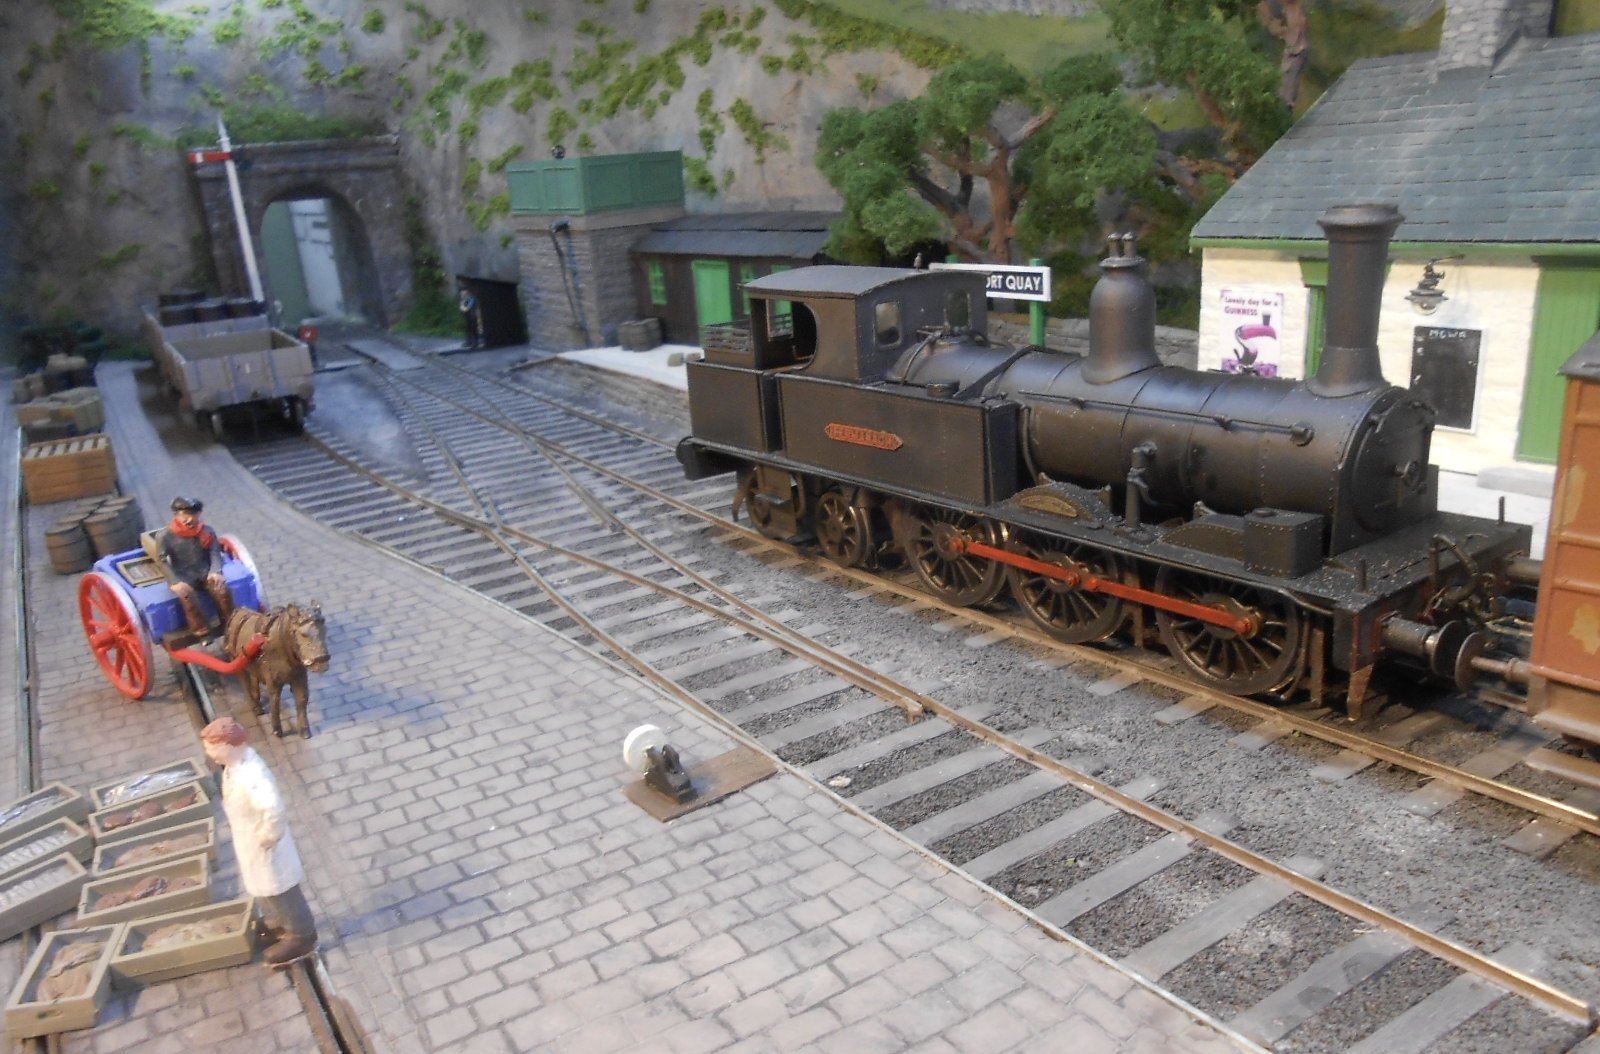
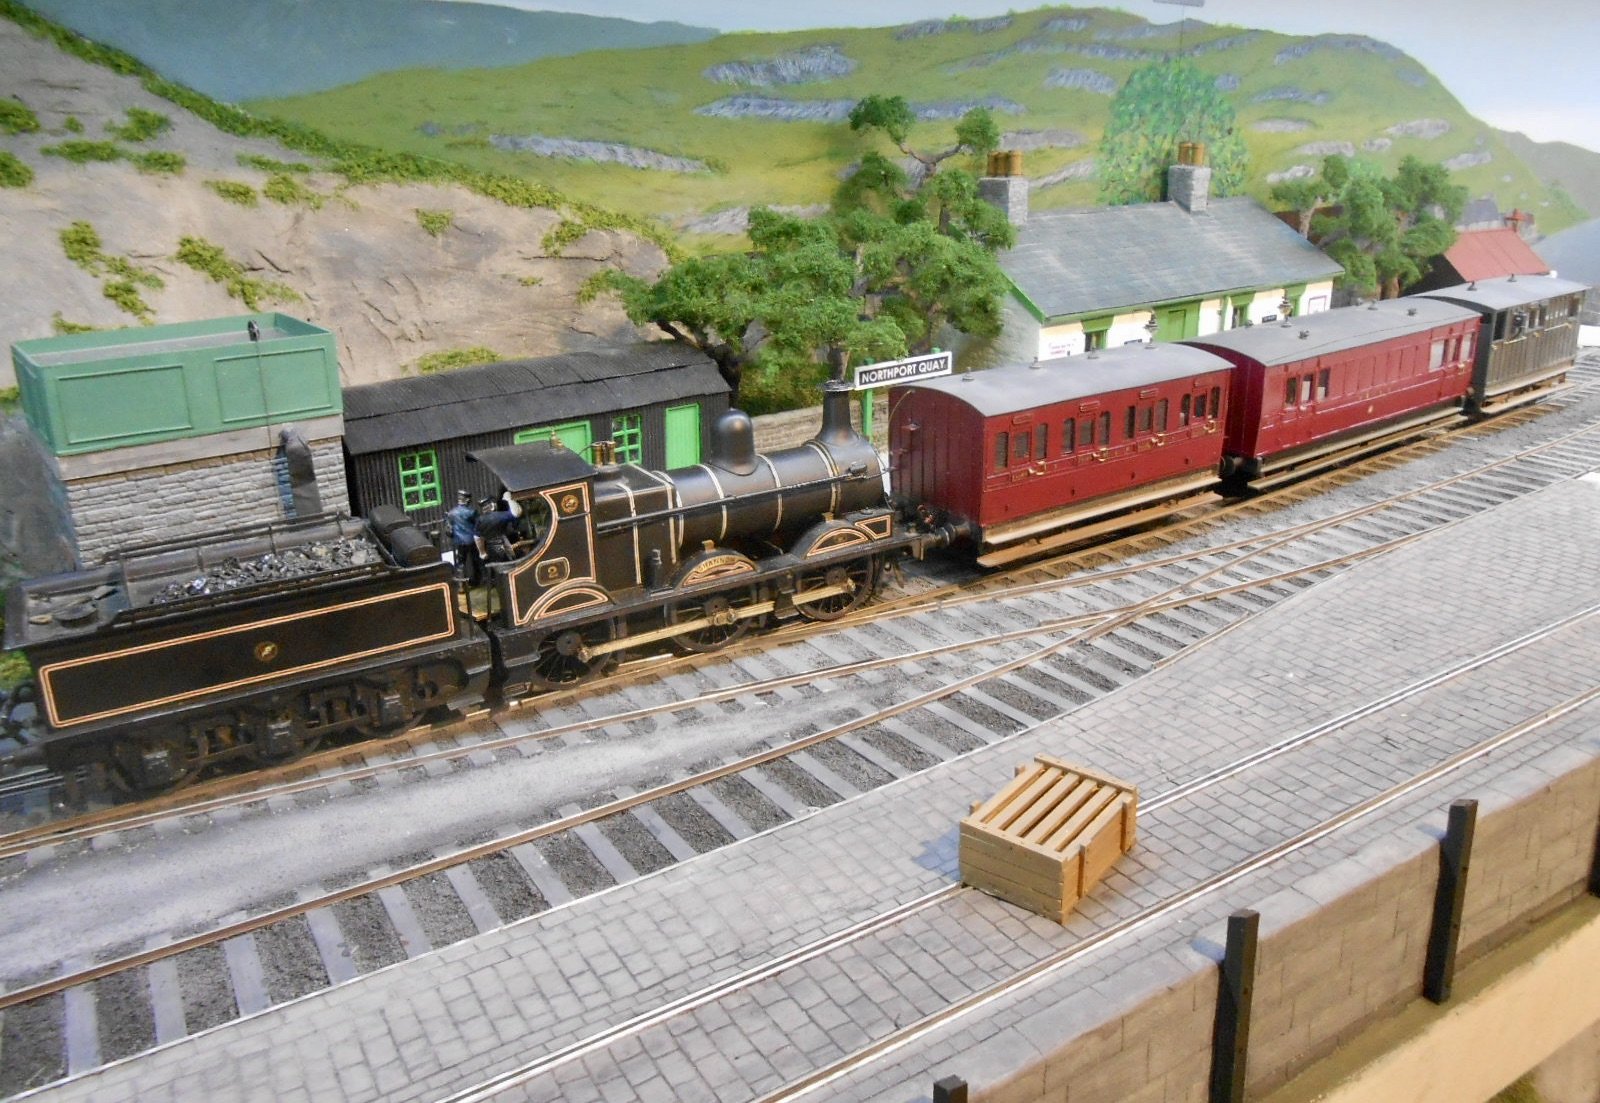
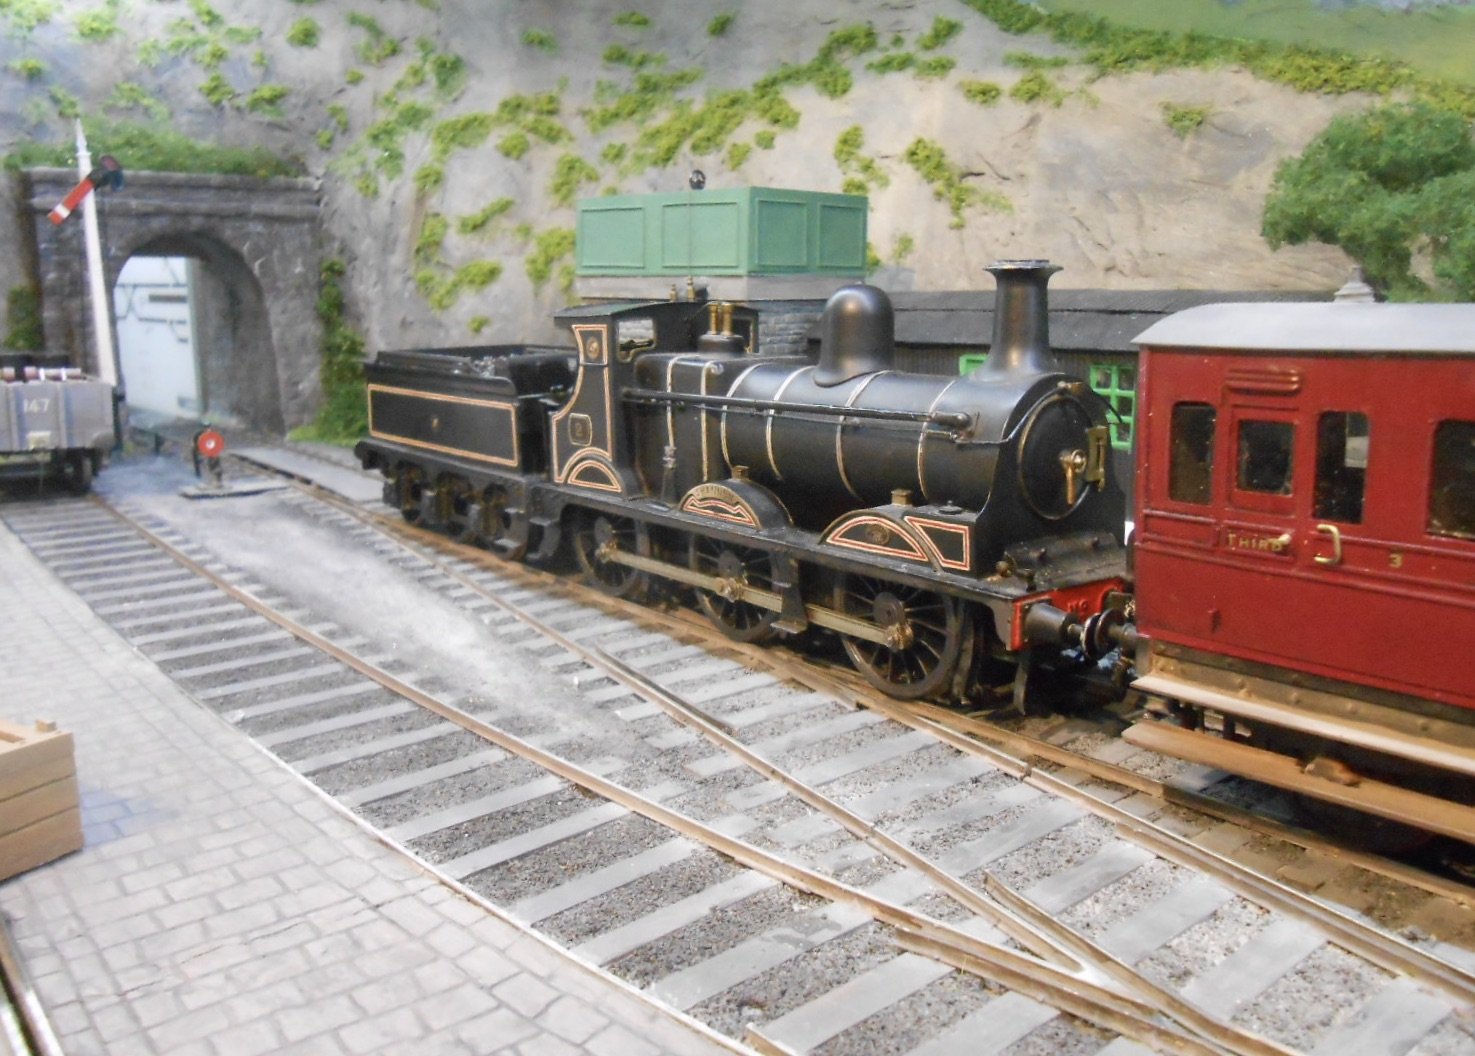
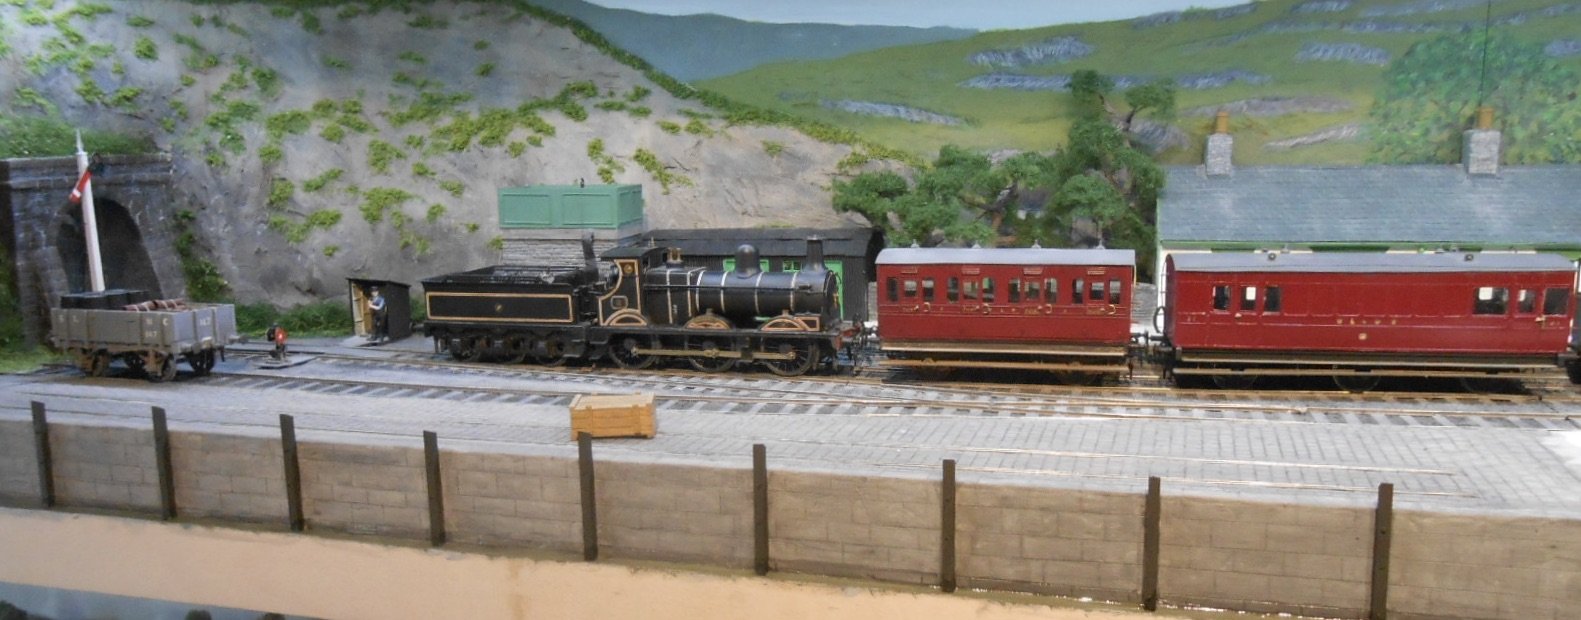
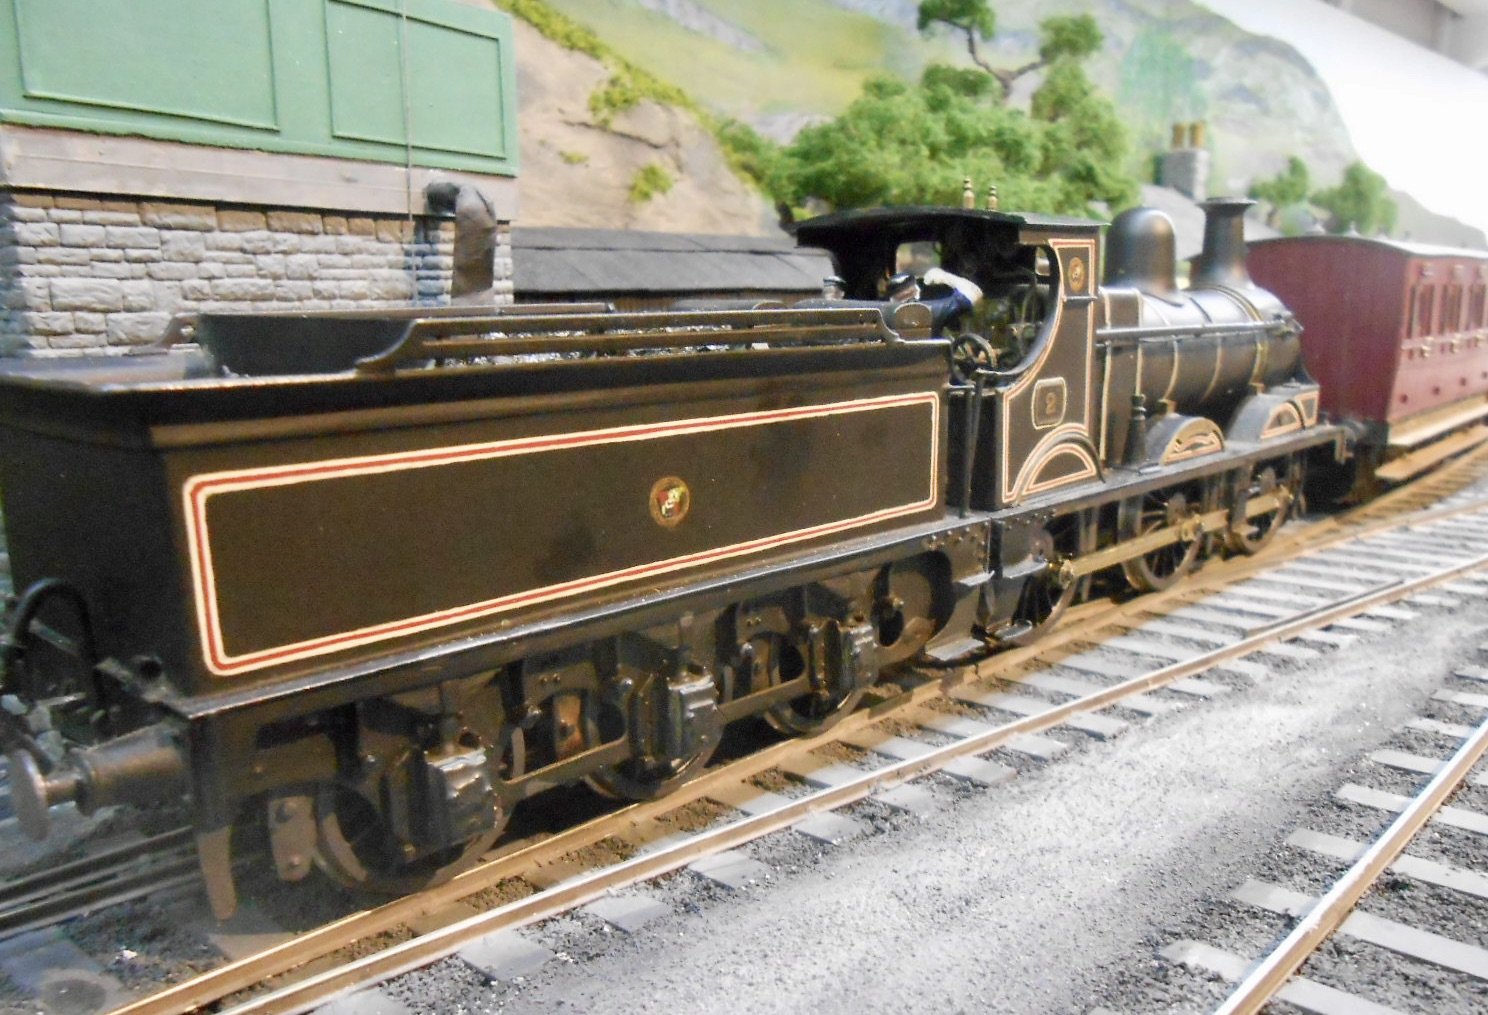
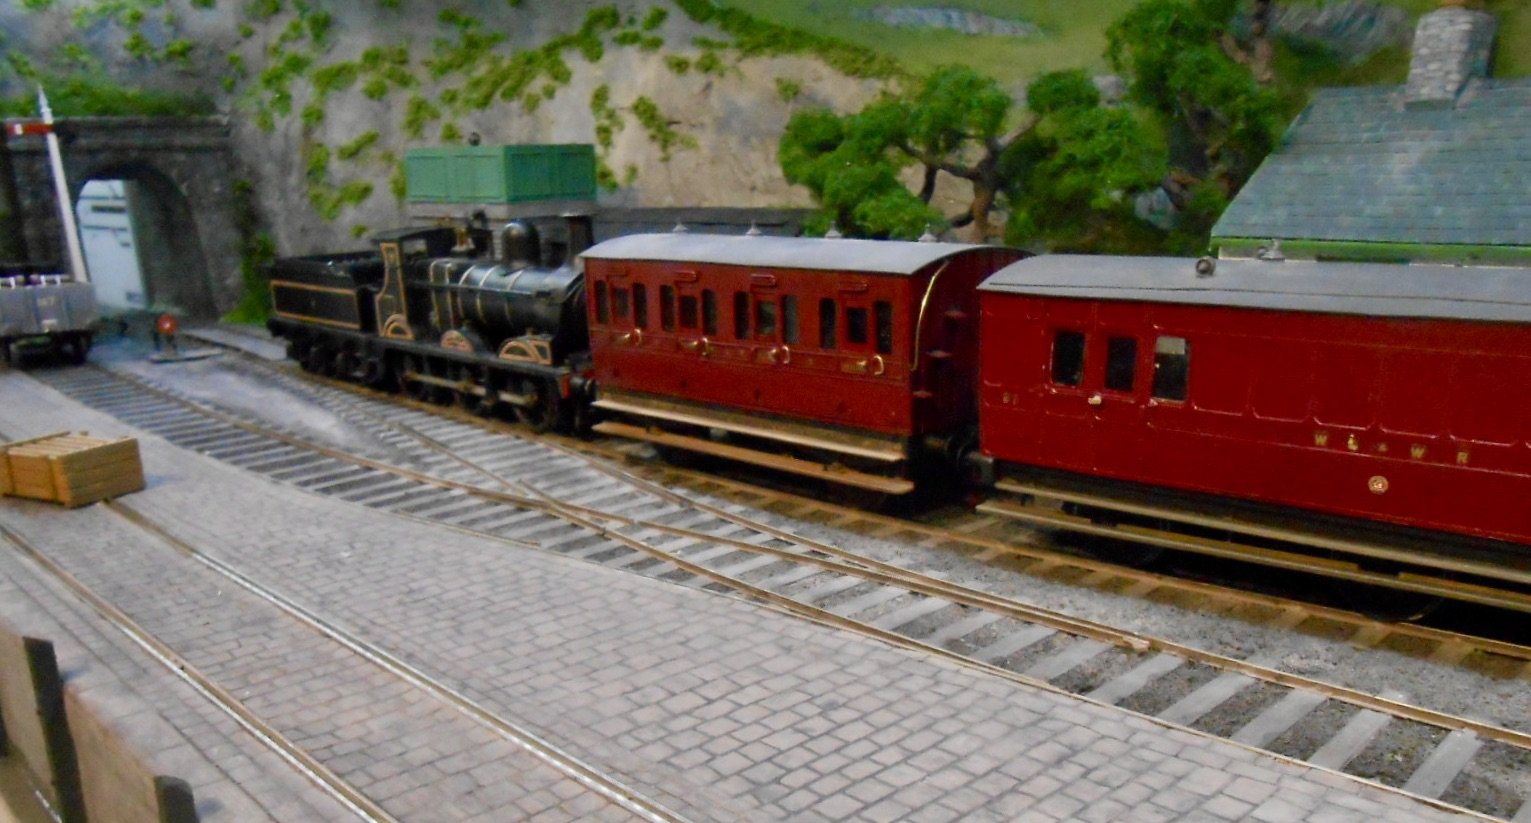
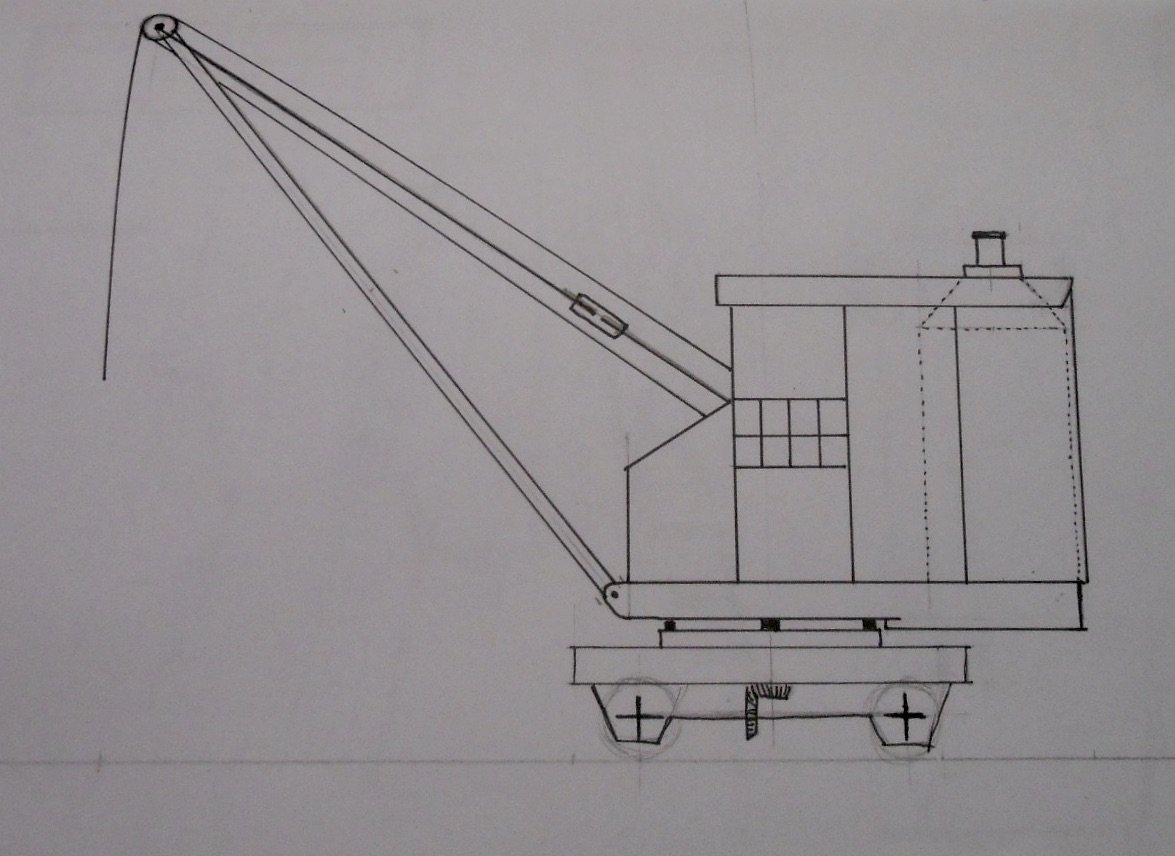
I seem to have spent the last week or so being busy to little effect. It's been all about painting the quayside surfaces, using multiple washes of acrylics. Started by using a mix of black and Tamiya 'deck tan', which worked well enough, but then, in trying to get a darker mortar colour, I used too much black and had to start again - including lightly sanding the surface back a bit. Half a dozen new washes takes to what you can see in the photos. Not exactly a huge change, with the wooden posts probably the most noticeable. There's also been some tidying up around the edges, including the base of the signal post. To brighten things up, have included a WL&WR train in the scene, with Richard Chown's superb model of 'Shannon' [now nearly 50 years old] at the head of a 'Mail Goods', comprising three scratch built vehicles of my own. Am starting to get a bit bored with all this scenic work of late, but what this area now needs is a range of details/cameos, so am off to explore various websites for things like packing cases, barrels and so on in the hope of bringing the scene to life. Am also wondering whether it is time to have a go at the travelling crane too. Did a sketch of what one might look like a few months ago, so let's see where the Muse takes me!
- 257 replies
-
- 16
-
-
-
Seems no matter how contemporary you try to be, barely a day goes by and it becomes history!