Horsetan
-
Posts
2,659 -
Joined
-
Last visited
-
Days Won
4
Content Type
Profiles
Forums
Events
Gallery
Blogs
Everything posted by Horsetan
-
Can't remember how much I paid for mine, but the rewheel to 21mm gauge was cheap.
-
Ernies Massive Irish 1930's to 2005 Photo Archive
Horsetan replied to Glenderg's topic in Photos & Videos of the Prototype
In some of the SLNC photos, you can actually see the way the rail head undulates on each length due to long-term wear. -
Turns the water black in the morning....
-
Ernies Massive Irish 1930's to 2005 Photo Archive
Horsetan replied to Glenderg's topic in Photos & Videos of the Prototype
"St. Luke's Youth Group!" -
Ernies Massive Irish 1930's to 2005 Photo Archive
Horsetan replied to Glenderg's topic in Photos & Videos of the Prototype
Just imagine it's the caravan that Father Ted, Father Jack and Father Dougal stayed in when they went on holiday! -
Ernies Massive Irish 1930's to 2005 Photo Archive
Horsetan replied to Glenderg's topic in Photos & Videos of the Prototype
-
....and to add some extra elements to that frisson of uncertainty, the oncoming driver may well be under the influence of his cannabis habit, may have no insurance, and the car he's driving may be on cloned registration plates since it doesn't have any valid MoT or Vehicle Excise Duty. And he may not even have a valid licence....
-
Meanwhile, over at Post Office Ltd..... Meanwhile, over at Dublin Bus....
-
Jaysus....
-
Block of flats, was it?
-
Arthur Kimber, the man behind the Northeastern Kits range of 4mm scale etched brass NER locomotives, is in his 90s and apparently still designing new kits, so.....
-
It's almost as if he senses that his time upon this Earth is limited, so he's going to build as many models as possible in the remaining lifespan....!
-
Would you model in 21mm if RTR track and models were readily available?
Horsetan replied to BosKonay's topic in Irish Models
With current technology, you can forget about doing Pandrol. -
Would you model in 21mm if RTR track and models were readily available?
Horsetan replied to BosKonay's topic in Irish Models
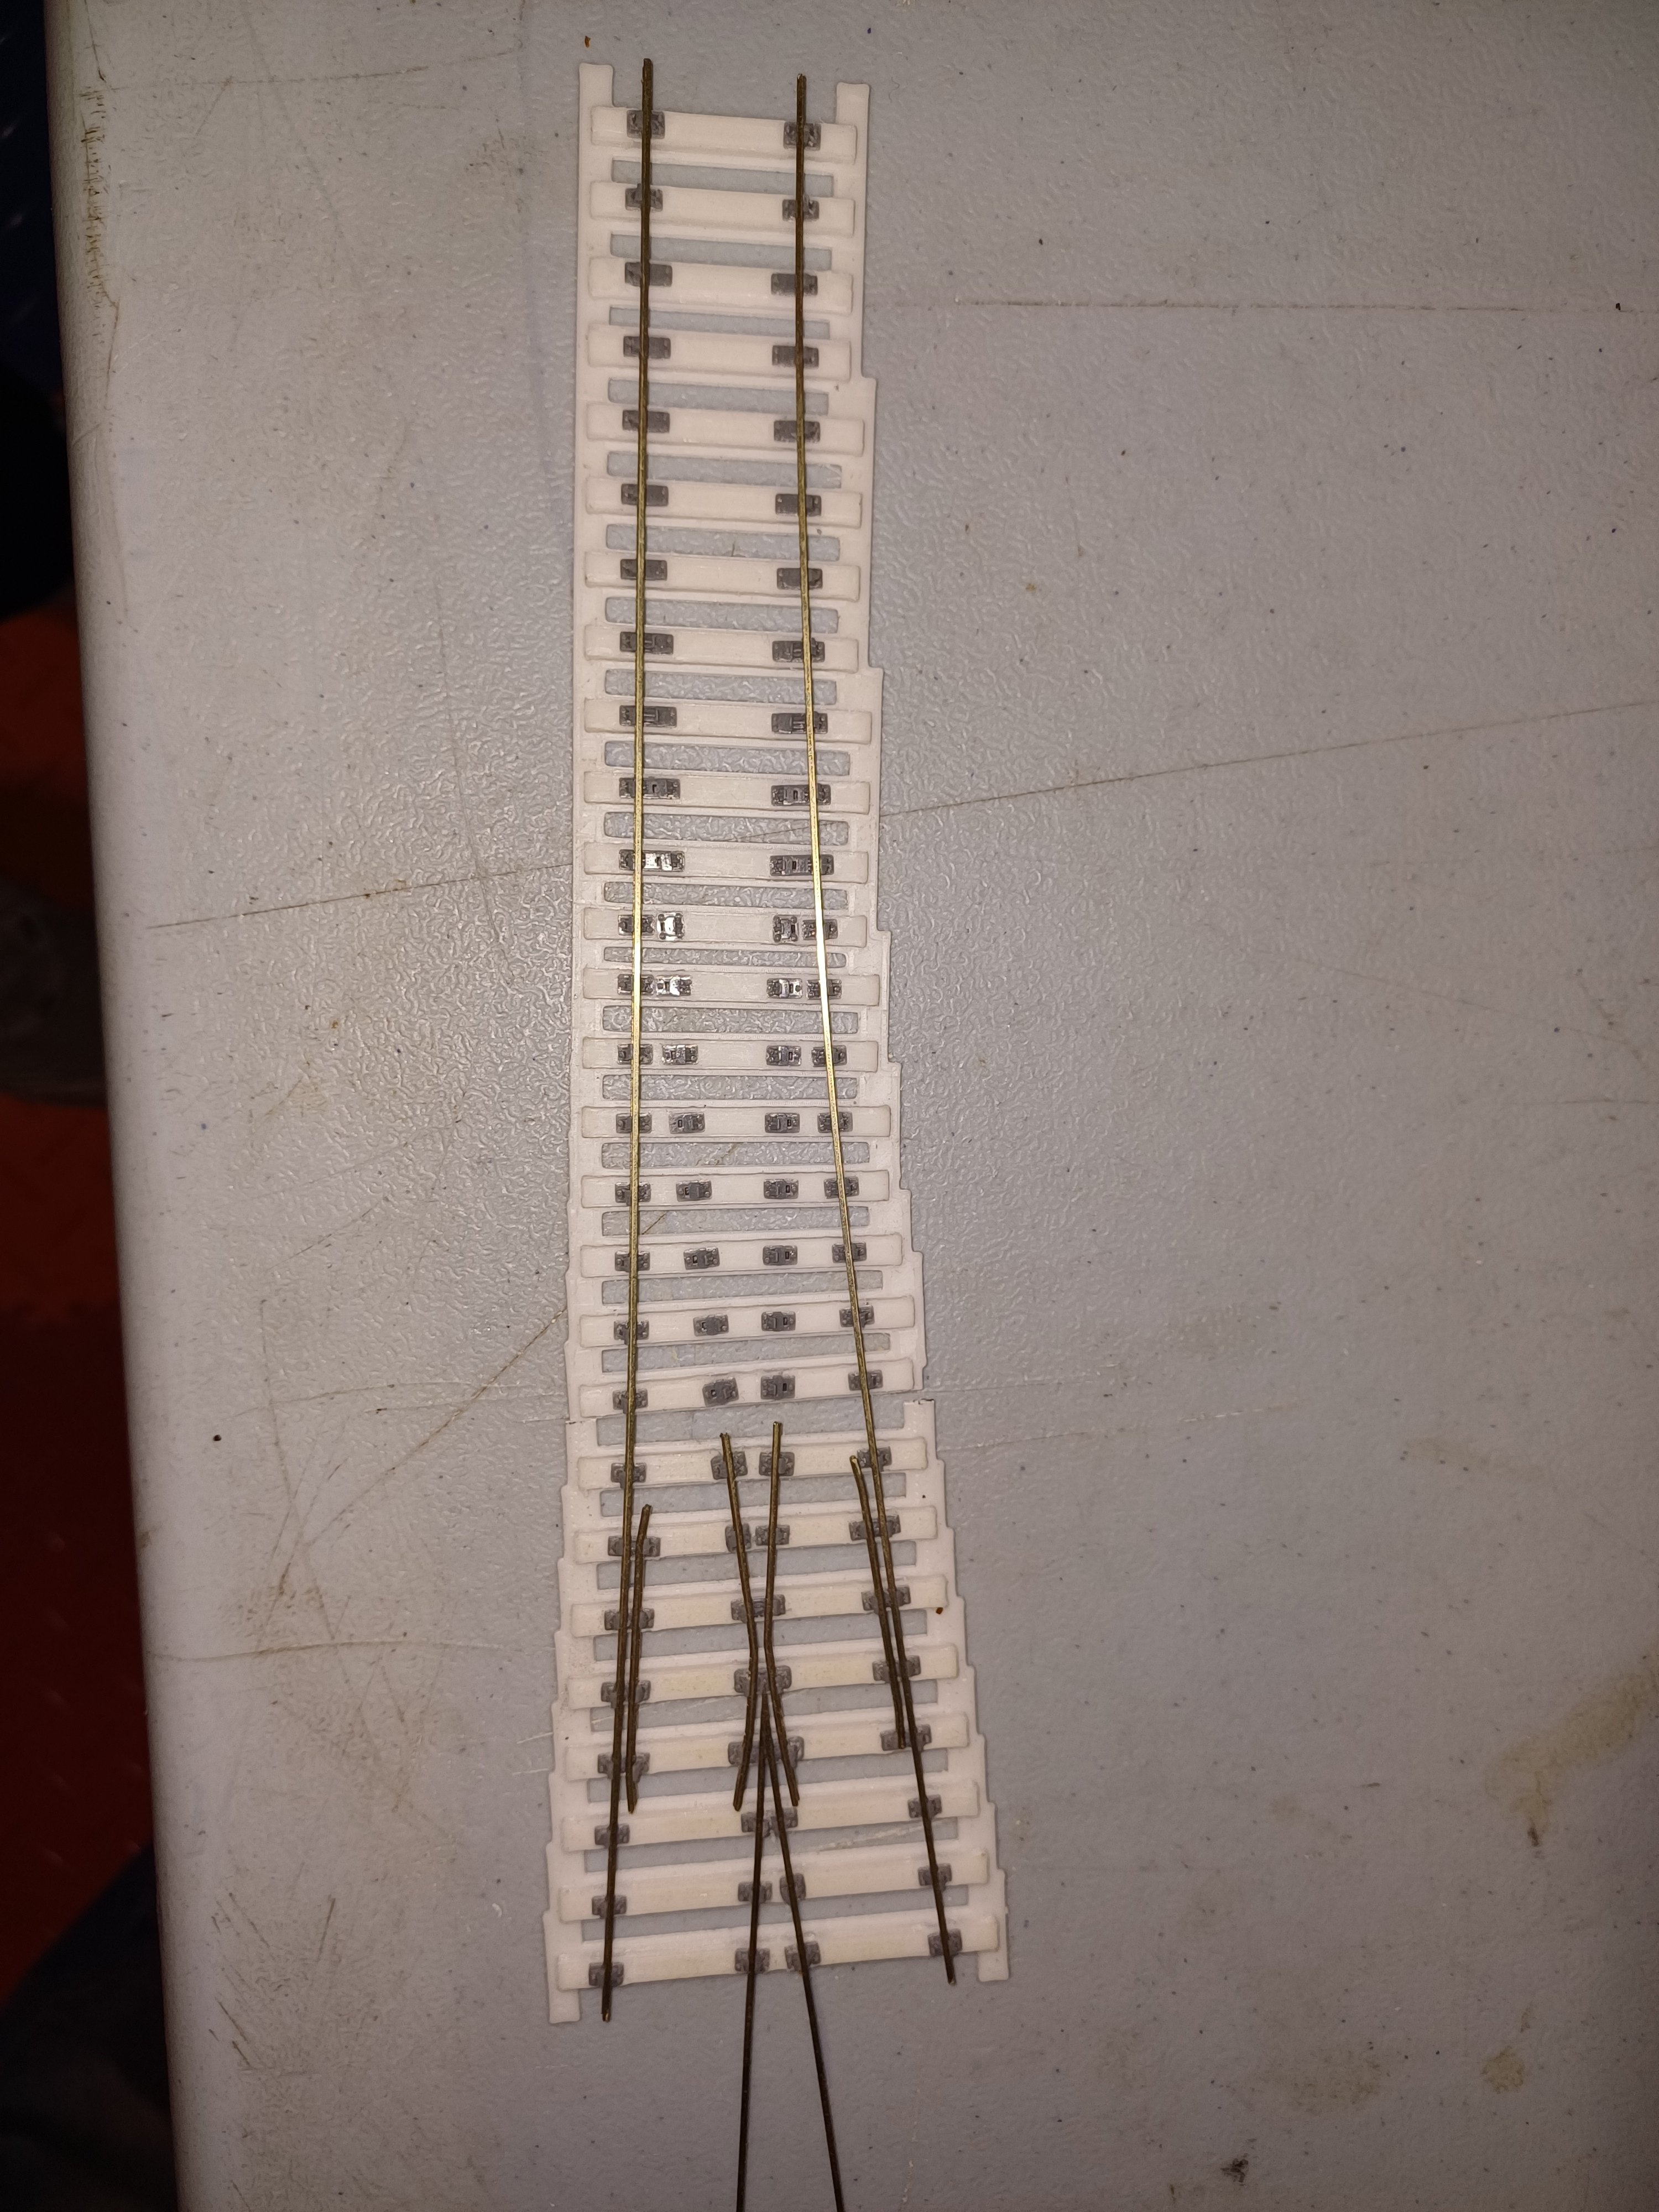
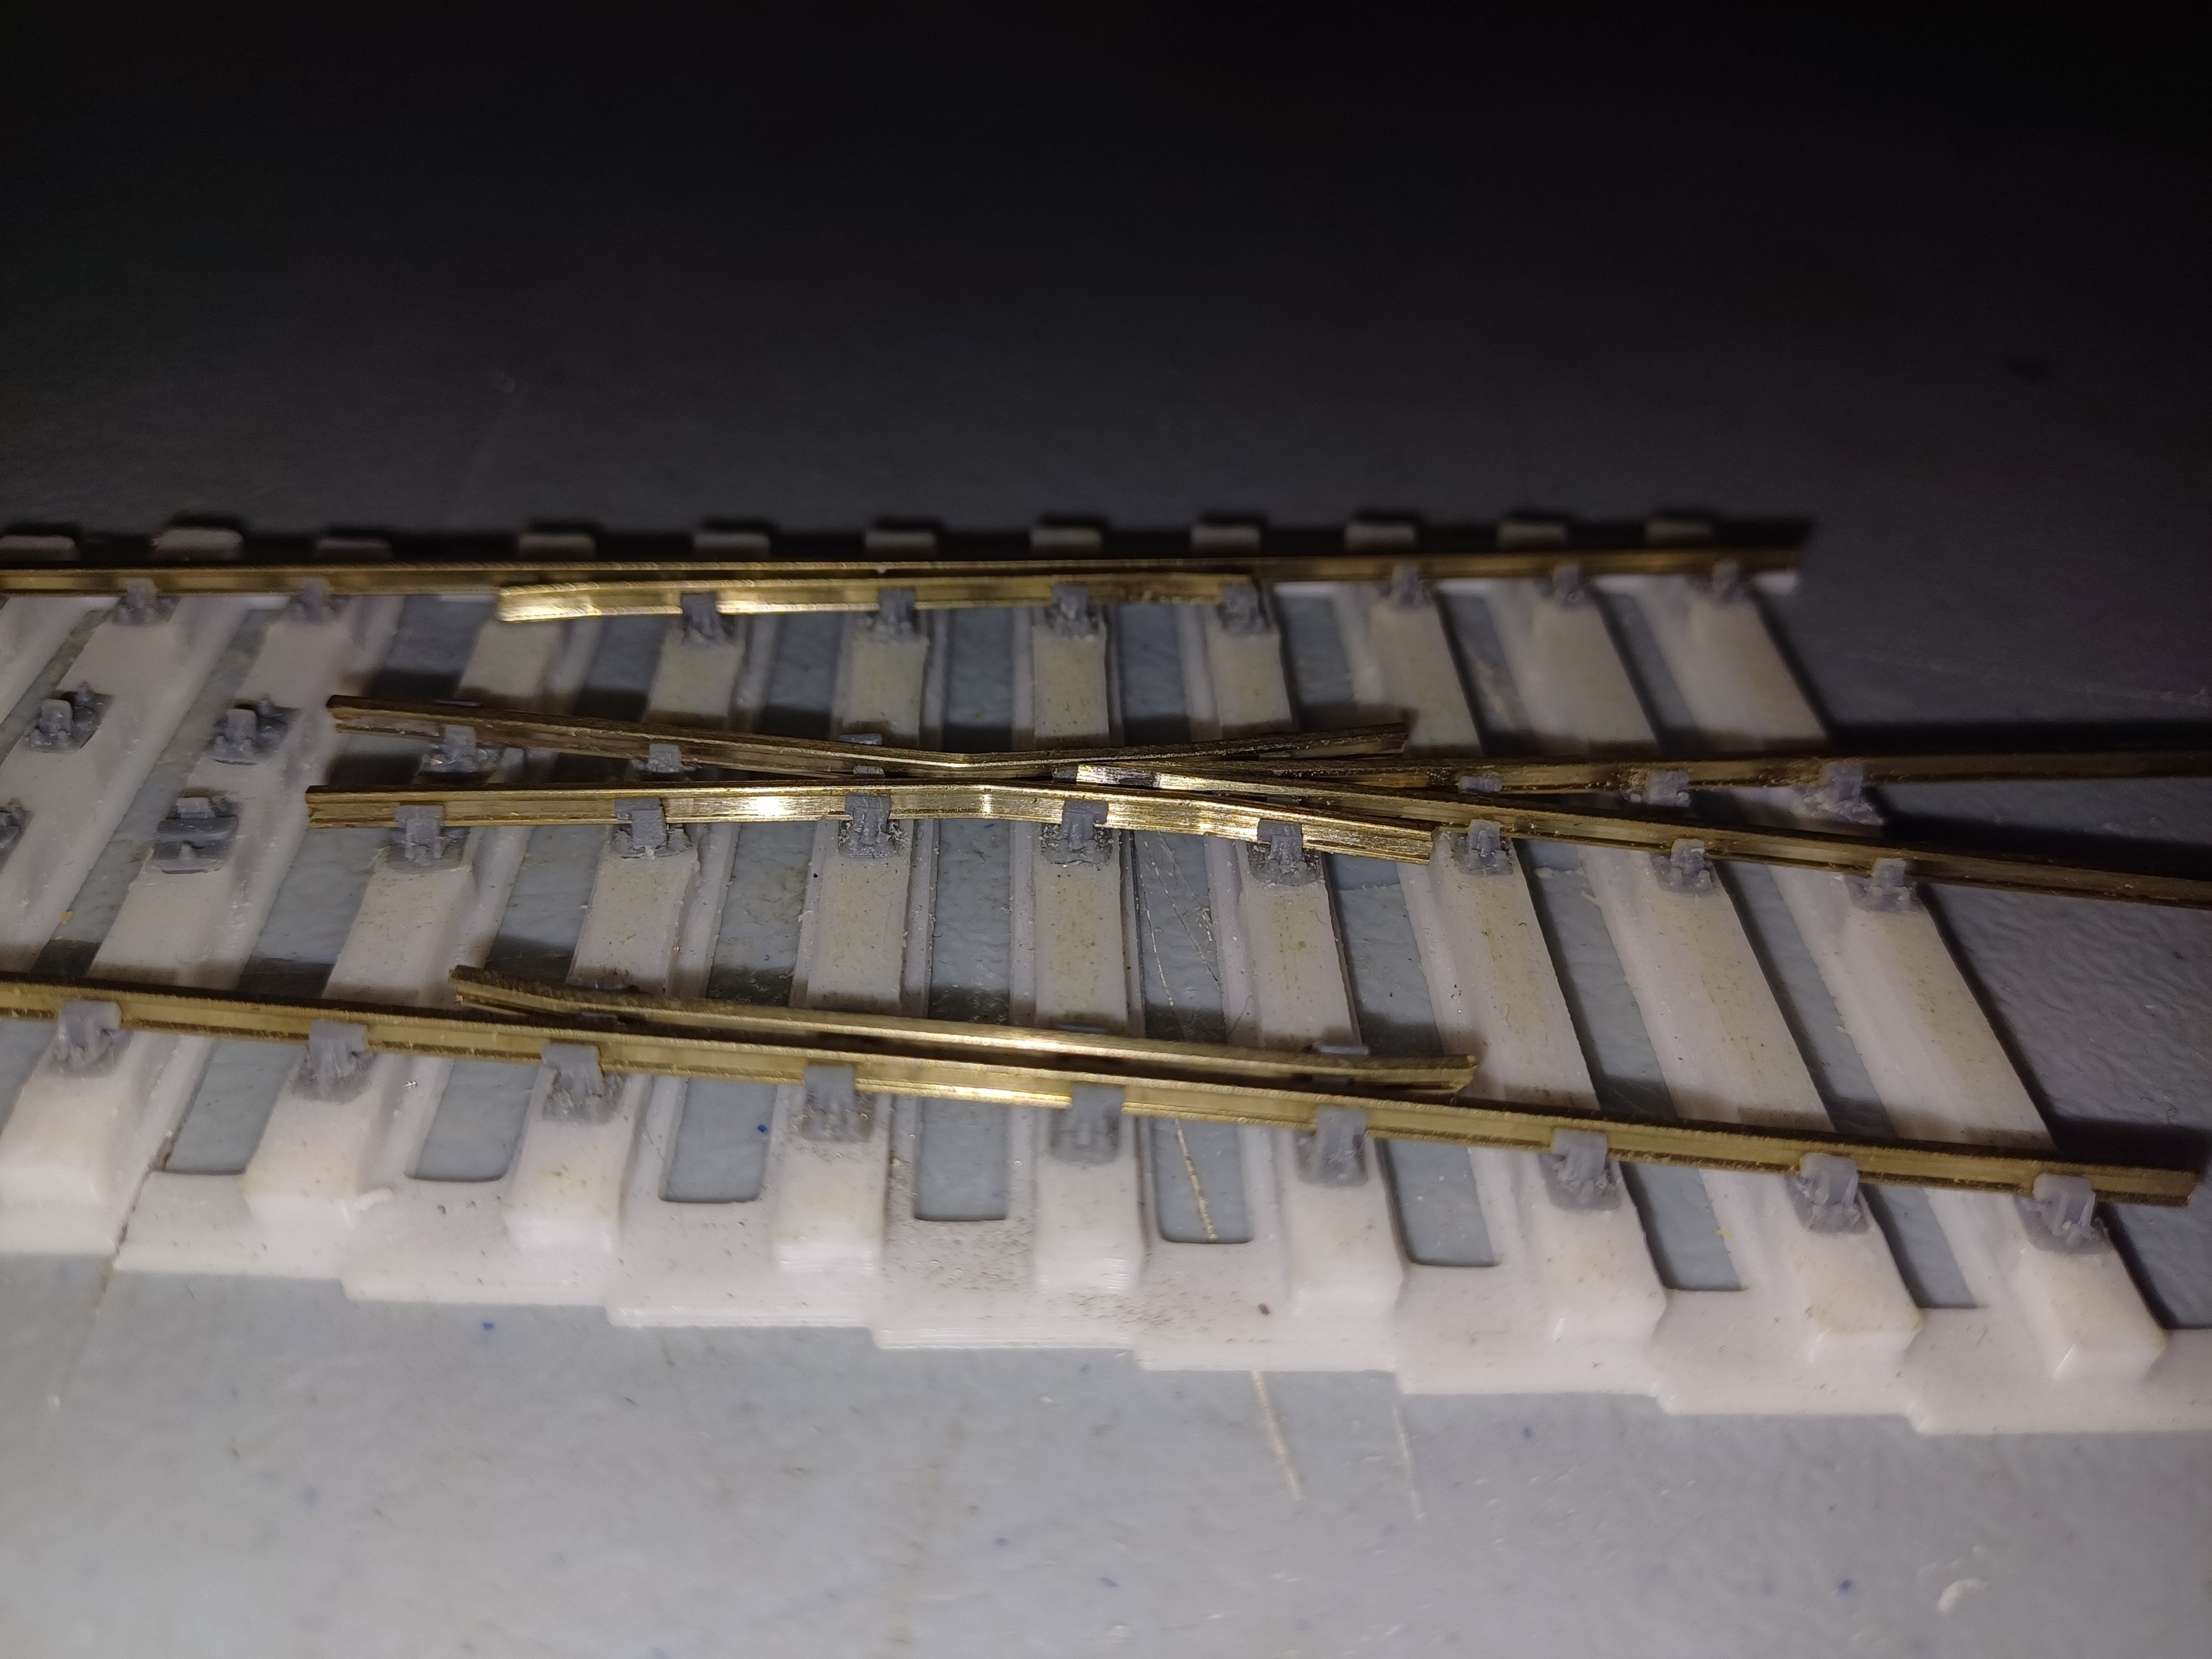
Templot will do pretty much any gauge you specify, within reason. I've seen a Plugtrack sample in the flesh and, for what it is, it's very good since you can potentially print out endless stretches of P4-standard 5'3" with pointwork to match. The only thing it doesn't do is have chairs that replicate the inward 1-in-20 tilt of the rail heads - the software isn't advanced enough to do this - so in this respect it's not that different to the old Hornby-Dublo and Triang-Hornby RTR track with strictly vertical rail (teamed with steamroller tyres and pizza cutter flanges)
-
I wonder who the original maker / supplier of the gear set is. It's not unknown for the individual gears to be machined from unsuitable or incompatible stock, leading to premature wear or stripping within a comparatively short timespan.
-
There must be at least fifty shades of it
-
Will they now.....
-
I suspect the last thing Paddy wants is a room full of random spares sitting there potentially beyond his retirement age.
-
I'm not sure airships needed any help being phased out after the Hindenburg thing.
-
Donedeal is where all those cars from over the water get flipped!
-
To the Chinese, everything is fair game. But the devil take you if you poach anything of theirs.....
-
If they are like hen's teeth, try a grand. Each. Should see off the flippers/price gougers.
-
I had both North and South. South was alright as far as it went, but did seem curiously underdeveloped at the Dublin end, as if the programmers had lost patience by this time and just wanted to get it all signed off.
-
I'd have thought Lough Erne was more promising as a vanity project, no?
-
"That's a particularly milky cup of tea, Mrs. Doyle..."