
Darius43
-
Posts
1,351 -
Joined
-
Last visited
-
Days Won
104
Content Type
Profiles
Forums
Events
Gallery
Blogs
Community Map
Everything posted by Darius43
-
Adjacent buildings constructed. Cheers Darius
-
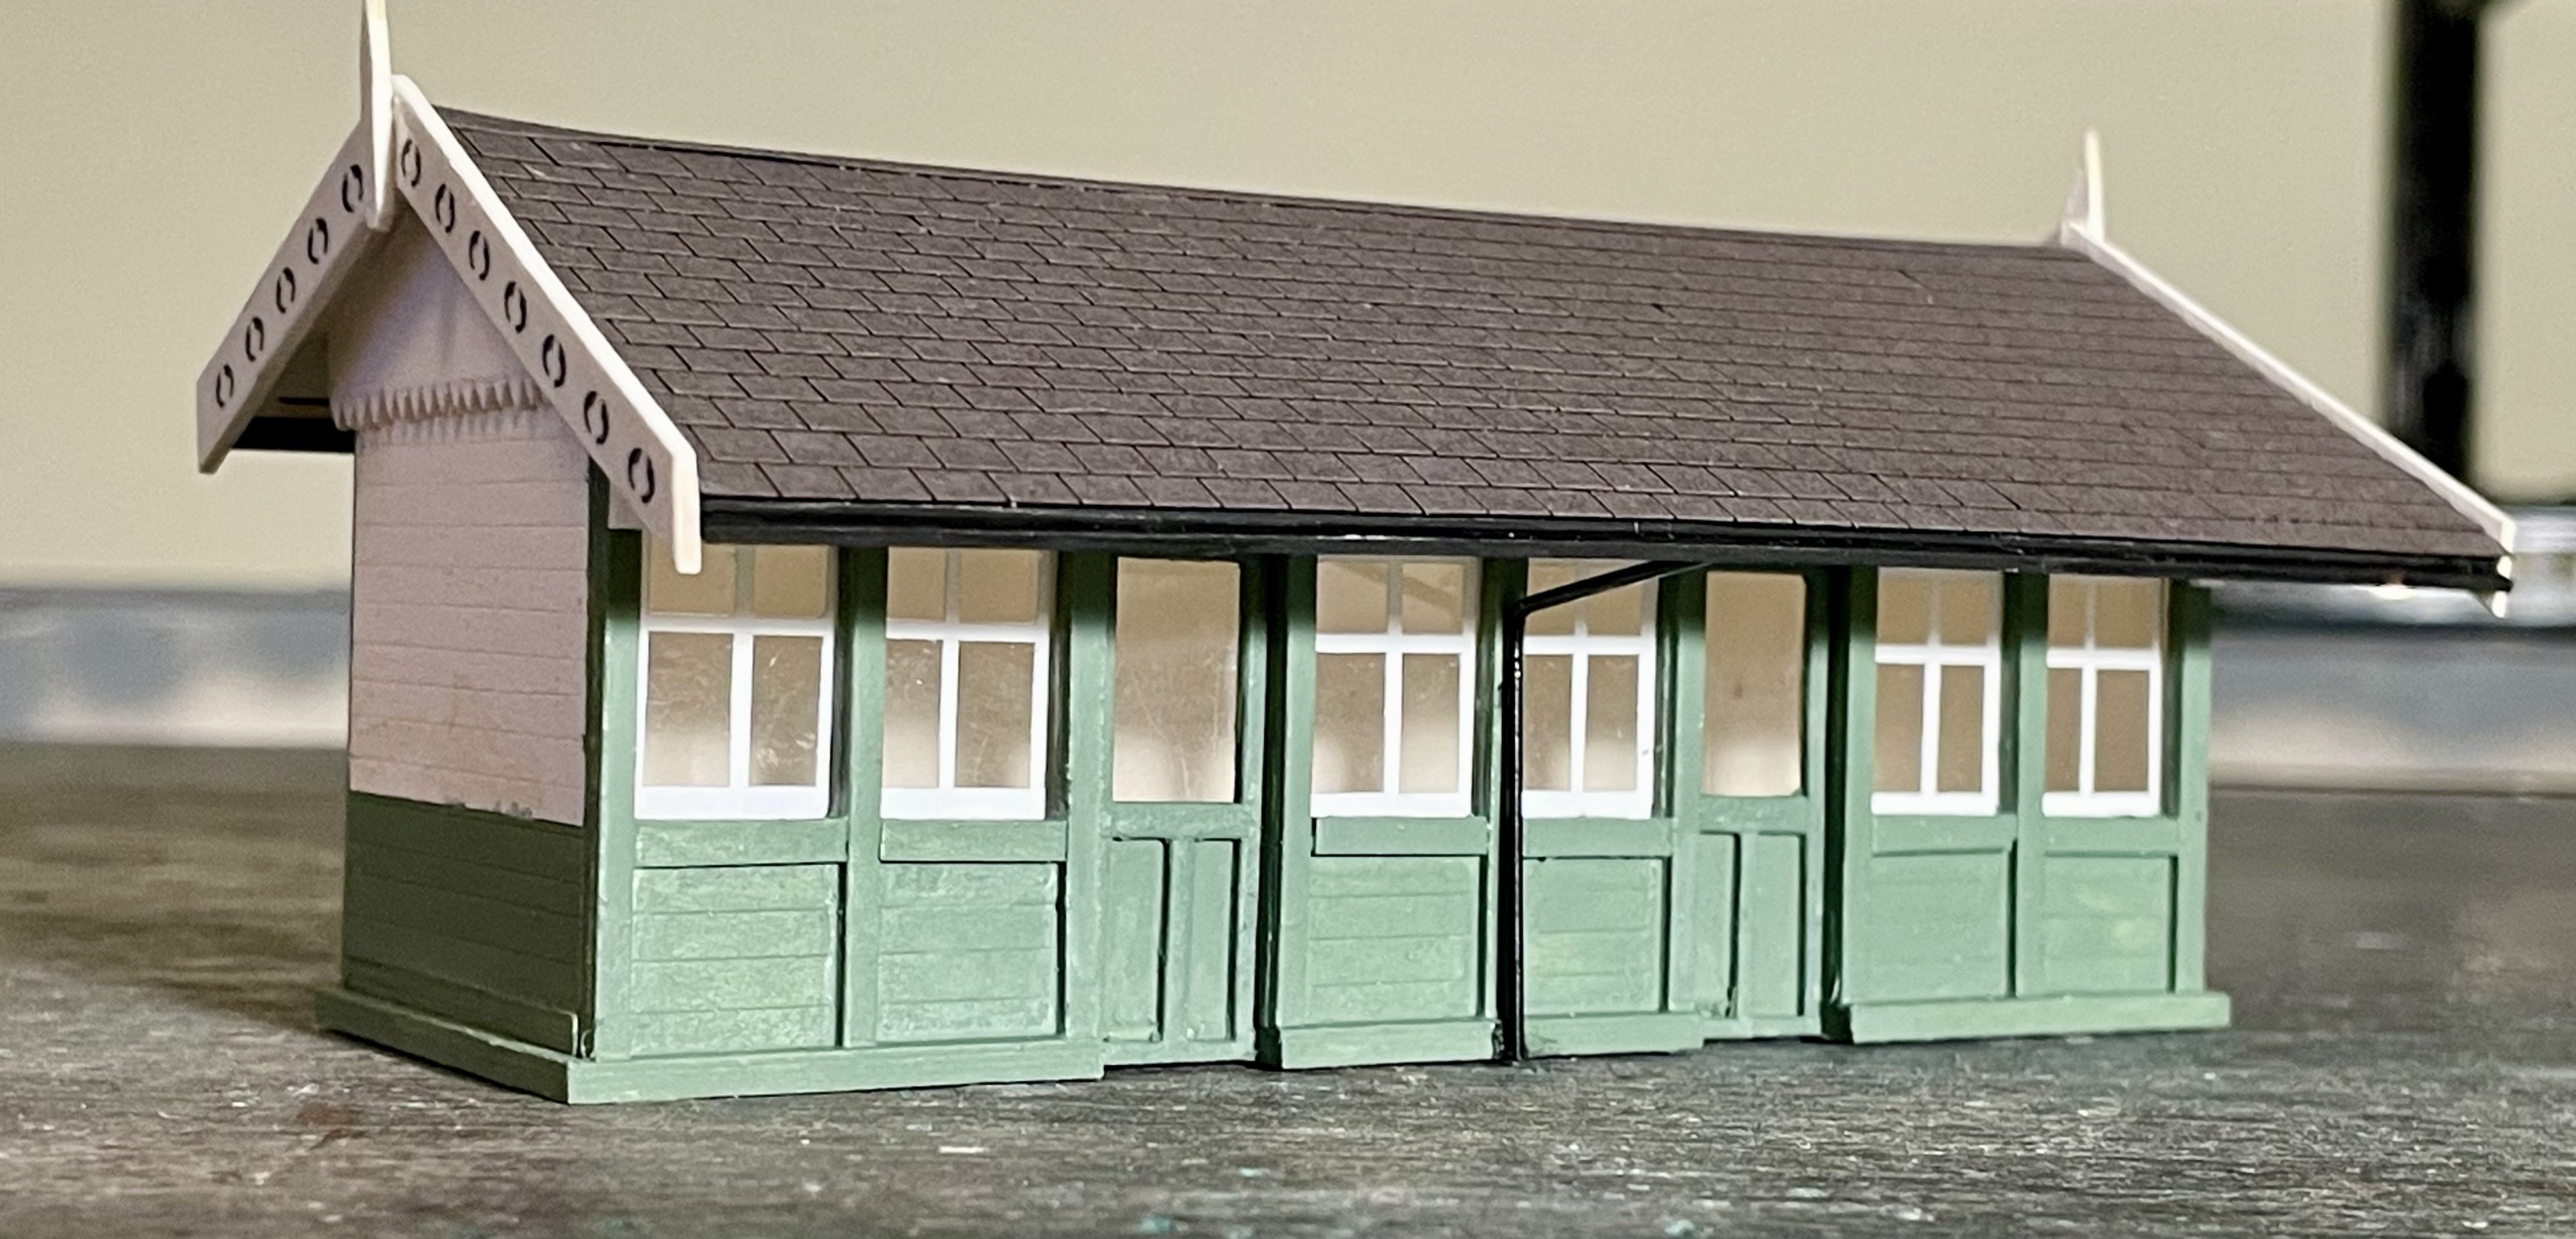
I drew the pattern big scaleee in MS Paint and then shrunk it and printed strips of them on clear decal paper. These strips were applied to the painted valences. Cheers Darius

-
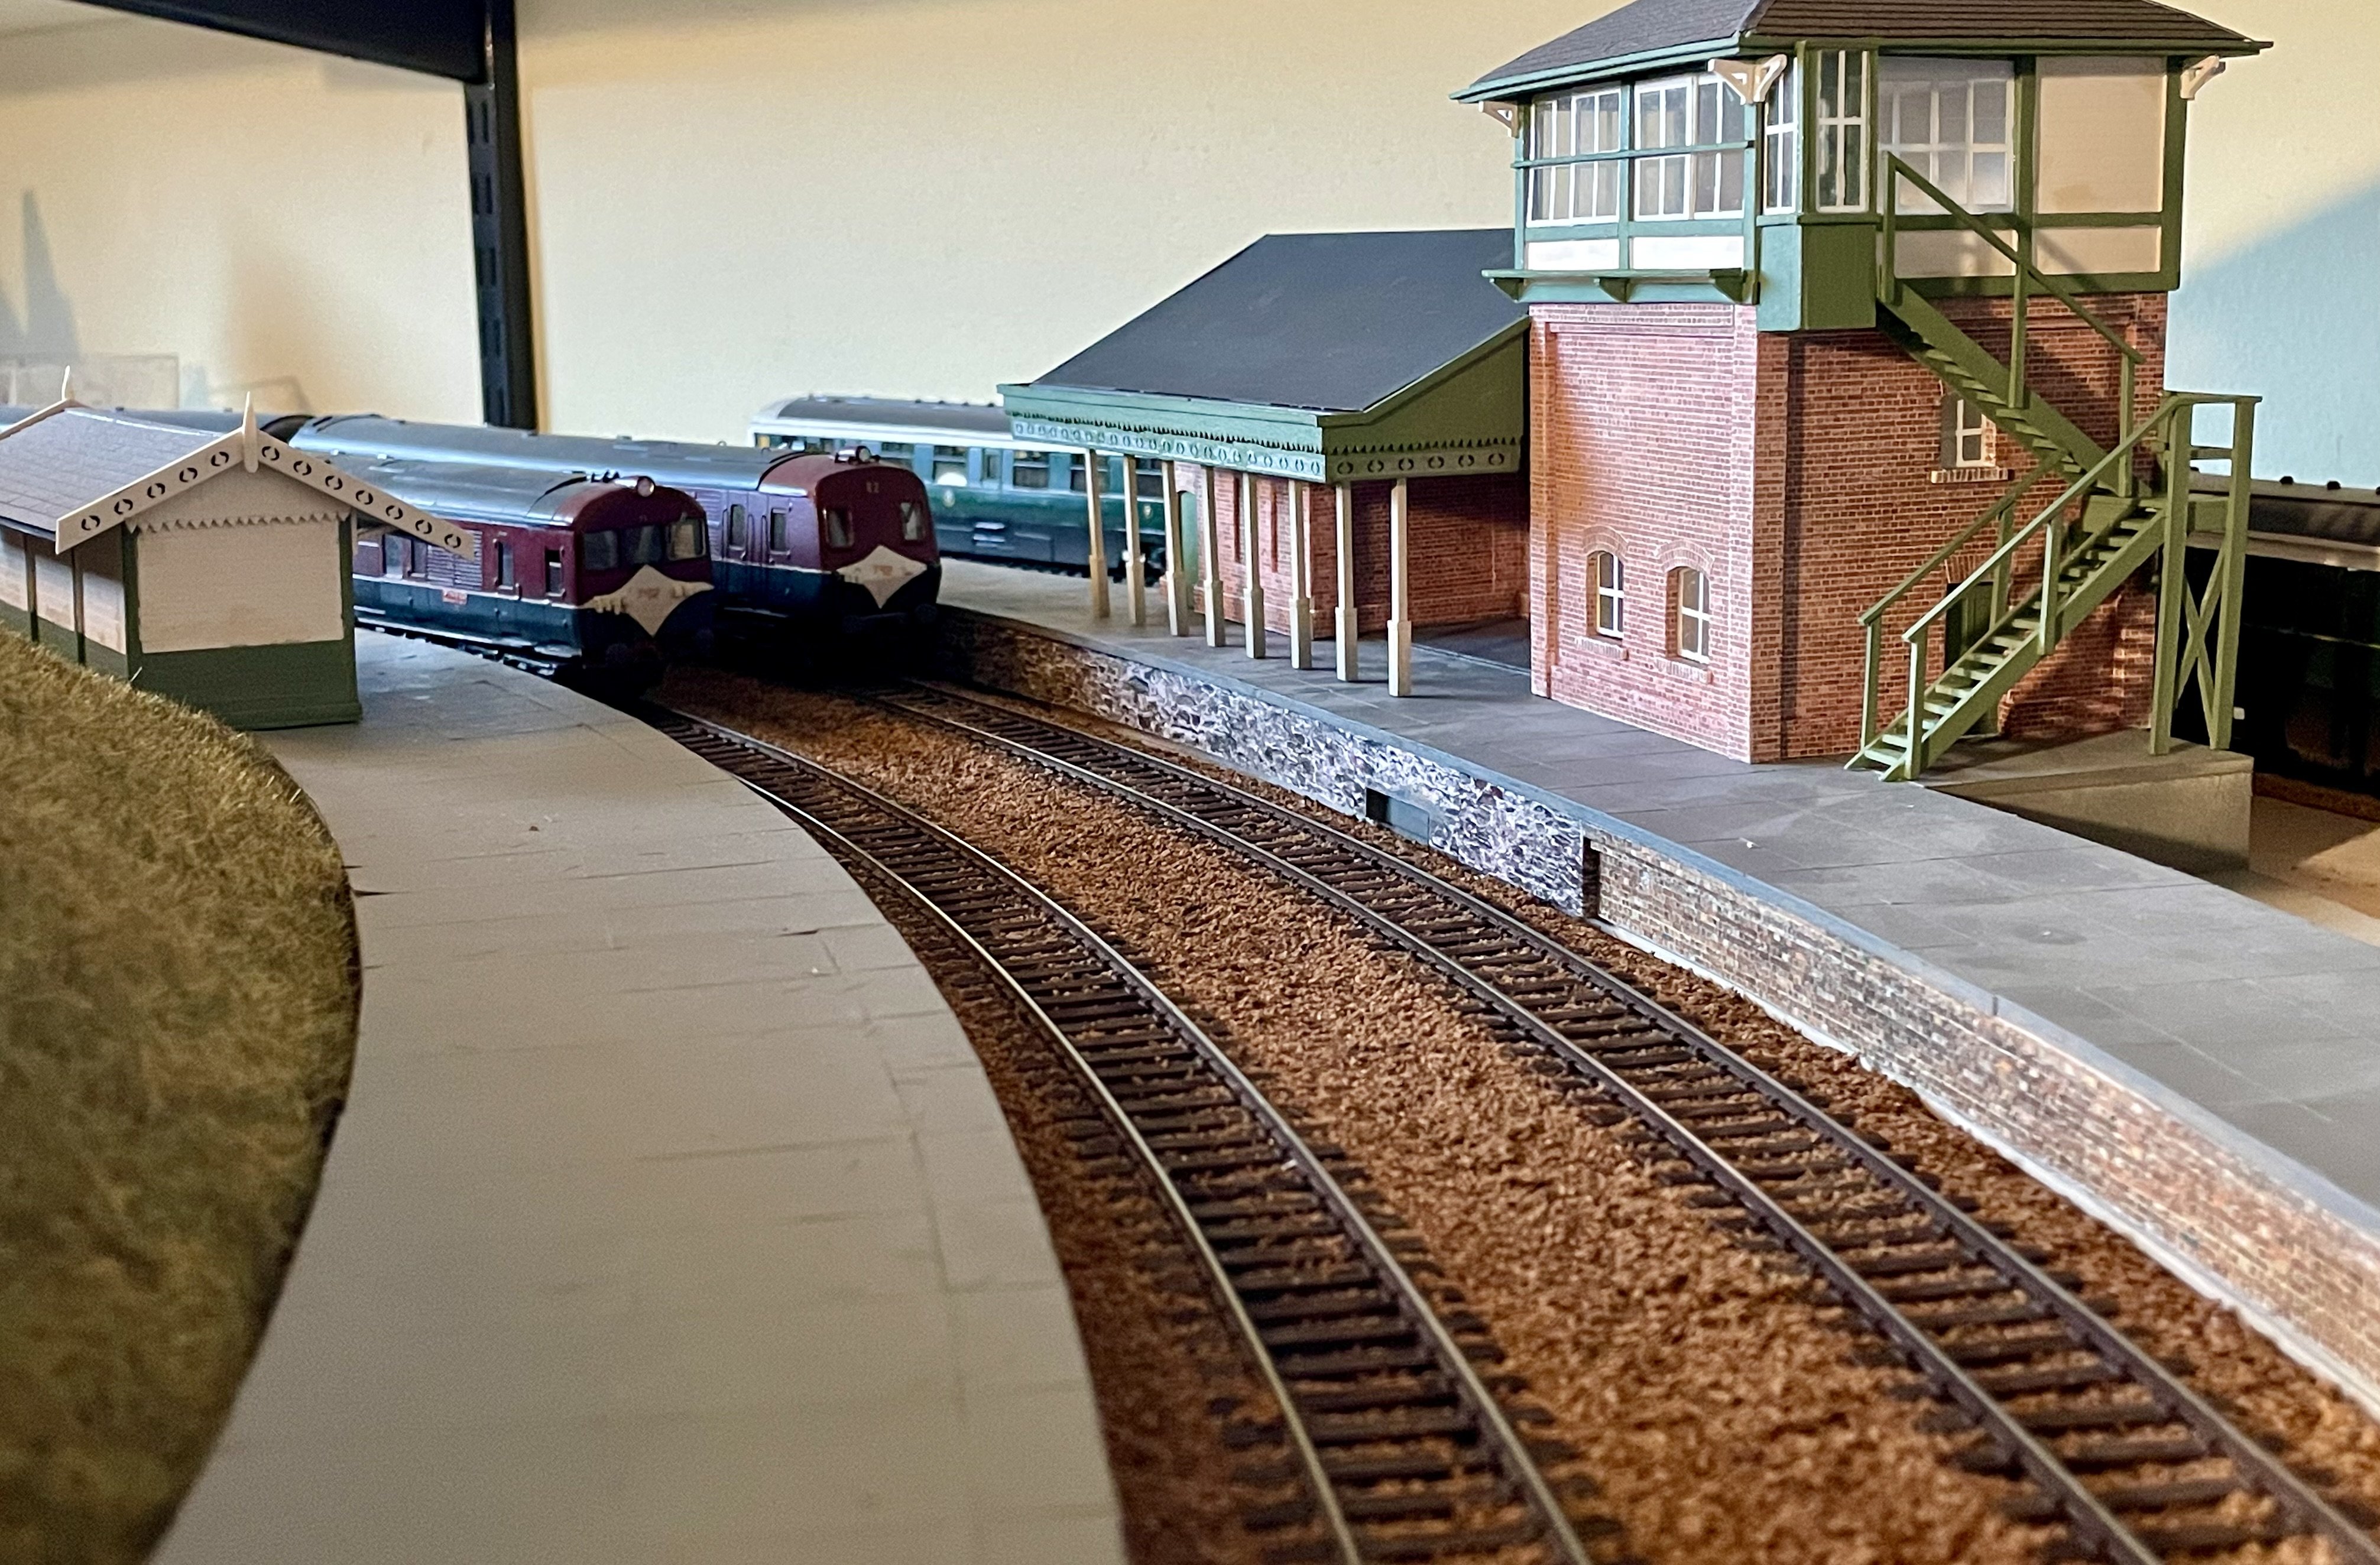
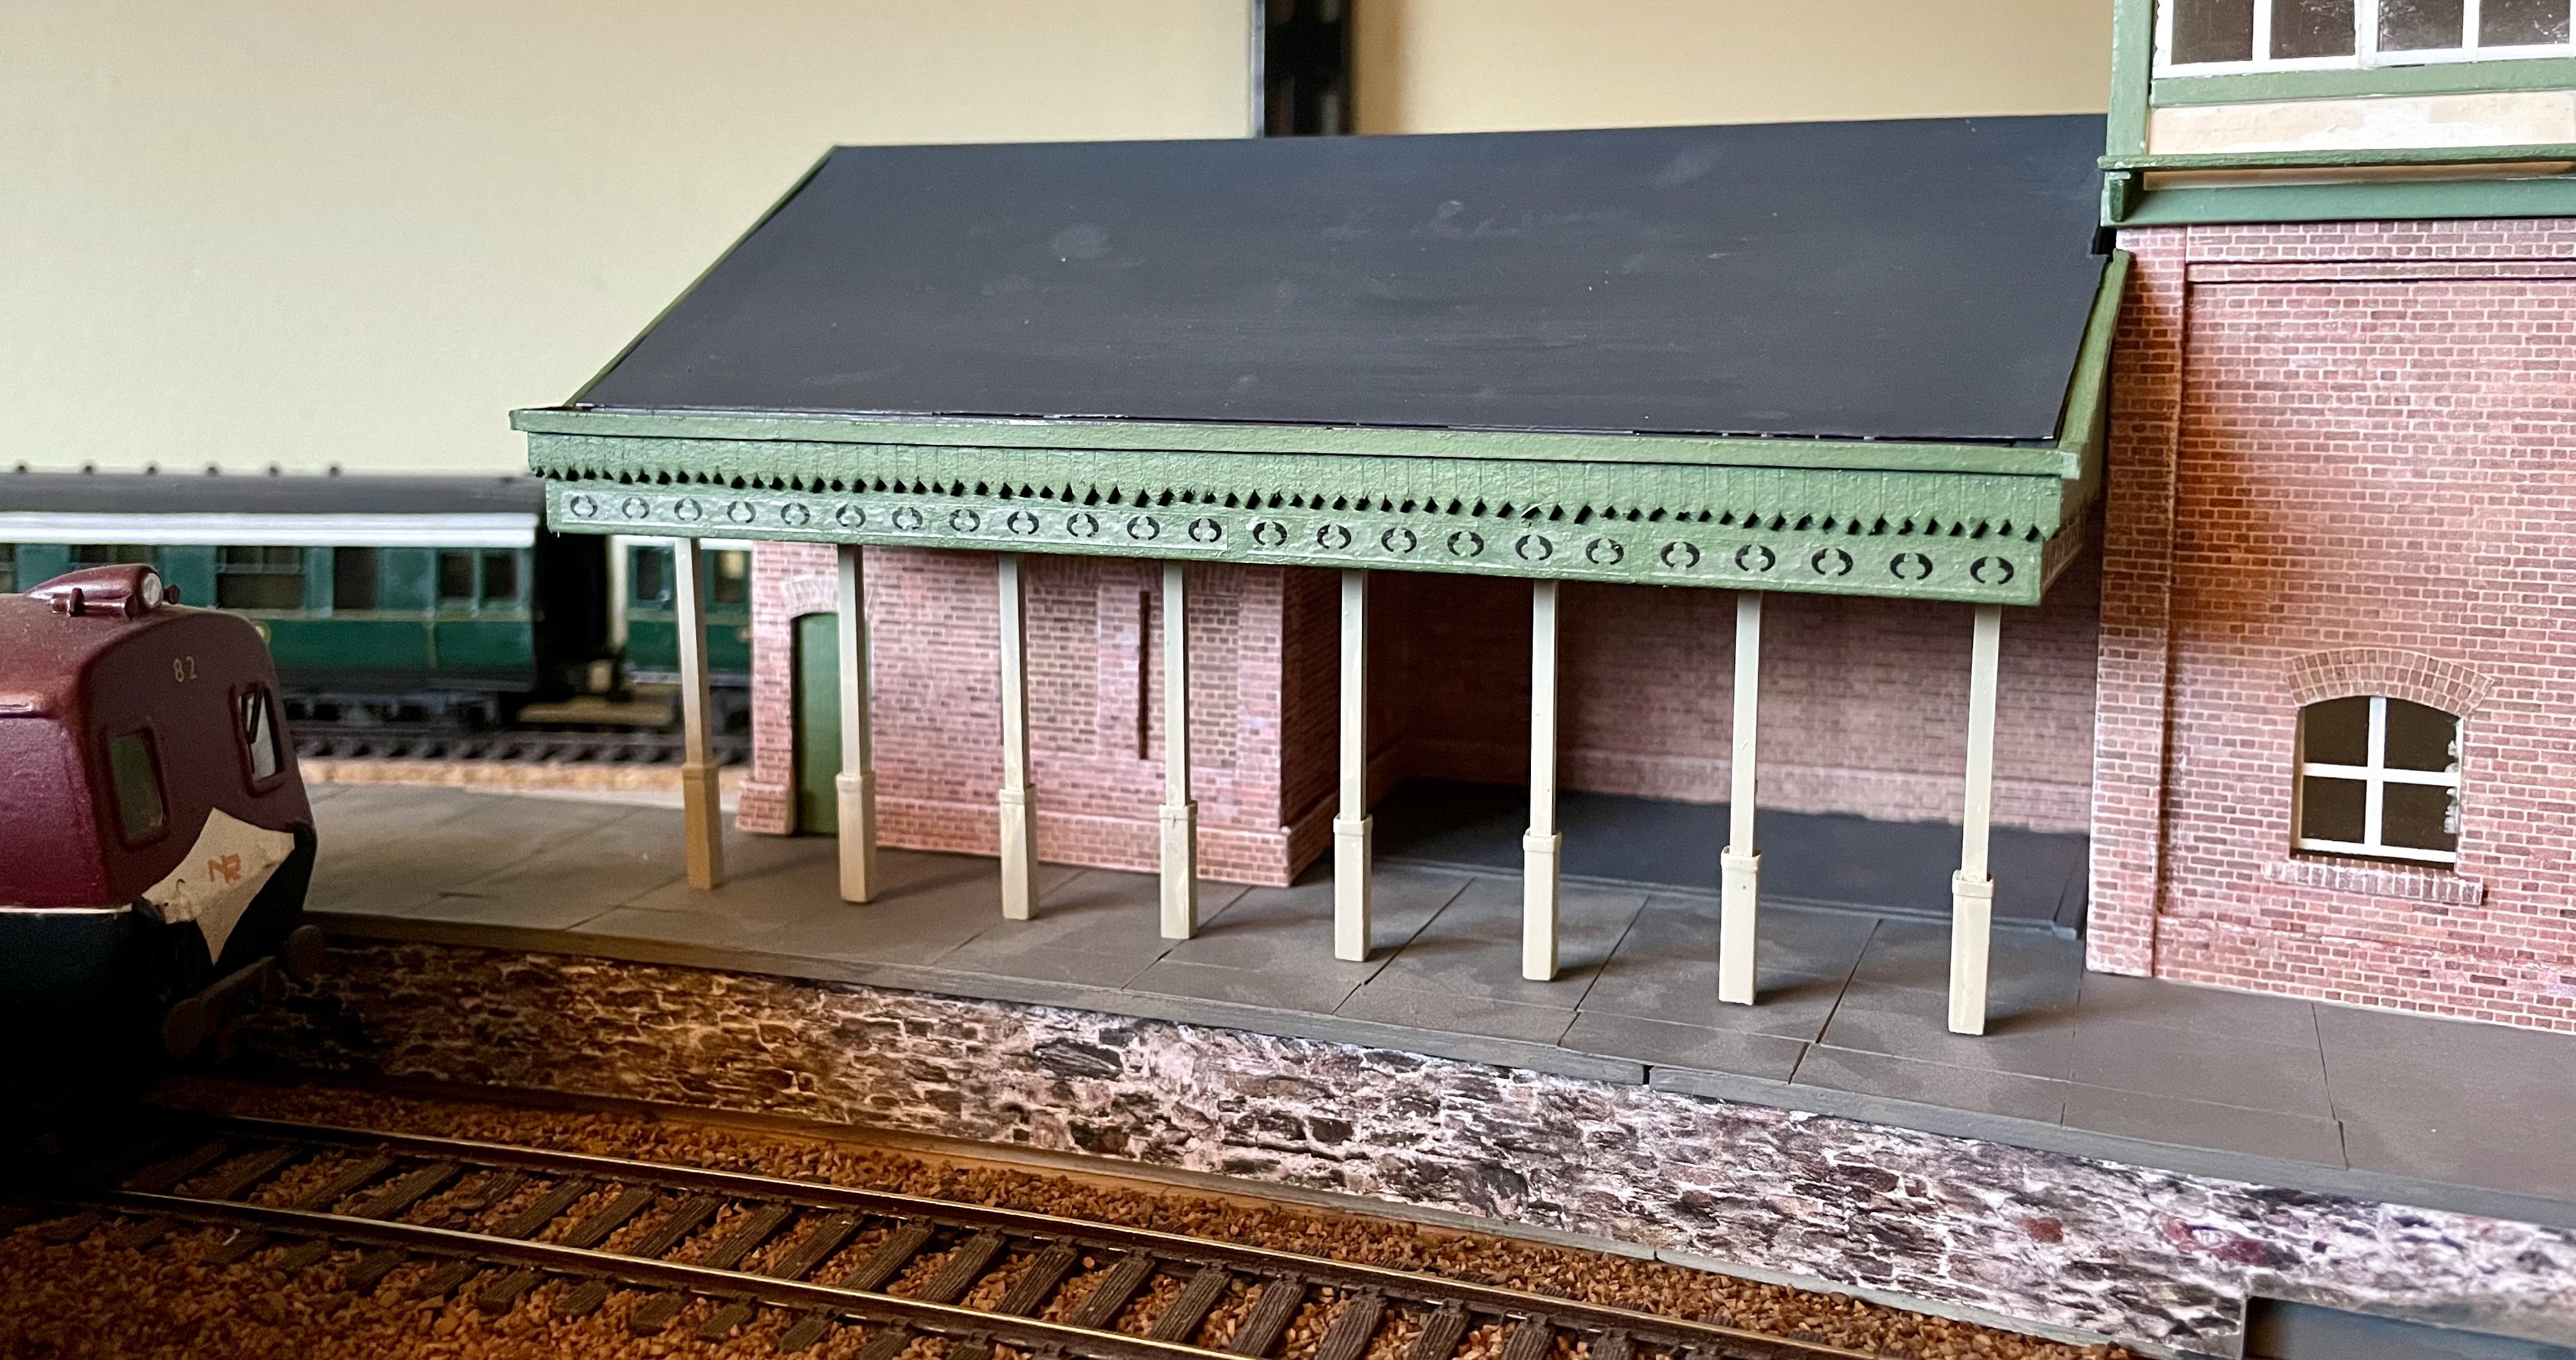
Columns painted and fitted. Cheers Darius
- 416 replies
-
- 15
-

-

-
Yeah, like I’ve never seen that one before
-
I was a civil/structural engineer for 39 years- just retiring now Cheers Darius
-
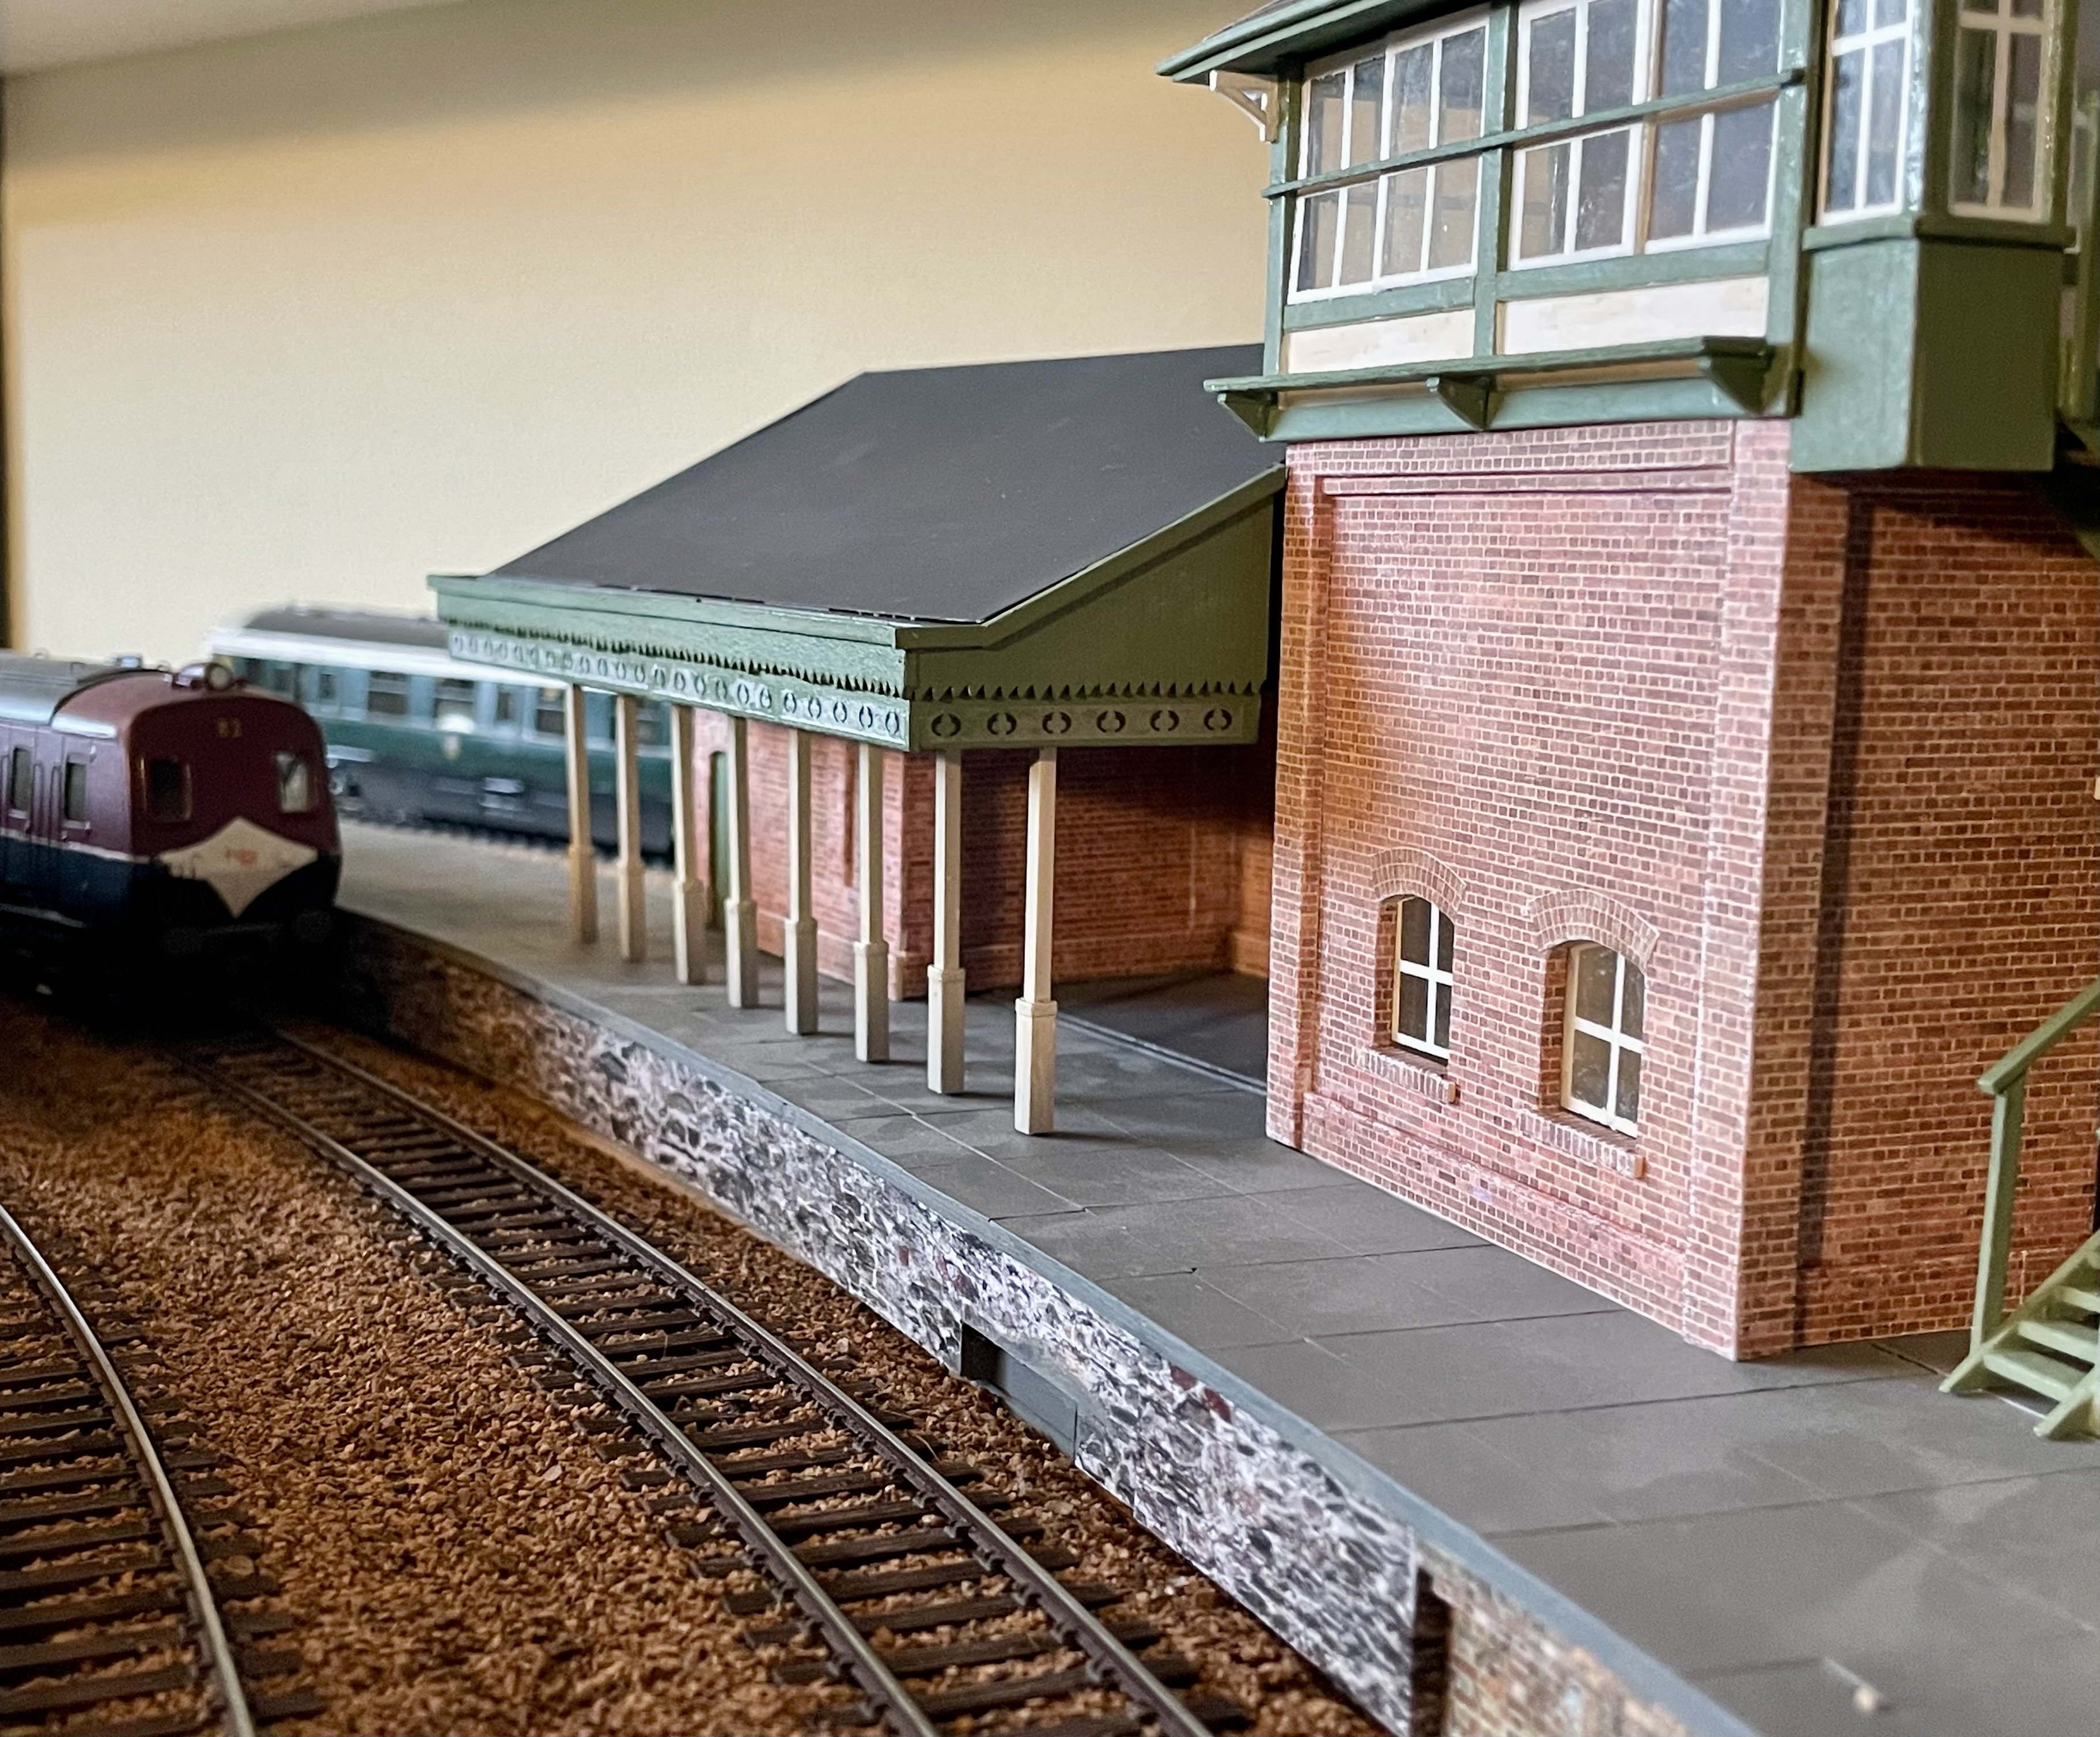
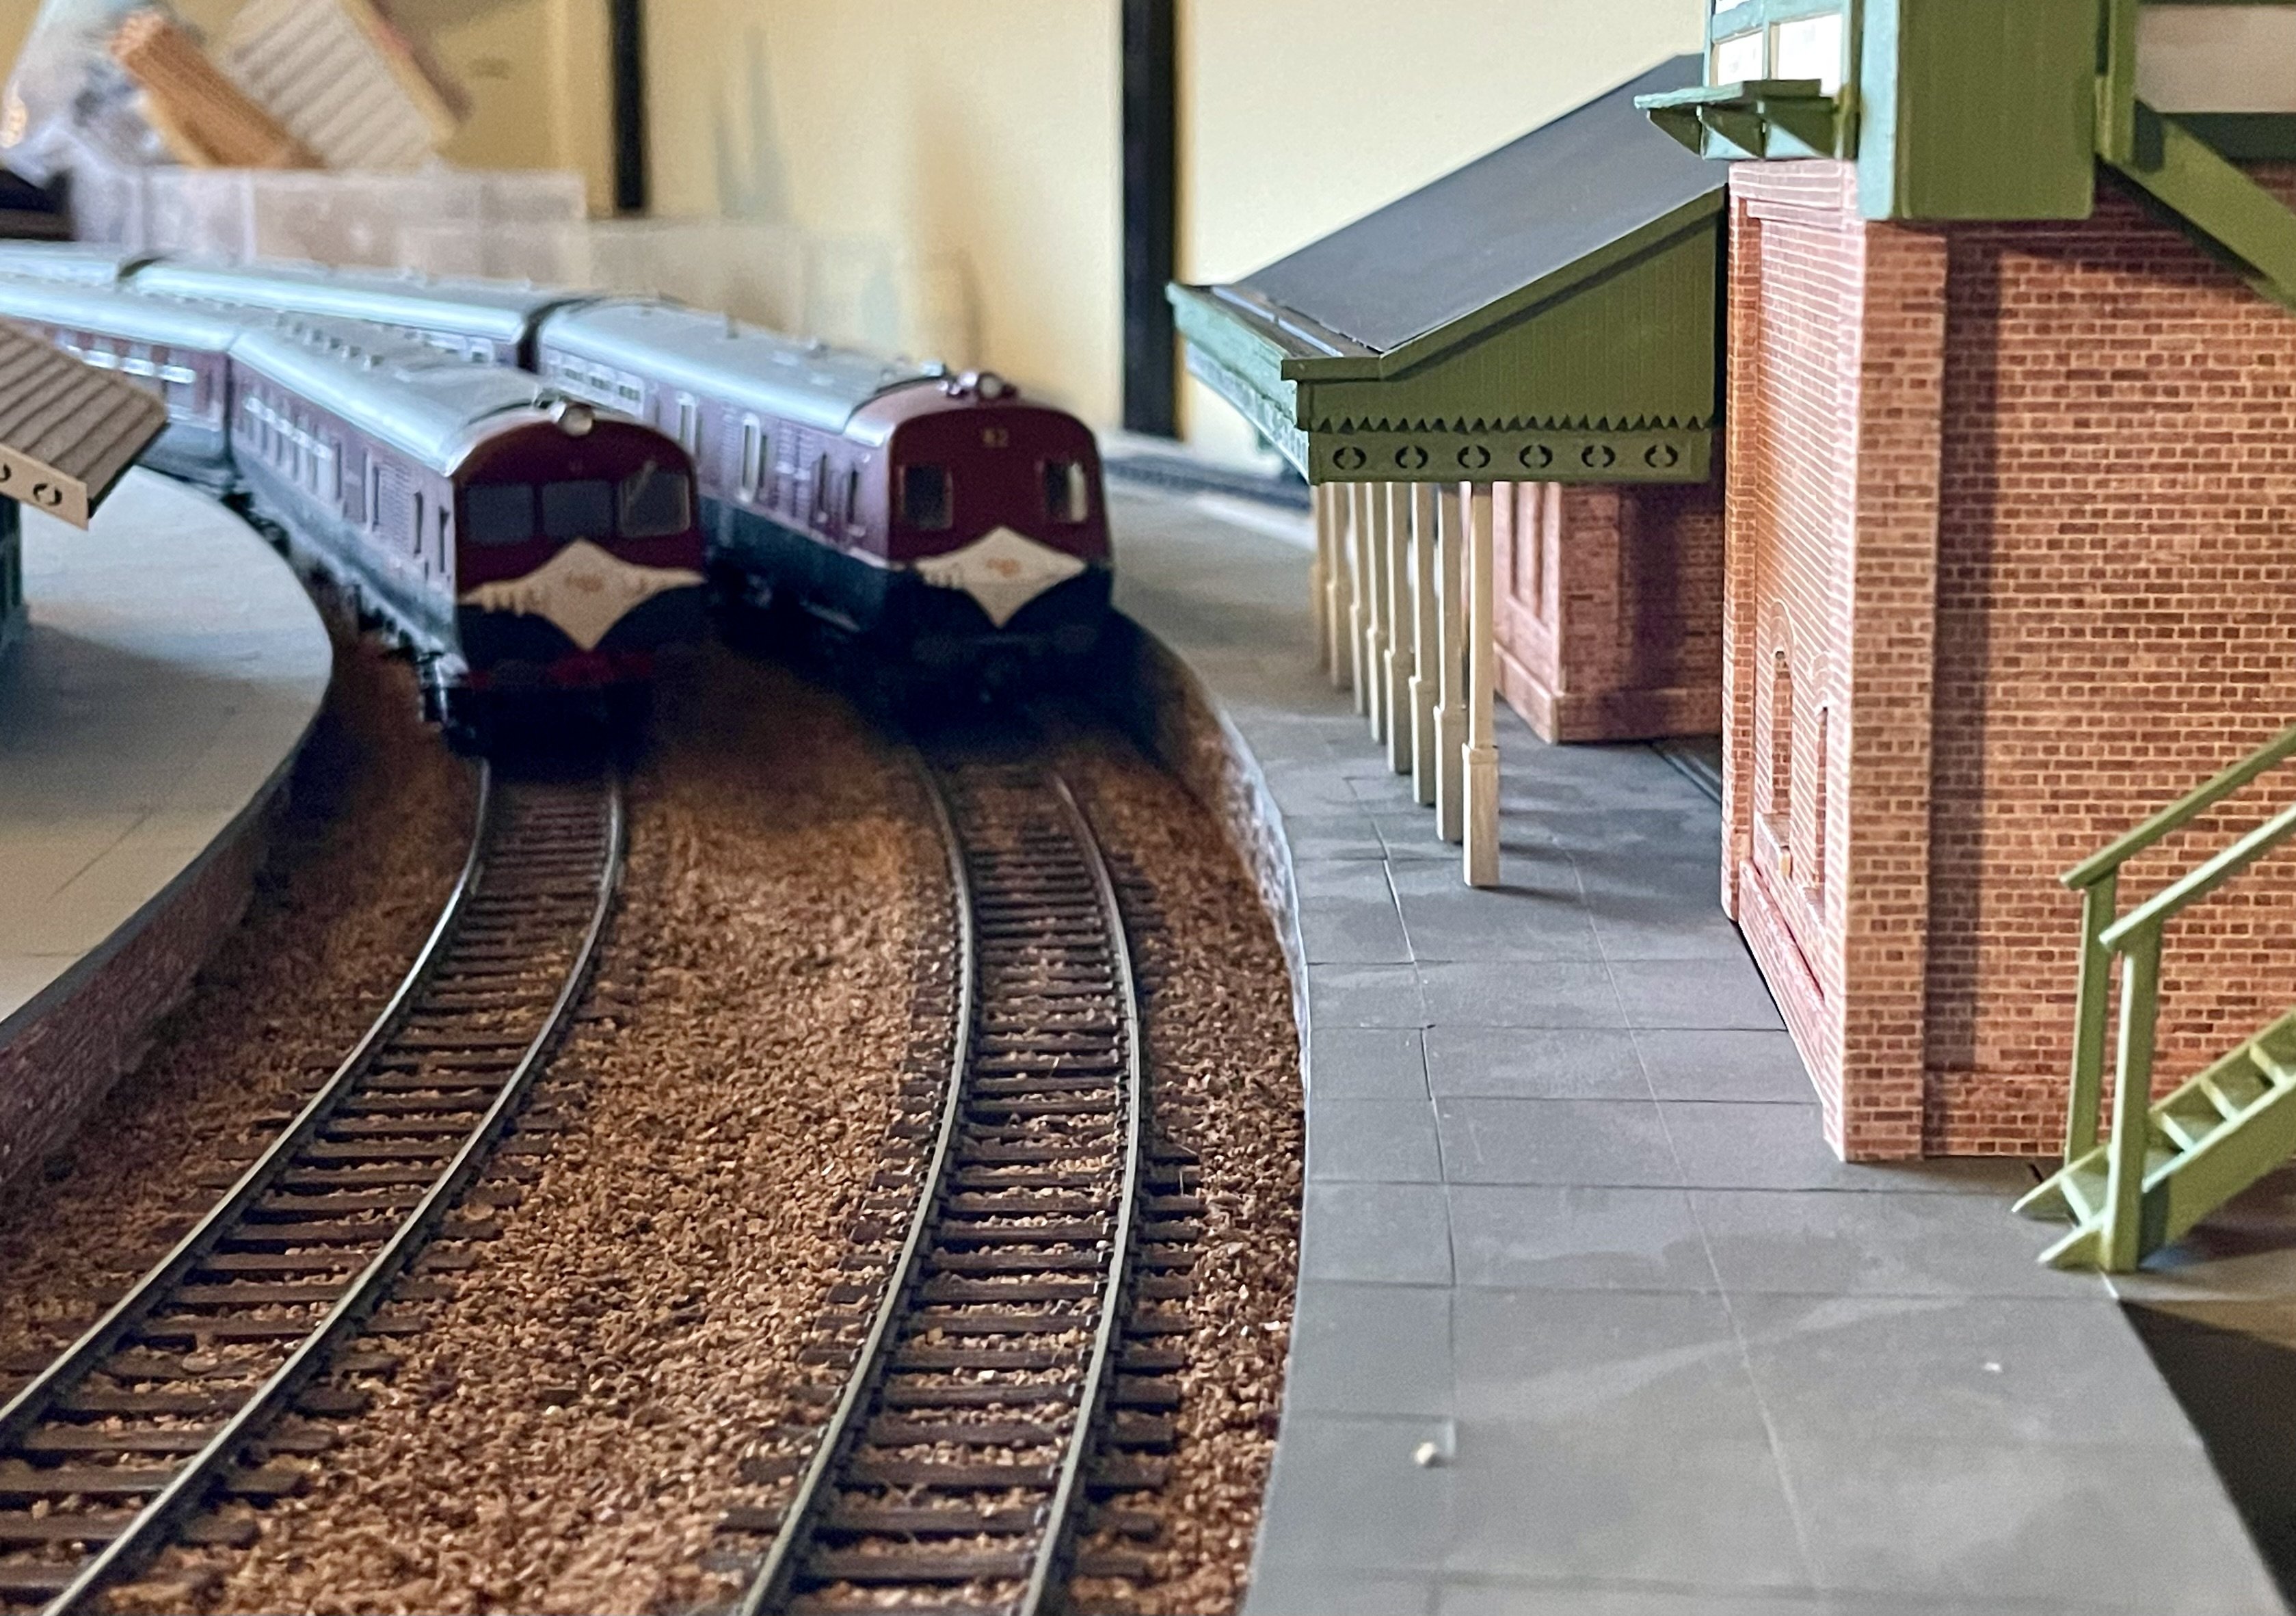
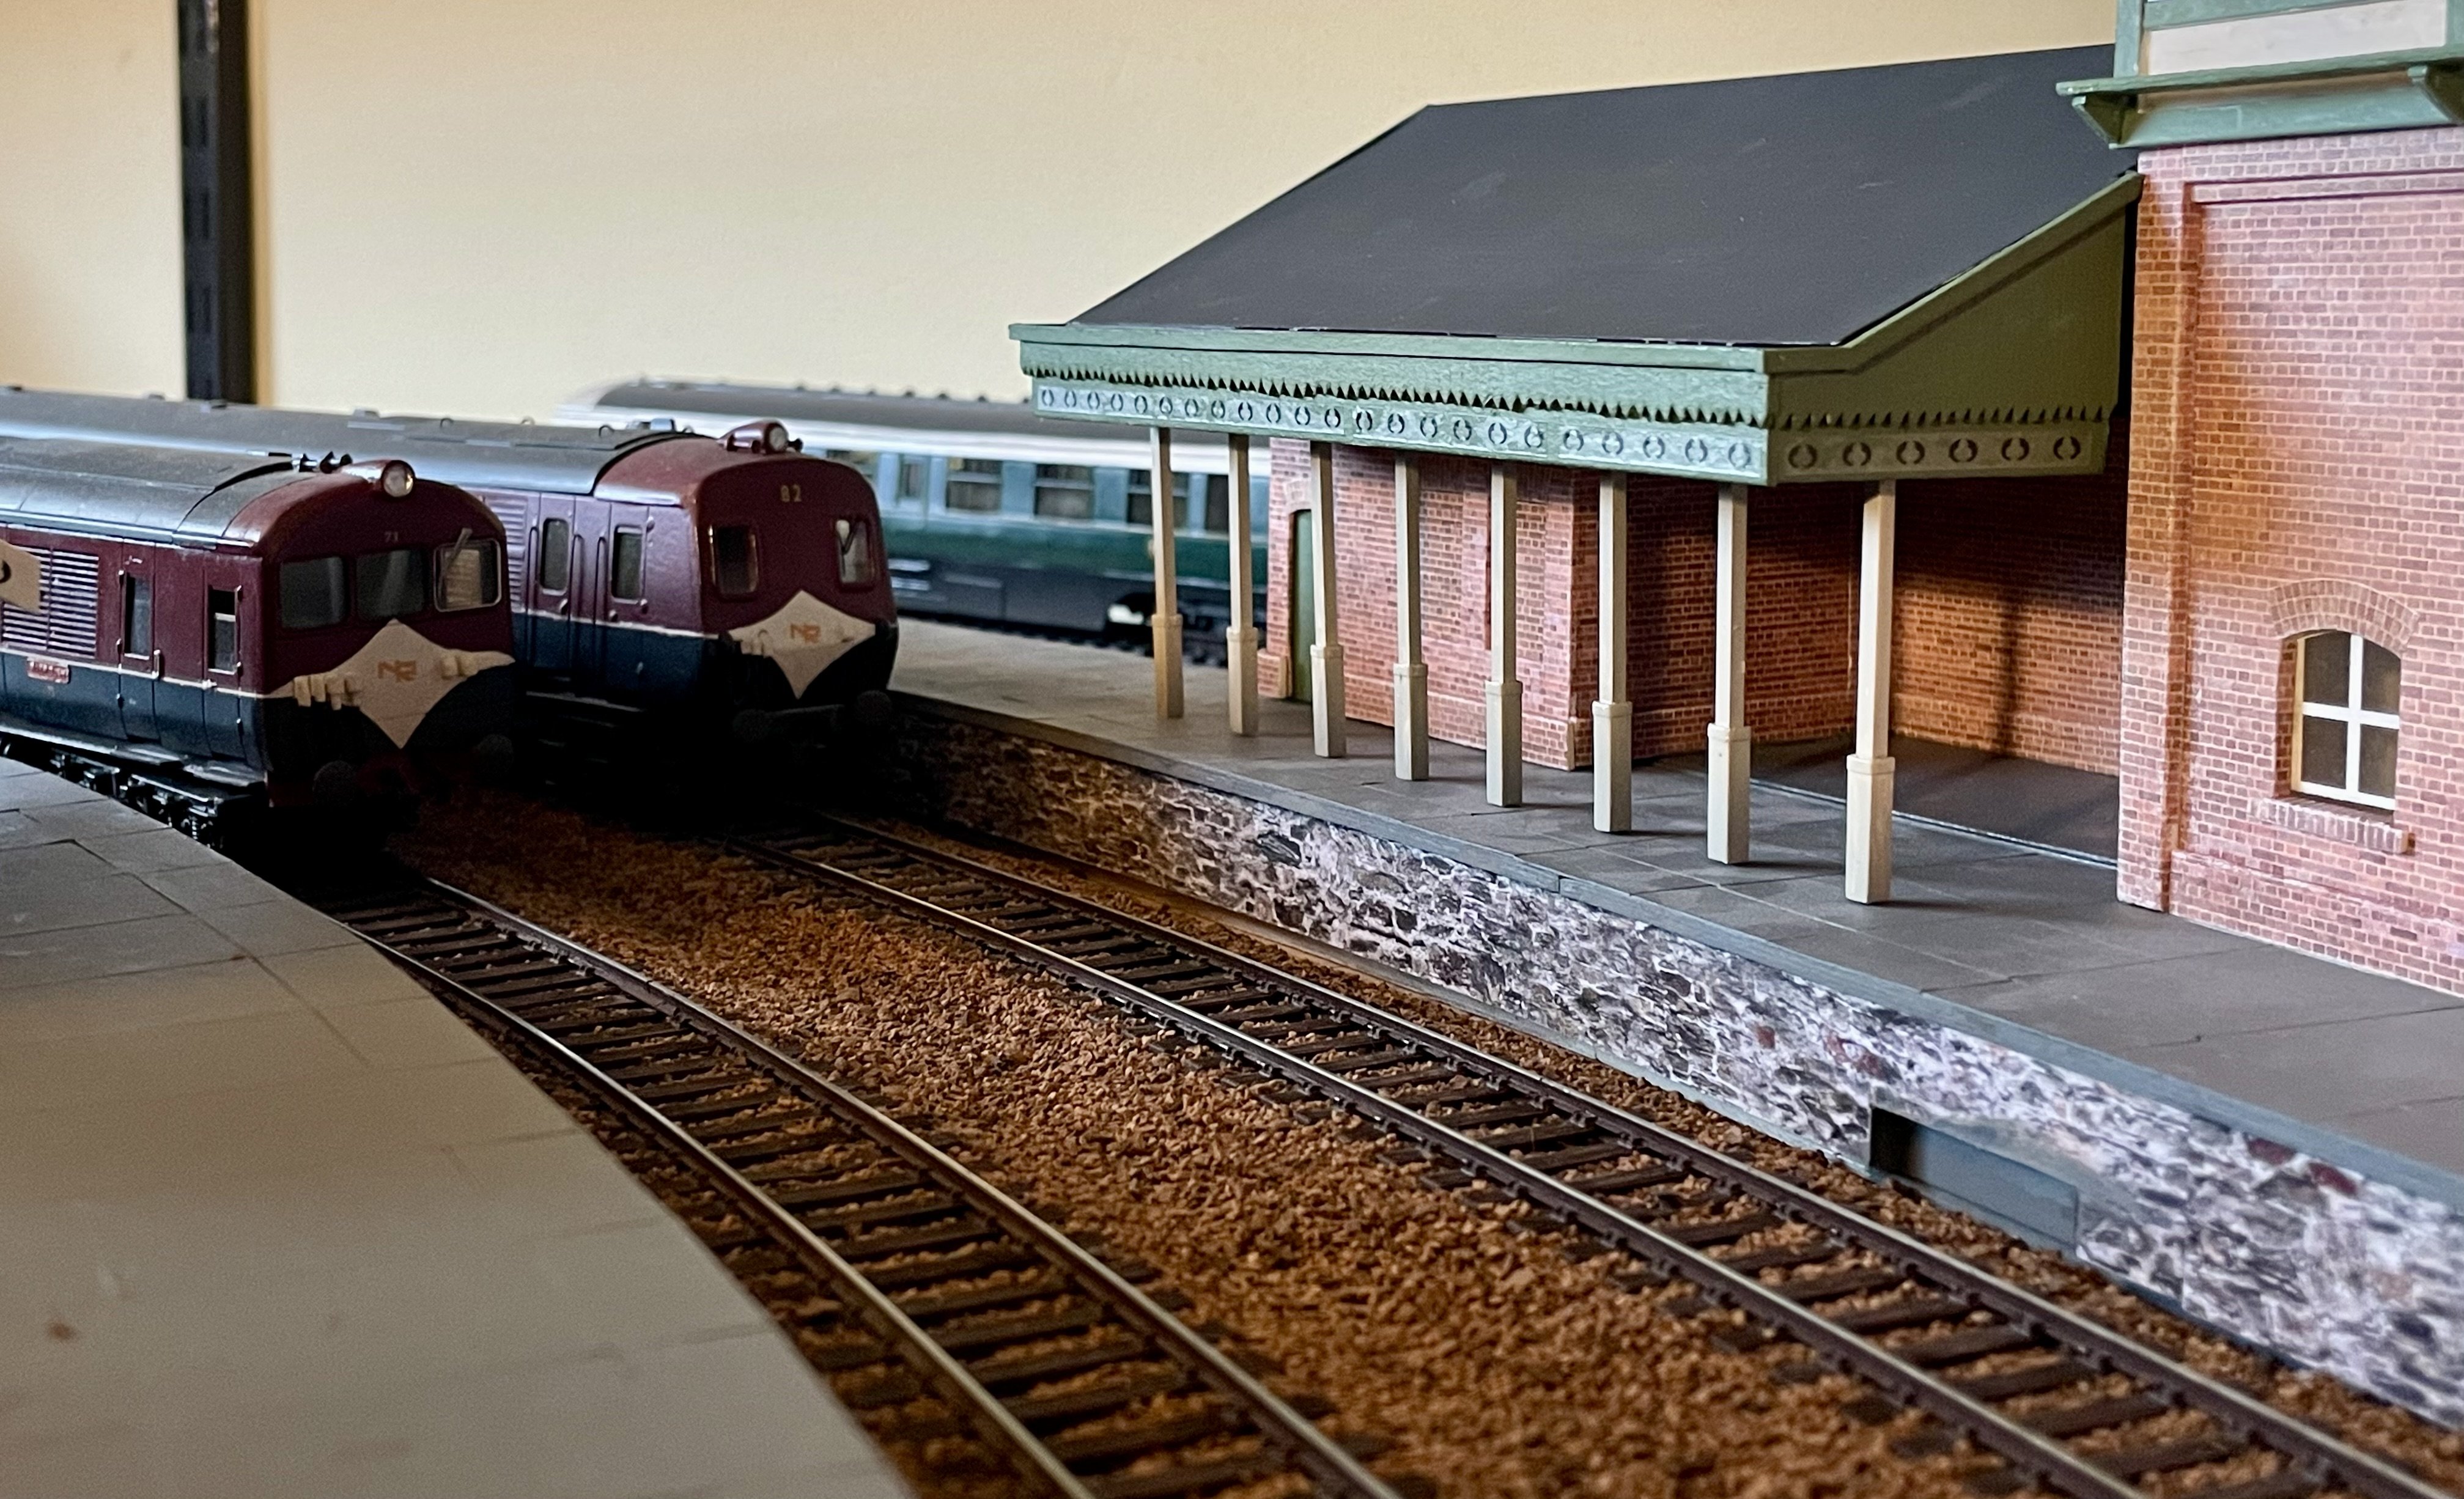
Canopy building painted. Columns made using 2mm sq. Plastruct, plasticard and tape strips. Supporting header beam made from 2mm thick card. The columns slot into the beam and can be adjusted up/down so that they all touch the platform surface before final fixing. Cheers Darius
- 416 replies
-
- 10
-
-

-
-
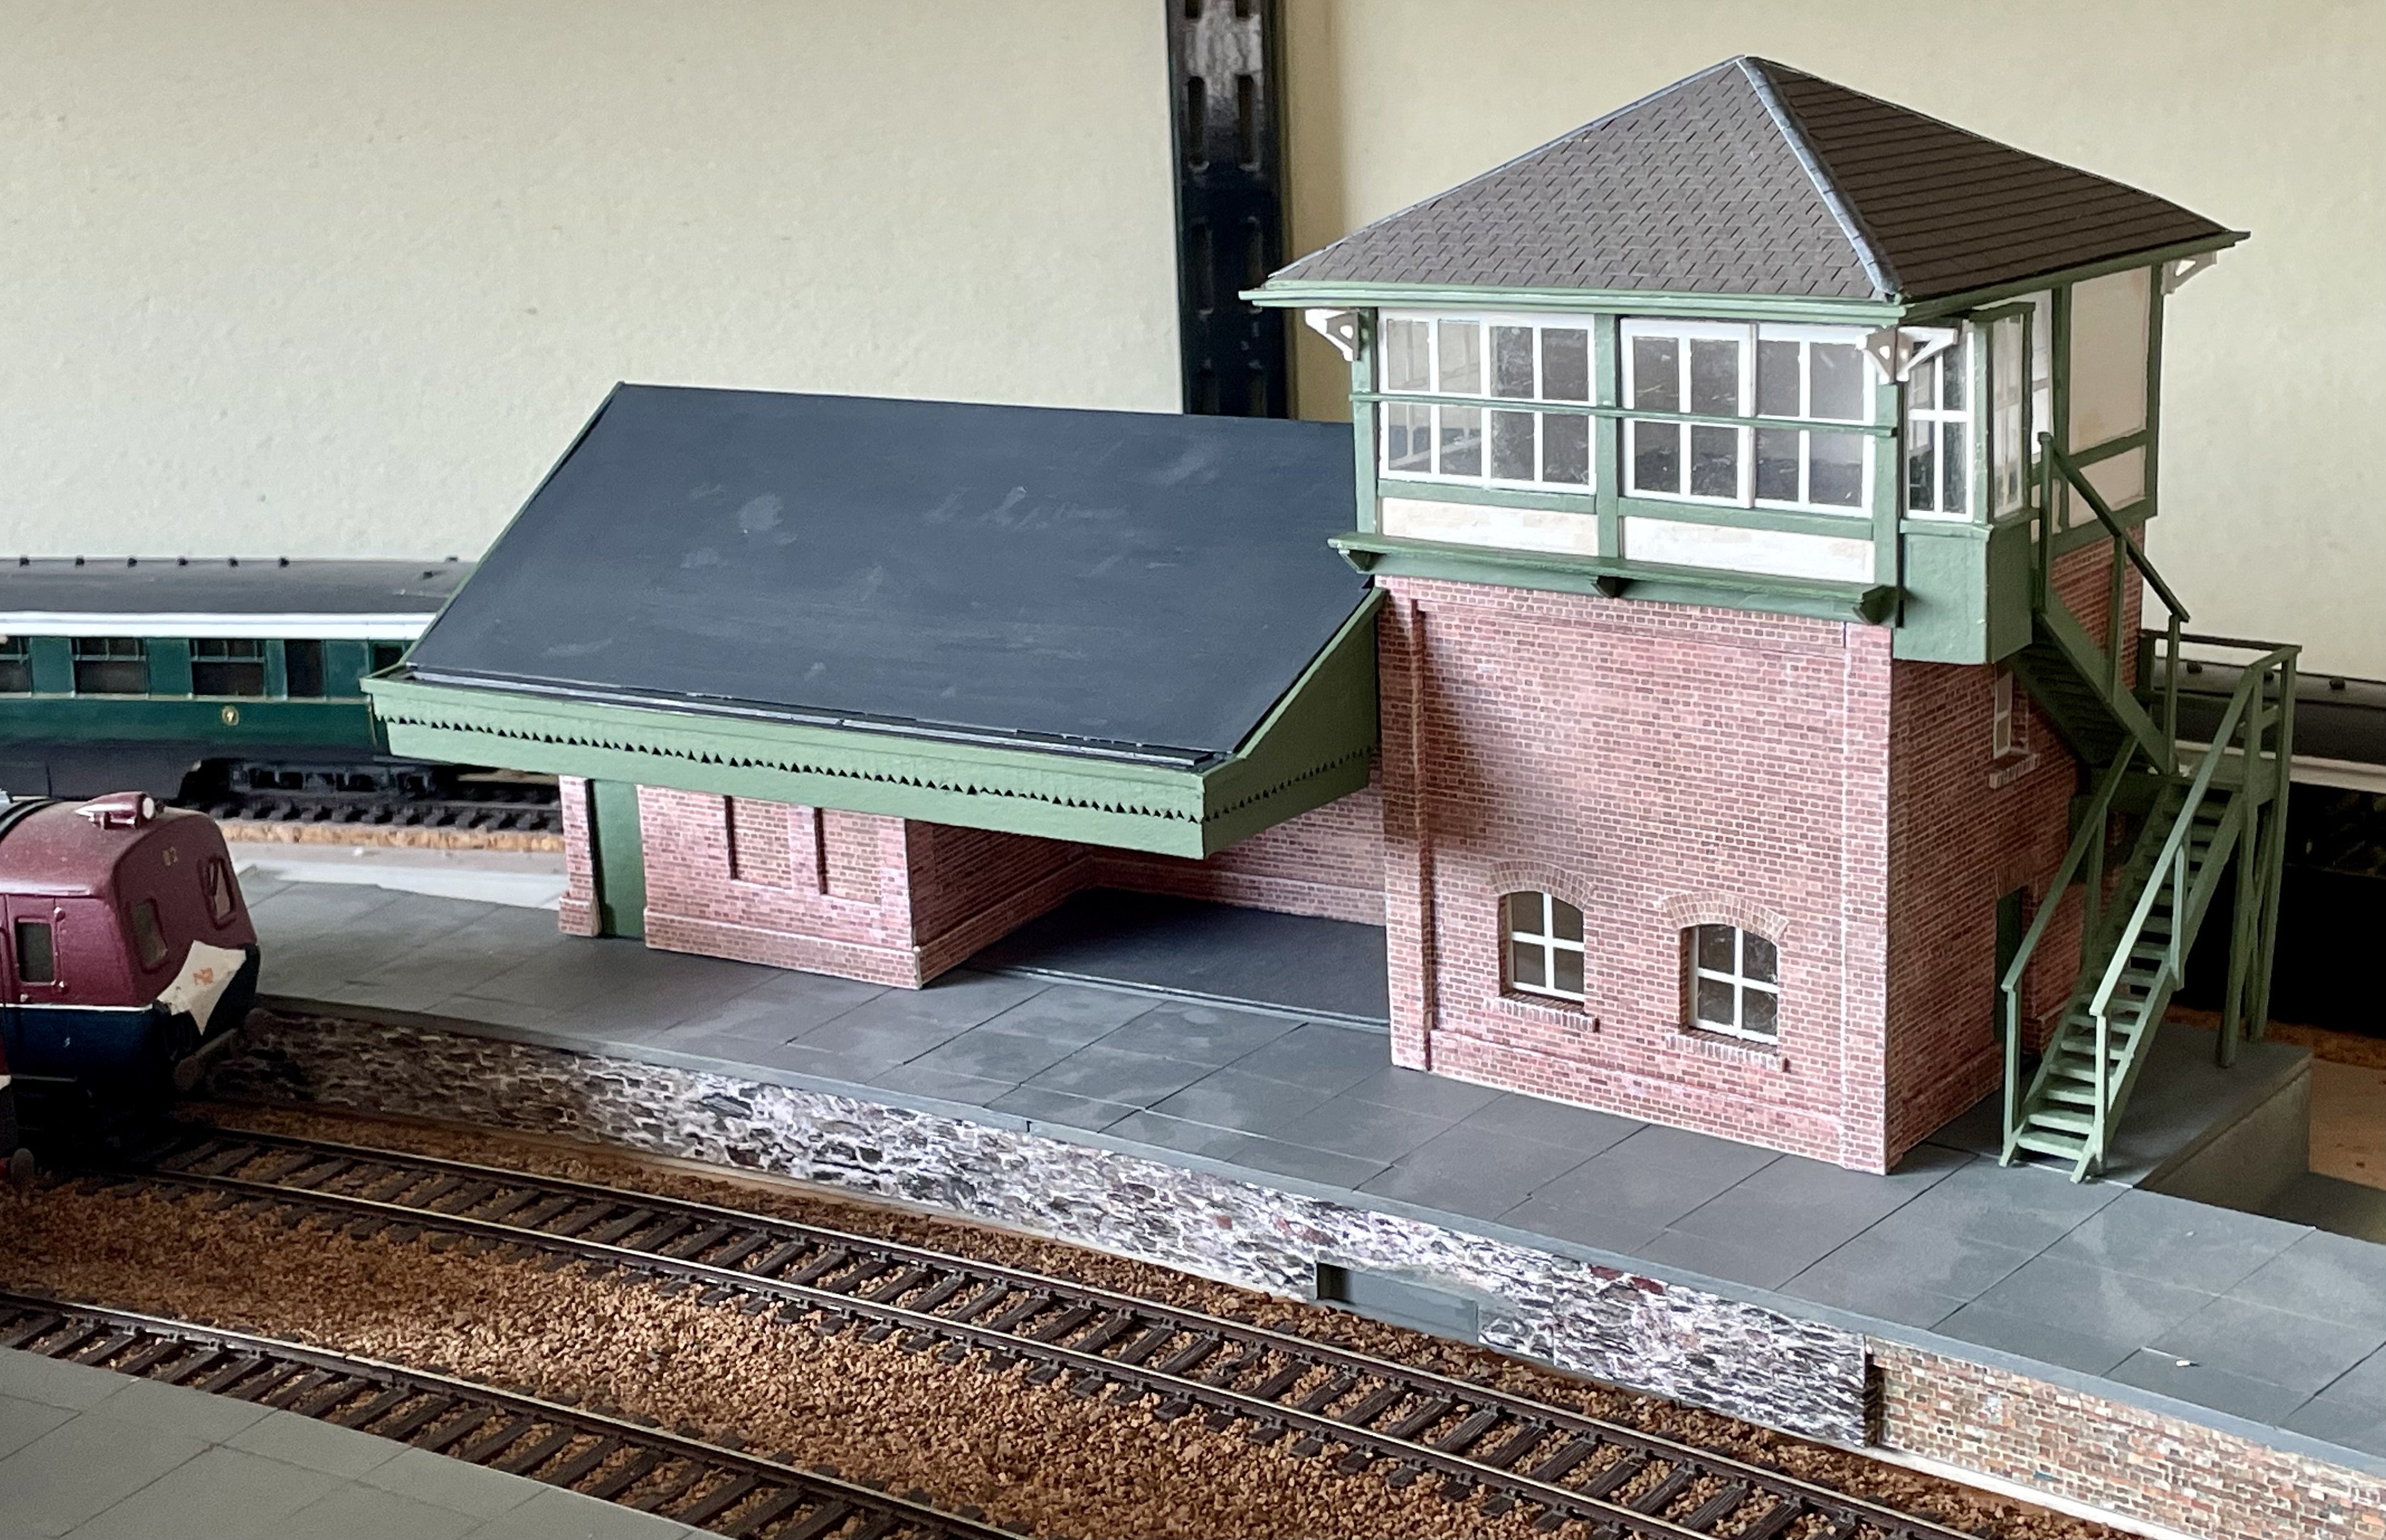
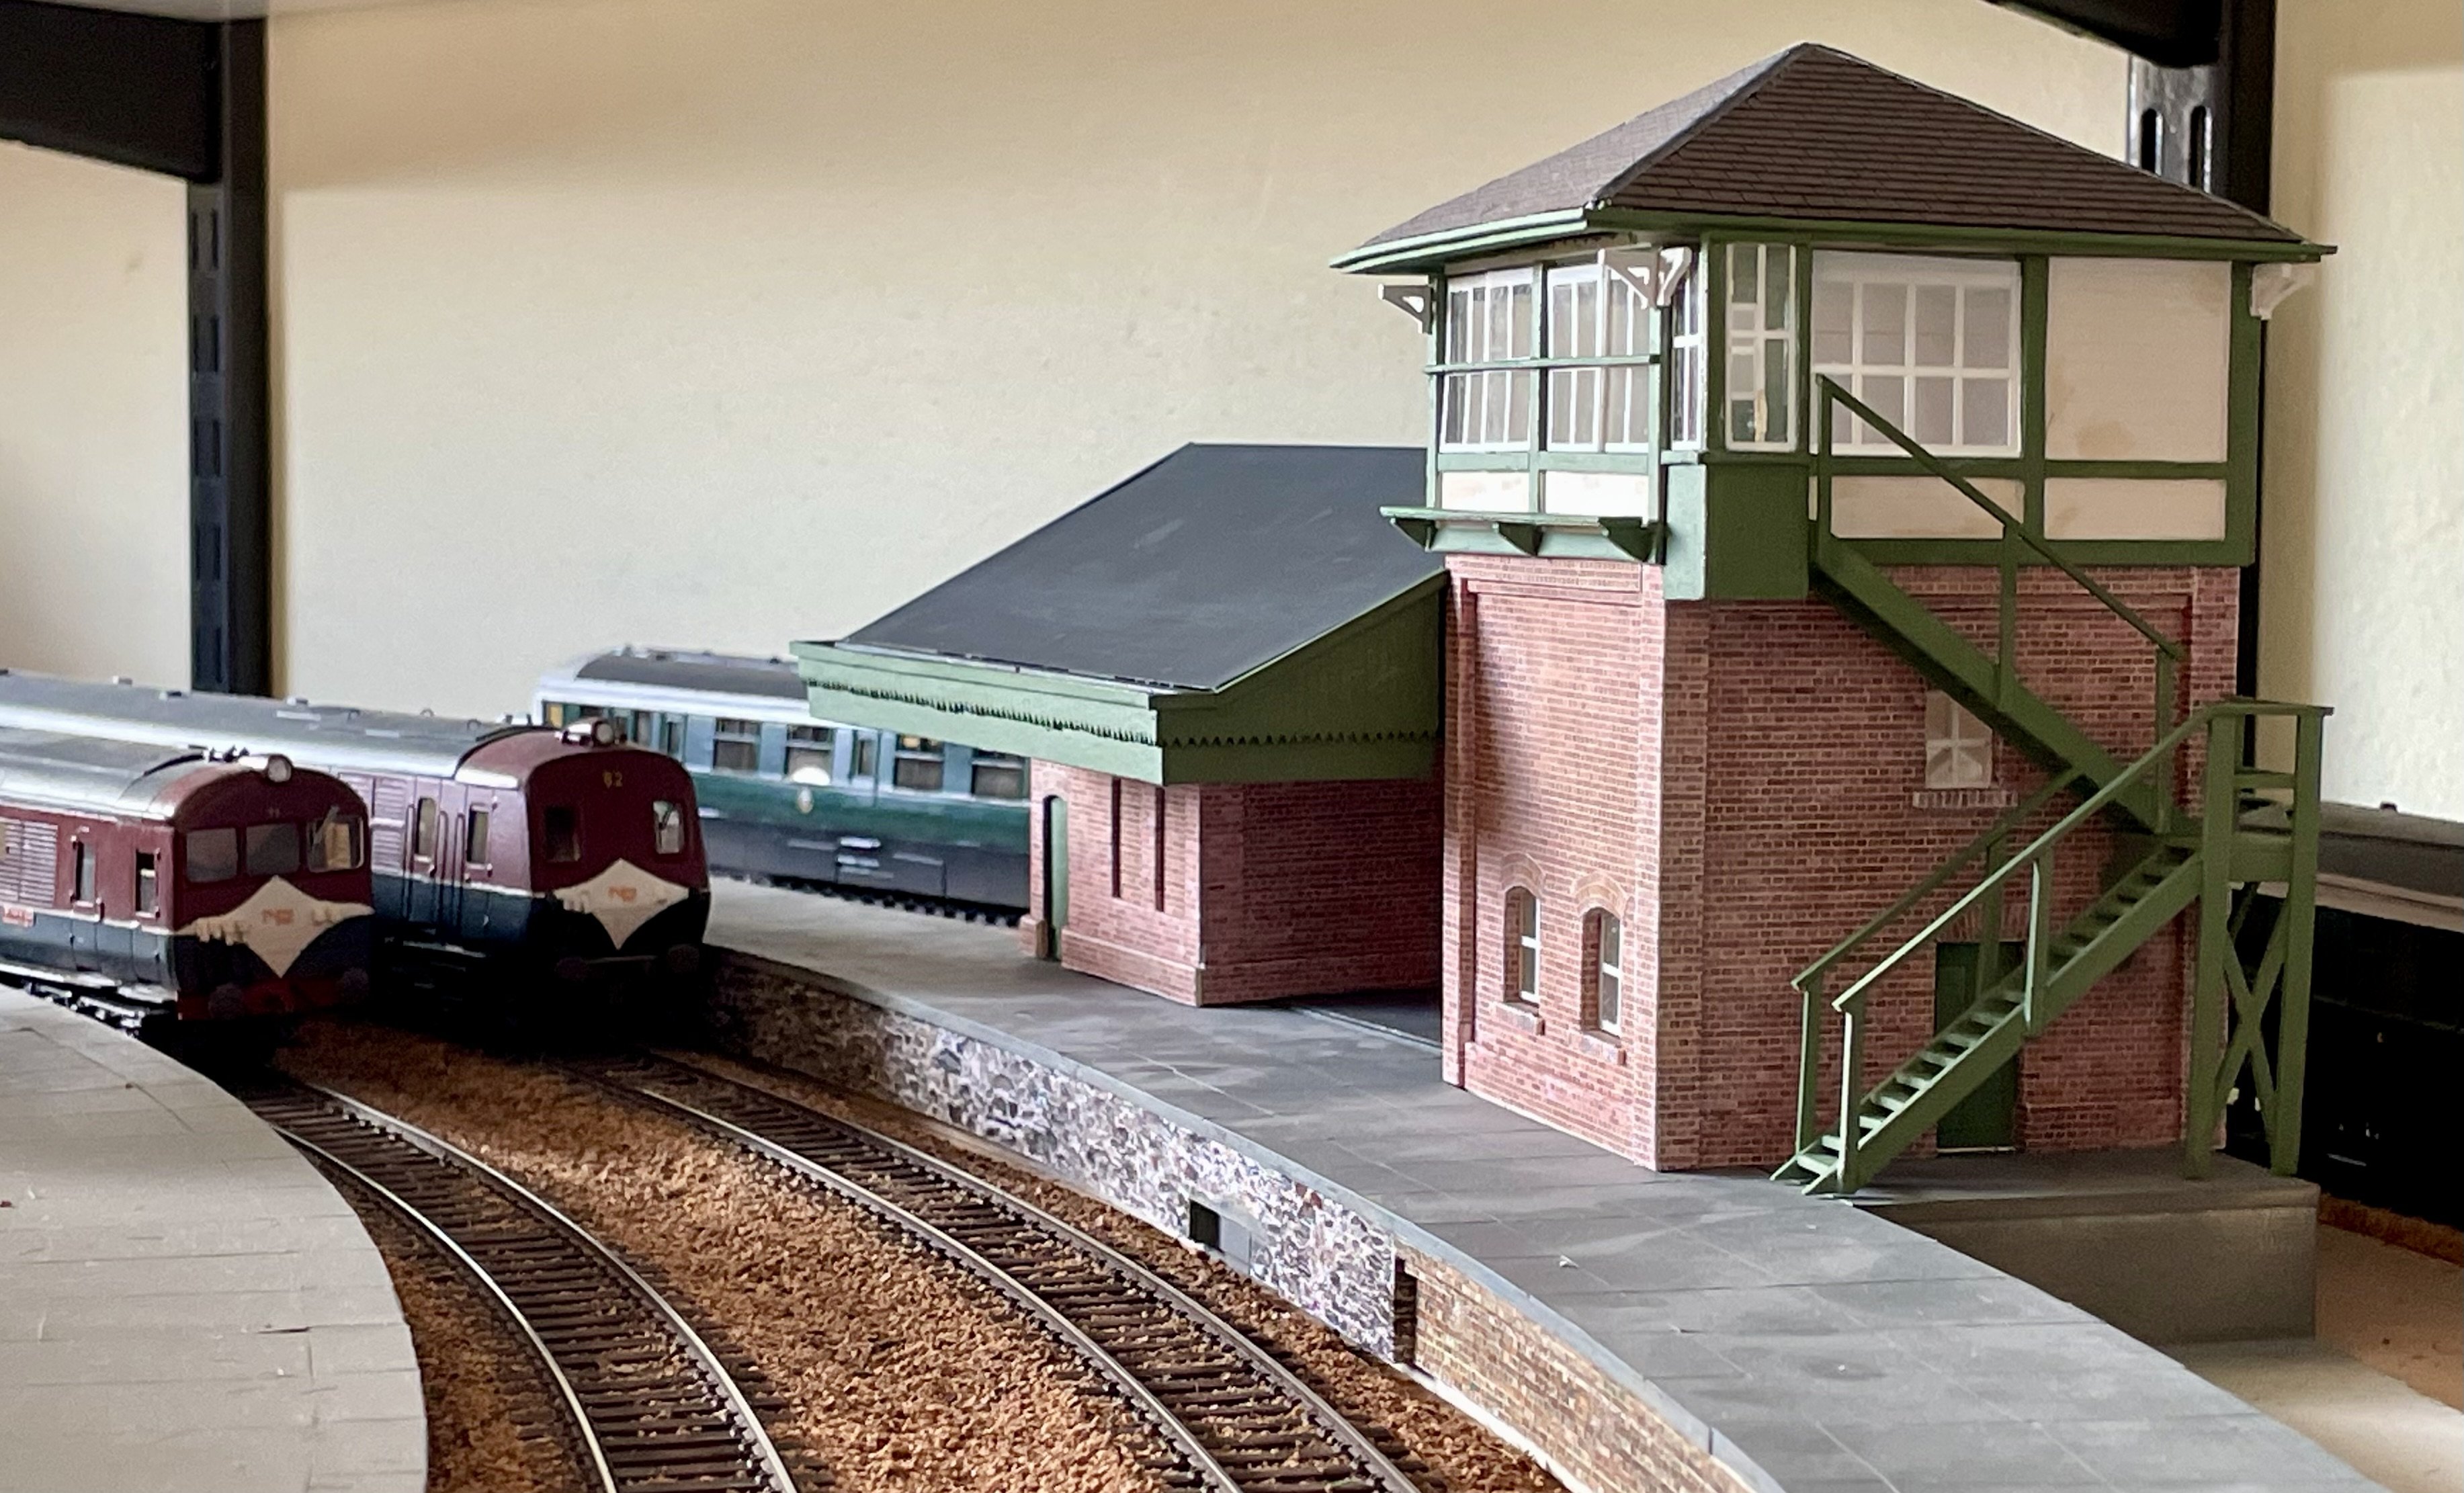
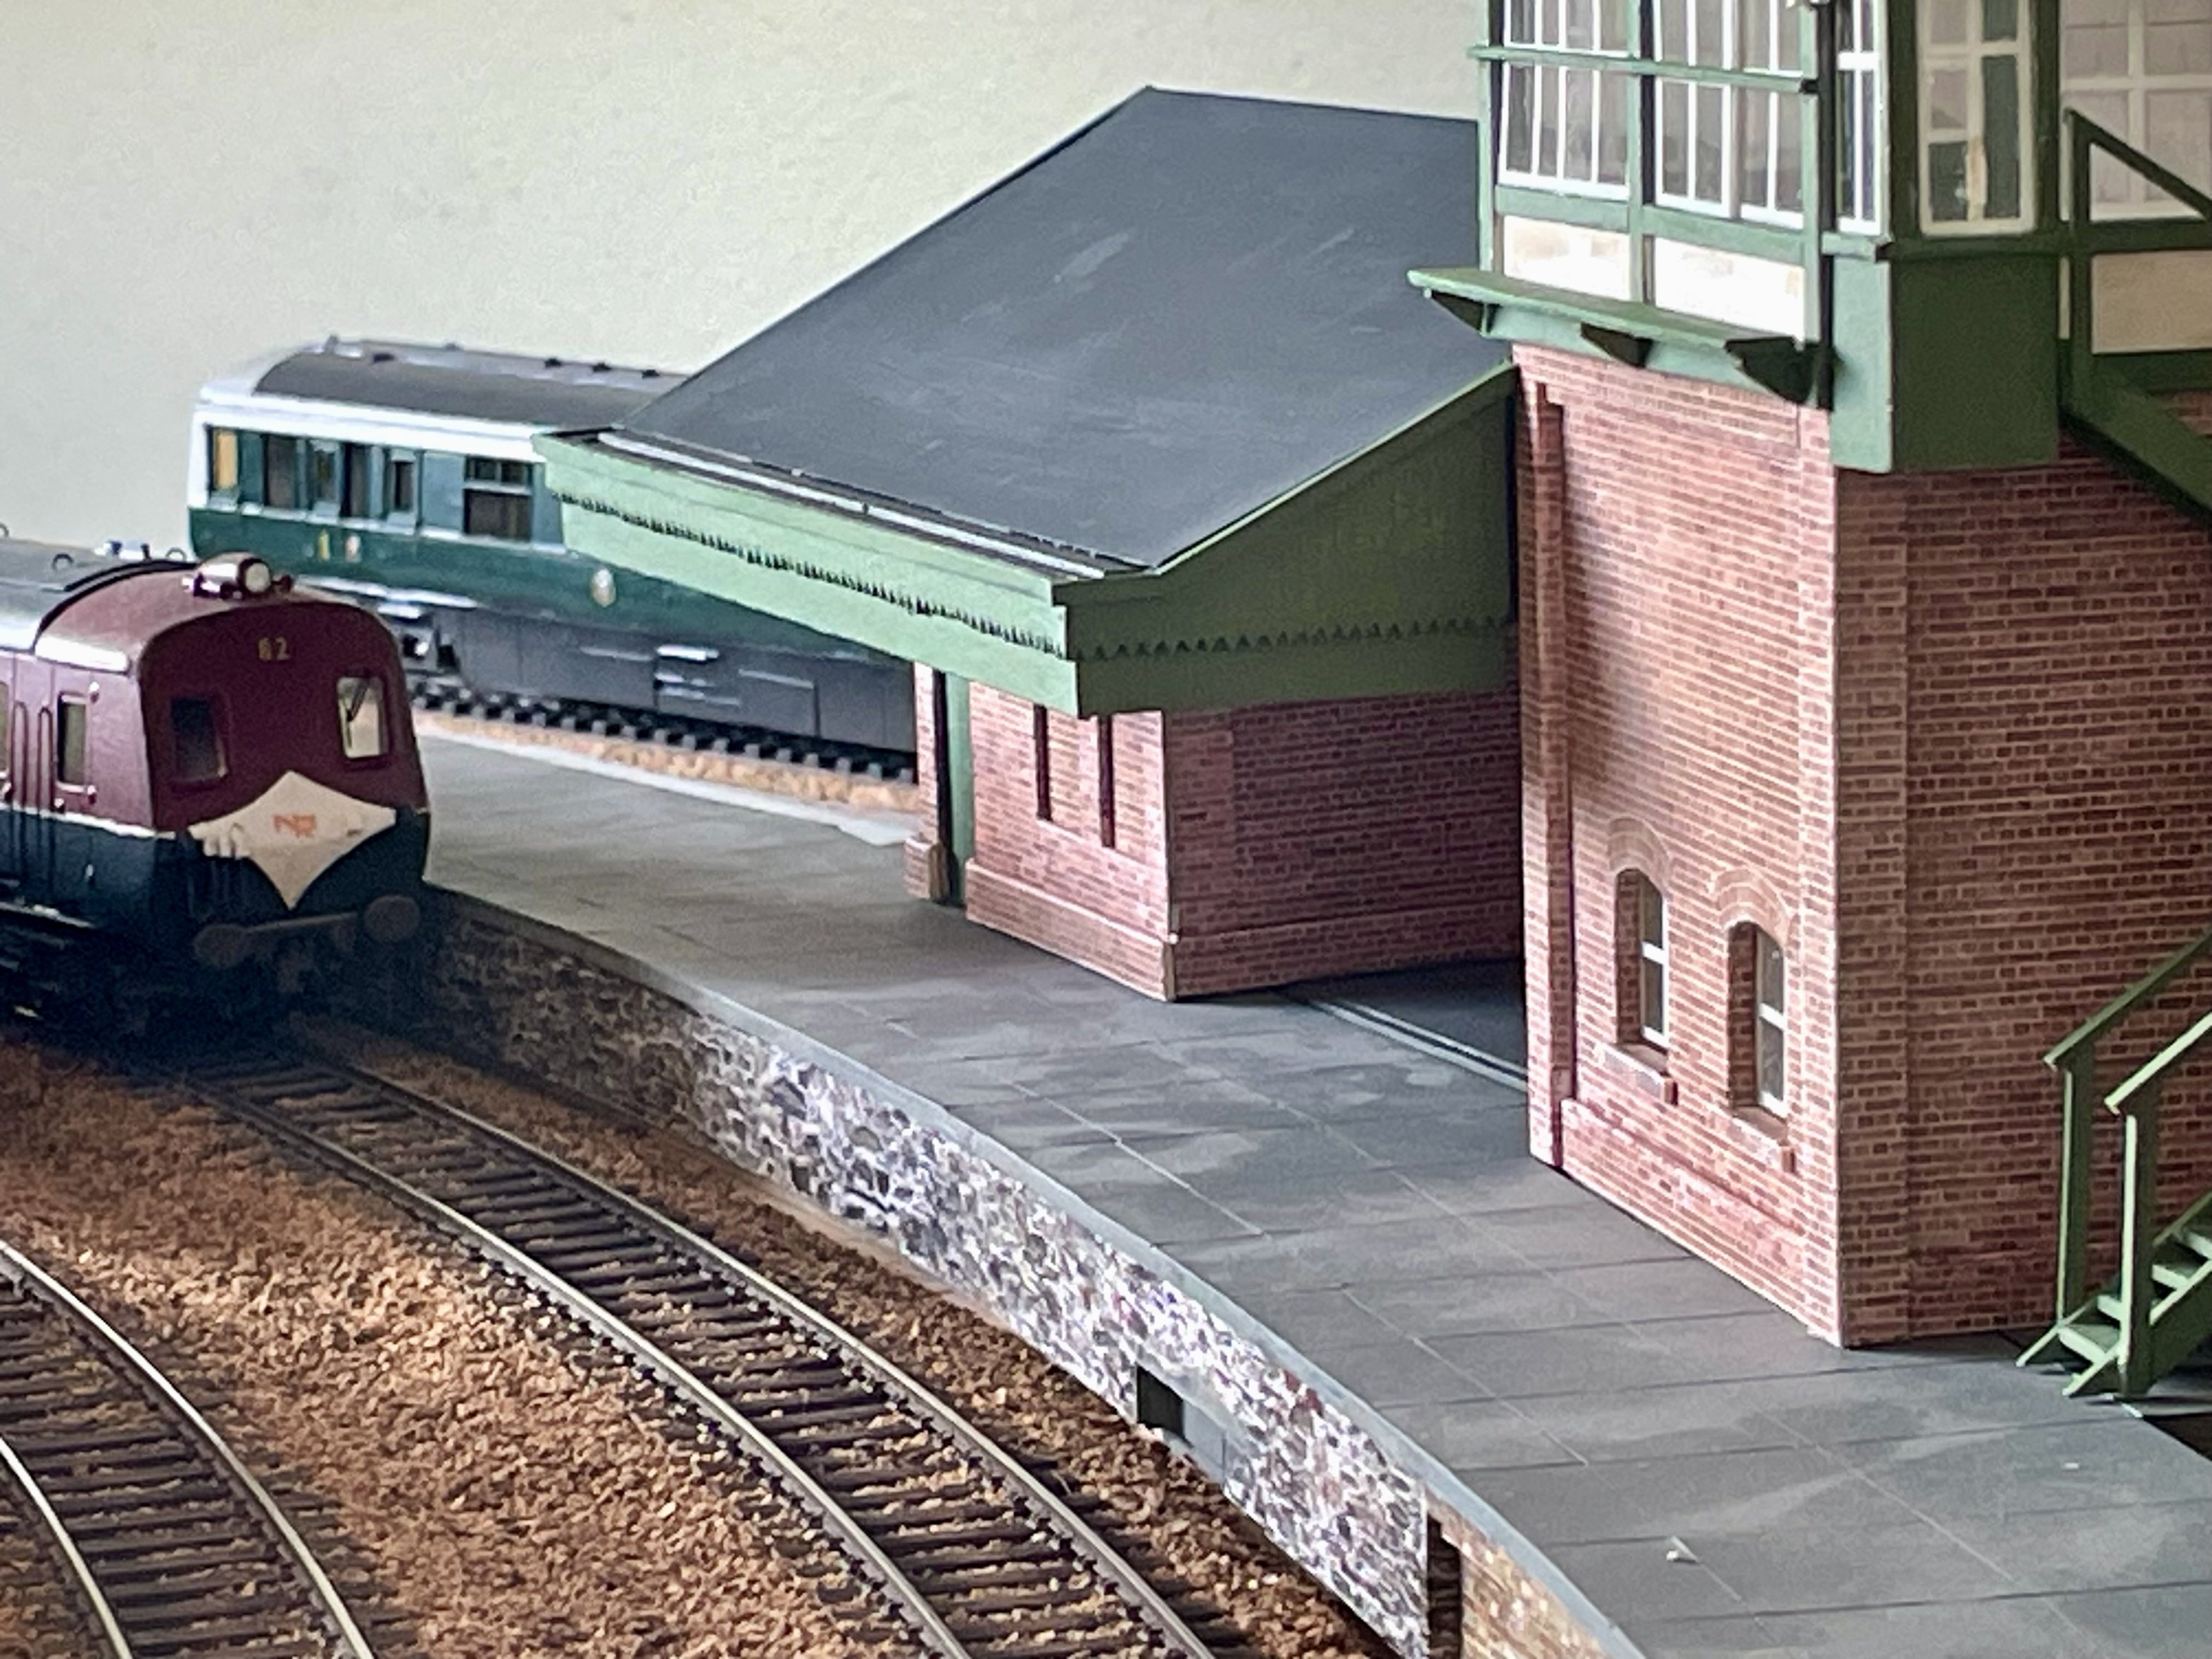
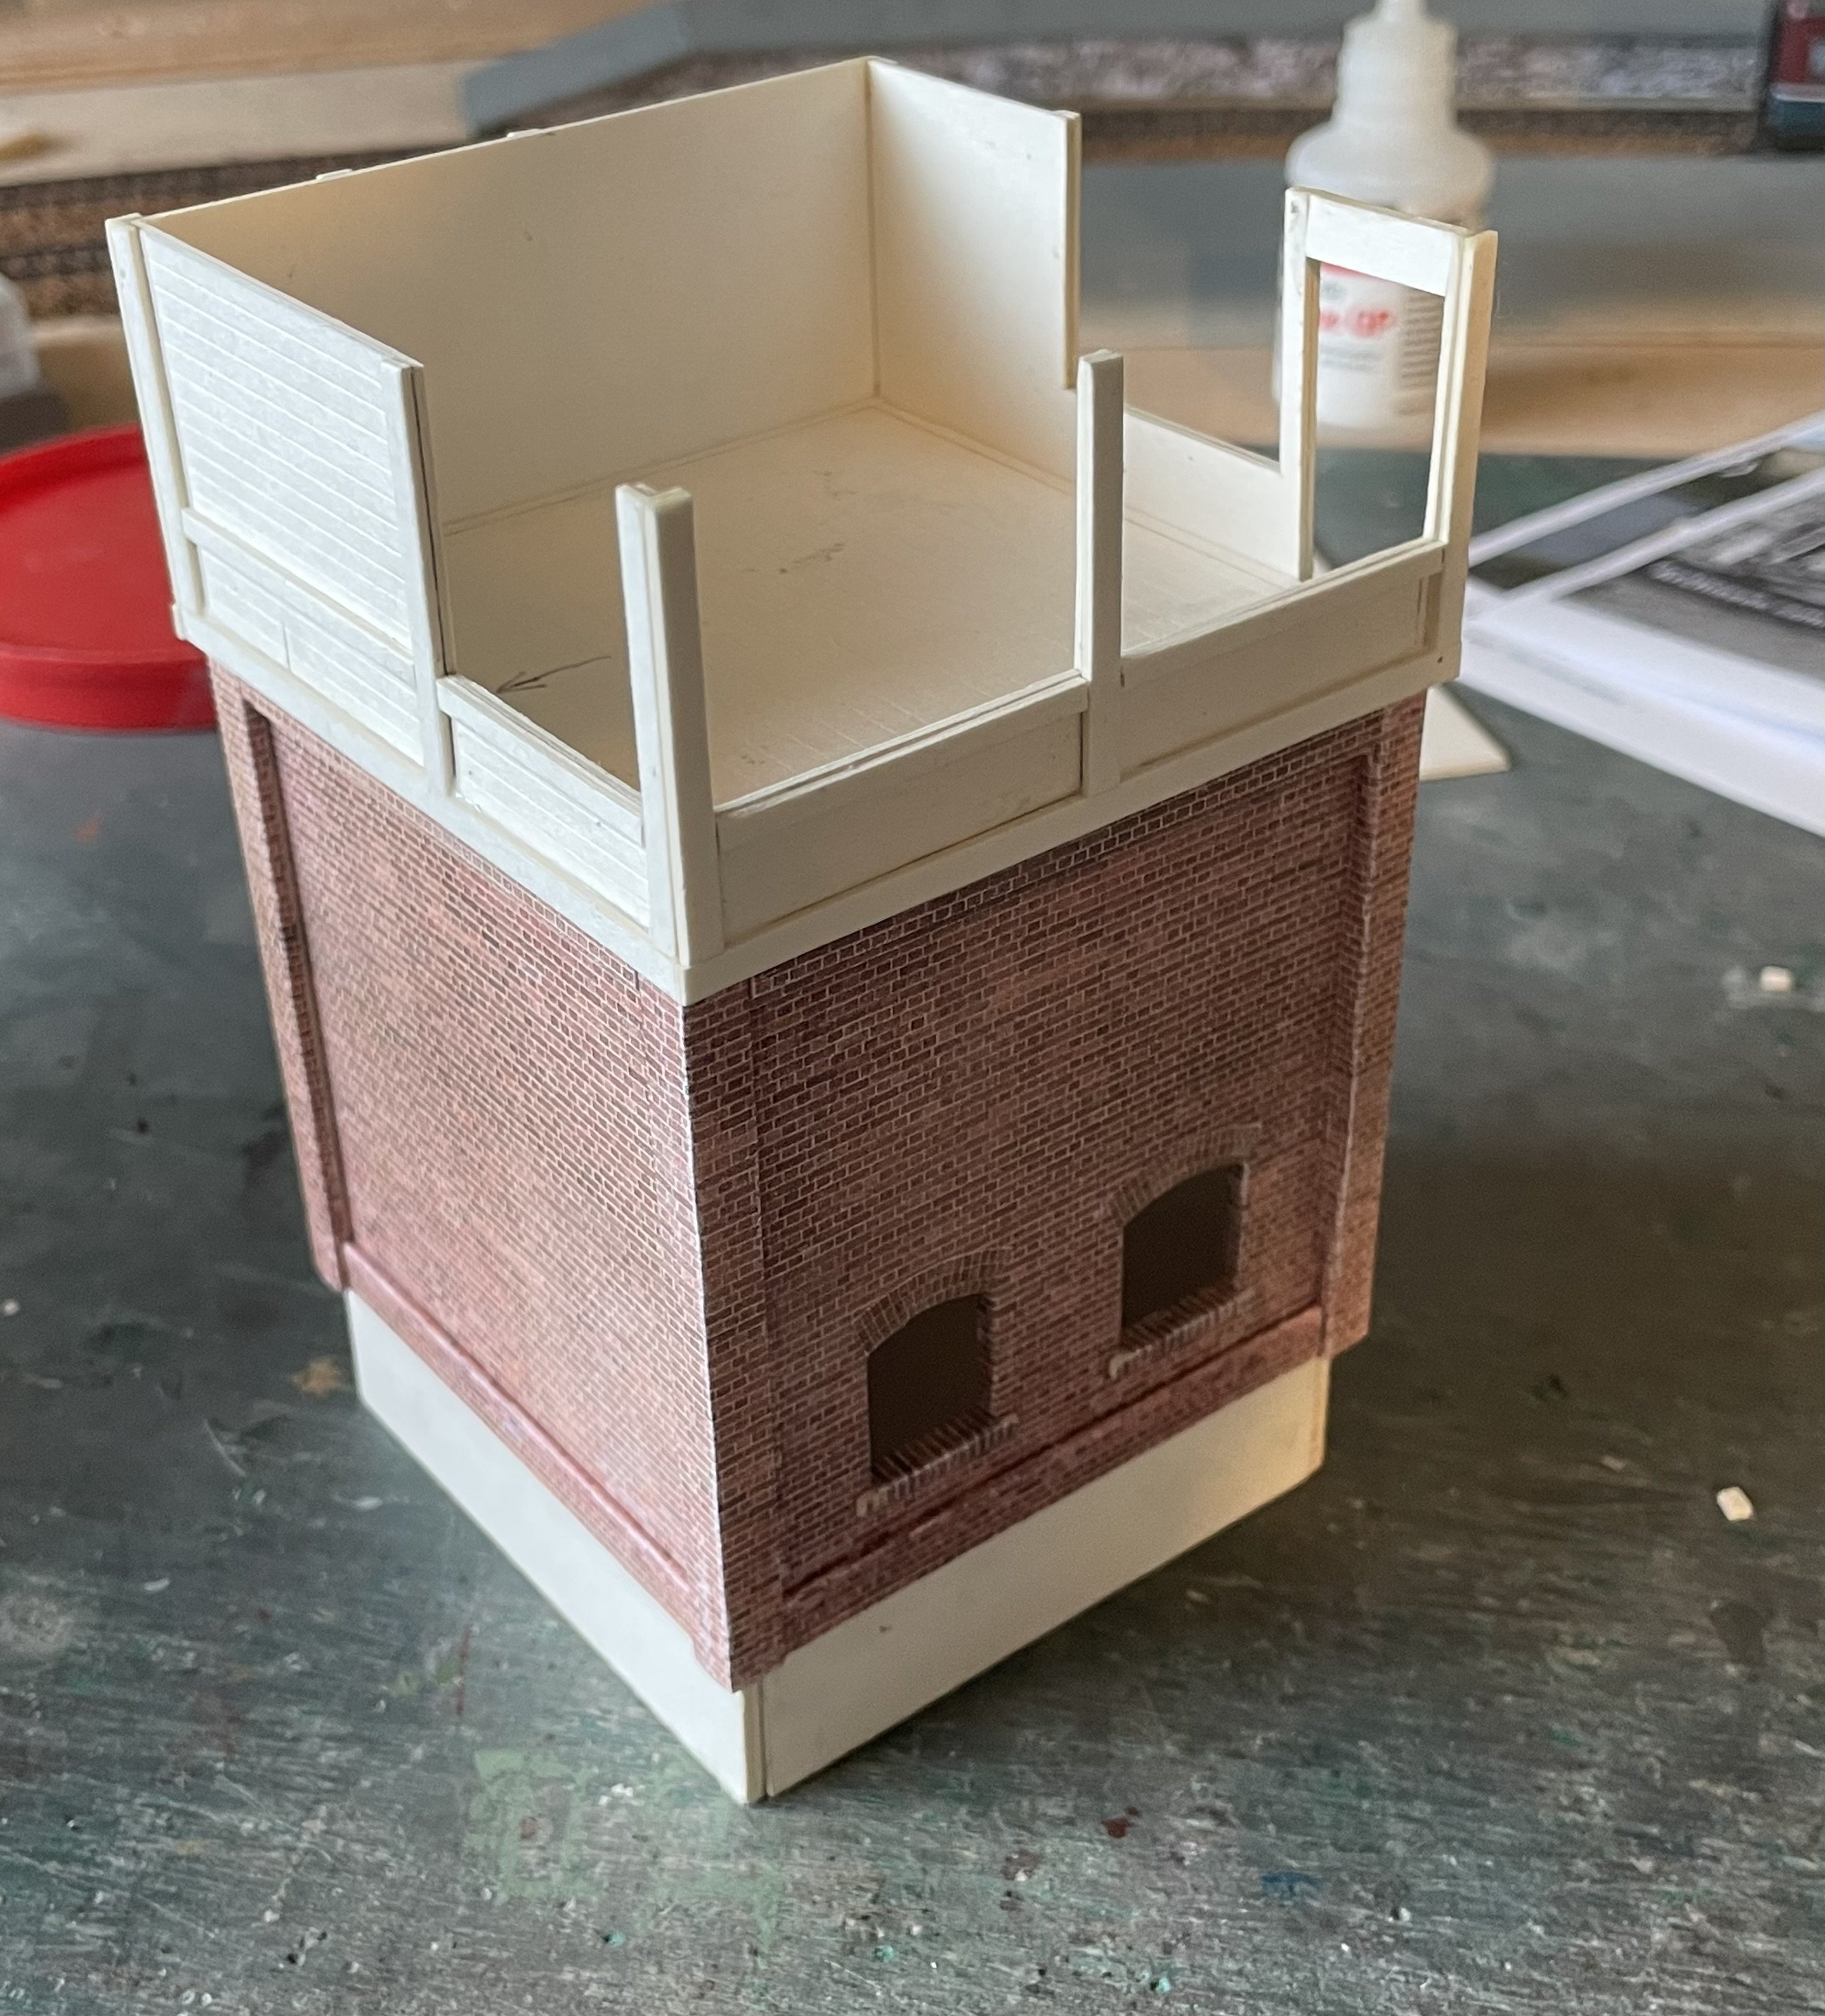
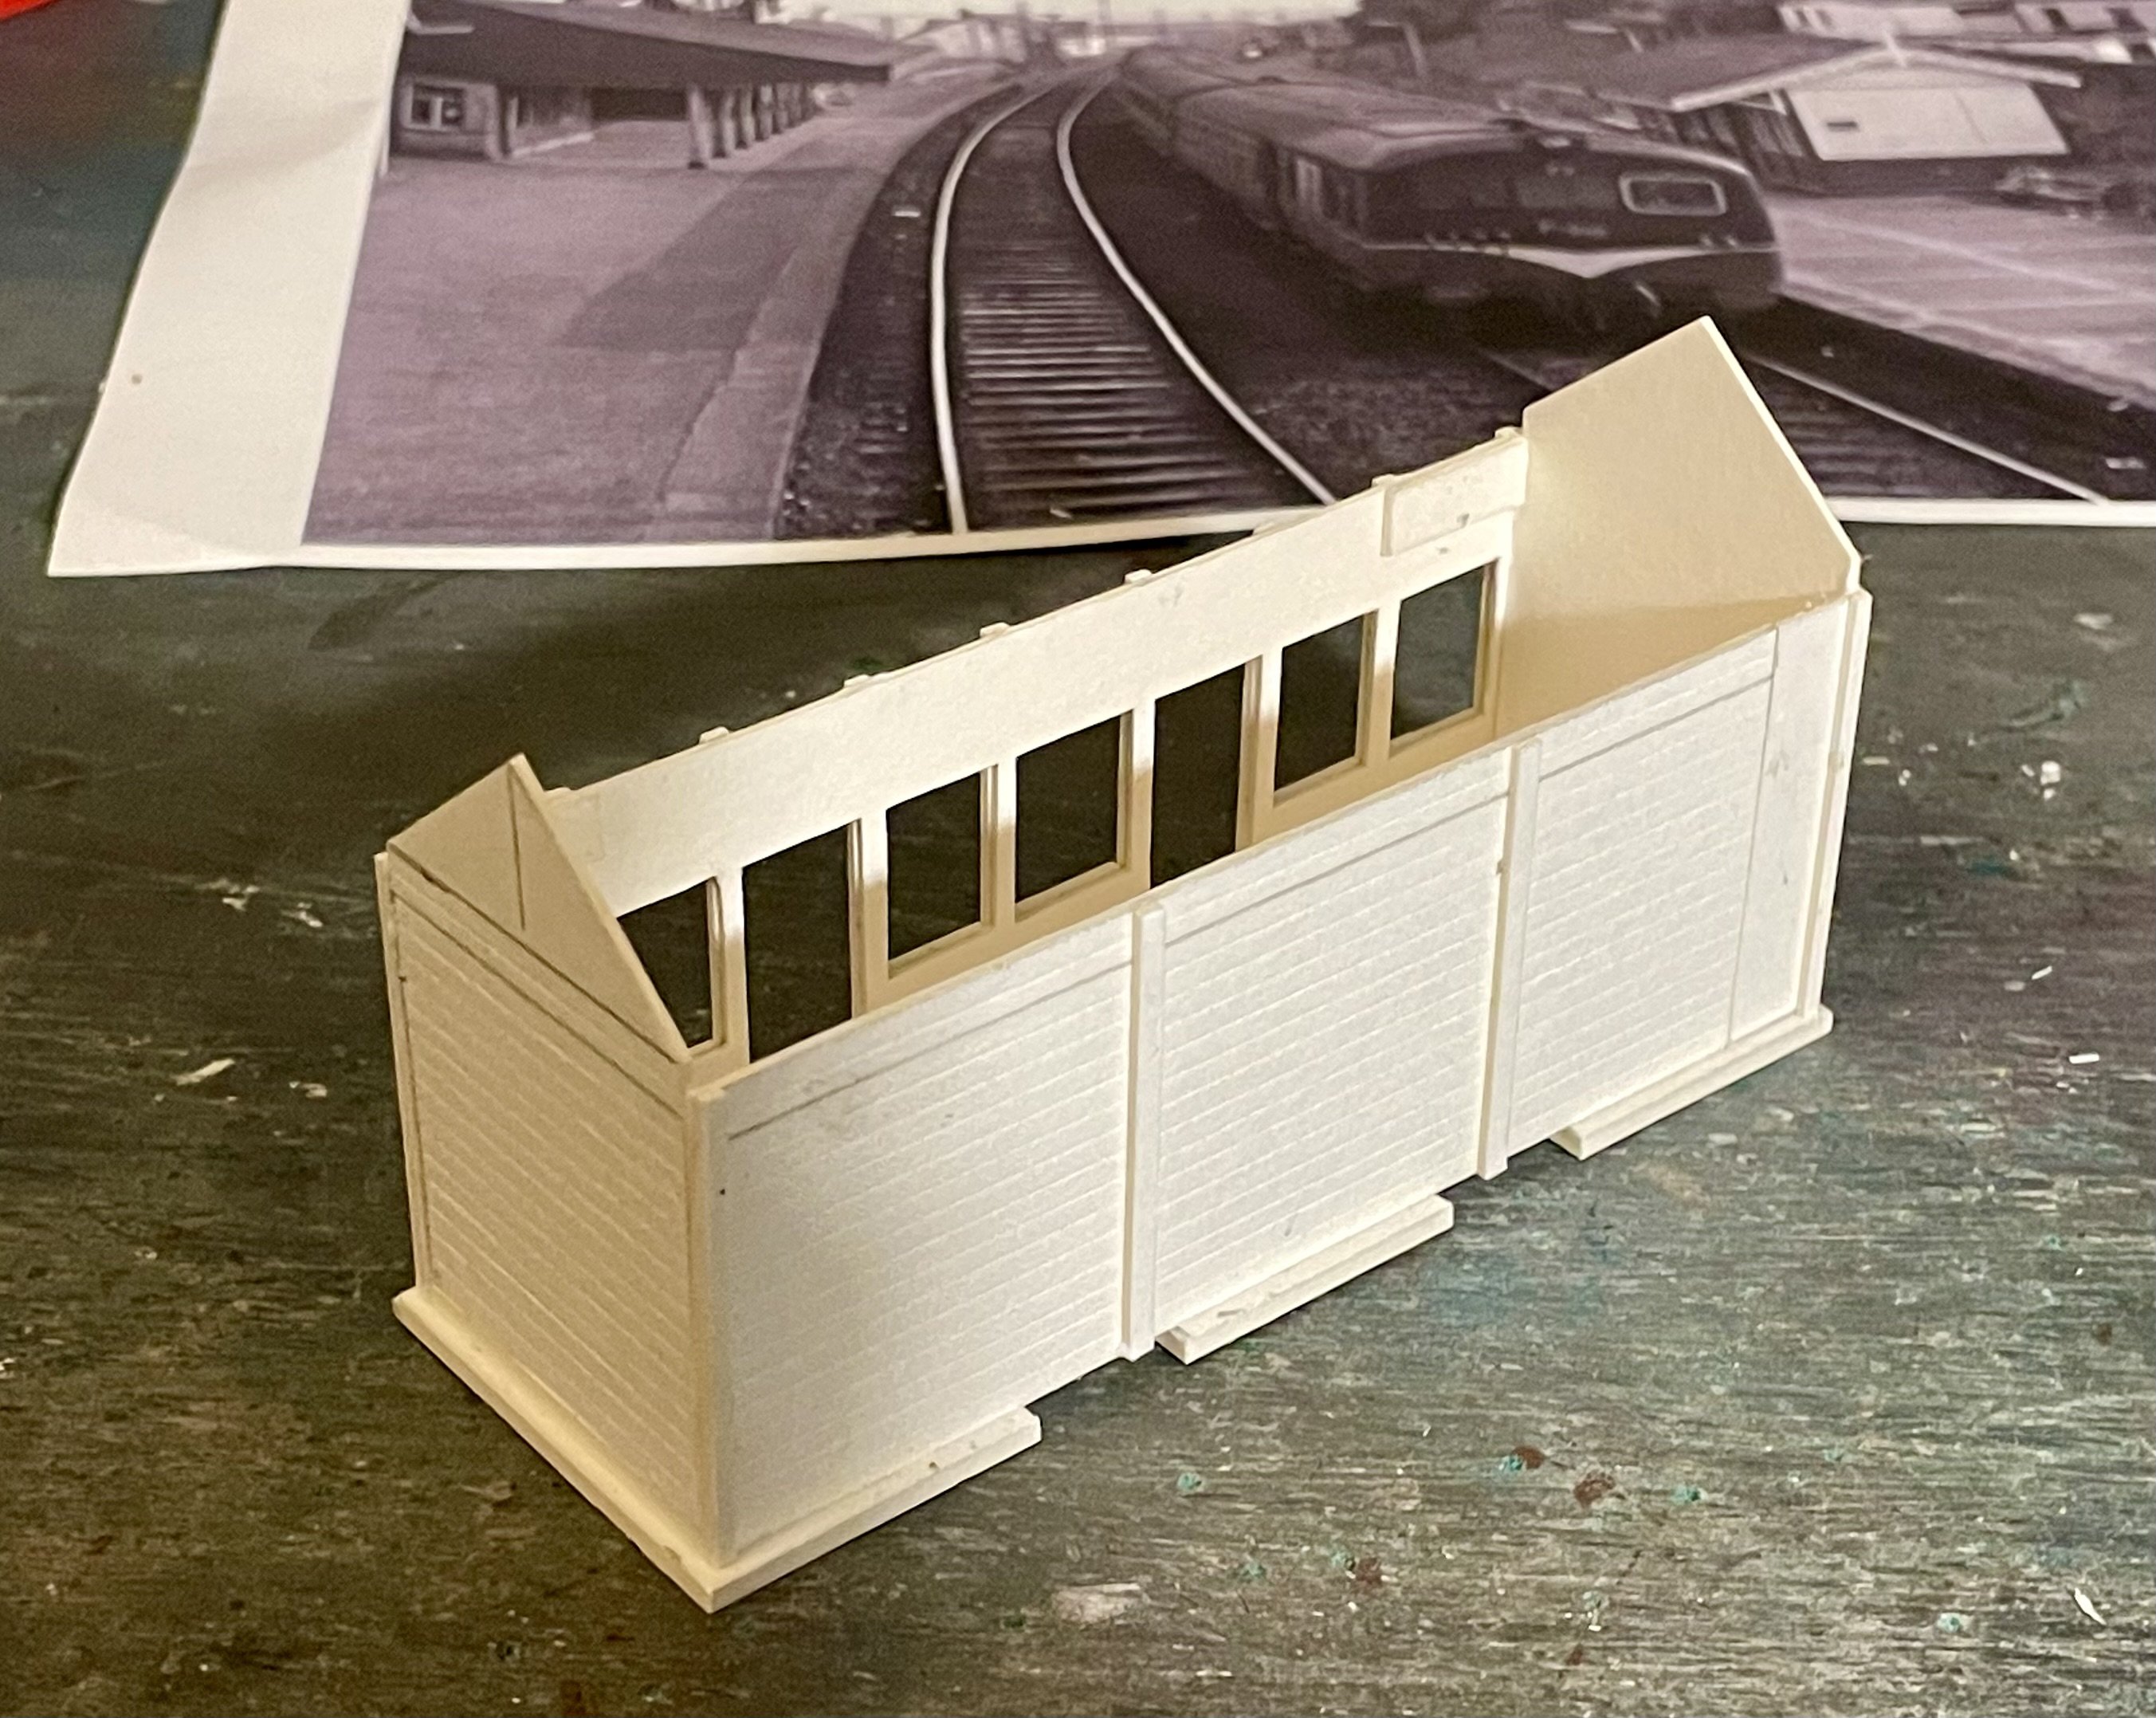
Further progress. Cheers Darius
- 416 replies
-
- 10
-
-
-
But probably not my spare room - even with T gauge… Cheers Darius
-
Canopy structure started. Cheers Darius
- 416 replies
-
- 10
-
-
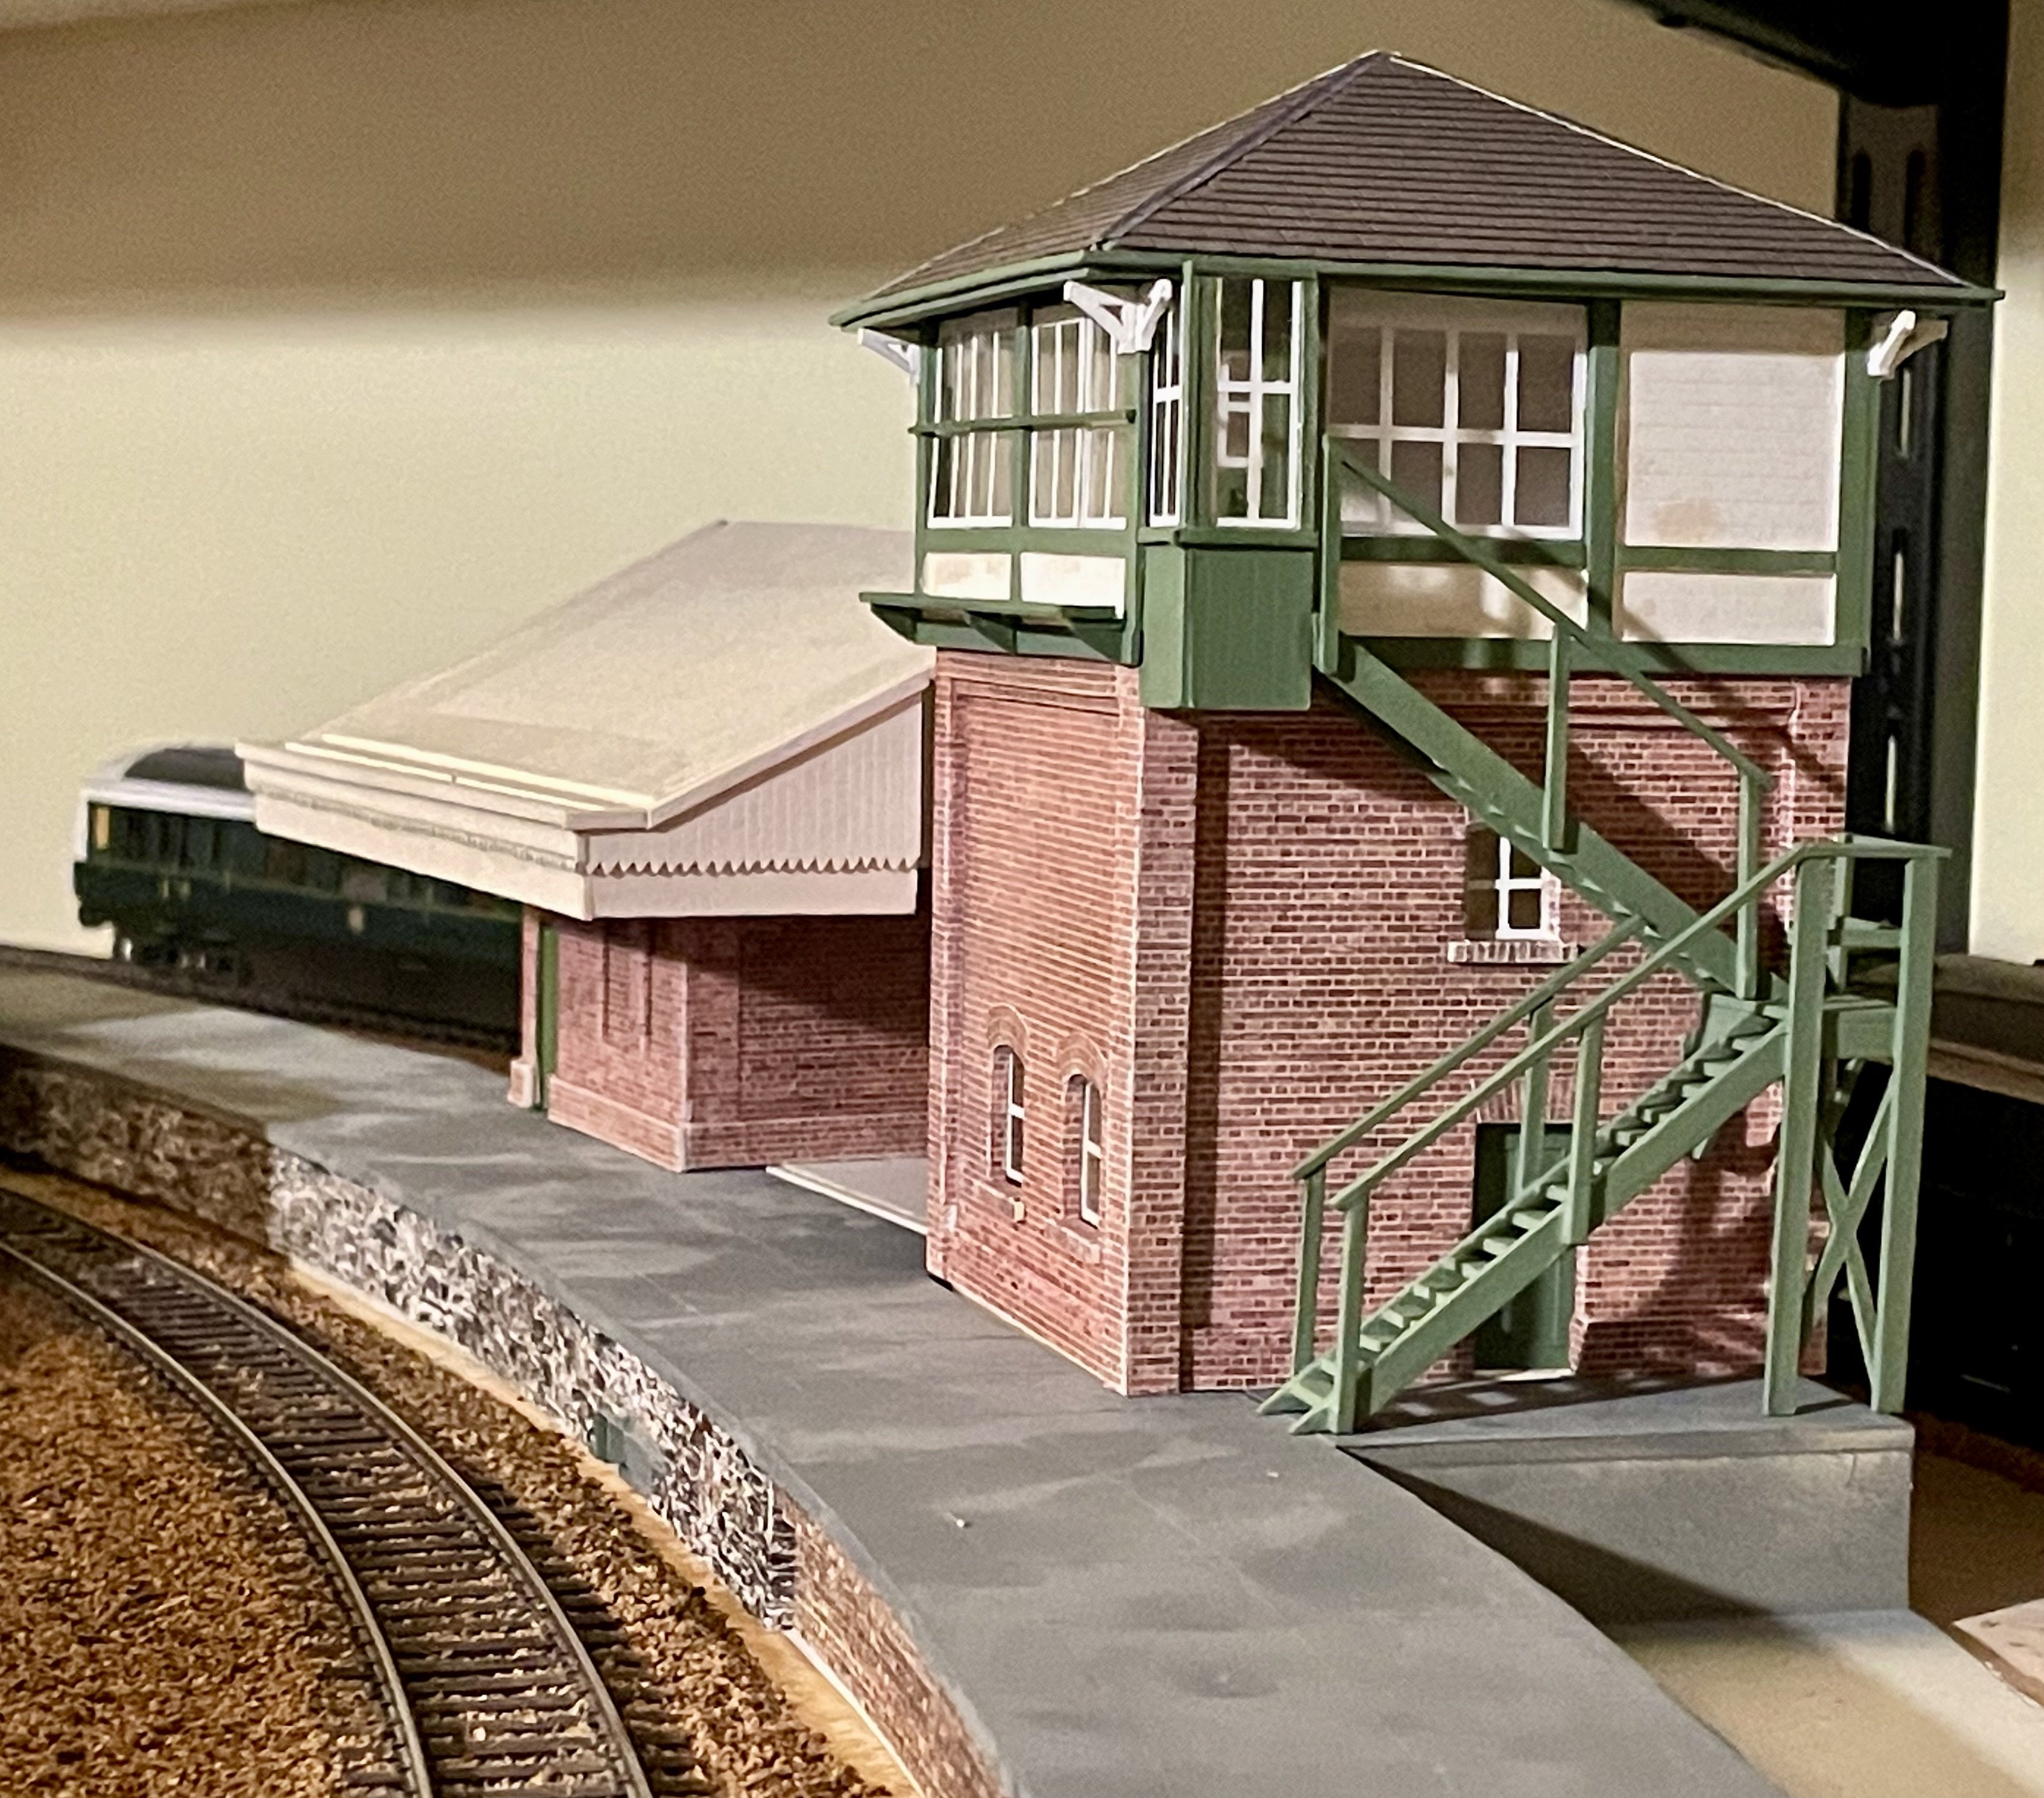
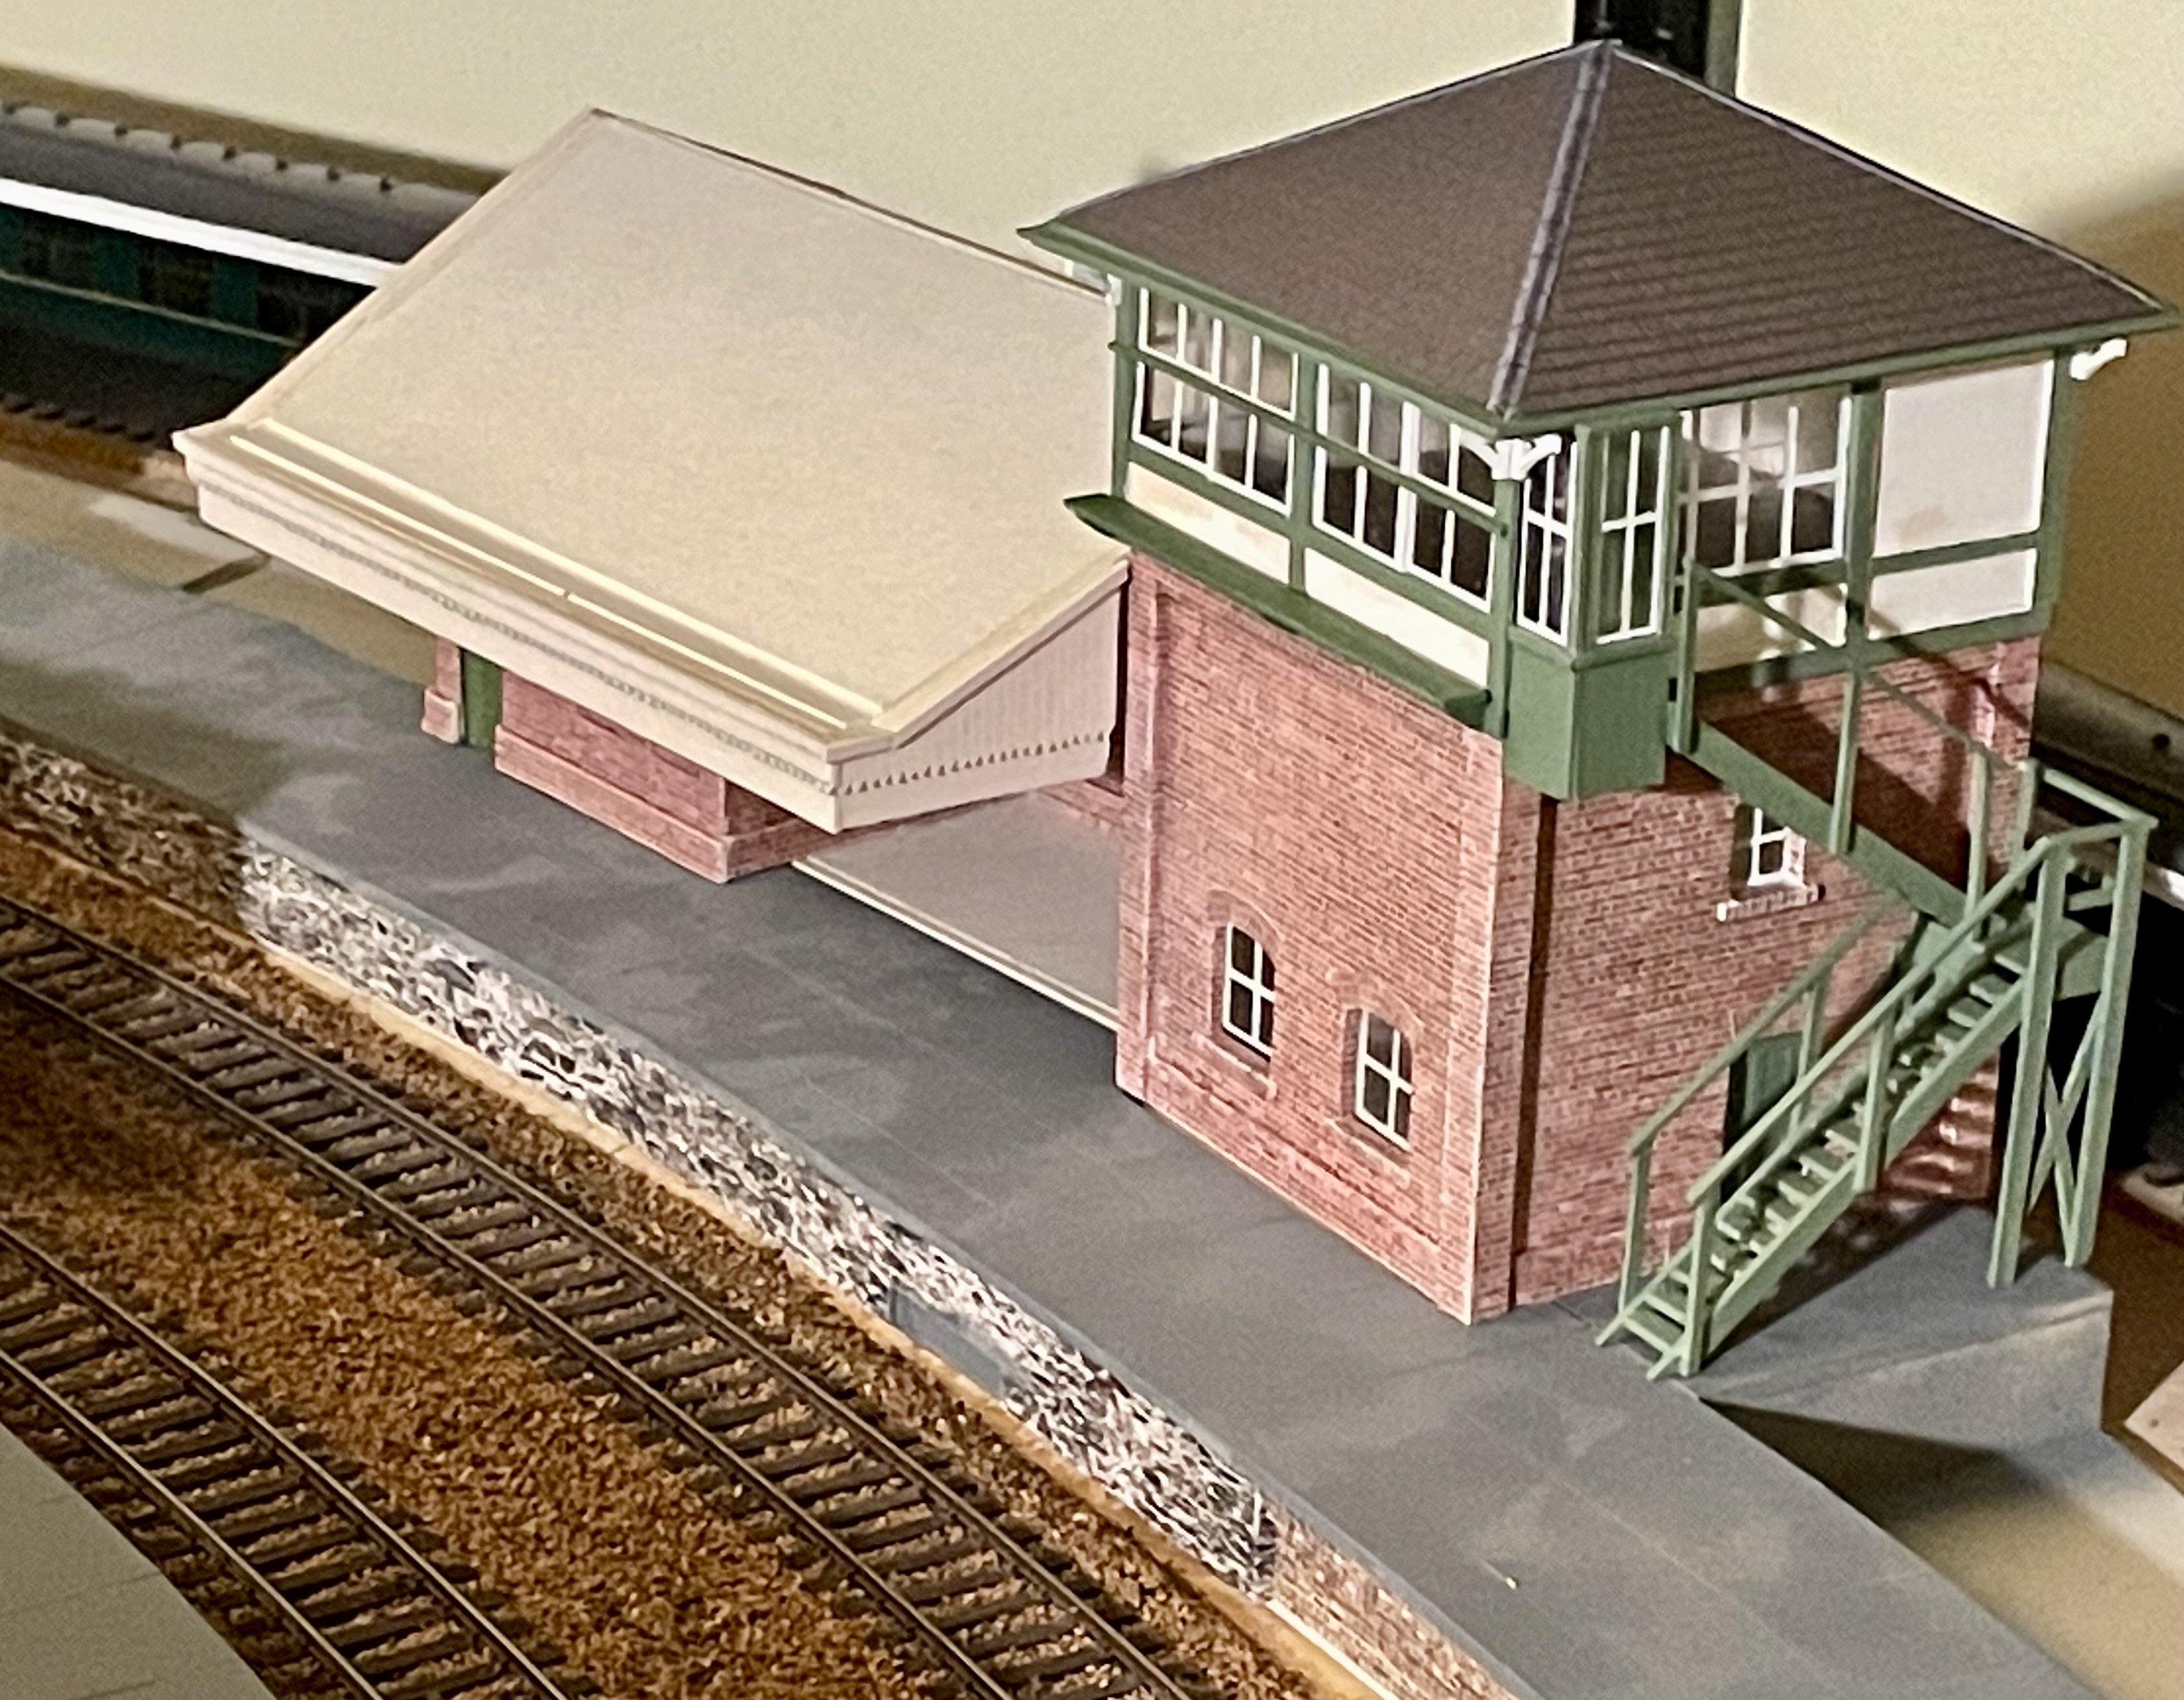
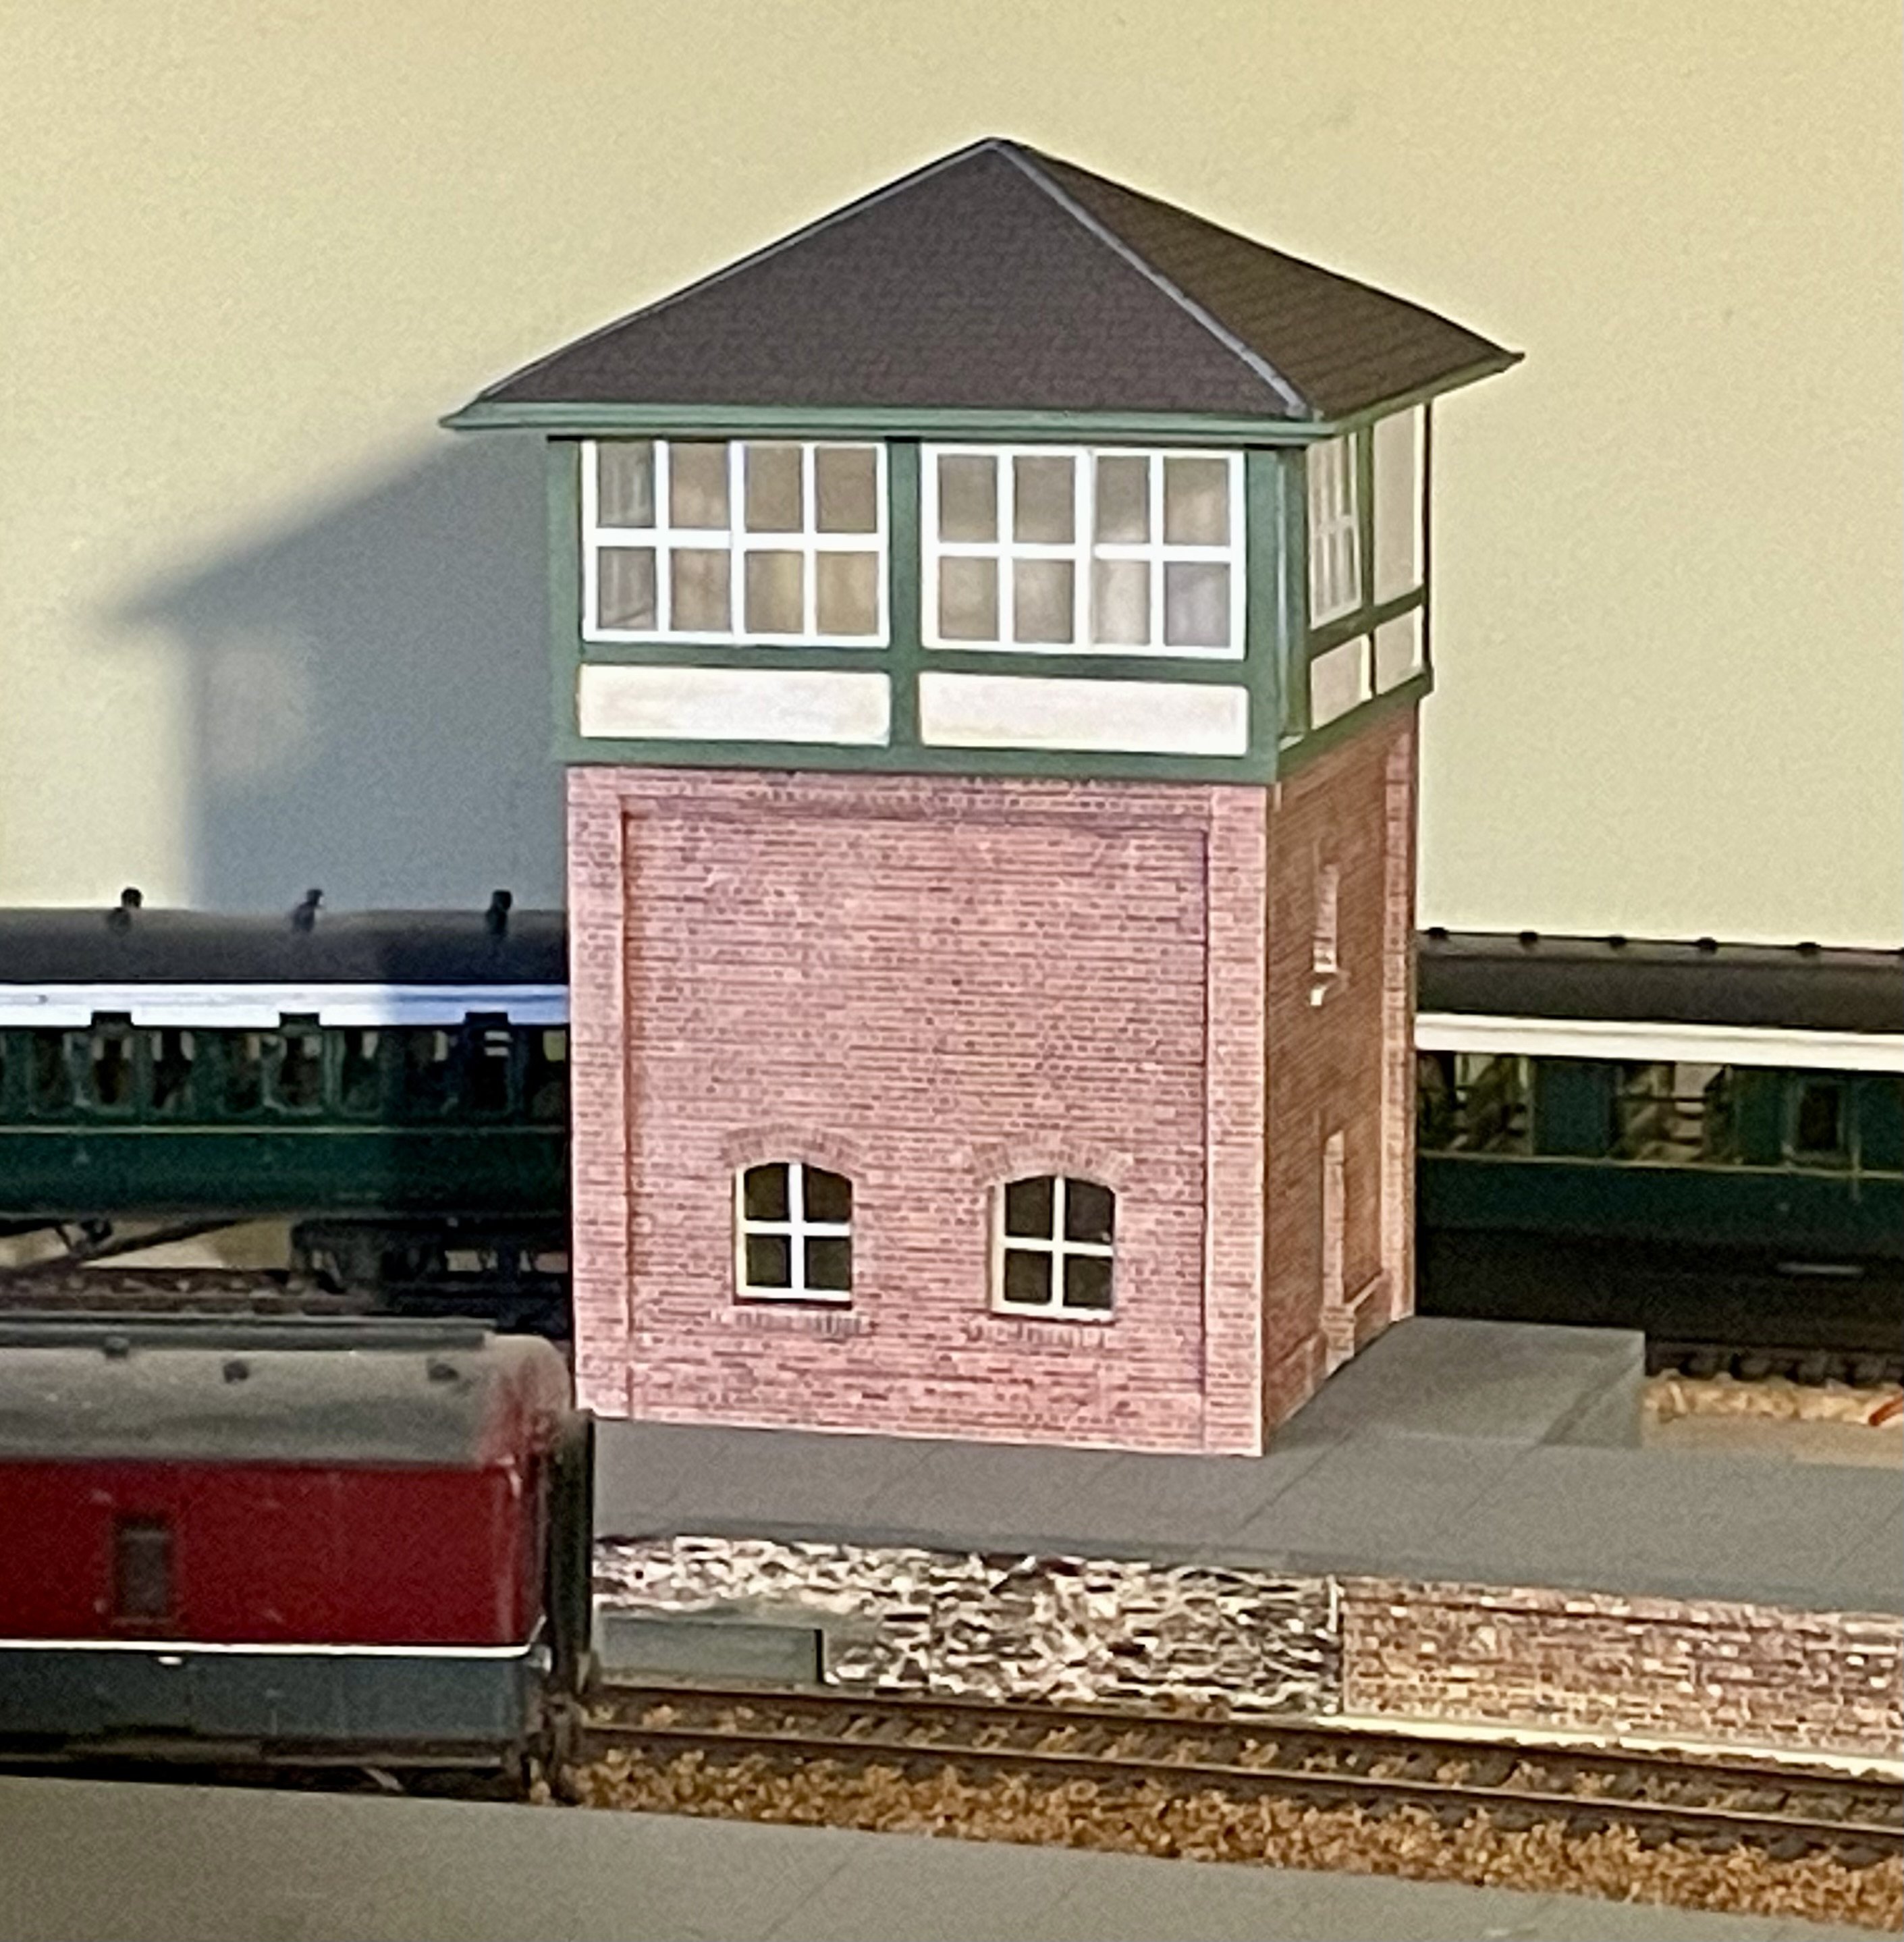
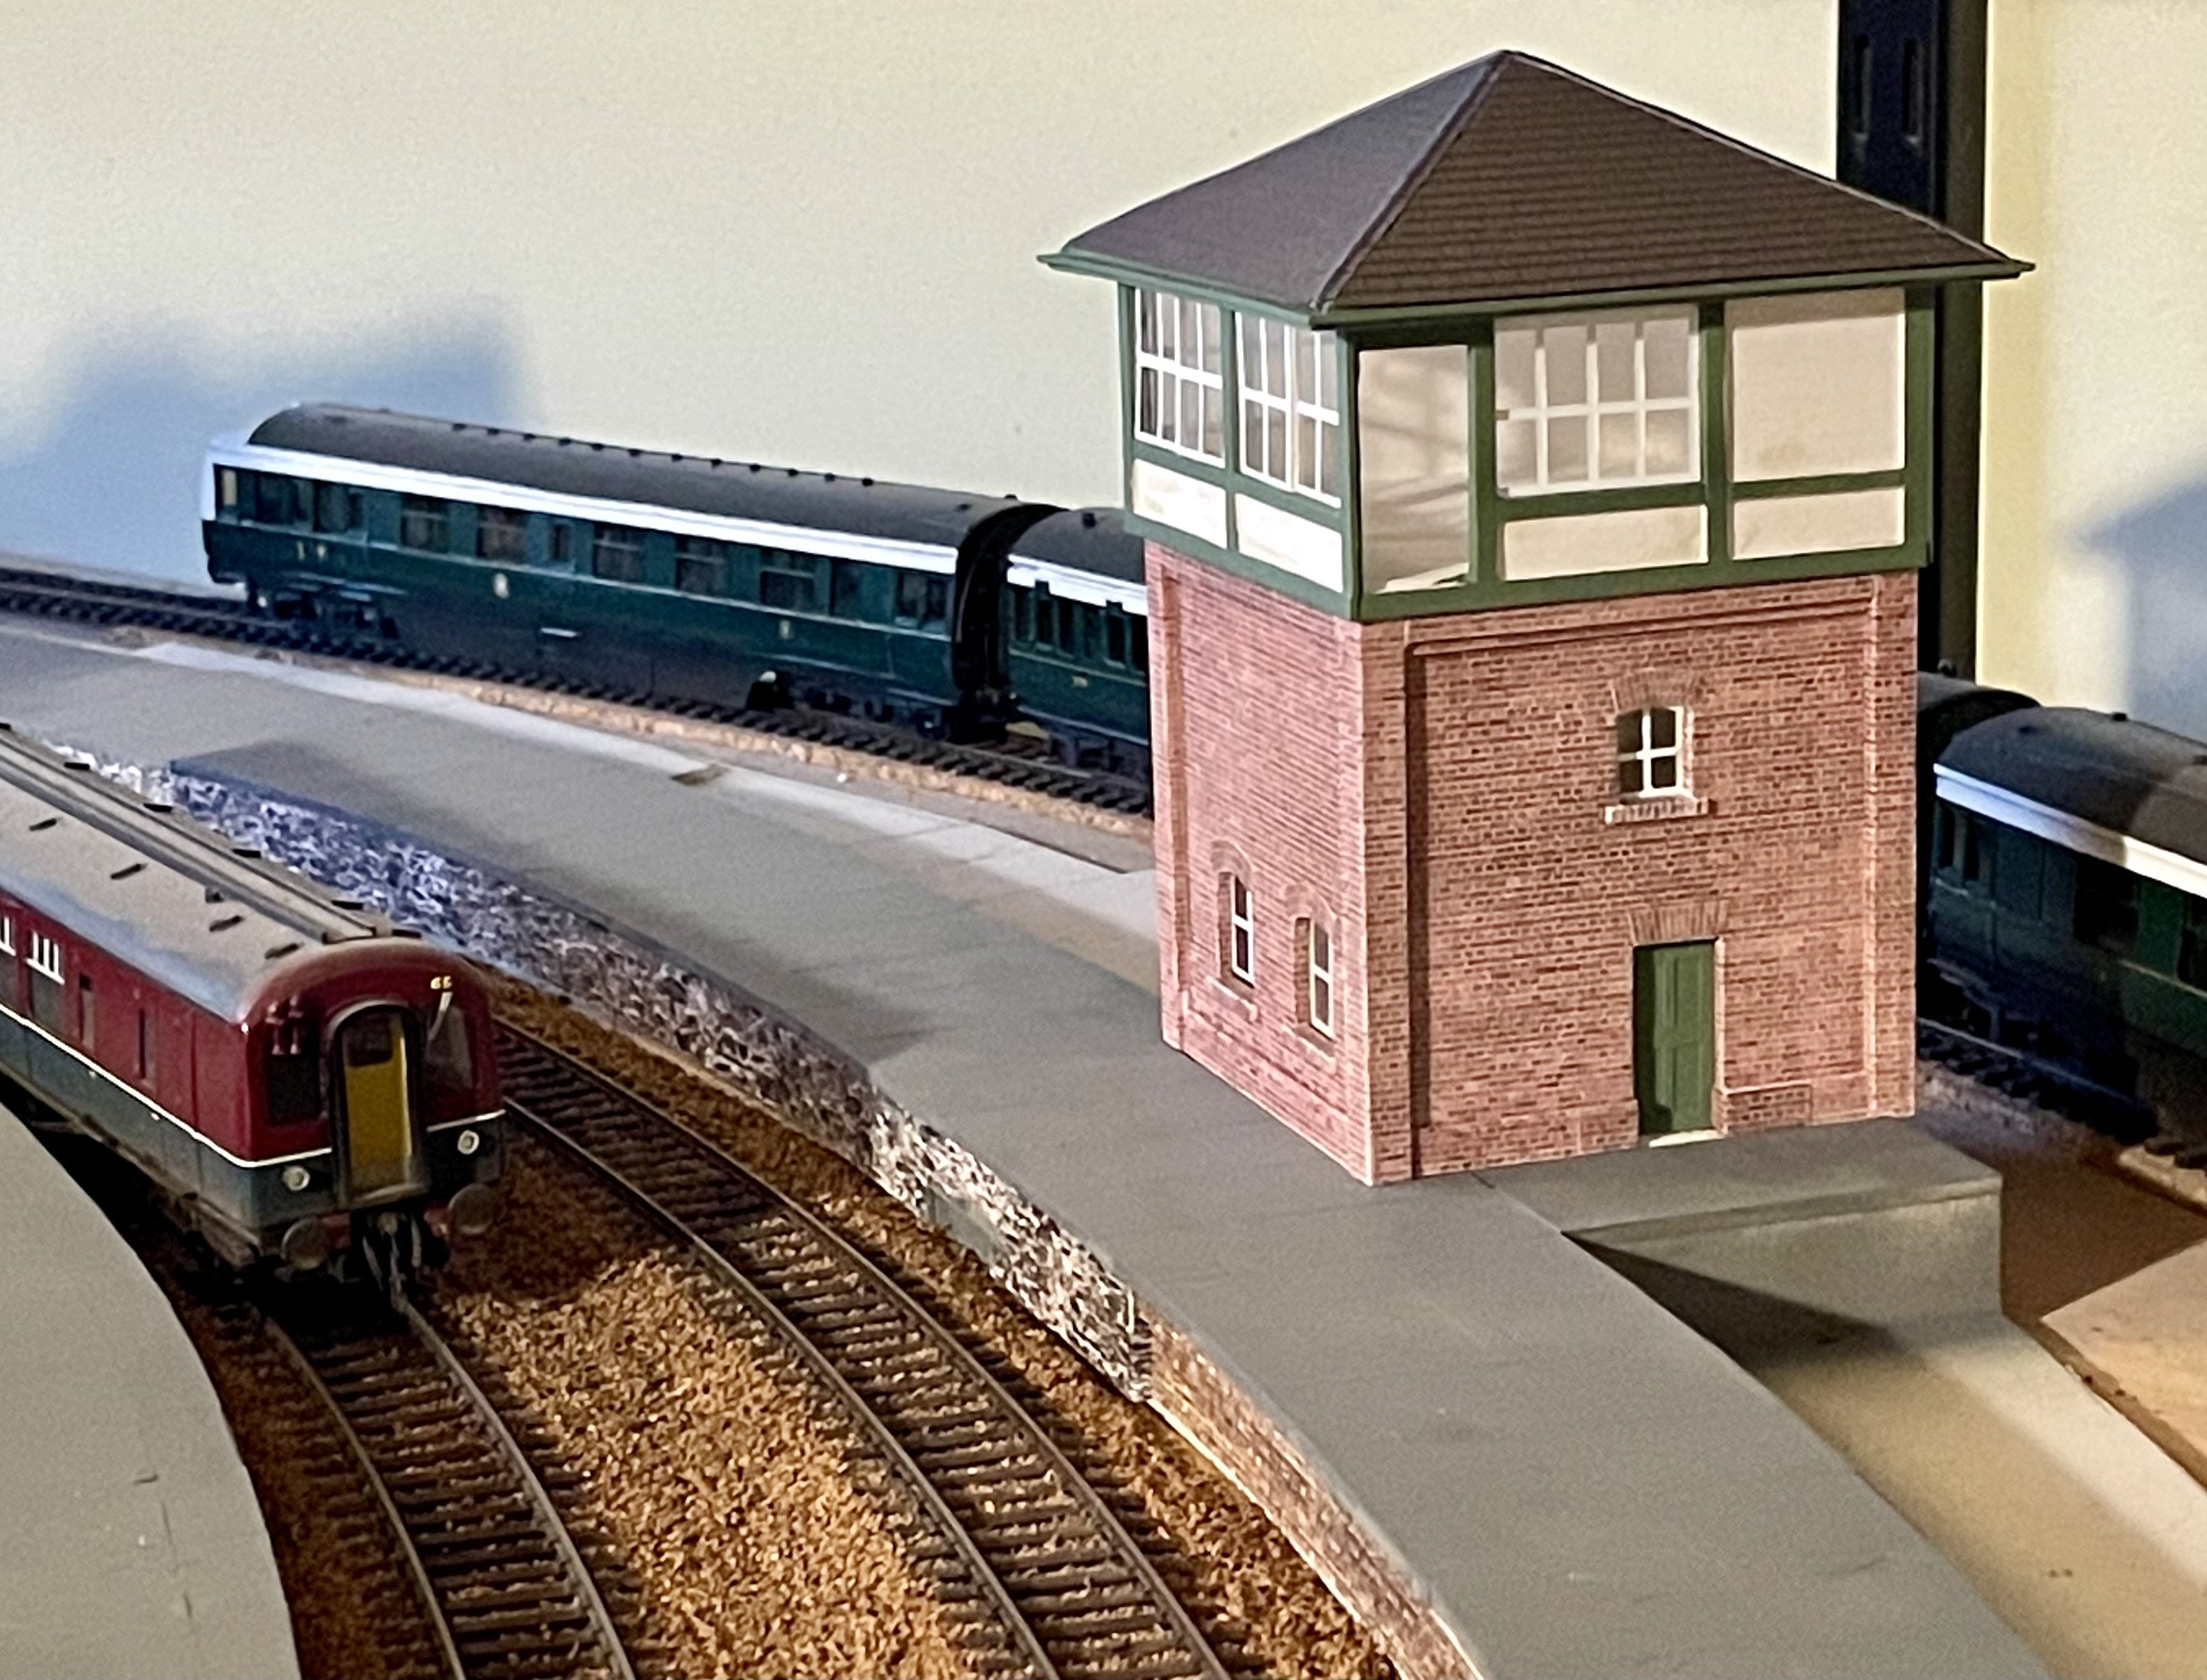
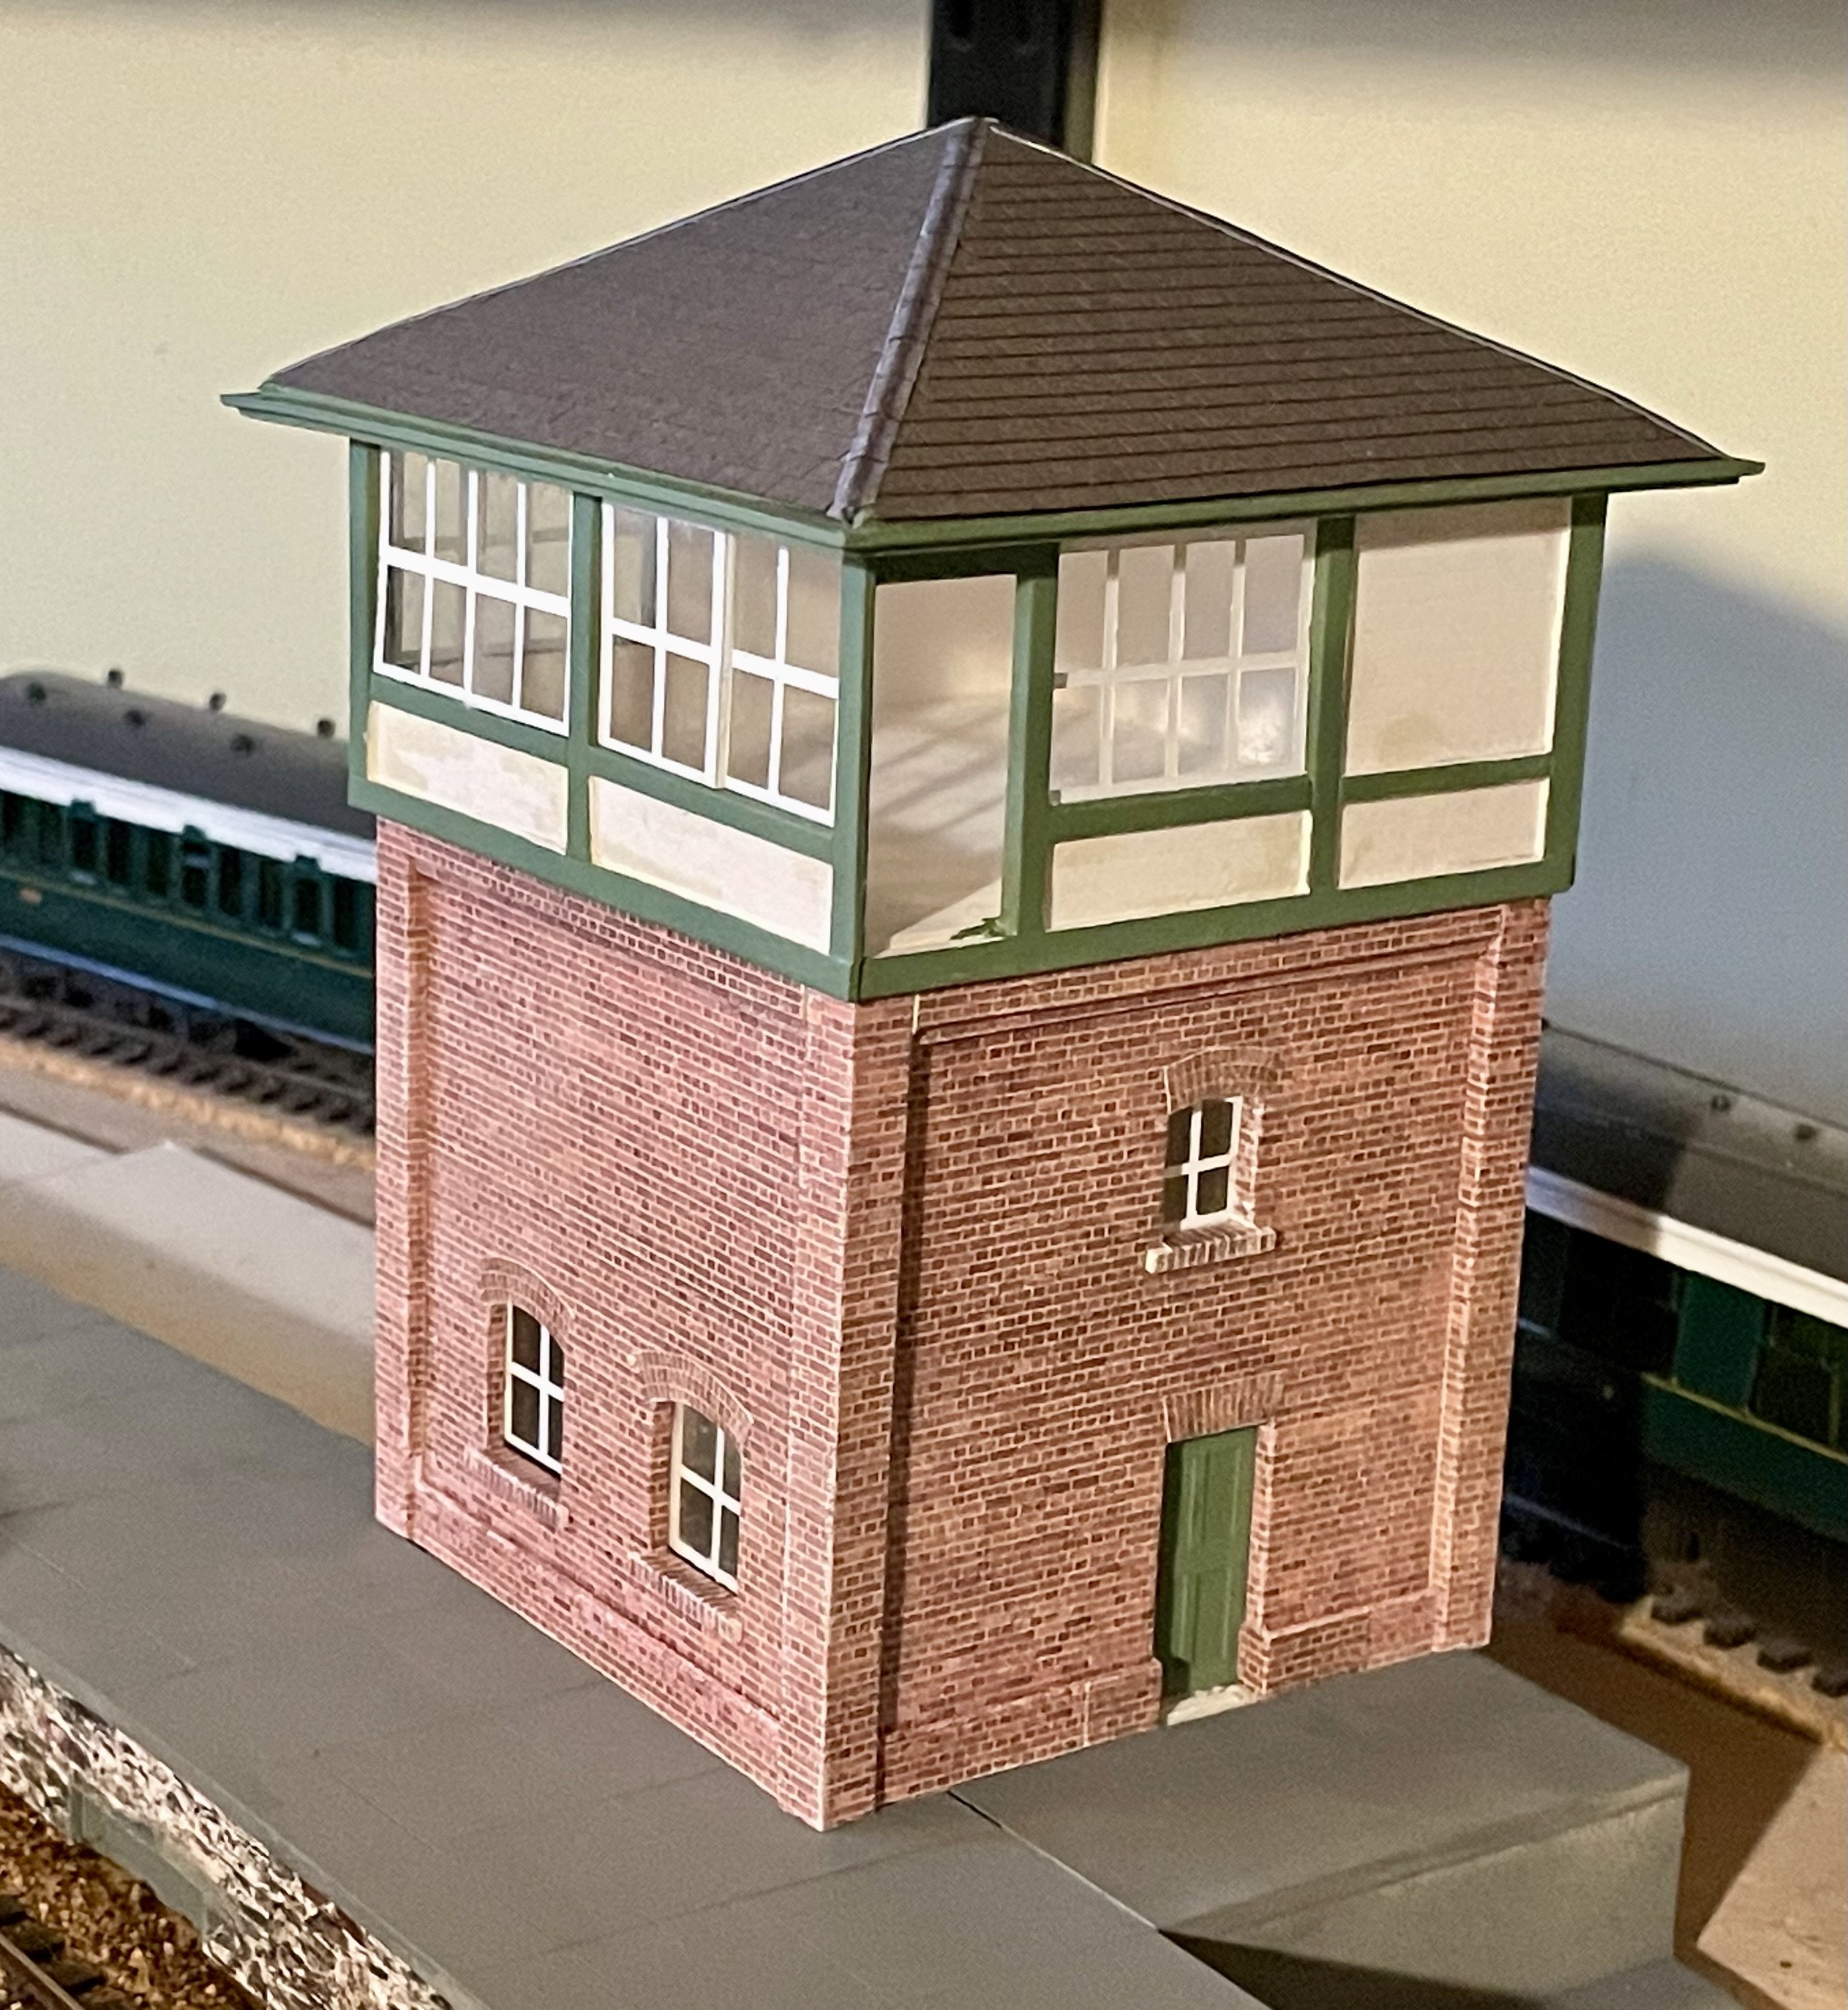
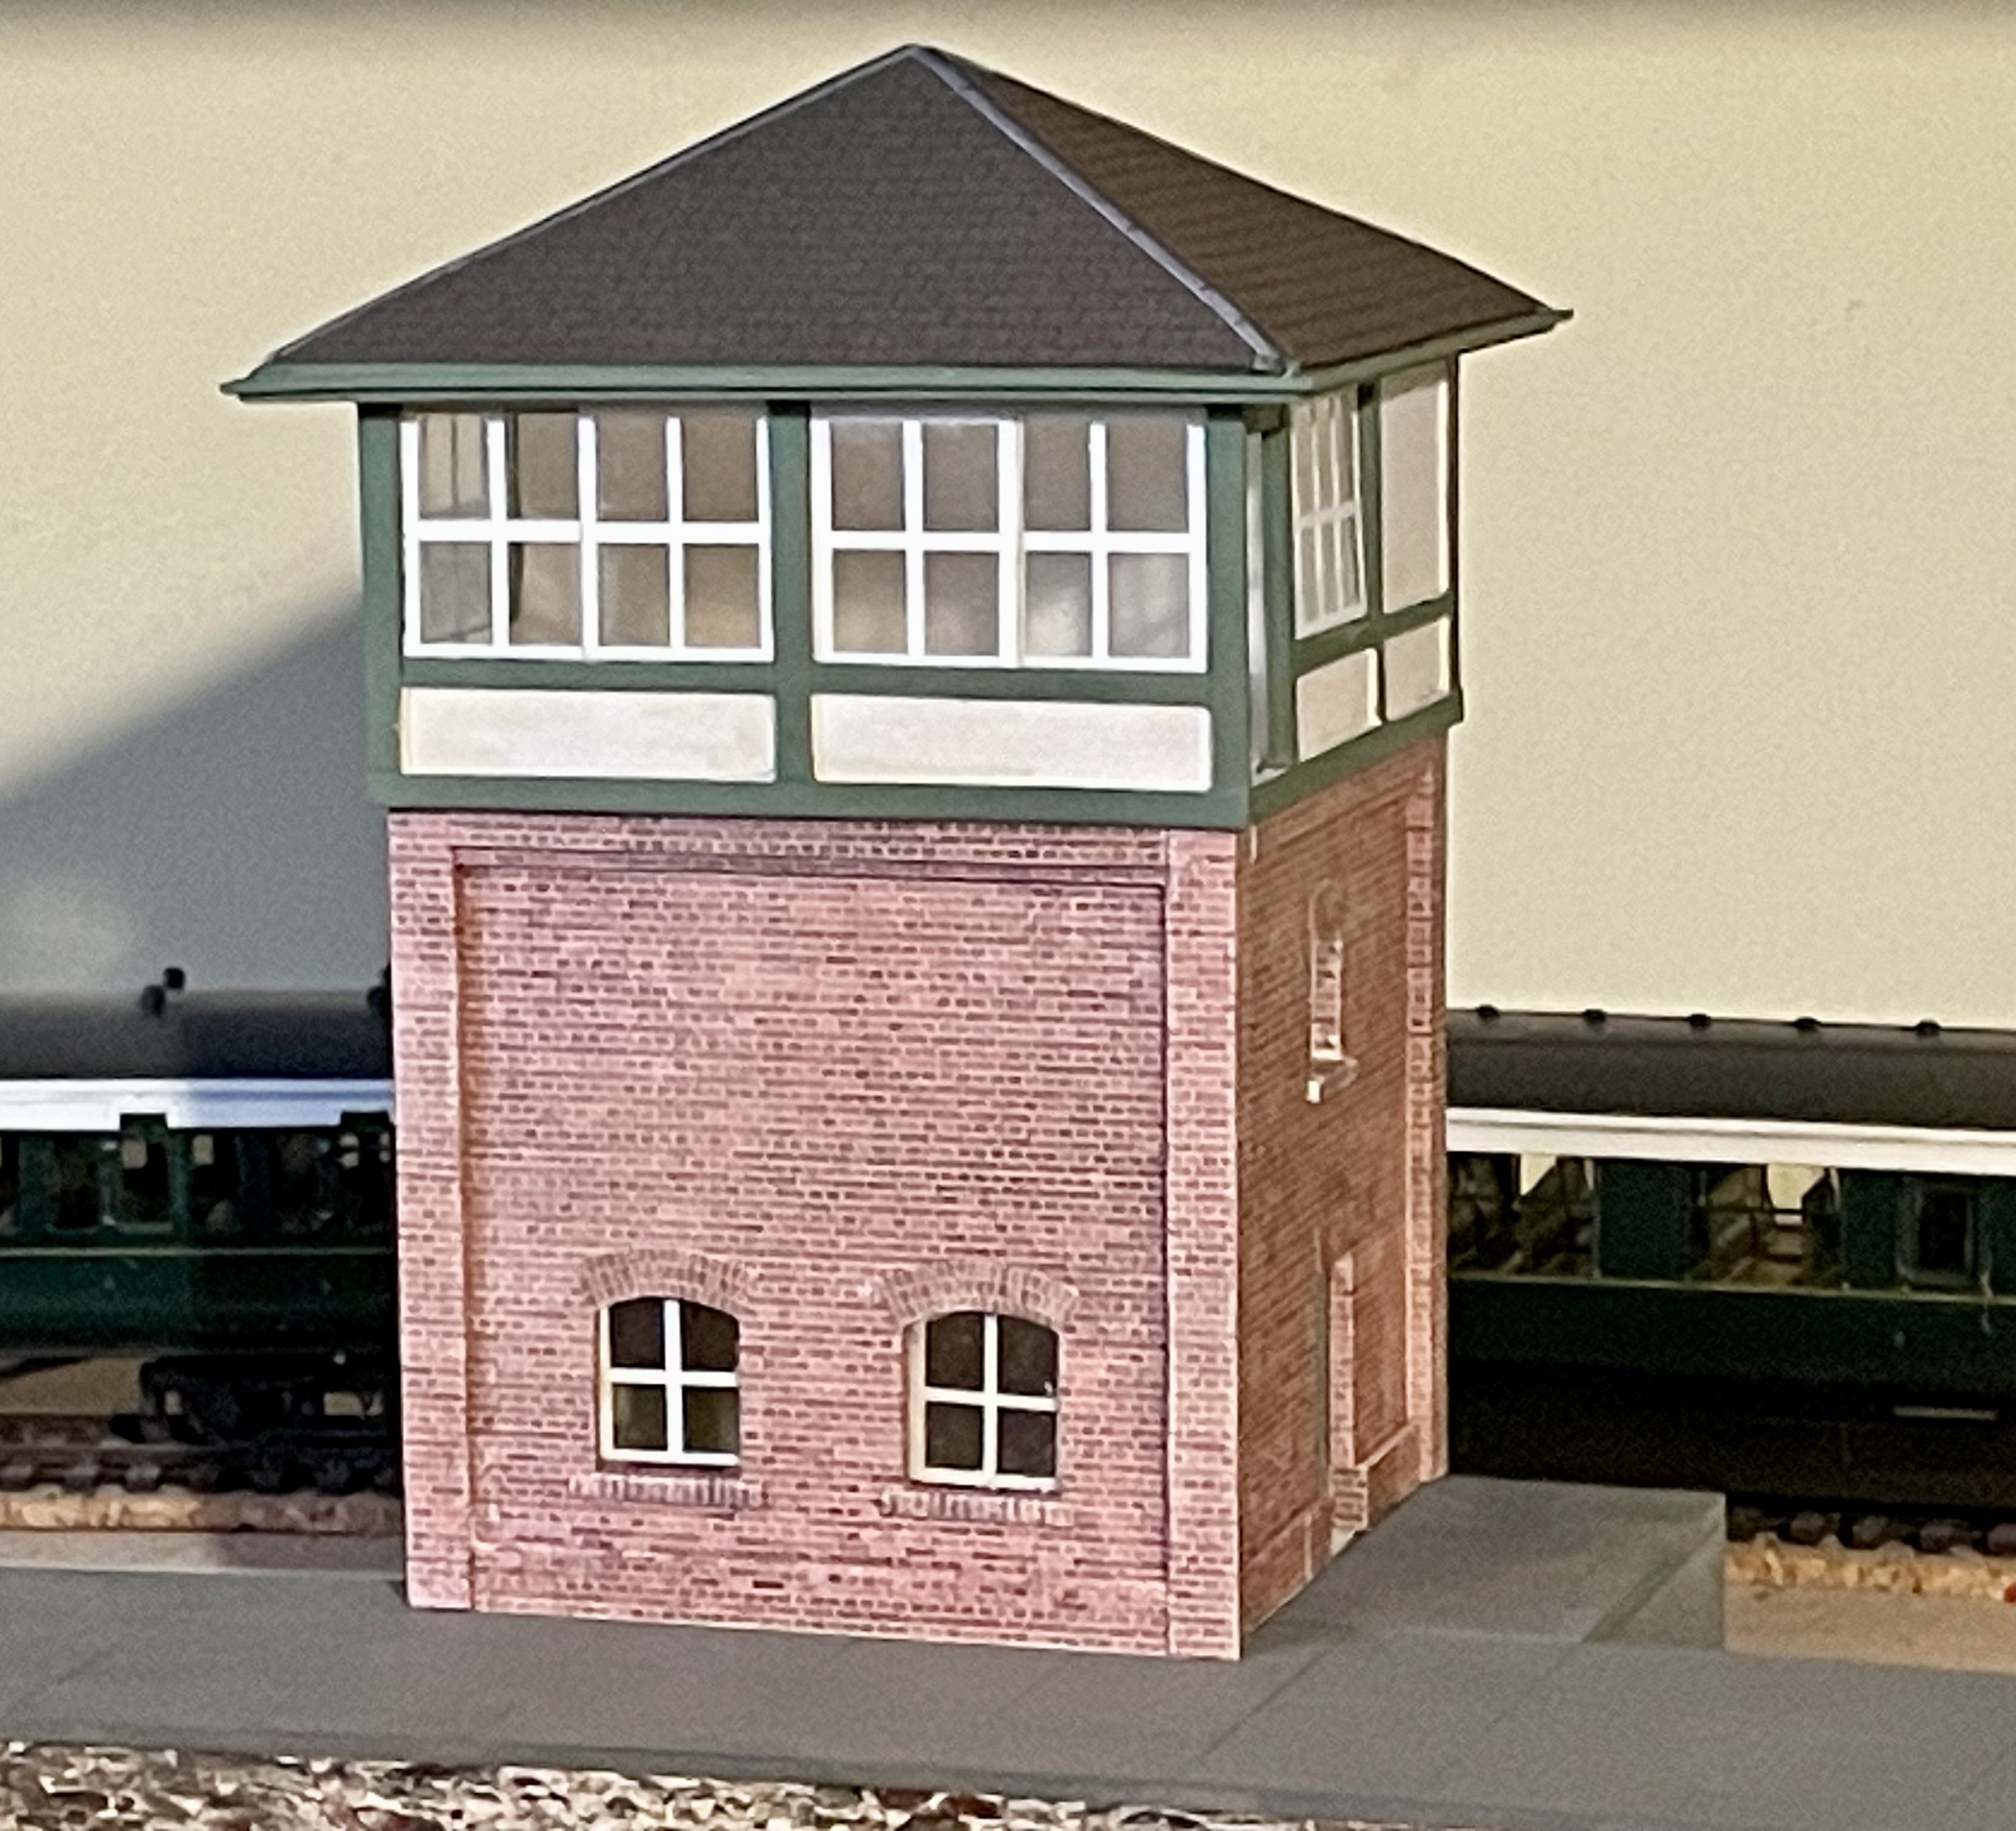
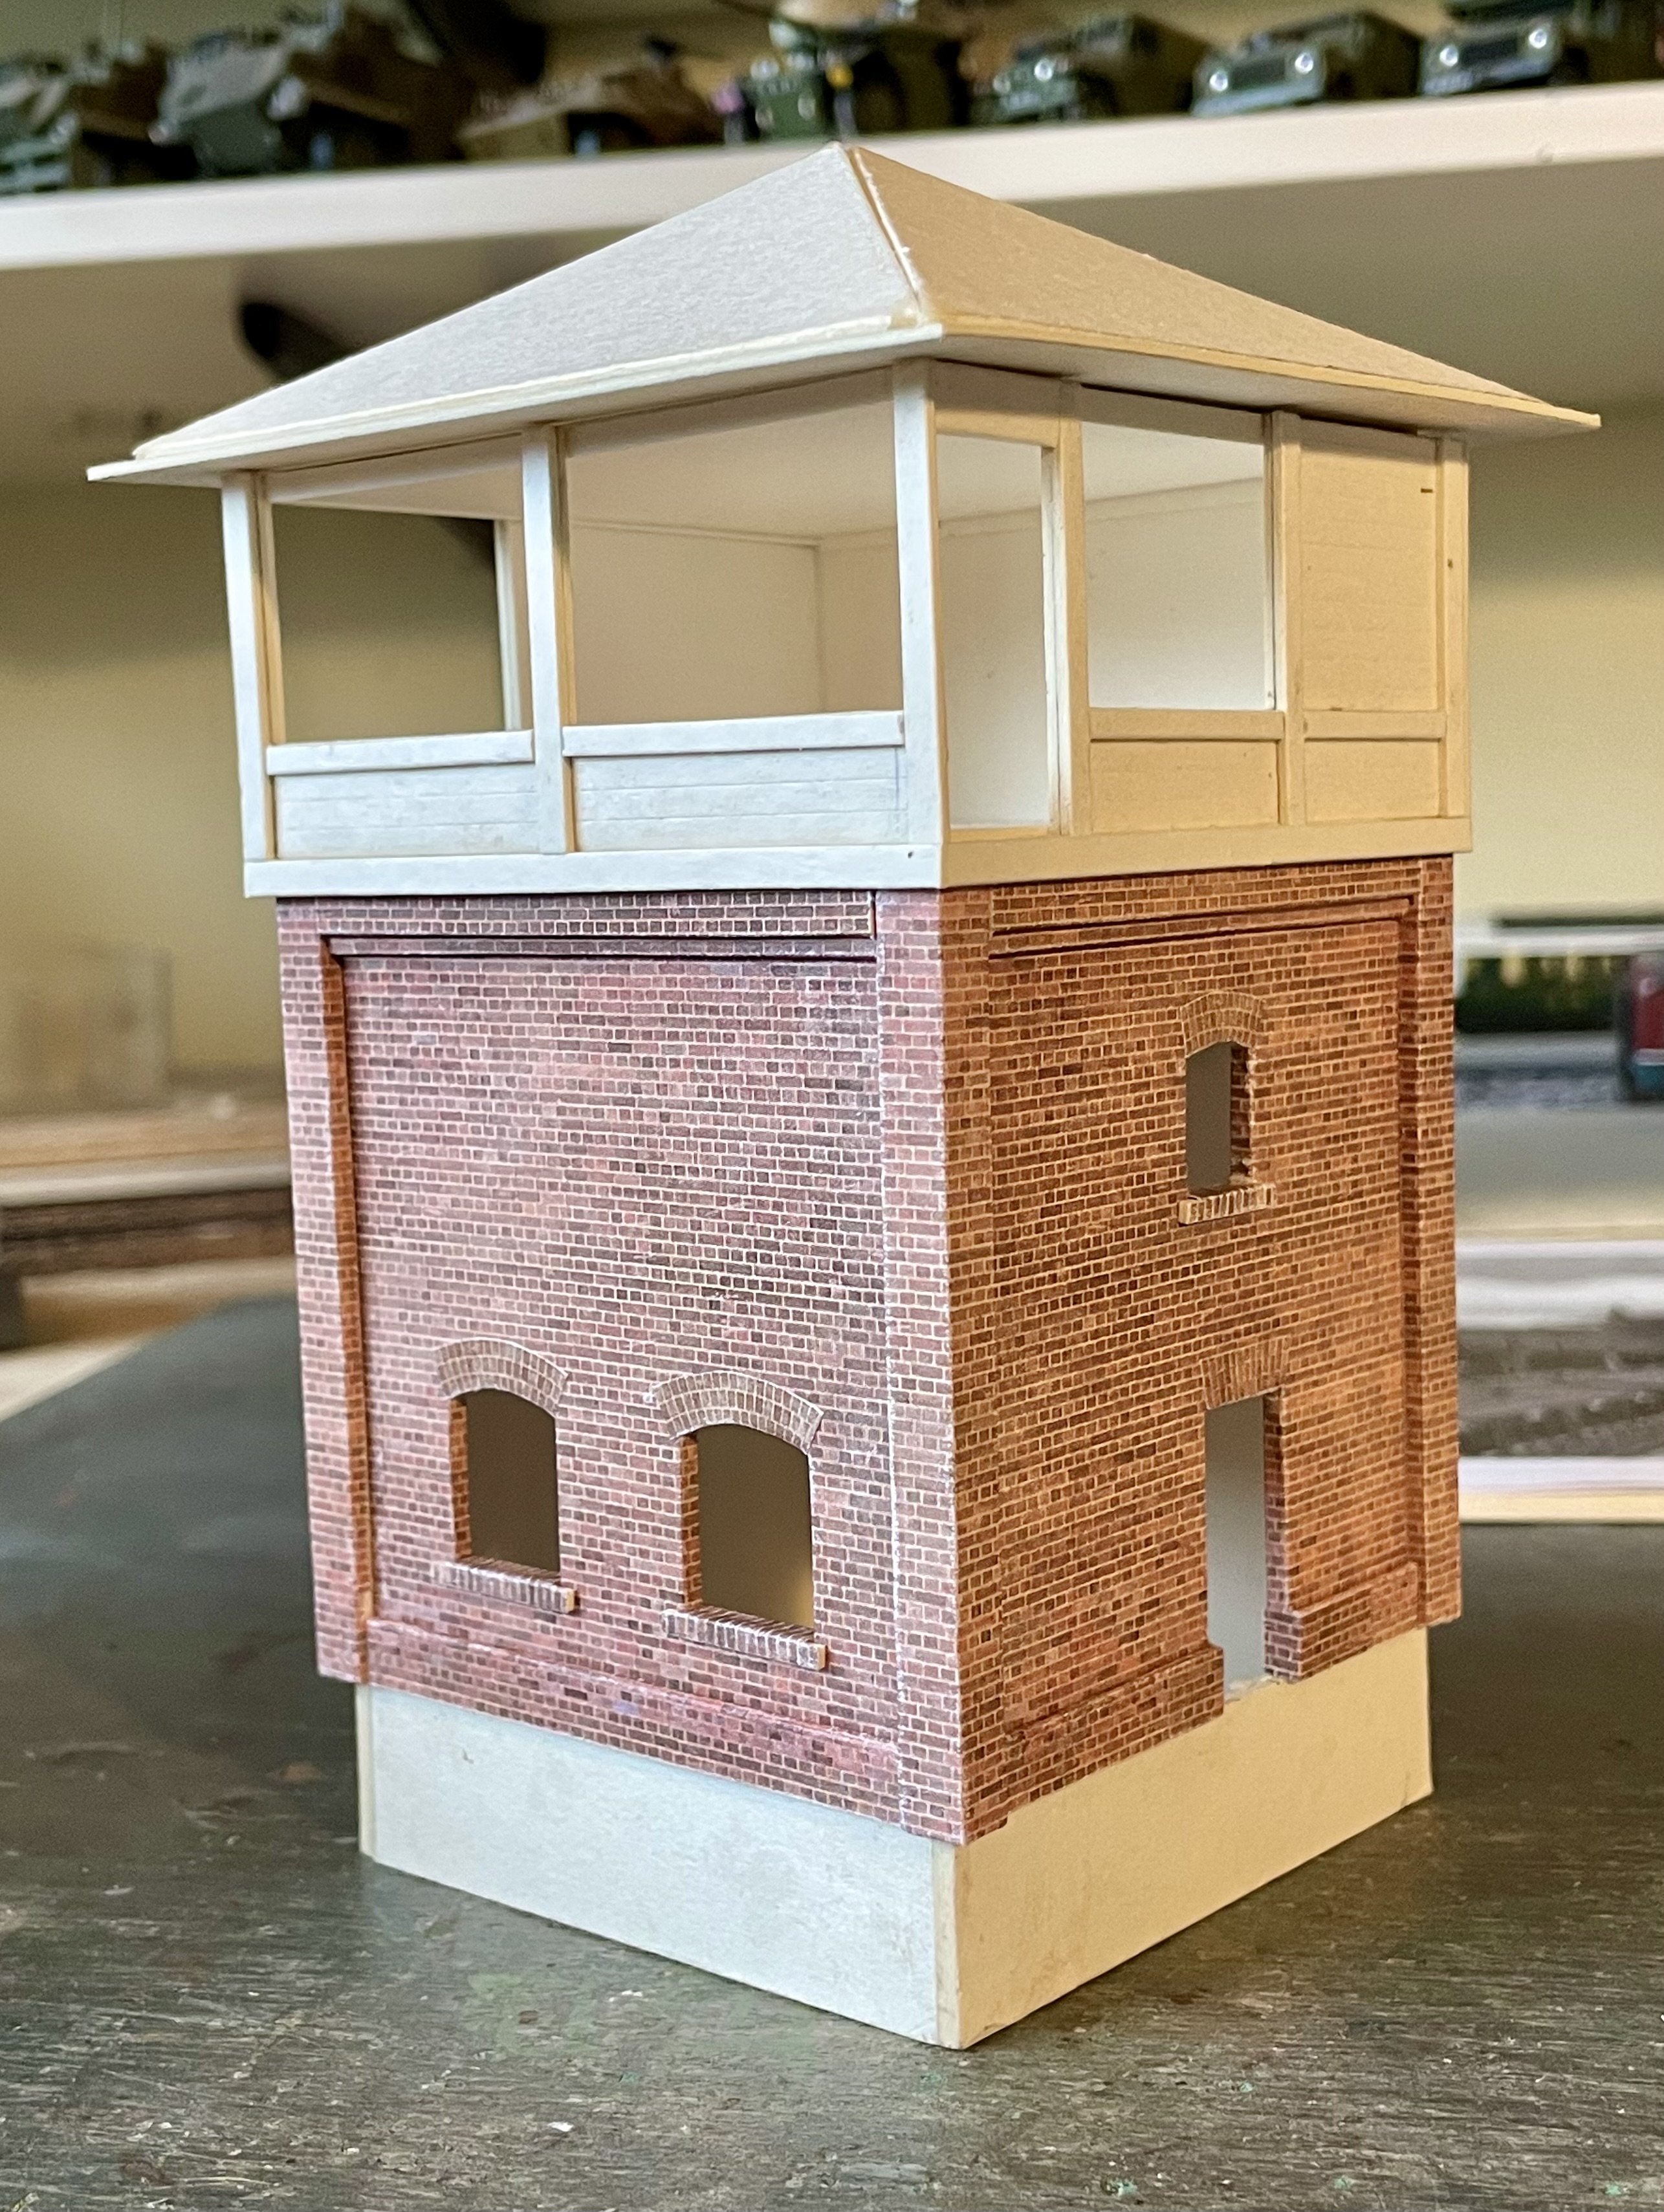
Signalbox completed - bar a few details. Cheers Darius
- 416 replies
-
- 11
-
-
-
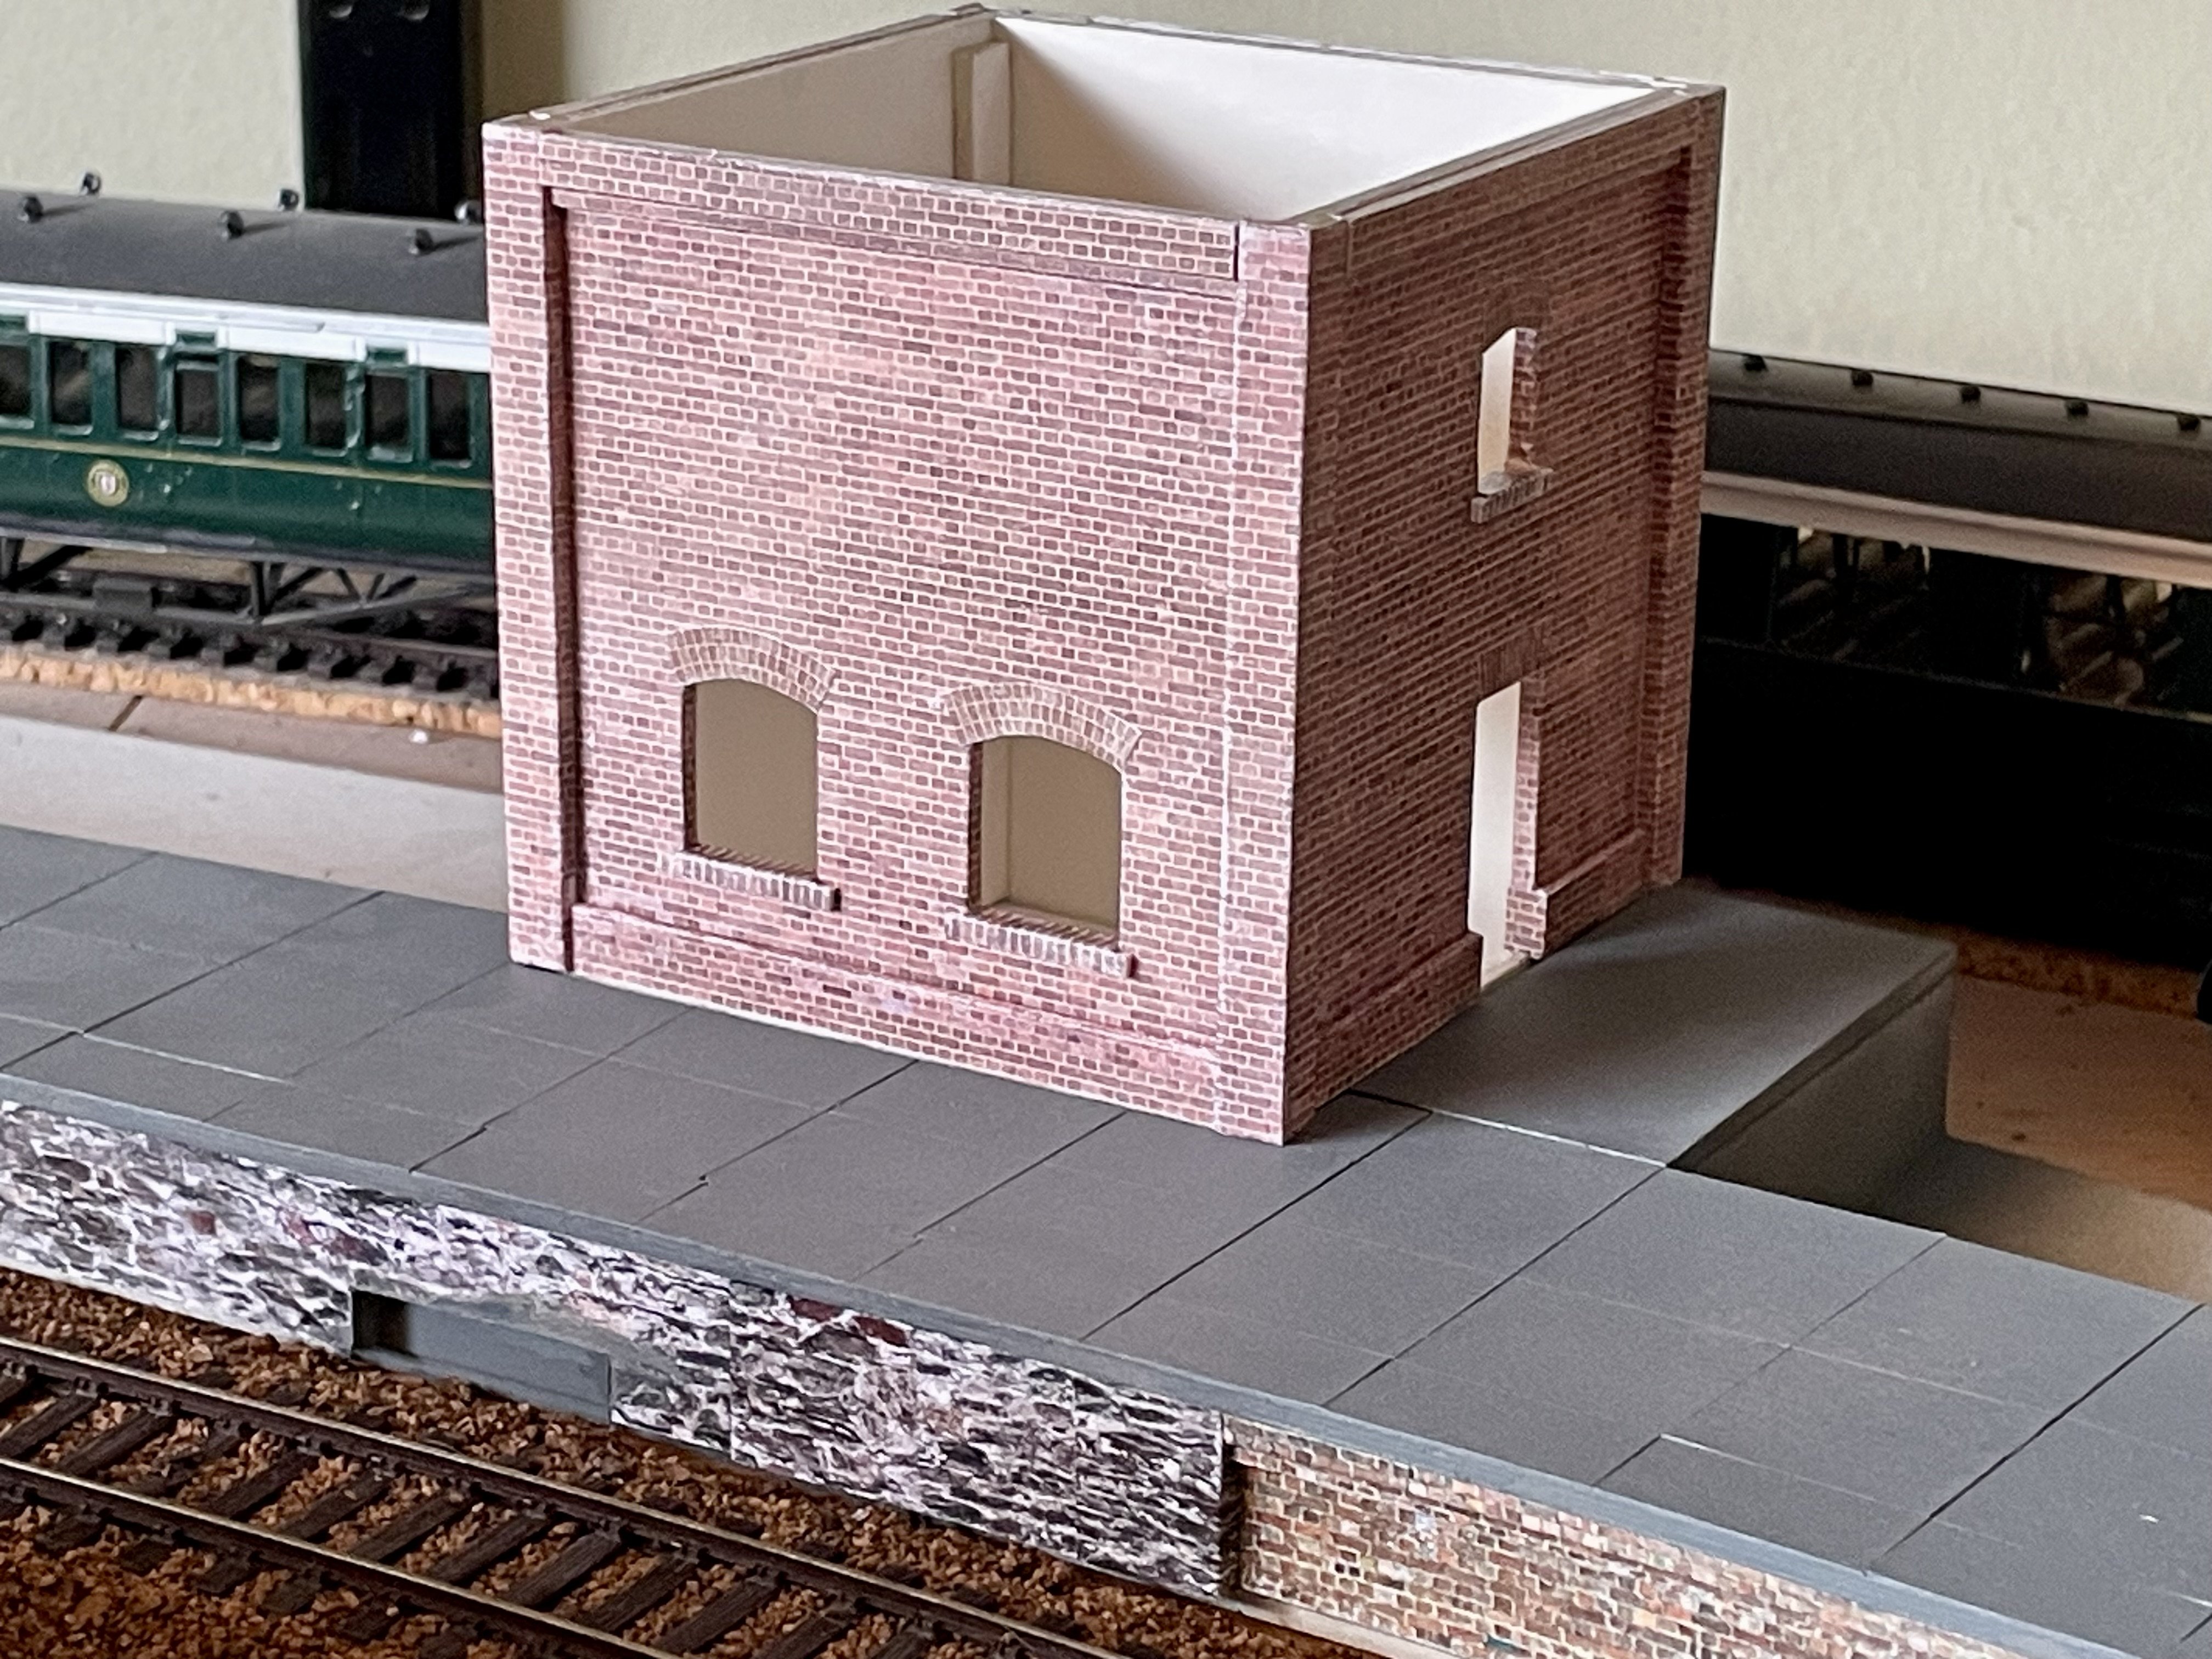
Halfway there… Cheers Darius
- 416 replies
-
- 15
-
-

-
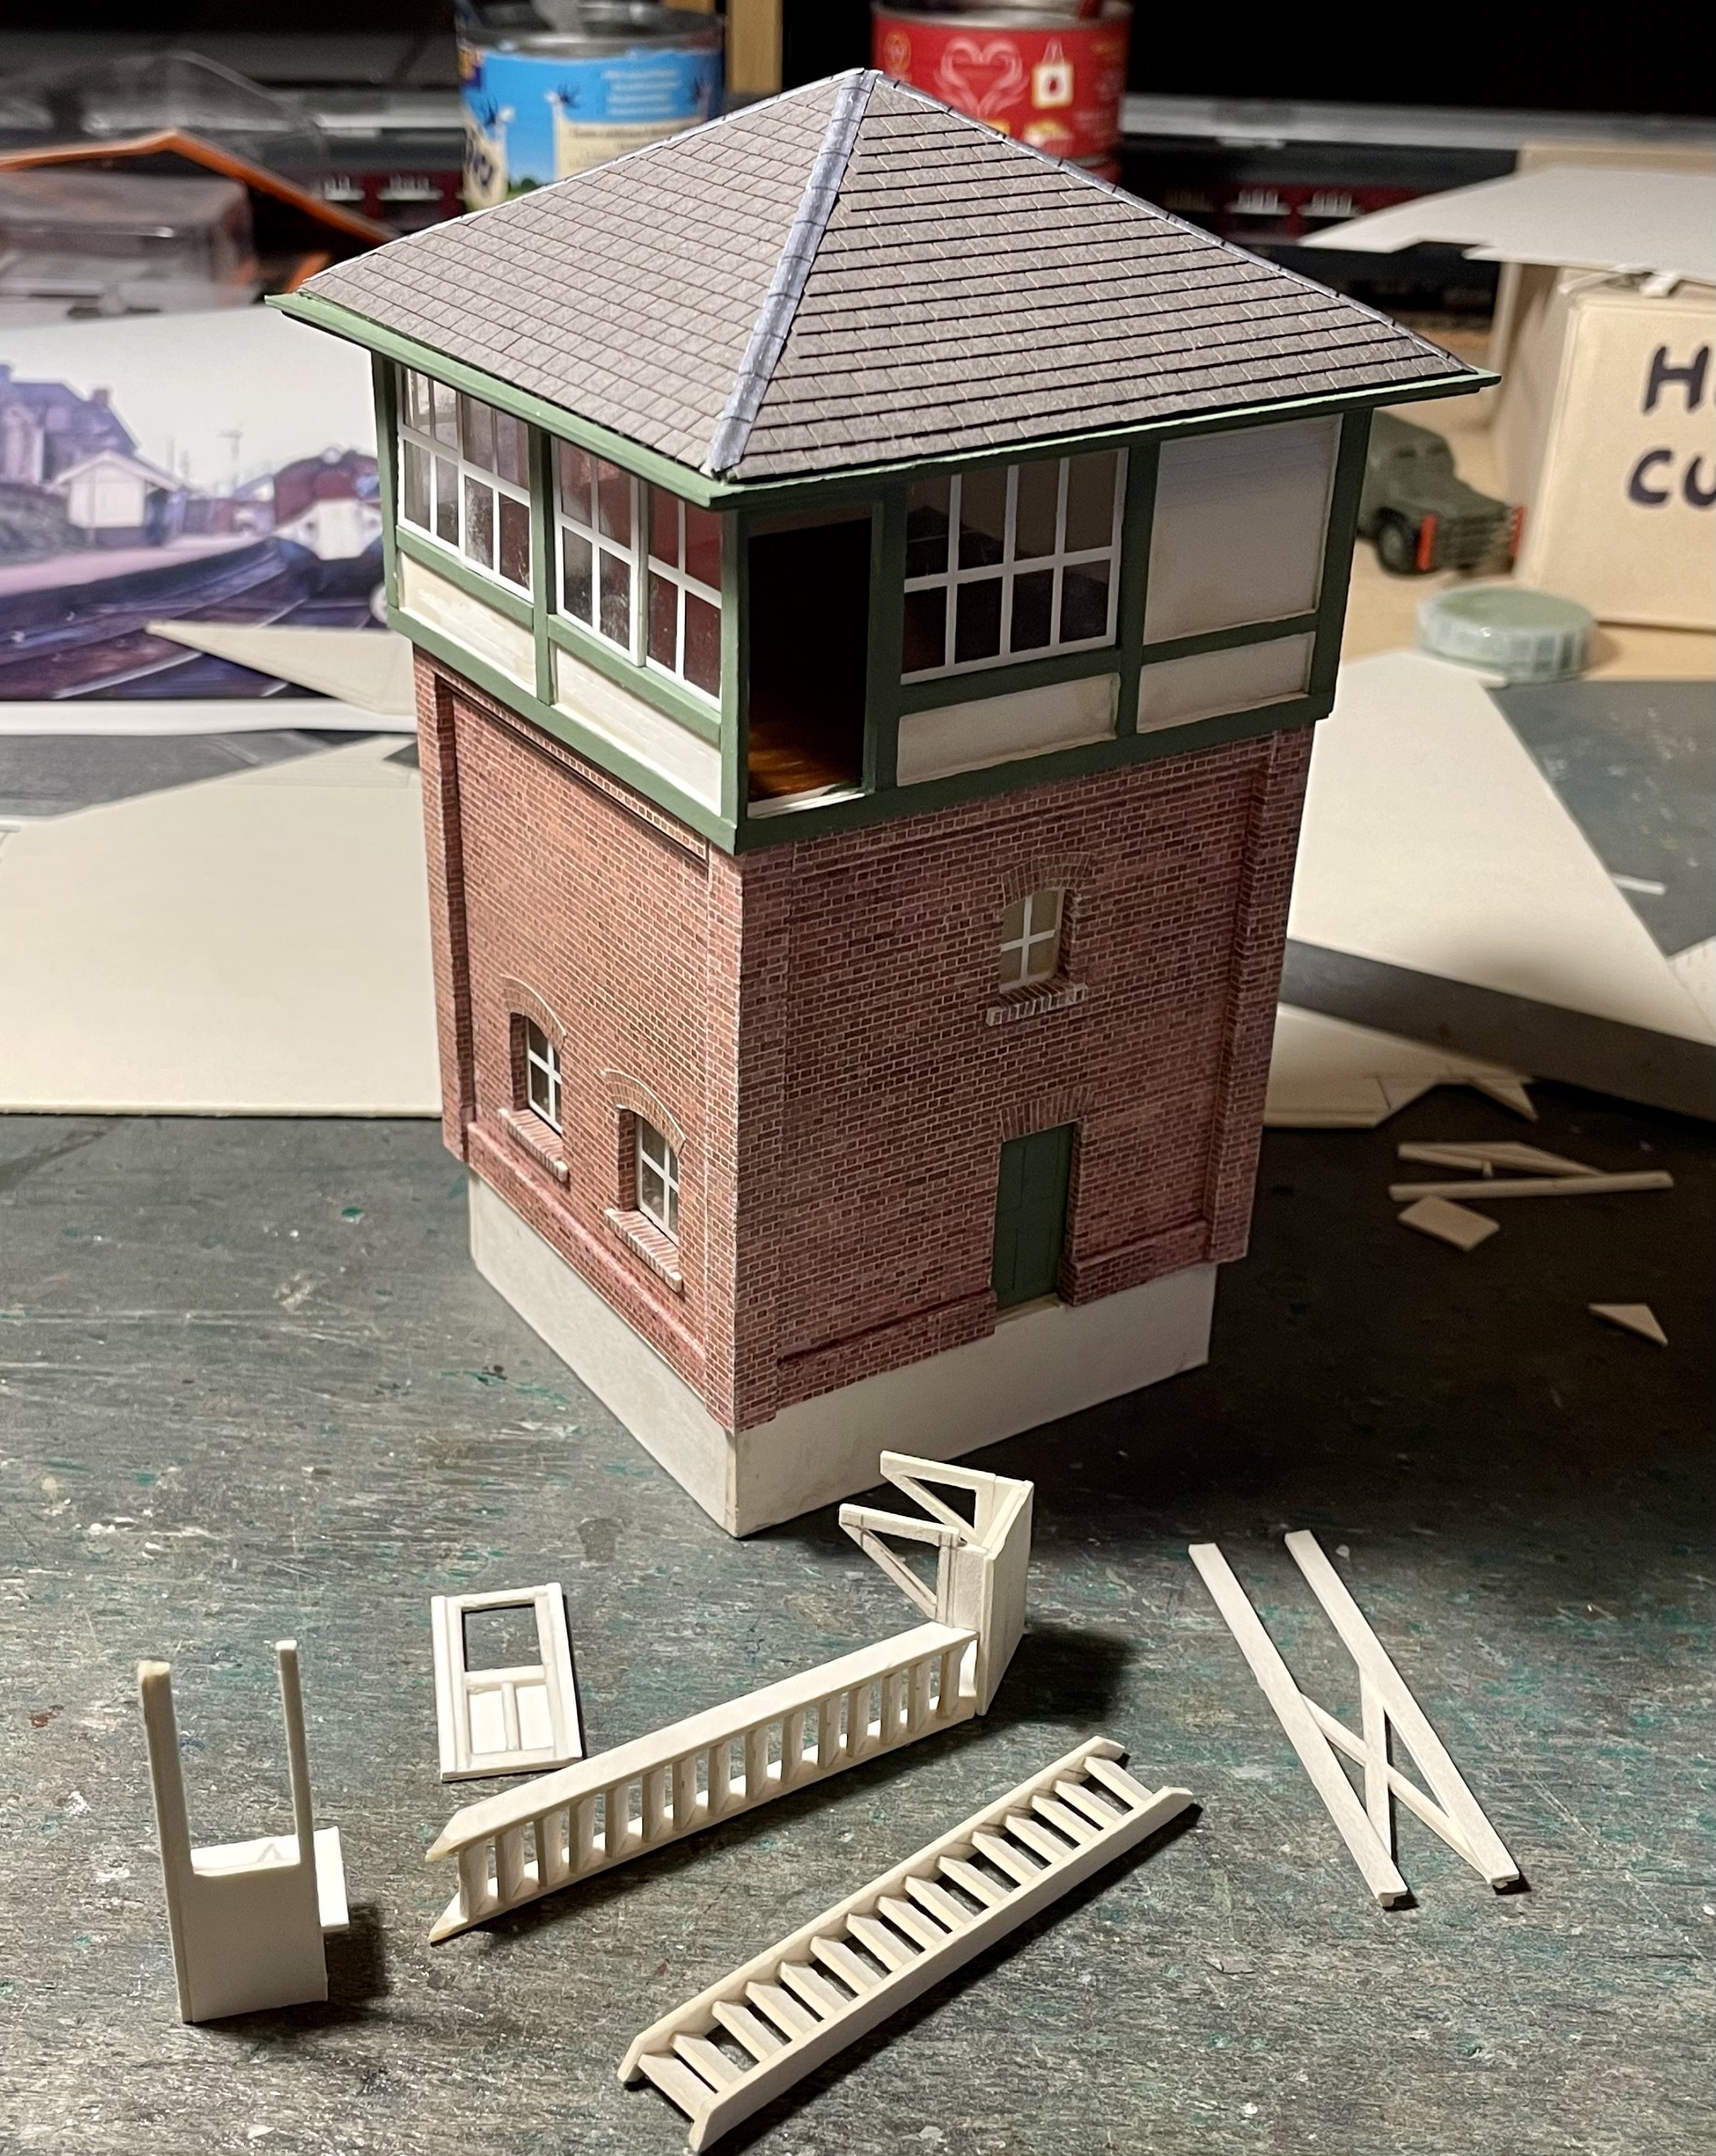
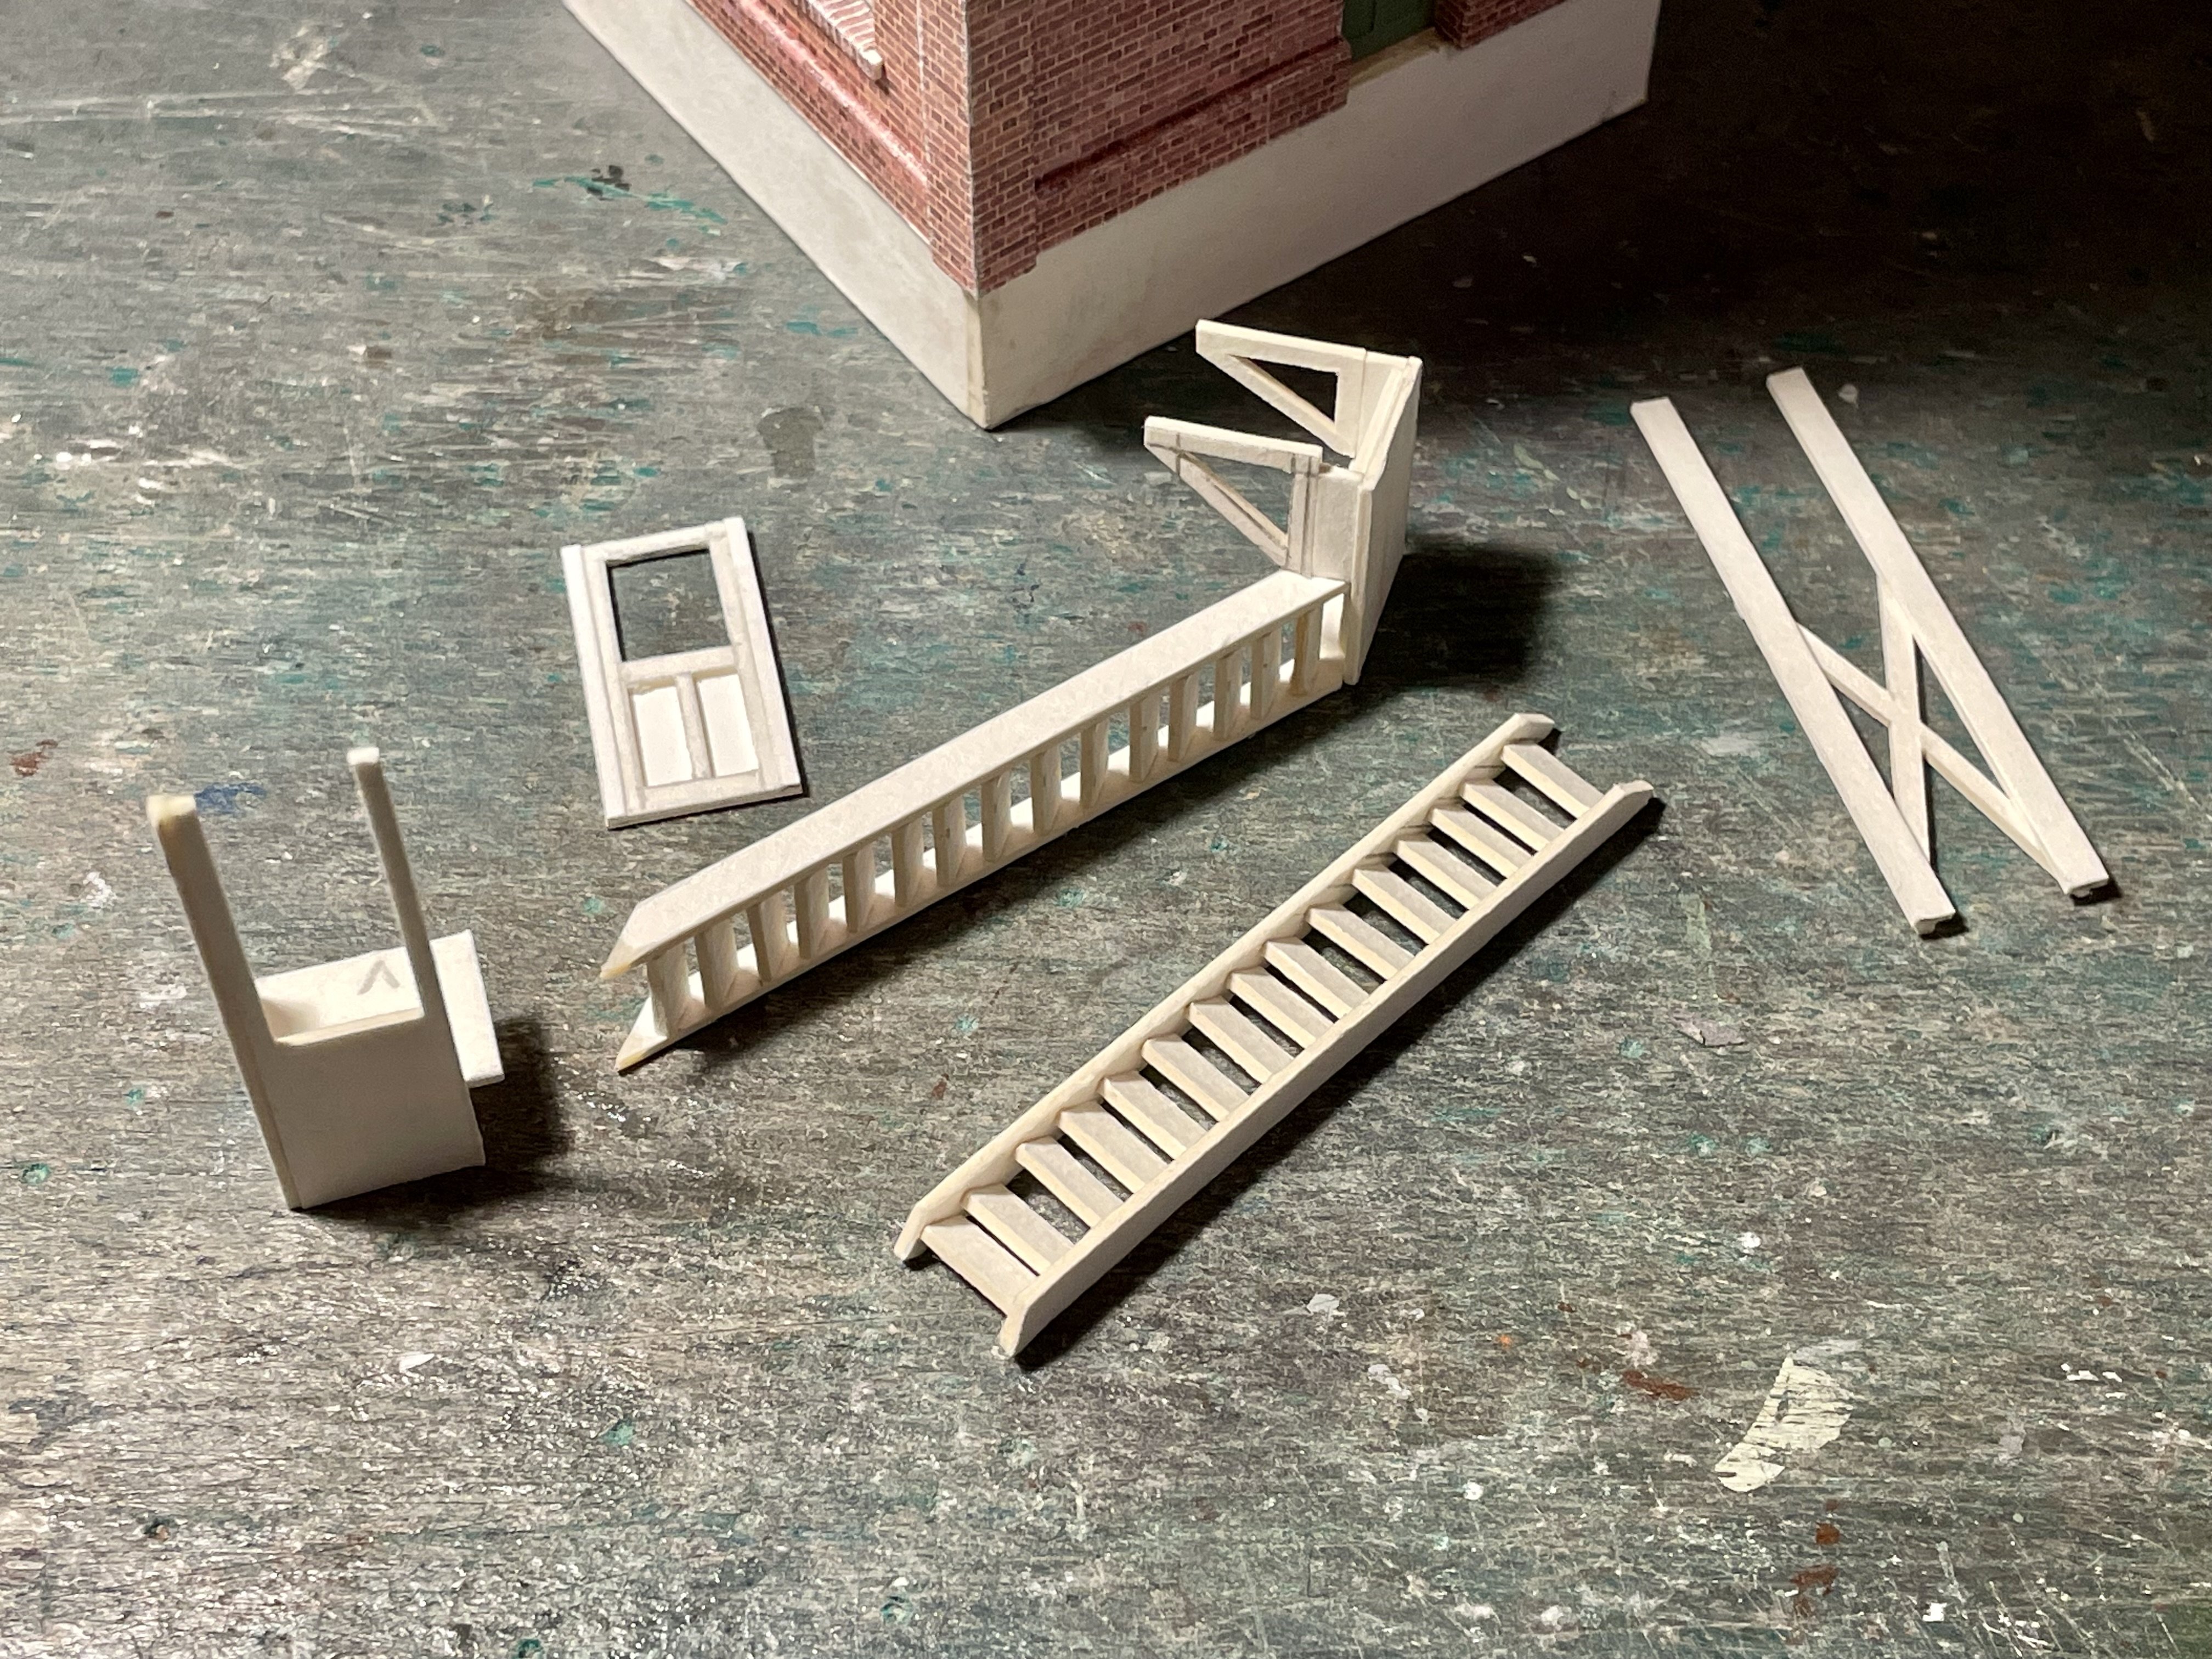
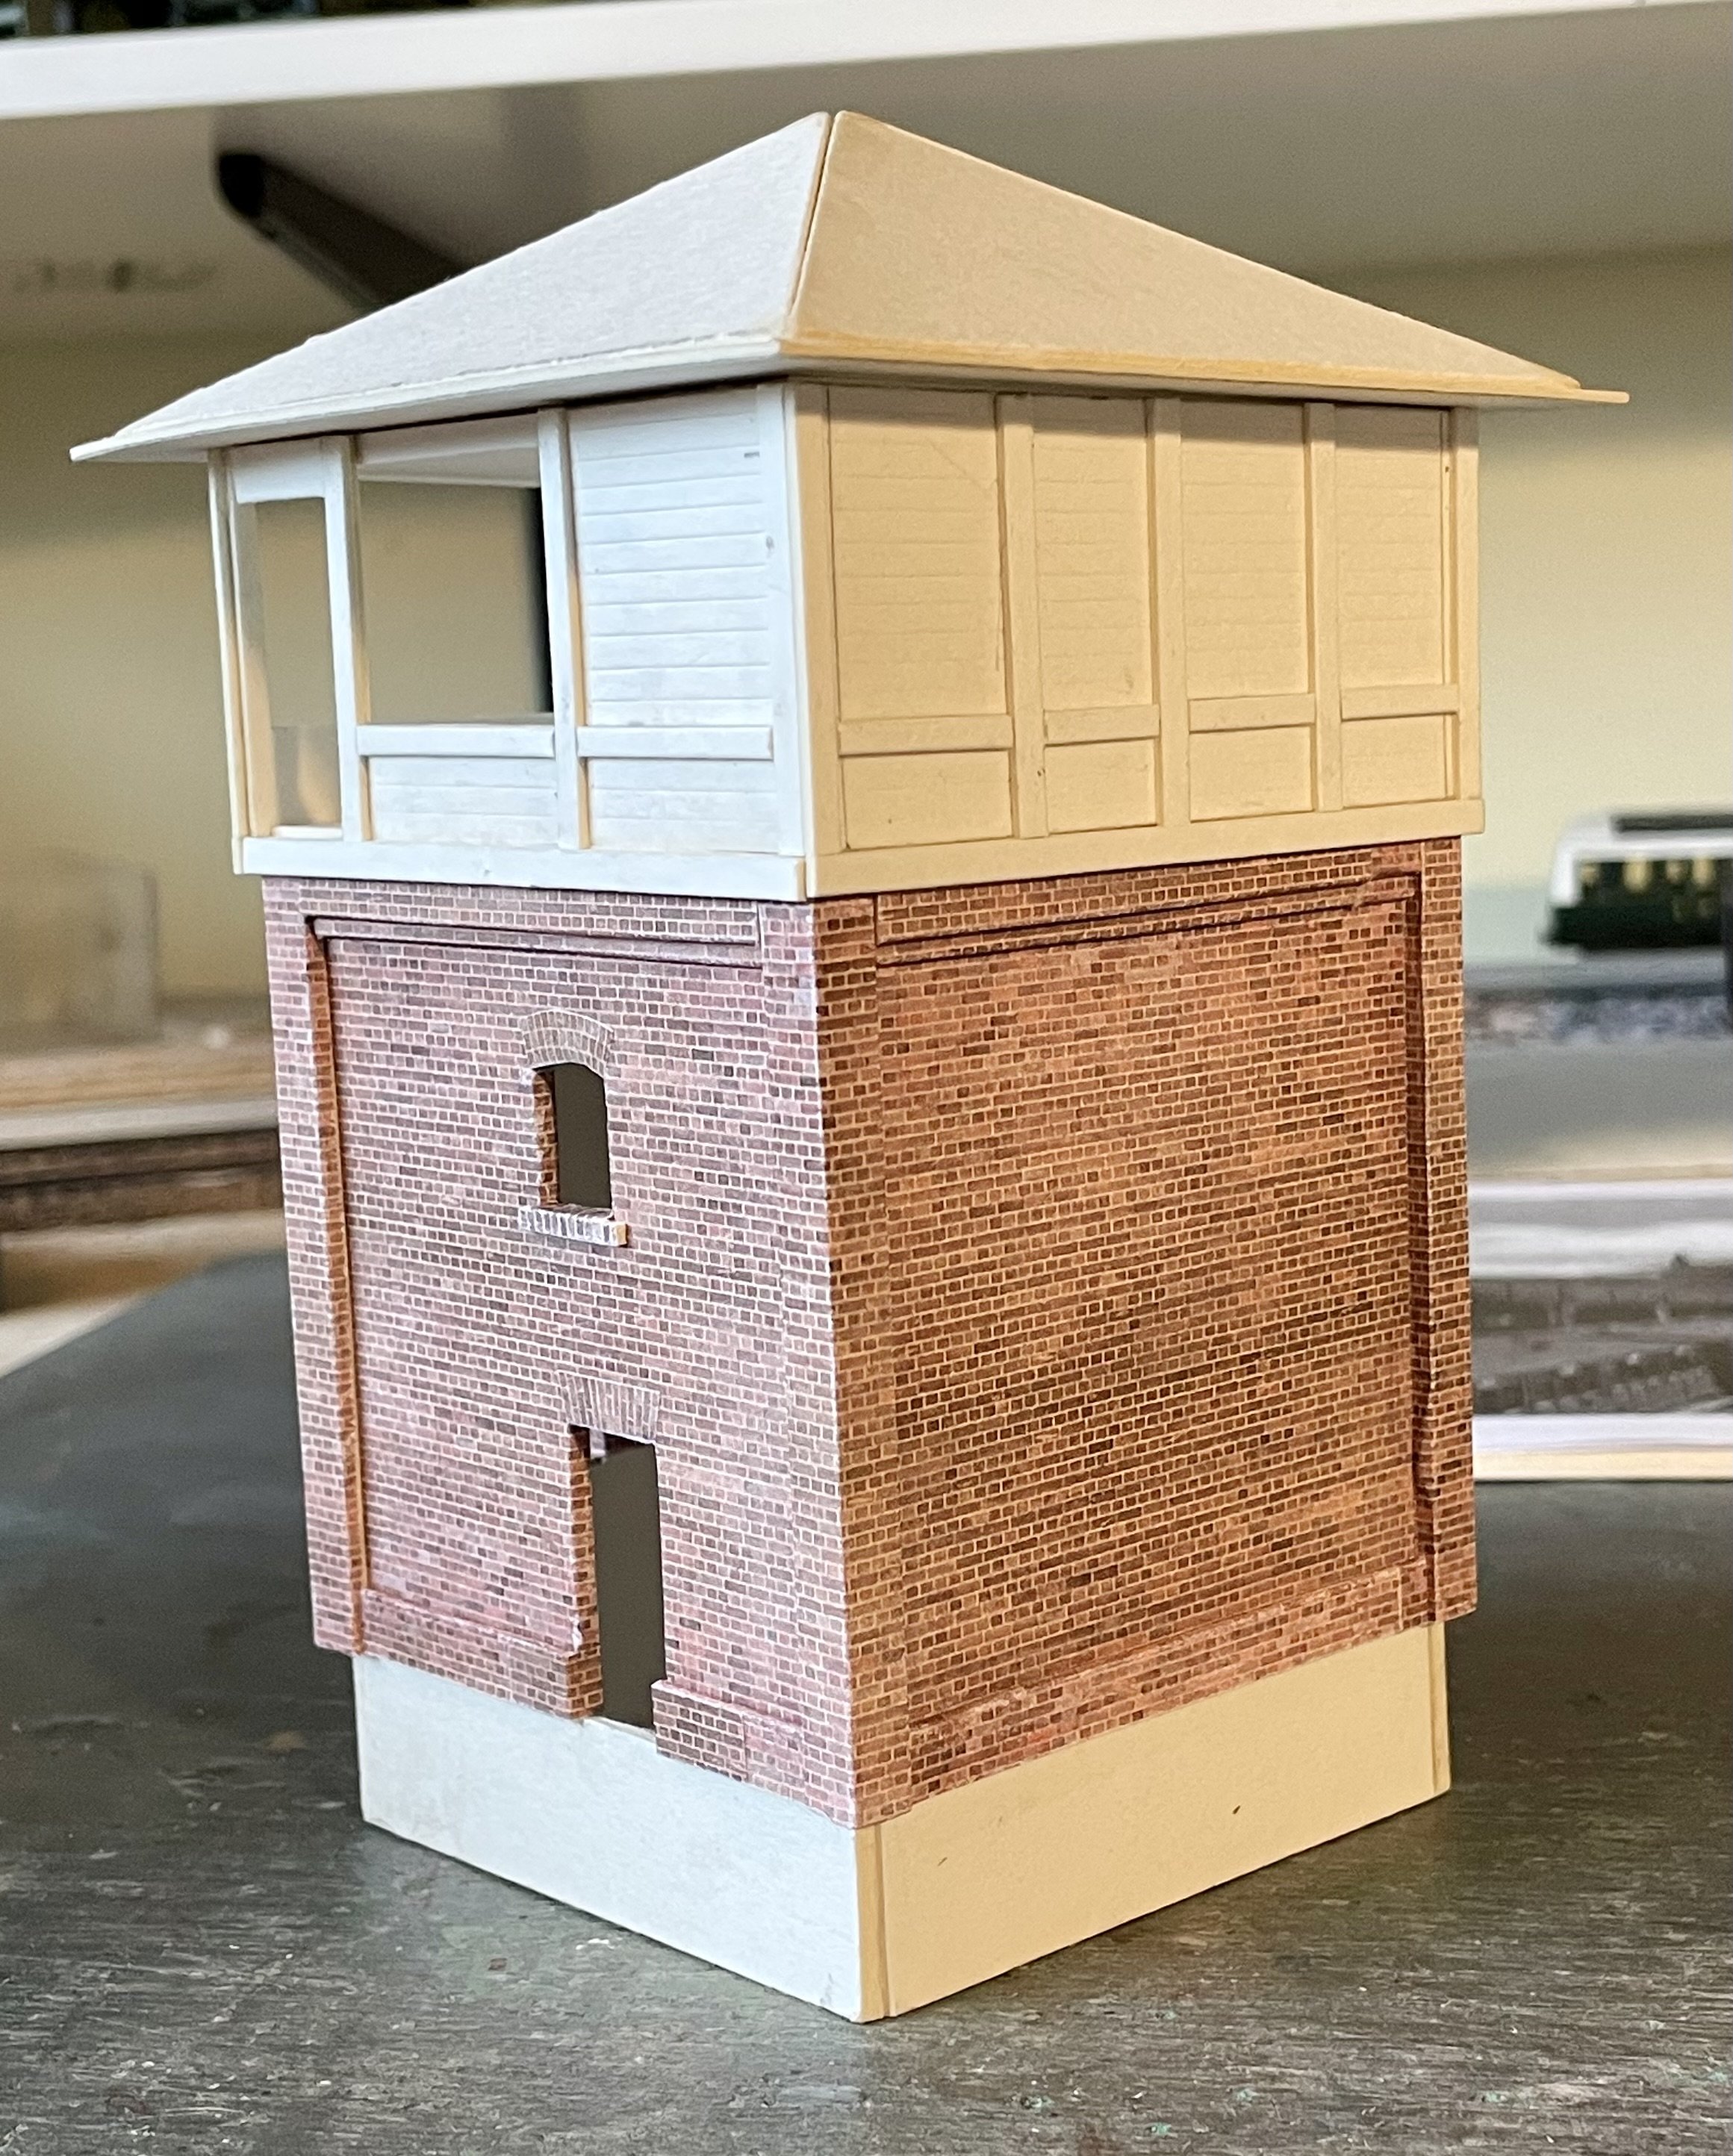
Worked on the access steps and porch today. Took it slow to ensure everything was level and true - ish. Also tiled the roof. The early photos show a chimney but this appears to be missing in photos of the early NIR era onwards. Cheers Darius
-
I did Cheers Darius
-
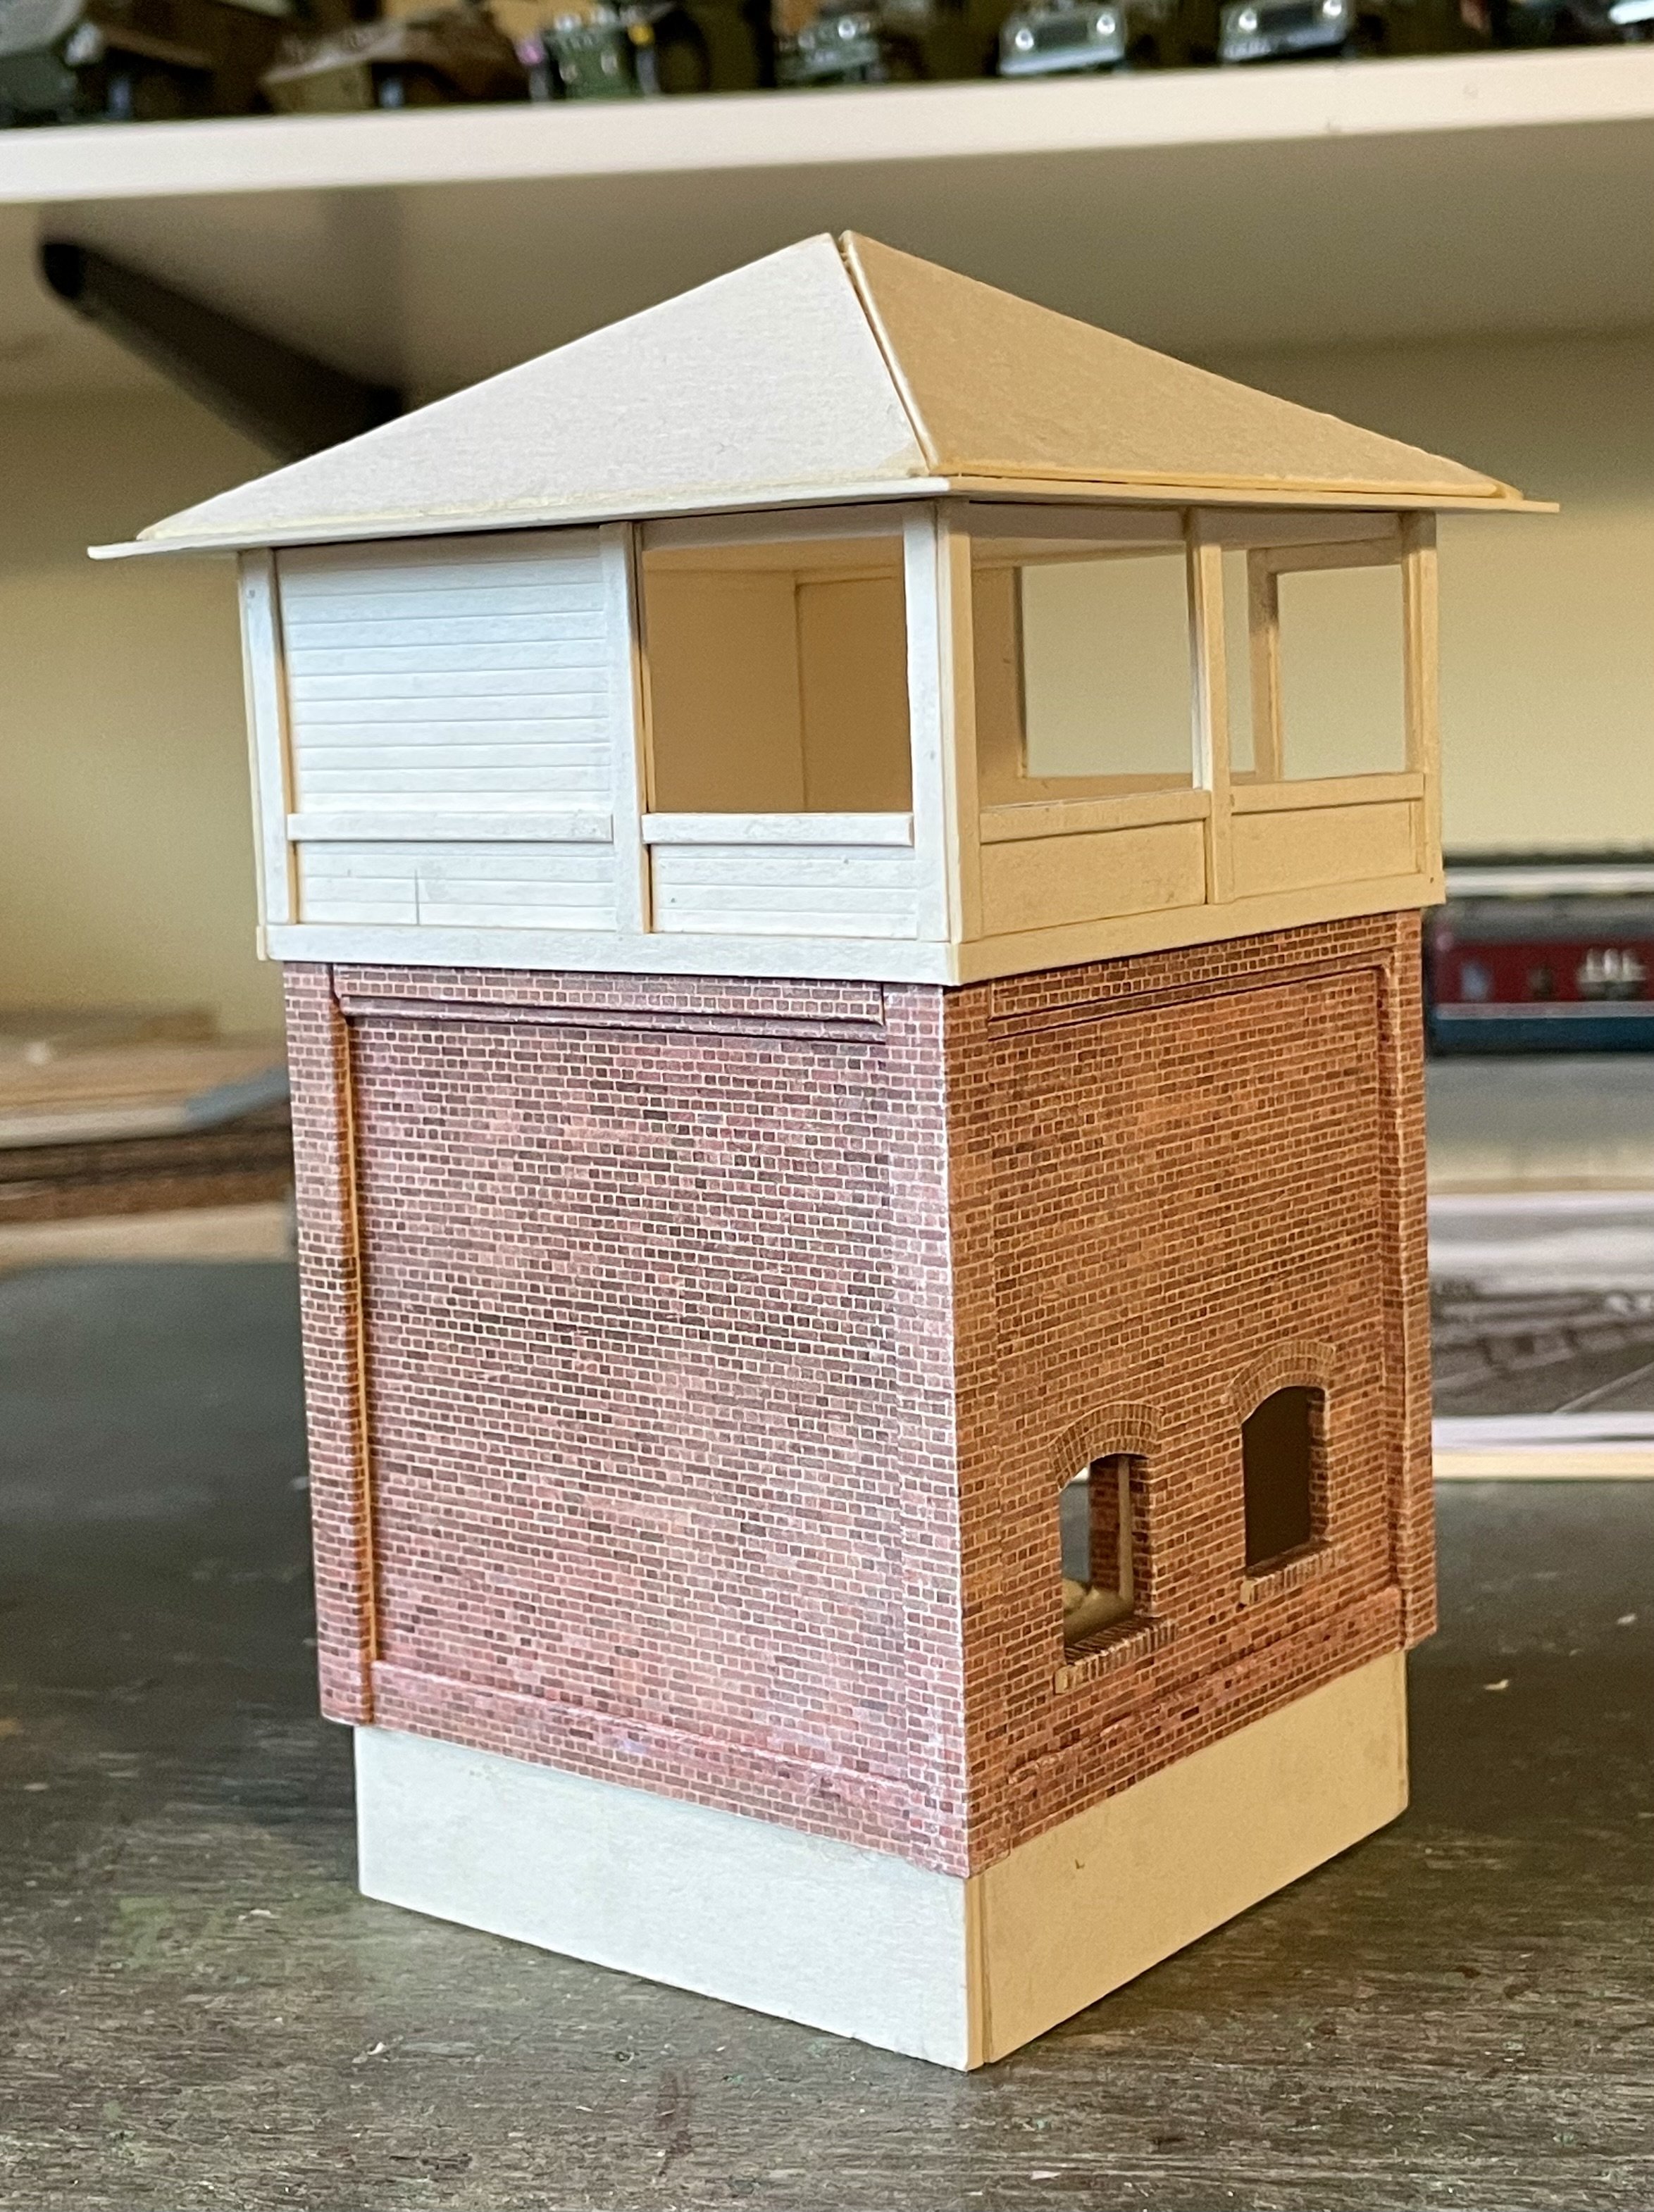
Cabin painted, glazed and roofed. Access steps and porch next. Cheers Darius
- 416 replies
-
- 13
-
-
-
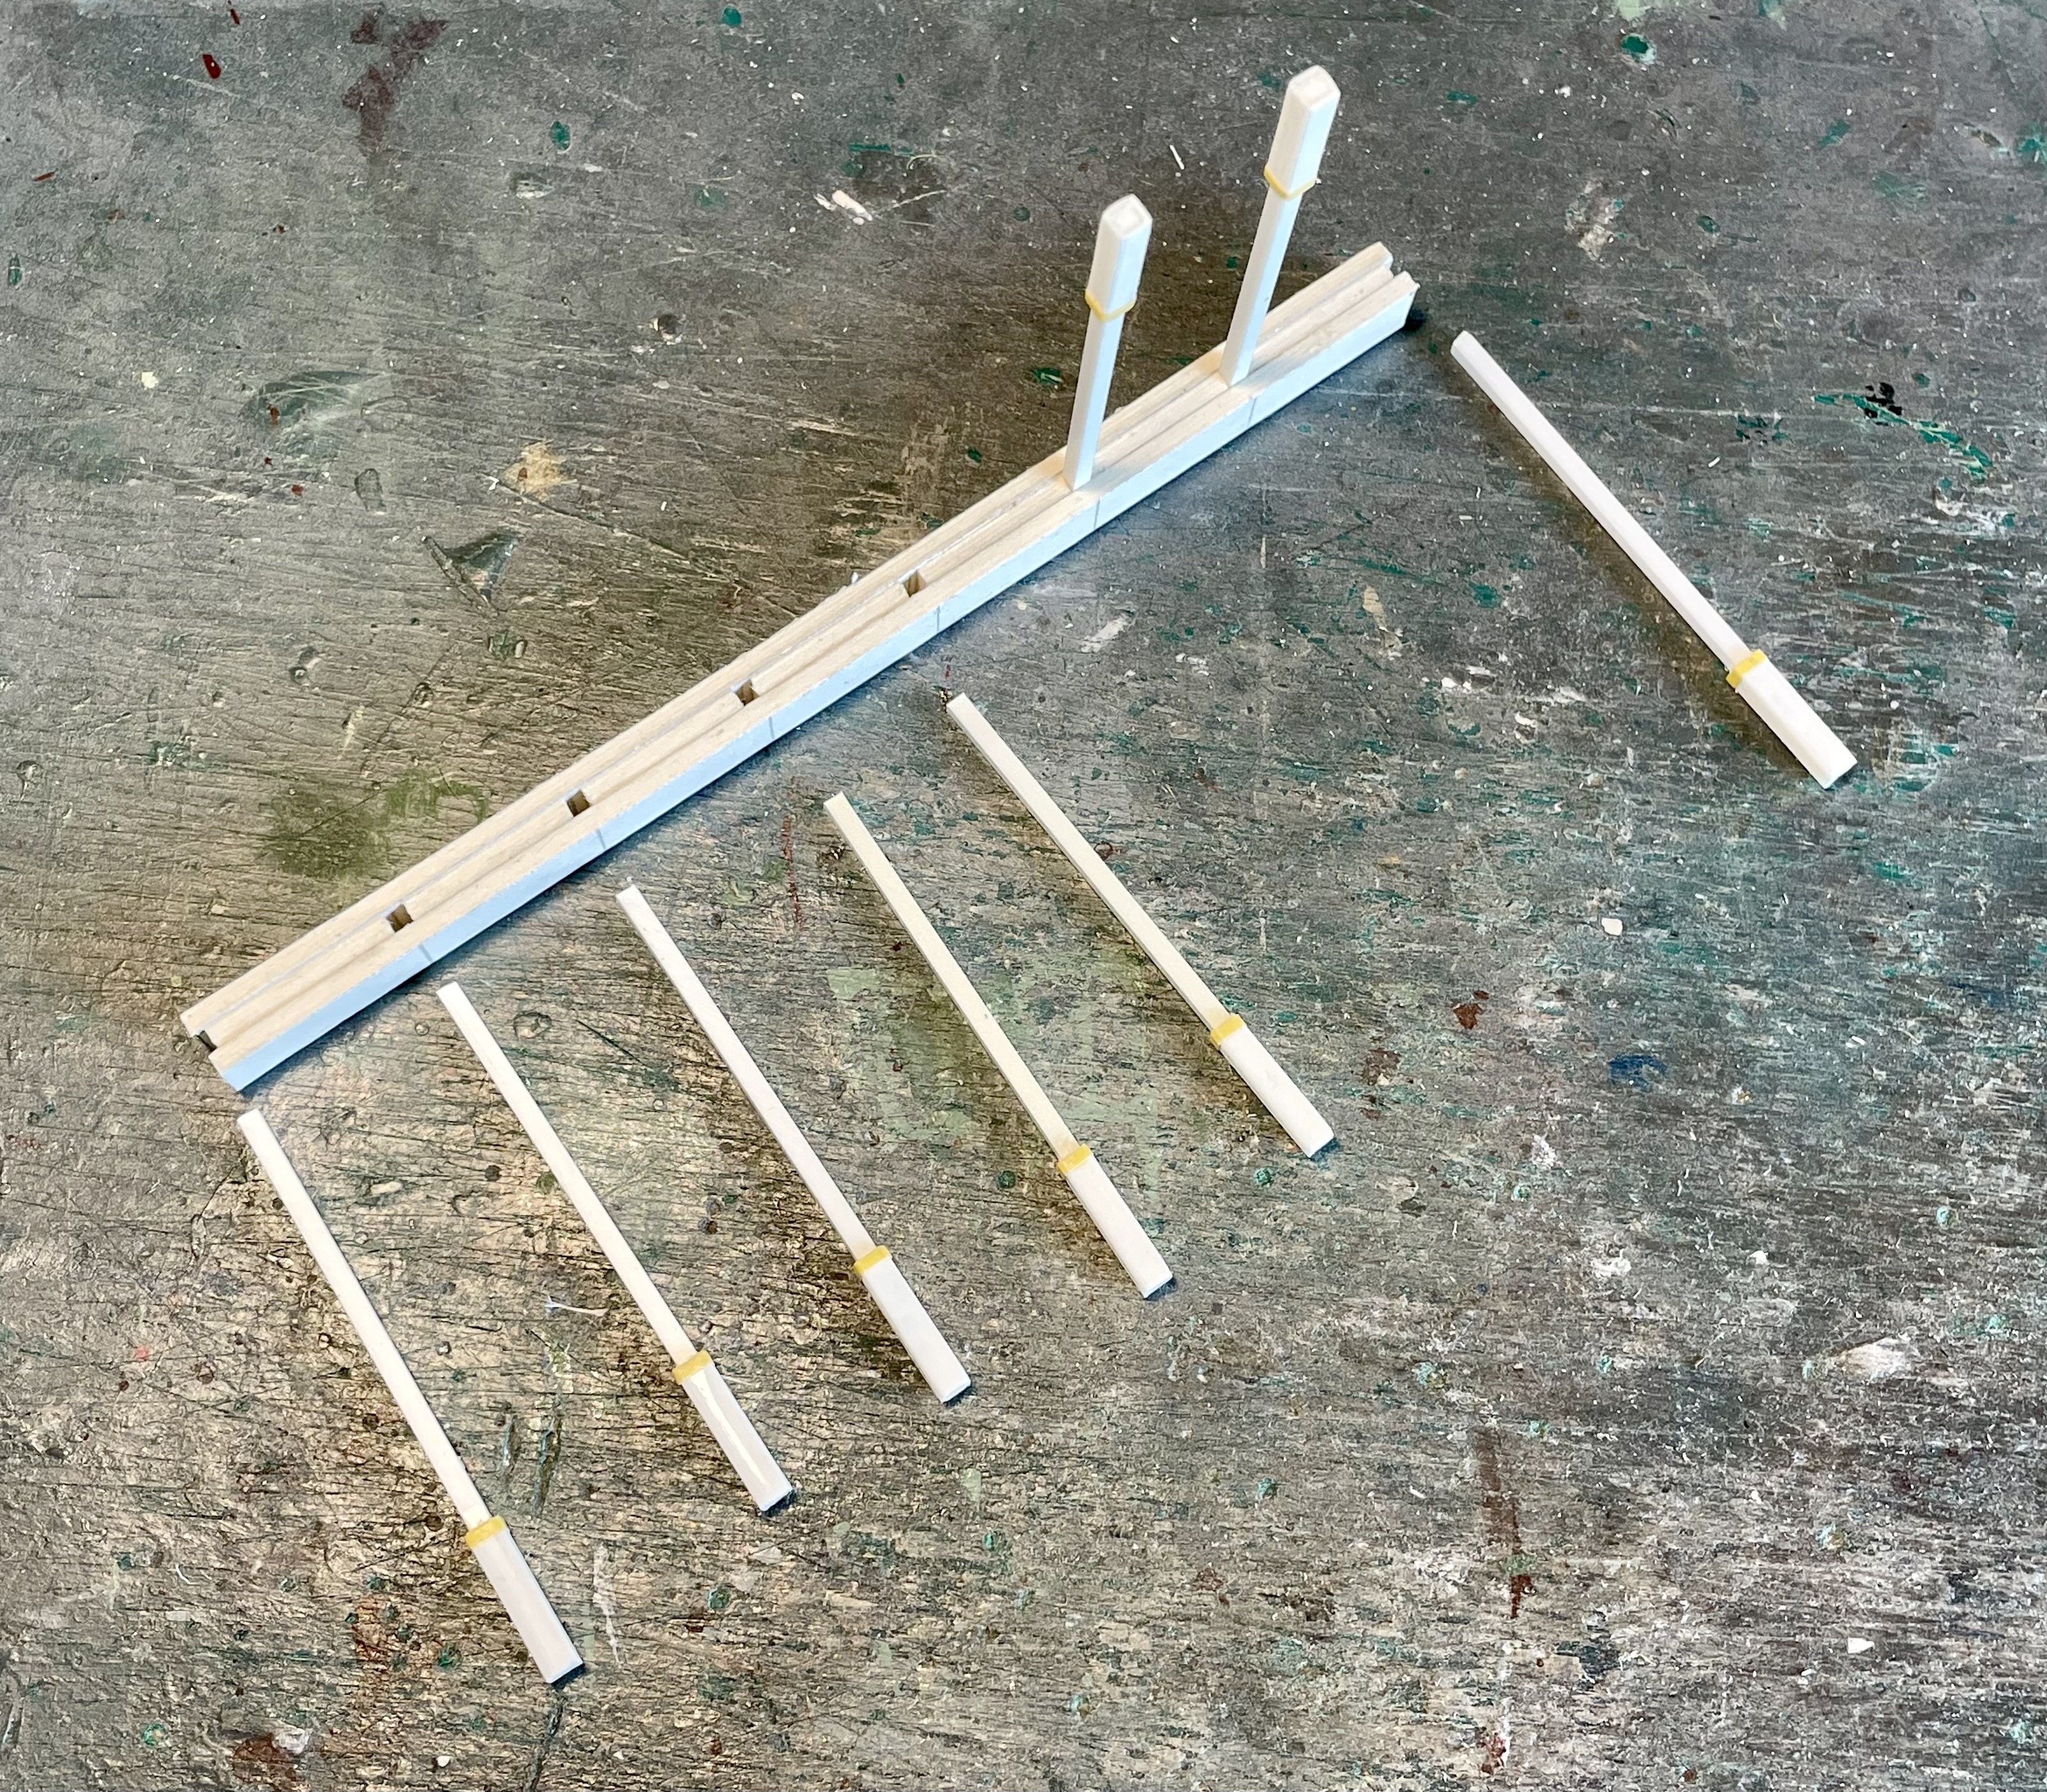
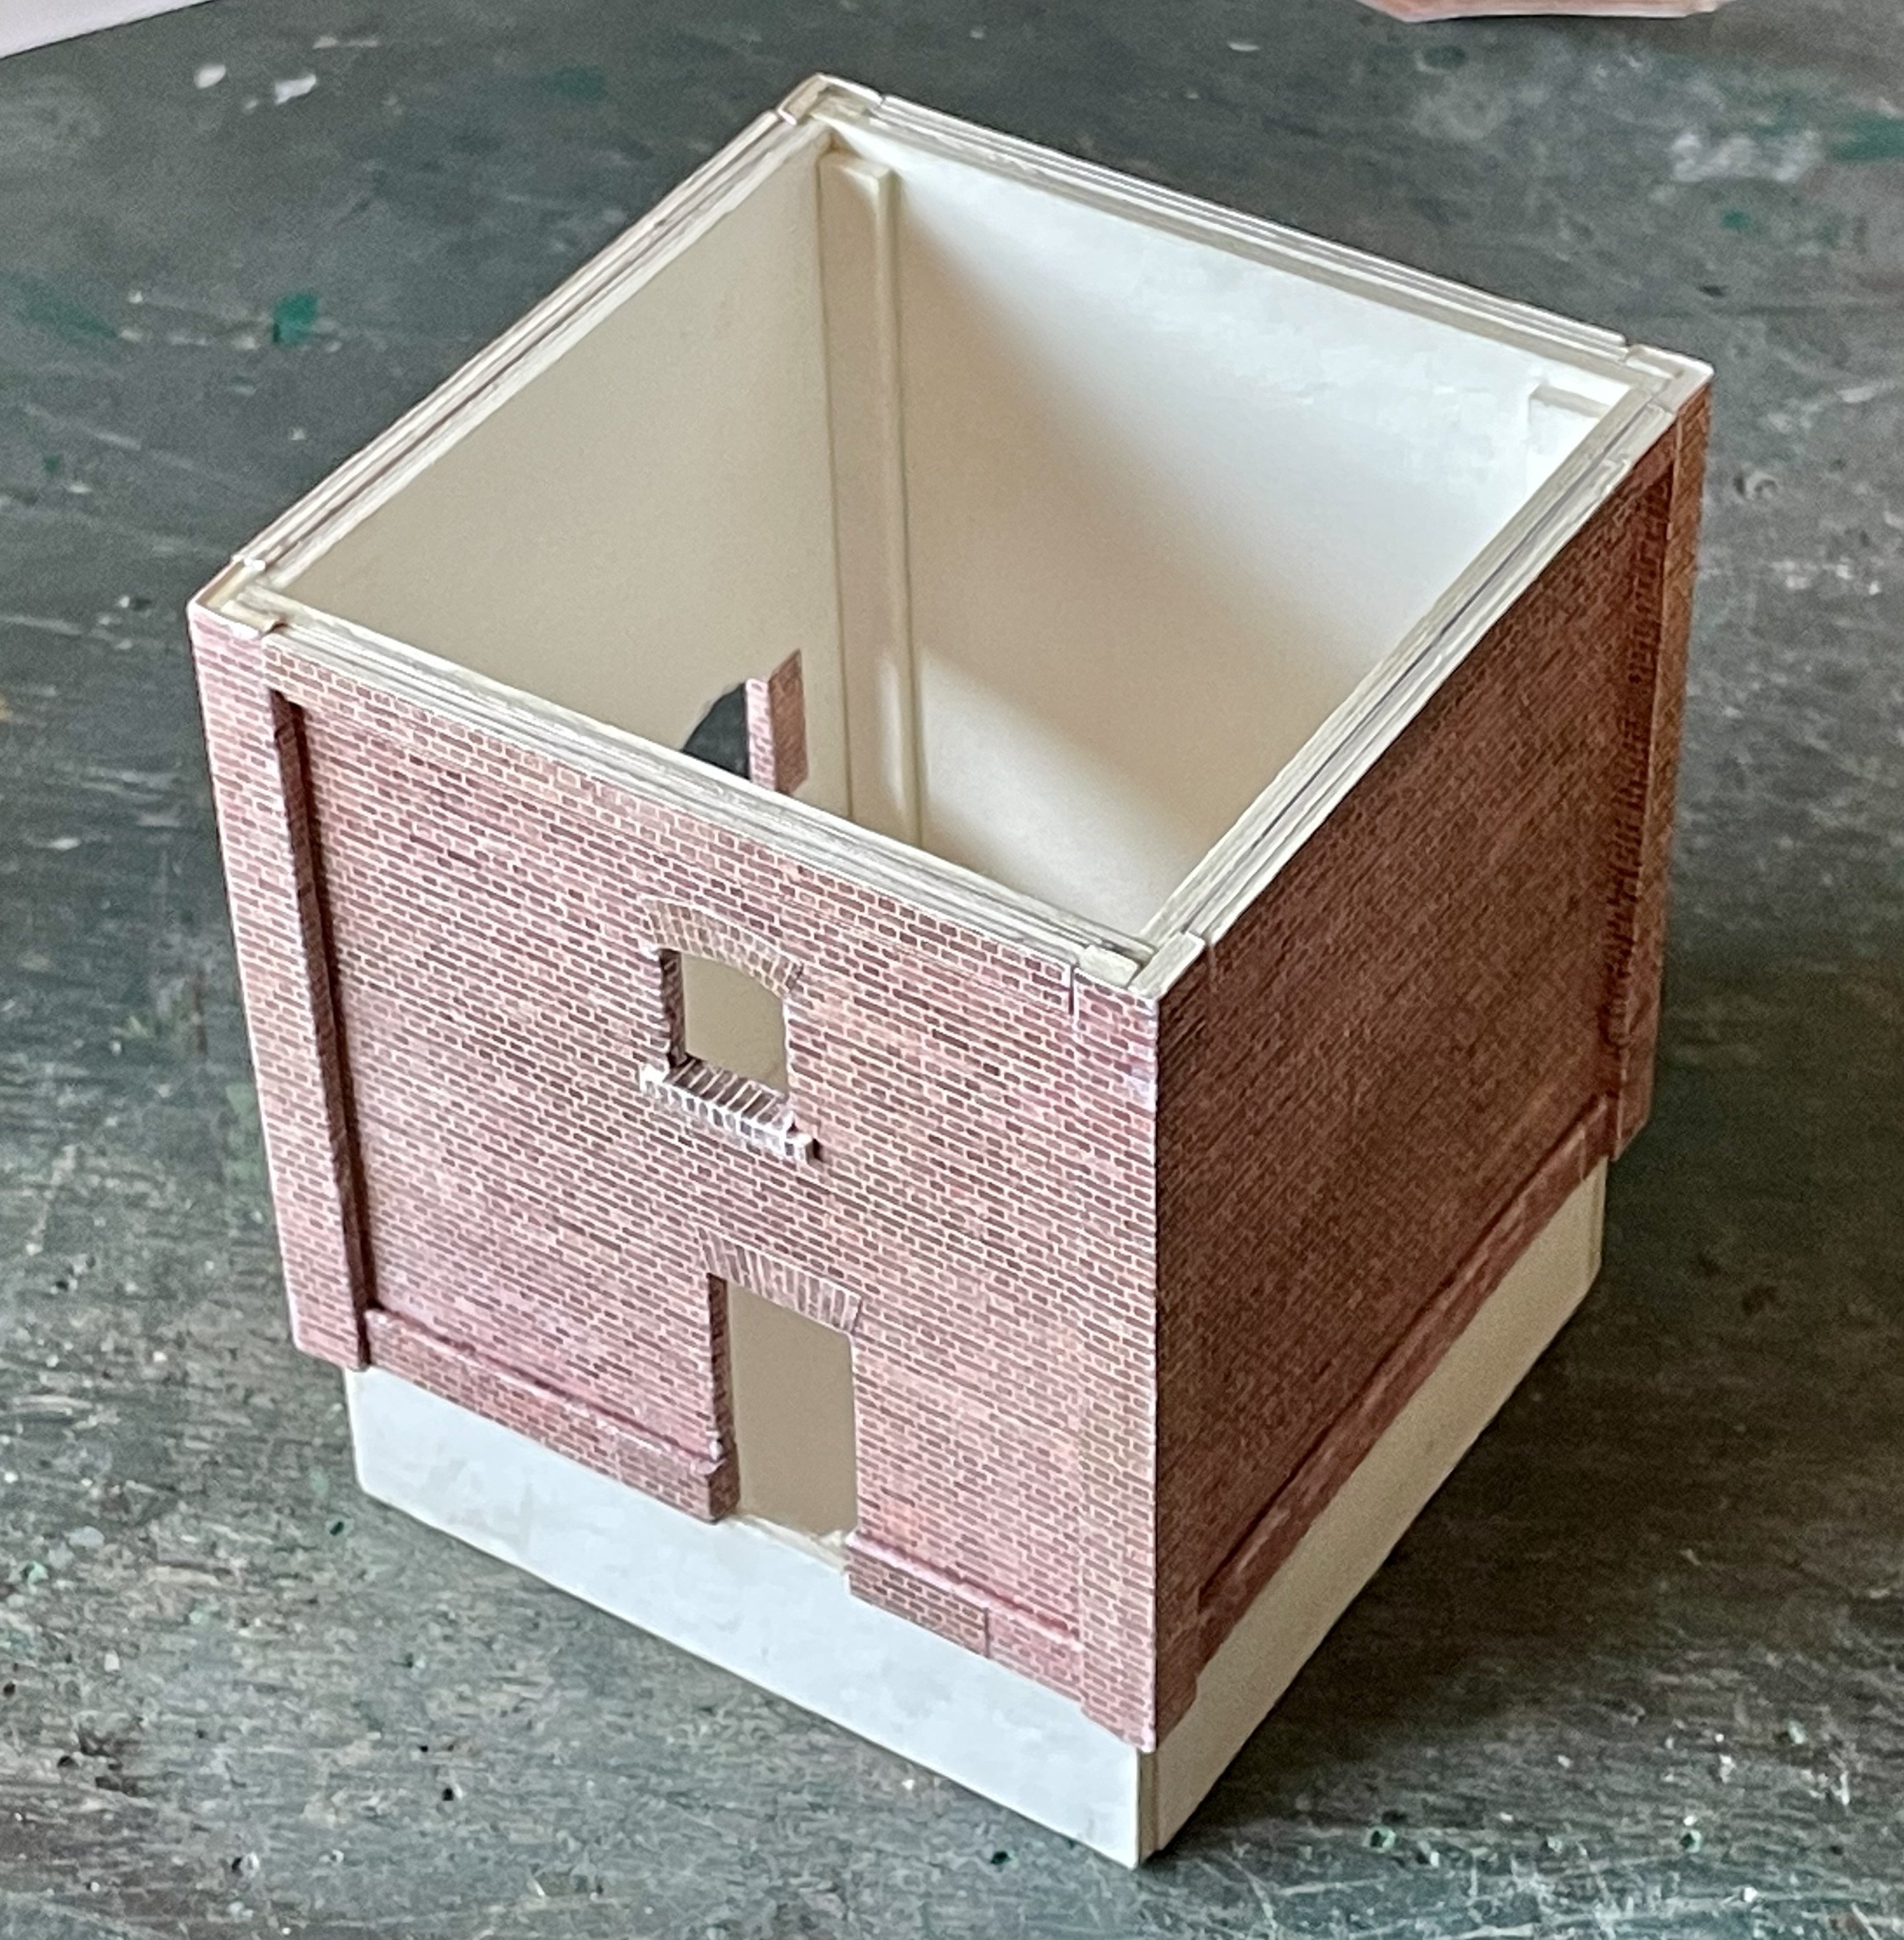
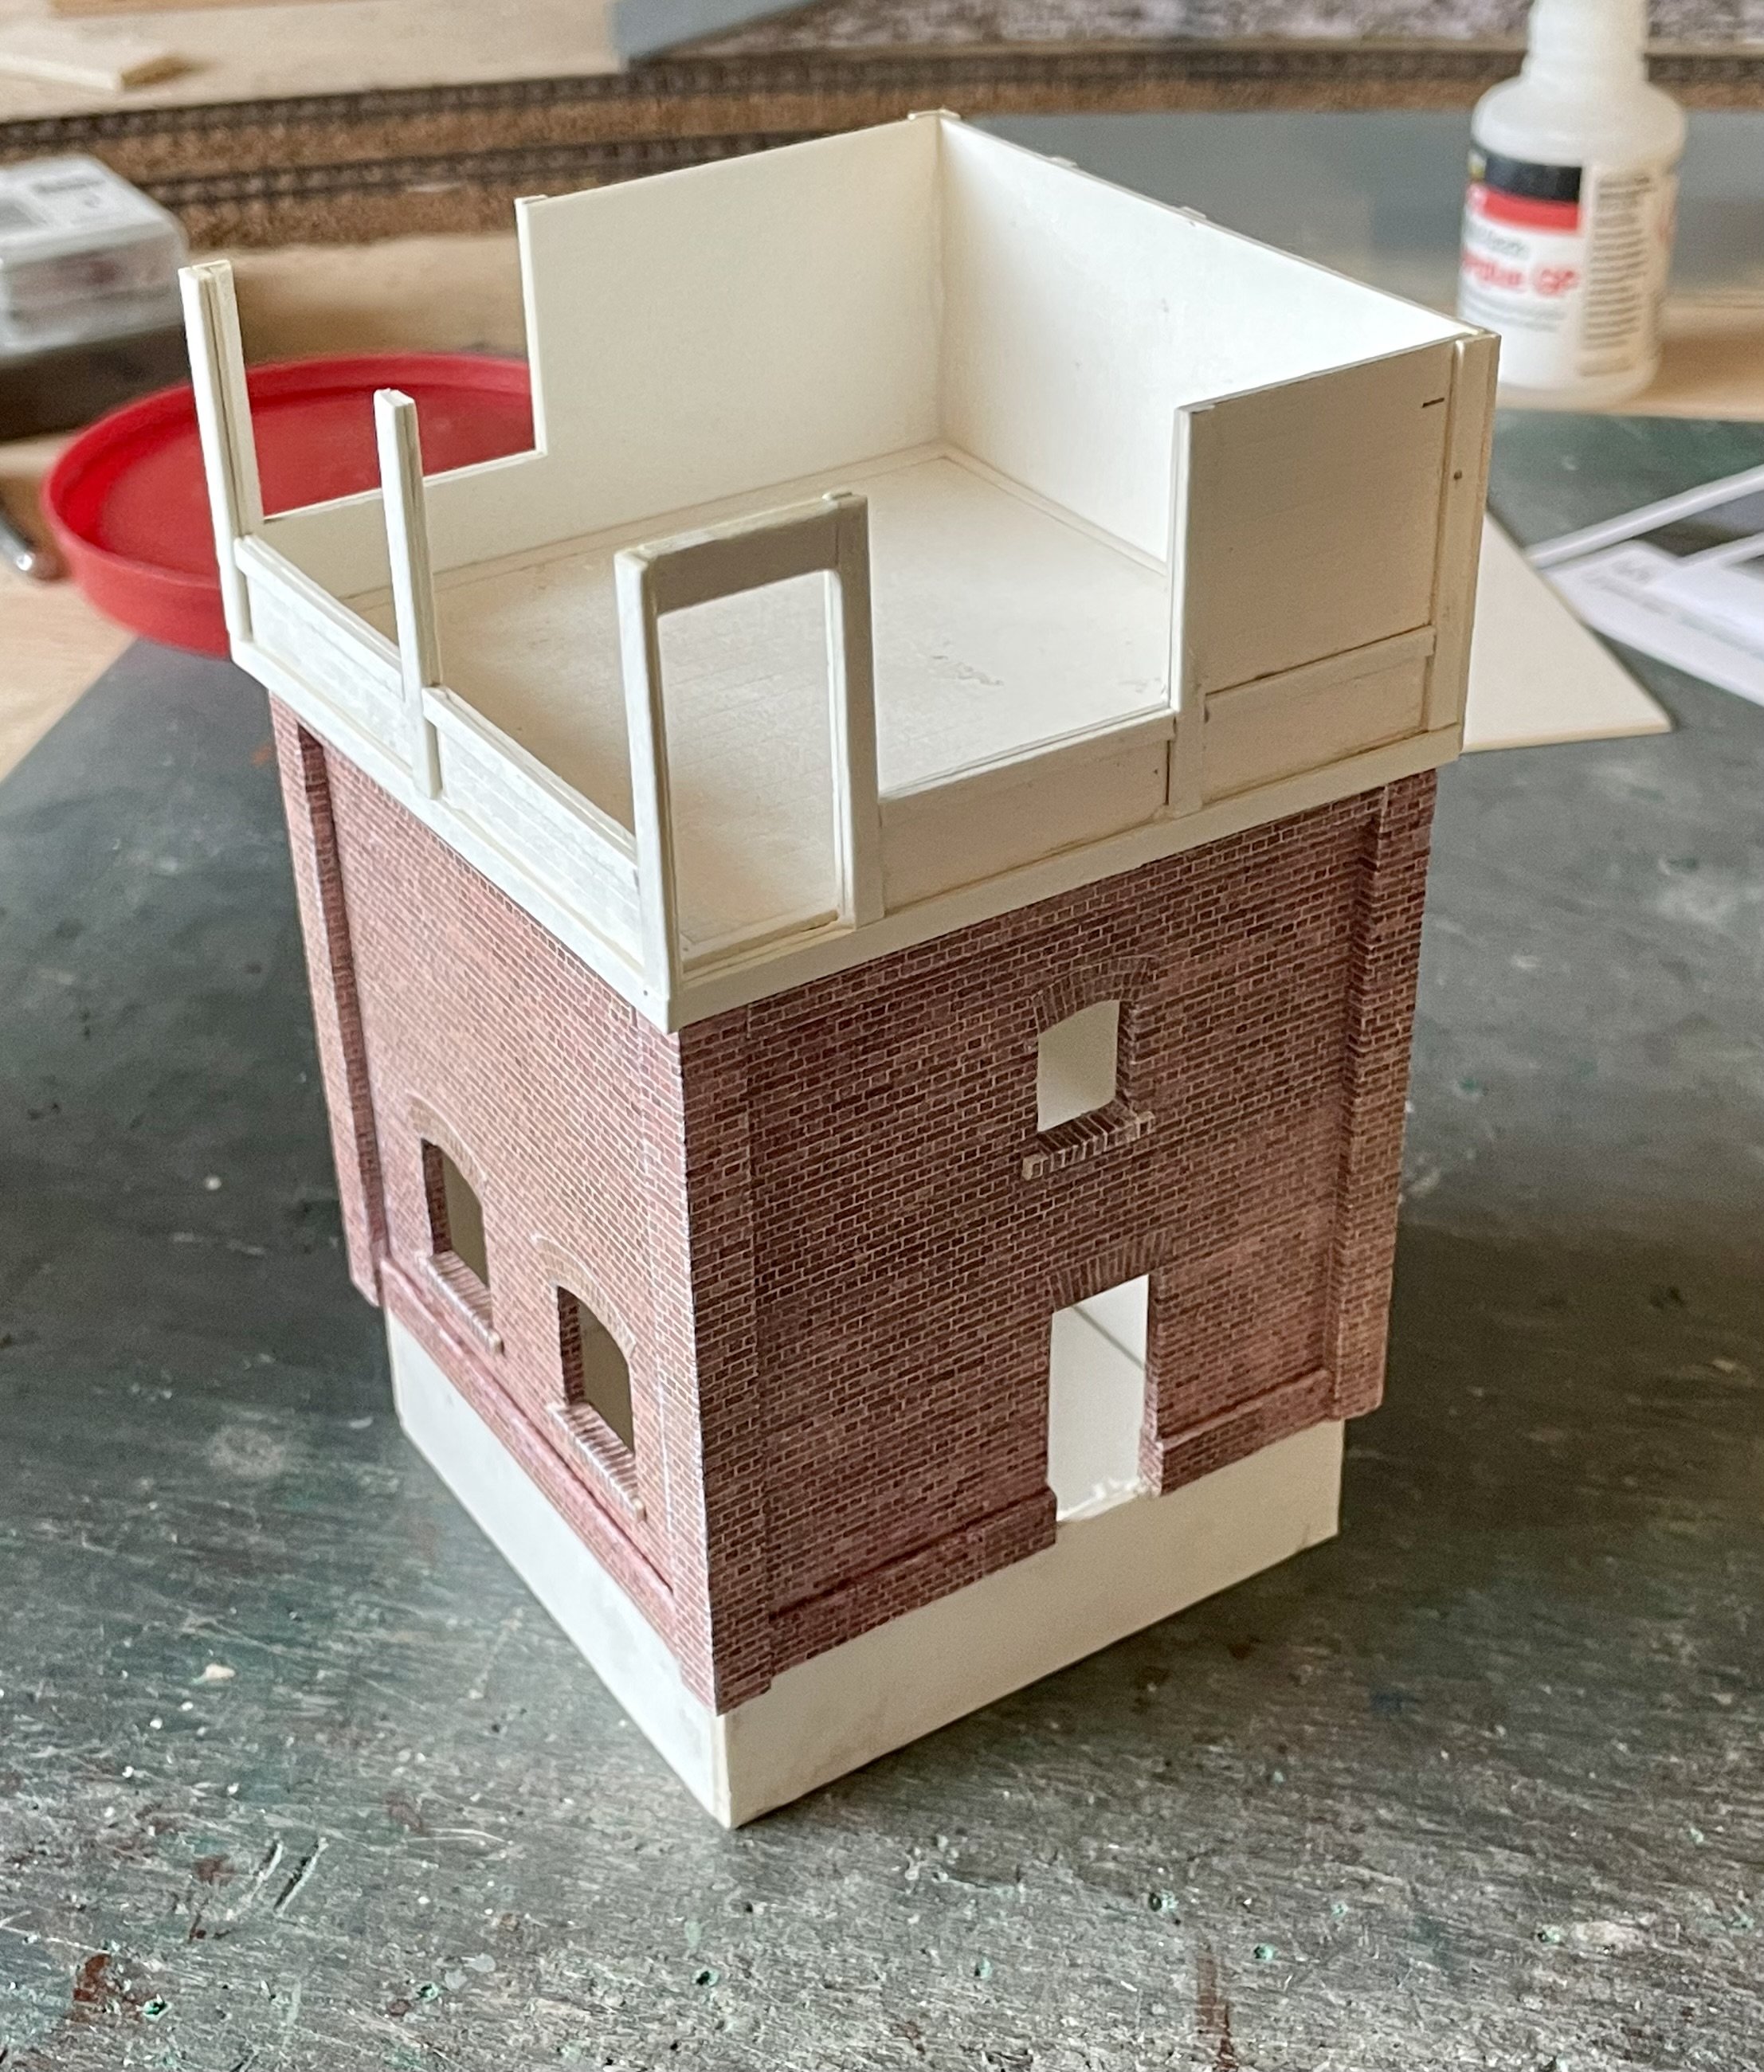
Made a start today on the station signal box. Cheers Darius
- 416 replies
-
- 14
-
-
-
-
Thanks Raven. That must be it - the clue is in the street name. Cheers Darius
-
Dunpaintin and duntilin. Cheers Darius
- 416 replies
-
- 14
-
-
-
-
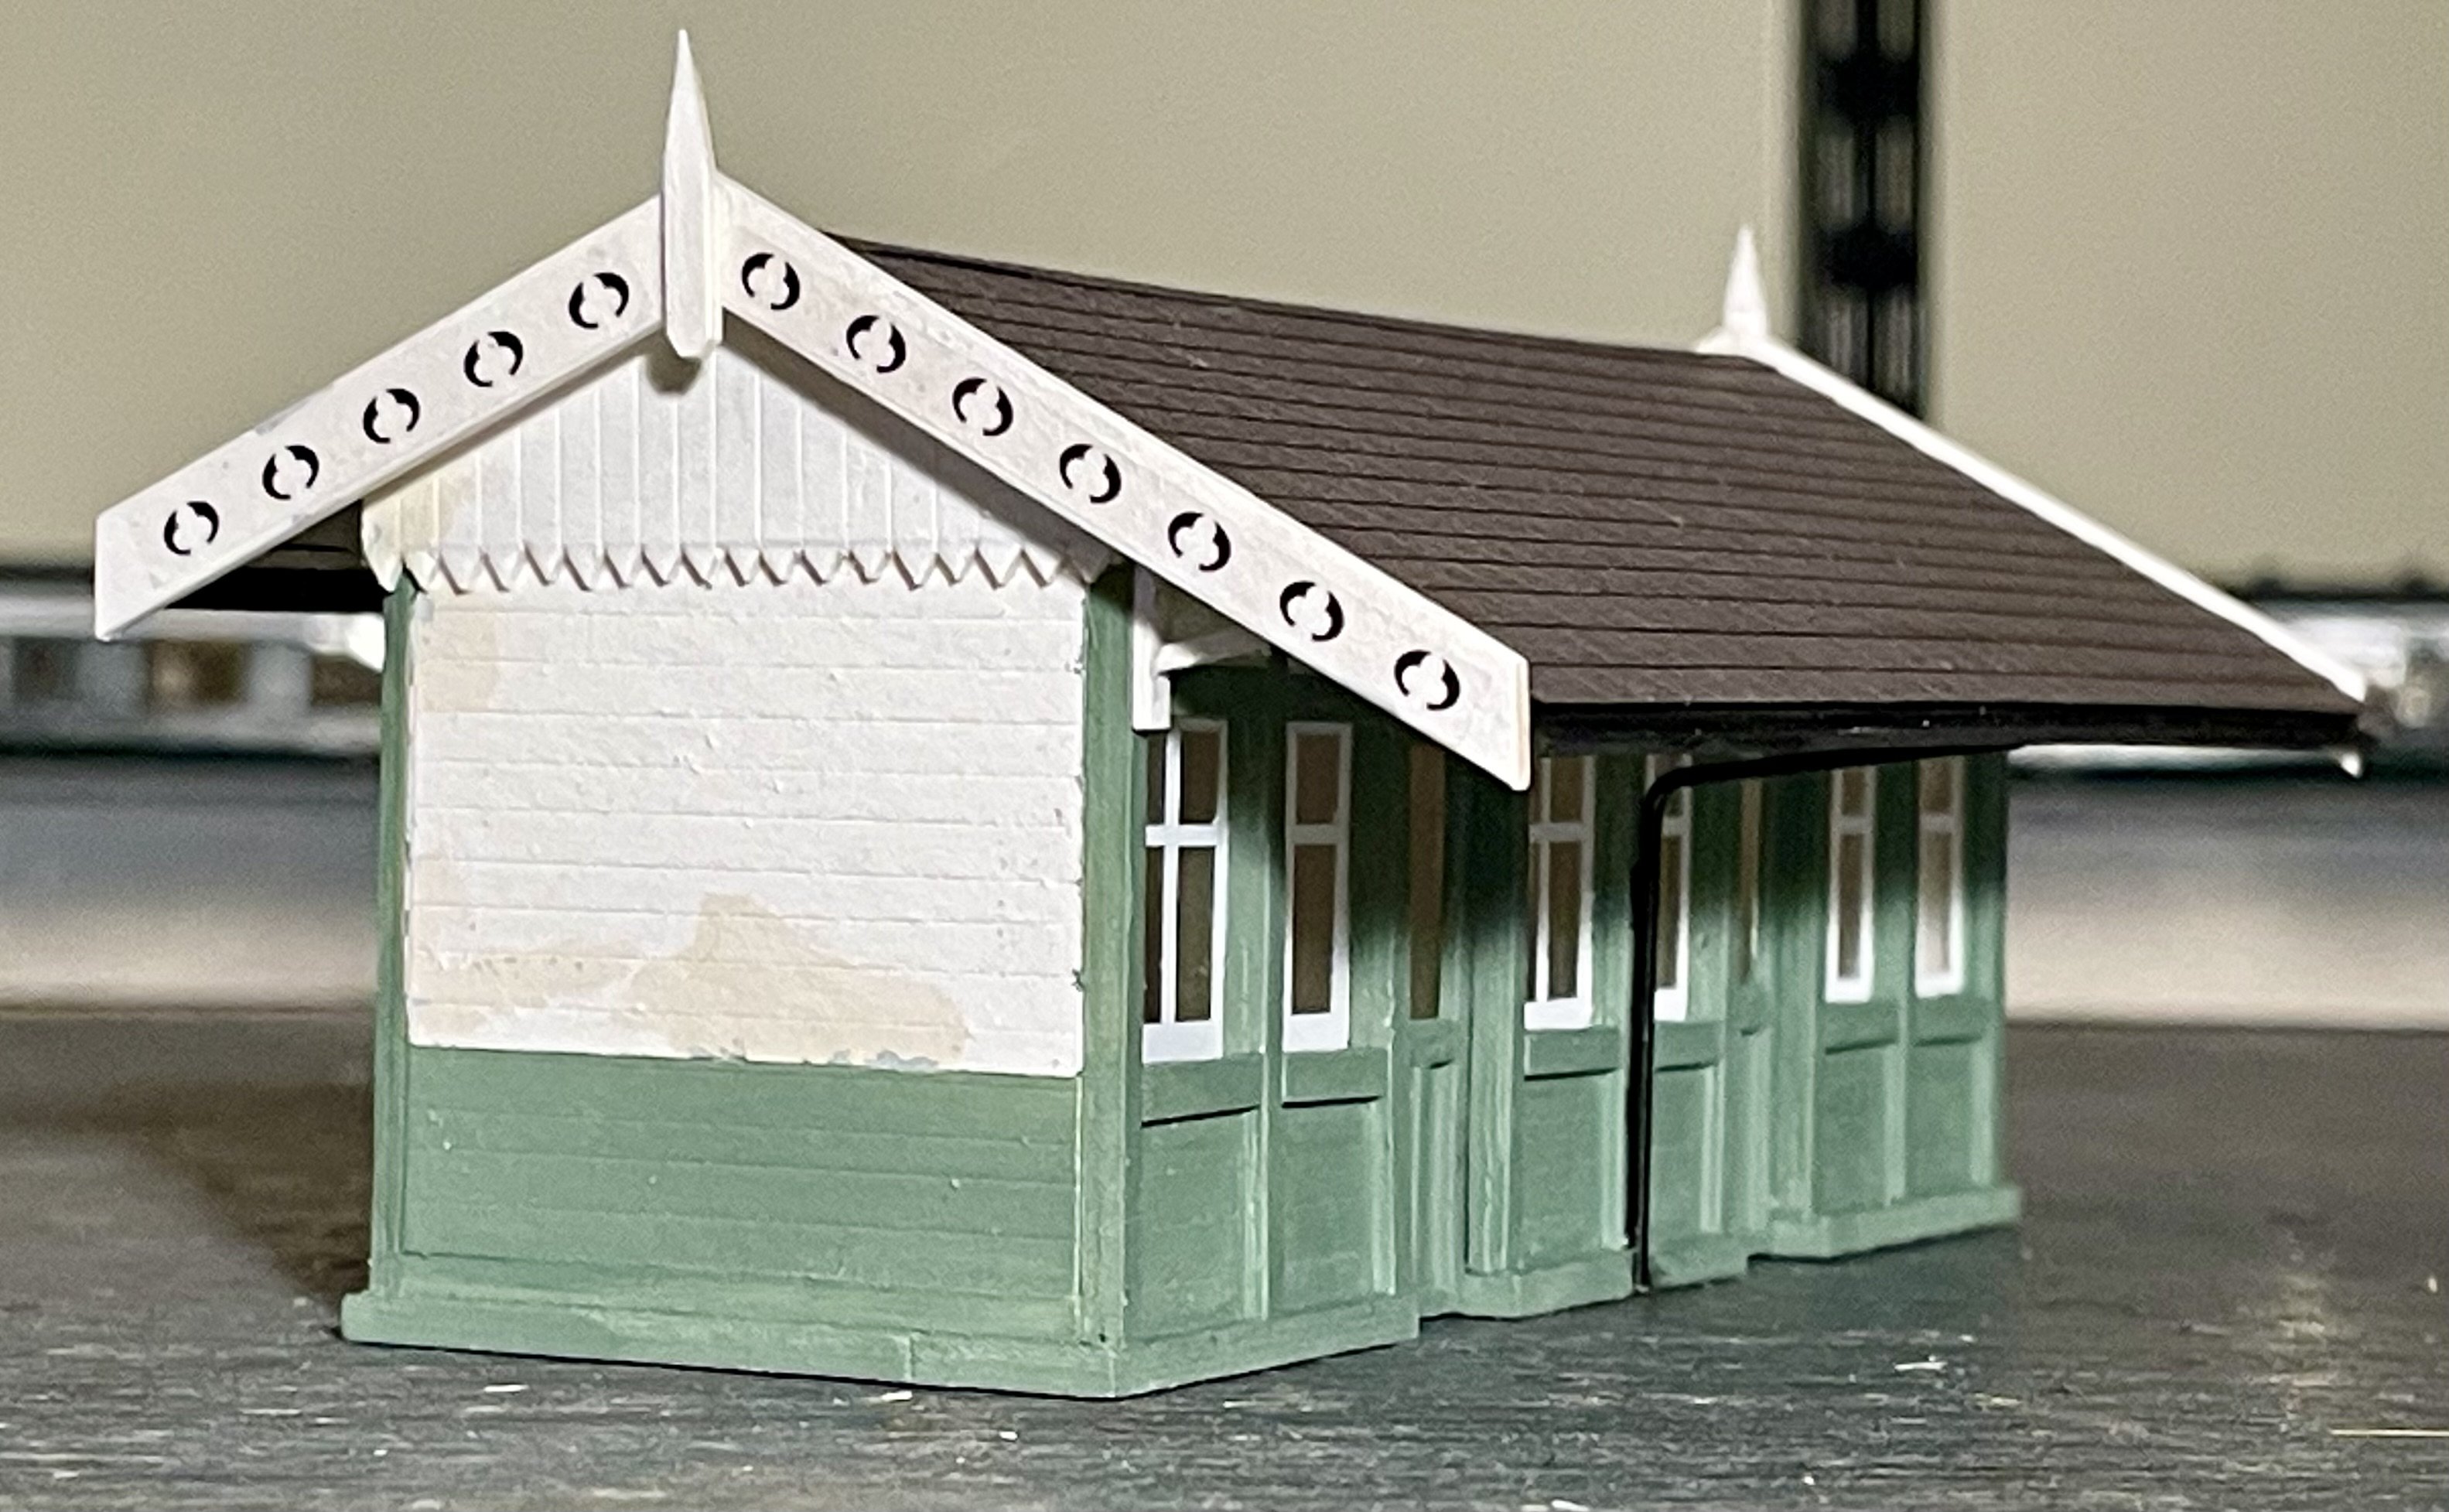
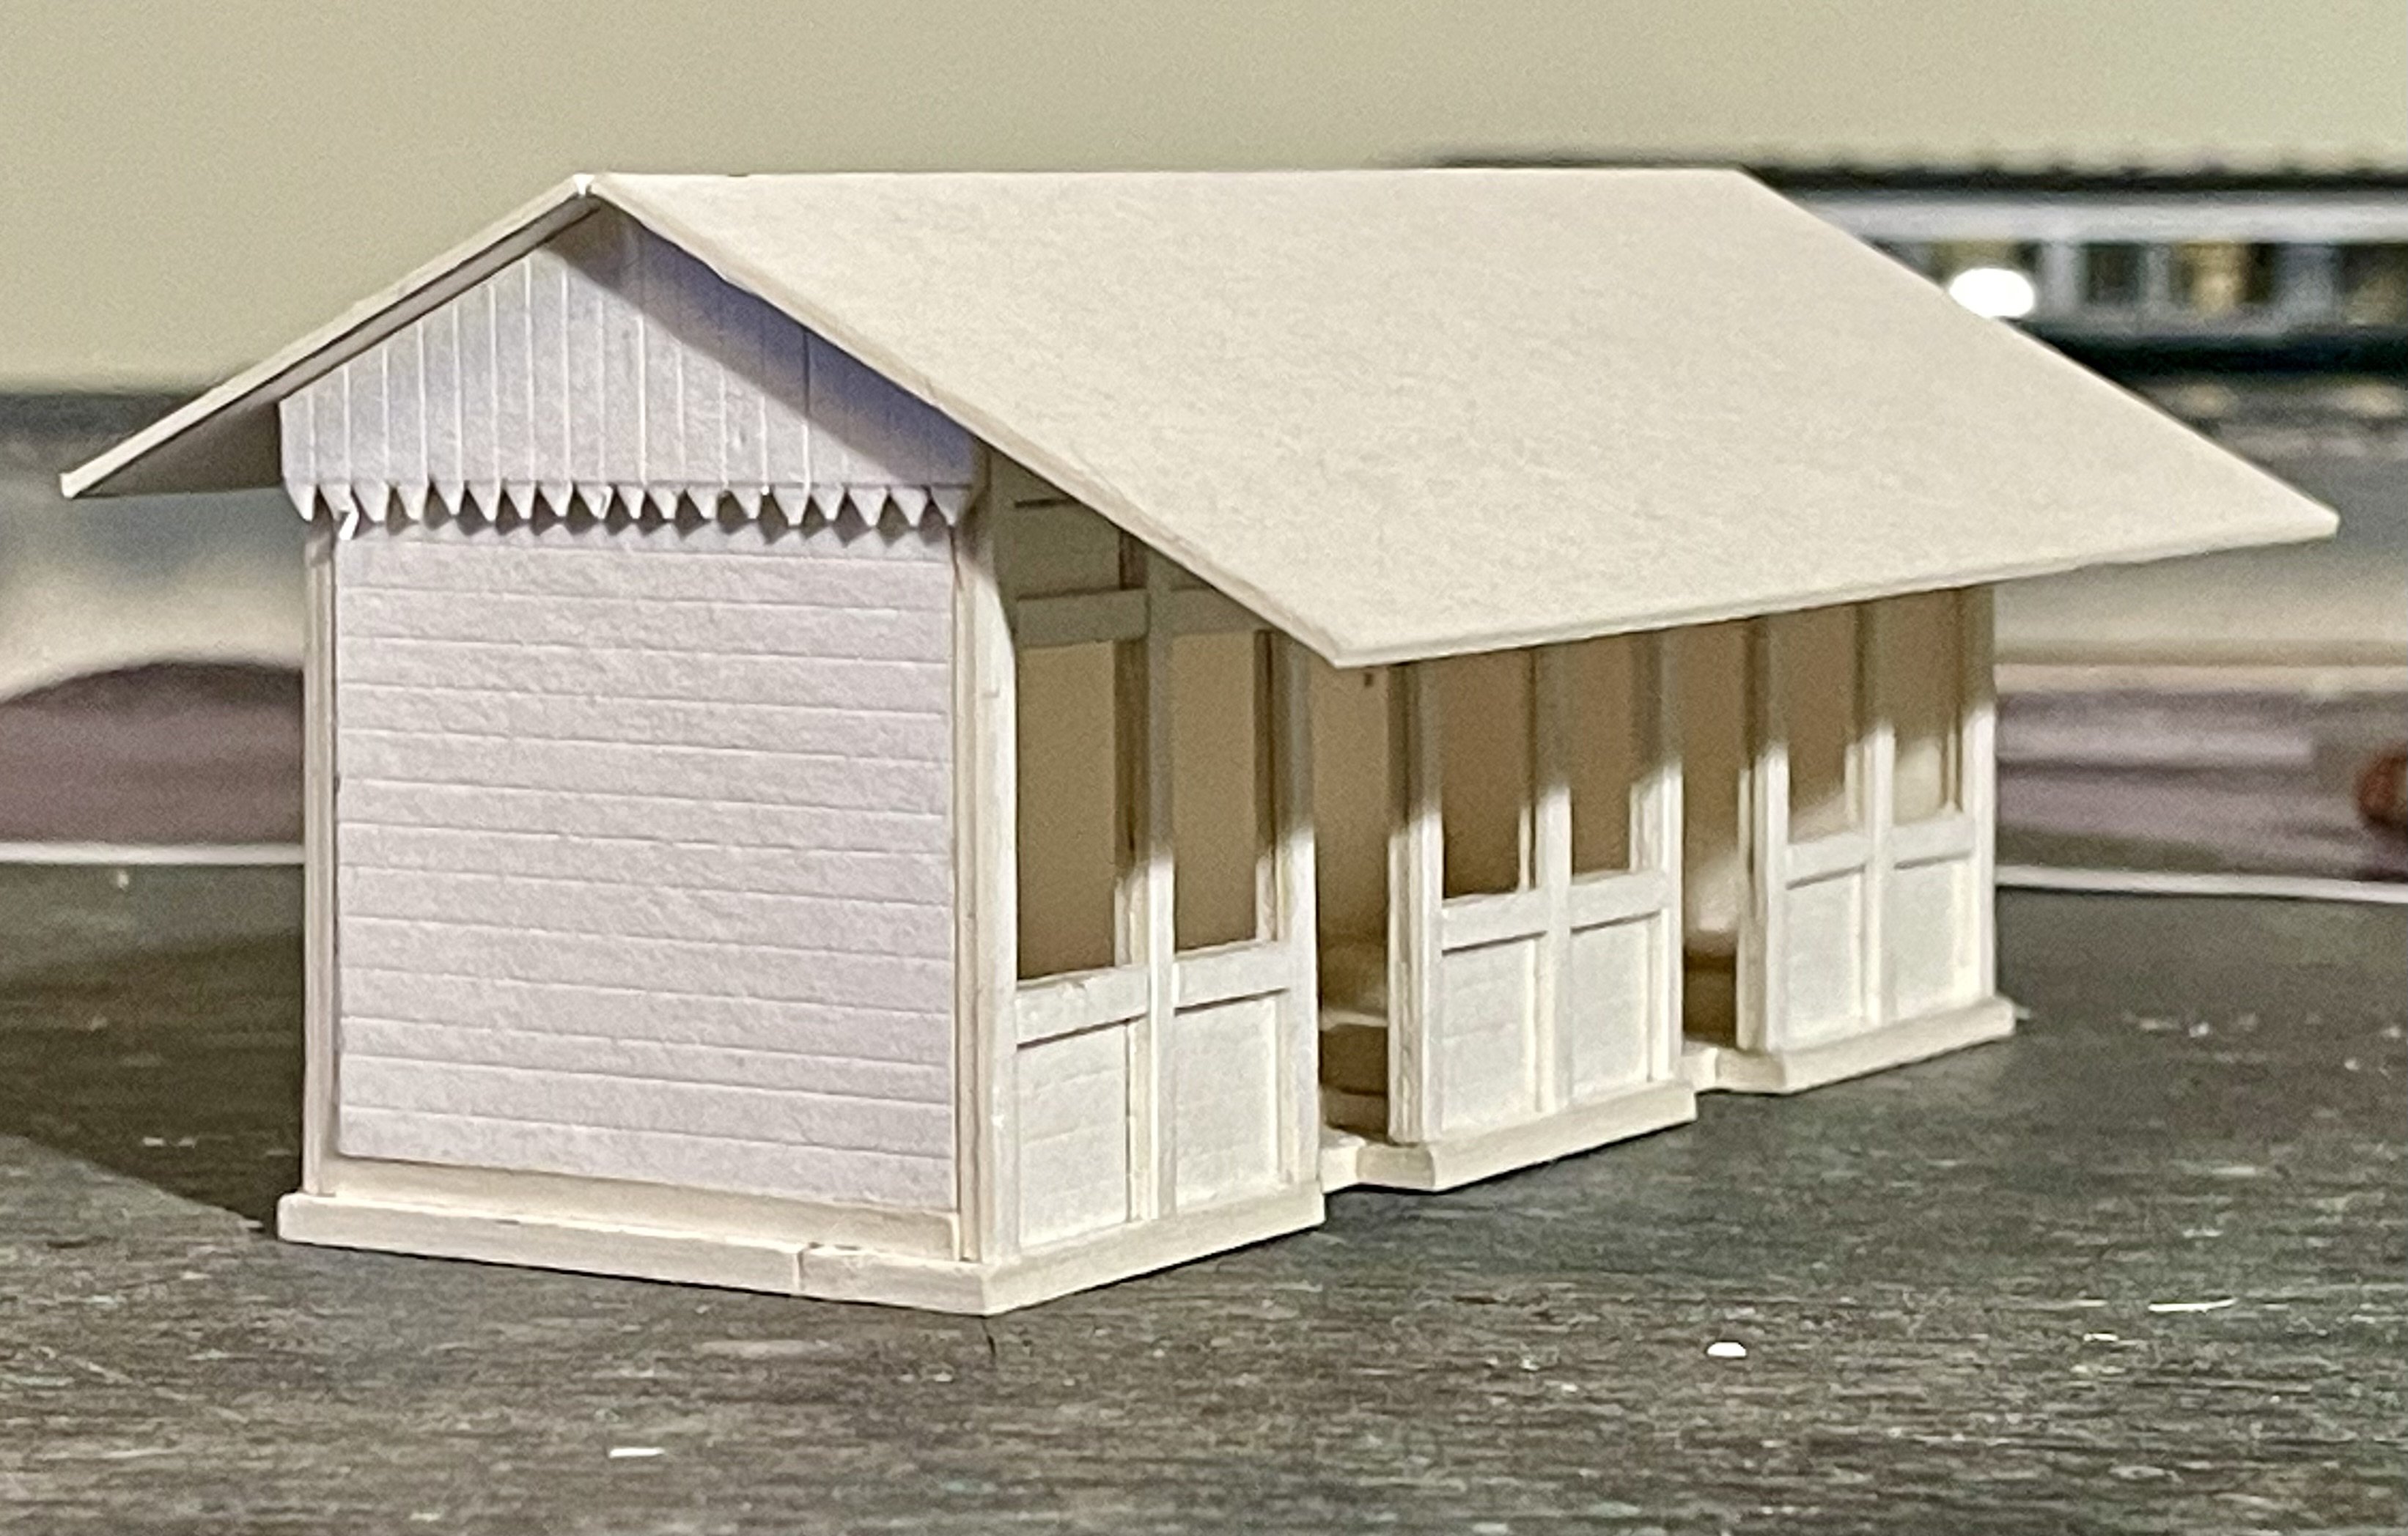
Thanks guys but a closer look will show that the valancing is not laser cut; rather my good self with a Stanley Knife. Cheers Darius
-
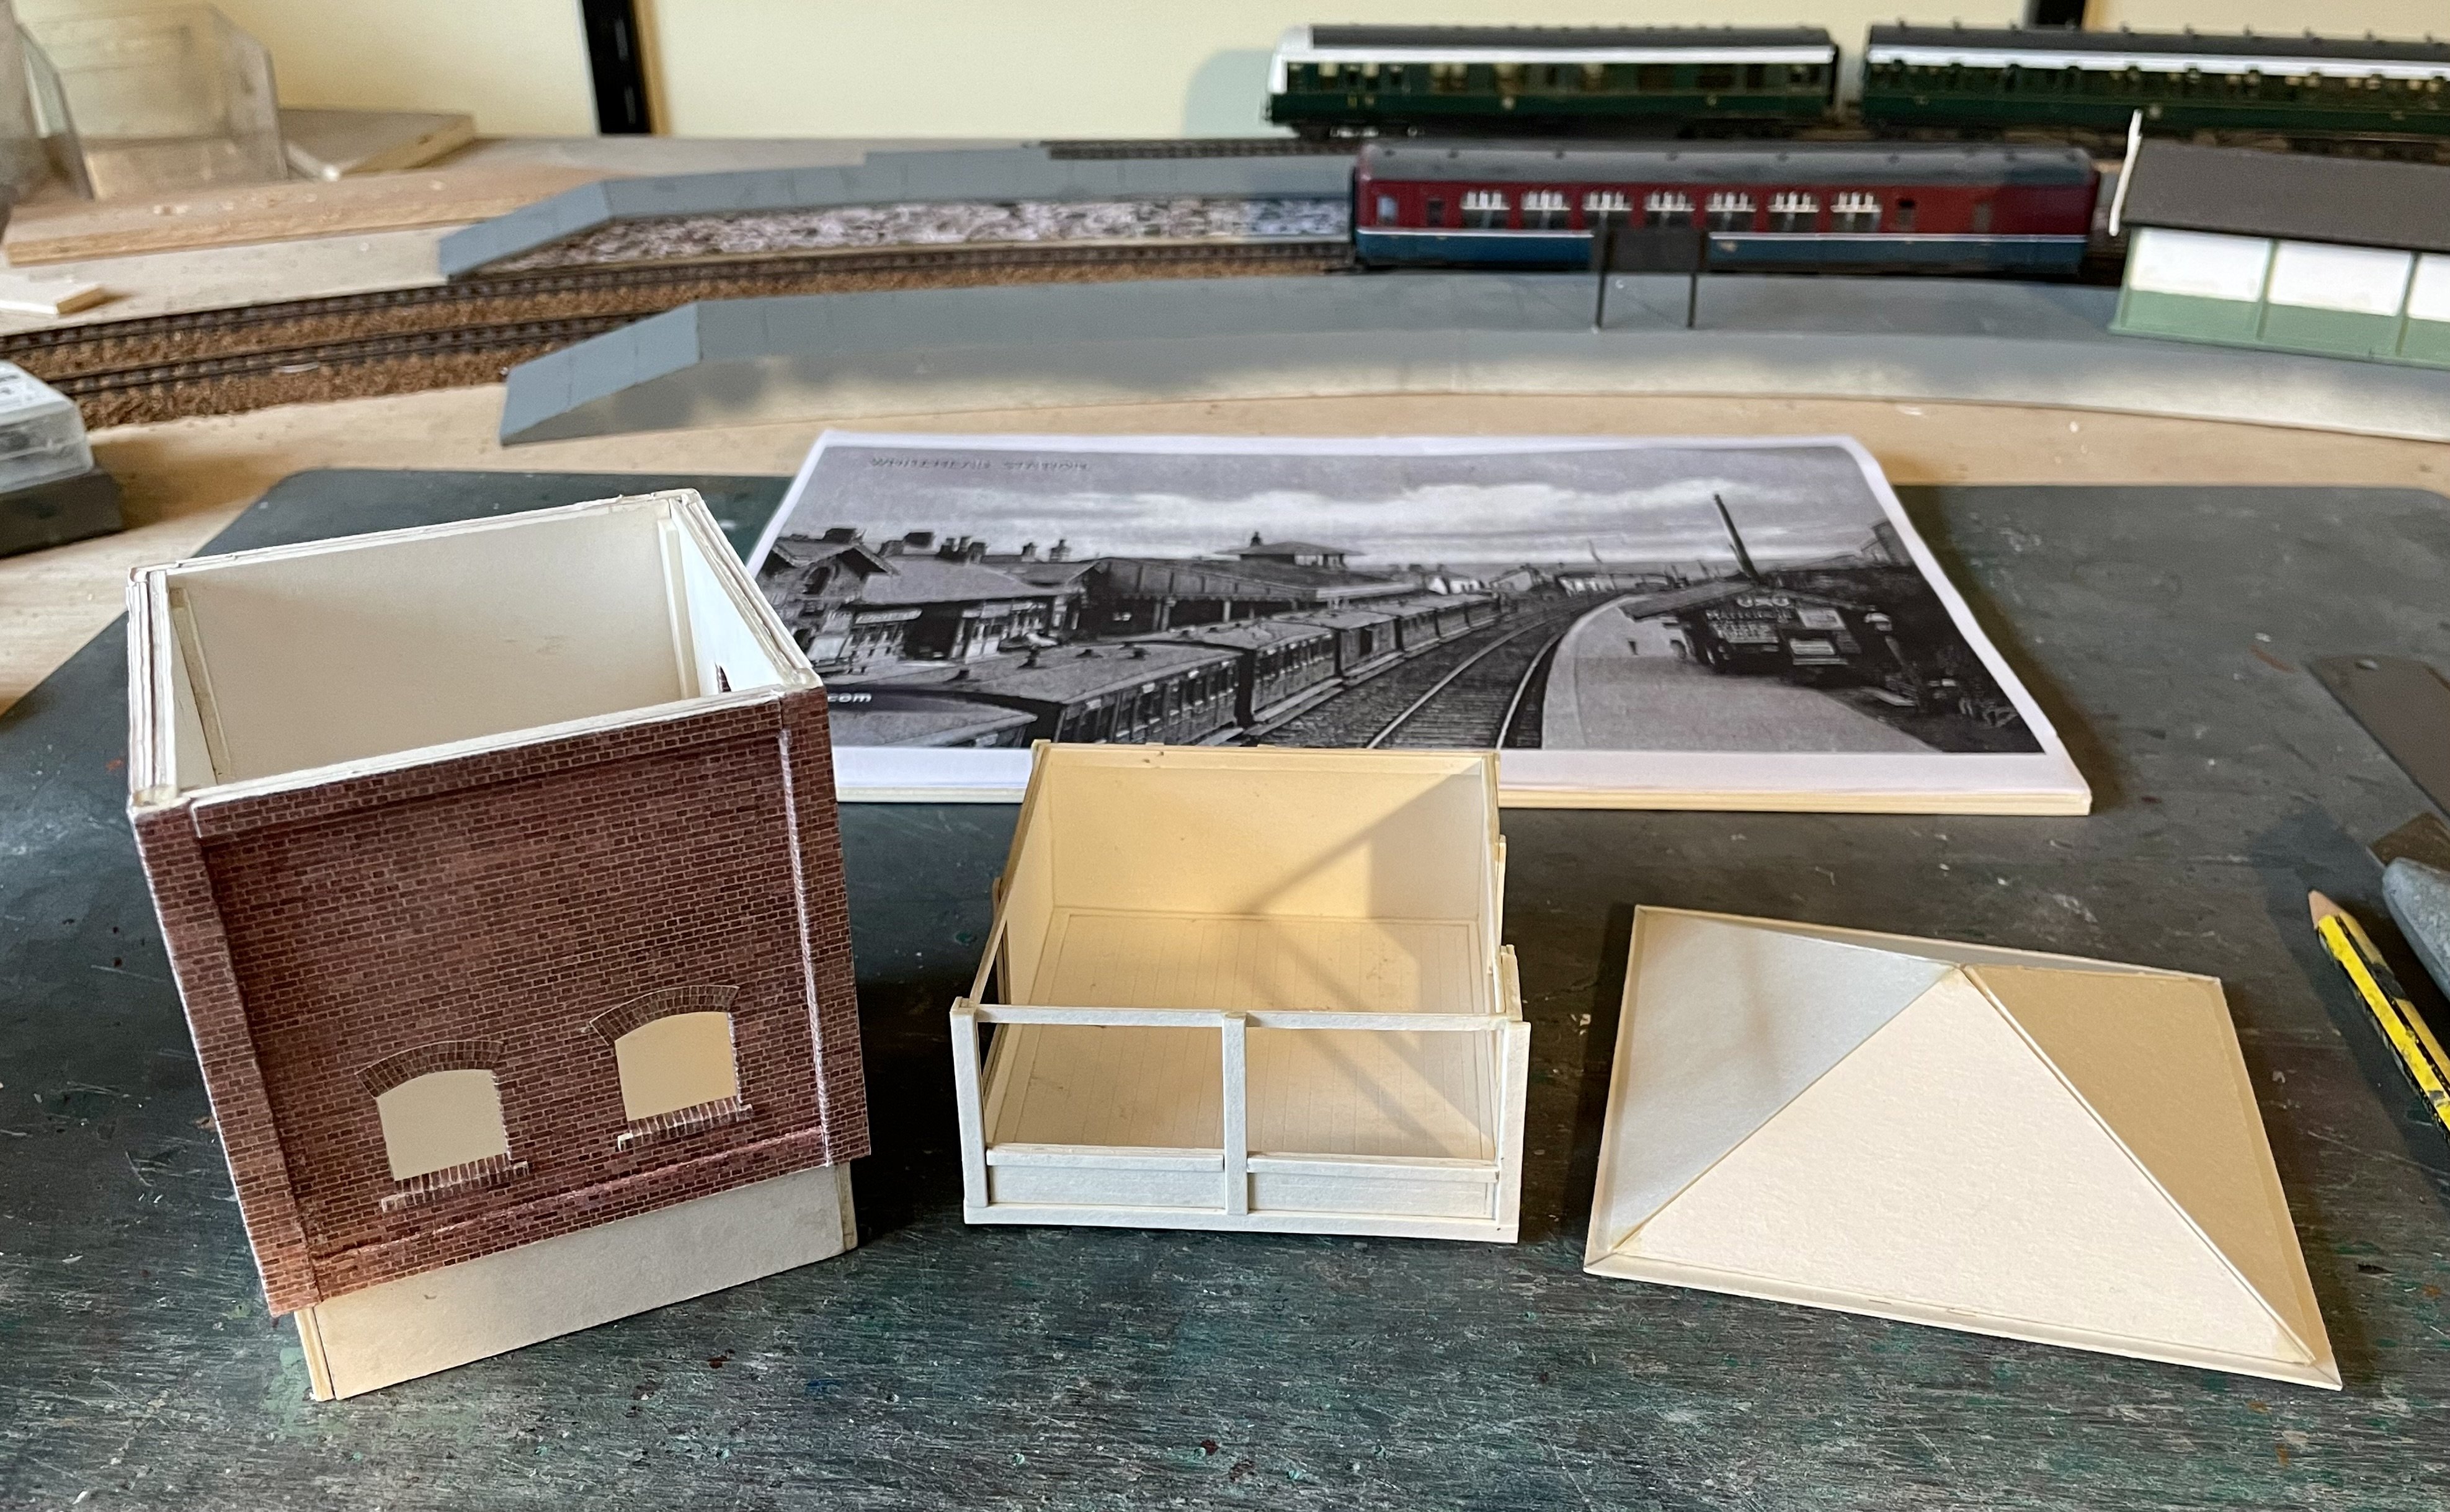
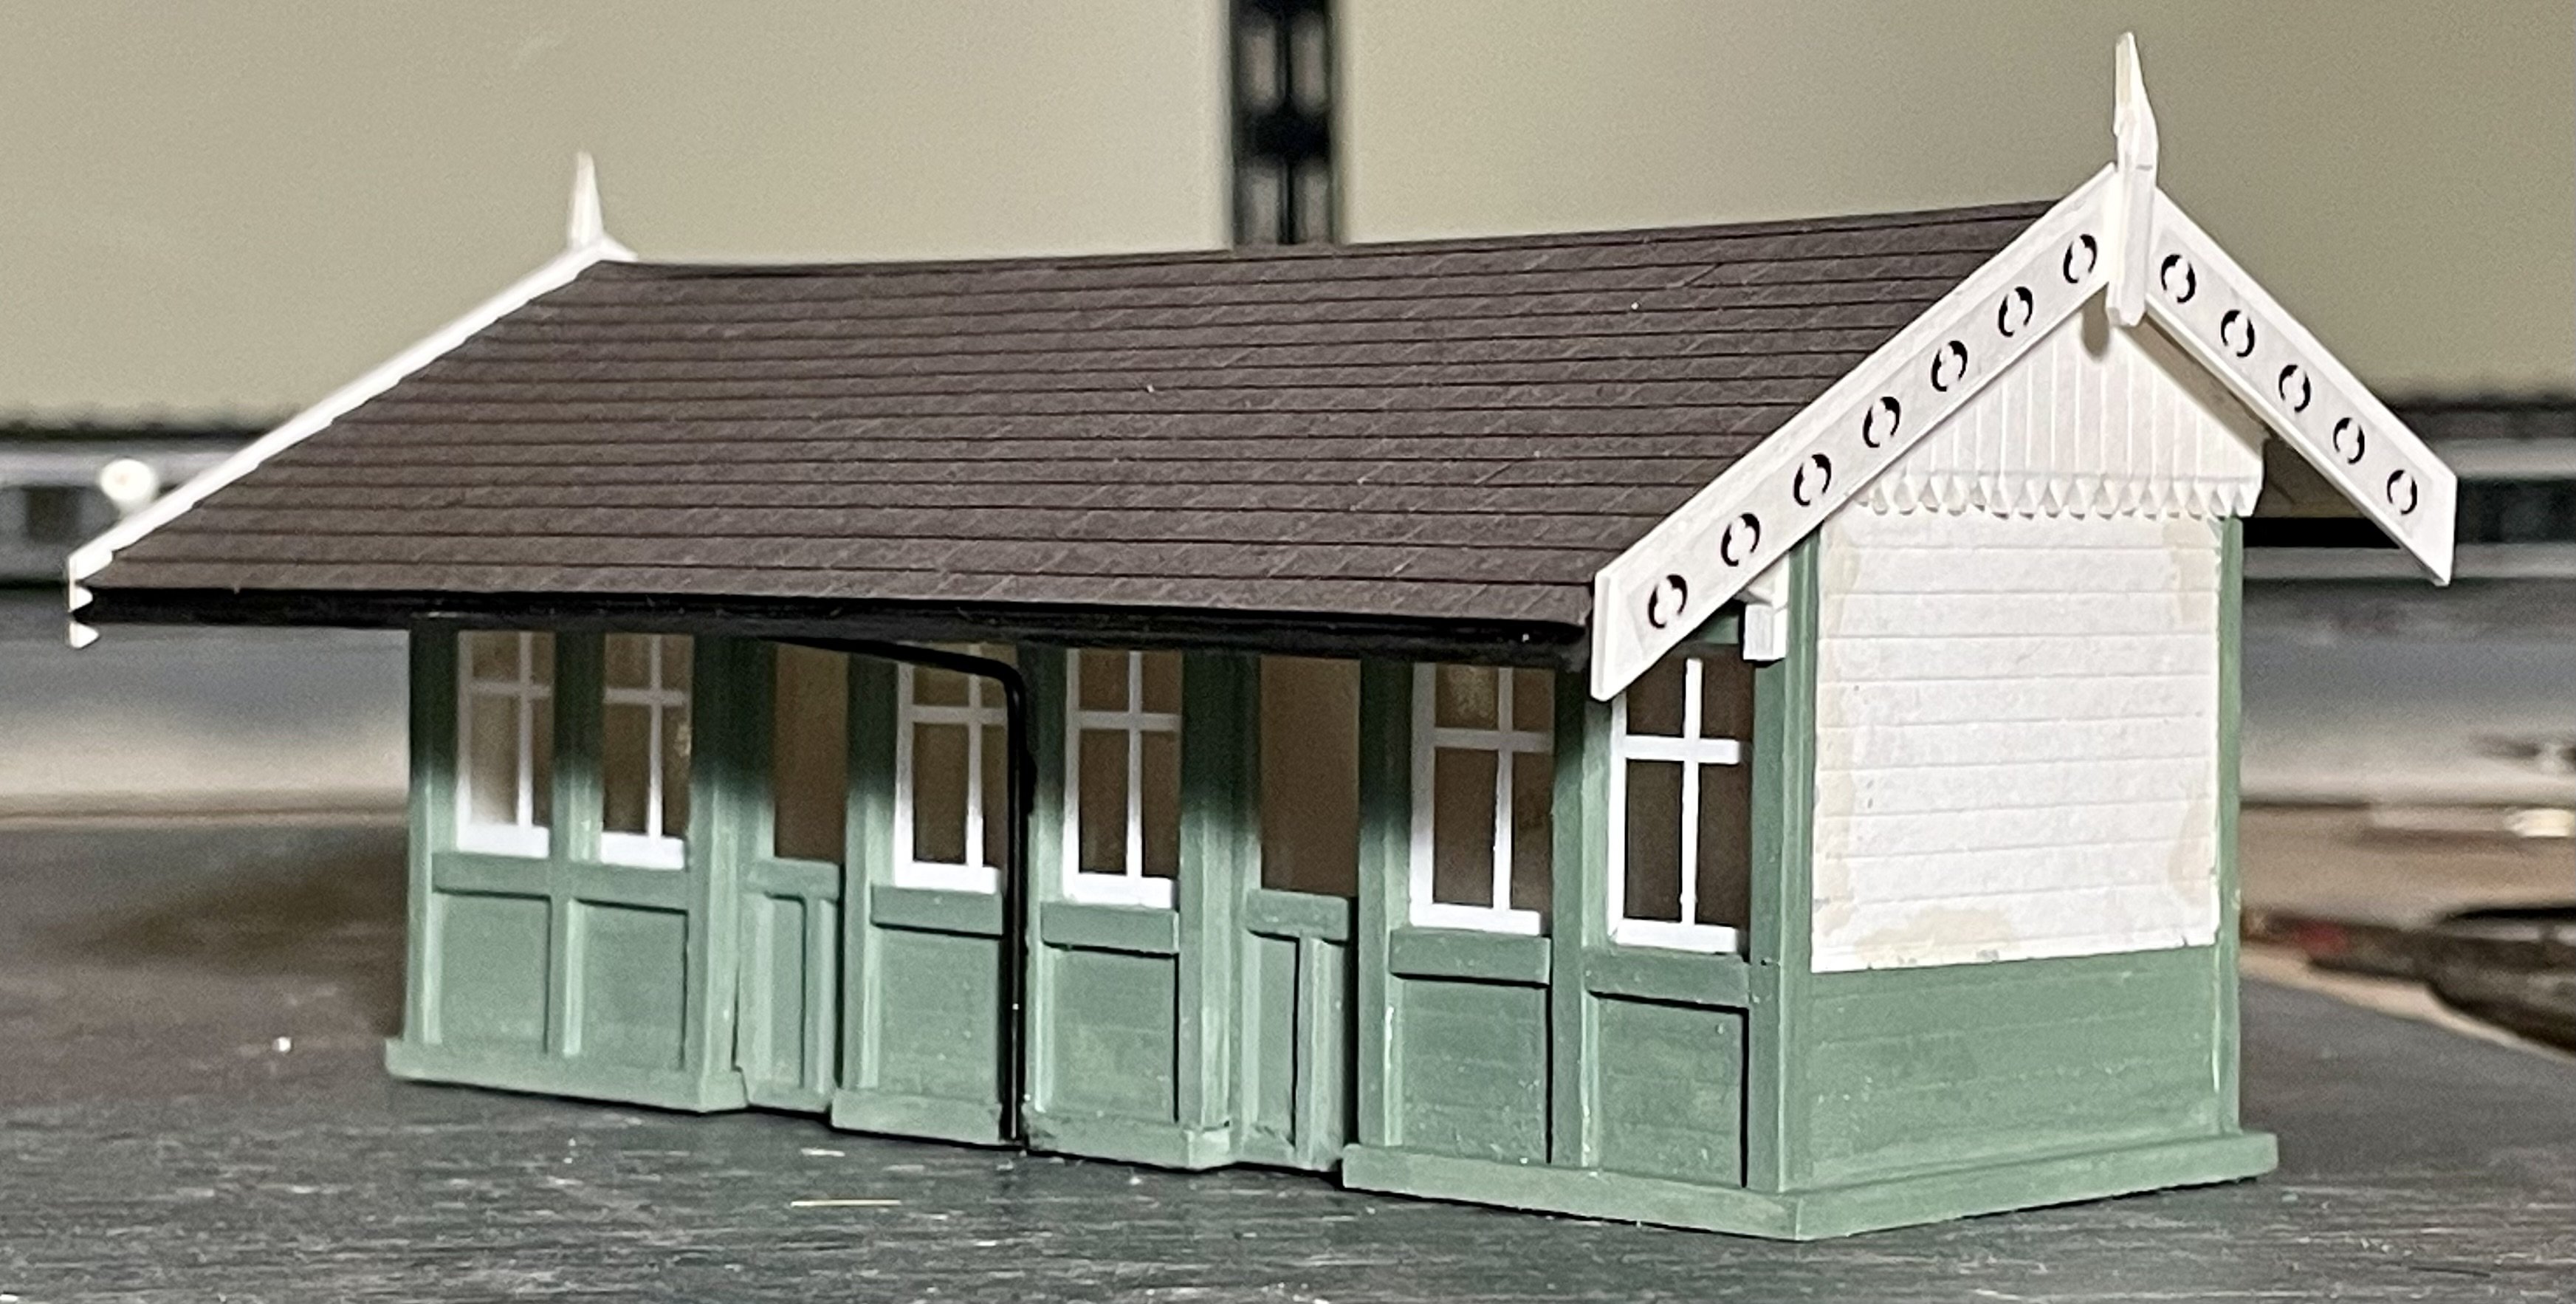
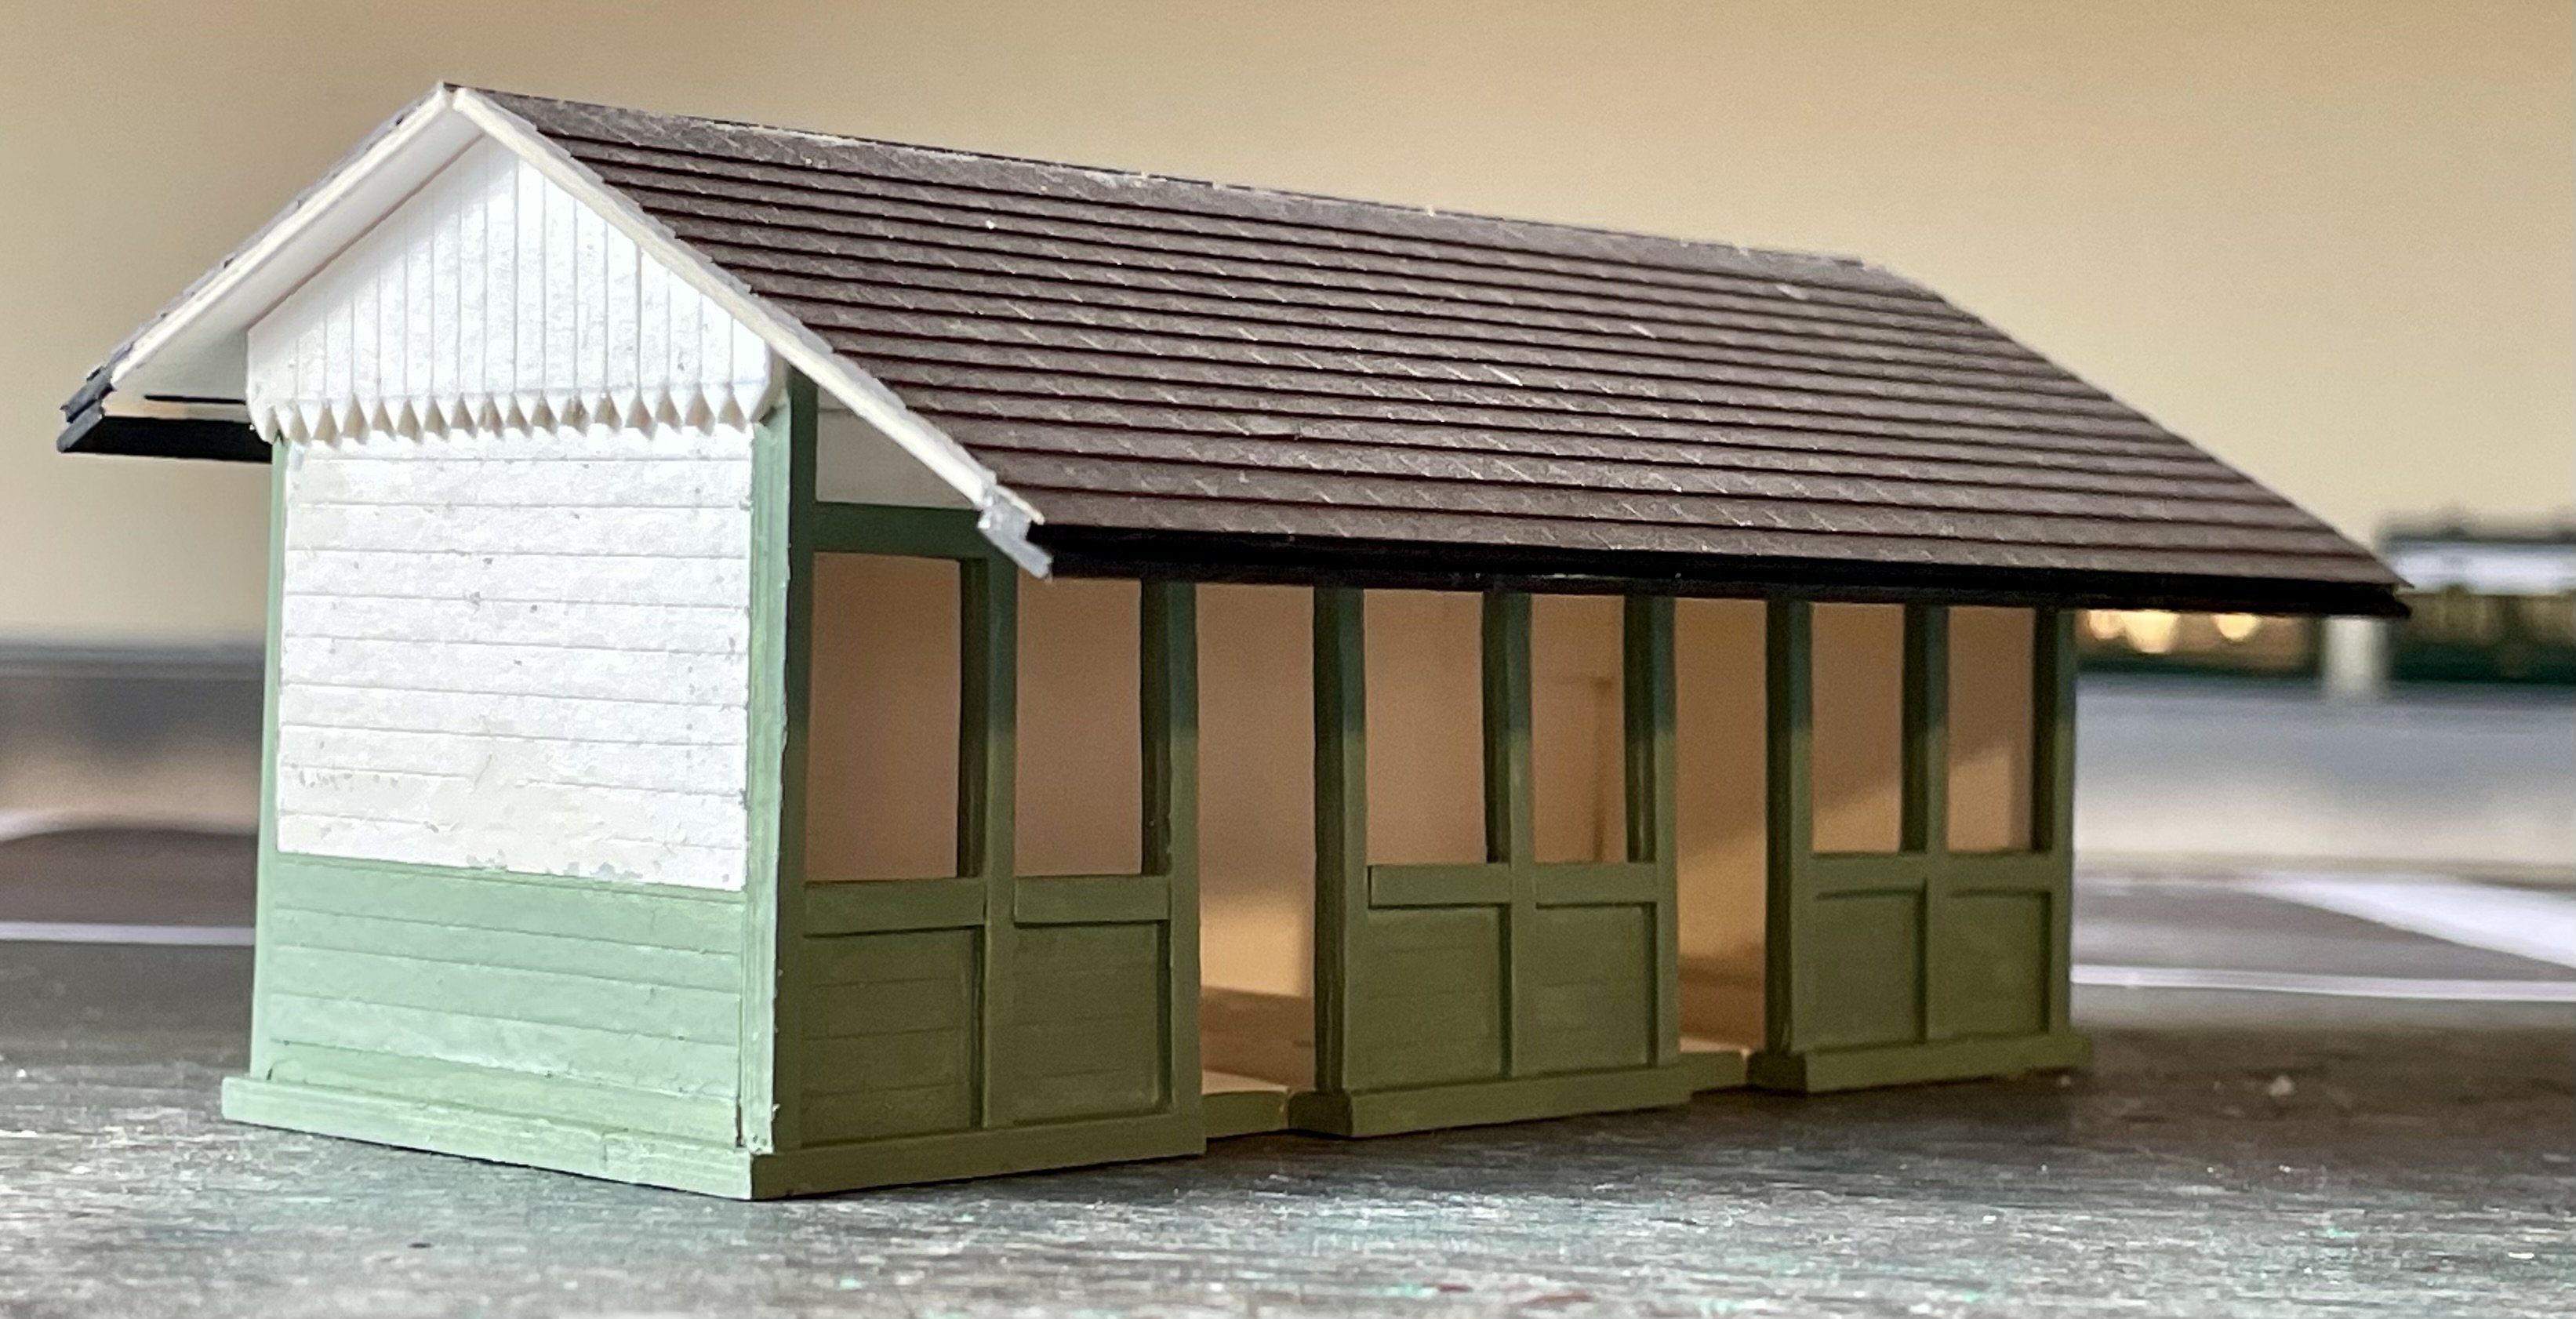
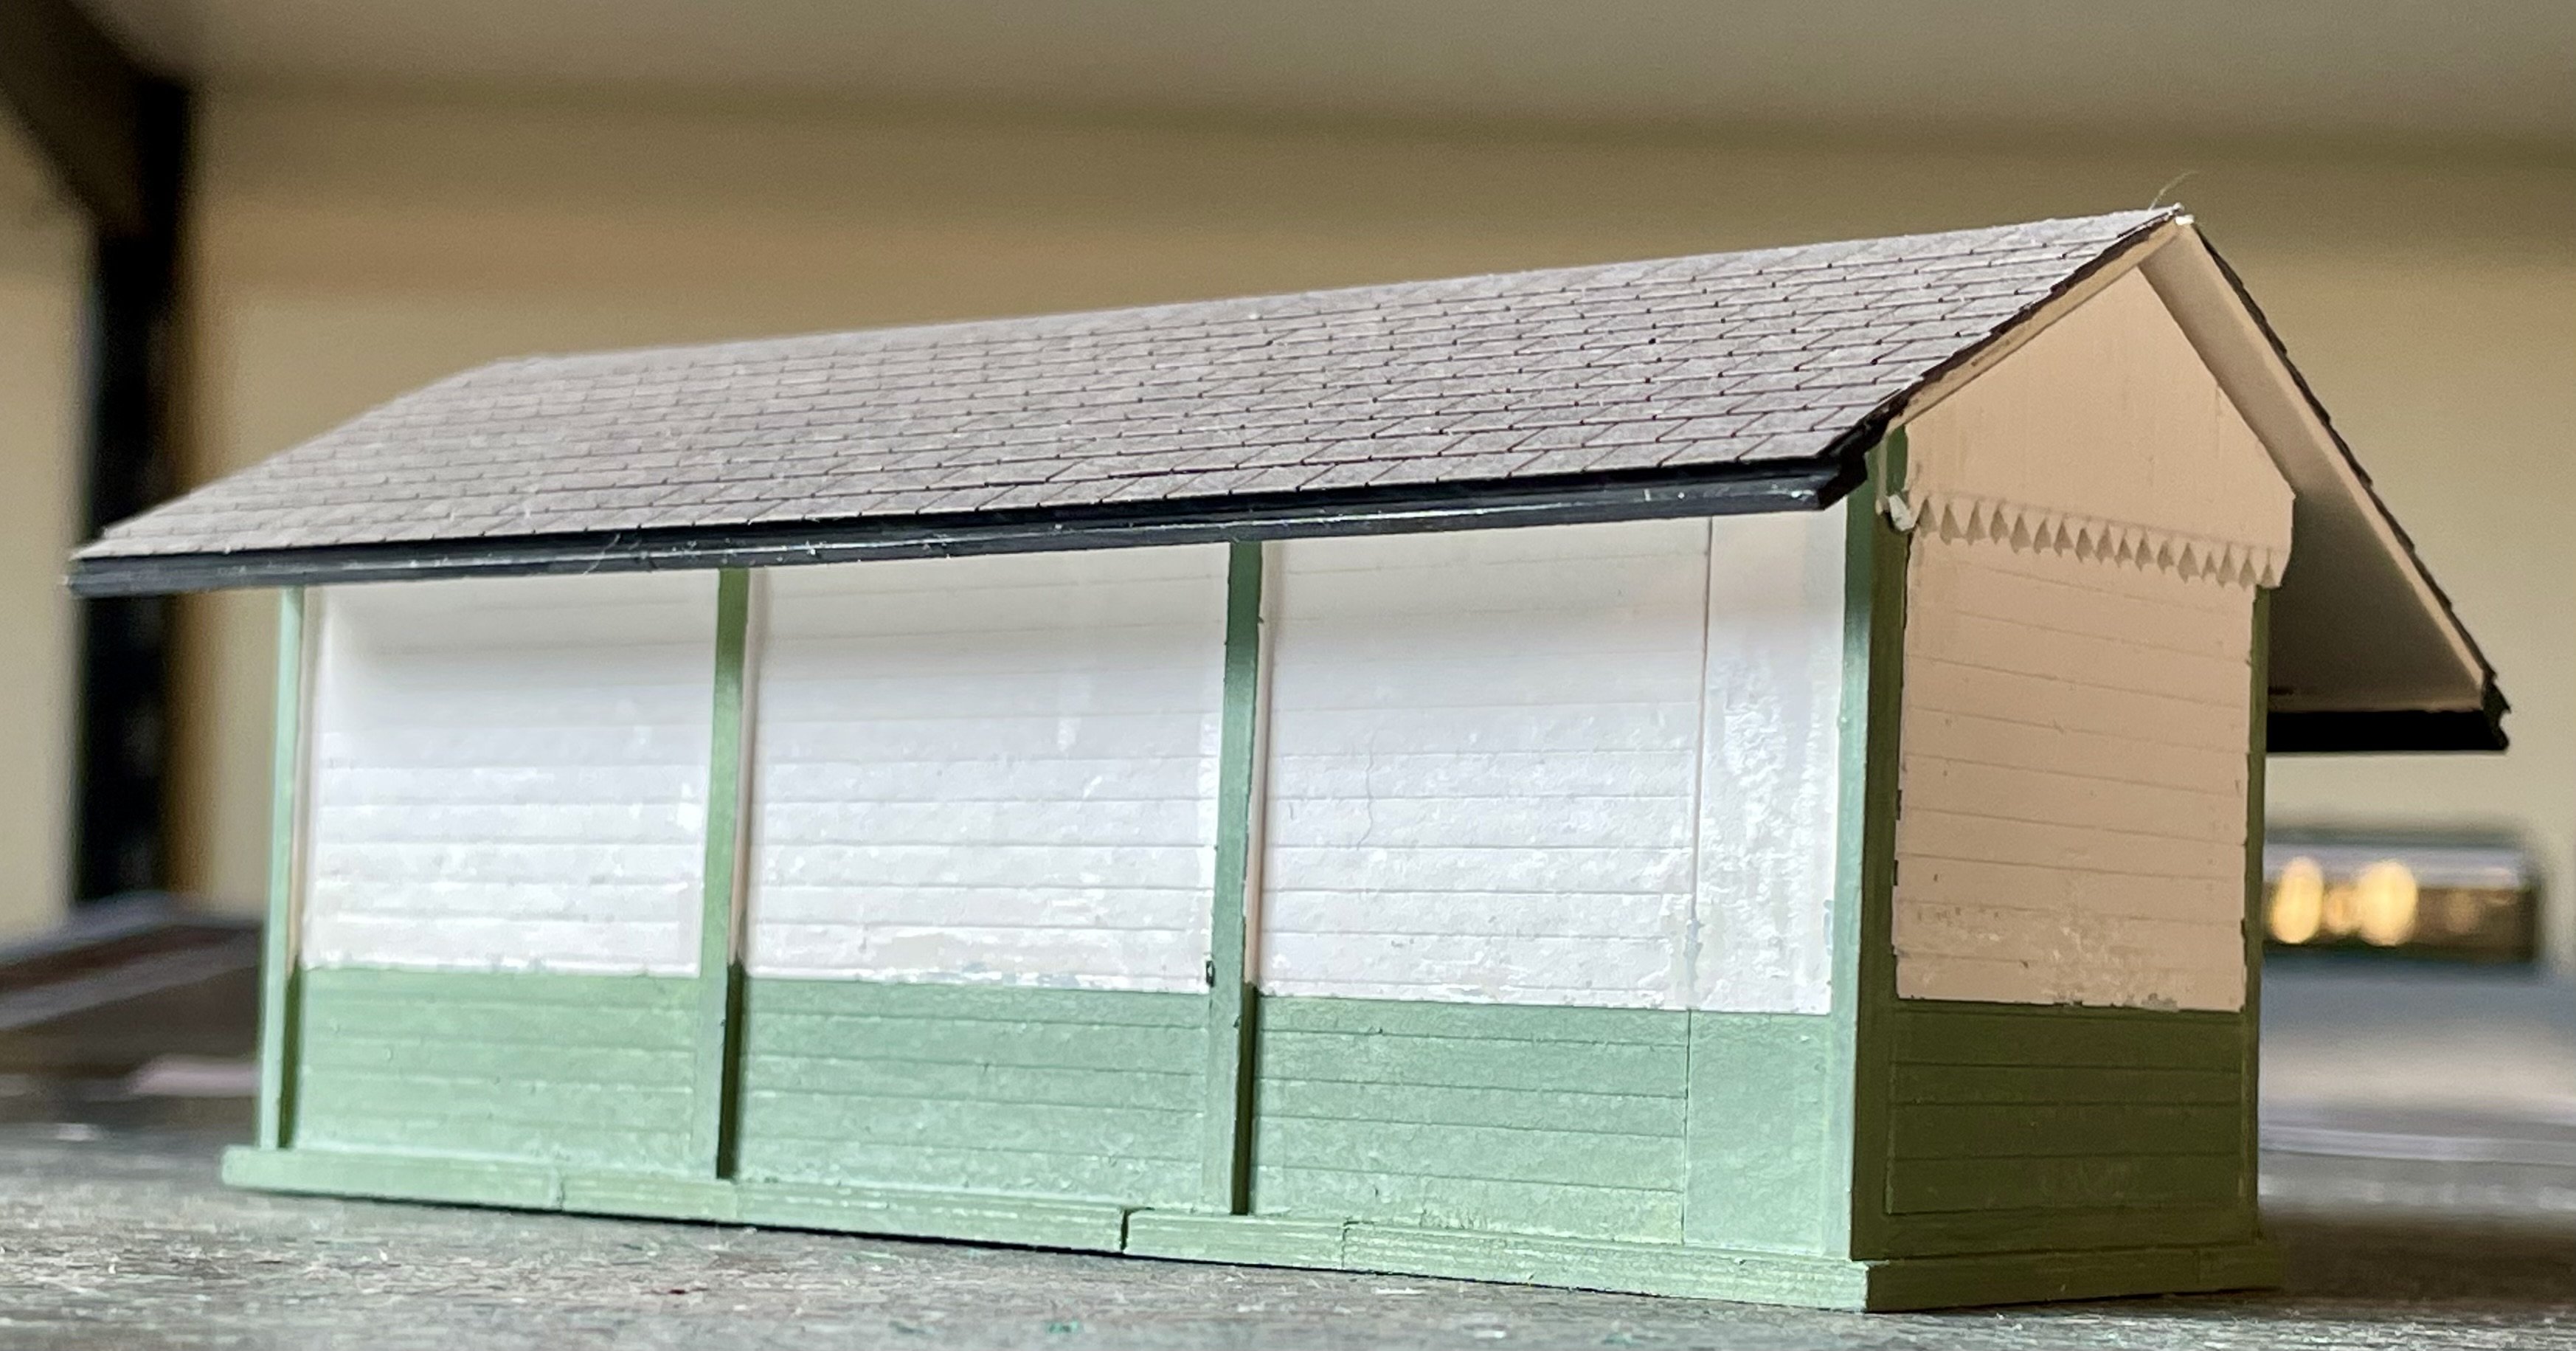
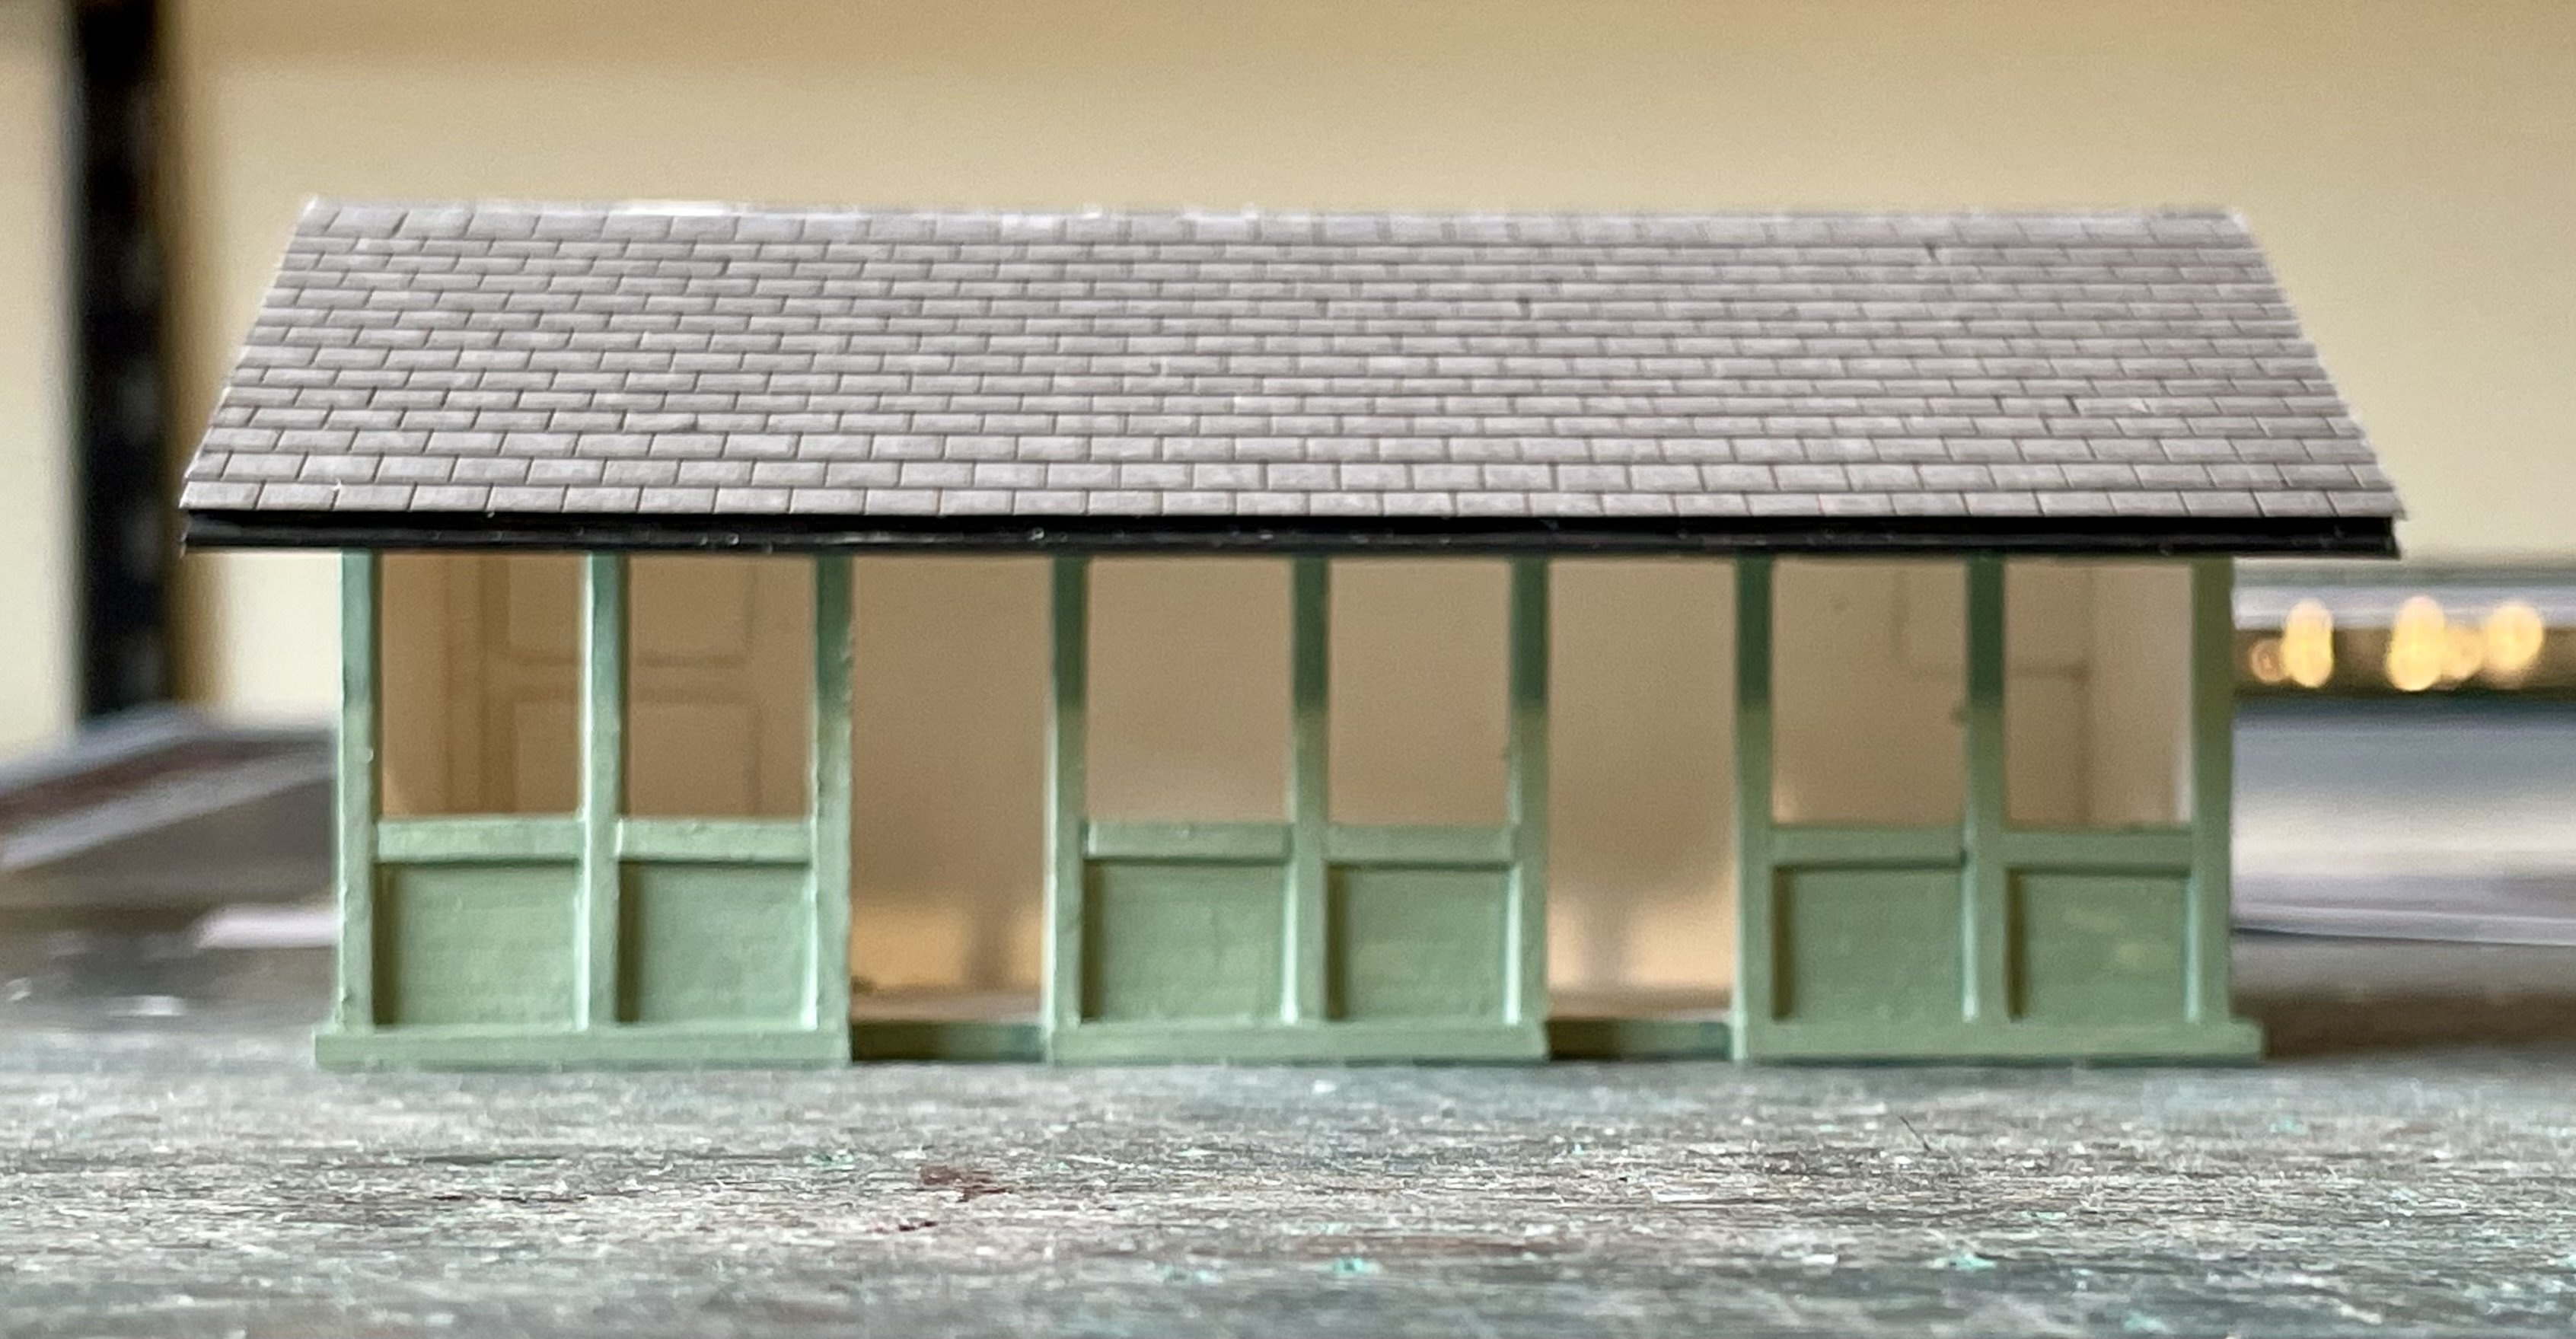
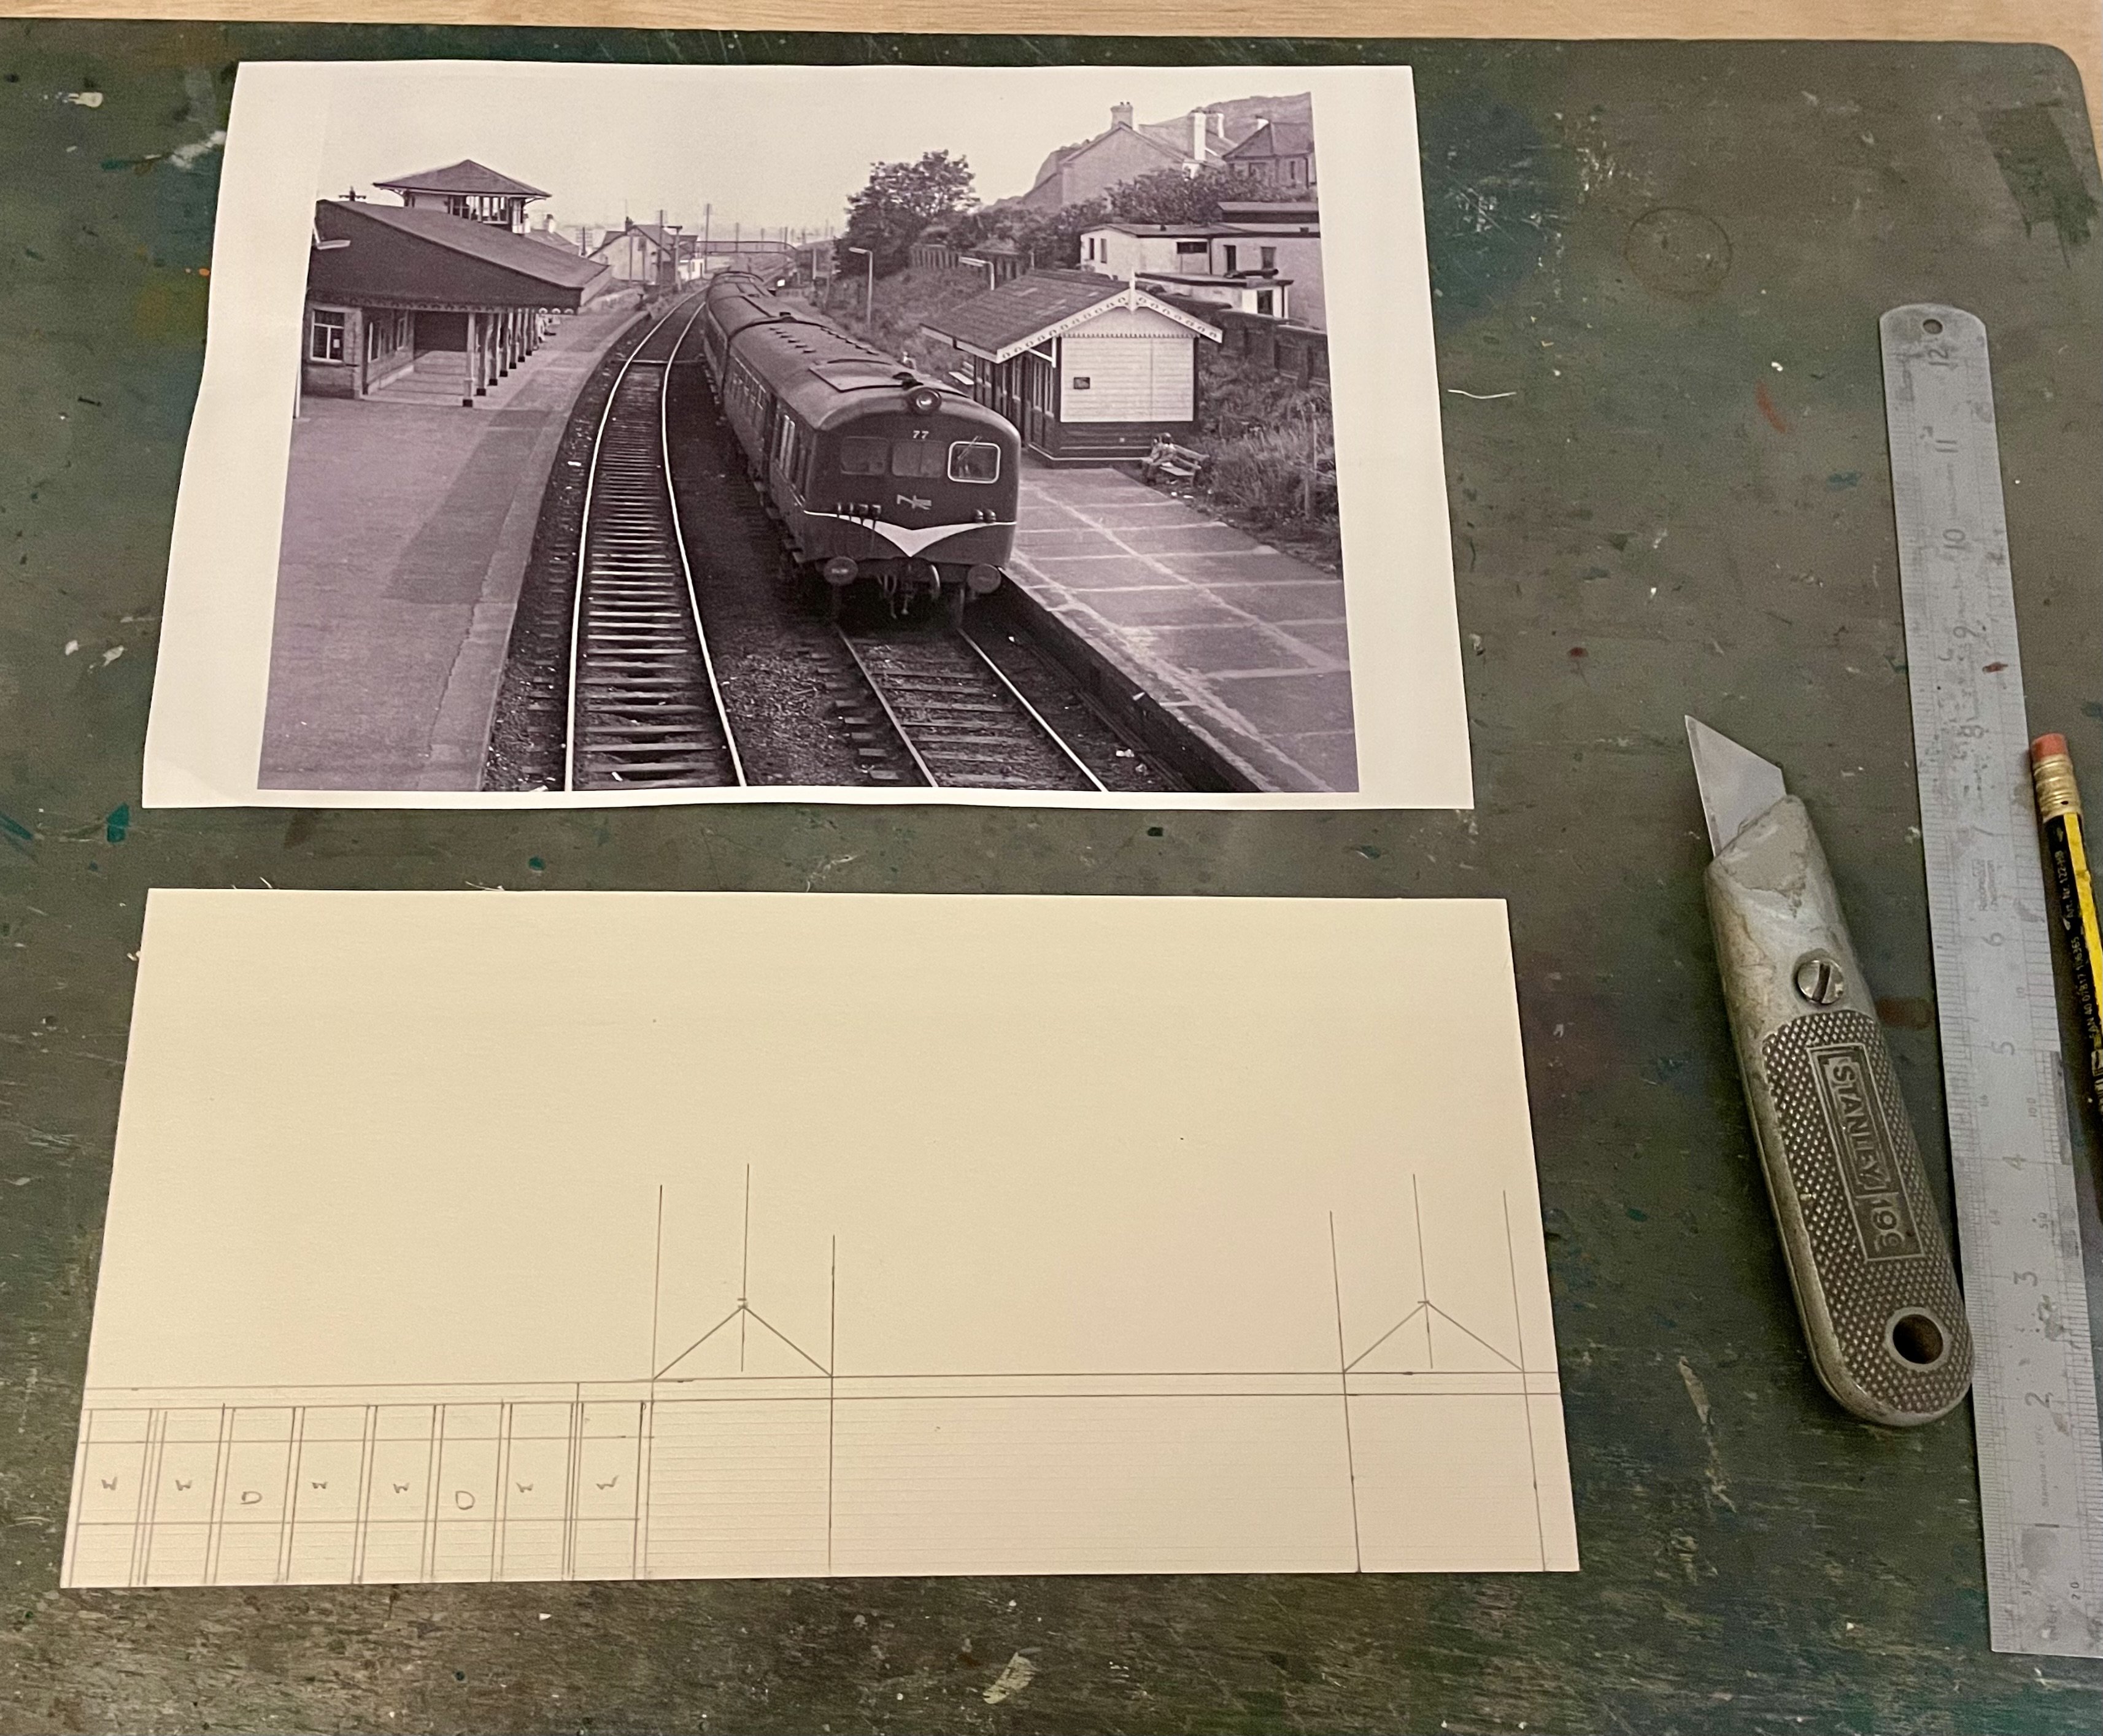
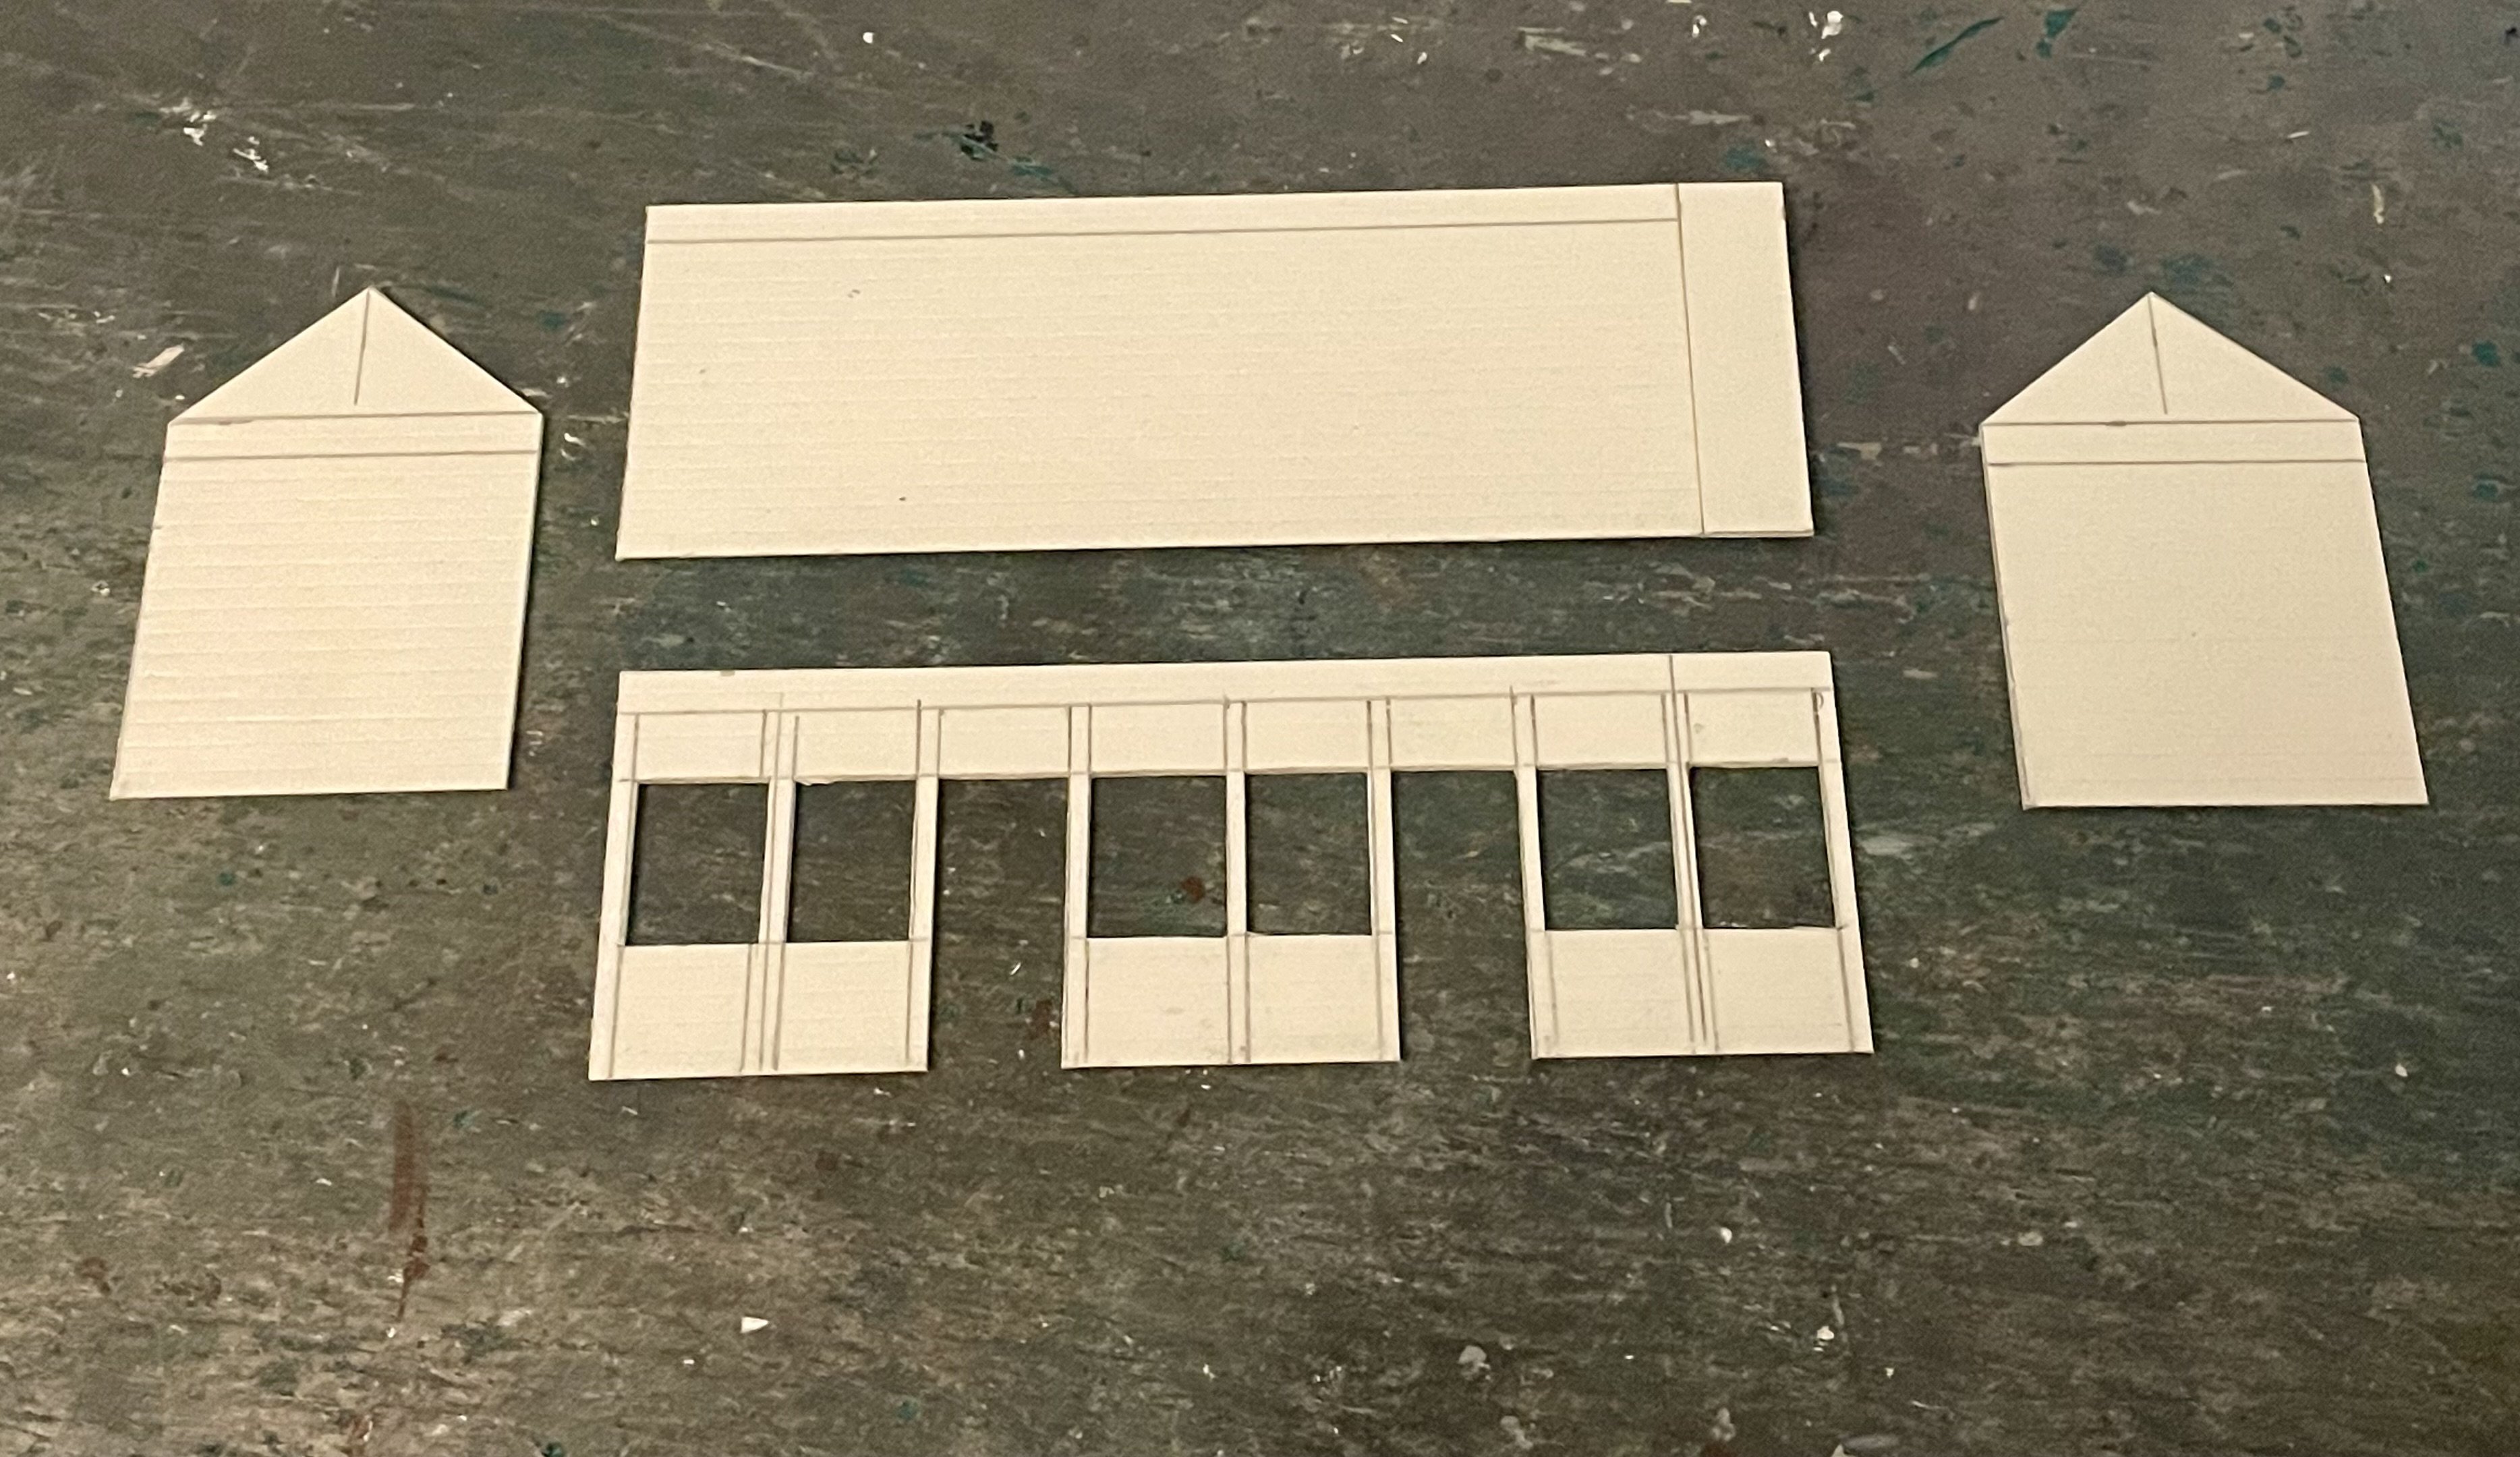
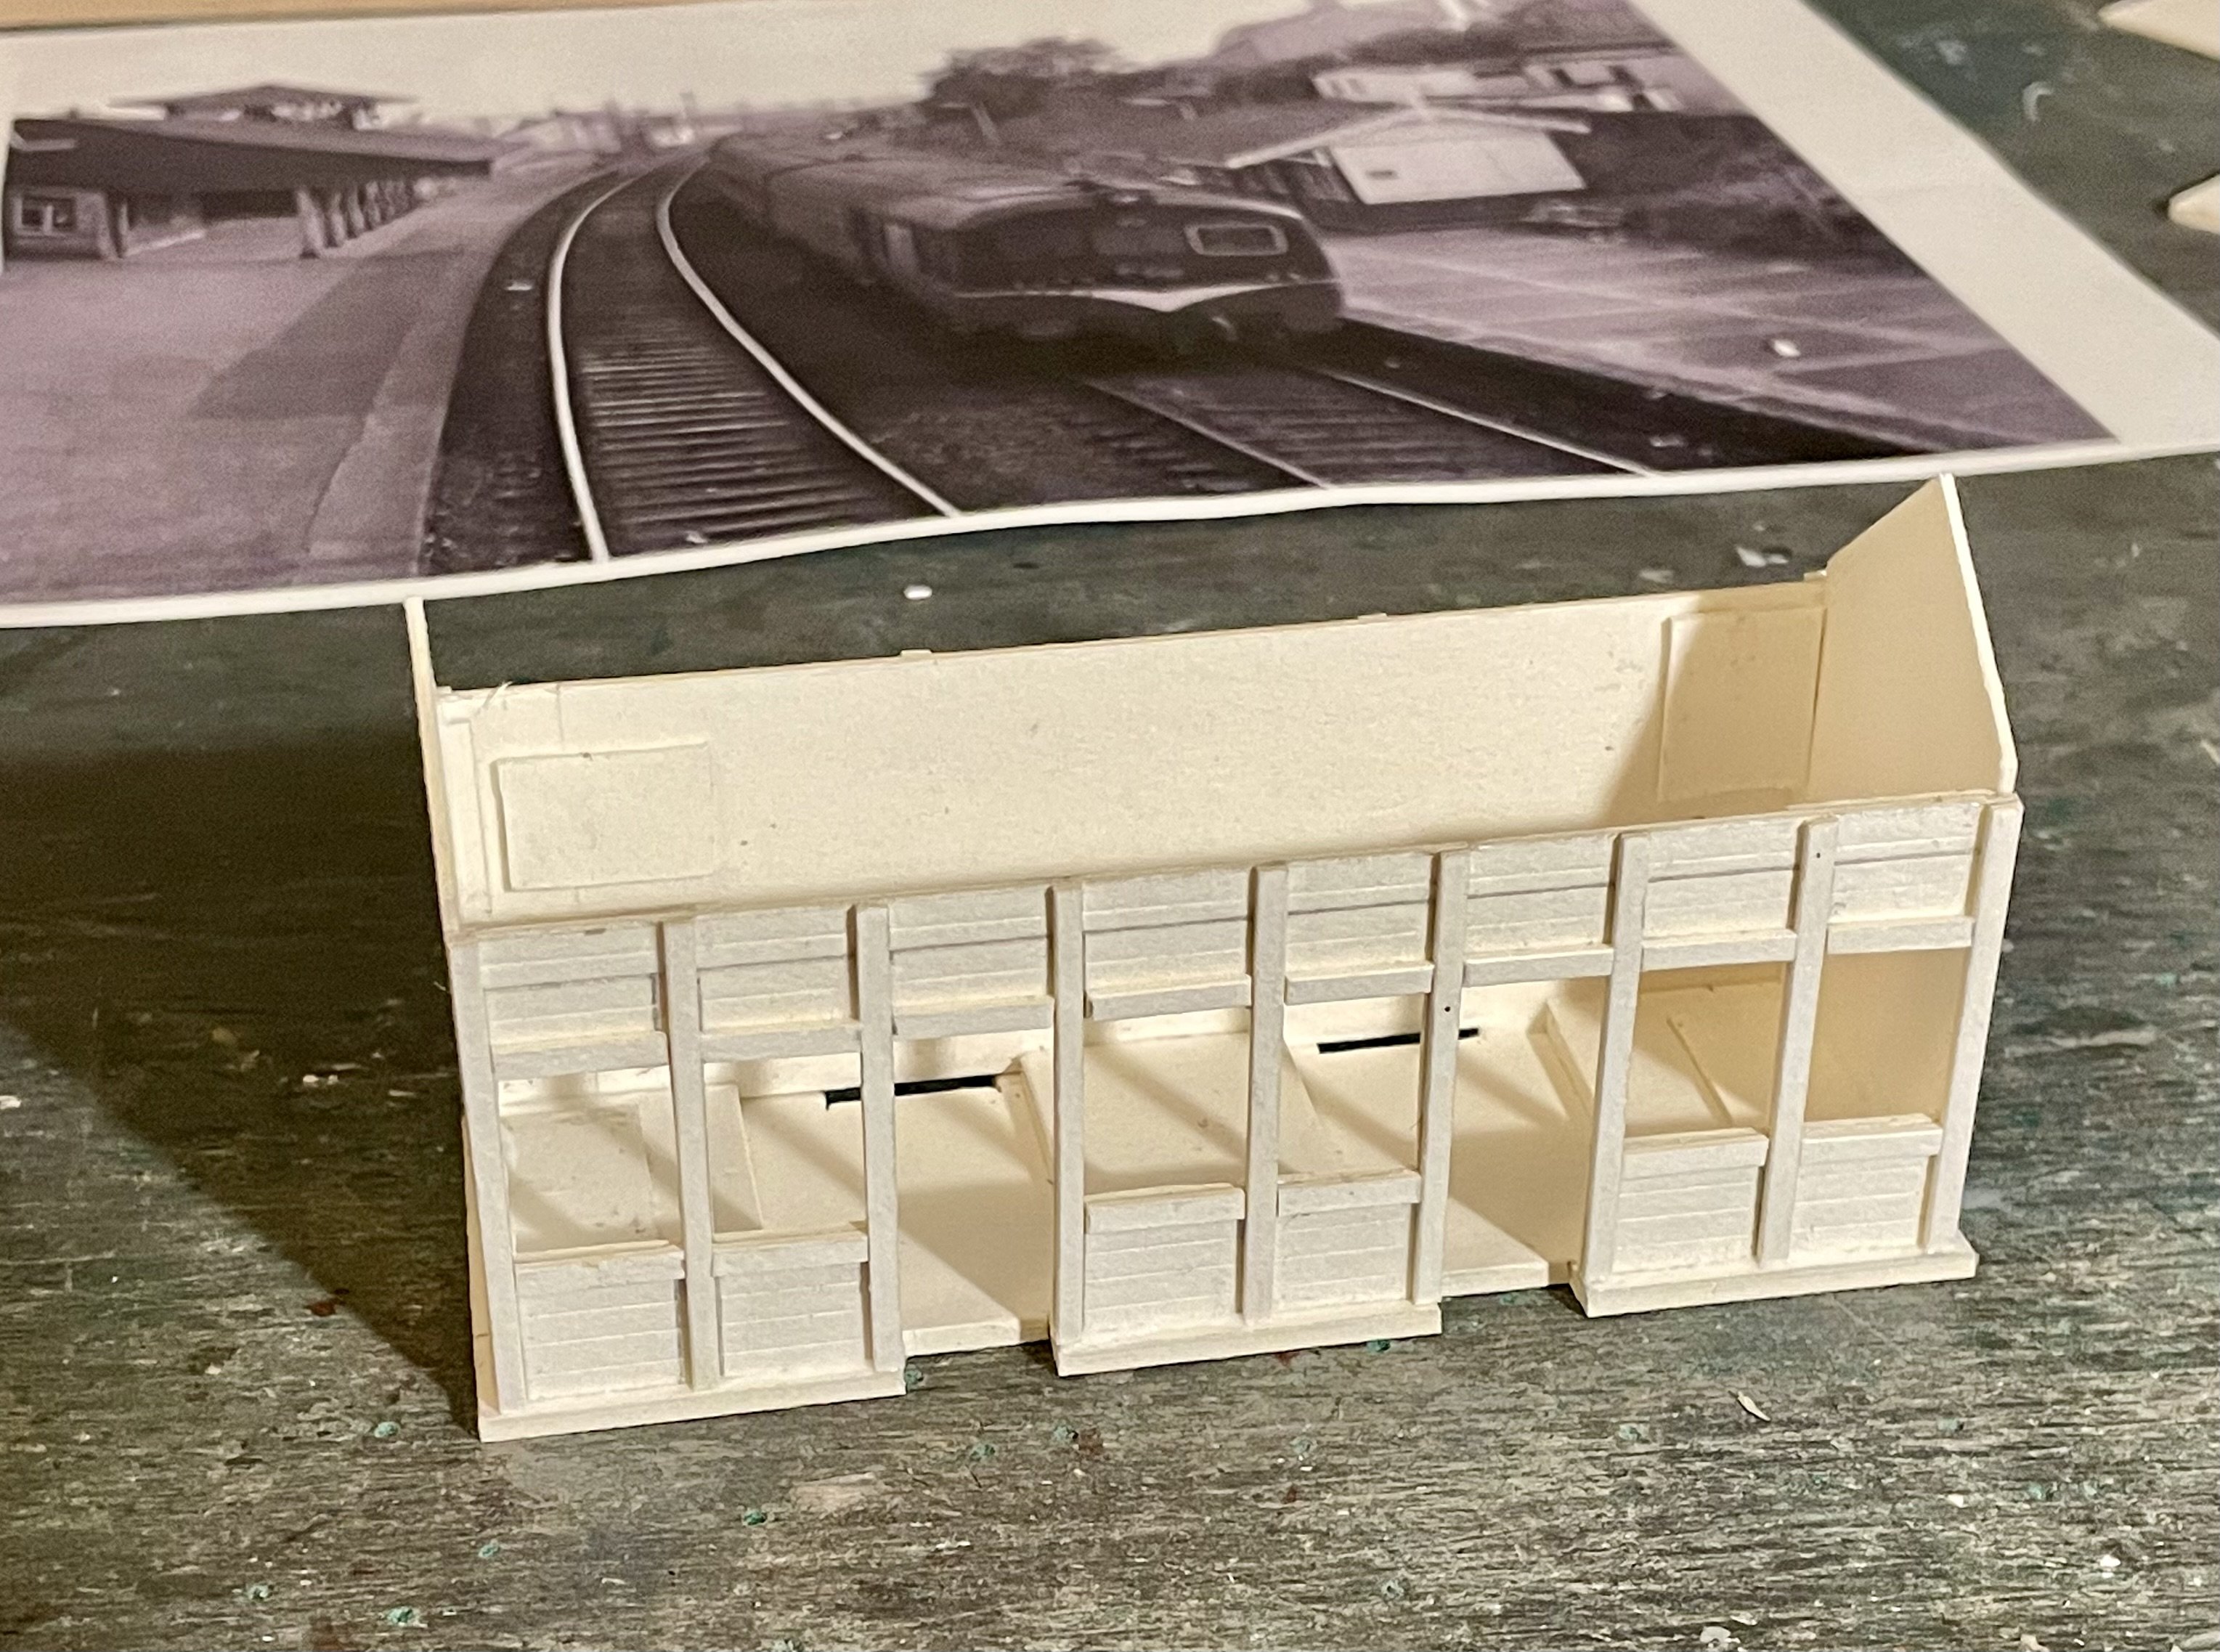
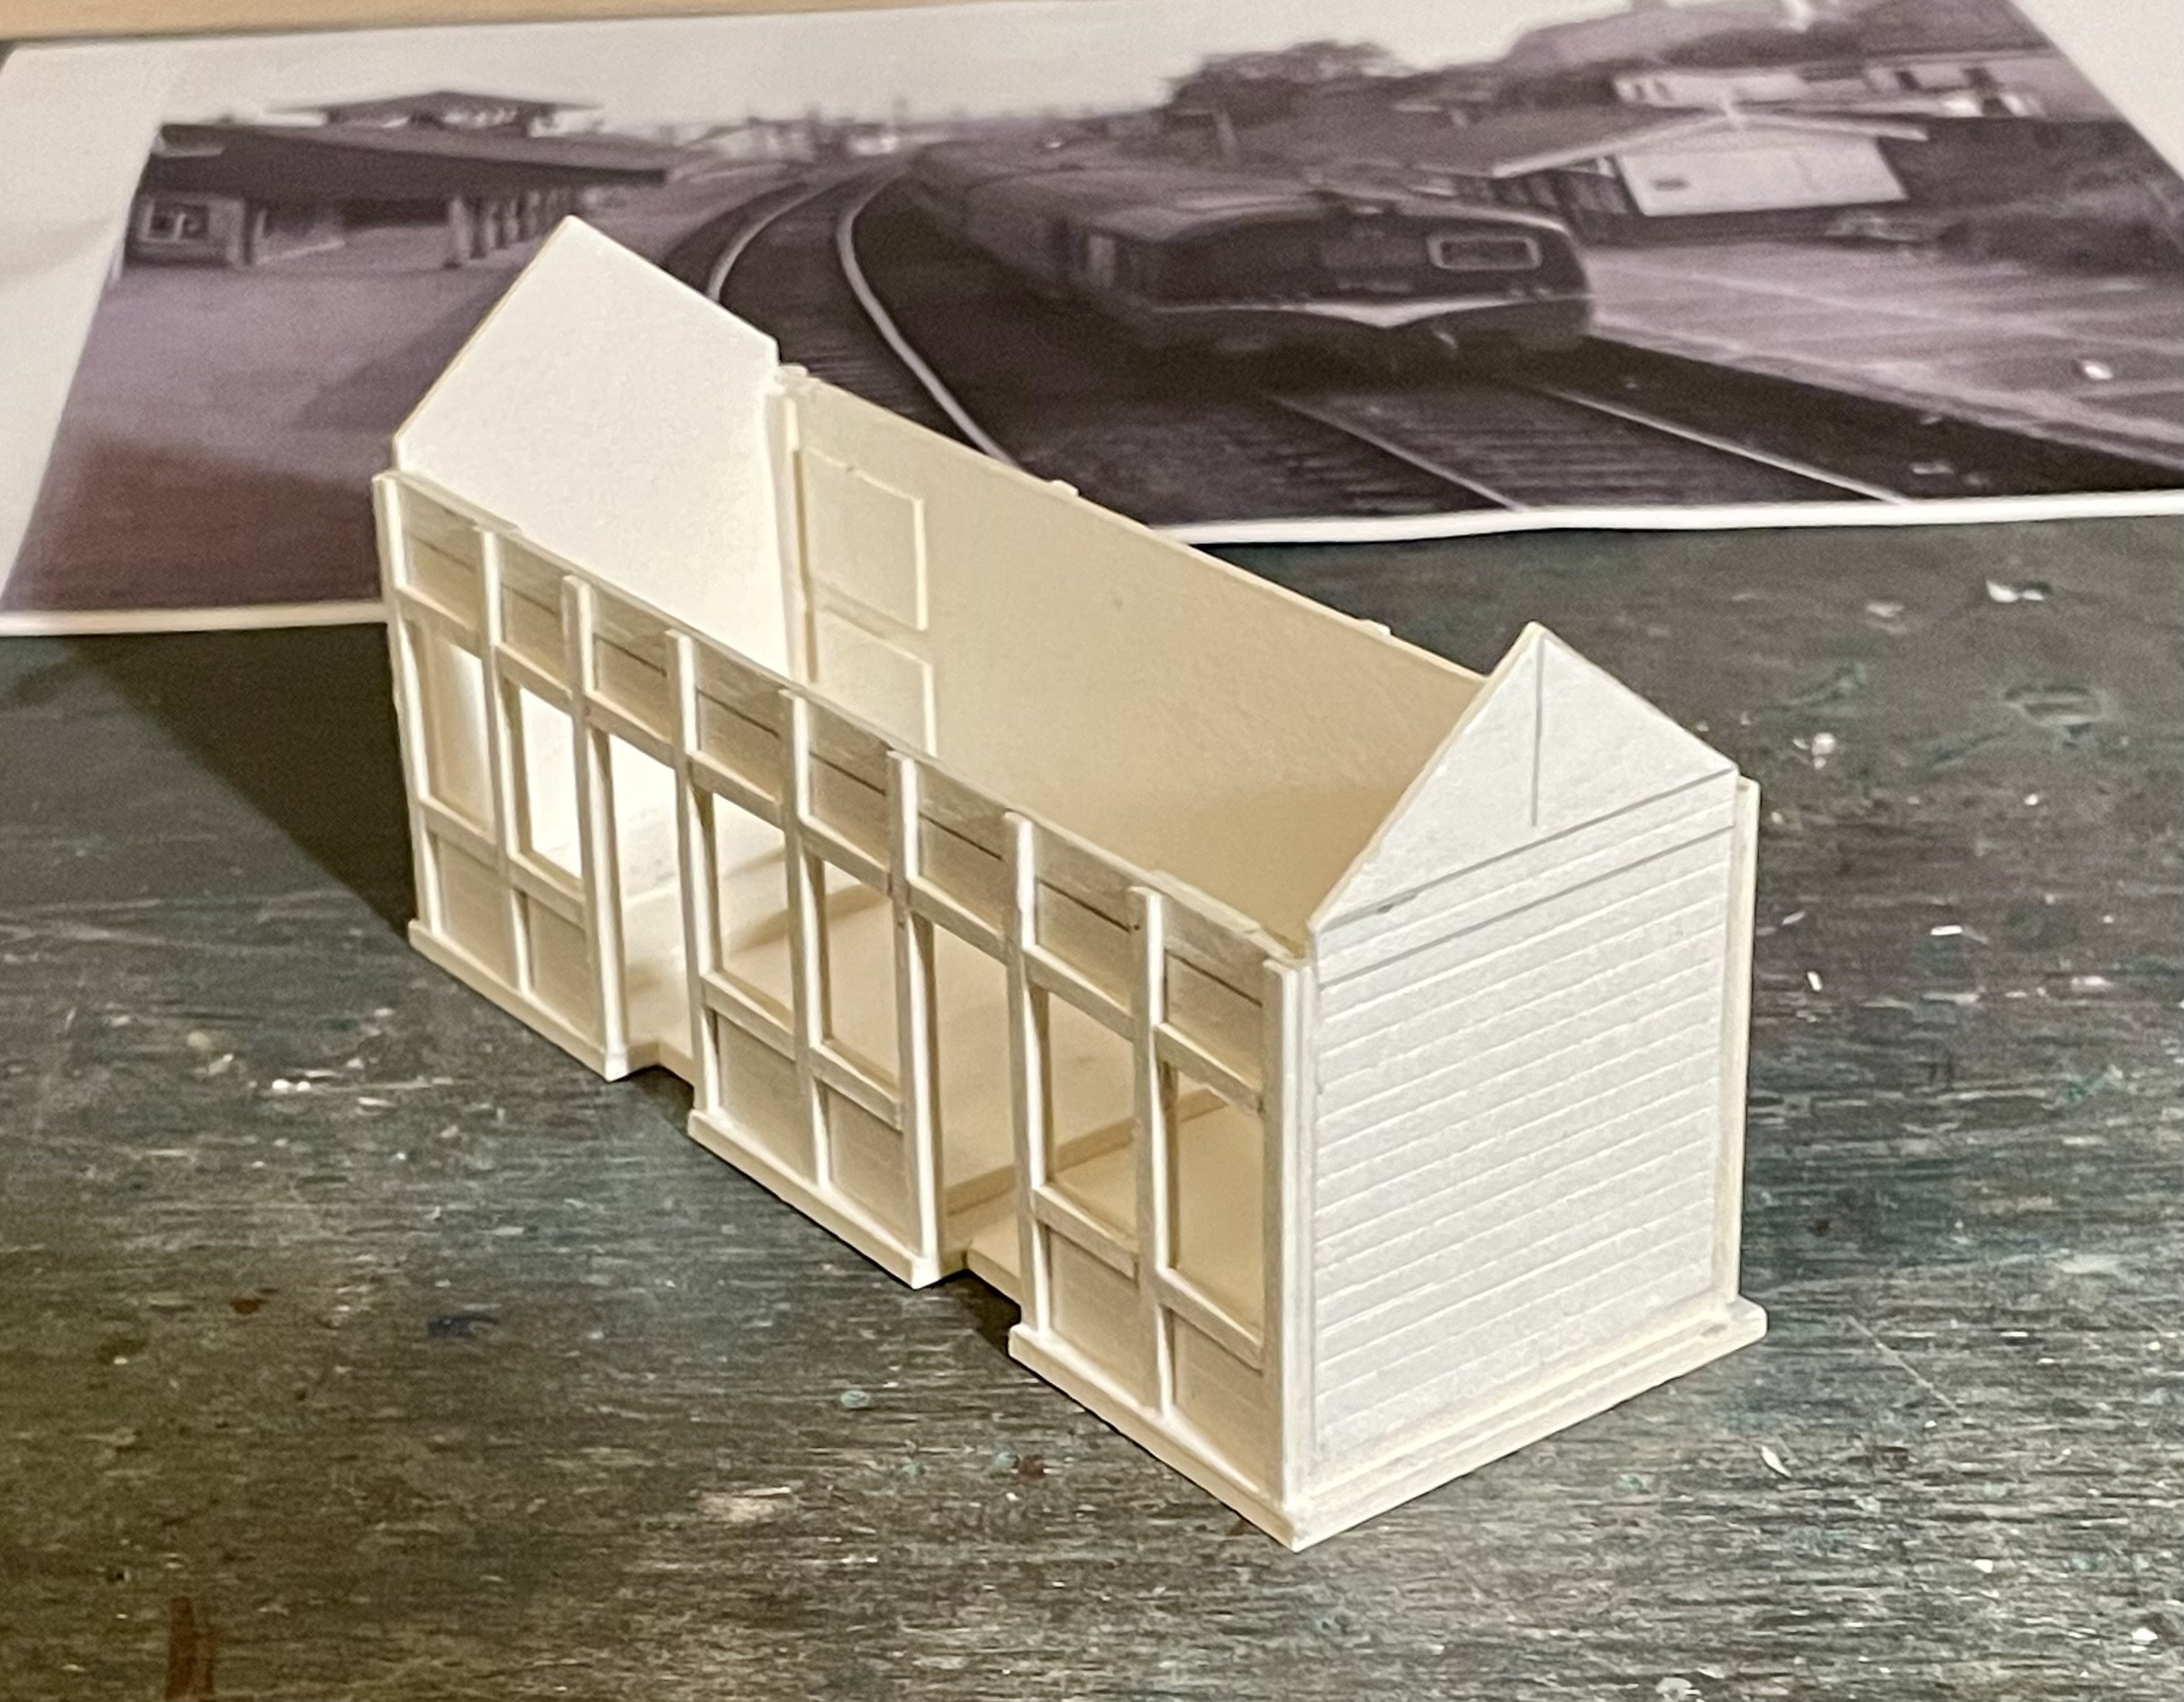
Made a start on the down platform waiting room. Cheers Darius
- 416 replies
-
- 17
-
-
-
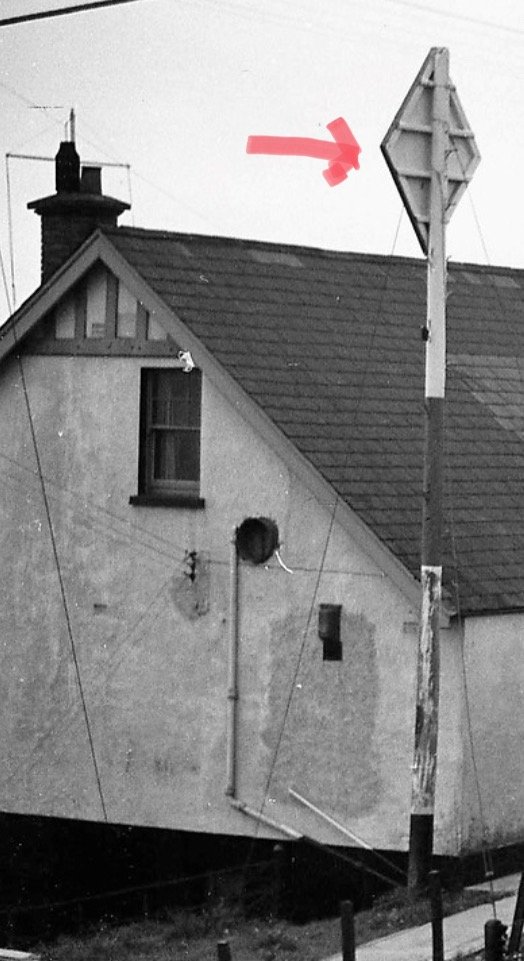
Question: this looks like a shoreline navigational hazard marker. Is it that kind of sign and does anyone know what the seaward facing marking is/was? Cheers Darius
-
Bring me sunshine Cheers Darius
-
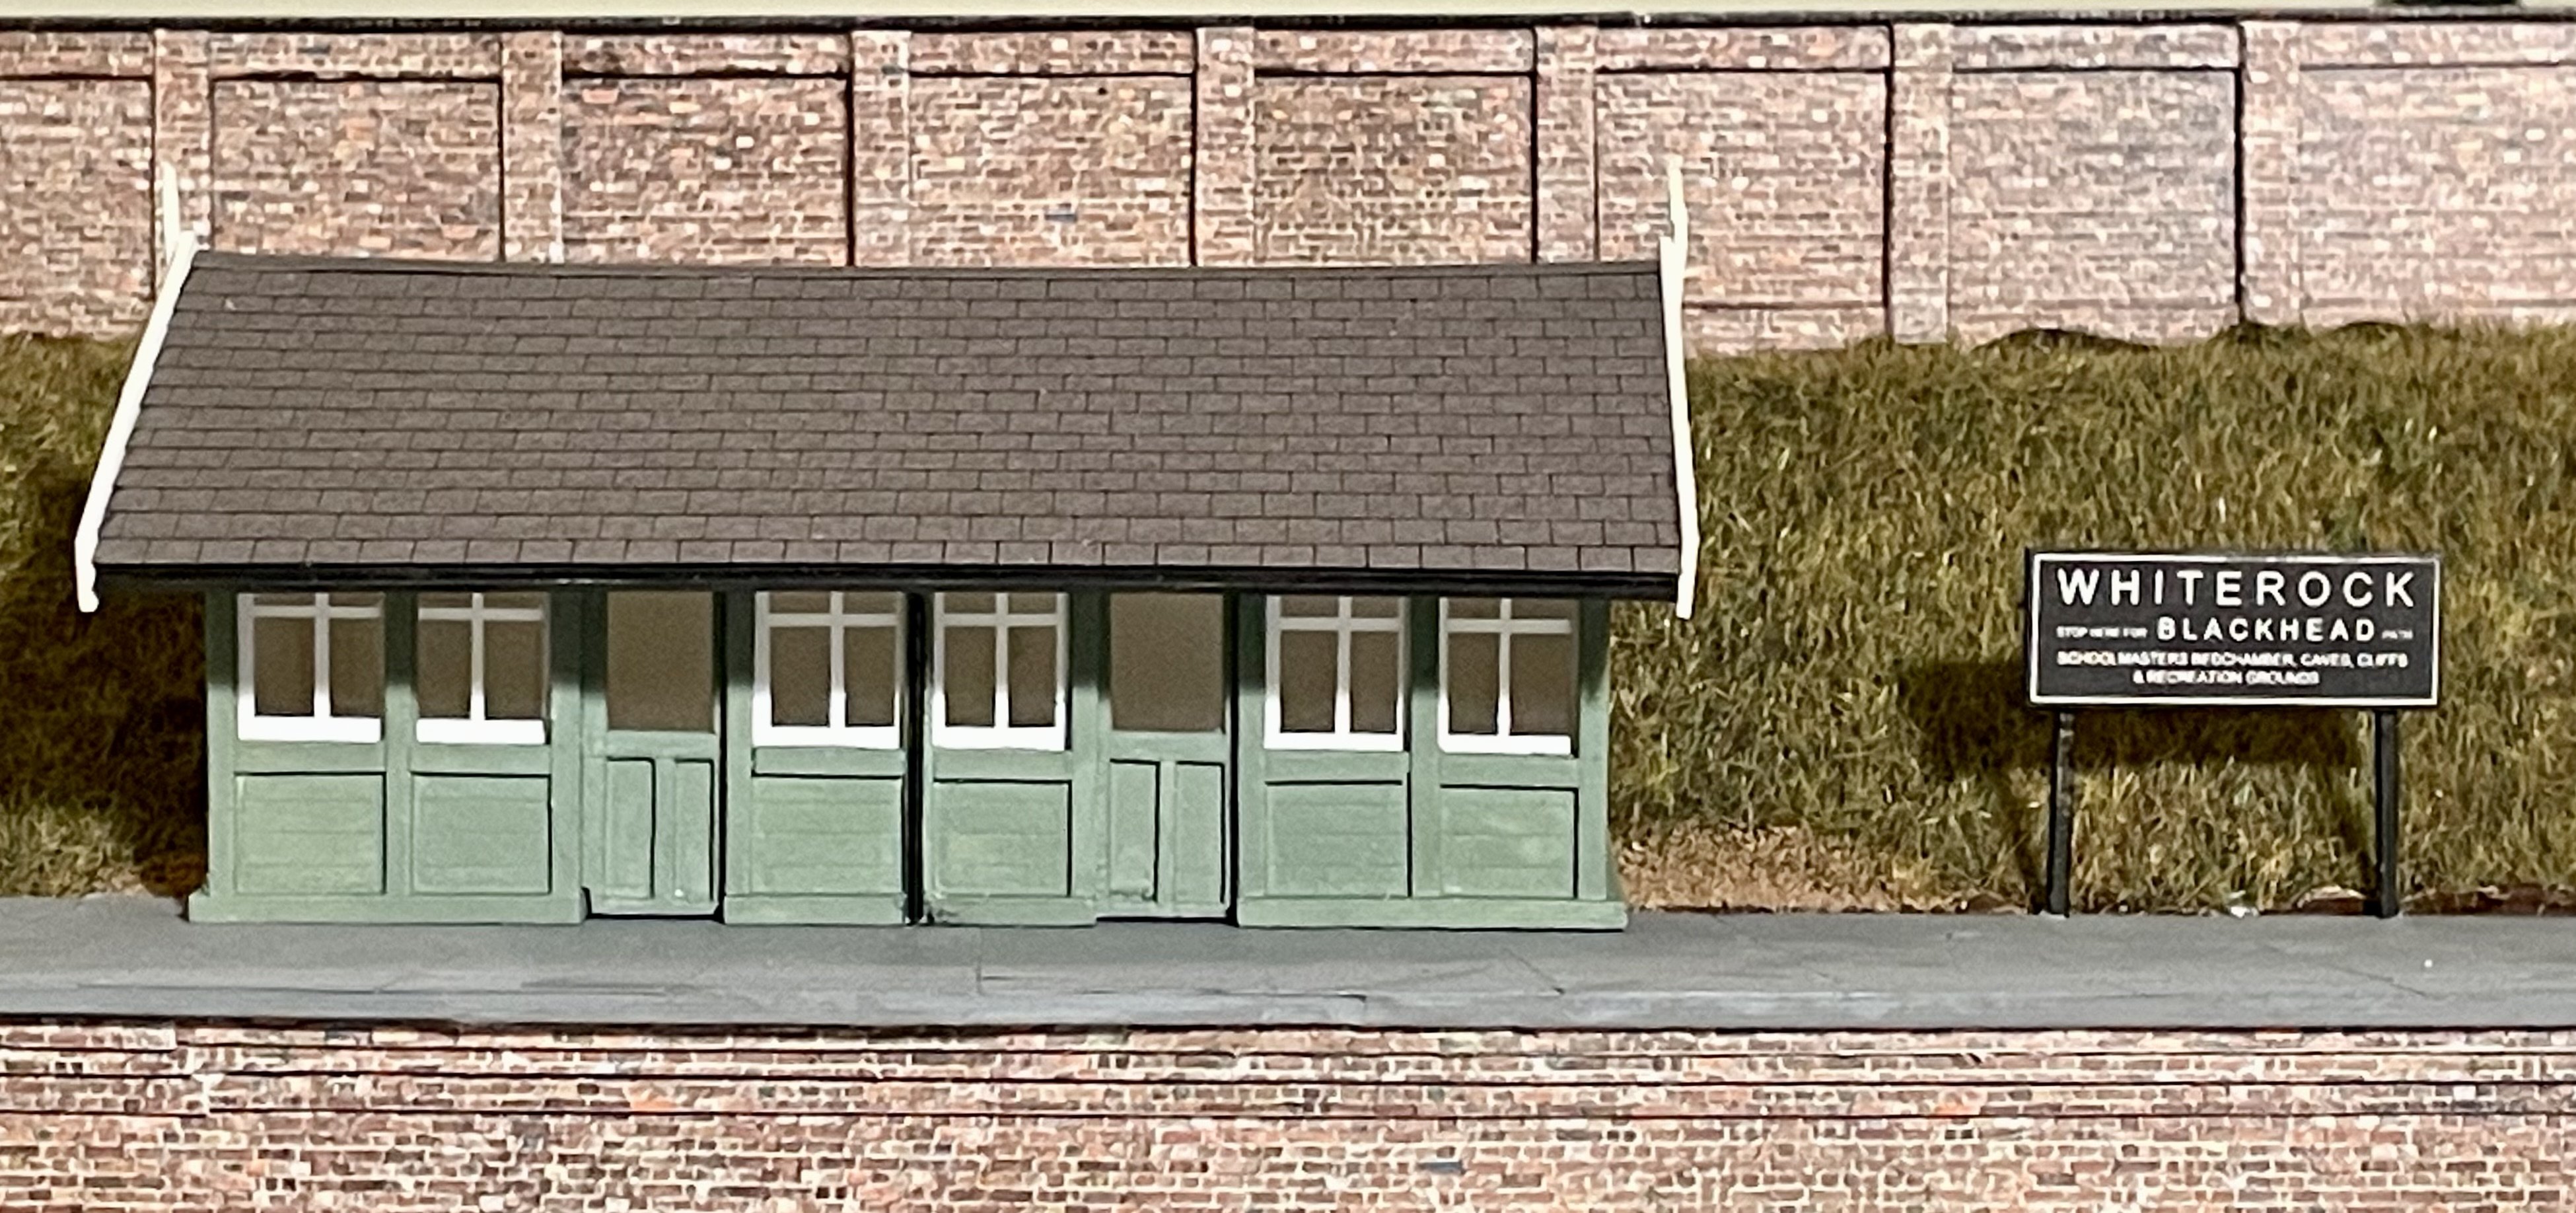
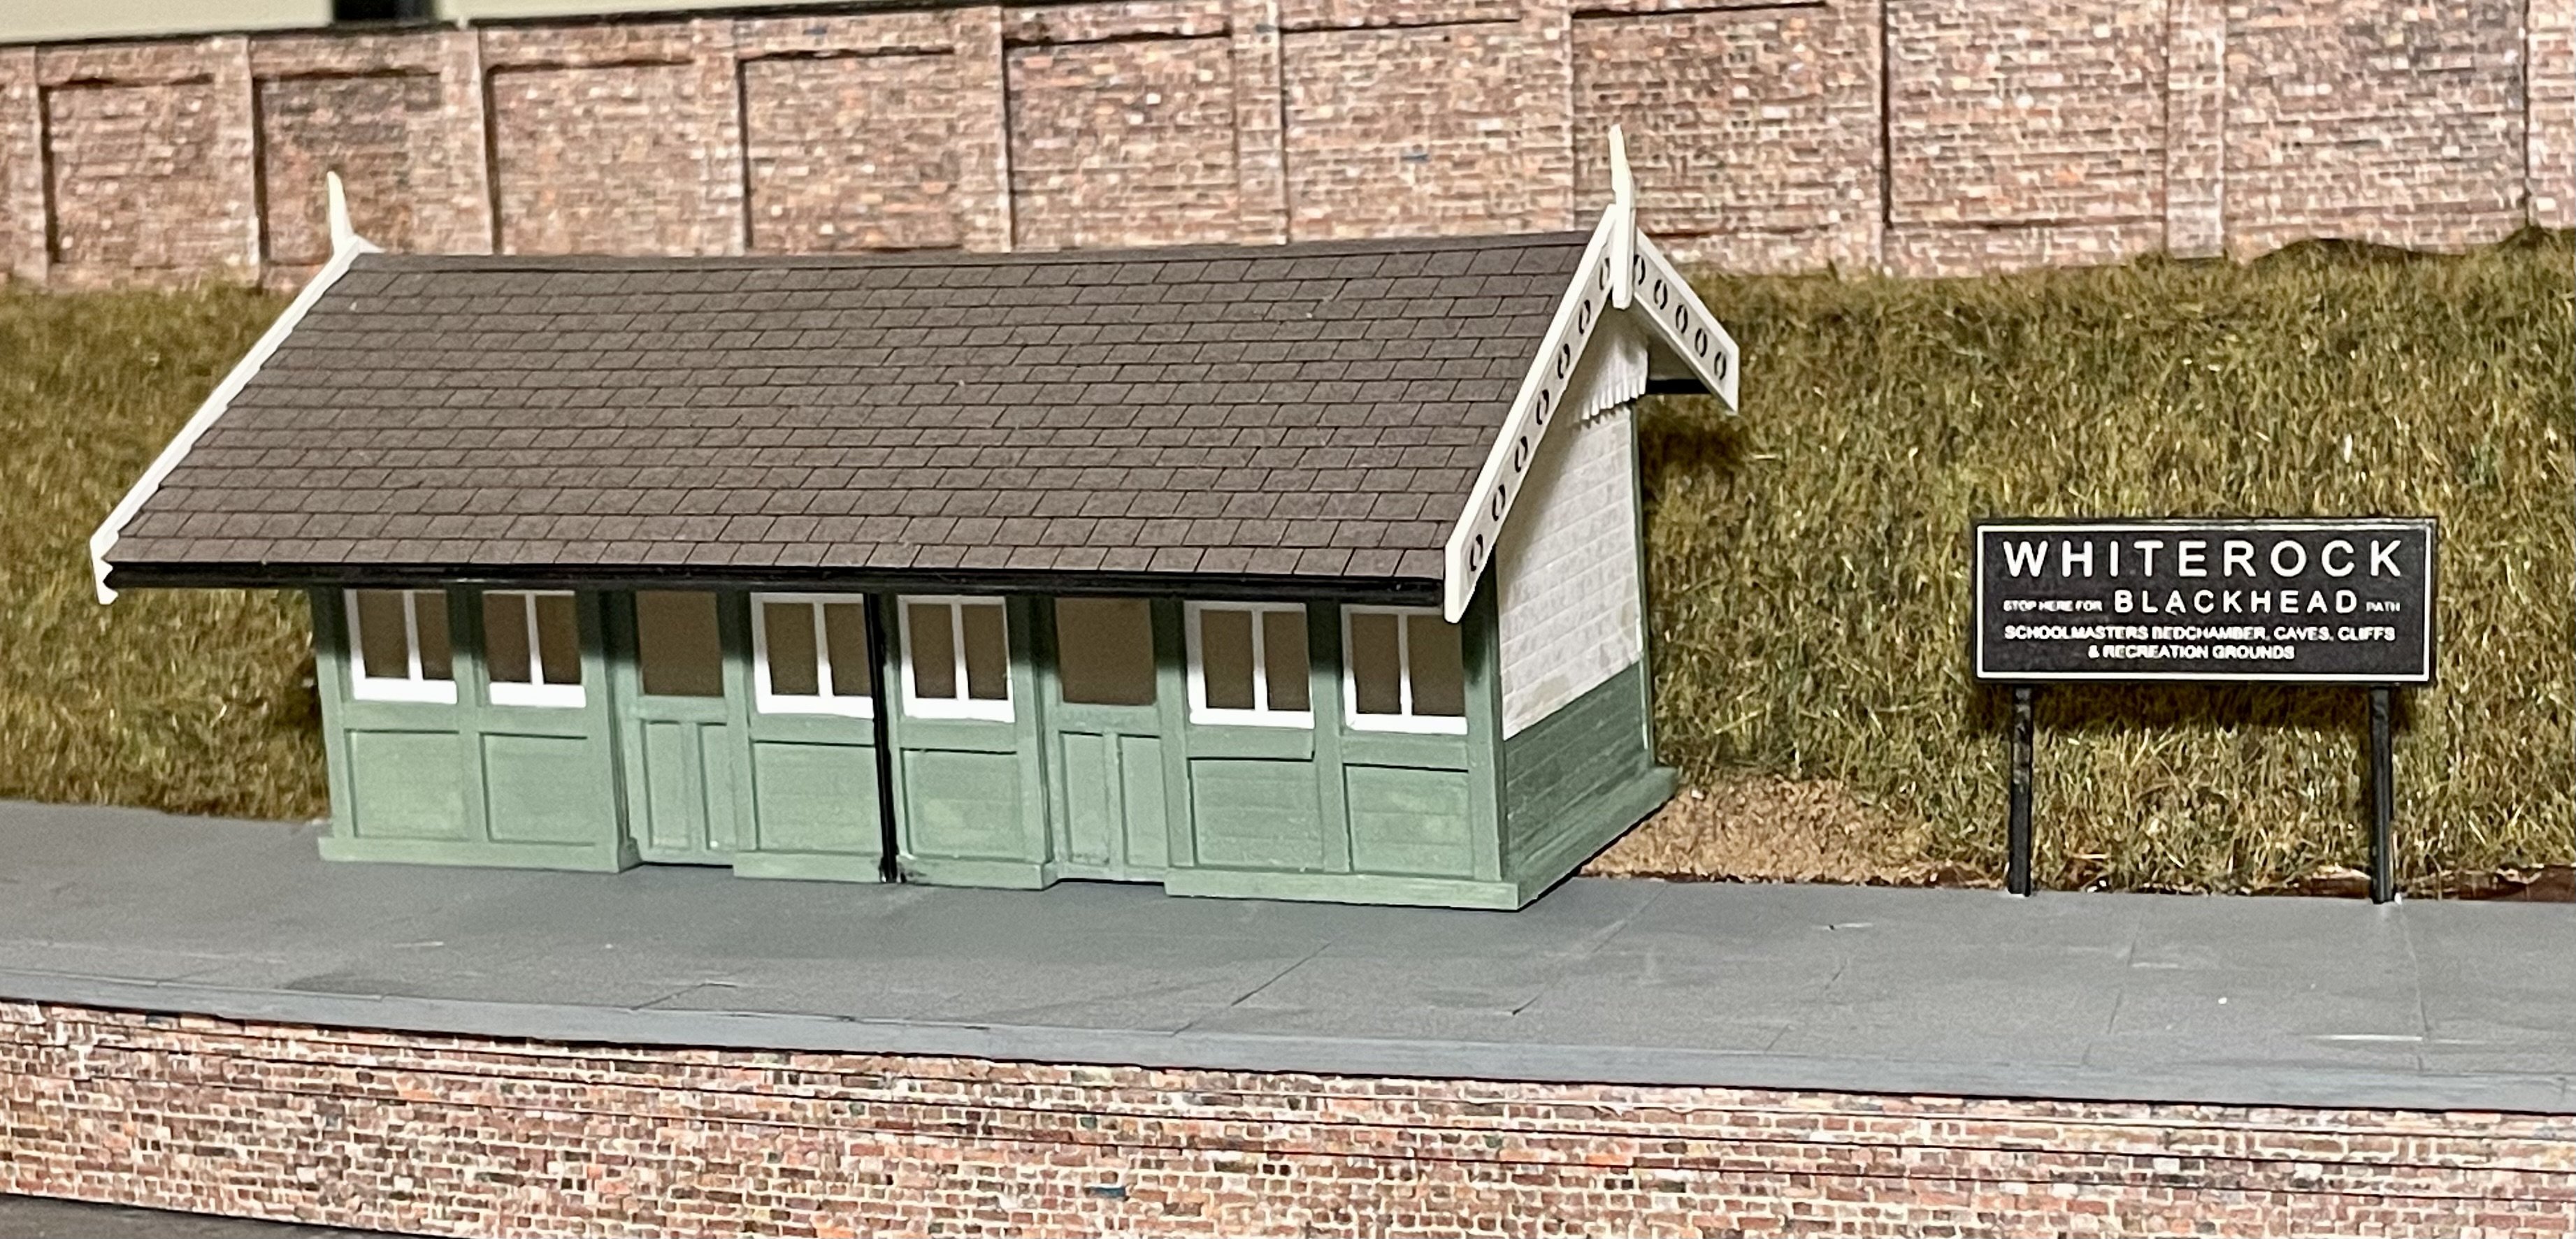
Did some scenic work around the footbridge today. Cheers Darius
- 416 replies
-
- 10
-
-
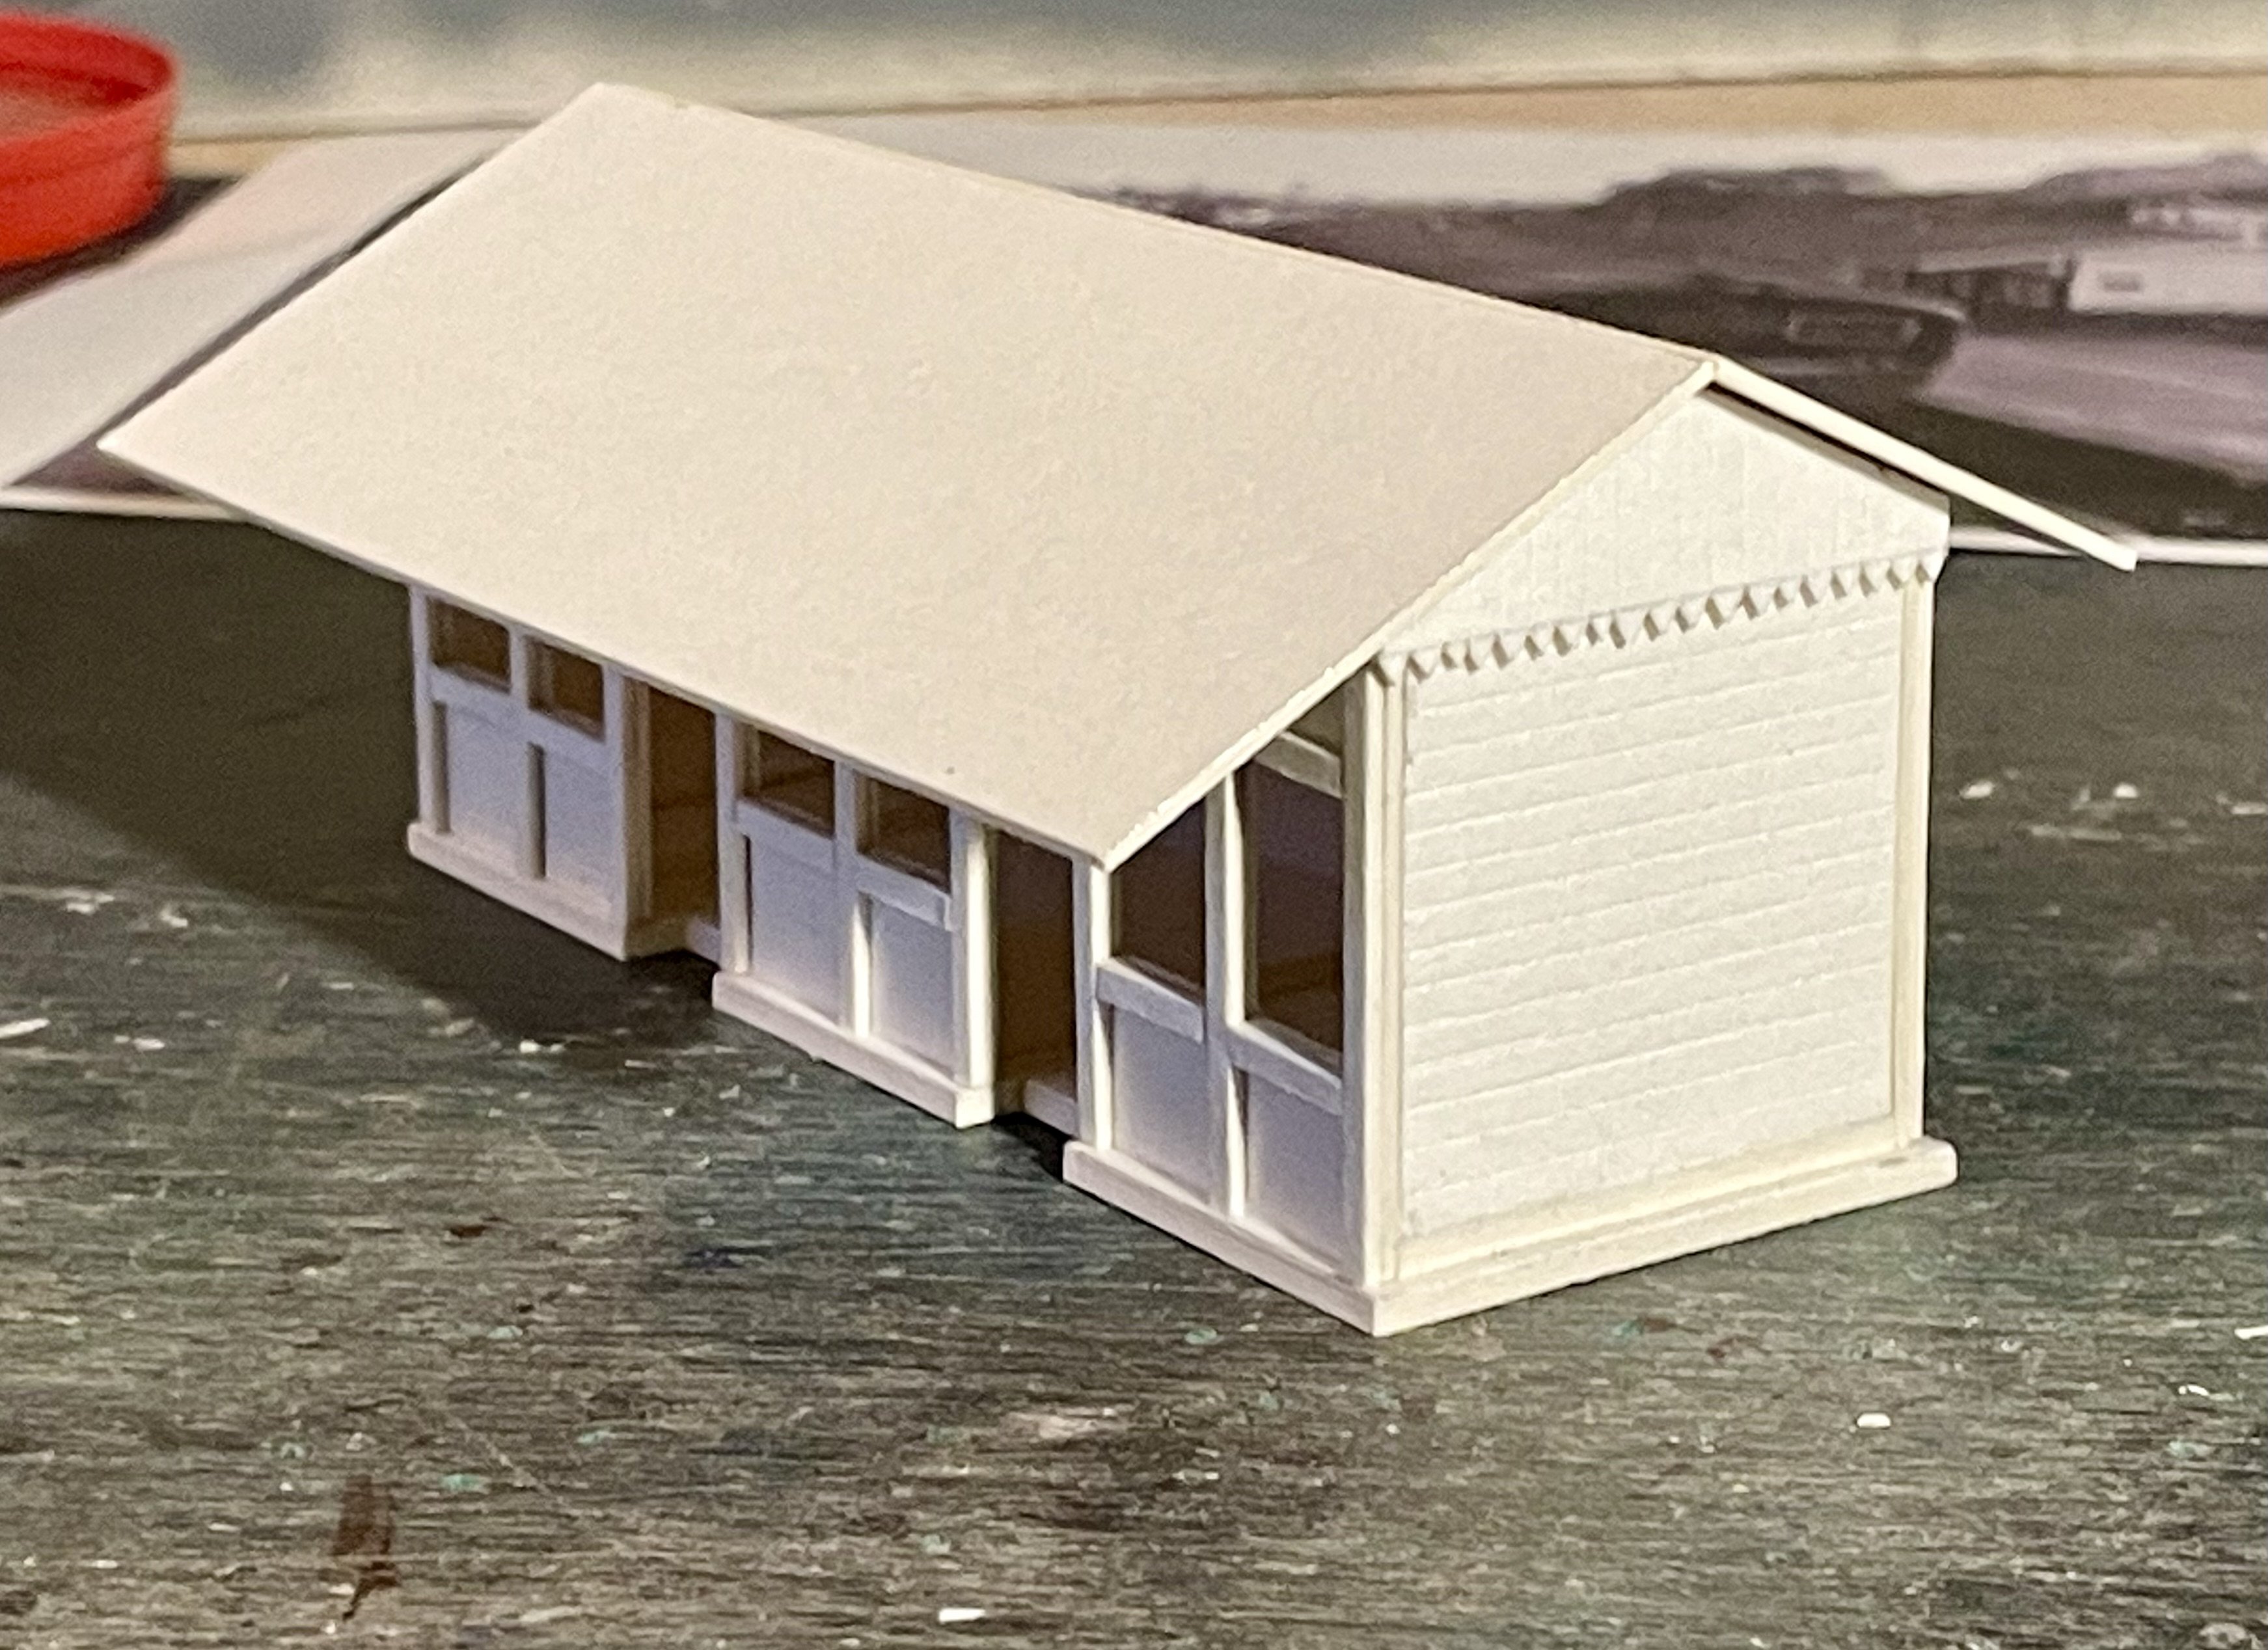
Added a few more things… Cheers Darius
- 416 replies
-
- 12
-
-