Mol_PMB
-
Posts
2,442 -
Joined
-
Last visited
-
Days Won
142
Content Type
Profiles
Forums
Events
Gallery
Blogs
Community Map
Everything posted by Mol_PMB
-
Many thanks for the NLI tips - I'll have a look. As for a freight diagram book, I haven't found anything for the GSWR, or indeed the GSR. There are some CIE wagon diagram books in existence but not in the public domain, and they tend to be 1970s or later. I do have a copy of the reprinted GSWR carriage diagram book, which includes NPCCS such as carriage trucks. So the GSWR Motor/Fish Vans are shown on page 104 - one of these is the nearest vehicle in Ernie's photo just above. Your single plank wagons are also for carrying vehicles - note that the sides are fixed but they have drop ends - but are not vacuum brake fitted and are numbered in the wagon series, so they don't appear in the carriage diagrams. The carriage diagram books do include some other types of open carriage truck.
-
Photos of Preserved Locos in Service
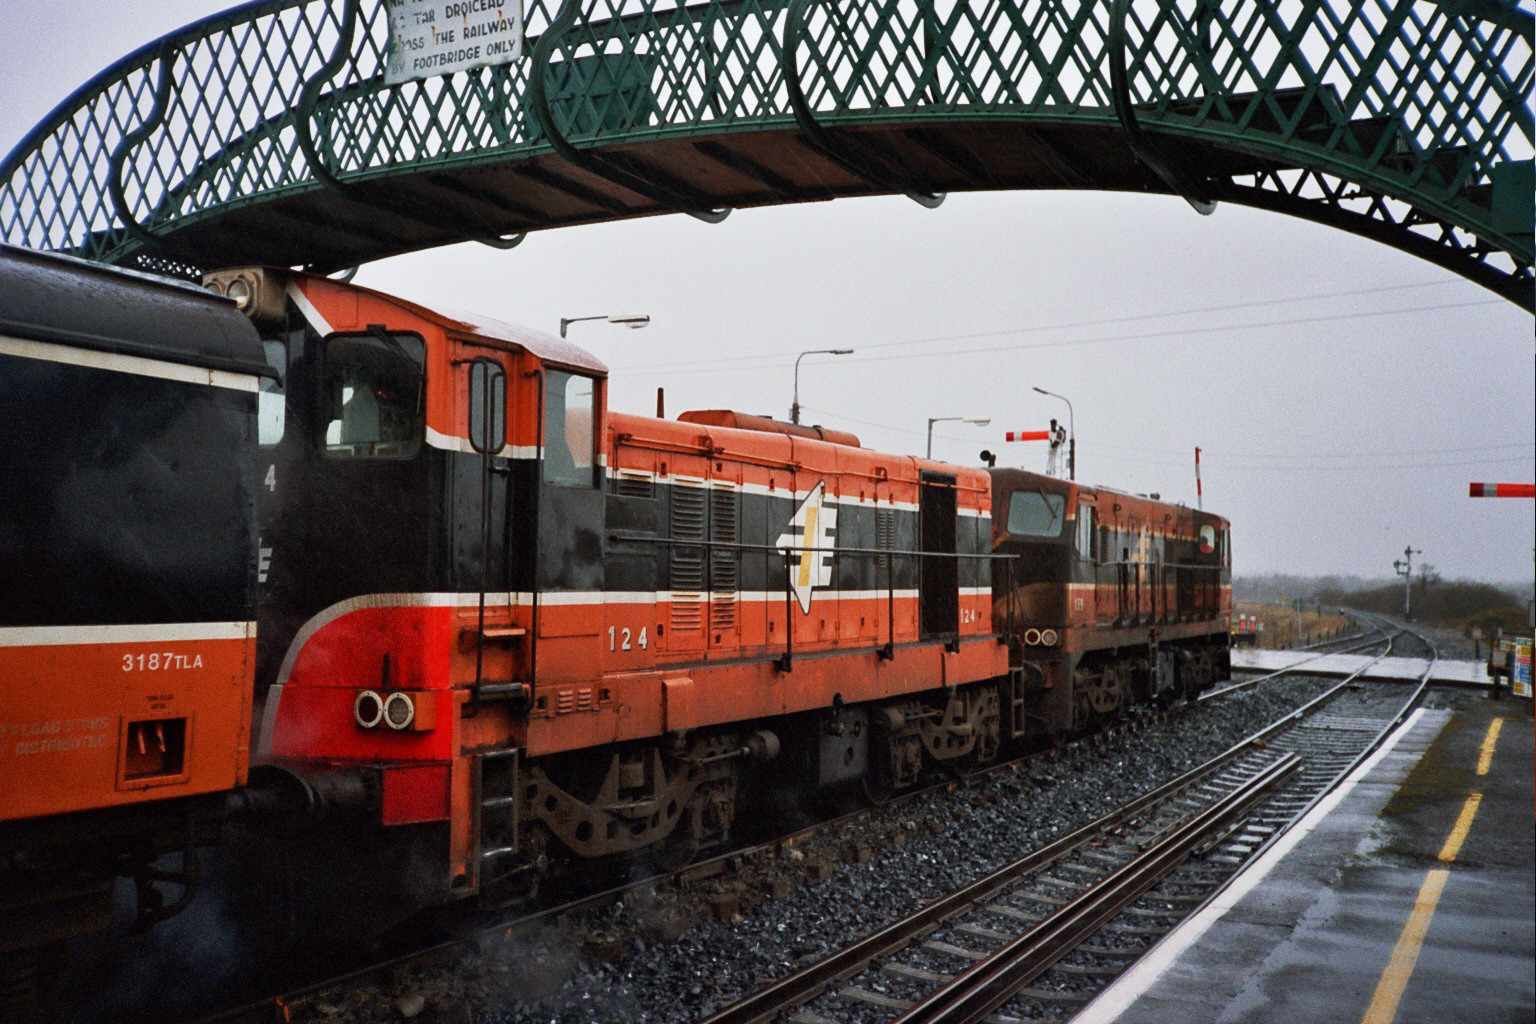
Mol_PMB replied to GSWR 90's topic in Photos & Videos of the Prototype
My pic of 055 at Ennis, now preserved at Castlerea: Photo by A Leach, 124 on a Cork-Tralee service: Not really on topic, as it isn't a loco: I'm sure I can find some more.
-
Yes, if this was at GWRA or equivalent, my wallet would be in danger!
-
Fortunately pendos are pretty robust. Even more fortunately, the driver was able to make an emergency broadcast on the radio which stopped the approaching northbound train…
-
I would have thought that to achieve the best prices from this collection the auctioneers should be appealing to the US market too. Yet the poor descriptions/photos and the ruinously strict terms and conditions will really discourage bids from anyone who can’t be there in person over at least 3 days.
-
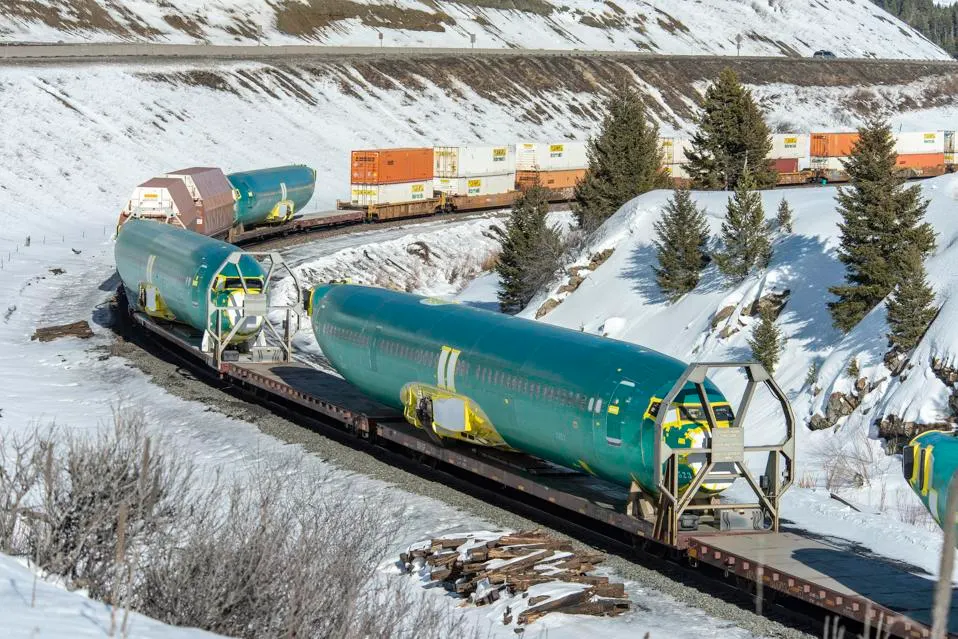
If you fly Boeing there’s a fair chance your plane went by train: but hopefully it wasn’t one of the trainload that wanted to try white-water rafting:
-
True! But to be able to view the items, and then attend the auction, adds hundreds of pounds of travel and accommodation costs plus some days of annual leave. There wouldn’t be any budget left over for buying the stuff, let alone getting it back home!
-
There are items on there (mostly historical documents) that I might be willing to pay a fair amount for, if only there was a better description or more photos. But I'm reluctant to take a punt on the basis of the awful information presented.
-
Agreed. That UTA rolling stock diagram book caught my eye too. I hope it goes to a person or organisation that would be willing to share the data in it, if the insides are as interesting as it sounds. One wonders what's in these lots (terrible listings but tempting photo): AN INTERESTING COLLECTION OF PHOTOGRAPHIC AND HAND DRAWN BLUEPRINTS together with copies and facsimi A BOUND VOLUME OF BLUEPRINTS, etc. for various locomotives mainly LMS NCC with technical details, no A MISCELLANEOUS COLLECTION OF RAILWAY AND LOCOMOTIVE BLUEPRINTS, etc. There are some odd combinations of items like the handmade model of an NIR DH class shunter (O gauge?) mixed in with some Hornby tat. I suppose they're all the same colour, so they must belong together? HORNBY 00 GAUGE DUCHESS OF HAMILTON AND TENDER boxed together with A Riva Rossi 00 Gauge Royal Scot In the pricing there's little account taken of the age/rarity of some railways compared to the bigger names. Some of the prices for the artworks seem high to me as well. The listings for the books appear extremely rushed - take a photo of a shelf-full, name only one and guess a random price. Some lots are a bargain while others are seriously over-priced. Some of the official railway paperwork is nice, but remembering that there's a hefty buyer's premium on the prices it's not cheap. Other items of interest may include a bound set of IRRS journals (perhaps from the very beginning? the listing is poor): THE IRISH RAILWAY RECORDS SOCIETY PROCEEDINGS A box of bound volumes of Irish Railway Records Societ
-
Is there an Indian takeaway in that town? Certainly ought to be!
-
Excellent work - another little masterpiece.
-
They all look amazing, and it sounds like the fettling you’ve done should ensure smooth running. Good luck!
-
"Voiding the Warranty" - Mol's experiments in 21mm gauge
Mol_PMB replied to Mol_PMB's topic in Irish Models
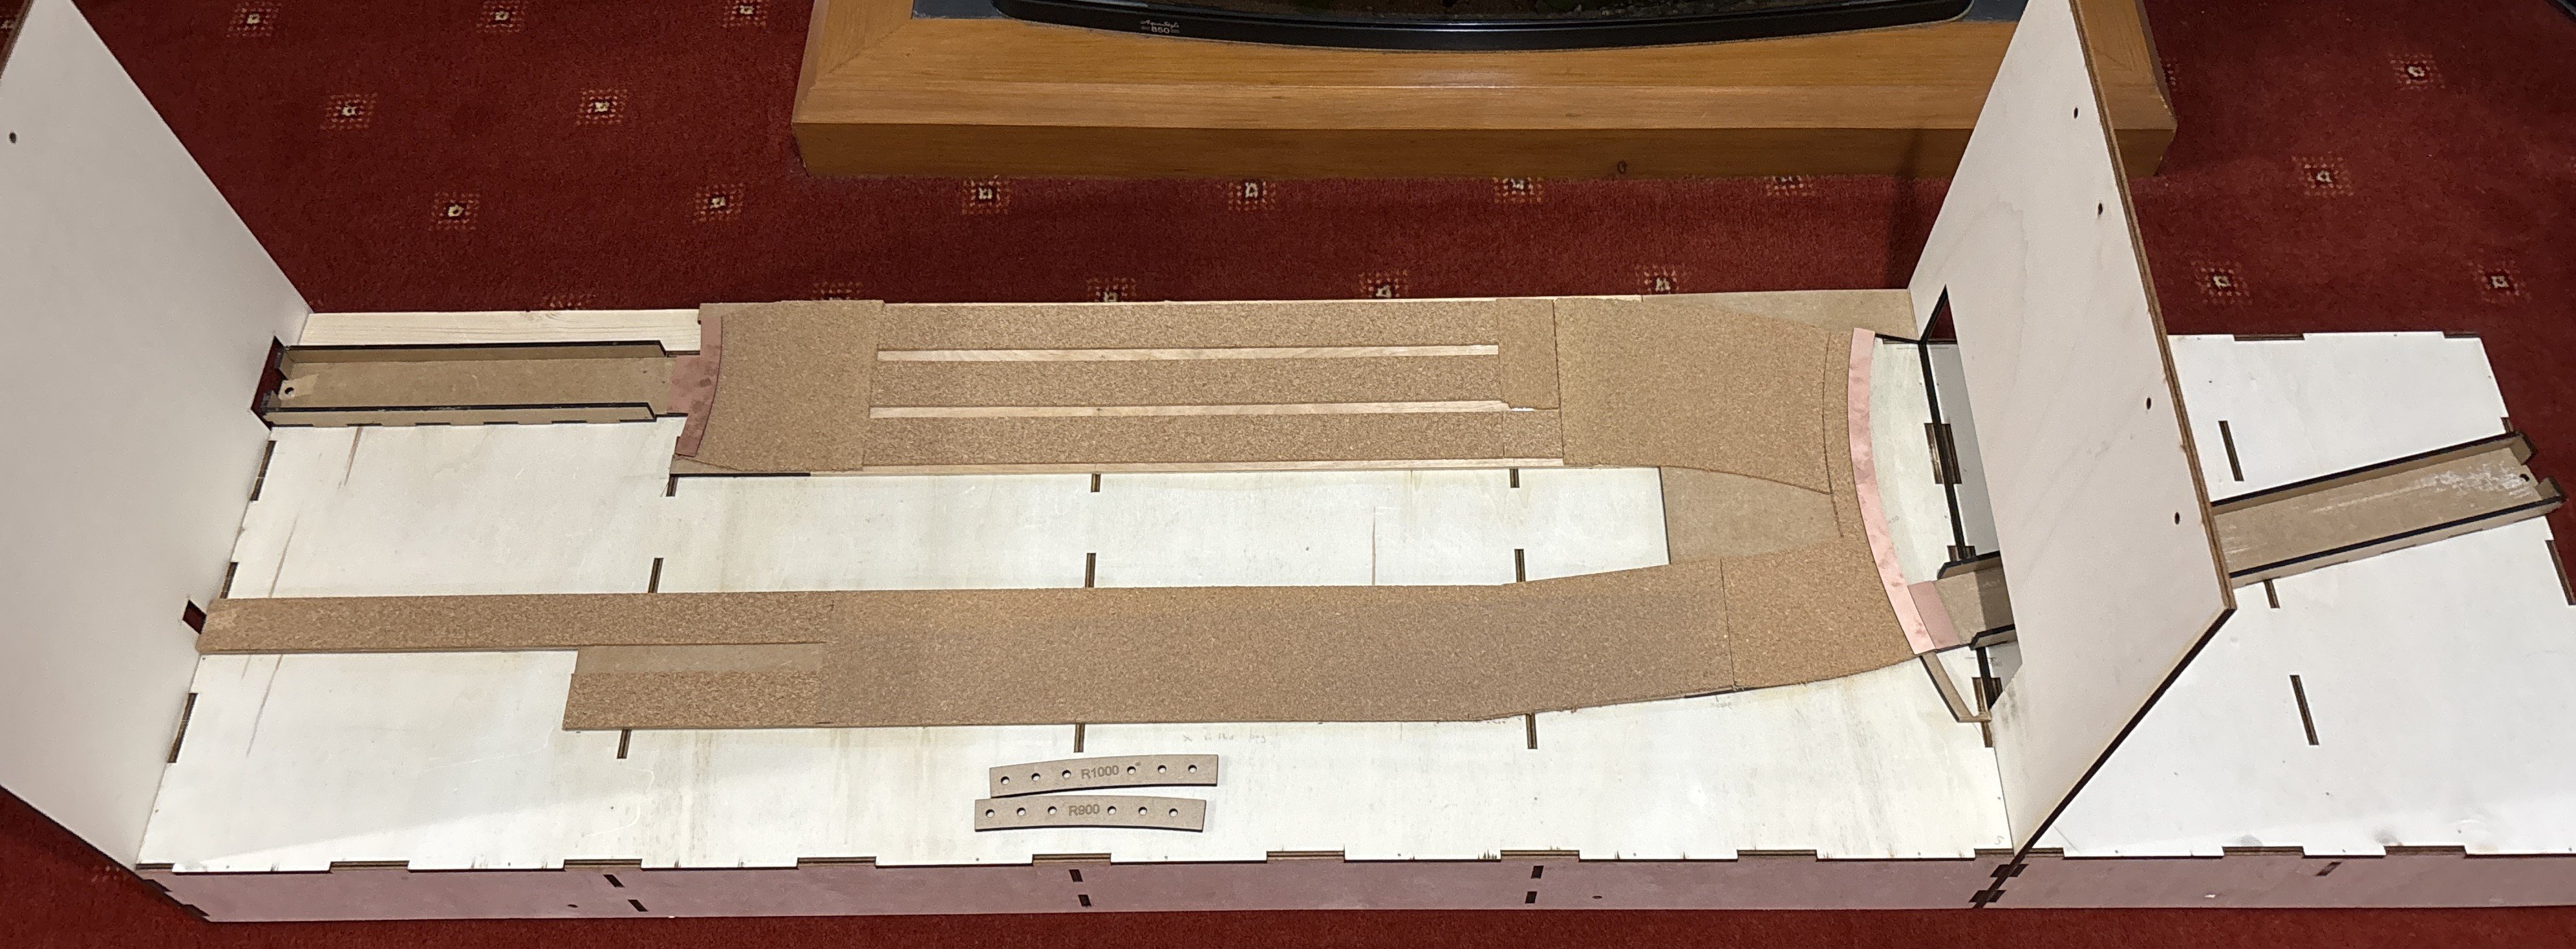
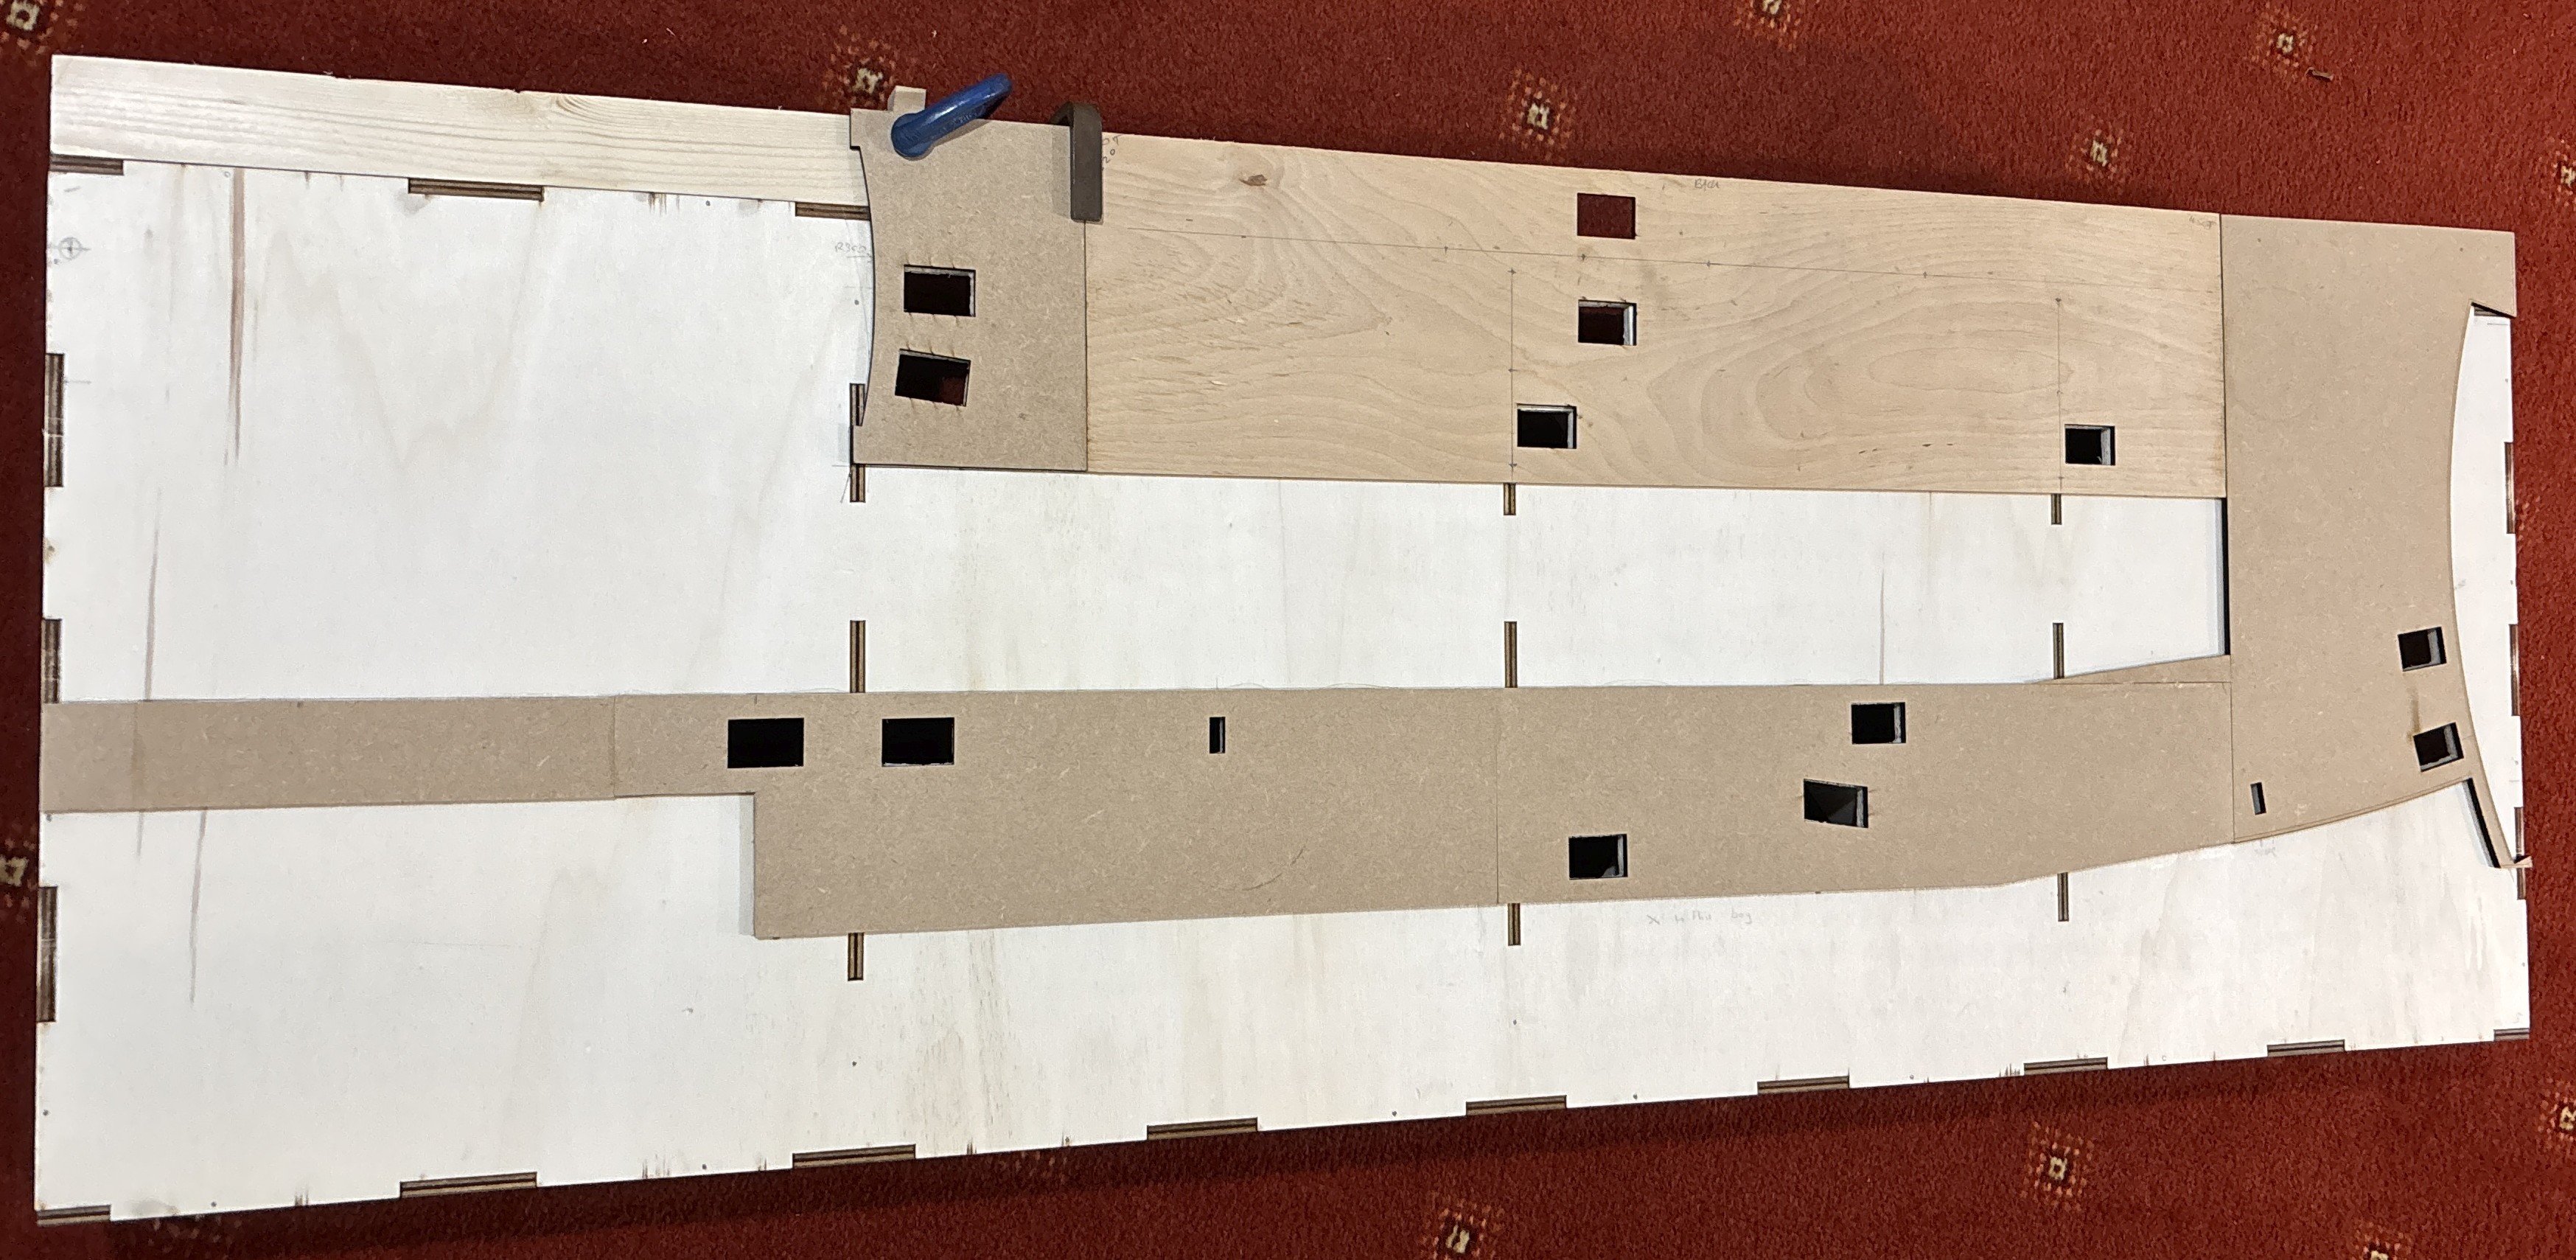
Yesterday evening I put a couple of coats of spirit-based sealant on the whole top surface of the board, with particular focus on the MDF. I rubbed down a couple of high spots and sealed it again. The main achievement today has been cutting the cork layer, and sticking it all down flat on top of the MDF. Once that had all dried under a lot of weight, I reassembled the boards: I've also laser-cut some curved bits: the sector plate ends are cut from copperclad strip, plus a couple of curve radius templates to assist with tracklaying. The next step is to set up the sector plates properly with their pivots and some plastic sliding plates for them to rest on. Then I can mark out the final track alignment and perhaps even start laying some track!
-
Great progress! I look forward to seeing this develop.
-
Well I'm sure the gentlemen wearing them were spouting a lot of hot air, anyway! Some of the ladies have got their best headgear on too.
-
These might appeal to the collector, Irish-made as well as Irish-liveried. At the moment, very cheap... https://www.ebay.co.uk/itm/406341101042
-
I spotted this on ebay - some extra inspiration for your splendid work! https://www.ebay.co.uk/itm/397206311361
-
Great research! It’s worth it, to understand how the system was laid out, and together with the photos that ought to help work out how it was operated. Have you been able to visit any of the locations yourself?
-
A very fine display of millinery!
-
"Voiding the Warranty" - Mol's experiments in 21mm gauge
Mol_PMB replied to Mol_PMB's topic in Irish Models
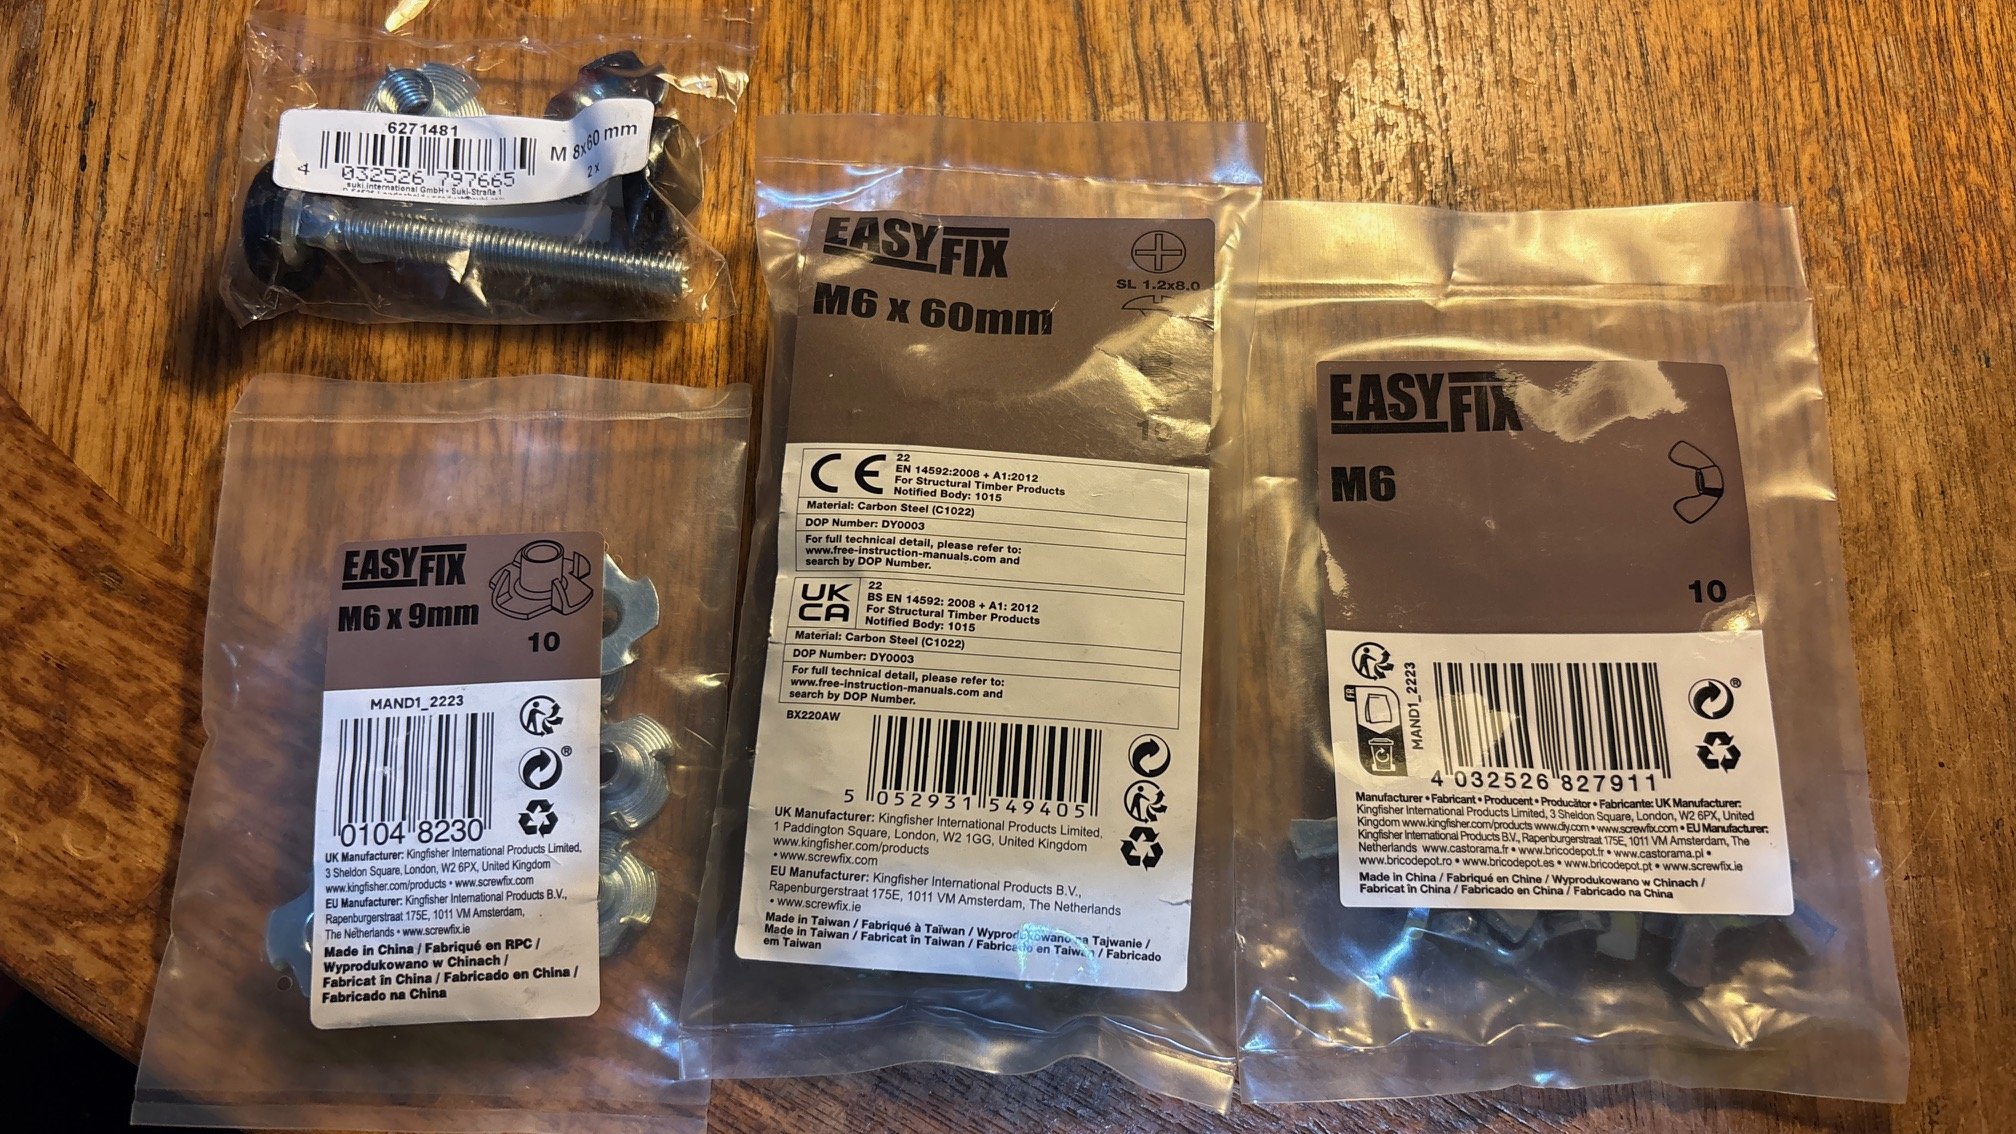
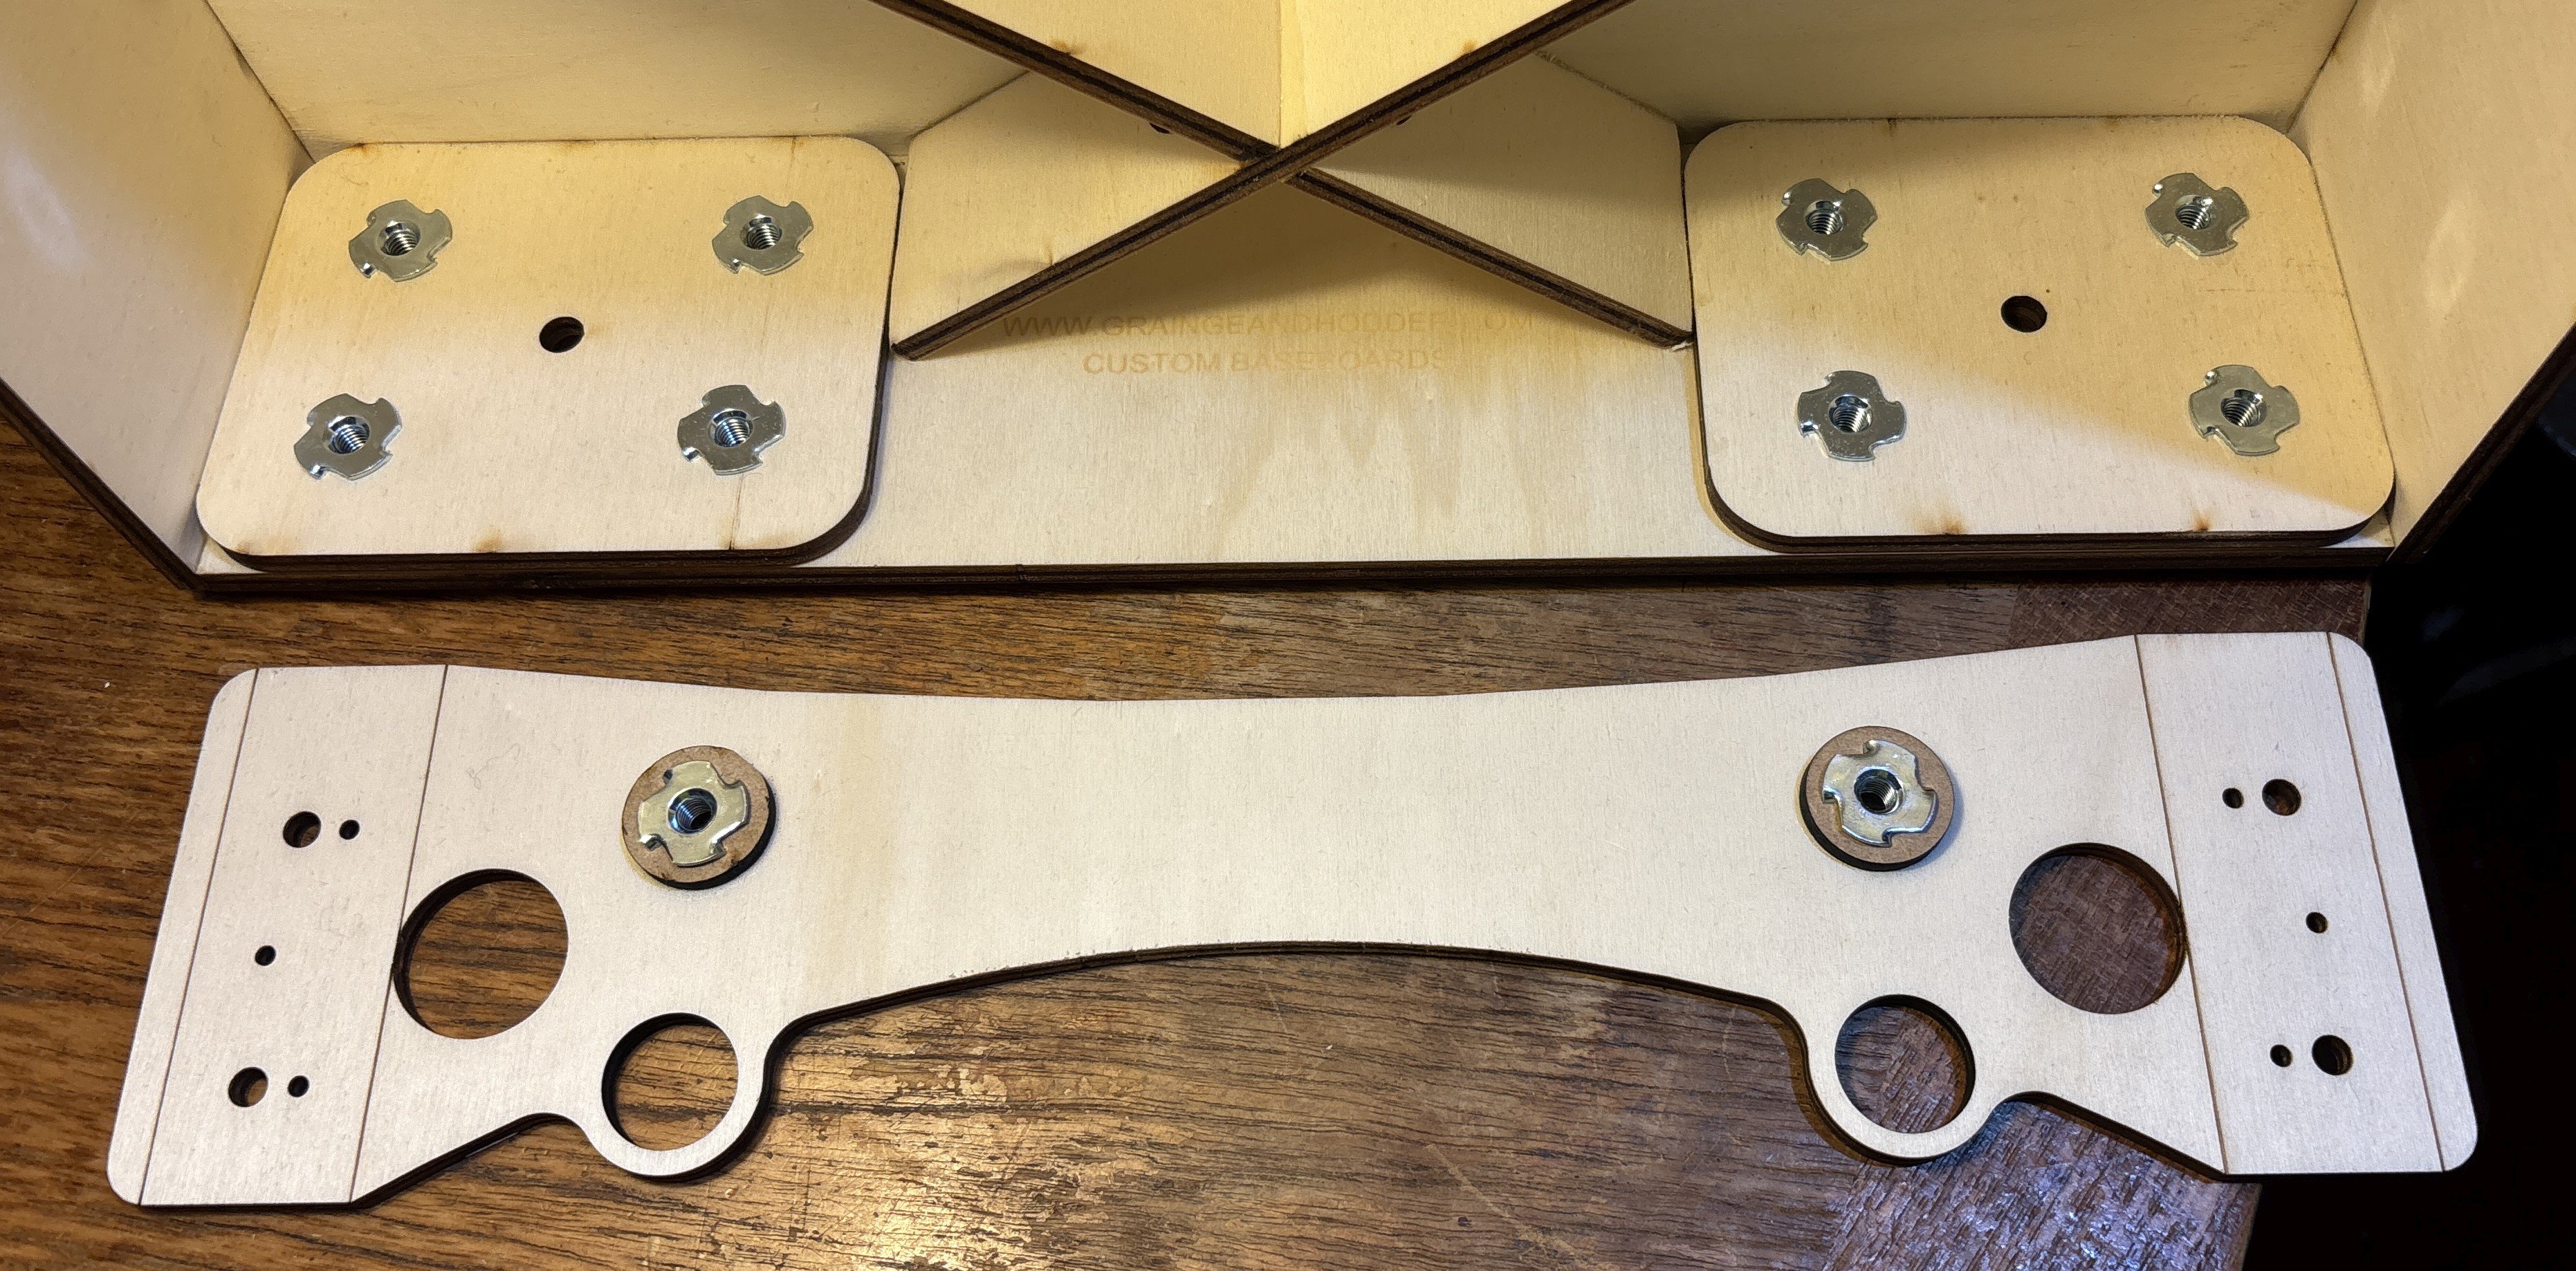
Well I'm kind of making it up as I go along. The parts I ordered from Screwfix were as follows (not all screw lengths shown in the photo): Qty Ordered Qty Despatched 79359 - Easyfix 4 Pronged Tee Nuts M6 x 9mm 10 Pack 3 3 838GX - Suki Levelling Foot M8 x 60mm 2 Pack 2 2 8114J - Easyfix Bright Zinc-Plated Roofing Bolts M6 x 60mm 10 Pack 1 1 3023J - Easyfix Bright Zinc-Plated Roofing Bolts M6 x 30mm 10 Pack 2 2 5213J - Easyfix Bright Zinc-Plated Roofing Bolts M6 x 20mm 10 Pack 1 1 6689T - Easyfix Zinc-Plated Steel Wing Nuts M6 10 Pack 1 1 That lot cost me £24 in total, and was delivered next day. The pronged tee nuts require the 6mm holes in the boards to be enlarged to 7.5mm diameter. If they're going into a single thickness of ply then they need a thin spacer (effectively a wooden washer) as well. You should get some of those spacers with the baseboard kits and will probably end up with spares. One of the pics in the previous post shows this. It takes quite a bit of force to push the prongs into the wood - hammer, vice or the M6 bolt itself working against a penny washer on the other side will all do the trick. Once they're in, they're very firm, and they won't get lost or need an extra hand or spanner when asseembling the boards. I haven't yet decided on my leg length (nor have I bought the timber). I did buy some adjustable feet though, as you can see. These are M8 but use the same type of pronged tee nut - in fact it was them that gave me the idea to use the pronged tee nuts in the board joints too. The M6 roofing bolts come with square plain nuts included, for normal joints. I got the wing nuts as well in case they turned out to be useful for something like the braces on the legs. Obviously the quantities you need will be different from mine, but with 8 bolts per board joint or leg pair, it's surprising how quickly they add up if you want to use all the holes! One tip - don't rush to fit the diagonal bracing on the underside of the boards. Think first! It can block important things like legs and point operating mechanisms. I modified a few of the G&H parts to suit my own needs - especially the ones that would fit in my laser cutter.
-
"Voiding the Warranty" - Mol's experiments in 21mm gauge
Mol_PMB replied to Mol_PMB's topic in Irish Models
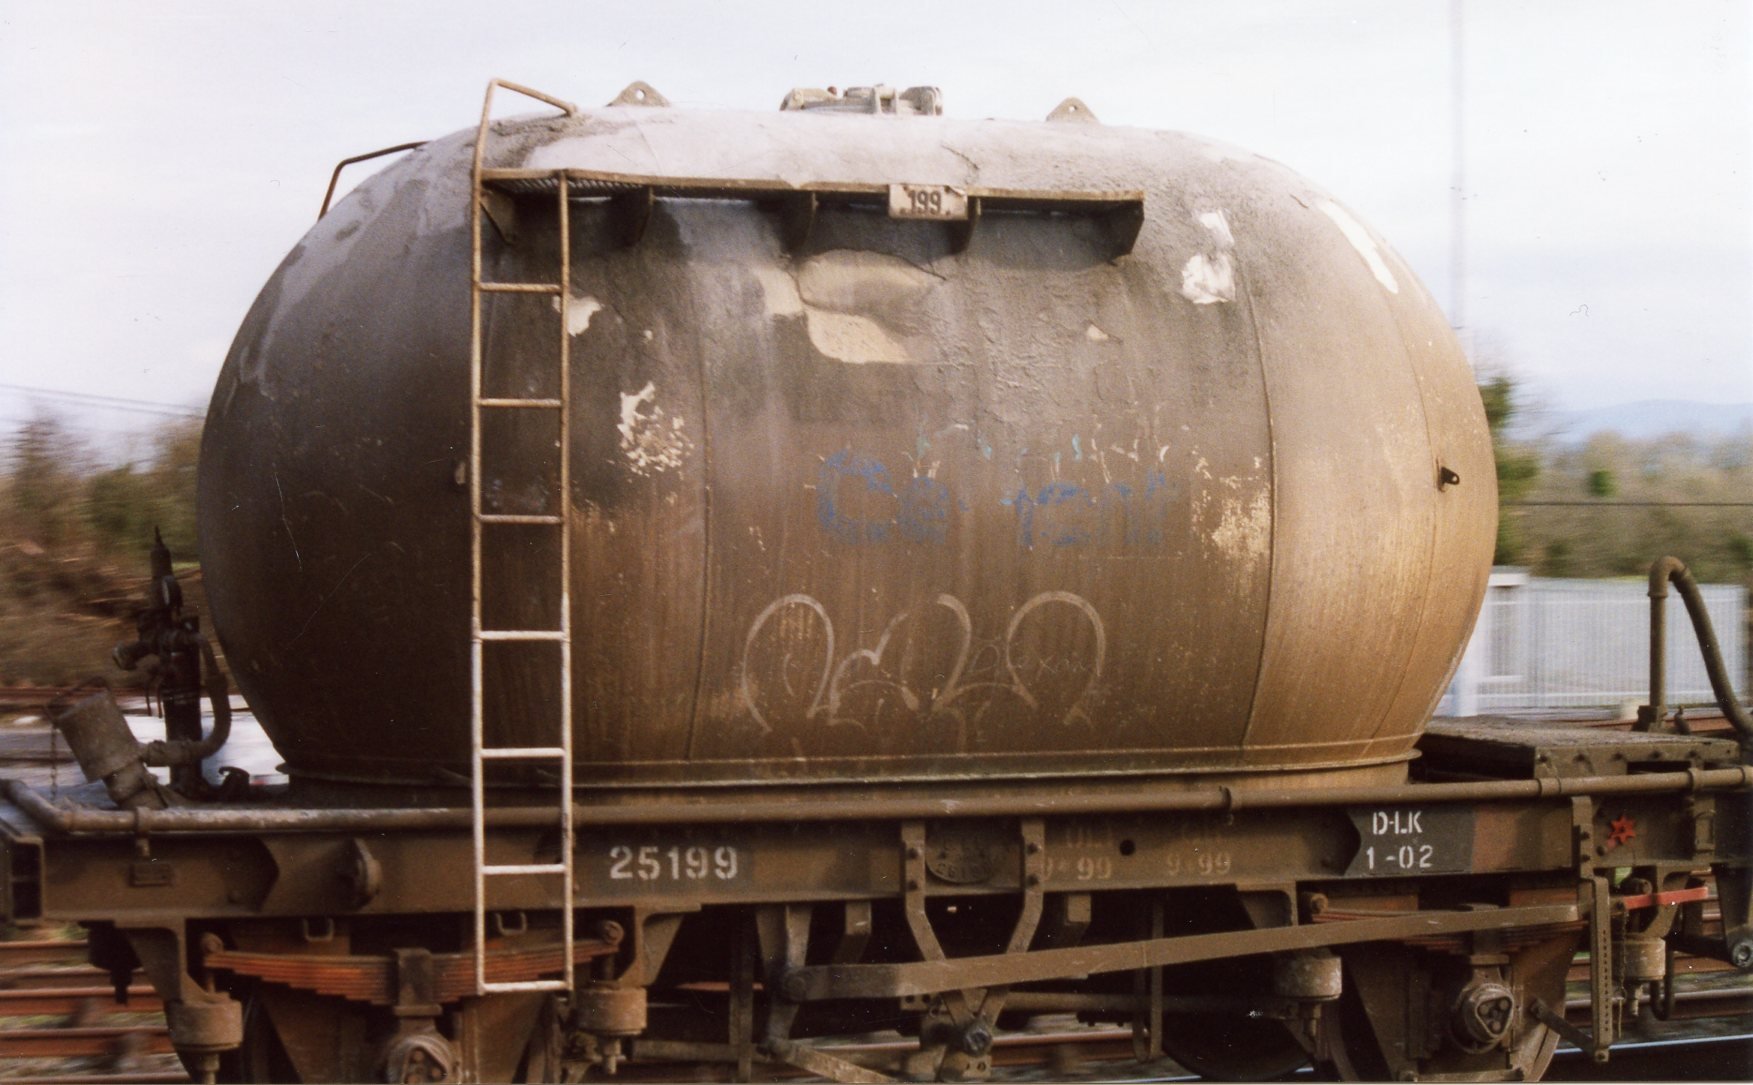
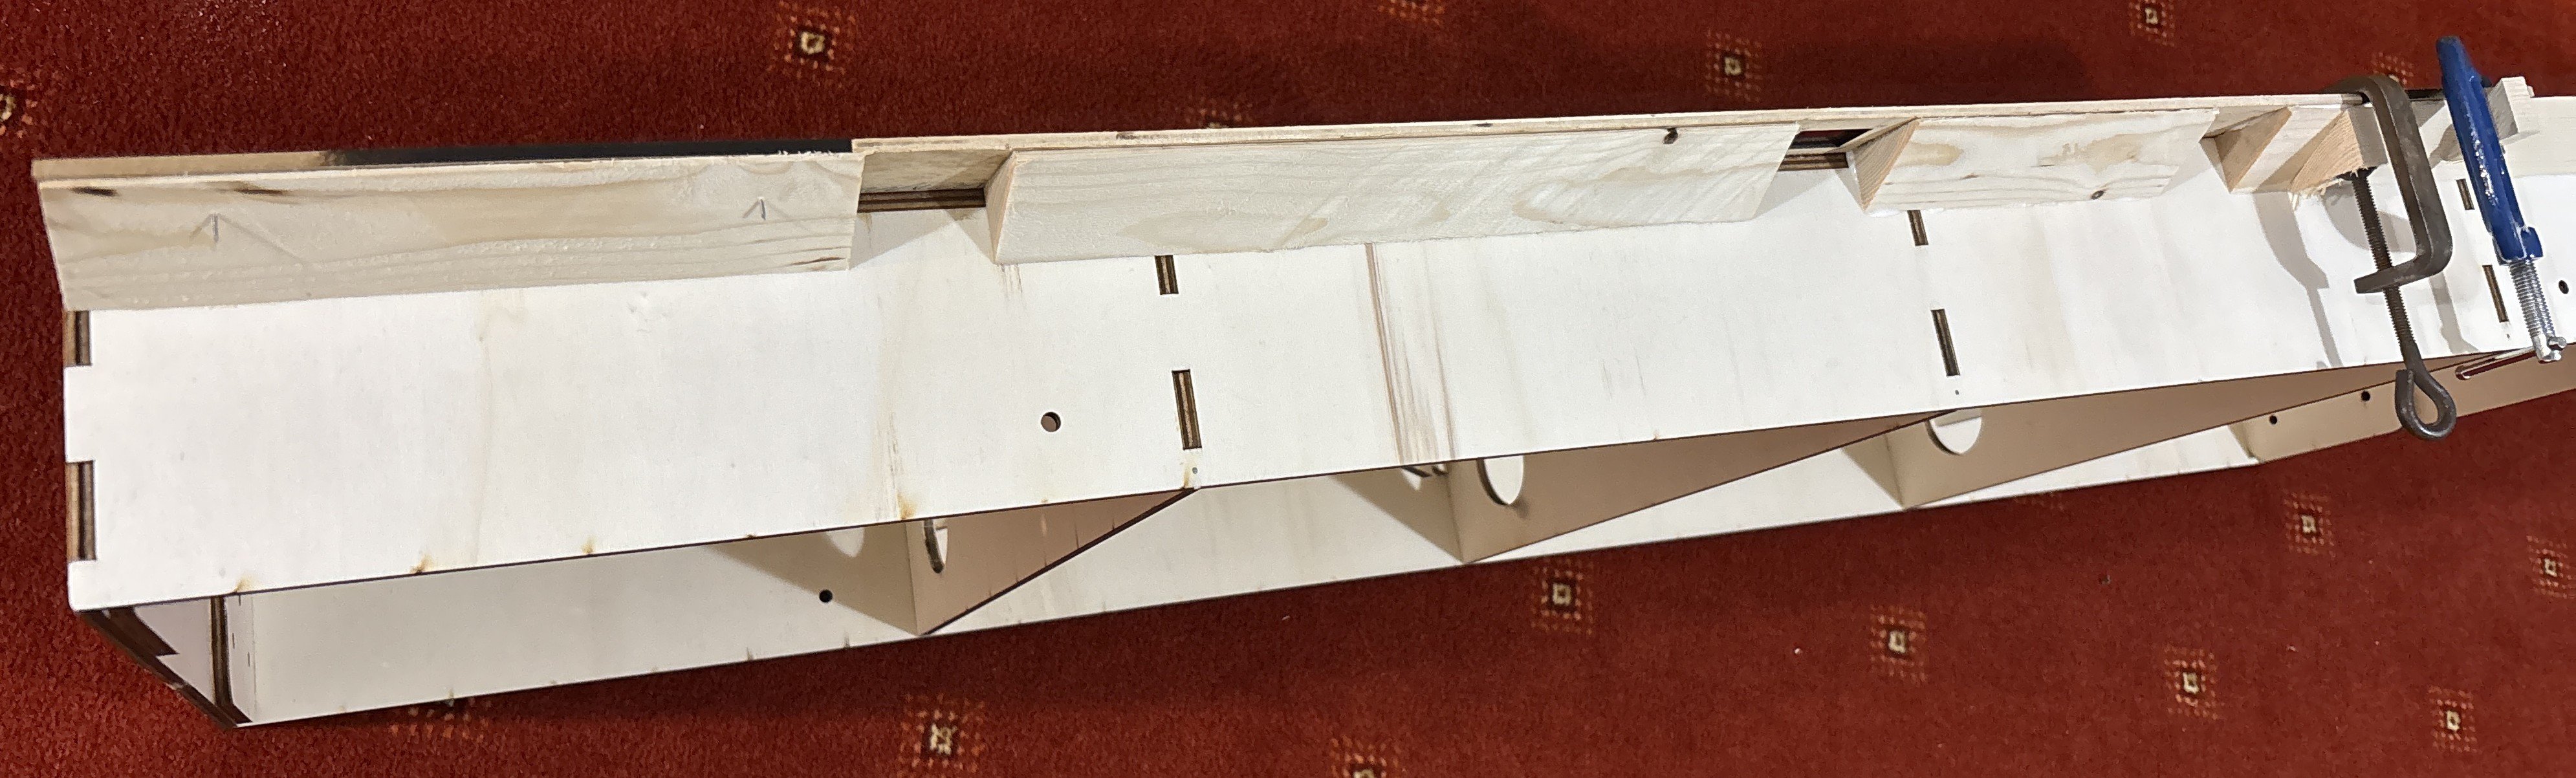
Some more progress on the Quartertown Mill baseboards today. I finished cutting out the track base pieces including slots for point tiebars and uncouplers, and then stuck those down, well weighted and pinned in a few strategic places. I also made and fitted a reinforcing fillet where the track base overlaps the edge of the board in the fiddle yard area. The Grainge & Hodder baseboard kits are supplied with holes to allow boards to be bolted together, or legs attached using their brackets. These are intended for M6 bolts but the fasteners aren't actually supplied. I ordered a selection of M6 bits from Screwfix and today I have also fitted the captive nuts to the timber parts where required. These will make it easier to assemble/disassemble the main components. Finally, my next victim has arrived! Destined to become a tar/bitumen tank, which is surprisingly appropriate for Quarterown flour mill because the siding was also used for tar deliveries to Roadbinder Ltd. So, nothing very exciting but some steps forward. I'm definitely not keeping up with Darius!
-
TMC are having a massive sale this weekend, with 40% to 70% off many items. There's a lot of new, good quality OO scale rolling stock available at 40% off. Not specifically Irish, but some of the items would be suitable for Irish layouts. https://www.themodelcentre.com/40-75-off-sale I picked up a new Dapol O gauge Austerity tank for £162.00 (RRP £278.91)
-
Especially if you’re modelling the electrified Cork suburban network! I understand a 25kVac version of the Dart+ trains will be ordered for that
-
And there was me thinking Sligo, Enniskillen and Derry/Londonderry...
-
Wonderful - many thanks!