Mol_PMB
-
Posts
2,159 -
Joined
-
Last visited
-
Days Won
112
Content Type
Profiles
Forums
Events
Gallery
Blogs
Store
Community Map
Everything posted by Mol_PMB
-
That’s fine, the same could be said of the contents of my cupboard of shame! The unbuilt kits must run into 3 figures!
-
Thanks Colin. From the point of view of buying individual kits rather than ranges of artwork, do you know whether he is still trading at present, maybe a transition period of selling off what’s in stock, or has he shut down already?
-
Nice idea! I look forward to seeing what transpires.
-
"Voiding the Warranty" - Mol's experiments in 21mm gauge
Mol_PMB replied to Mol_PMB's topic in Irish Models
Good question. It's brass and I think these are 2mm ID 3mm OD. They look a bit chunky but are stronger than the 2mm ID 2.5mm OD. Of course you can re-use the IRM axles but in my experience not the wheels, as the tread is too wide to get a 19.2mm BTB. The IRM axles from these vans will be re-wheeled (with Gibson EM wheels) and probably turn up under my next wagon project. -
"Voiding the Warranty" - Mol's experiments in 21mm gauge
Mol_PMB replied to Mol_PMB's topic in Irish Models
Indeed, it’s a lot more work than the unfitted versions, which is why I thought a description of what I did might be useful. The first one I did, I took way too many bits off that I didn’t need to. Overall, it’s not too bad to convert, and there’s much less to do if the buffers don’t bother you. -
Thanks - yes please - it would be good to know the exact shade that was used. I tried buying some Precision Paints CIE green but it turned out to be the dark green. I’ll get a photo of the model in daylight, as the apparent shade varies in different lighting. This one will only be lightly weathered but no doubt that will influence the colour slightly too.
-
I was looking at the triangular area bounded by the old WLWR loco works, the slightly newer wagon works, and the fuelling point and main lines. The advantage of a works is you can justify all sorts of things turning up. Including the Taras! But the Navan branch sounds a good option too. I don’t know it so well.
-
Thanks - that helps a lot! I was wondering if it was Irish or a mix. Smallish bogie locos then, which will be important in setting the length of any headshunts. Given that a loco and 2 carriages would fill about half the length of the space available, I don't think passenger operations are really feasible in the space available, unless a single or 2-car railcar. With freight, a shunting layout is certainly possible, but if you want to run round a train and have a fiddle yard it will fit in, then the maximum train length would be quite short. A sector plate or traverser fiddle yard would be a major space-saver. I looked at doing a shunting layout based on part of Limerick Wagon Works which was about the same footprint you have.
-
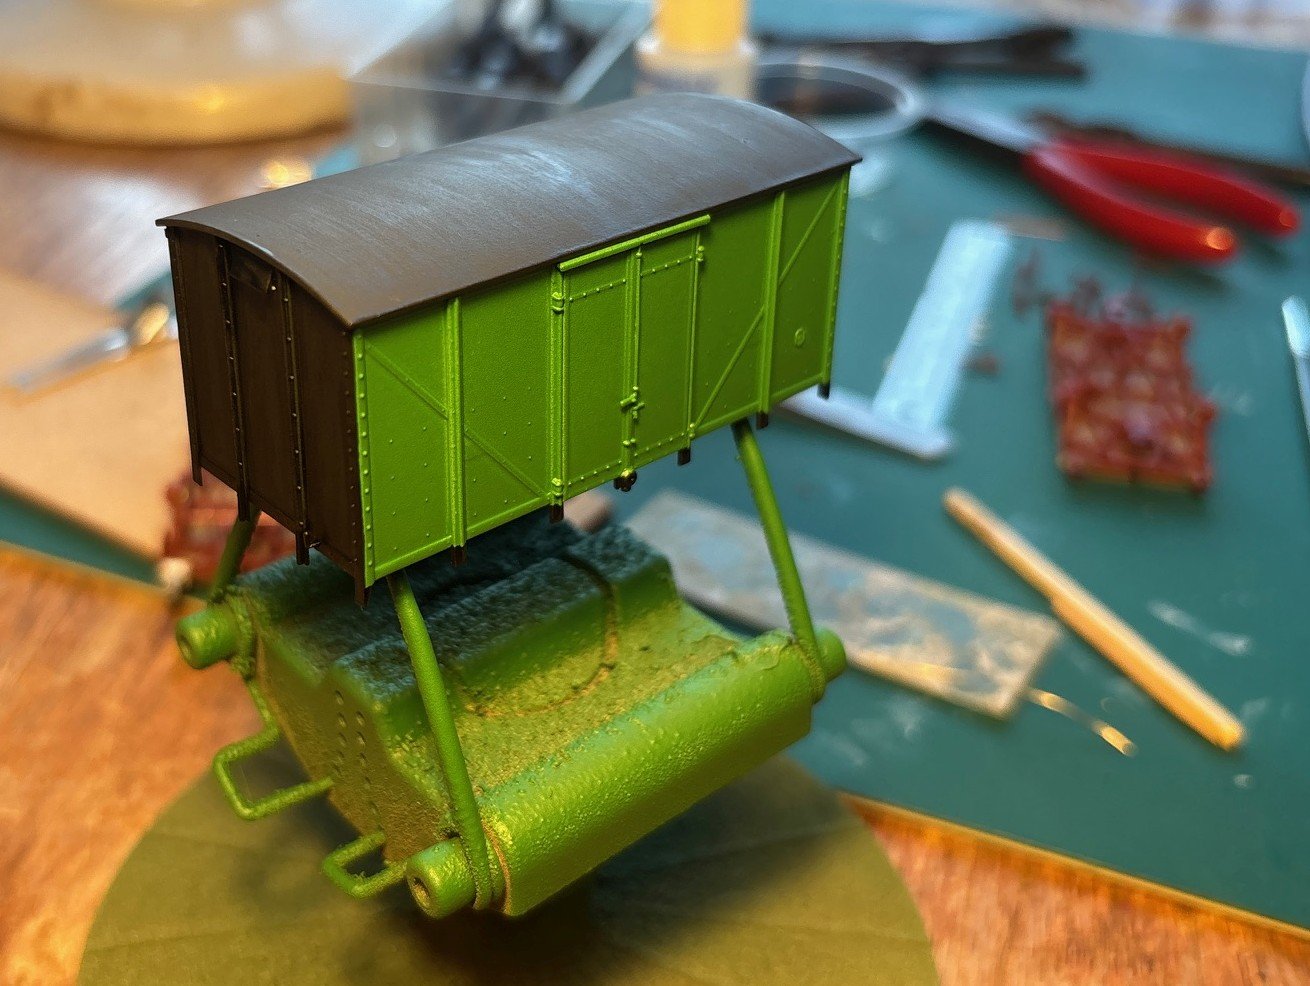
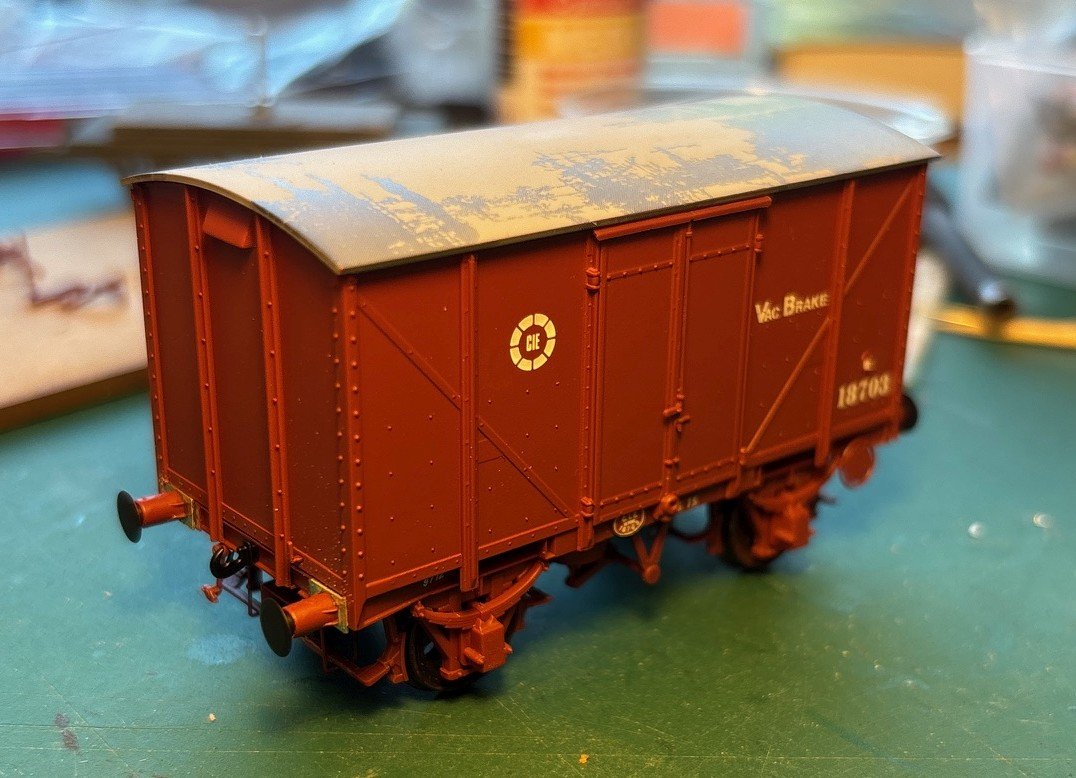
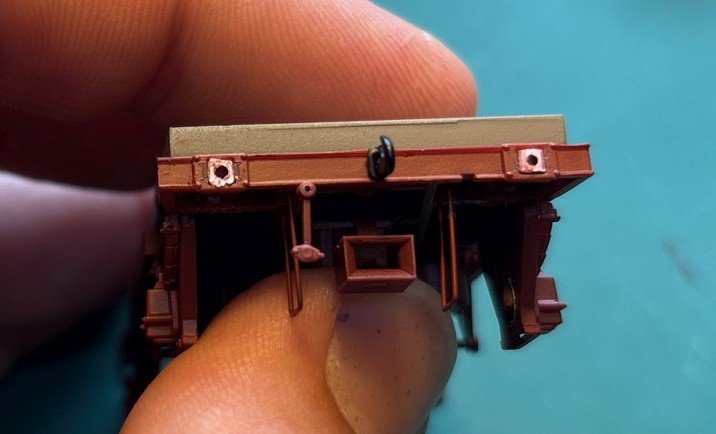
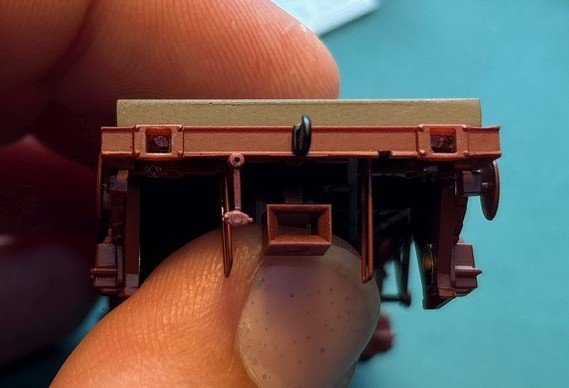
On the workbench, something green is occurring... Packers for the buffers Fitted to the chassis, ready for the buffers to be refitted in front: This will be painted black once complete. The body is unmodified except a coat of paint. In the absence of any better ideas I'm using Southern Railway Malachite to represent 1960s CIE light green. Maybe Bulleid brought some with him? Almost ready for transfers now.

-
Why not post a few pictures of the stock you have to give us some inspiration? At the moment the possibilities are so broad that it's hard to develop any suggestions.
-
Do you already have the stock, and what sort of era/prototype is it? I ask because what is achievable within the space and operationally interesting will depend on the length of the rolling stock you're using, and the type of facilities it would use. The space you have isn't really long enough to do much interesting with passenger trains formed of bogie coaches, but there could be much more operational interest if it's a freight yard with 4-wheel wagons.
-
"Voiding the Warranty" - Mol's experiments in 21mm gauge
Mol_PMB replied to Mol_PMB's topic in Irish Models
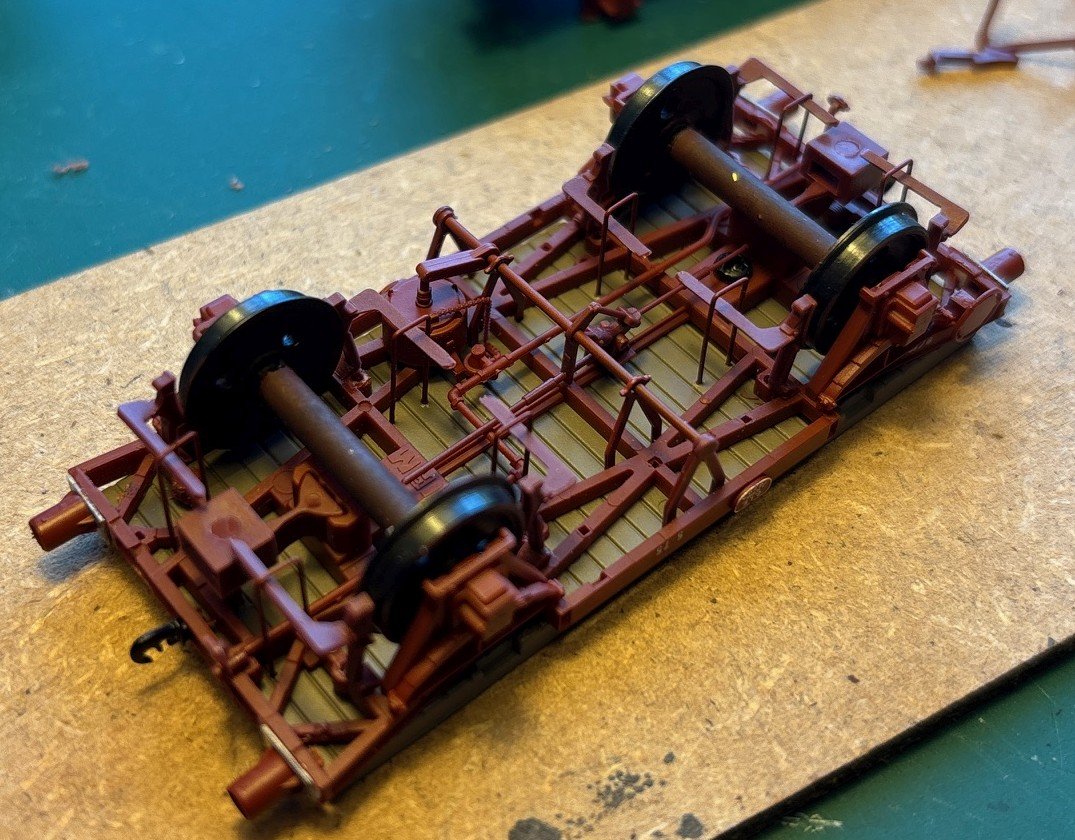
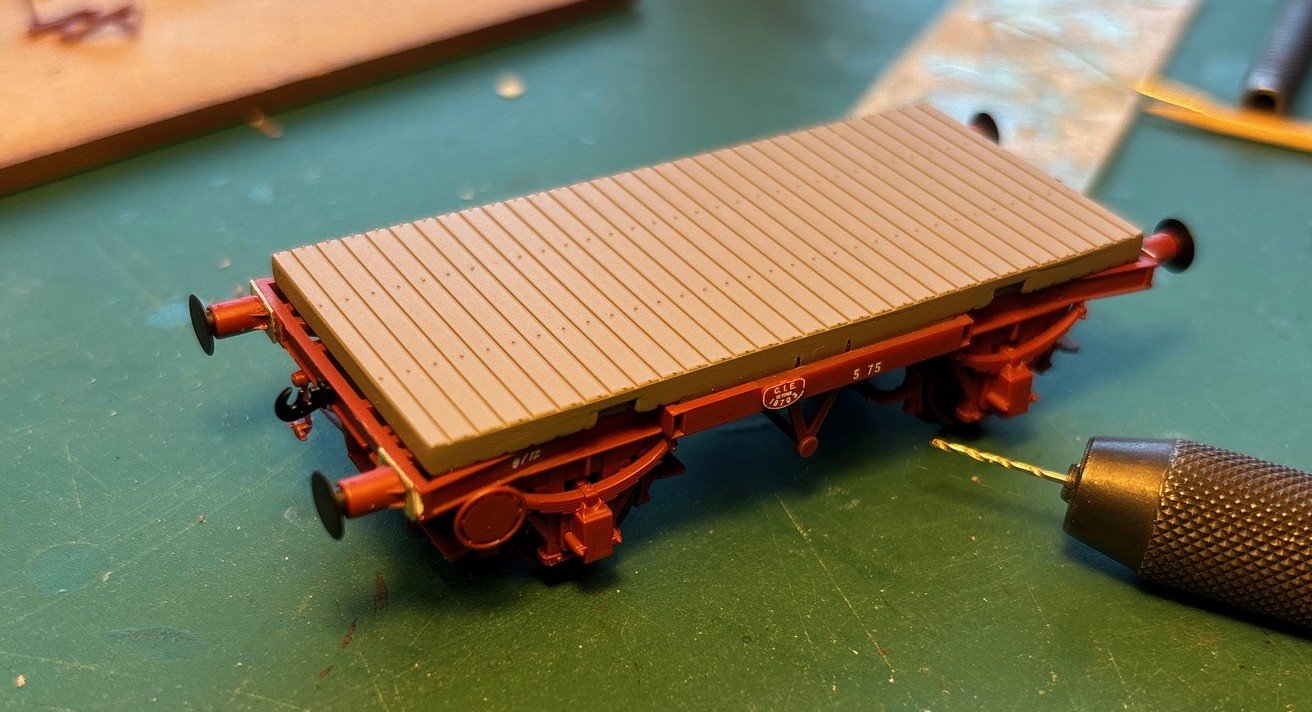
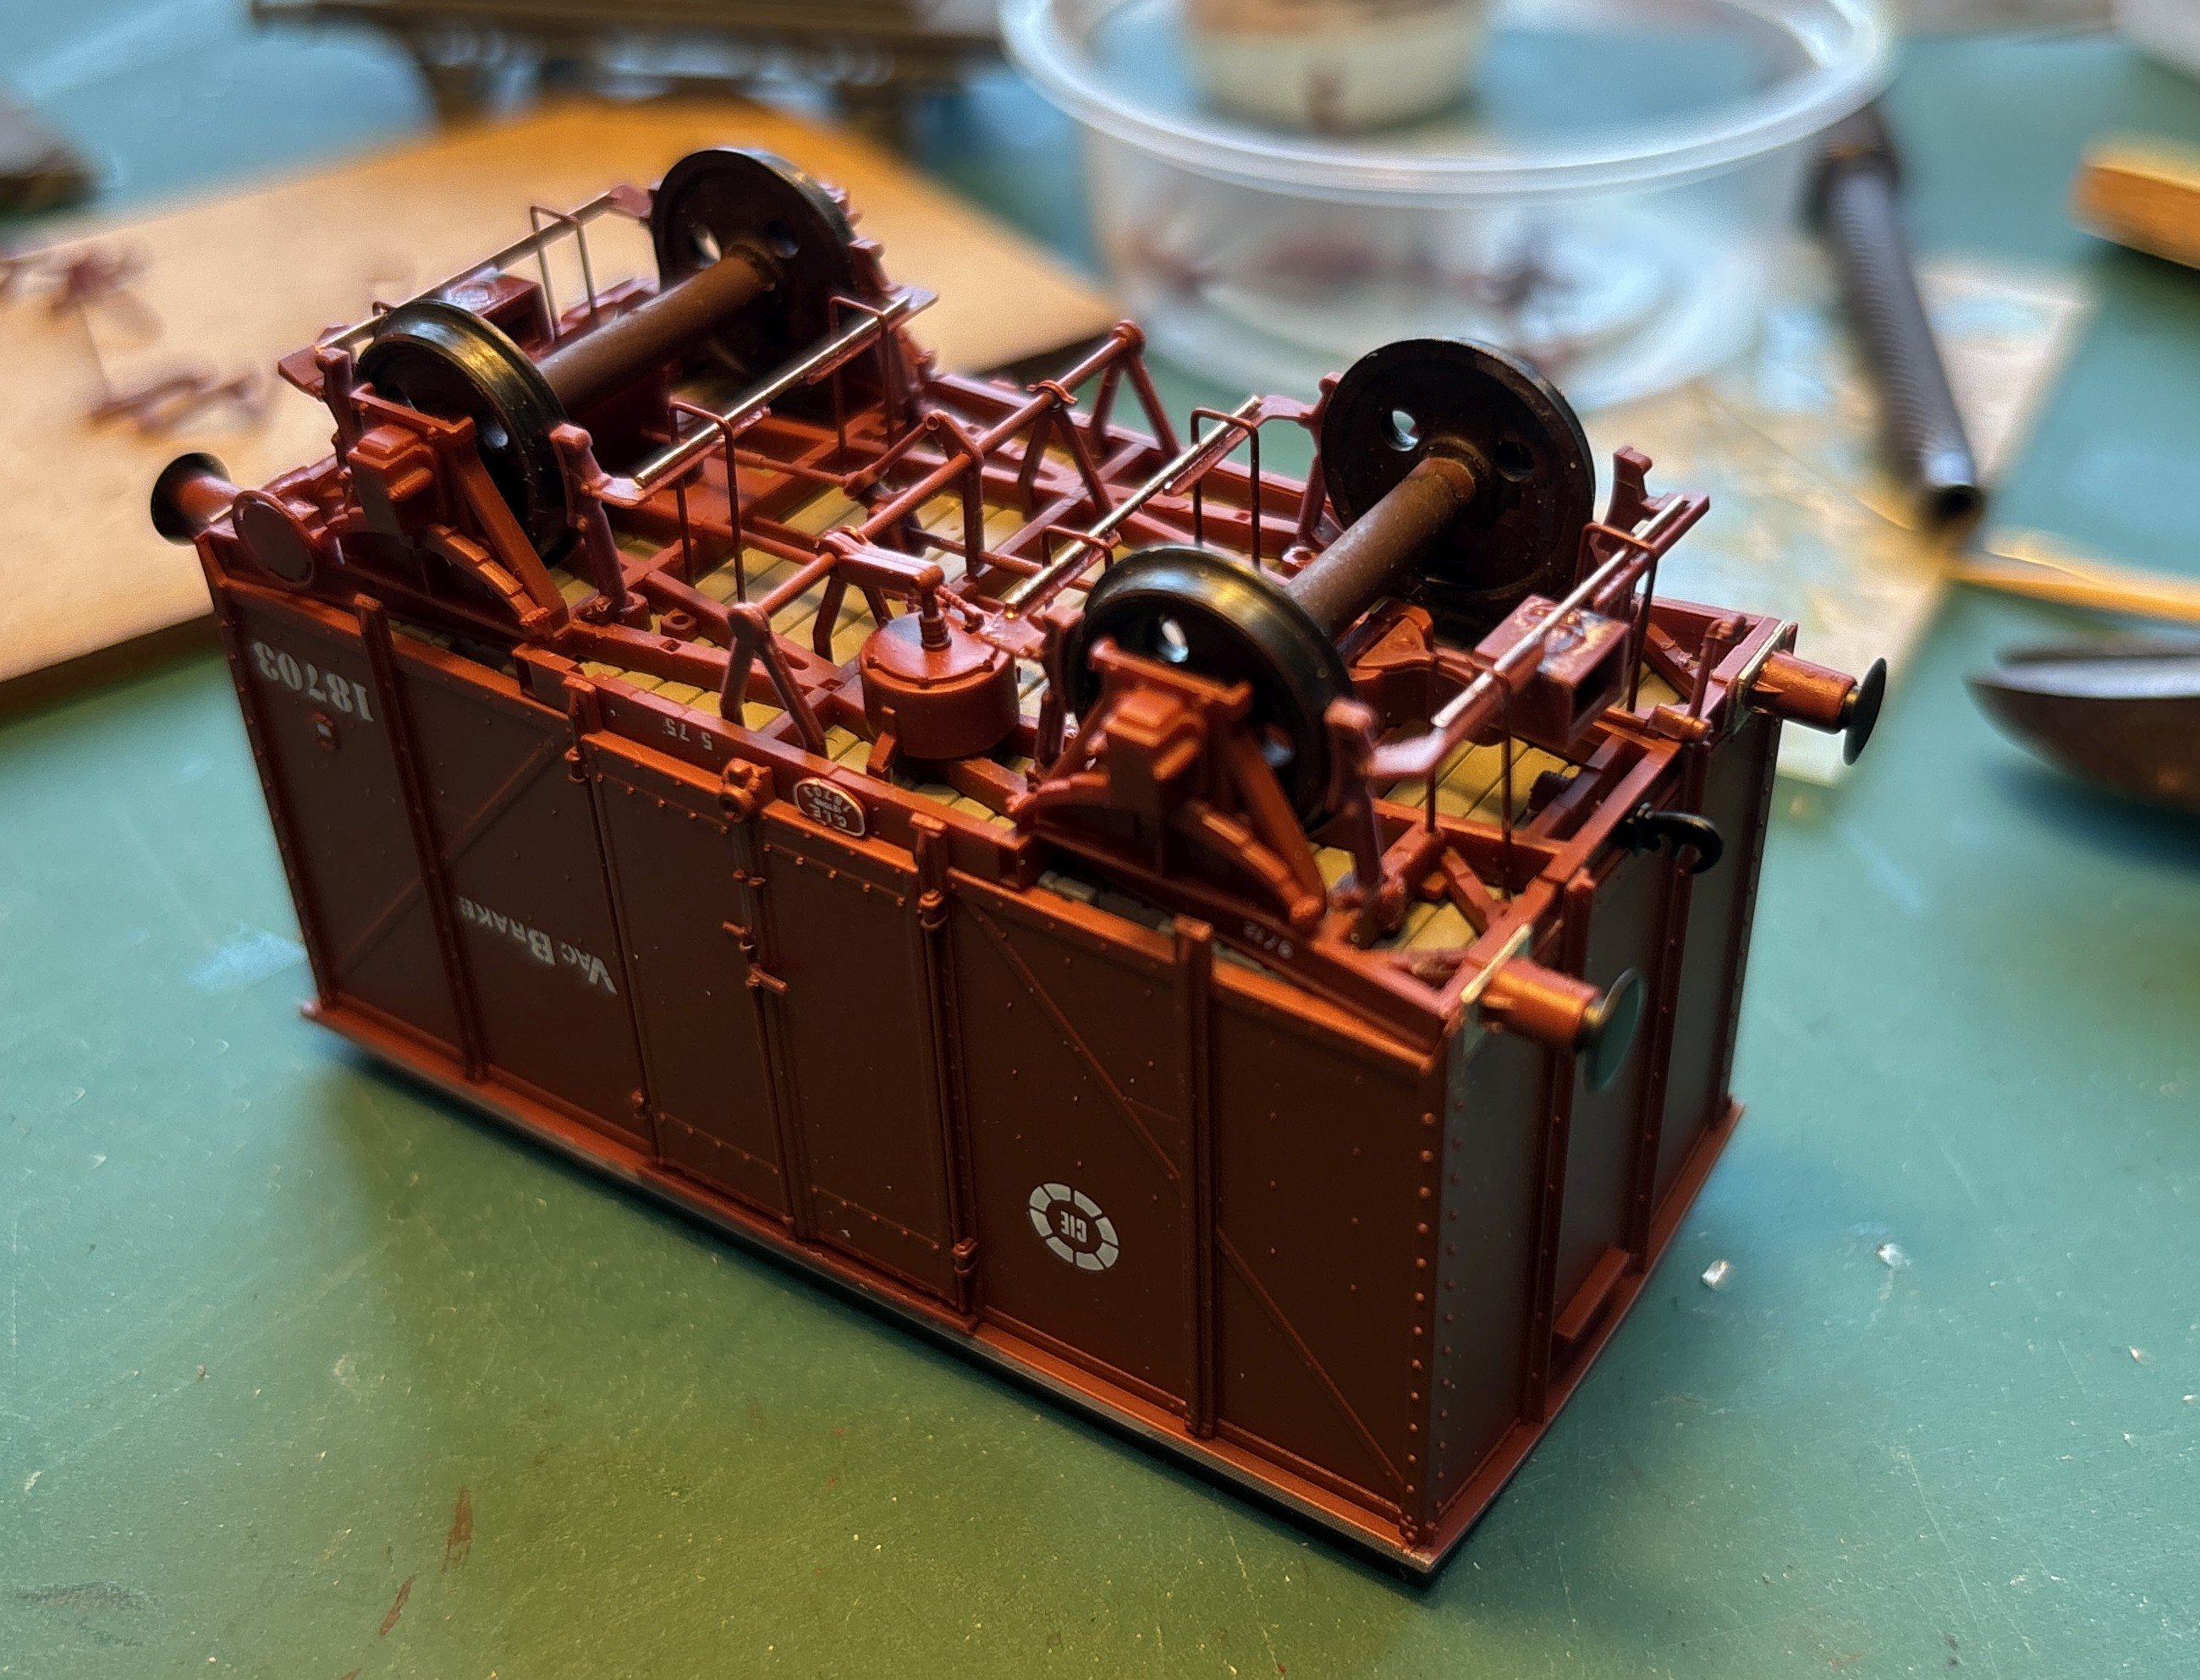
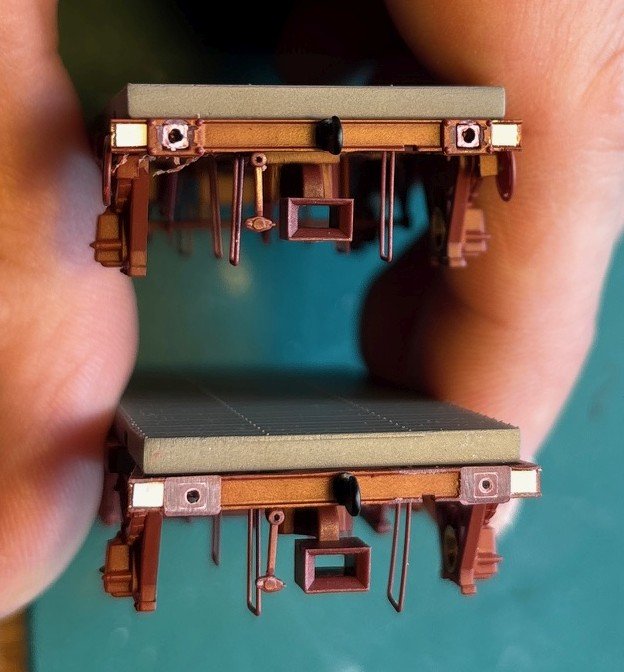
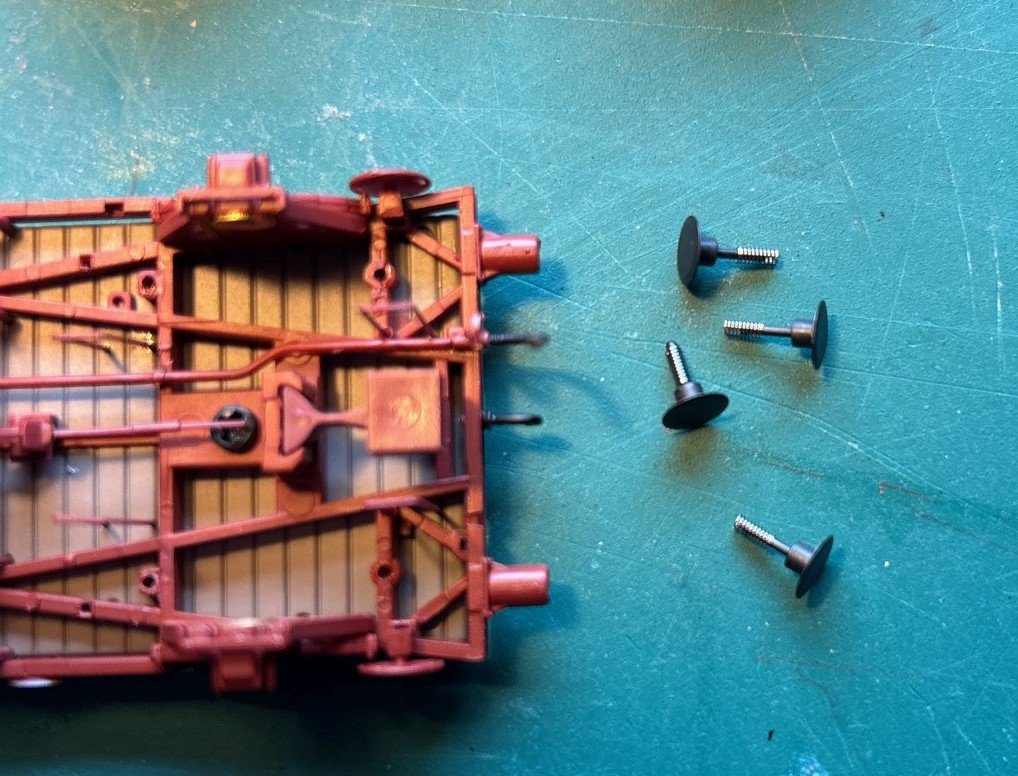
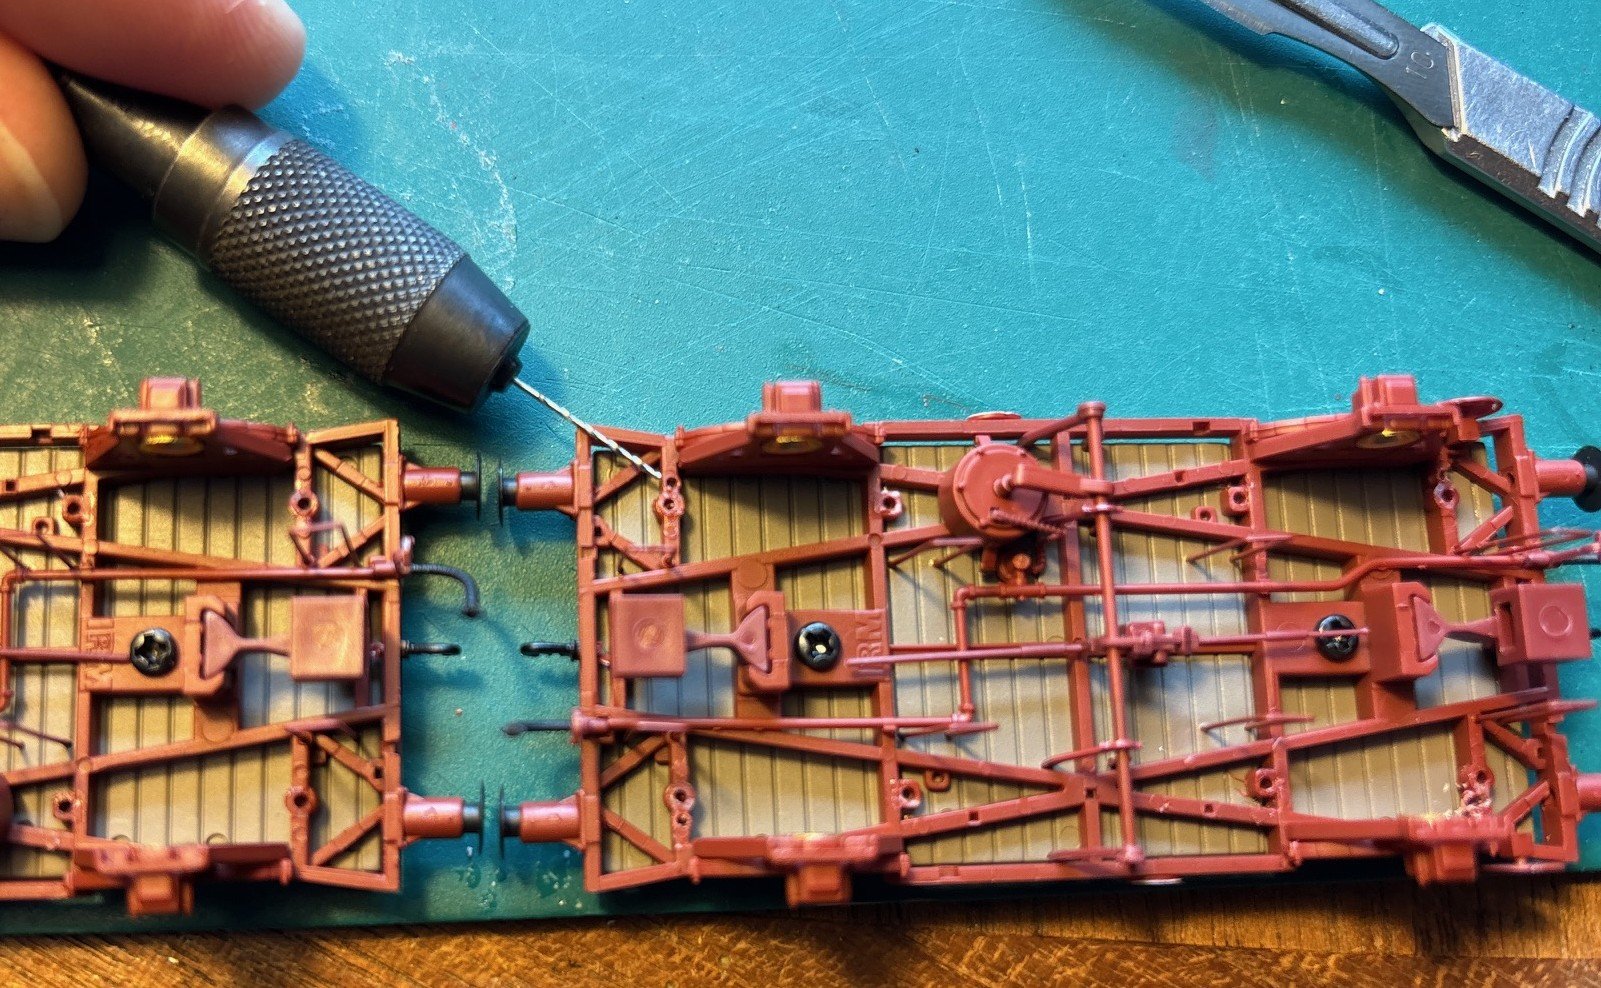
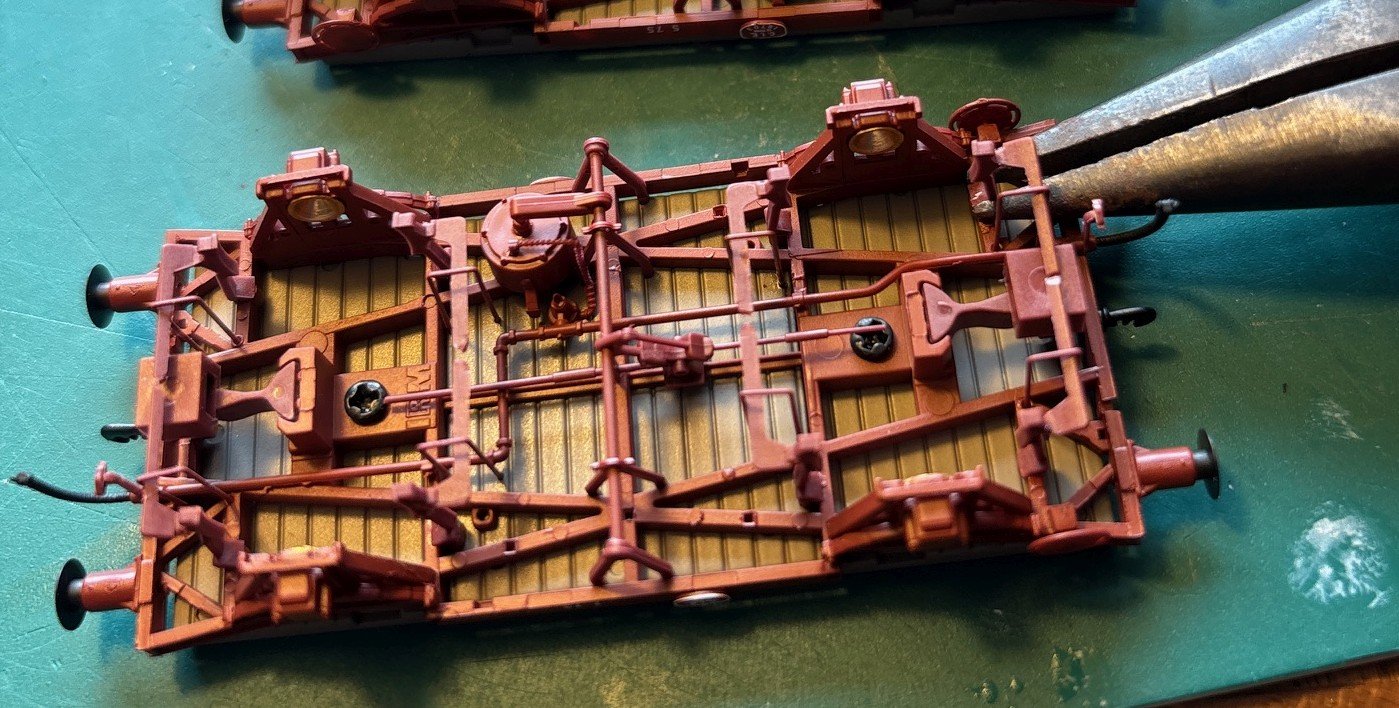
Next, drill out the buffer holes to 1.5mm, then stick the buffer bodies back in place, making sure they are straight and square. Add a pair of 21mm gauge wheelsets to assist in positioning the brakes. Then, you can re-instate the brake hangers, into their new holes. I didn't stick them in place just yet. As you can see, the regauging has left a gap in the middle of each brake cross-stretcher. I chose to cut some 20mm lengths of wire and glue them across this gap - it's not a perfect solution but I don't think anyone's going to be looking too closely when the wagon is in service. Whilst gluing these, if necessary you can tweak the position of the brake hangers so that they don't touch the wheels. A dab of glue on the tops of the brake hangers will secure them in the right place. Make sure the wheels spin freely. (pic) I decided not to reinstate the links across the axles - they're almost invisible from normal viewing angles and they prevent the wheels being removed. Now to the buffer heads. The buffer shanks may have become partly blocked by glue. If so, use a 0.7mm drill (exactly) drill to clear them out. Then push the buffers (with springs) firmly back into place. Now check the fit of the body corner stanchions over the repositioned buffers. It may necessary to file a little material off them to achieve a good fit. Then re-fit the body, which is harder than you might think and the guitar pick will help. If any other small bits have fallen off, stick them back on. There's a little bit of paintwork to touch up, otherwise it's done.
- 319 replies
-
- 11
-

-

-

-
"Voiding the Warranty" - Mol's experiments in 21mm gauge
Mol_PMB replied to Mol_PMB's topic in Irish Models
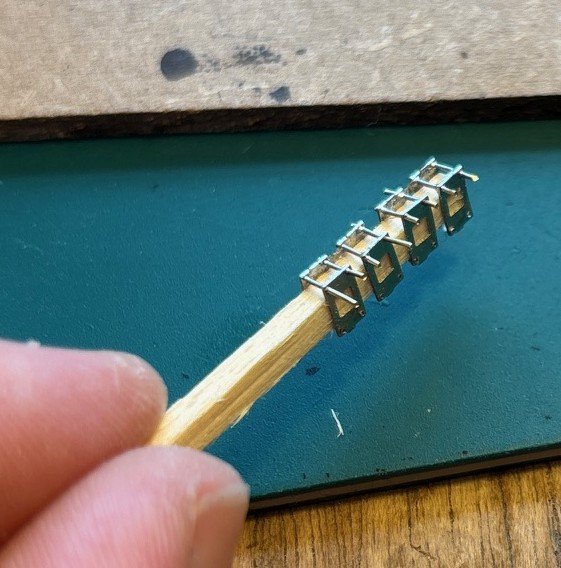
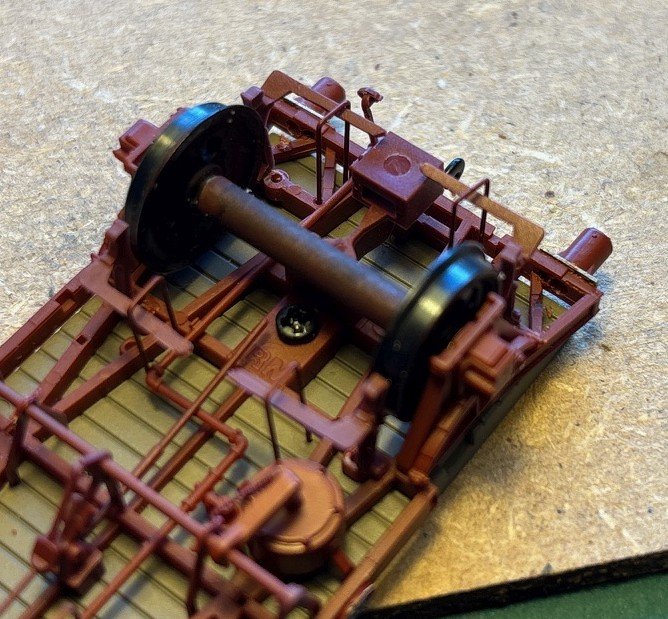
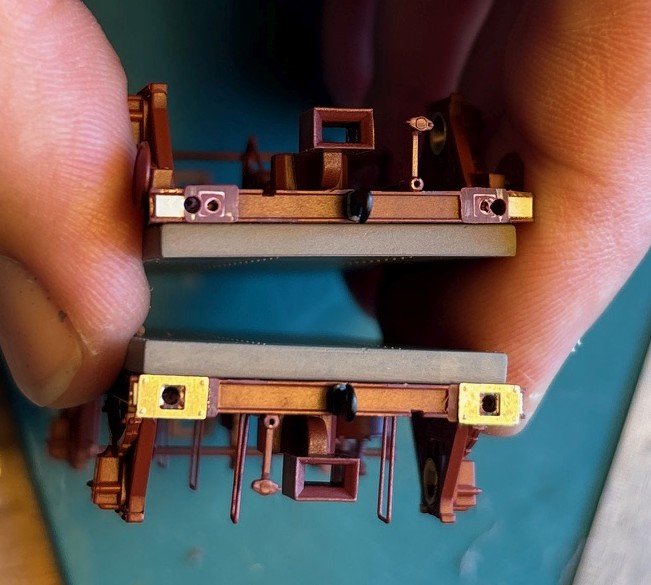
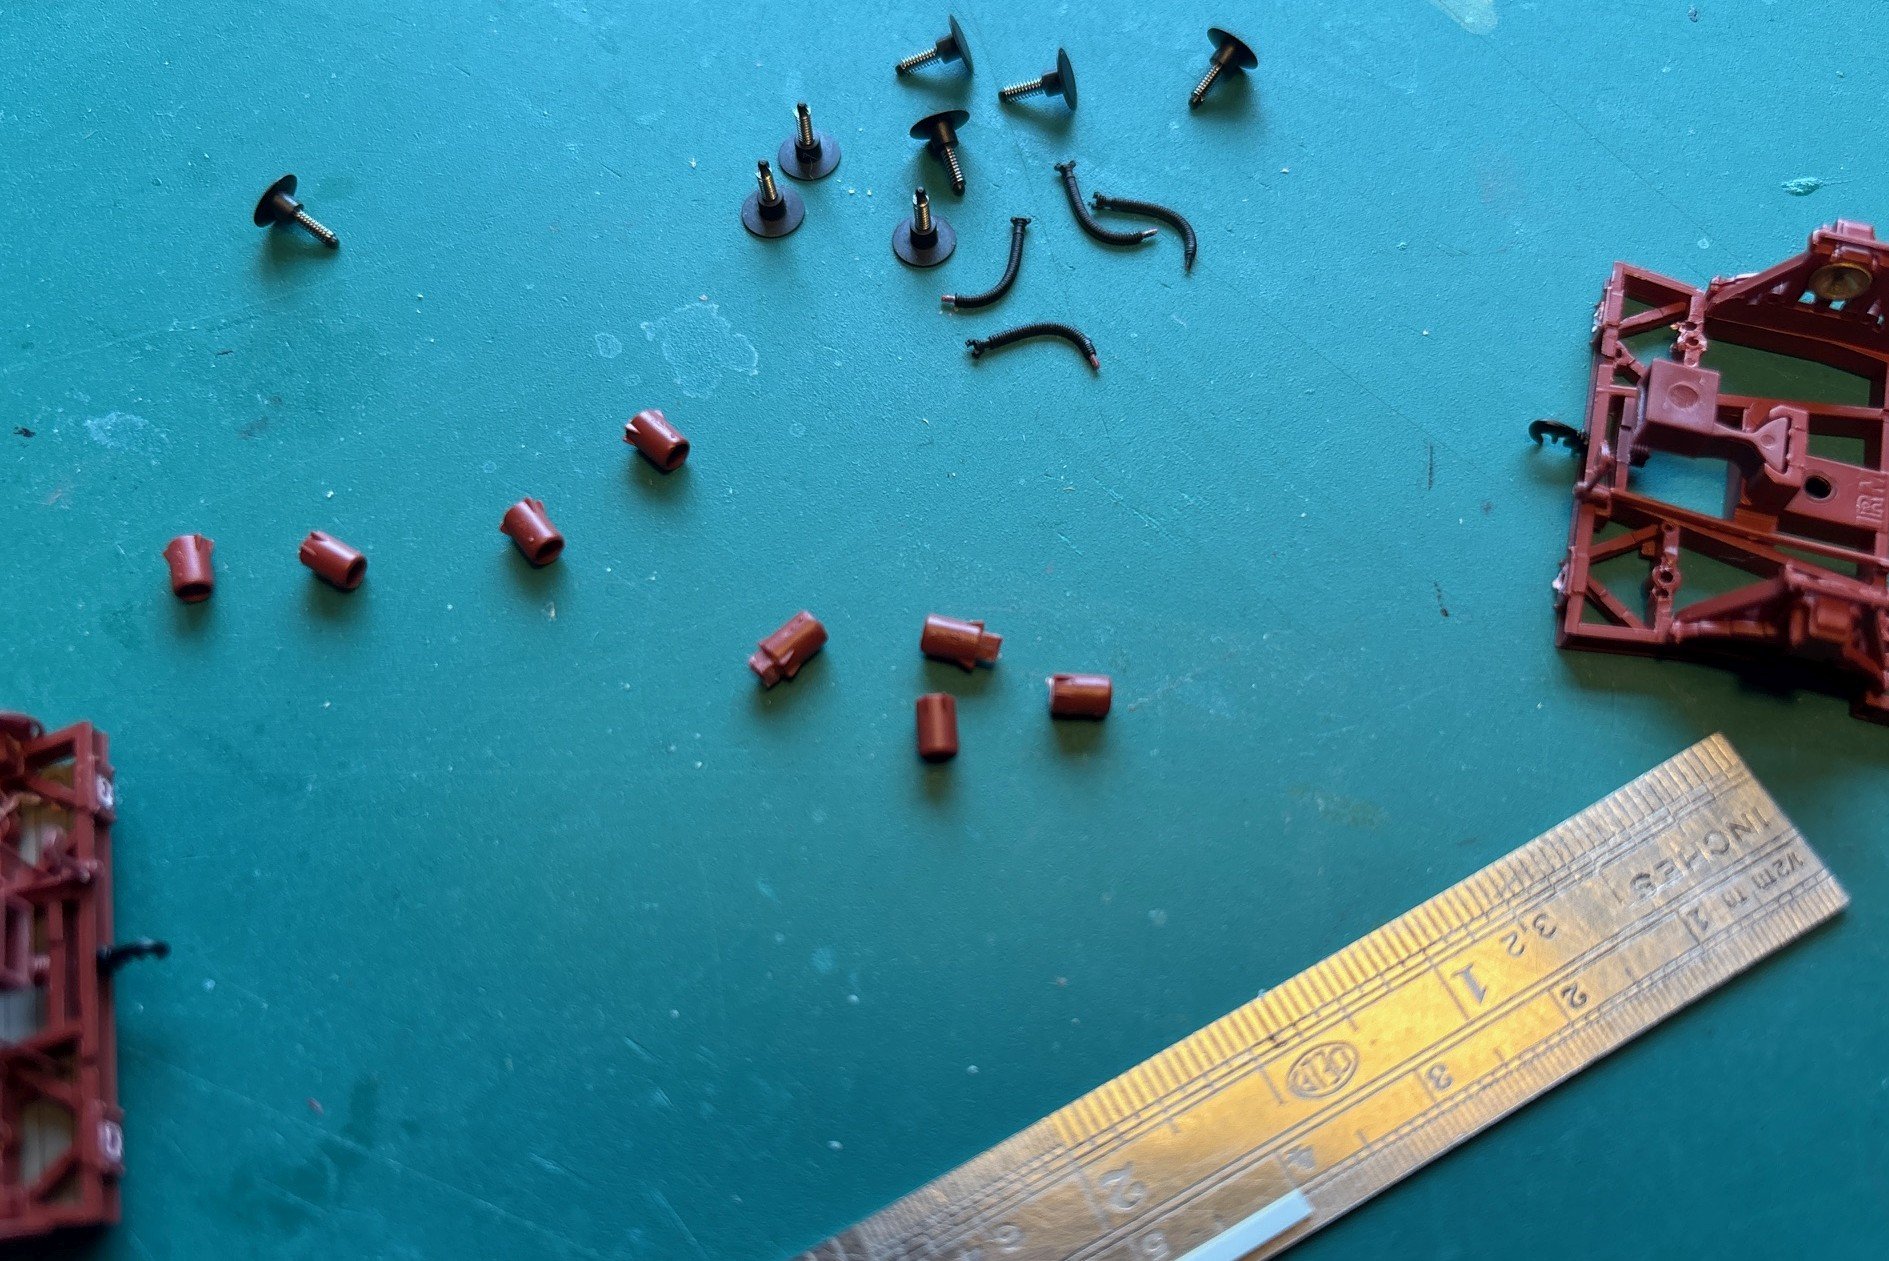
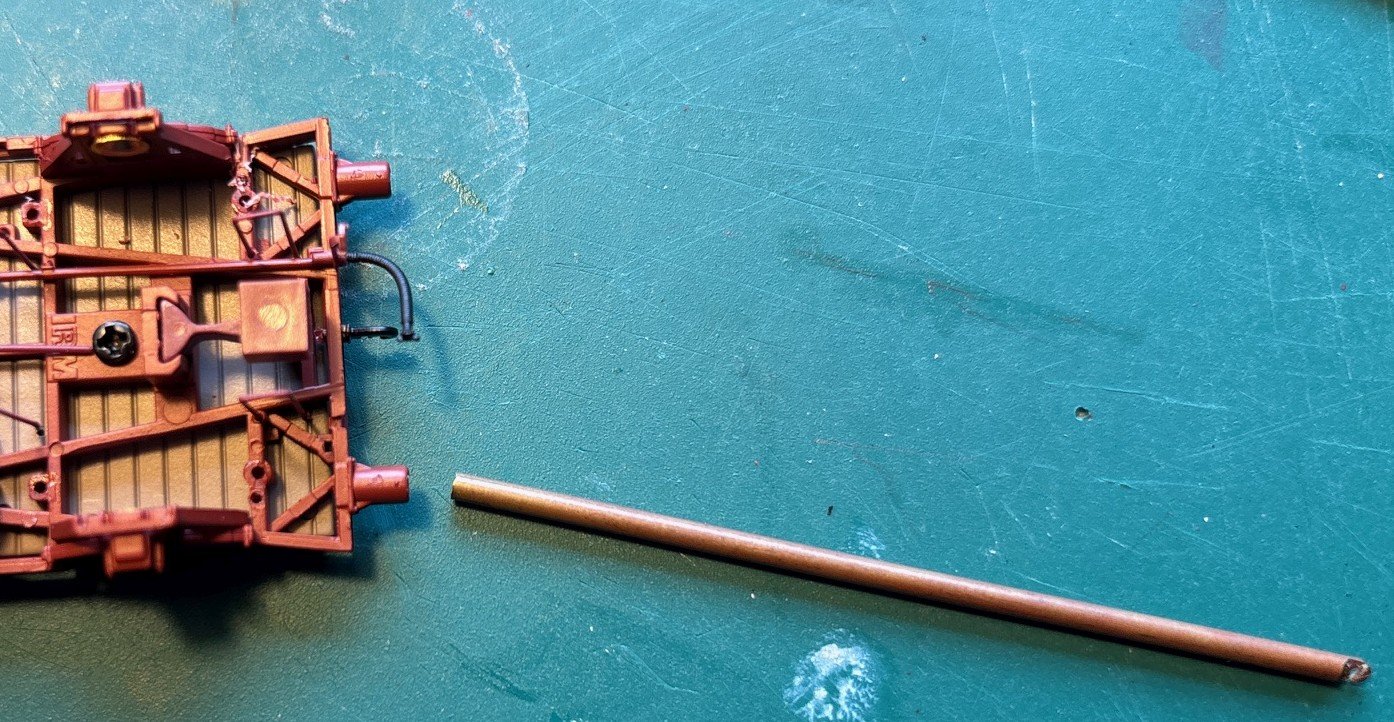
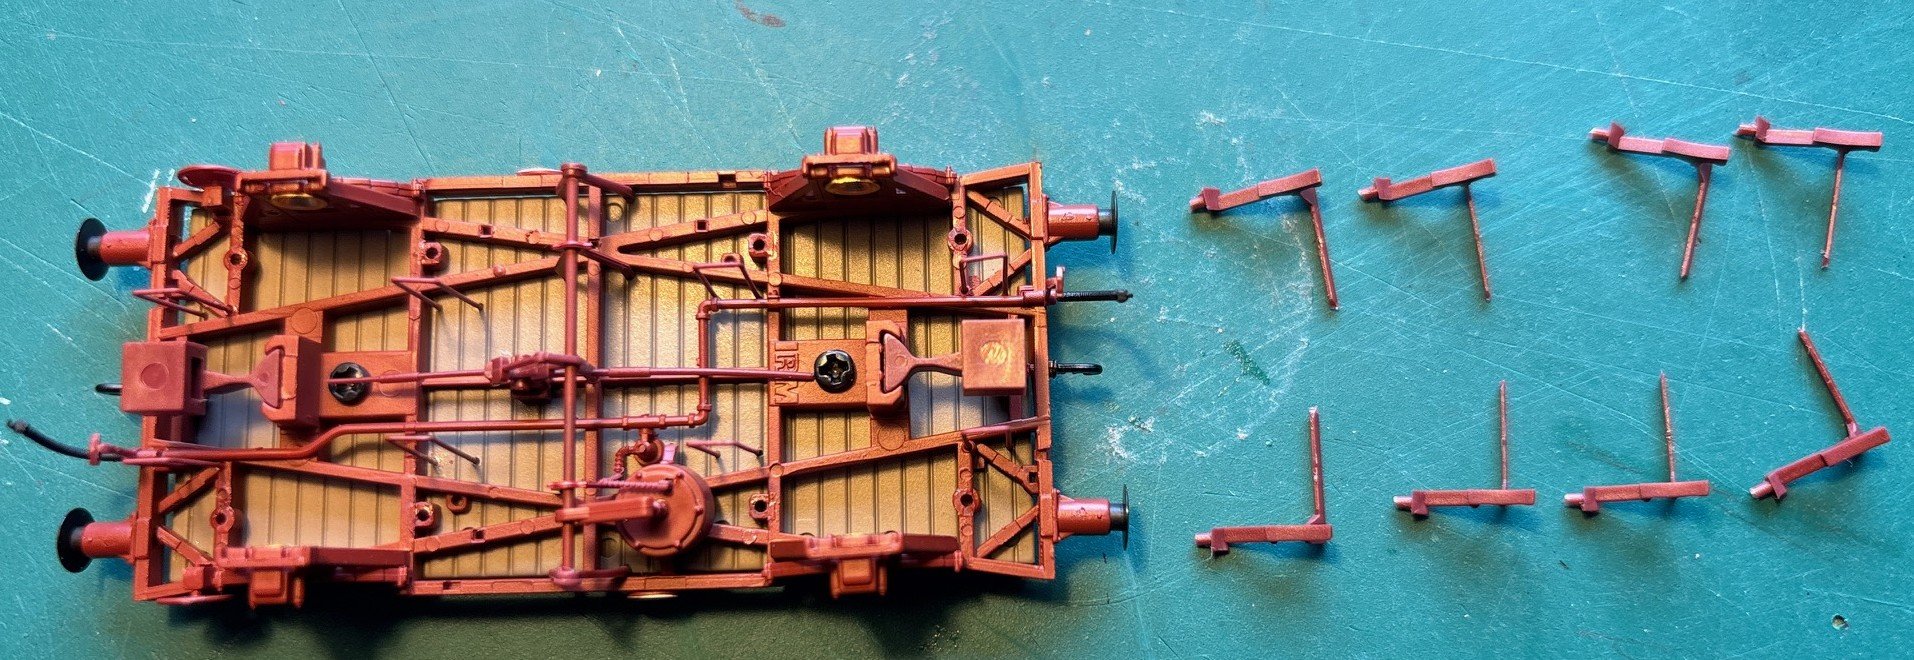
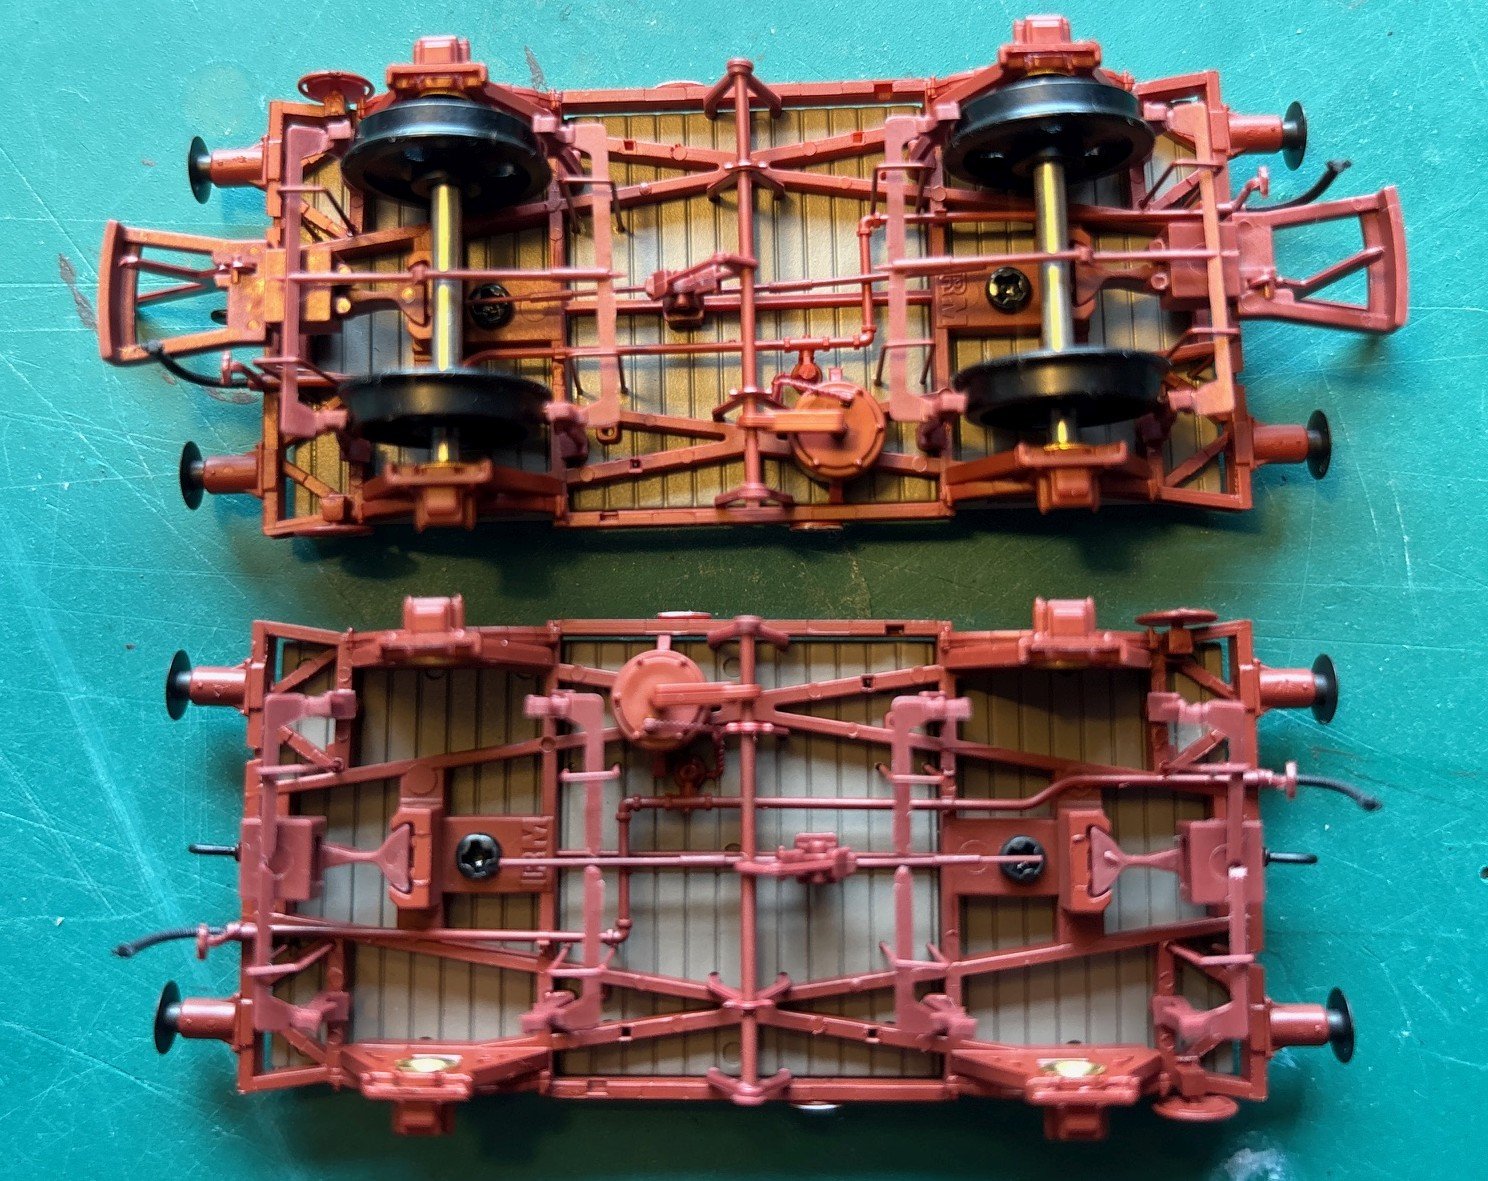
Here's a step-by-step guide to regauging a fitted H van; having done a few now I've learnt what needs to be done and what can be avoided. Firstly remove the chassis from the body - a guitar pick inserted just inside one of the bodysides will do this quite easily. You can leave the chassis attached to the metal floor. Now use some sharp side cutters to cut through the brake cross-stretchers on both sides of the longitudinal link between them. You can now remove the wheelsets. Upper chassis = before, lower = after. Next, use fine pliers to grasp the block at the top of a brake hanger. Twist it, rotating gently side-to-side until you hear the glue give way. Repeat for the others. Now, carefully use a scalpel as a gentle lever to lift the brake hanger out of its hole. You're not trying to cut through the peg, the brake hanger should come out intact: Now you should have something like this: For the outer brake hangers, you need to make new mounting holes to suit the 21mm gauge wheels. This is tricky - start with a tiny drill in a pin vice and work up to the right size for the pegs. The inner brake hangers don't need new holes, they can be pushed into the gap between the old hole and the diagonal frame member. The next step is to deal with the buffer spacing (sigh...). Firmly pull the buffers and they will come out, try not to lose the springs: Using a length of 2mm metal rod, insert this into the buffer surround and wiggle it side to side until the buffer comes off: Usuallt the plastic shears off almost flush, but if the glue is a bit weak then the square shank comes out with the buffer. Now your bufferbeam will look like one of these: If you have a square hole, fill it with some plastic strip. Otherwise it will be very difficult to drill the new holes in the right place. Then, use some microstrip to fill each end of the bufferbeam channel outboard of the former buffers. Once the glue has set, sand it all down flat, flush with the front face of the bufferbeam channel: Mark new buffer holes at the correct spacing (25mm) and drill out to about 1mm diameter. Now you need some new buffer bases, which could be bits of microstrip but I made some etched ones in a spare corner of my E410 body etch: more to follow in the next post...
-
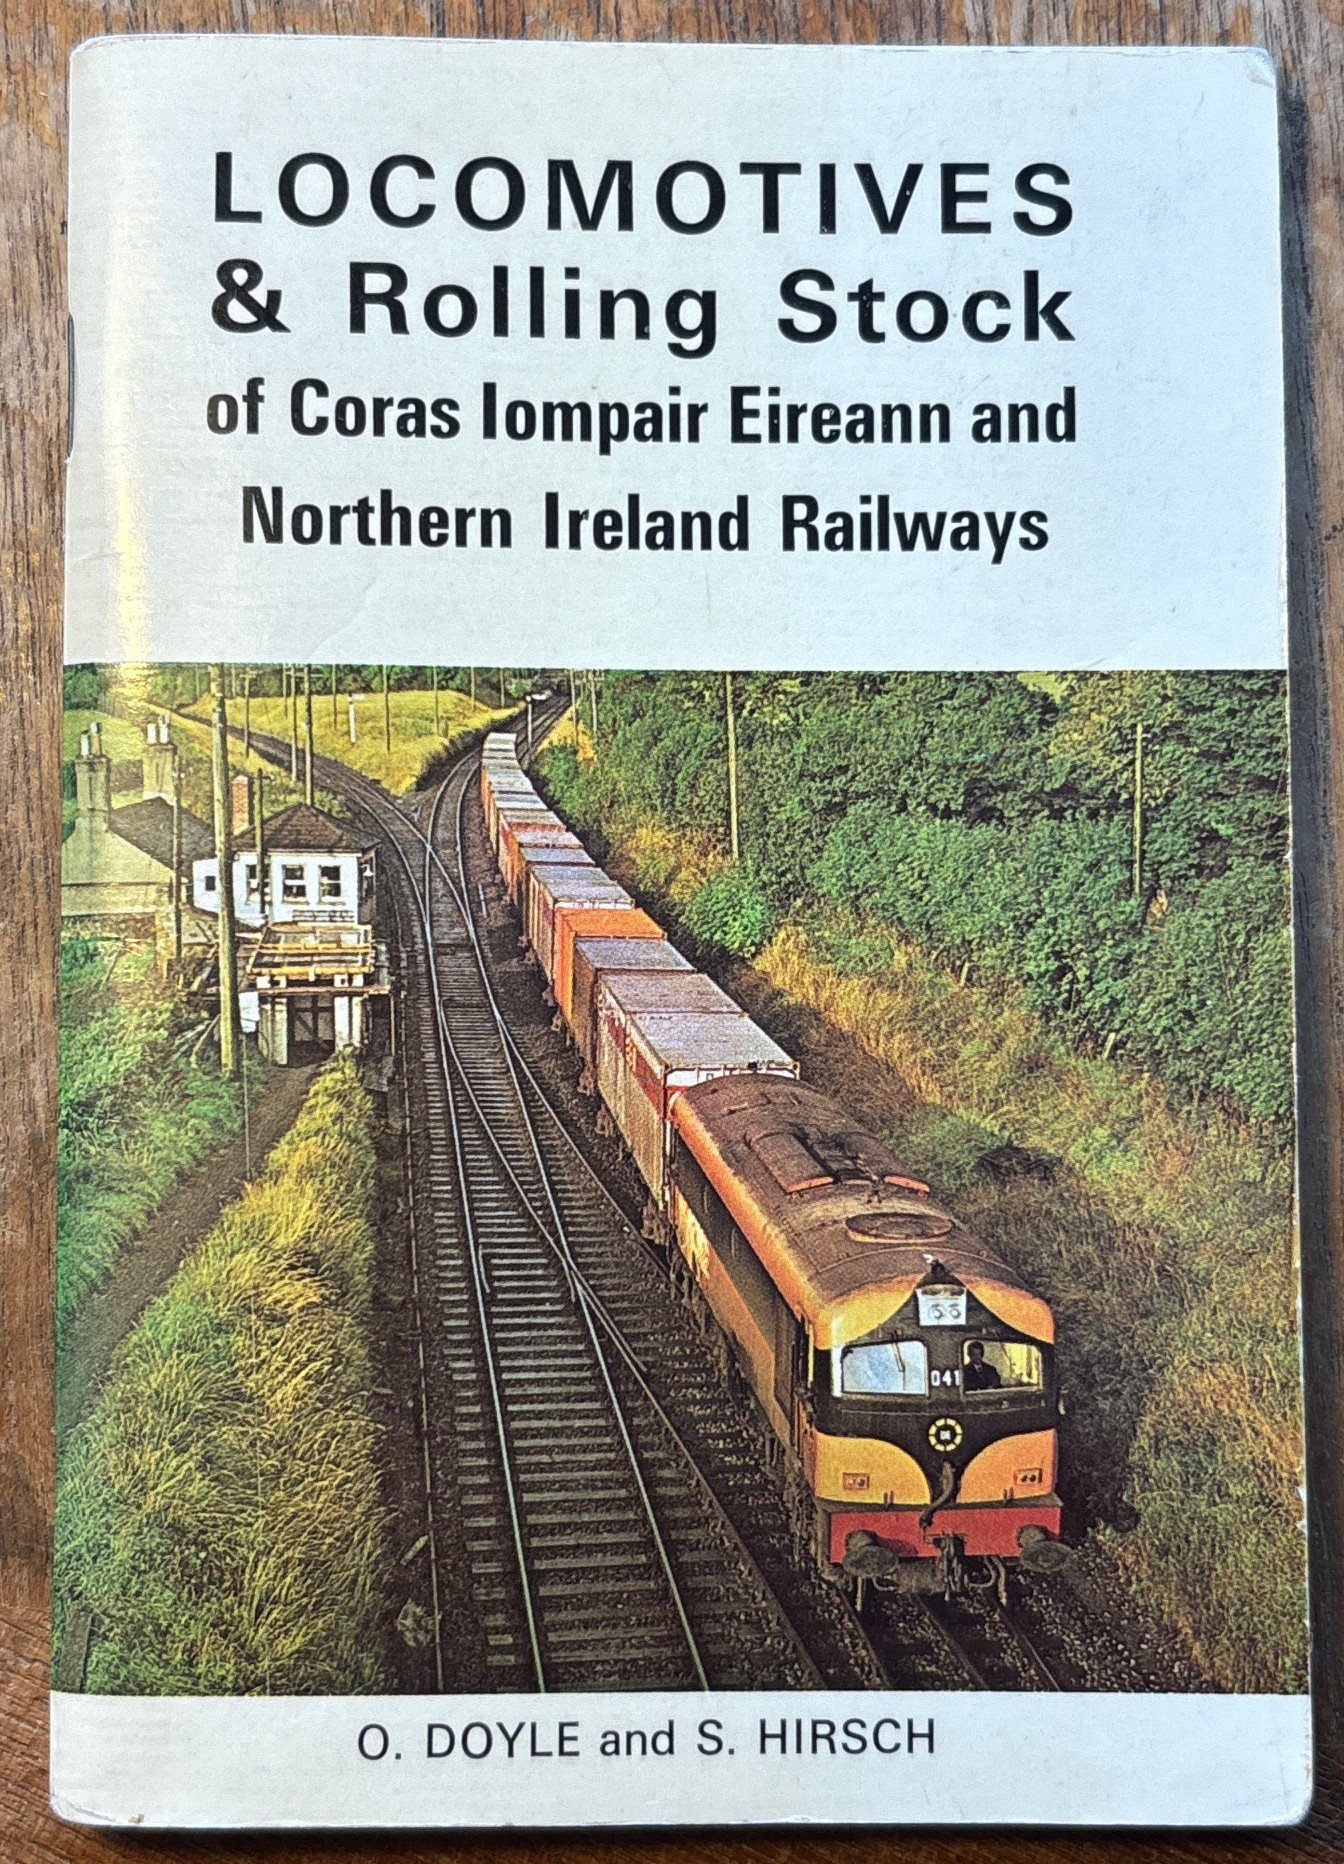
I would strongly recommend seeking out a copy of this little book: It is an illustrated stocklist of locos, carriages and wagons published in 1979. A great help in understanding the types of rolling stock in use in the 1970s. There were also 1981 and 1987 editions, perhaps not so ideal for your chosen period, though not much changed between the 1979 and 1981 editions.
-
Sorry for my incorrect answer - now I look more closely, I agree that Andy is right.
-
Wonderful - many thanks!
-
Yes. Before attaching to the floor, I'd solder a bolt in place pointing downward through the hole.
-
I note a couple of Irish nameplates in the next GWRA auction: https://www.gwra.co.uk/nextauction.html W 'The Foyle' and S 'Slieve Donard'
-
They'll be mounts for the bogies.
-
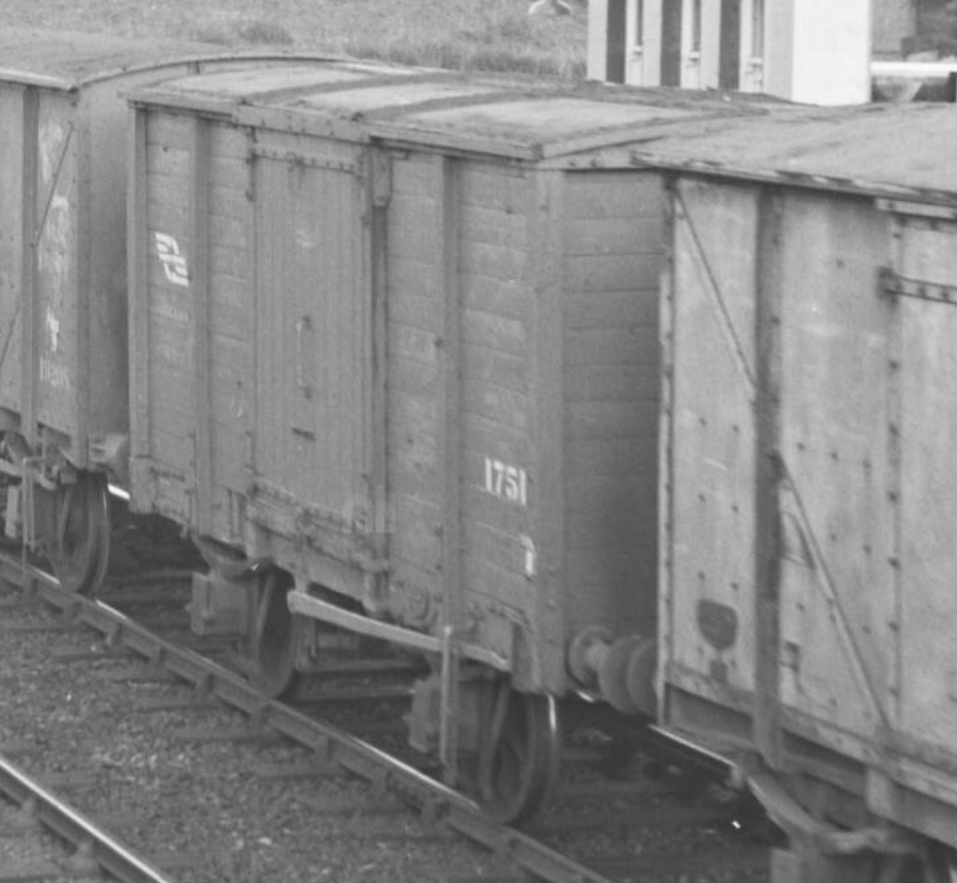
A couple of extra snippets on the MGWR vans. From the NLI archive and a photo dated 1960, this is very likely to be 1751M although the suffix is hidden by the corner stanchion. The roof has been modified and this may be a former 'convertible'. https://catalogue.nli.ie/Record/vtls000304956 And from @Westcorkrailway on the railwayana thread, this plate is off one of the IRCH vans:
-
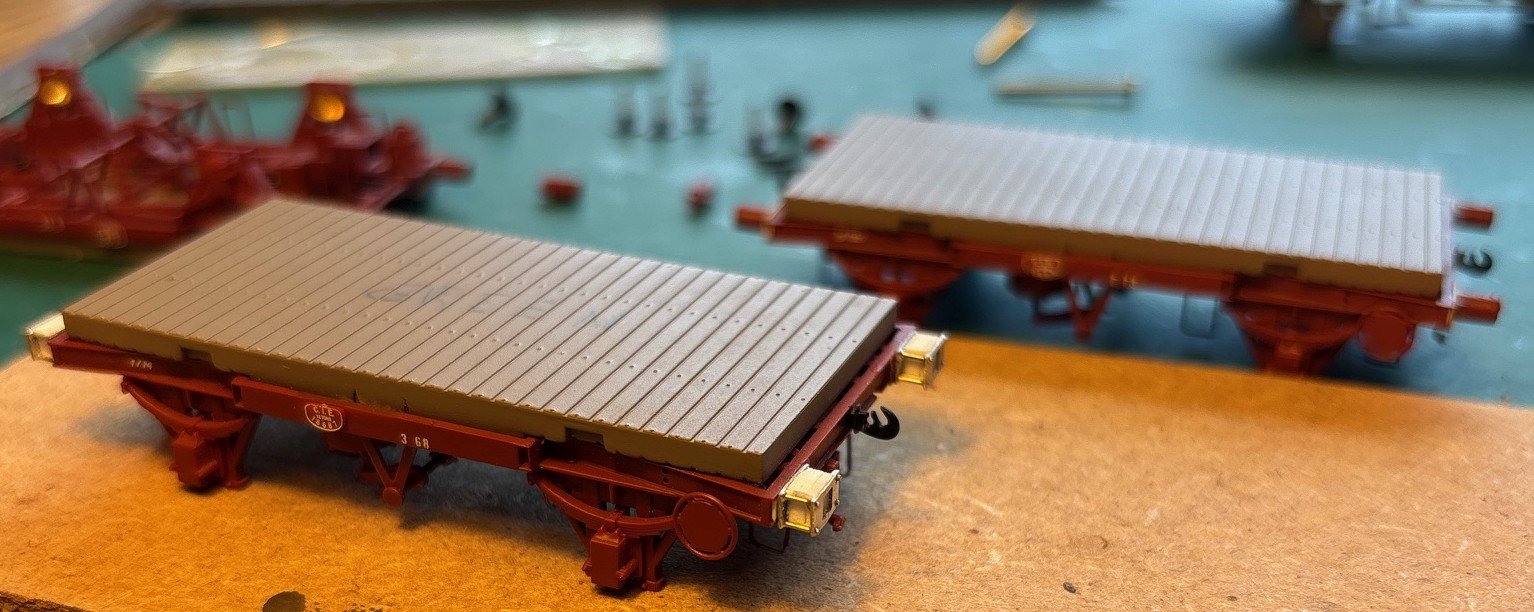
Great contrasts of new and old in the first shot. The train has a brand-new coach but ancient 6-wheel brake and vac-fitted ventilated van behind the loco (meat/fish/fruit van?). The loco is probably older still! The brand-new H vans in the sidings also contrast with GSWR vans dating back to the early 1900s.
-
Fortunately they’re not following in 5T’s footsteps to the USA. The next hurdle would be this week’s steel tariff percentage! Great work by all involved.
-
Is that what adorns most of the 071s?
-
One interesting thing that happened in the mid 1970s was an increase in services on many routes. With the completion of the A and C class re-engining projects and the delivery of the air-con Mk2 trains and the BR heating vans, there were more resources available and a new timetable with considerably more, faster trains was introduced. It turned out to be a over-optimistic and was dialled back a bit until the 071s turned up. But there was a big increase in passengers travelling, and in the late 70s and early 80s there was a very critical shortage of coaching stock, until the DART and Mk3 stock arrived. Short branch line trains were a consequence of this!
-
The second vehicle in that train appears to be a brake second, converted from a composite built in the 1950s. That should provide some more seats, a toilet and a the guard’s facilities. It does not appear to have a steam-heat boiler or generator but it’s April so perhaps warm enough to do without. Some of these brake second conversions did have boilers, but the lack of hatches and exhausts on the roof suggests this one did not. Here’s another shot of the same train from Jonathan: https://flic.kr/p/2nmq55N