Mol_PMB
-
Posts
2,377 -
Joined
-
Last visited
-
Days Won
135
Content Type
Profiles
Forums
Events
Gallery
Blogs
Community Map
Everything posted by Mol_PMB
-
Recommended books - 1960s to 1980s
Mol_PMB replied to west_clare_wanderer's question in Questions & Answers
https://ebay.us/m/gktWWE if you haven’t found one yet -
That's an impressive and ambition programme! I keep thinking I need to stop detailing wagons and start building baseboards and track.
-
Although it is partially dismantled, the wooden-framed tank container is fascinating. It appears to be resting on the underframe of a more conventional tank wagon. I found a few more photos of similar things, including the other side of the same one with different lettering: https://www.flickr.com/photos/irishrailwayarchive/54252949956/ https://www.flickr.com/photos/irishrailwayarchive/54252053167/ https://www.flickr.com/photos/irishrailwayarchive/53511272051/ https://www.flickr.com/photos/irishrailwayarchive/53511702435/ I wonder what else these were carried on? Standard gauge wagons or road vehicles?
-
Clogherhead - A GNR(I) Seaside Terminus
Mol_PMB replied to Patrick Davey's topic in Irish Model Layouts
There can be quite surprising variation in the gauge of wheelsets supplied by model manufacturers. If they are a bit too close together on the axle, they get trapped across the checkrails of turnouts and crossings, and ride up. If they are a bit too far apart, the checkrail can't do its job properly and the opposite wheel flange can ride up on the crossing nose. The bumpy running over the double slip that your video shows, suggests that the wheelsets aren't set quite right. The gauge illustrated by @Galteemore is what you need to adjust the wheels a fraction so they will run smoothly. -
Clogherhead - A GNR(I) Seaside Terminus
Mol_PMB replied to Patrick Davey's topic in Irish Model Layouts
Very nice! Have you checked the back-to-backs on the wheelsets? Looks like that might be the problem? -
Andreas' railway or the new West Clare Railway.
Mol_PMB replied to Andreas Weniger's topic in Irish Model Layouts
Most interesting - that makes a great deal of sense, especially once the maintenance had been centralised. I don't think I've seen a photo of one, but I'll have to have another look. Something 'different' to put in a model freight train! -
(Almost) Brand new out of the box. Class 93 Tri-mode on test
Mol_PMB replied to leslie10646's topic in Irish Models
Squint a bit, replace that upper orange band with a white one, delete the letters and edit the orange ring in the Beacon logo, and it could look quite Irish- 5 replies
-
- 2
-

-
- railway operations group
- class 93
- (and 1 more)
-
https://www.ebay.co.uk/itm/396786582753
-
(Almost) Brand new out of the box. Class 93 Tri-mode on test
Mol_PMB replied to leslie10646's topic in Irish Models
Nice to see! The first batch of class 99s have arrived now too. It will be interesting to see how the two classes compare when in service. Whilst they both have capability to run away from the wires, it's either at lower power (on diesel) or for relatively short distances (on batteries). OK for yards and depots, and short non-electrified sections, but not ideal for long-distance heavy haul. On diesel, the Class 93 is broadly equivalent to a 181 class, perhaps better in short bursts using the batteries as well; the Class 99 is equivalent to an 071 class. Of course, they're mainly intended as electric locos so are a great deal more complicated for no initial benefit in Ireland, but it all depends where and how quickly the knitting goes up!- 5 replies
-
- 1
-

-
- railway operations group
- class 93
- (and 1 more)
-
Excellent- thanks John. I’d like etches for a luggage van and a heating van, plus a roof for each. I would also be interested in the 3D printed detail parts for these if you do produce them.
-
Ah, that’s very good news, thank you. Panic over! For some reason I’m not getting these emails from 4D.
-
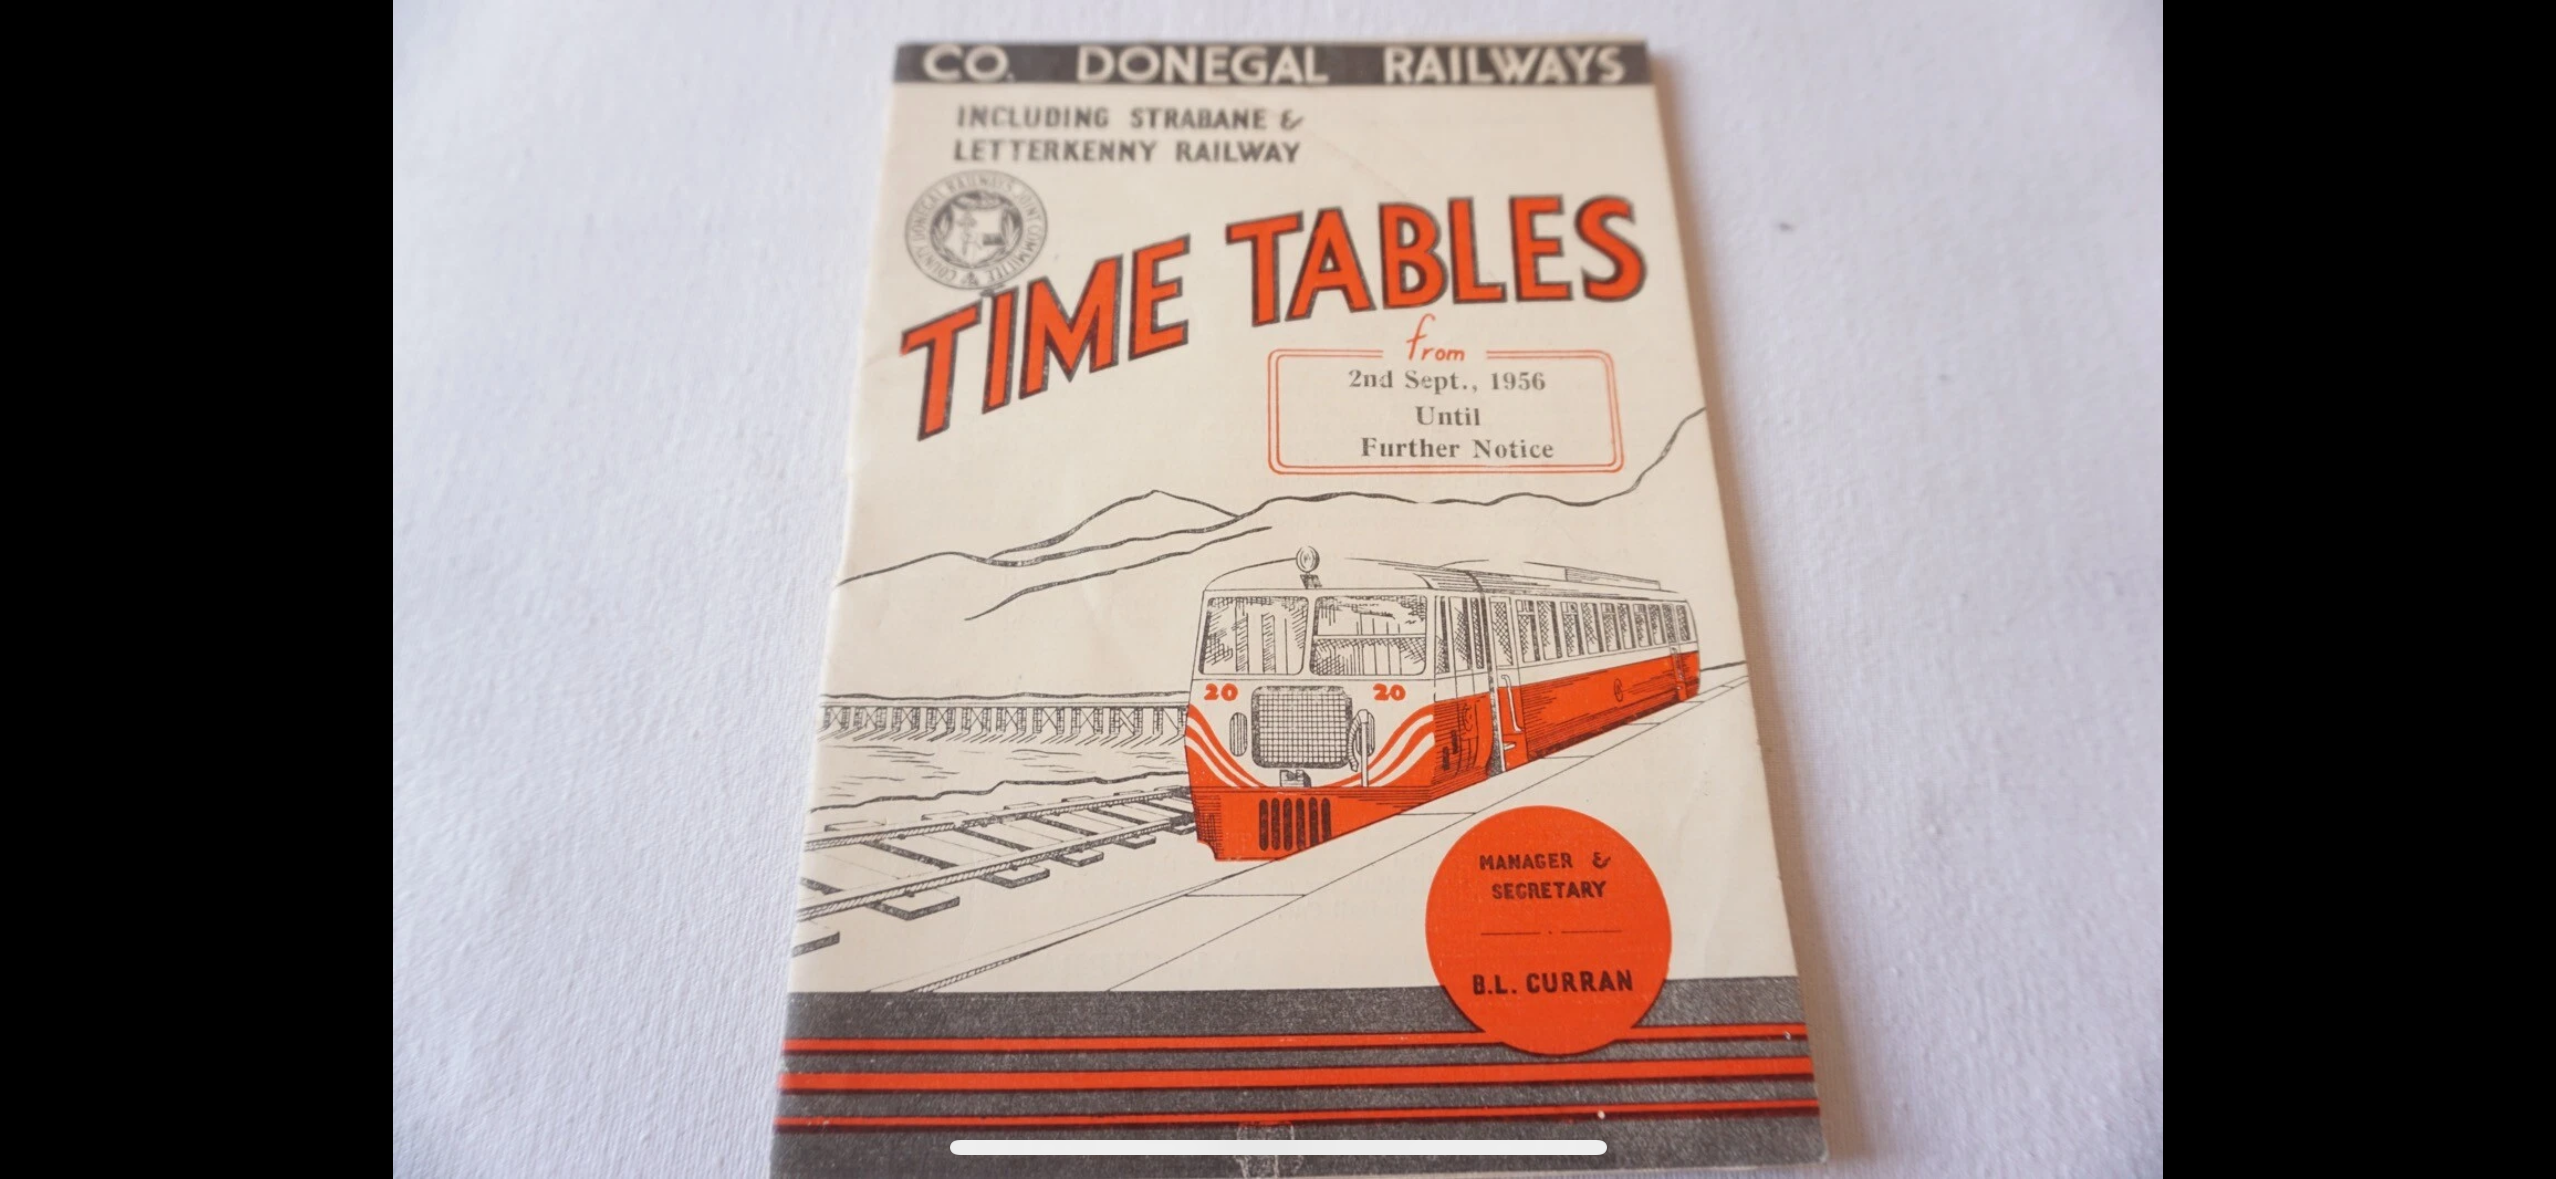
One for the Donegal enthusiasts? https://ebay.us/m/UnD7yy Interesting so see railcar 20’s fancy front end paint job featured.

-
They're a model of the same prototype as the old Hornby ones, but a much newer, finer model. The Bachmann FGAs have buffer beams at one end, which could also be added at the other and then the body would pass for a CIE 62' wagon. Not quite identical framing etc, but not bad. The bogies are wrong, but you could do a bogie swap with the IRM 42' flats, which would potentially improve both types! I don't know whether the bogie interface on the models is similar; this might be more difficult than it sounds. The early Freightliner containers would be good for Ireland in roughly the 1968-1975 period.
-
Very sad indeed, and unexpected. i have emailed them to see if I can get hold of the tooling for my etch projects including the E401. Not sure whether I’ll get it, or if it could be used by other manufacturers, but worth an ask.
-
Heritage Railways in the Republic of Ireland
Mol_PMB replied to Celtic_transport's topic in General Chat
Not always. I have had a couple of short delays and the dreaded schienenersatzvehrkehr on two occasions. My recent experiences of Ireland have been equally reliable and punctual. I cannot say the same of GB… -
Heritage Railways in the Republic of Ireland
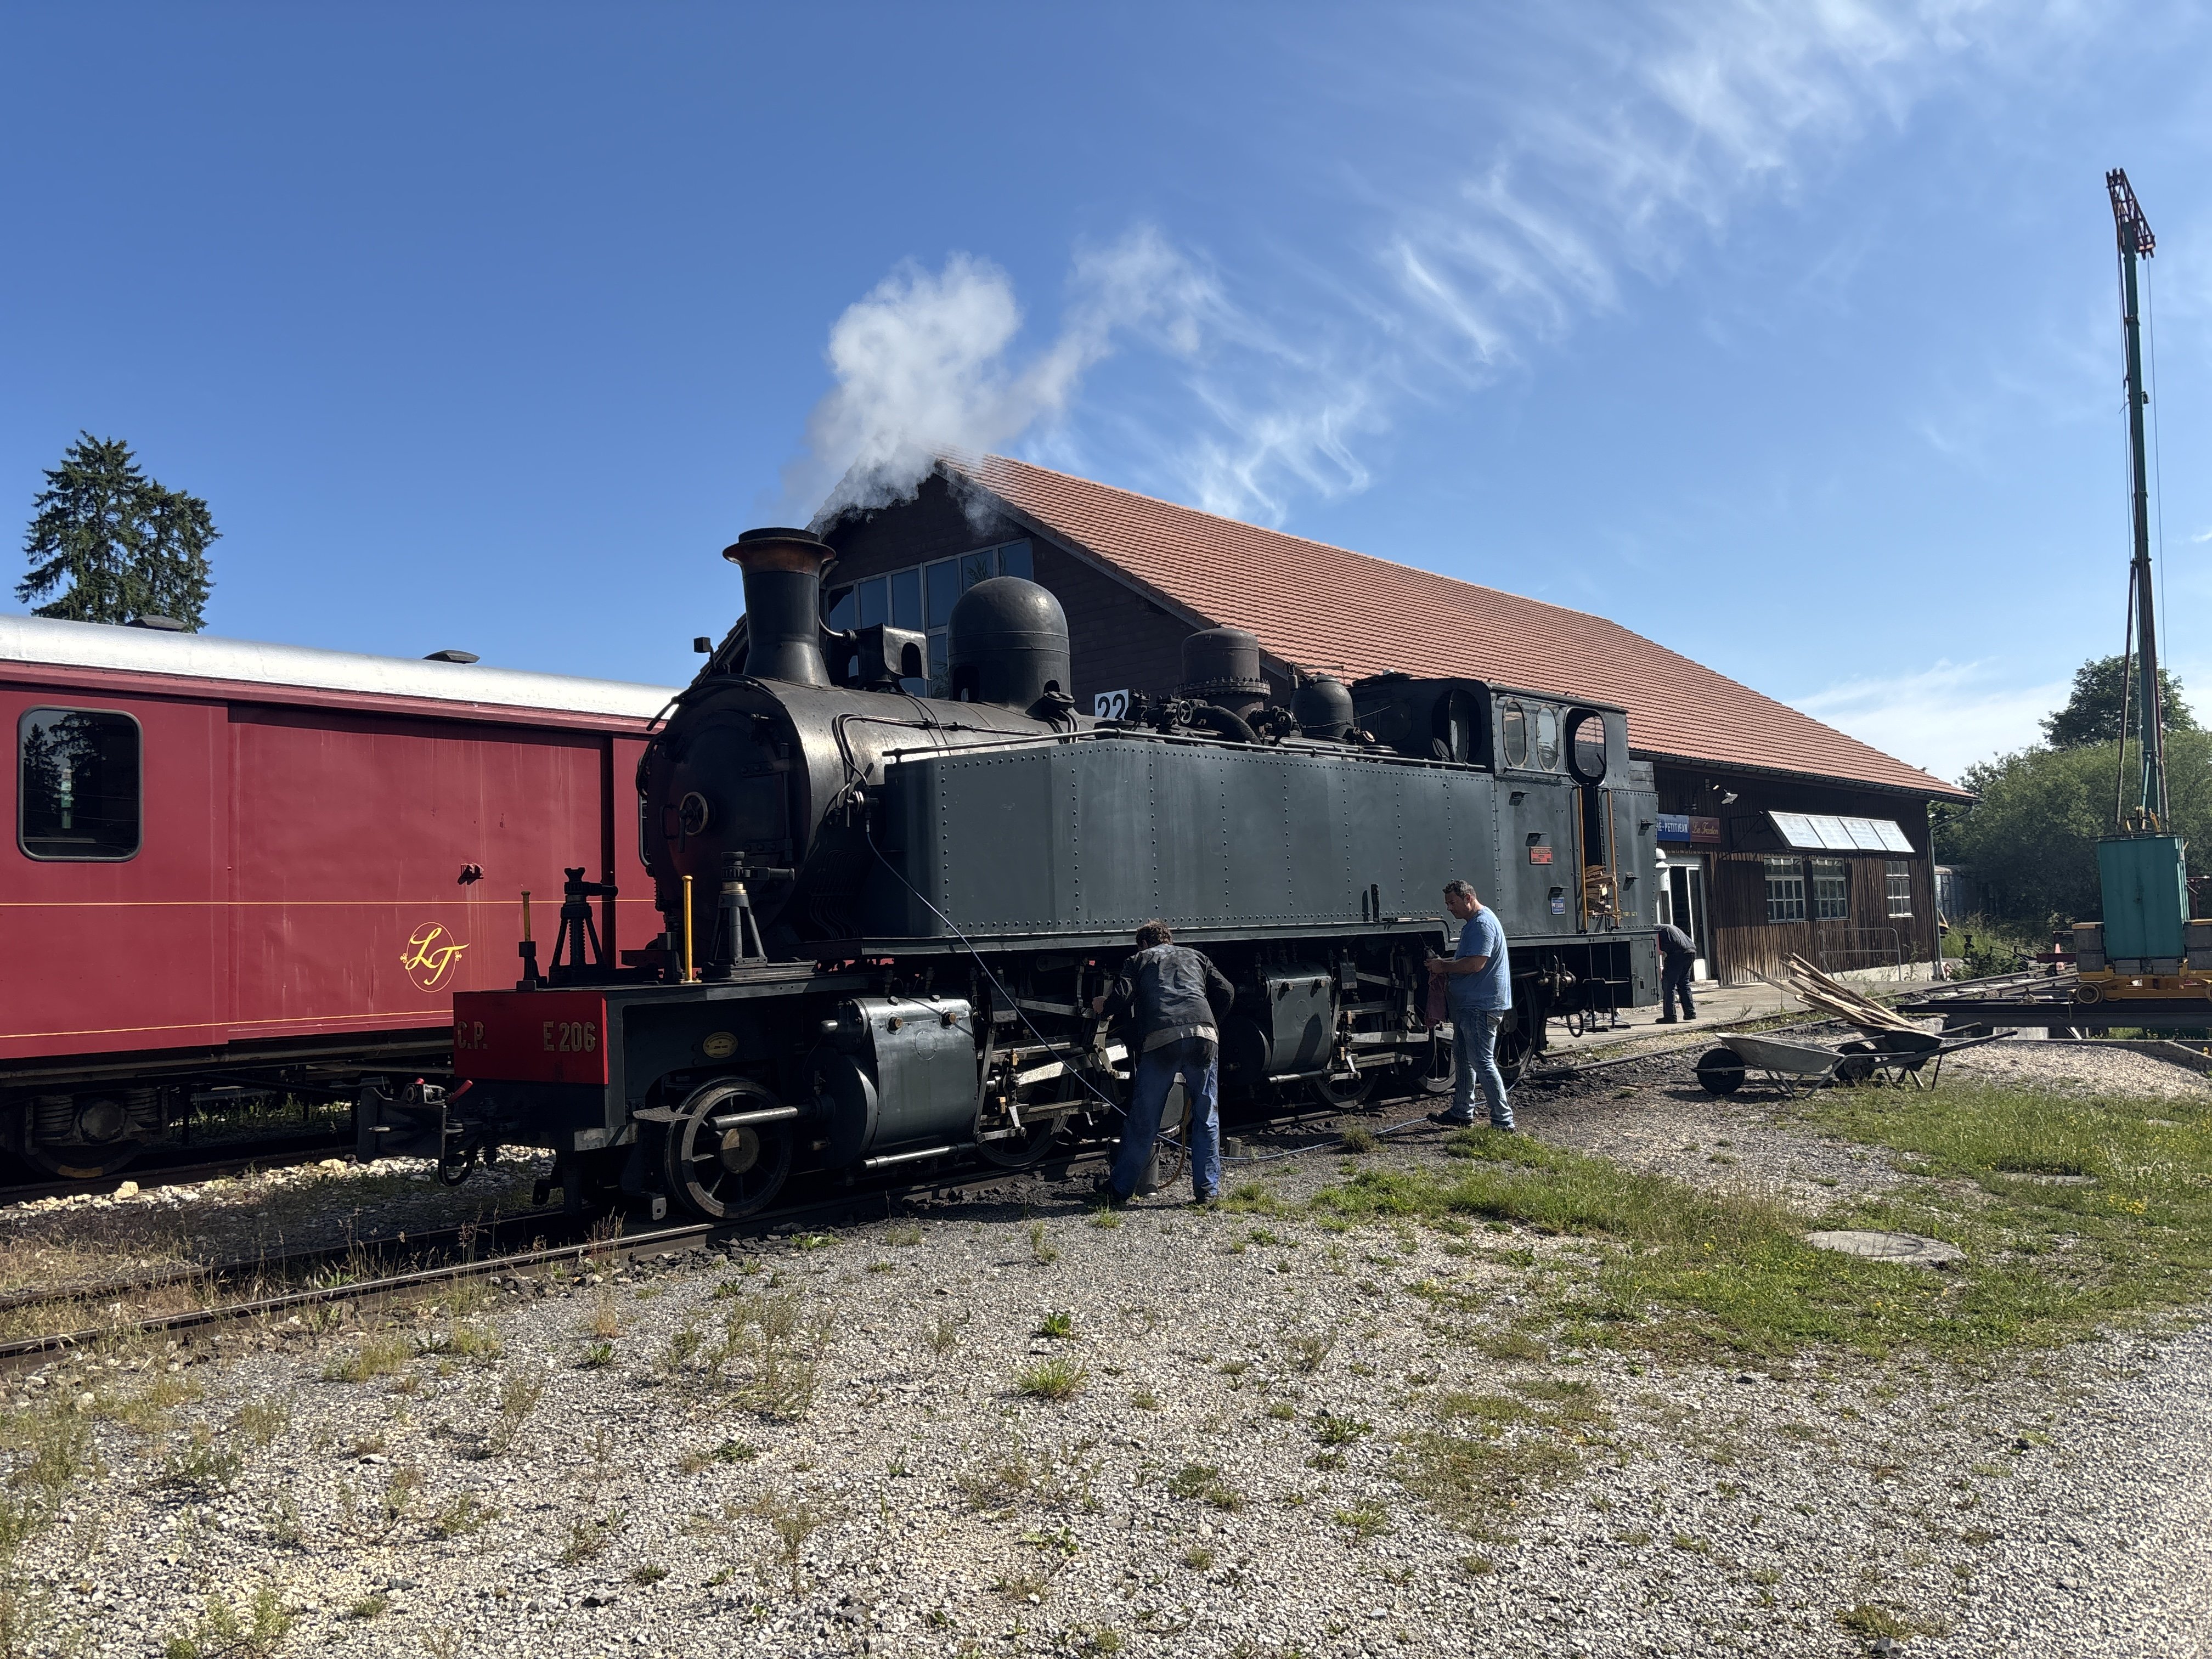
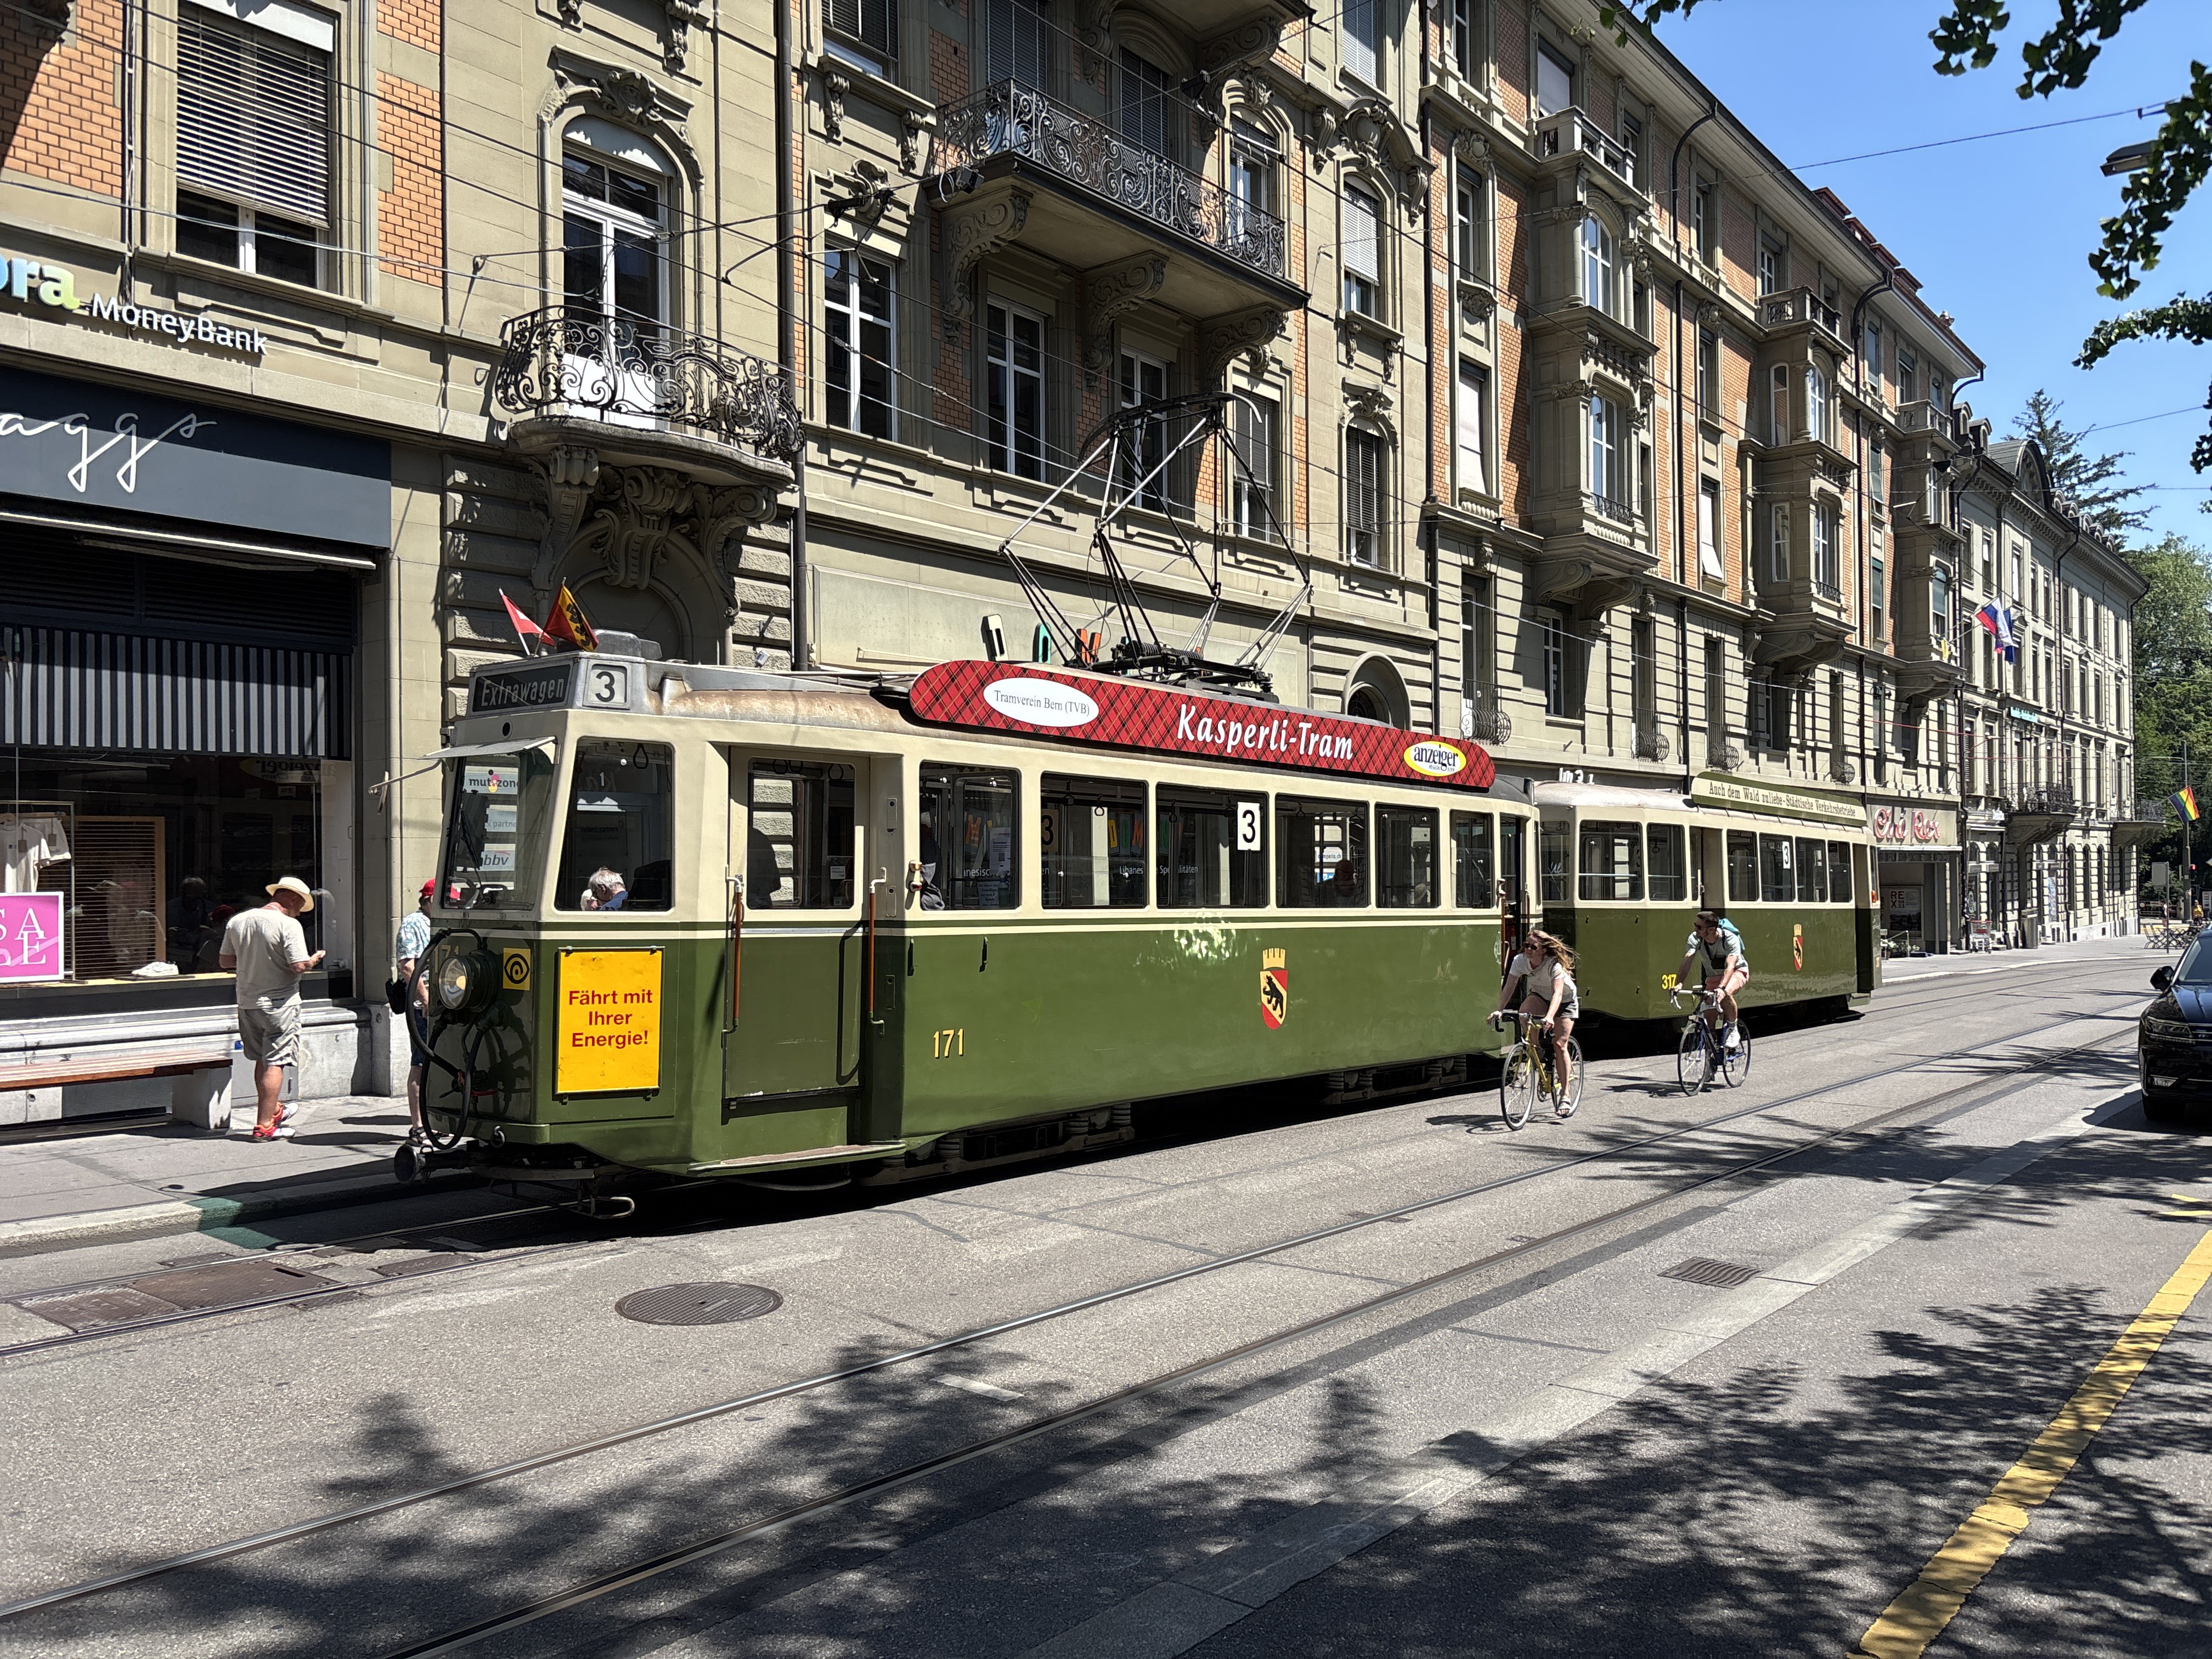
Mol_PMB replied to Celtic_transport's topic in General Chat
A couple of examples I’ve visited this weekend in Switzerland, a country with a population broadly comparable with Ireland but more densely populated. ‘La Traction’ operates steam trains over the metre gauge lines in Jura Canton. Typical of many historic groups operating steam over the rural metre-gauge lines (most of which survived in Switzerland, unlike the Irish 3’ lines). One of their Mallets in steam yesterday being prepared for the day: And in the cities, most of the tramways have an associated museum/preservation group operating tours over the city routes at weekends. Today I am in Bern and this 1940s tram is running on one of the routes all day, for a supplementary fare payable on board:
-
Wonderful stuff! Having been brought up in Essex and familiar with Chappel and the Sudbury branch as well as other local branch lines like Braintree and (former) Maldon, I think you have captured the atmosphere very well. And Shannon looks superb!
-
Andreas' railway or the new West Clare Railway.
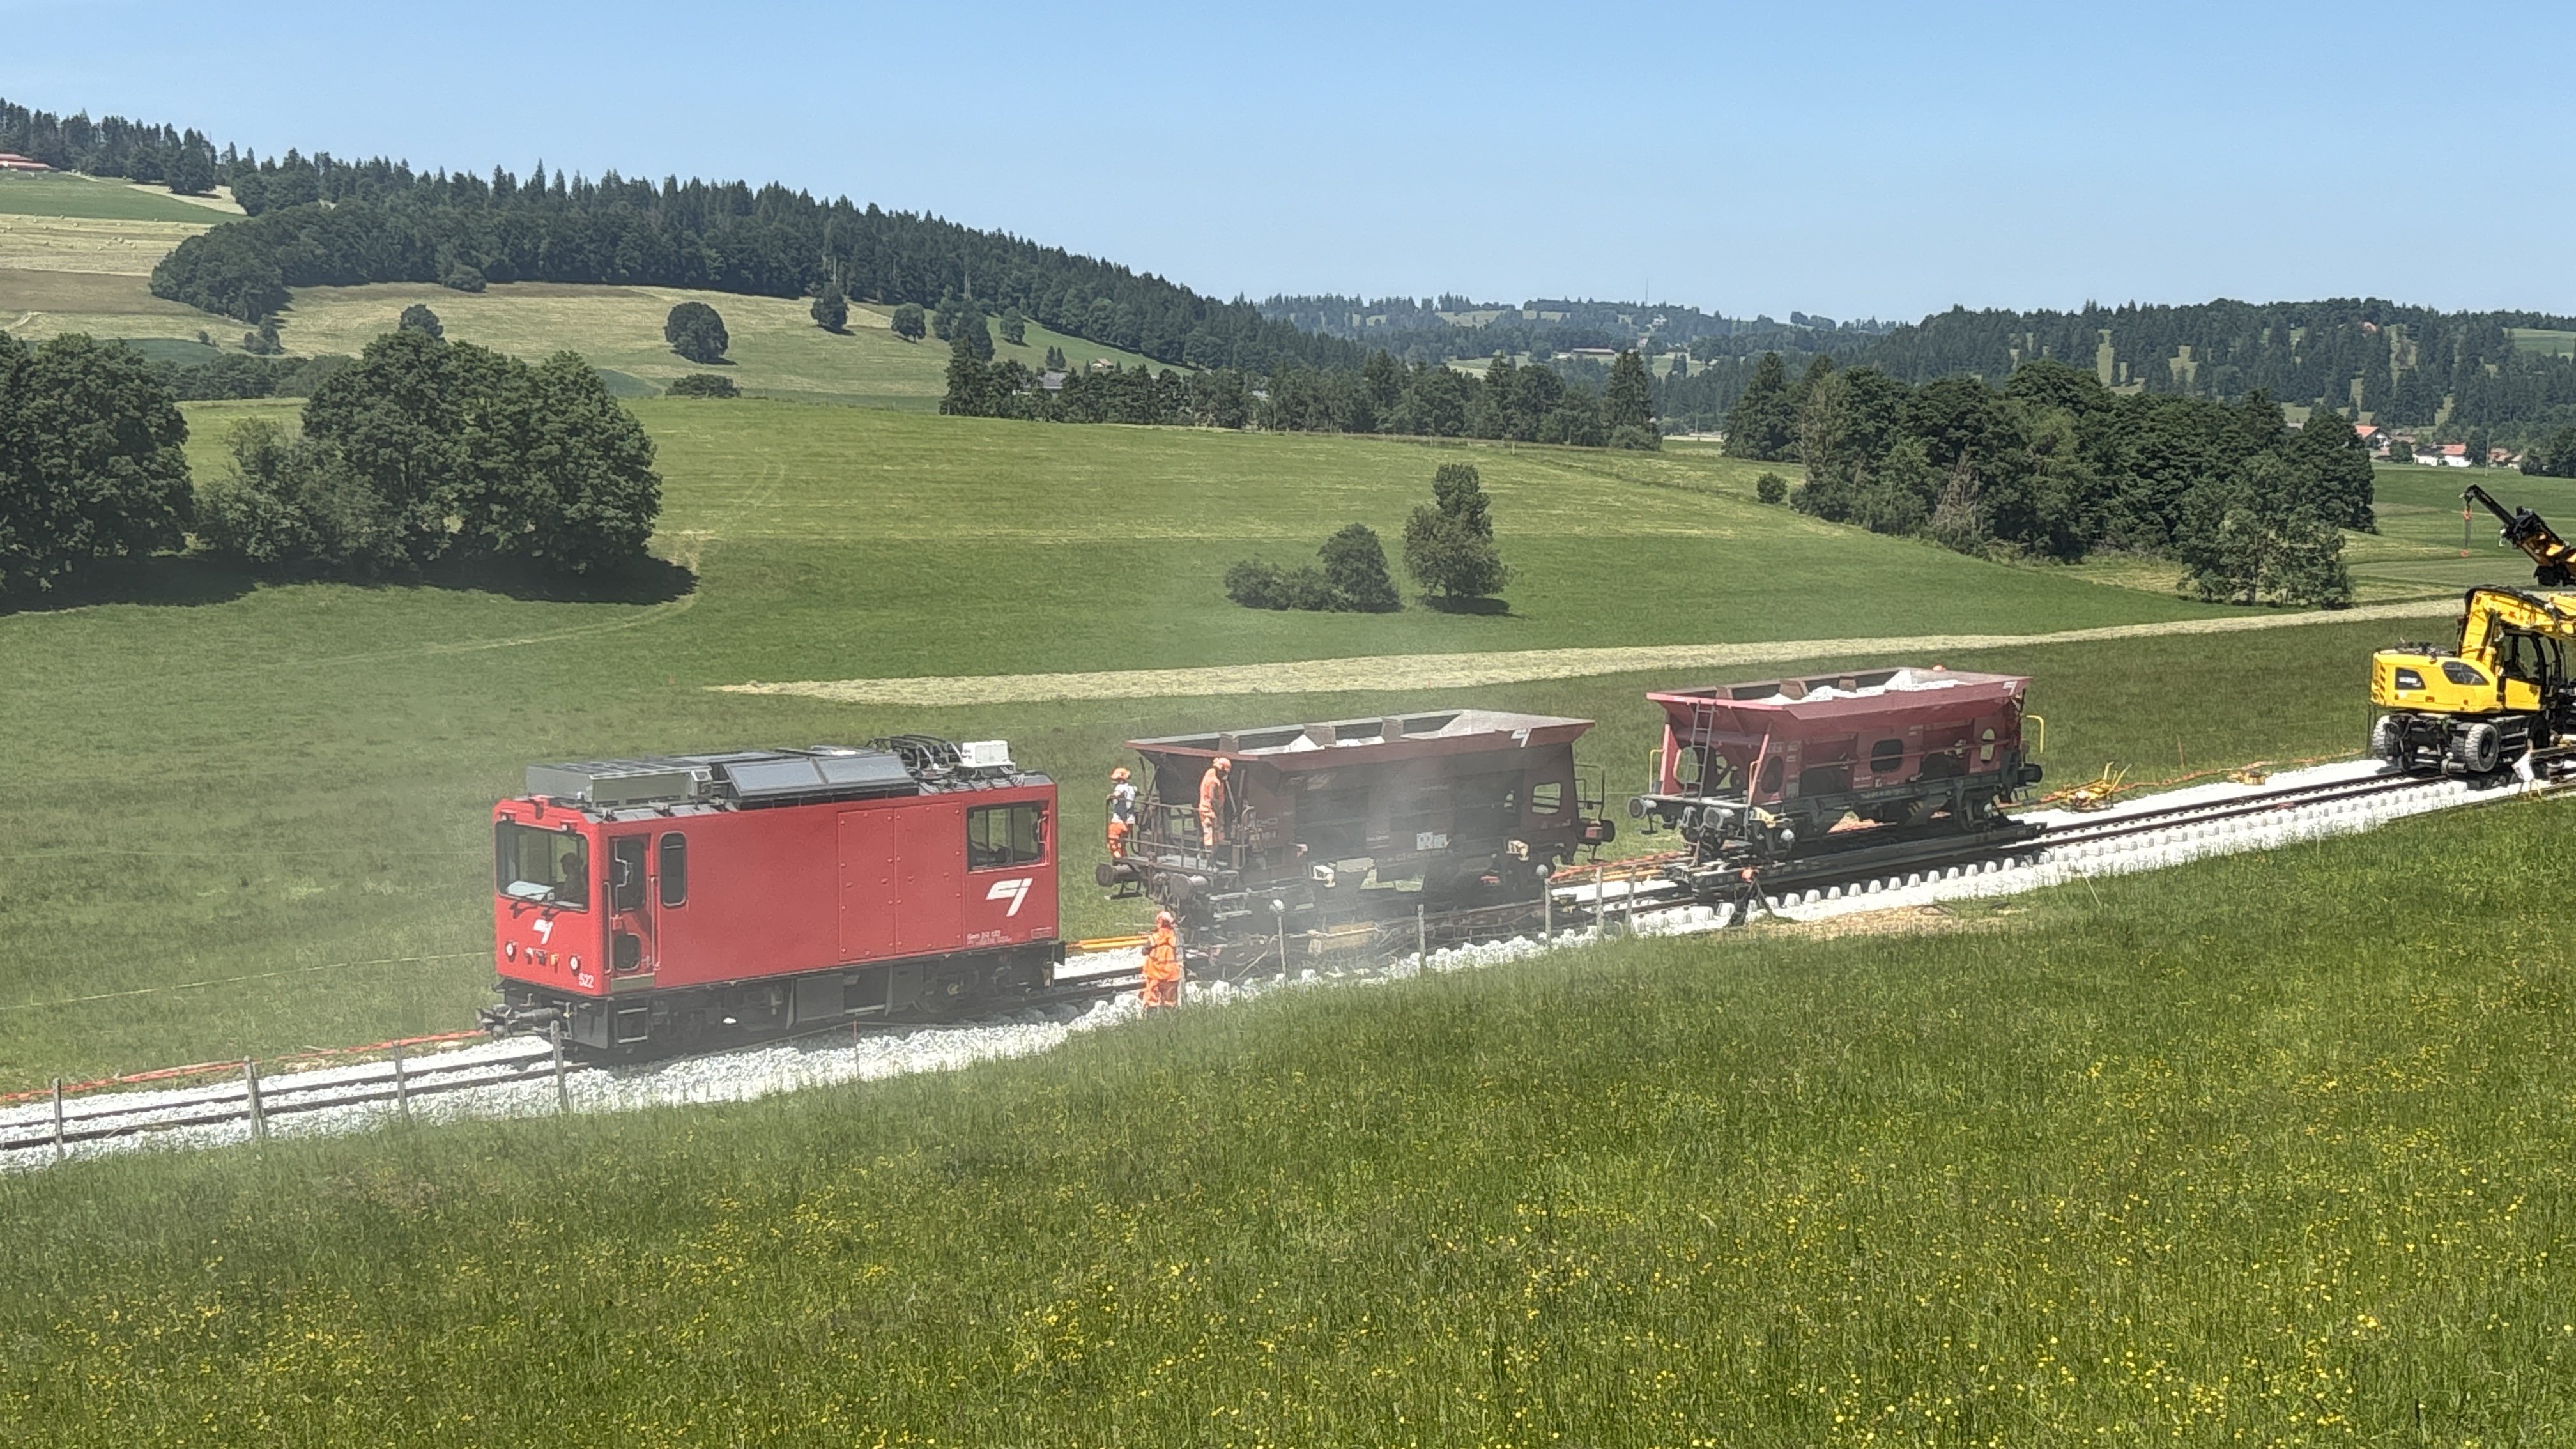
Mol_PMB replied to Andreas Weniger's topic in Irish Model Layouts
Very nice Krokodil! I am in their native country this weekend, though at the other end of it. Another rare species I’ve seen today is the transporter wagon, seen here carrying standard-gauge ballast hoppers dropping ballast on a metre-gauge line. Fun to watch. I don’t think any of the Irish narrow gauge lines used transporter wagons? They were once common in mainland Europe but rare now.
-
I have bought a few tiny milling cutters with a view to making some track gauges of the flat type. I just haven’t got round to doing it yet! Unusually, I have a mill but not a lathe - this goes back many years when a friend and I bought one of each with a plan to share resources, and then ended up moving a long way away from each other! I guess I could also make jigs for milling switch blades, given time
-
Great news! The CIE vans - which variants are you offering? My preference would be one luggage van and one heating van.
-
Heritage Railways in the Republic of Ireland
Mol_PMB replied to Celtic_transport's topic in General Chat
Germany is quite strong on heritage railways, and a decade ago I would have said Austria too. There is also a great deal of interest in railway heritage in Switzerland but the operating model is different - almost all the independent metre gauge lines have a heritage operator as well as the regular one. More like lots of mini-RPSIs, but most now have operating licenses in their own right rather than relying on the host railway for drivers etc. Switzerland probably has more heritage operations per capita than the UK, but they operate less frequently. -
I’m learning Templot and selecting 21mm gauge is easy, as is setting your preferred checkrail clearances etc. Some other aspects have a bit of a learning curve but I’m getting there. Personally I don’t have printing capability. Also a lot of the standard templates are for bullhead rail whereas my preferred prototype is flat-bottom. But it’s all getting closer…
-
Heritage Railways in the Republic of Ireland
Mol_PMB replied to Celtic_transport's topic in General Chat
That is a good example of the challenge. It doesn’t just need a vast amount of money and commitment to create in the first place, it also needs an ongoing commitment from many other people to keep it going long term. -
Heritage Railways in the Republic of Ireland
Mol_PMB replied to Celtic_transport's topic in General Chat
It’s worth noting though that the ‘running costs’ of a large old building can be very high, especially if it’s past its best and you’re trying to keep the internal environment suitable for the conservation of historic artefacts (e.g. moderately stable temperature and humidity) Most museums don’t make money, even NRM York has become more of a food court than a museum in an attempt to cover its costs. To achieve an income with any hope of covering the costs you would need the museum to be open most days. A few special events per year won’t cut it. -
I’m glad someone here has picked those up. I was briefly tempted by them but they don’t really suit my plans. I now have a lot of work ahead of me to regauge and backdate 9 grey bubbles. I’m not far off finishing the batch of 7 H vans so perhaps the bubbles will be next. My imaginary Fenit Pier layout is going to need an imaginary model Vigan to handle the cement traffic!