Mol_PMB
-
Posts
2,320 -
Joined
-
Last visited
-
Days Won
129
Content Type
Profiles
Forums
Events
Gallery
Everything posted by Mol_PMB
-
This looks like a nice plan with plenty of scope for some varied scenery. Somewhere to run your NIR stock? The boards will provide a generous size for the layout - I like the idea of using the wider boards to make the most of the scenery where hopefully you won't have to reach over too often. I look forward to seeing it develop!
-
One Heating & Luggage Van kit, plus one Luggage Van Kit, please.
-
I'm pleased to say that I now have official permission to measure and photograph the van at Cultra, so in late August I'll gather that data and then prepare a scale drawing. Thanks to the staff at Cultra for taking the time to respond to my request and grant permission.
-
3ft gauge steam at the giants causeway railway
Mol_PMB replied to Jamie Davis's topic in General Chat
Interesting, thanks for the info. Here's an old pic of mine on the one occasion I made it to Shane's Castle: The only time I've been to Giant's Causeway was before the present railway existed (but long after the tramway closed). Is the present railway worth a visit? -
Wow, quick and quality work! I look forward to seeing this develop and hopefully it will inspire me to get on with some of my own projects. I've got a set of those universal rods in my stash but haven't tried using them yet, so it's good to see your approach to it.
-
Announced April 2023 for delivery Q2 2024, they’re not yet so far behind as some projects! It would be nice to have an update but I appreciate the AS/IRM team have a lot going on at present. Somehow I’ve ended up with 5 on order, 3 paid for months ago. Looking forward to them, and I have some potential conversions in mind too. Do they ever sell ‘seconds’ or ‘misshapes’? Maybe that’s just for biscuits.
-
That’s not too bad - you can still see the rails! It’s when the train leaves a bow-wave that it’s properly flooded. I have once been on a DMU that braved 6 inches of floodwater above the rails and left a bow wave. It was all for nothing, the track dropped further and when the driver could see the platform surface was underwater at the next station, he stopped before he got completely stranded and went back to dry land!
-
Those 6-wheelers look excellent! Any chance of a photo of the underside - how did you arrange any sideplay/steering on the wheelsets?
-
Hopefully it’s not the Boyne Bridge that’s flooded!
-
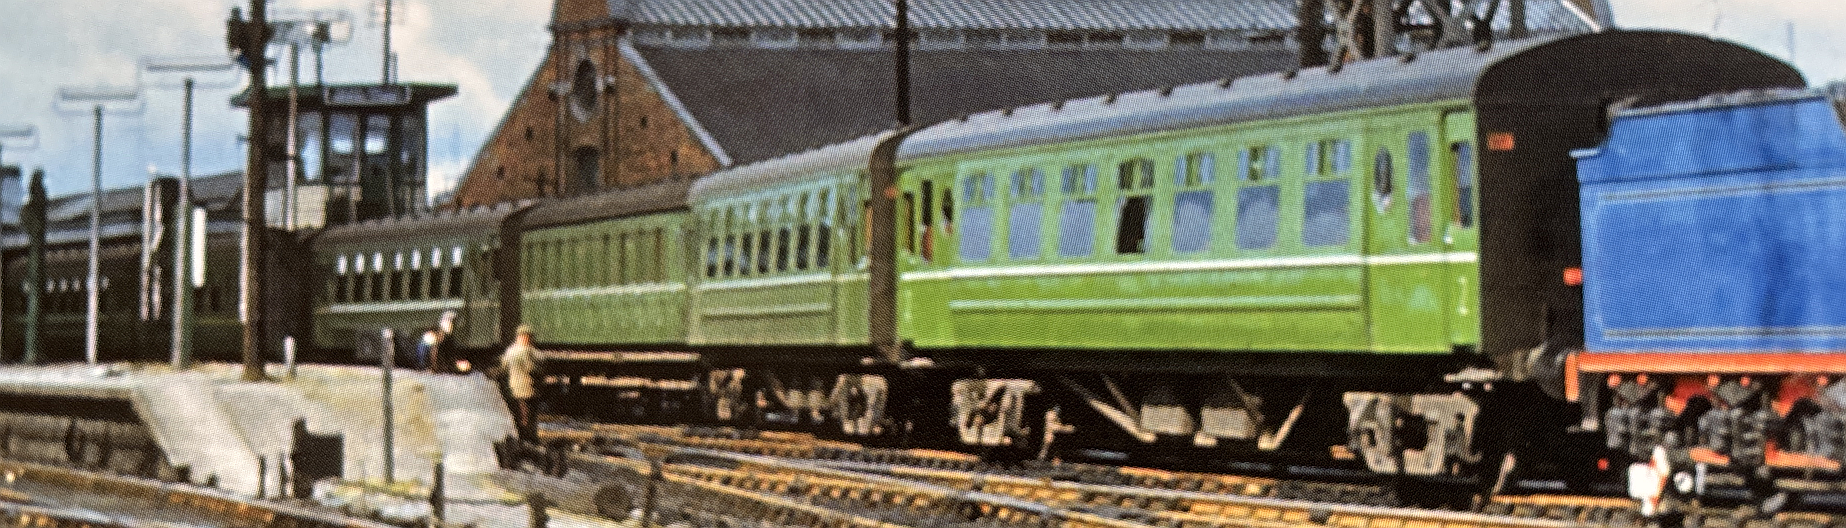
I can't find the good photo now (I'm at work) but this is one of the brake standard conversions, note the headlight on the end: https://www.flickr.com/photos/irishrailwayarchive/54252109222/
-
No, they were powered. As far as I am aware there were two types of driving trailer converted for use with the AEC railcars - at least one Park Royal on the W&T section, and two of the early 1950s CIE-built brake standards. Good photos of both types exist.
-
80 Class were Mk2s of course, indeed some had trailer cars from the original Enterprise Mk2 fleet. Before the 3000s were delivered they would have been first choice for a substitution on the Enterprise, but I wonder when that last happened?
-
It couldn't have been much later than 2007 as the Cravens and Mk2s were withdrawn around then.
-
Interesting - thanks for sharing some photos of the budget paint job - ideal for the modeller without a lining pen! They all appear to be dark green, and (where class designations are carried) third class rather than second class. In C.Creedon's book on the CBSCR (volume 3) there are several references to carriages being sent to Rocksavage for painting in the mid-1950s, including two of those converted into driving trailers for the AEC railcars. I thought that was interesting because I've not seen a photo of a driving trailer in use on the CBSCR, maybe they just visited for the paint job? In which case, I wonder if Rocksavage managed to match the standards of Inchicore! I'm sure I found some photos of these driving trailers converted from CIE-built brake standards somewhere, but I seem to have mislaid my reference. Will have to look again...
-
RPSI steam Enterprise, or the regular version?
-
They seem to be multiplying! Is that disembodied tail a fifth one?
-
"Voiding the Warranty" - Mol's experiments in 21mm gauge
Mol_PMB replied to Mol_PMB's topic in Irish Models
I'm still on a learning curve with Templot - I can manage a crossover on straight track, or a simple turnout on a curve, but I haven't mastered Y-points (contrary flexure turnouts) yet. -
The statement might have been true before BnM’s expansion in the 1940s/1950s. In the 1920s, the railway system used to build Ardnacrusha was probably bigger too.
-
Nice. I see that your work is being inspected by the supervisor.
-
An update on the classes and designations after a bit of searching online and in the library. I think that in southern Ireland the 3-class system was dropped before the formation of CIE, so that in 1945 there was just first and third. Coaches inherited by CIE and repainted into the more complex dark green livery with waist and cantrail lining ought to have class designations on all doors, reading 1 or 3. Also these normally had snails. There were still plenty of older coaches in this livery around in the mid-1950s. Some inherited coaches were painted into a simplified unlined dark green livery, they may or may not have had class designations and snails. The earlier coaches built by CIE in 1951/1952 were dark green, no lining, no snail, with a 1 on first class doors, but no other class designations. Those built in 1953/1954 were the same but with a narrow line at the waist, no snail, with a 1 on first class doors, but no other class designations. The AEC railcars were delivered in this scheme but did have third class 3 designations on the doors as well as first class 1. Carriages built in 1954/1955 on the triangulated underframe with commonwealth bogies (including Park Royals) were the same livery as the 1953/1954 coaches, but had silver bogies and underframes. Third Class was redesignated Second Class on 3rd June 1956, the same date as in the UK. Some coaches may have been outshopped with 2 designations on the doors a little in advance of the official changeover, this photo is dated 2 weeks prior: AEC railcar 2646 seen here only a few days after the class redesignation already carries 2 numerals: Coaches weren't all repainted overnight, and this interesting photo dated September 1956 shows the first vehicle with 1 and 2 on the doors. Note that the 1s have been there a while and are weathered, whereas the 2s are freshly added: Meanwhile the second vehicle is still in the 1940s livery with 1s and 3s on the doors (and snails). Same date in September 1956, note the Park Royals on the right, one of which has received a 2 but the other hasn't: So it looks like some carriages had the 2s added to their existing paint job, and therefore 2s could be seen on dark green coaches: So, regardless of the exact year in the 1950s you're modelling, I think your Bredin composite with the waist and cantrail lines needs some 1 and 3 class numerals and some snails. Your open standard can needs a thin waist line but doesn't need class numerals or snails. This photo is cropped from page 4 of Keith Pirt Colour Portfolio (an excellent album - highly recommended) It dates from 1961, so a later period, but I think it shows most clearly the contrast in green liveries on Park Royals. The leading coach is freshly-painted light green with black ends, 2 class designations on the doors. Note that the window frames have been painted green. The second coach is the same, but a bit weathered. The fourth coach is is much darker green, despite being at the same angle to the sun and not in shade - we can see the sunlight glinting off the opening toplights of the windows. They would glint, because when the Park Royals entered service in dark green these toplights were left unpainted, as seen in the two of Ernie's photos immediately above this one, and also shown in the brand new photo: https://www.flickr.com/photos/irishrailwayarchive/53506776188 When new they also had dark green ends, again the same three photos prove this. So for the Park Royals, I am convinced that the following variants existed in the green period: Dark green on sides and ends, unpainted aluminium window toplights. Eau-de-nil waist line. No class designation on doors. Silver underframe and bogies (got dirty quickly). Dark green on sides and ends, unpainted aluminium window toplights. Eau-de-nil waist line. 2 class designation added on doors. Silver underframe and bogies (got dirty quickly). Light green on sides including window toplights. Eau-de-nil waist line. 2 class designation on doors. Black ends with dimension plates picked out in red. Underframe and bogies may have been painted black or just left dirty. There may have been other variants as well. At some stage in the late 1950s the doors were modified which might create further variants. It is not clear from the Accurascale website which shade(s) of green they are using. The only green decorated sample I've seen is light green with black ends, which is in accordance with the first 2 coaches in the image above except it is lacking the 2 class designations on the doors. Are the model coaches with green ends a darker shade? We shall see...

-
I suppose key dates are when CIE abolished the 3-class system, and when third was re-designated second. I haven’t found definitive dates for those changes but it would have been 1950s. I think this railcar has a 3 class indication on the rear door in 1953: Whereas the 1959 photos have a 2 class on the railcars: Shades of green are so variable in photos! I find them hard to interpret especially if there were supposed to only be two shades of green.
-
That train is looking great! I agree that a single waist stripe is correct for your open standard as built. My belief is that the Park Royals were delivered in dark green with the single waist stripe and green ends. Silver underframe and bogies but those got dirty very quickly. Then at their first repaint they got light green with a single waist stripe and black ends. Another observation relates to the class numerals. In the original dark green livery with multiple lines, all classes were marked with numerals 1 2 3 on the doors. In the simpler dark green livery applied to the earlier CIE-built carriages, first class had 1 numerals on the doors, but second/standard class was usually not marked. Whereas in the silver livery and the light green livery, there were 2 numerals on standard class doors as well as 1 on the first. I haven’t proven this 100% and there were surely exceptions to the rule, but it may be a useful guide to the shade of green in monochrome photos.
-
"Voiding the Warranty" - Mol's experiments in 21mm gauge
Mol_PMB replied to Mol_PMB's topic in Irish Models
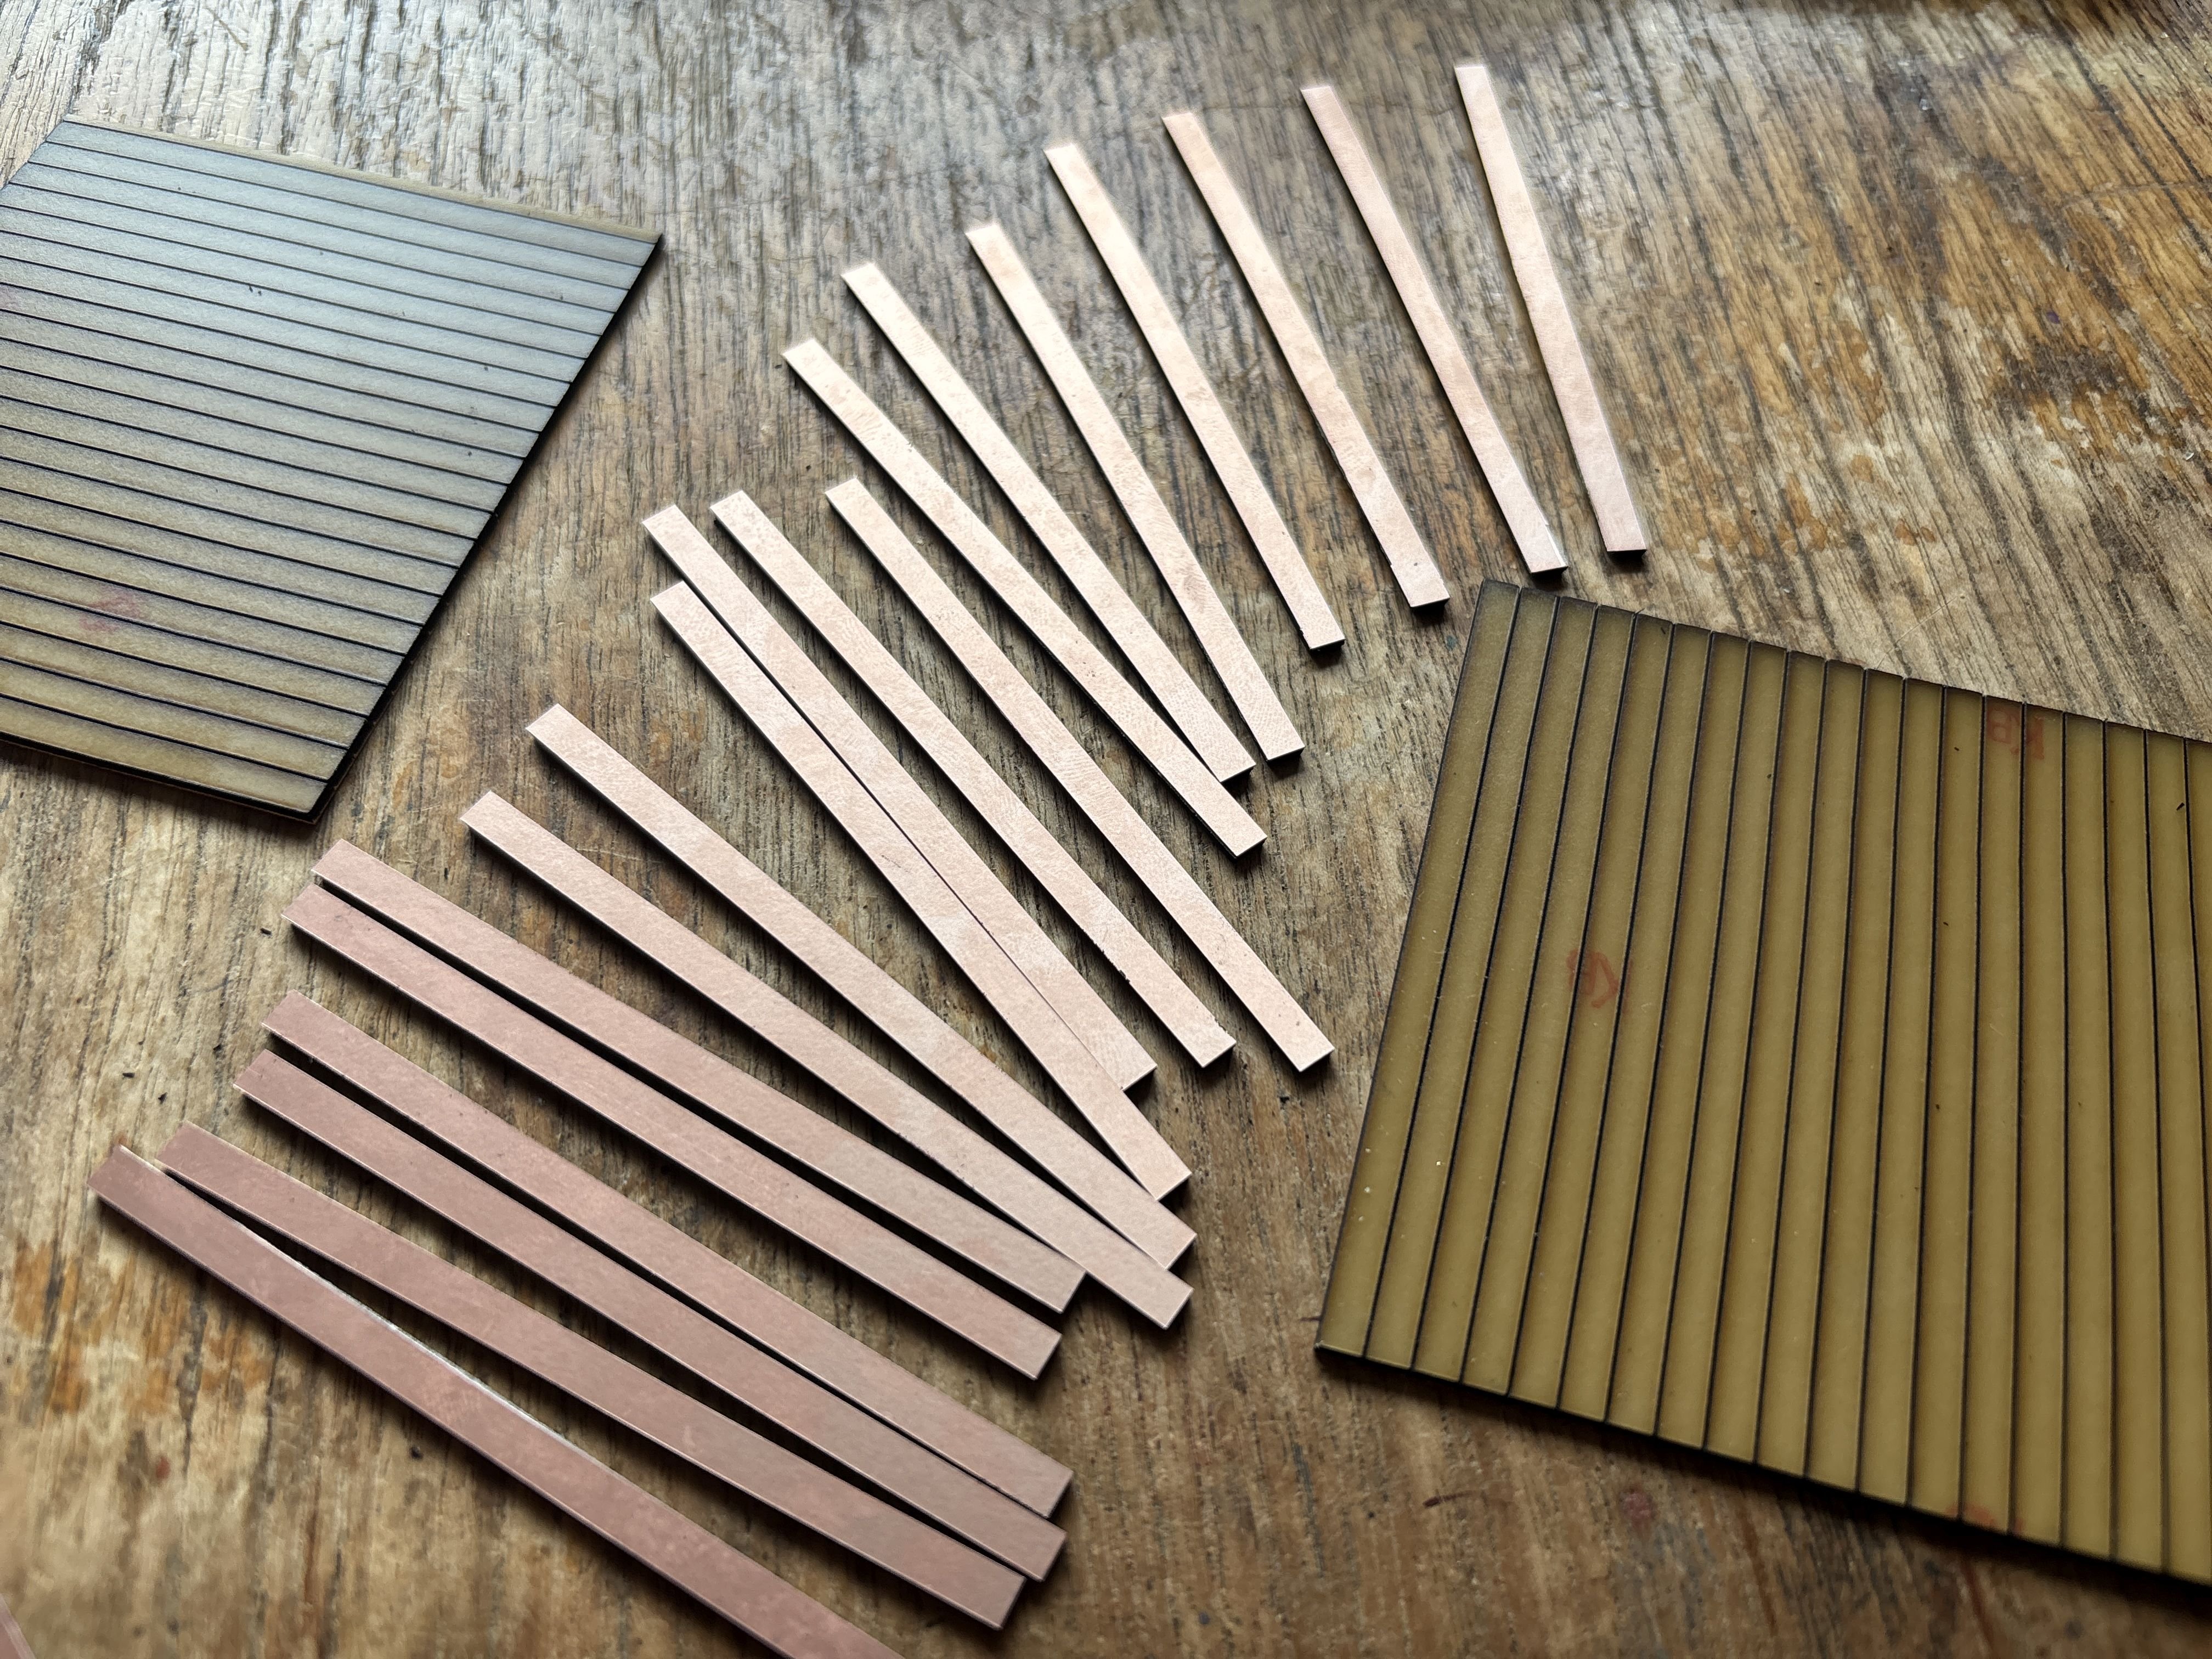
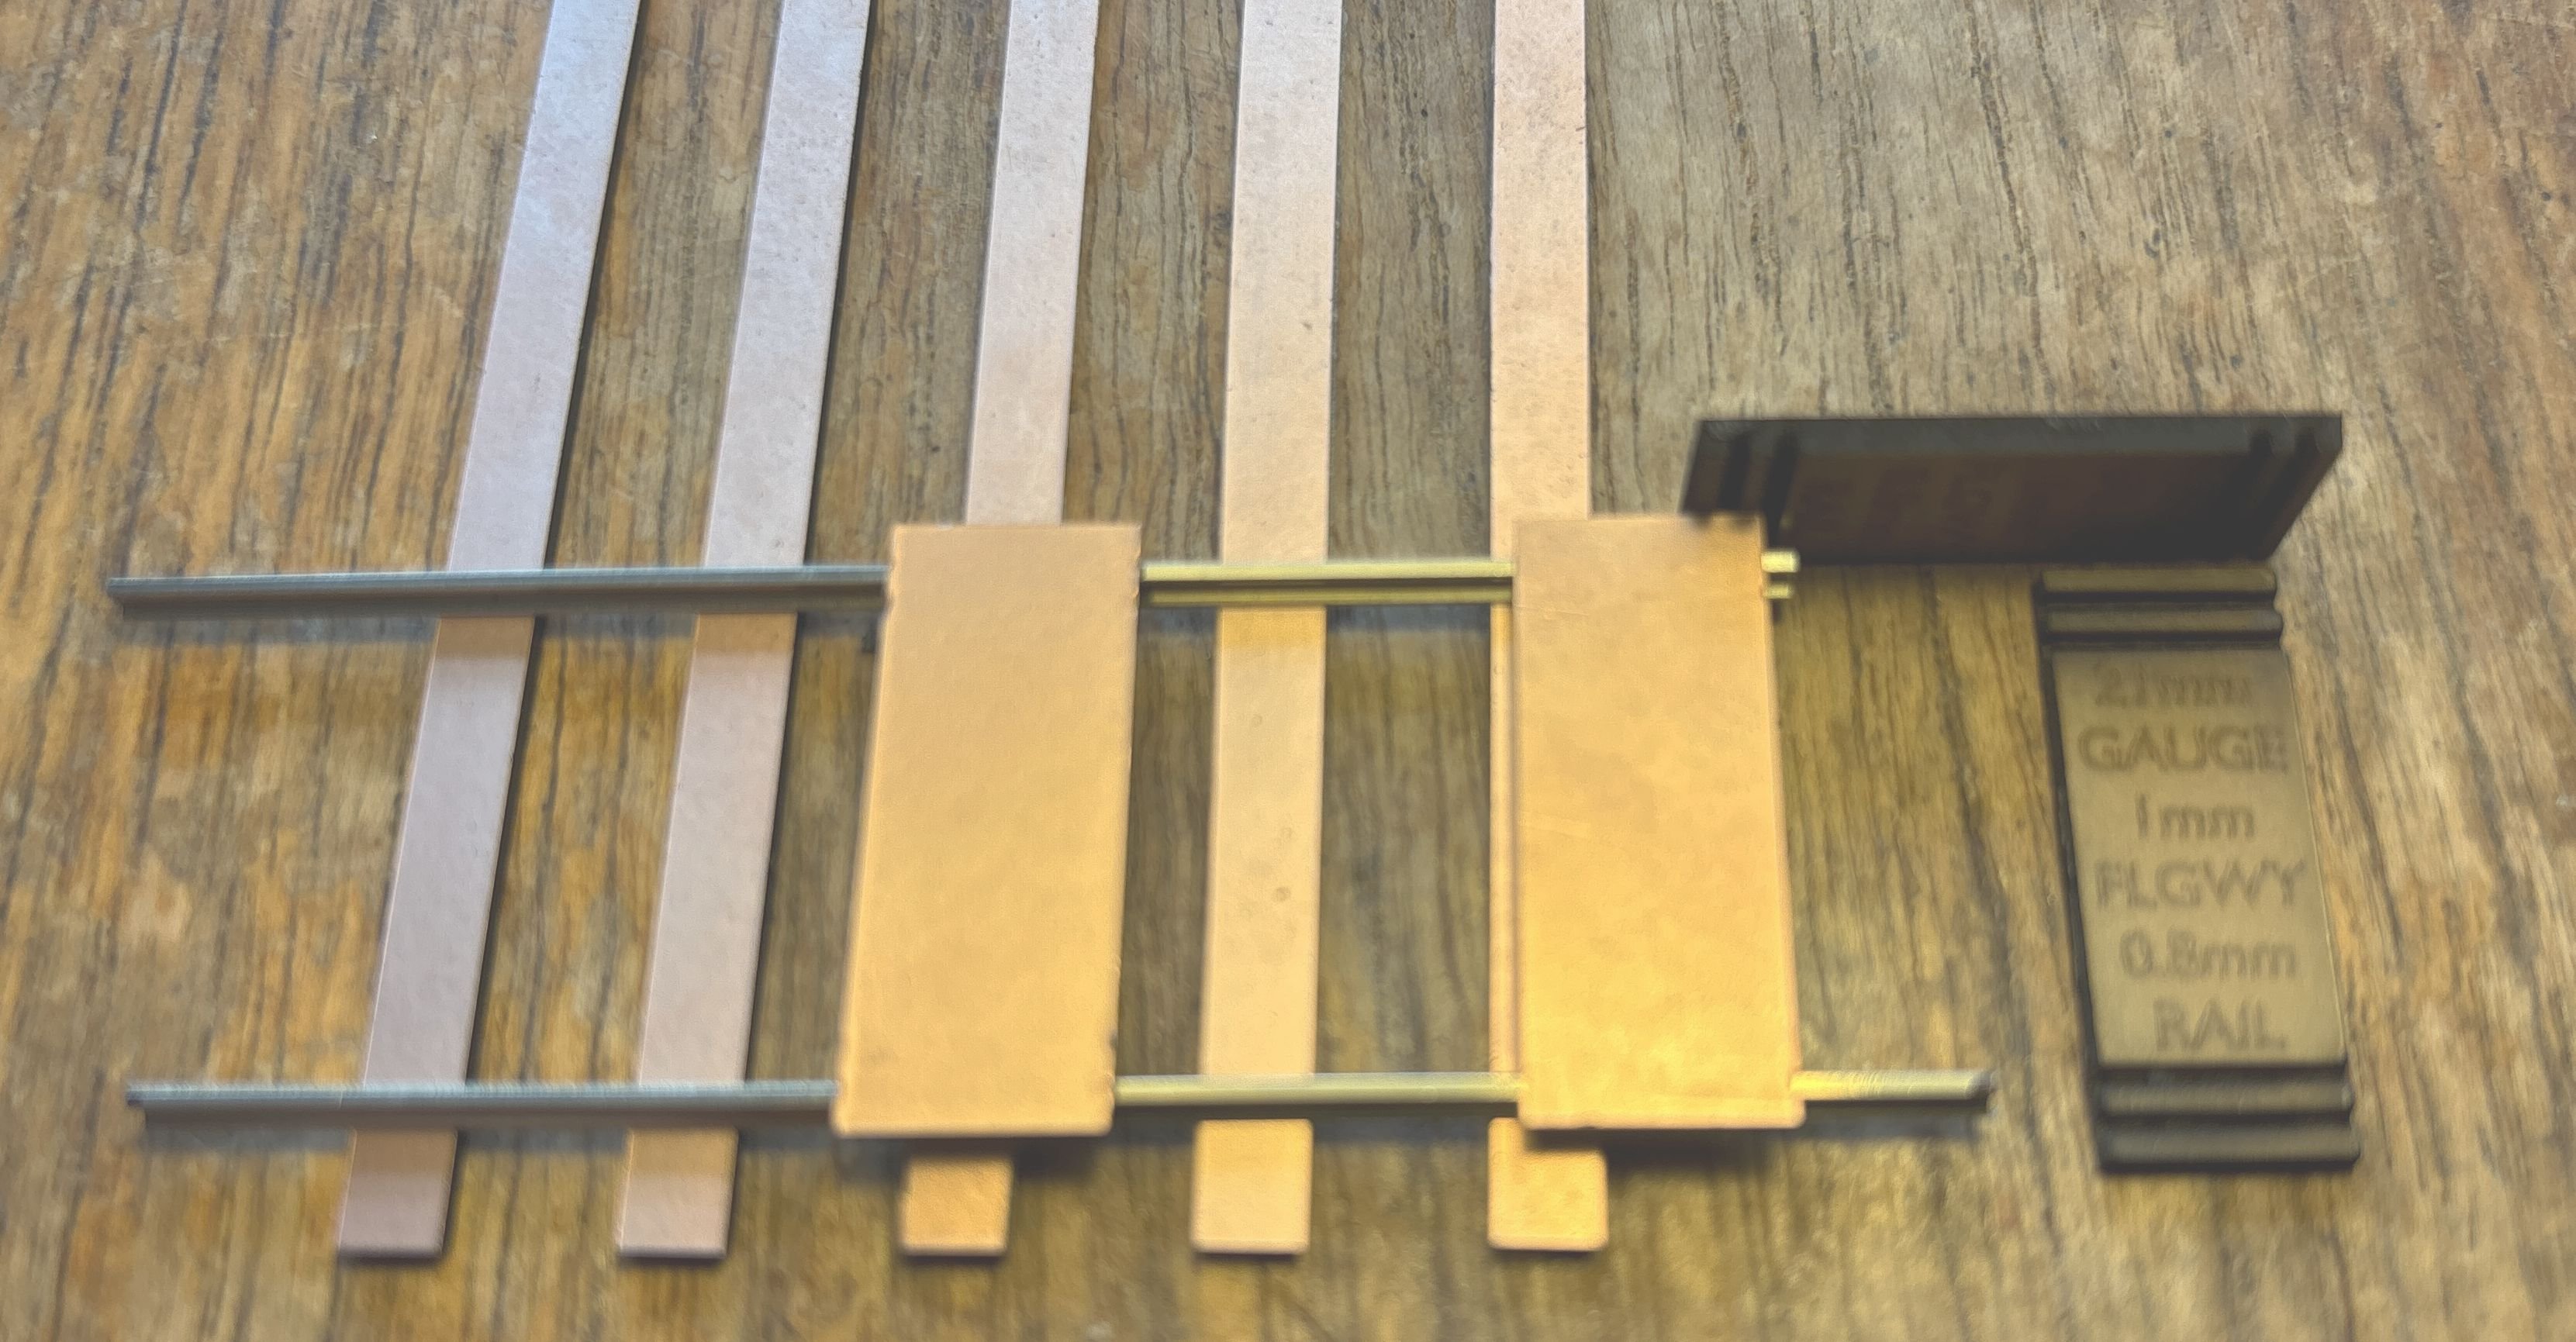
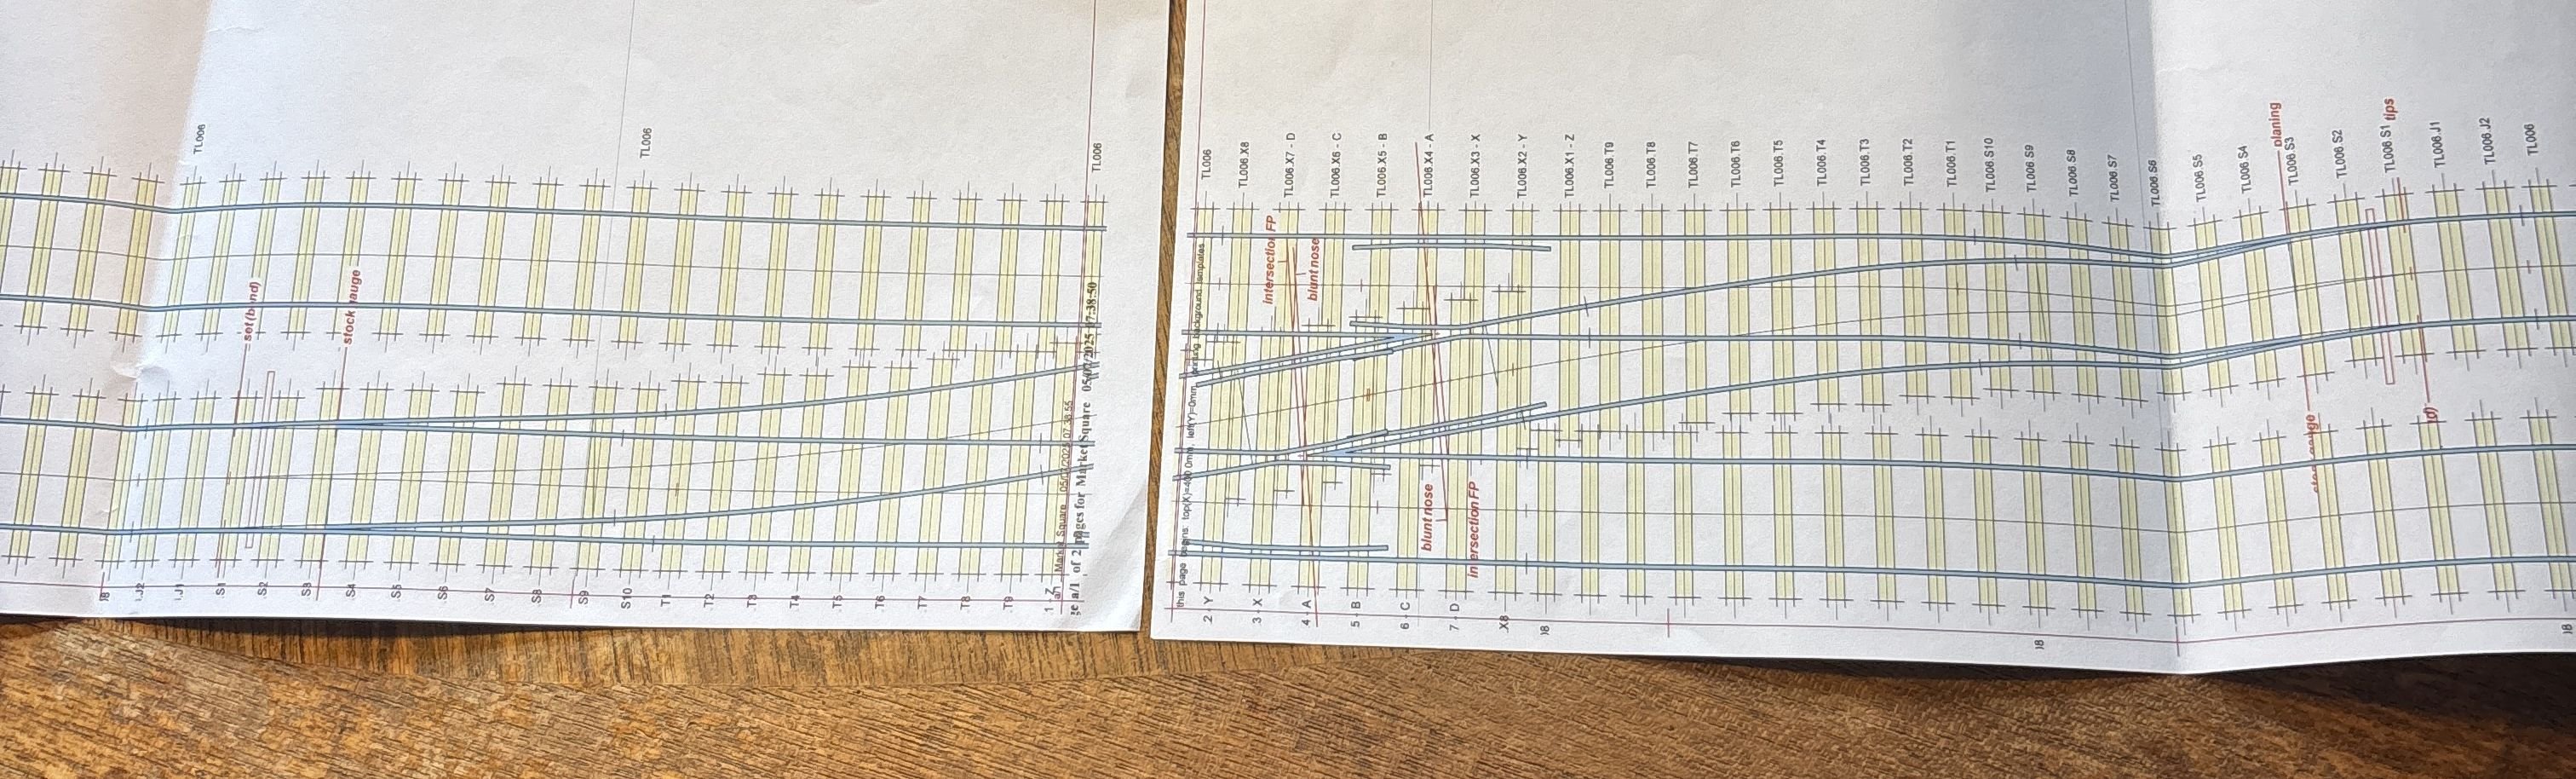
Today I have been experimenting with cutting copperclad sleepers for 21mm gauge pointwork, using my laser cutter. After a few trials I have prepared a set of bearers for a crossover: I also had a go at making some track gauges from the same material, which seems to have been quite effective. I may reinforce them by soldering a rail offcut to the copper surface. I have my plan created in Templot and printed out: Now I need some rails...
-
Those are the two books I have on the system and I'm not aware of any others, though it features a page or two in many general Irish railway books. It's a long time since I visited the brewery/museum but there was plenty to see there too.
-
DB Cargo Have Only Gone And Named A Loco After Us!
Mol_PMB replied to Warbonnet's topic in British Outline Modelling
Did you not fancy a special paint job too? Maybe that’ll come in future on a different class of loco?