Glenderg
-
Posts
3,490 -
Joined
-
Last visited
-
Days Won
11
Content Type
Profiles
Forums
Events
Gallery
Blogs
Store
Community Map
Everything posted by Glenderg
-
Hmm, that's a dilemma all right. I suppose it comes down to how complex your layout is going to be, and then the proposed cost of the new track, taking into account the trade in/fleabay of your code 100. And is it worth it? I've seen plenty irish layouts here with code 100, where the track is ballasted and weathered nicely, and it overrides the overscale nature of the track. Alternatively, you could do a massive industrial layout and bury all the track in concrete, and nobody would notice
-
Dave, What vintage is your stock, particularly the locos? The tolerances of the older wheels over the vees etc. on points are a derailing issue. If it's all new stuff you have, flog the code 100, and go 75. Ask Bosko though. He has every piece of stock going and he's on code 75. R
-
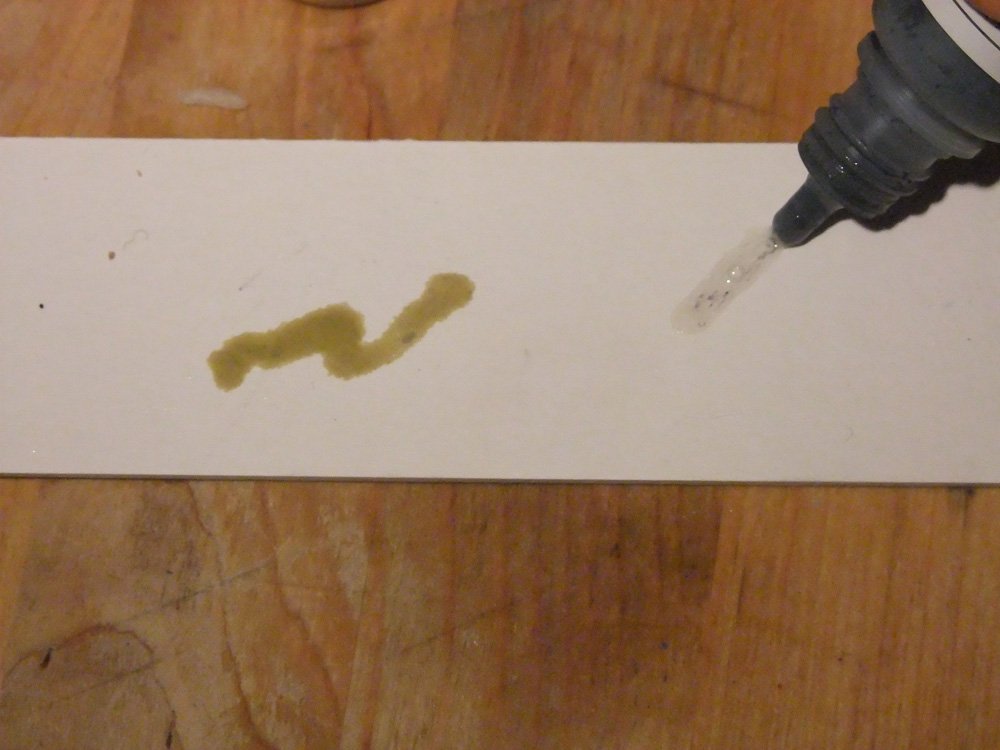
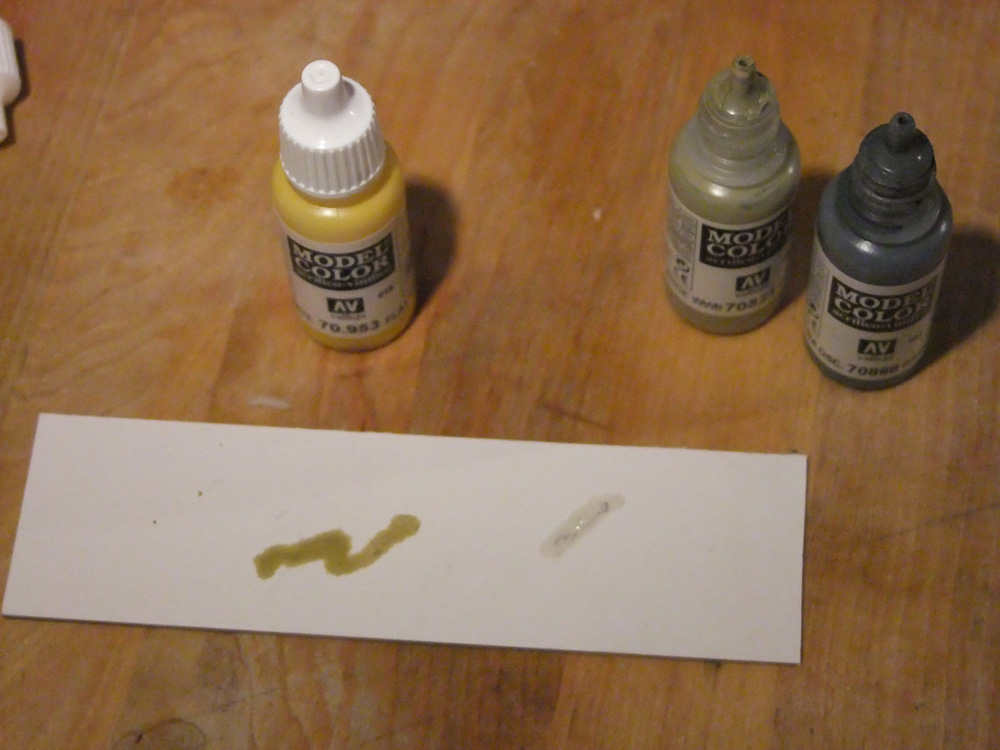
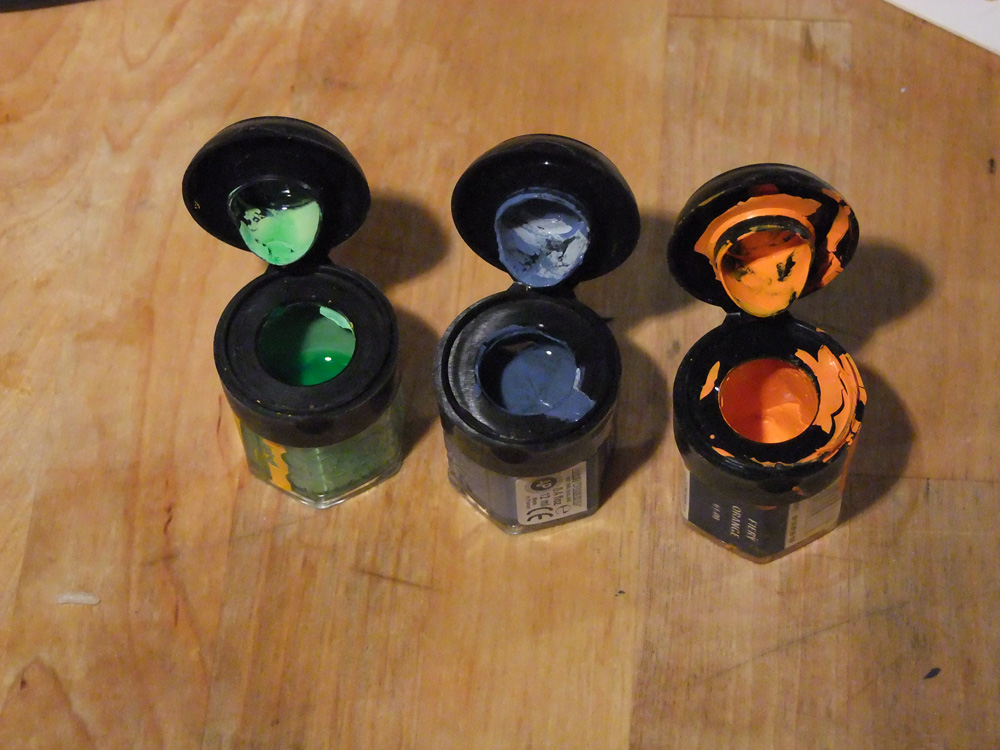
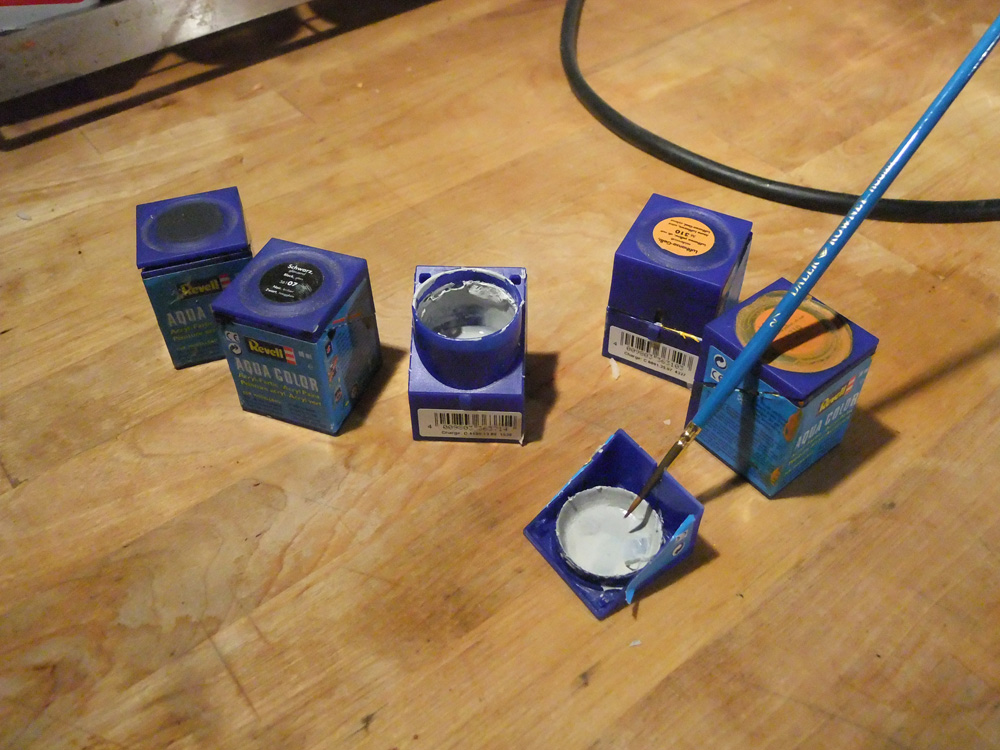
Instead of brining the other thread completely off topic, i thought i'd throw down a few notes on paint and how it affects your decision for what airbrush to purchase. This is not intended as an "enamel vs acrylic" discussion. I took some time to take photographs of paints to inform rather than use handy marketing snaps from the web. I hope this info is of some use to the younger brigade who may be assembling a paint collection or those who are are thinking of getting an airbrush. In the interest of supporting the home grown retailers, I'd like to include availability and cost per pot, so if I don't have you listed post or pm, I'll update the thread. Every little helps. Acrylics Tim Shackleton has a whole chapter on paint in his book on weathering techniques, so i'll briefly sum it up. Acrylic paint consists of particles of paint suspended in water, which never dissolve completely with the medium, and is why you will see separation of water and paint in a tin left for some time. Acrylic is a plastic, a polymer emulsion, the medium it is suspended in being the emulsifier. One is a plastic (from oil) the other water, or a derivative medium (water-based). How they work is best left to Mr. White. Acrylic paints generally break up into various dilutions, some which love water, like watercolours, others that don't - like artists acrylic. Avoid both for airbrushing, they are not designed to be fired out of a gun at high pressure. The paint I want to focus on is the variety you can buy in the Modelshop, Marks, Easons, ModelshopBelfast. Now let me get to the separation part. Some paints are better than others at avoiding this and i'll get to the products shortly. As the particles of water and acrylic leave the airbrush at high pressure, much of the water evaporates. As these two media separate, particles stick to poorly engineered airbrush nozzles, in the microscopic grooves left behind at manufacture. These will build up creating a little pile obstructing the flow. I find the more a paint is willing to separate in its tin, the more hassle you'll have later on. Acrylic paints then... Vallejo - or - Model Colour Both the paints above have been shaken for a good minute, but still produce this "snot". Not ideal for airbrushing small amounts of colour, but if you can decant it into another pot to mix and thin, all the better. This stuff loves separation, will clog readily a cheap airbrush, but it's colour depth is great. Perfect dispensing nozzle for airbrushes, no wastage or spillage. Not readily available here on the high street, and sometimes labels do not match the contents. My Algal green is battleship grey..! For the novice I'd steer clear - to find a colour to suit a particular rail livery you may have to buy several to see which is best. 17ml tubs though, and they don't take up much room. That's the green one on the right....! Available from : The Model Shop, Capel Street, Dublin 1 - €2.80 ea Any Other Retailer - ? Humbrol The older type love the clogging, and are better suited to hand painting for figures. ( the ones at the back) However the more recent versions are excellent, especially the authentic rail colour variety. Readily available from most retailers here, and I'm sure if you wanted a batch purchase a deal could be done. The only way to assemble a paint collection quickly. 14ml tubs like their enamel cousins, and same size so if you have a drawer with separations to accept both even better. Accurate painted lids make these really good value when looking for a colour in a hurry. Available from : The Model Shop, Capel Street, The Model Shop, Belfast, Marks Models, Almost Nationwide, Banba/Toymaster outlets, Any Other Retailer - ? Tamiya Lovely smelling paints, which are in an acrylic medium rather than water, and go on well. Domestic authorities tend to mention the smell though. Not easy to find, usually in bargain buckets, and rather expensive relatively. The nice little glass bottles only come with 10ml, opposed to 14ml normally, so a bit of a swizz. Available from : The Model Shop, Belfast, Marks Models, Almost Nationwide, Banba/Toymaster outlets, Any Other Retailer - ? Games Workshop These paints never seem to separate and generally do not clog, though it's not easy to get consistent dilution to suit airbrushes. Also at 4eu for 12ml, it's poor value. Also the colour range would not be as wide as the guys above, with highly saturated colours, more suited to lazer wielding orcs than brake vans. Available from : Games "Hey, what orc are you painting then (get away from me freak...grrr)" Workshop - €4.00 Free pain in the ass from the spotty kid with every purchase. Revell Acrylic I like these a lot, good square pots - hard to knock over after a beer or two, and the lid doubles as a brush holder, - most importantly - the paint does not separate. My only complaint is that the sticker on the lid doesn't always match the contents accurately, but this could be from shop soiling and age. The big upside is that it is in an 18ml jar and I find the yellows and orange tones to suit Irish Rail colours. If I were to restart my acrylic paint collection again, I'd go with Revell for brush and airbrush work. Available from : Banba/Toymaster outlets Any Other Retailer? Lastly, there are acrylic mediums out there - Tamiya and Windsor & Newton. I have yet to see Tamiya for sale here, but I believe it is excellent. Rather than using water to dilute, it's a specialized formula to try and blend the paint and carrier more effectively, so less clogging. I uses the Windsor & Newton one, and it does a great job. Des noted once that denatured alcohol also works fine, but I assume that's only available from chemists. The alcohol evaporates nearly instantly on contact with the surface, for quicker times between coats. Enamels Enamel paint generally has a different molecular make-up than acrylic, whereby the solution which dilutes it becomes a constituent part of the paint rather than a carrier. However, there are two different formats when it comes to enamel paint that aren't such an issue whit acrylics. Matt and Gloss. No, not a poor boy band from the mid eighties, but two different paint formulas which behave completely differently, particularly in the tinlet. Matt paint generally has thicker particles which, when suspended in a thinner, and gravity effects same, means it falls to the bottom of the tin. It may never harden, but the long it stays in the pot, the more stirring is required to re-agitate the paint and make it useful. Matt paint, prior to airbrushing, requires a hell of a lot more time stirring to ensure you will not get gummed up in an airbrush. Cocktail sticks and fancy coffee stirrers aren't worth a fiddlers for waking up the paint - grab a fat paint brush that has seen better days and hammer the crap out of it. Lumps will be stuck to the bad brush. Be sure to transfer the "good paint" to another pot, via the brush, and then thin. Don't take matt paint direct from the pot, or else you'll get textured bits like orange peel coming out the end of you airbrush. I have a 25 year old pot of Humbrol 82 - the Gurkha colour - and the Gurkha mentality. It just keeps coming back for more punishment. Gloss paint has a different compound make up, though a lot heavier in parts per million than matt paint, has a finer solution. Rarely will you find a tinlet of gloss paint that has separated, this is commonplace with it's matt cousin . It also contains extras which enhance colour, glossiness, and at times metal particles to produce silver, metal, and bronze. With gloss paints, the main drawback is dilution - a crimson red gloss will be as thick as snot, and a silver will be as thick as kids snot. This has to do with the components added above. The way I work out the dilution for the above paints is that if its an old colour that would appeal to a 40 year old, thin it 4 to 1. If it would appeal to a 10 year old, thin it 1 to 1. Not scientific at all, but its my non patented Snot Scale. It's easier to thicken paint in the airbrush environment than thin it. Thin paint won't adhere to anything. So sum up with enamel paints, matt paint is really enjoyable to work with, though if from an old tinlet, needs to treated with caution - and gloss paint it is the easiest formula for airbrushing, without question. Whether you stick to the Snot Scale or not is your choice! Thankfully the range of enamel paint falls doesn't vary as much as acrylic. If you have good ventilation and a 3M mask, patience to wait between coats drying, enamels are the way to airbrush.

-
Done Vincent!
-

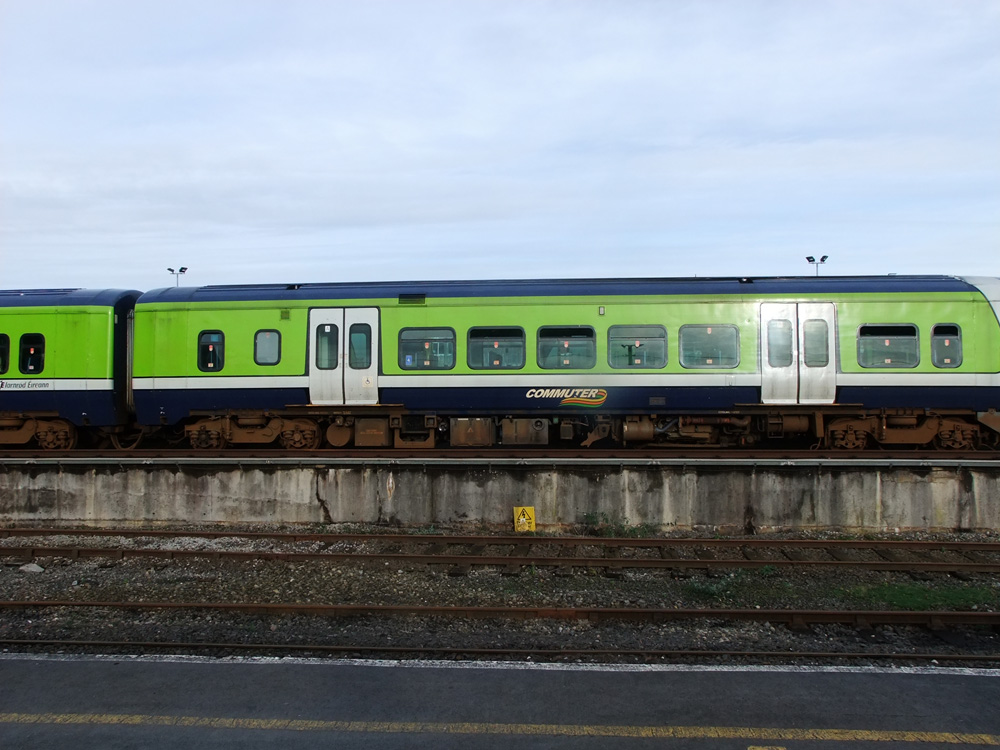
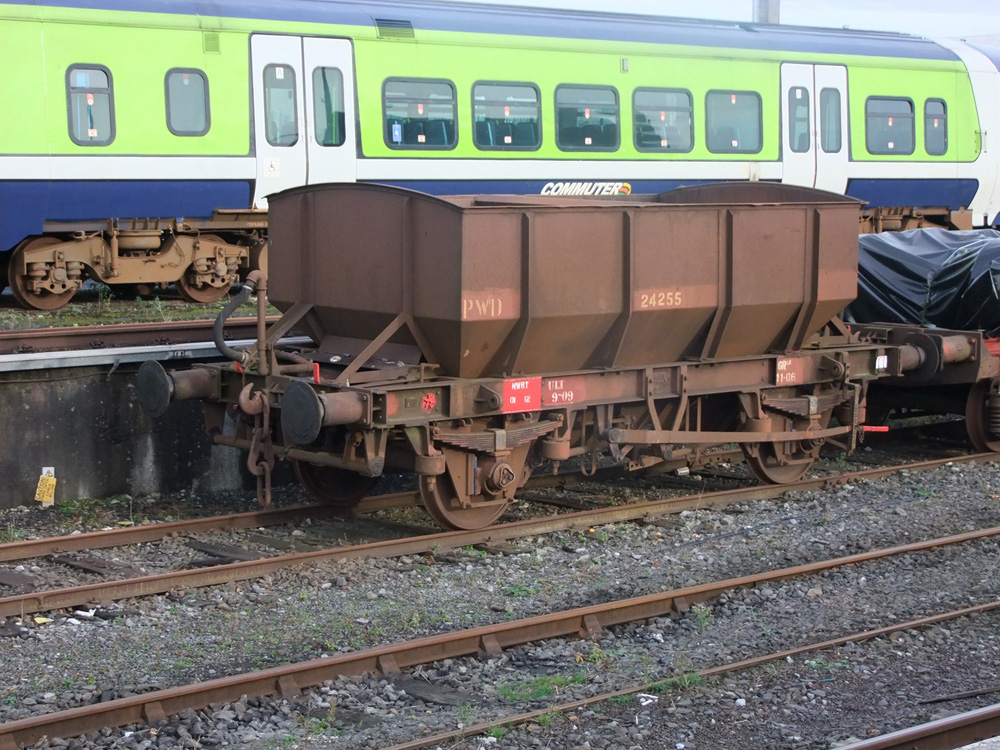
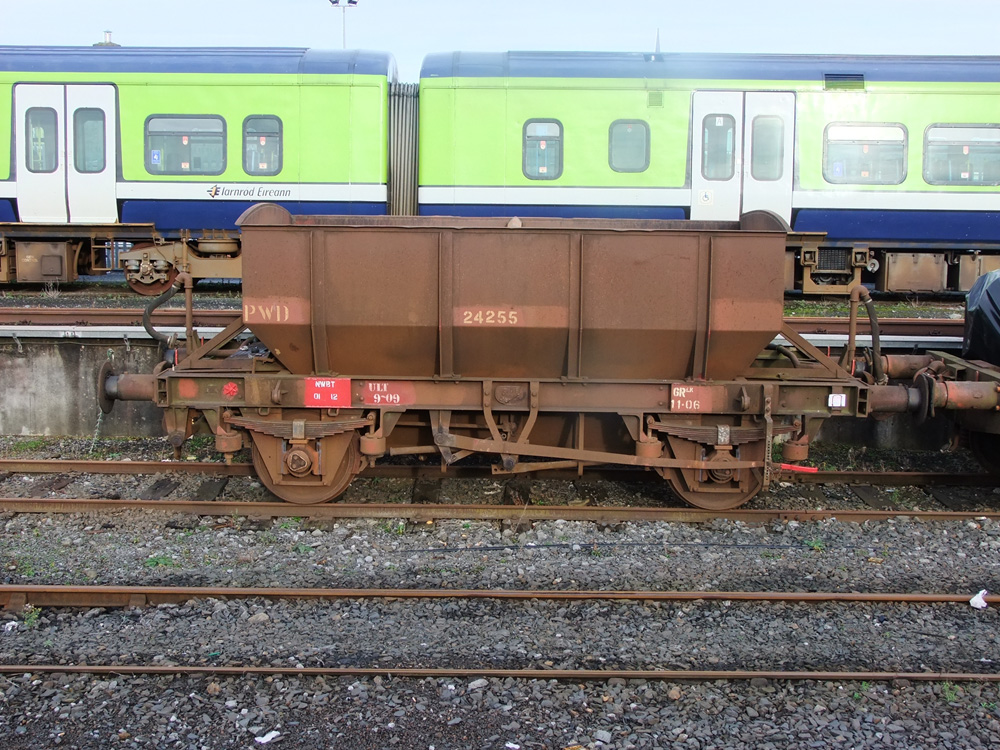
Freight Photos Limerick Christmas 2012
Glenderg replied to Glenderg's topic in Photos & Videos of the Prototype
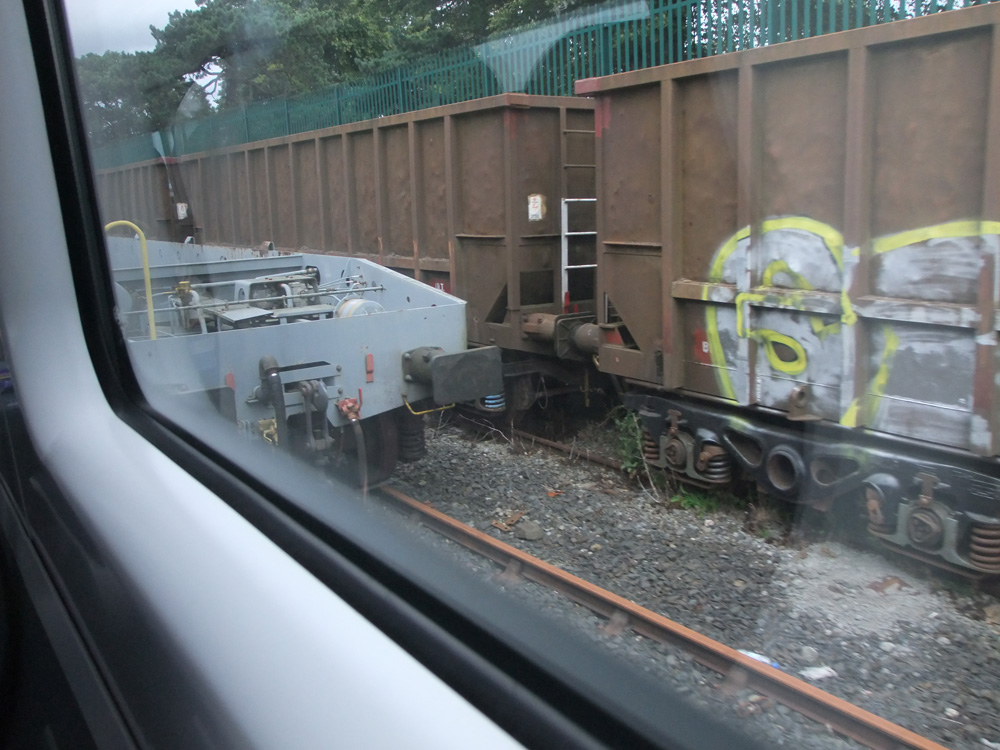
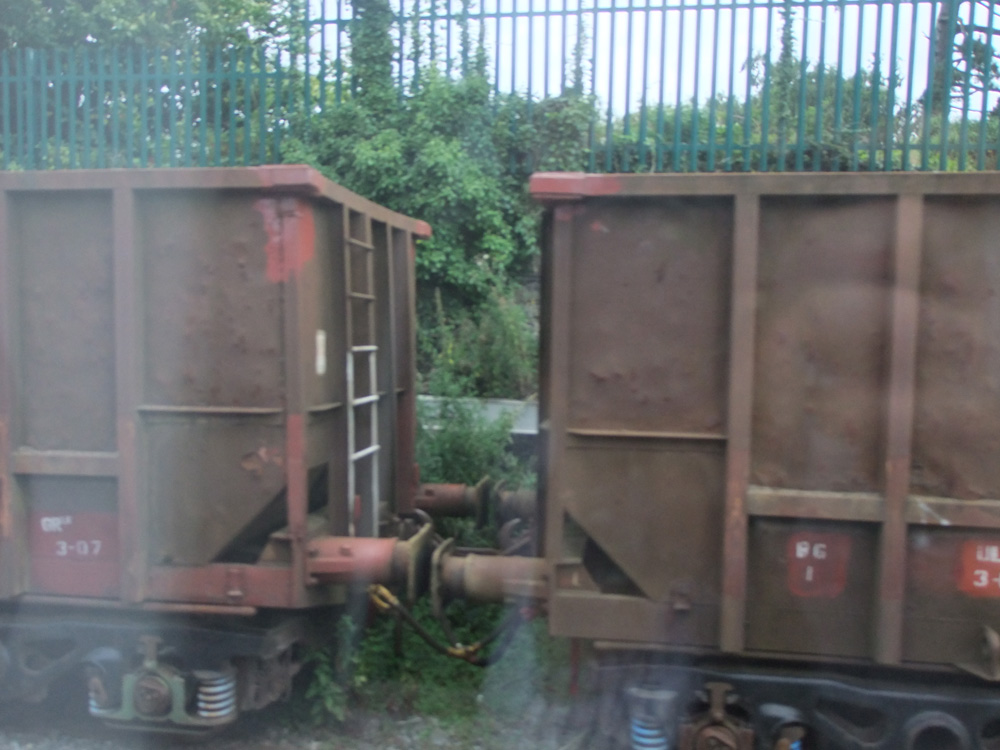
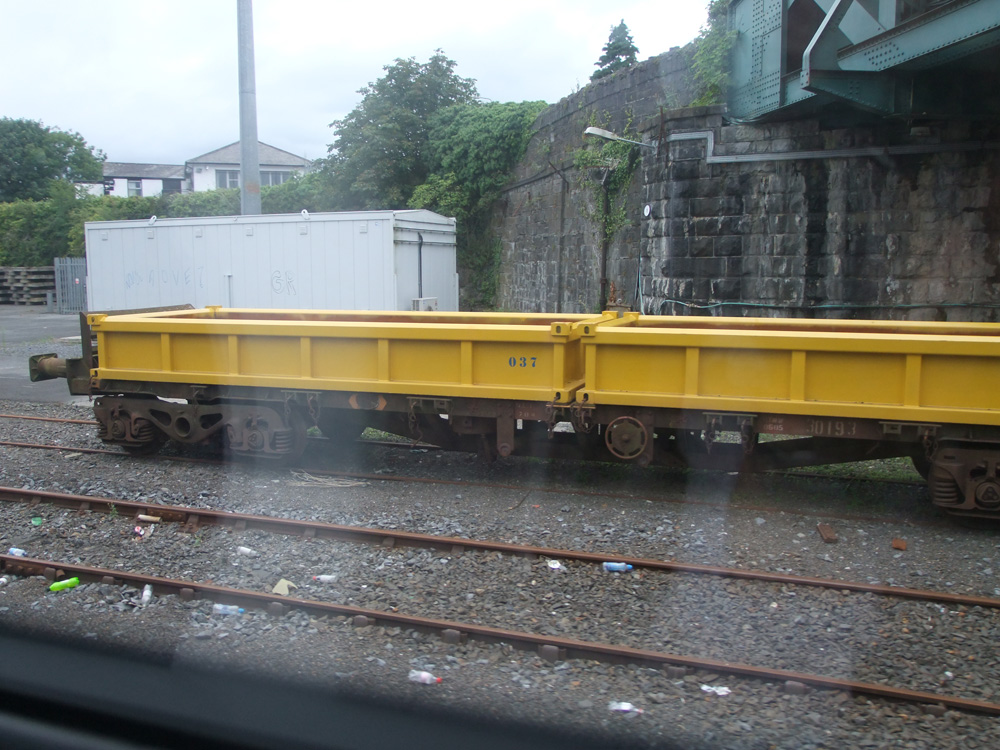
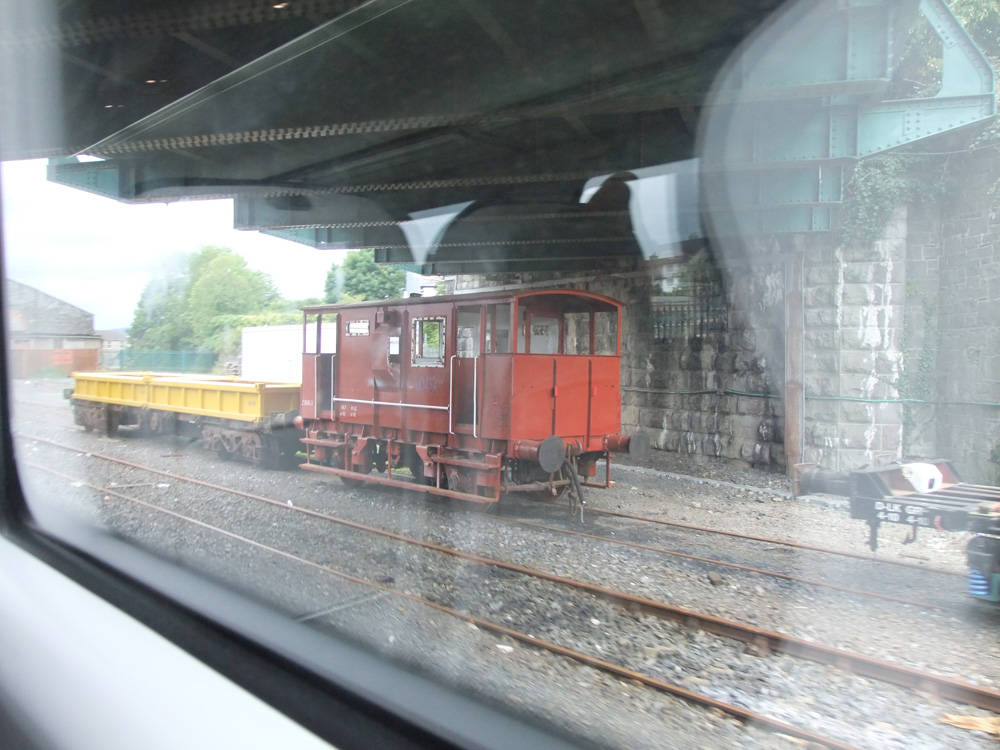
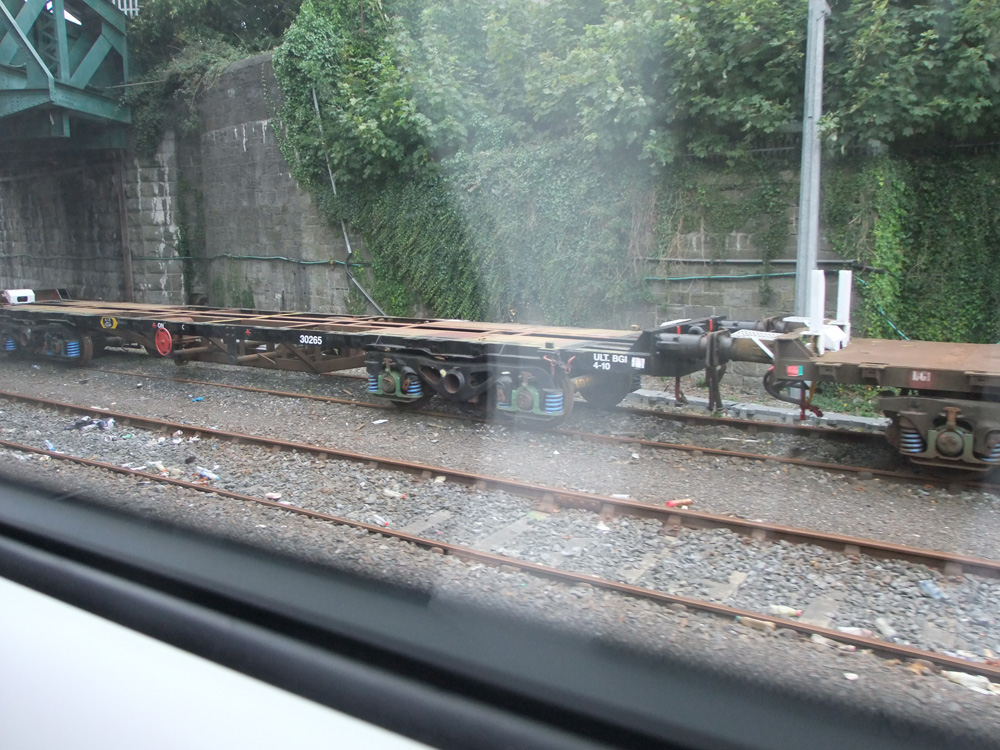
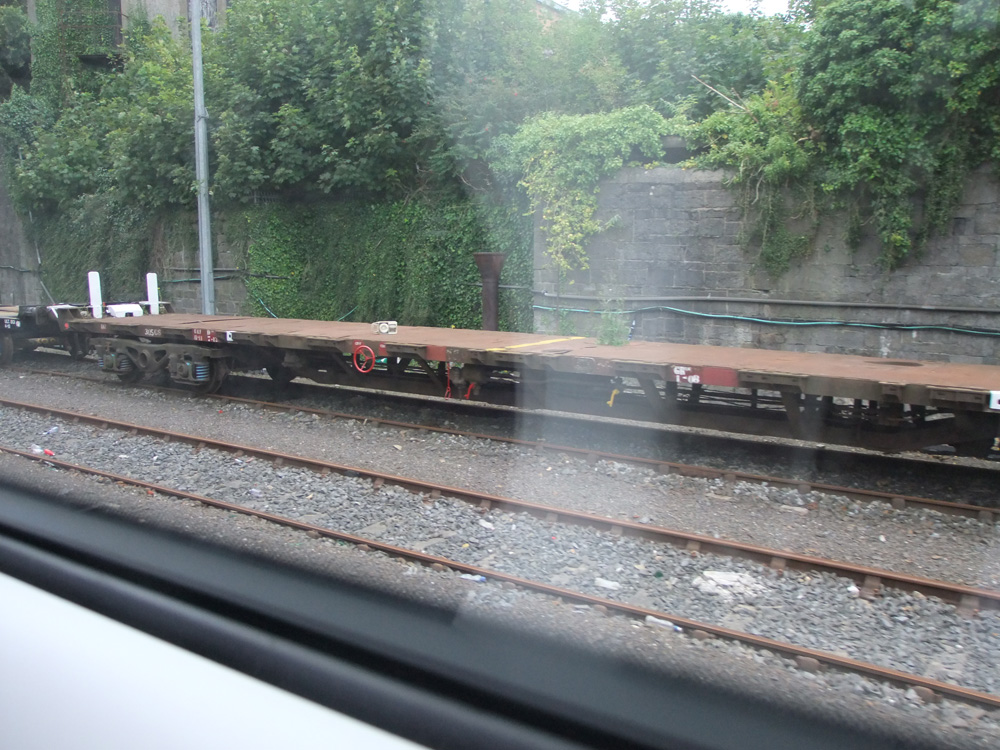
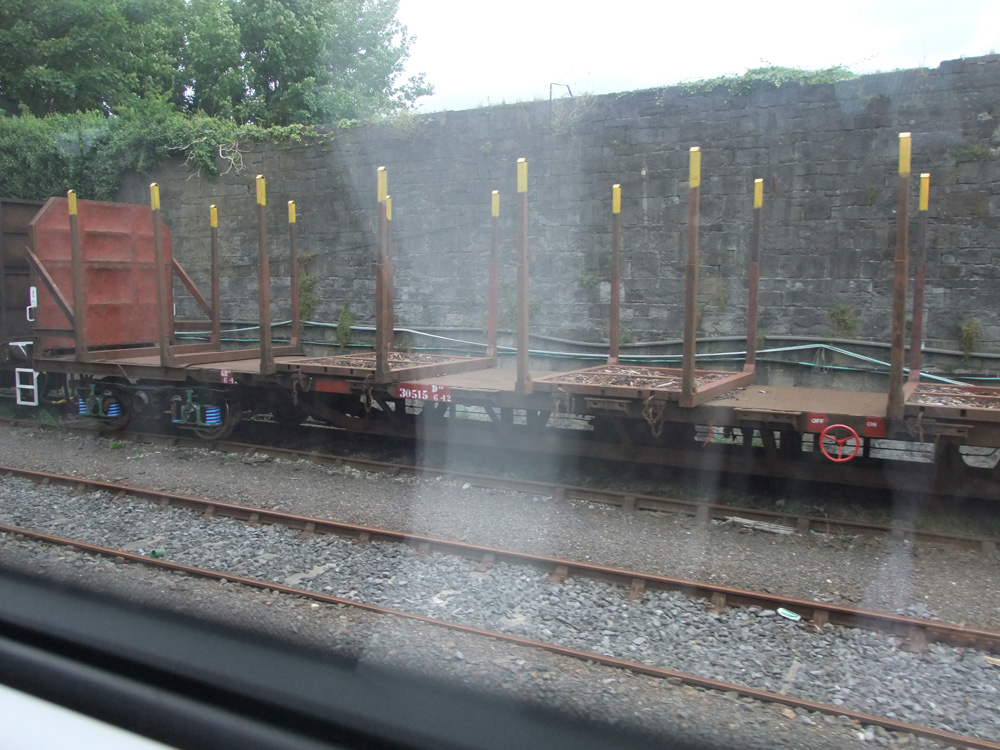
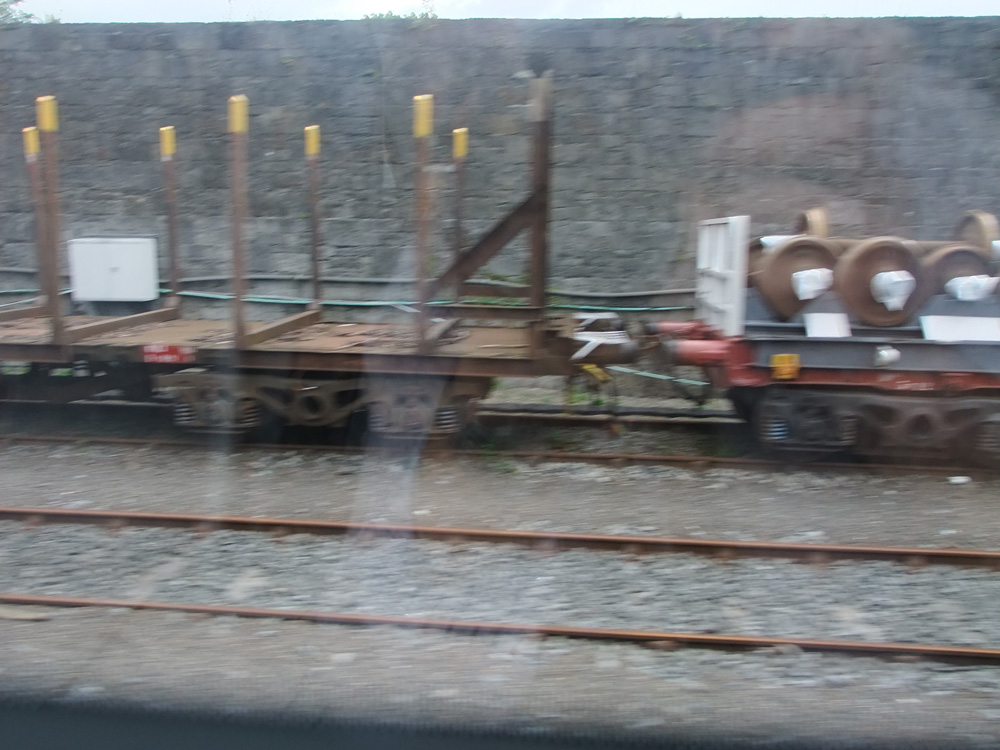
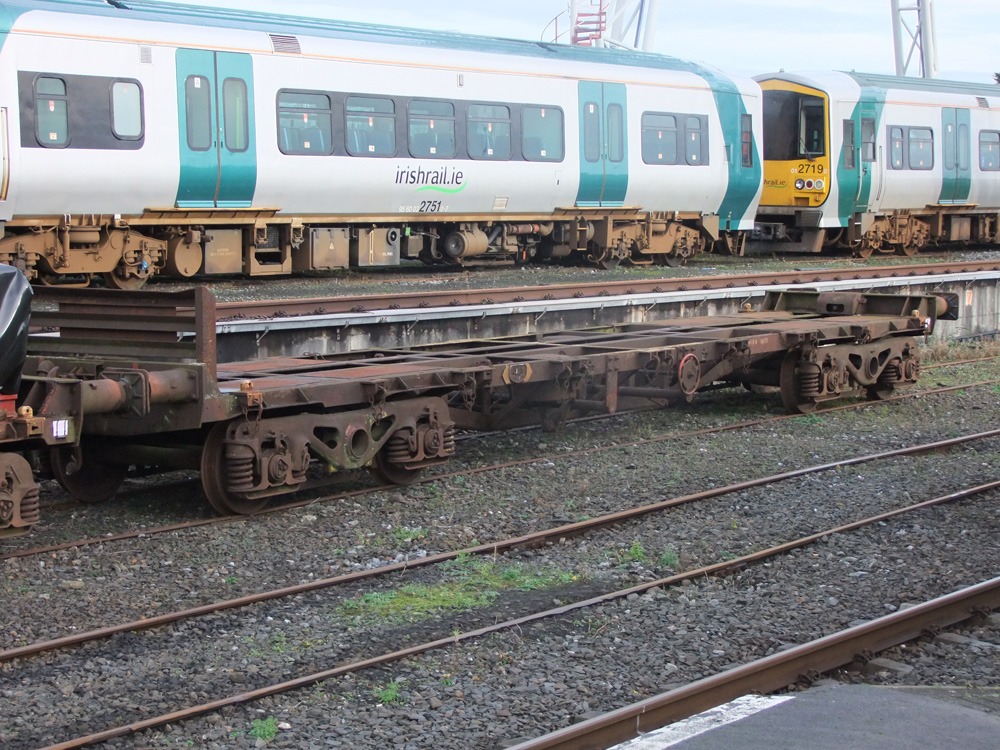
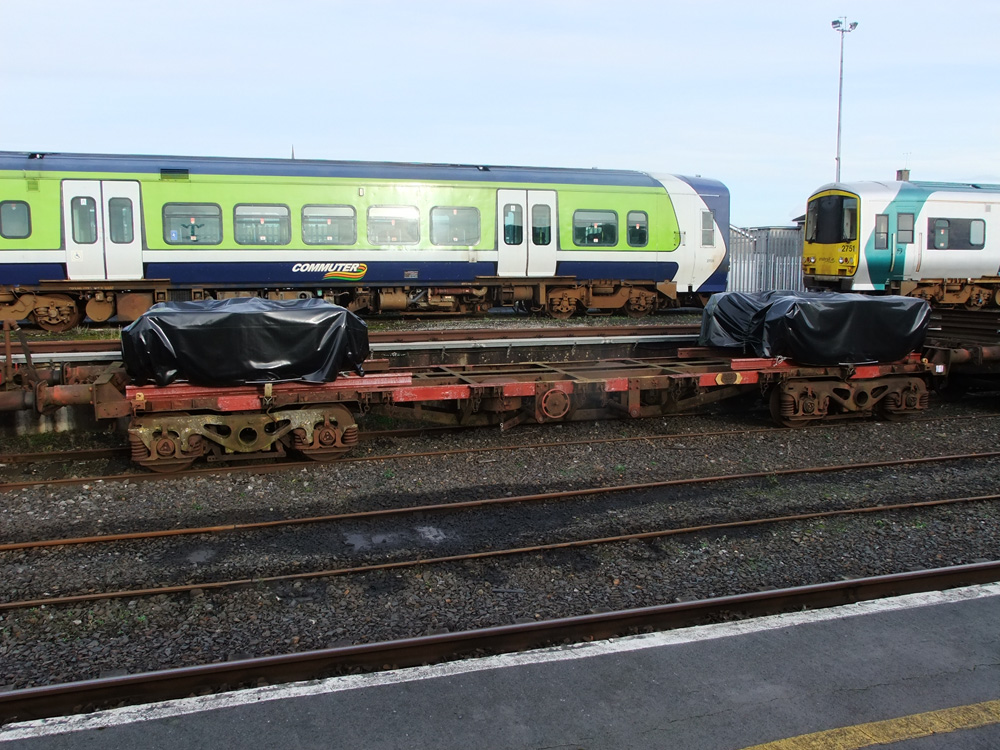
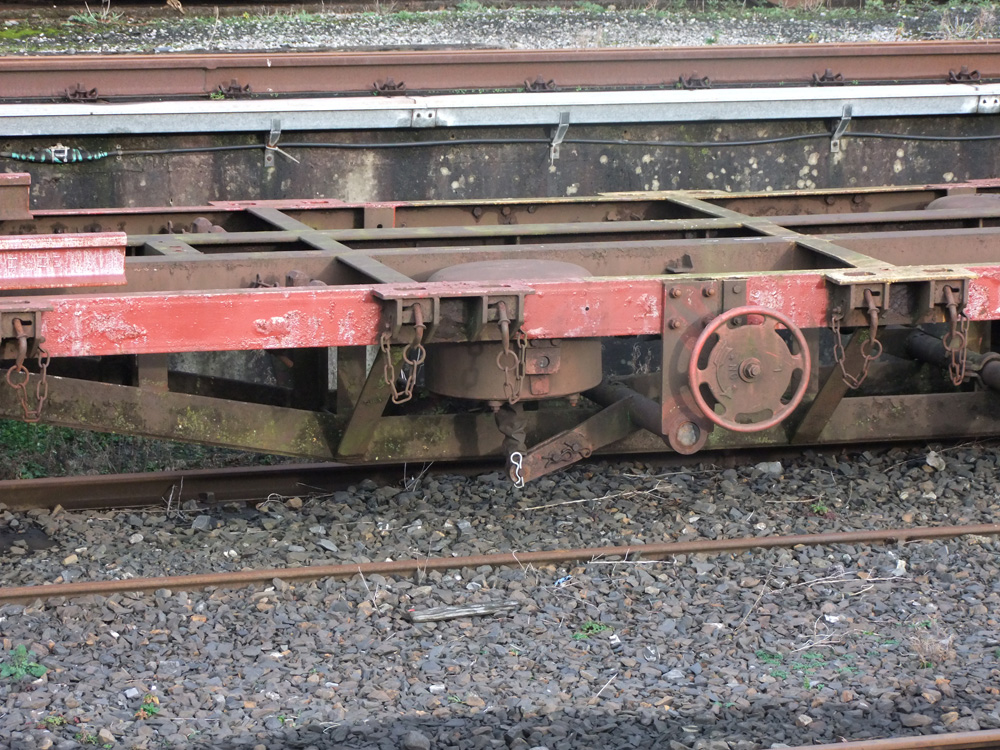
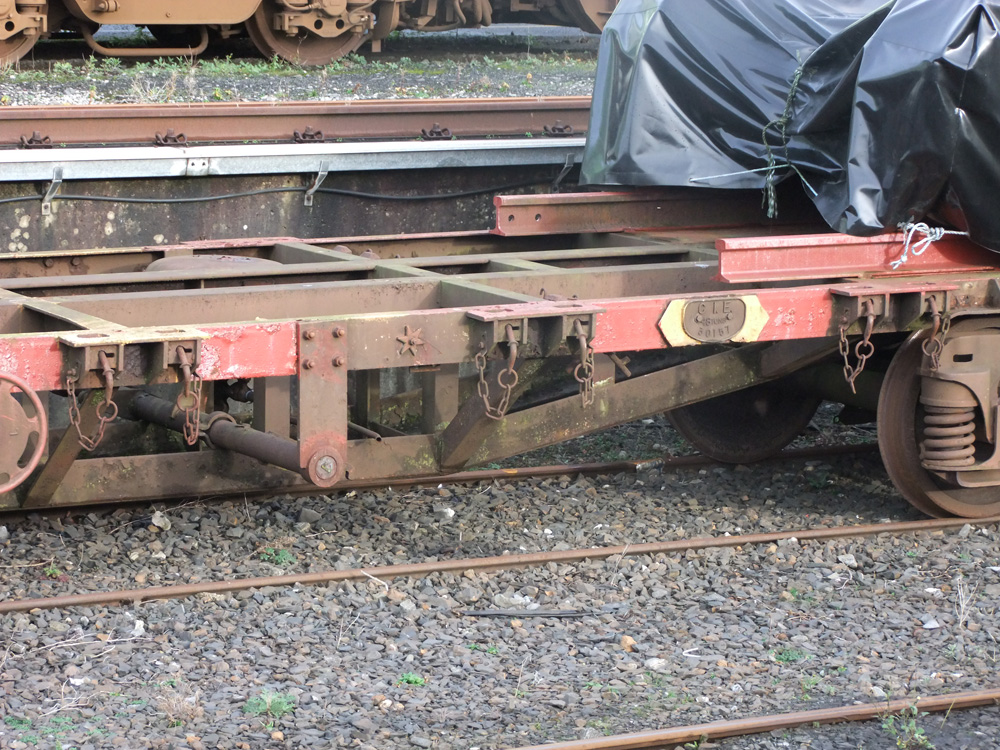
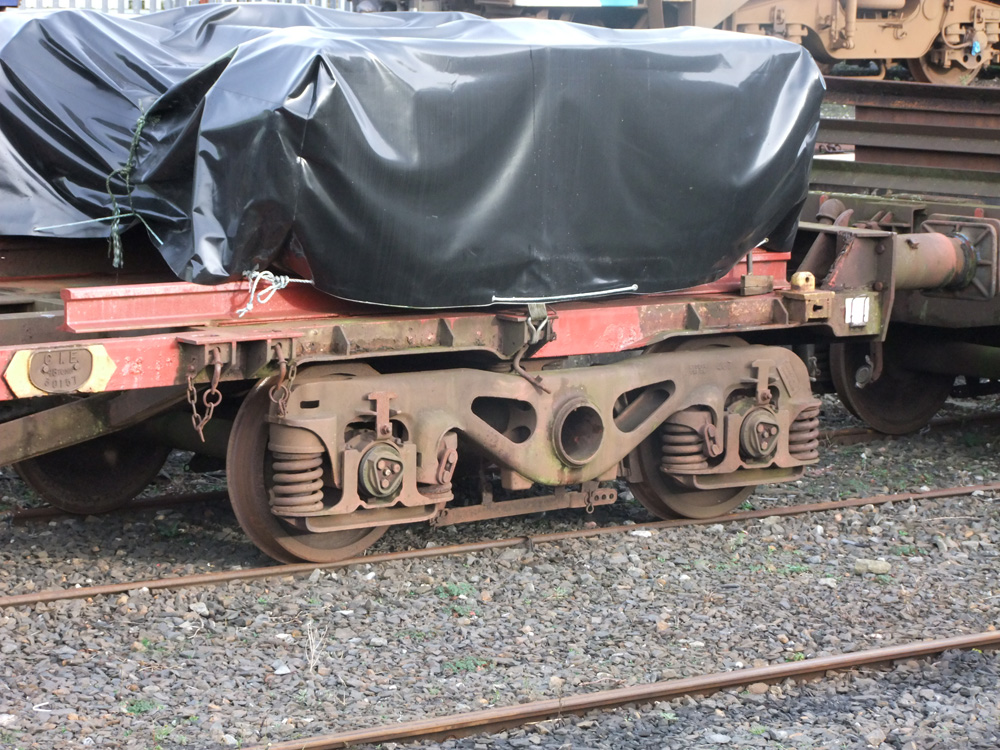
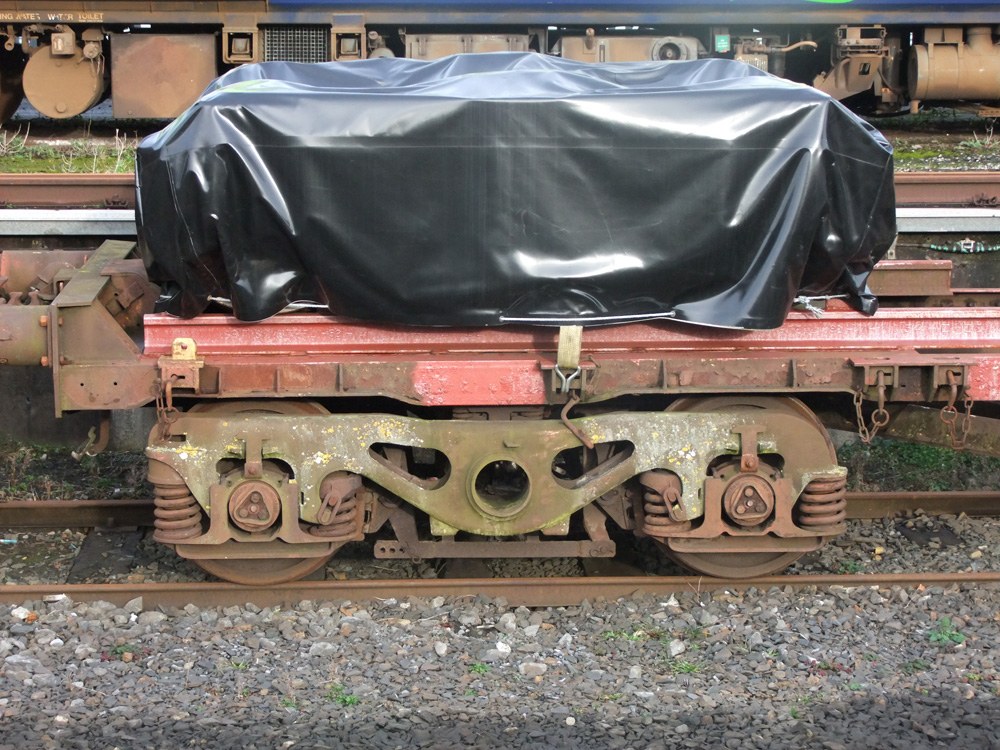
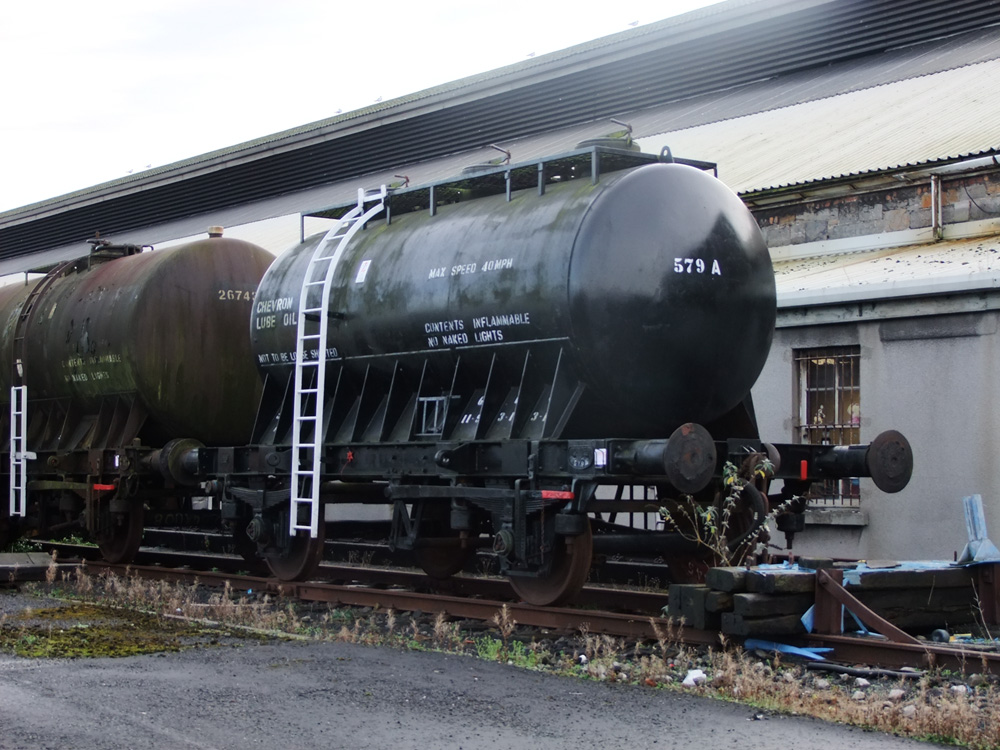
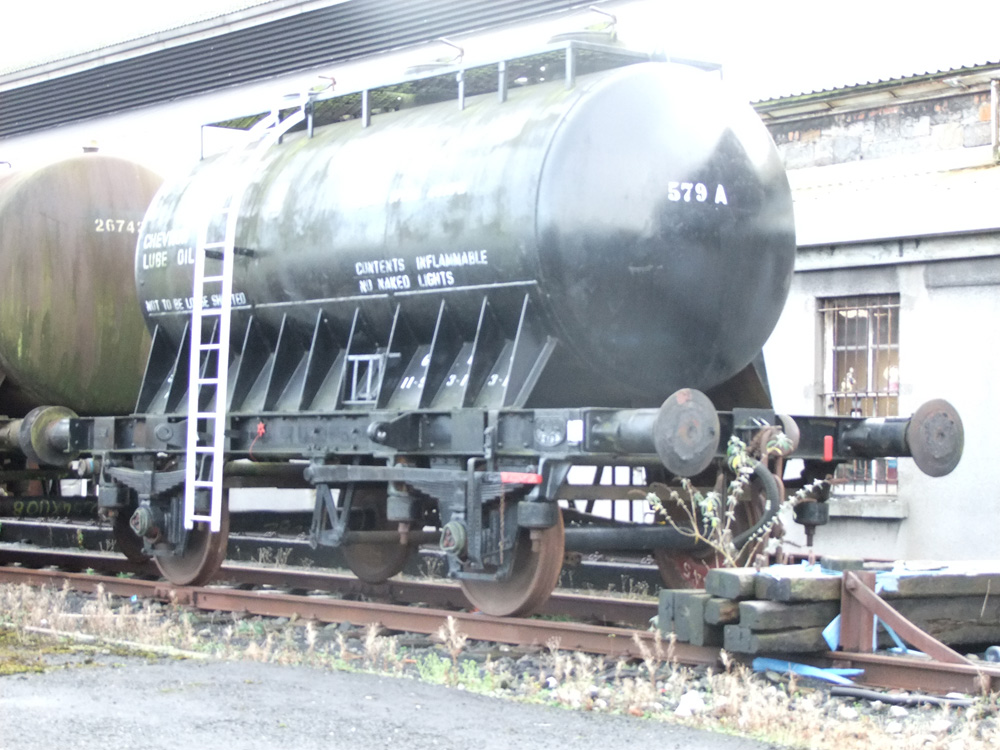
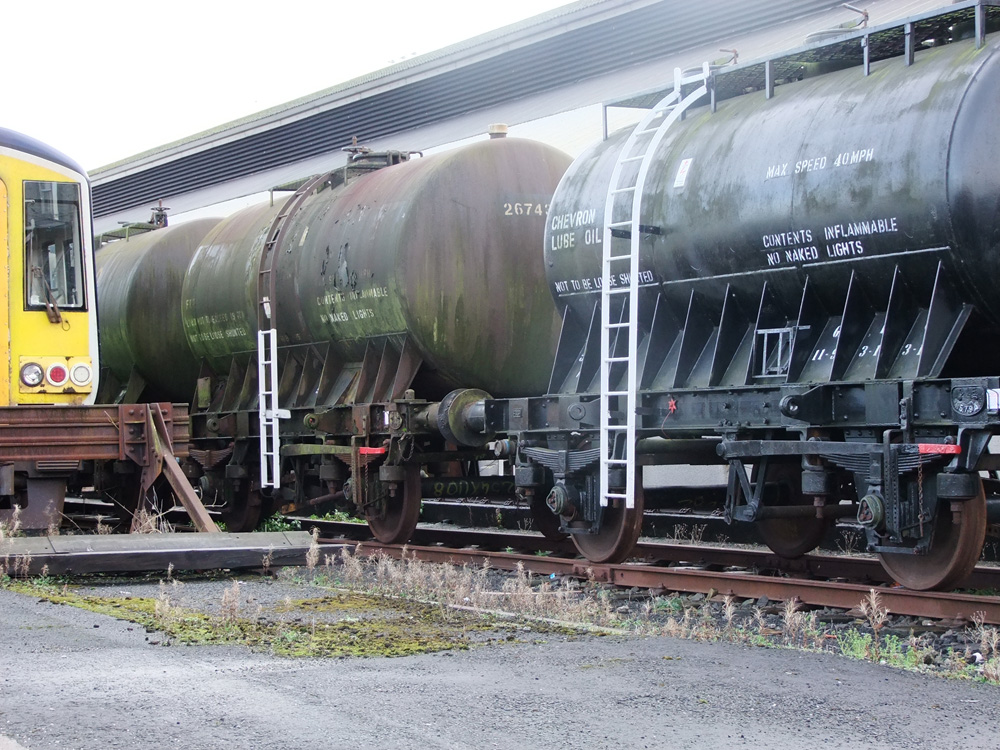
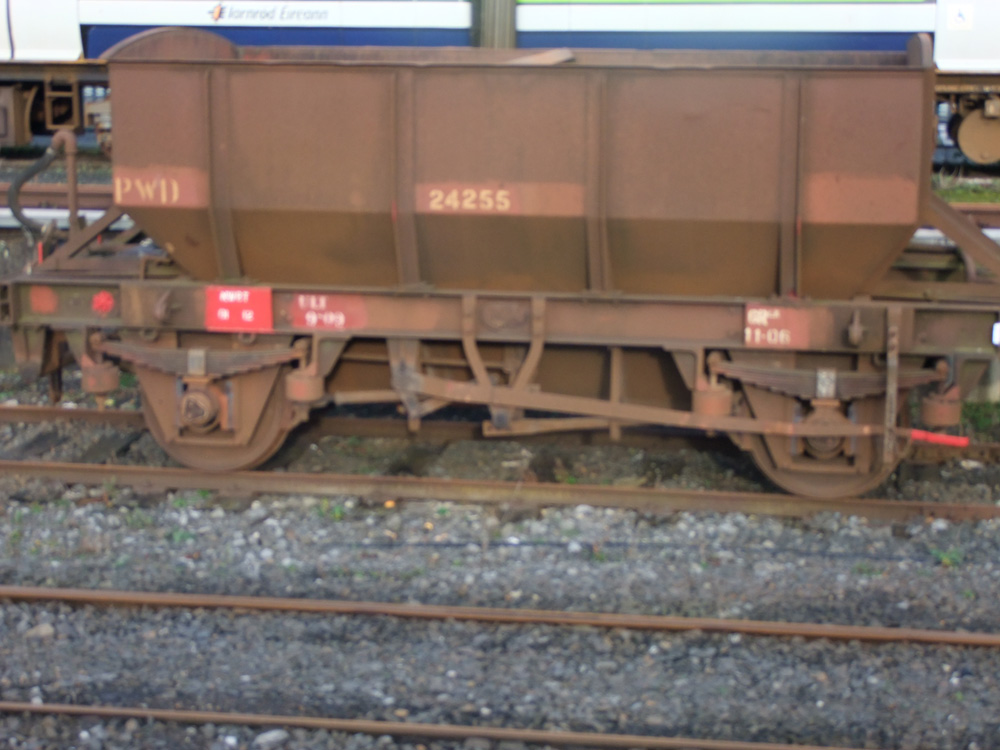
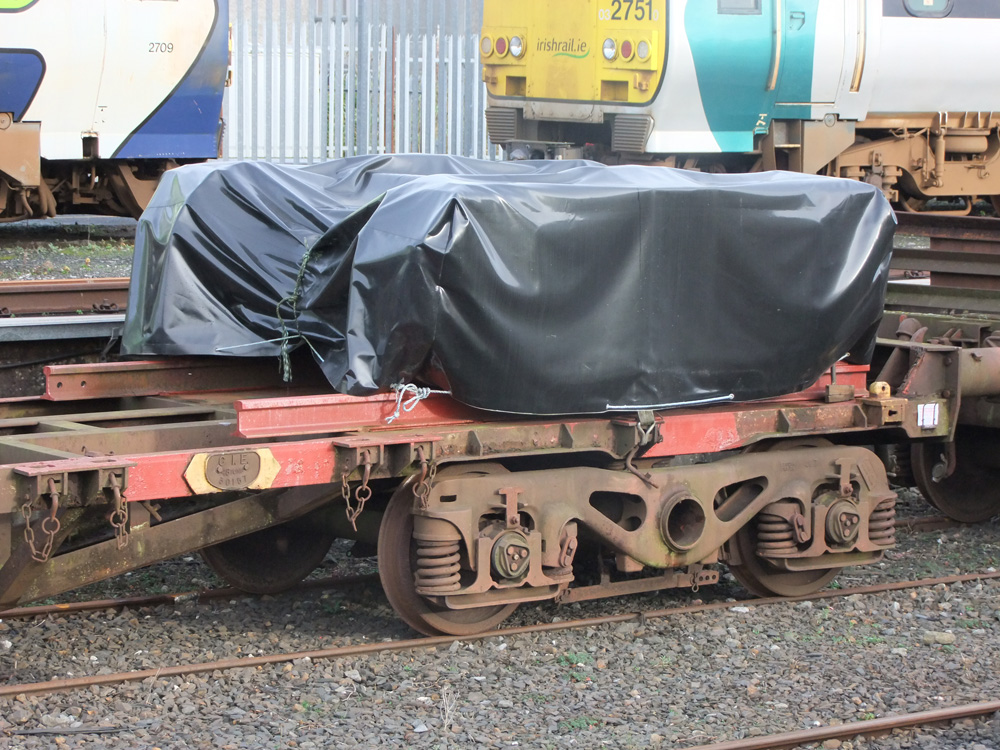
They appear to be on the storage sidiings out beyond the carriage/freight works area completely, and the only way I can figure that a photo is possible, is if you commit yourself to St. John's Mental Home alongside and hop the fence, you might be able to get some shots. However, to preserve your sanity, I have a couple of vids taken from DMU's heading for the junction, just focussing on freight, which I can upload to the toob. They were taken pretty much every time I went home, so there should be a fair amount floating about on the hard drive. (locos don't do it for me so it's just freight:tumbsup:) Rob, I reckon if you made a couple of 42' bogie flats, you could swap out almost the entirety of heavy goods simply by changing the load carried - Anything from cable trains, to rail laying trains, bogie transporters, wheel carriers, timbers, PW spoil wagons, and so on. It's such a versatile unit I don't suspect that IE will be doing away with them any time soon. Does that give you more scope for headscratching? I'm glad they're of some use and hopefully may encourage the "red oxide all over" crew to look at puny freight wagons in a different way. Check out the bogie detail of the 42' flat, most of it is rusty green! Rich, if I put numbers and arrows on the ballast wagon photo, you think you could annotate what's what? I haven't an earthly idea what a J hanger is I have higher res versions if anyone wants them, just drop me a note. Richie. -
Yeah, I think I'd have to go with both RedRich and Mike on the actual airbrush front itself. I have 5 of those airbrushes, bought as parts of severals deals etc. online, and though I clean them thoroughly after use, there is always blockages. Last night for instance, I was putting white acrylic primer on a weedspray coach, and whilst the mix was perfect, the nozzle began to clog. In frustration at non-constant output, I dumped all five brushes into brake fluid overnight, and the result was astonishing, for at least 15 minutes today. It's the one regret that I have - I should have gone for an Iwata/Badger, and saved the frustration for myself. I will say this though - I am pretty much 90% acrylic when it comes to airbrushing, and molecular make up of the paint is vastly different to enamels, hence the clogging. Any time I've used the cheaper airbrushes for enamel work - railmatch weathering paints mostly - the brushes have been flawless, and no latent paint remains the following day. To some up - if going acrylic - go expensive, if going enamel - go cheap. This in only my opinion now, so I'd like to hear others' view on acrylics & airbrushes. On the compressor front, I have the one from the set I posted, it's my second, and it has been flawless to work with on coaches, locos etc. Constant output with a moisture release valve to get rid of any water in the system, and as long as it isn't on for hours on end, you won't kill it. That's how I killed my first compressor, god rest her poor taiwanese shell. Glad I could help too. Richie.
-
Freight Photos Limerick Christmas 2012
Glenderg replied to Glenderg's topic in Photos & Videos of the Prototype
-
Freight Photos Limerick Christmas 2012
Glenderg replied to Glenderg's topic in Photos & Videos of the Prototype
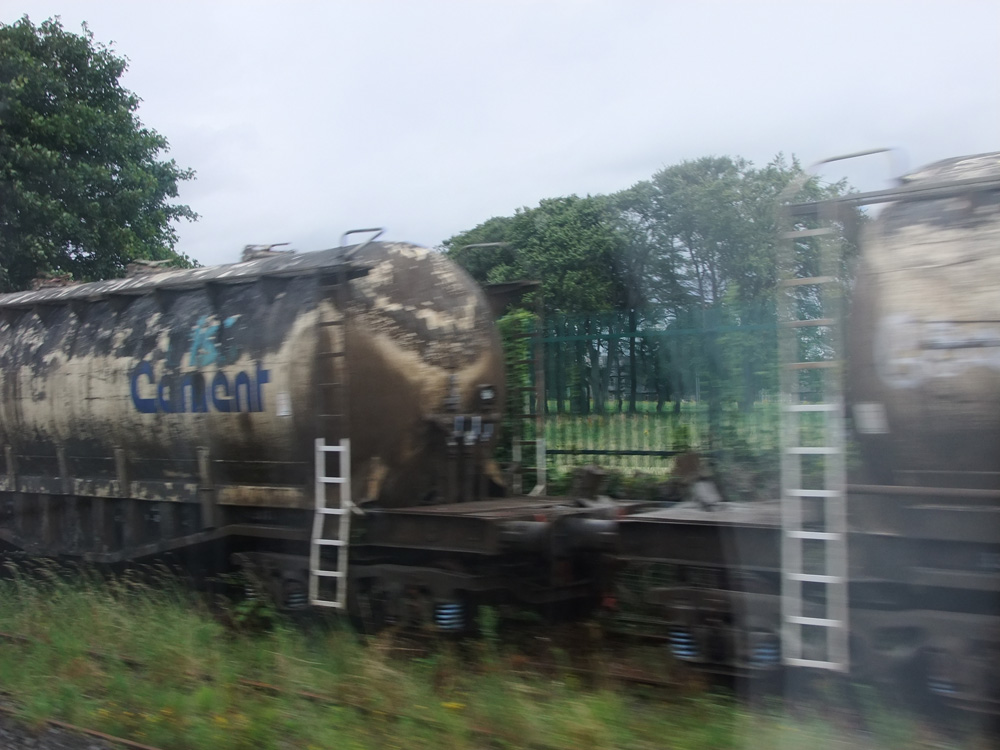
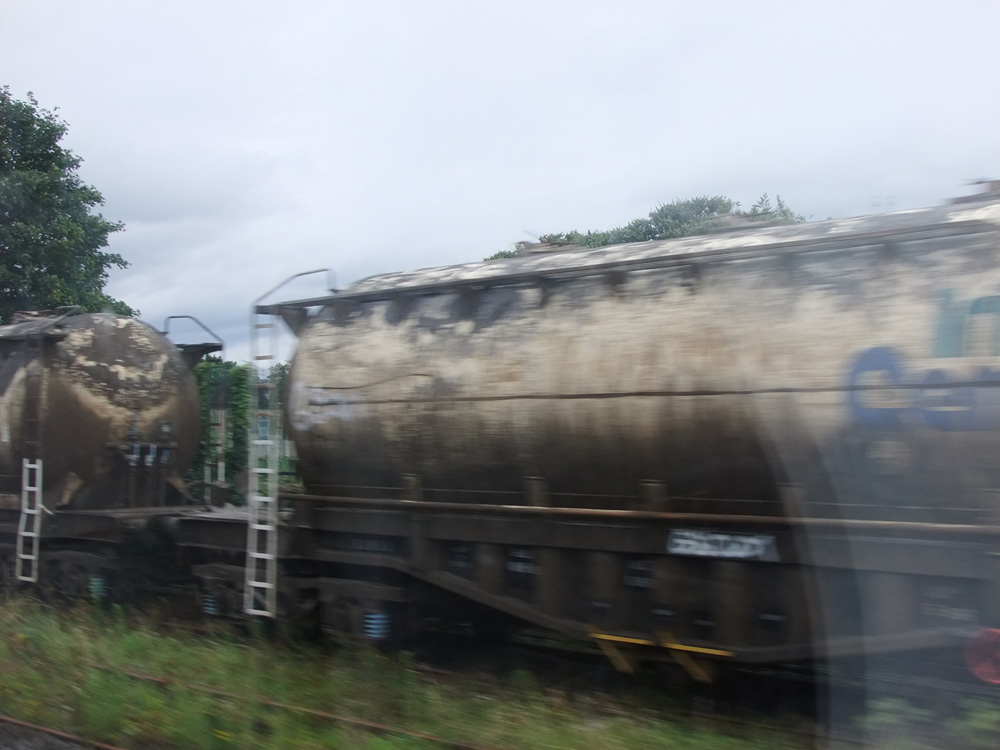
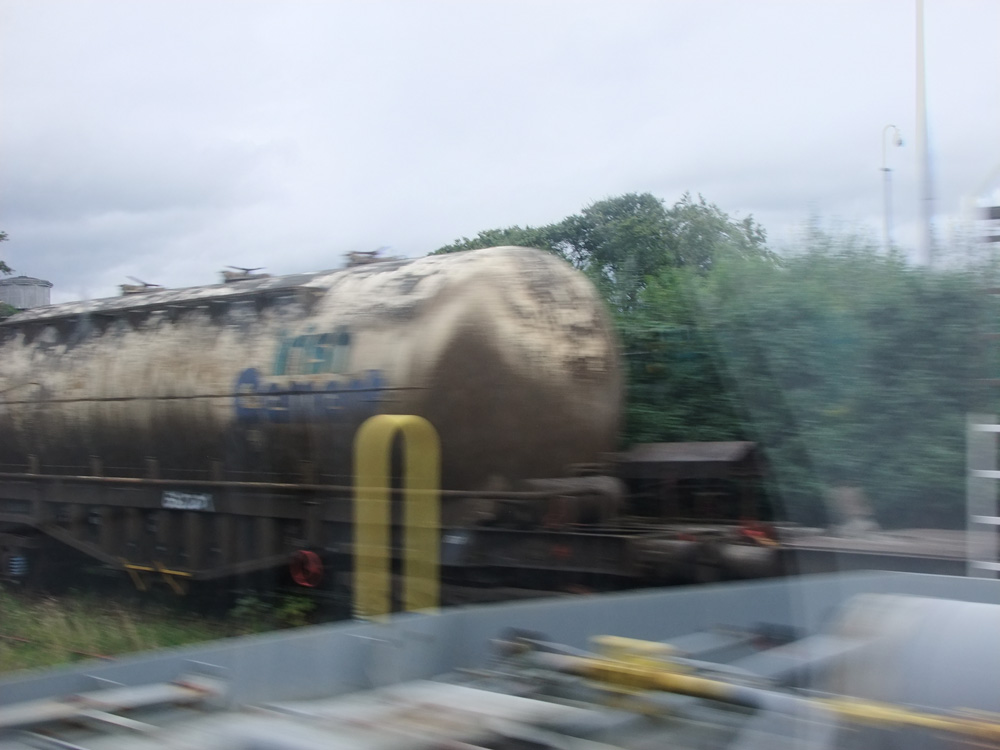
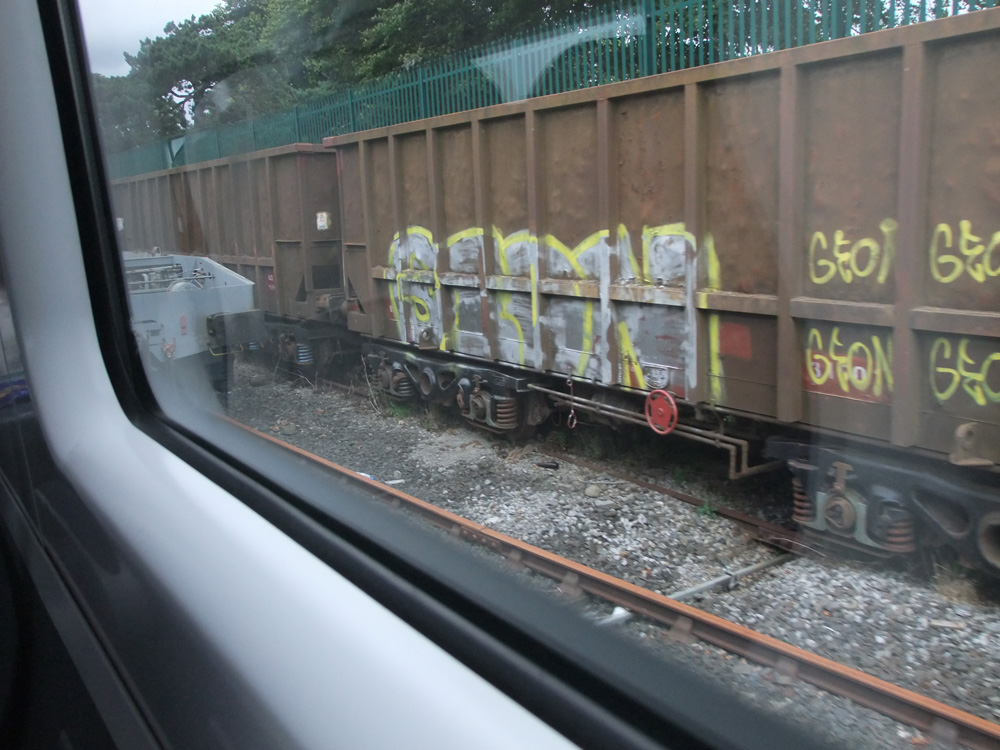
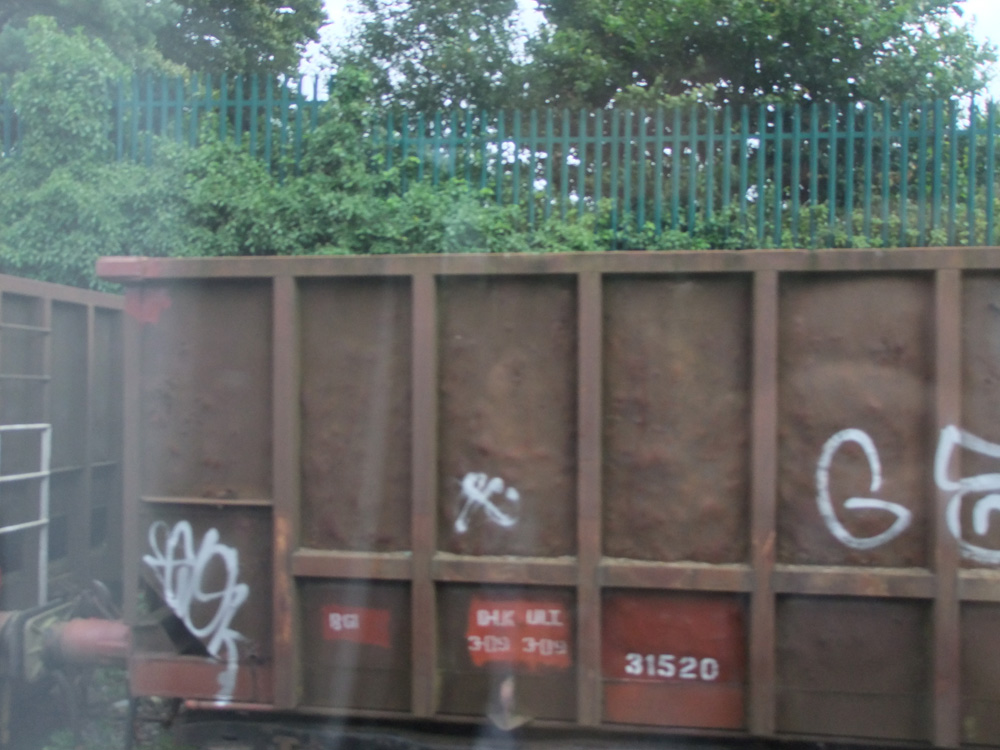
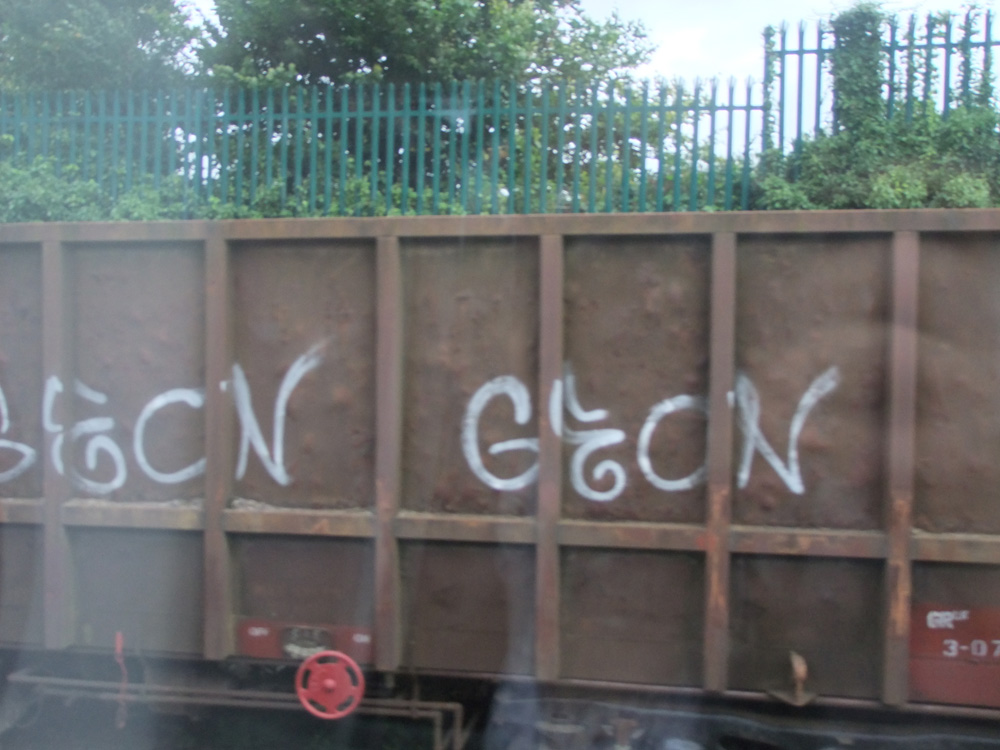
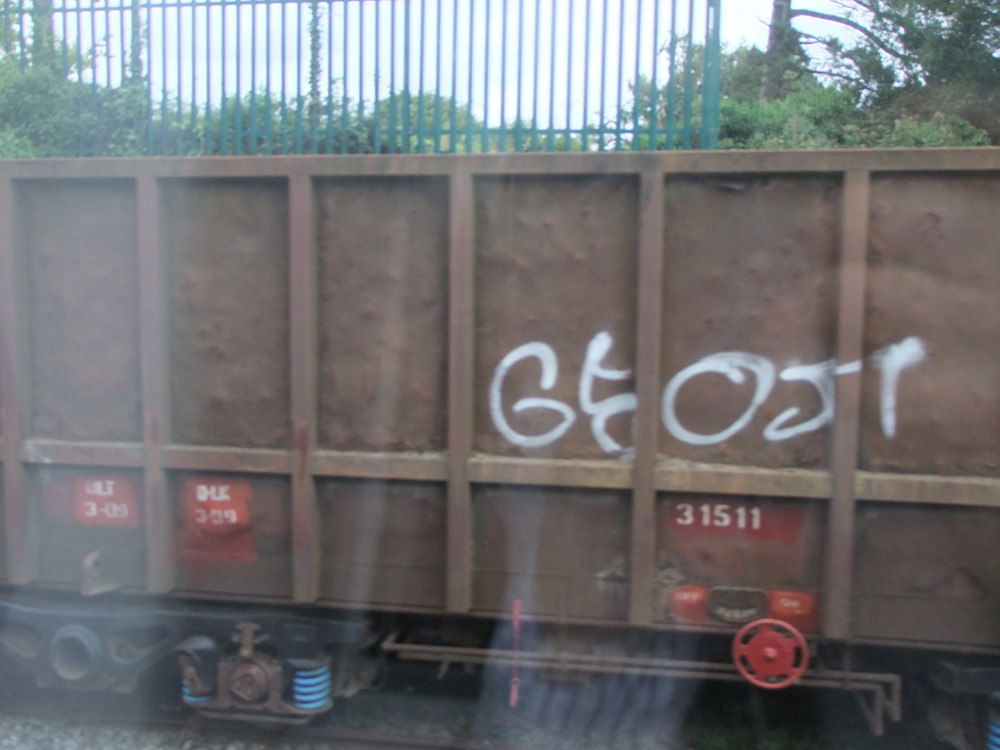
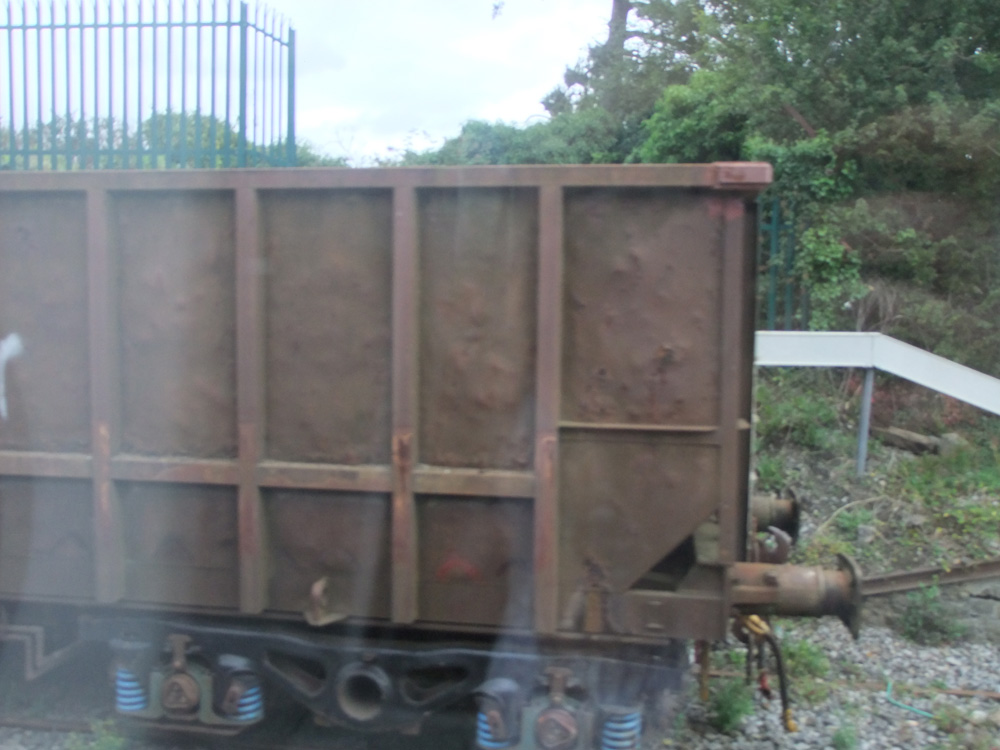
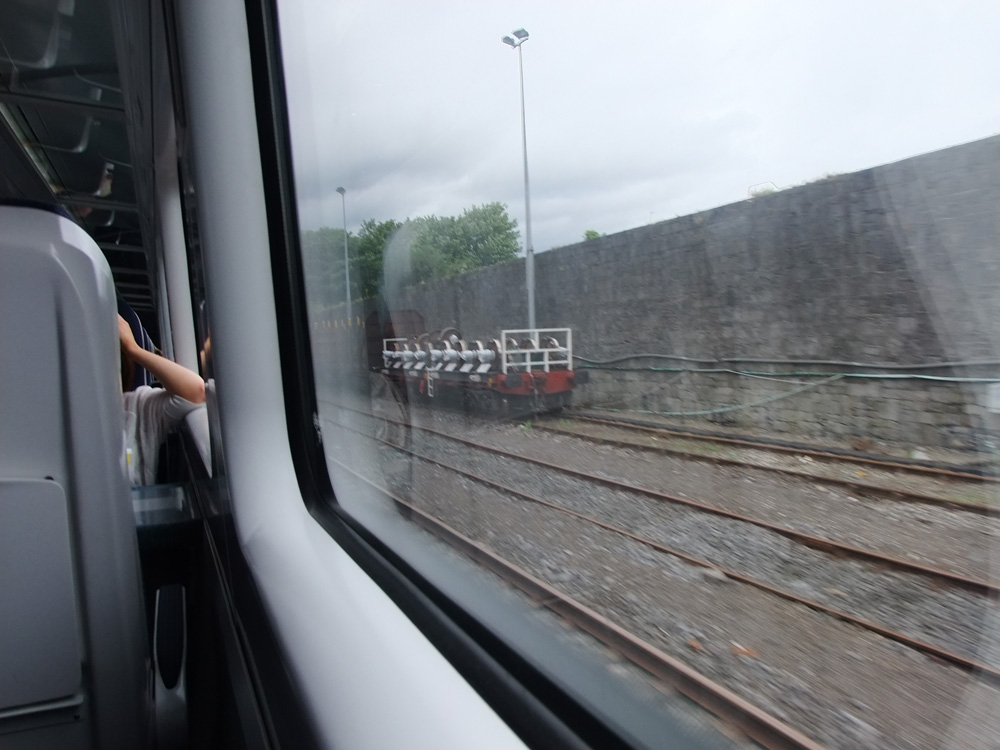
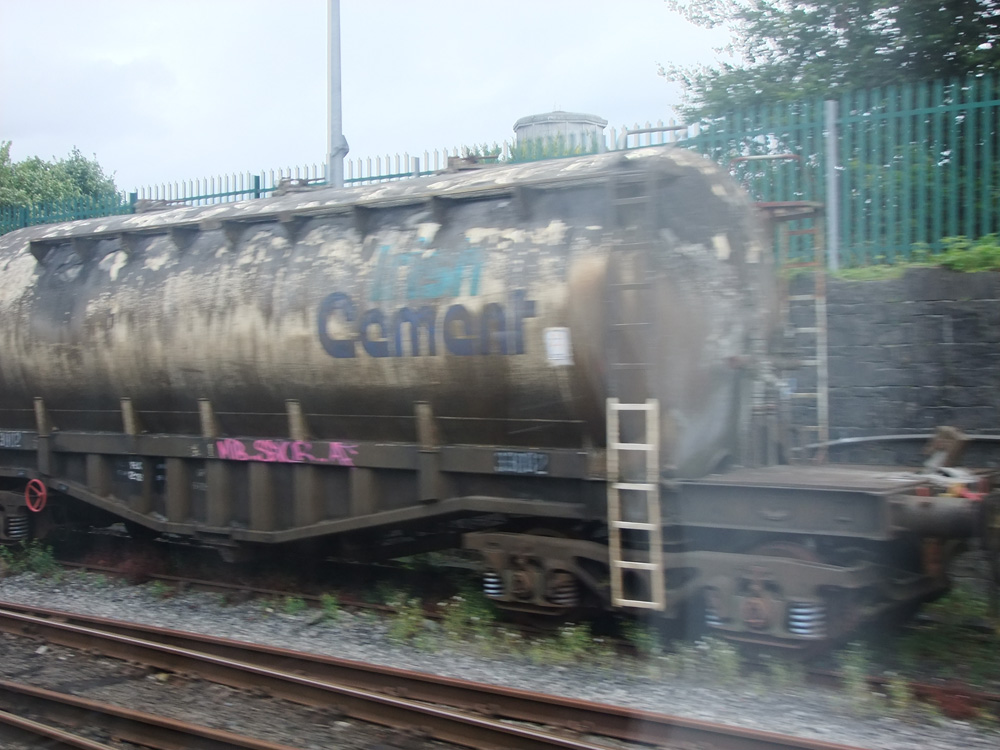
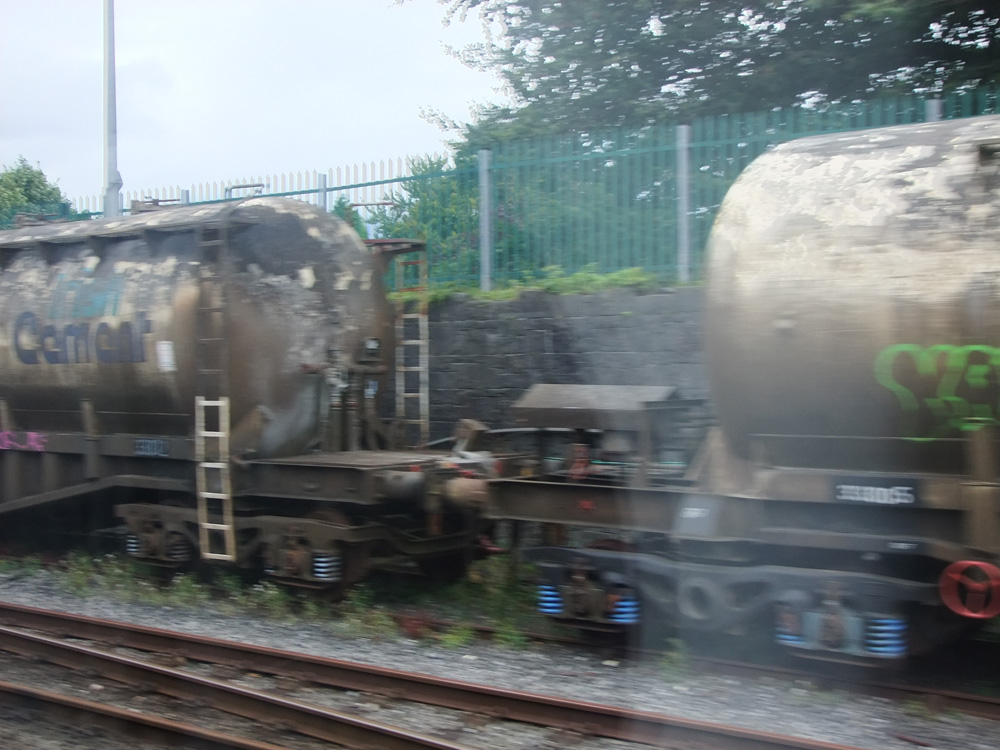
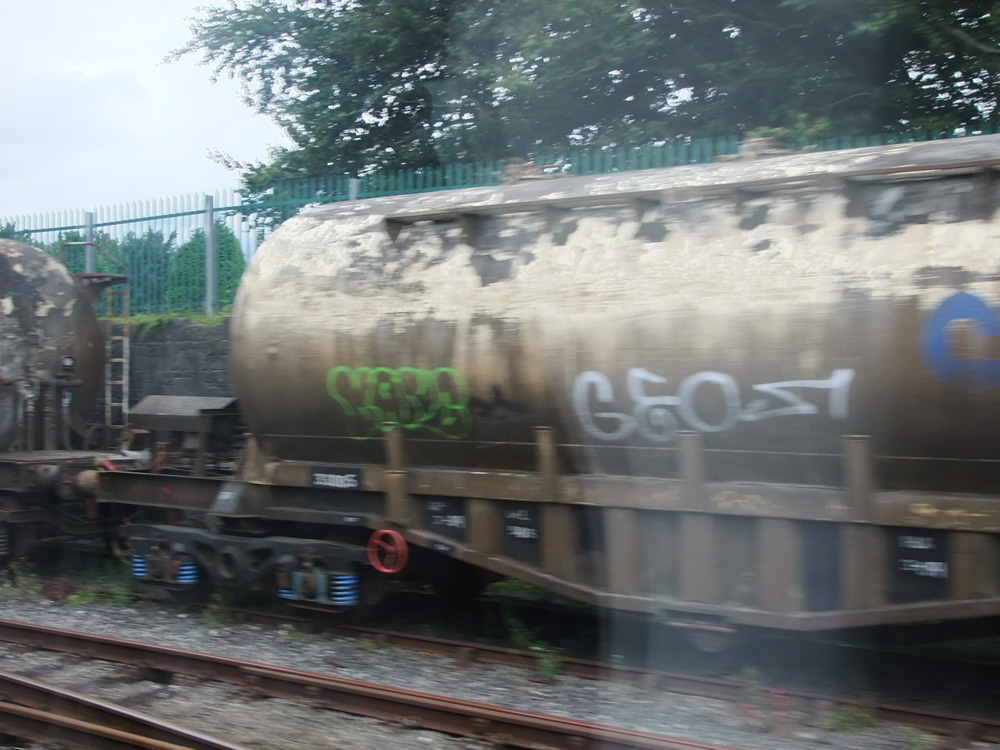
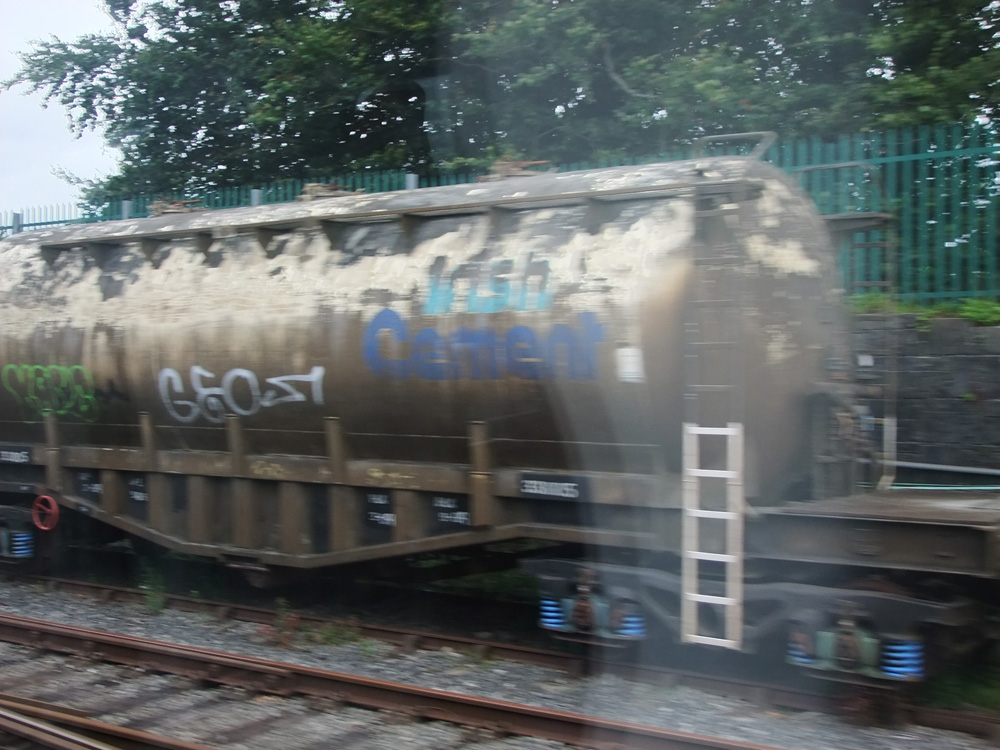
...and a few more from this August, same location, apologies for the blur and reflections...
-
Freight Photos Limerick Christmas 2012
Glenderg replied to Glenderg's topic in Photos & Videos of the Prototype
-
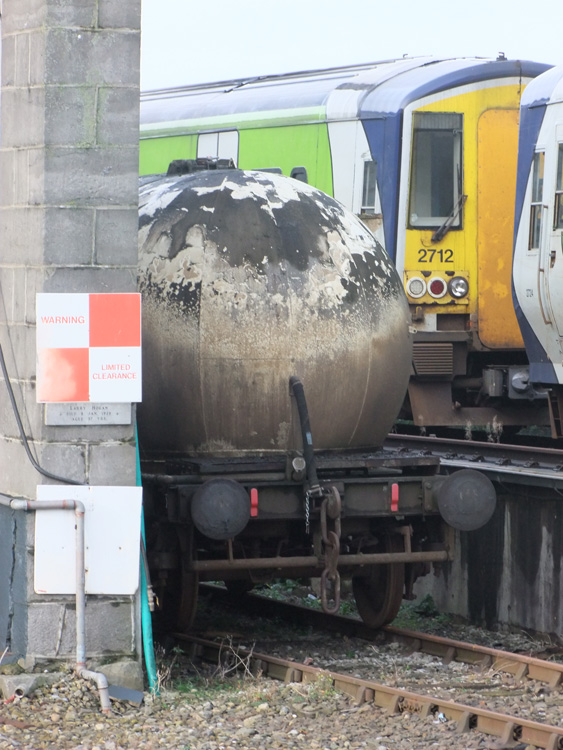
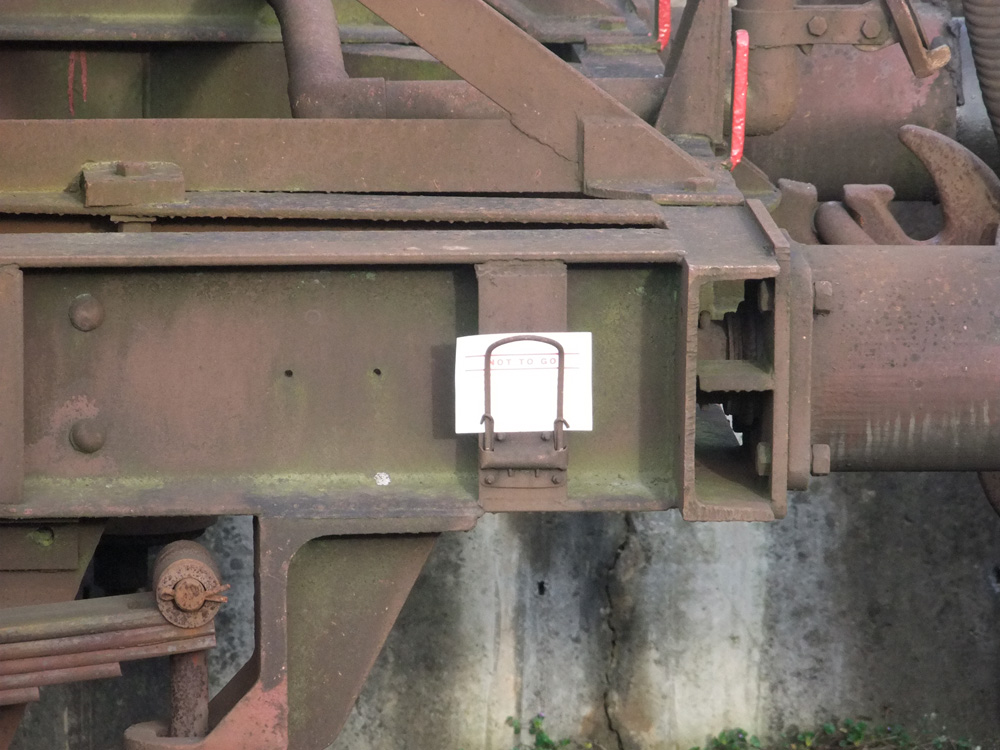
In my quest to capture every damned CIE sign ever hung, I stumbled across some gems in Colbert yesterday, and they might be of use for reference.
-
1990's Irish Railways Archive by Dave Sallery
Glenderg replied to Robert Davies's topic in Photos & Videos of the Prototype
-
Tidings of comfort and joy to all, and may 2013 bring all you deserve. And a few pints too. richie.
-
Graham's layout - Monkhill and Saltstown.
Glenderg replied to irishthump's topic in Irish Model Layouts
Looks fabulous keep up the good work. As far as the white line is concerned, it was usually quite thin 100 - a 1.3mm strip at 00. The most common approach was to lay 600mm concrete paving or granite slabs as the platform edge, and tarmac/gravel up to it and paint the platform edge white. Later on when the yellow line was introduced it was set back behind the concrete, using a road marking roller to paint the yellow line, again 100mm wide. Ashtown and Attymon Junction are the first that come to mind made entirely of brick as a platform side.Richie. -
Was there an incident at 3:27 that we weren't supposed to see?
-
Very sorry to hear of your loss Anto, if there's anything we can do, just say so. May he Rest in Peace.
-
Cheers Scahalane! No PVA, it squirts out all over the place when the foil is rolled with a lino cutting roller and takes ages (24hr+) to dry. I got some cheap french spray mount glue for 8.50 eu that does the trick. Laminated in about a minute. I cut the foil in strips of about 4 feet long and press the whole lot in one length. After a few hours the glue goes off and gives it enough strength. Individual sheets would put me in a mad house. Oh and keep the shiny side hidden and wash the hands or use gloves. Otherwise fingerprints all over it when you're done! I'll do a tutorial on it over the christmas? Richie.
-
Setanta as a lad had a fight with a dog, the one above pictured, the meanest dog in Ulster, who guarded Culanns house. Legend is that he, after Culann the local lord saw him play hurling, he invited him to his table for a feast. The dog not knowing the young Setanta went after him and the story goes that he drove a sliotar down his throat with a hurley, and the dog choked. So devestated was Culann at the loss of his dog, that Setanta vowed to take the dogs place to defend the master. Cu Chullainn means "Hound of Culann" and he went on to be a heroic, if not gruesome warrior.
-
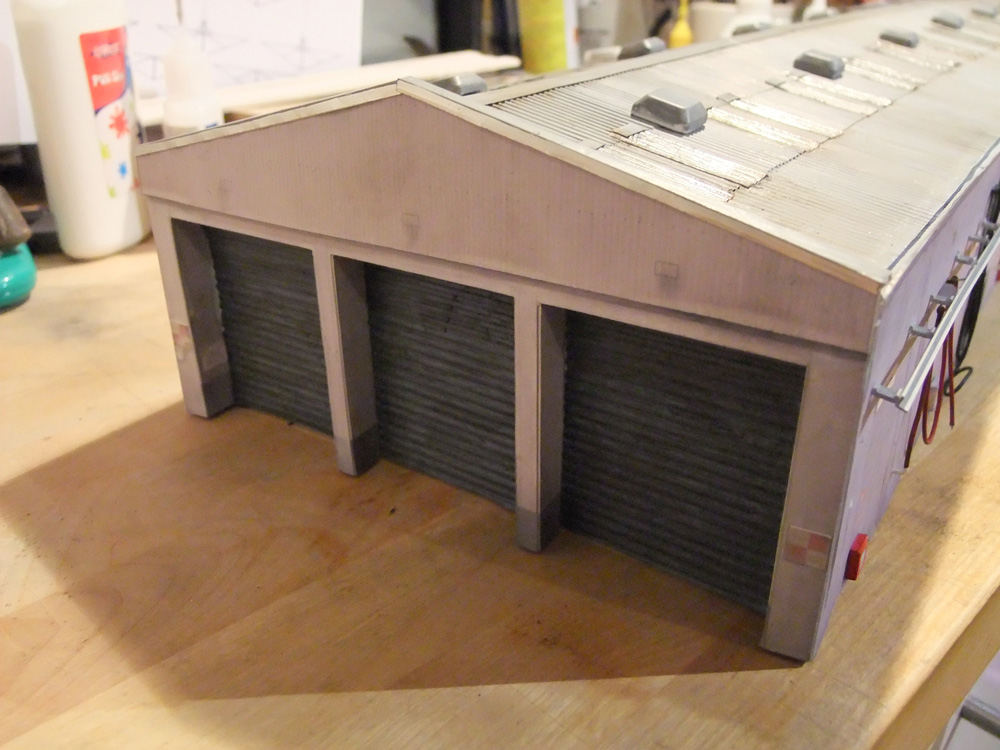
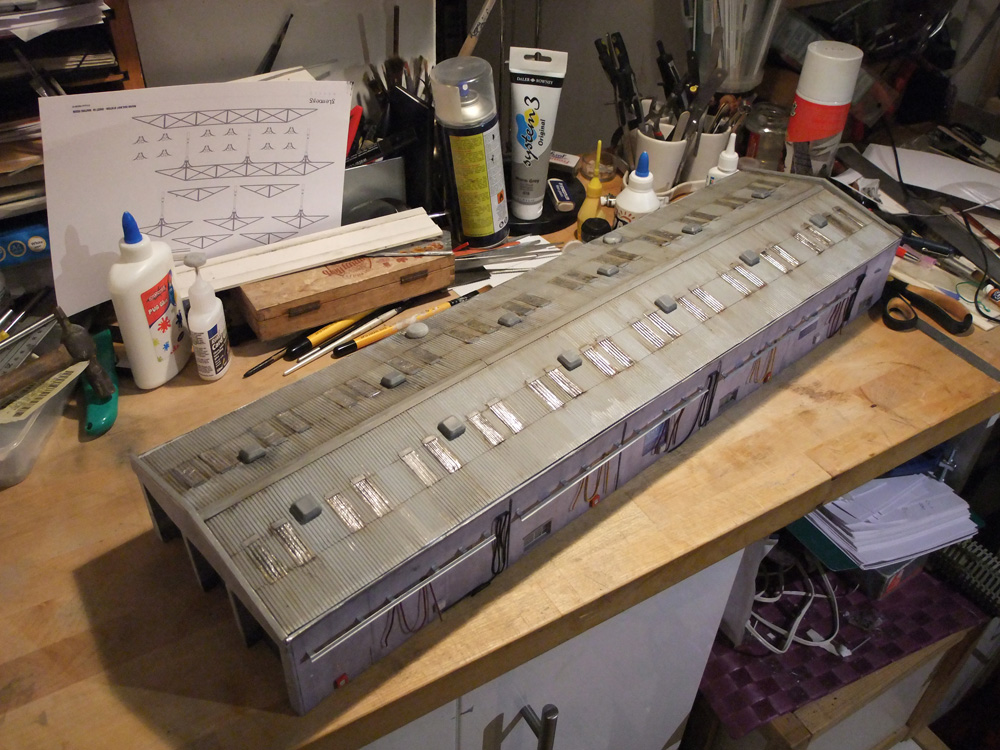
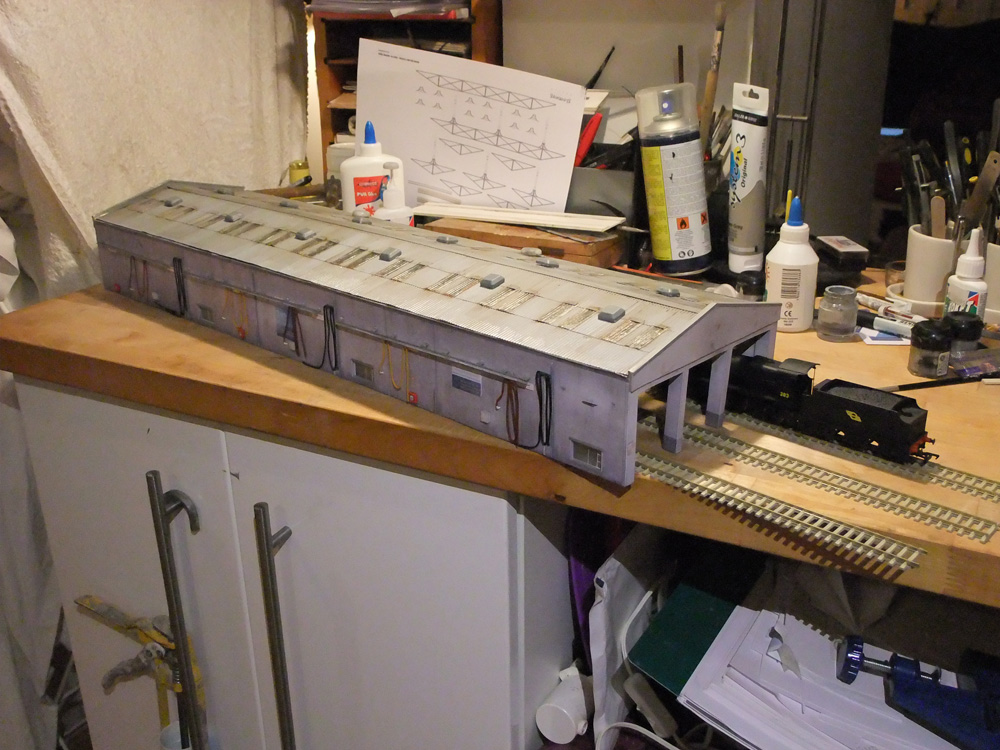
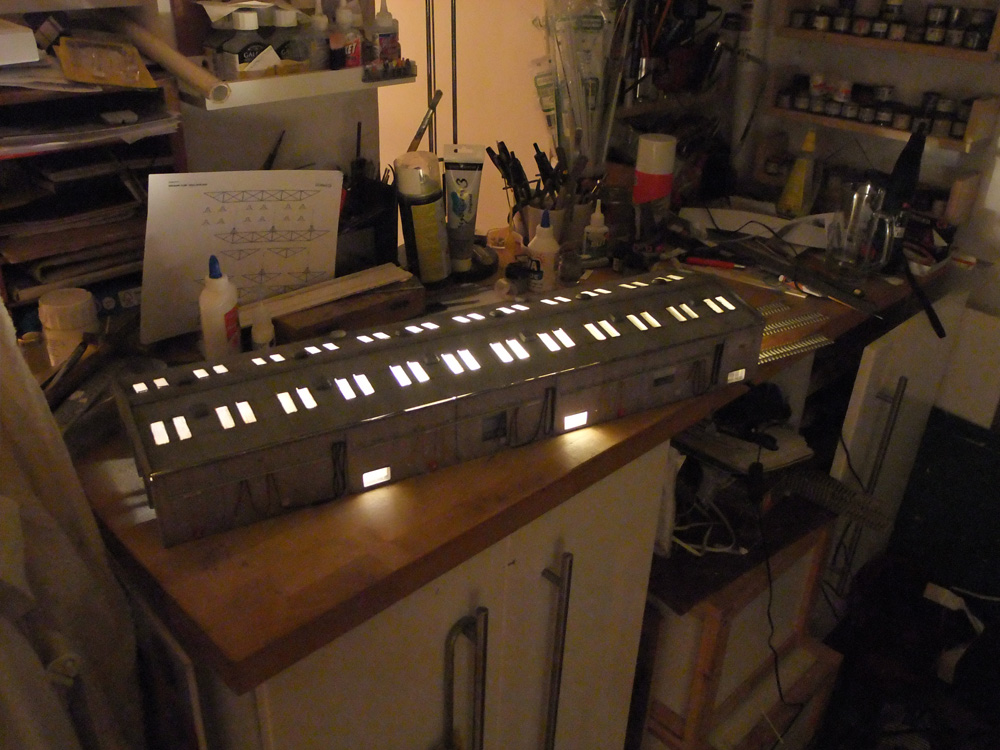
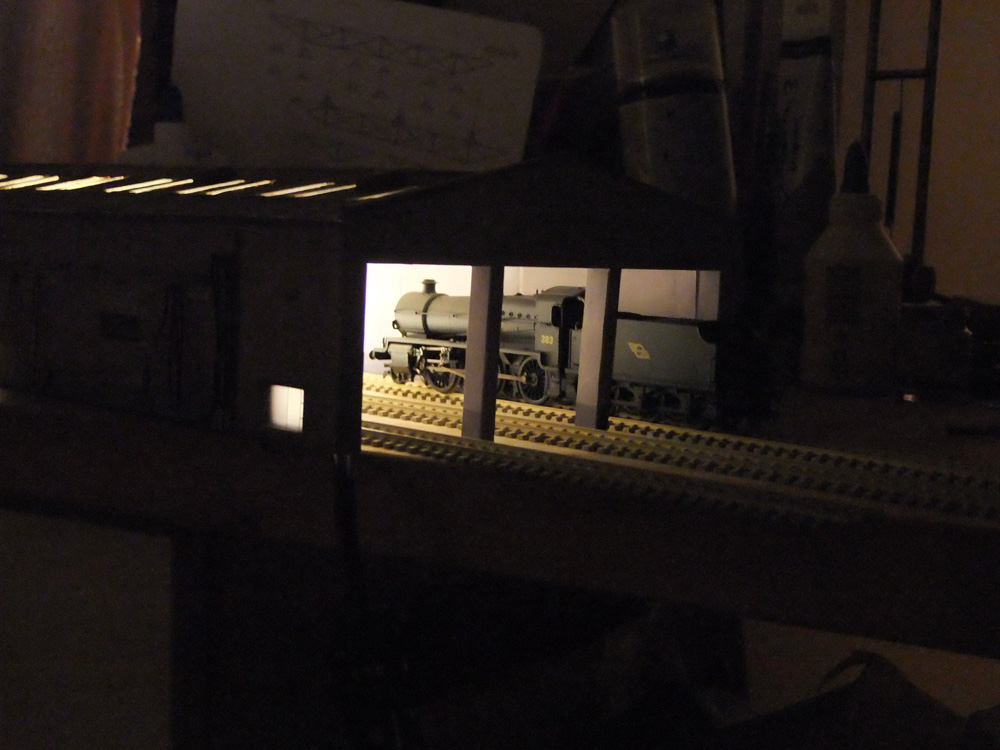
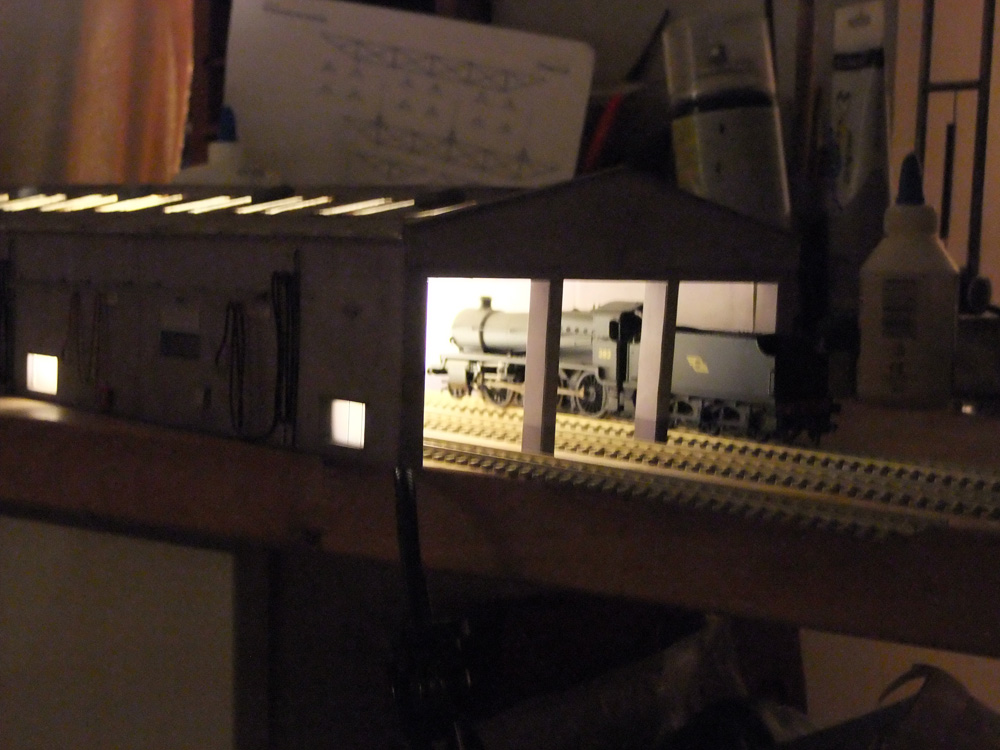
Gents, Firstly, Seasons greetings to all and Secondly a big apology to a few members. I took up a job recently and it has destroyed any free time whatsoever. I seem to be in a loop of work, eat, sleep - rinse and repeat, 16 hour days with no overtime, so my sincere apologies to Garfield, Bosko, Dave, Wrenn, DartStation, Kirley, Anto, Tommy and Paul O'G for delays in getting stuff out. I'll bust my ass to get all outstanding bits distributed before Santy comes a knocking, or a few days later at the worst. I'll pm all concerned tomorrow with details of deliveries etc. and arrangements. But before my eyelids solder shut from lack of sleep I thought I'd post up a few snaps of Bosko's finished "Restoration Depot" The rear end to make it a "fake" through and through shed. The Ventilation Hoods are made from plastic door stoppers, available from your local cheapy euro store. The gutters, flashing, parapets, and roofing are made from Schalanes technique of pressing metal to get the form, but this is ordinary tinfoil laminated 6 times and then pressed. It's remarkably sturdy once the glue goes off and given a lick of thick acrylic paint. I chose to do the roof finish by hand, otherwise the rooflights would have been obliterated, and I'm glad I parked the airbrush. The roof finish is done using the gauche method I posted a good while back using three colours and washing and diluting it each time. This is the effect of six washes, which started as wrecked and rusty, eventually toning down to dirty and poorly maintained. The rooflights were made by layering 8 sheets of ordinary cling film together, which produces this nice "fibreglass" look to it. Once in place, a lick of PVA over the top and it's as good as Wills plastic sheet, and a damn sight cheaper. I bunged a light in, and I reckon now is the time to grab some cheap fairy lights for this kind of lark. Need to blank out the light bleed at the wall plate, but that's not a stresser. The refuelling lines were painstakingly done with various gauges of wire and styrene strip to make the gantry, everything else is card. The whole thing has been sealed with three coats of matt varnish to protect it from accidental water damage so fingers crossed it will survive. Again apologies to the members above, delays will be rectified as soon as humanly possible. Bed calls. Richie.
-
Great googly moogly. I never really had much time for that class - i never remember it action. But, those photos have blown my mind, it looks like the real thing to scale. Stunning finish. Richie.
-
On telly this evening on BBC Four at 22:00 GMT - "two part series telling the remarkable story of a band of visionaries who rescued some of the little narrow gauge railways that once served Britain's industries" Here's hoping there's some hardcore "ship-on-dock-on-train" action! Richie.
-
C'est tres bon Pat, but ou est les splatterings du graffiti on les walls that bons franc is well known for? Should we club together and send anto over to clandestinely 'fix' les rolling stock?
-
.... only if them boys are holding walking sticks....
-
Great to see as many approaches to this mystic part of layout creation as possible. In fairness, your layout has everything ballast wise, from high shoulders to diesel dipped platform areas, so a tutorial might be posted when you're finished ? 2017? Possibly a rolling tutorial? R.
-
Ah! A Hari-Kirshna qoute mixed up with mother-in-laws. Tough night seamus, perhaps a bit of "hari-hari" round the kitchen would soothe those ******** impulses?
-