Angus
-
Posts
301 -
Joined
-
Last visited
-
Days Won
3
Content Type
Profiles
Forums
Events
Gallery
Blogs
Everything posted by Angus
-
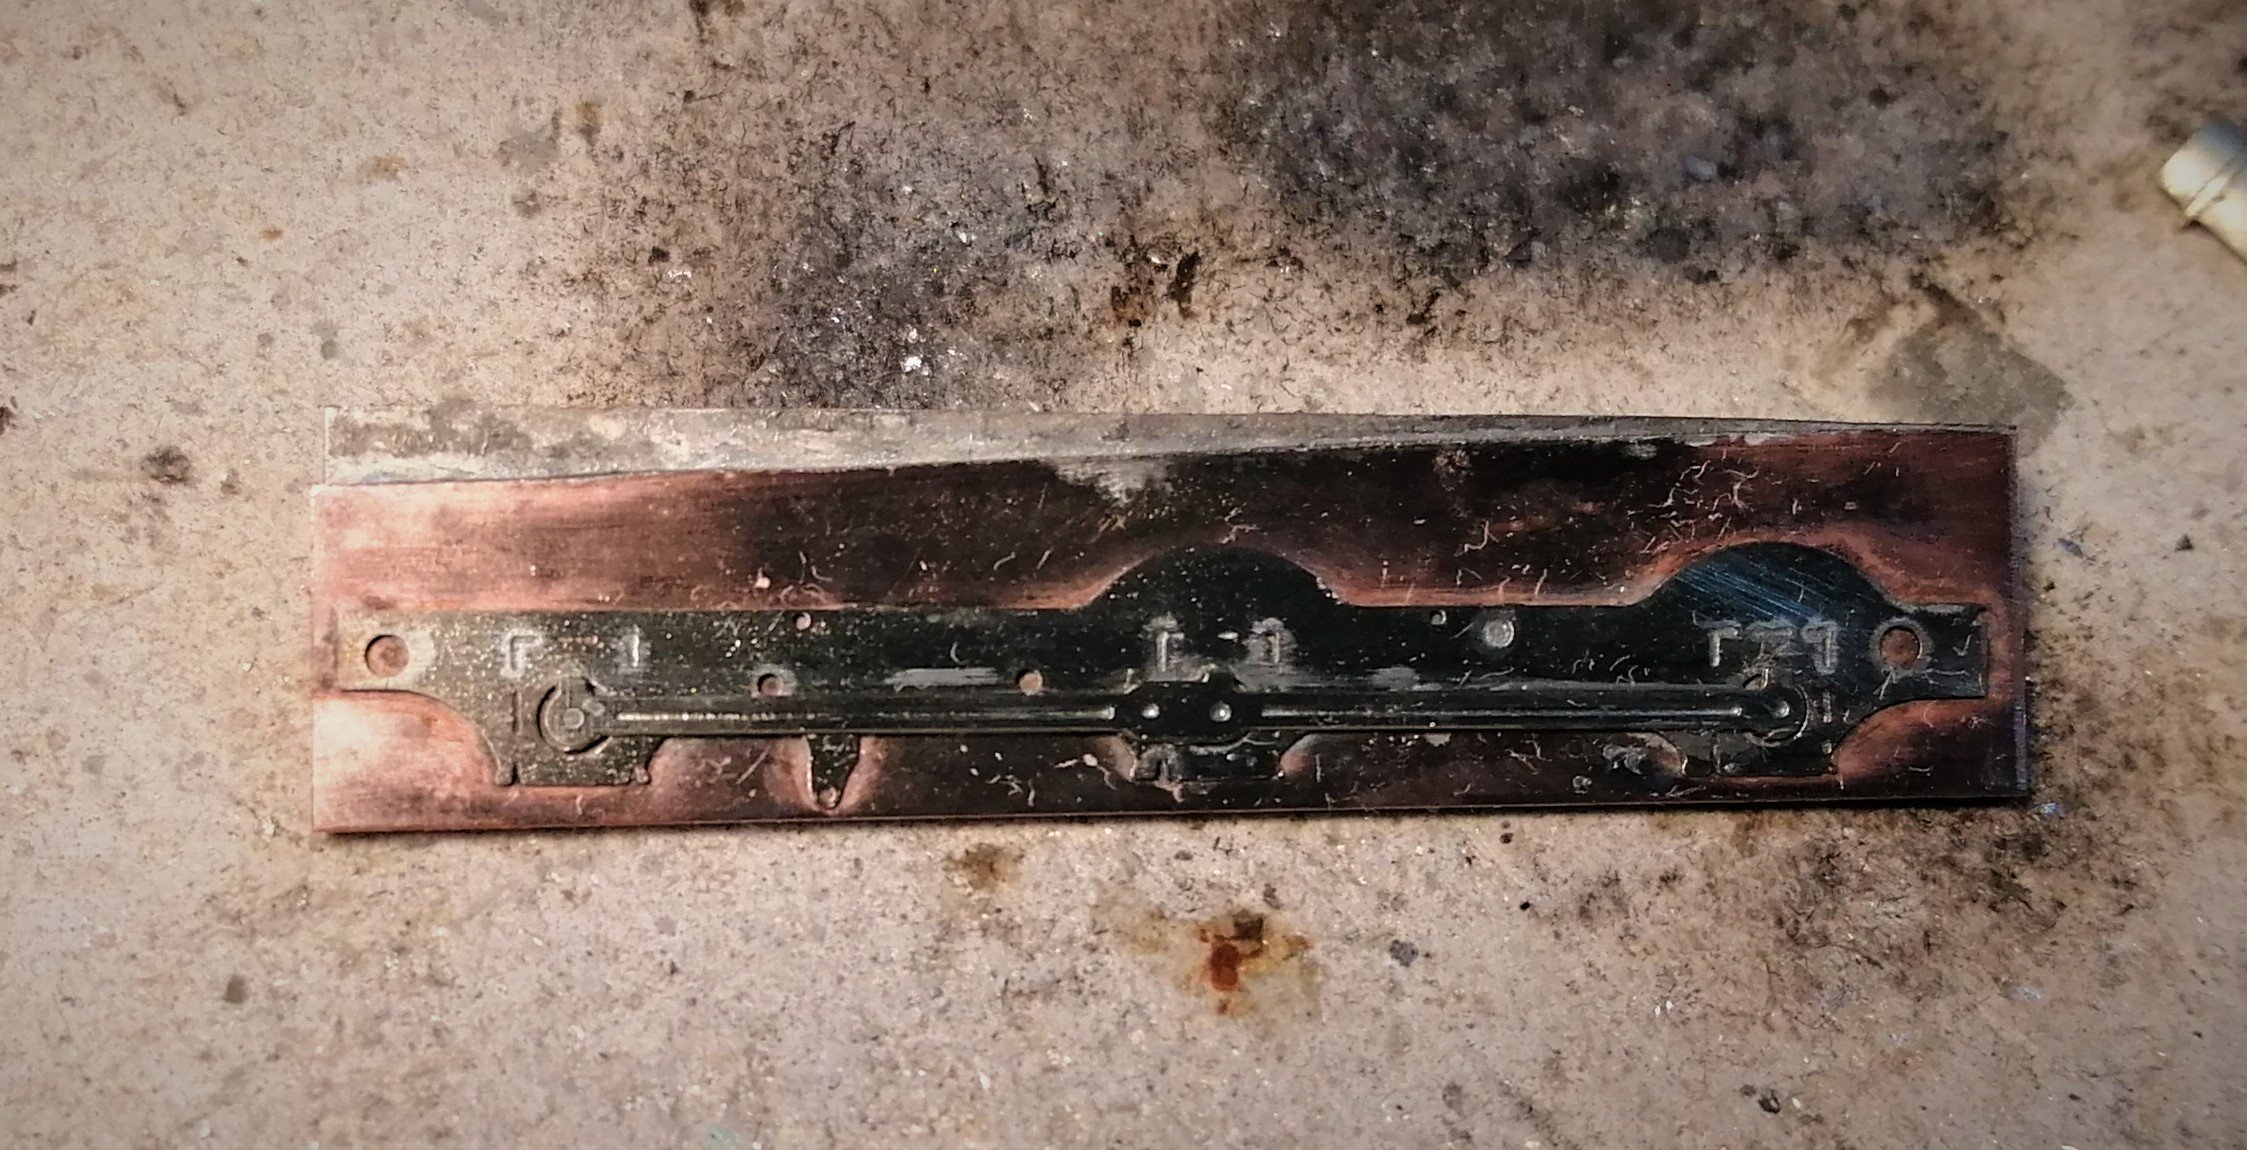
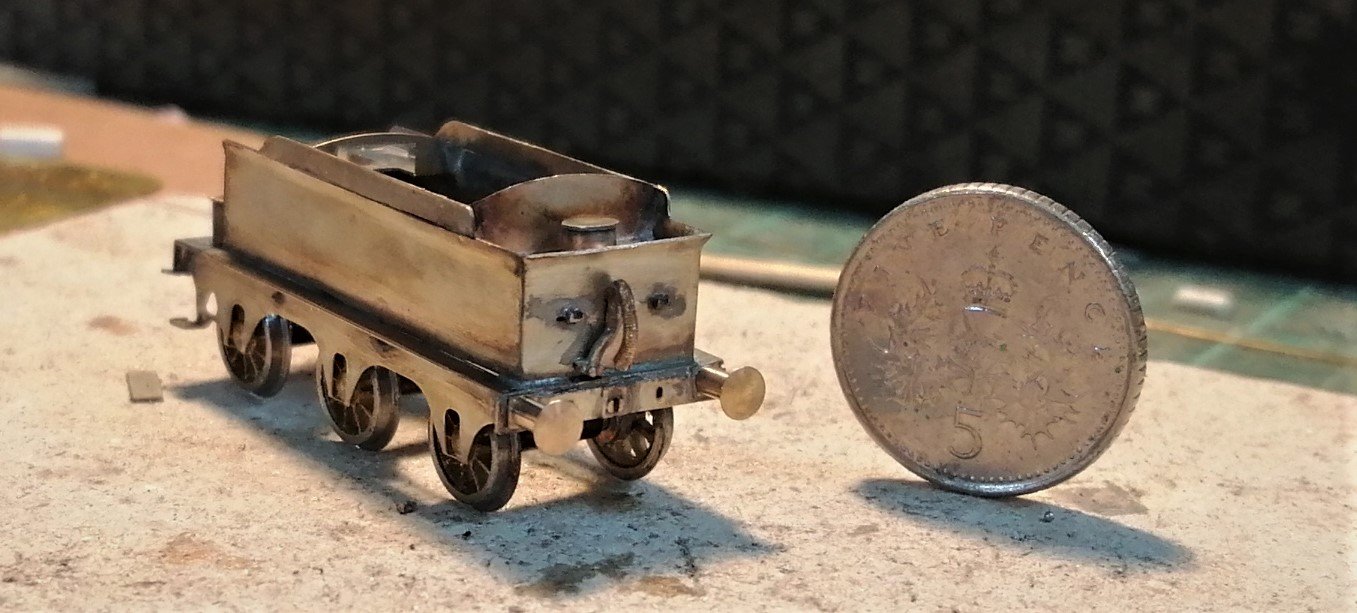
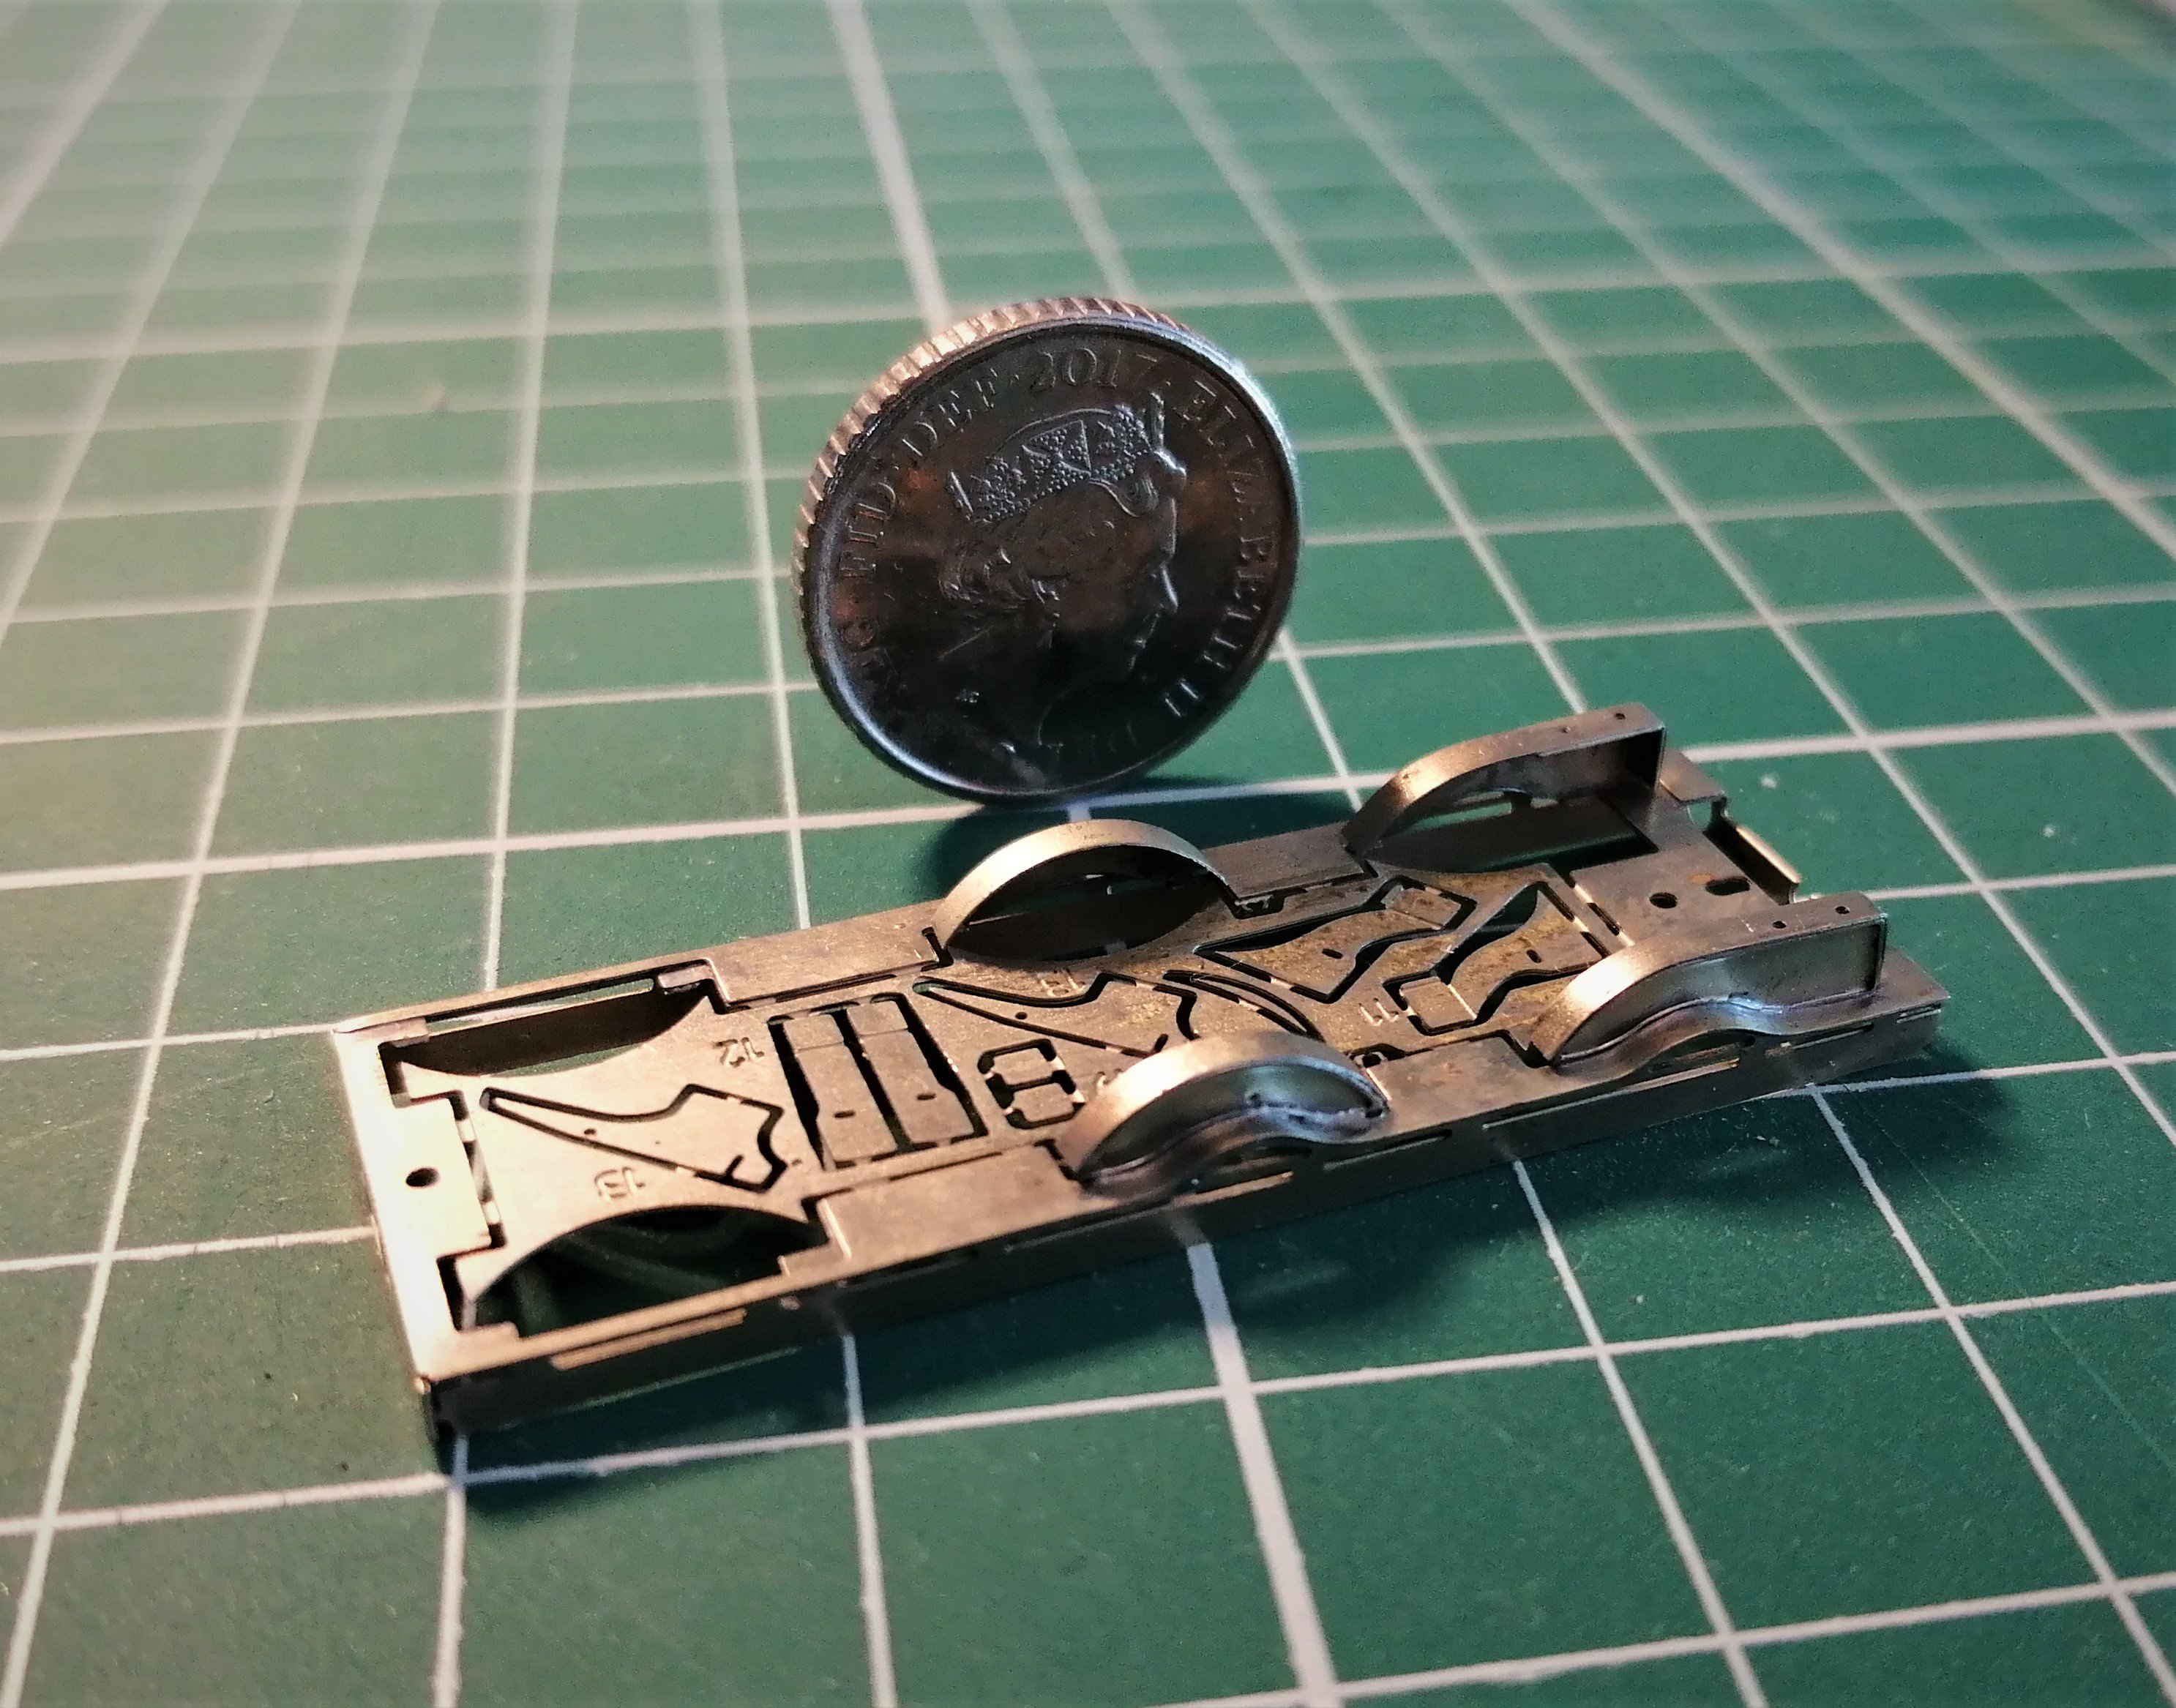
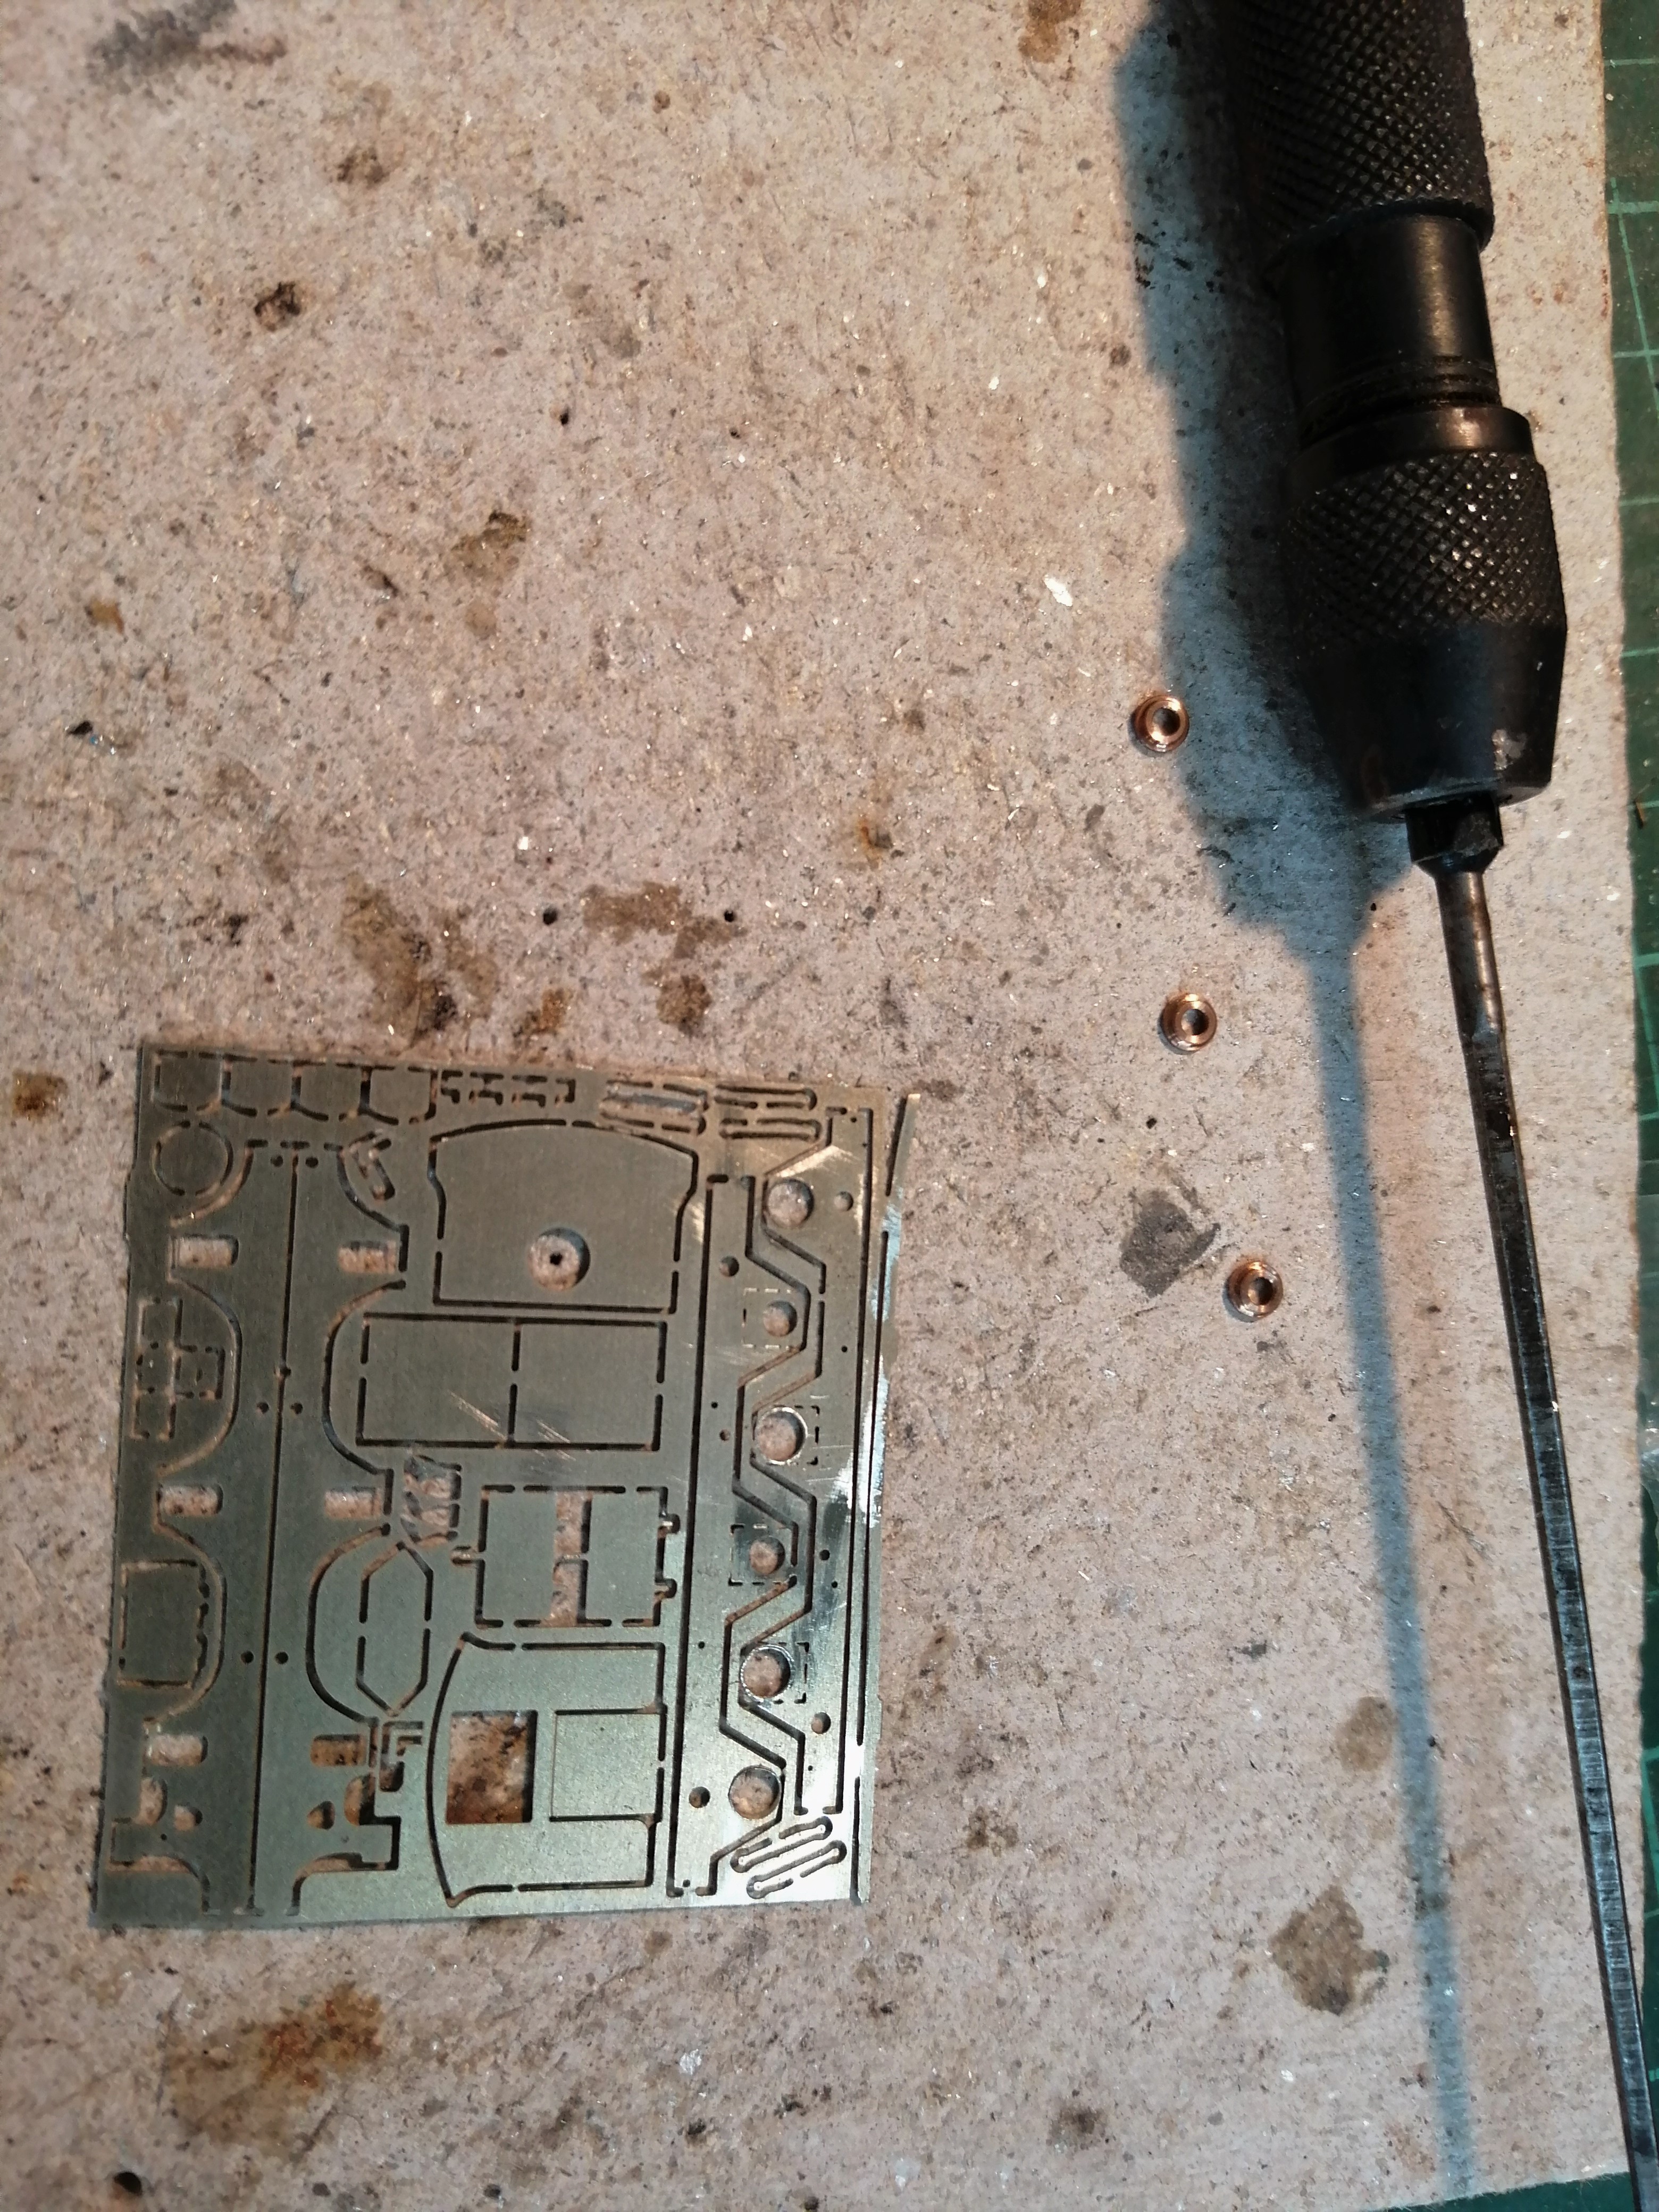
Time to tackle one job I've been putting off, the tender handrails. There is no easy way of doing these, initially I drilled the tender base then added the uprights in 0.3mm brass wire. For the handrail tops I tried 0.5mm strip, but accurately drilling the 0.3mm hole in the centre of a 0.5mm strip proved too difficult so I just went with some more 0.3mm wire. I also realised why I couldn't fit the brake standard between the sandboxes and handrail, it actually fixes to the handrail. I've also removed the buffers, I decided I couldn't live with them and await a smaller set in the post. Apart from the rear lamp irons, which I will fit with the new buffers, that will finish the soldering on the body so I can start adding the plastic details. I've still the tender brake gear to fit to the chassis, another job I'm not looking forward to...... As I've reached a hiatus with the tender I've started on the loco chassis. Experience with the tender chassis showed that the etch is too thin to provide enough rigidity for the loco, it's ok for the tender chassis but not the loco, any twisting would jam the coupling rods. So I'm going to cut the chassis from sheet using the etched version as a template. Two layers of 30 thou phosphor bronze sheet (using phosphor bronze avoids the need for bearings in the frames) and the chassis etch were solder together with a blow torch then the coupling rod soldered on top to provide a guide for drilling the axle holes. Once the holes are drilled for the axles and the brake gear I'll cut out the chassis shape with a piercing saw. It's the first time I've attempted to do this, it could be interesting!

-
It's alright David, over on RMweb I called it a G2 then edited it to a G3 leaving a comment that any fool would know it was a G3 before finally realising my mistake and corrected it back to G2 Confused? I know am! I blame the gin......
-
Thanks Mayner and JHB, Actually the photo is a bit deceptive, I deliberately took it from a low angle as I've managed to dish the sandbox lids slightly. A touch of filler and a quick sand off to level will sort before the primer goes on though. The 101 etch is a bit a weird in that some parts fold and fit fine, others don't. I have experienced this before which shot down etches, I think the process removes any tolerance. That said your MGWR horsebox and meat van went together well so I've high hopes for the K class.
-
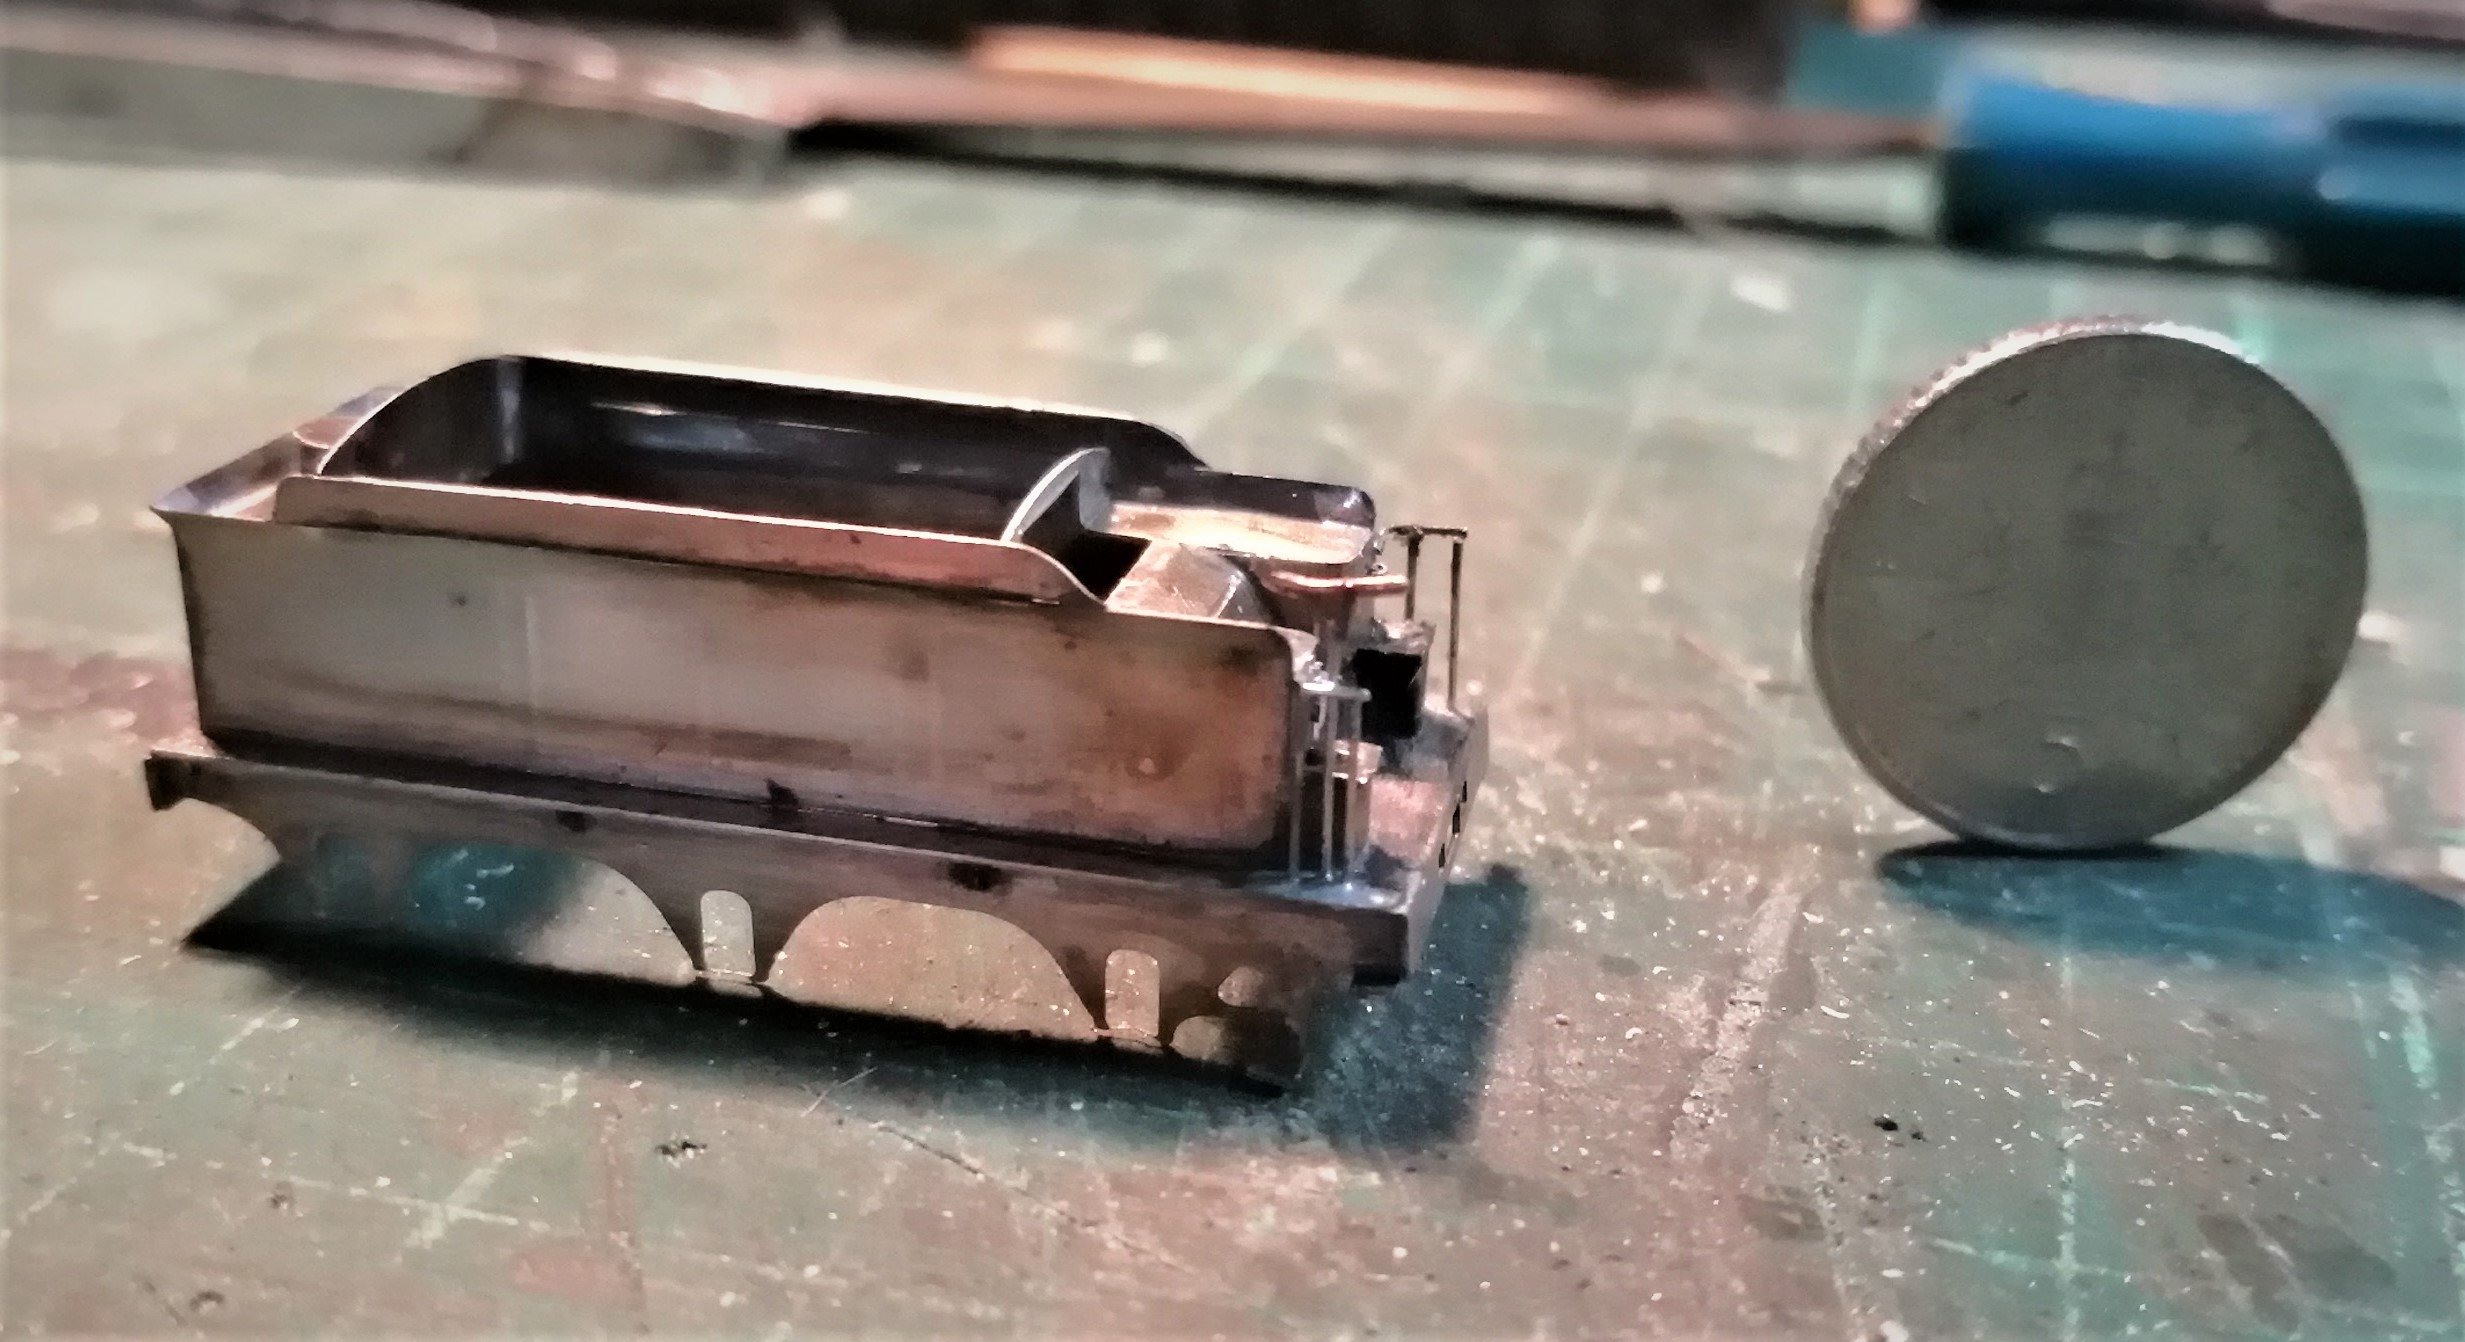
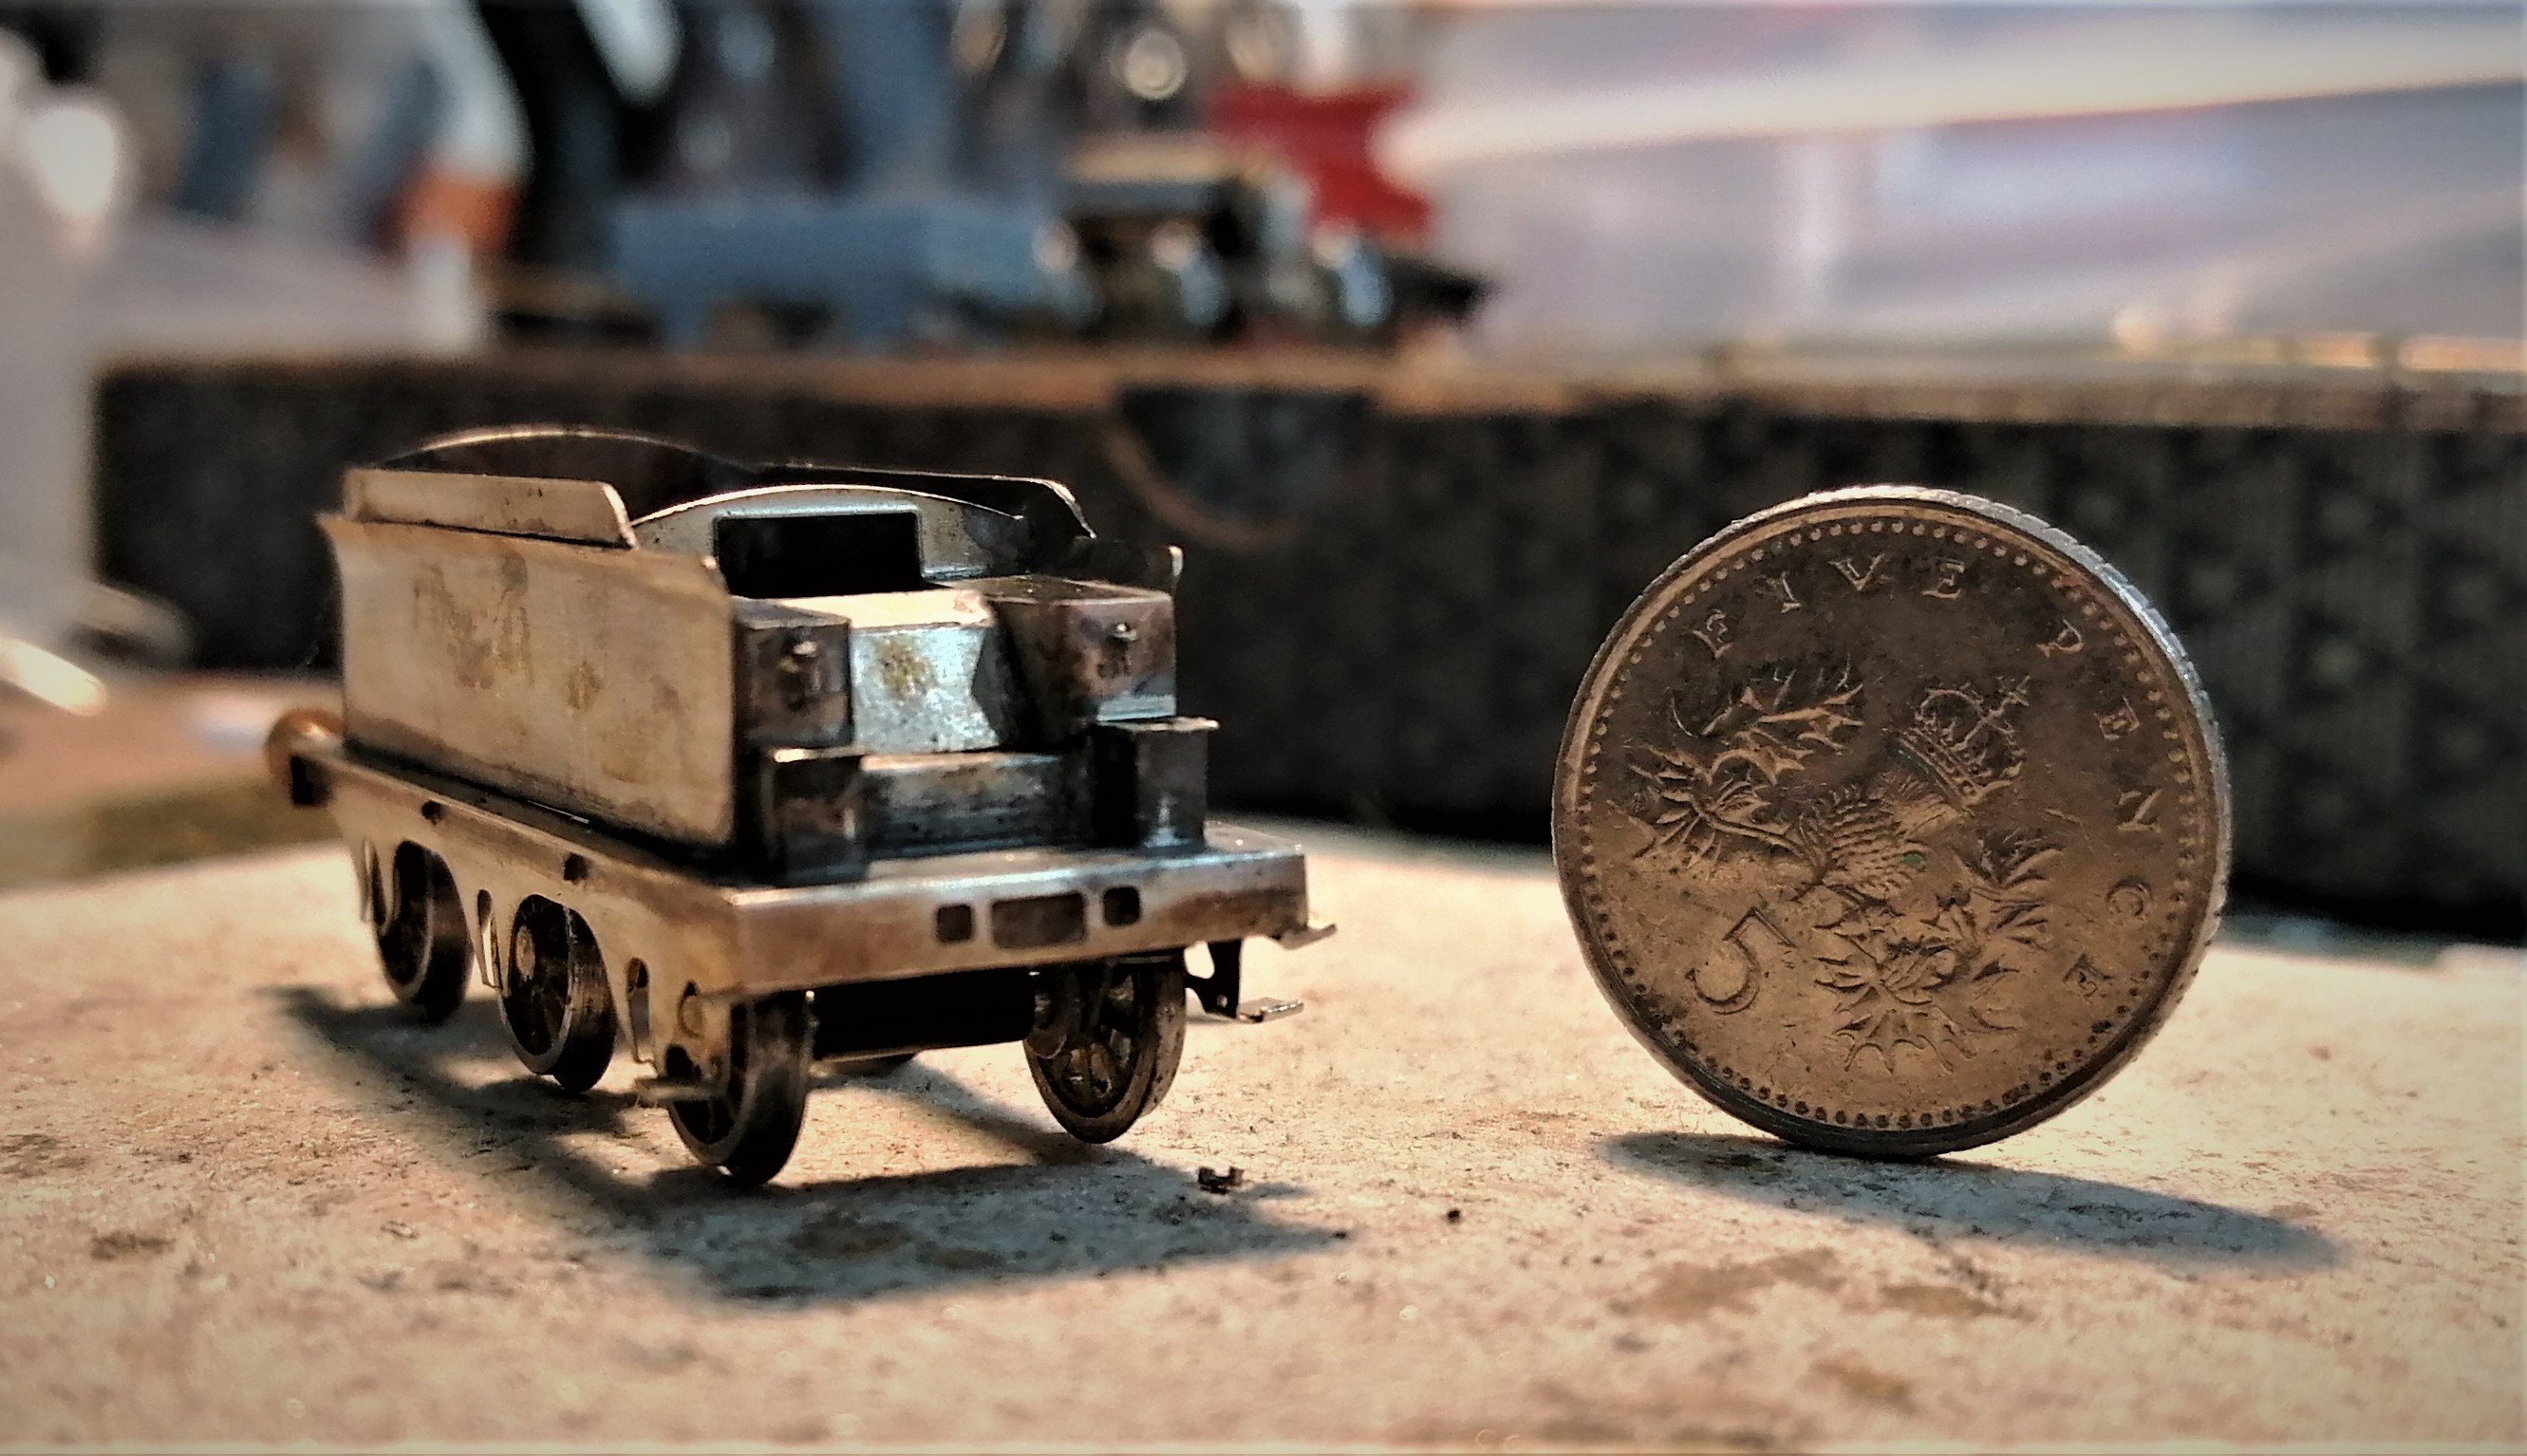
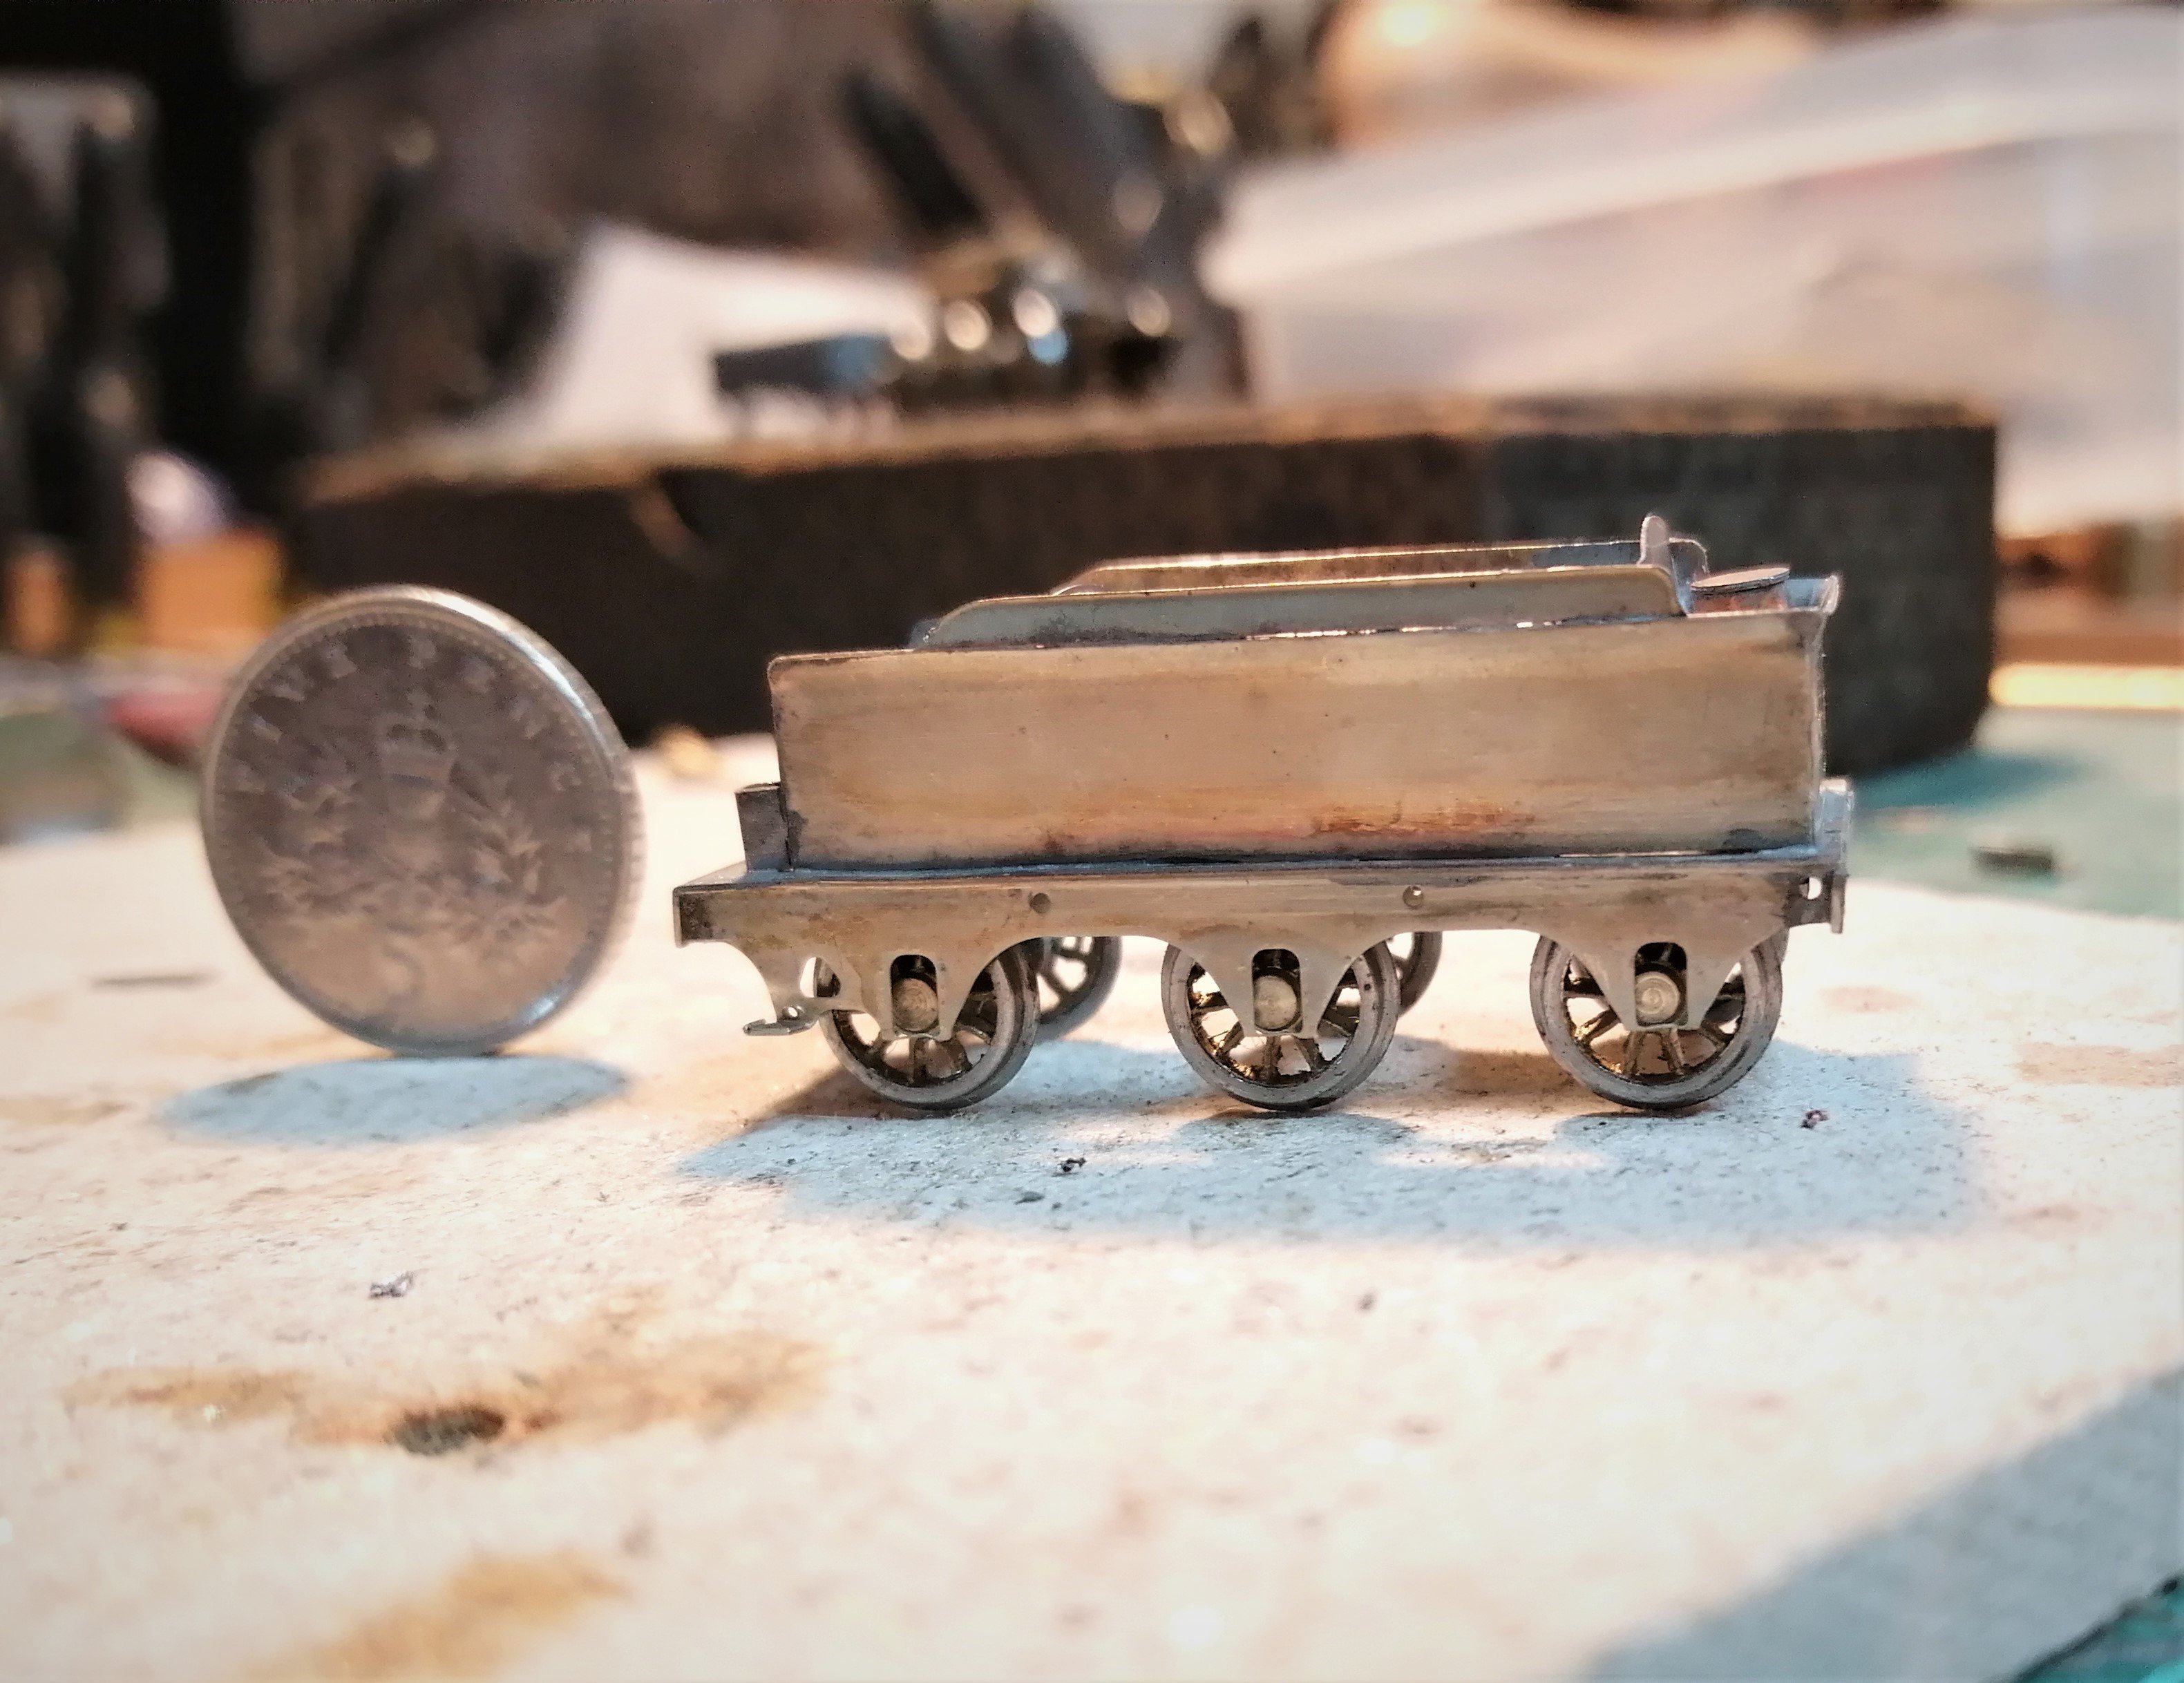
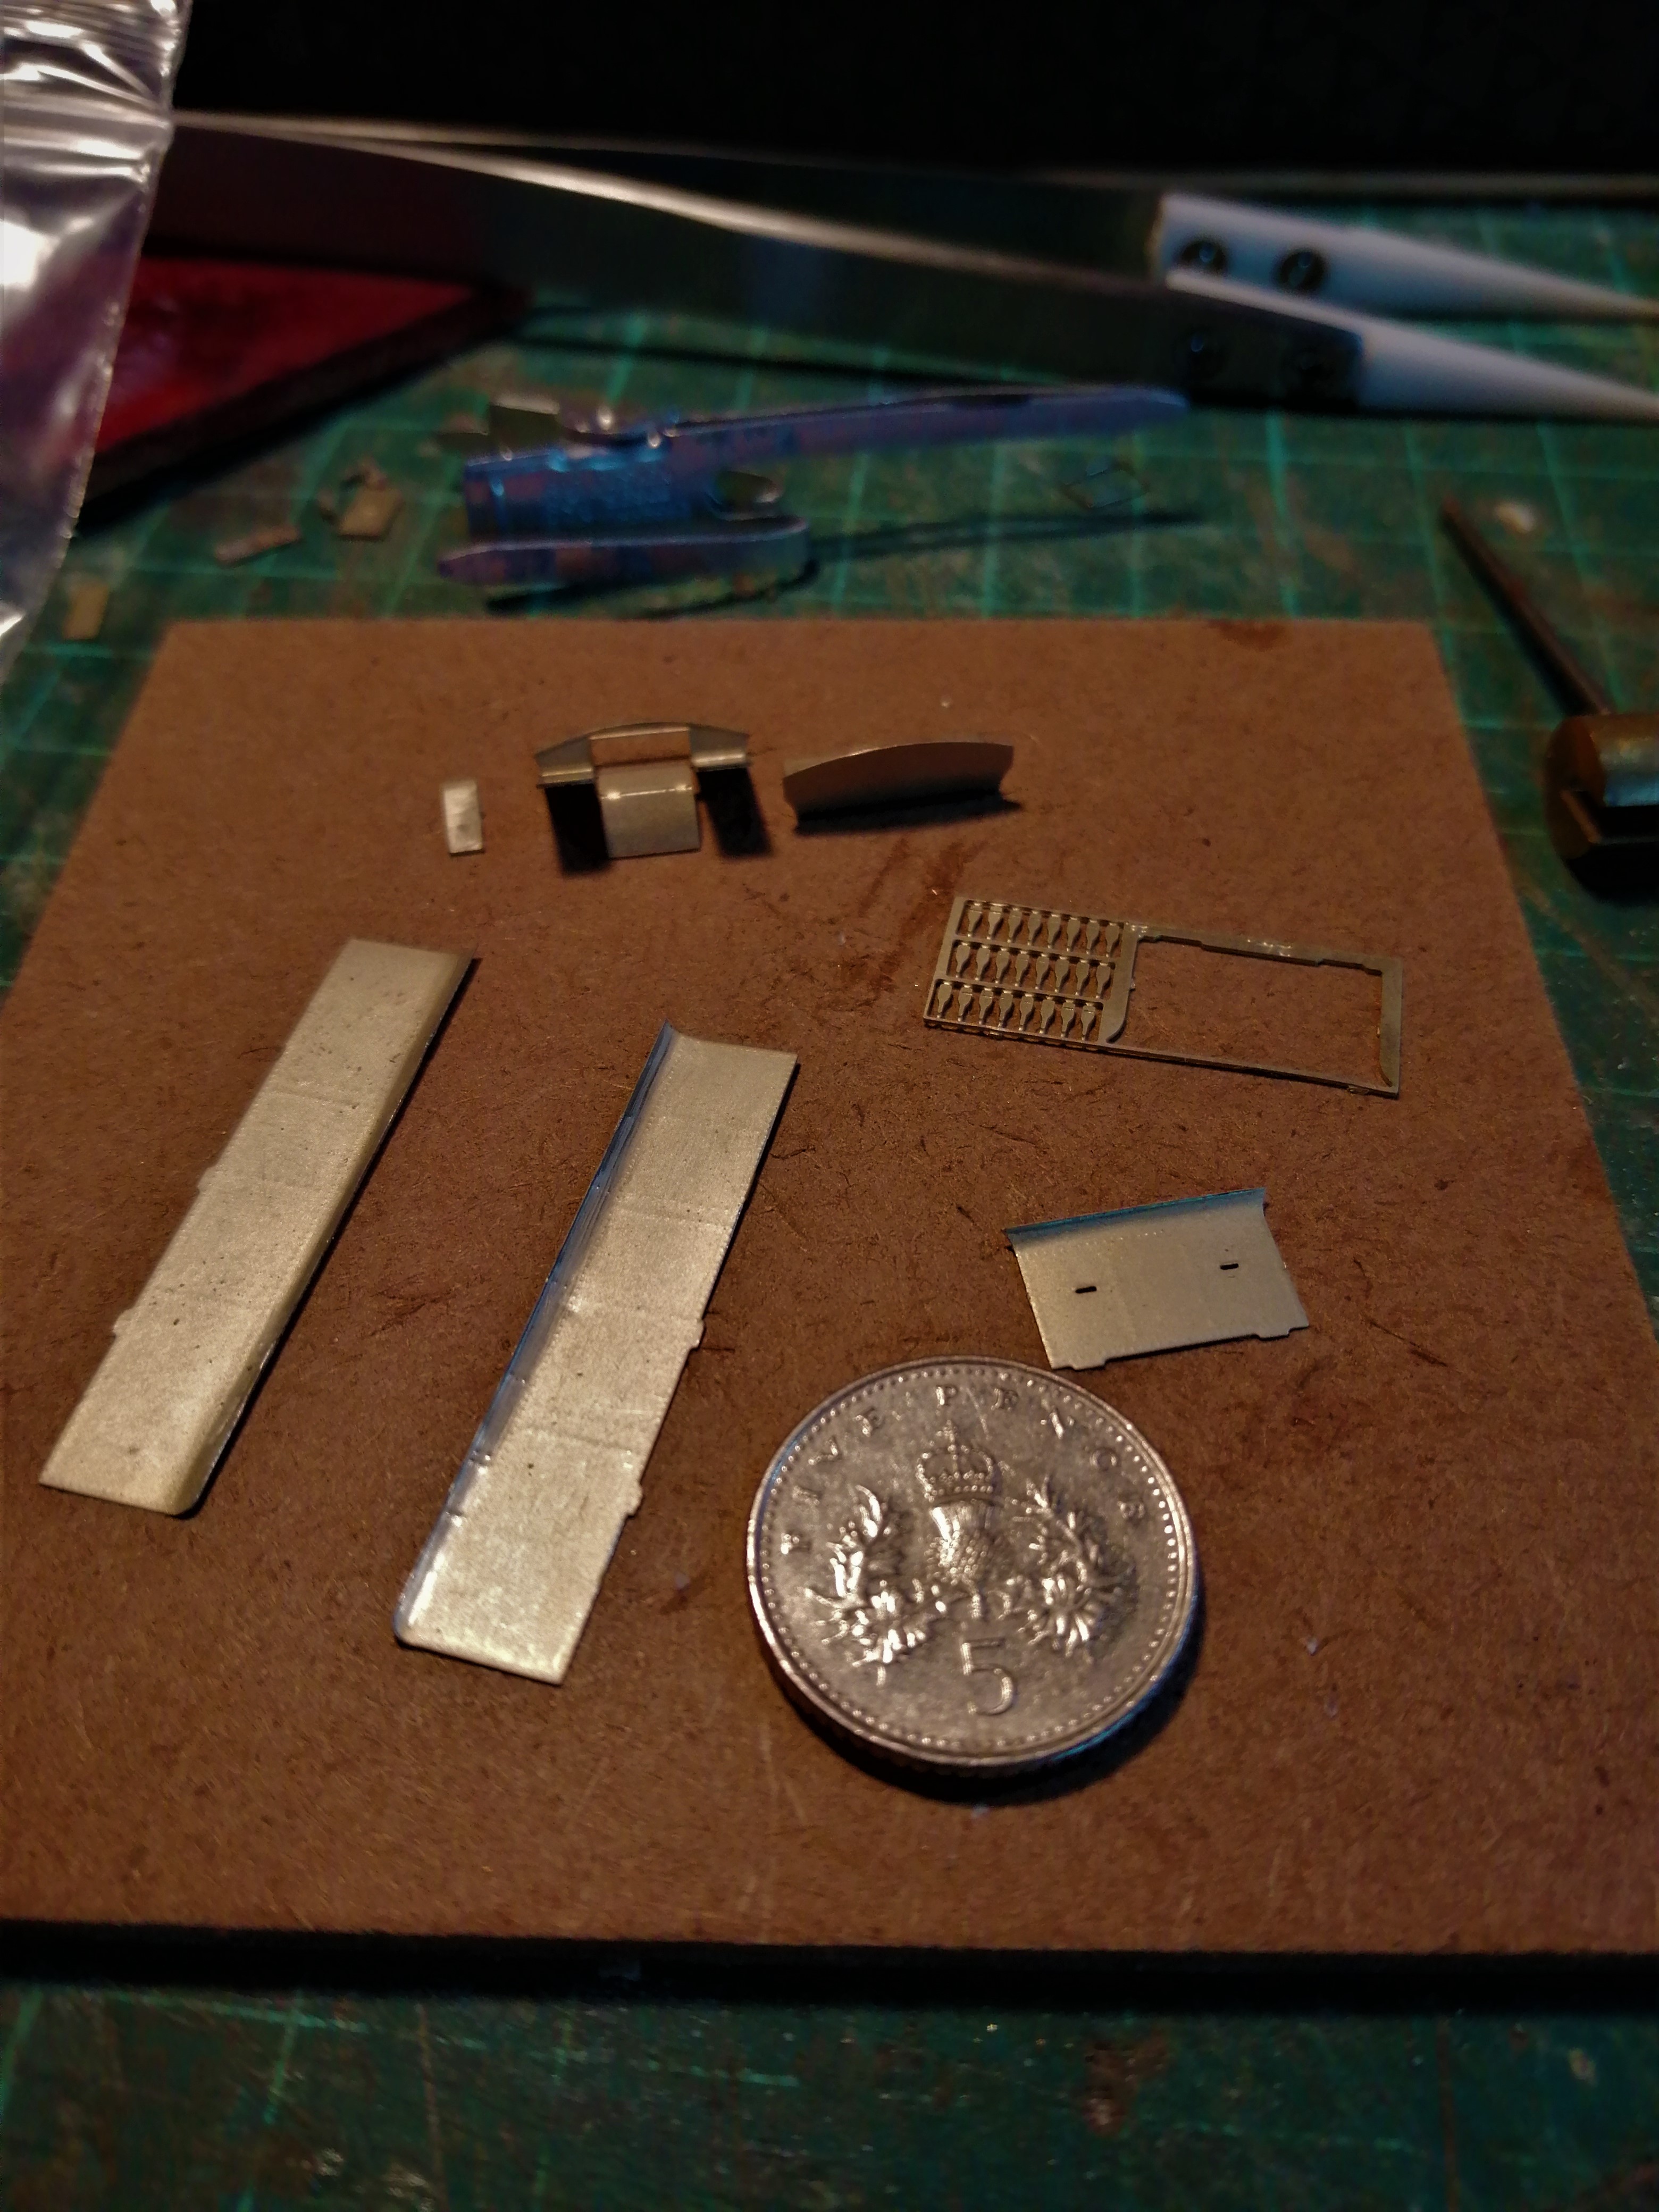
Some more progress with J15 tender, decent photos of the standard GSWR A type tender do seem hard to come by for detailing purposes. The rear is nearly finished, just the lamp irons to add. The rear steps caused a problem as the etched ones pinged off into the wildness after I'd very carefully bent them to shape. Some 1mm x 0.5mm brass channel was used as a substitute. When cut 1mm wide it is on the edge of what is visible to manipulate into position. I am also not sure about the buffers, they look a bit over scale. In some photos that buffers are large in comparison though. The front is also progressing nicely, I just need to add the handrails (a job I'm not looking forward to) and the brake standard, then all soldering on the body is complete. I can then add the plastic details. I have some 3d printed springs that look the appropriate dimension and the toolboxes will be from plastic strip with the etched ends and top glued on. The etched bodies provided with the sheet were way oversize, anomalies like this quite often occur when etches are shrunk to a smaller scale. I've a feeling the sandboxes on the front have a similar issue as I am struggling to find space to fit the brake standard. I've just noticed the righthand top steps needs bending back horizontal, the joys of model photography!
-
A modicum of progress can be reported. The easing of lockdown in the UK has meant days away for work, the opportunity to catch up with relatives along with a holiday (in the UK) has left little time at the workbench. A grotty day today gave the excuse for a few hours at the bench this afternoon so more progress was made with tender. A lot of forming and fettling to fit needs to be done and it was one of those days where everything seemed to need fitting twice, still persistence paid off. Most of the tender body is now complete with only the detailing needed. A bit of cleaning up is needed but it's coming along nicely. The motor will be mounted in the tender so I will need to form an opening in the coal plate for the drive shaft. I'll do that once I have the gears mounted in the loco chassis and the motor fixed in the tender. This will help me get it in the right place. In other news, my appeal for any unbuilt J15 etches turned up another two with one set of casting. This will let me build another J15 in the future, it will built as running in the early 60's hopefully with a superheated boiler so I can run it alongside the C Class diesel. With the etches came a nicely assembled footplate. This should speed up the body construction, which is useful as I really want to crack on to get to my next project. One I'm really looking forward to. John Mayner kindly agreed to reduce a couple of his etched locos to 2mm scale for me so I'm now in proud possession of MGWR K class, I've already bought the wheels, motor and gears but need to resist the temptation to start and just focus on the J15 until it is complete.
-
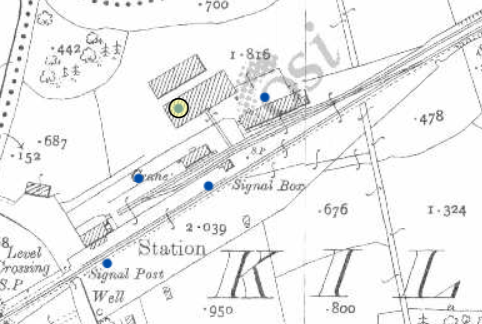
Hi KMCE, You are correct the end of the loop at Dromahair is too short for loco (at least as scaled form the 25" map). I think livestock were loaded near the station building end of the goods dock, the loop would enable the horseboxes and cattle trucks to be moved in, loaded and removed without having to shunt any wagons being unload at the two goods warehouses further down the goods bay. At least that's my supposition.
-
There was also a flour store behind the two goods stores fed by little stretch of narrow gauge rail on which ran a small bogie to transport the sacks. It was too short for a loco though. https://www.buildingsofireland.ie/buildings-search/building/30806021/killananima-dromahair-leitrim Strangely the Historic 25" map also shows a loop in the goods yard, which I've chosen to model. I've never seen this in any photos so can only presume it is either a figment of the surveyor's imagination or it was removed earlier in the station's history. Not many photos of the SLNCR seem to exist prior to the 50s and I've never found any early ones taken at Dromahair.
-
Co-incidentally the May issue of New Irish Lines arrived at lunch time with drawings of three DSER wagons including that van! A 3d printed version is available on Shapeways so I might invest in a few to kick start my van stock (1x GSR, 1X GSWR, 1xDSER) there's enough differences to make the distinct.
-
I love that van David the photo in Rails to Achill caught my eye too, I didn't realise the GSWR also had them, can you point me the way of a photo?
-
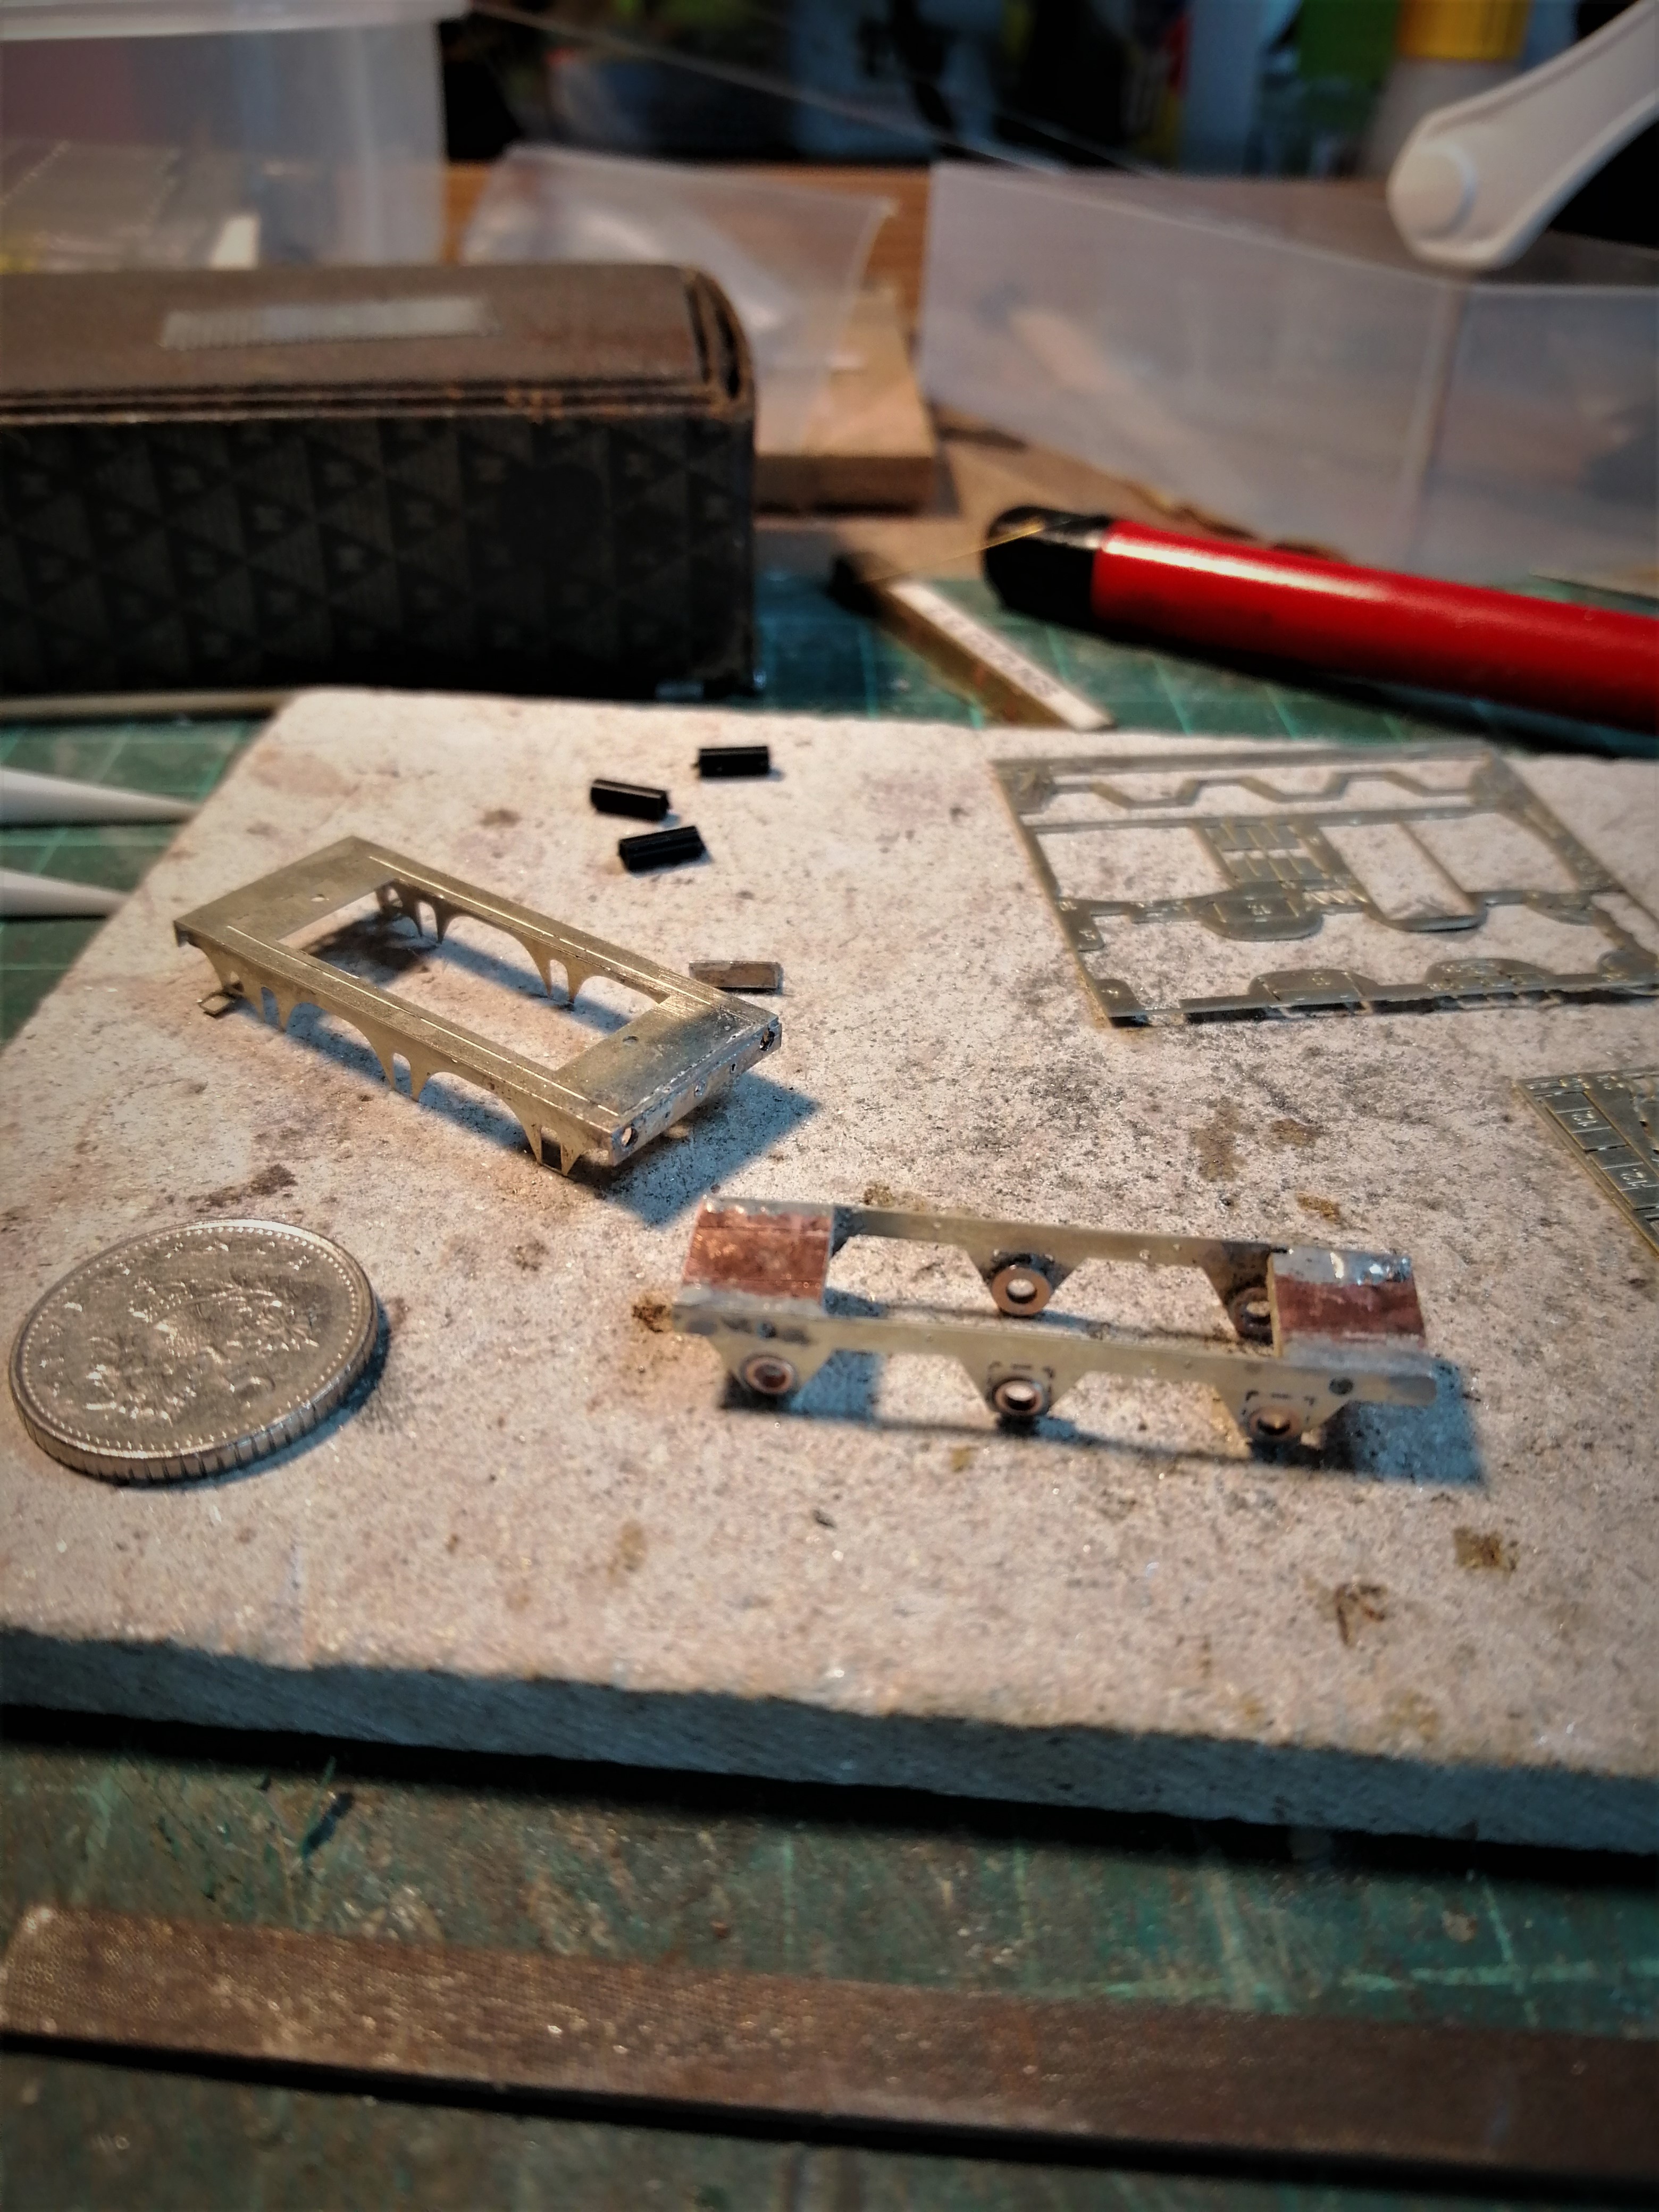
The first bit of progress to report. The bearing holes have been successfully broached out. I was dubious that there would enough brass on the etches to accommodate the standard 2mm association phosphor bronze bearings but there was. Just. I've used the standard approach of double sided PCB frame spacers, in this instance 8mm wide to allow for the broader Irish gauge. All clamped and ready for solder (I can only find one of my axle alignment rods so I bodged one of the axles, I'll need to find my other rods before I attack the loco chassis, I'm not bodging that!) So I've now got the basic inner chassis and the outer chassis all soldered. I've also bent up the tender flares and the inner partitions, I was hoping to get a rolling chassis and the superstructure soldered up but a late finish at work prevented that. Not much but a solid start.
-
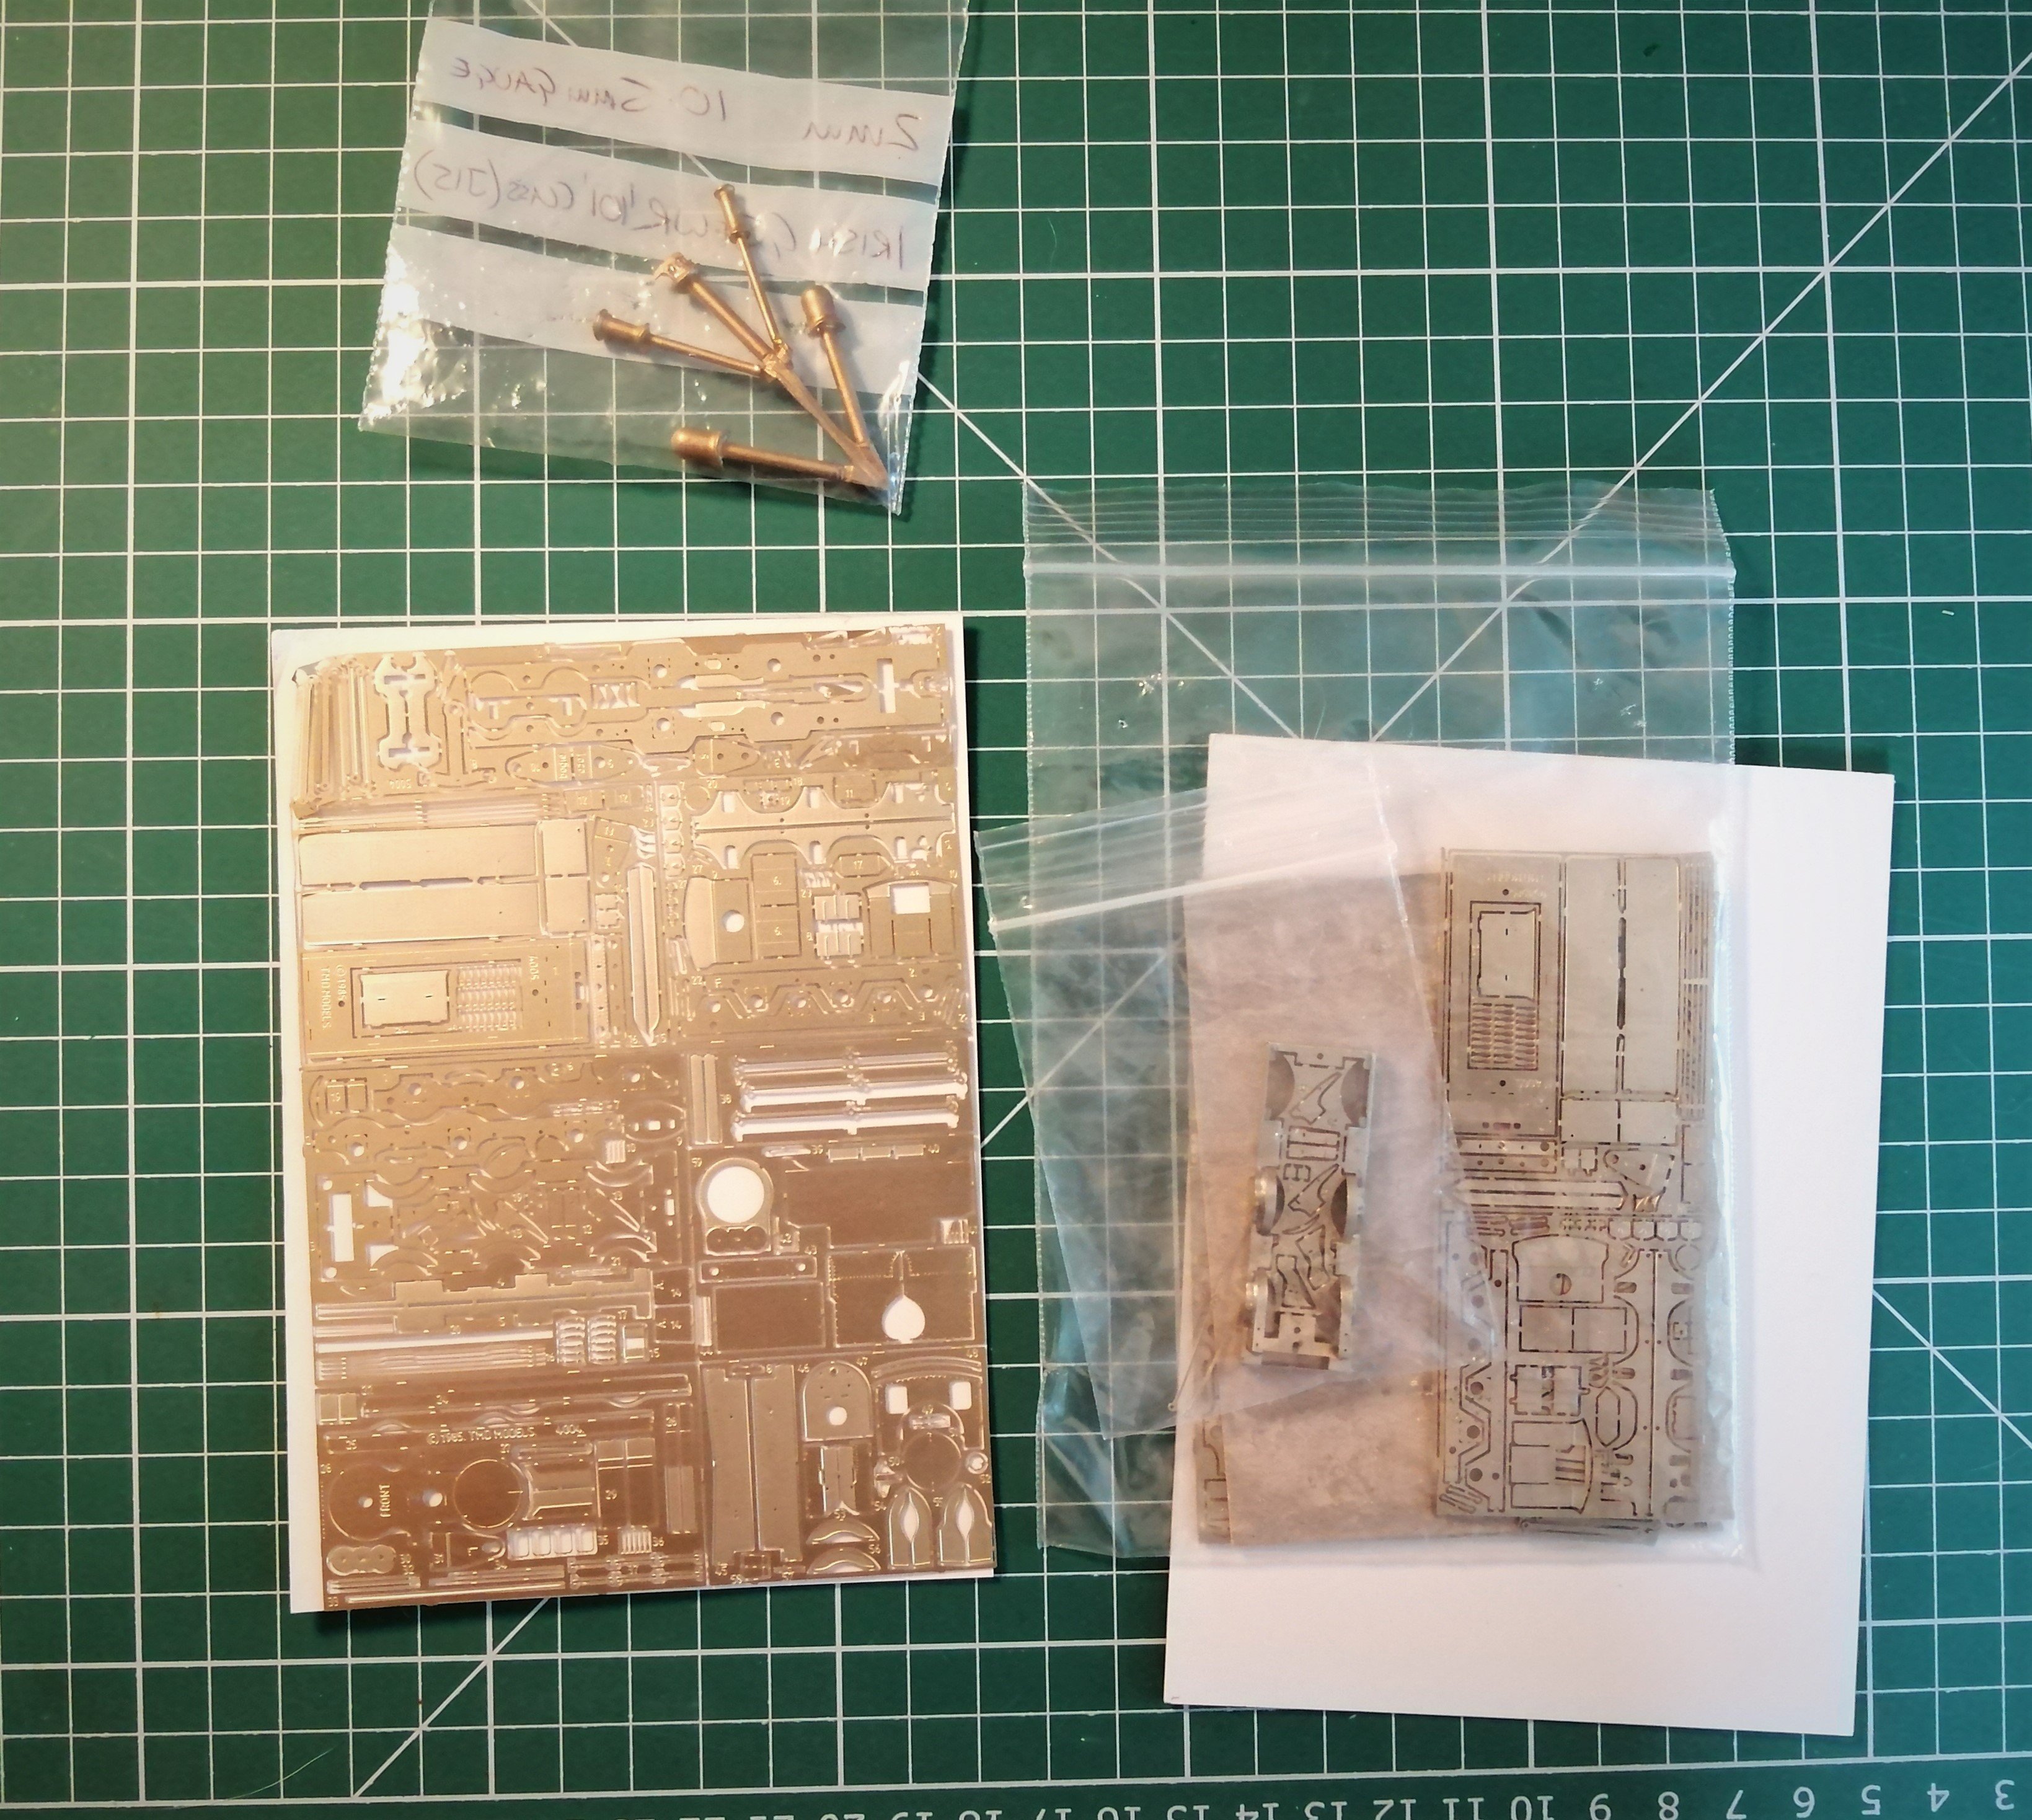
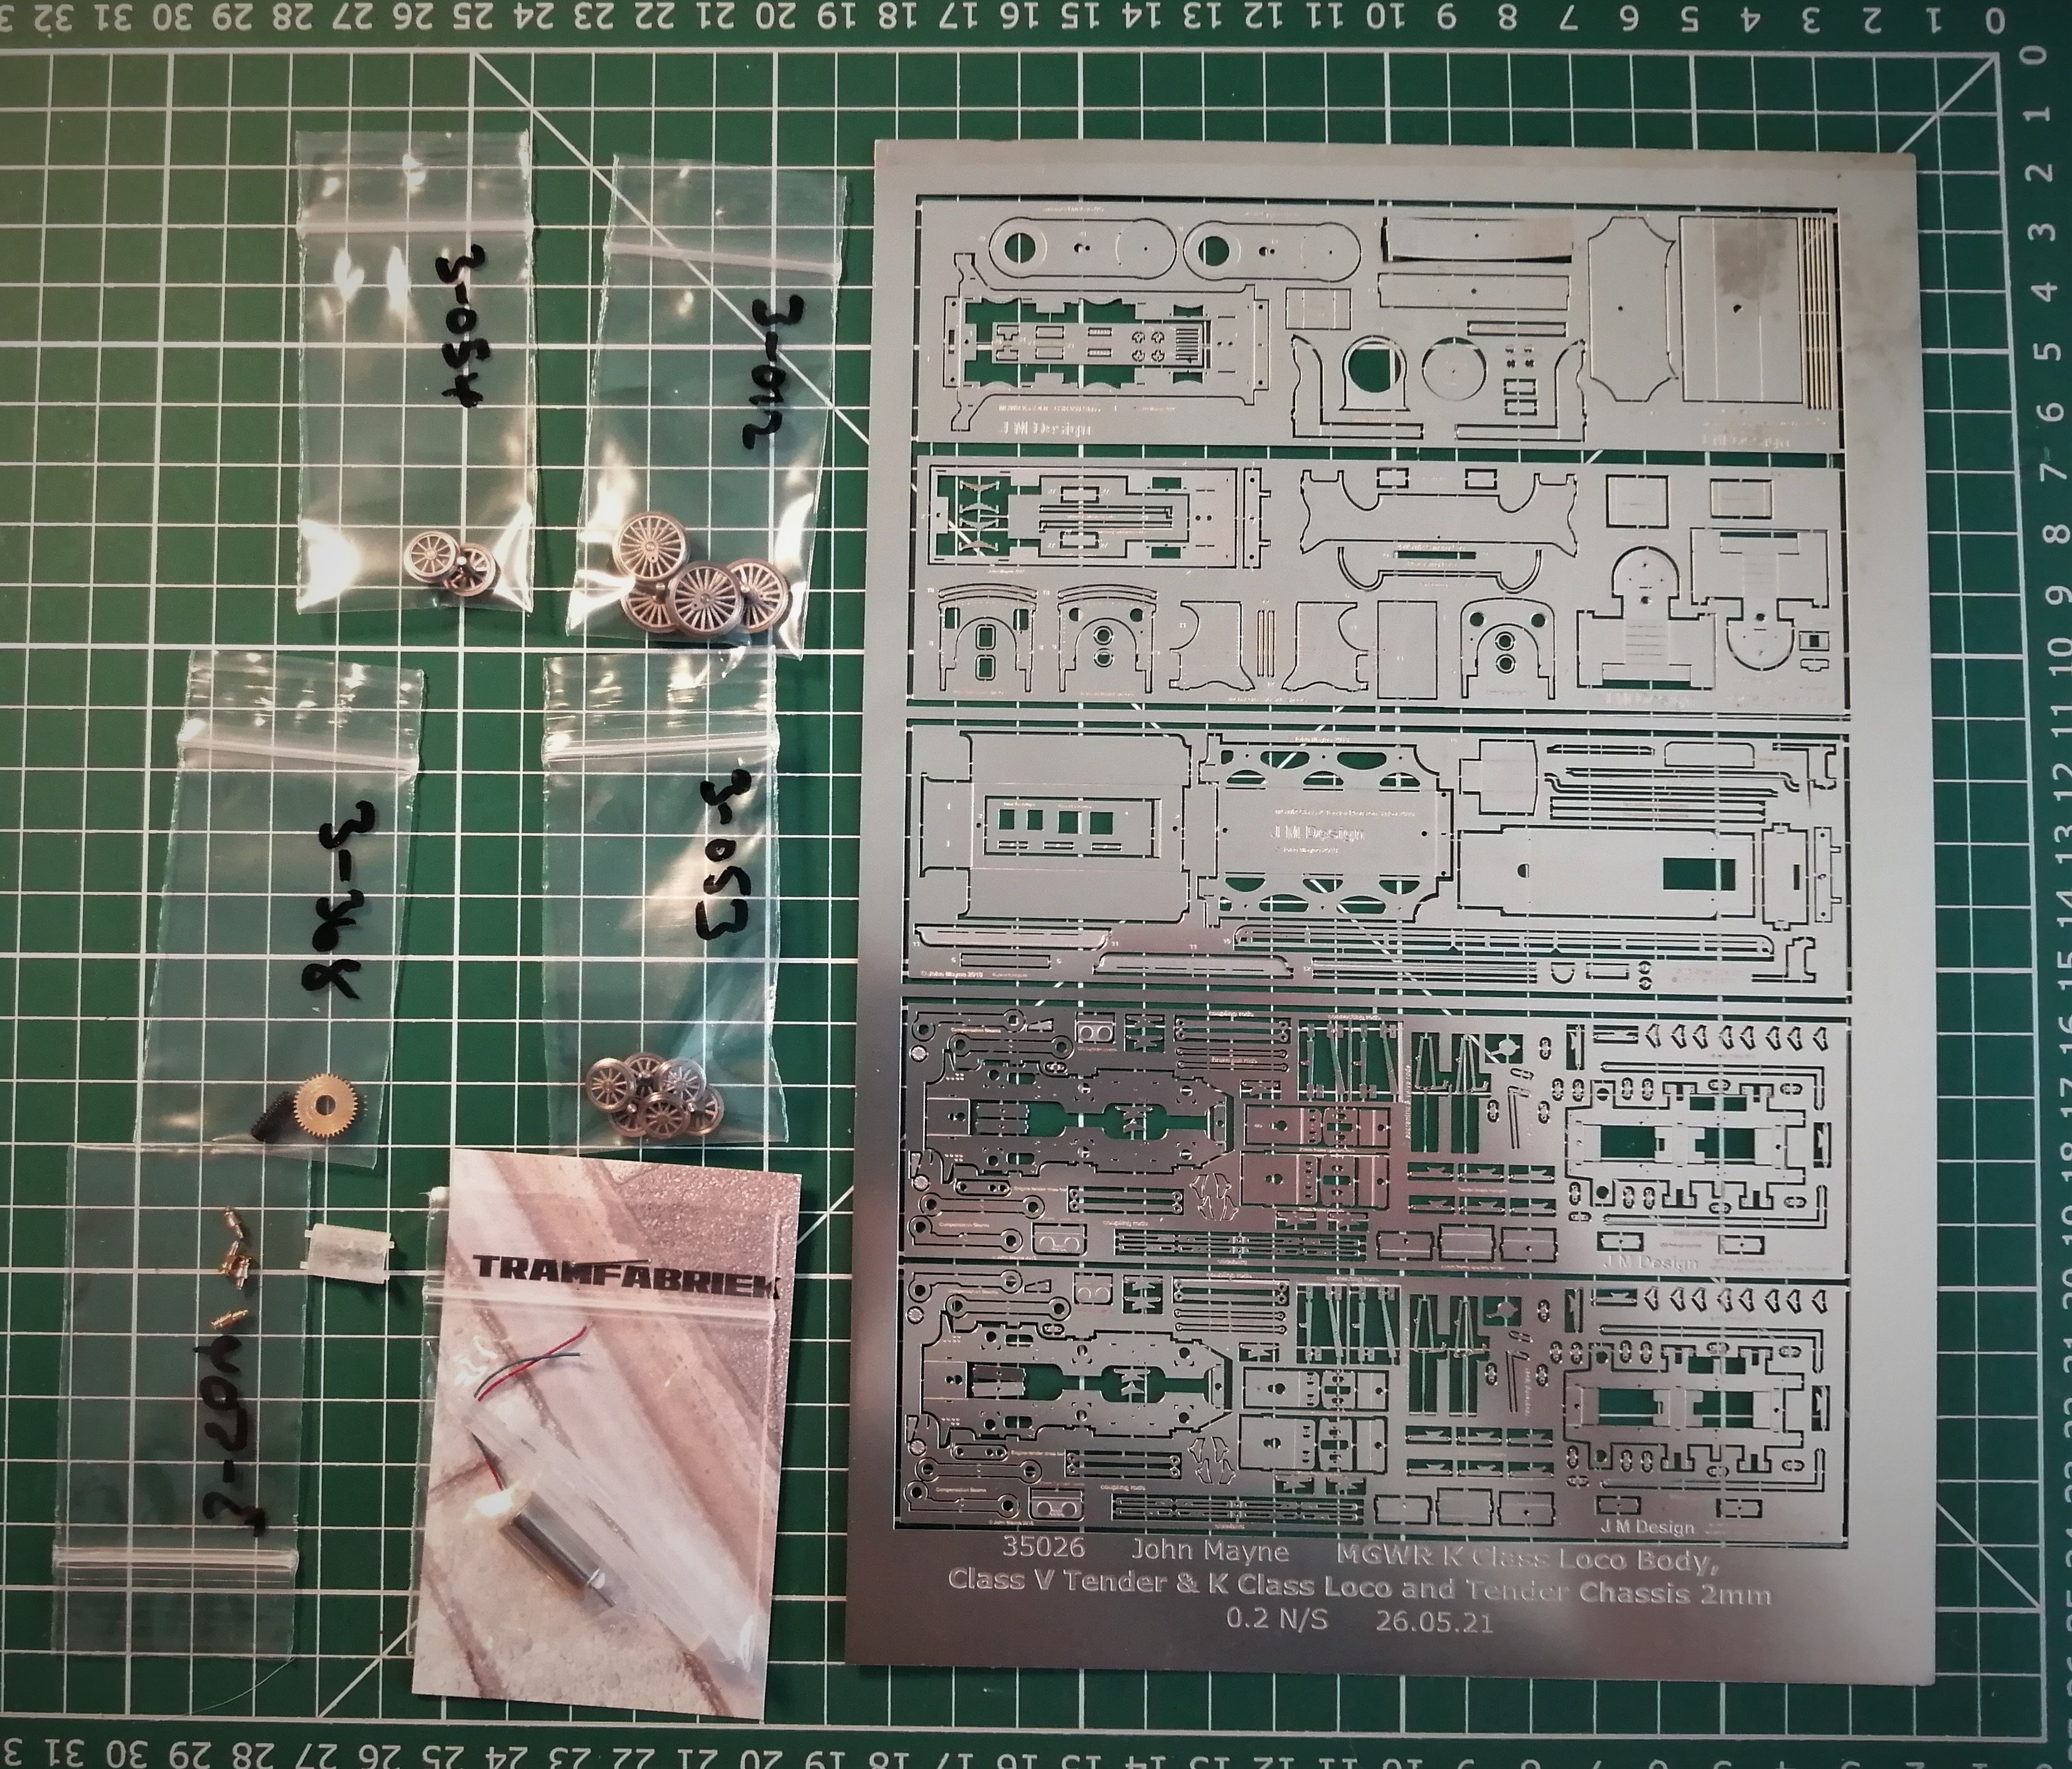
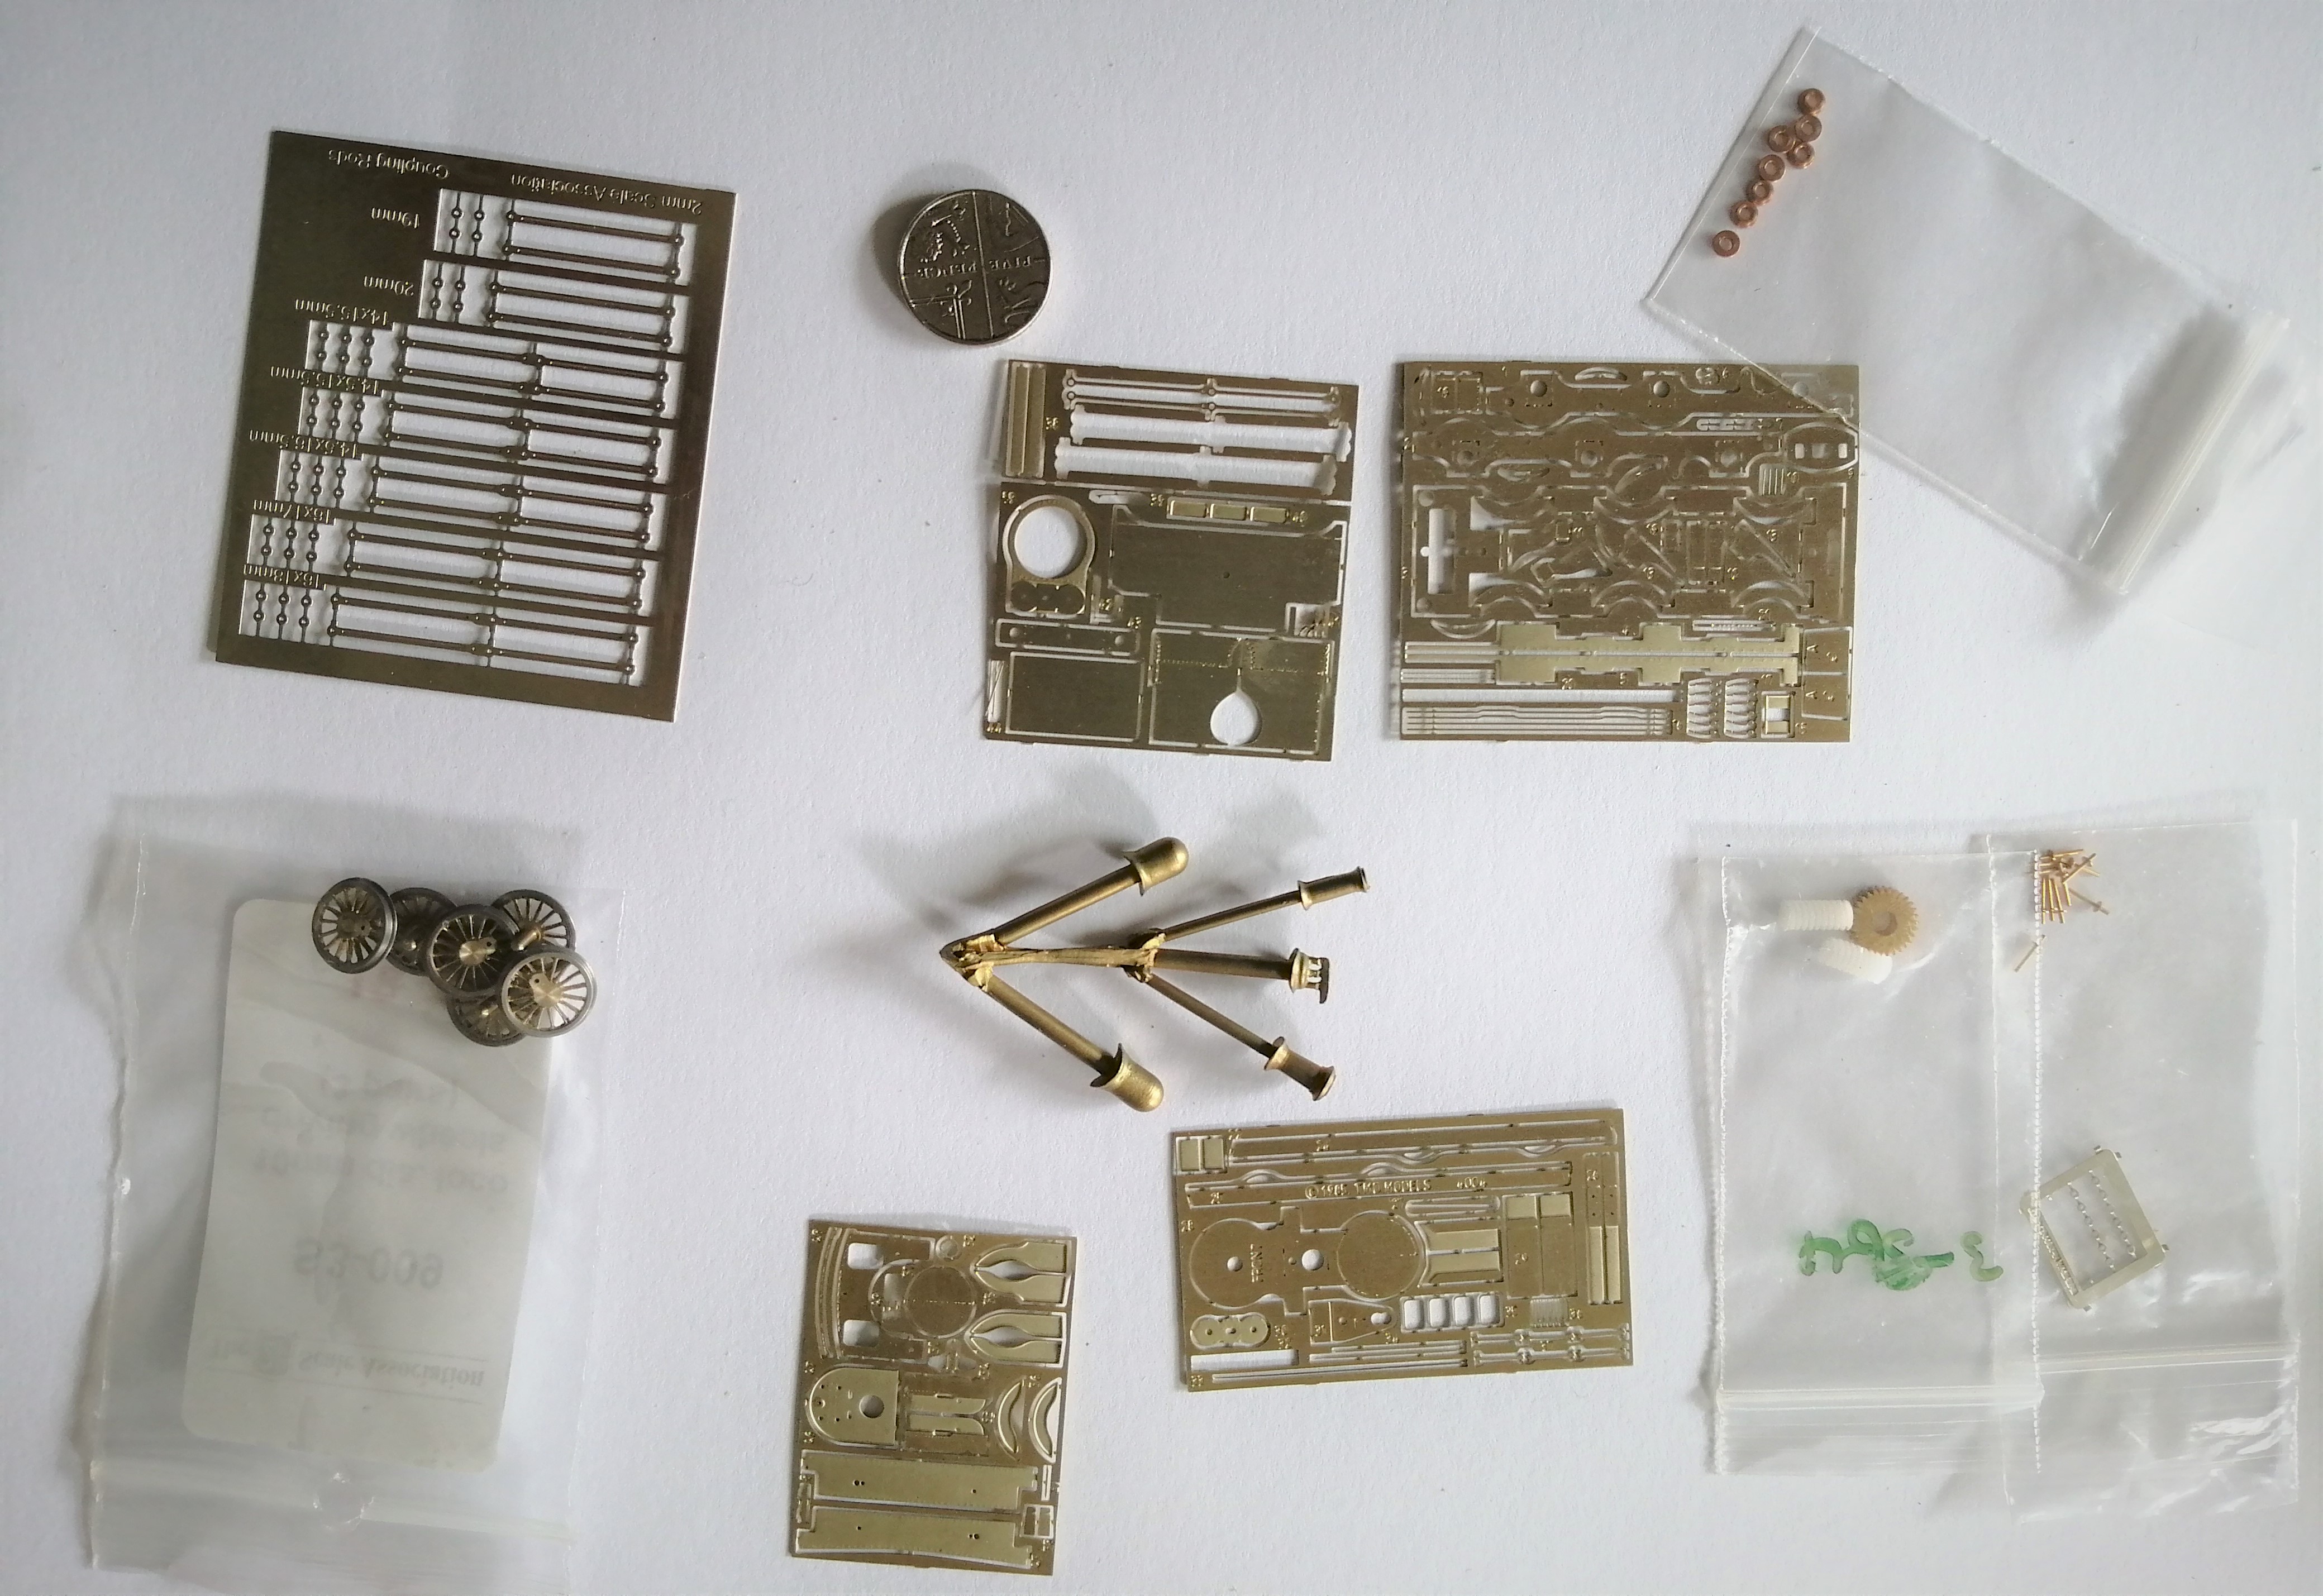
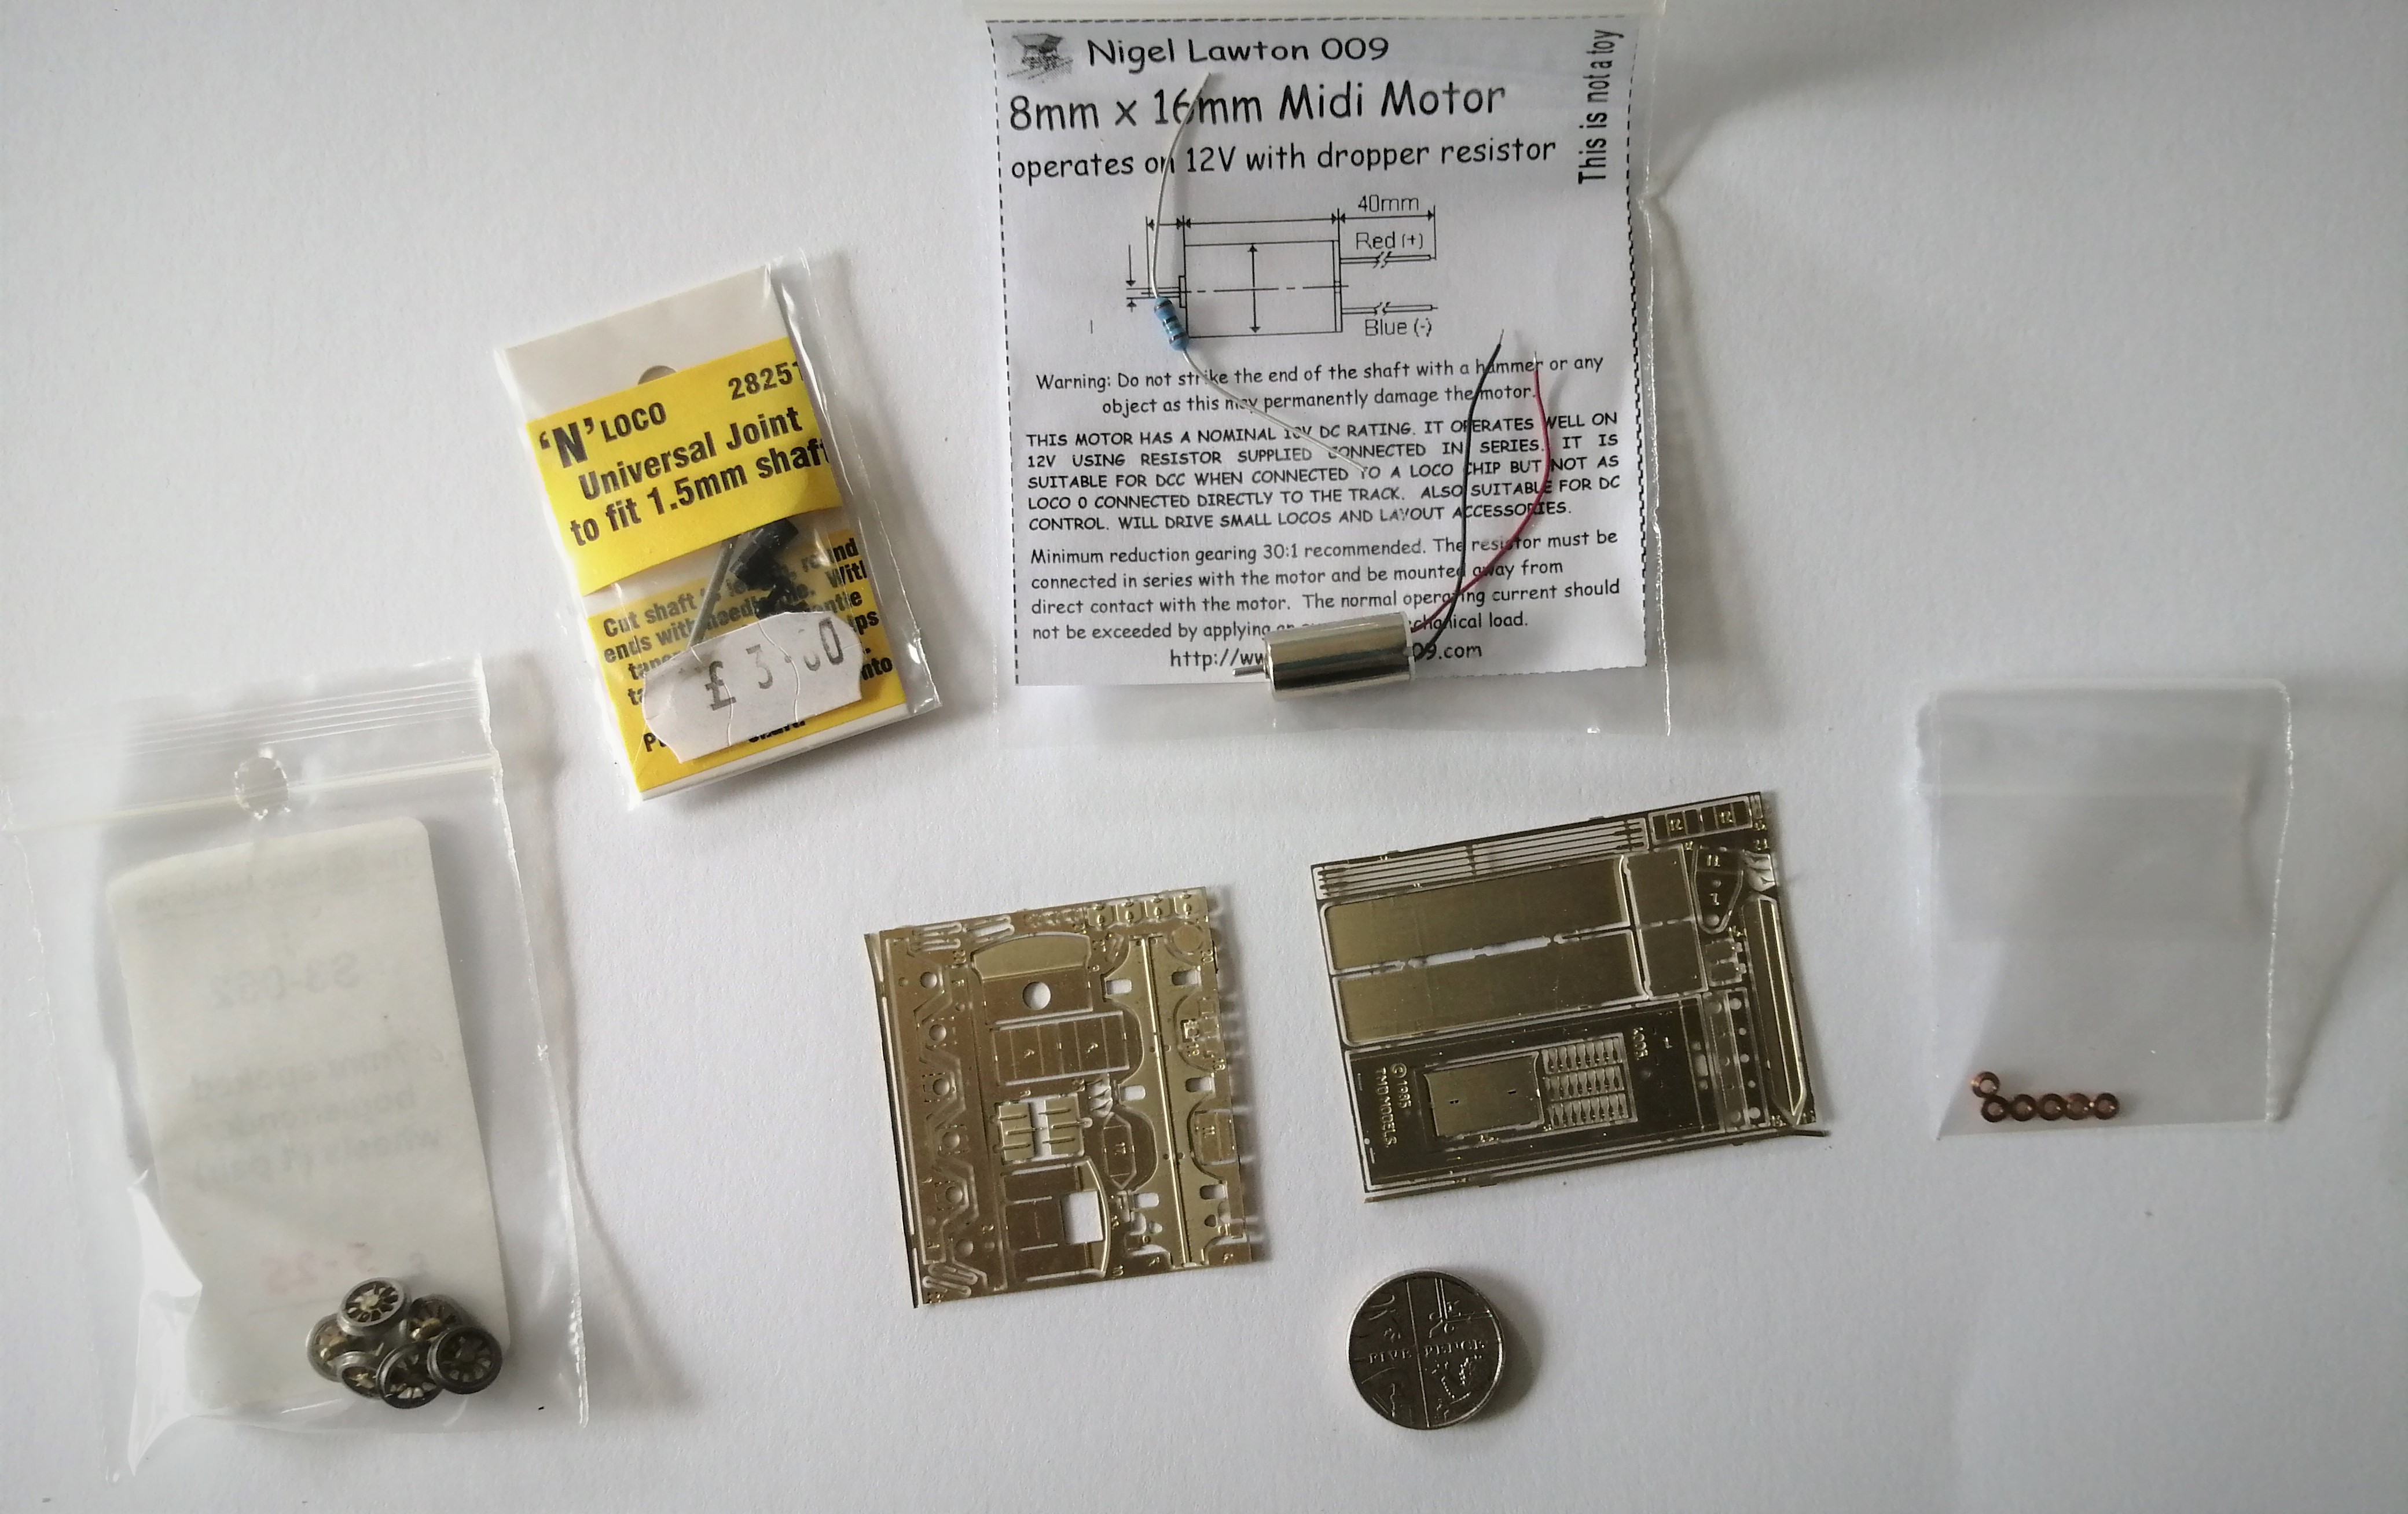
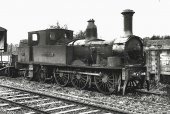
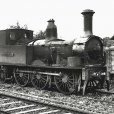
Looking to start work on the 101 class requires some research as these loco varied a lot in condition through their lives. So which one should I model? I've spent some pleasant hours in the past few days wading through my relevant books, The tome that obviously missing is the recent Locomotives of the GS&WR, it has been ordered and is eagerly awaited. I'm intending to focus around the Sligo area which offers rich pickings for the modeller, as evidenced by the work of David Holman and Galteemore. The GSWR (WL&WR), MGWR and SLNCR all ran into Sligo with a strong presence of GNR freight stock and the occasional passenger coach. Photos of 101s at Sligo are rare, I've only found one of 121 late in CIE days, however it would be reasonable to assume they would have worked up from Limerick via Tuam. So I need to look for a loco based there. The GSR loco book gives allocations for 1938 and 1945 which suggests these were relatively static so I have a list of 101s based in Limerick. I'd also like to model a version as rebuilt with a 4'4" boiler retaining the iconic GS&WR double smoke doors, so I am looking for an engine so graced during the period from the creation of the GSR to the early 30s. Ideally I would like couple of decent photos of the loco to work from. I've chosen no 106, there are good three photos in the books of her in the early 30s around Limerick albeit on the lines to the west rather than the north. She does have an ugly stove pipe chimney in one picture (but we'll ignore that insult to her appearance) there are also photos of her at a later date after acquisition of her Z type boiler in 1937. On to the build: I've collected the parts together, I find it easier to keep all the parts this way so I can remember which parts go with which project. The loco and tender will be split frame for current collection (as is standard 2mm practice) with the motor in the tender driving the engine via a universal jointed shaft to a 1:38 gear box. This will enable plenty of weight to be added to the loco. She will be DCC chipped with a stay alive. The etches came with some nice cast parts with a selection of chimneys and domes which will save some time turning these up from brass rod. The etch has lost 2 of the coupling rod layers. fortunately the 101 used a fairly standard wheelbase so replacement etched rods are available from the 2mm scale association shop. These line up well with the kit's rods. I'm intending to start the build with the tender, which looks quite a complex build. There are a couple of build threads for 4mm and 7mm versions on here that will prove invaluable, so thanks to those who have taken the time to log their progress. Right, enough waffle, heat up the soldering iron and get cutting some brass!
-
Thanks JHB, as informative as ever. In fairness to the manufacturer the black and red are their standard finishes which are correct for most of the plates they produce. So to recap for a 101 class in the late 20's I should have the build date (say 1874) but for a Midland engine of the same time period I should have no script at the bottom of the plate. I'll my order placed, plain brass of course as they are going to be painted grey!
-
There has been discussion on numerous topics about the GSR number plates, all relating to colour. As I understand it the majority of the plates were simply painted grey, some with the lettering and border polished back to metal (not brass!) some simply painted yellow. A few had the backgrounds painted black with the lettering and borders picked in red. My question is on the lettering itself. The Light Railway Stores (formerly Narrow Planet) produce some customisable GSR plates and they have kindly agreed to make these available in 2mm scale for me: https://www.lightrailwaystores.co.uk/collections/number-plate-styles/products/npp-420 Would all locomotives have the text "Inchicore Works" at the bottom? I am thinking here of ex Midland engines for example? Or would this only be applied after a re-build? Also was the build date always included? Take say an ex GS&WR engine, built at Inchicore but in say 1880? Or was the build date only added for locomotives built after the creation of the GSR in 1925? I have spent quite a time wading through photos but unfortunately the bottom lettering is quite hard to discern.
-
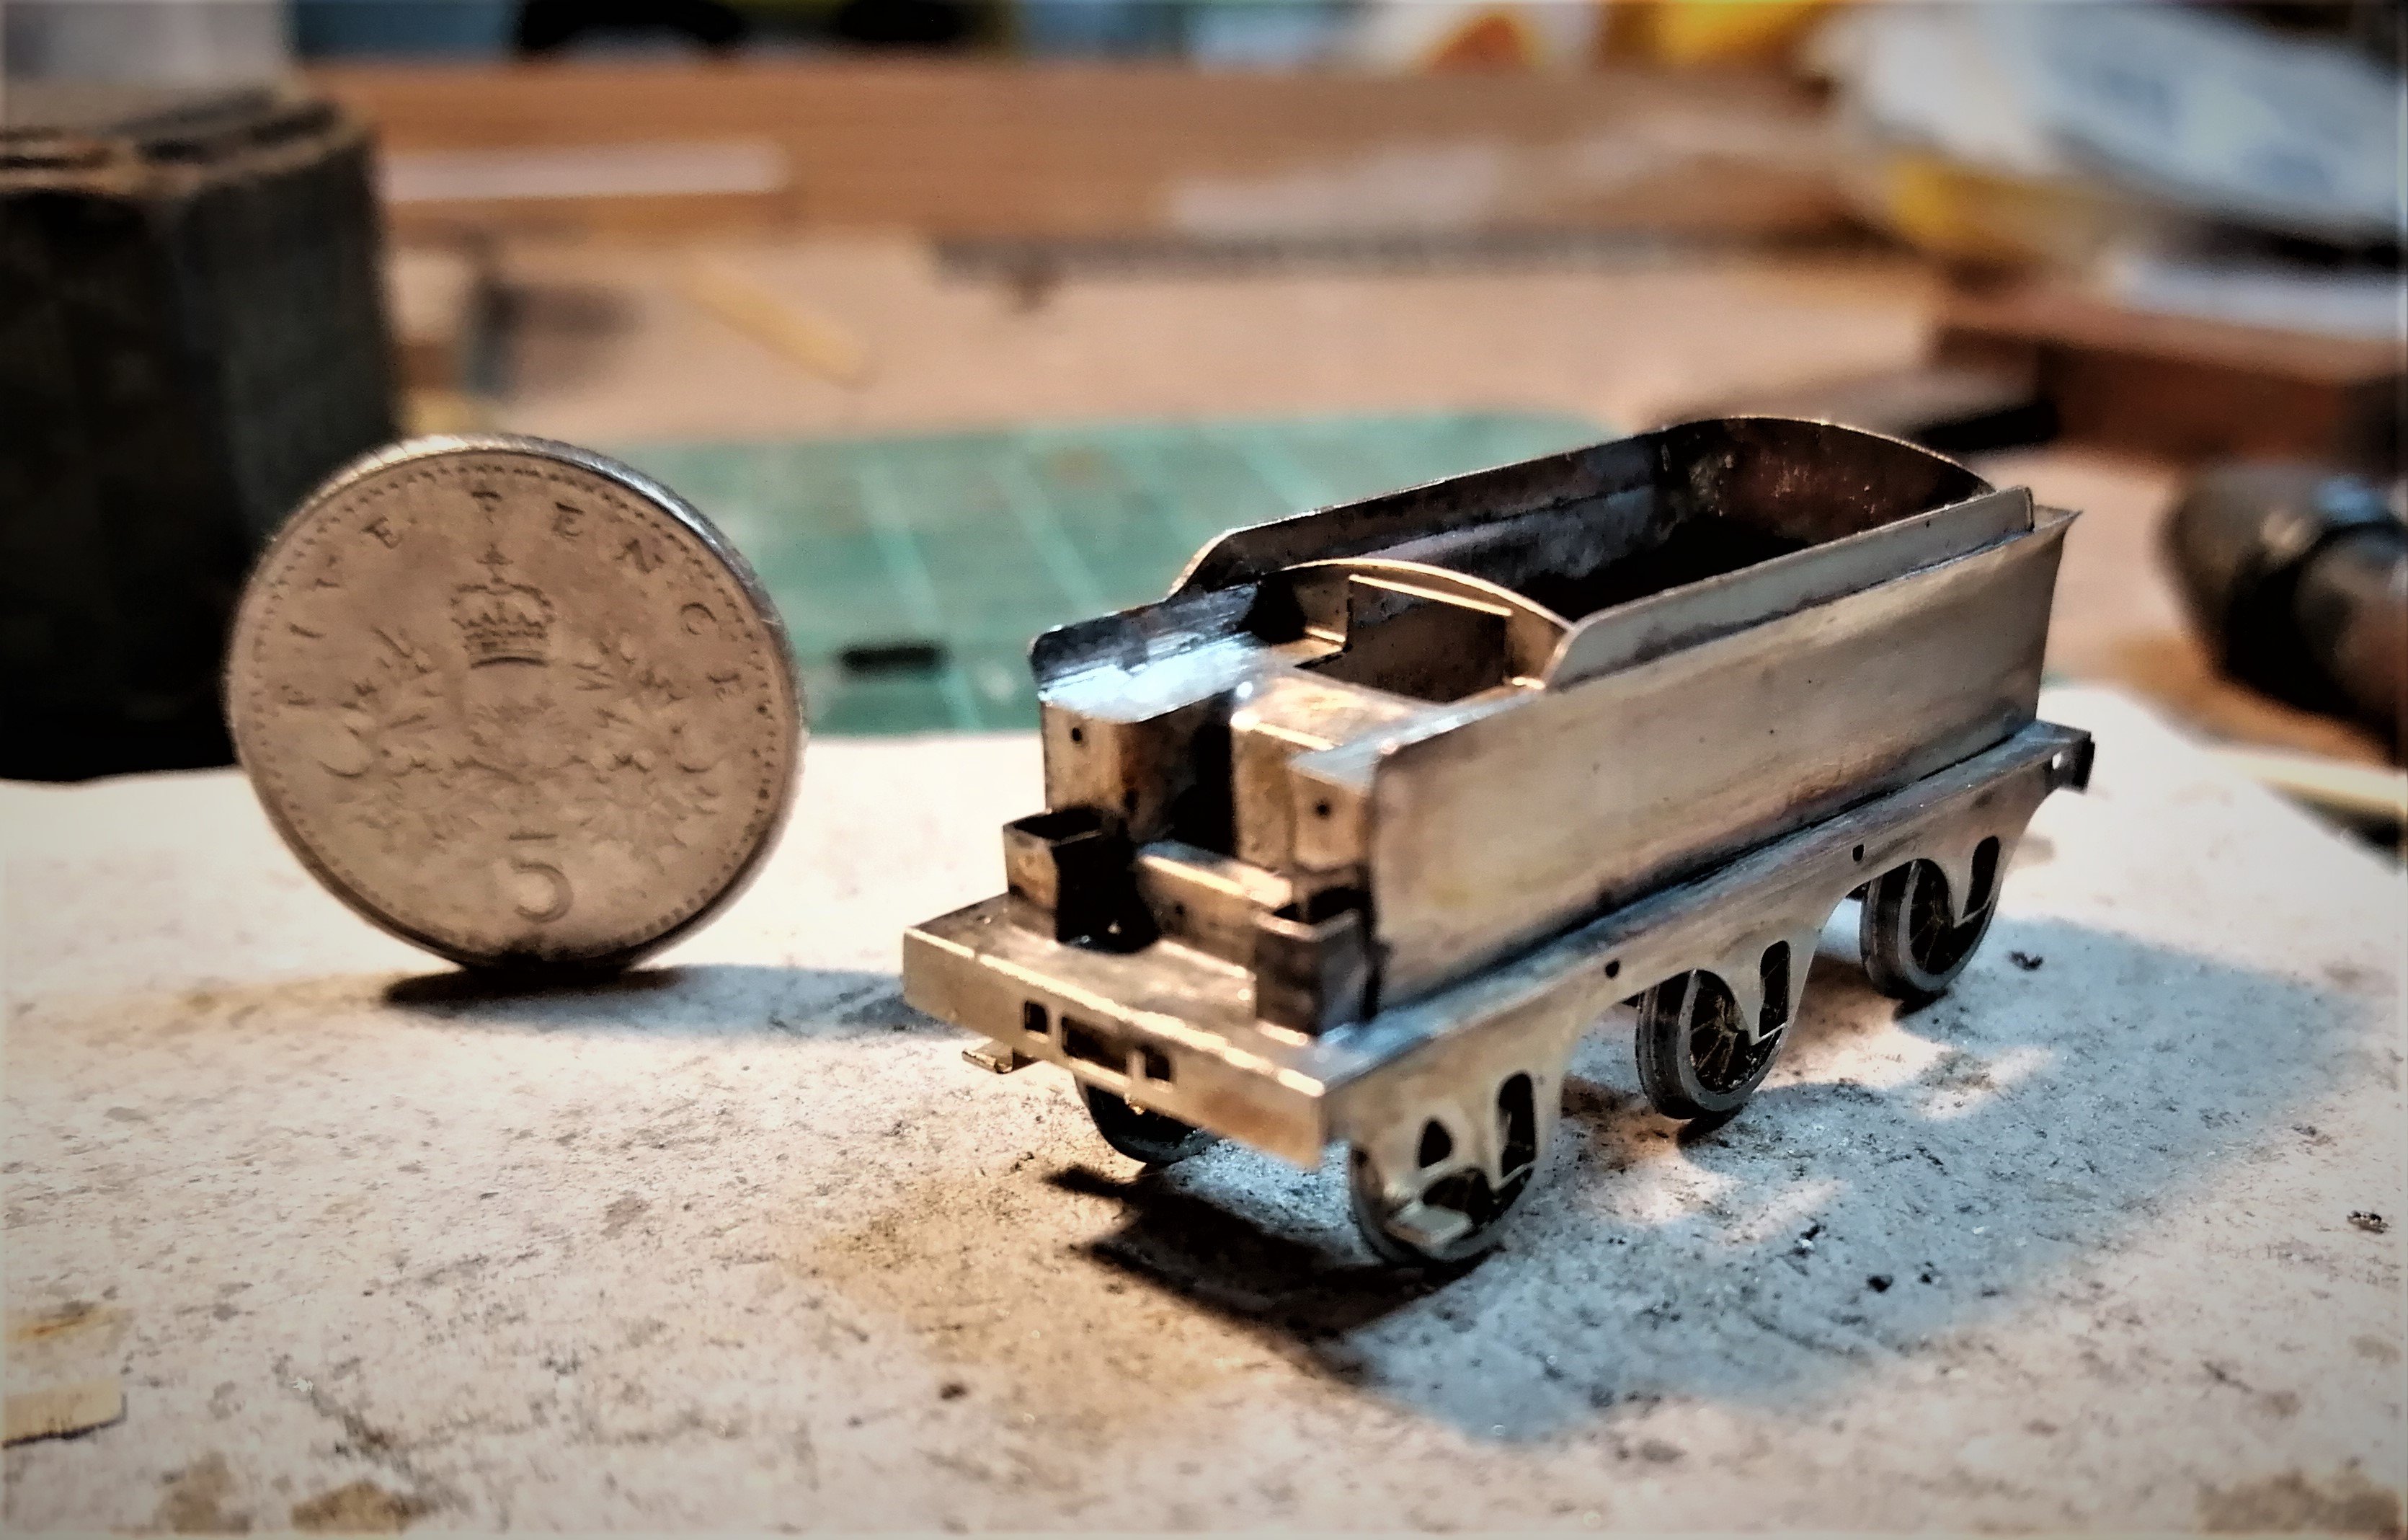
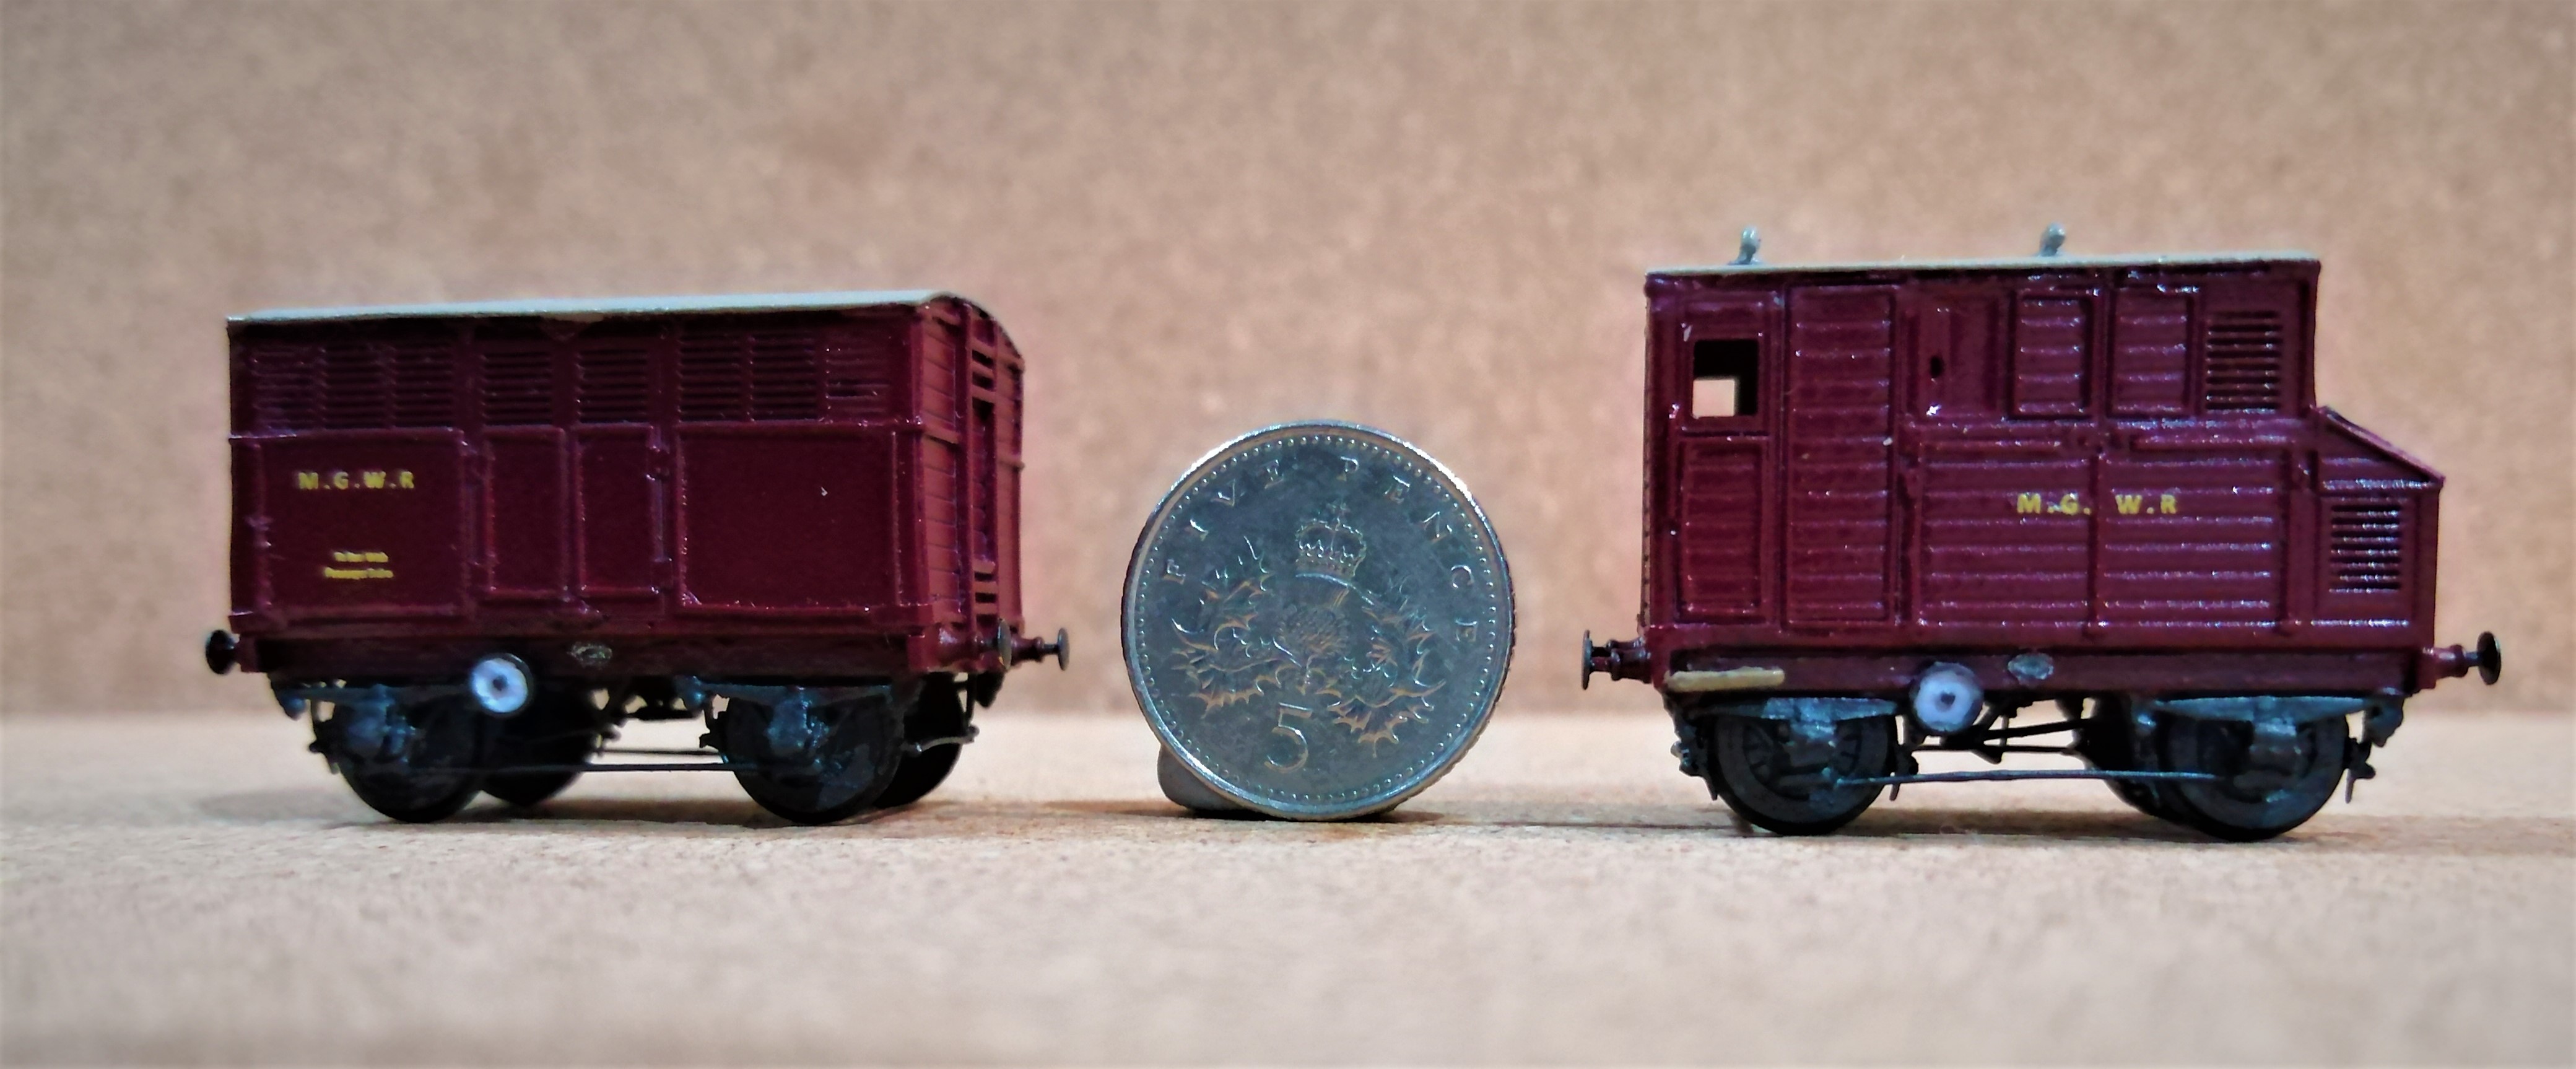
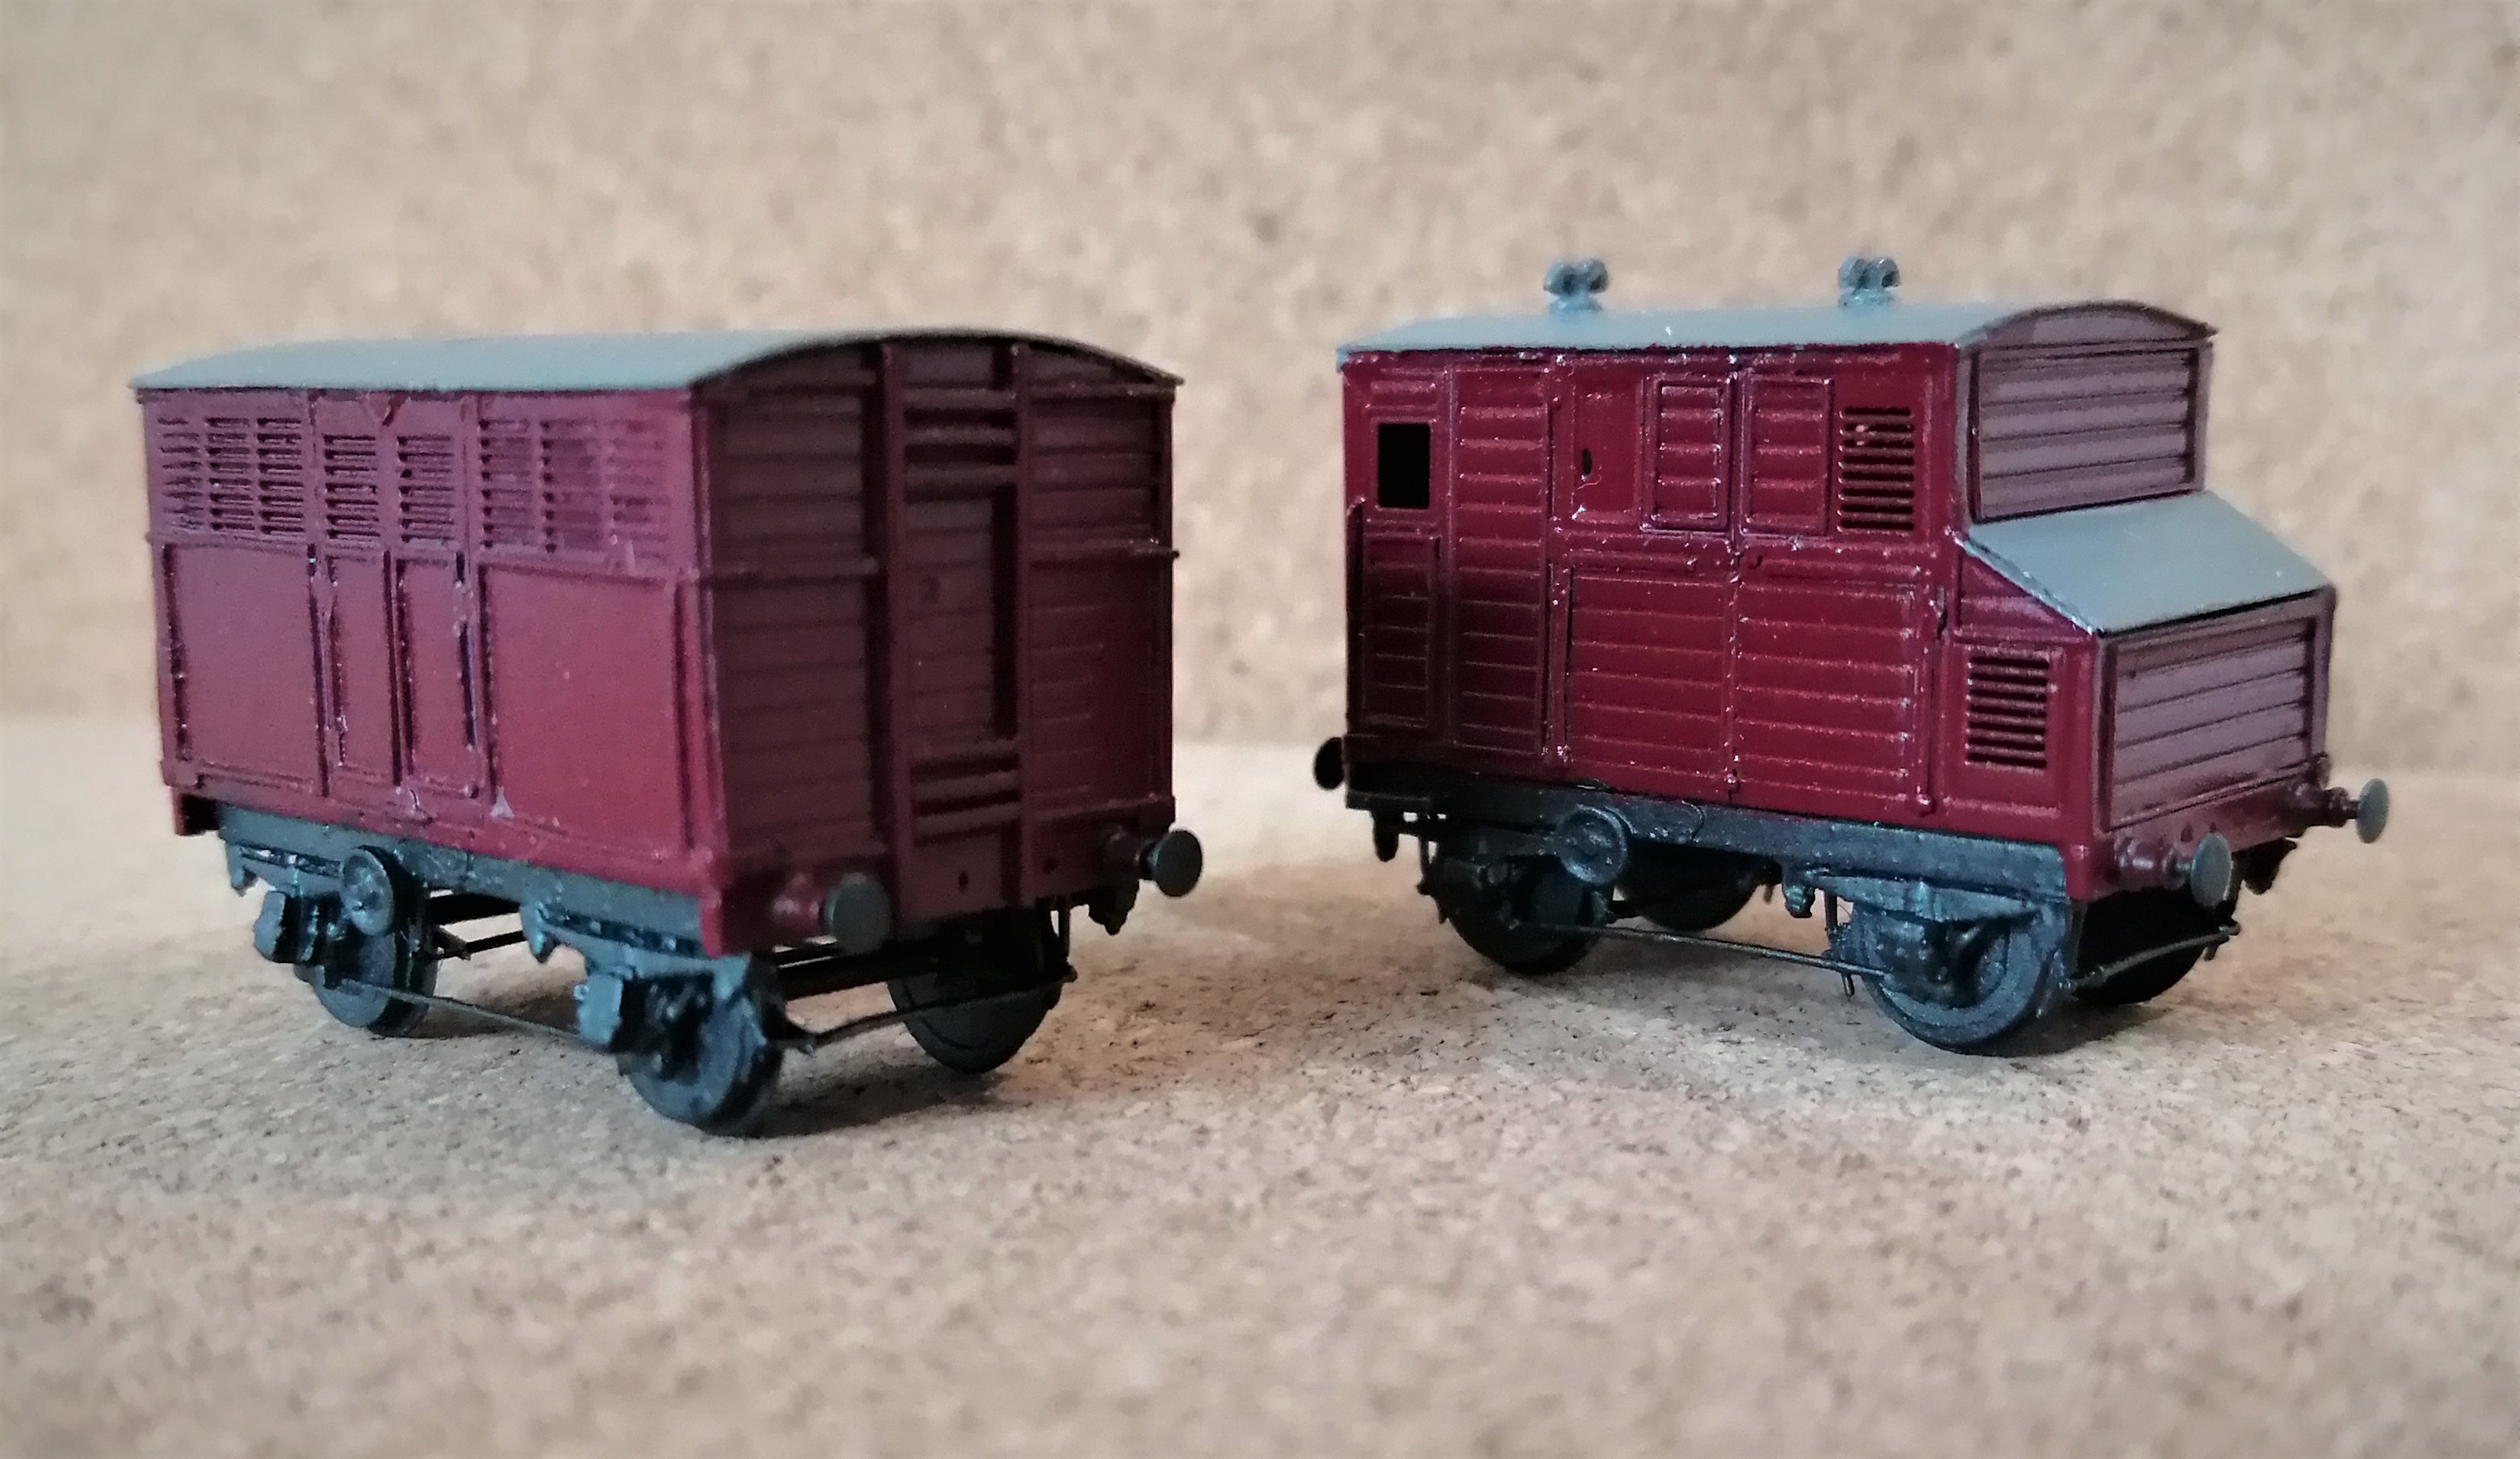
I've decided to create a workbench thread as I expect my Irish modelling to outlive my Dromahair layout and its associated topic (layout always feels too grand a word for a 2' long module!). I'm hoping it will act a reference should anyone else be mad keen enough to model Irish Railways in 2mmFS to 10.5mm gauge. The initial builds will be: a 101 class from a shot down TMD/SSM 4mms scale etch to be built in early GSR condition and C class diesel built form a 3d printed body and a converted commercial Japanese N-scale chassis. I've also a couple of six wheeled coach build mid- construction, one a 3d print (MGWR brake third) the other a Worsley works etch (GSWR luggage compo) I tend to jump around a lot with my modelling so expect to see progress in fits a starts. why the 5p? Well......
-
Thanks both, Apologies for the late reply, I had the slightly bizarre experience of going into the office today. It has been so long since I used IrishRM on my phone that it no longer recognises me and I couldn't remember my password. I'm normally confident enough to tackle most kits without instructions (whilst acknowledging the always help, especially if you actually read them....) but the 101 class etch boggles the mind! I'm also pleased you've identified the chassis Mayner, I had assumed it was 4-6-0 (or 0-6-4) but hadn't found a prototype with the appropriate wheelbase. Your identification restores my sanity! The fact it has potential as a SLNCR engine is a useful bonus!
-
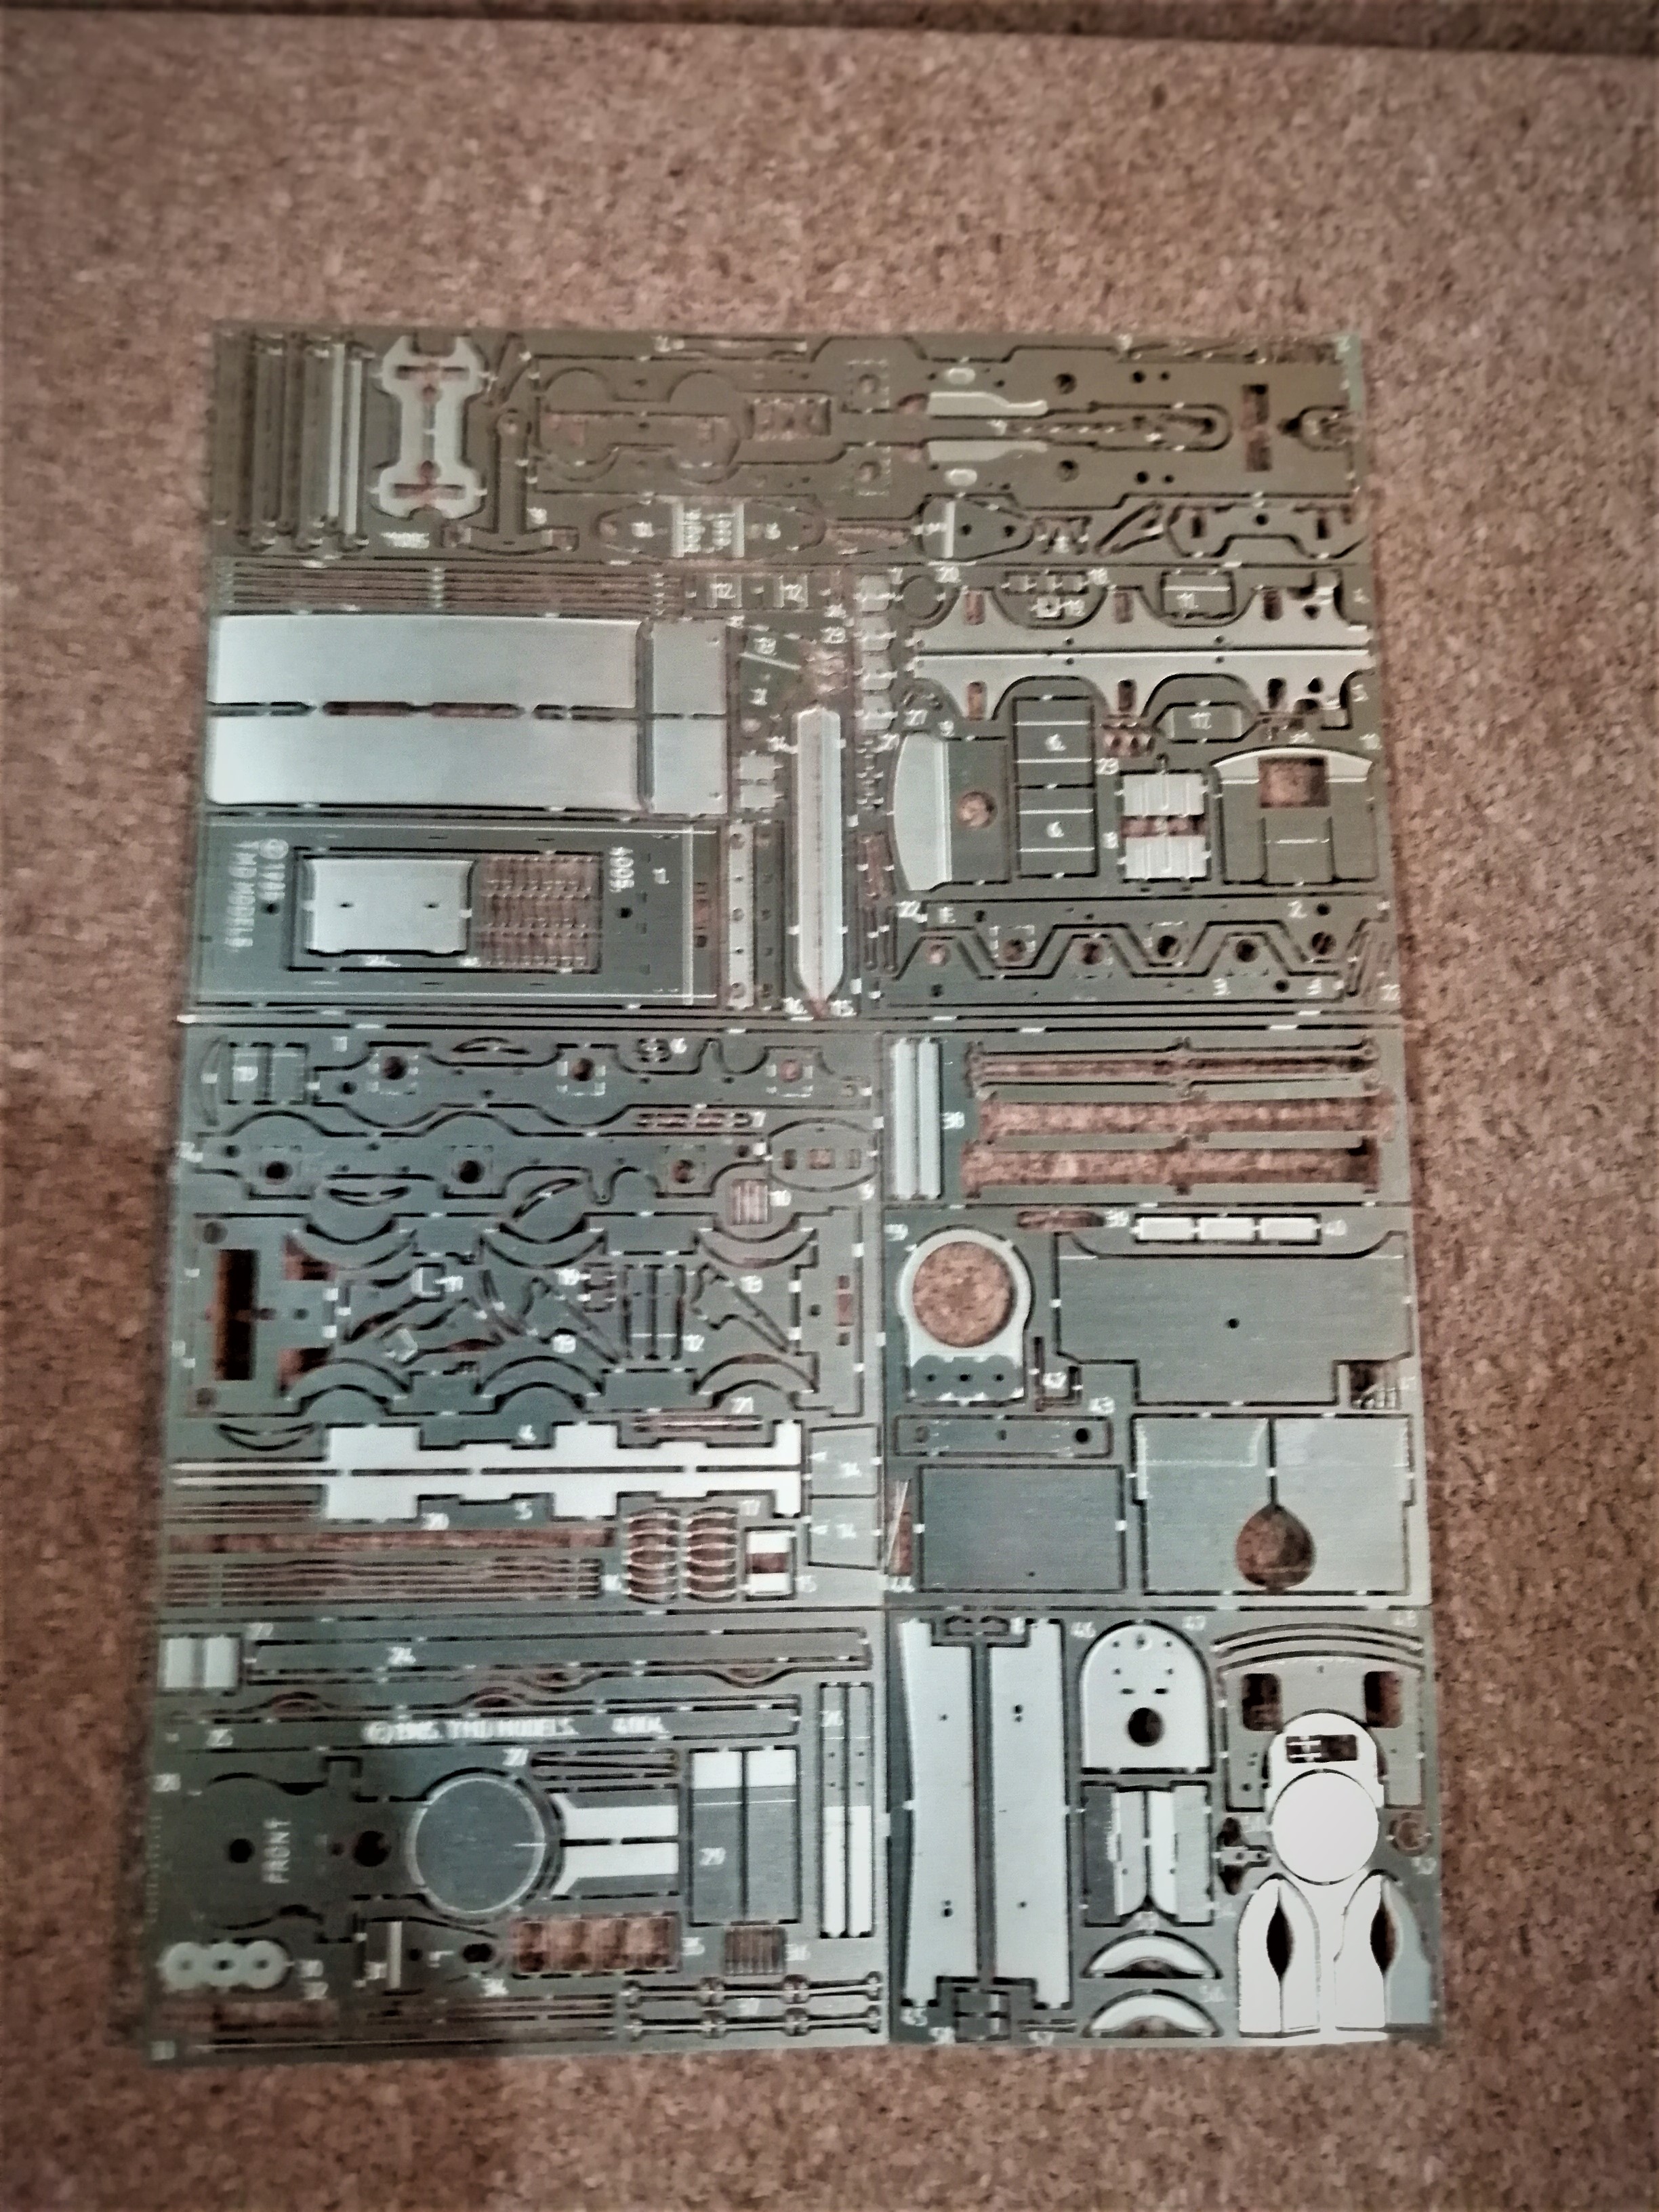
The MGWR vans have been taken as far as I can go at present, apologies for the photo quality, natural light is hard to come by at this time! I had some lettering made up using standard fonts, not shaded but I think I can get away that in 2mm. I've included the 5p just for David The wording "to run with passenger trains" is almost legible which is a tribute to the printing skills of Rail-tec transfers who produced the lettering. I just need some numbers to match but they are currently out of stock of the ones I need. Once I have these I can seal the vans and apply some weathering to tone the colours down and blend everything in. The letter is slightly small (a problem I never thought I'd have in 2mm scale!) I haven't been able to find any complete pictures of the vans in MGWR days, they do however photobomb a couple of locomotive pictures. There seems to have been a storage road for these vans behind the turntable at Broadstone. The horsebox also appears on the famous picture on "wolf Dog" on the turntable (there is a copy of the picture is in David Holman's recent build thread: Following these photos I've lightened the grey on the rooves, I'm guessing by early GSR days they wouldn't be so white, I've add the white inner circle on the brake wheel apparent in the first photograph. I've not included the "to run with passenger trains" wording on the horsebox as I can't see any evidence of it, that said it could easily be obscured in all the shots. Finally another request, In the box of goodies I was gifted there is an etch for GSWR 101 class, I believe it is shot-down from the current 4mm scale etch sold by Studio Scale Models. The etch has "TMD Models 1995" on it which I believe was a predecessor. It is quite a complexed etch and I could really do with some instructions, has anyone got a set I can beg/steal/borrow (or even buy)? I did try emailing SSM but got no response, in fairness I am not a paying customer and unless they suddenly produce a 2mm scale range am unlikely to be!
-
Thanks Mayner, that's really helpful information. My railway library is already overflowing and it is difficult to justify spending £20 on a book just to get the livery details for one wagon. Presumably the lettering and fonts are similar on the grey wagon?
-
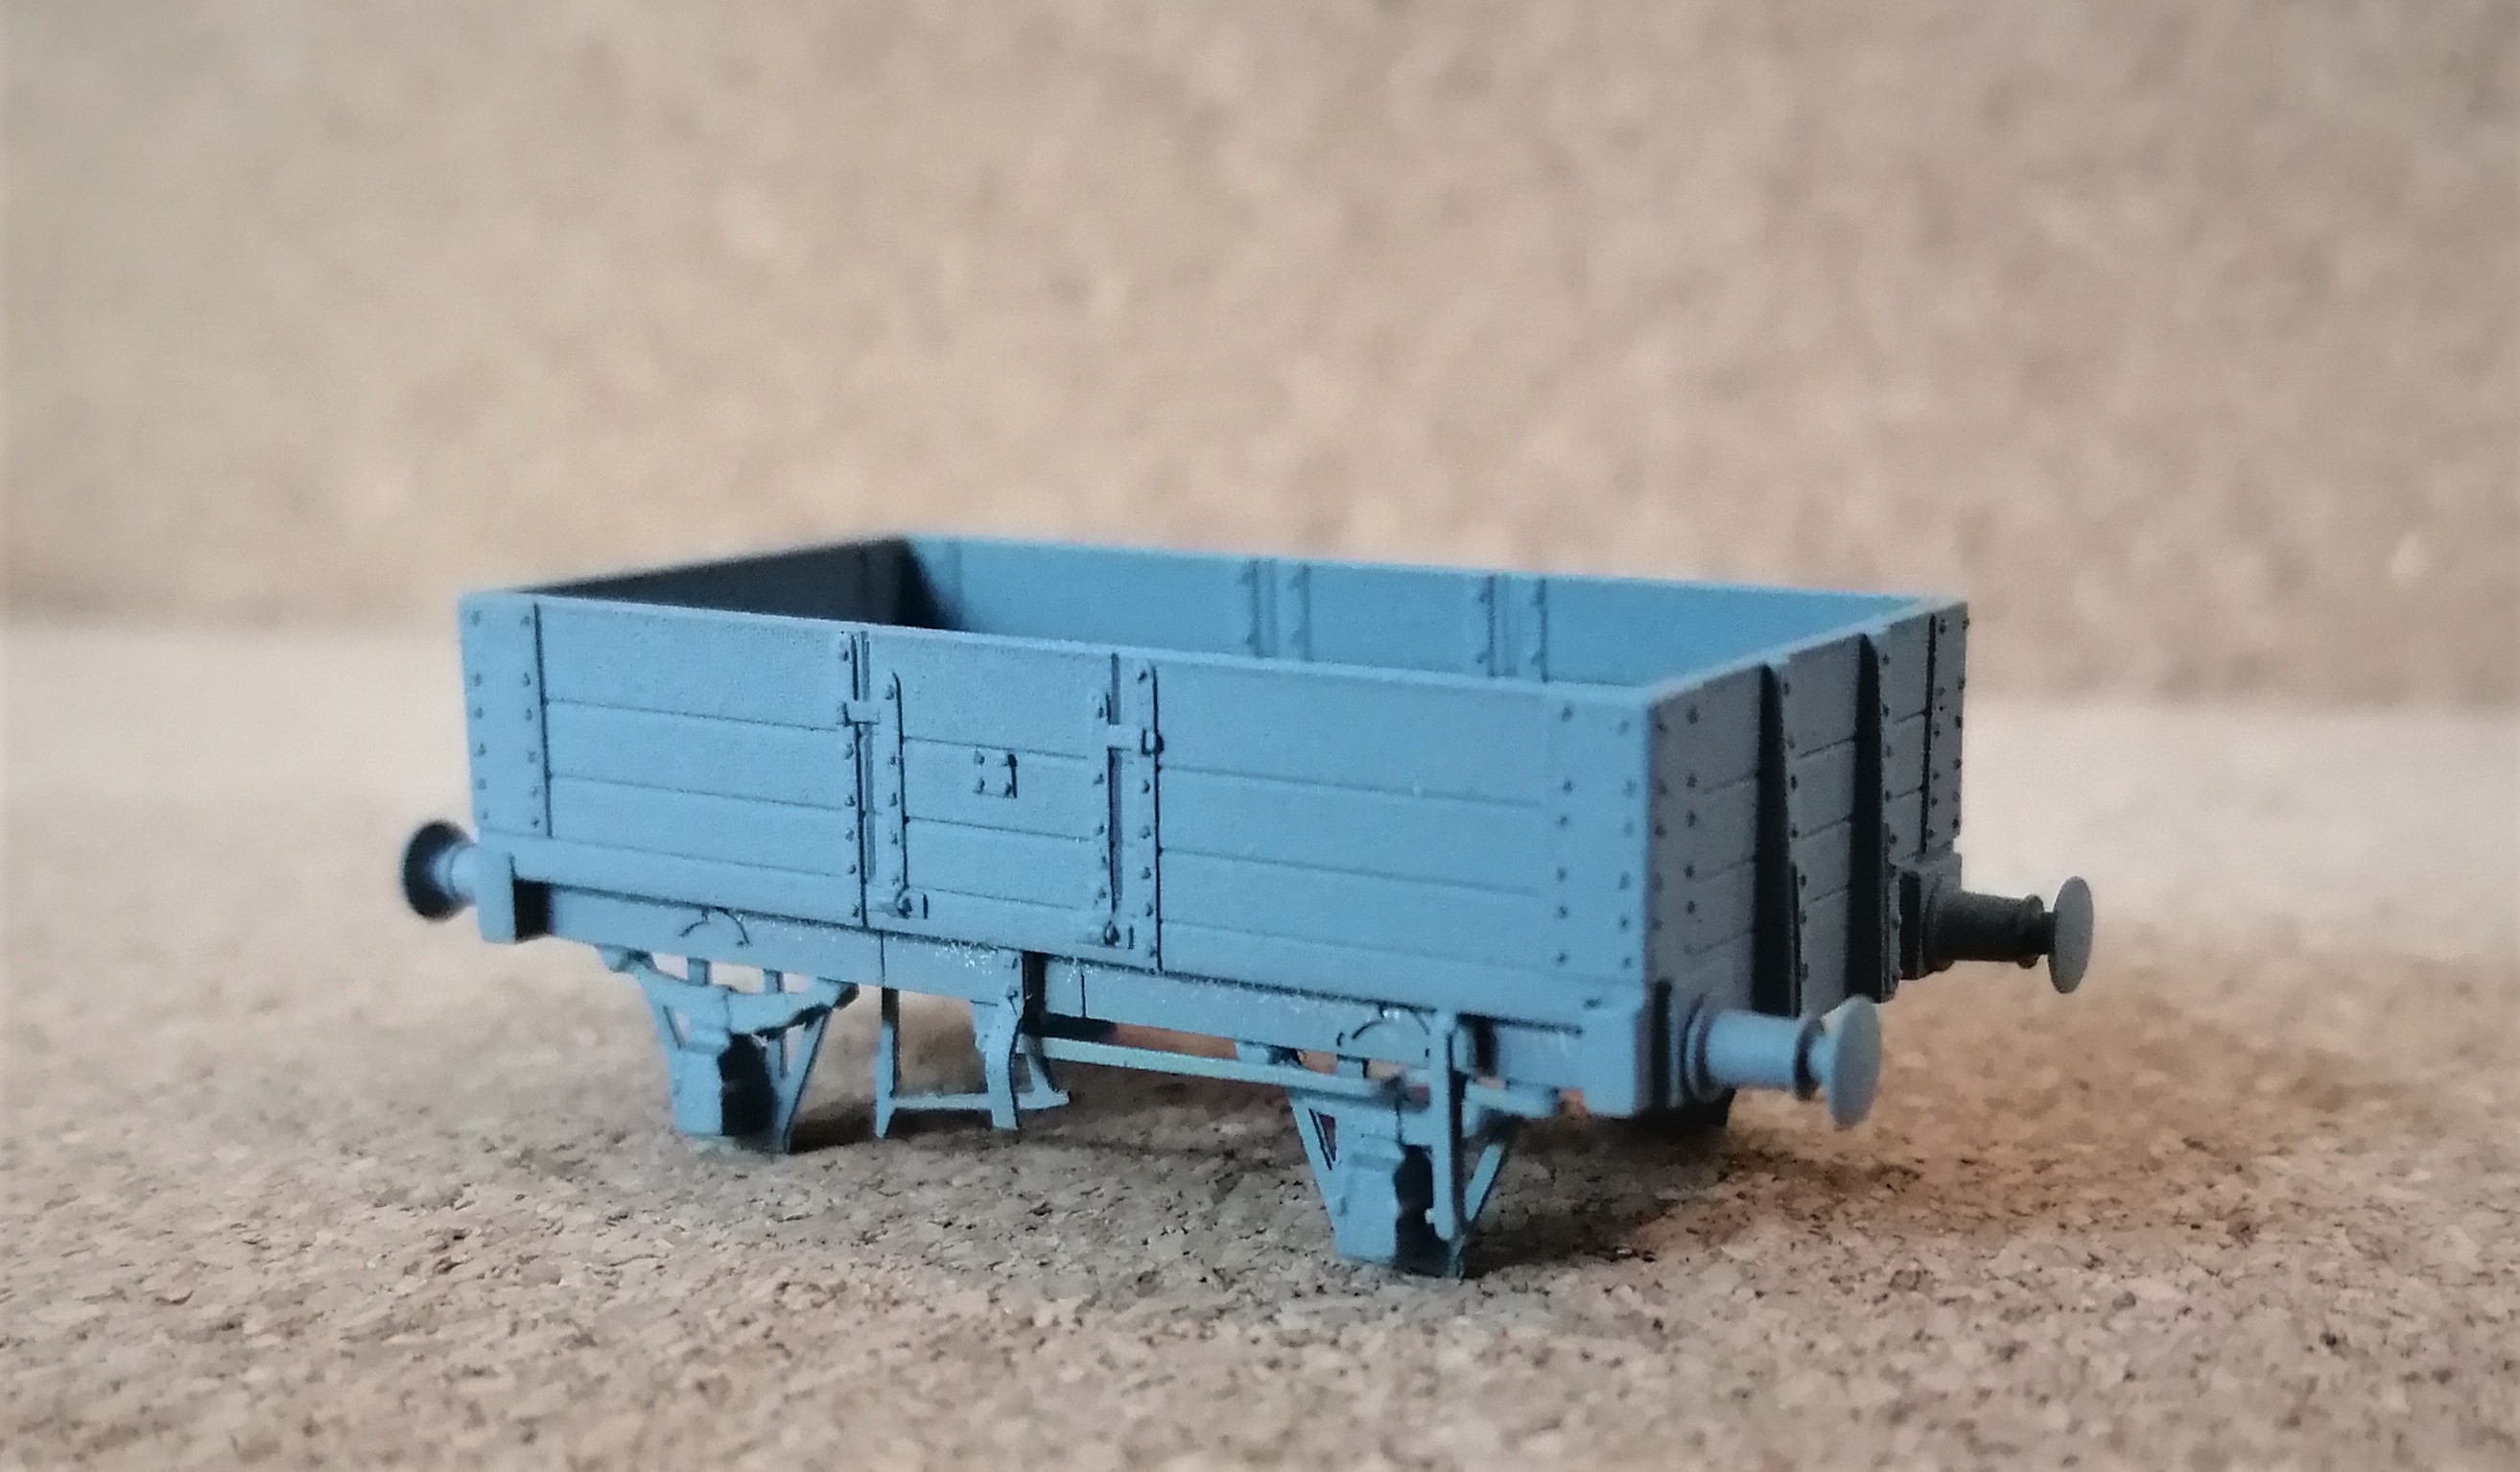
Hi Galteemore, the wagon has 20thou sides, so 0.5mm or scale 3" thick.
-
A bit of progress is being made on finishing some stock already built. These MGWR vans attracted a bit of attention when first built. Inspired by David Holman's recent MGWR mail train build I've decide to finish them in pre-GSR colours. This probably means I'll have to backdate the layout to early GSR days at the least. It would give me the opportunity to run a mix of liveries although the thought of lining out a loco in 2mm does bring on a cold sweat! I've just realised I've painted the solebars underframe colour as a steel underframe rather than body colour for a wooden underframe. I'll correct that. A couple of questions to the audience, is the body colour correct? I believe it should be slightly darker than LMS maroon for late period MGWR which I've tried to capture? In the UK the wooden centres of the Mansell wheels were sometimes varnished or even painted (on the LNWR newly constructed coaches had varnished centres that were then painted the body lake colour at the first re-paint). Does anyone know what the MGWR practise was? Accepting, of course, being low to the ground the wheel centres would be covered in crud in ordinary operation! I made reference to being gifted some models from a fellow 2mm scale association member. This included what is described as a CB&SC open wagon. The body is scratch built from styrene and is rather exquisite (please bear in mind this is 2mm scale so the body is only 30mm long) I can't find any details of the wagon (the CB&SCR doesn't appear in my library as it's a bit far south). The wagon scales at 15' in the body with a 9' wheelbase. Also I can't find any CB&SC wagon livery details either, I could always cop out and paint it GSR grey, in which case the undercoat will suffice! I'd be appreciative if anyone can fill in in any of the gaps?
-
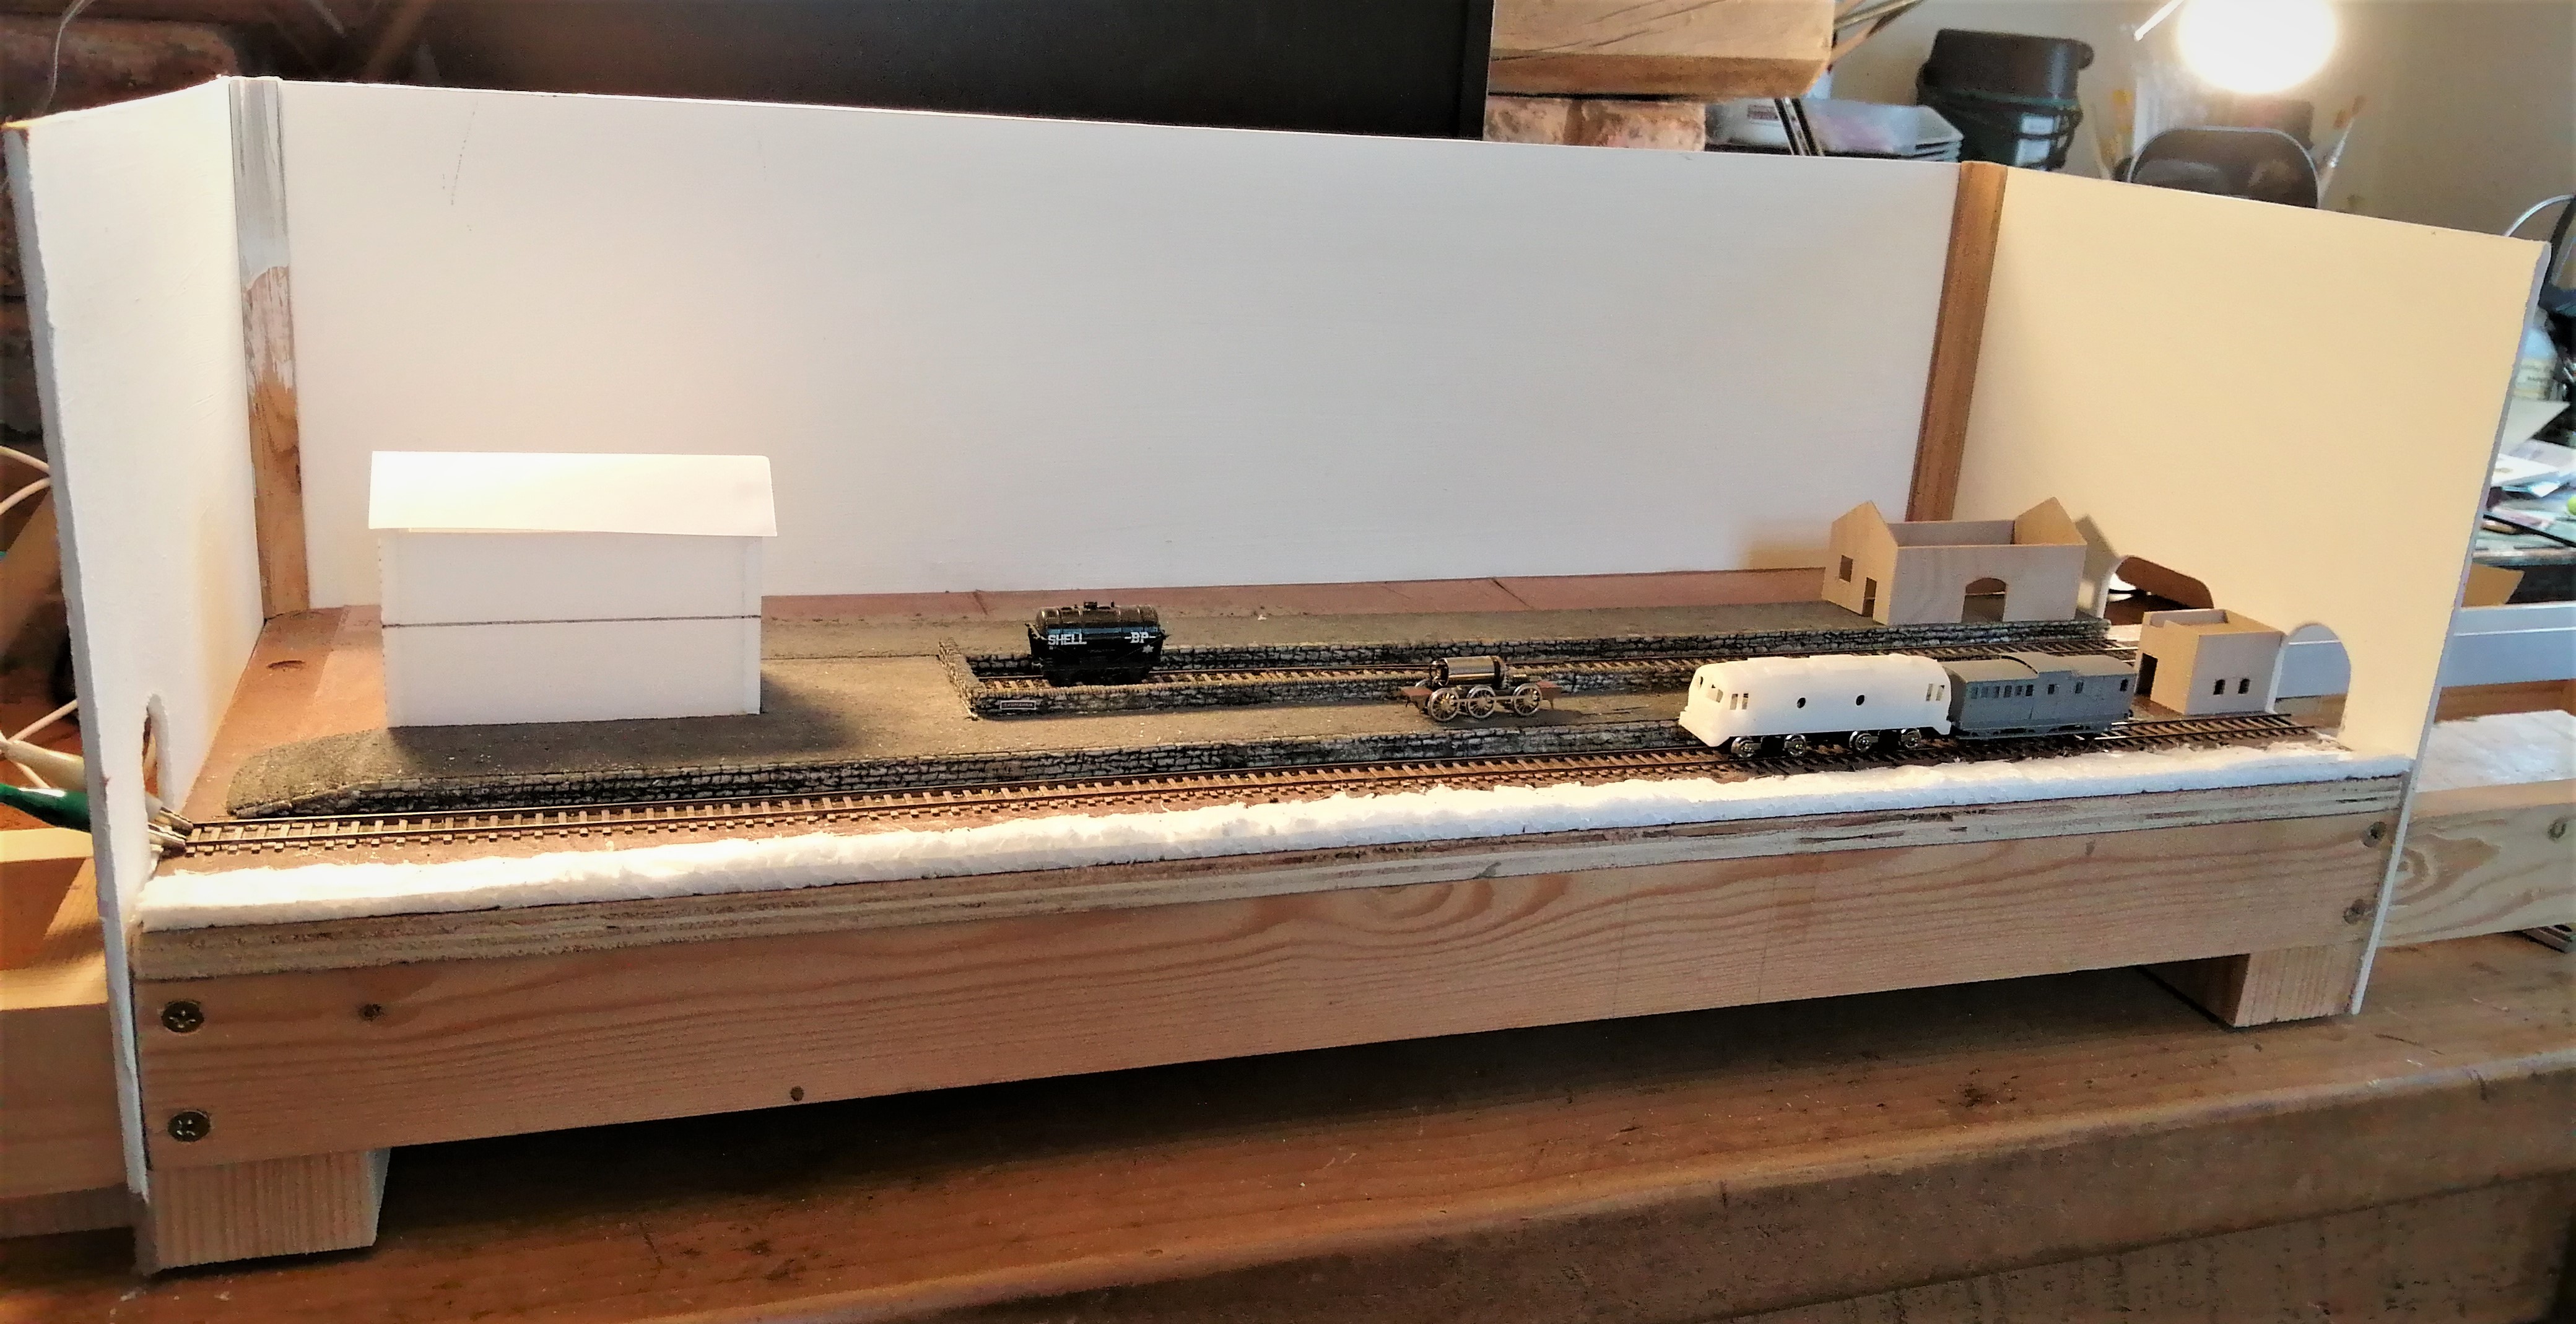
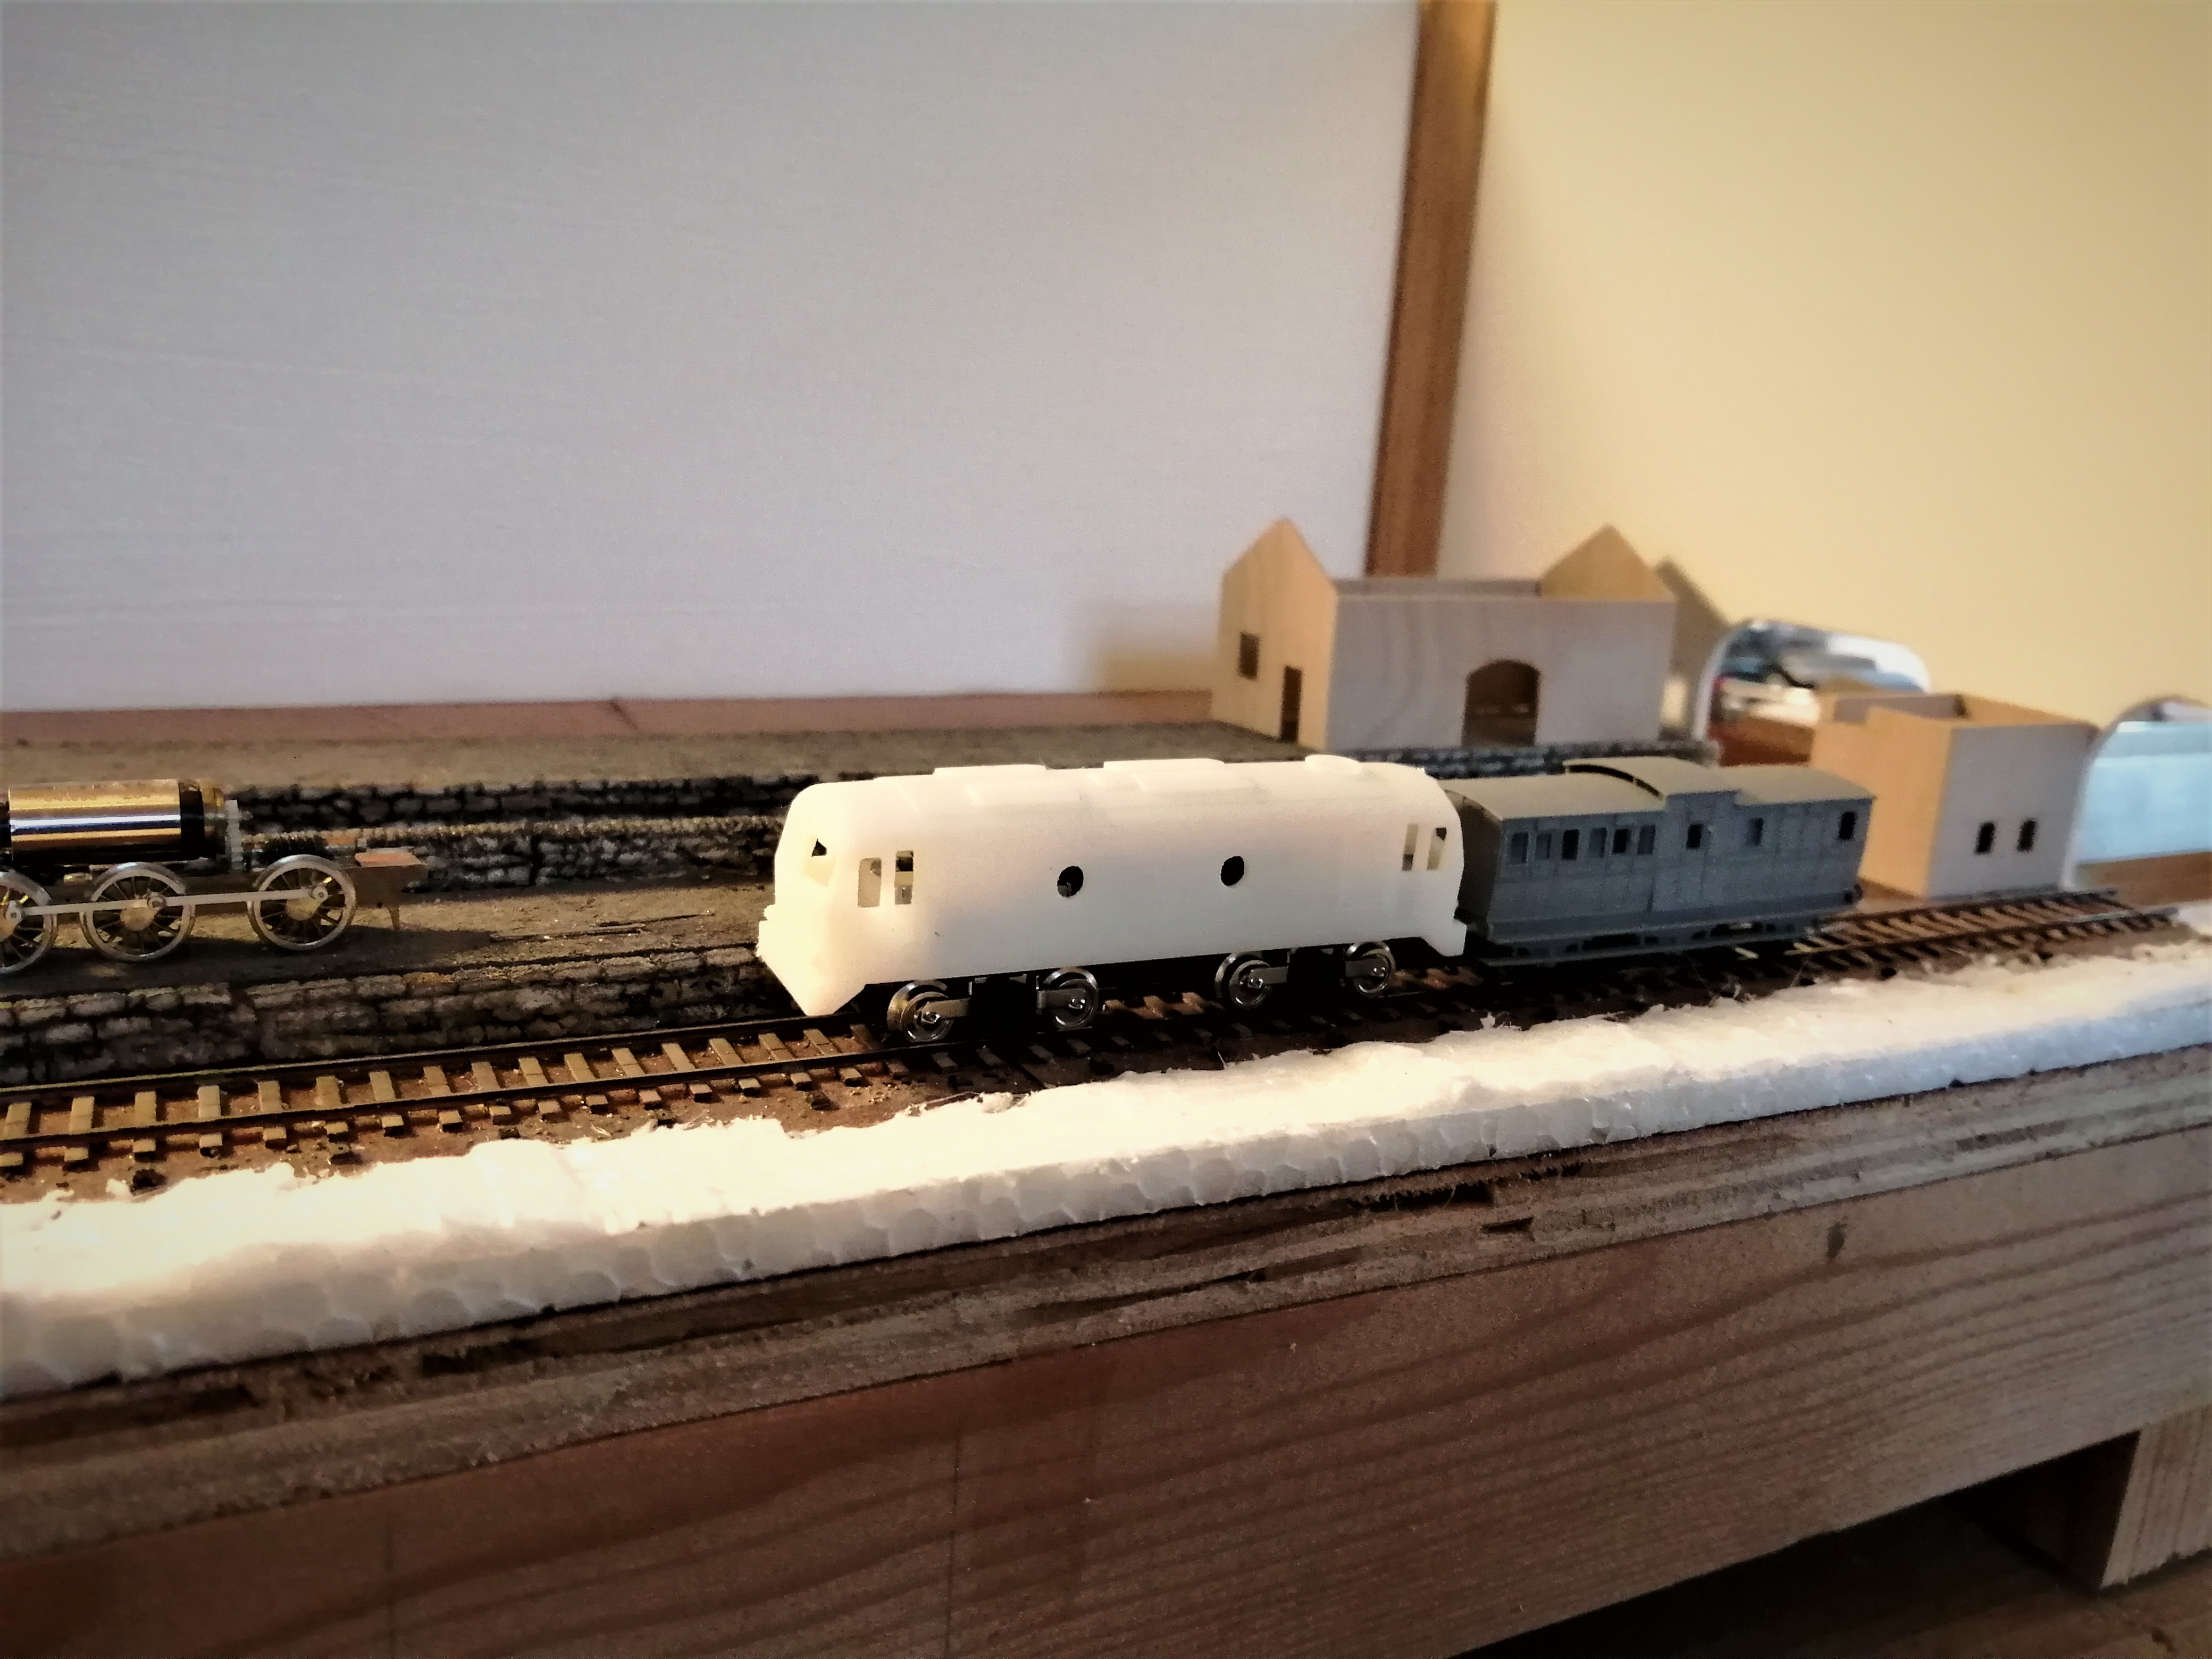
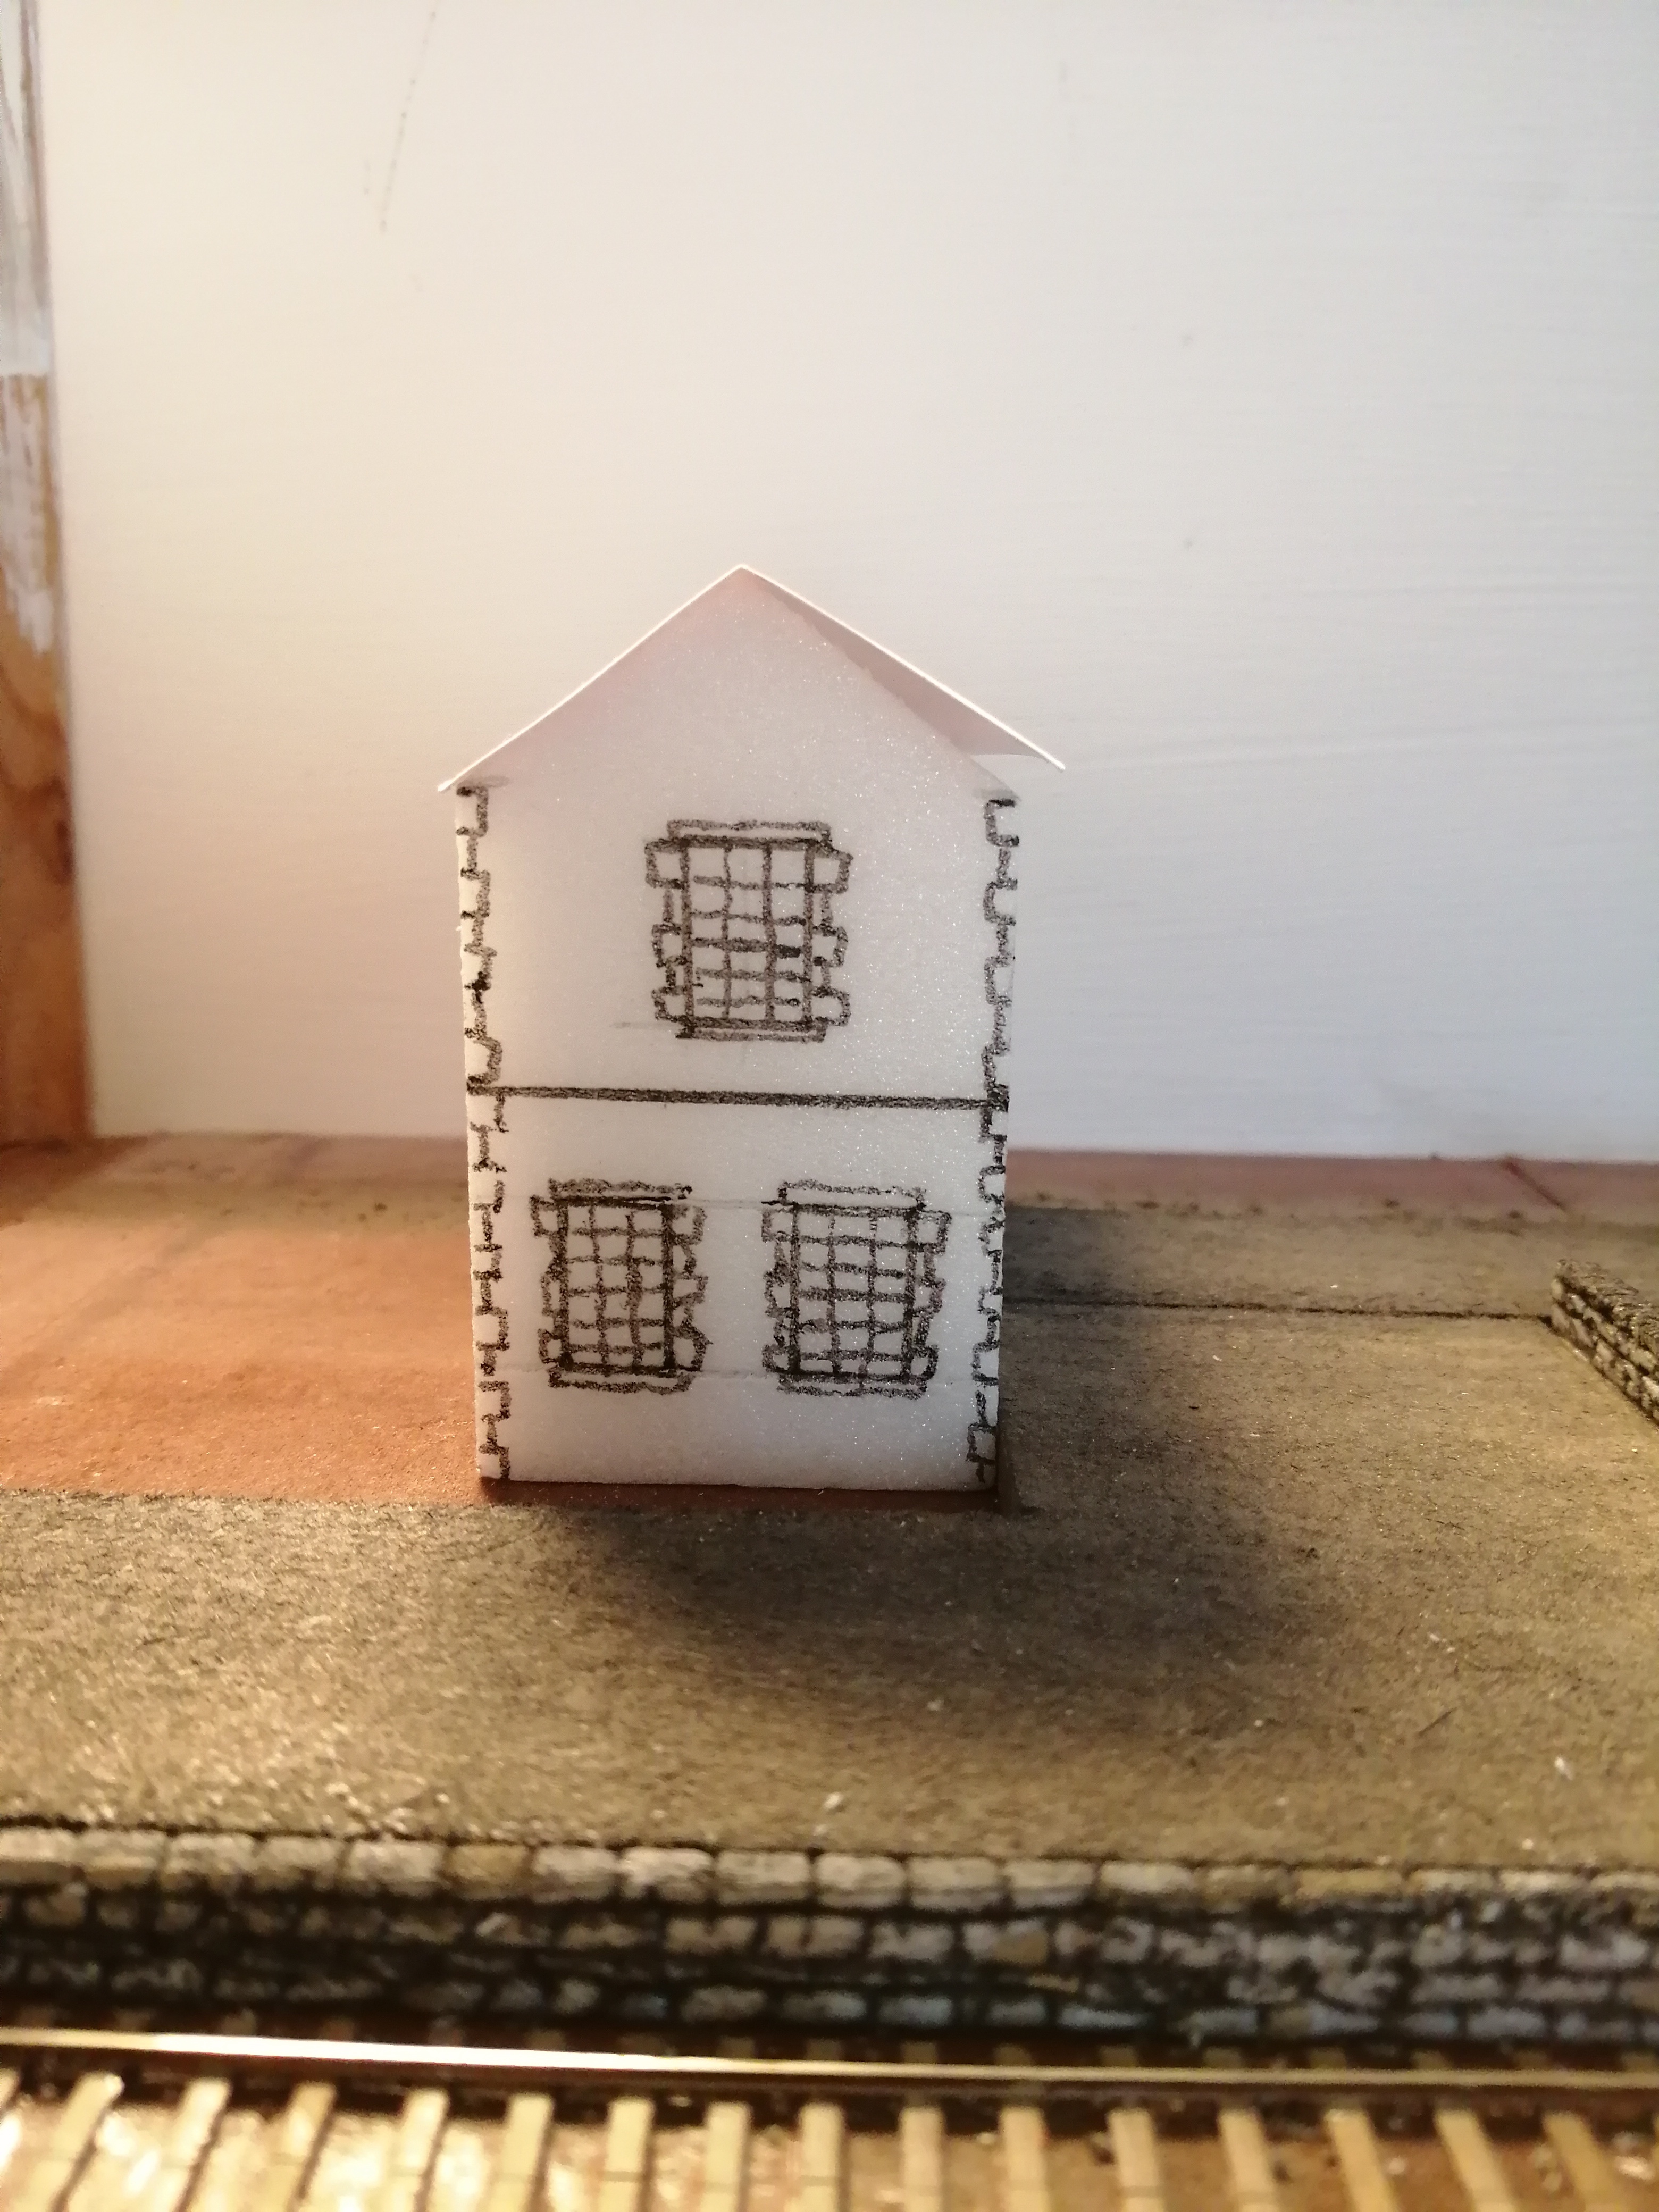
Well it's nearly a year since any progress on Dromahair but work is back underway. To be honest, the module's future was looking doubtful for a while. It was being built for the 2mm Scale Association's Diamond Jubilee Layout competition originally scheduled to be judged at the Association's annual meet in June 2020, this was rescheduled for June 2021 which was also cancelled. The competition was aimed at building something as either a toe in the water for newcomers to the scale or letting modellers try something new, hence the opportunity to try something Irish in 10.5mm gauge. The module is only 600mm long so not something I would ordinarily build, a bigger layout would take more commitment and cause more distraction from other modelling activity so my Irish modelling stalled. A few things have conspired to change this, firstly a fellow 2mm modeller gifted me his Irish stock and components recognising he would get around to doing anything meaningful with them so I feel honour bound to use them, secondly the competition has been rescheduled for June 2022. Finally I was surprise to see this little model mentioned in some esteemed company over on RMweb in a list of 5' 3" scale gauge models. I naturally felt obliged to to start up again. So where are we? The backscene is in position but needs the corners filling in, ultimately integral lighting will be added, I'm still working this out. The platform facing was also catching on passing stock as there was insufficient clearance, the facing was carefully cut off, thinned down by sanding back then re-glued back on. All is good. The C class is a 3D print that was amongst the items gifted to me. I've bought a Tomix chassis that is very nearly scale. (Bogies are correct but the centres are slightly too close together). For the moment I've simply pushed the wheels out to match the gauge, obviously this won't run through pointwork but it was fun to connect up some power and have the loco run along the front of the module. Testing clearances.....obviously! Who would have thought the first loco through Dromahair would be a diesel? The body print is quite nice, although it will need a bit of work to add some detail but should be fun. Although out period I've always had a soft spot for the little diesels. I had previously posted some concerns regarding the station building dimensions so I set to work with some pens. once the windows are sketched on it is amazing how it all seems to come back into proportion.
-
that looks absolutely superb David! The plates finish it off nicely.
-
Hi David, Allen already does these in other scales, I have a couple of 2mm scale ones under way, albeit not touched them for 6 months or so. I've also built some of his non-Irish coaches and loco bodies. If you you email him he will produce them, if you are lucky and he is preparing stuff for the next batch for the etchers turn around can be quite quick. As you've noted the kits are scratch aids and only contain the basics for the body but do save a lot of work if you were stating from a blank of brass or plastic.
-
One thing you might want to consider are solder balls https://www.ebay.co.uk/itm/Tin-Material-BGA-Solder-Ball-Repair-Tools-leaded-for-ICchip-Reballing-Balls/363225899211?hash=item5491f360cb:g:l4IAAOSwViVf3QJK They can be found relatively cheaply and 25,000 would last a while..... (there are local stockist on ebay who can deliver in short timescales if need be but you have to pay a bit more.) These are widely used by those us us working in 2mm scale, I find one 0.6mm ball per joint works well. For 4mm use one 0.6 ball either side of the joint. The advantage is control over the amount of solder used, this gives a consistent appearance once complete. The technique is easy after bit of practise, lay out the sleepers, apply a small amount of flux to the areas under the rails to be soldered. Lay the rails in place. Tip some of the balls into a saucer and by using a toothpick with the end dipped in a bit of water you can pick up individual balls and place the balls into the flux on the sleeper. The balls will stick to flux. If the rail is held in place then all you need to do is apply the iron so it heats both the sleeper and the rail and the balls will flash forming a joint. You can systematically work along the track applying flux to a section, following through the balls before finally soldering the lot in a batch process. Oh, and by the way, be careful with Powerflux, it is good stuff but needs careful cleaning. If not washed thoroughly everything will turn a nice shade of green if left. Personally I use a less aggressive water based flux that seems easier to clean up. that said, as with all things, it comes down to personal preference.
-
Much better and well worth the effort, however I'm glad I didn't have to start the butchery. Committing to the first cut must have been hard?
-
“Locomotives of the GSWR” by McMahon, Clements & O’Rourke
Angus replied to jhb171achill's topic in General Chat
Same here but it's three weeks for me. I ordered via Book Depository as they offered a 10% discount but have email a few times to say they are struggling to get stock. I guess that's the disadvantage of Scottish and Yorkshire genetics......... Still, I'm sure it'll be worth the wait.