David Holman
-
Posts
4,359 -
Joined
-
Last visited
-
Days Won
117
Content Type
Profiles
Forums
Events
Gallery
Blogs
Everything posted by David Holman
-
If it's no trouble then yes please. Am presuming the axles will be something like 3mm or 1/8th inch steel. Easy enough to replace, especially with no quartering required, but the modern penchant for force fit, nylon, final drive gears would have me worried about both splitting when replacing, plus the worry of sourcing a new one.
-
Many thanks! I thought there might be room and shaving a bit off the back of the axle boxes could well do the trick. However, wondering if would then need to realign the brake and sanding gear? Another concern is whether the wheels are thick enough overall to cope with moving them out 2.4mm on each end of the axles? Back to back on Fine scale 0 gauge is 29.2mm, I think, but 33.98 (call it 34) for broad gauge. When I looked at an Impetus 0-6-0T a while back, replacing the axles didn't look much of a problem, but potentially breaking the nylon main gear in the process put me off immediately. In the end, another loco I wanted, but didn't need, so pragmatism ruled...
-
Northport Quay will be there this weekend (actually at the Stoke Mandeville stadium). Very much a finescale show, I' m quite chuffed to be included and fly the flag for broad gauge. On Sunday, Galteemore is bringing some of his stuff as well, so possibly the largest selection of 7mm scale, Irish broad gauge at a model railway exhibition for quite some time. Shame the layout is only 7'6 long!
-
Great thread. Recently been pondering on an 88DS for Northport Quay. Photos of the model indicate there might be enough room behind the dummy axle boxes to ease the wheels out a couple of millimetres each side to 36.75 gauge. If so, I'll have to debate my customary needs and wants with myself. I don't actually need one, but I could certainly want one...
-
Northport Quay is at Railex this weekend. 7mm scale/36.75mm gauge, I use code 100fb rail on copperclad sleepers, which works well, both visually and physically.
-
There are some fabulous Lego models out there. At the recent Ashford show, they had an oval layout that hadhe Forth Bridge as the centrepiece. I kid you not. Approximately 7mm scale, I guess the bridge itself was about 7m long and 1.5m high. The oval layout was more like 10m by 4m. If that wasn't impressive enough, there was a vast range of trains available, all made from Lego and very recognisable. Everything from modern diesels to steam outline. A bit of 3D printing was involved for some details, but all essentially Lego. Probably spent more time watching this layout than any other and it was great to see it was mostly younger people involved too. It will be coming to the Chatham Show, in the Historic Dockyard, in July.
-
The latest Model Railway Journal celebrates the above, with a fascinating insight into some of its many achievements. Former members include some real legends of our hobby including Alex Jackson (of auto couplings fame) and Sid Stubbs. Both men were pioneers of 4mm scale in the immediate post war years when you had to make everything - including even wheels and motors! Indeed Alex Jackson worked with 24 volts, after using no less than 110 volts in his Gauge 1 garden railway. Chee Tor, the pioneering 2mm FS layout also features, along with a host of other stuff. Well worth getting a copy if this sort of thing interests you.
-
Epic! Thanks JB.
-
Interesting to see how the whole approach to modelling changes as you go up a few scales. Lovely stuff!
-
It might be me, but reading these regs made by brain hurt and my eyes glaze over! Can't help wondering whether high tariffs or making the system so complex that nobody want to use it, amount to the same thing.
-
Recommended books - 1960s to 1980s
David Holman replied to west_clare_wanderer's question in Questions & Answers
The Keith Pirt book is especially good as all the pictures are full page and therefore give lots of detail for everything from weathering, through wider landscapes to buildings and even clothing of the time. -
The latest Railway Modeller has an article on weathering a Class 37 which looks very useful.
- 58 replies
-
- 1
-

-
- 1950s to 1990s irish railways
- harcourt street line
- (and 3 more)
-
Pure magic and oh so subtle. That pale, weathered stone really looks the business.
-
Thanks Jamie, definitely worth a look.
-
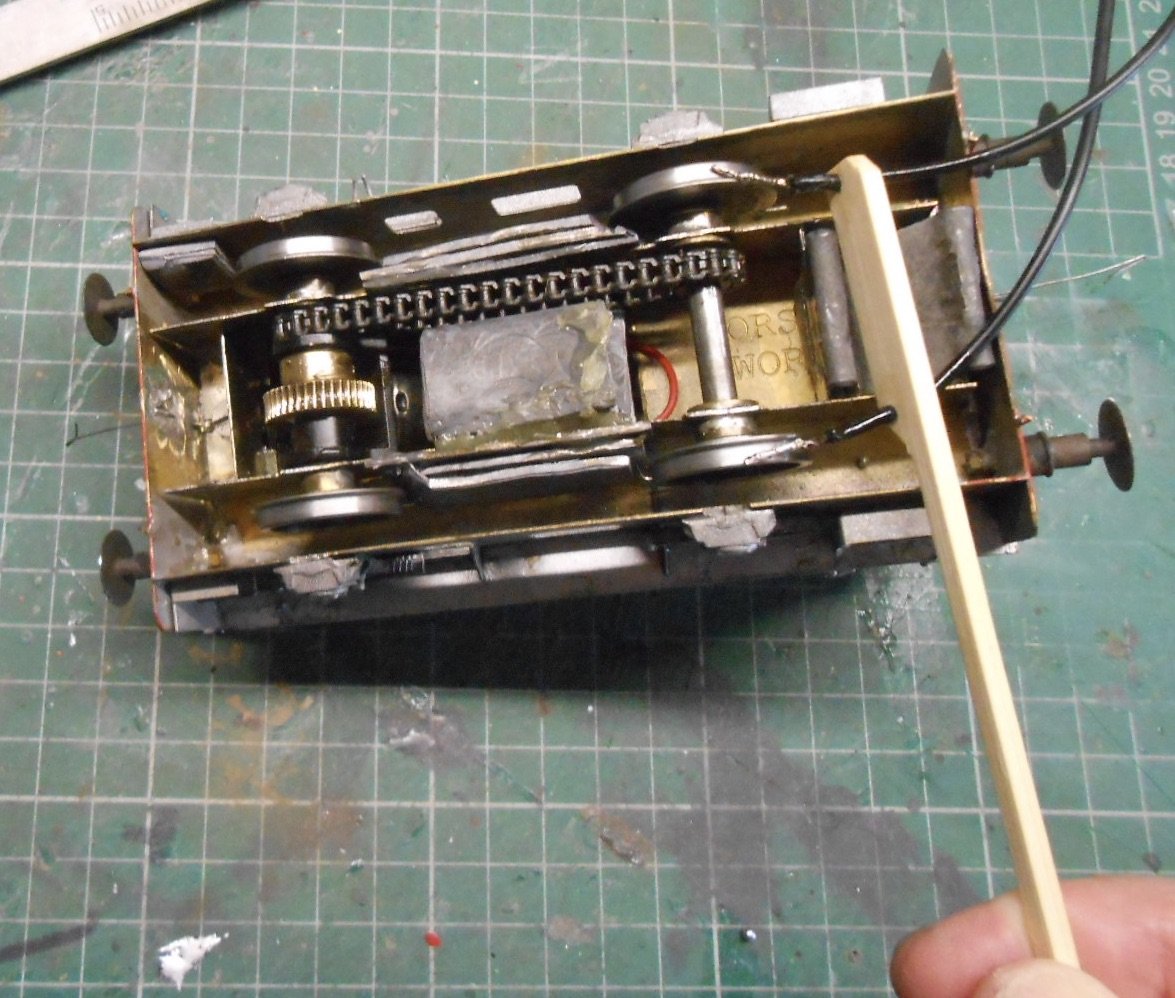
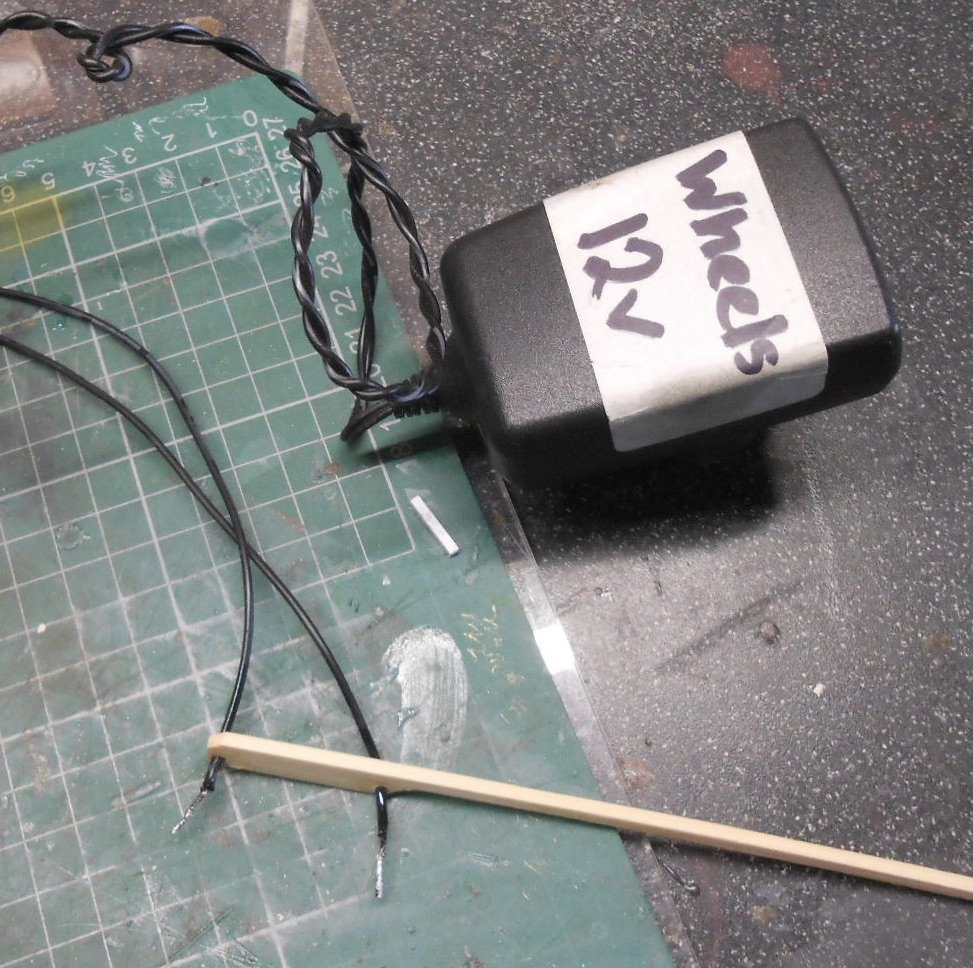
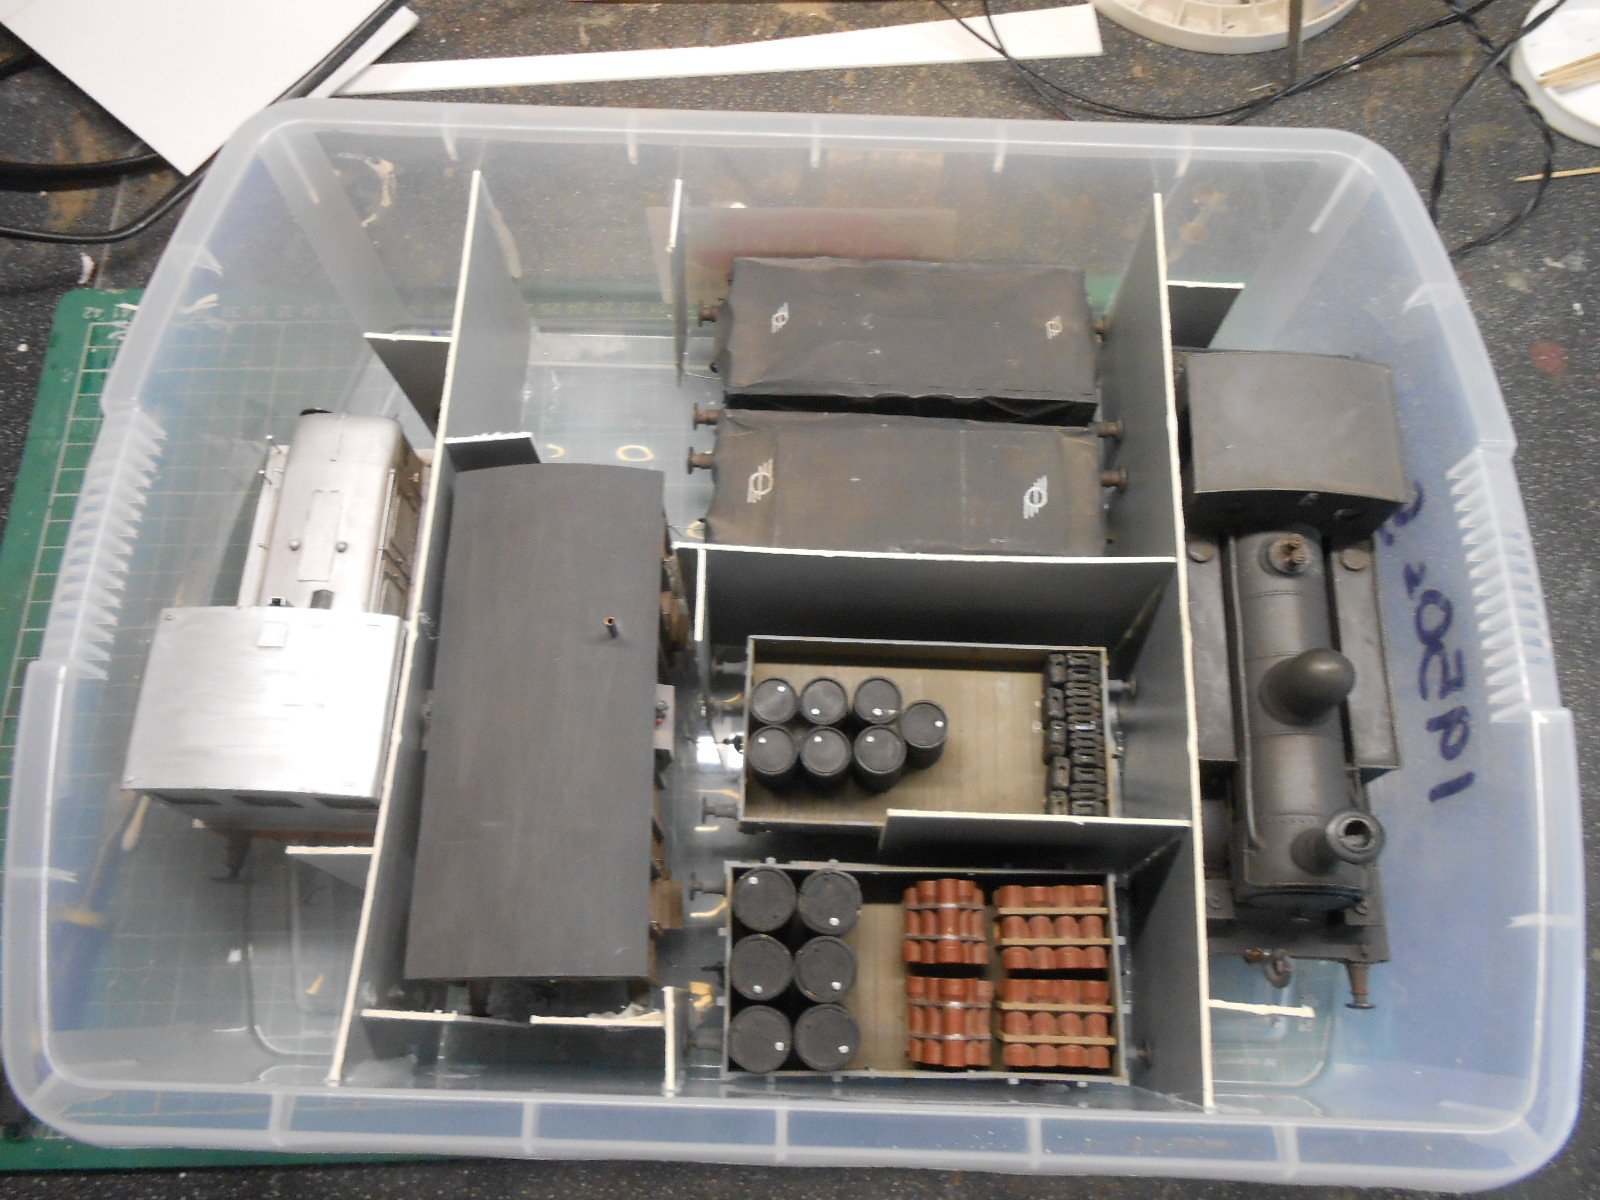
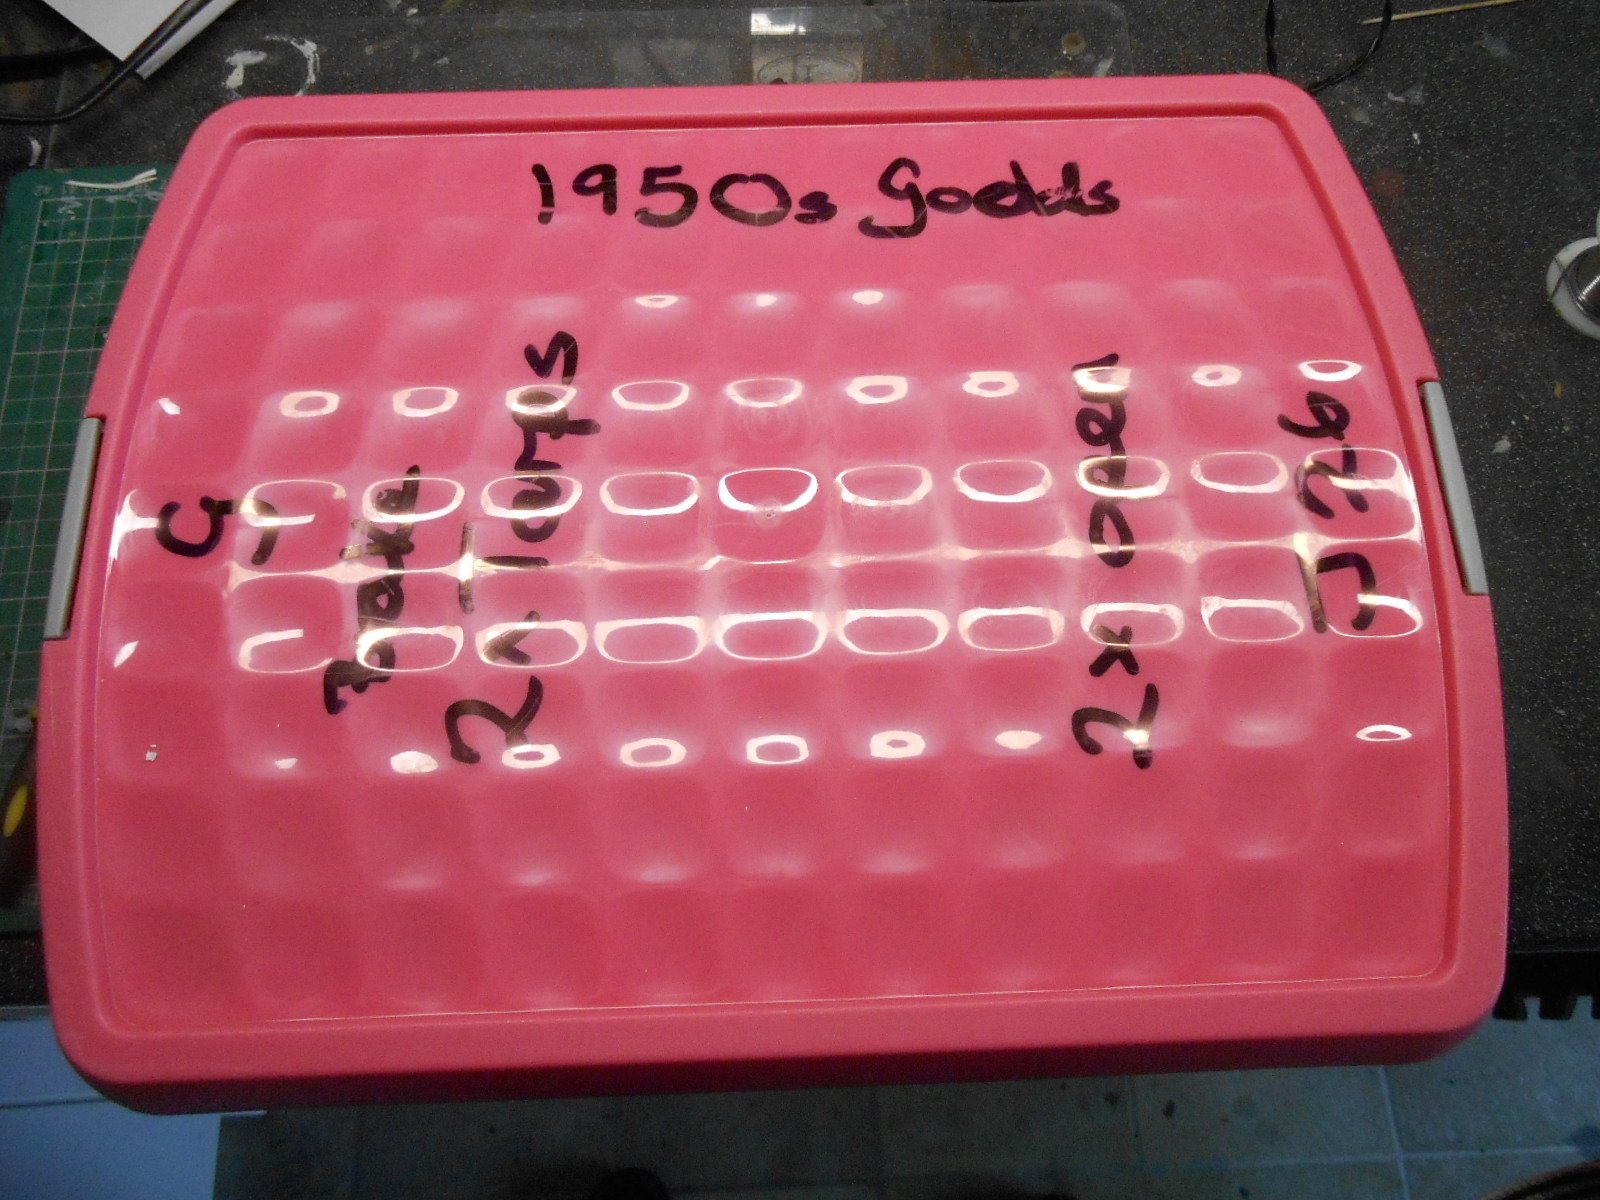
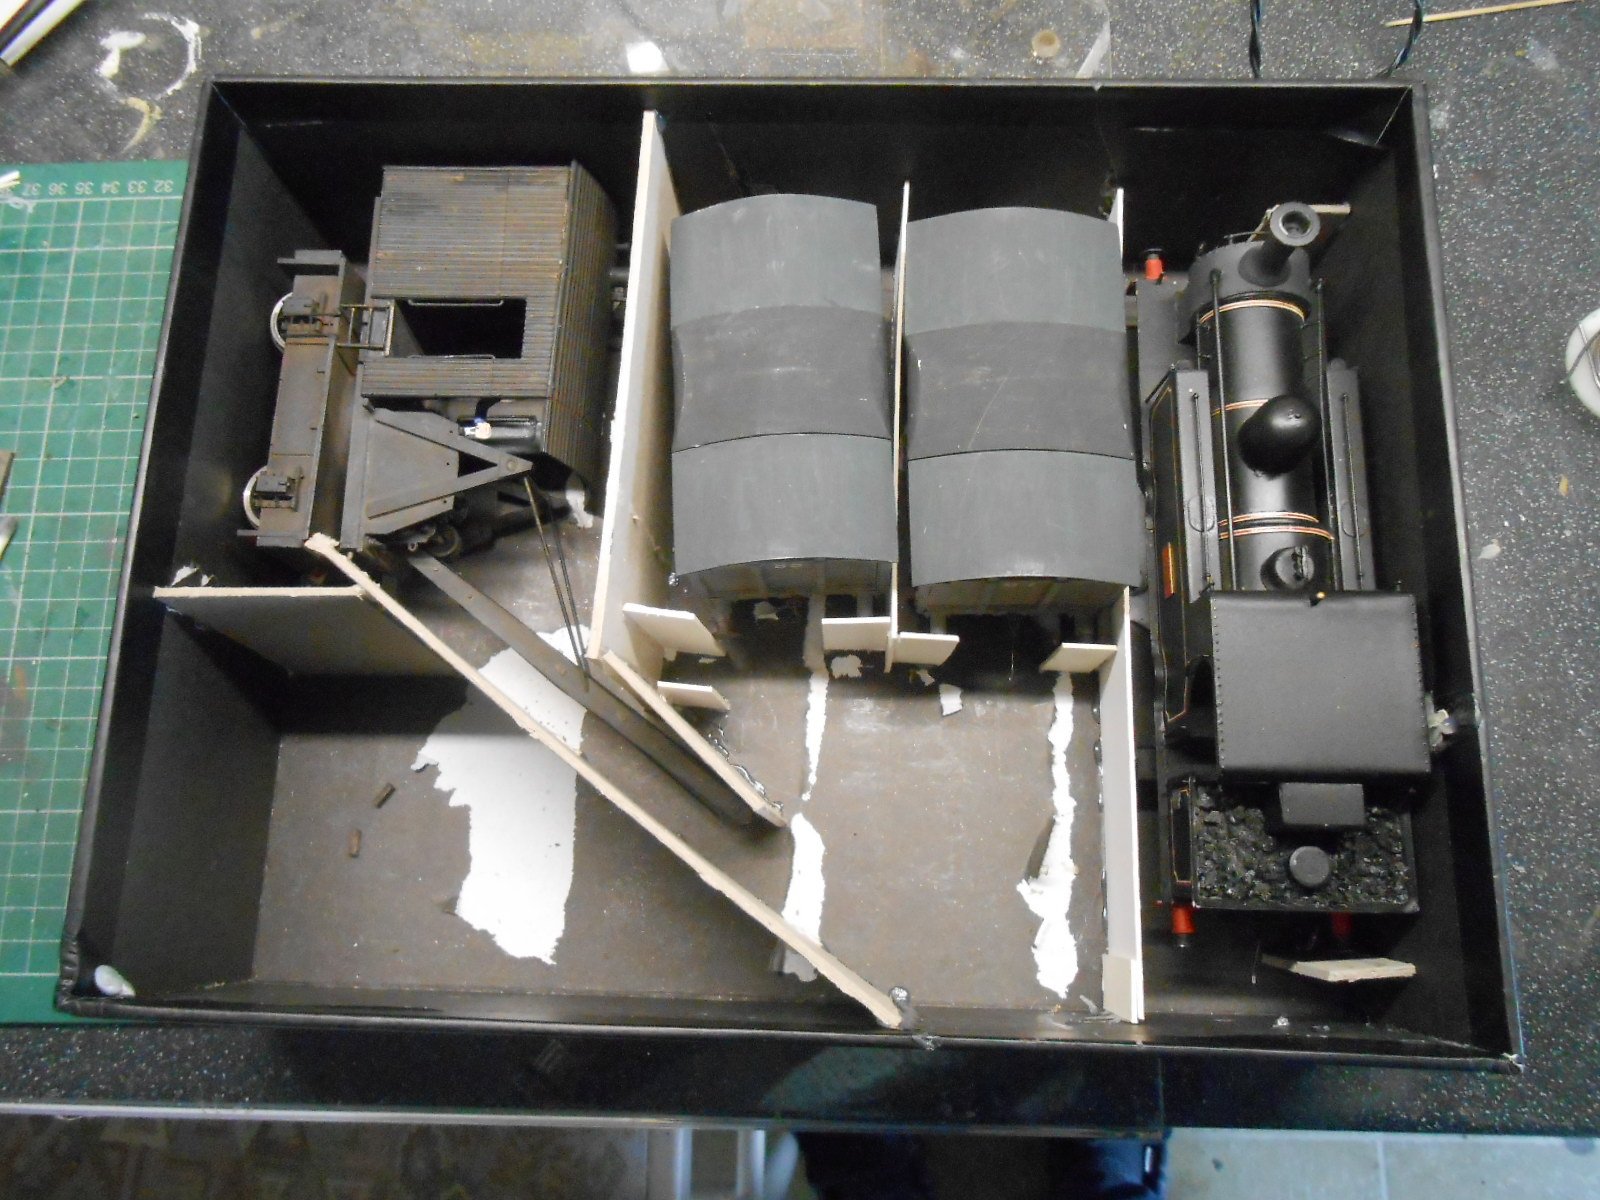
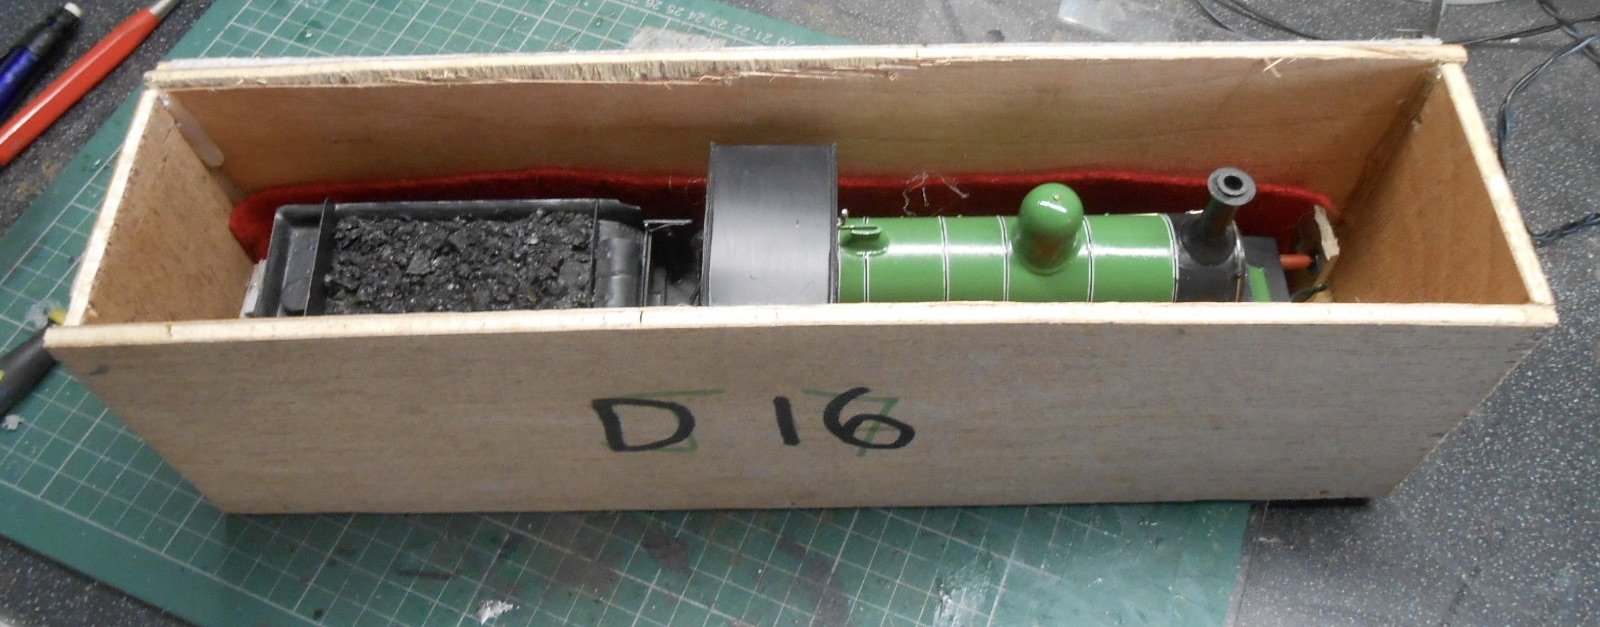
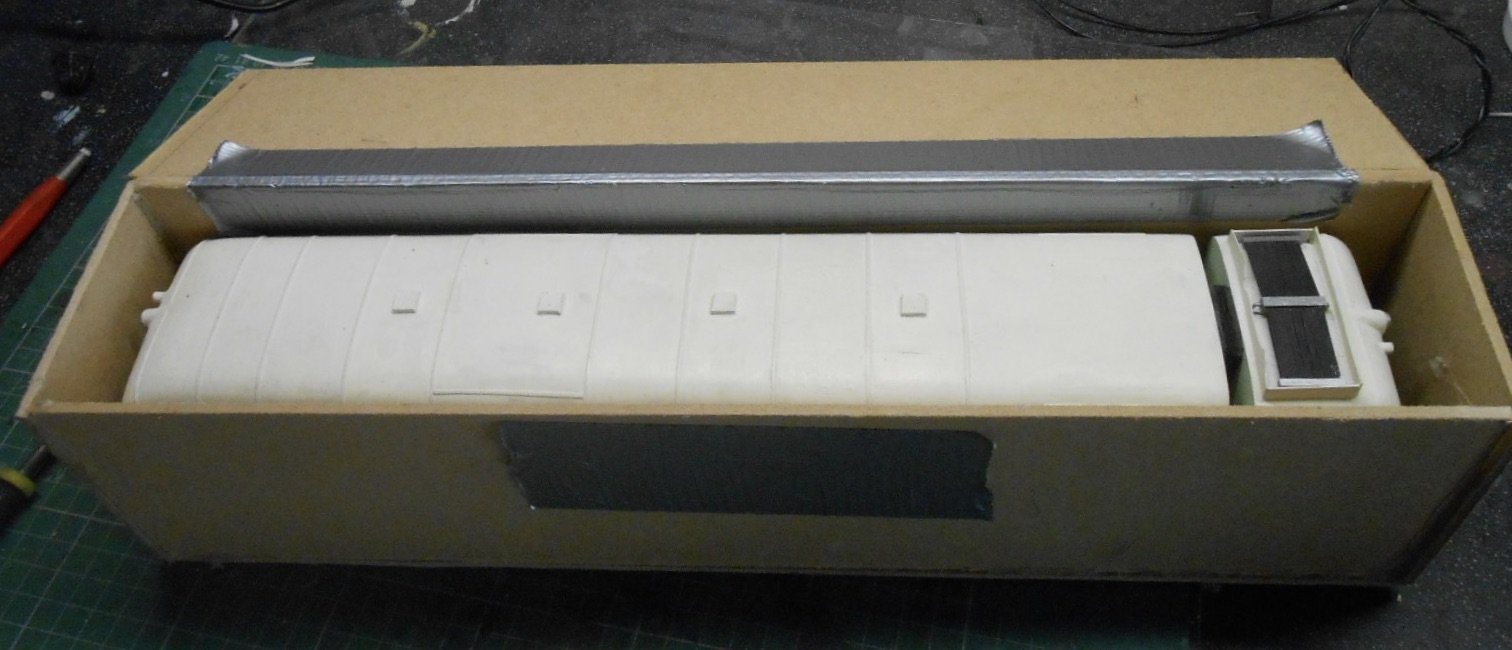
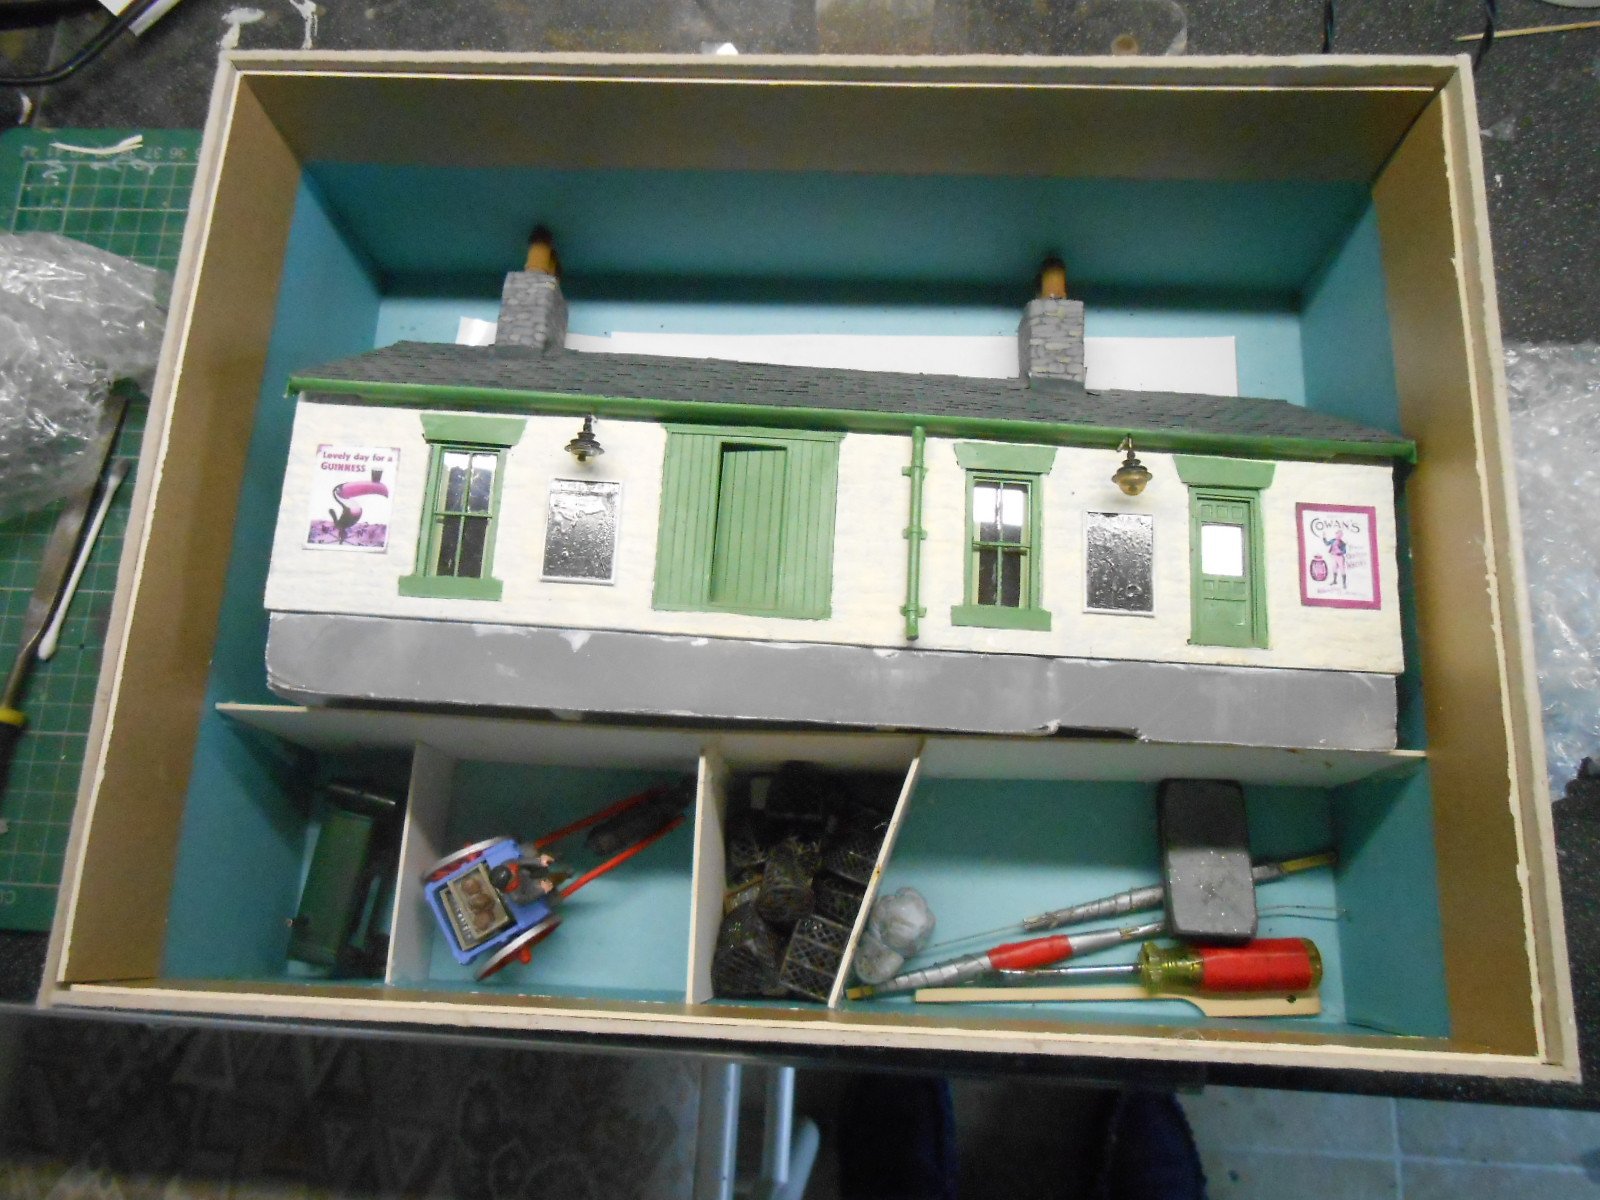
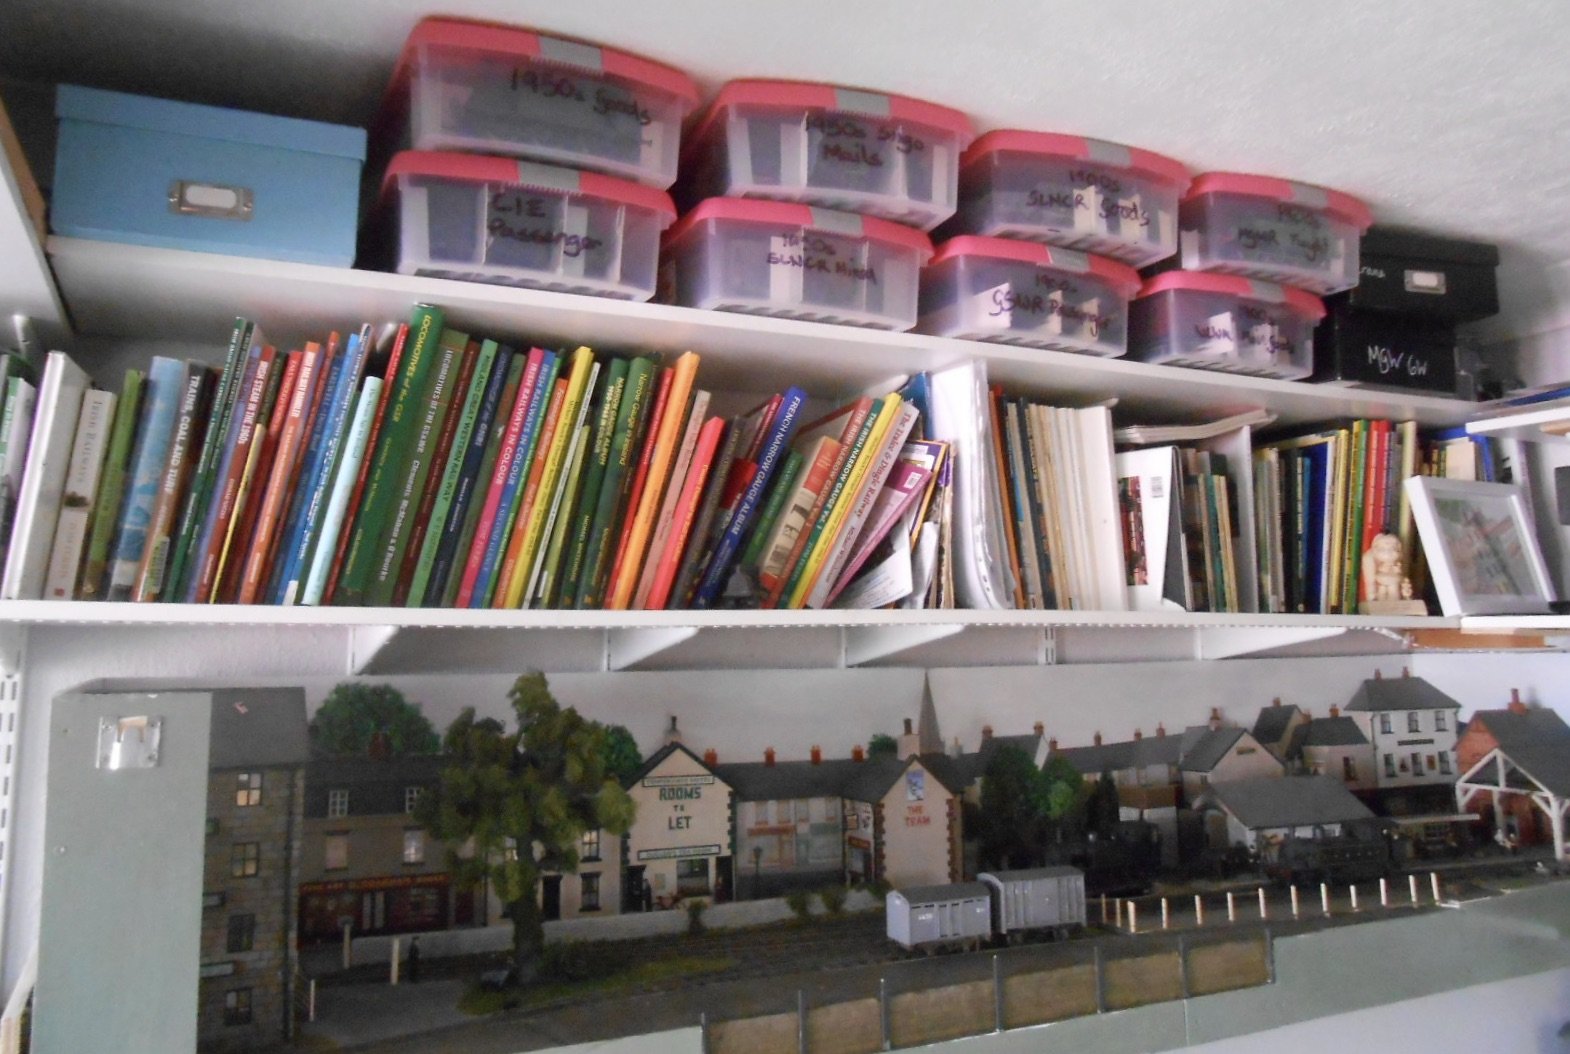
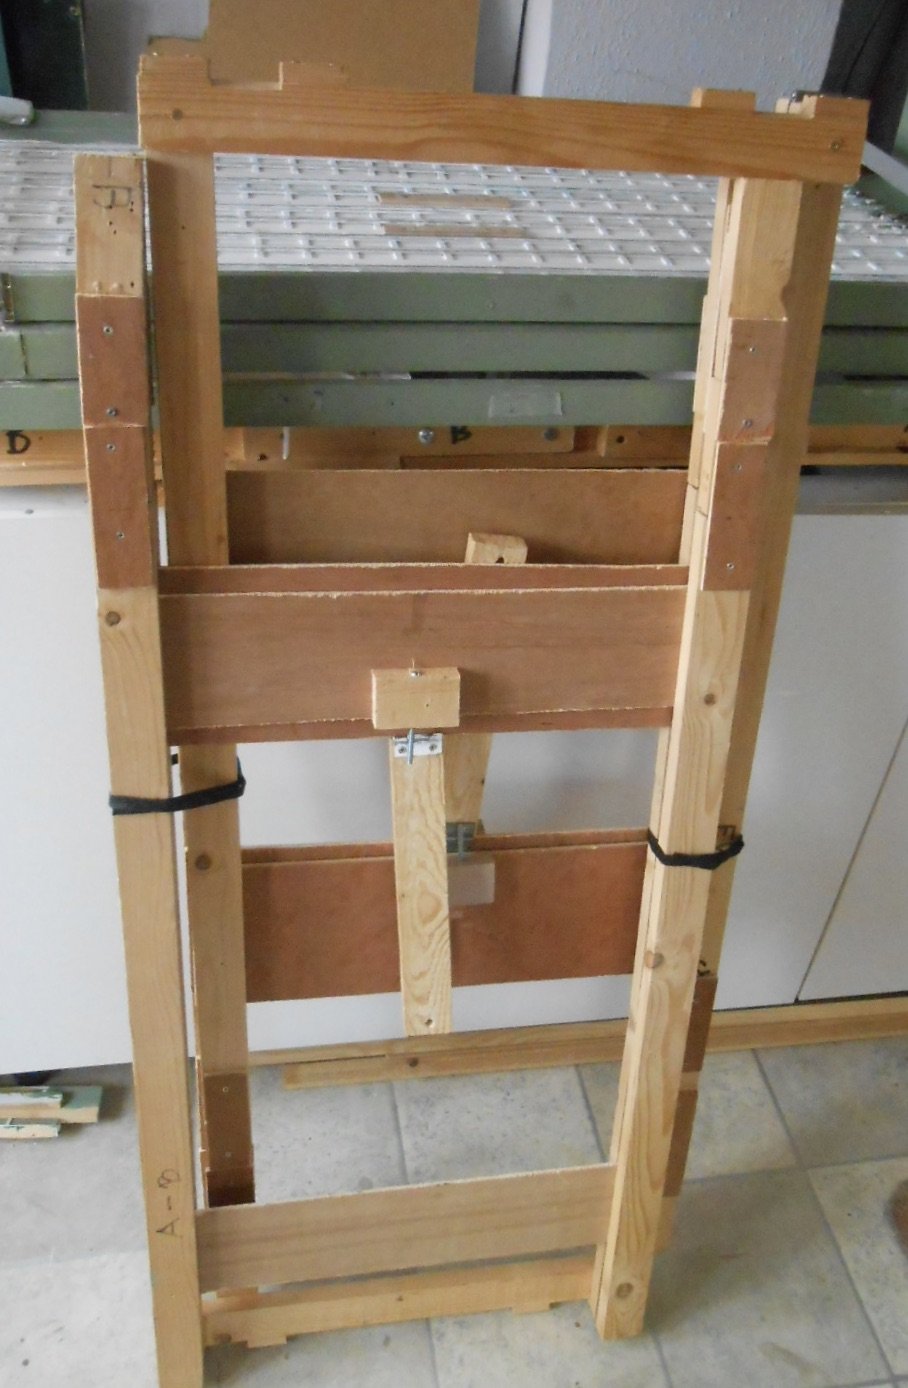
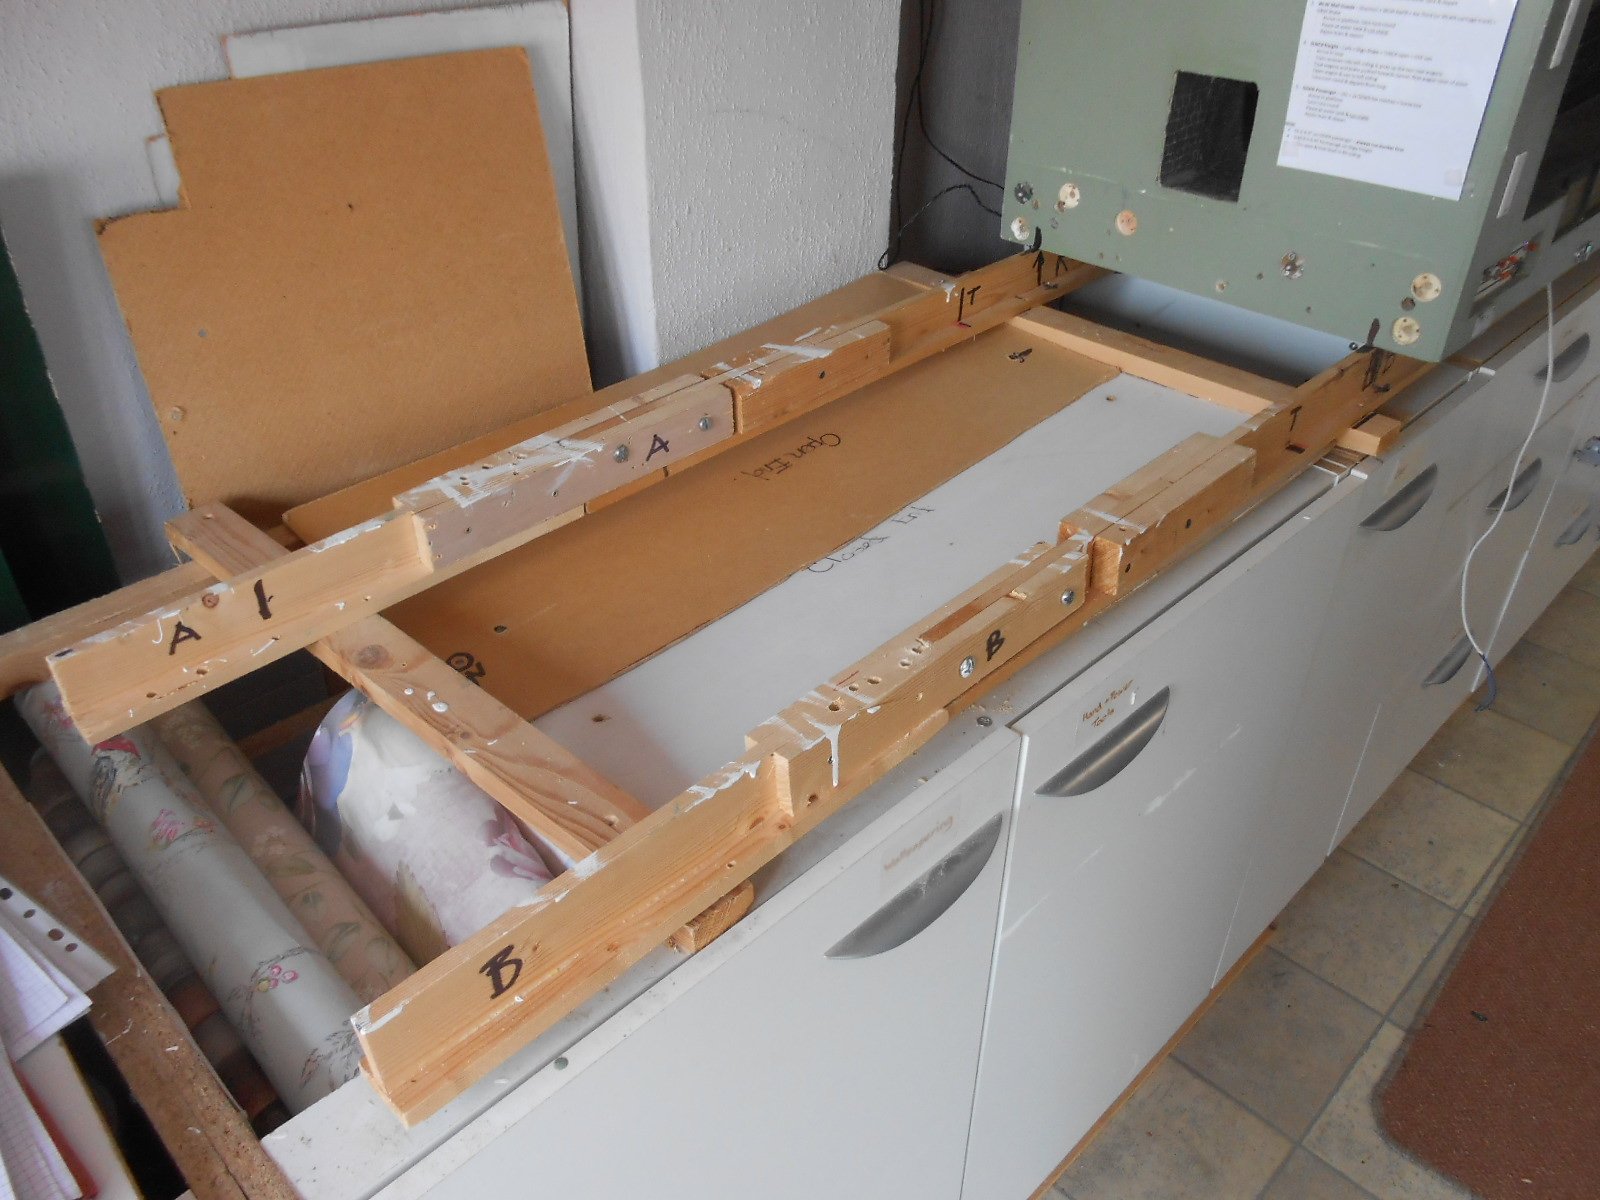
Exhibiting Going to a show is a bit like having guests visiting - you tidy up and make the place look respectable. Except with a model railway, it all has to be dismantled, boxed up and made safe for transport: in my case a Kia Sportage with the back seats lowered. Mostly I'm fairly tidy, but there were a few things noted from seeing how the Gravetts pack away Arun Quay that made me resolve to do better, plus address a few things that really should have been done ages ago. First was wheel cleaning. I use a 12v plug in wall transformer for this, but holding the two wires against the wheels with one hand, while using a cotton bud soaked is IPA [no, not the beer] with the other is fiddly, so made up a holder for the wires from a barbecue skewer, which is much better. Looking after your very precious stock is always a concern and I despair at folk packing stuff in old ice cream tubs and the like. I've now largely standardised on those plastic crates that come in a variety of brands, with most coming from The Range. The pink lids are a bit Barbie, but they do the job, especially as, a]they are deep enough for the stock to stand on its own wheels and b] I've added various dividers and all important end pieces to protect the AJ couplings. My trains are short, so I can fit one per box, which helps setting up and at the end of a show. A few non-standard items require a different approach, in this case A4 filing boxes. The crane, F6 and a couple of spare wagons go in one... ... while Railcar B and Wolf Dog, being both too long to go in an A4 box have their own, home made ones, using mdf/ply. One other box is a deepened box file, which takes the station building [it is loose because it spans the baseboard join], plus one or two other scenic items. There are 14 boxes in all, some of which can be seen below. A large supermarket carrier bag will take up to four at a time, which makes carrying things fairly easy. The layout comprises just three baseboards [two scenic, one fiddle yard], but there is all the other stuff too: Trestles, beams, pelmets, fascia and lights, plus two larger plastic crates. One has all the electrics - transformers, controllers, extension leads etc - the other everything from my drinks cup to packing pieces, bolts, the drapes and a myriad of other odds and sods. There is the tool box too, which you hope not to use, because that means something needs repairing. As can be seen, stuff is arranged to fold up, nest, etc and is secured with velcro strip to help with handling. And yes, it does all go in the back of the car! I usually spend the week before a show dusting and vacuuming the layout, cleaning wheels, stock & so on. With everything ready, it takes less than an hour to load the car, though it is always worthwhile making sure stuff is suitably padded with old towels to stop and rattling and protect the interior. Once you get to the show, it is always nice if the unloading points are near to where the layout stand is going to be. One or two venues [Chatham and Allypally for example] are big enough to let you drive your car to your stand, which is nice, otherwise it all has to be carried by hand and it is quite a few journeys. Setting up can be done in an hour [less with help], while knocking down takes half that, because at the end of a show, stock can be gradually put away before the finish. After that, it all goes back in the car, only to be unloaded again when you get home. All the more reason to be careful and worth remembering next time you visit a show.

- 257 replies
-
- 12
-
-

-
"Voiding the Warranty" - Mol's experiments in 21mm gauge
David Holman replied to Mol_PMB's topic in Irish Models
Fine work and also like all the research. Anyone modelling wagons from this side of the water usually has a wealth of photos and other material to work with - even whole books on the subject. My experience has mostly been peering at the background of photos to try and identify details, so Ernie's archives are really important and the one of 11562 a real gem. Hadn't noticed the missing axle box cover before, but learned fairly early on not to get too precious about certain details and things like different buffers on opposite ends and different wheels on the same wagon seemed quite common! -
Definitely looks like room for a layout there!
-
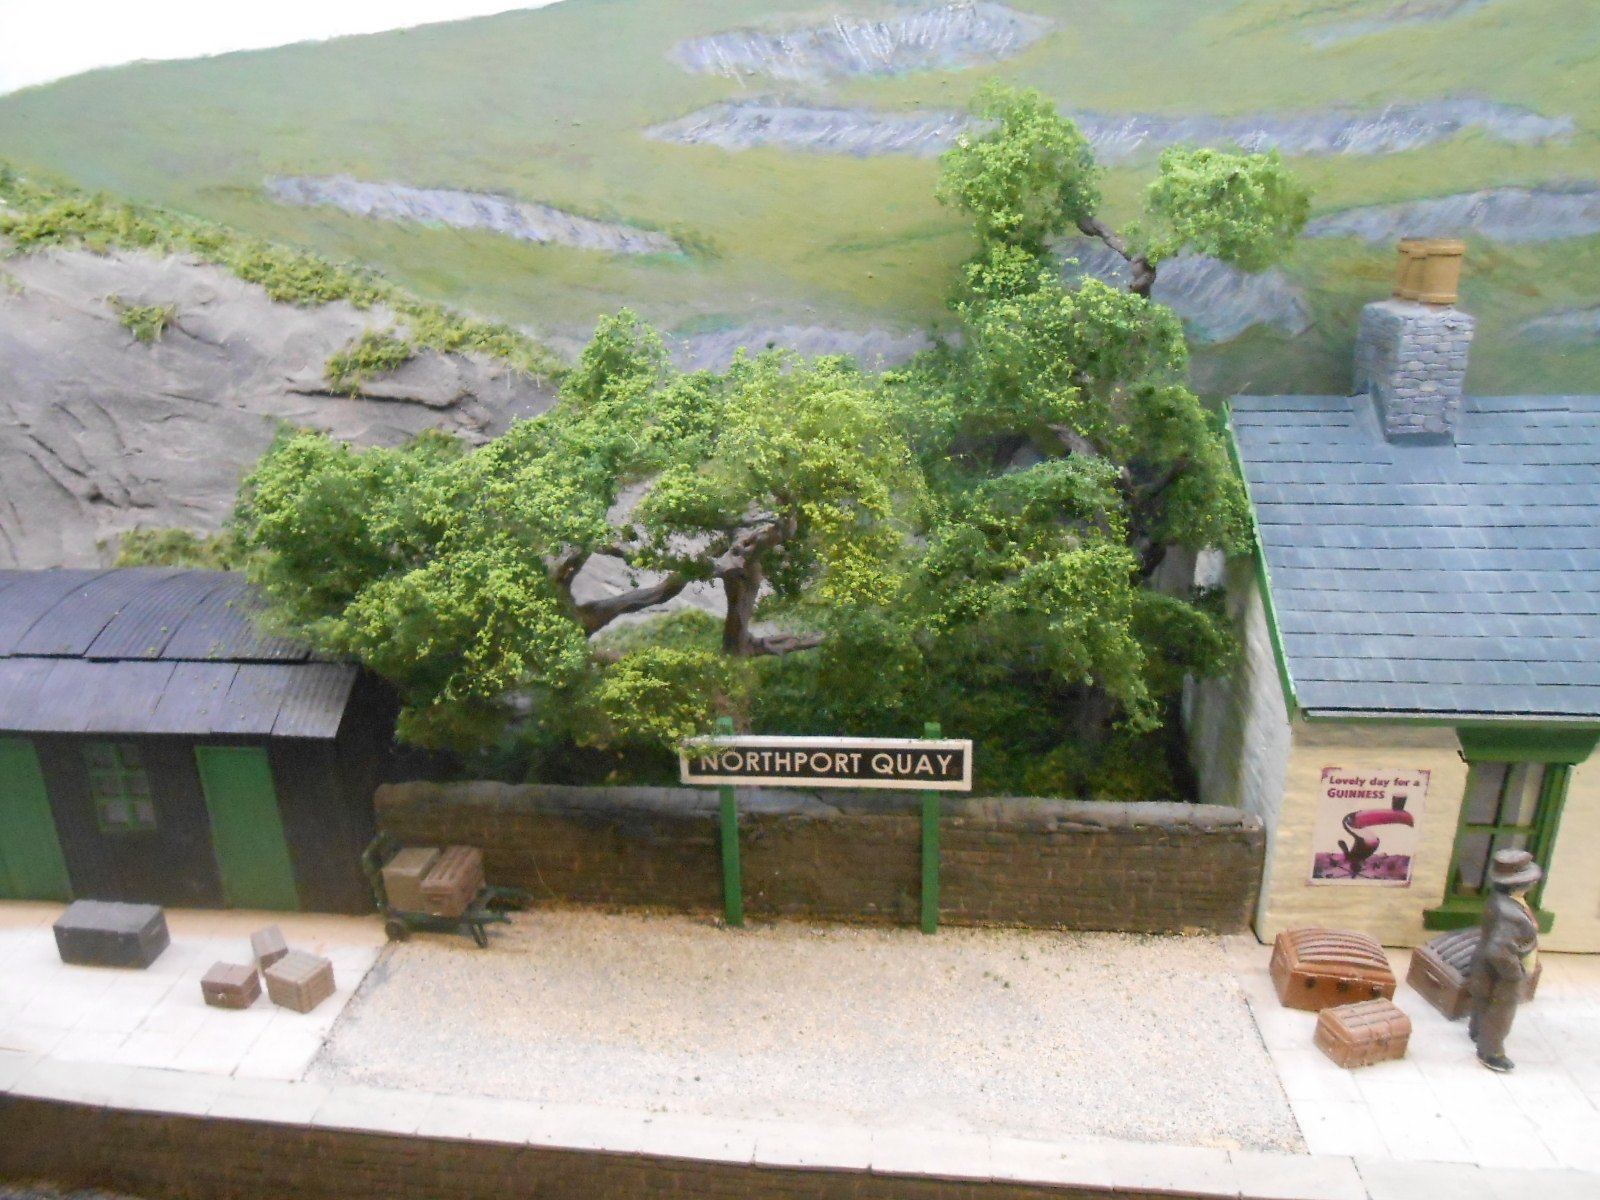
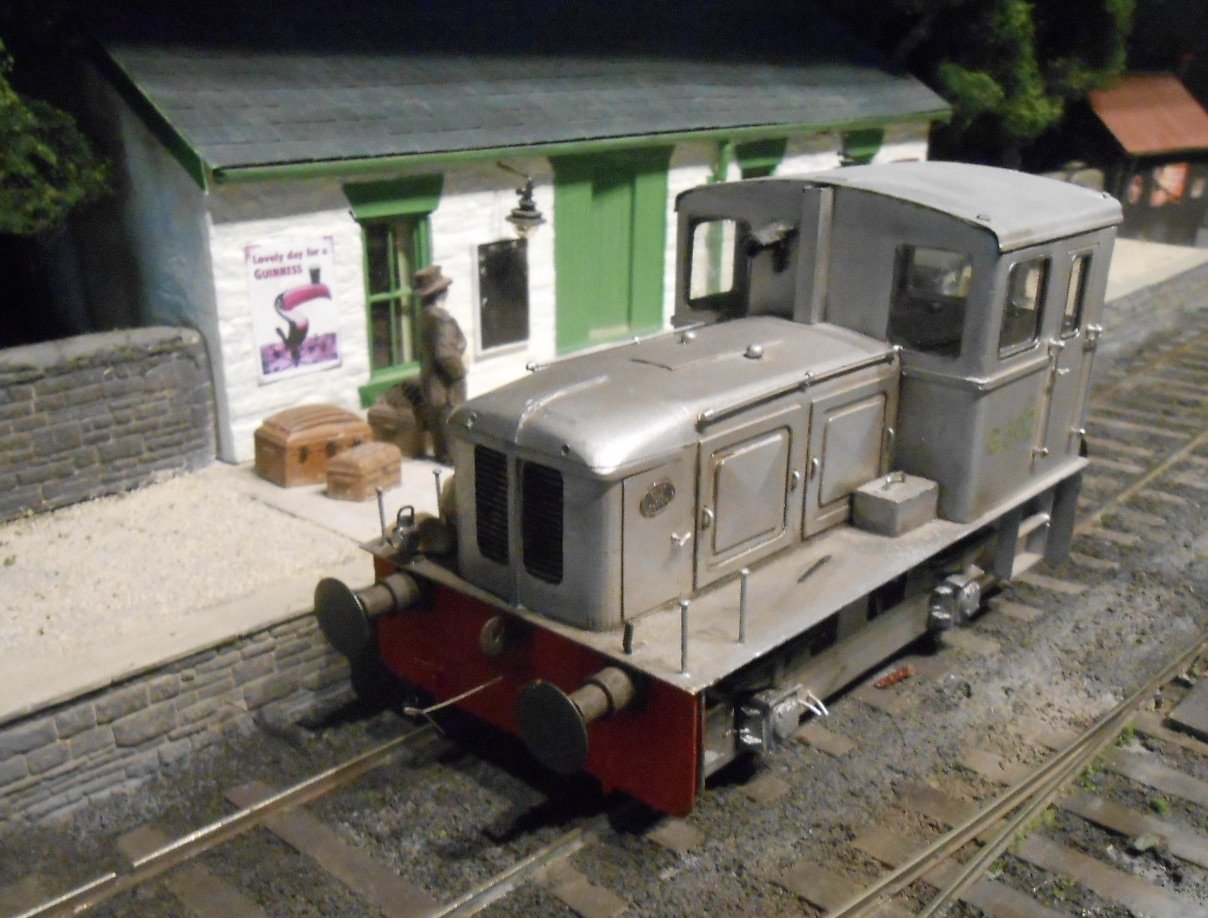
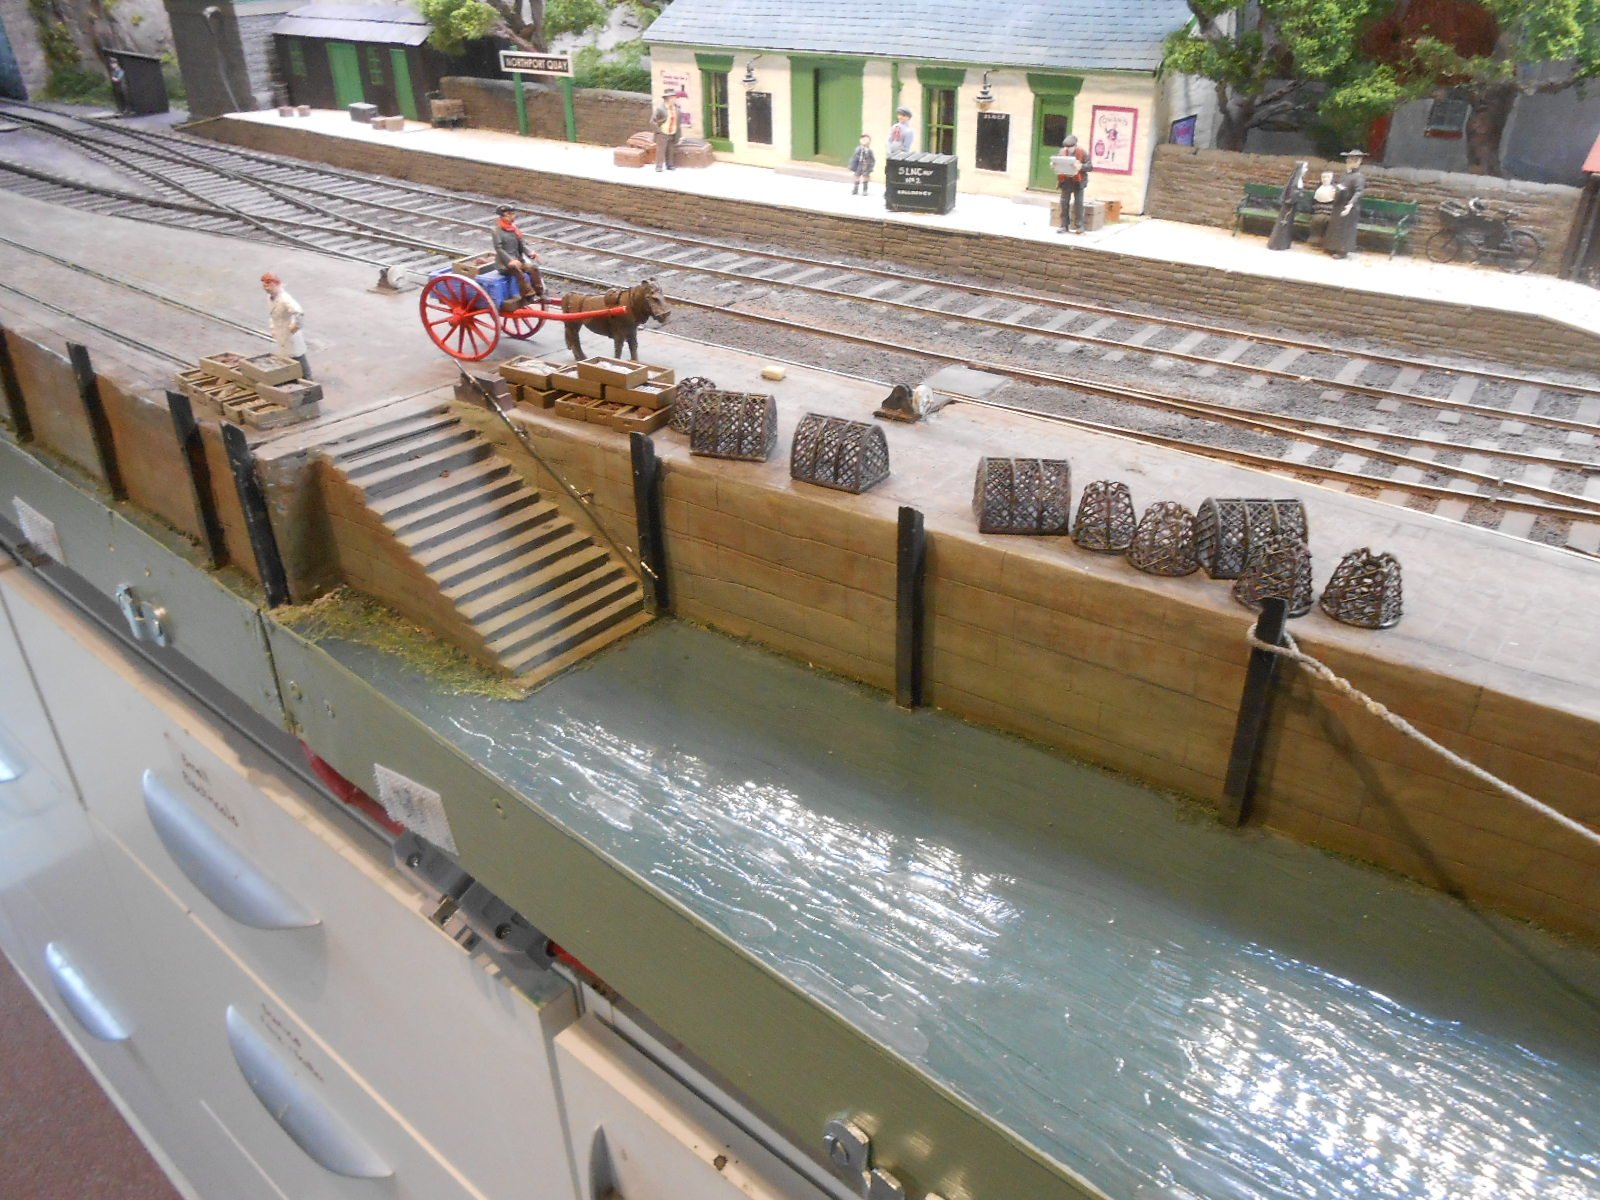
With NPQ going to Railex at Aylesbury in less than three weeks time, attention has turned to a bit of tidying up on the layout. The trees either side of the station [I'm calling them hawthorns] have never looked quite good enough, so teased out the Woodlands Scenics matting a bit, glued on some more and added some lighter coloured scatter/crumb to hopefully improve the texture. Am temporarily adding the crab & lobster pots I bought for Swillybegs to the quayside, while the donkey & its cart have had a tidy up too. Now find myself wondering if I should try and fit a small fishing boat in next to Acla? The space below is about 35 scale feet. Something else needing a tidy up was my Deutz G class. The roof had come loose and the brass was starting to show through the paintwork in several places, while the buffer beams had got very tatty. Still have the aluminium colour rattle can, so sprayed some into a paper cup and used that to touch in the exposed areas on the bodywork, while the buffer beams have been given a new coat of Humbrol red. The model uses a set of Worsley Works etches, adapted to look more like the early version. Fairly sure I described it all on my workbench thread, several years back.
- 257 replies
-
- 14
-
-
The capacity of the Orange Man Baby (as the Daily Star calls the current POTUS), to invade every part of our lives is quite remarkable. The fact that he has now put politics into the former sanctity of our hobby borders on the unforgiveable. We must hope that, as with all his other T word shenanigans, it is (mostly) bluff and bluster - what he does as part of 'doing deals'. And focussing attention on himself, of course. What never ceases to amaze me is how (particularly in more modern history), regimes built by individuals have prospered, even when basic logic should tell the masses what is proposed is not right. The power of the internet doesn't help either.
-
Looking at one of your earlier pictures, the loco only has three link couplings, so chances are it might also only have a mechanical hand brake, operated by a wheel in the cab, as per a steam loco. Presumably, when the Gs were used to operate mixed trains, a vacuum or air brake must have been fitted, along with screw link couplings. Given that there were two batches, could this have been fitted to the later ones from the start? There were other differences too, in cab windows.
-
Put bluntly, this is what happens when you let a fox loose in the hen house. Regardless of where you stand politically/economically, no problem is ever black or white and all actions have consequences. It might seem easy to say "just do this to fix the problem", but no good ever comes out of meddling with world order because you think you hold all the advantages.
-
Having spent 20+ years helping run the Chatham Show, the word that best described many modellers is fickle. They like what they like, often to the exclusion of everything else. Comments like 'not enough N gauge/BR blue/GWR etc happen all the time. Perhaps the most extreme one was a trader showing me a very nice, ready to plant on the layout, greenhouse which a customer had just refused because it had no plants in it. Certainly sympathise with IRM, because such narrow views must make it difficult for any trader to know what stock to display/take to a show. I'll happily look at anything that is well made, interesting or just makes me smile. For example there was an amazing model of the Forth Bridge at the recent Ashford Show, built of Lego, with very recognisable trains running on it made the same way. Went back to it several times because it was so interesting and well done. Equally, much as I like seeing new products, I'm not going to buy them because I model to (very) niche standards, making most of my stuff from scratch, so it is materials, fittings and so on that I want most. Pot, kettle, black? Probably...
-
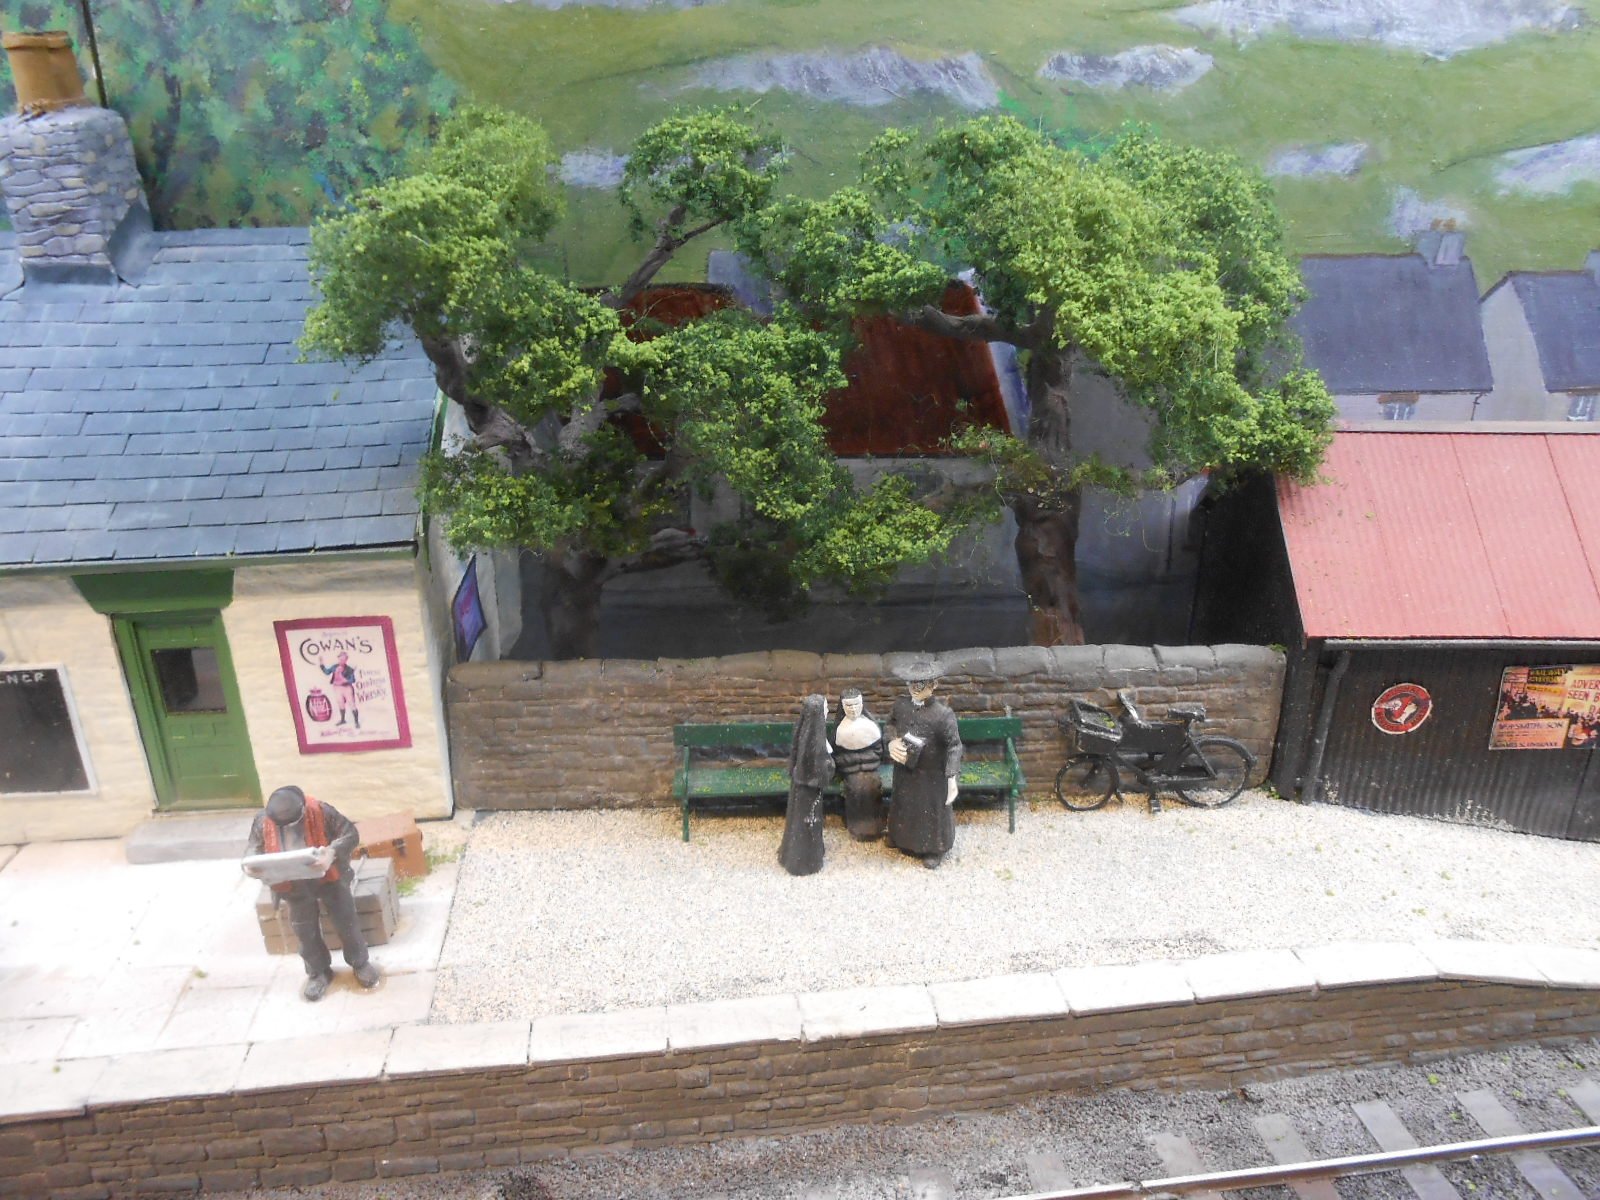
Great picture of Pat. Diorama anyone?
-
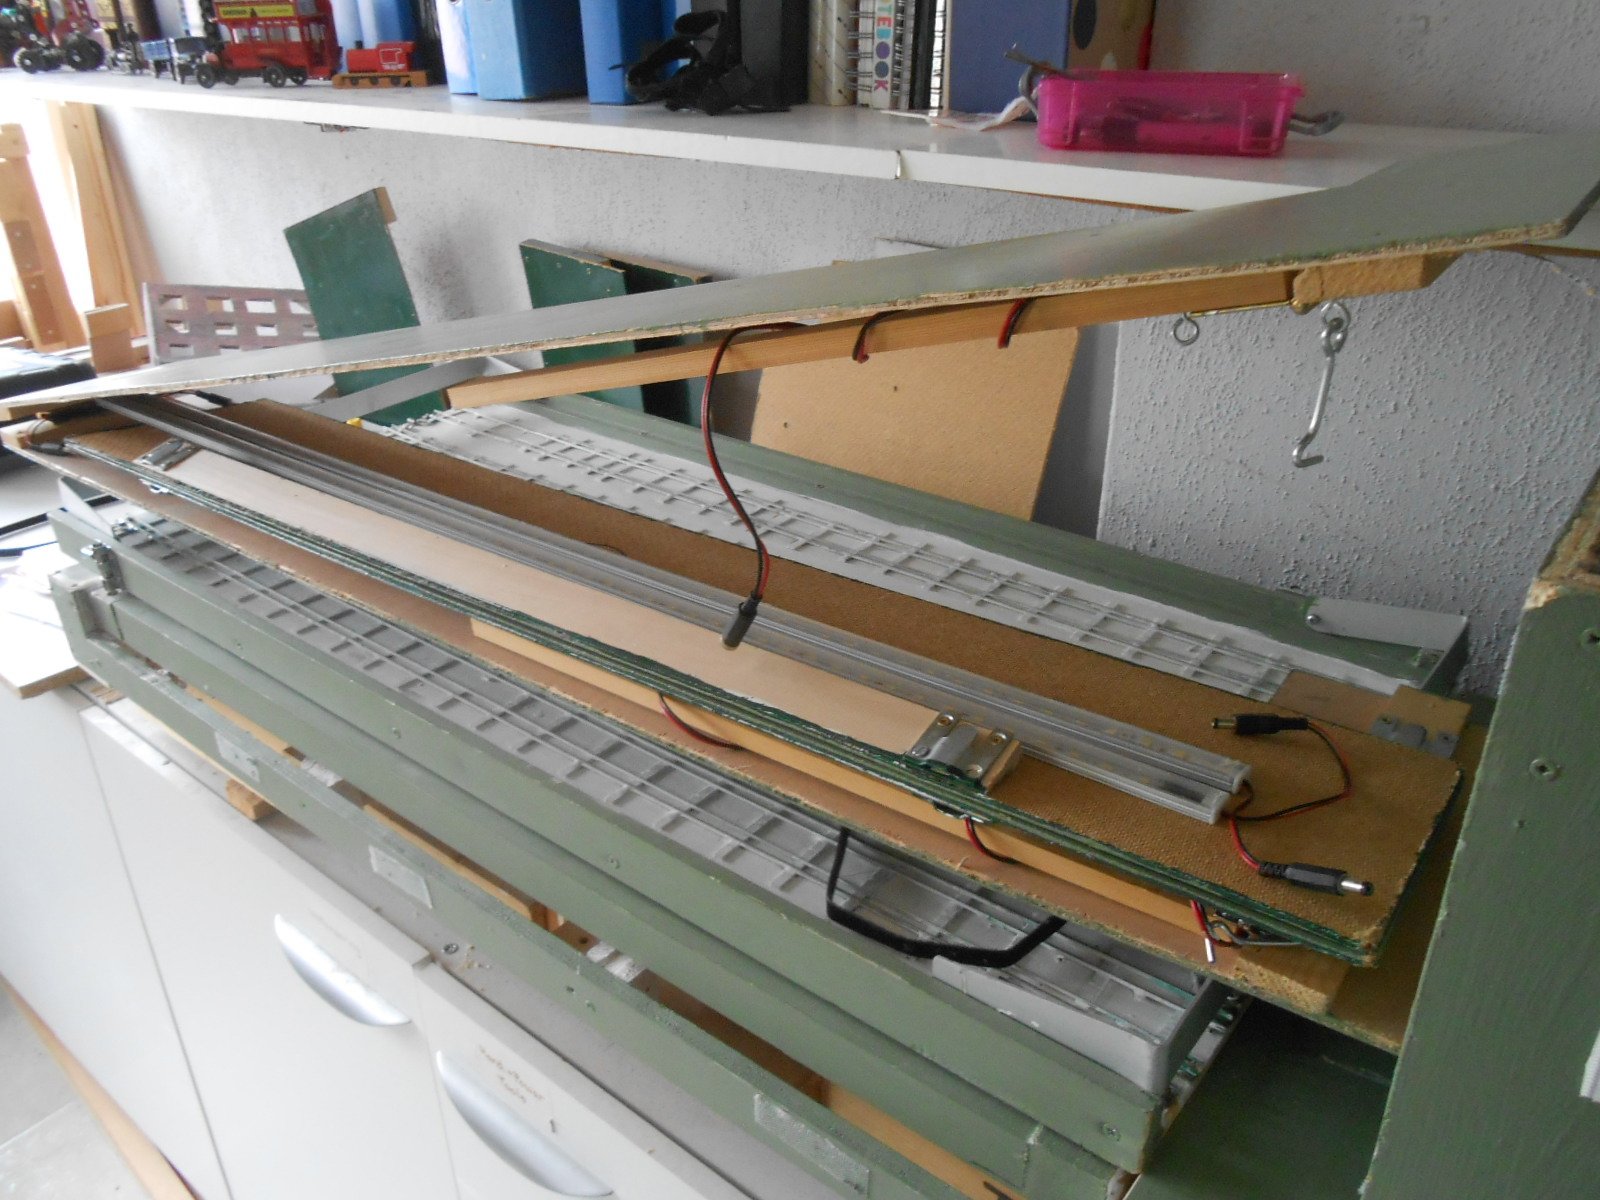
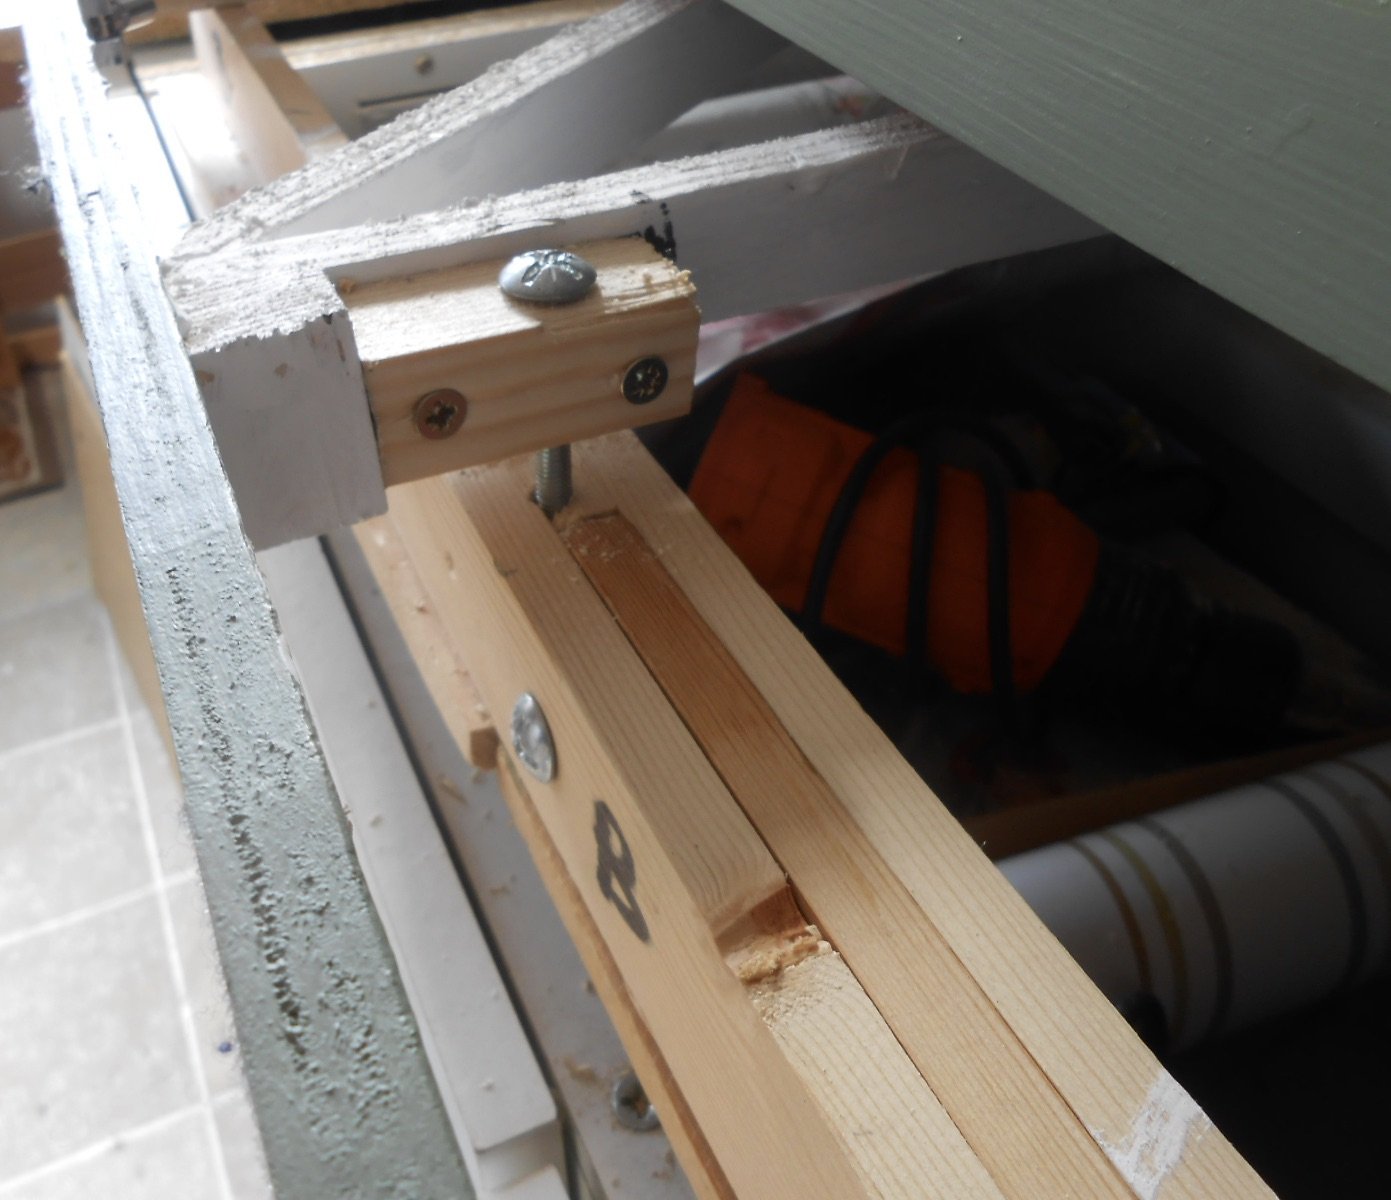
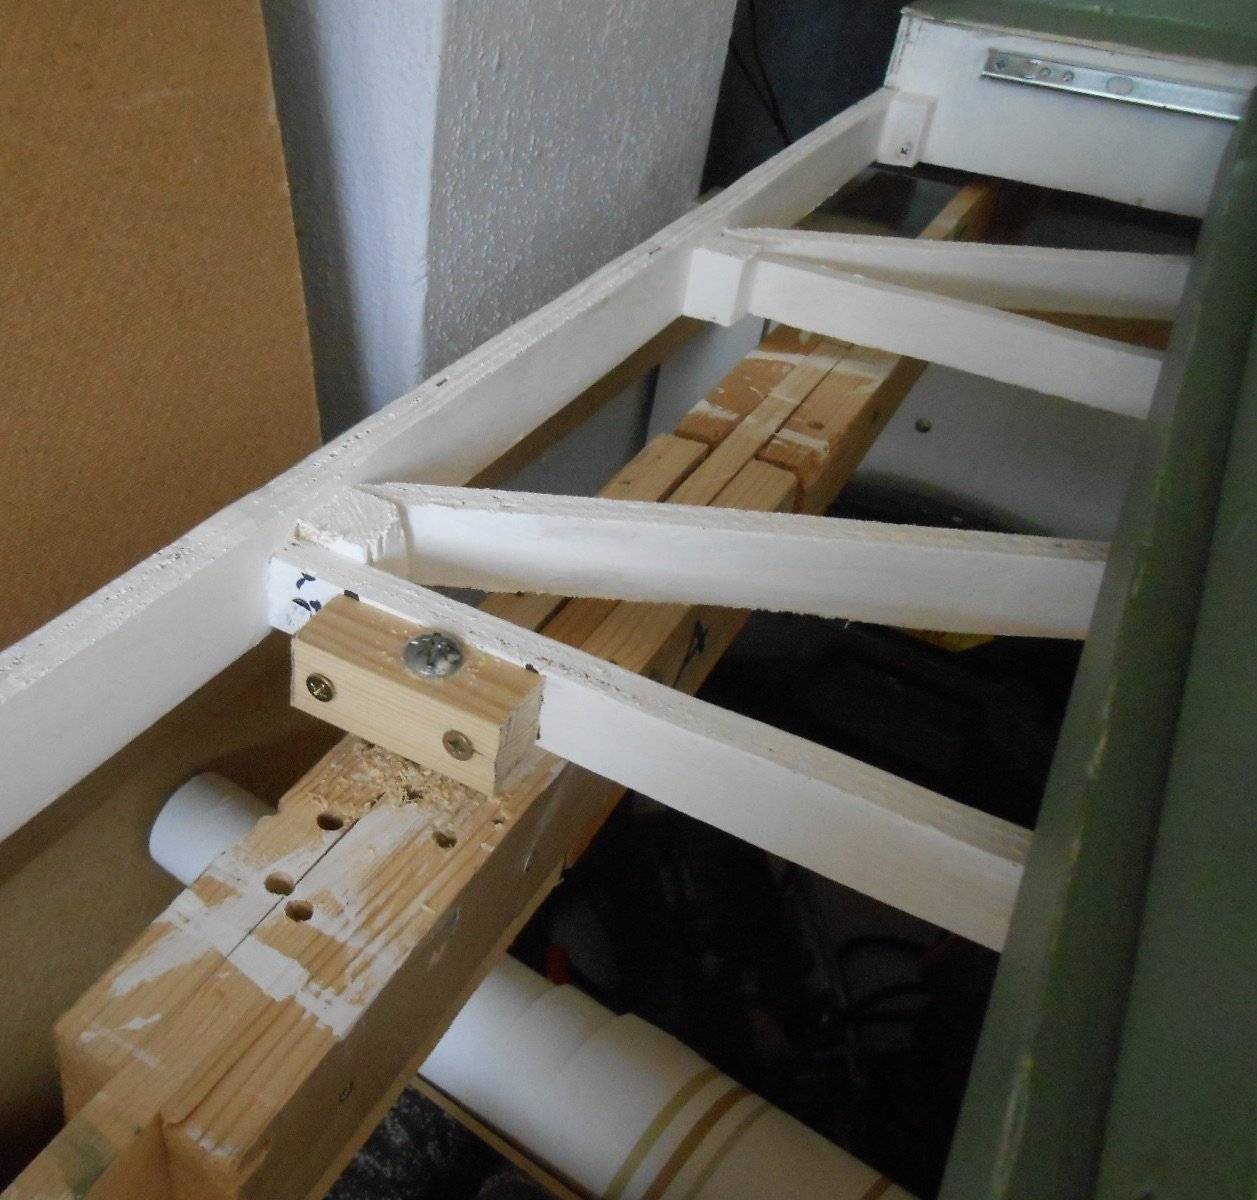
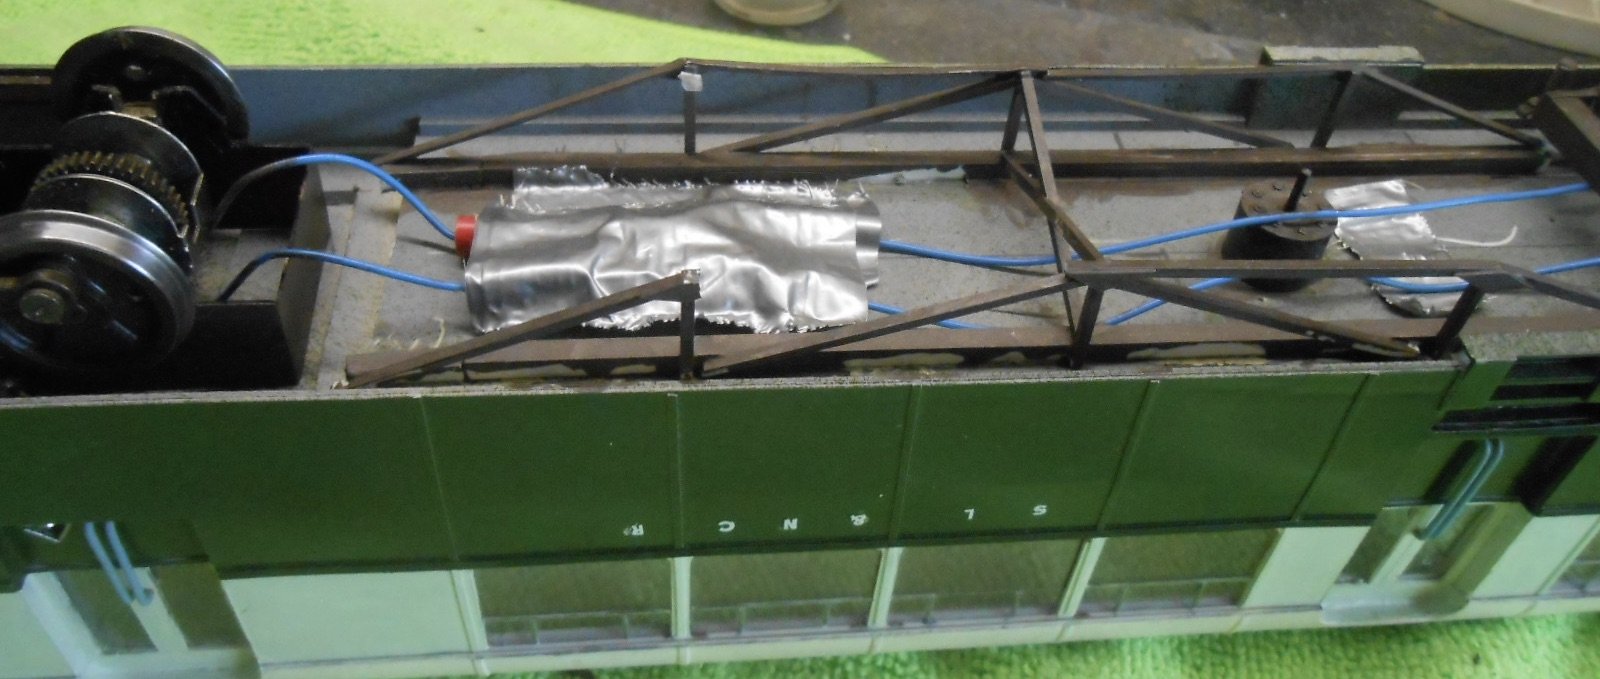
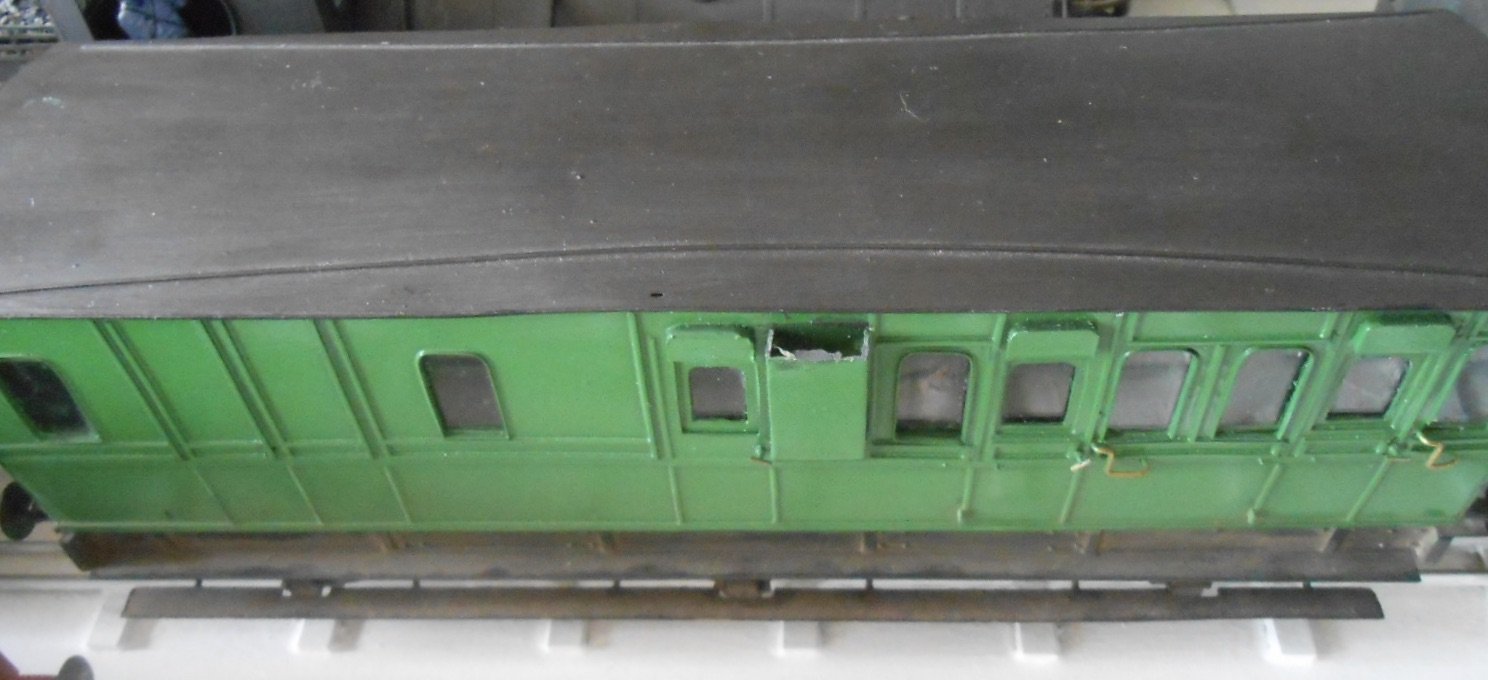
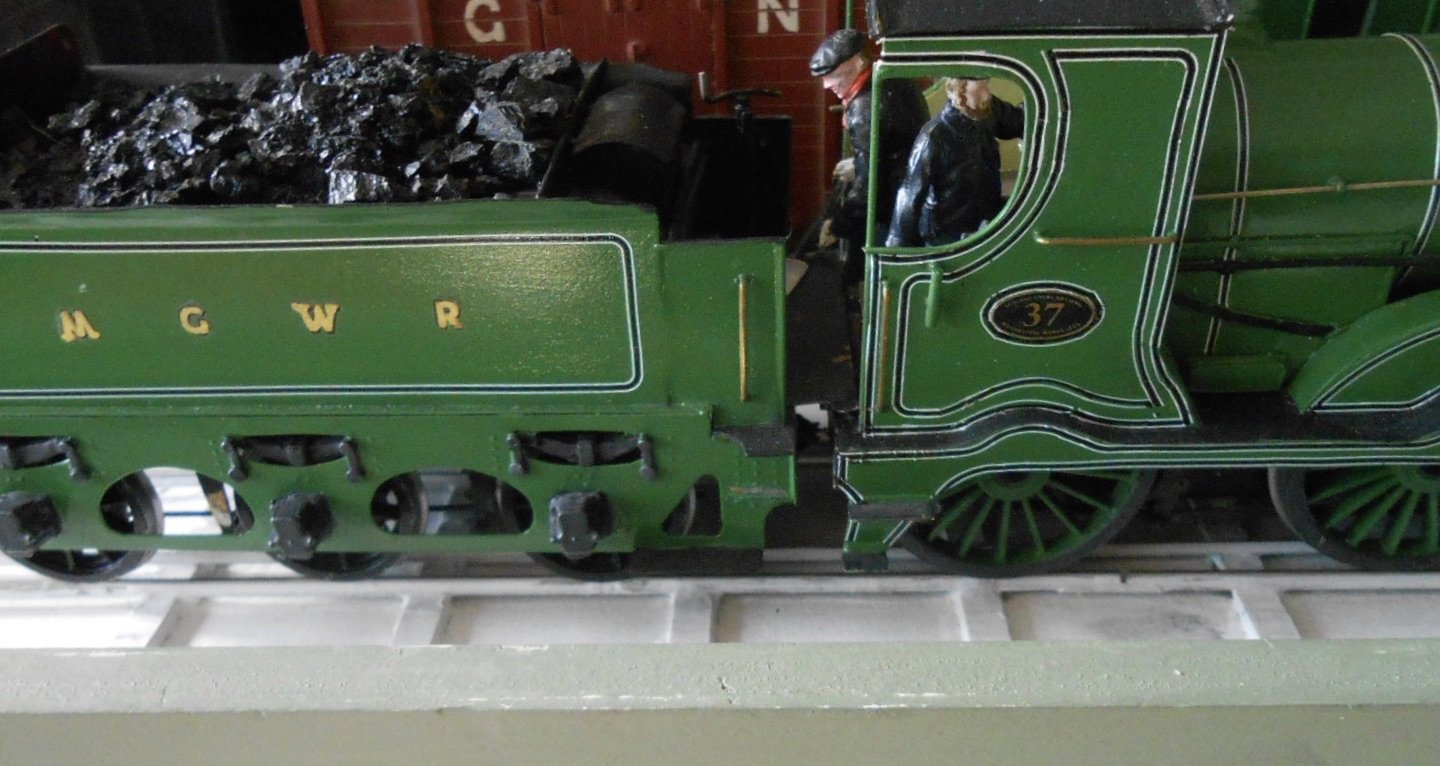
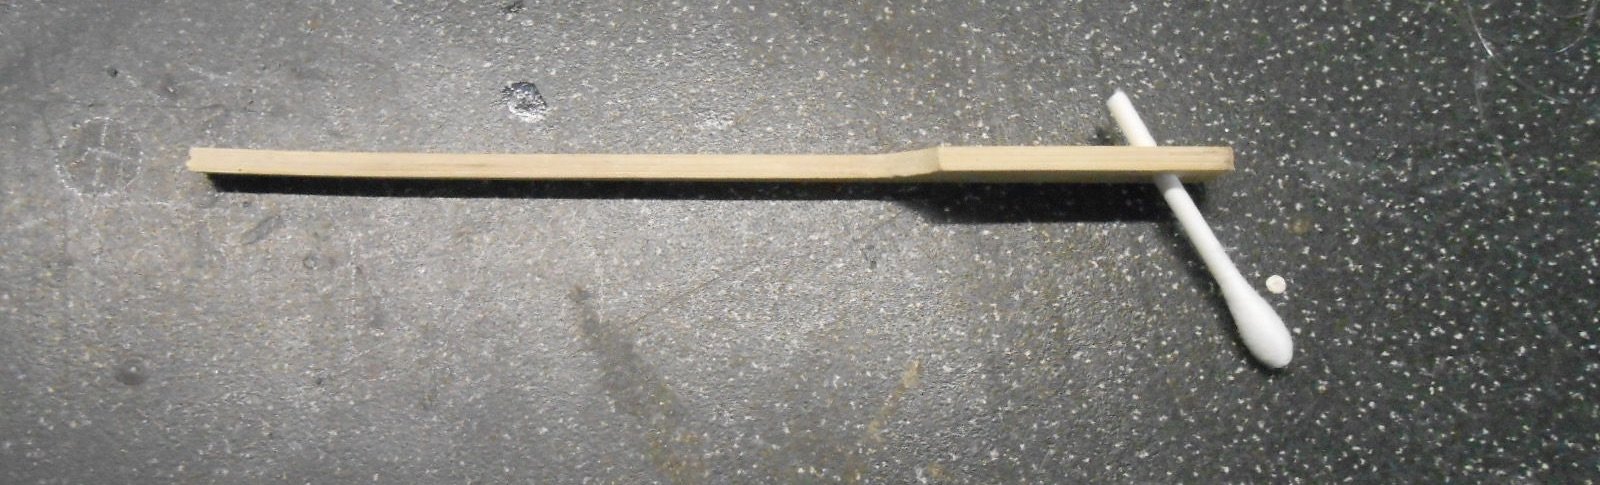
Stuff! A combination of Mayner's writings and a weekend with Gordon Gravett, has prompted a serious look at my exhibition stuff, in an effort to tidy things up and make life a bit better than 'it will do'. A big problem with going to shows is that [for me anyway], however good the intentions going out, coming home tends to be a bit hit and miss. I keep a record book to note everything that goes wrong, but this means I'm more reactive than proactive. All a bit C minus, must to better! So, first up, did a bit of an audit with the aim of trying to be more preventative. Something that has had me worried for a while is the sliding/rotating fiddle yard. It's a bit of a nervous breakdown every time the train table needs rotating and though I'm [fairly] sure everything is safe, decided a bit of belt and braces was needed - hence a couple of wooden blocks screwed to the frame so that long bolts can go through the beams for a bit of extra security. Also decided a new, separate storage box was merited for all the electrics - instead of chucking them all in the 'sundries crate' at the end of a show. As Mayner has already pointed out with his large scale garden railway stock, our models can lead a hard life and so it is with exhibitions - mainly down to getting things in and out of boxes all the time. Going through my stuff found a host of minor problems, plus several niggles like loose cab roofs and so on: Above is the under frame of Railcar B, missing one of its struts. Below is one of the exMGWR 6 wheel coaches, lacking a cover to the guard's Duckett. Discovered several wagons with missing bits of under frame, brake handles & so on, while even Wof Dog wasn't immune, having lost a step from its tender. None of the remedial work took long to fix - though the repairs still need painting and there are a fair few other models that need a bit of touching up as well while I'm at it. As stuff goes back in the stock boxes, I'm also taking time to make sure each of the sections is secure, including the all important pieces which protect the Alex Jackson couplings. Decided it might also be a good idea to have a spare Tortoise point motor - just in case. They rarely go wrong, but you can be sure if the do, it will be at a show! Fairly easy to fit a new one - though probably not from underneath the layout... Finally, a neat little idea I learned from Gordon at the Ashford Show. It's his track cleaner, which uses a barbecue skewer with a hole drilled in it to take half a cotton bud. Soak the bud in meths/alcohol/lighter fluid and it becomes a very handy way to clean to the rail tops.
-
Lovely model, Alan and well worth the effort.