David Holman
-
Posts
4,359 -
Joined
-
Last visited
-
Days Won
117
Content Type
Profiles
Forums
Events
Gallery
Blogs
Everything posted by David Holman
-
Great to see two iconic Easy Coast Mainline racehorses looking in fine fettle. Give me green diesels rather than blue anyday!
-
That signal is certainly different! A one off? Somebody out there will know.
-
Modern Image (ish) too as BR class 01 diesel shutters worked the breakwater for many years. There were quite a few pier railways with idiosyncratic motive power. The Weston, Clevedon and Portishead Railway used Muir Hill tractors - one literally a road model with uneven sized rail wheels, the other looking more like a motorised garden shed. Then there was the Spurn Head Railway, which used sail powered trolleys and old motor cars with rail wheels. Great modelling possibilities methinks!
-
Slightly surprised to see Mike Edge recommending larger wheels. On the prototype, tyres were allowed to wear down at least and inch or two before replacement and with flanges on models being somewhat oversized (P4 etc, excepted), had always thought accepted practice was to go down an inch or two to avoid them fouling footpaths or splashers.
-
Thanks, Andrew did his usual fine job with the photos and likewise whoever put them and the article into print. Their payment is now £210, so that nicely covered the three points I bought from Marcway recently!
-
Excellent, especially as I do have a copy!
-
Lovely and subt!e.
-
Do any photos exist? Might make an interesting wagon for Swillybegs!
-
Based the wagons (?) on WL&W coaches. Made one side and end from plastic sheet and strip, using this to create masters for resin castings. Significantly quicker than scratchbuilding four sides/ends and a method well worth considering if learning CAD/3D printing is not your thing. The six wheel chassis is Alphagraphix, while the turf load is chopped up matchsticks and needless to say, only a few mm deep.
-
What about pioneering enthusiasts and Modellers? Cyril Fry, Norman Johnson, Des Coakham for example.
-
Yep, looks great!
-
Some fine recycling going on here for the baseboards.
-
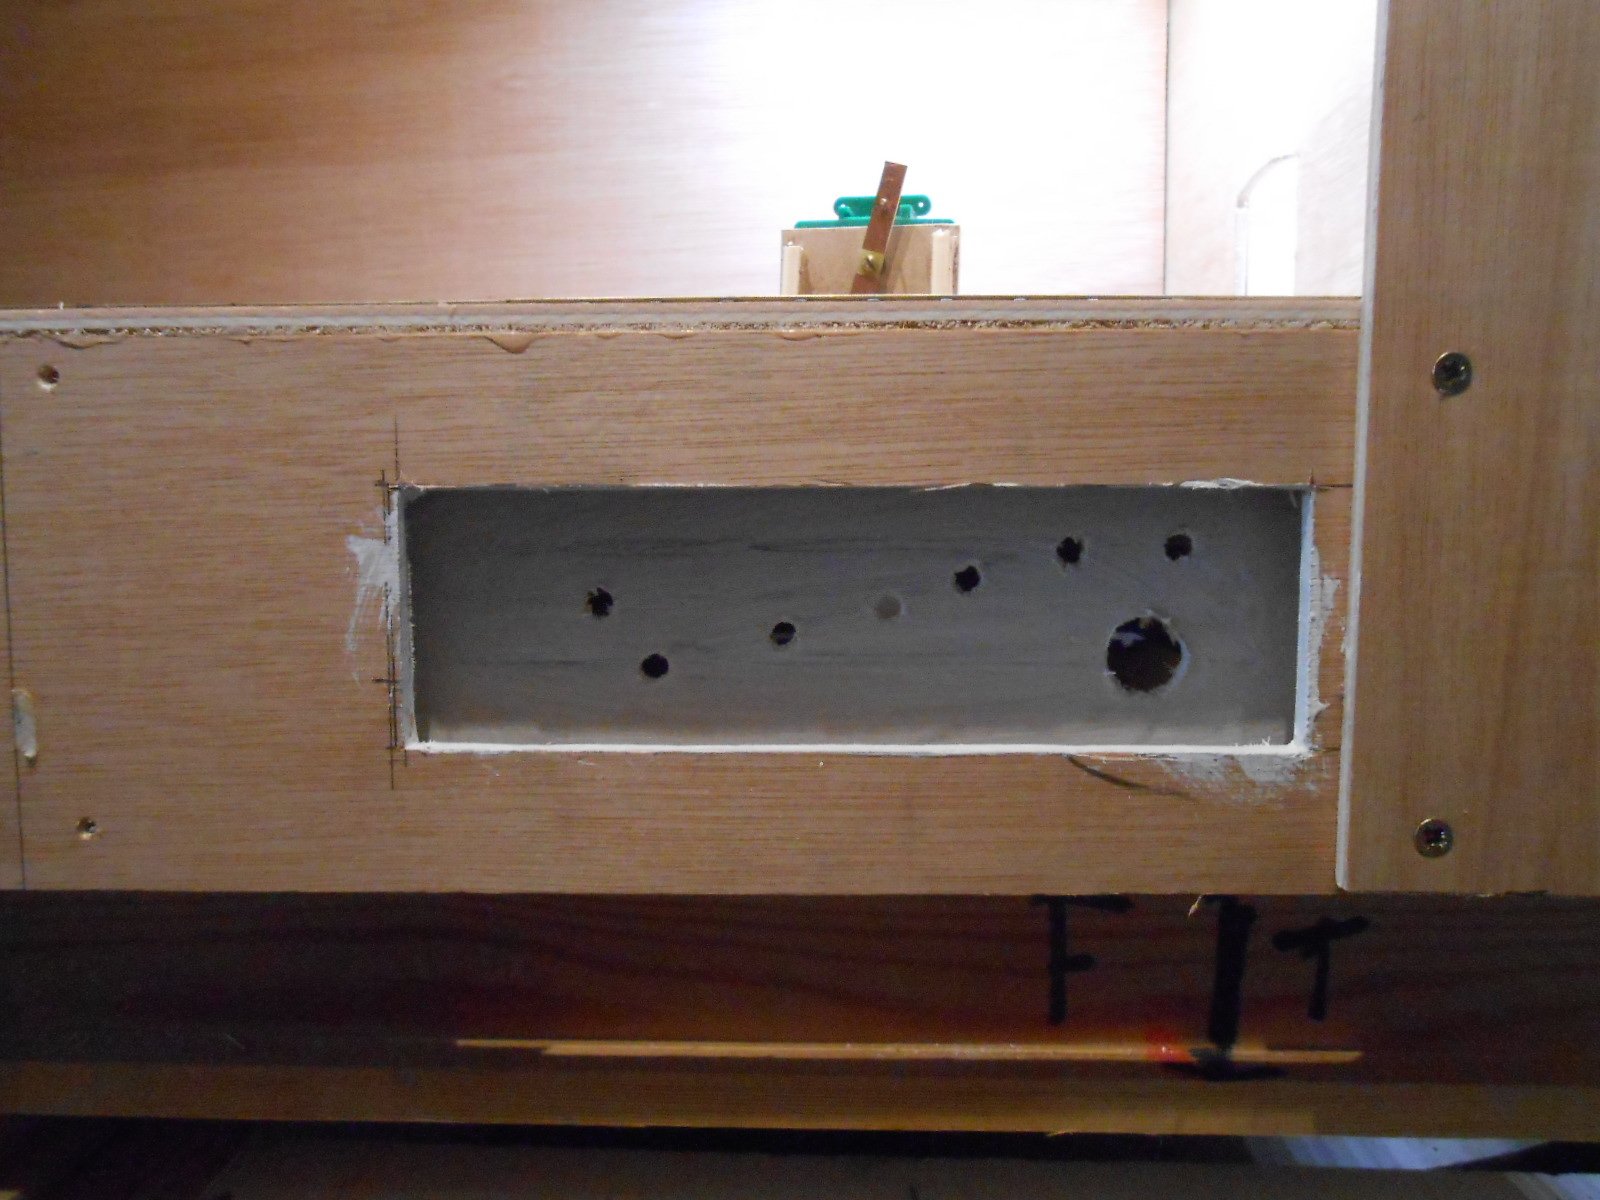
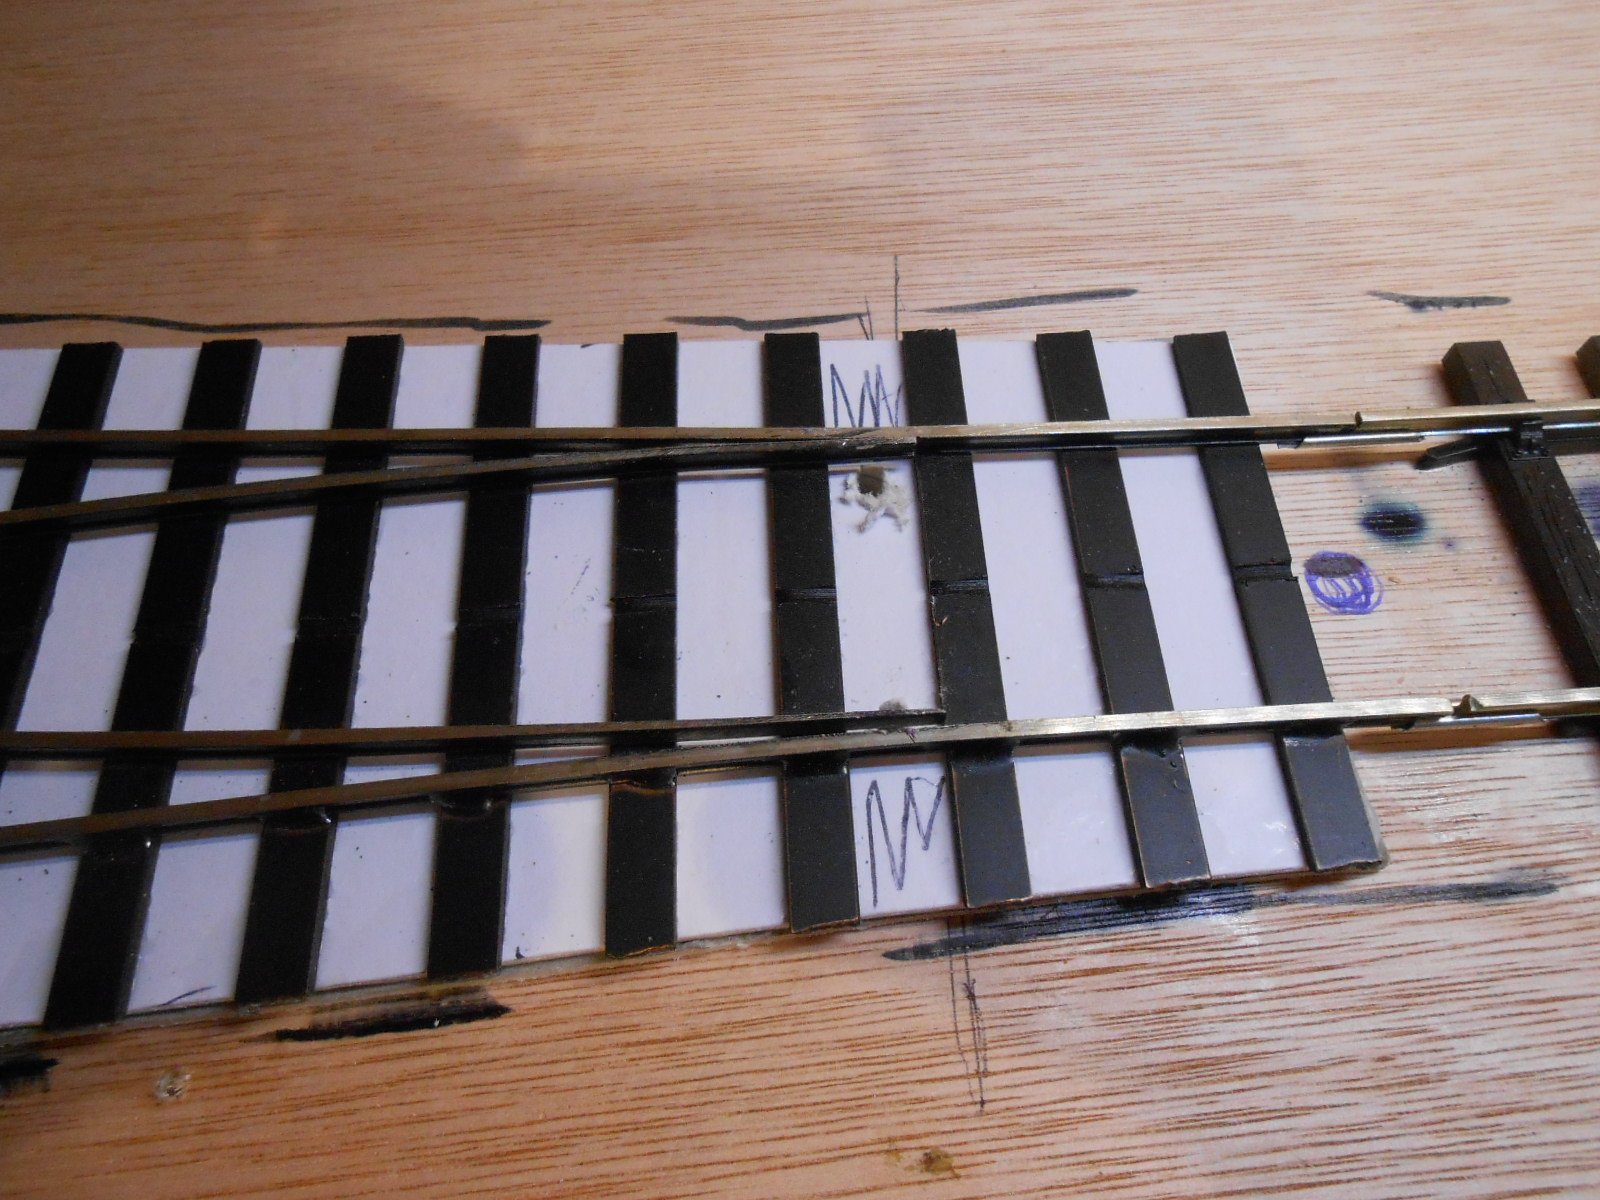
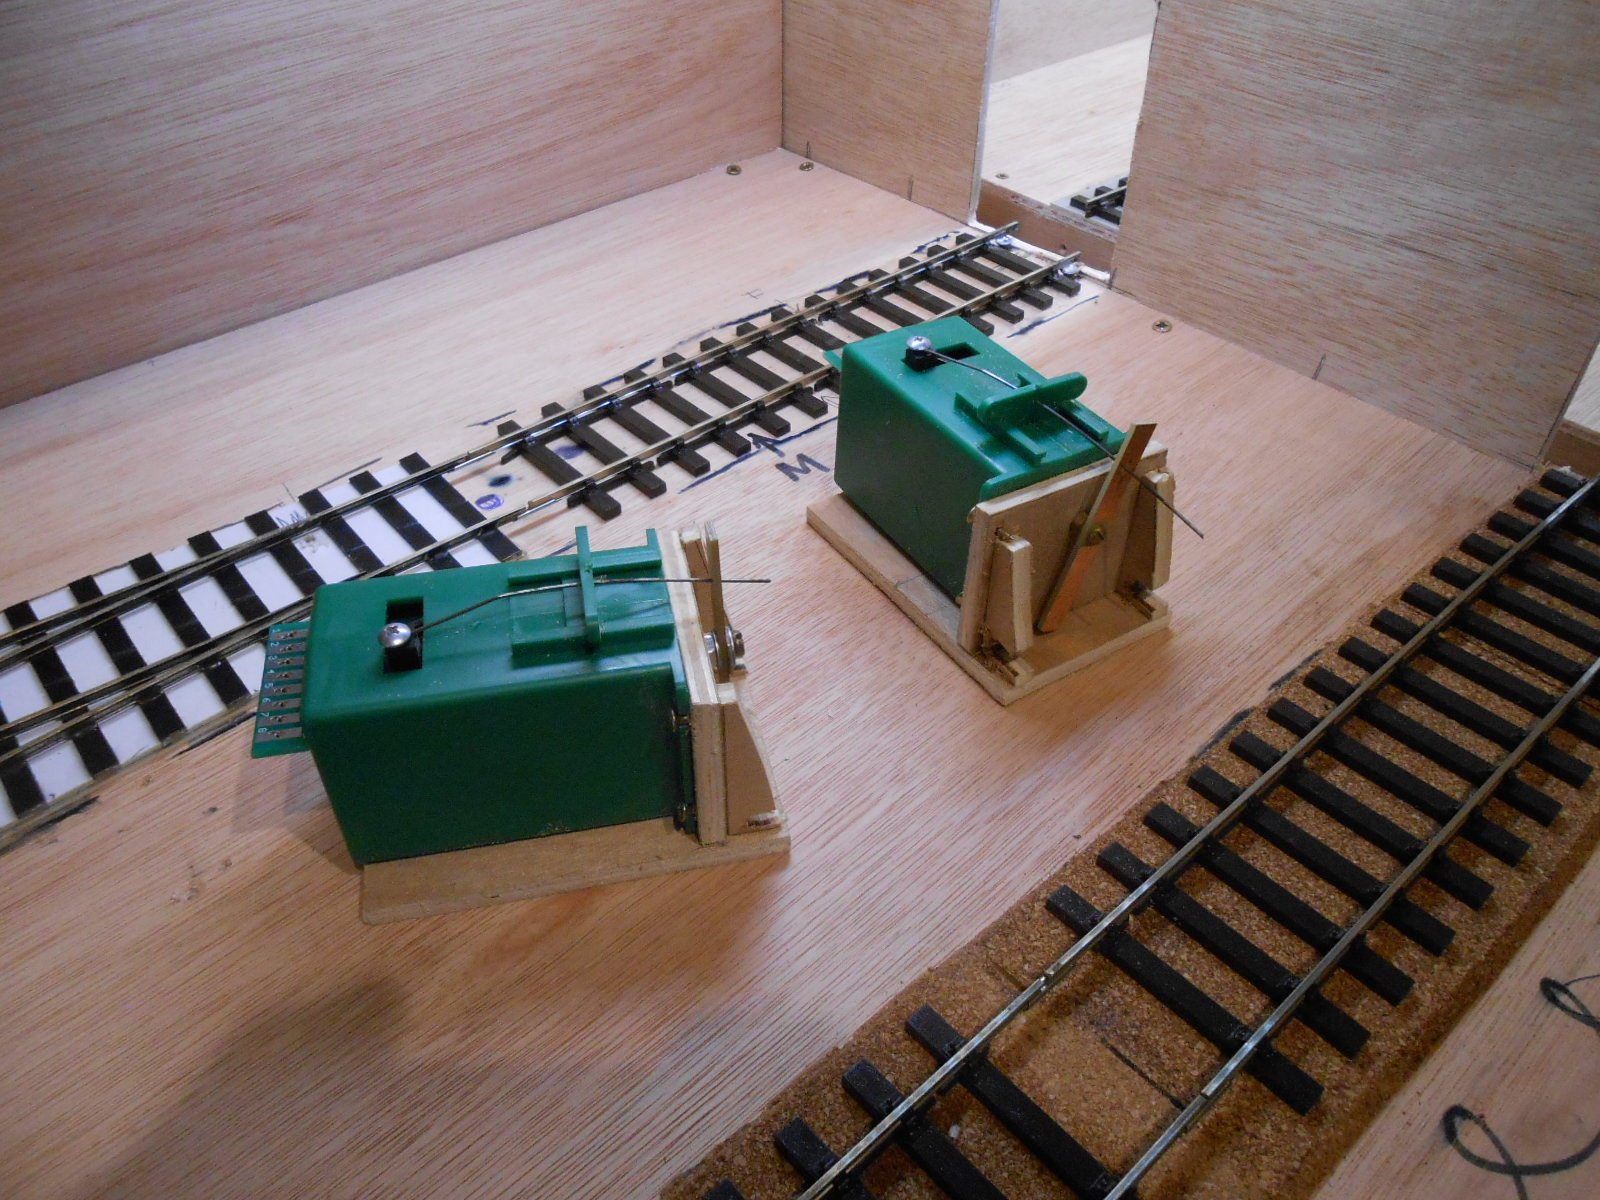
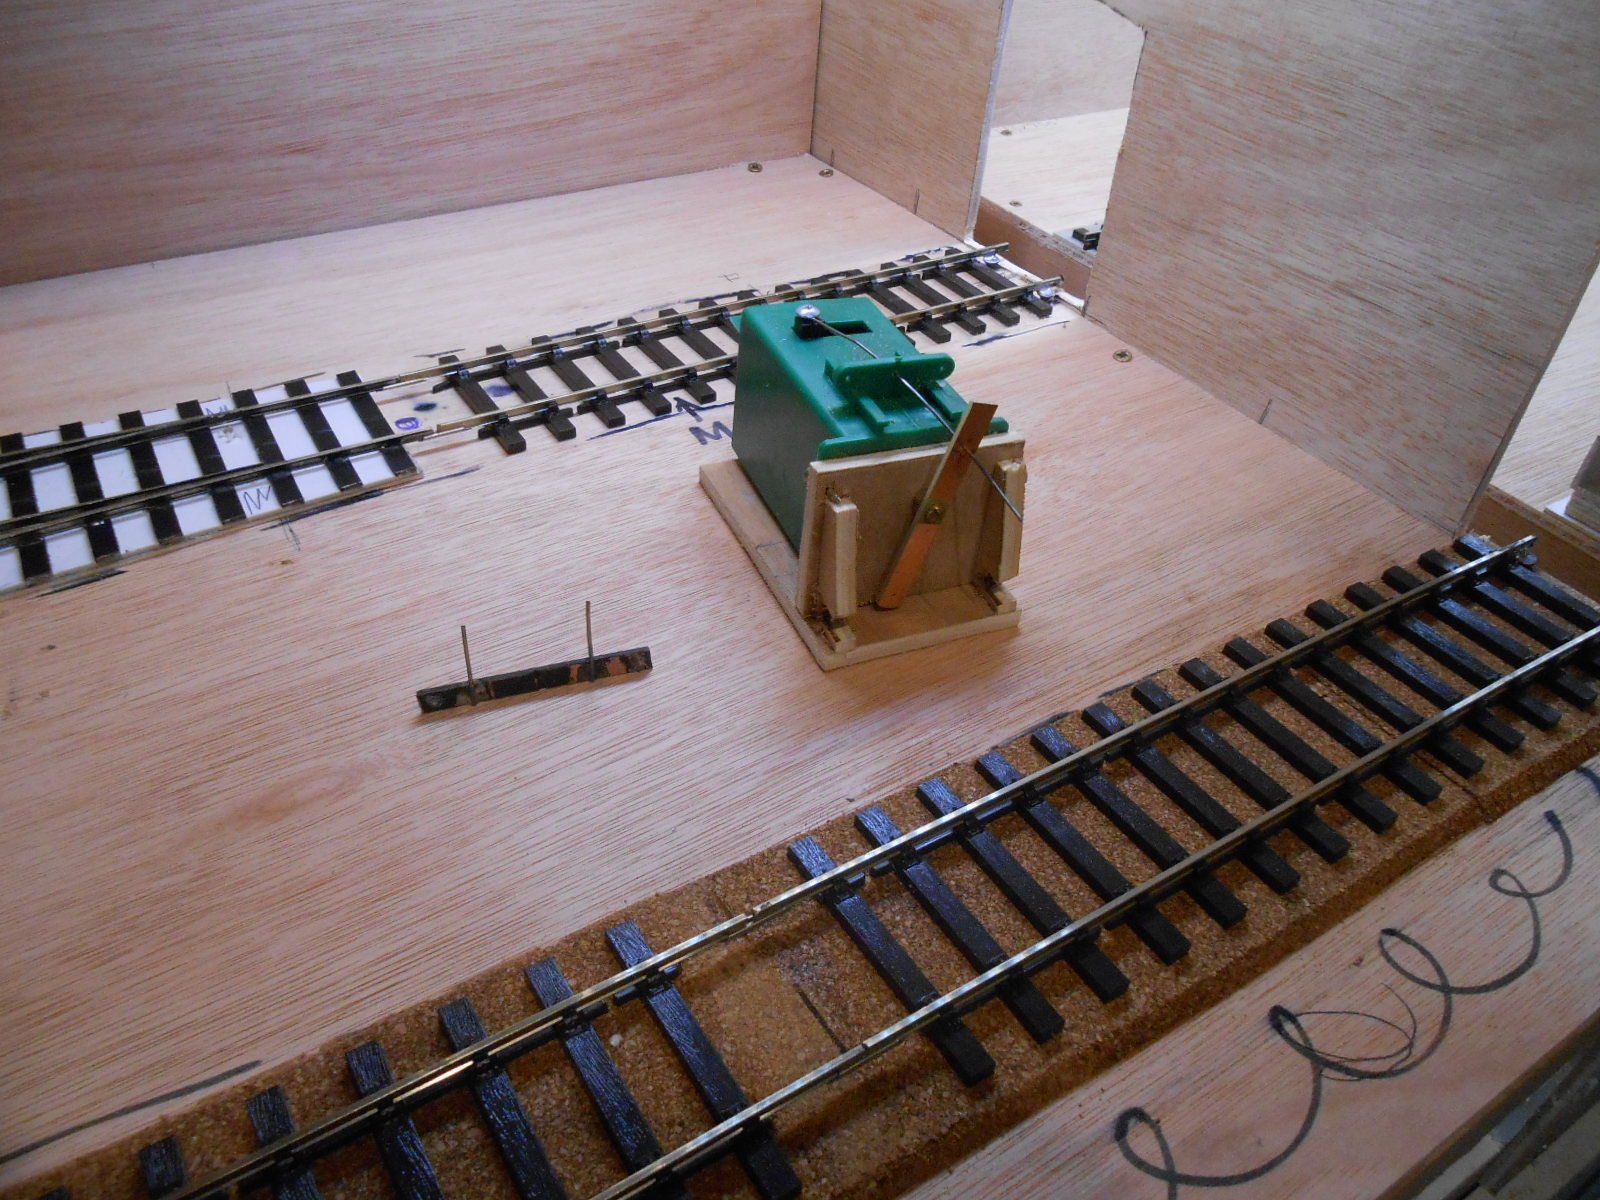
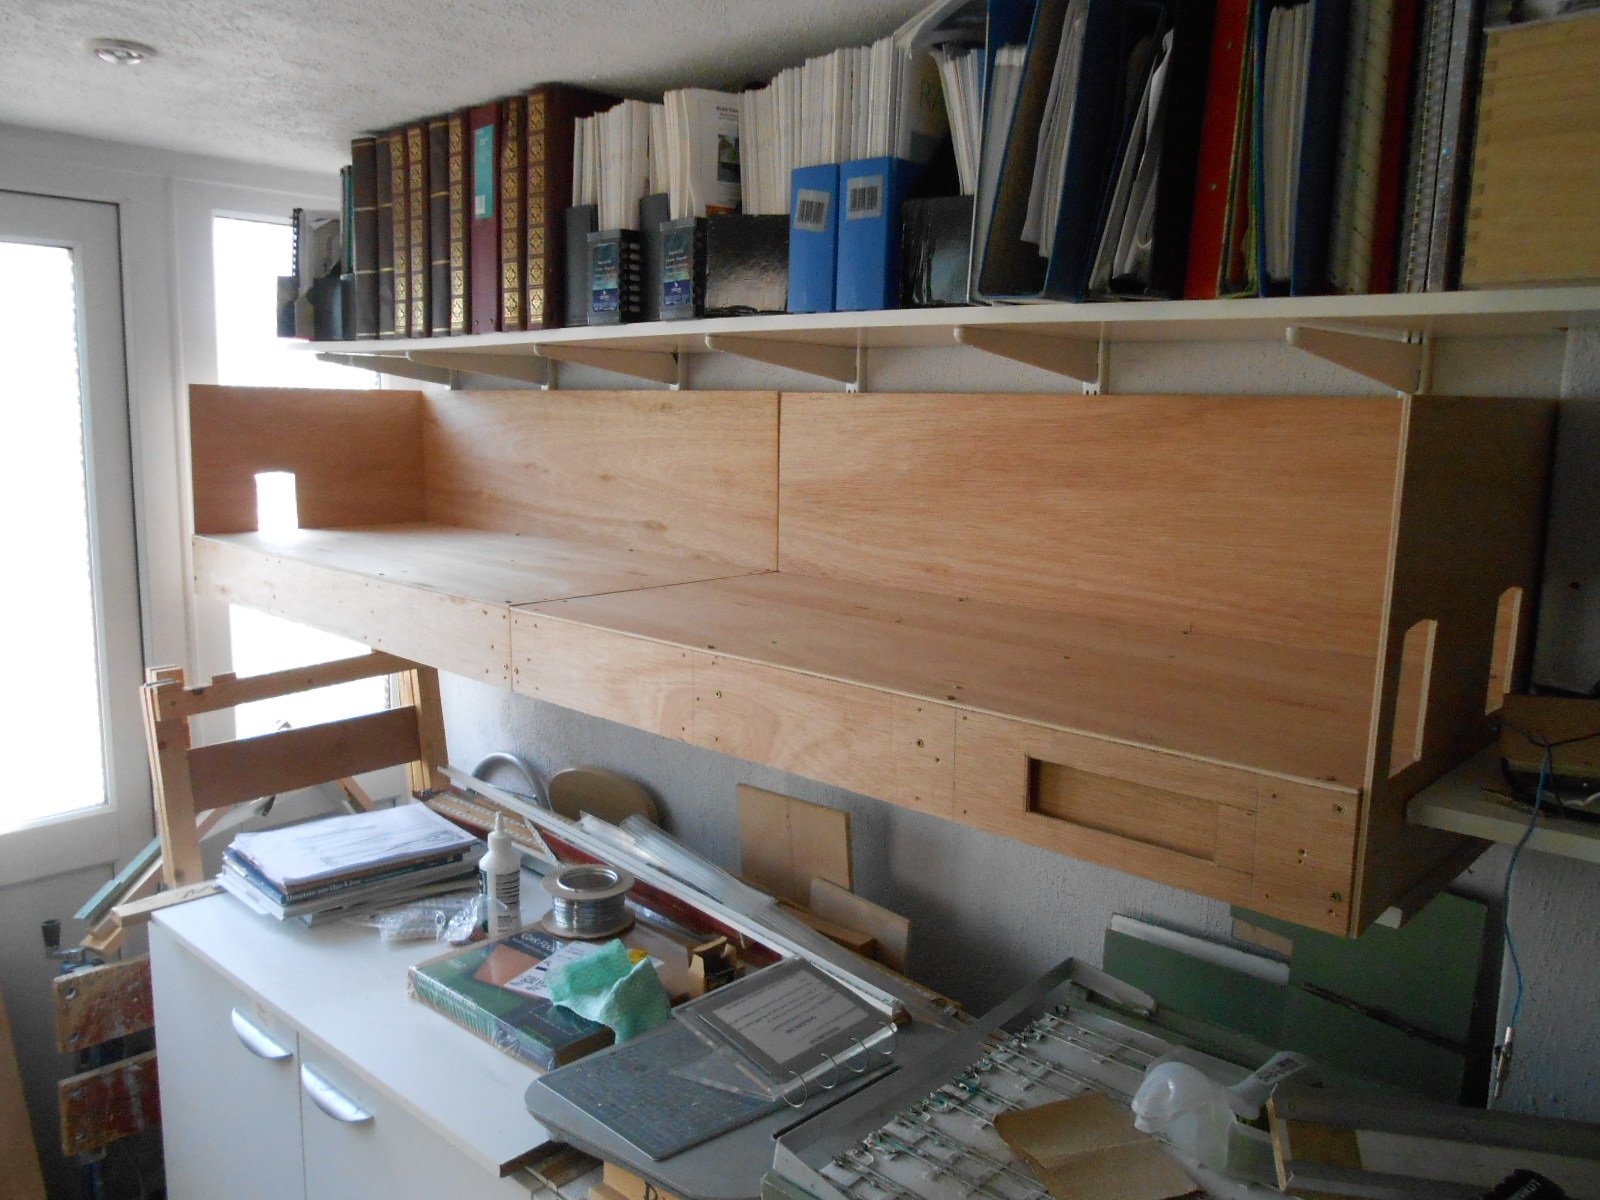
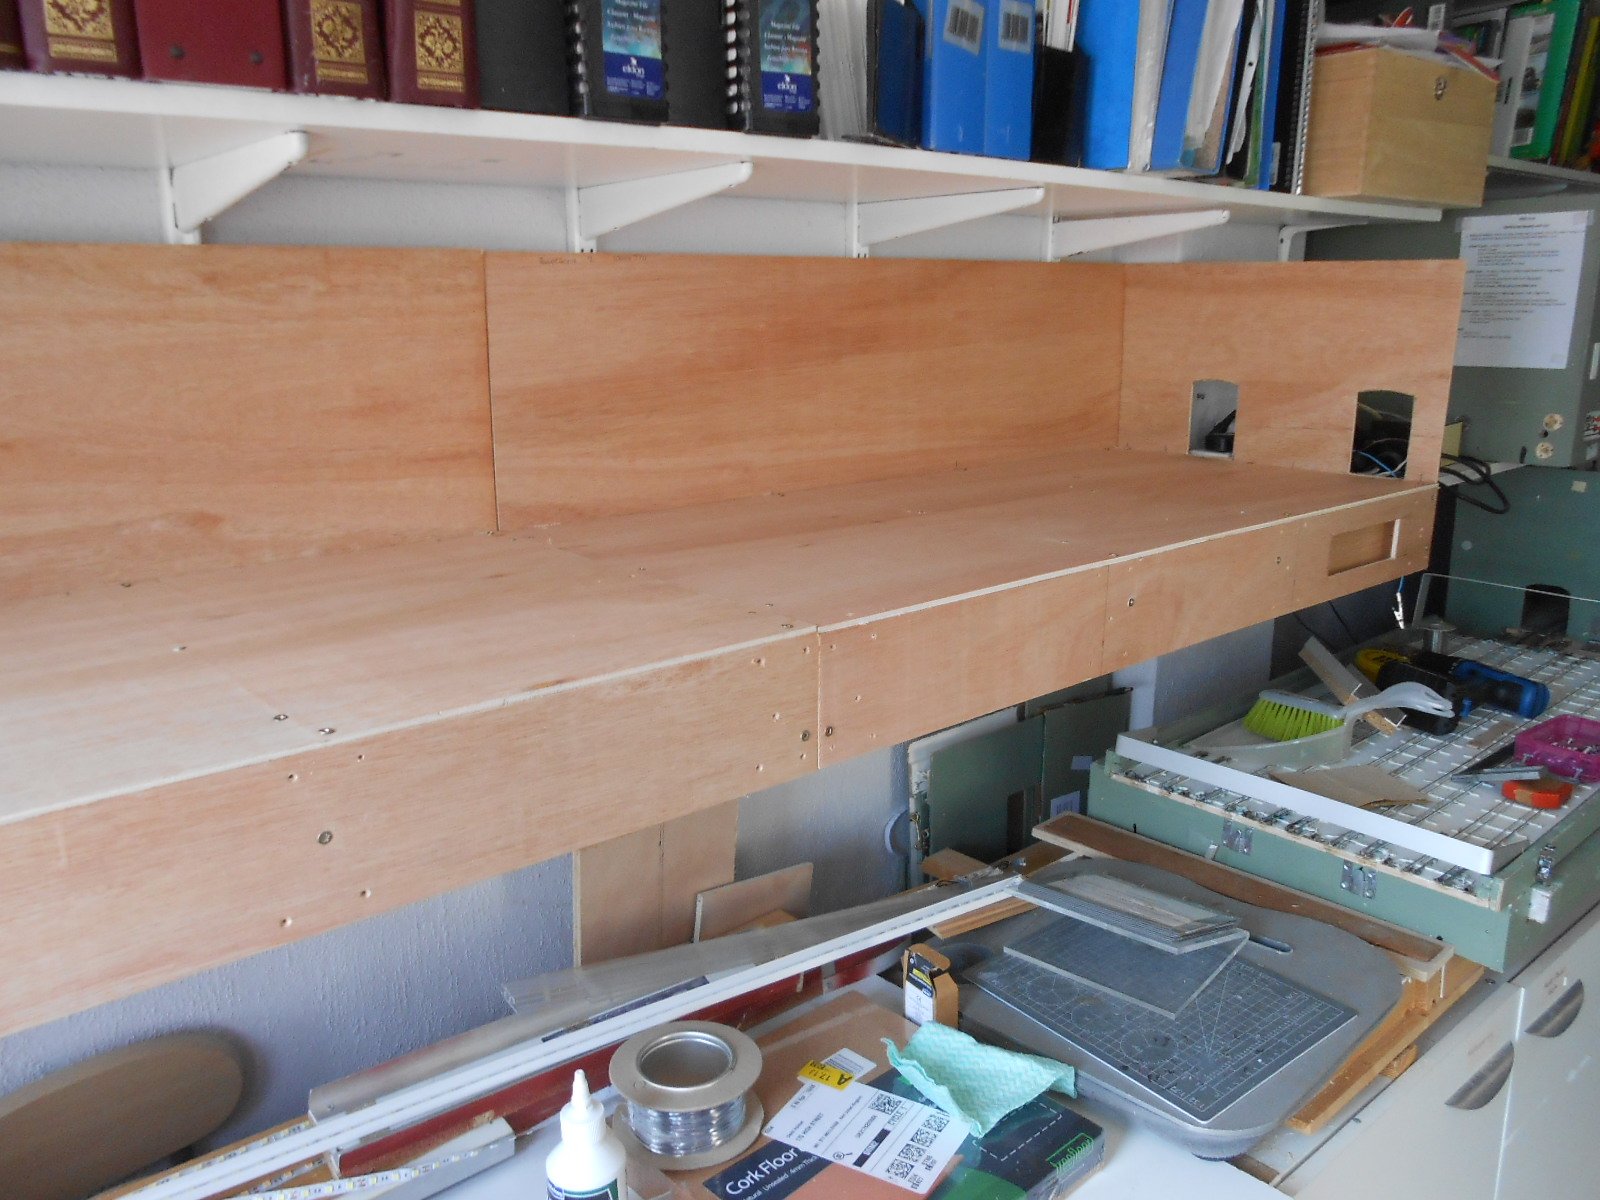
Been making lists, to try and minimise the pain of wiring. So, holes drilled for sockets, switches, point motors and the like, along with fitting the wings of the 'proscenium arch, each end. Very Iain Rice. The inlaid control panel with have three point switches, three push to make switches for the uncoupling magnets, plus an isolating switch for the loco shed. Am using Tortoise point motors, but as these are about 10cm deep, I make simple brackets from plywood, so they can be mounted on their sides. Above, you can see where I've drilled holes next to each point blade. A piece of stiff wire is soldered to each blade and then to a piece of copperclad below the baseboard, which then acts as an invisible tie bar. Below, you can see the brackets I've made for the Tortoises, with the hidden tie bar alongside in the second picture. The bracket includes a pivot arm, with the torsion rod from the tortoise going through one end and [eventually] a piece of stiff wire the other, going to the tie bar. Clever idea that I was given by Gorden Gravett.

-
Often said that coaches are every bit as demanding as locos. So much detailing work and roofs (simple arc types apart) always a pain. While Worsley have saved a lot of effort with the sides, so much more clearly required, so very well done. The late David Jenkinson had the answer to complex roof shapes in his book Carriage Modelling Made Easy - he had them machined from hardwood in bulk. Fine if you are making dozens, less so for just one or two!
-
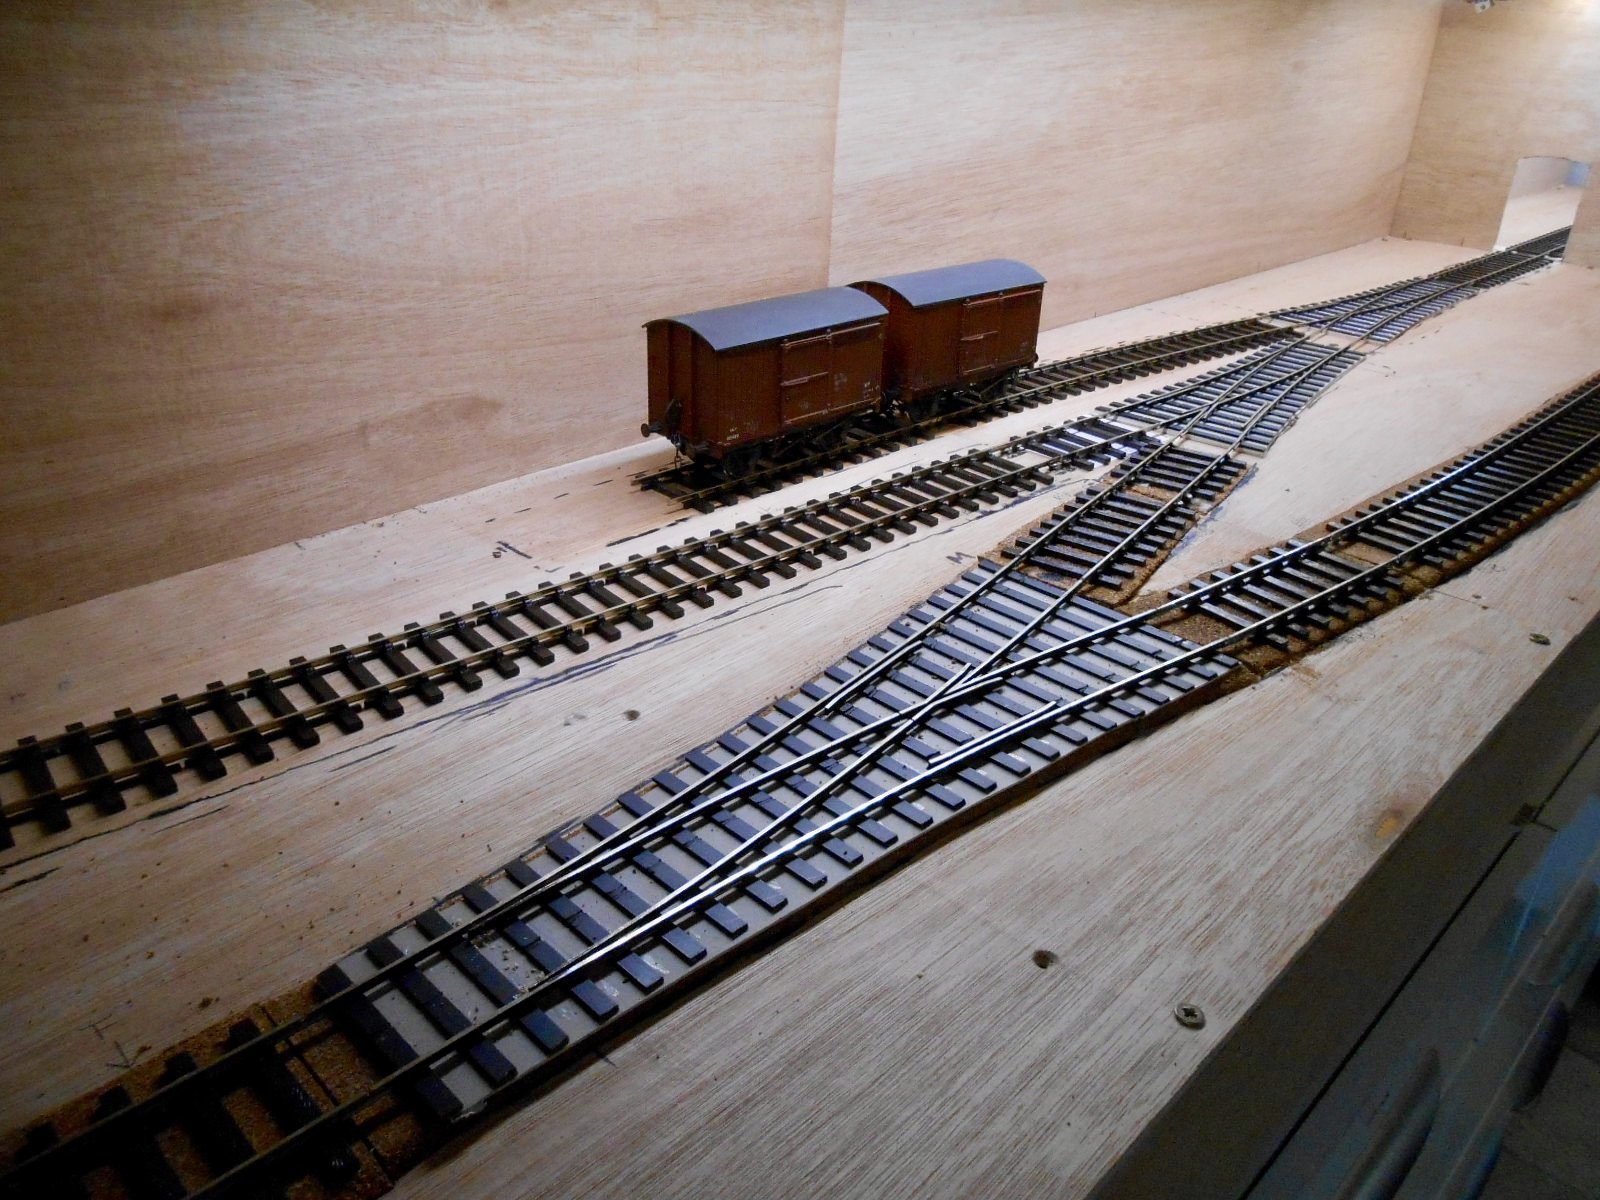
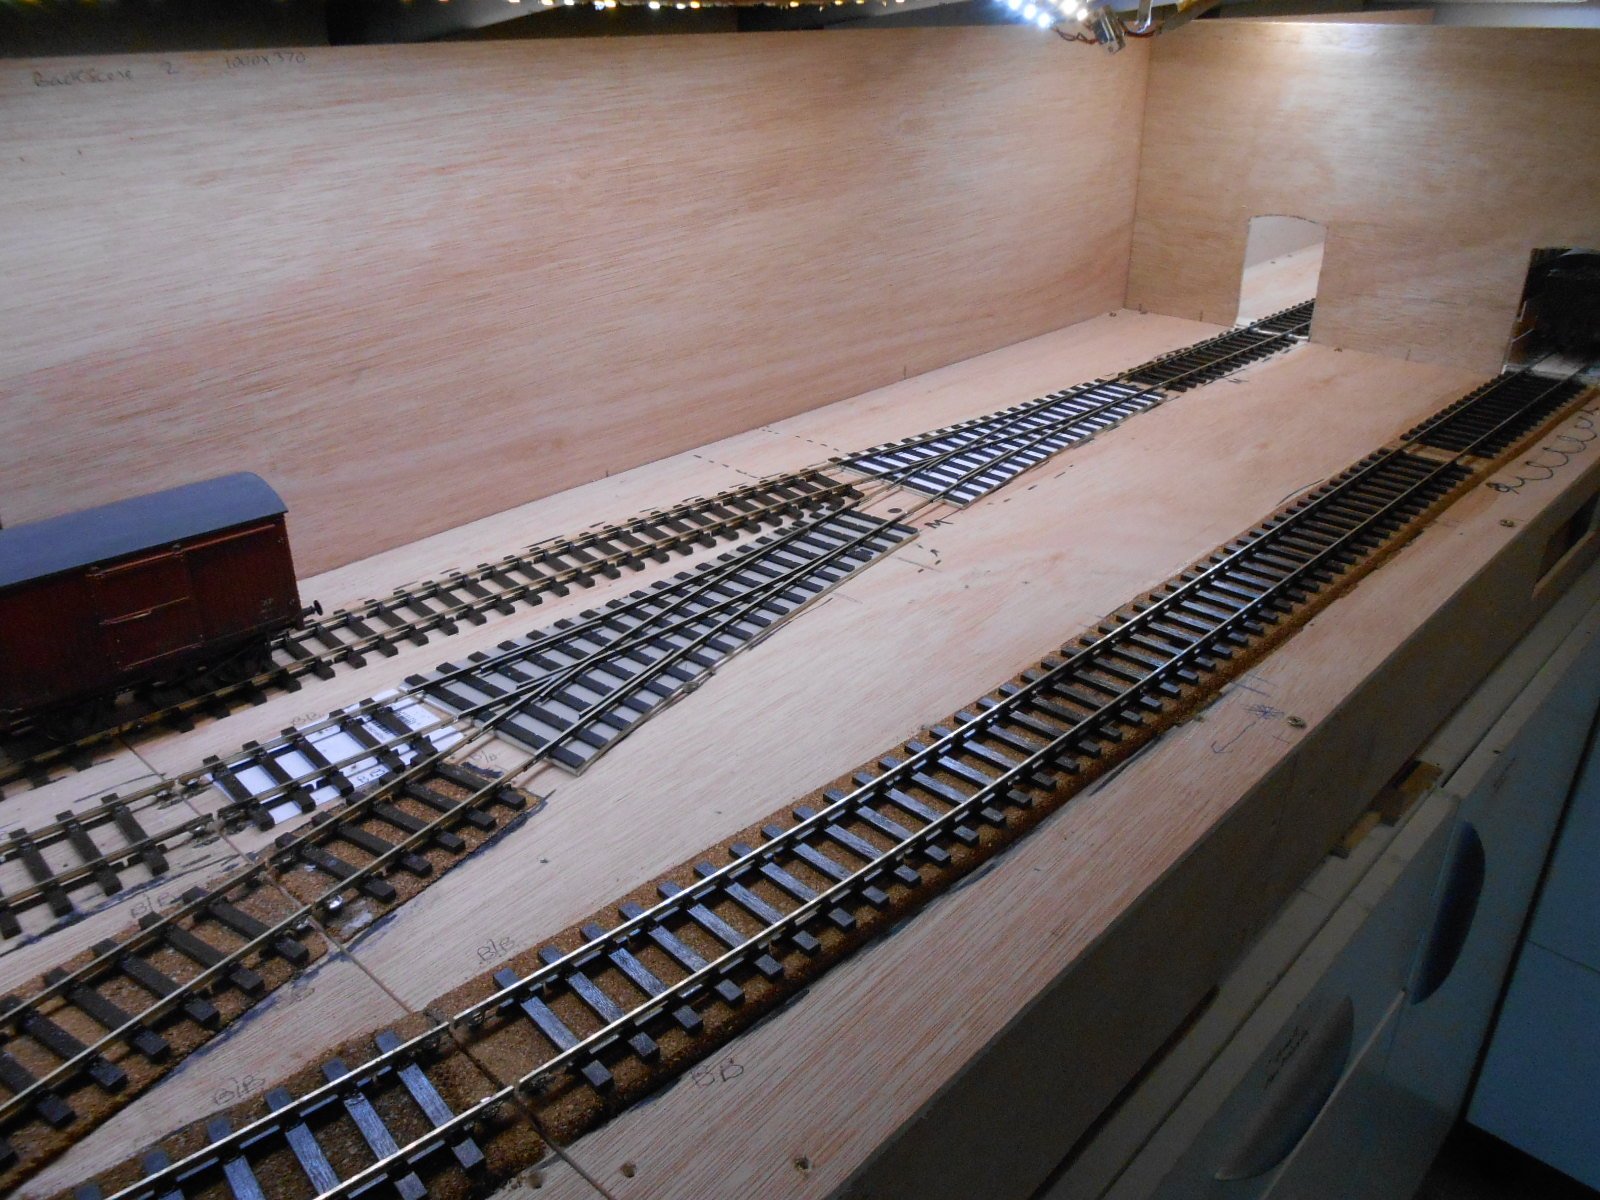
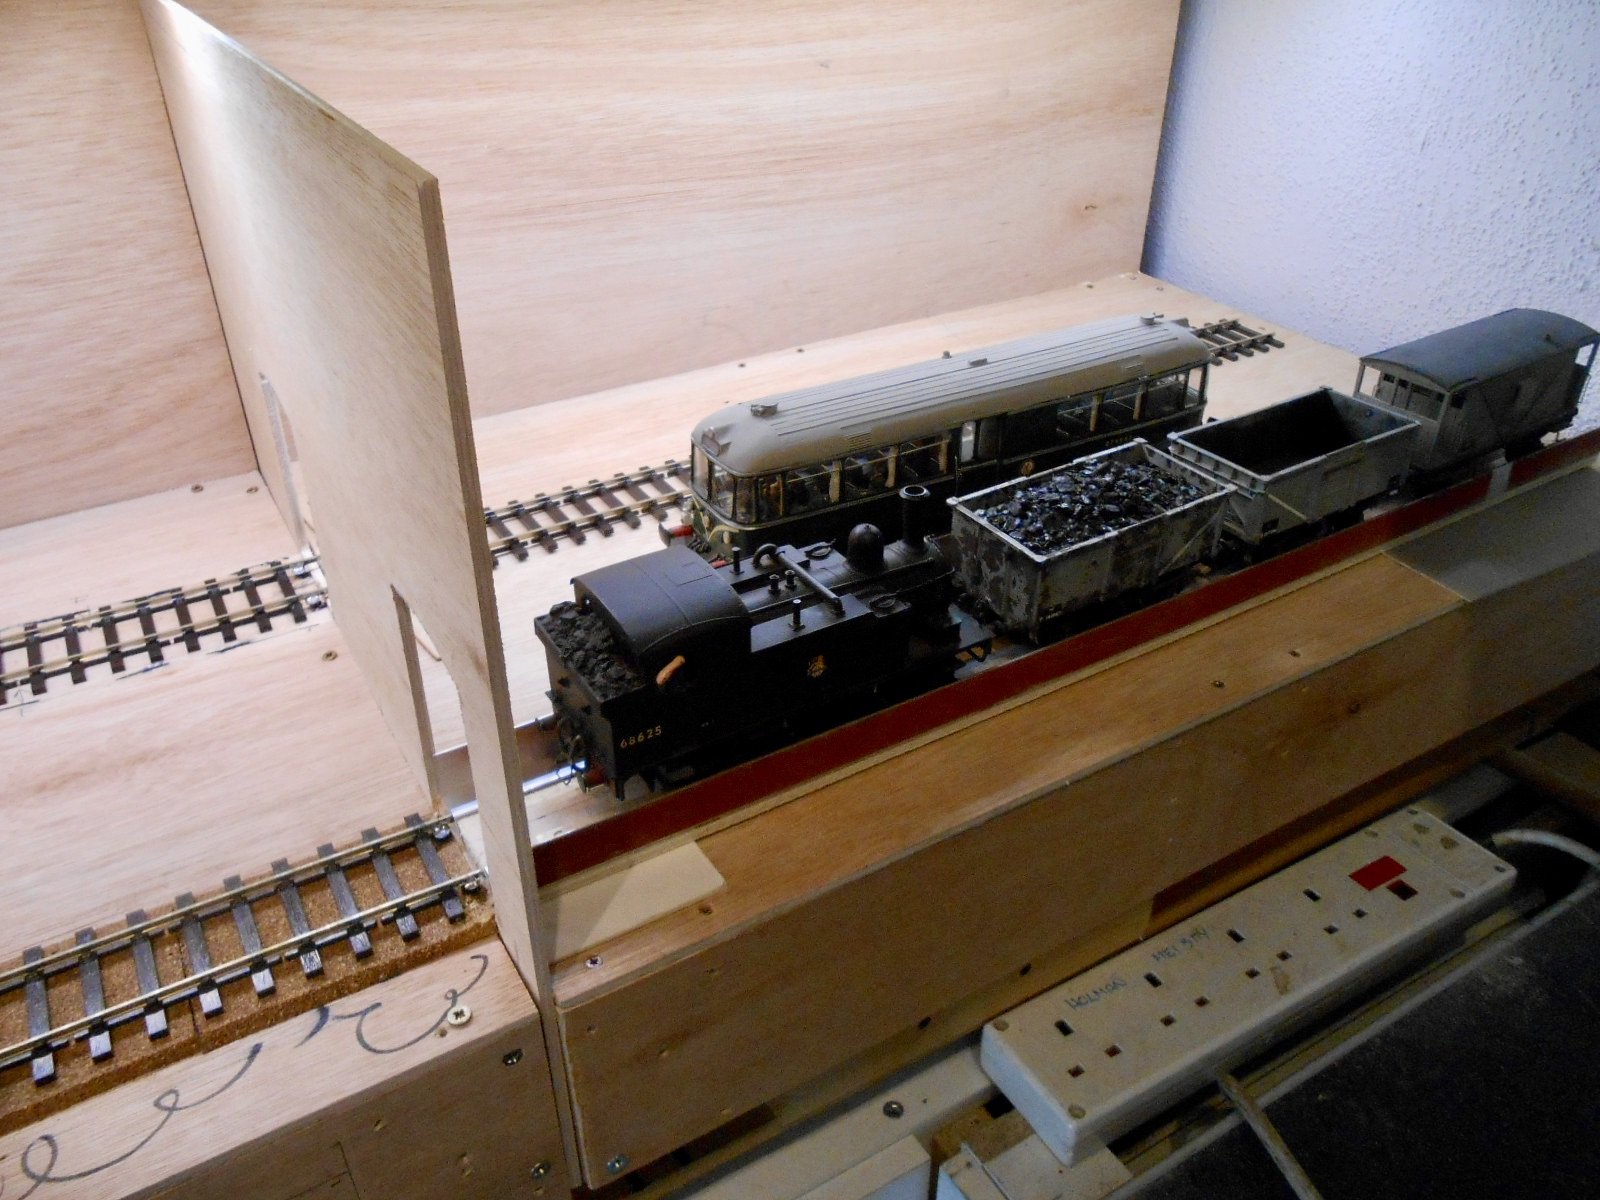
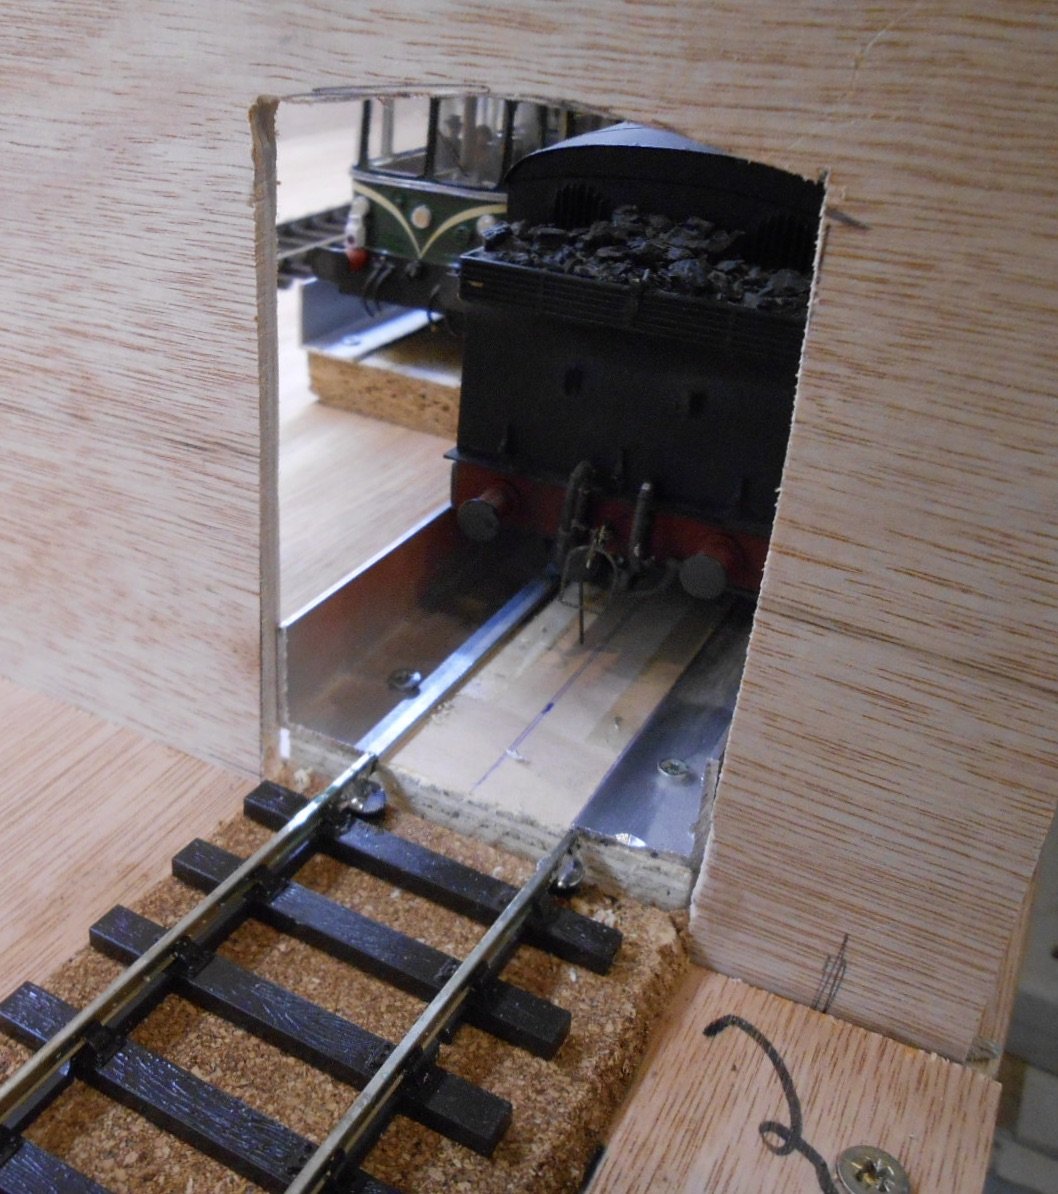
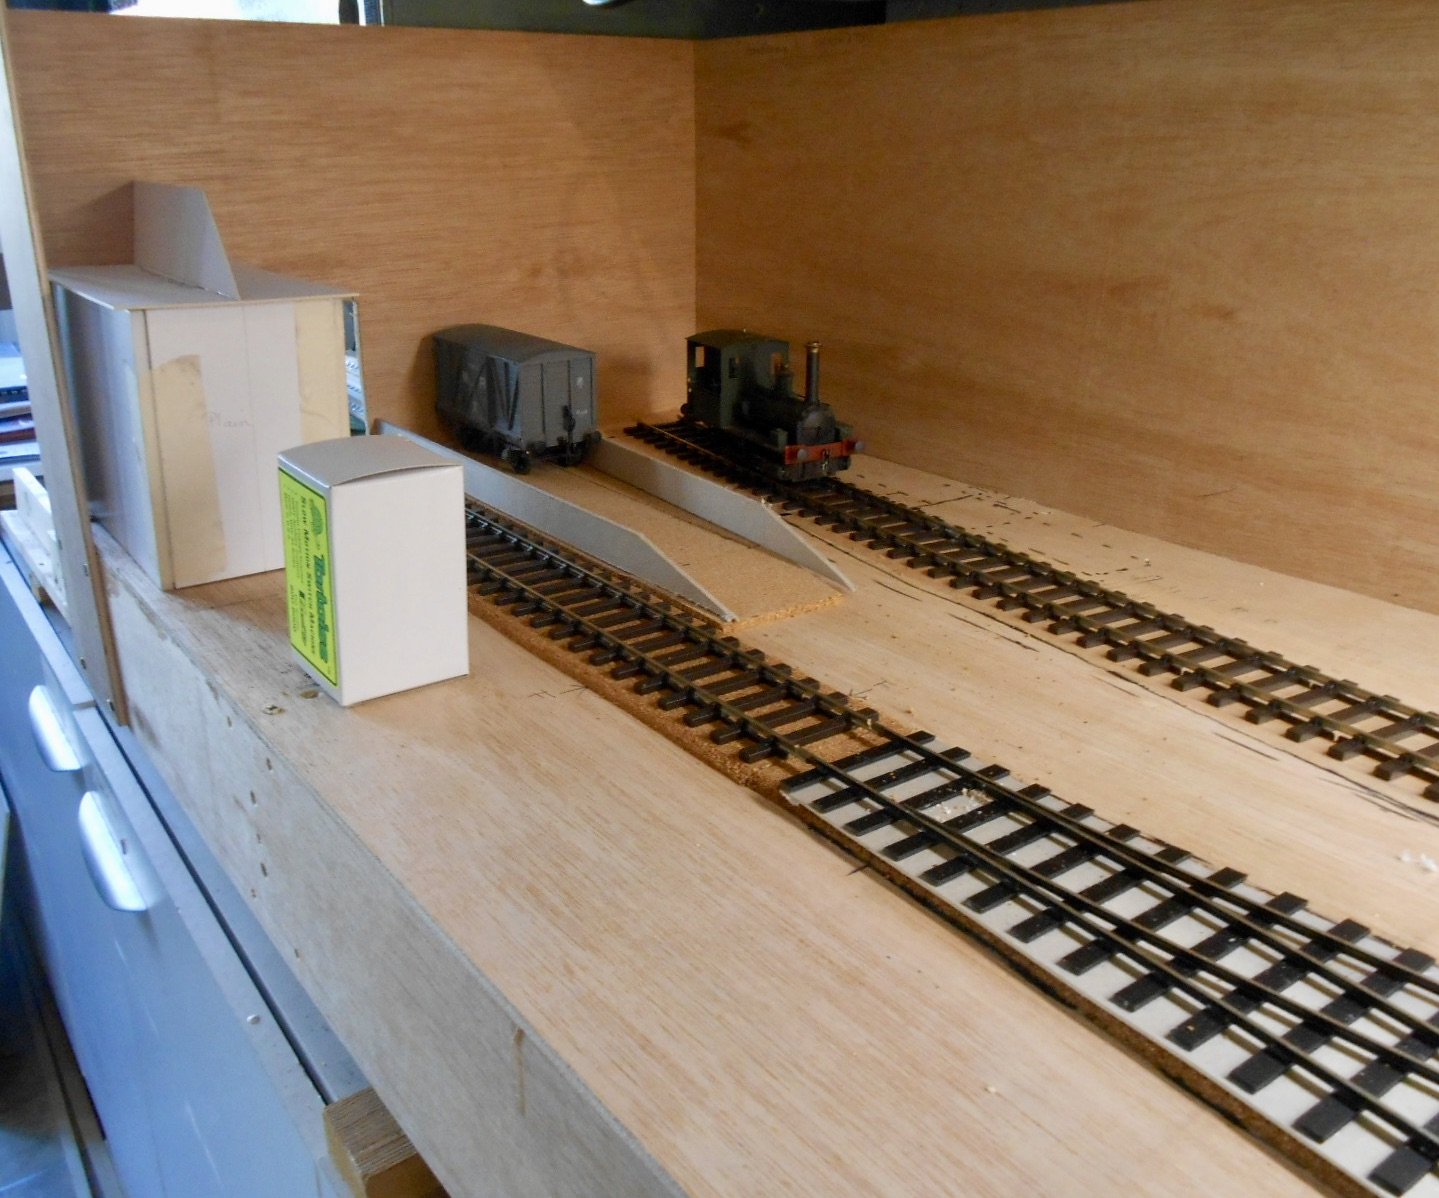
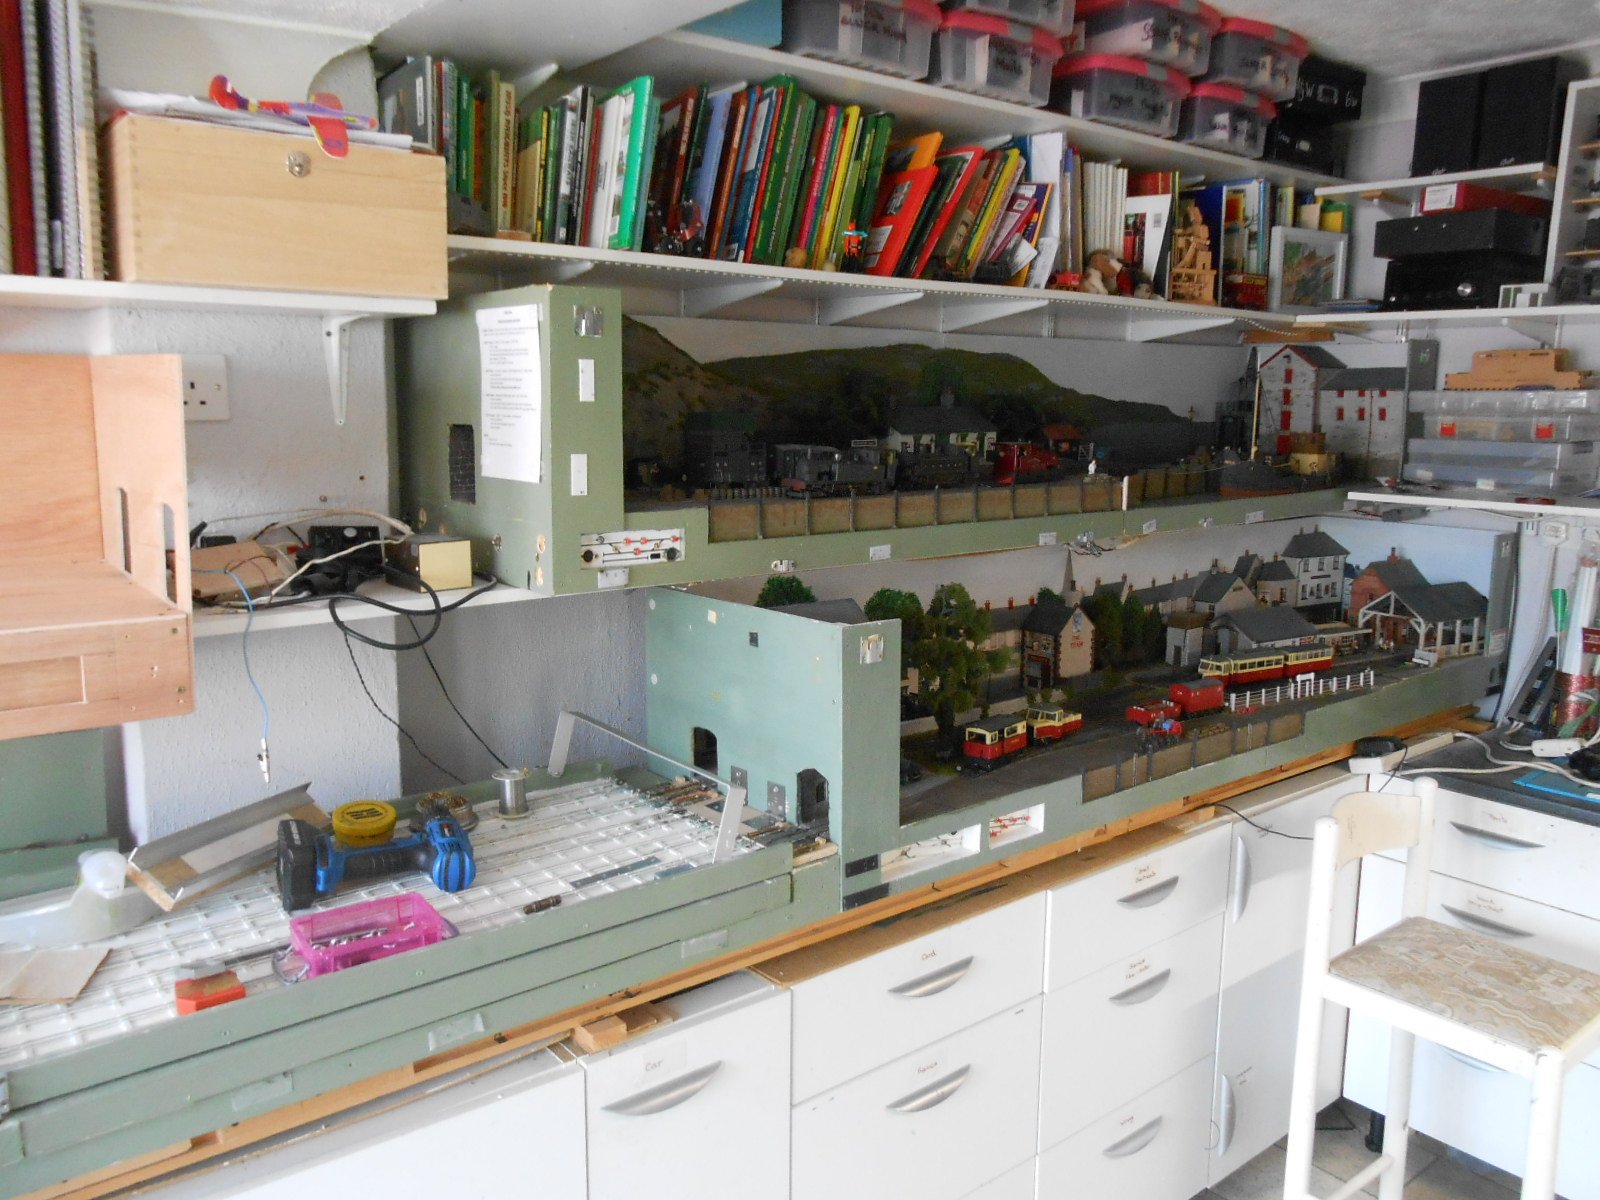
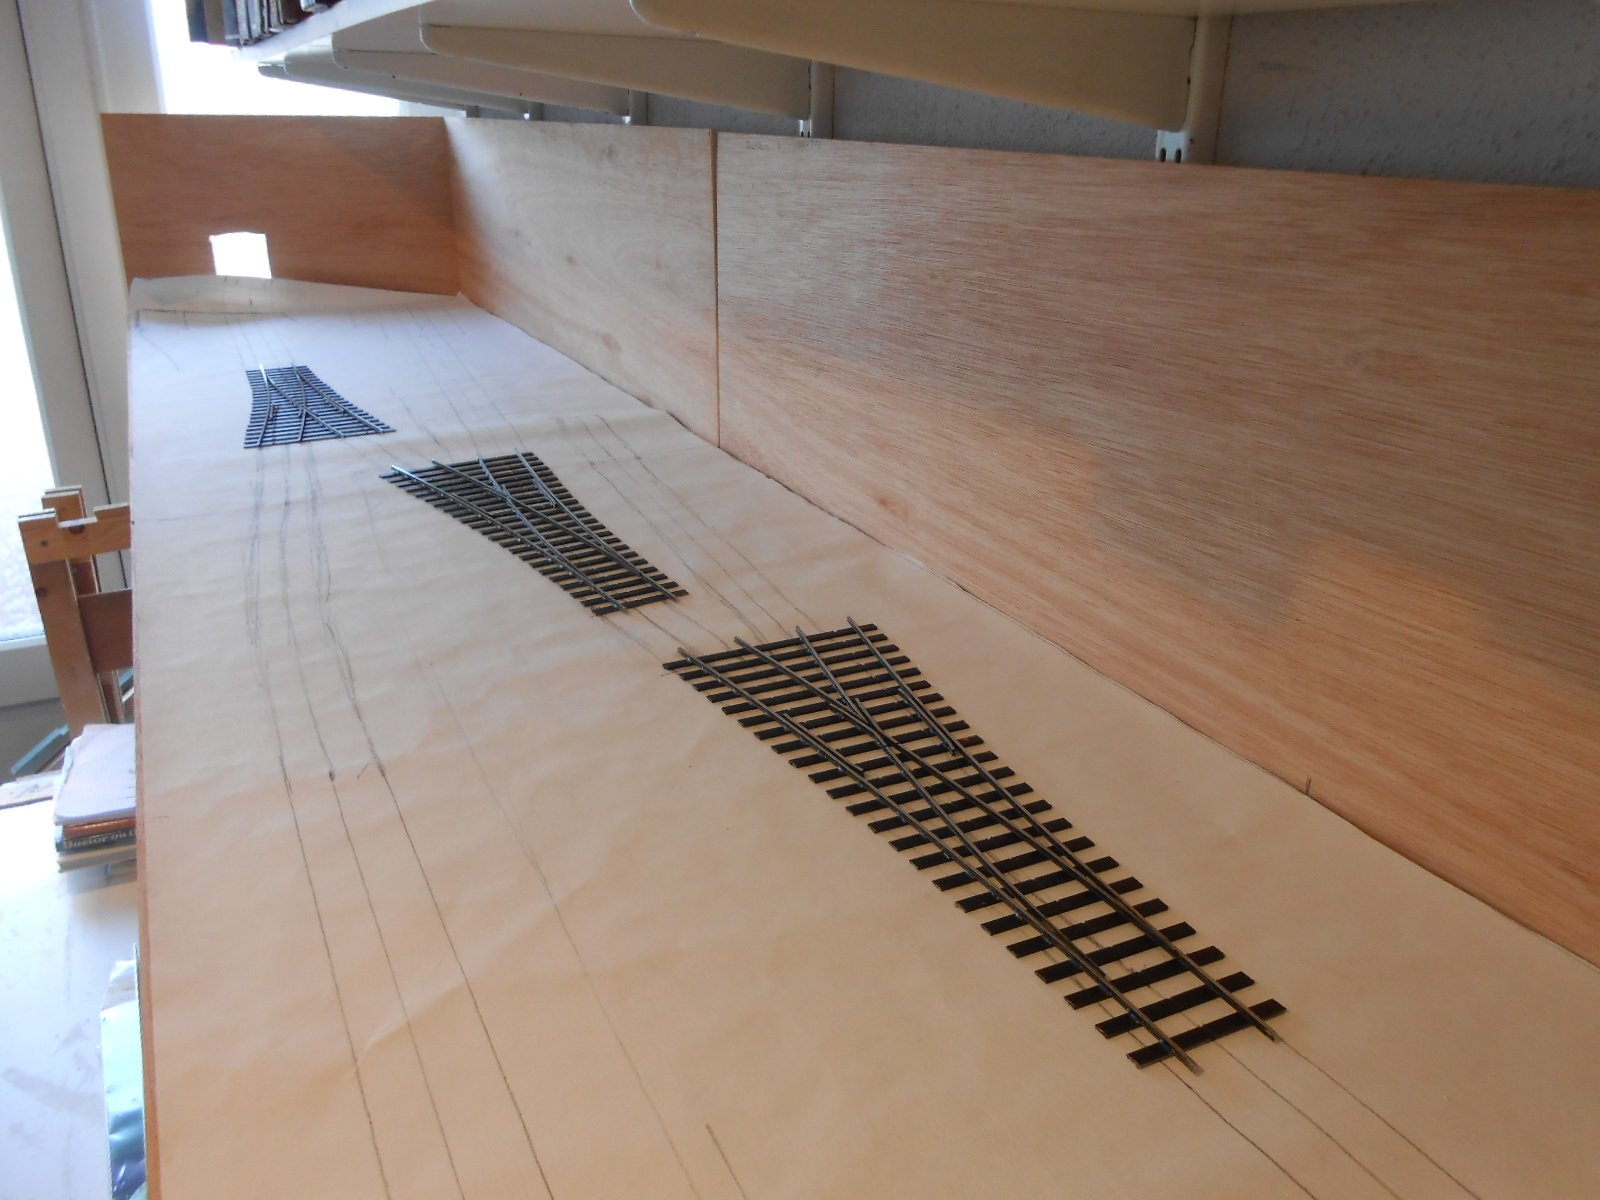
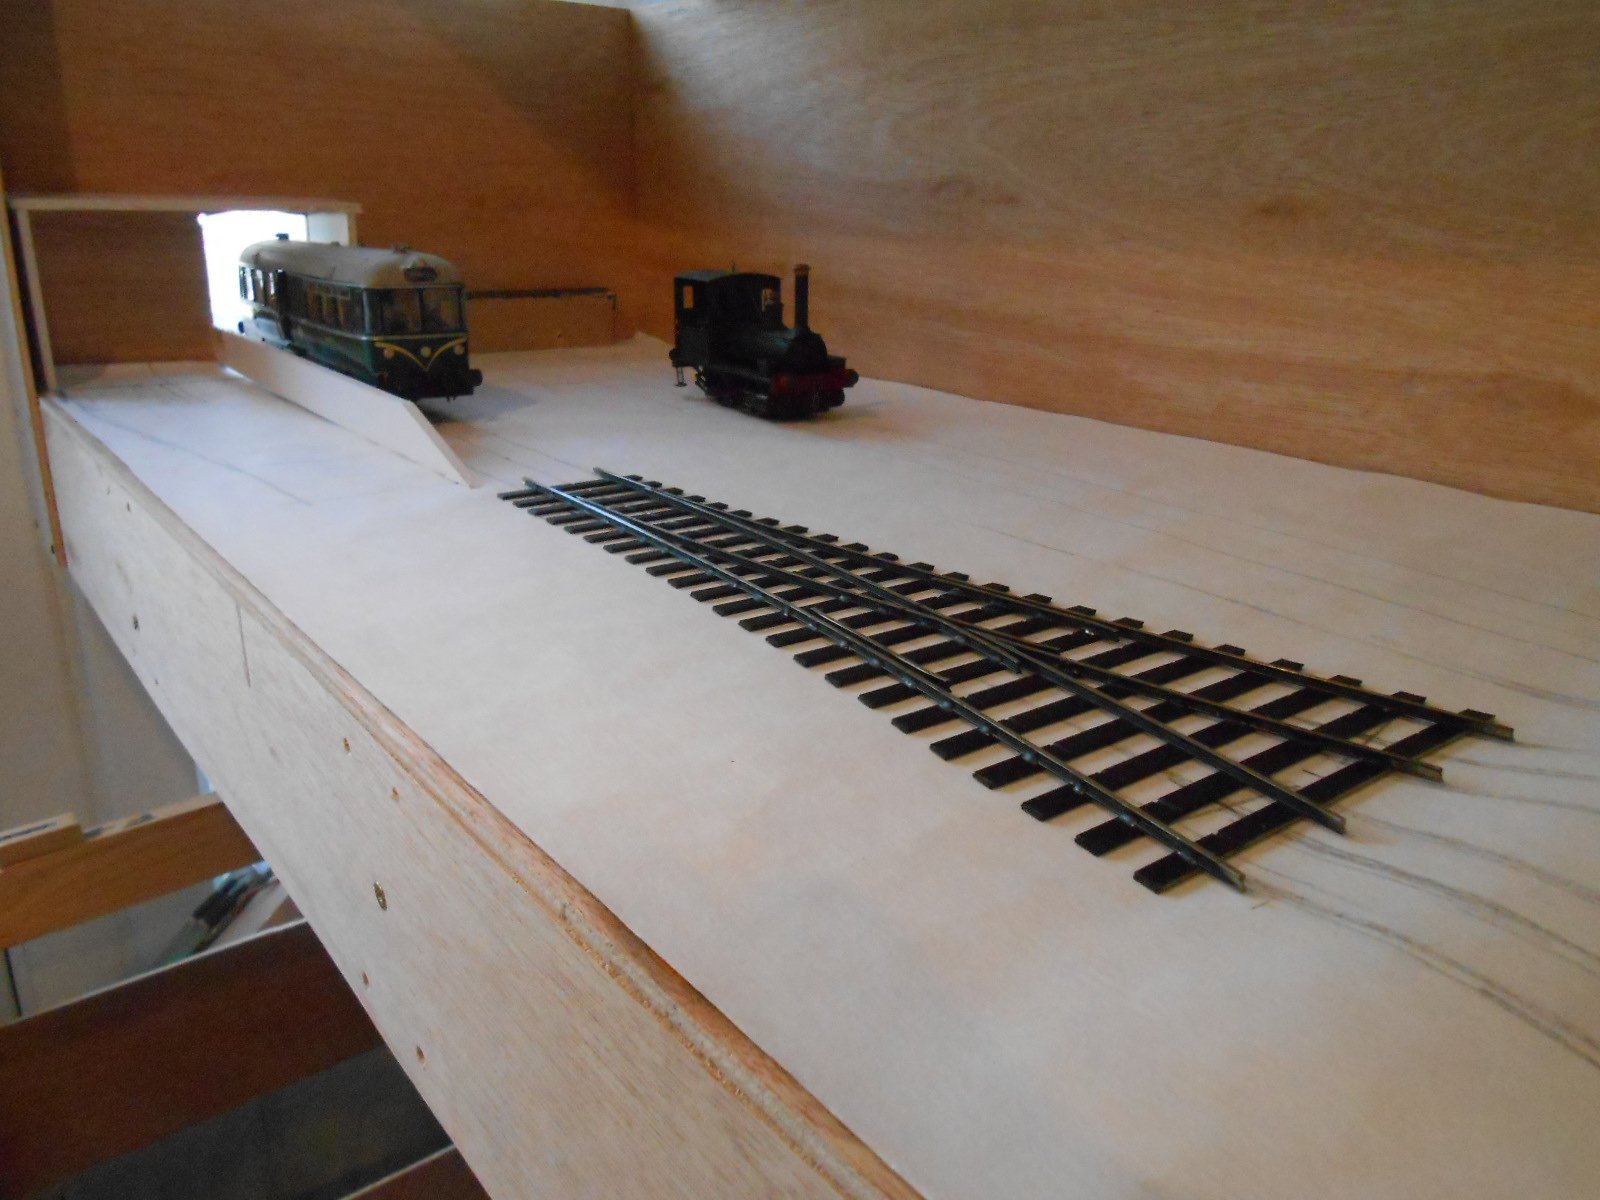
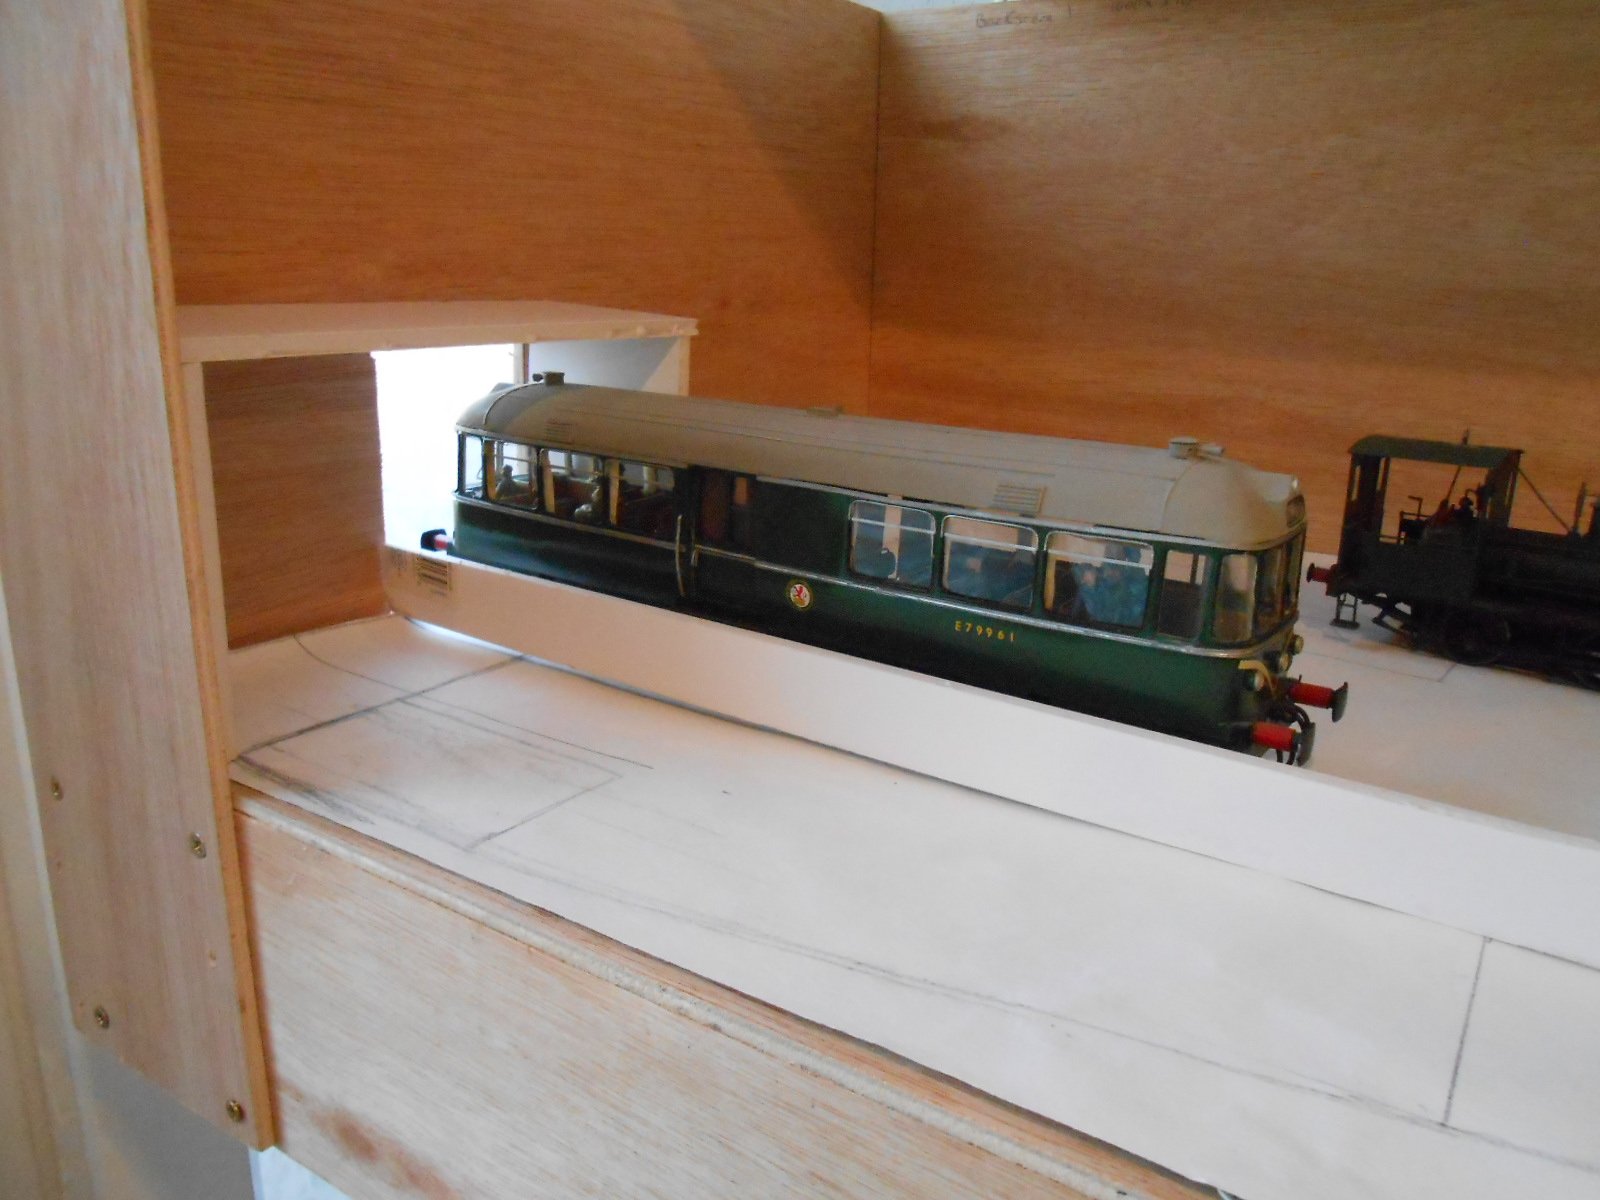
The new layout [no name as yet] has now been moved to the lower level in my workshop, so it can sit on the longitudinal beams that I use for my exhibition layouts. This has let me get on with track laying. Couple of surprises here - didn't realise how expensive Peco bullhead track now is [over £11 a yard] and that Marcway points are 2mm shallower, due to their thinner sleepers. Sharp in take of breath with the former, mounting board to level up the latter. Took a while to get the alignments right, but while things are not quite as I'd originally sketched out, I'm happy with the way it has worked out. As you can see, I'm using cork tiles as underlay for the 'main line' track , but the private lines are laid direct to the plywood baseboard surface. Am hoping this will give a small, but noticeable change in levels. The left hand end has caused me much thought and experimentation, to try and find ways of masking the hole in the sky. Current thinking is that the main building will be based on the station house at Snape, while the Tortoise point motor box will be a on crossing keeper's hut. On the other side of the track will be the station [more of a halt really] platform, which a grounded van body will sit. Behind this, where the Wantage tank is waiting, will be a timber loco shed, based on either Wantage or Mid Suffolk types. In front of the platform ramp will be road access to the yard, while between this siding and the mainline, I may put a second short wooden platform, so that should I decide the private line leads to an airfield or a mental asylum, passengers could transfer. The right hand end will initially be shielded by trees, but will eventually be either Snape like maltings, a dairy, or whatever else takes my fancy. Beyond that, is the main fiddle yard, constructed this morning. Main line trains will be on cassettes - have used these many times in the past. At just 27" long, they will hold a tank engine, two wagons, plus a brake [or just a single wagon if it is a tender loco]. Each cassette is simply a piece of 9mm ply with two lengths of aluminium angle as the track. Simple, but effective. At the moment, the plan is to have further cassettes racked on the back board of the fiddle yard. The off scene private railway track is just a length of Peco. On line orders are gradually arriving to enable the wiring: point motors, electro magnets for uncoupling [Alex Jacksons], plus switches, sockets, wire etc. Never my favourite occupation, but needs must!
-
That's more like it!
-
Still think that first picture might be a model - all the other photos show flush glazing on the cab front....
-
Spoiling us again, Ernie!
-
There is always room for a model railway!
-
Very little happened this side of the water either, though in Kent, the Allhallows branch wasn't built until the 1920s.
-
Can see what you mean, Mick. Those front windows are deeply inset and the glazing isn't exactly flush. No tension lock or Kadee though, even if the track looks decidedly Peck Code 75.
-
Delightful.
-
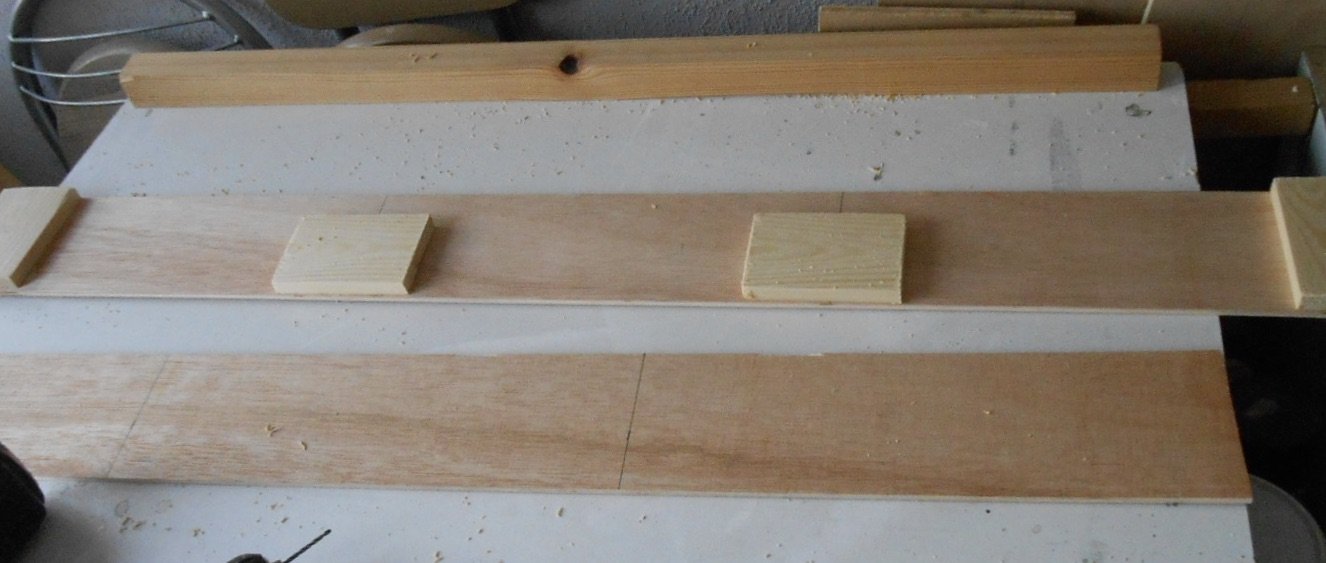
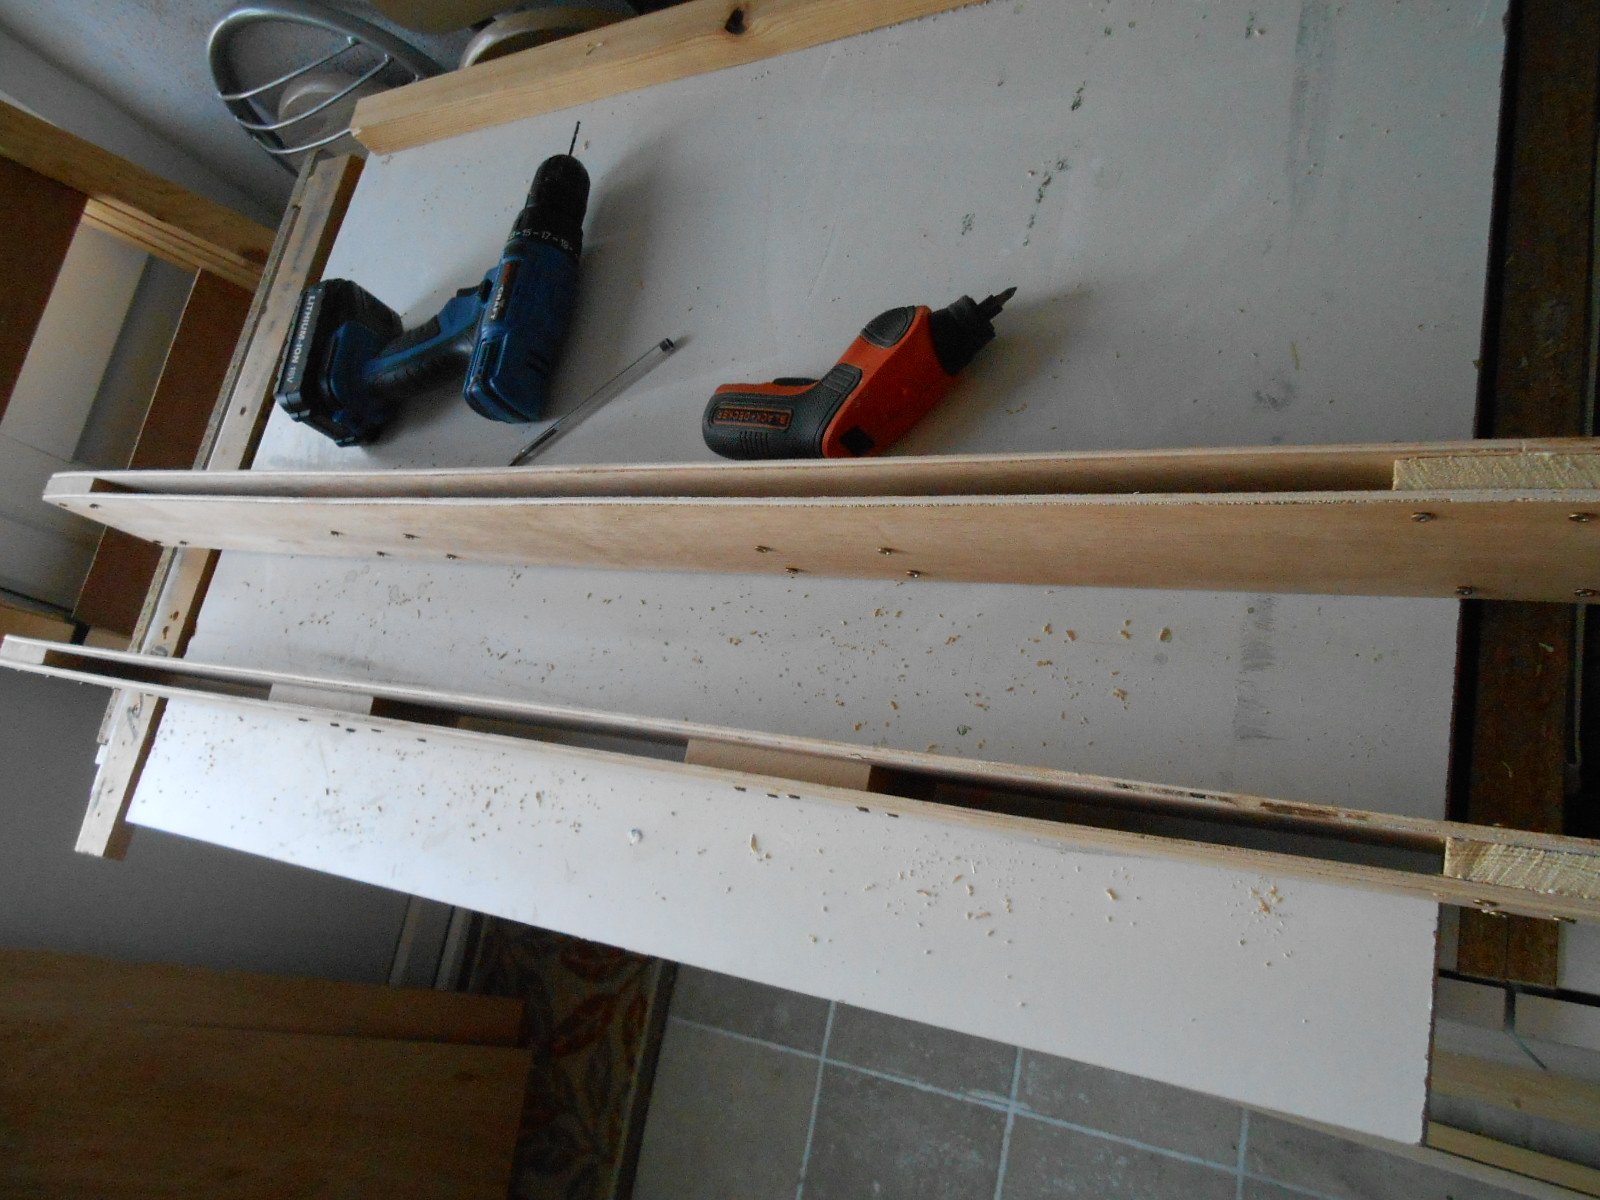
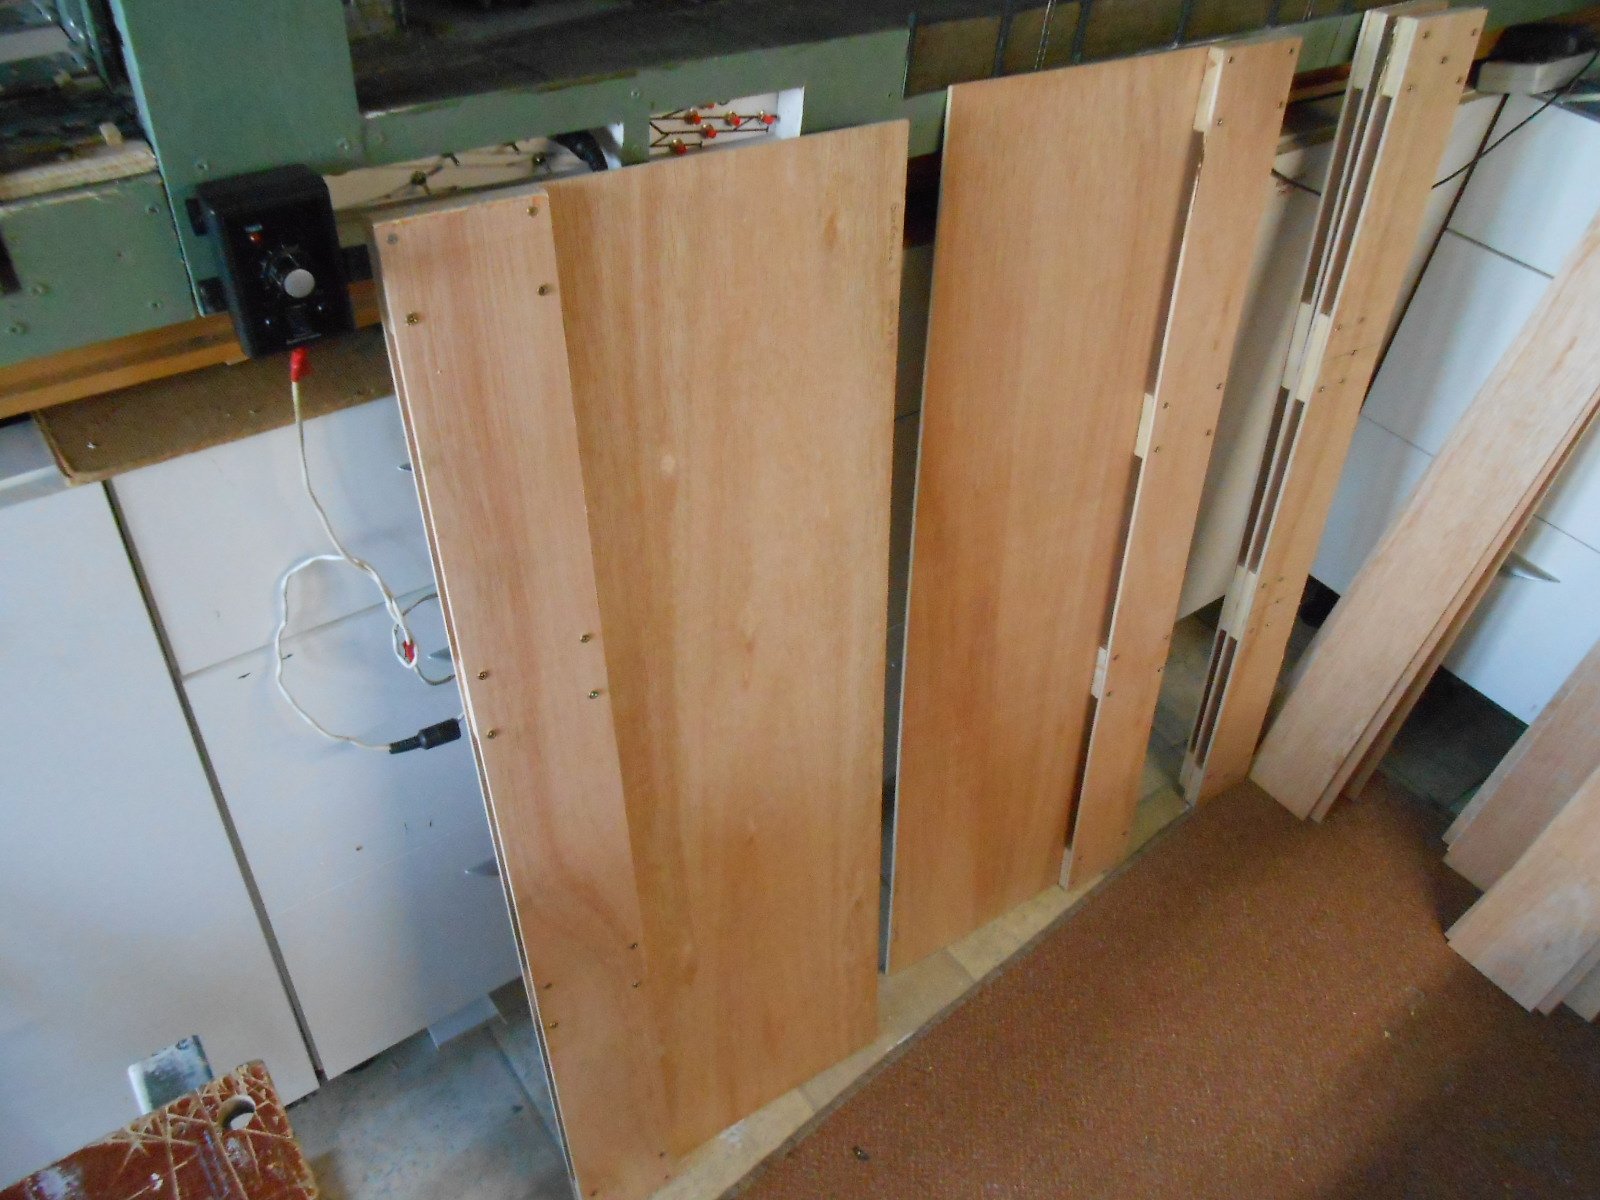
Got the plywood on Tuesday and have been assembling the two baseboards since then until this afternoon, when [returning from the garden centre], found a package containing my three points from Marcway. Not best pleased to find £200 worth out in the open on my doorstep, but then nobody would know what was inside and doubt if anyone would be interested anyway! As the ply is fairly thin, have gone back to slightly older practice by using the 'ply sandwich' method, where the frames are two strips of 10 cm ply either side of rectangular blocks of 12mm softwood. Screwed and glued, they are light but very strong and stable. Baseboard joiners ensure alignment, with M^ bolts to hold everything together. So, the workshop now has three layouts, with two sitting on the higher shelves and the one being worked on lower down. The arrival of the points has allowed a visualisation session this afternoon, starting with the left hand end. I need to have a decent view blocker here, to hide the hole in the end back scene. Looking in books and on the Web, found that Tollesbury in Essex had a nice, small, timber built station building that suits the space, but also need to find a suitable over bridge to copy.
- 89 replies
-
- 10
-

-

-
Where do you get your etched works / loco nameplates from?
David Holman replied to Jamie Davis's topic in Irish Models
Shame to hear about that. Light Railway Stores are very good value for such things. There are alternatives,, so try an internet search. Fox Transfers do some, but not sure about custom jobs. Depending on what size you want, Sister's Plasticard do some fairly small letters, so it is possible to make your own. -
Fascinating - though well outside my pay grade in mechanical terms! Lovely model, doing well for 25 years use too..