David Holman
-
Posts
4,359 -
Joined
-
Last visited
-
Days Won
117
Content Type
Profiles
Forums
Events
Gallery
Blogs
Everything posted by David Holman
-
One for the 'prototype for everything' file! An Albion lorry chassis, with home made buffer beams, no couplings (just chains) and running on split spoke wagon wheels. Would be fun to create something similar and might be possible to squeeze a High Level motor gear box in the front end, under the bonnet. In 7mm scale, a natty little project, perhaps with an old Corgi Classic, like the Lipton tea van - though the scrap box may be a better option.
-
"Voiding the Warranty" - Mol's experiments in 21mm gauge
David Holman replied to Mol_PMB's topic in Irish Models
Older weighbridge for me. That new building sticks out like a sore thumb and compromises what is actually a nicely balanced scene. Such are the perils of prototype modelling - however 'right' you get it, at some point new evidence will emerge to annoy you! Maybe the best option would be to model to weighbridge building on a removable sub- base that allows it to be swapped according to period? As for back scene painting, while blue skies with fluffy clouds might seem nice, it is far easier to paint an all over pale grey, almost white, sky that we often have. Trees are another matter though. The photos seem to show them in winter - in which case ditch the paint brush and use pencil, crayon, fine marker pens etc, which are far more controllable. A good foundation for trees in full leaf too. Either way, start with colour pictures of the real thing. I find any photo that has trees in the background the most useful and then try to copy what is just an overall effect, rather than fine detail. I use hogs hair brushes and acrylic paint to stipple on a mix of greens, adding blues, yellows and some grey/black as I go along. These will blend together as you add the layers while wet but you can also leave patches of sky showing through. The most important thing though it to keep the colours fairly muted. Too bright and they stick out in a bad way. Tree bark is likewise rarely brown, more often a mix of greys and greens. Paint what you see, not what you think, as my art teacher used to say. I think it is a superb scene and well on the way to being a superb layout! -
This year's Railway Modeller Christmas special edition features a fairly extensive article on the Fry Collection.
- 1 reply
-
- 8
-

-

-
Having never come across such things, had to Google them and discovered a weird and wonderful array of tools. Every day a school day! That said, will probably stick to soft iron garden wire to hold a boiler in shape for soldering.
-
Interesting to see how tidy and, especially litter free the 1950s pictures are. These days we are plagued by the stuff, most of it take away food packaging. Which only goes to show how society has changed in recent years and, let's face it, how lazy society has become...
-
I started building the Wantage tank ((No5), aka Jane, aka Shannon, formerly of the Sandy & Potton Railway, for my Loose End layout. Soon after I started the scratchbuild (one of my first), Model Railway Journal ran a series of articles by Laurie Griffin to build your own - with the option to buy all the castings and a specialist set of wheels, to go with it. Serendipity or what? Apparently many sets of parts were sold, but (as far as I'm aware), very few got turned into models. Laurie was a former Chatham Club member and his articles were absolutely perfect in terms of me building the model, which runs as well as it looks. Since embracing Irish railways, I've always aimed for a 'Jane Layout' one day, so it's nice to be able to work on it at last.
-
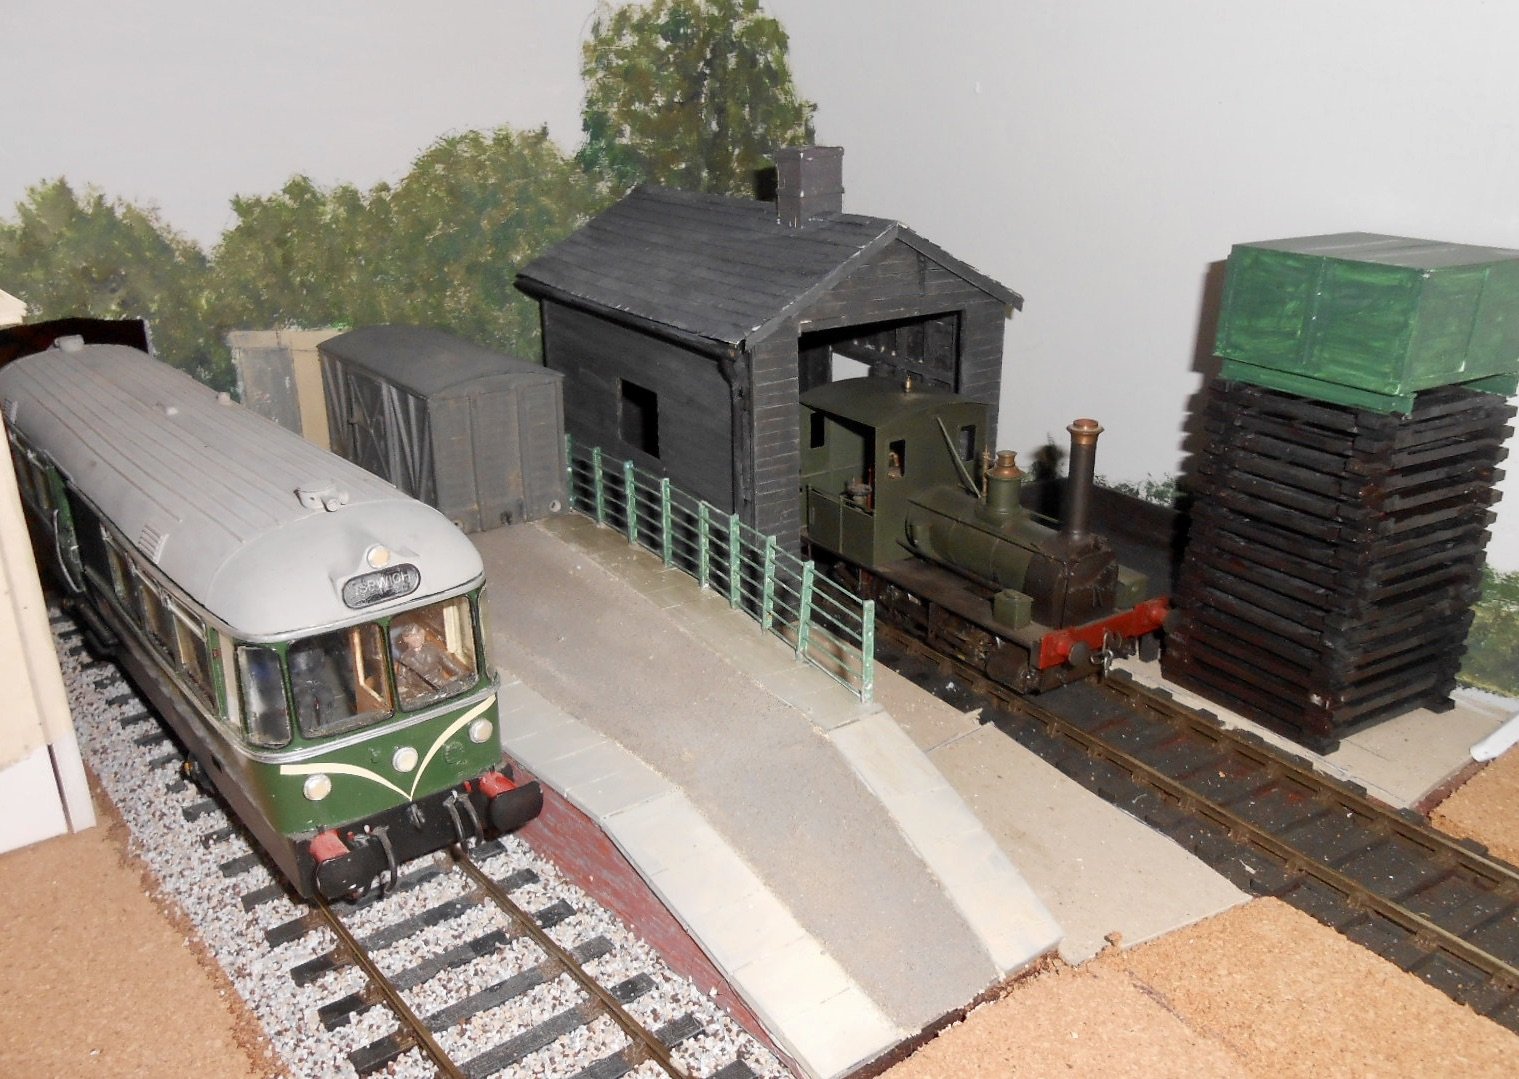
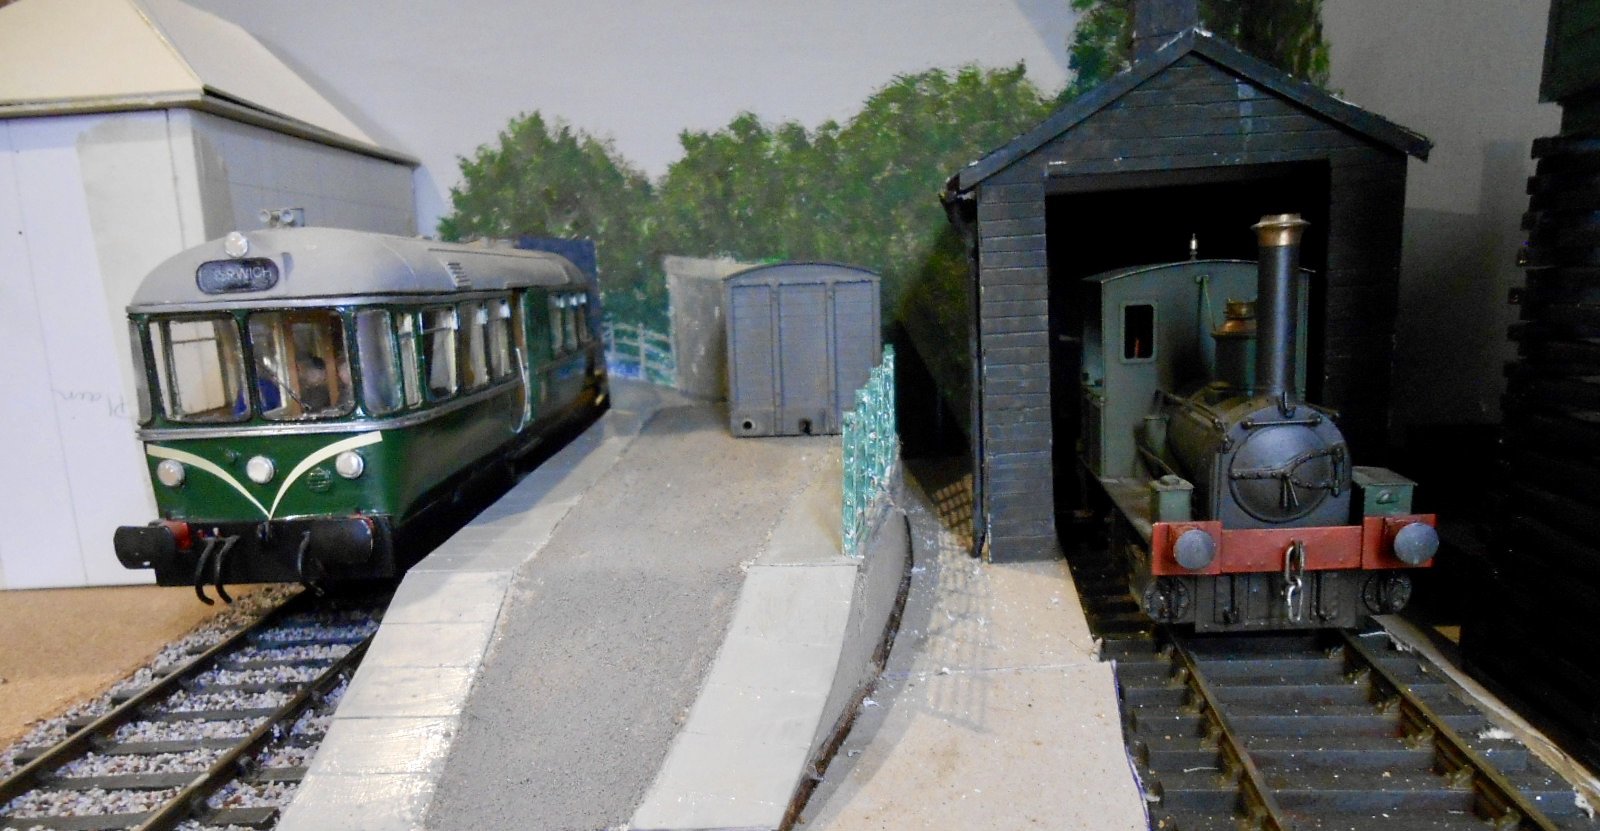
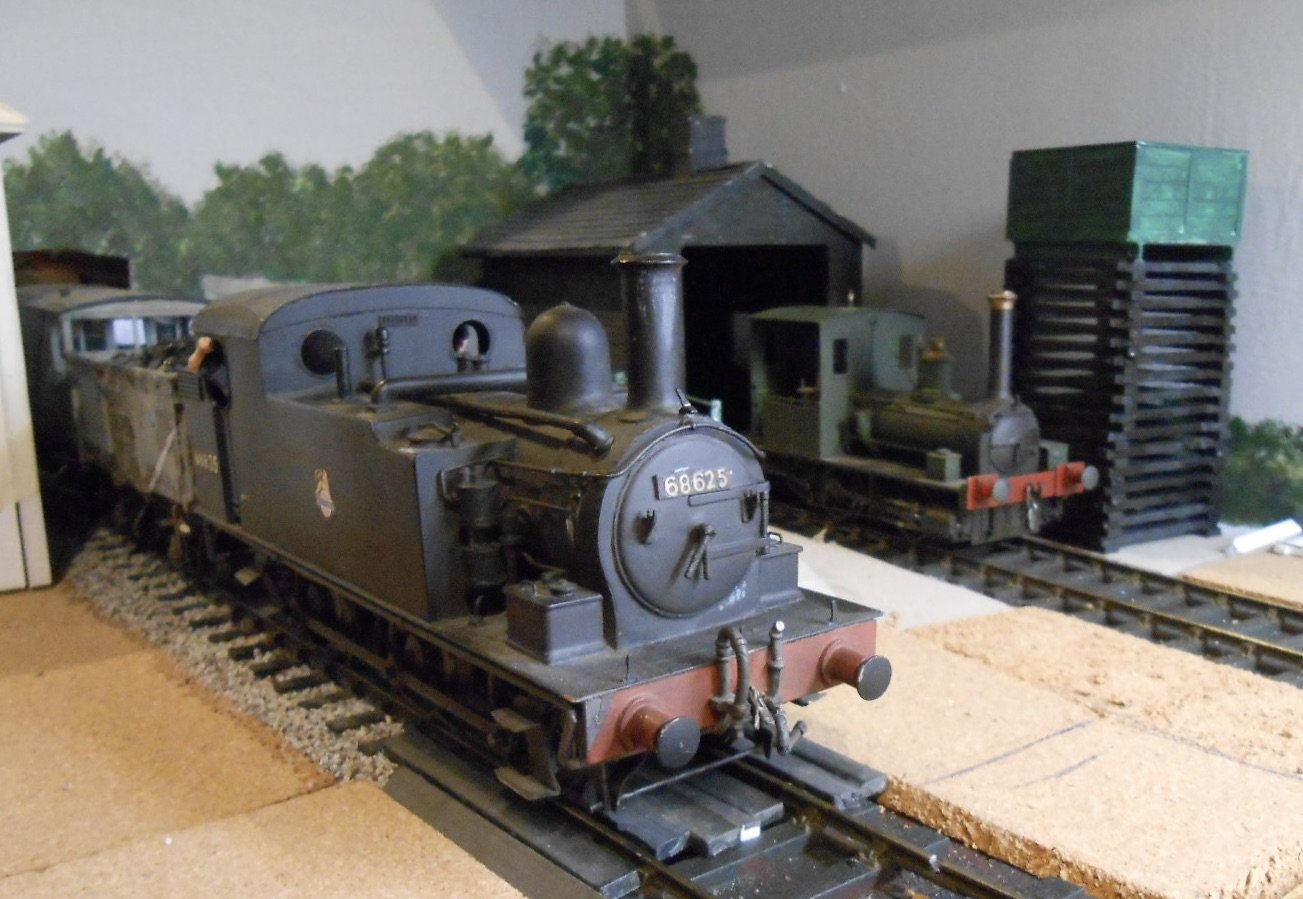
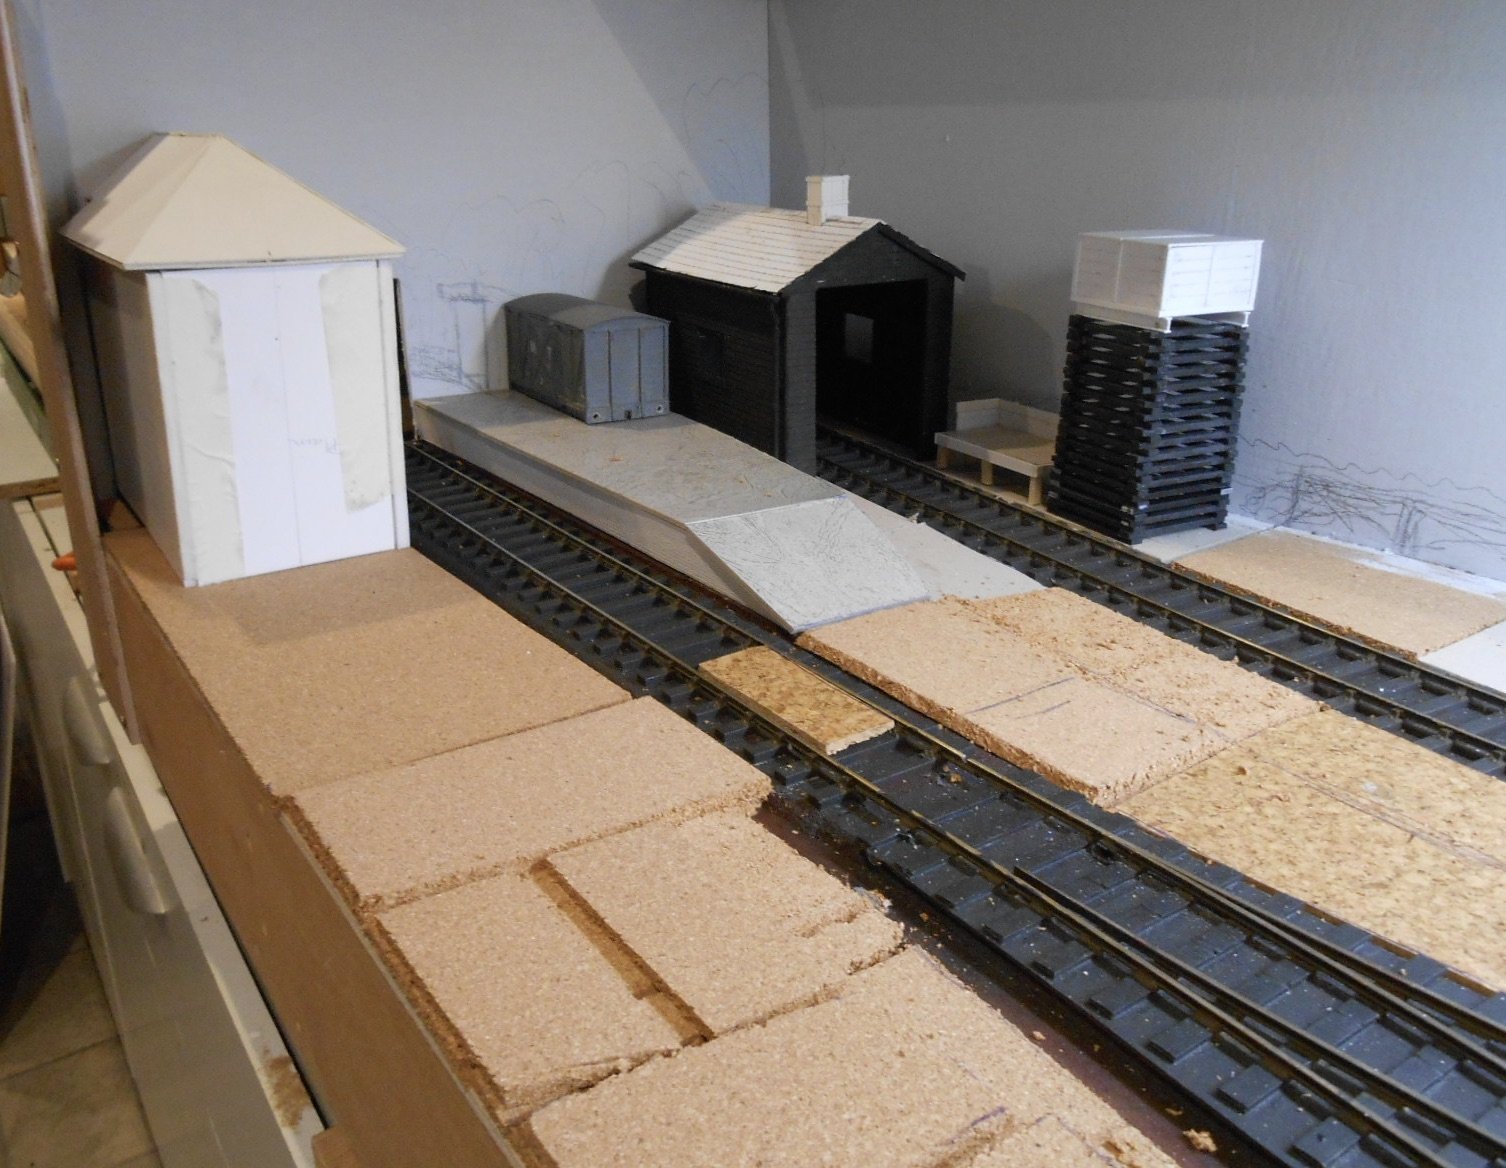
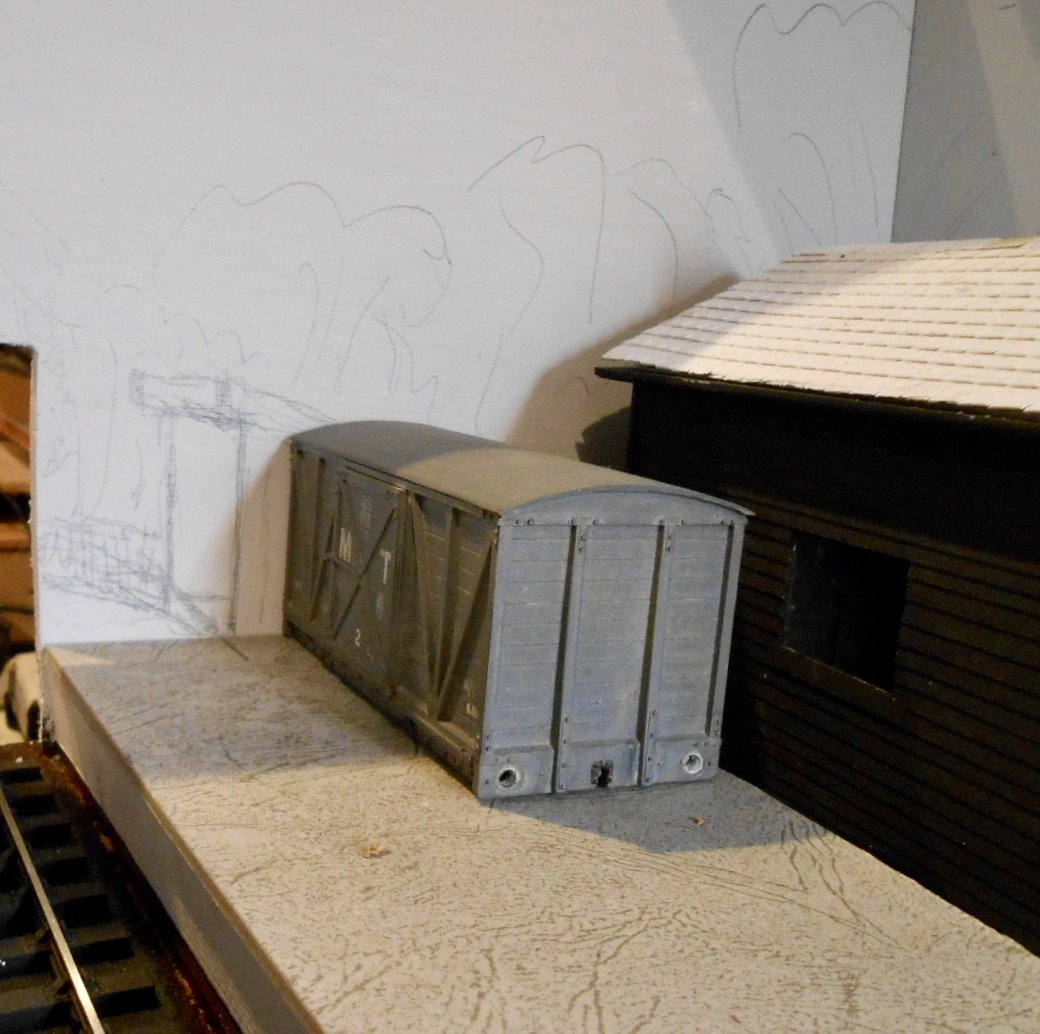
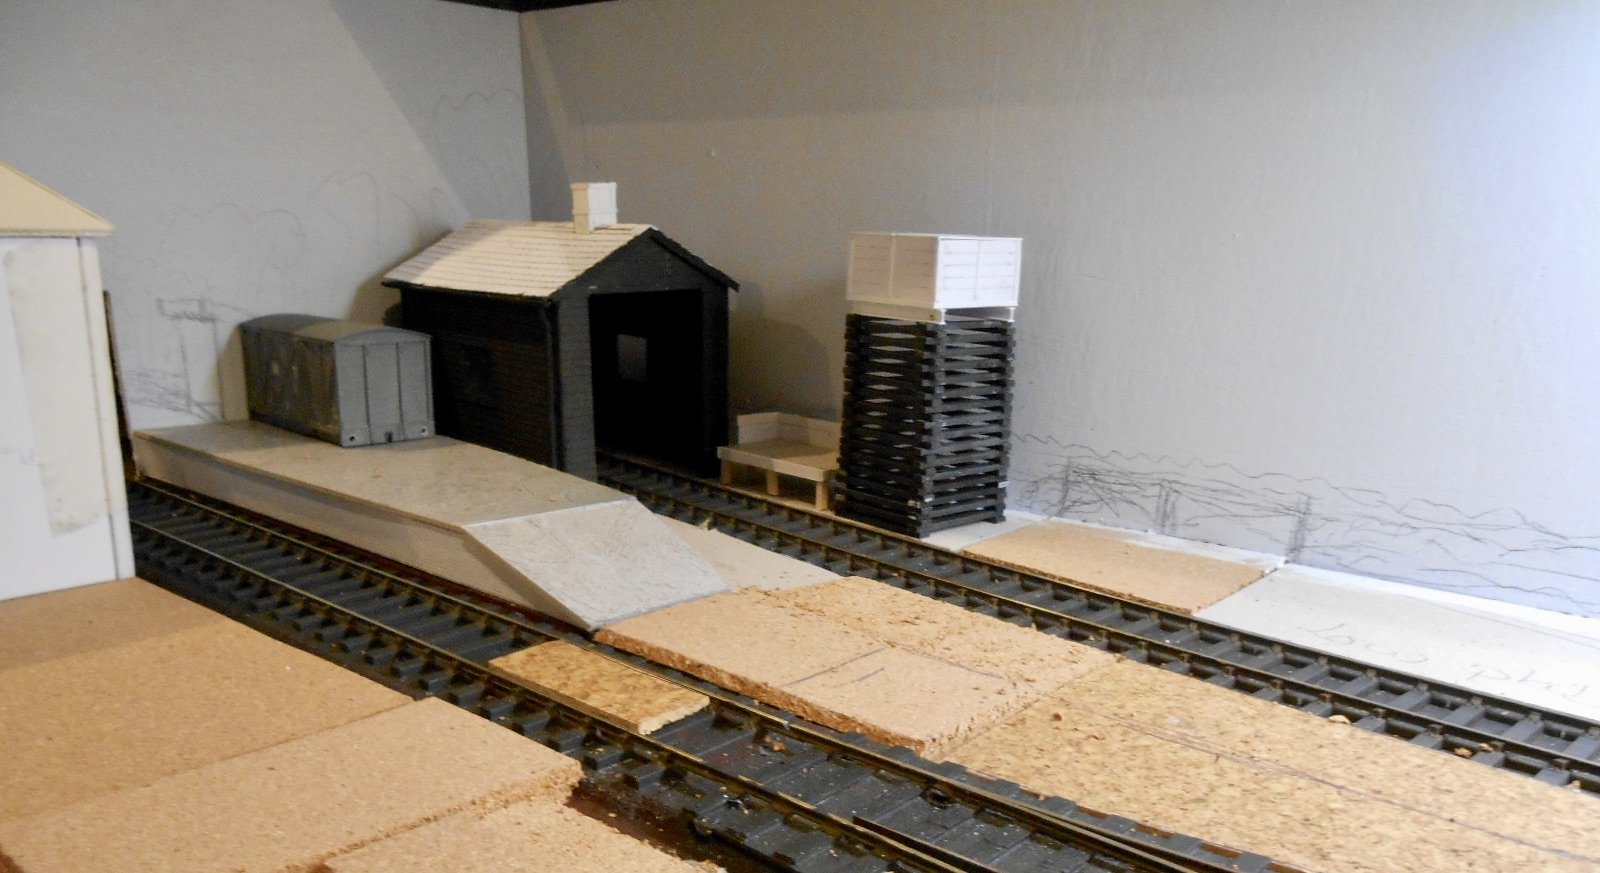
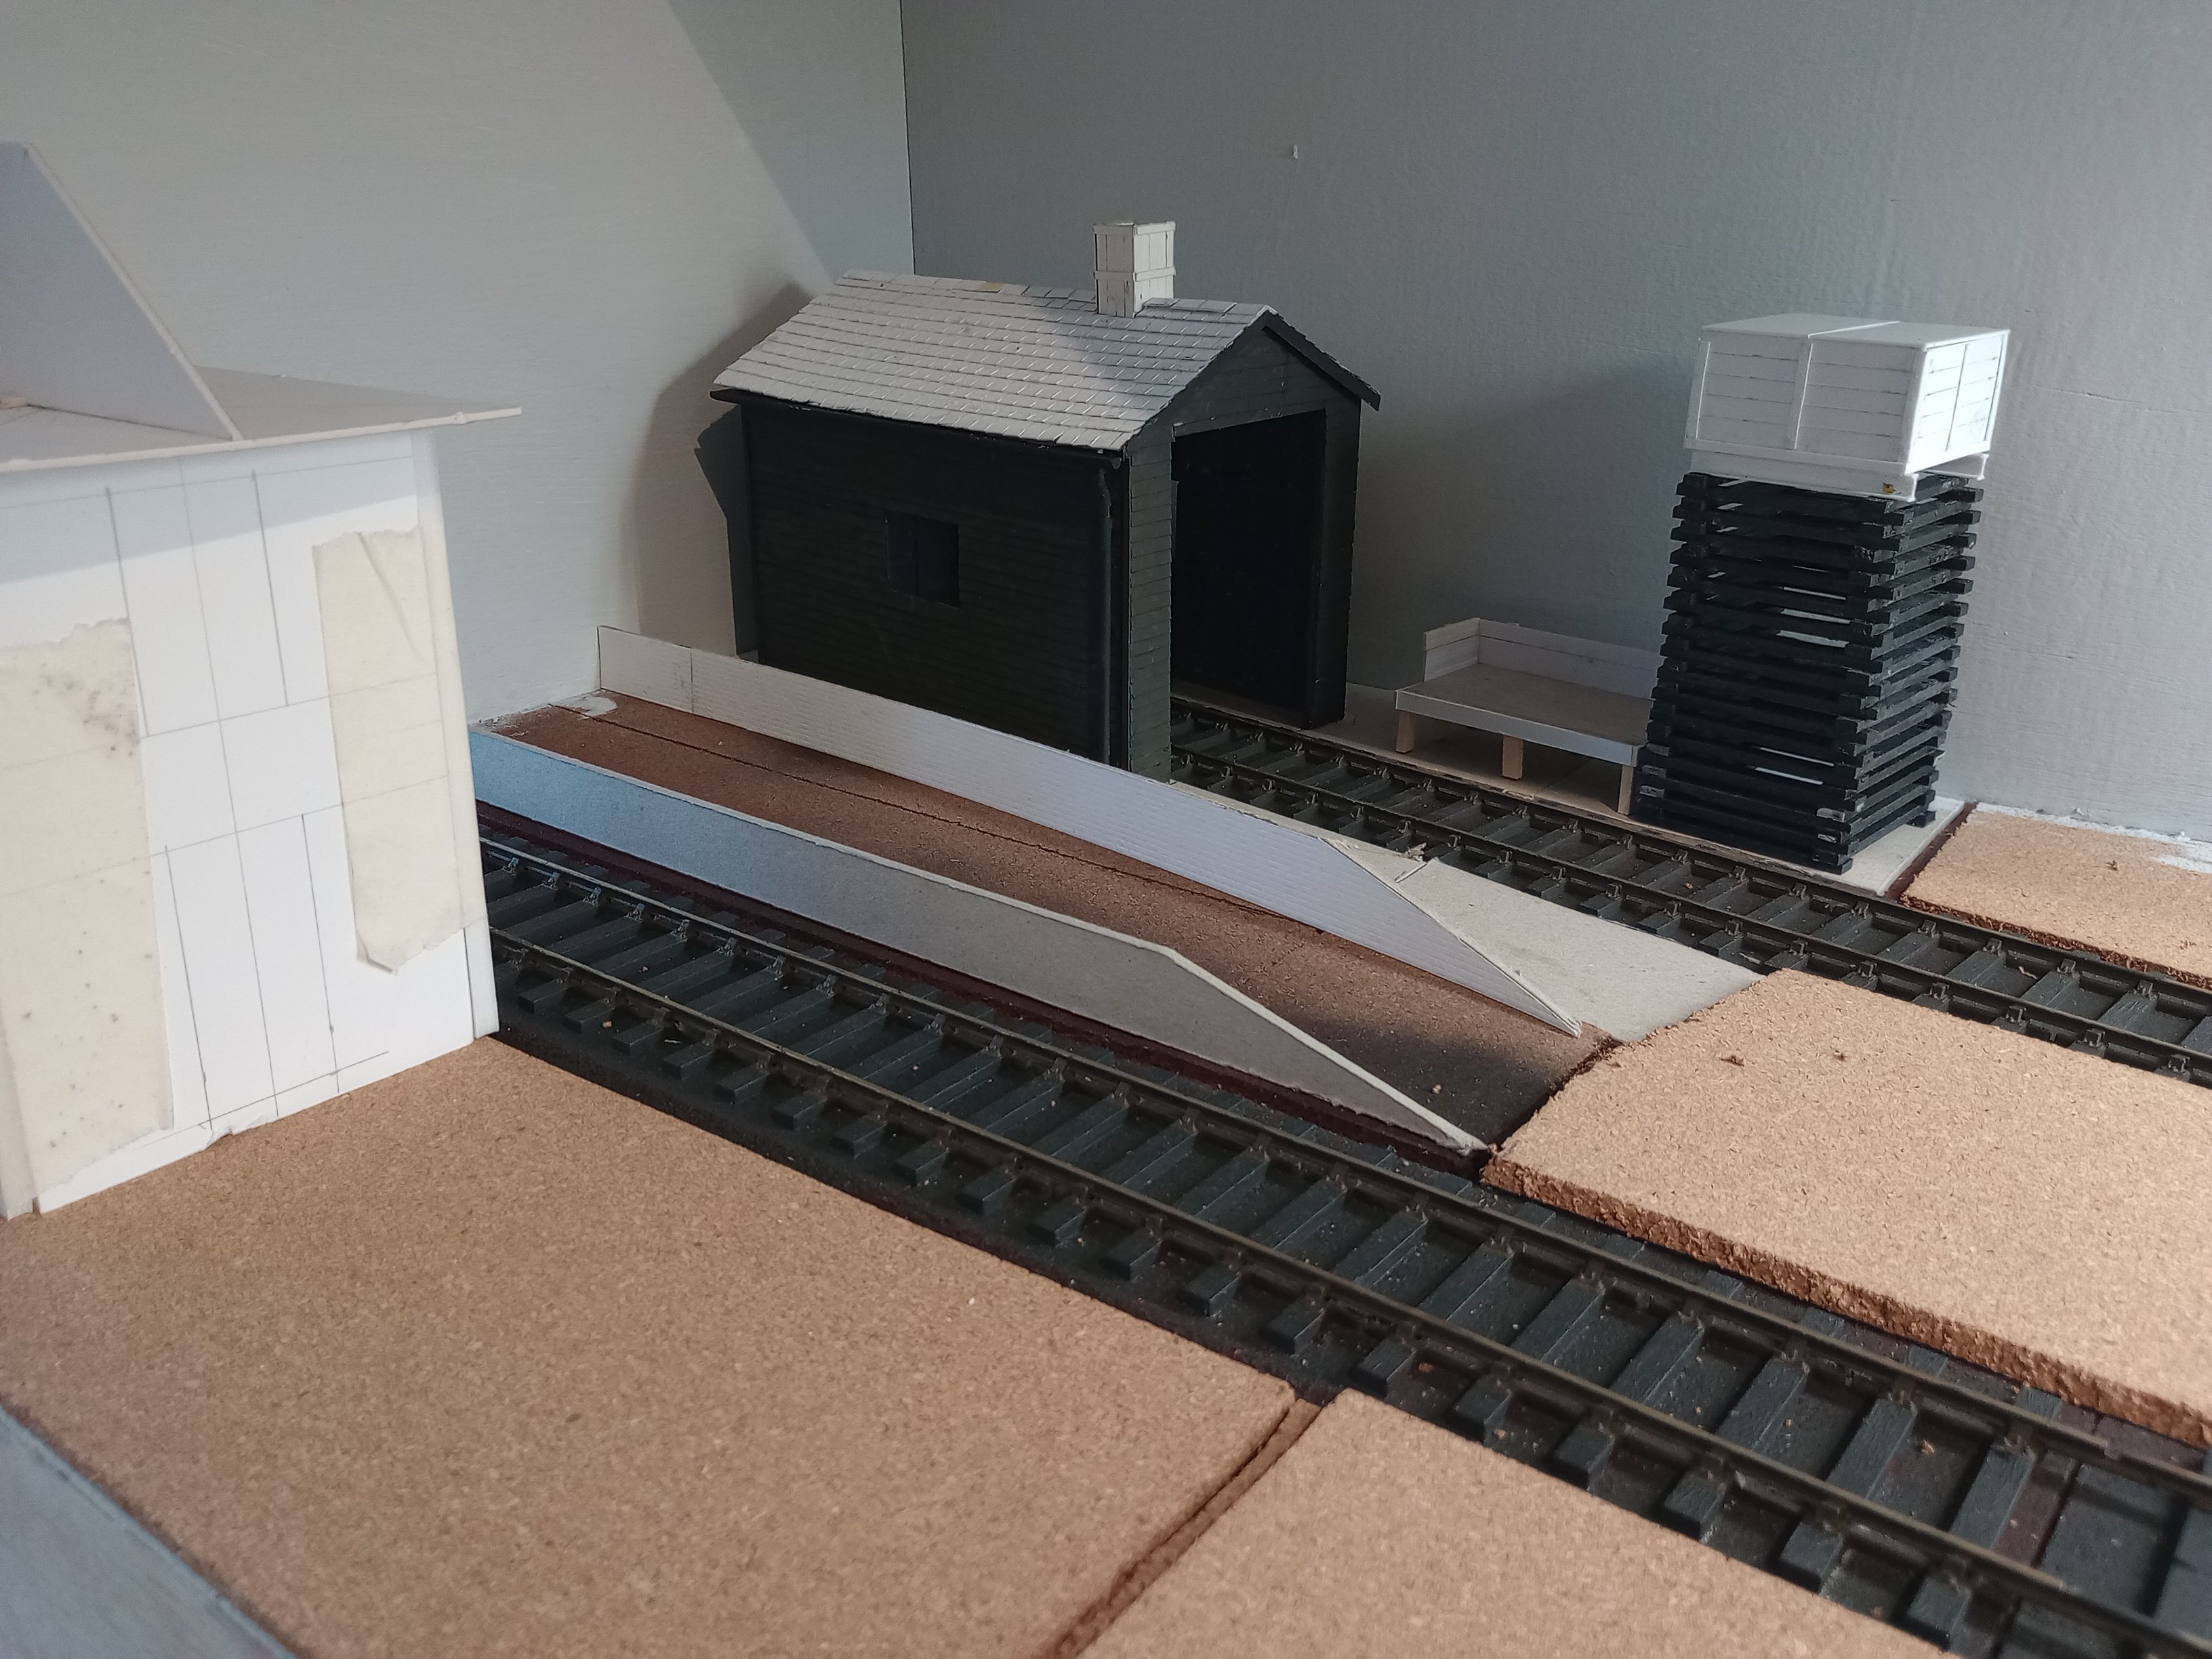
Decided to try and fill in a complete section this week, so made a start with the left hand side, where I'd got several pieces on the go, namely the platform, loco shed, water tank and coal stage - none of which had been painted, or indeed fixed down. However, the first job was to paint the some of the back scene: a few trees, plus a suggestion of the platform merging from 3D into 2D. The platform was was covered in some Howard Scenics embossed brickwork that I've had in a folder for a good 20 years [!], then coloured with wax acrylic crayons, followed by a wash of mortar colour. The platform surface is just thick card, with the paved edges being plastic sheet. Surprised myself by creating concrete colour with a mixed of mainly white, plus small amounts of yellow ochre & black, applied in several thin washes. I'd actually tested this on a garden water feature which I've been repairing & found it a good match for the real thing. The other items have received a couple of coats of paint, but now need detailing & weathering, but couldn't resist posing a few items of stock to help set the scene.

-
"Voiding the Warranty" - Mol's experiments in 21mm gauge
David Holman replied to Mol_PMB's topic in Irish Models
Proof, if needed, that small layouts can be very complex! -
The proposed Sligo Garrett would have been a 2-6-6-2 if I remember rightly. Have a copy of the outline drawing somewhere and the axle loading was only about twelve and a half tons. Somebody actually built one in 7mm scale, but certainly wasn't me as the thing would have been too long for Arigna Town's headshunt. As for a traction engine on the Sligo, I fear coal and water capacity would have been a problem! Ragstone Models were going to do a Sirapite type a few years ago, but don't think anything came of it, while Giles Favell (radio controlled 7mm road vehicles guru) certainly did a traction engine.
-
Colour wise, everything from pale grey onwards, it seems - all down to what is going on, on site. Gordon Gravett's new layout in in this month's Continental Modeller by the way - and debuts at Manchester next month. Back to French metre gauge, very simple but (as you'd expect) very, very good.
-
Yes George, a traction engine on rails. It is called Sirapite and was originally going to be named after a gypsum product - plaster of paris. Until somebody realised that Parisite didn't sound too good.
-
Think that sounds about right. Even in 7mm concrete has zero texture, so card and talc should work well. The difficult part with concrete is the colour. Humbrol concrete just isn't right, but then the shade varies according to age, weathering, dry or wet. Tullygrainy's probably the master. Let's wait to read what he suggests!
-
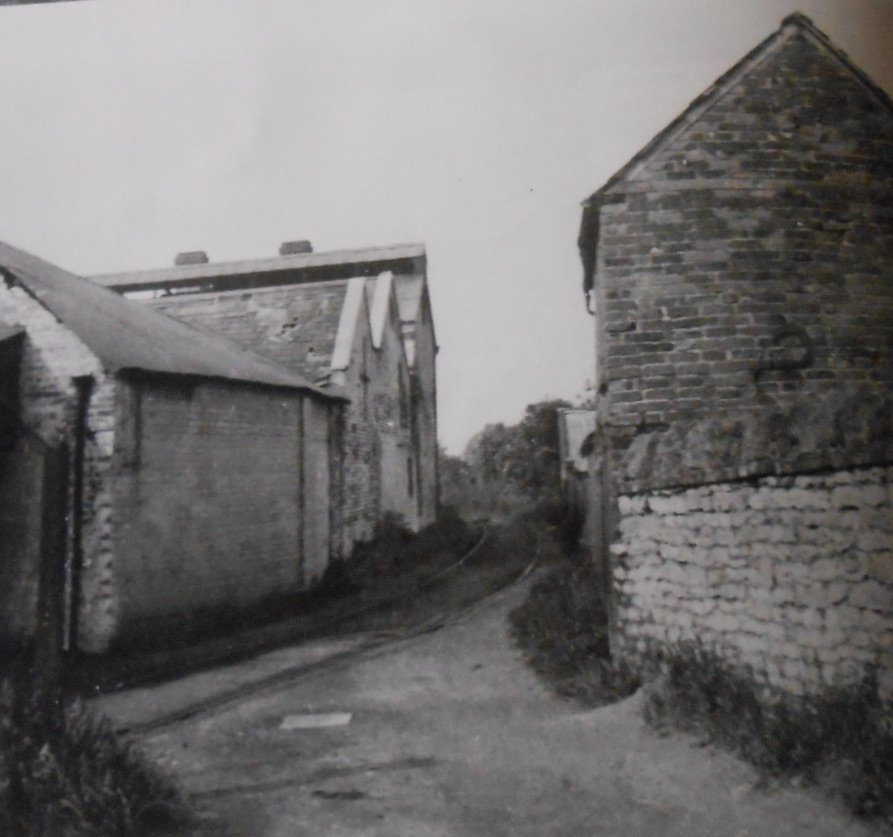
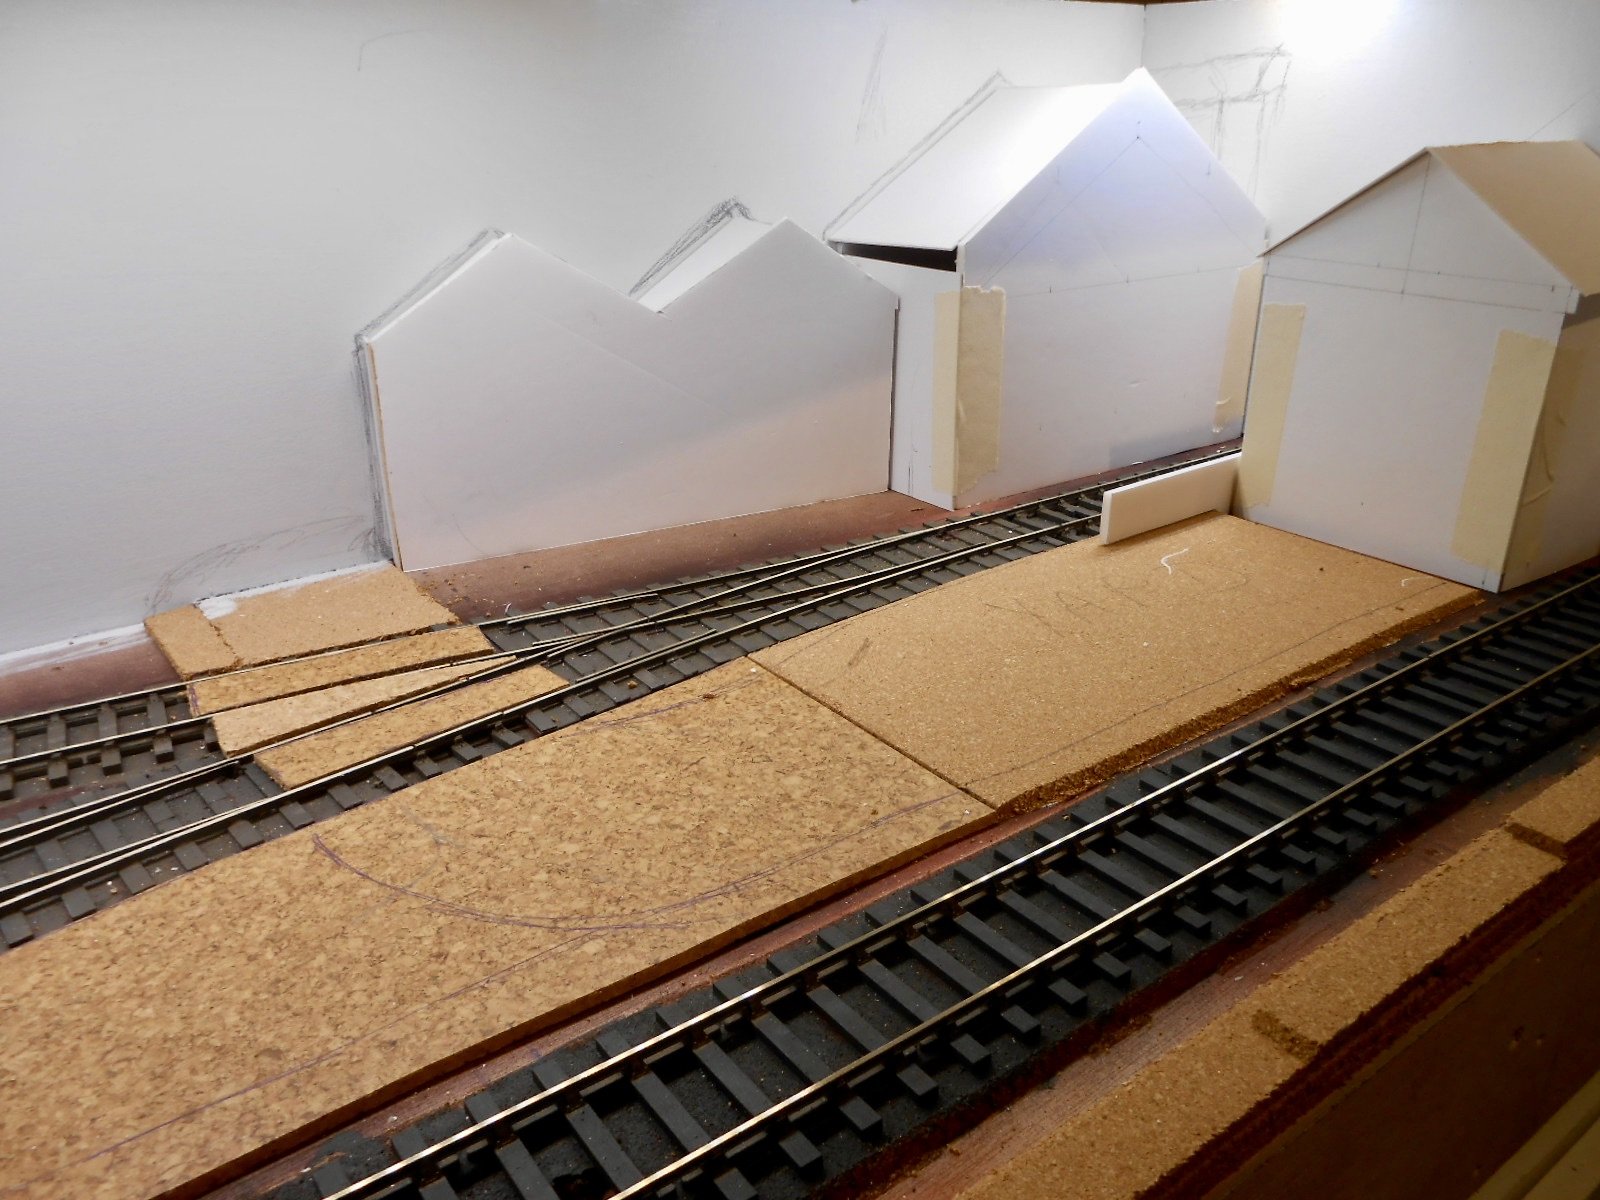
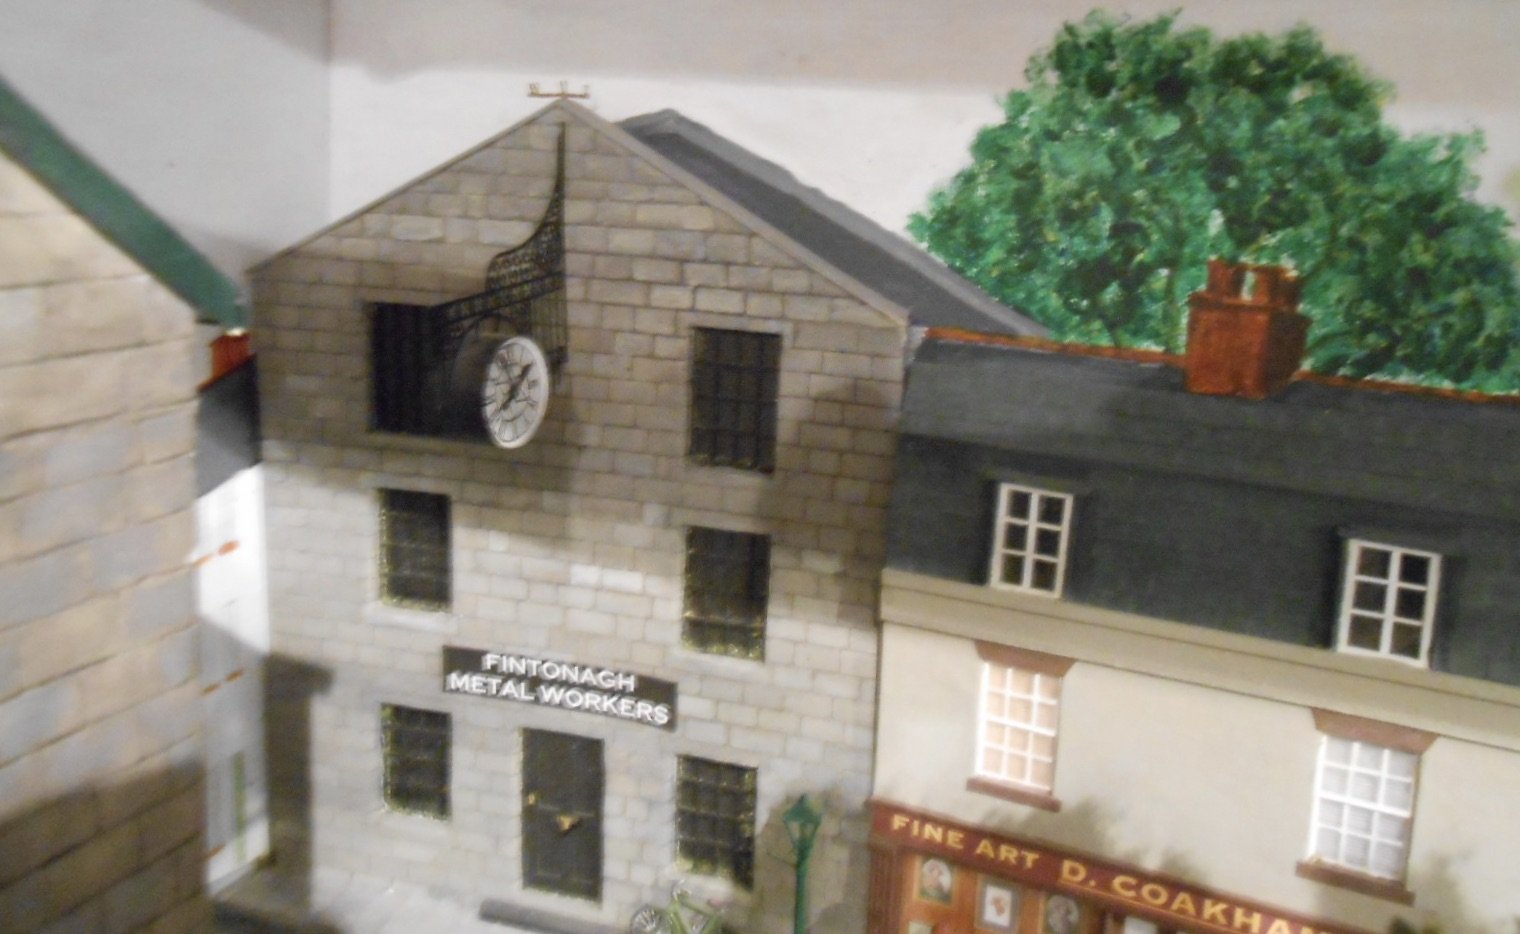
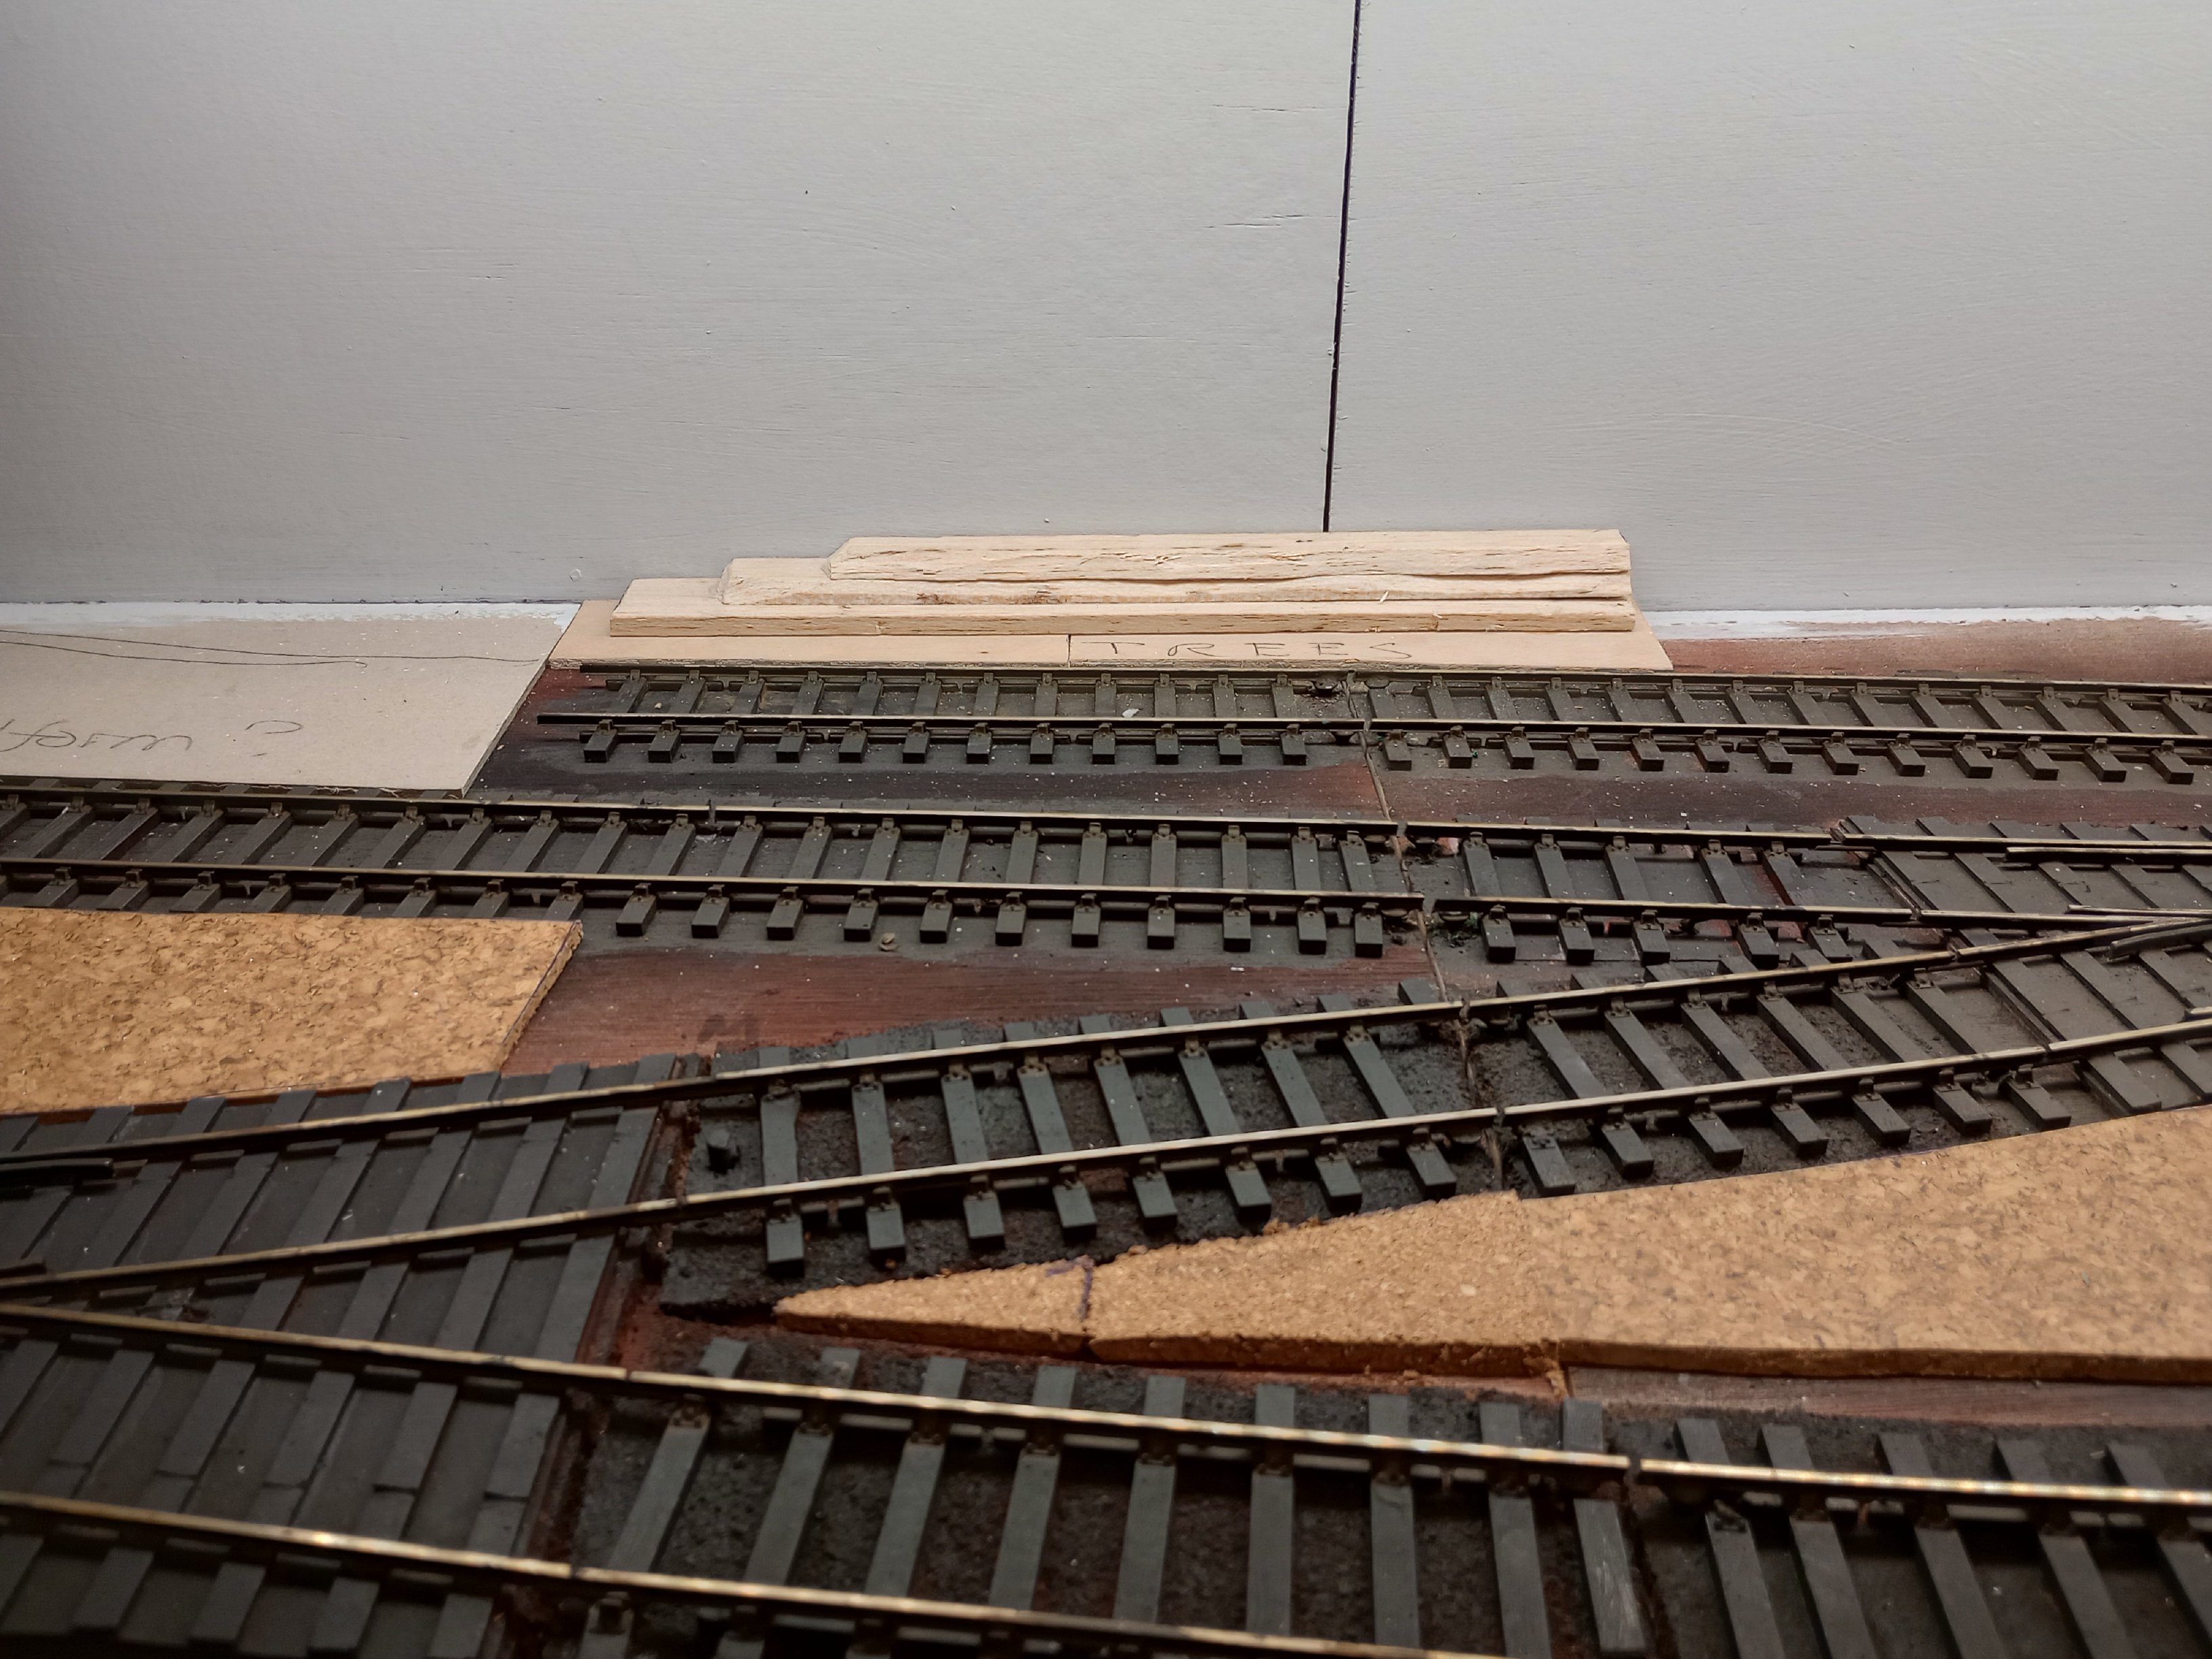
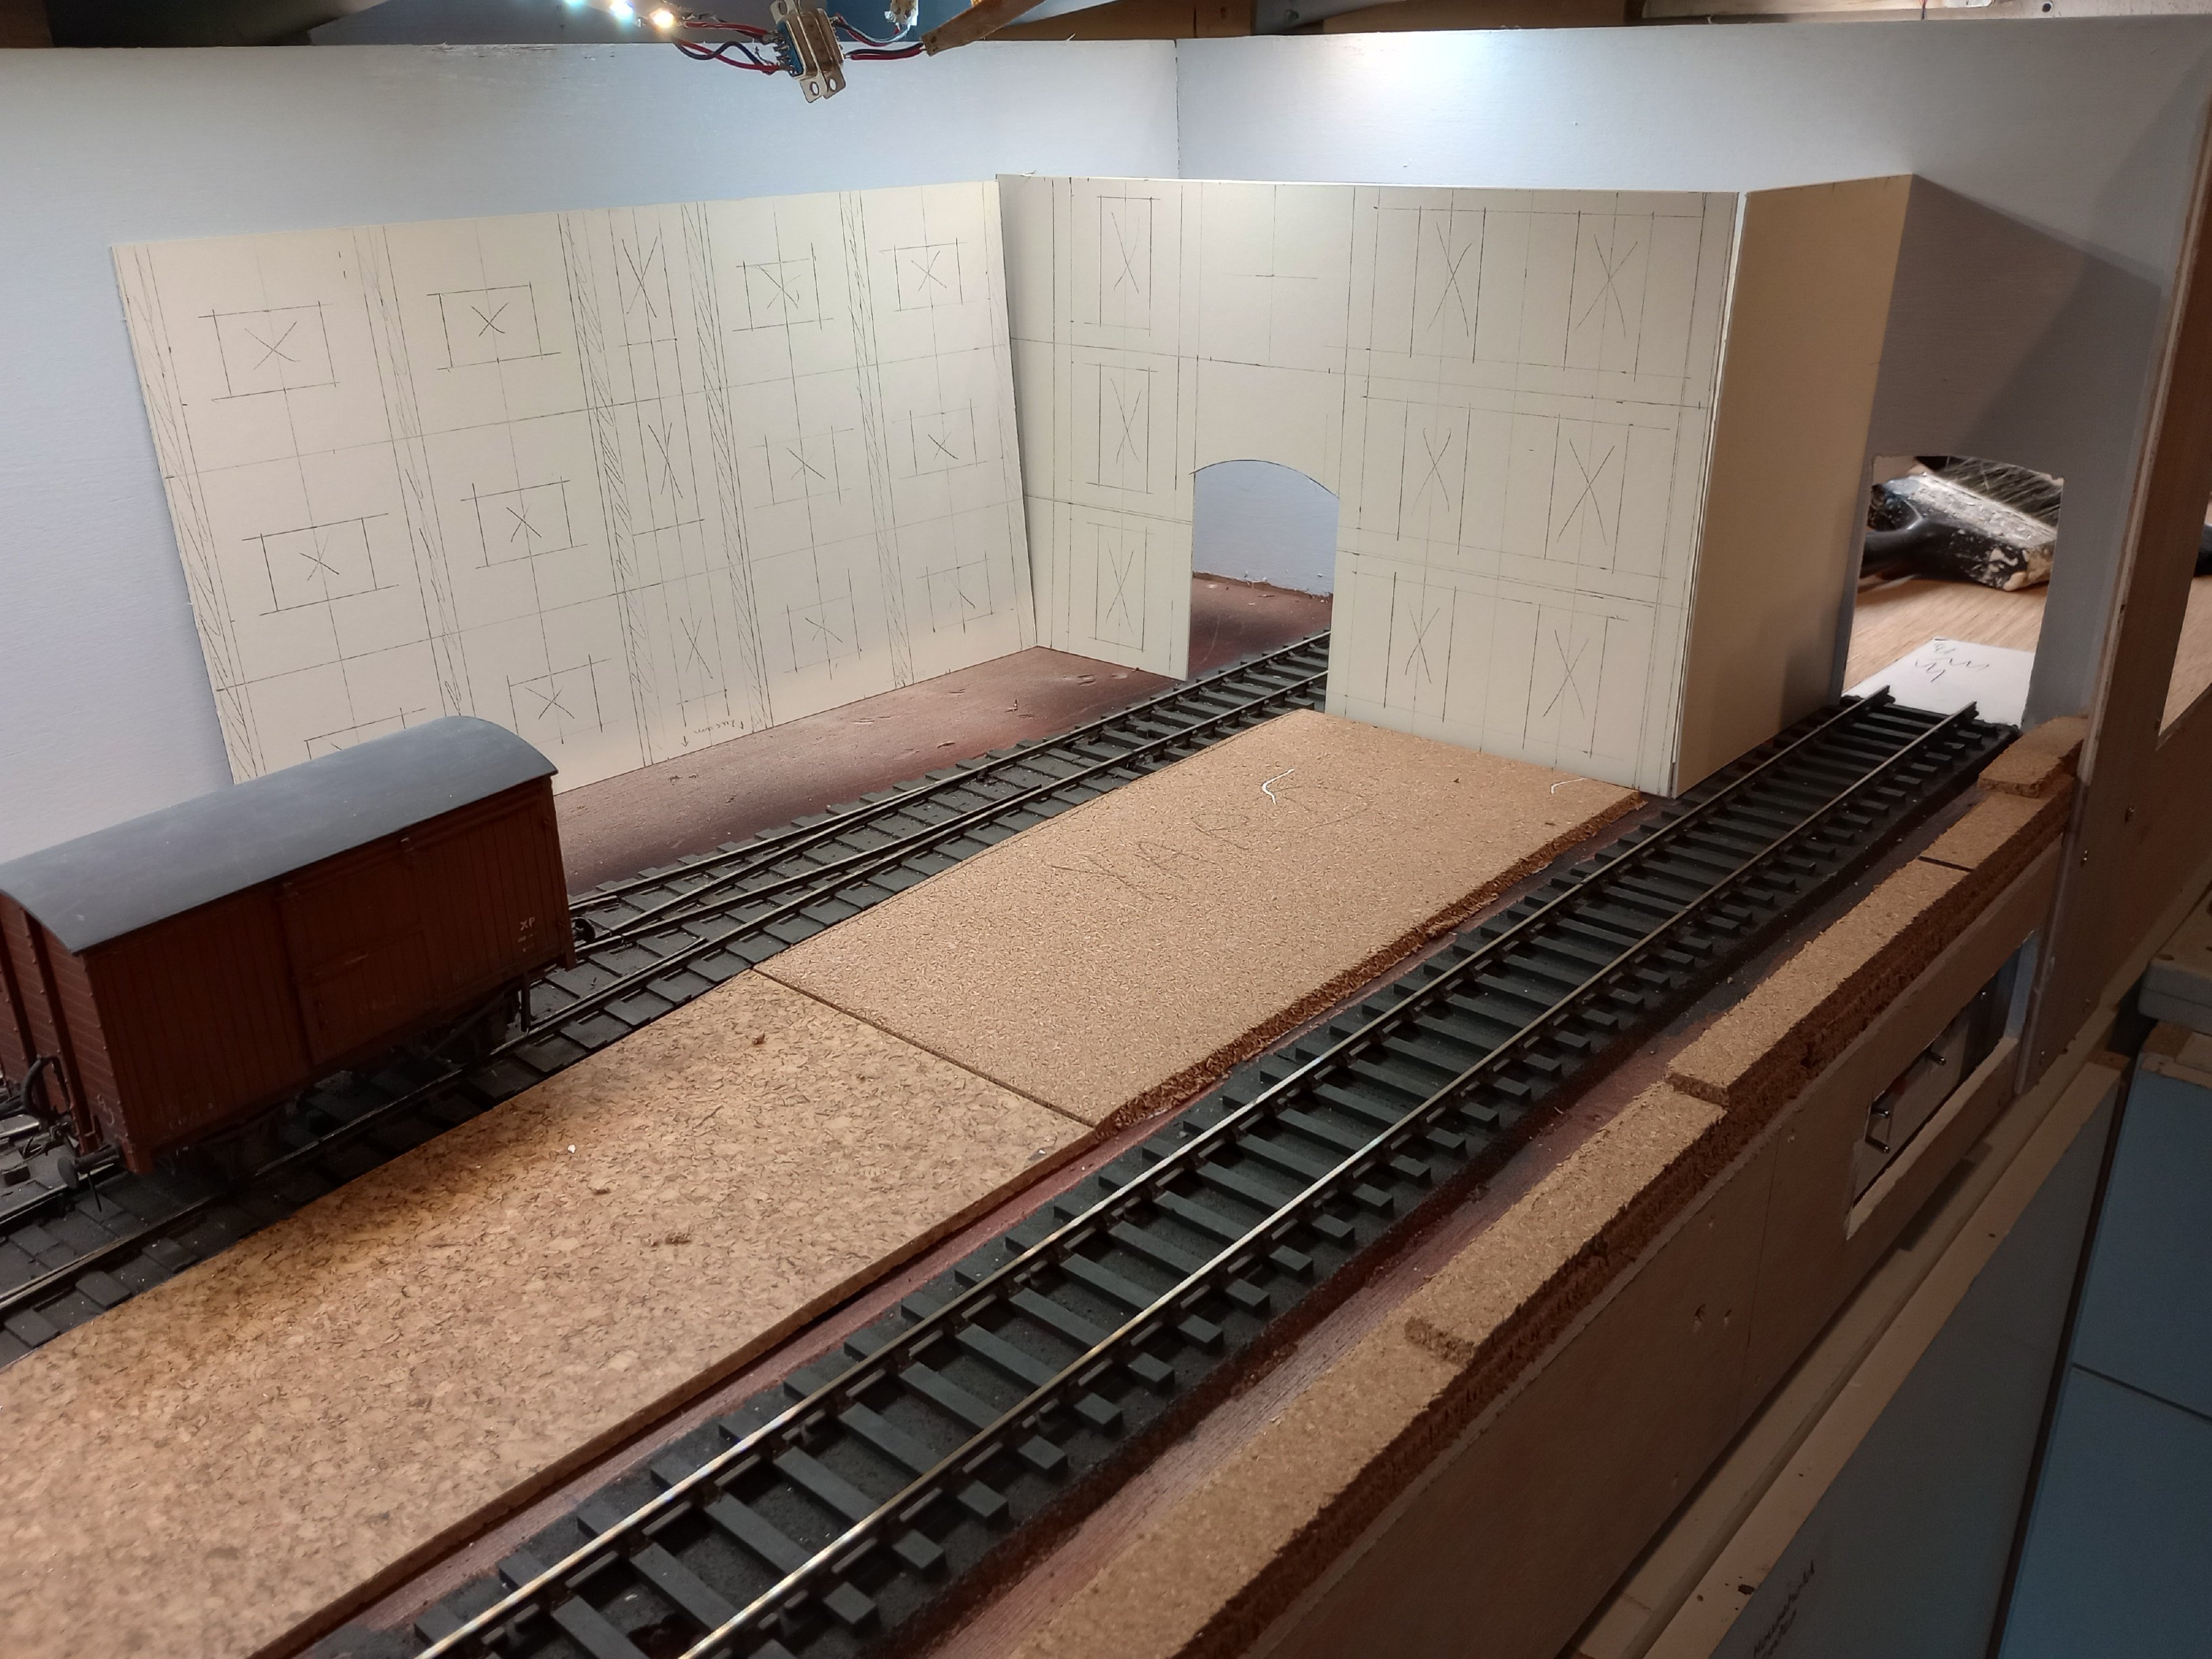
Managed to get both ends of the layout 'blocked in' now, having thought long and hard about the composition. Post Tolworth, have been asked by the Gauge 0 Guild to write an article about Swillybegs/Fintonagh & while drafting this realised what I had done for this layout was also needed now. Looking through my many books again for inspiration, found it in two of my favourite pictures - one of the exit from Wantage Town & the other of Leiston, & the line to Garrett Engineering Works. Each show a railway sneaking away between houses and industry: in the case of Wantage, the buildings on the left are the town gas works, so both options provide plenty of traffic. So the right hand side of the layout is a mix of the two, with what will be the works office filling the space between the two lines and low relief gas works buildings forming the back scene. An access road crosses the works tracks [and this will curve away behind the gasworks on the back scene]. The two slightly fuzzy pictures below show how I tried to make a very low relief building look like it is extending into the back scene. One thing I've always disliked is buildings that are simply cut off at the sky. On the other side of the layout, finally got around to mocking up a hipped roof for the station house and likewise more structure to the platform. An old Slaters Midland Railway van has been grounded on the platform, while behind this, on the back scene, the rest of the platform [including part of a shelter] has been sketched in to suggest the line disappearing into the distance. As for the centre of the layout, a small milk depot is still favourite, but for now, I have plenty to be getting on with.
- 89 replies
-
- 11
-
-
"Voiding the Warranty" - Mol's experiments in 21mm gauge
David Holman replied to Mol_PMB's topic in Irish Models
Swilybegs/Fintonagh, though 7mm scale has always used 4mm finescale clearances, ie 1mm flangeways through the points. My b2b are 19.2mm (ish), which chimes well with what John is saying. The rail is code 82 FB. Have found that anything more than 0.2mm variation in b2b can cause problems. Can only echo what he says about Gibson wheels: quality can be mixed. My main issue though has been around drivers coming loose on the axles. Once on, the fewer times you have to remove them during construction the better! Needless to say, a loose driver destroys both b2b and quartering. Give me Slaters wheels any day. Square, shouldered axle ends that automatically sort b2b and quartering, plus a strong brass centre too. MUCH simpler. -
Is it a coreless motor? I can't use these with my Gaugemaster feedback controller, so have to stick with open frame ones. 're the G2, on my 7mm scale one (Alphagraphix) the coupled wheels are solid, but the front carrying wheels have a springing arrangement, using NS wire. Pick ups on the tender wheels help running, though it needed plenty of weight in the boiler to manage even three six wheel coaches.
-
No lomacs (yet), but the idea of the layout is both to use some of my older models as well as providing an excuse for building a few new ones. Not sure about Sirapite, but the Heljan 48DS, especially in Express Dairy livery is very tempting, even though it would break the habit of a lifetime by buying something rtr!
-
Back in the day, when Mr O'Leary was doing his £1 flights from the larger island to GB airport, Cultra could be an ultimate day out. There really is something for everybody. Fabulous place.
-
Great fun. Thanks Patrick. Christmas cards anyone?
-
"Voiding the Warranty" - Mol's experiments in 21mm gauge
David Holman replied to Mol_PMB's topic in Irish Models
I agree with Father Ted. Black rarely looks right on any model, especially the smaller scales. It is too dense. Steam locomotives never stayed pristine for long and in portraying a working model, need to be toned down to reflect this. -
After two shows with my Irish stuff, fancied a change to the new layout. As ever, despite many ideas for the scenic side, things aren't quite working out as I'd thought. Am currently happy with the left side of the layout. The hole in the sky will be hidden by the station house (based on Snape), with interest in the corner provided by the platform end, a grounded van and the loco shed, complete with water tank and coal stage. Have managed to paint the back scene a suitable light, plain sky colour and at the moment the middle section is going to include a stand of fenland like wind break trees. These, from forest in a box (aka sea foam) will sit a top a low cutting The eventual intention is this section may become a small diary, but Wild Swan's Milk on the Rails is currently out of print. The right hand side was going to be based on Snape Maltings, but having drawn a couple of sections out on mounting board am thinking they look too big and rather dominate the scene, making it look unbalanced overall. Thoughts now turning to Garret's engineering works at Leiston, where their private line left the station via a narrow lane, squeezing between various buildings none of them particularly tall.
-
It does indeed make sense, Angus. My idea on shortening the iron wire dropper was to reduce its counter balance effect. Altering its angle and or making it J shaped, as per the instructions, is another idea, while your one of moving the main etch in board certainly makes sense. At the moment though, swapping the 15v magnet transformer to a 12v one is showing promise, so will continue tinkering!
-
Brian Harrap - a real track guru. Made some triple gauge pointwork back in the day. I think it featured in Model Railway Constructor magazine, so that was quite a while ago.
-
"Voiding the Warranty" - Mol's experiments in 21mm gauge
David Holman replied to Mol_PMB's topic in Irish Models
The Chatham Club 00 layout use this method and seems successful. When I used single rare earth magnets on Fintonagh, I had to replace all the steel axles on my wagons and coaches with 2mm brass wire as, the magnets found the steel ones highly attractive... -
Lovely stuff, as usual - though initially thought Mount Pleasant track was third rail electric until I zoomed in and saw the sleepers. A modelling opportunity for someone, msybe?