David Holman
-
Posts
4,359 -
Joined
-
Last visited
-
Days Won
117
Content Type
Profiles
Forums
Events
Gallery
Blogs
Everything posted by David Holman
-
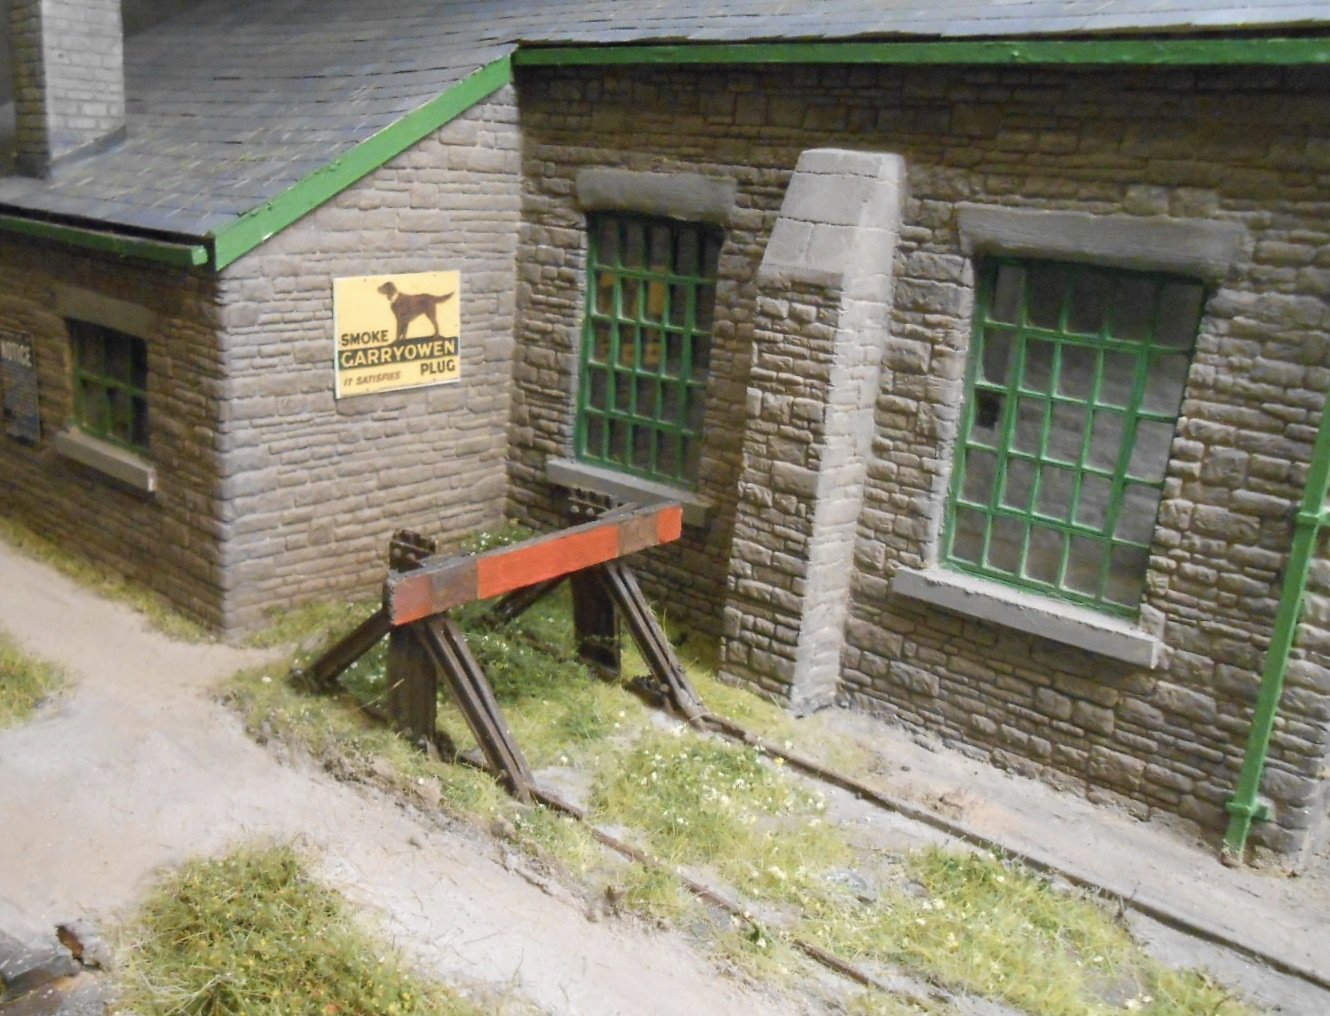
Full of fine details for us modellers and some very smart work on the level crossing too.
-
Walker Diesel Class F - ECMbuild in 4mm for OOn3
David Holman replied to murrayec's topic in Irish Models
A little jewel. Beautifully done.- 136 replies
-
- 1
-

-
- class f
- west clare
- (and 1 more)
-
Especially the lower one.
- 490 replies
-
- 1
-

-
- ballyercall
- layout
- (and 1 more)
-
Walker Diesel Class F - ECMbuild in 4mm for OOn3
David Holman replied to murrayec's topic in Irish Models
Oh my! And there was me thinking it was 7mm scale!- 136 replies
-
- 1
-
-
- class f
- west clare
- (and 1 more)
-
Not green though, so really ought to be dyed before planting in PVA. Not sure it would like being ripped off after the glue dries either.
-
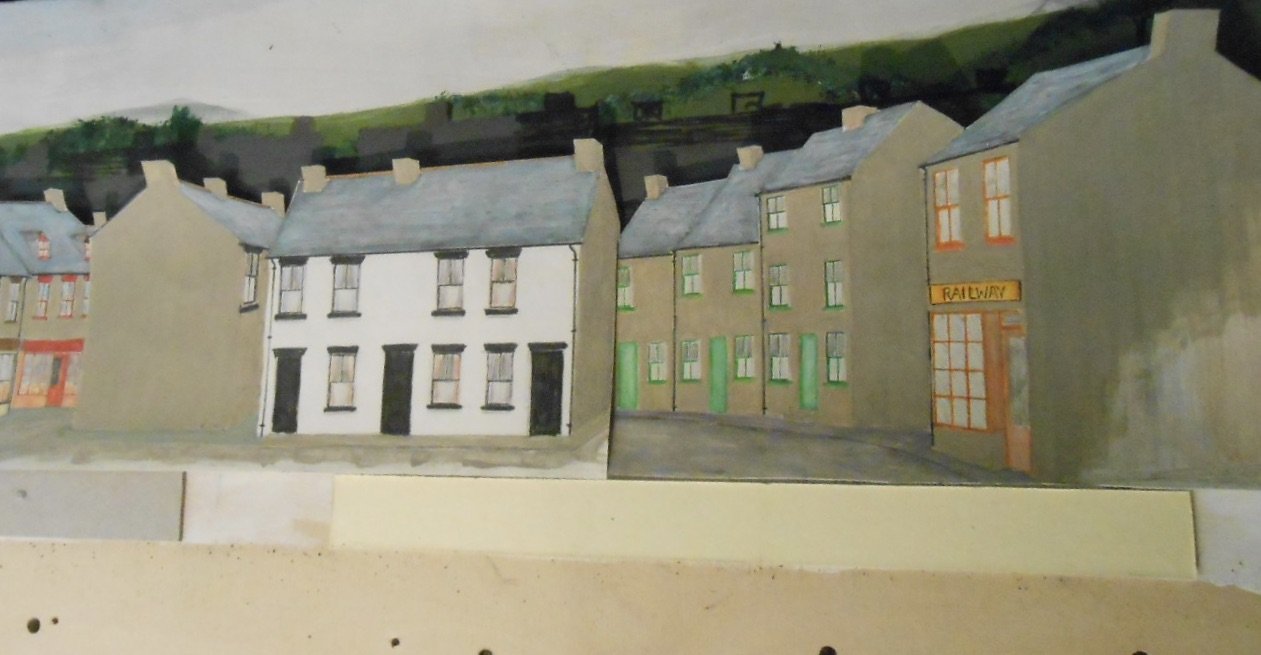
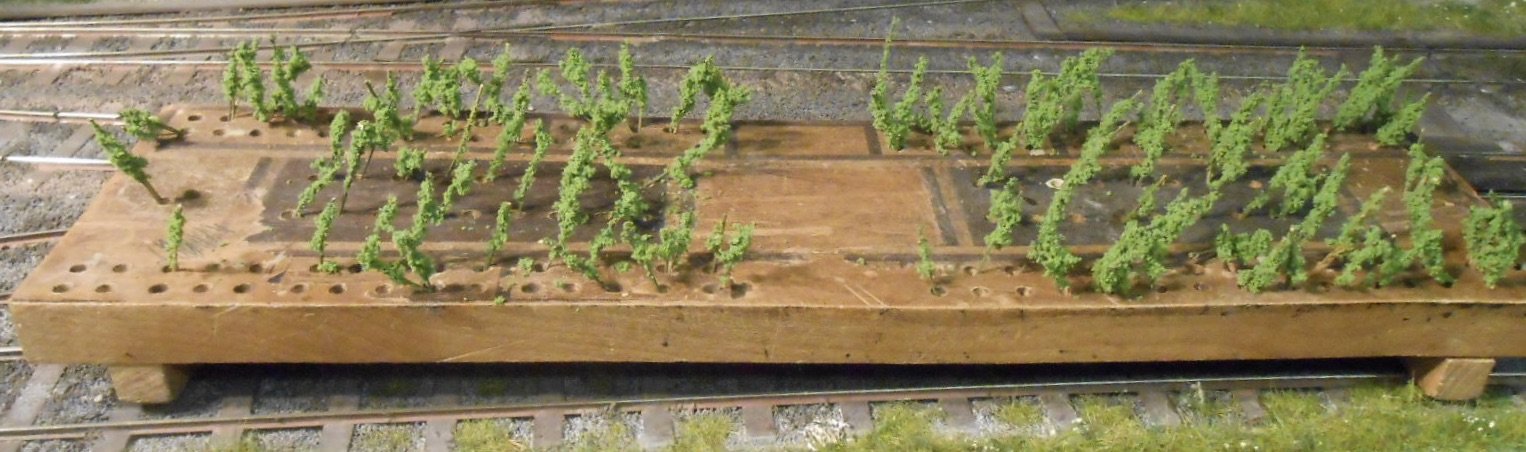
Moving on to Baseboard 1 After significant amounts of static grass and flocking, decided it was time for something different. That's the nice thing about layout building - when you've had enough of one thing, you can change to something else. First though, had to untangle my hawthorn trees from the electric drill bit [and each other], strip off the foliage and then repair the damage to the armatures with a hot glue gun, after which these needed painting again before being redressed with foliage. Thankfully it only took a morning's work before they were properly planted, as the pictures show. Still a bit of tidying up to do, but hopefully you get the idea. It was at this point that I shuffled the boards around, so I could get all round access to Baseboard 1. Hence boards 1 & 2 are now up against the end wall of the workshop, which somehow makes the scene look a lot neater than with the currently scruffy BB1 as a background. BB1 has been turned around so I can get to the rear - actually the old front of Arigna. What was the cattle dock is now where the goods shed and co-operative warehouse are, plus a small area of flat standing. The latter needed profiling to BB2, so there was still a bit of filler mixing and spreading to do. While I was at it, I scraped out most of the grass and weeds in the track, replacing it with more ash ballast. The idea is that, covering two periods, the track will need to be in better condition than Arigna's, though a few strands of grass can be seen poking through, which is still quite nice. So, on to some different modelling. Much of it has been fairly mundane, things like preparing the loading dock surfaces for the goods shed and Co-op, plus putting back the walls and stop blocks at the end of the platform. I've still got all the different castings of loads for these areas, mainly from Skytrex. Since then, I've been doing a bit of fettling on the goods shed, though the main work has been to make the pillars holding up the front of the Co-op. Vaguely Colonel H. F. Stephens in style [I'm sure the fact that we share a name is key to my interest in minor railways], I can't vouch for any authenticity, but at least the Co-op [which is a semi-flat] now stands up on its own! The two back scenes have been removed of course and the last of the photos show what I'm plotting for the end board. Like all the other back scenes, it will be profiled to the scenery/buildings, with the sky painted on a second board bolted behind. However, on this end board I want to put an impression of the town. For this, I've been toying with the idea of a bit of decoupage - where buildings are not just painted on the back scene, but appear as layers of card flats. Interestingly, at the Stevenage show in January someone was demonstrating just this, so hopefully I am heading on the right lines. The final picture gives an idea of what i'm trying to do.

- 179 replies
-
- 14
-
-

-
Clearly it is all in the genes! All power to your elbows!
-
Stuff like this is what makes this forum so wonderful!
-
Need I say more?
-
Currently, on this forum, there are two people doing 7mm broad gauge - Galteemore and me. Is anyone else tempted? Come on in, the water's lovely!
-
All sounds good, folks! The thing about a Sentinel is there would be no wheel quartering involved, being just discs. Not sure what the axles are, but guess they could be standard Slaters wagon type with the pinpoint ends ground off flush with the wheel. If so, replacing the axles shouldn't be too difficult. The only other issue then is whether all the nice details below the sole bars are far enough out to enable the wheels to be moved out 2mm each side without drastic surgery. Another possibility would be if the wheels themselves are meaty enough, then they could just be tweaked out with some filler in the centre to hide the hole. If anyone gets the chance to have a look at the model, I'd be very interested to know.
-
The new Railway Modeller has a review of the above and it looks like it might just be possible to ease the wheels out to 36.75mm gauge. Why? The Limerick market branch used a couple of Sentinels and strikes me that this could form an interesting minimal space diorama. You'd still have to build the track and put together a few wagons, but could be a nice way to get into the 'senior scale'. Of course, it may be that Dapol's model is not the correct version, but the arrival of such things always get me thinking. Indeed, could I justify one on Belmullet's harbour branch??
-
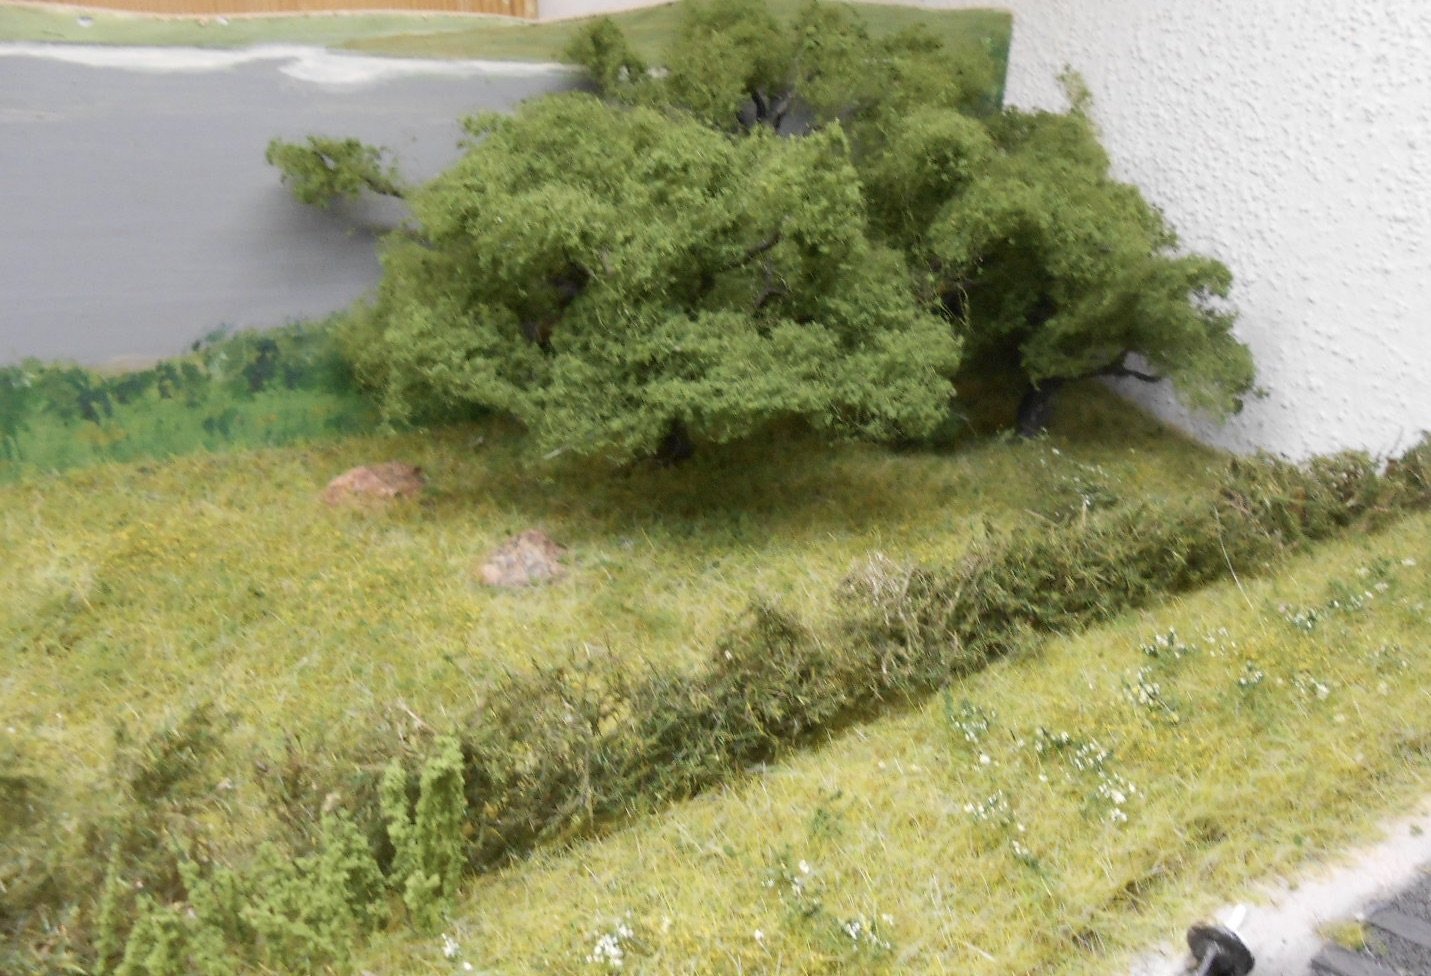
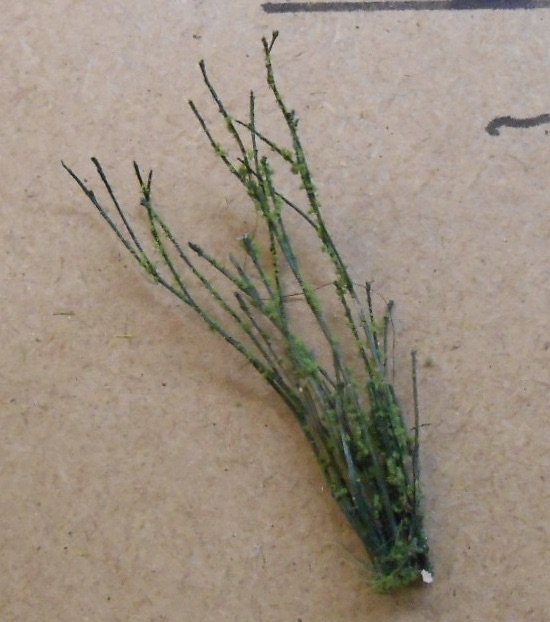
Hawthorn trees, well yes. More like a single hawthorn this afternoon. Had got all seven finished and foliated and was carefully planting in the corner of the field. This involved drilling holes in the ground cover and somehow a stray strand of foliage got caught in the drill and barely two seconds later four of the trees were wrapped round the drill and each other... It was one of those shock horror occasions when you can't believe umpteen hours of work has been destroyed in just a couple of seconds. Since then, have managed to untangle the mess, strip off the foliage and been trying to repair the trunks and branches with a hot glue gun. It then all needs repainting and defoliating. There really aren't enough rude words to describe how I feel!
-
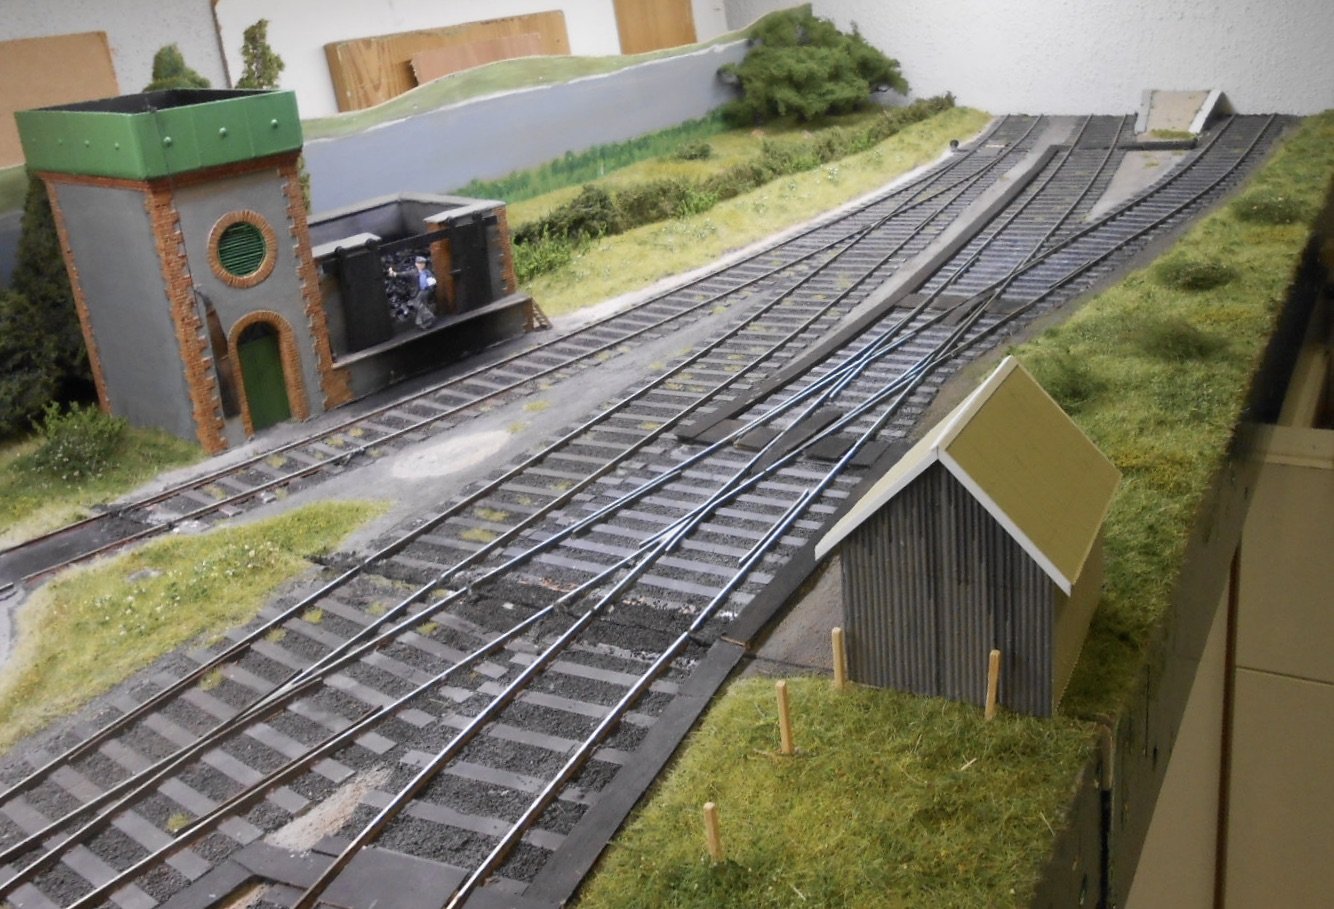
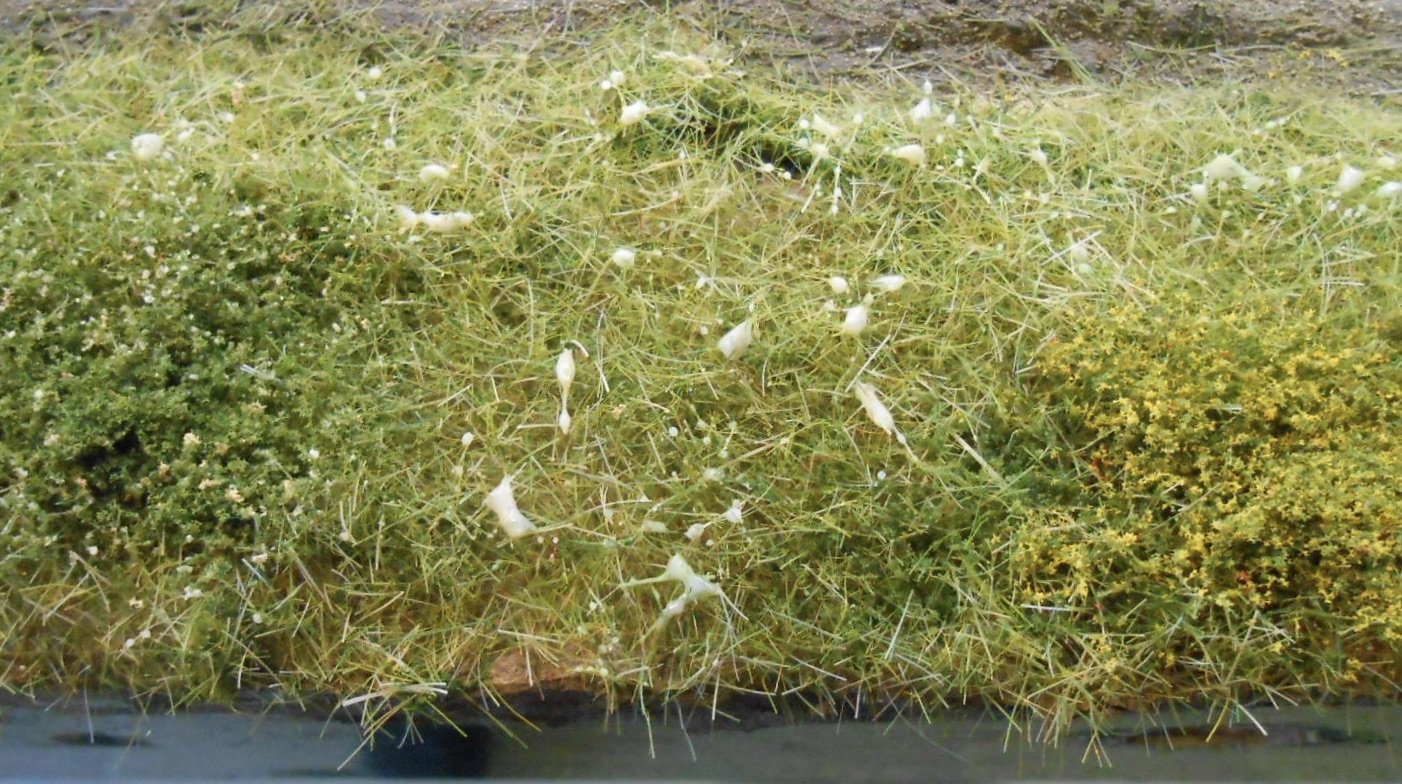
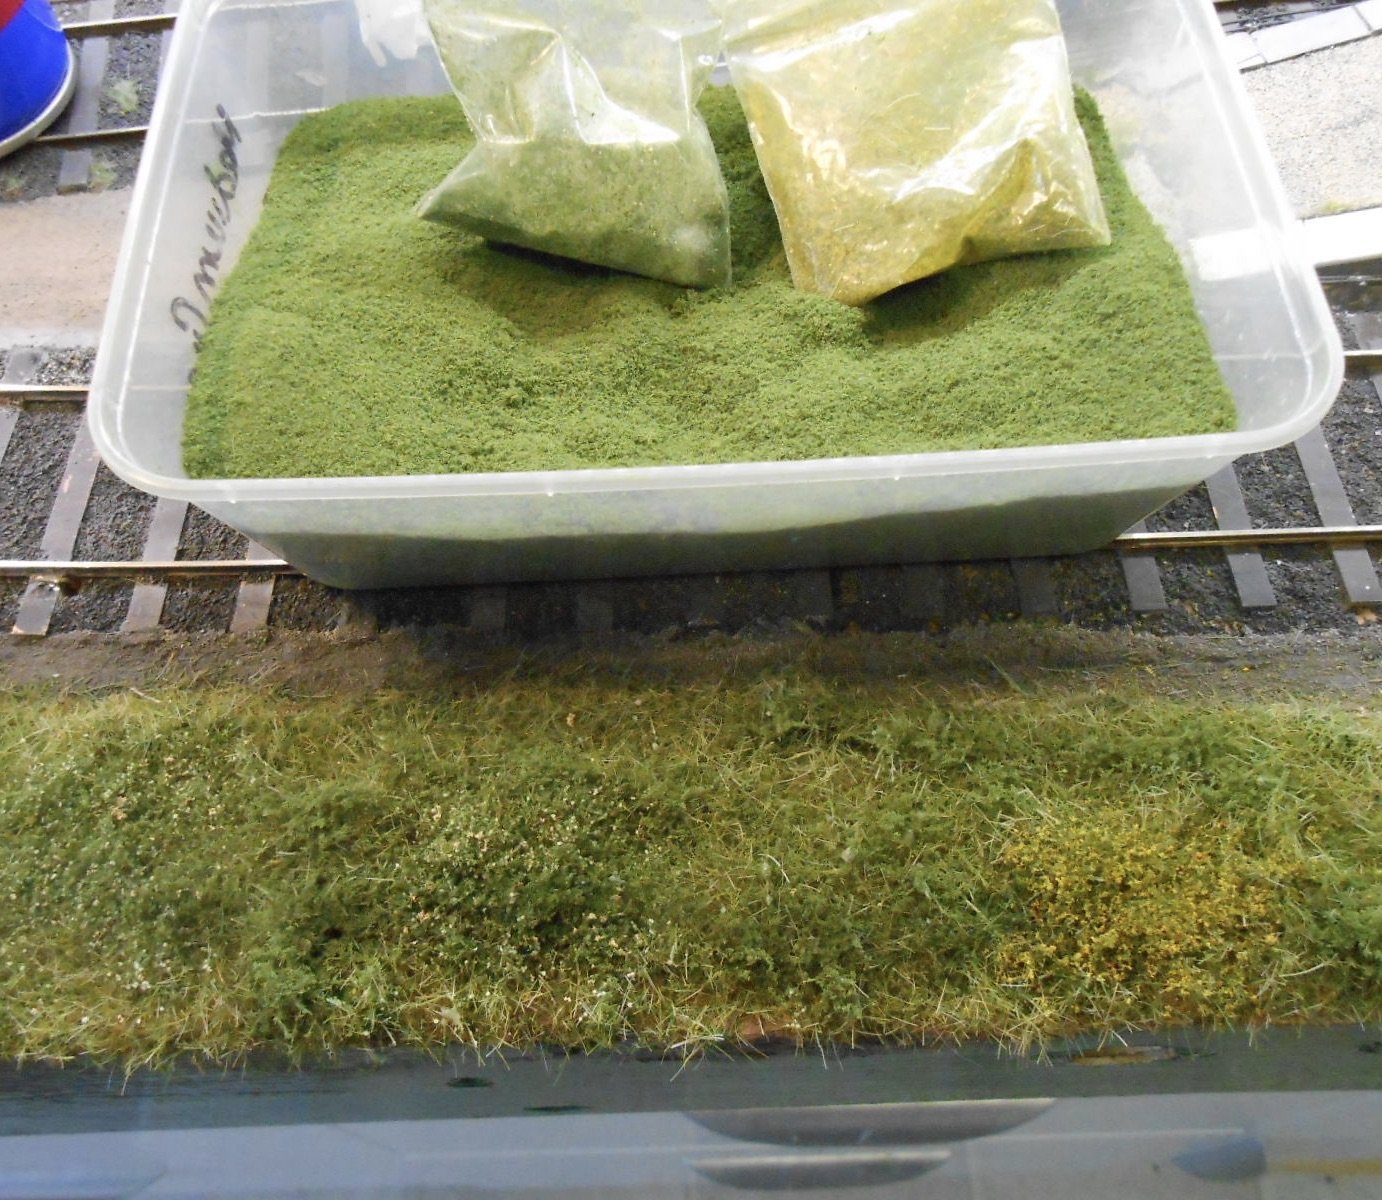
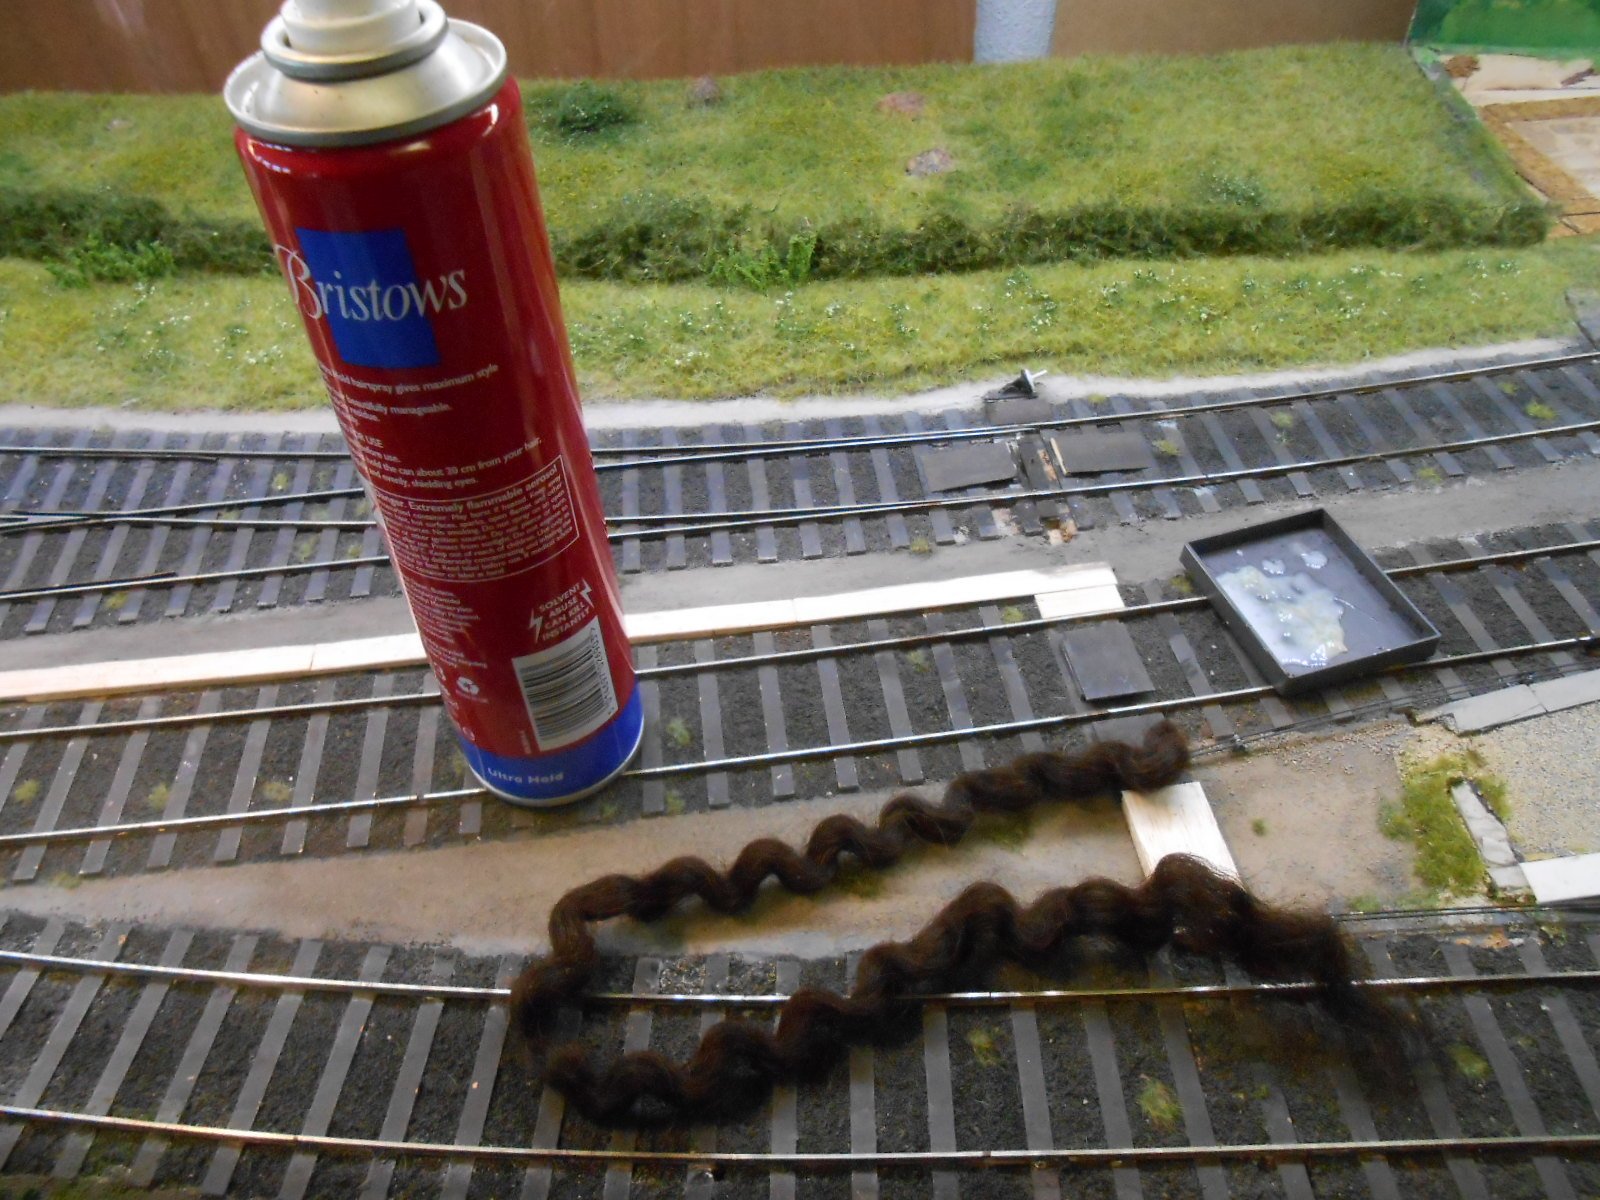
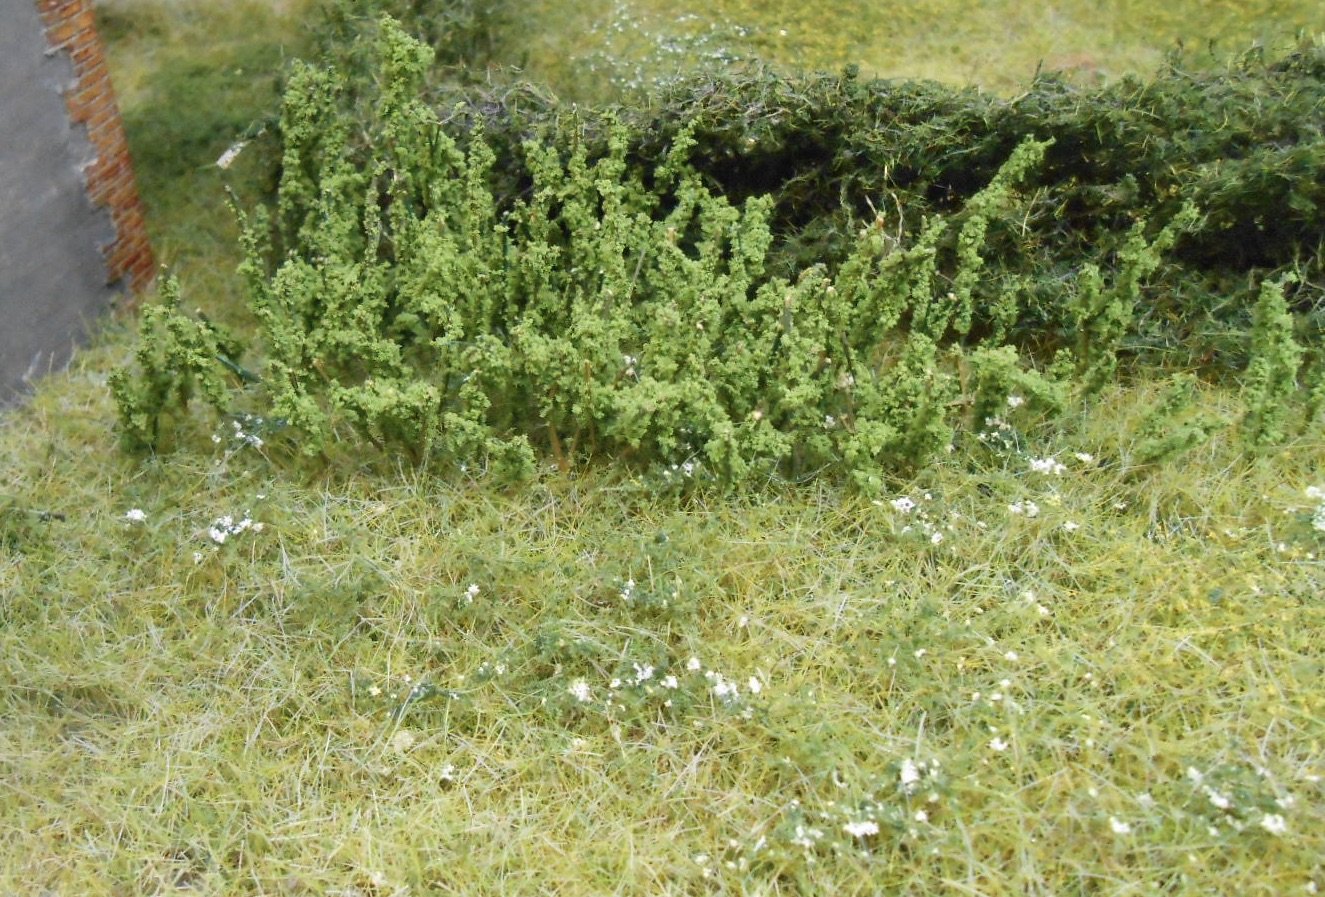
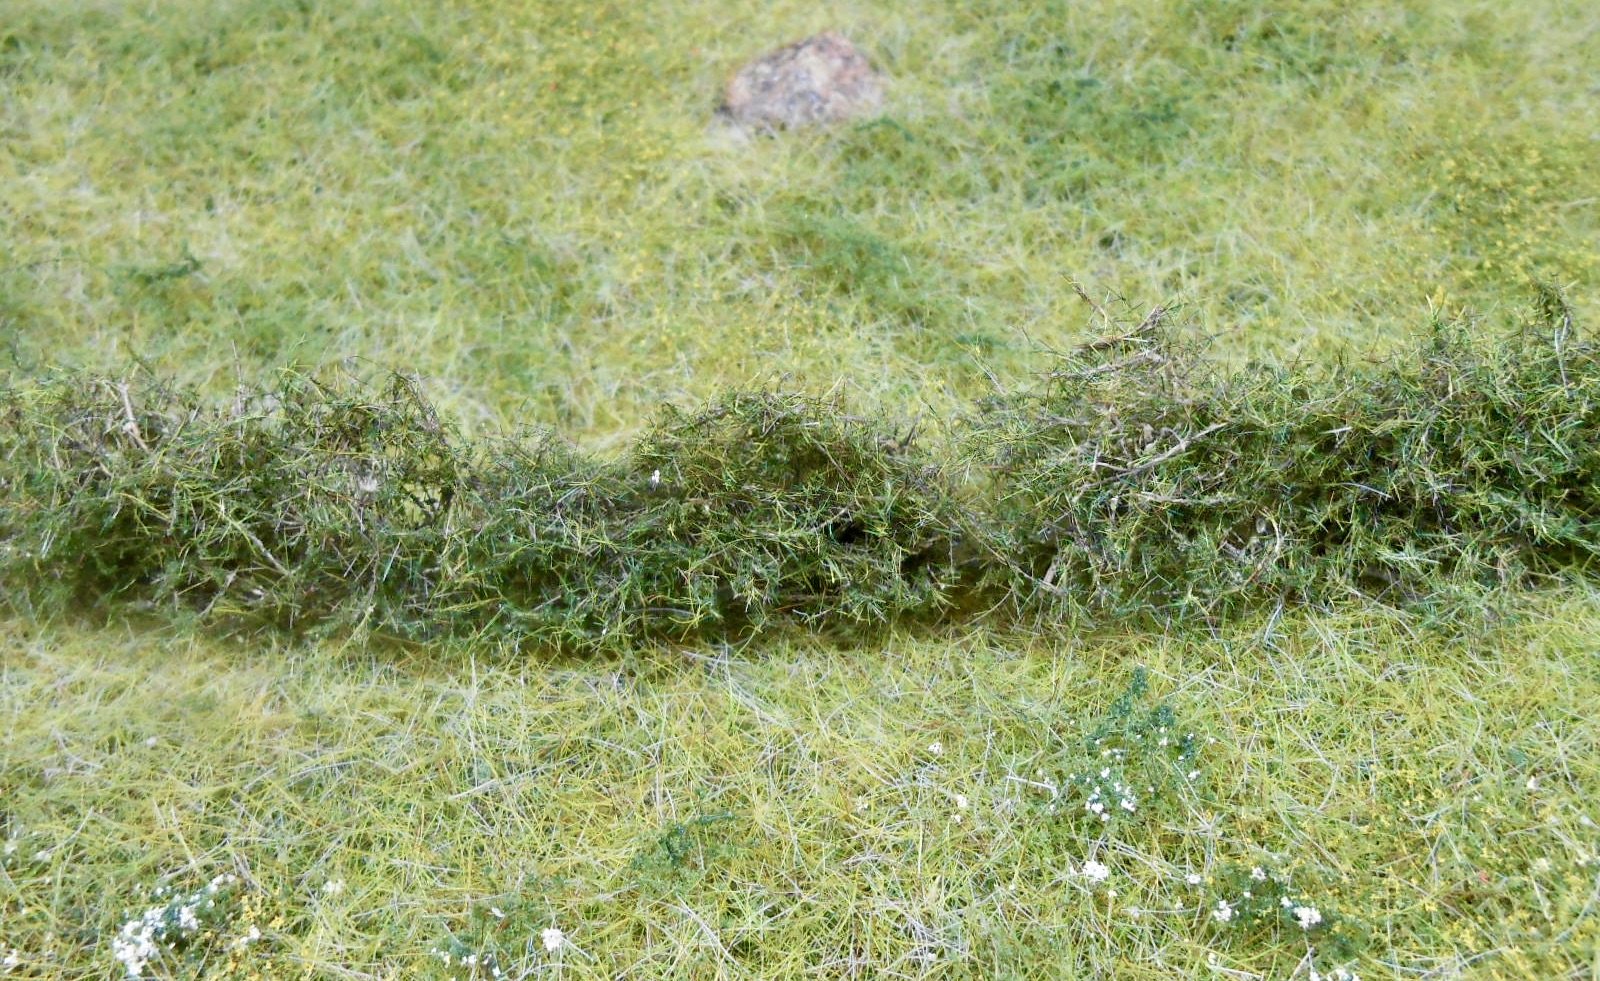
Weeds & other scenics Baseboard two is progressing: Nettles - proper old school scenics here. I used Woodlands coarse fibres [see pics], cut up into short lengths. Each length is then dipped in PVA and then into some medium crumb from Greenscene, before being put aside [in an old cribbage board], to dry. A couple of hundred of these and next day, it was time for planting! Next up, some work on the joint between baseboards two and three. As before, used clingfilm in the joint, before mixing fine ash ballast with neat PVA and the filling the cracks - ensuring the ground cover was level both sides. Other work on the join involved doing more static grass and foliage cover as below. The front of baseboard two has been causing me a few furrowed brows recently, but as with the rear section, I've decided to keep things simple and mostly go with rough grass, brambles, etc. Hence a layer of mixed foam scatter, with static grass on top of that. Once dry, some extra depth was added with further static grass, held in place with cheap hair spray. Further layers were then added in the same way, but this time using fine scatter, mixed with yellow, white and pink granules from Woodlands. The final touch [thus far, anyway], has been to add brambles using Postiche [see pic if you don't know what this is] with hairspray and fine scatter, plus some other weeds. These are created by carefully wiping PVA over the tops of the grass fibres and then adding fine scatter on top of this, before vacuuming the whole area afterwards to remove any excess. Other work has focussed on covering for the point rodding as per SLNCR in Eniskillen. Meanwhile, seven small hawthorn [ish] trees have been made, hopefully to blend in with the painted back scene across baseboards two and one. The final picture should give an idea of where this is going.
- 179 replies
-
- 12
-
-
-
Looks good to me too!
-
What a fine piece of modelling and creative thinking. Lovely job!
-
Wow, thanks Ken! Imagineering made real.
-
Baseboard crates (for exhibition transport)? Storage siding baseboards? Very neat, whatever they are.
-
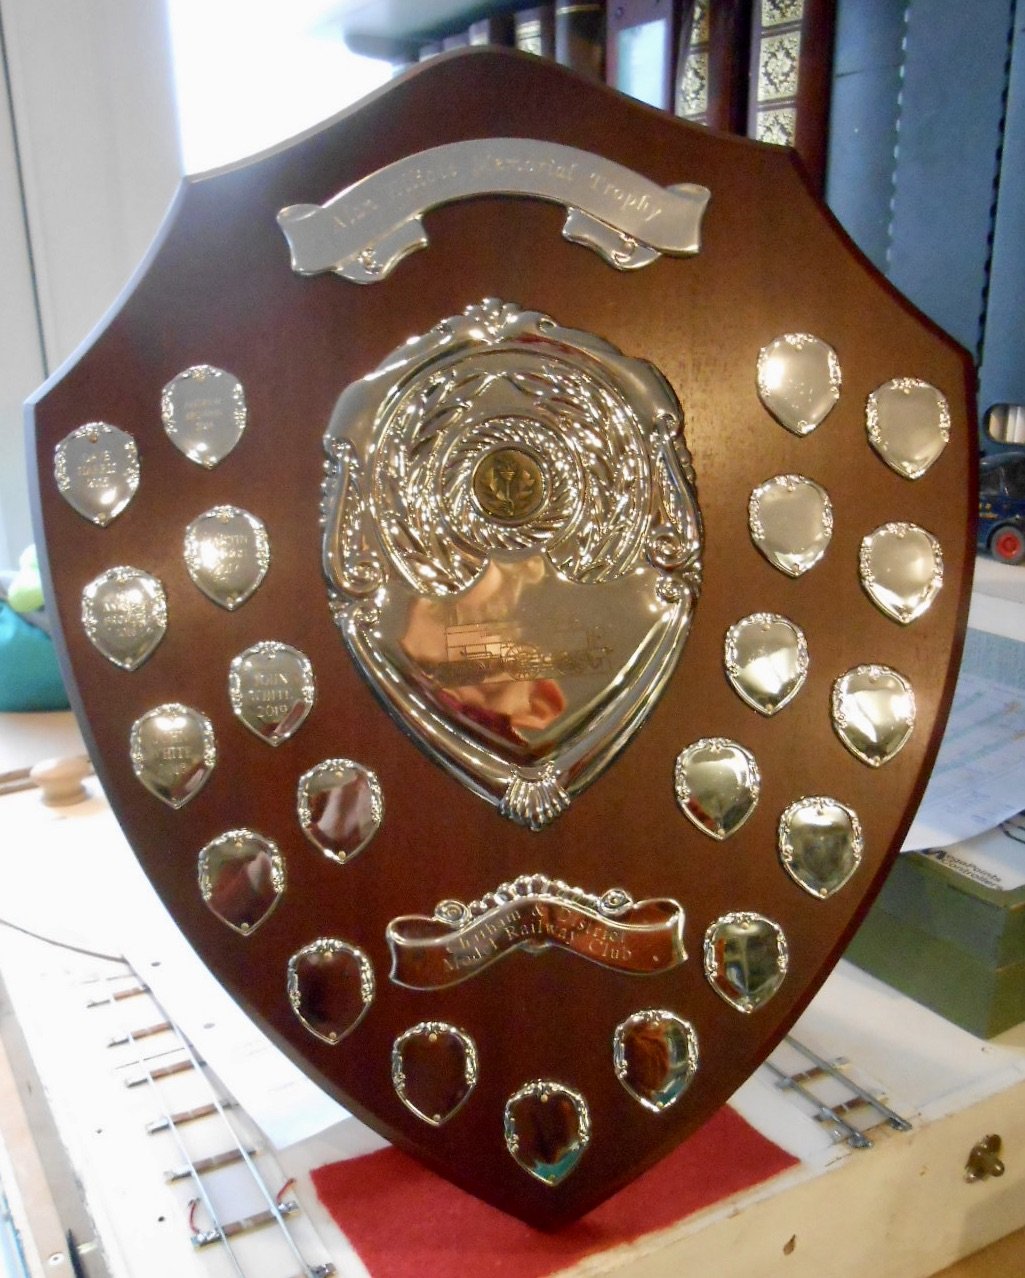
Thanks folks. Must admit to have been coverting that shield for the last five years. It replaced the previous 'best overall' club trophy in 2014. The latter was nice pewter cup that we think might have been a golf trophy in another life. In the beginning, this sat on a wooden base, so that little plates with the winner's name could be fixed to. However, over the years, extra layers were added to the first base until the whole thing was bigger than the cup. Managed to win the old one a few times over the years, but not the new one, until now. Club competitions can bring mixed feelings when just as you think you've done your 'best ever', someone else comes along with their own acme which just happens to trump yours - and there are some very talented modellers in the Chatham club! Though really just a bit of fun, with the added intention of getting people making something to bring along and share, it certainly helps improve standards too.
-
CIE Laminate Coaches - Worsley Works - ECMbuild in 4mm
David Holman replied to murrayec's topic in Irish Models
Hard to believe this is 4mm scale. The close ups really highlight the skill required. Don't let anyone tell you a coach is just a box with windows... -
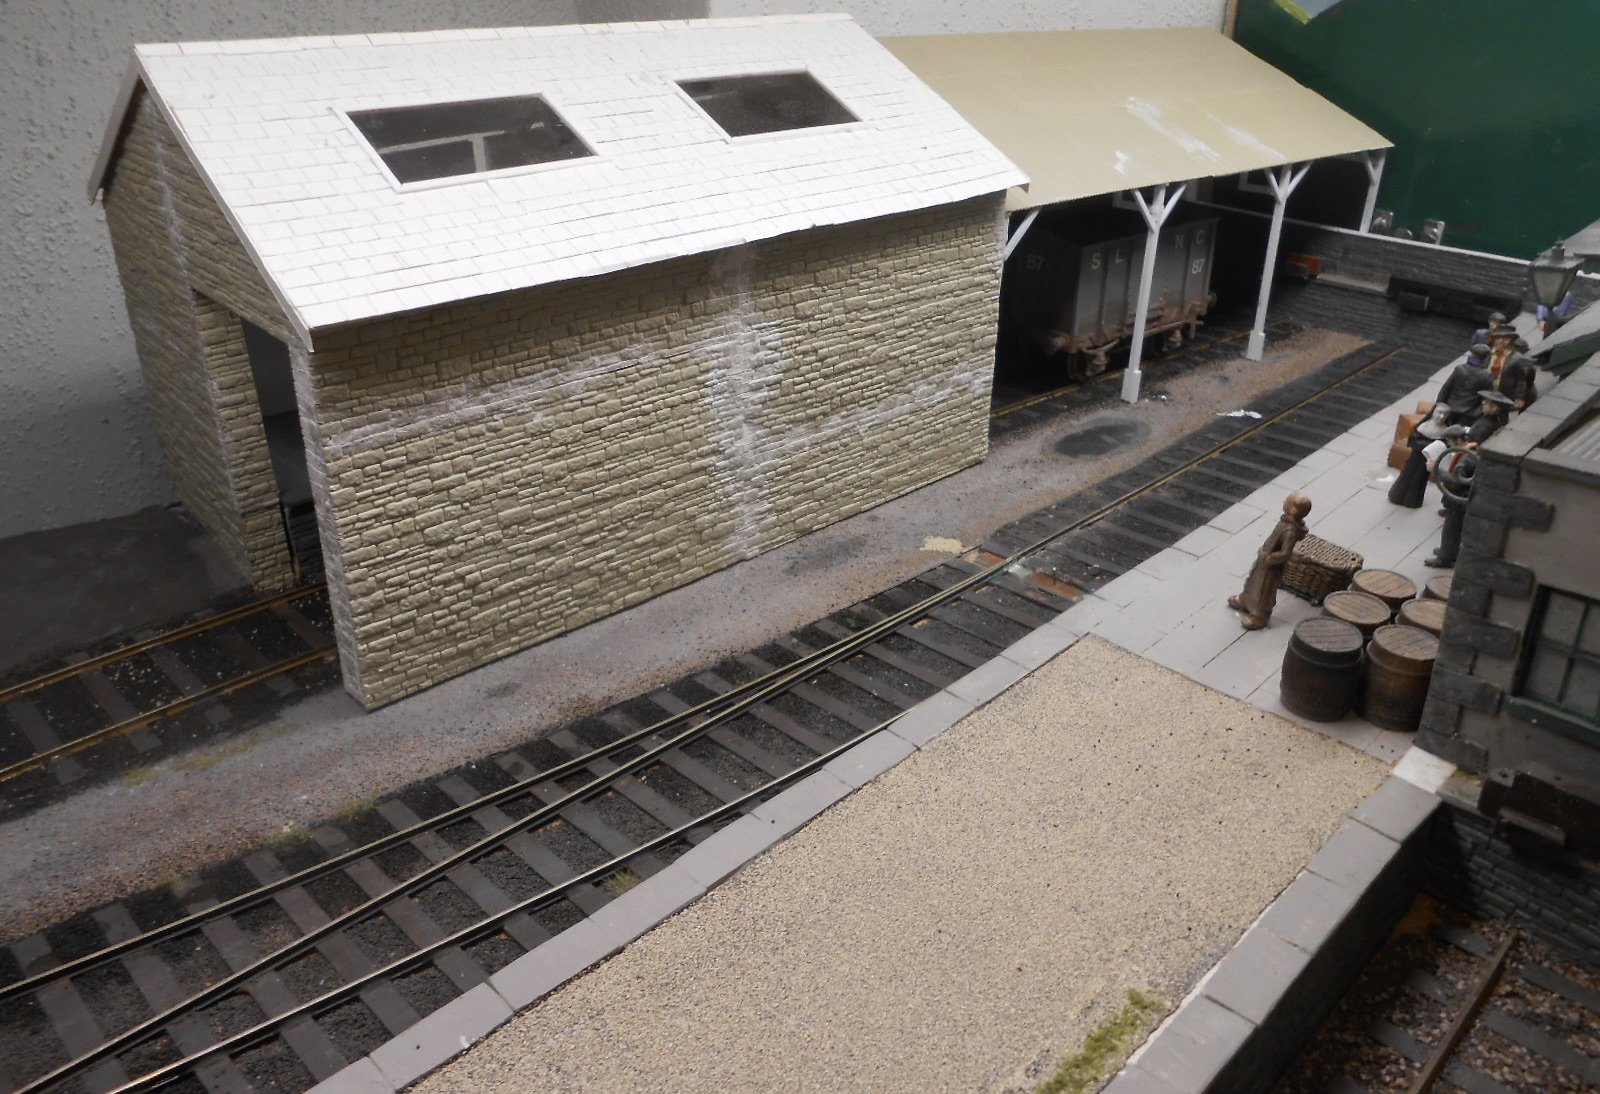
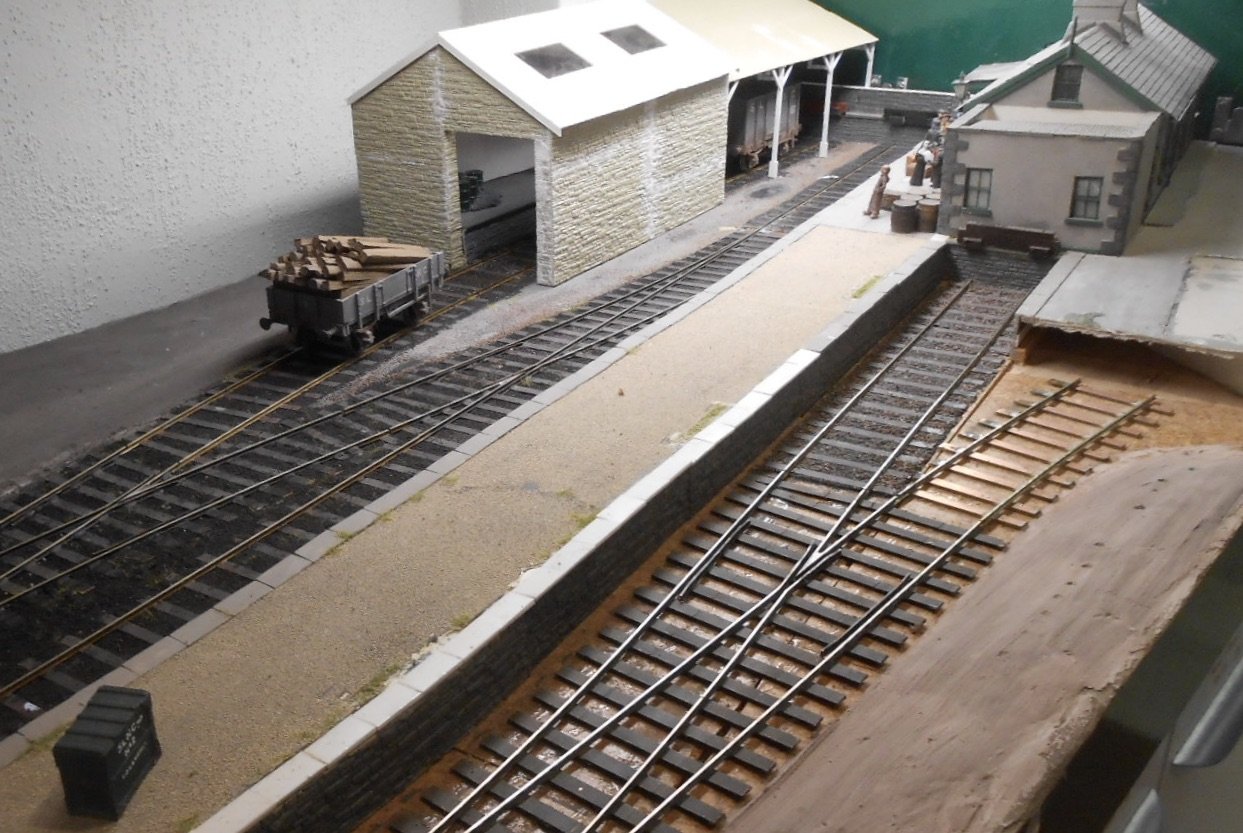
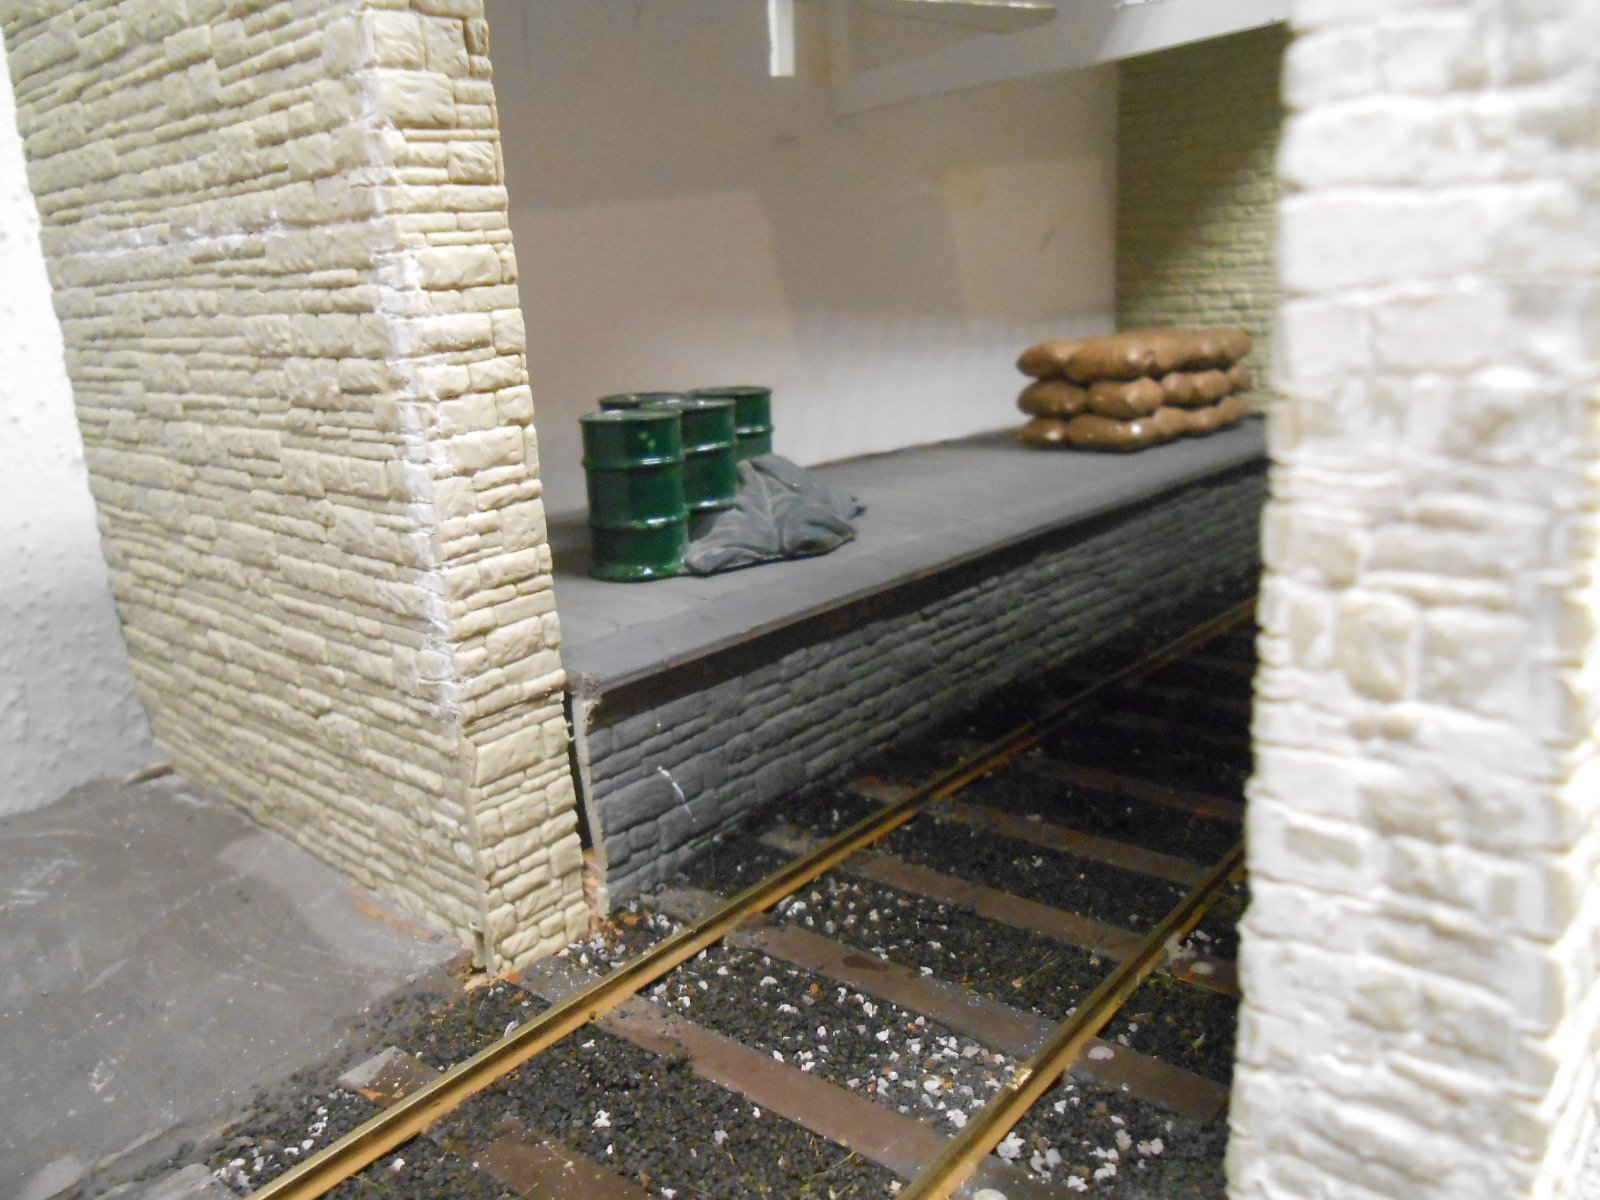
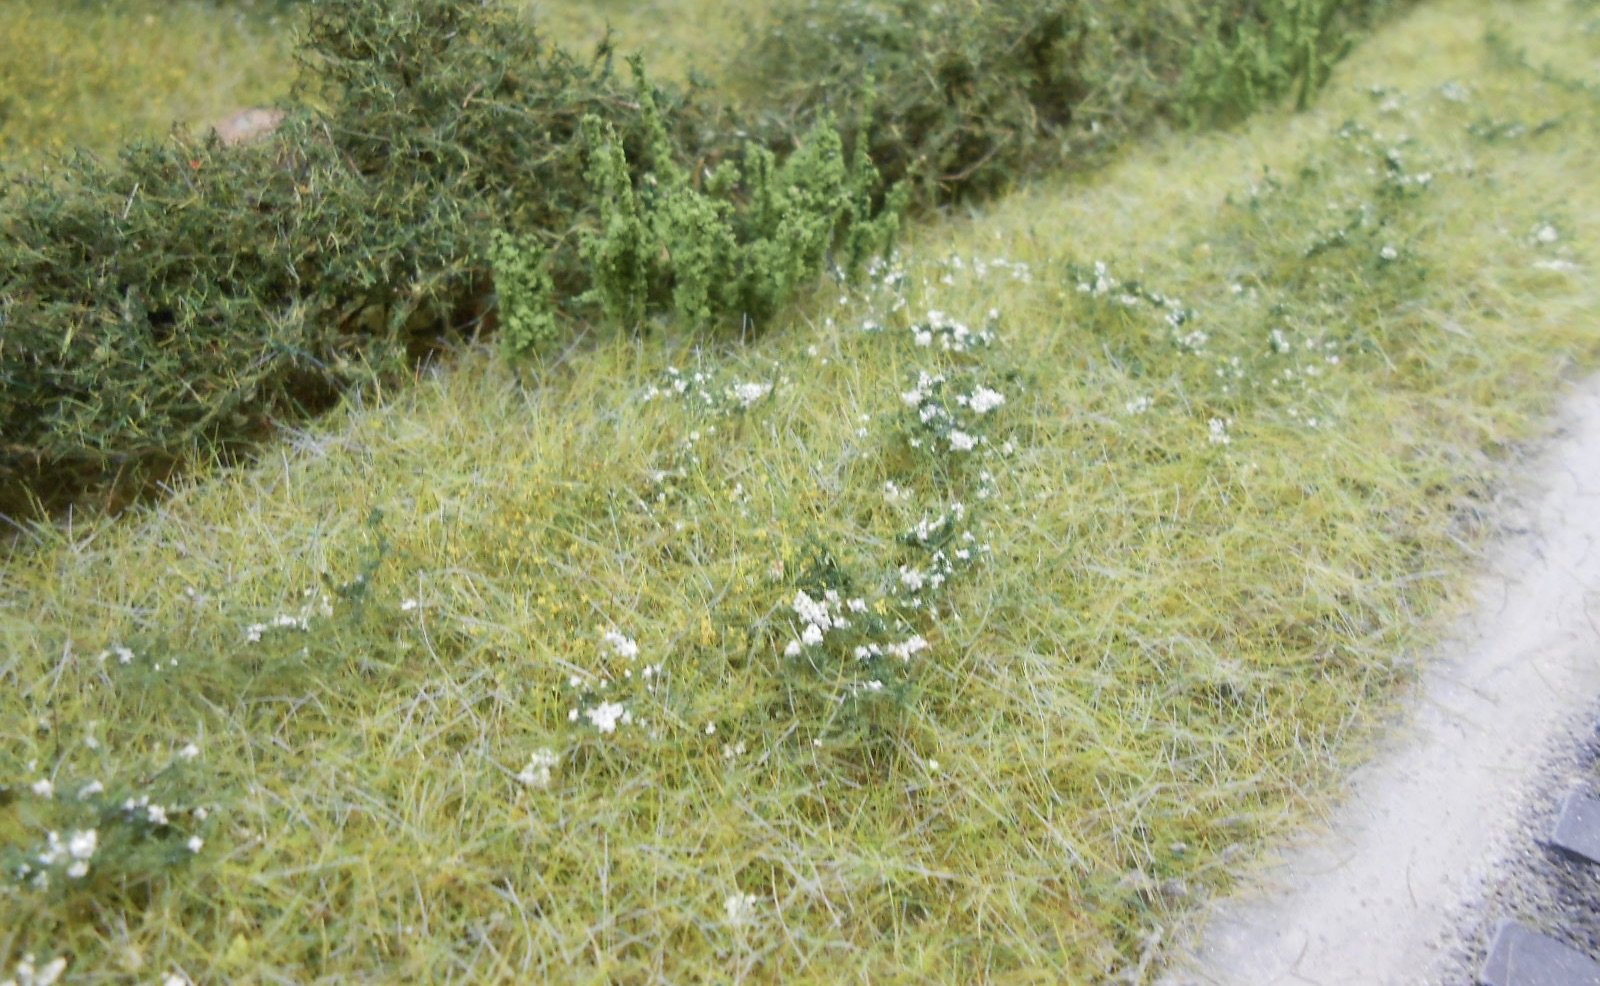
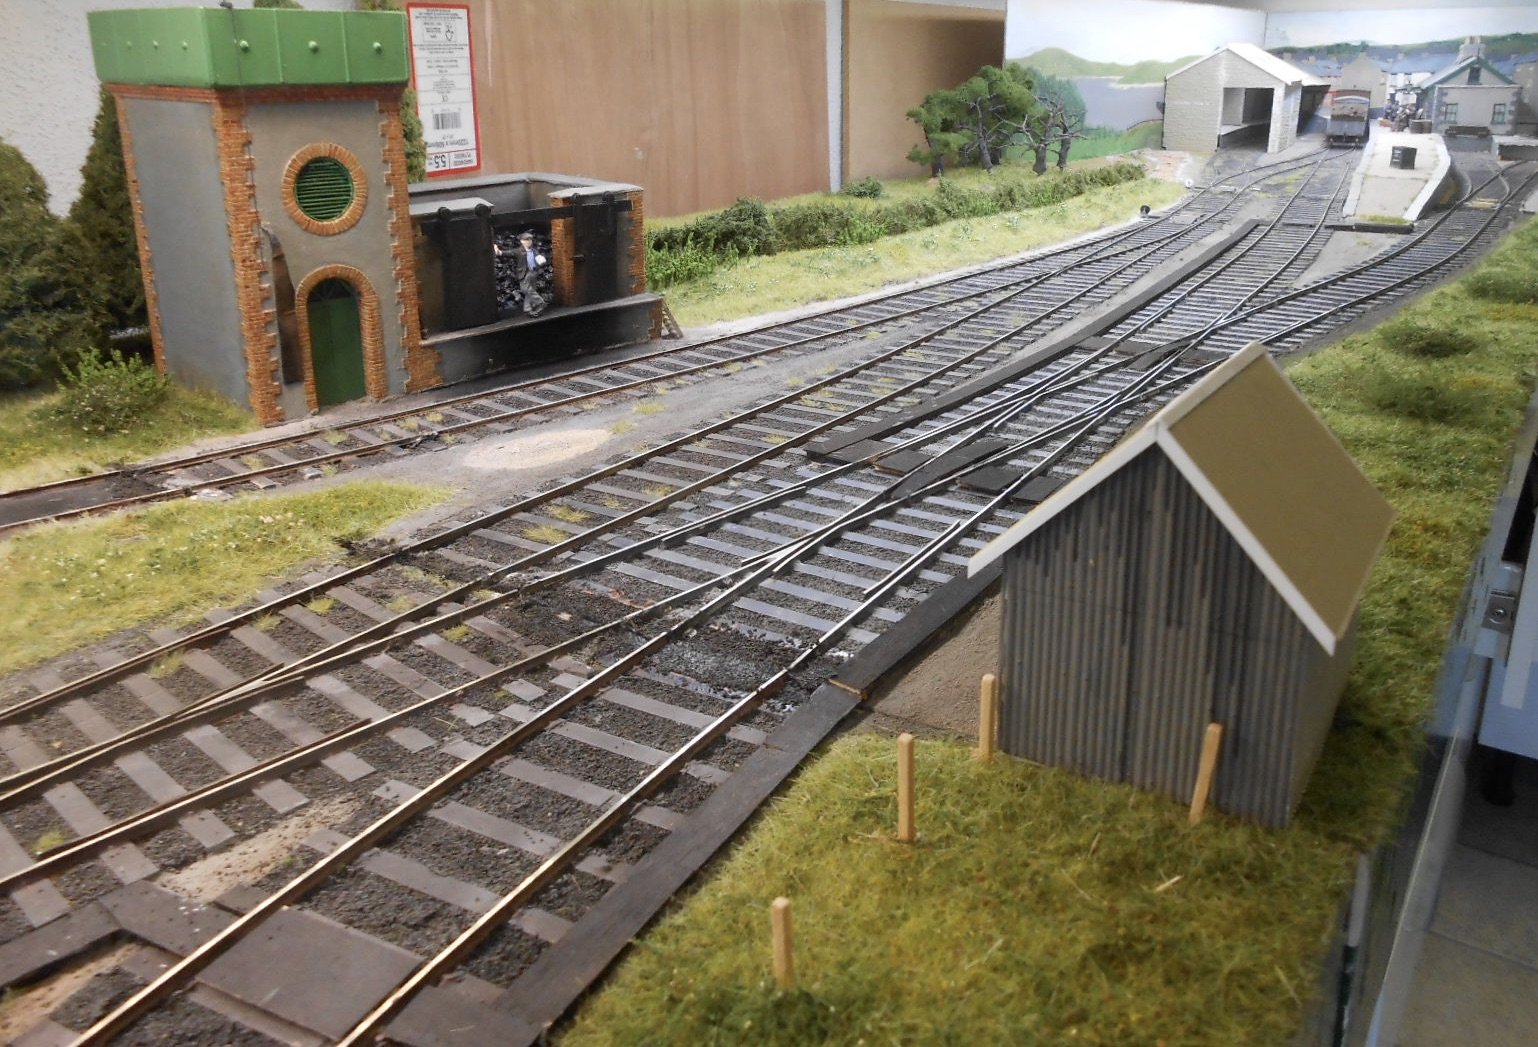
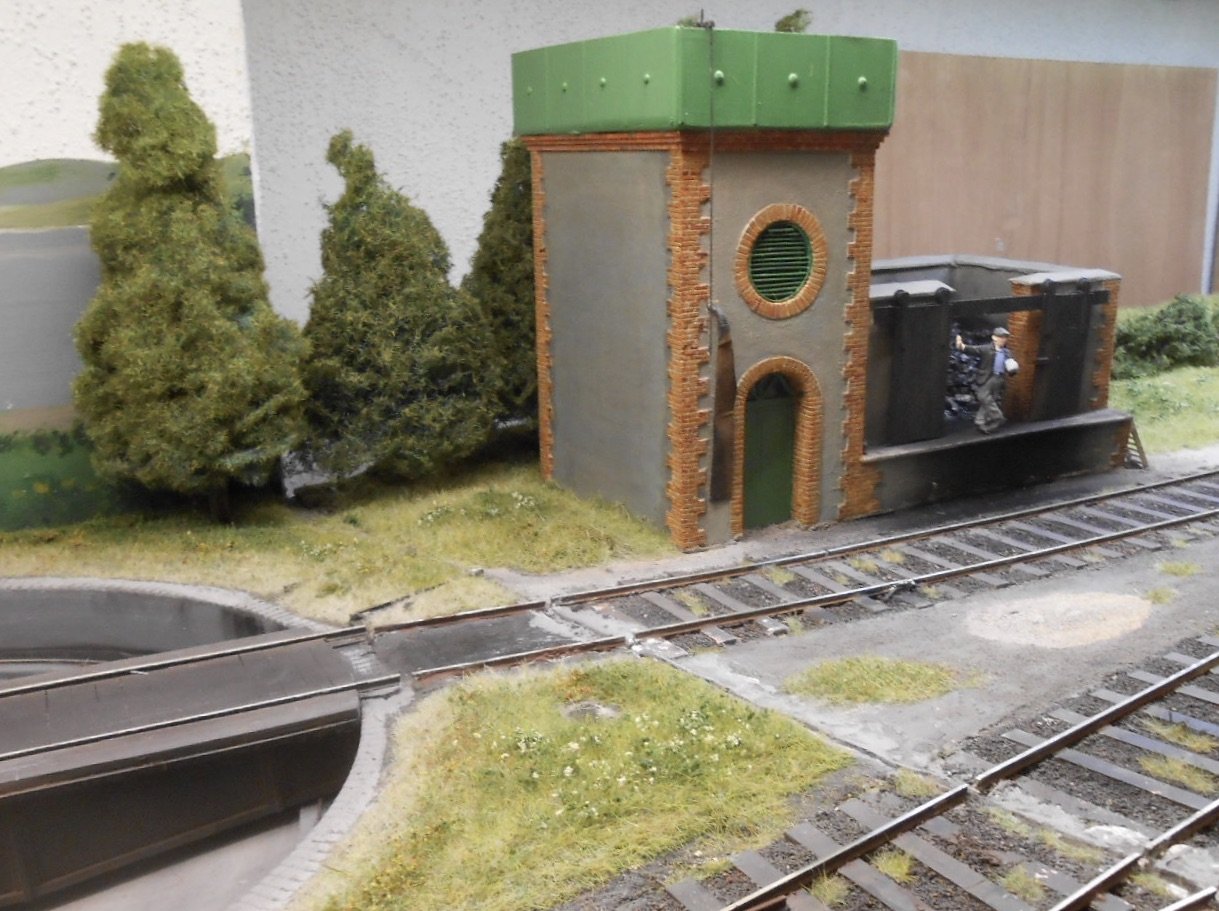
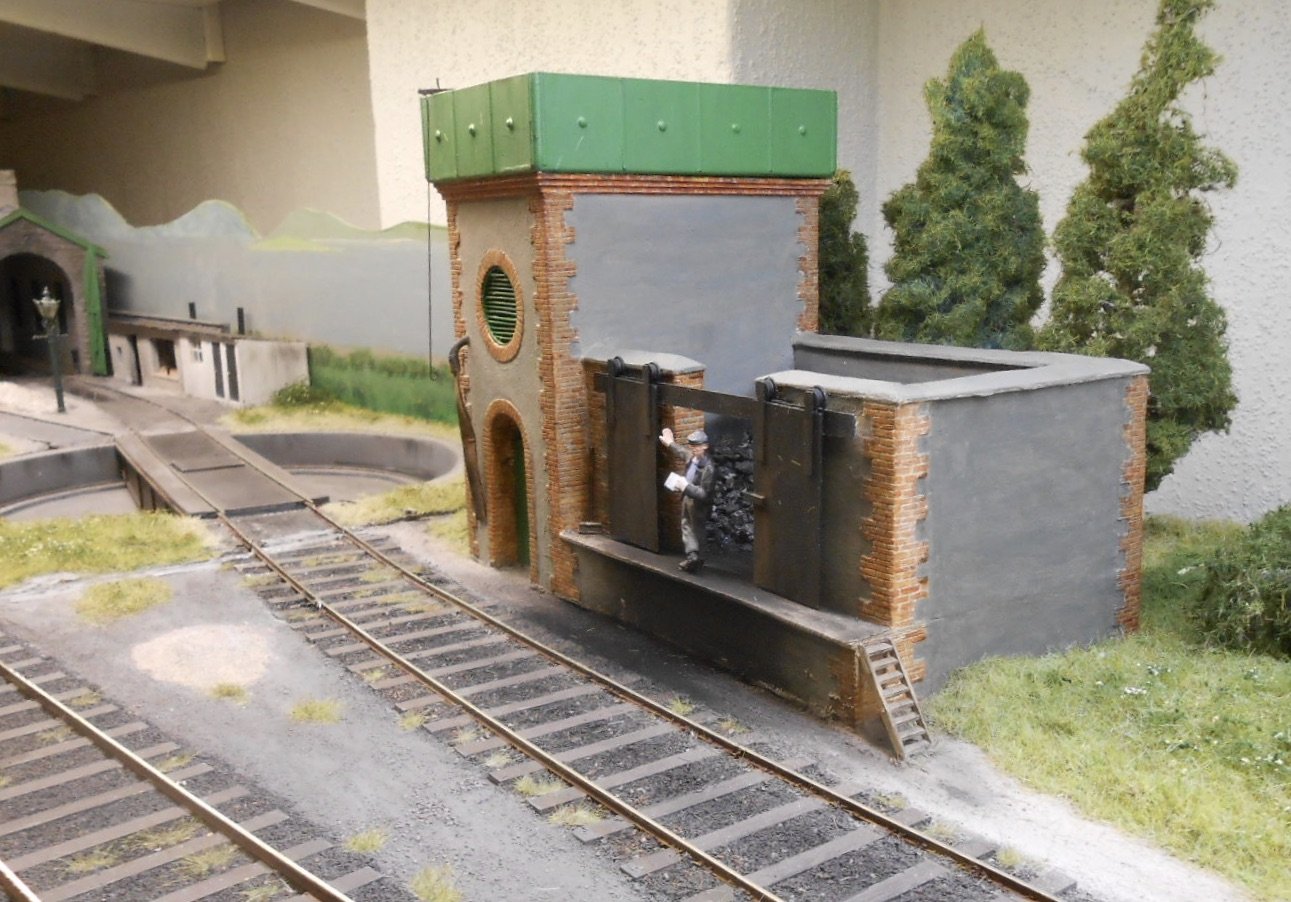
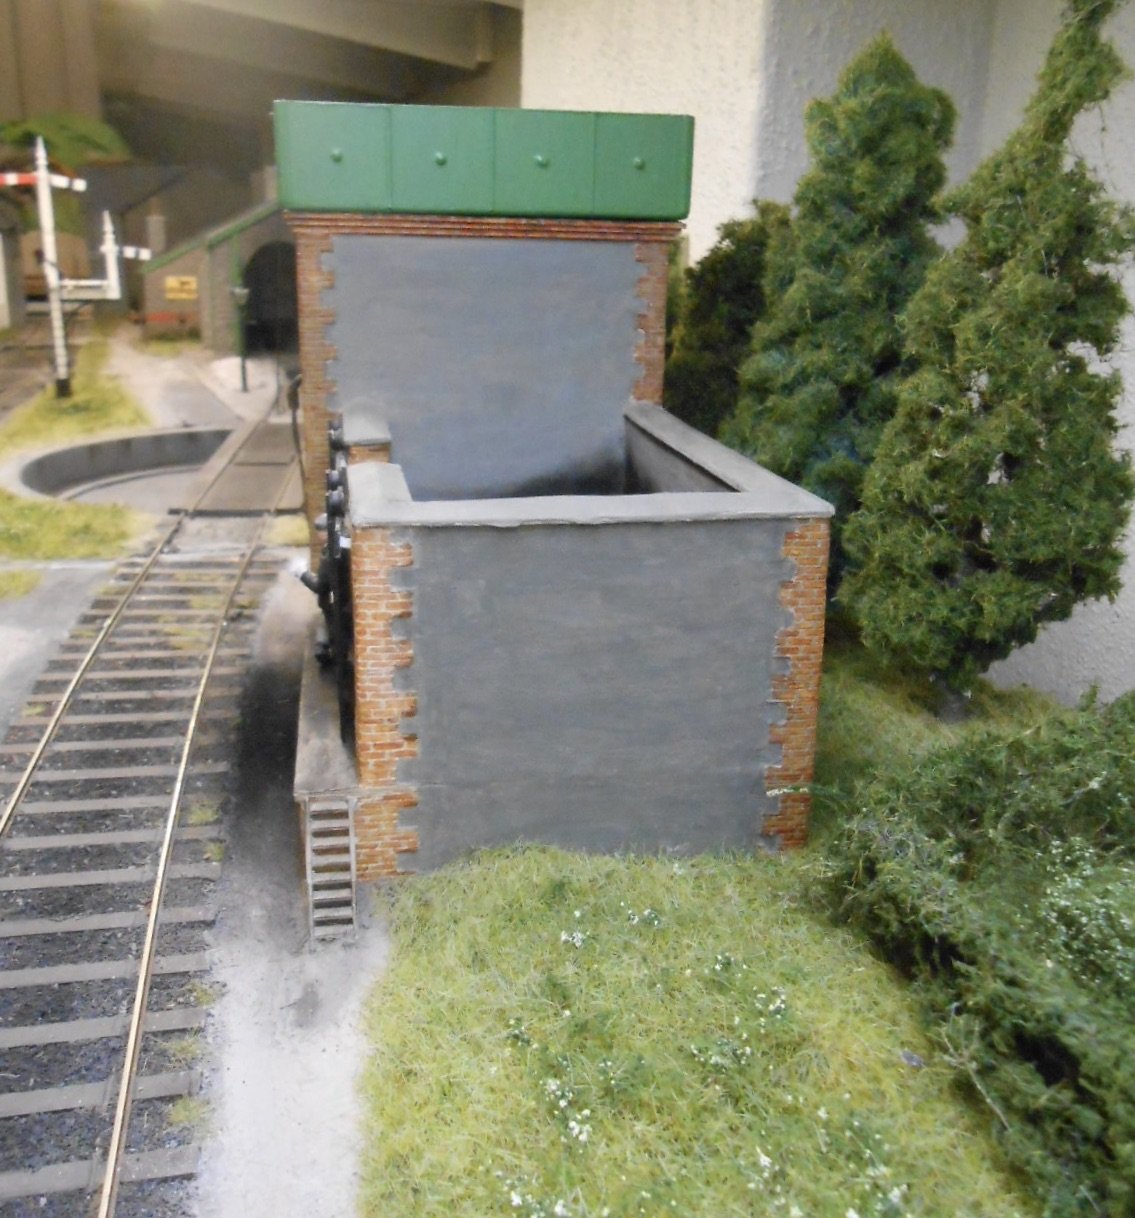
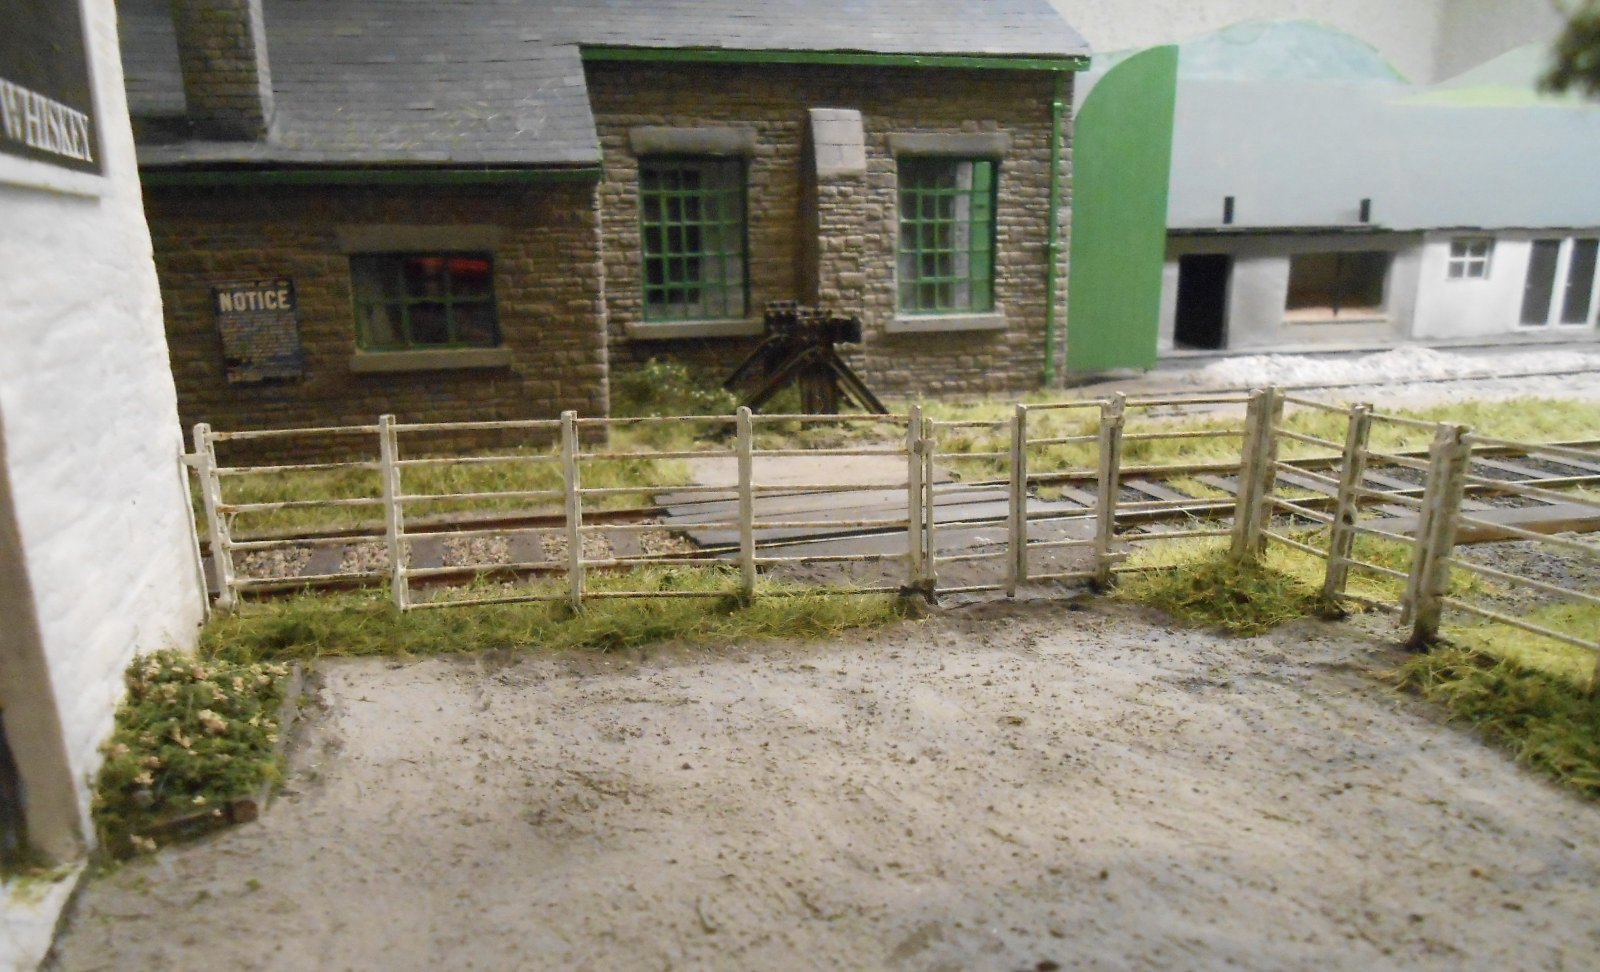
More scenics After a bit of a gap over Christmas & the New Year, action has recently focussed again on the baseboards. Number three, nearest the fiddle yard, was reasonably complete, while the middle, number two board had not really been started. First up then was to try and finish off BB3. This meant waiting until after the Chatham club's annual competition, as I wanted to enter the loco shed, to which I also added the coal stage/water tower. And it was worth it too, as the models not only won the 'Buildings' shield, they won the overall shield too, which you can see from the photo is a rather splendid thing. Anyway, competition over, I could now go ahead and fix the sub board with the shed to the main layout board, while the coal stage soon kick started work on BB2. Work was the usual tedious, but ultimately satisfying mix of scenics: Filling in gaps and creating ground cover with my usual mix of filler, PVA and acrylic paint. Several layers, each one a bit thinner, aiming for a light gravel surface in the yard areas and rough ground for the scenic bits Once dry, the next layer is a mix of slightly watered down PVA into which Woodlands medium 'crumb' is scattered. This gives a nice uneven surface of the sort you might see in rough ground or moorland. While this is still wet, the next step was to hit it with the static grass machine, loaded with a mix of 4-6mm fibres of different greens, keeping well away from the bright ones. This was then allowed to dry, after which further treatment was added ranging from extra layers of fibre [stuck with spray mount this time], through fine, dark green scatter sprinkled on to PVA brushed lightly [& sparingly] on the tips of the grass, plus clumps of Postiche, sprayed and sprinkled with fine scatter, to represent brambles. The final layer has used Woodlands flower scatter, mixed with fine crumb, to represent weeds and flowers. This really brings the greenery to life and is quite subtle - so much so that it shows up less in the photographs than it does on the model. I've included a few close ups to try and show what I mean. So, BB3 really is [mostly] complete, albeit still needing a couple of figures and a vehicle of some sort outside the distillery. It is currently minus its sky scene & in fact I'm not planning to add these until all three boards are finished. The more observant among you will have noticed that the white cottage from Arigna Town is missing. I'd intended to use this as a feature at the join of BBs 1 & 2, but it just didn't' seem to fit in, so instead some basic rough ground is there instead. To this will be added a patch of hawthorn, as per the back scene, to help hide joins and blend things together. I've also hit on the idea of putting a small area of hard standing next to the goods shed, with the suggestion of a harbour wall and pier on the the back scene. Belmullet seems to have two harbours, linked by a short canal across the neck of the peninsula. The harbour on the north east side is deemed to be served by the branch, while the other is close enough to the station for produce to be carted twist ship and train. That's the theory anyway!
- 179 replies
-
- 14
-
-
-
So atmospheric!
-
Must challenge you on not being a painter! The scenes created in those cameos show more than a bit of artistic ability. Didn't know it was called Ben Bulben, but certainly recognised the dramatic landscape from my one and only trip to Sligo. Lovely stuff.
-
Fine looking model of fine little loco.
-
Lovely stuff!