David Holman
-
Posts
4,359 -
Joined
-
Last visited
-
Days Won
117
Content Type
Profiles
Forums
Events
Gallery
Blogs
Everything posted by David Holman
-
Must have a closer look at this, to compare with the 7mm RTR model. Like the new Sentinel, it could be an ideal start for an Irish shunting layout. Stick to 32mm gauge and only a repaint required, maybe. Better still if it can easily be regauged...
-
Nowt fancy when I cut with a Dremel, I'm afraid. Usually done when cutting frames, cab sides etc, that are done in pairs, sweated together. Not unknown to simply hold material in one hand and Dremel in the other. However, no surprise that things soon get too hot to handle! Hence, common sense and a vice takes over. Usually draw an outline on the metal with a scriber, then cut as close as I dare with the Dremel, then finish off with files. Trouble is, because I'm an all rounder, often go a year or more between certain skills, so tend to forget! My last loco was over a year ago (the 101 kit) and last scratchbuild was Sir Henry, which must be at least three. Note to self: read up a bit before starting Wolf Dog later in the year!
-
Laurie Griffin Miniatures do a wide range of 7mm scale brass fittings. All the advice above is proper workshop practice, which sadly I never experienced at school, so purists might want to look away now. A slitting disc in a Dremel is a crude but effective way of cutting thicker sheet metal and strong scissors for thinner stuff. Eileen's Emporium is a good source of metal strip, some of the wider pieces can be a better start than using a full sized sheet. Mixing materials is worth considering. For example plastic water pipe might work for the boiler, as would larger diameter copper pipe. Five minute epoxy will stick most things and the copper pipe becomes a massive heat sink, of course. You can turn some things using an electric drill and files, while resin casting works for some items too. Make a plasticard master. Drawing pins make decent 7mm scale buffer heads and indeed are included some sets! Some folk, Gordon Gravett amongst them have had considerable success in turning perspex for boiler fittings. Some of the locos on Pempoul feature this. Once a cost of paint is applied, nobody knows what is underneath. Brass and especially nickel silver as very satisfying to work with, but sometimes plastic can be simply and quicker. The Ahern book on loco building is a gem, likewise his one on buildings. Source them if you can, written over 70 years ago, they offer simple solutions of how to make pretty much everything on a loco. Of the newer books, Geoff Holt's two 'Locomotive Modelling' ones are great for 7mm scale and, when you get there, Ian Rathbone's 'A Modellers Handbook of Painting and Lining' is excellent too. All three from Wild Swan.
-
So, where's the layout going? Great to see behind the scenes of Barrow Street. There is a TV aerial socket in my workshop, but never got used as I prefer the radio. Indeed, a hundred years ago (ok, four weeks), Saturday and Sunday afternoons doing modelling while listening to football or cricket, were an ideal pastime for me.
-
Have used Halfords primer cans for years, both for their intended purpose and as 'wagon grey'. The red oxide primer works well for fitted wagons too. Don't know what is behind the design of the spray nozzle, but in my experience, they are far superior to most other rattle cans, which can be more like muck spreaders!
-
Is it me, or have Kadees become like coffee? Remember the times when you could go into a cafe for a sit down coffee? You want a coffee, but have to travel through a five page menu to find the basic item, which even then will have a fancy name. Happy days mind...
-
All ideal train combos, even in 7mm scale. Applying Iain Rice's formula, that a train needs to travel three times its own length across the scenic part of a layout, means that on Belmullet/Arigna my fiddle yard is a quarter of the overall length. This is just under 1.2 m. Doesn't sound a lot, but is enough for a G2 2-4-0 and three MGW six wheelers, or a Sligo tank and six wagons.
-
Oops! Handsome engine though.
-
In many ways, diesels can be harder than steam engines, because of the complex curves. Some aspects are therefore best done from solid - plastic, resin, etc - and lots of gentle filing. Front ends and roofs can certainly come into this category. The modern way is 3d printing of course...
-
Not as difficult as you'd think. Getting a six wheel chassis to run smoothly can be harder, because the valve gear doesn't actually do anything on a model, just wave about and look like it's going to tangle in knots! The first one I tried was on the Vulcan kits Sierra Leone Hunslet 2-6-2T. It was all held together with 14BA nuts and bolts, which avoided any soldering. Put an RG4 in for power and it ran beautifully.
-
That's very much the way to do it. Only need another 20 or so for a nice SLNCR train!
-
Two years ago, met a chap at an exhibition who said he was planning to do a kit of a C class, in 7mm scale. Even produce a resin casting of the cab from his pocket. We swopped email addresses, but haven't heard from him since... The C class should make a really nice model, because while it looks like a proper main line loco, it is fairly short and will fit a small layout nicely. Plus, they made it to Courtmacsherry, in my mind the perfect branch terminus.
-
Never ceases to amaze me the amount of unpublished stuff that is still out there. Keep sharing JB, they are all little rays of light in these challenging times.
-
Looks very much like the CVR ones to me. However, while I've built four of them, I'm more than capable of missing what is entirely obvious.
-
The GSW guards van pic is a real gem and one is very much on my 'to do' list! As for Senior's transport, I think I prefer the inspection saloon to the bike!
-
Bill Ascough, of Ace Models once let me take a kit of a GN C12 at a show, for half the price - happy that I posted him a cheque later. ACE make an etched kit of the Southern's N and U, which may be of interest to MGW 7mm scale modellers. Bet that's a fairly limited market though!
-
Some lovely models here.
-
They certainly look the part.
-
Looking good so far. Whose chassis kit is it?
-
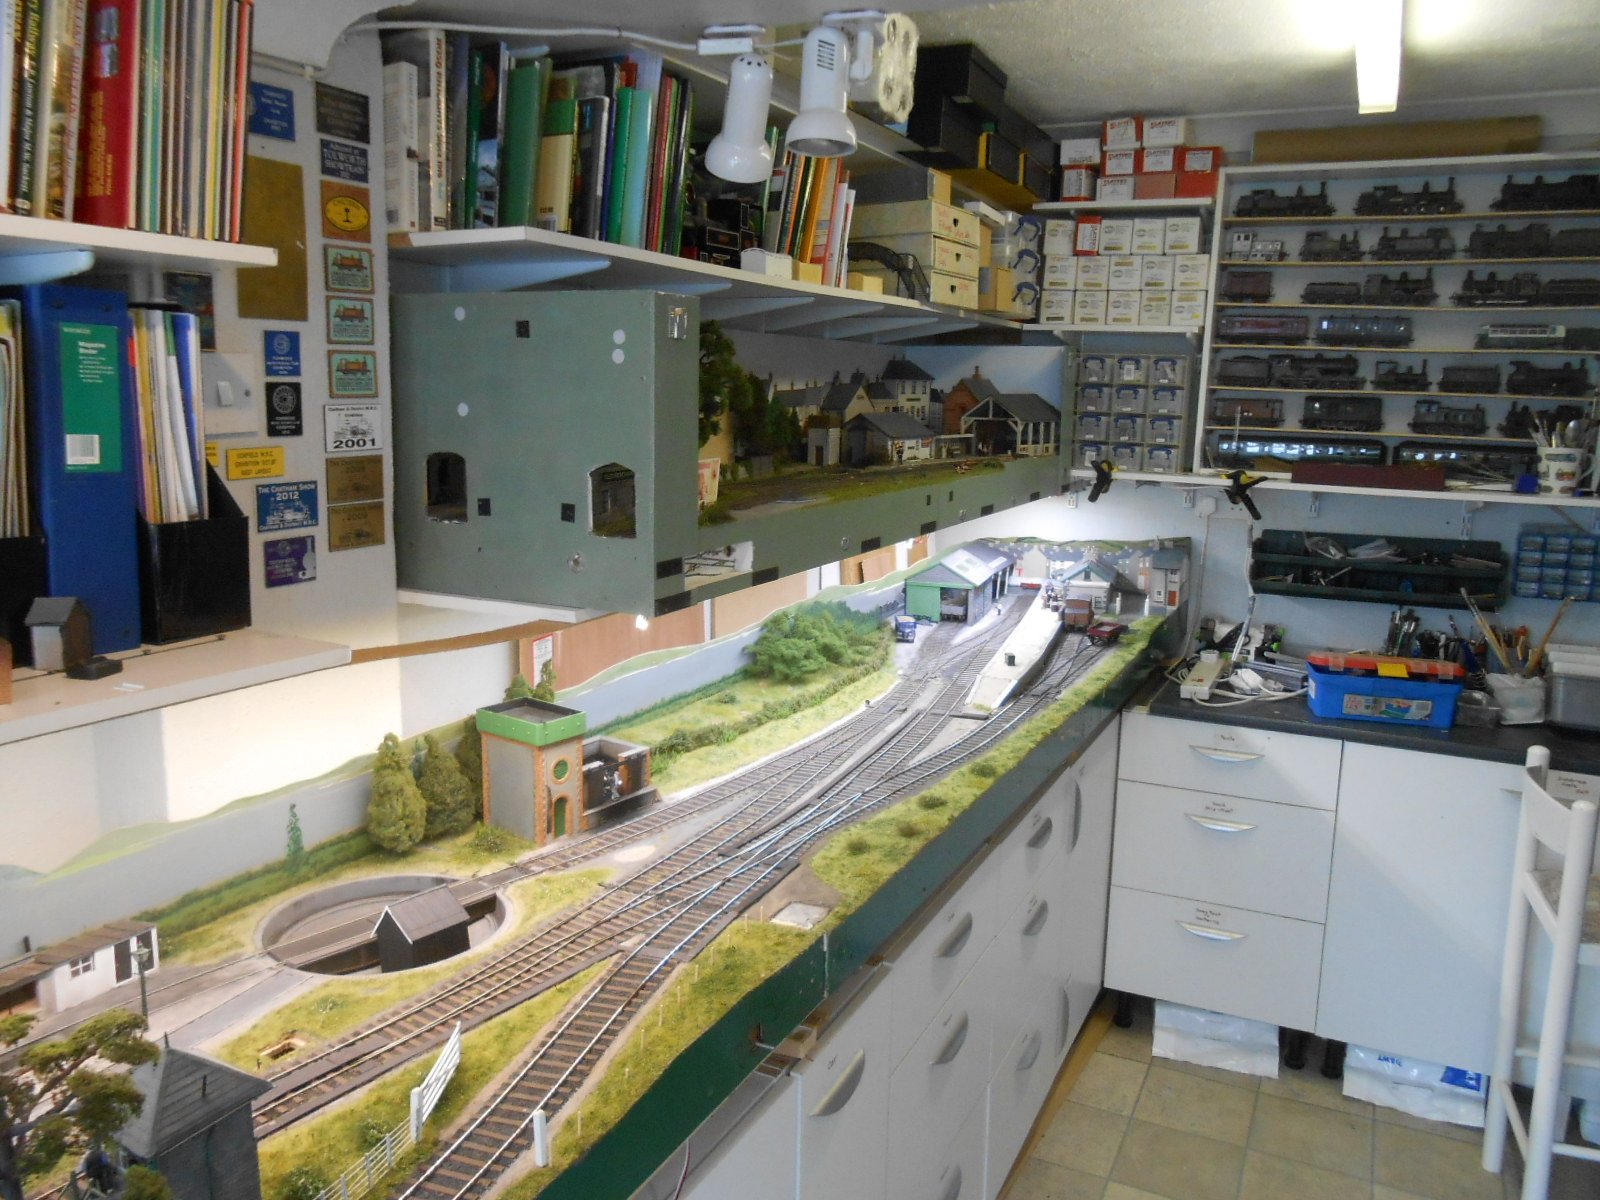
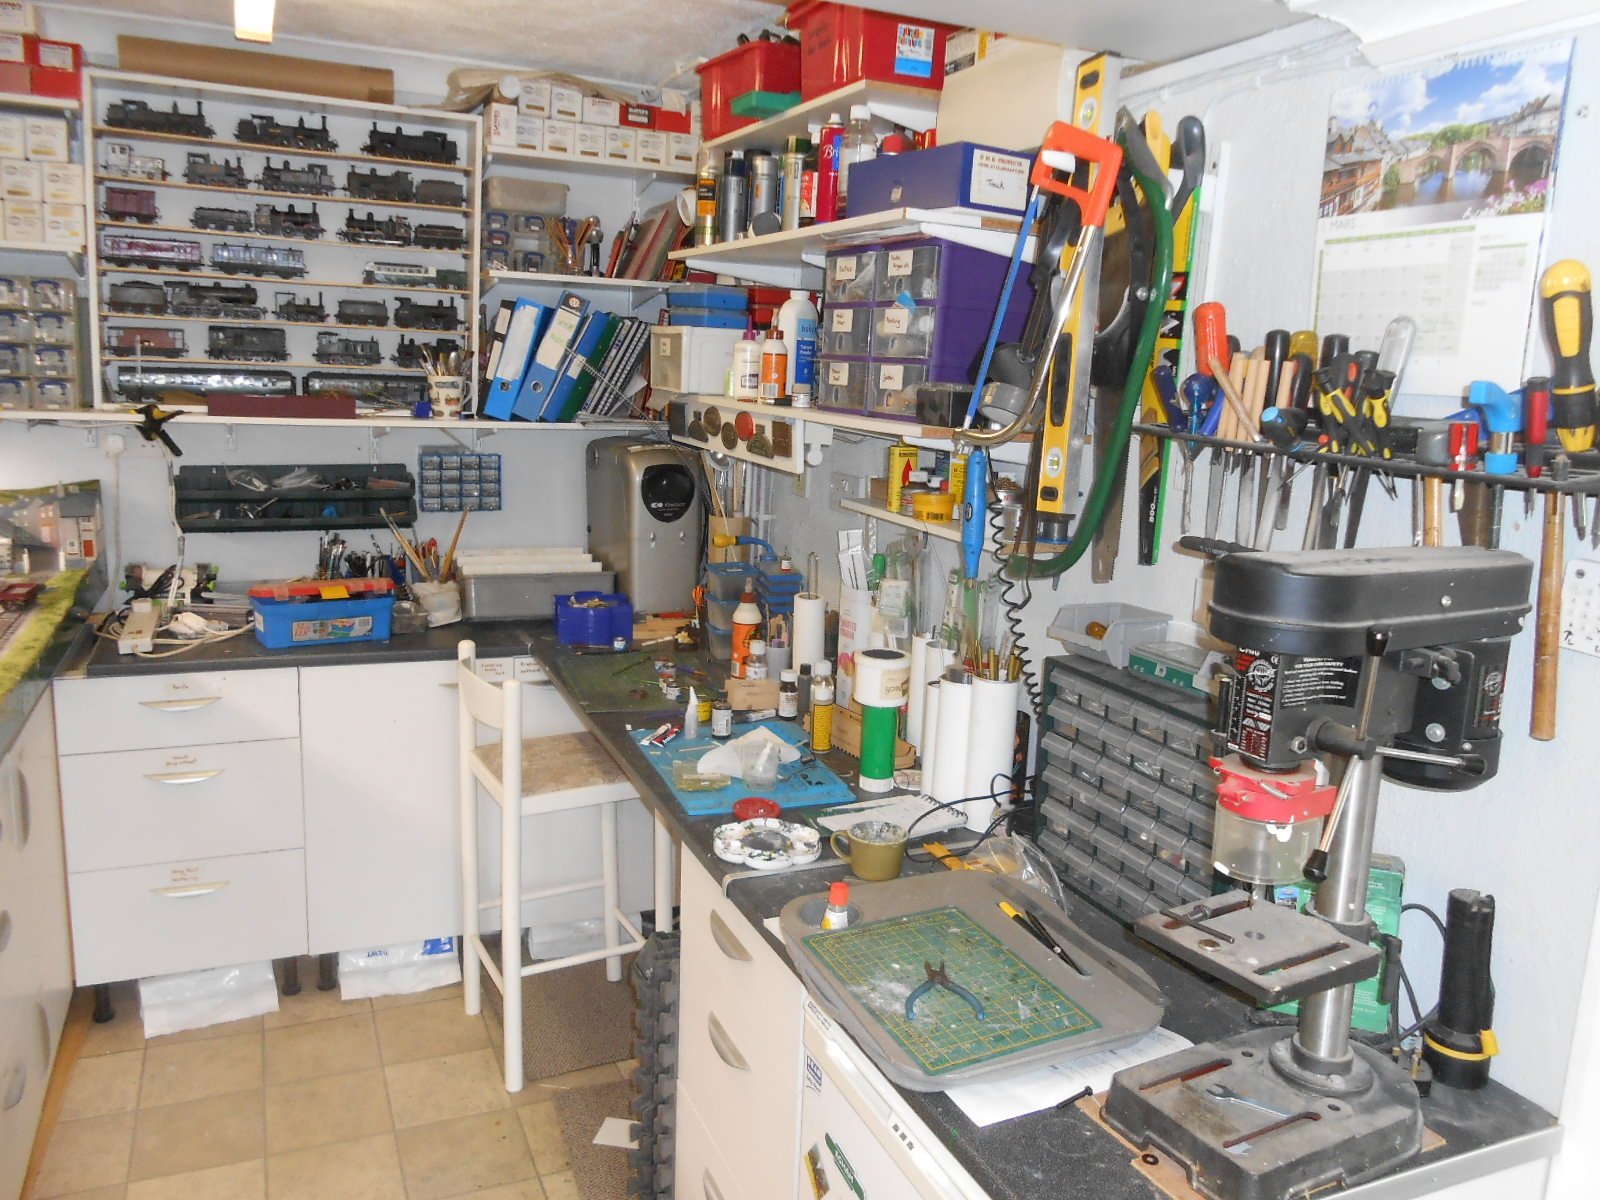
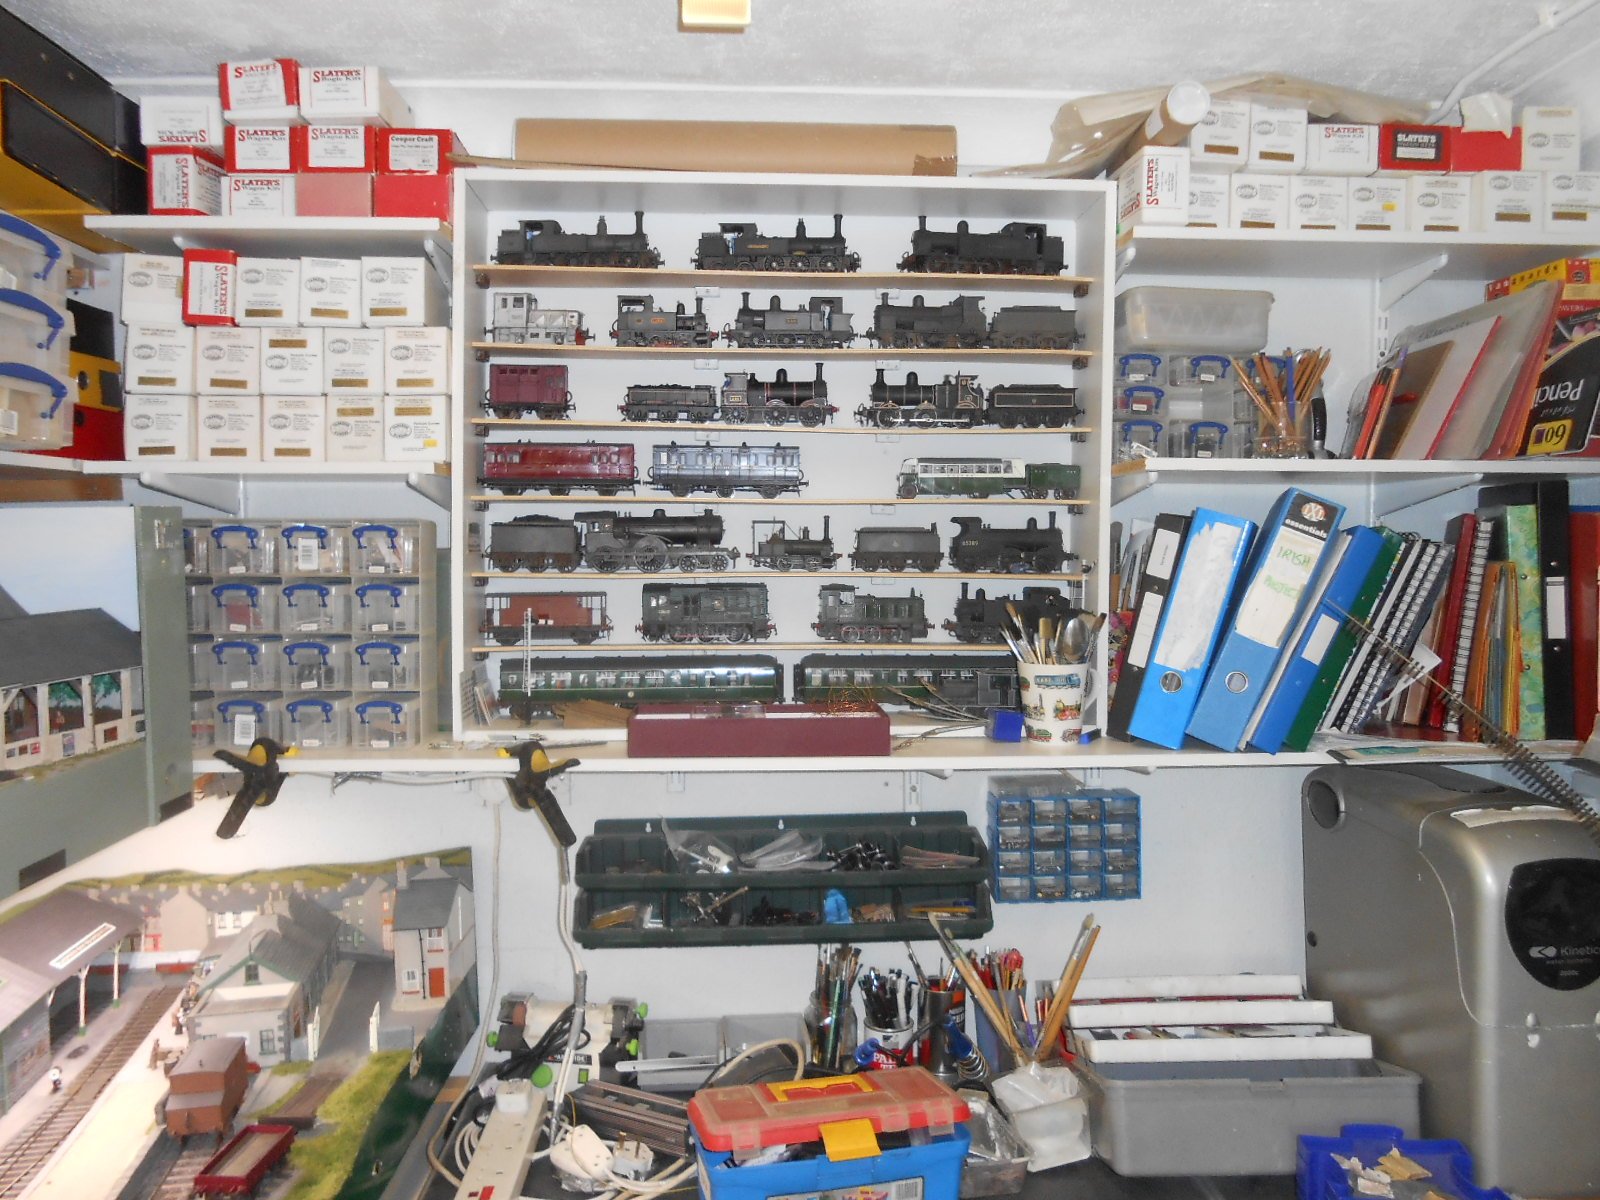
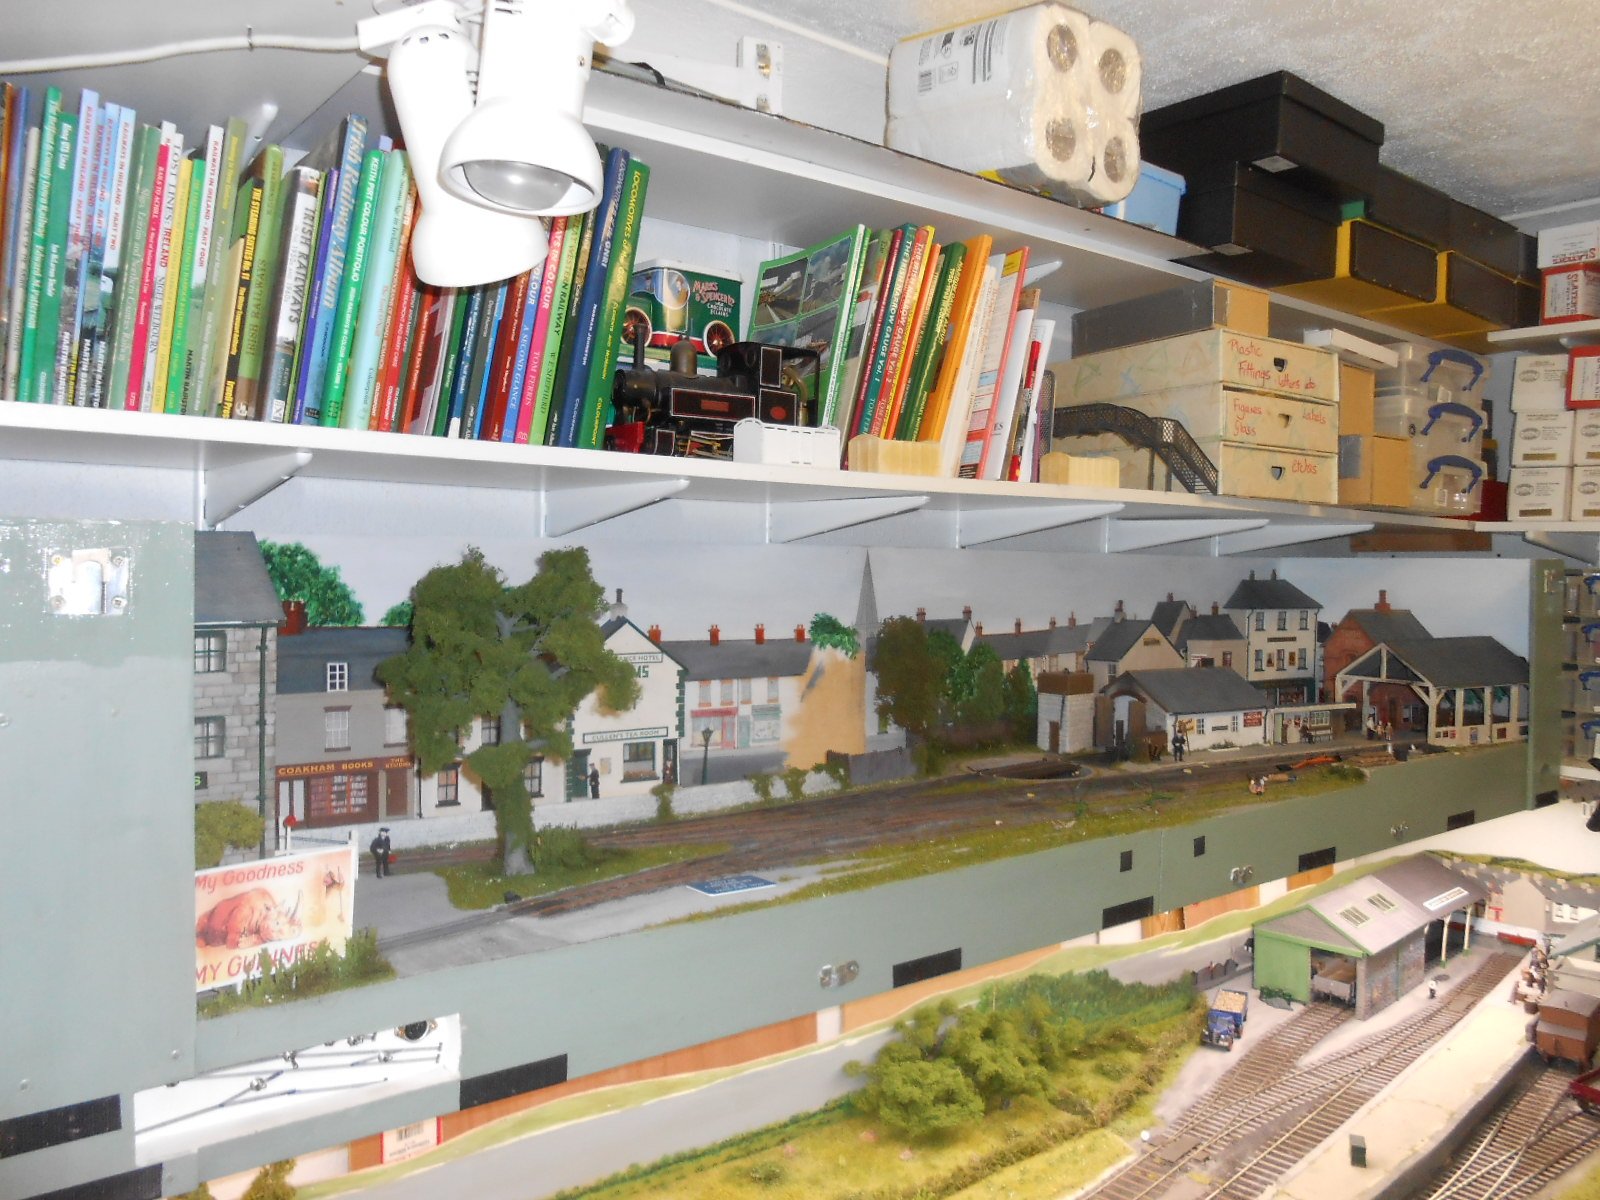
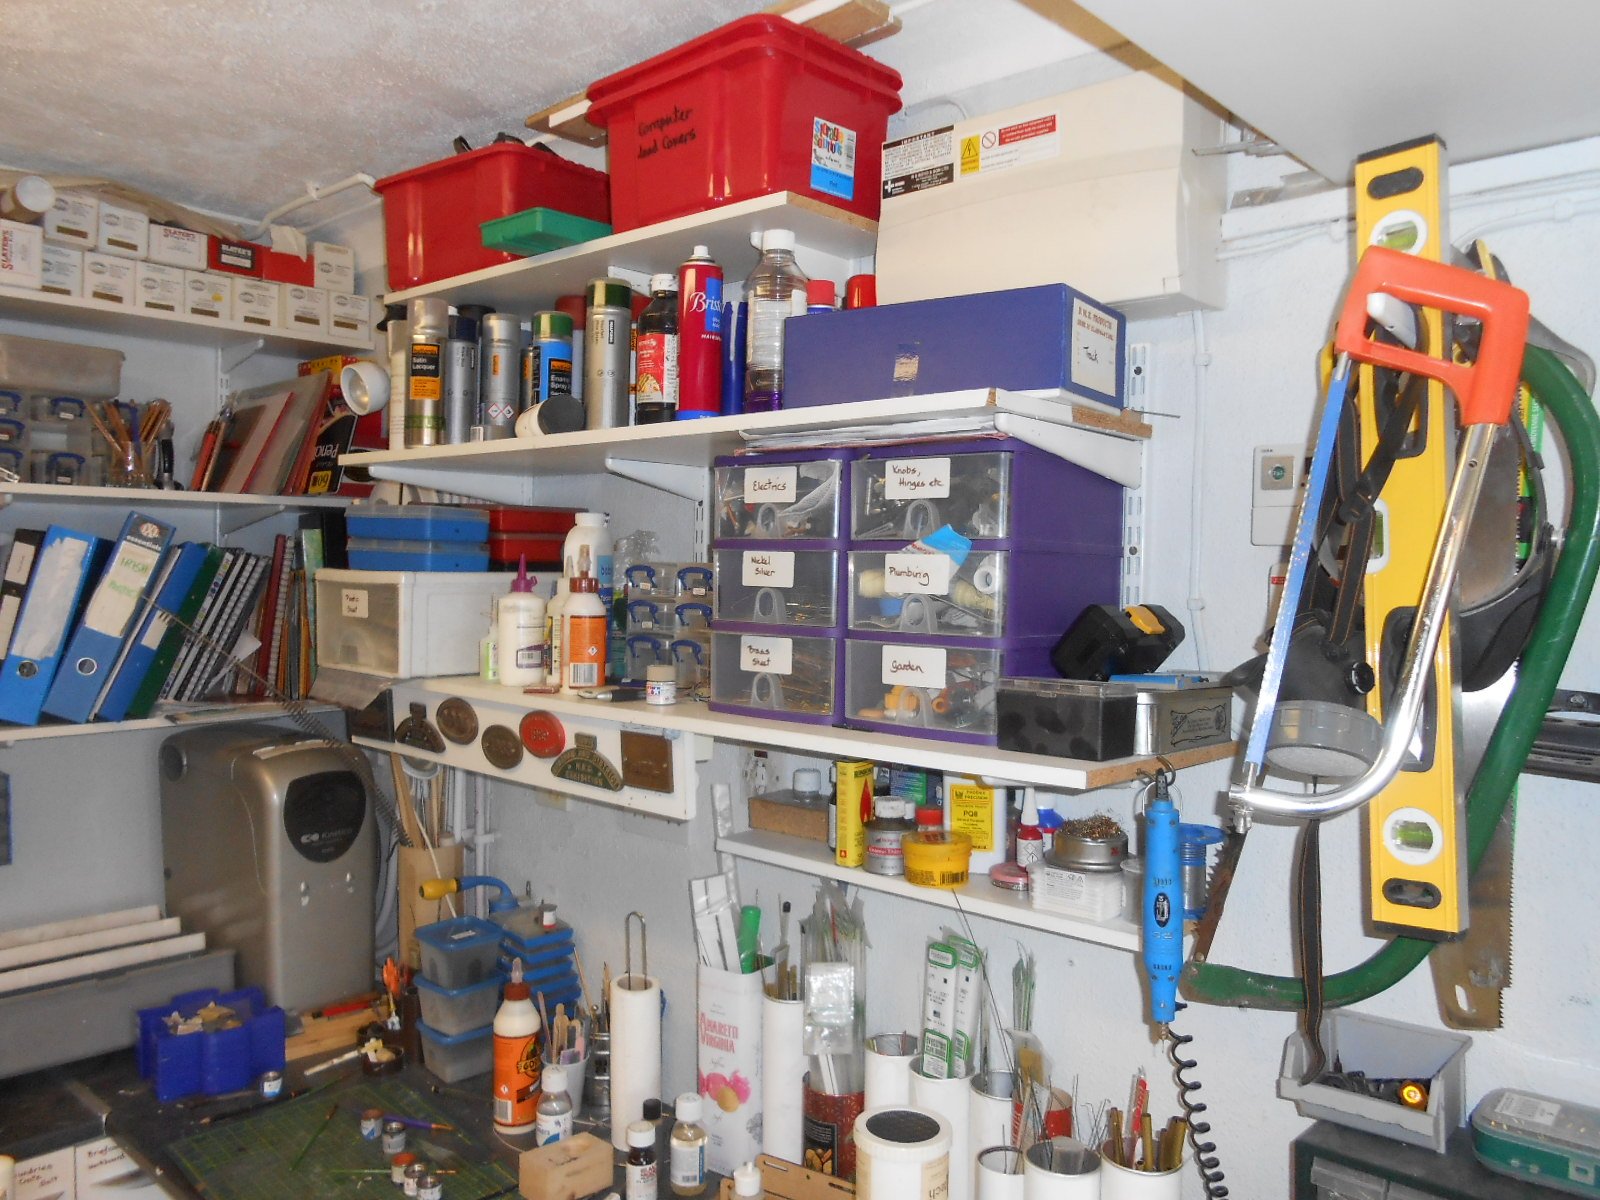
As suggested elsewhere, thought it might be a nice idea to share where we do our modelling. Am always interested to see how others do things, so here goes with mine. When we first got married 41 years ago [I was a child bride], my wife and I's first house was a two bed Victorian terrace, though this did have the advantage of a 10x12 cellar, where I built my first layout. We moved to our current house five years later and have been extending and improving it ever since. Initially the railway room was the spare bedroom, which doubled as a study. However, taking an exhibition layout downstairs, through a 180 degree turn soon lost its novelty, while becoming a schools' advisor meant I needed the study for report writing and so on. Hence the current railway room/workshop, which we converted from the former integral garage. While I know I'm very lucky to have this 16x8 space, like most modellers, I'd love to have more - ideally a double garage, so I could have a continuous run, but that aint going to happen. The garage was converted by replacing the flimsy up and over door with secure conservatory doors and an internal access door was added from the hall, along with a radiator off the existing central heating, plus plenty of extra mains sockets. Hence it is warm and dry all year - important in our hobby methinks. The layout is as follows: Along one long wall is the main layout, now called Belmullet, currently being rebuilt from the previous Arigna Town. This sits on [cheap] kitchen units, in which household tools, paints etc are stored, along with drawers for modelling materials. Above are long deep shelves, separated by a rather inconvenient pillar in the middle. Both sets are just over 2m long. on one side is my general railway library: one shelf of magazines [including every MRJ] and another of books. The other half has three shelves: Fintonagh lives on the first [minus fiddle yard], with the 'Irish Library' above, with some of my stock boxes and more on the top shelf, along with facias, pelmets and beams for Fintonagh. Because of that central pillar, there is space behind Belmullet for storing things like trestles and spare sheets of plywood. The end wall has more kitchen base units, but with a worktop above on which sits a range of small tools and containers. Above these are shelves and a display case for some of my models. Some of the shelves hold files of modelling info, plus things like storage boxes for small items, paint brushes and the like. The other long wall also has base units, but not as many as this is my main workbench space, while a larder freezer also lives here. You'll see there are more shelves for odds and end above, with a range of containers for plastic strip, wire etc on the workbench, on which also sits my pillar drill. So, there we are. It probably needs a bit of a spring clean and clear out, to free up cupboard space, but currently our recycling centre is closed, so that job will have to wait. By and large, everything fits in well. However, problems arise whenever I want to move things around, as stuff then need to go elsewhere while I do, which doesn't always go down well with the 'domestic authority'! Oh yes, that is a bath panel you can see - it is not just a modeller's workshop, other stuff has to be done here too.

- 18 replies
-
- 13
-

-
Think we've all been there (and indeed continue to revisit in my case), to a greater or lesser extent, Leslie. My own workshop is close to the limit in terms of storage and accessibility, so every so often, I force myself to have a tidy up and put things away. Trouble is, as soon as you start modelling again, the number of tools and material required grows exponentially in comparison to the task! I call it 'three pin plug syndrome'. After all the years these things have been around, you'd think we could buy one that required, at most, two tools to wire it up. But no. Two, perhaps three different screwdriver heads, wire stripers, pliers and, in my case, usually many rude words because getting the wires to sit neatly is an unbelievable faff! Enough already! Maybe I'll start a thread on 'my workshop', or perhaps one exists already? Either way, we can show how we both empathise with your pain and share ideas of how to make our modelling areas (because by no means everyone has the luxury of a dedicated space) more user friendly.
-
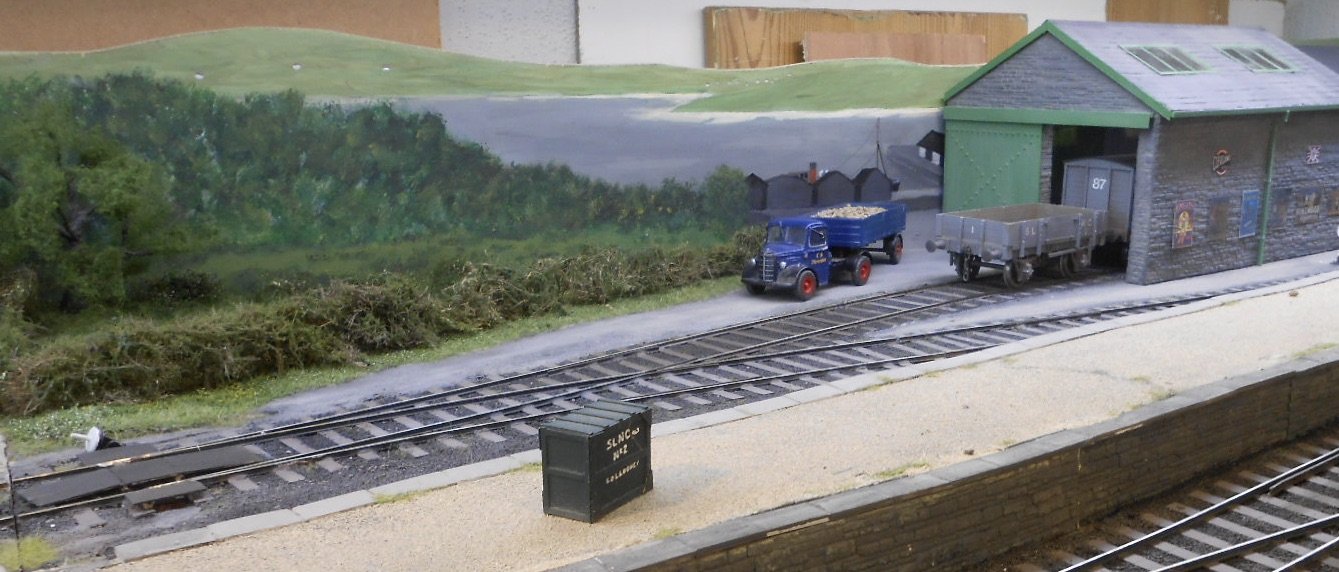
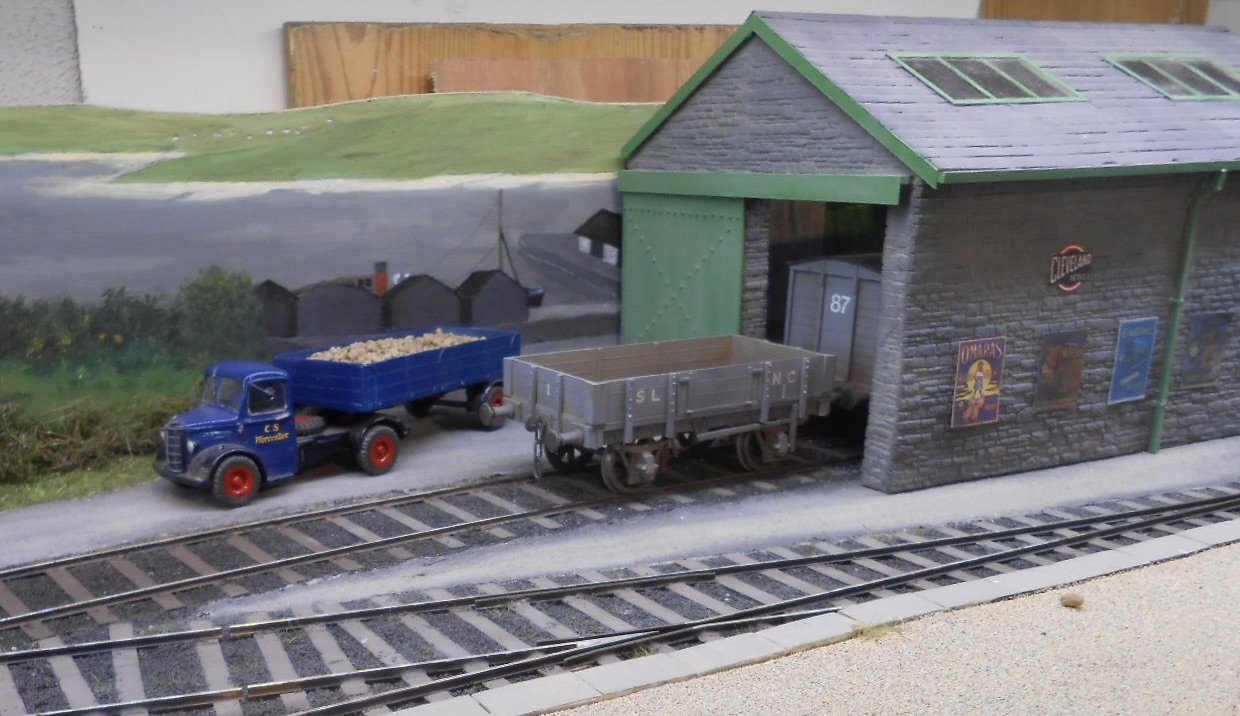
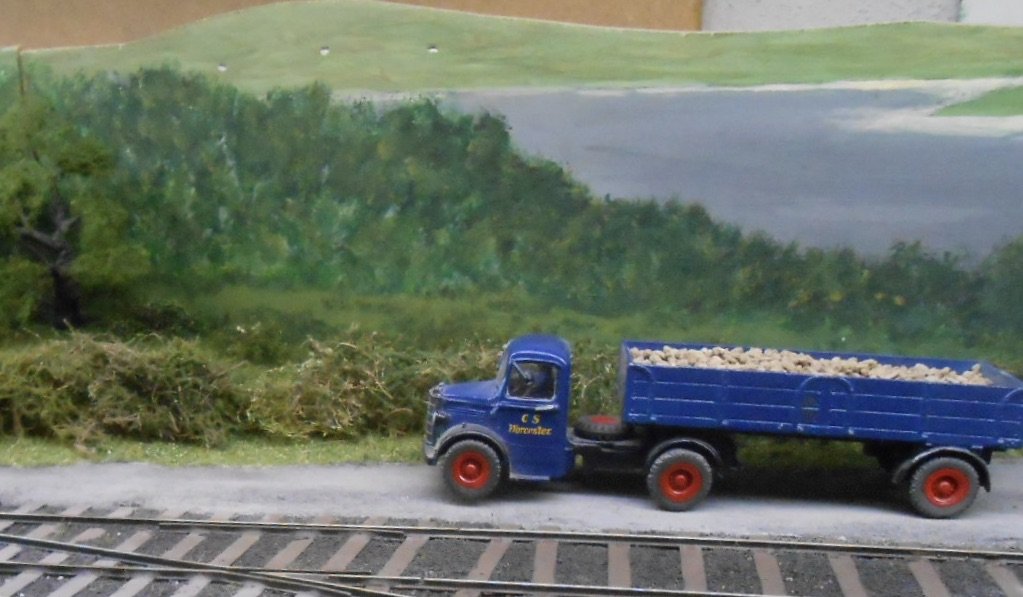
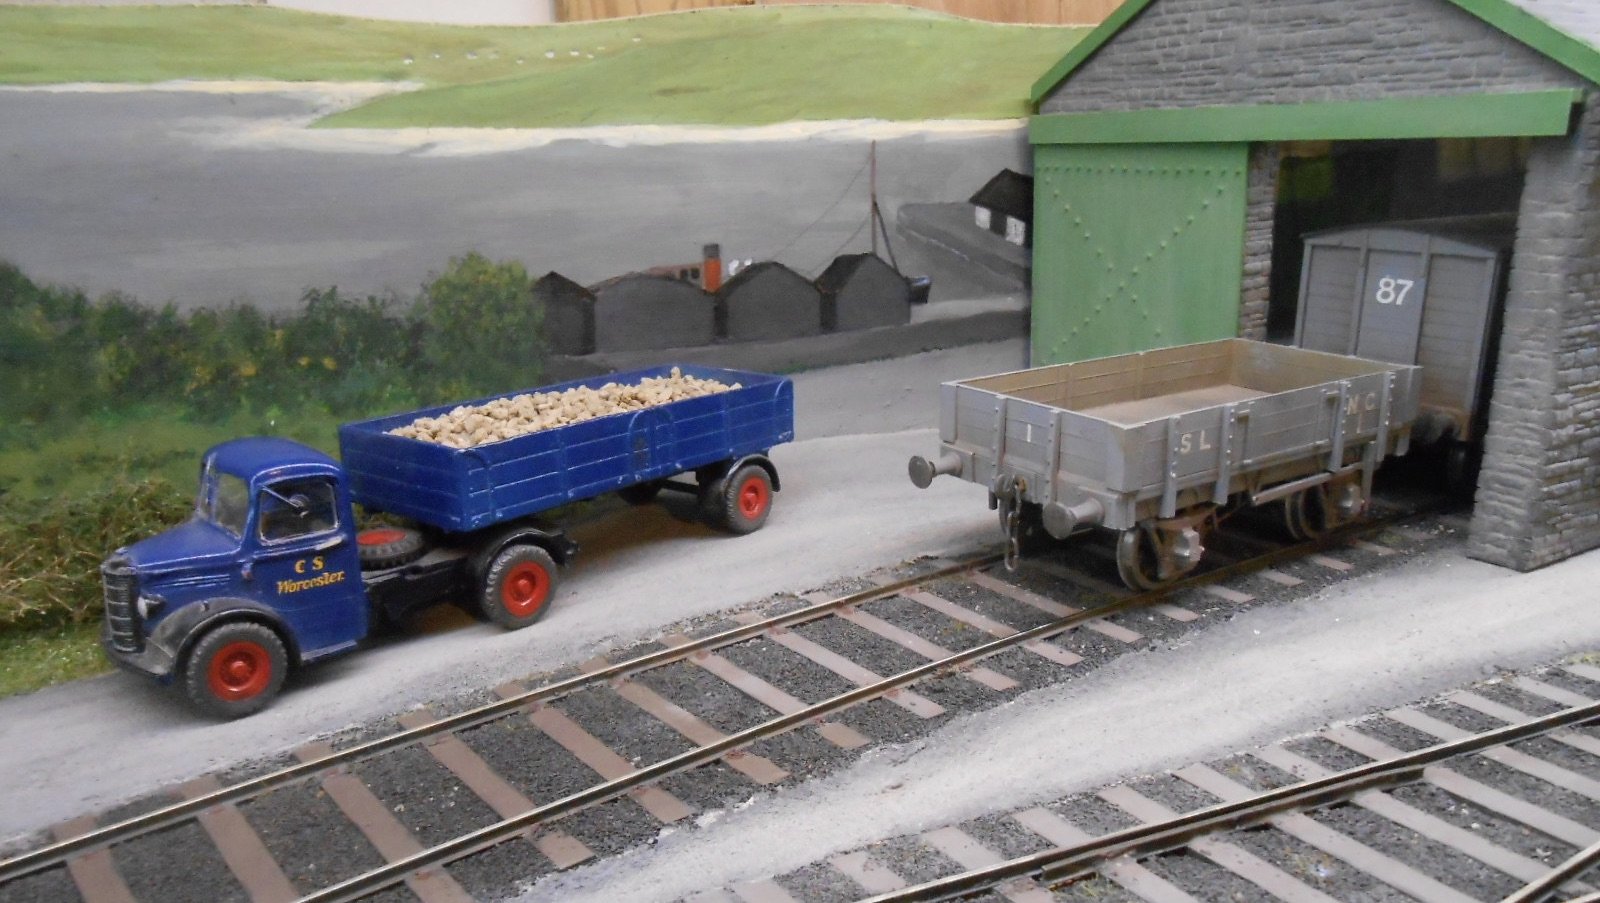
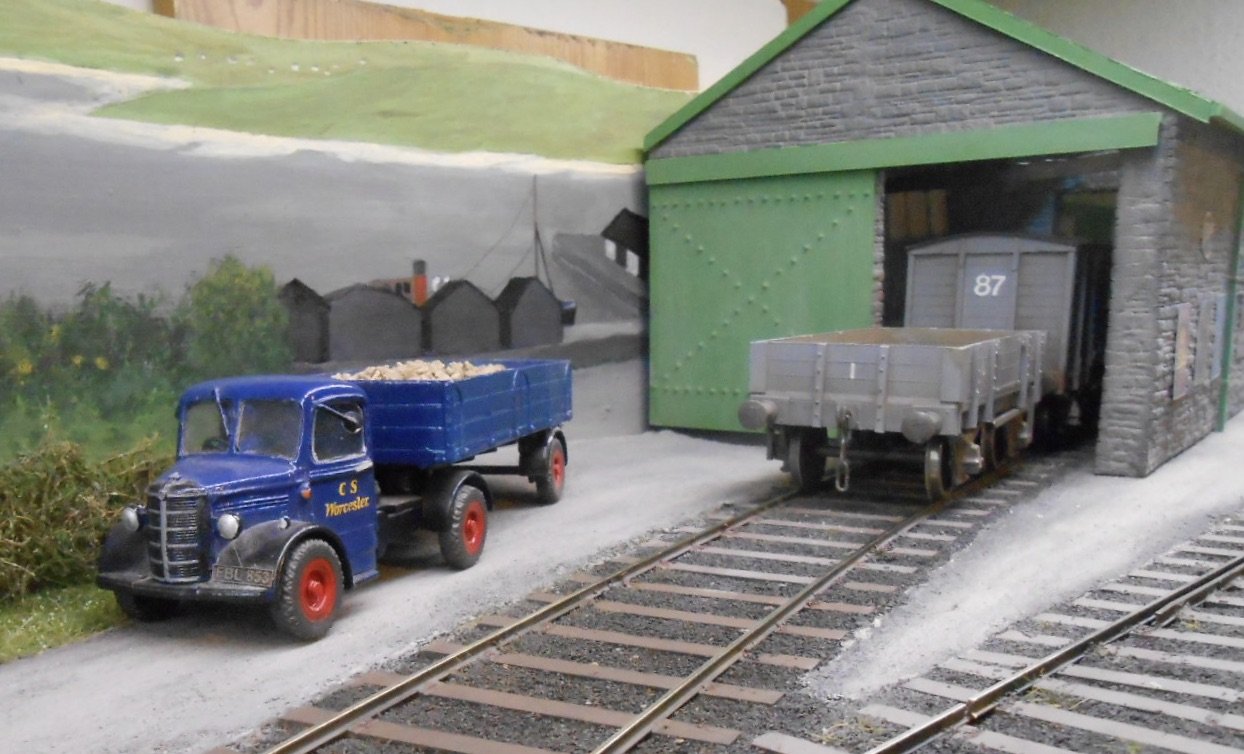
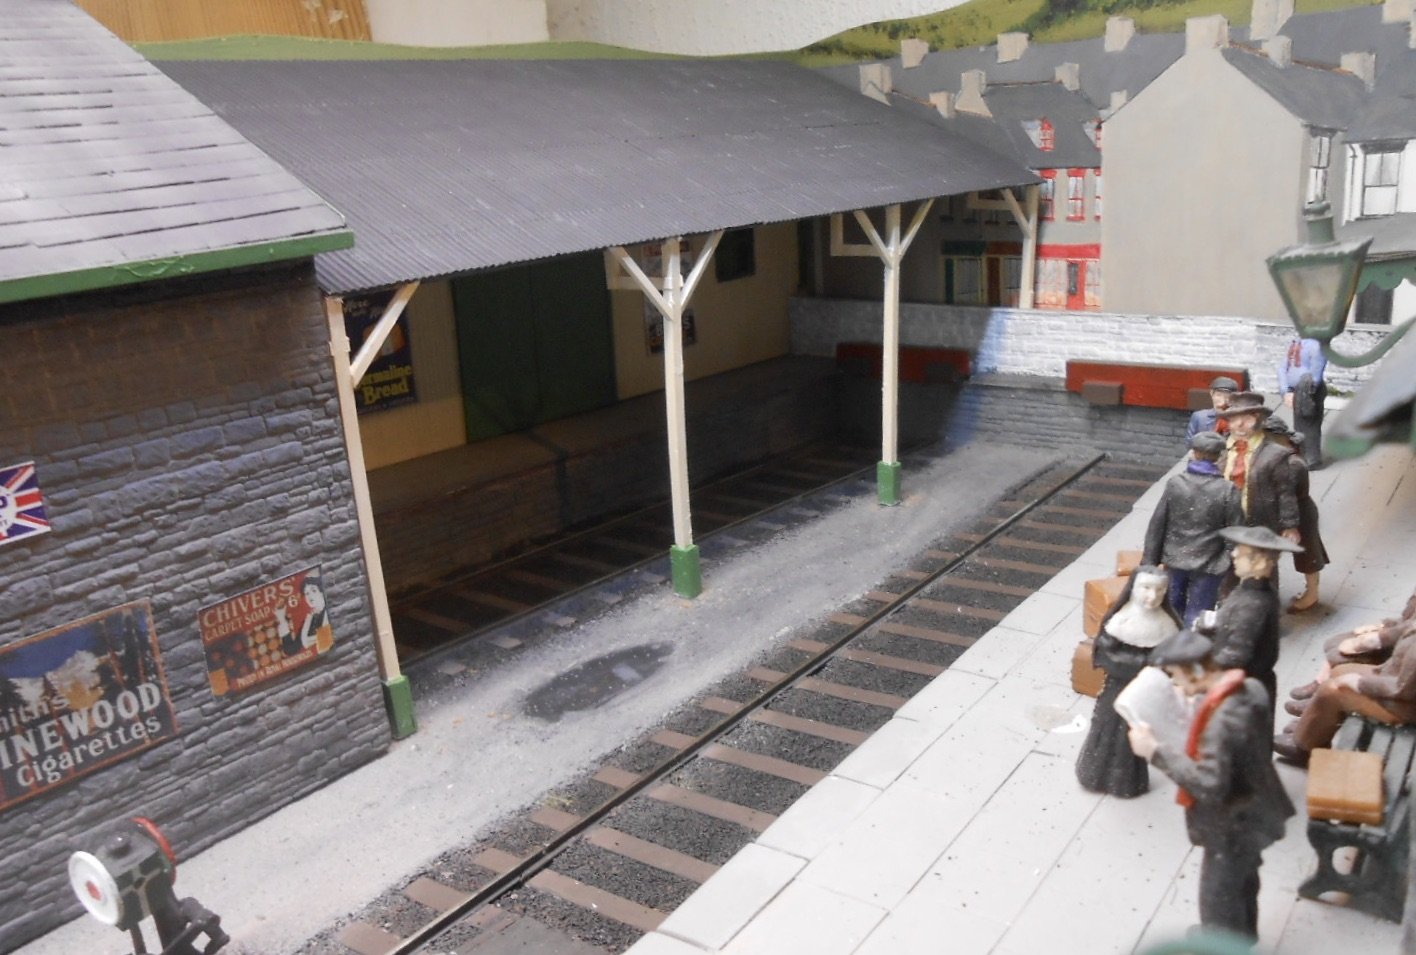
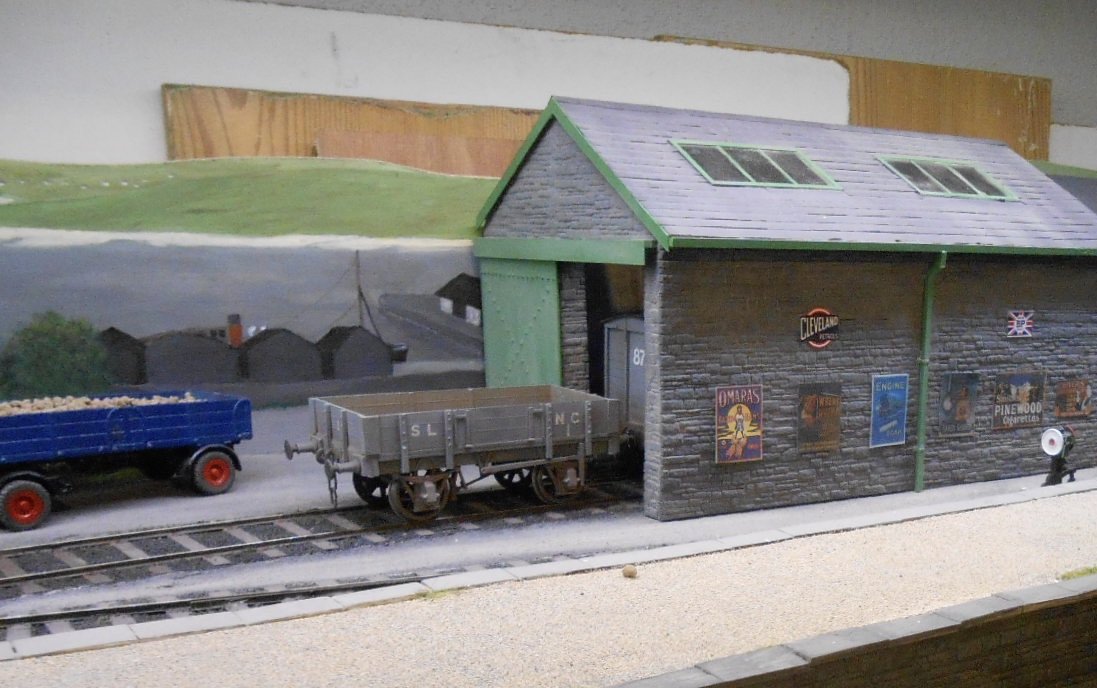
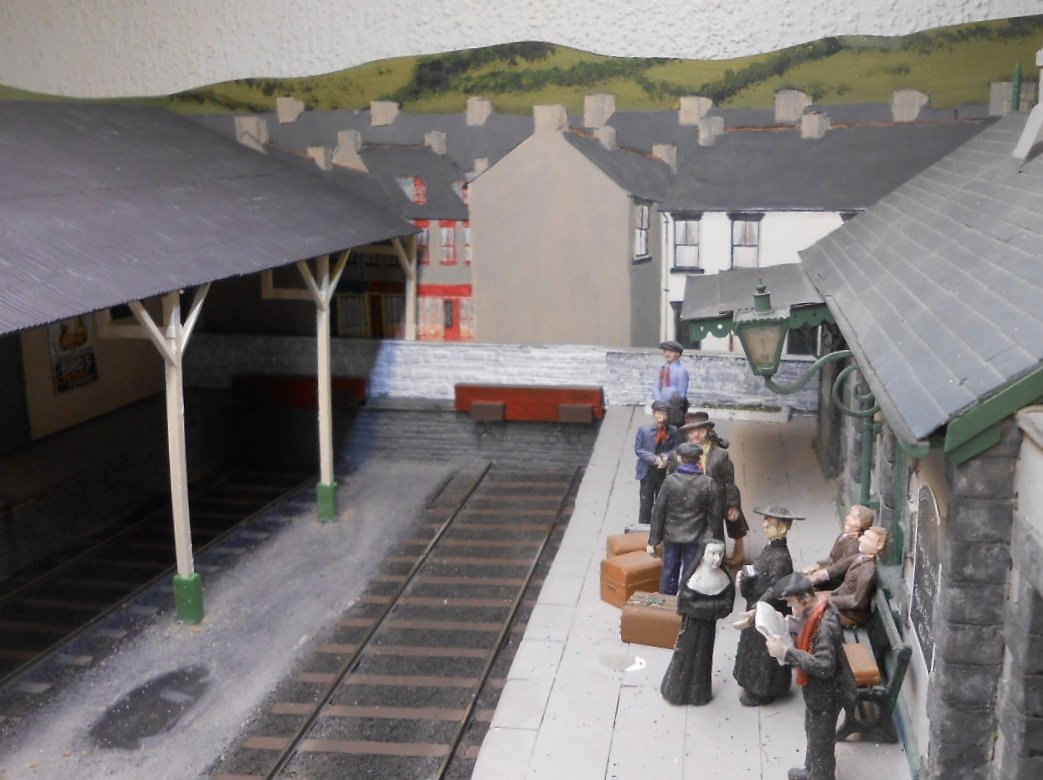
Almost there? Well, not quite, but most of the key elements are in place now, with just one major structure remaining which will be a three doll signal at the platform end. Feel like I've been messing around with this baseboard's back scene for far too long and am still not entirely convinced. The decoupage of the end board seems not too bad to me, though that is for others to judge. In fact, much of it will be partially hidden by the framing when the layout eventually gets exhibited. The little scene behind the goods shed has taken even longer. Originally, was going to put the white cottage from Arigna there, but it dominated the scene too much, so replaced it with a stand of hawthorns and a hedged off field. Behind that, I've been trying to create a distant quayside, the mark four version you can now see in the photos. The 'Clyde Puffer' has doubled in size from its first incarnation and now has been largely hidden by a row of black sheds. Further back still, the stone pier now has a fish shed on it, though this still doesn't look right in some of the photos. Rather like some of Fintonagh's back scene, much depends on the viewing angle, so hopefully at exhibitions it will seem ok. The articulated lorry is an old dinky toy, well into its sixth decade. It is the wrong scale, either 1:50 or 1:48 [should be 1:43], but has been glazed and given a repaint, with the addition of windscreen wipers and door mirrors. 1950s period only of course and should have a better number plate too. Its current one is East Anglian, from a previous 0 gauge layout. Plenty of detailing still left, so at least I've got stuff to do during lockdown. After that, or as well, there will be much to do with running trials, as all the stock hasn't turned a wheel for nearly two years, so will need a thorough service.
- 179 replies
-
- 11
-
-

-
Remarkable.
-
Looks like I will need to make removable signs for my layout when it goes dual period. Easier than having two liveries for all the buildings. I shall have to plead artistic licence.
-
For a while toyed with alternative names for Arigna Town, including Ballyrina, Killyconcaray and (my favourite) Bailleshawbheagan - think zebra crossing. Meanwhile, the Orpington model railway club use the village hall in Pratt's Bottom, while not far away are places called Badger's Mount and Fawkham. As for Bastardtown, there was a cartoon in the Guardian of a lady at the desk of a solicitor's office. The secretary was saying something like 'if you are unhappy with Mr Smith, perhaps you could speak to one of our other solicitors?' The name of the firm was B'stard, B'stard, B'stard and Smith. Now we know where they were based.