David Holman
-
Posts
4,359 -
Joined
-
Last visited
-
Days Won
117
Content Type
Profiles
Forums
Events
Gallery
Blogs
Community Map
Everything posted by David Holman
-
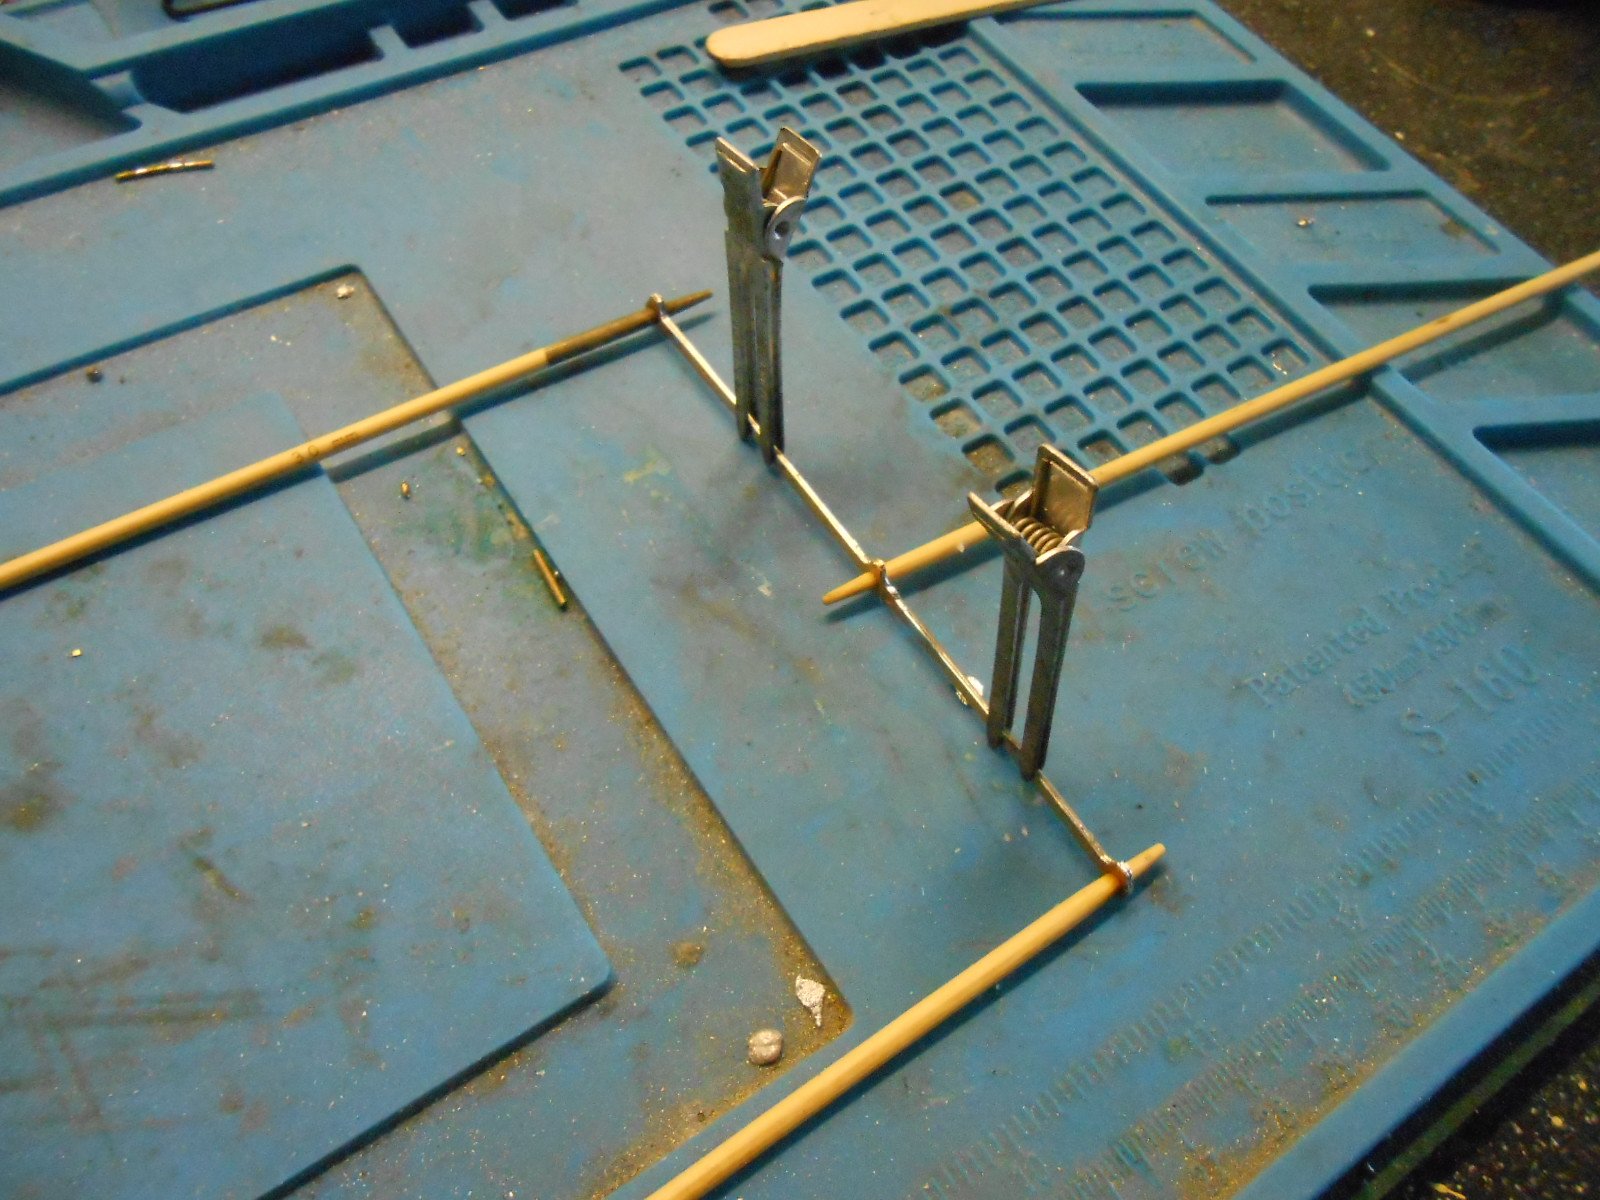
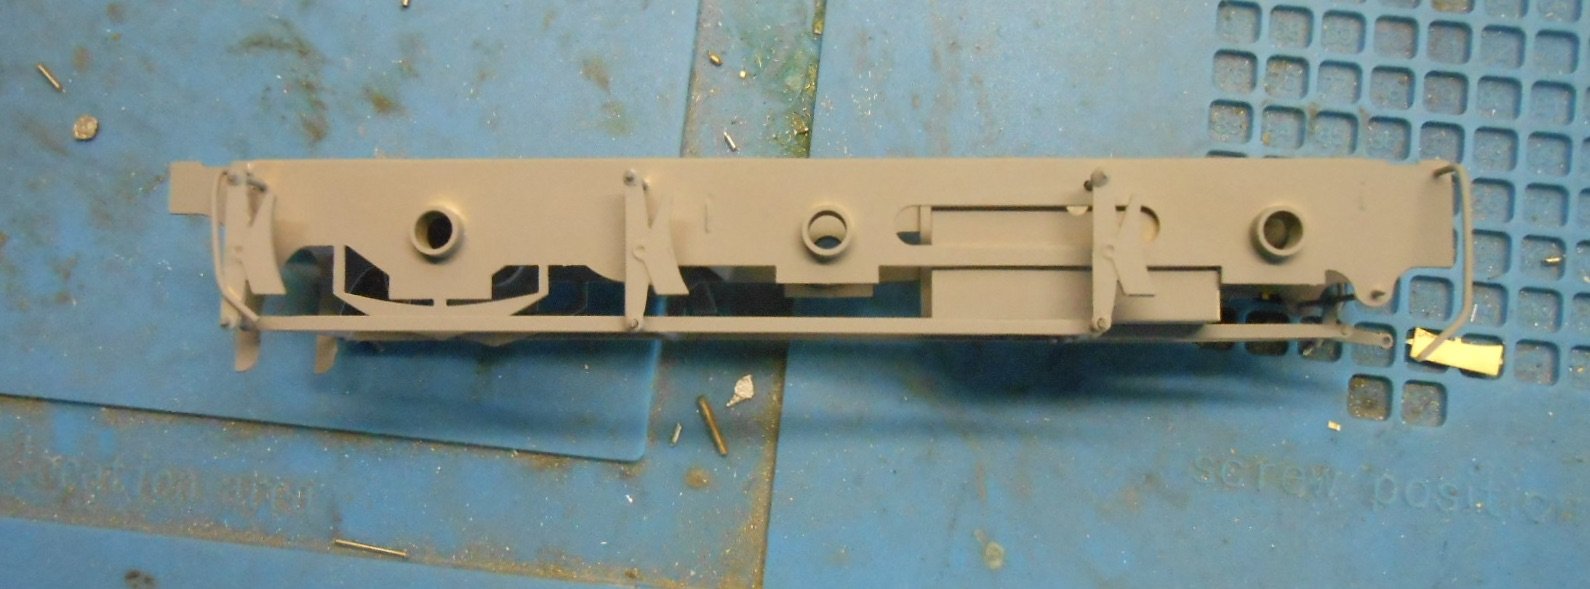
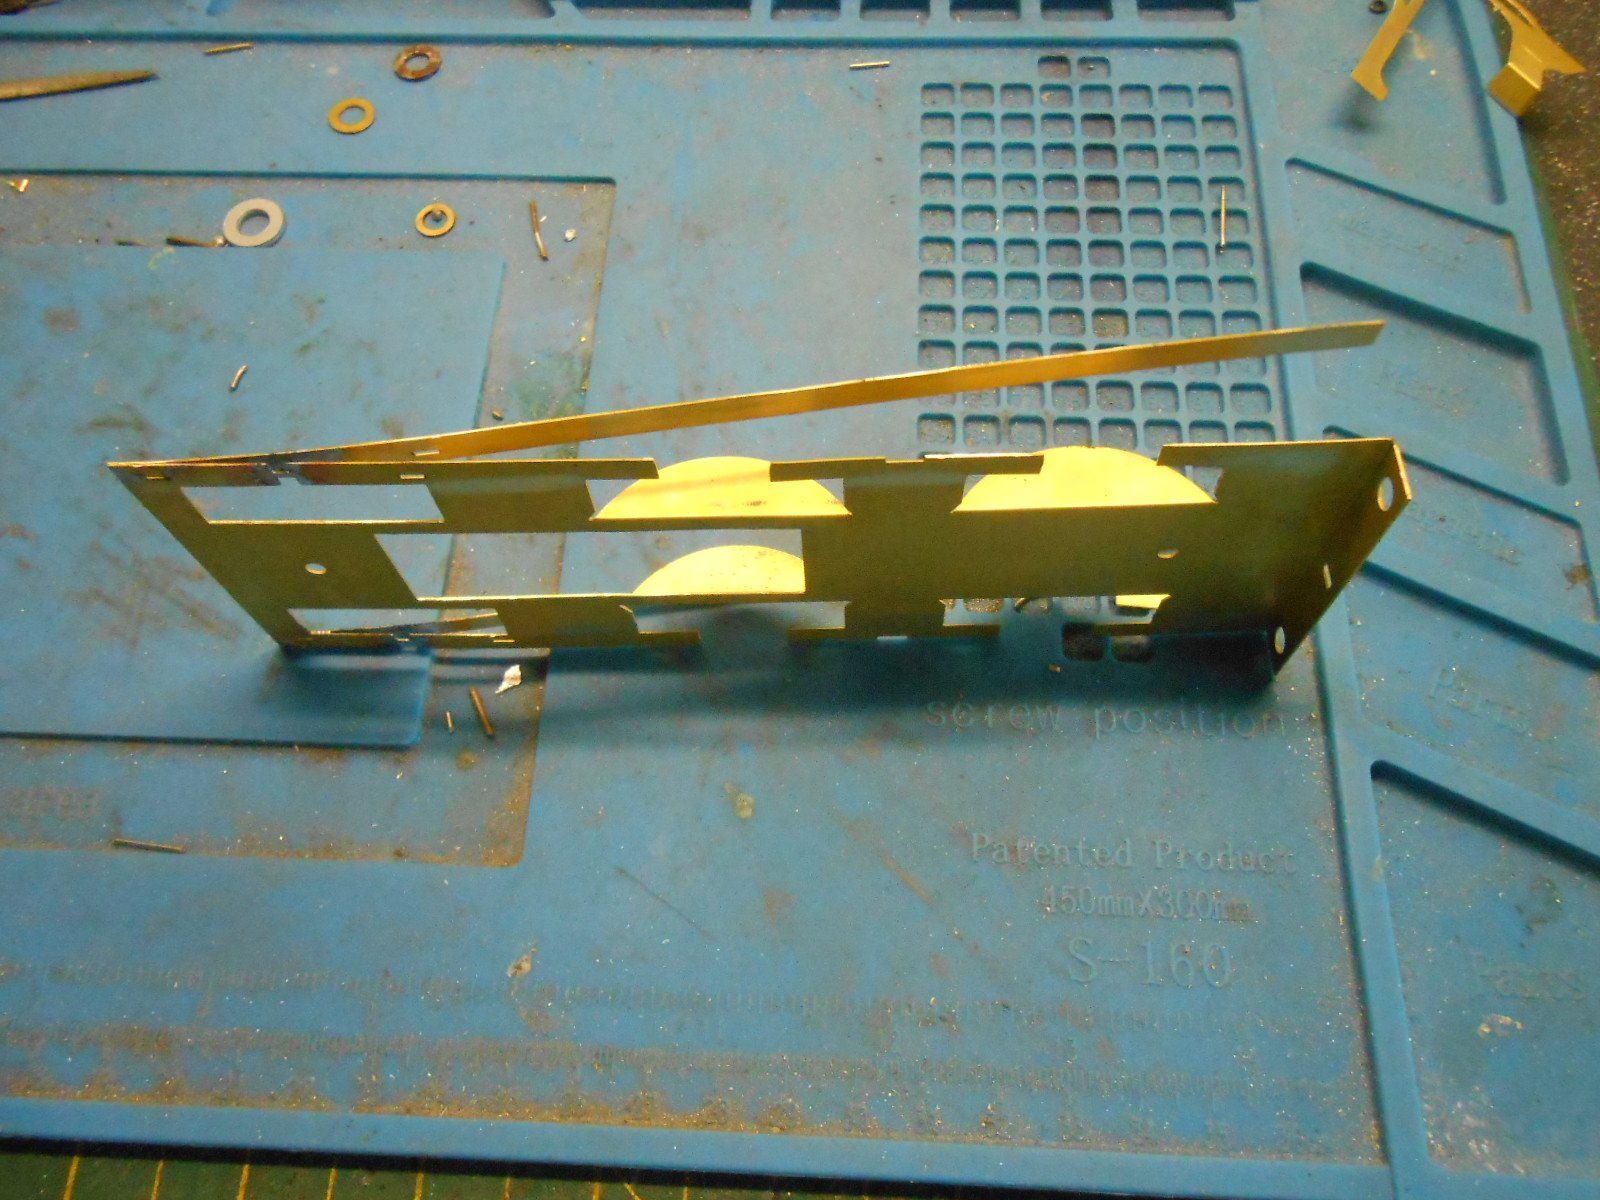
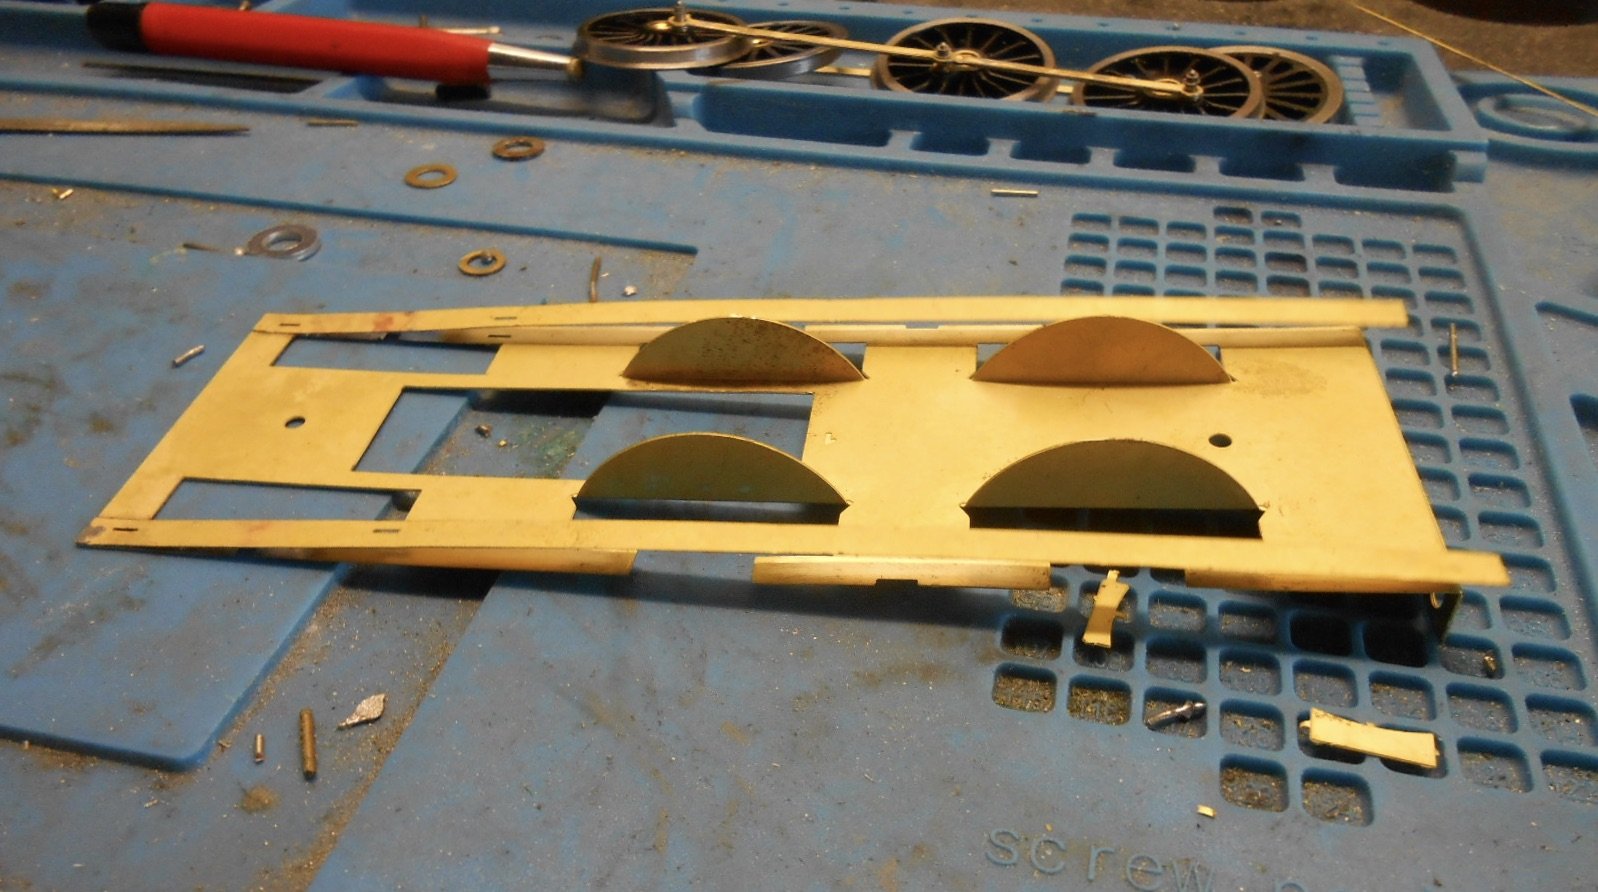
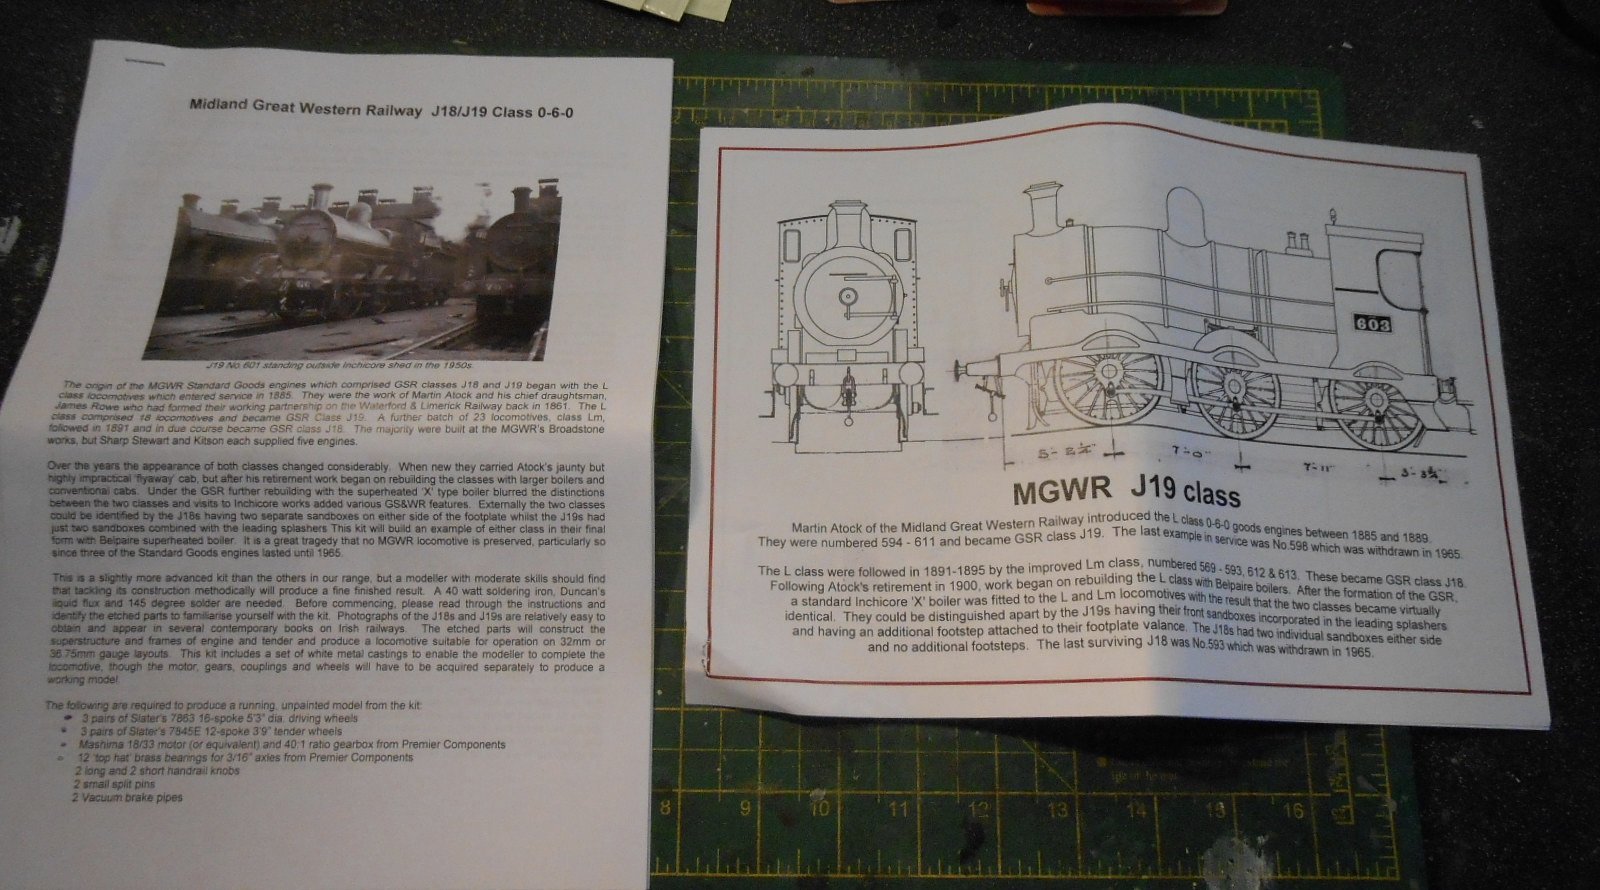
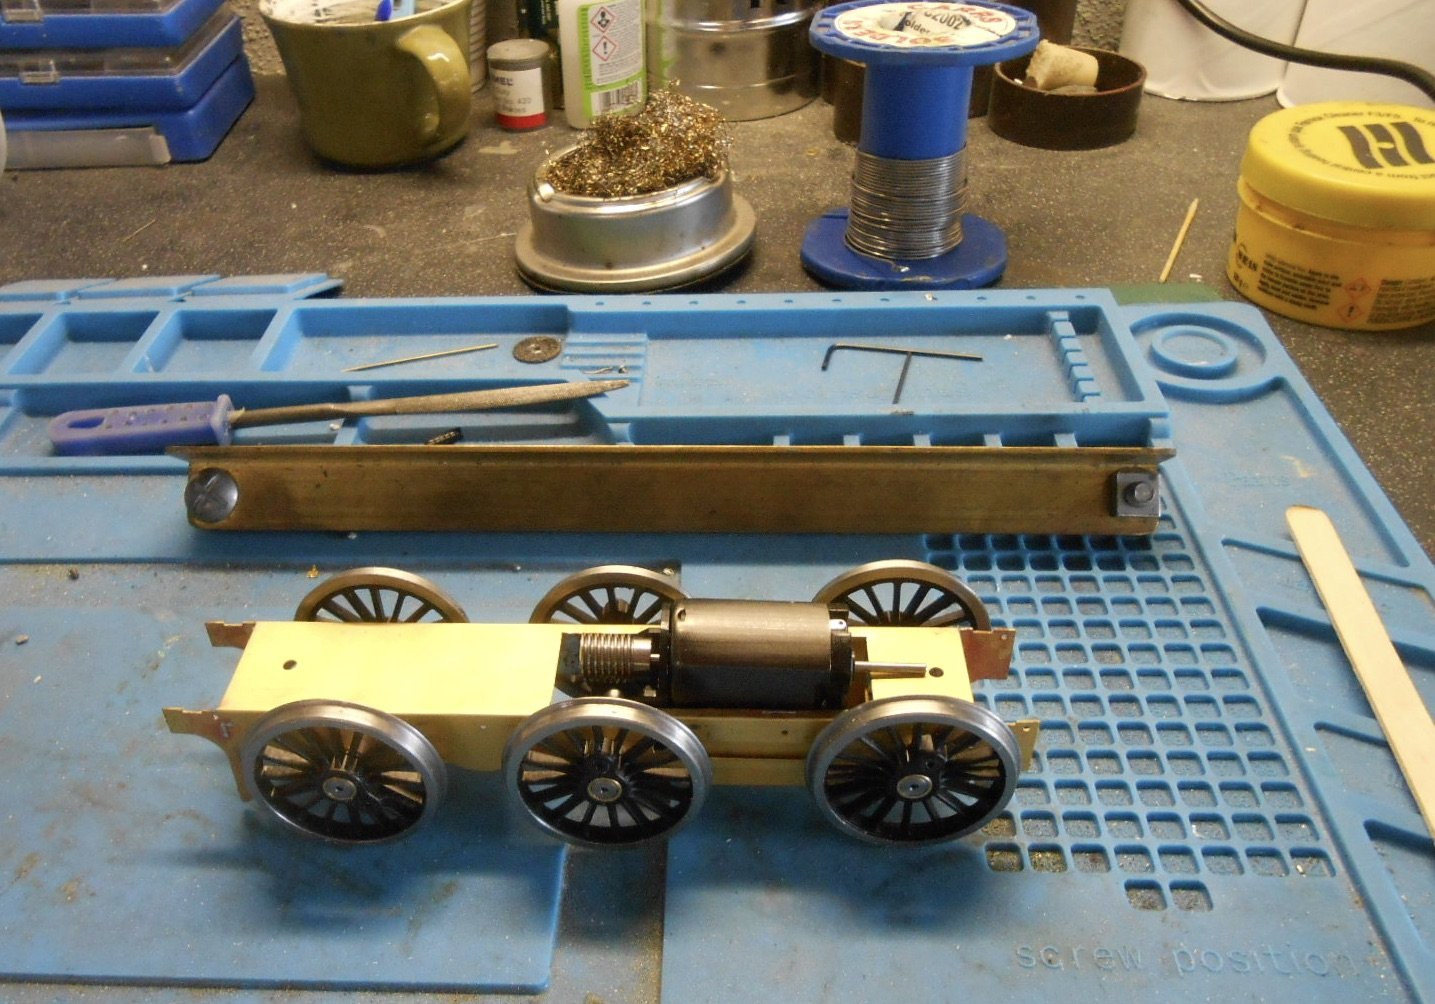
Research, Rods & Stuff Have spent a couple of interesting hours trying to decide which loco I'm going to model. The GSR 'bible' is initially a little confusing in that it suggests both U and W tenders were paired to J18/19s, whereas my Tyrconnel kit has the same type Z as used with the G2 2-4-0. Later, it says tenders were rotated almost at whim, while the instructions certainly show at least three photos of locos with the Z type tender. Hence the dive into my 'library'... As far as I can tell J18s 590 and 588 fit the bill as having the Z tender and the correct cab sides for those supplied in the kit [see photo below]. Likewise, J19s 603 and 597. The others that I have photos of either have the wrong tender, wrong cab, or both. Note that my chosen model also requires it to be a J18/19 rebuild with the X type, Belpaire, superheated boiler. The main reason for sharing this of course is that there are among you people far more knowledgeable about such things than me, so am hoping someone can confirm that the following is a good choice: Either J19 597, as my photos suggest this would fit the parts I have, or J19 598, for no other reason than [like my Castle Rackrent WL&W loco] was also once called 'Shannon'. 598 is also shown as lasting until 1965, whereas 597 succumbed in 1959, but this is not a deal breaker. Meanwhile, the loco chassis was completed in another 75 mins this morning - just two hours in total - by the adding of the coupling rods and brake gear. The former are shown in one of the pictures, being 'sweated together', using hair clips and barbecue sticks. A little light reaming was required after, but once fitted to the wheels and with a light oiling to the gears, when power was applied, they turned smoothly, with no evident binding. Given my locos are expected to work for their living and in particular stand up to scrutiny at exhibitions, I can't begin to say how reassuring this is! Brake gear, on the other hand, always seems to be a bit of a faff for me, but for once all went well here too, so, as per instructions, the next step was a general clean up, prior to a coat of primer from a rattle can. By way of 'celebration', I cut out the footplate and valances from the etchings this afternoon. This is one of those steps that, no matter how often I read the instructions, a 'dry run' is essential for me to understand them. The footplate is not unlike that of the GSWR 101/J15, in that there are small splashers over the coupling rods - always a bit of a challenge to create. Here, the outer edges of the footplate are etched to half thickness, to which you add a further, half etched overlay. At first, when you tack solder it to one end, it looks too long, but once the curves are formed, it should fit perfectly. All I can say is wait and see for now, but it certainly looks like a clever way around the problem.

-
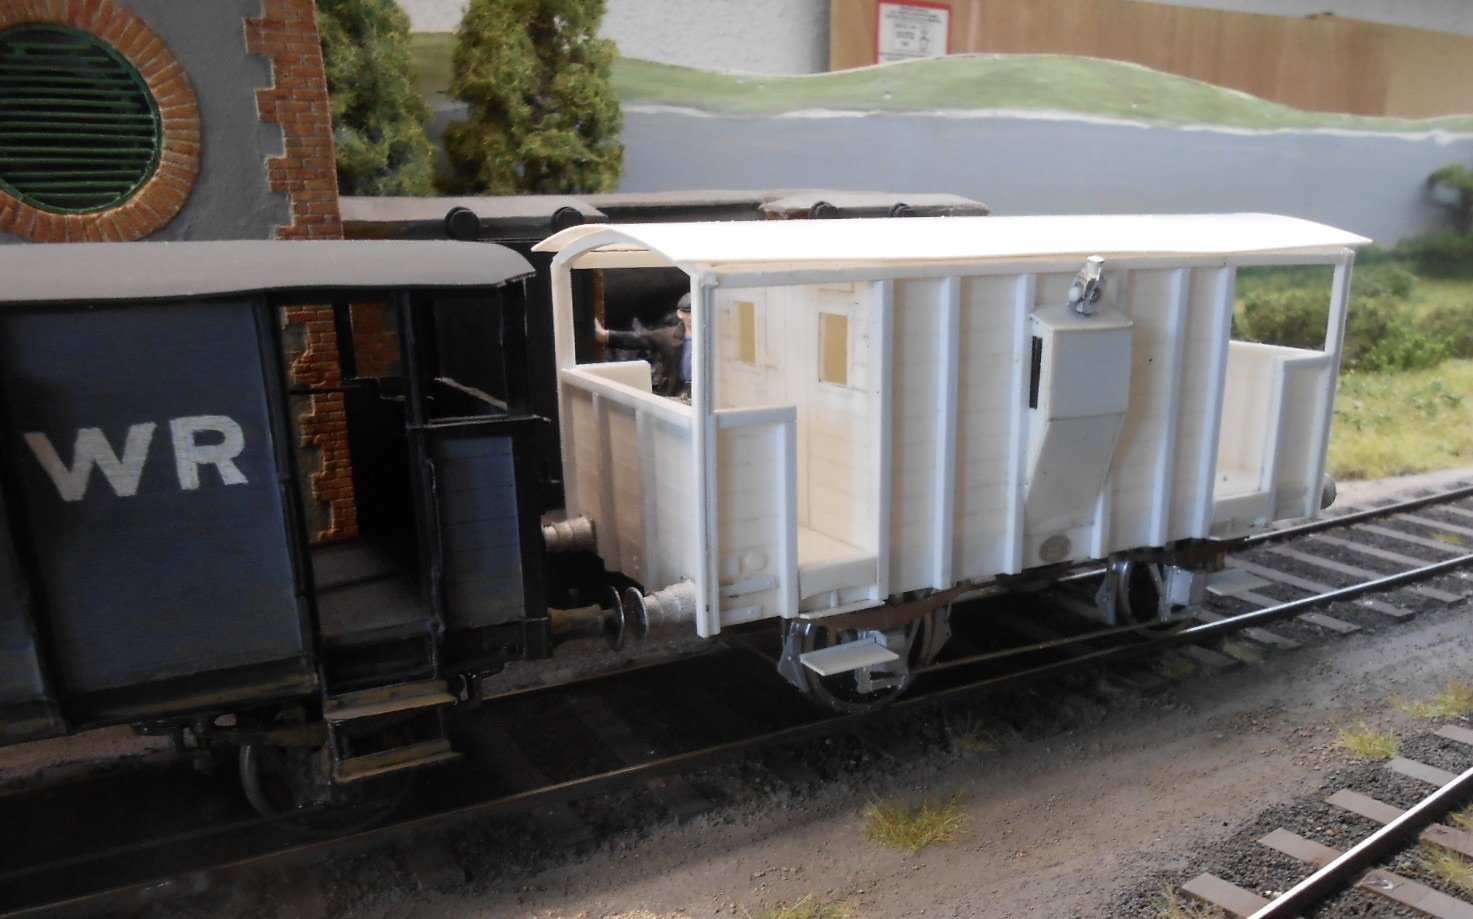
Small details like the two modern lamps and a screw link coupling really finish things off nicely.
-
Somebody's been busy! Great work.
-
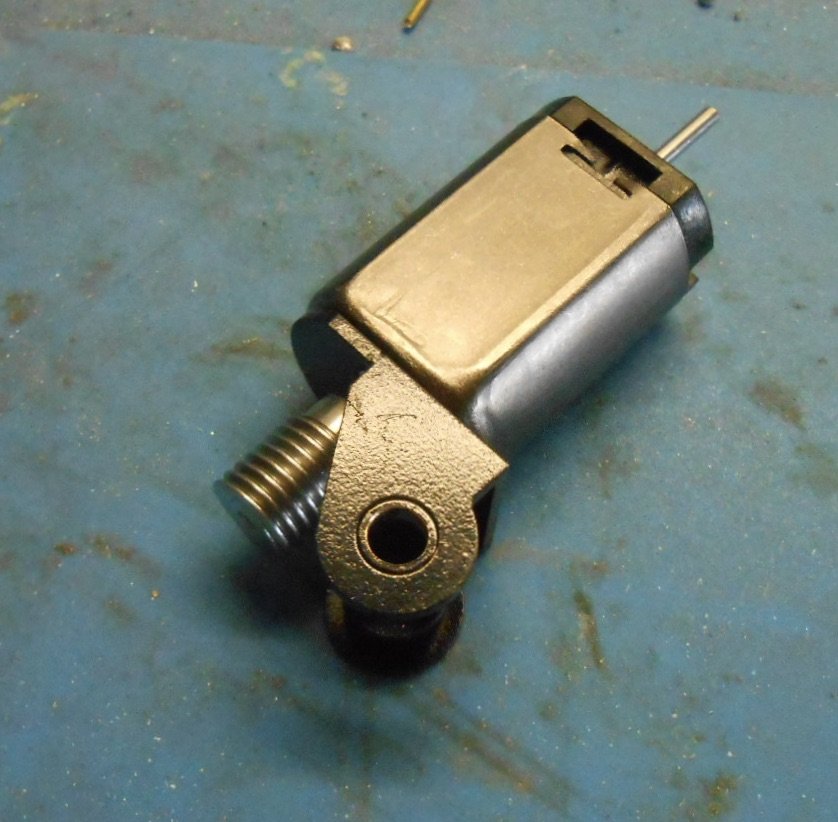
Correction on the motor gearbox. It's from Premier Components. Really can't recommend them highly enough. The gear box is a machined item and comes already fitted to the motor, so simply drops between the frames. Costs the same as an etched gearbox, but takes away all the variables. Premier do a big range of other stuff, notably profile milled coupling rods. For anyone scratchbuilding a loco, they are definitely the place to start as you can use them to drill the axles holes in the frames, meaning a rolling chassis first time, every time. Nice and chunky too. As for the cab on the J19, haven't checked if there are alternatives yet. If not, it will narrow the options somewhat, but am sure there will be a suitable prototype to follow.
-
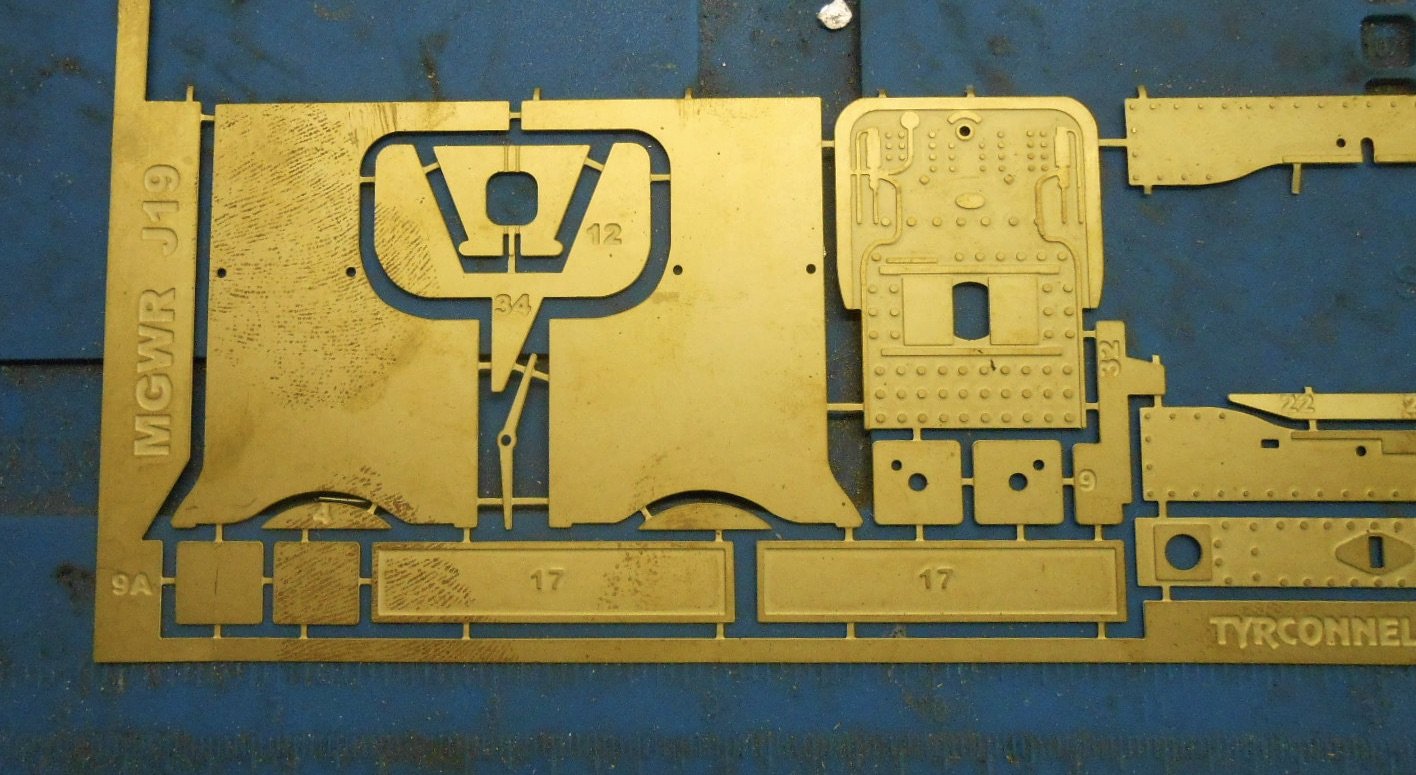
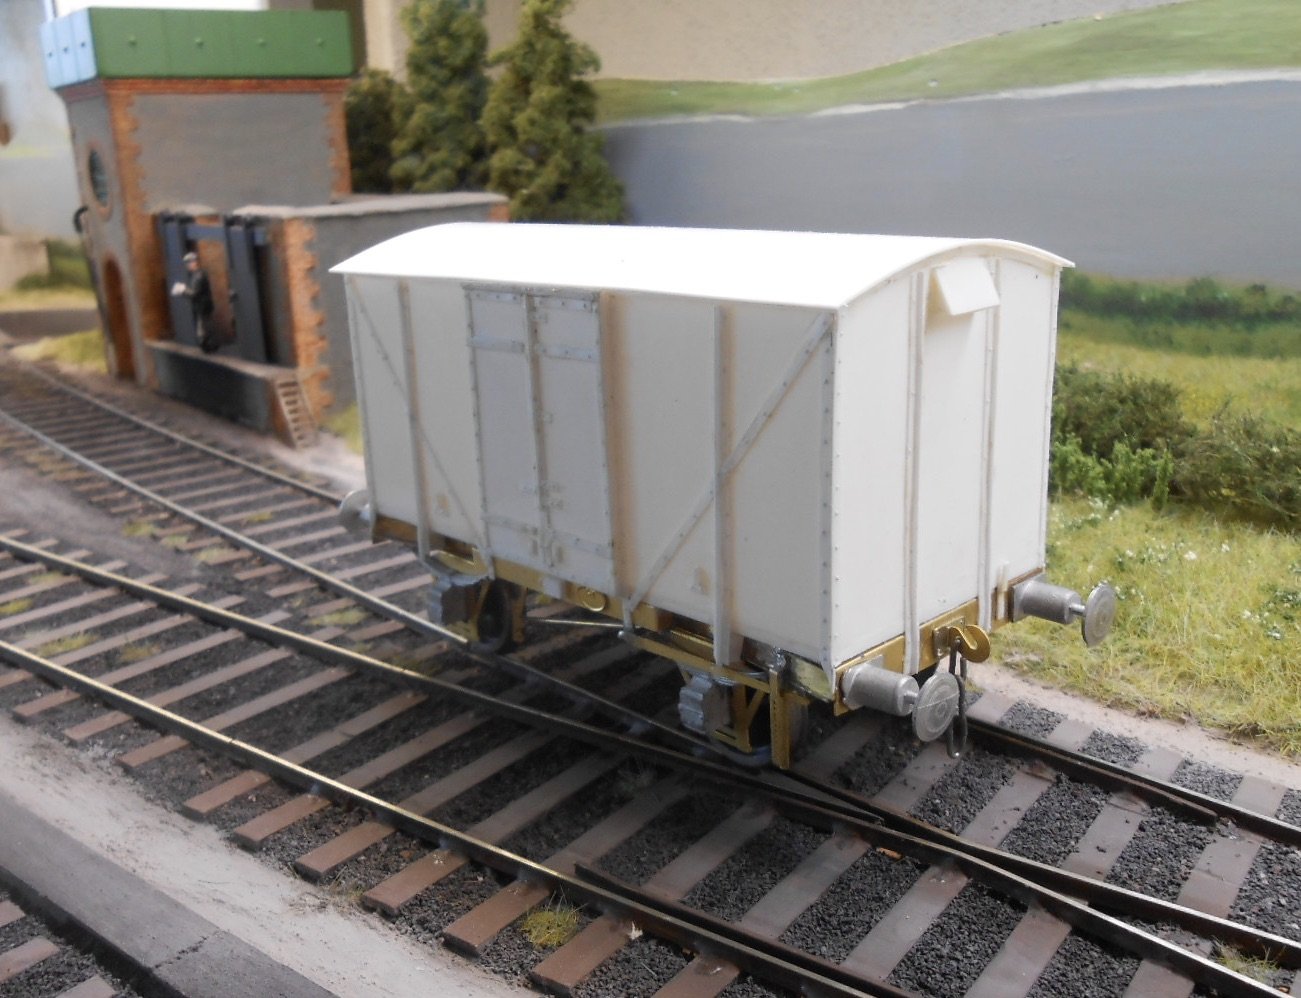
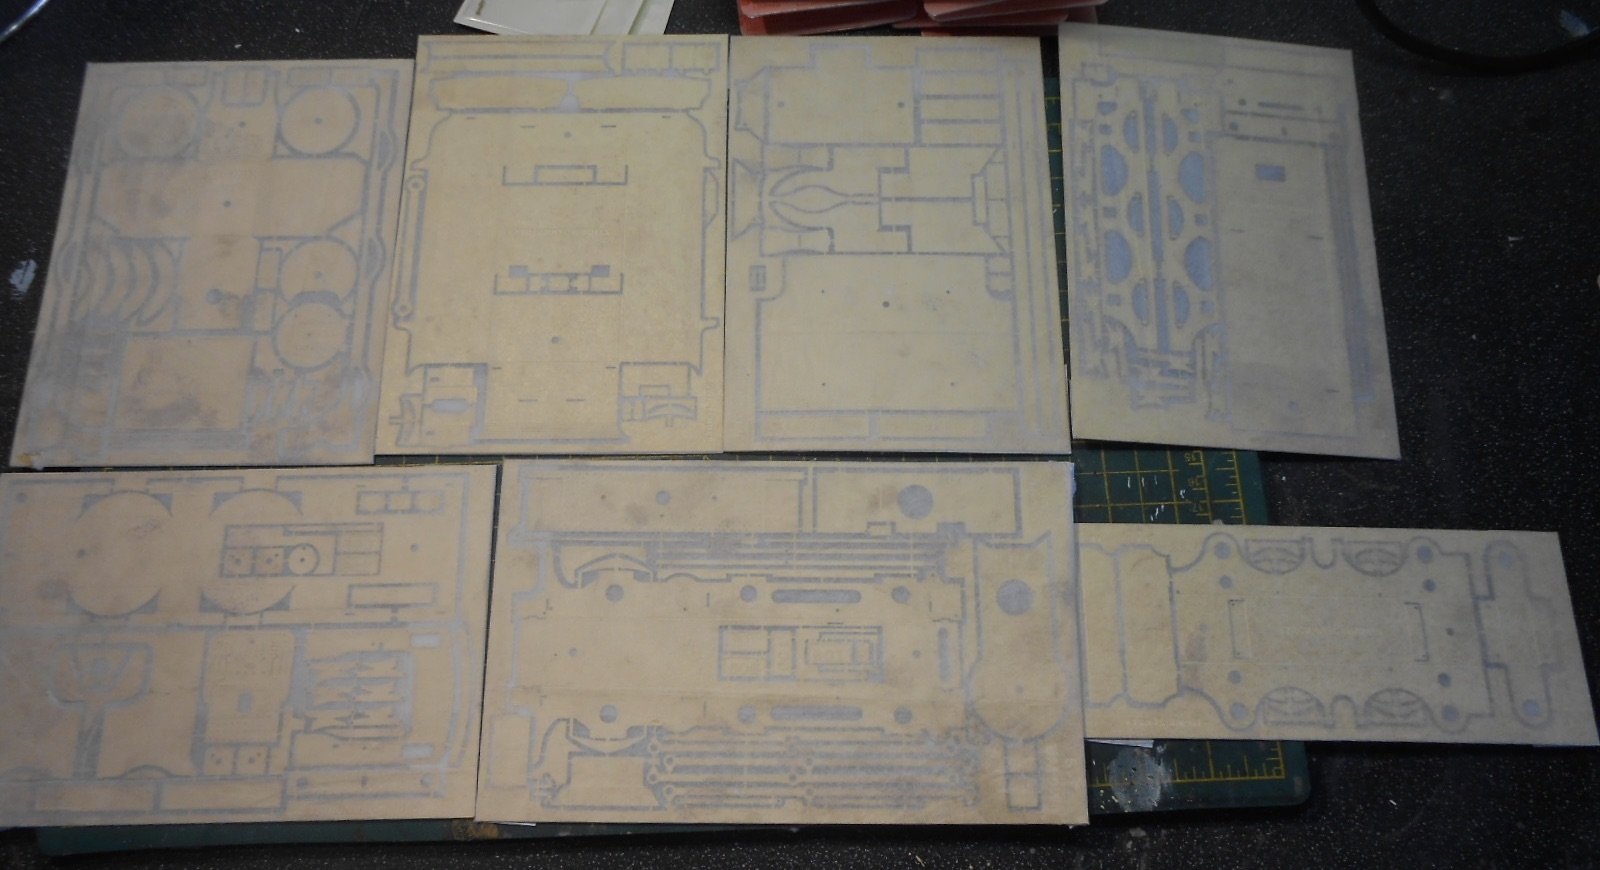
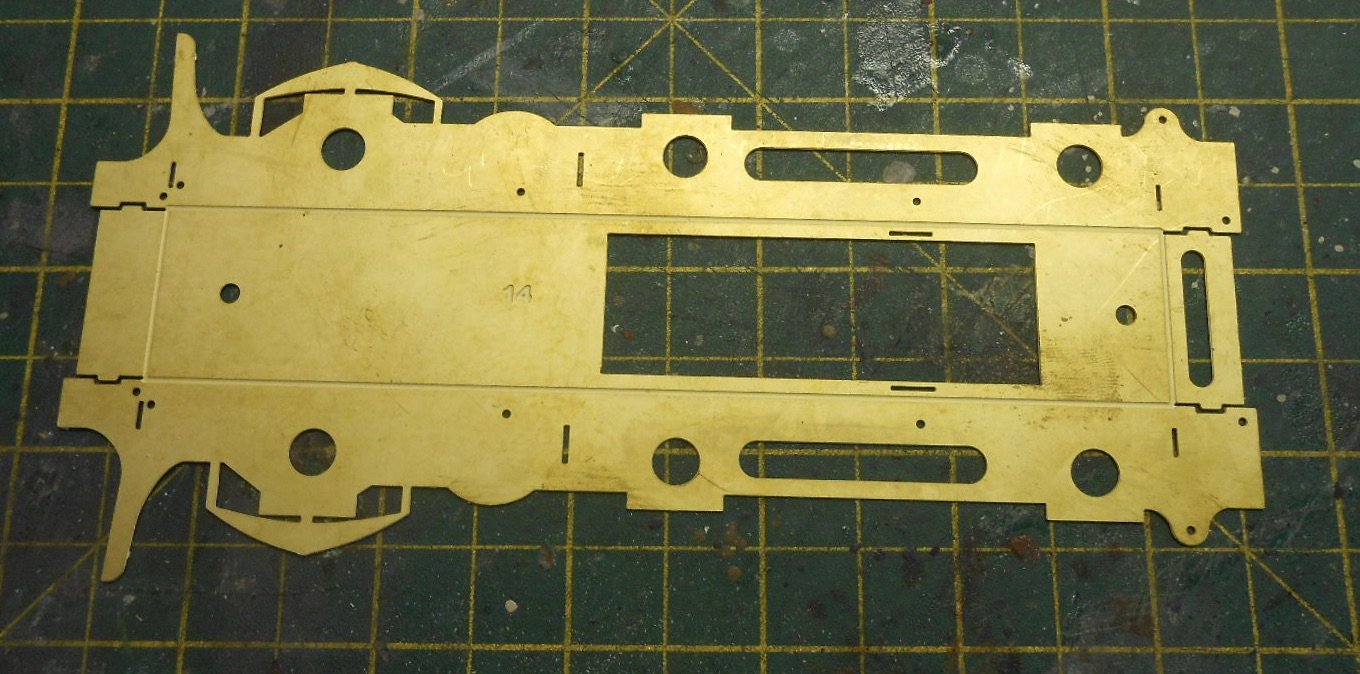
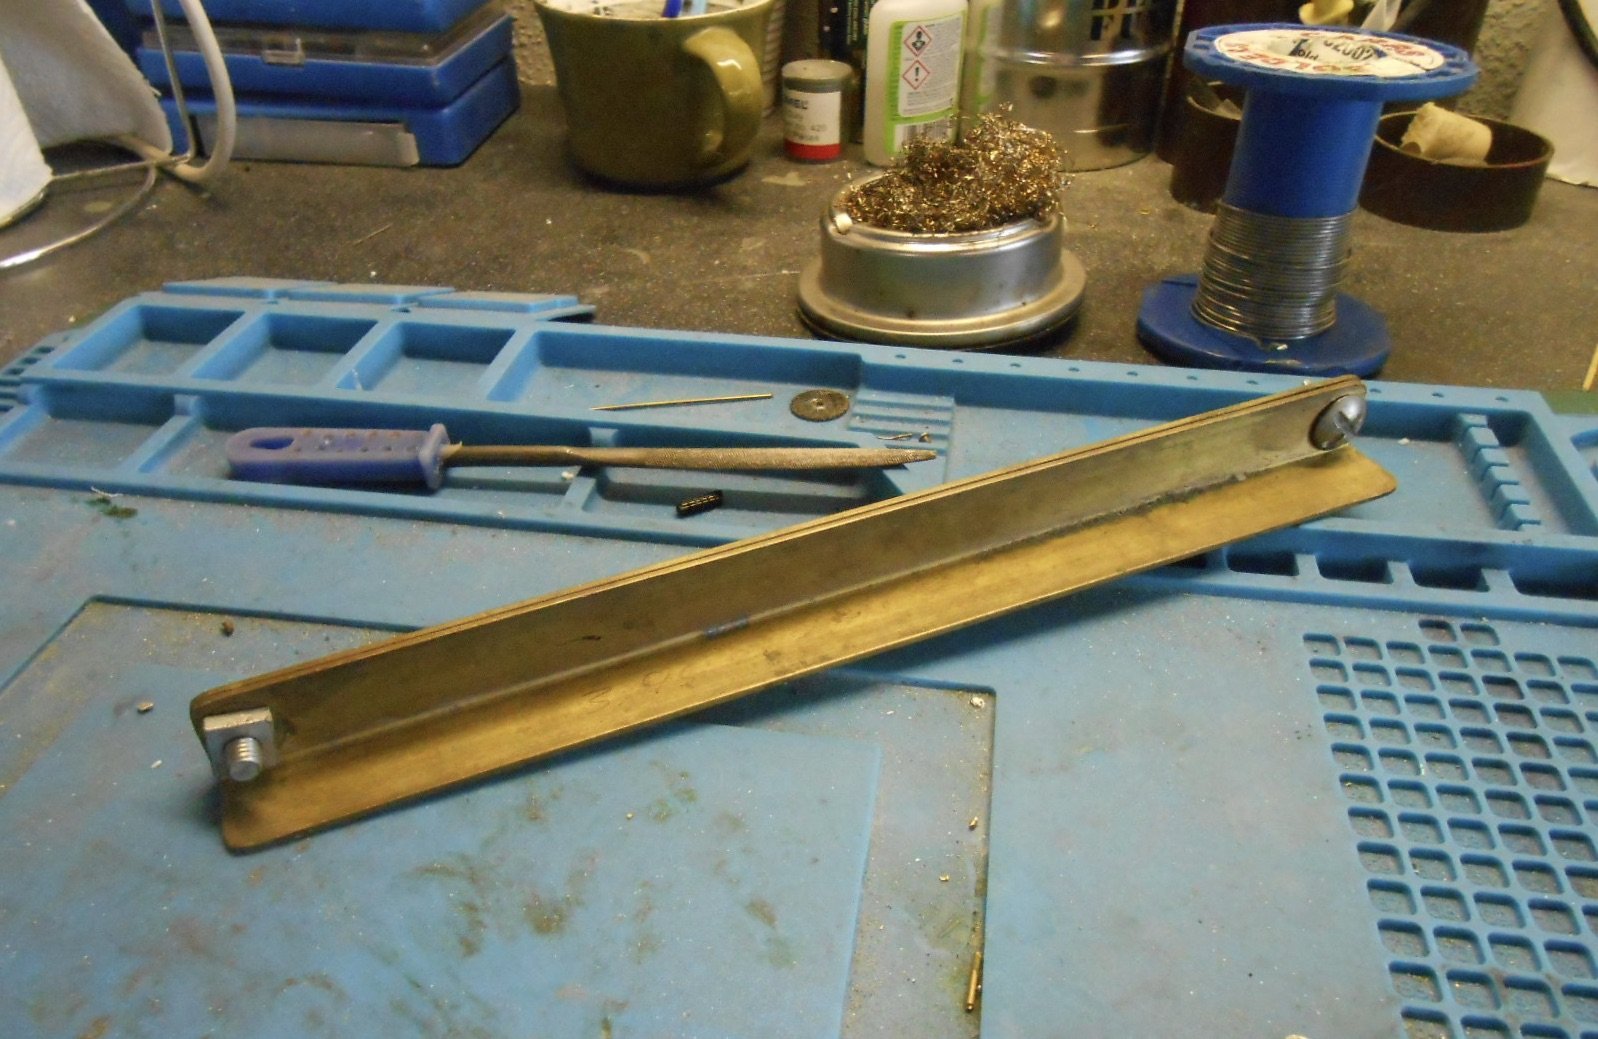
H van Eventually, with any project, I think you get into a kind of rhythm and so it has proved with this van. A couple of afternoon's work and suddenly it was all coming together: getting the other side and both ends done. That left the roof, couplings and small details like the door clips. The latter are certainly nothing accurate, just a couple of bits of plastic strip to suggest their presence. However, things are now on hold until my order for transfer rivets arrives. The chassis needs a few of these, likewise the sides, so the model has been put to one side, as it is not worth painting until this is done. Overall, I'm fairly happy with it, especially as it is just a van. I have a rake of Parkside BR steel mineral wagons that I gave the full Martyn Welch 'Art of Weathering' treatment to - rust first, then Maskol, top coat and peel off the Maskol to reveal the rust underneath. I'm still rather proud of them, but whenever they ran at exhibitions, they were barely noticed. Indeed, it is a standing joke at the Chatham Club that another member's model of an Isetta bubble car [bought from a second hand stall for 50p] got far more interest from the viewing public! So, for now, on to something rather different: Midland Great Western J18/19 kit I treated myself to this Alphagraphix/Tyrconnel kit from the proceeds of my Fintonagh article in Railway Modeller. Well, that and a quite a bit more. Those of you experienced in the world of 7mm scale loco kits, will know that most of them are far from complete. This is not a criticism, for the Tryconnel kit certainly looks well designed. However, you still need to buy wheels, motor and gears. Slater's wheels are £22 an axle, plus there are the tender wheels and six extended axles for broad gauge and also a Precision Models 40:1 gearbox and Mashima motor. All this pretty much doubles the cost of the kit, but then you have many hours of [hopefully] fun putting it all together, while if such things are important to you, the finished model should be worth up to three times what you paid for it. Have included a few pictures of what you get with the kit - several sheets of etchings, some white metal castings for boiler fittings, buffers and the like, plus around a dozen pages of well illustrated instructions, including a nice scale drawing of loco and tender. The latter is the same version as used on the Tyrconnel G2 2-4-0 kit. I'm not yet certain which loco the model will actually become, though it will probably be a J19, with the X type, Belpair boiler and like as not an Athlone based loco too. Hence will need to refer to the GSR Loco 'bible' to choose one that had the G2 type tender and lasted Ito the 1950s. Made a start this afternoon and it took me just 45 minutes [yes really] to build a rolling loco chassis. Tyrconnel loco kits are cleverly designed in that the chassis is a single piece that you just fold up. Have made four of them now and it just works. A bit more care needed with the J19, as cut aways mean you can warp the sides, but my ancient set of bending bars came in very useful here. So, fold up the sides, fold down the two end spacers and add a third in the middle. The firebox coms next, again a single etch, then solder in the wheel bearings. The etched holes for these are a perfect fit, requiring no reaming out whatsoever. Temporarily fit the wheels to check the chassis is square and there you are. Well done Roger - if only all chassis were this simple!
-
Model railway royalty indeed!
-
Wow, louvres too! Something else that is a real pig to make!
-
Looking forward to seeing new projects, Nelson. Seem to remember my college days had little in the way of modelling time, or study for that matter. Pushing up the value of brewery shares and having a good time was the main priority! Different times though, with grants and guaranteed work at the end of it. My generation has it easy compared to now.
-
Hopefully the station house looks bigger because it is so stark, so a bit of work with felt pens or crayons should soften it. If not, as Eoin and David suggest, trees should help balance the scene. Ideally similar height objects at either end will balance the view. Current thinking favours curved corners to the backscene, though again, trees or buildings can hide these. Presumably, there will be a fascia to help hide the holes in the sky? Great to get an insight into the overall project too.
-
Excellent stuff. Many thanks everyone!
-
As I posted recently on another thread, there are times when we modellers find ourselves doing something almost for the sheer devilment of it! If I'd stopped to think about the H, am sure the project would have gone on the back burner for a bit and especially if I was making more than one. As Patrick says, in 4mm scale, buy Leslie's kit. Sheer bloodymindedness says I will continue with the van as is, but an internet search for rivet transfers is definitely on my to do list!
-
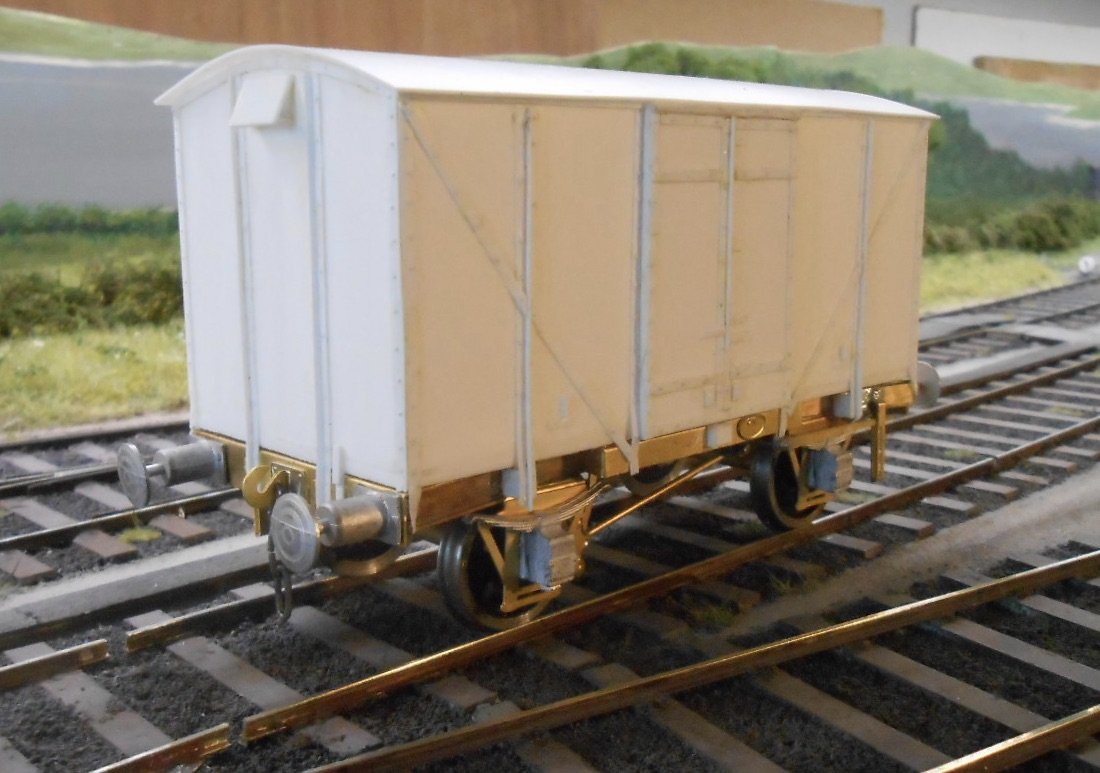
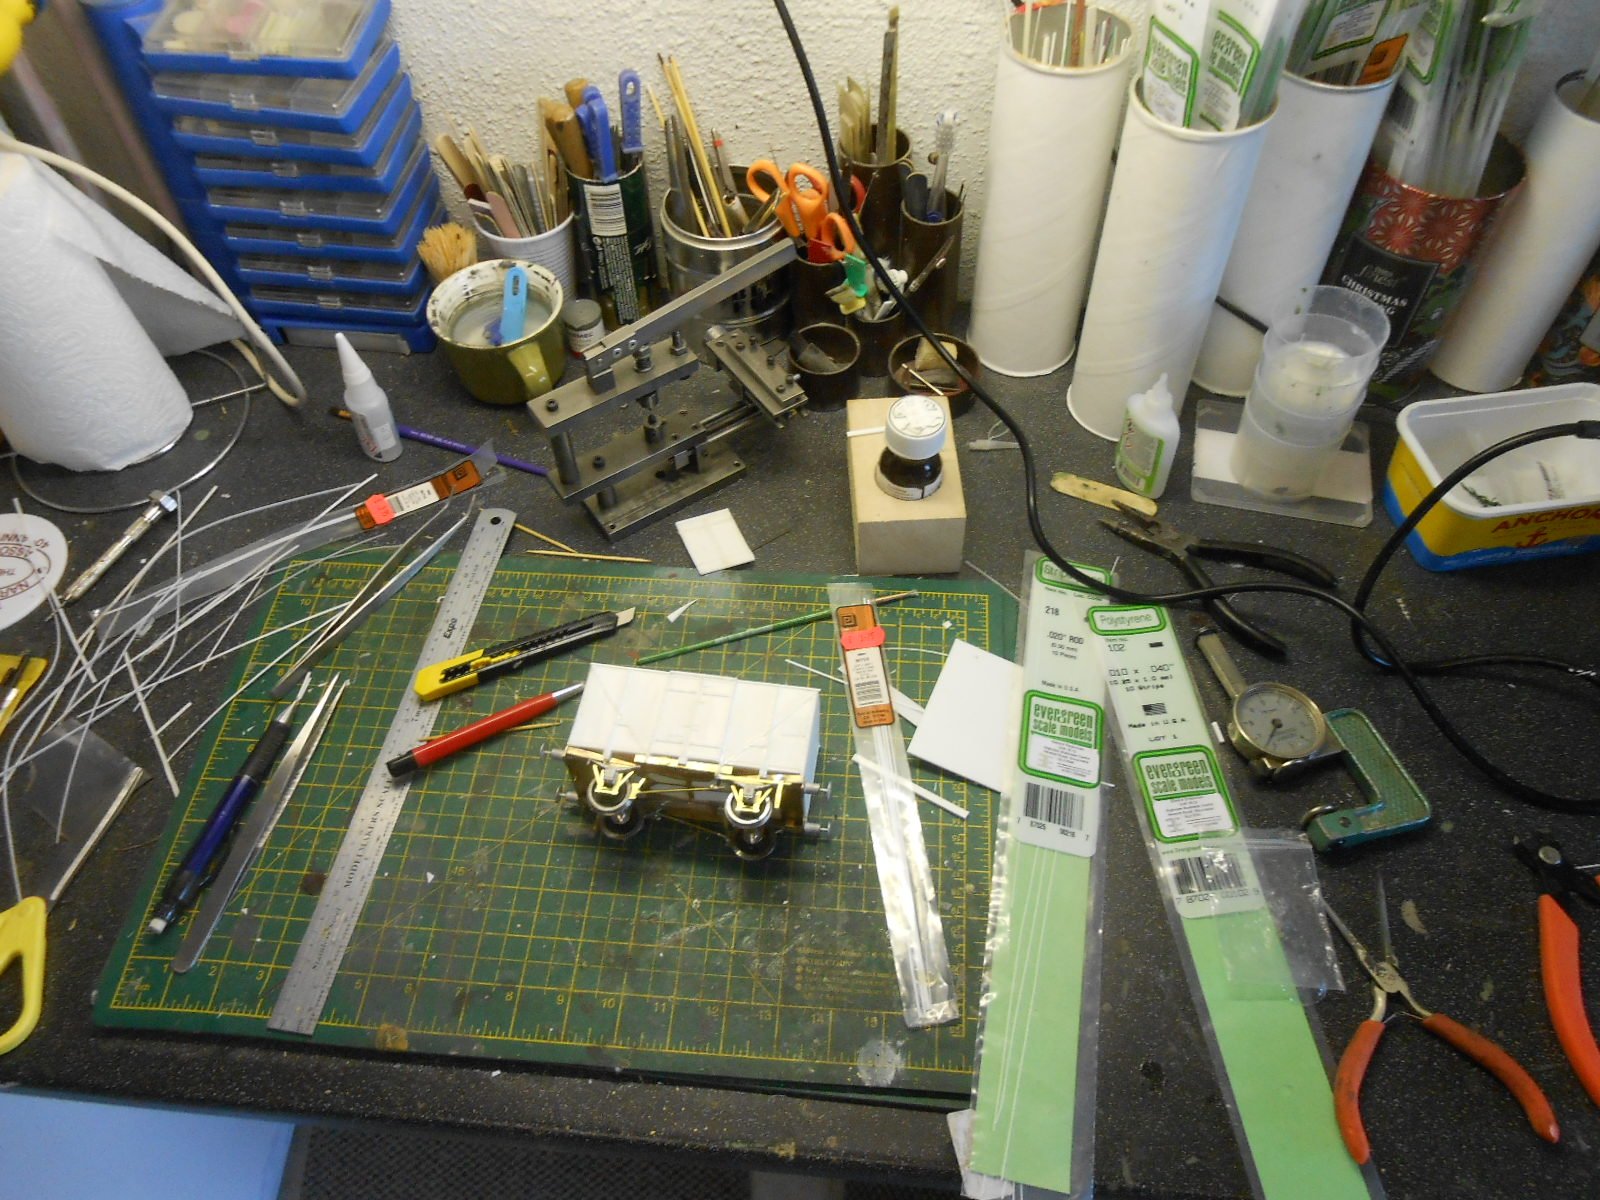
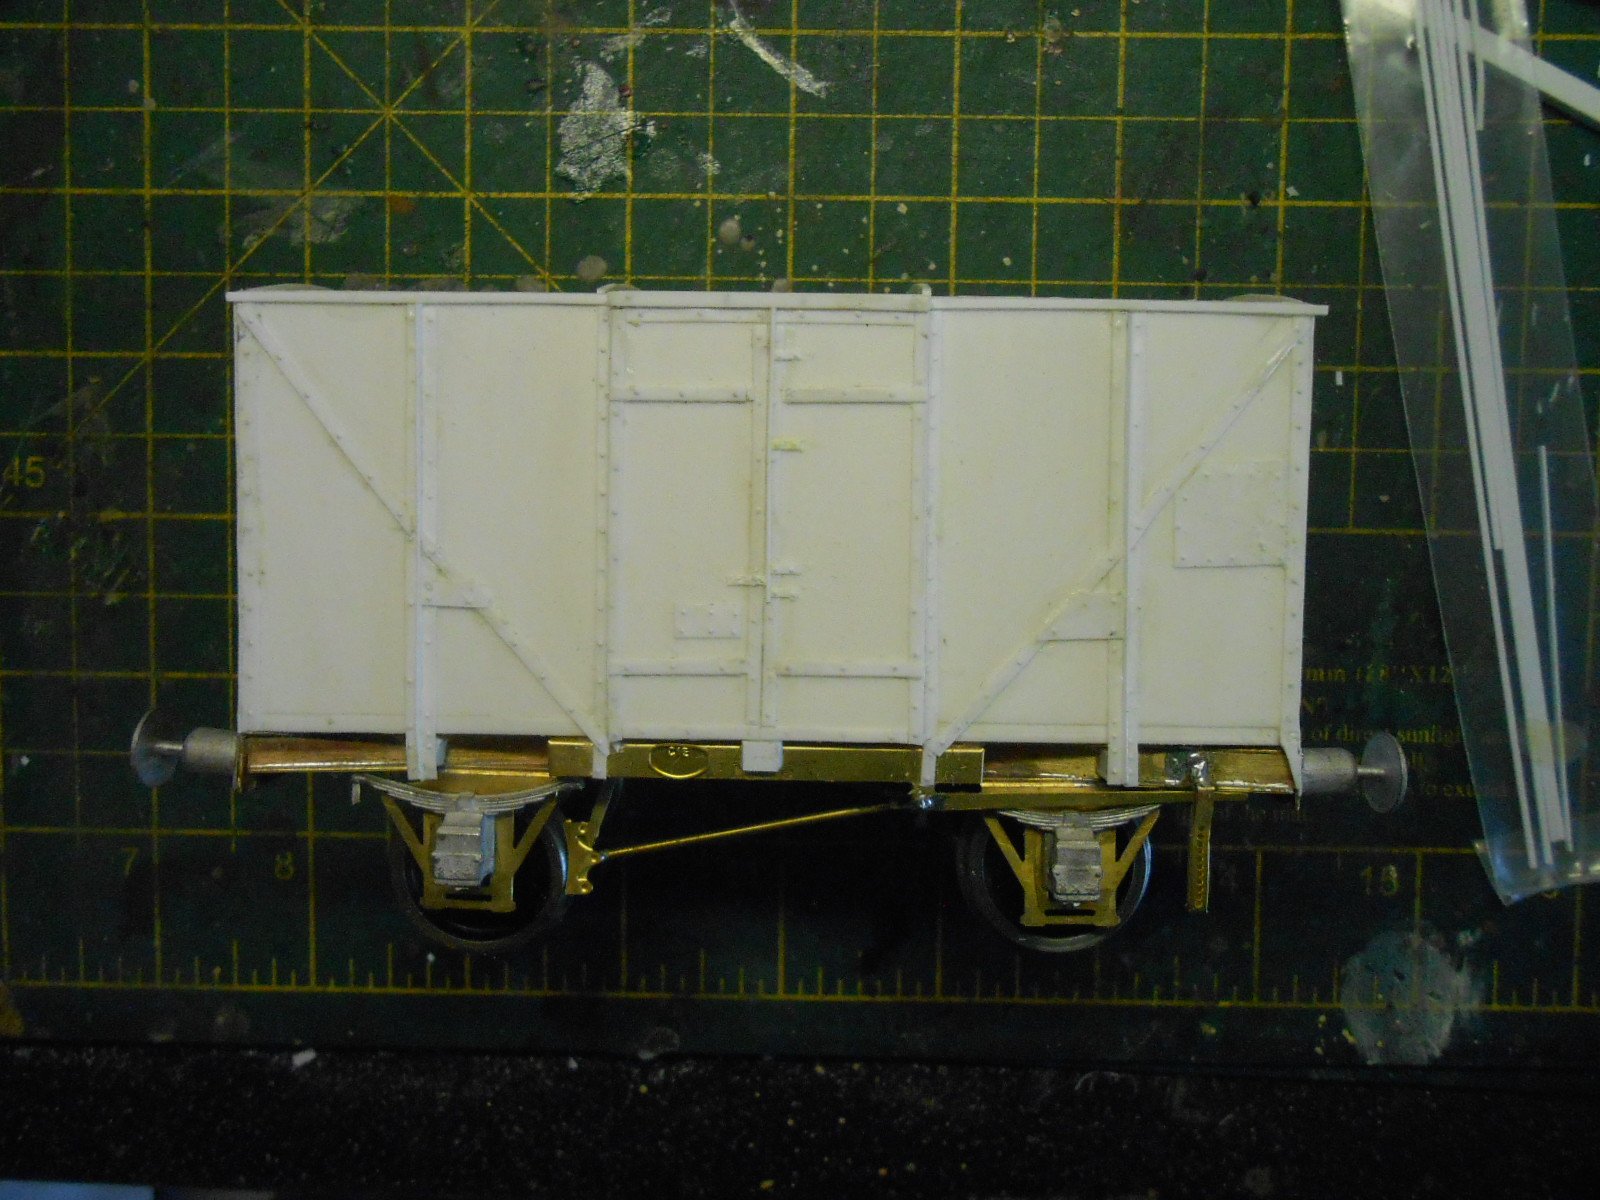
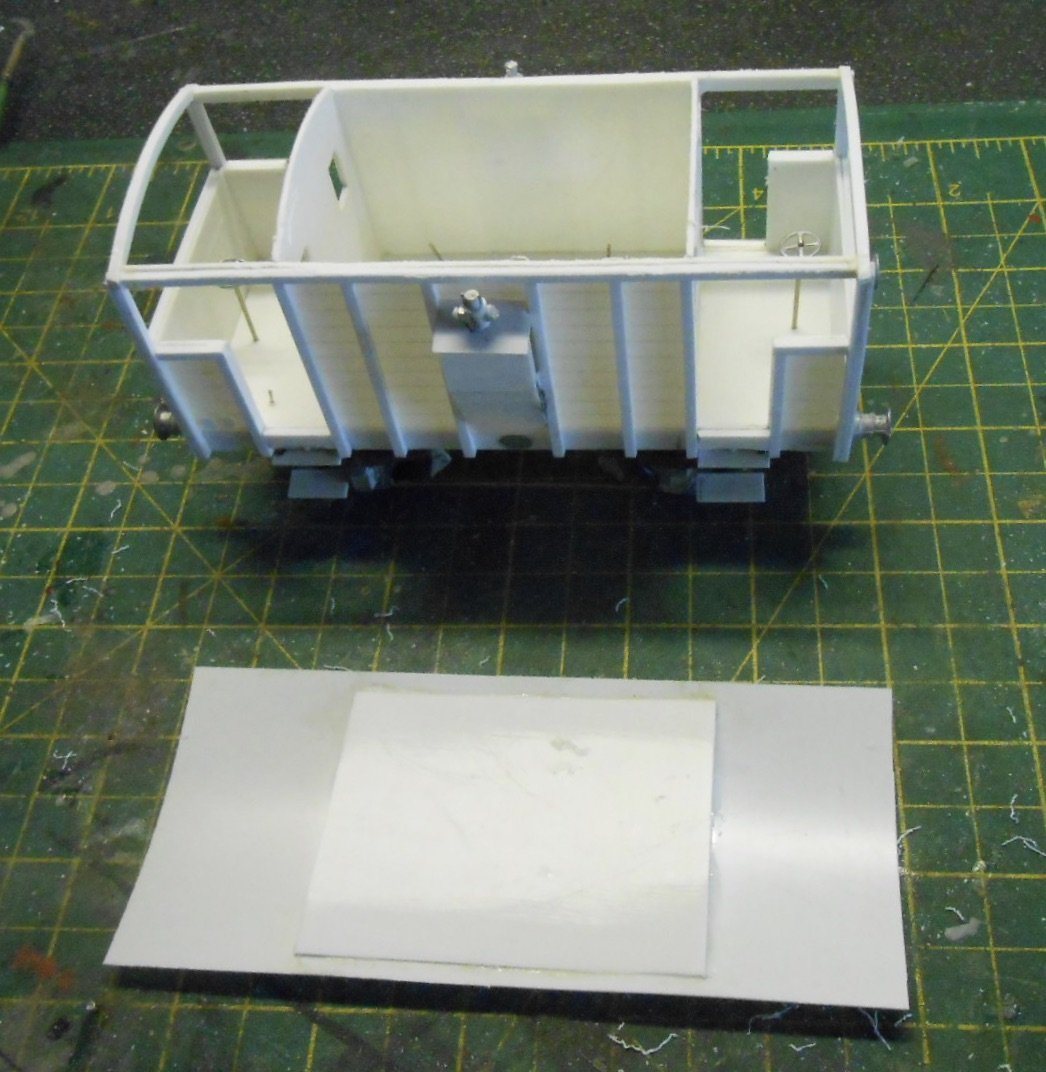
A H type Van Many thanks to all those who have offered help with this project, though as you will see, it is not proving easy. The first bit was straightforward enough - the Tyrconnel [Alphagraphix] etched kit of a Bulleid triangulated chassis. This really is a clever bit of work, including as it does a neat way of making it compensated, with provision for 36.75mm gauge too. An hour or so with the soldering iron and a working chassis is the result. The only things that are missing are a couple of small bits of brake linkage and the safety straps, but not a problem to add these later. The basic van body is simple enough too. Made mine from plastic sheet, with an 80thou base and 60 thou sides. However, any thoughts of it being a quick project evaporated as I took stock of all the strapping and rivets. As well as flat strapping around the edges of the body and the doors, there is T section strapping down each panel and both ends - plus this has rivets down both edges [as indeed does the flat stuff] as well. The total number of rivets runs into the hundreds, not that I can be bothered to count them of course. As far as I can see, the only way to add rivets to the T section strapping was to make it in three parts, so the two bits flat to the body sides were made from 60x10 thou strip [which I had to cut myself] with a piece of 40x10 micro strip for the vertical piece. Cutting your own strip from 10 thou is fairly easy: the trick is not to cut through each end until last, otherwise the strip will curl up. The GW Models rivet press then comes into its own, albeit you still need to be careful punching rivets into a strip of plastic that is just 1.5mm wide. Fixing these pieces to the body also requires care and patience. Too much solvent and it all gets messy, too little and it won't stick at all. Thus far, have managed to do one side, so still have the other and both ends to do. A wooden van, with nice thick [60 or 80thou] strapping is a breeze compared to this bad boy! The first photo probably sums this up nicely, as you can see all the tools and detritus from doing the strapping on just one side, over the last three days. Hopefully the van itself passes muster, though I fear a fair bit of tidying up will be needed, but hopefully nothing worse, especially as the doors are already the mark two version...
-
Four hours sounds a lot less time than building a kit, Angus - especially with my soldering! Fours hours is probably the clean up, filling and clean again time, so maybe those Shapeway jobbies are no bad thing.
-
You and me both by the sounds of it!
-
Fab! Thanks everyone!
-
Looking at photos, it seems there are a fair few variations in the H vans and especially compared to the drawings I have. Not surprising I suppose given the number built and period involved. For example, see that the fitted versions have a brake wheel, rather than a handle, while the variation of plates and rivets on the body sides is considerable too. For example, the picture of one being constructed at Inchicore in the Great Southern Railway album seems to have no rivets in the body, only on the strapping. Indeed, I wonder what the former were for - internal strapping maybe? Either way, there are masses of them and building a model is proving far more challenging than a wooden van! If I was building more than one, then resin casting would be essential. Mine is going to be an early, unfitted version, so any excuses to limit the number of rivets will be gratefully received.
-
You are indeed correct Mark. The line to the exchange sidings comes off the loop and wagons have to then reverse off that into the front siding. Fairly sure I supplied the correct plan, but these things happen and am certainly more than happy with the article as a whole, especially Andrew's photos. RM and CM have come on a long way in recent years - some of my first articles, back in the '90s had only small pictures, with no colour either. The fee is very generous too. £35 for each page, which considering I only supplied a sketch plan and the text, to me ain't half bad and is already reinvested in a new loco kit!
-
Looks rather good to me. Can't have been easy trying to sand such a tiny item but the primer/witness coat says it was a success, especially as it is just 60mm long! Major blemishes will stick out like a sore thumb in anything that size, so very well done. If be interested to know how long it takes to get a 3D print to this stage, compared with building a kit (assuming one exists), or indeed a scratch build. Either way though, can't help thinking that a rake of these is going to look splendid.
-
Many thanks, it has been a fascinating and valuable thread.
-
It's a bit of a hybrid, Angus. A Tim Cramer drawing, given to me by Andy Cundick, was the basis. Changed the wheel base to 9'6 then used a combination of Richard Chown's model, photos and the posts about Leslie's kit to make a drawing. Hence can't vouch for total fidelity, but hopefully it captures the look of the prototype. Will post my drawing later. Next project is an H van, using a Tyrconnel chassis to get the soldering skills (such as they are), up and running, prior to making a start on my new J18/19 kit. Managed to source wheels and axles from Slaters without any problems, plus one of Premier Models excellent motor gear boxes too. However, now waiting for a new tip for my 100 watt iron. Come on Eileen's!
-
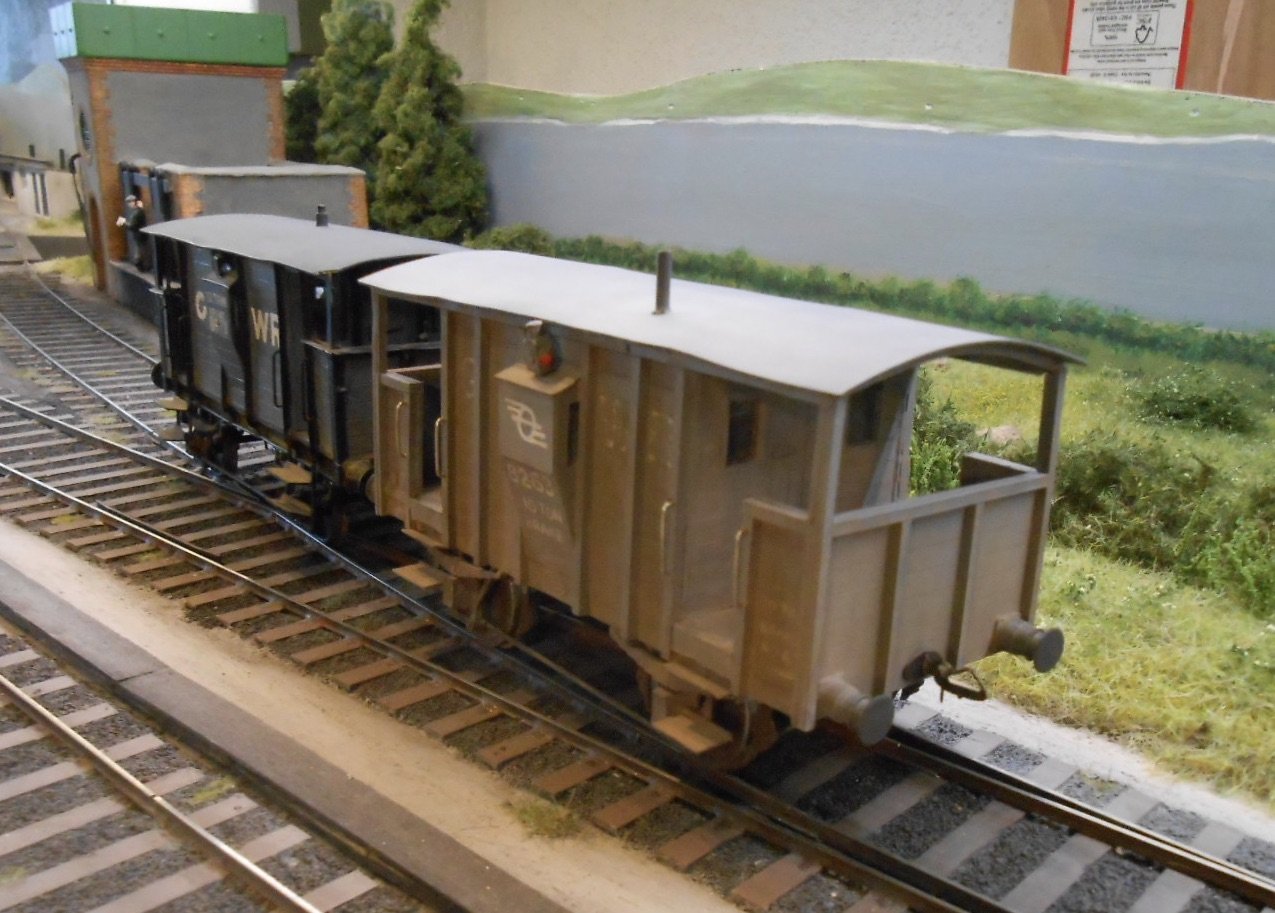
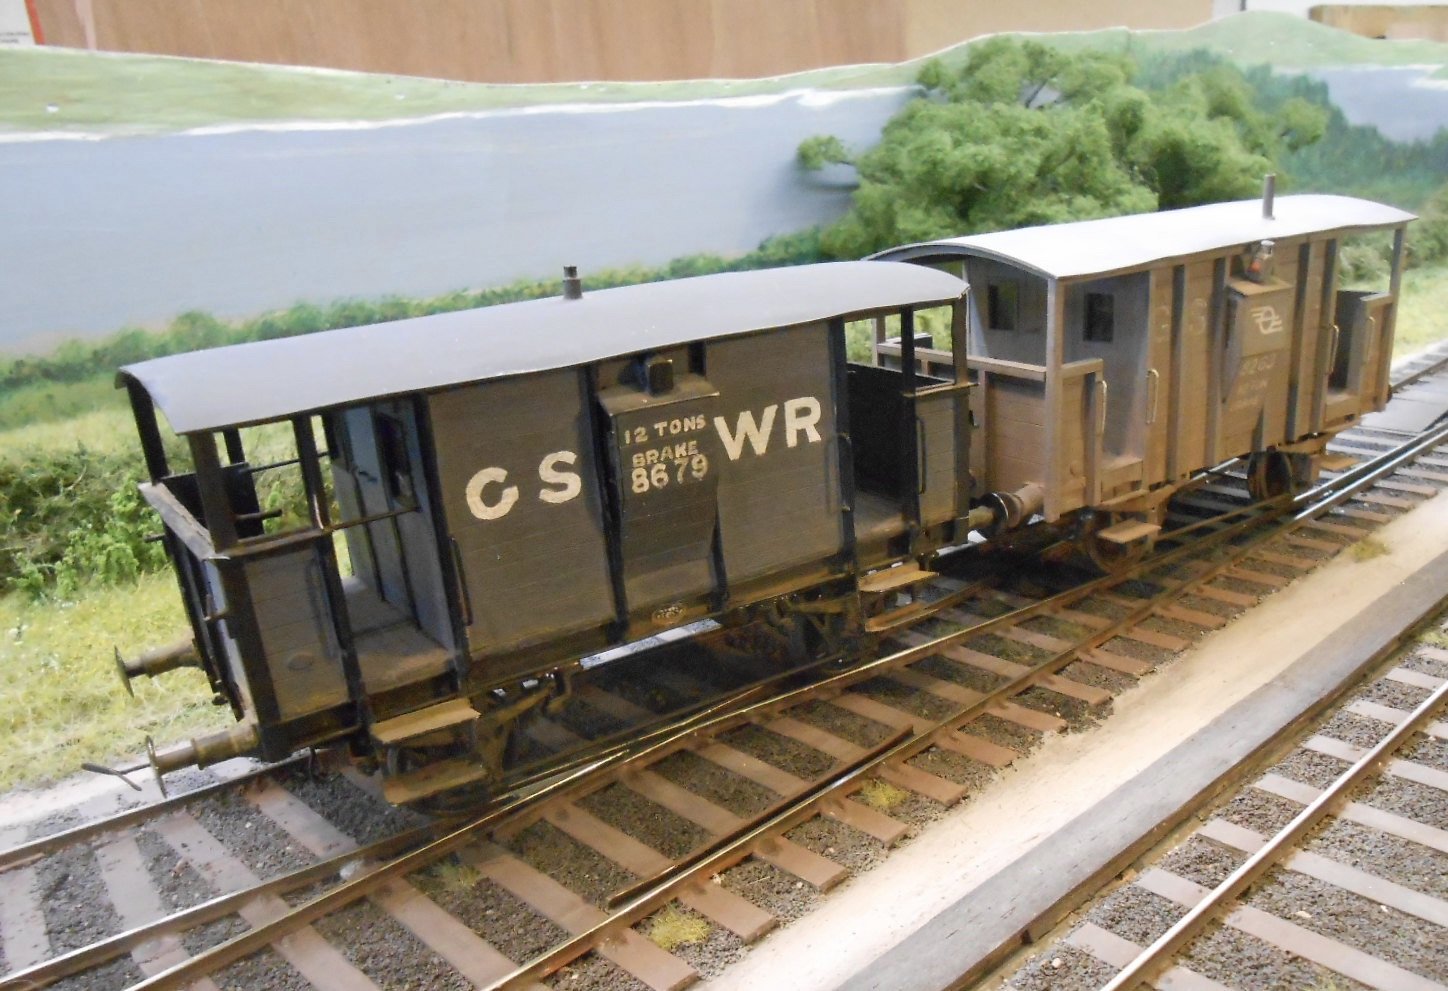
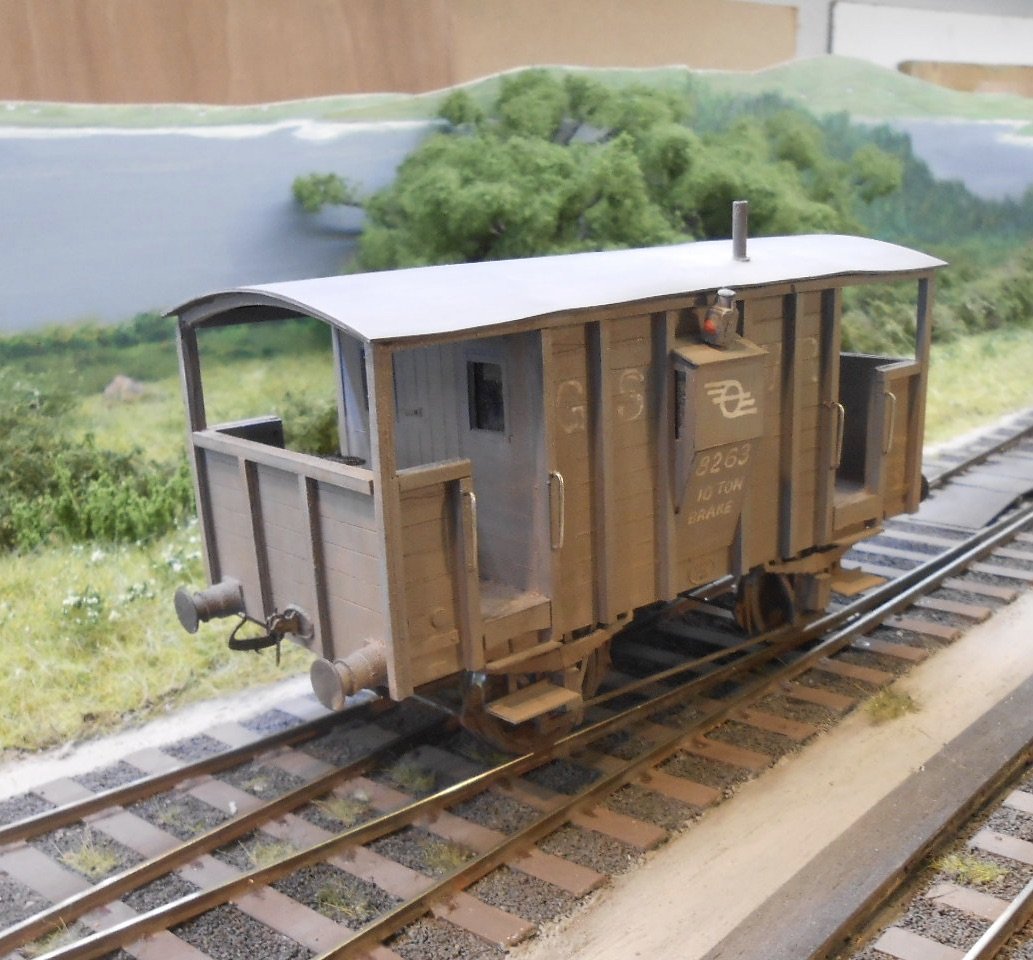
GSWR 10 ton brake After many months of layout building - scenics, electrics, buildings, back scenes and the like - I finally decided to turn my hand to some rolling stock. In an ideal world, I should be making some signals, but parts are not available at the moment. However, in the world of model railways, there is always something else to do. It must be months since I last made any broad gauge rolling stock, so a brake van seemed a good place to start. Having spent so long doing other stuff, perhaps unsurprisingly the hardest bit was knowing where to start. A simple box van would have been easier - a floor, two sides, two ends and some strapping - but the GSWR 10 ton brake also has a veranda each end, so working out how to incorporate these led to a fair bit of head scratching. Salvation came in the posts covering Leslie's 4mm scale resin kits and I largely followed the way the parts are arranged. Construction was fairly conventional: a base of 80thou Plastikard, with sides of 40 thou sheet, scribed for 7" planks Strapping is all 80thou square strip W irons are white metal castings, but with the springs filed away and replaced with longer plastic ones - though they are still probably a bit too short. Buffers also white metal, while brakes are Slater's plastic blocks on nickel silver wire. Roof is 20thou plastic sheet The model was initially sprayed in Halford's grey primer, then hand lettered in white ink using a fine nibbed dipping pen. Once this was dry, the GSWR lettering was scrubbed away with a fibreglass brush. After weathering was applied, first with a dilute wash of Humbrol gunmetal, matt black and bauxite, followed by judicious use of weathering powders. Wheels and brakes got an undiluted weathering mix, while the roof is 'roof dirt' from Precision. Guess the whole project has taken about 15 - 20 hours over the last week. Have included pics of a GSWR 12 ton van from Castle Rackrent for comparison.
-
Just discovered I have a drawing after all! Wasn't labelled and somehow got into my MGW file... All the same, many thanks for the help, it really is what this forum is about.
-
Airbrush masks look the ideal protection against the dreaded Myley Cyrus (Covid 19). Re acrylic paints, Omen Miniatures now have a range out which are becoming highly regarded. Gorden Gravett recommended them to me as an alternative to Tamiya. Start up cost is quite high though - £80 for the complete set, but would be much the same (if not more) were I to ditch all my Humbrol enamels and start again. Still thinking about it!
-
A fine model! See what you mean about the rivets, while an order to Eileen's will be needed as my store of microstrip is getting patchy and not likely to pick up supplies at exhibitions any time soon ...
-
Just had me scuttling into the workshop to check! The fiddle yard is slightly different as the line to the exchange sidings doesn't go on to the turntable now. Tried it, stock was liable to fall off when being turned at shows. My fault, as that was on the sketch I gave them. The only other thing I can see is that the track from the turntable goes straight into the shed, which is therefore at an angle to the platform. There again, it is not unknown for me to miss the glaringly obvious!