David Holman
Members-
Posts
4,359 -
Joined
-
Last visited
-
Days Won
117
Content Type
Profiles
Forums
Events
Gallery
Blogs
Community Map
Everything posted by David Holman
-
You say it may not be perfect David, but it has the look - that almost indefinable something of proportion and colour which says it is right. Placed in the setting of Rosses Point, which also has all these qualities, then it all adds up to very fine modelling! Already looking forward to seeing what comes next.
-
They look very good indeed and as nobody has been on holiday much, what a splendid way to spend your hard earned. My only criticism is the ugly front coupling, which is pretty much unnecessary and spoils the otherwise handsome front end. Indeed, when not being run, both models merit being on display as fine examples of the model maker's craft. Enjoy!
-
Already capturing the feel of the loco and no doubt will be quite an impressive beast when finished. Then you'll need another one and a spoil train, or maybe a tender for those long runs south...
-
Fine setting for a fine model.
-
Thanks JB, and everyone. My chosen loco is 603 and have a rear three quarter colour picture of it in Keith Pirt's Colour Portfolio. It is at Sligo in 1961 and in black. Cleanish too and the buffer beam looks newly painted, so maybe it hadn't been black for long.
-
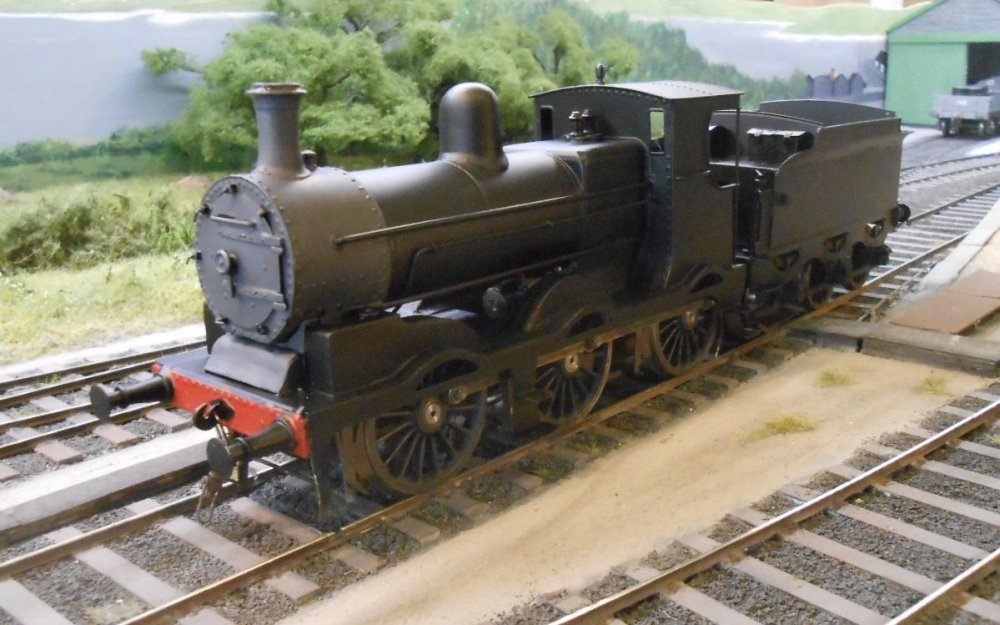
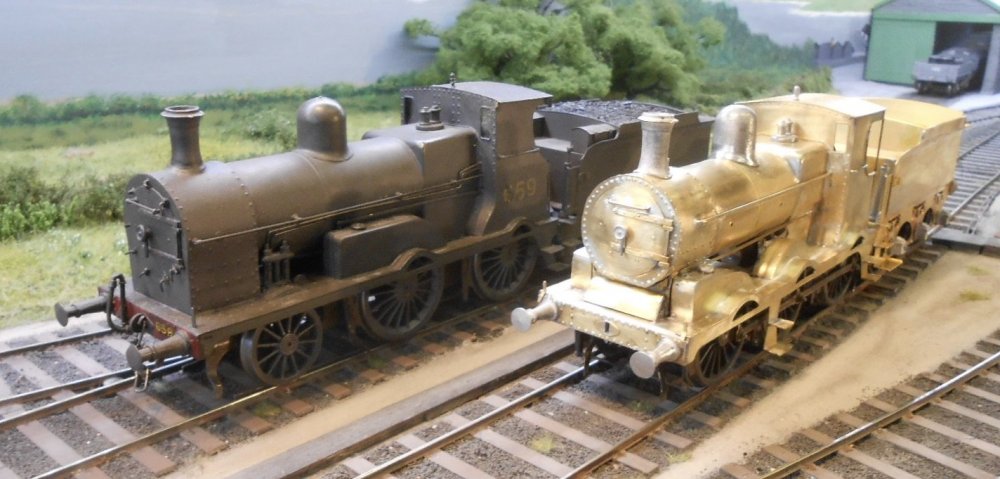
The J19 has become very, well... black. Must confess that I don't actually like this bit of loco construction much, as it is really more of a necessary evil, for me. You go from a gleaming brass model, through a grey one, with lots of filler, before eventually giving it the top coat - Halford's 'go faster' matt black in this case. It is however, very black, though a small positive in this case is that the model seems to wear it well, especially from the front three quarter view. On the other hand, one of the next jobs - painting the buffer beams red, is always a bit of a pain because Humbrol red really doesn't cover well and needs at least three coats. Another issue at this stage of the model is that, though it feels like it is nearly finished, it is anything but. I made a 'to do list' yesterday and it's grown to at least 18 separate items, ranging from making some mock inside motion, through fitting couplings, painting the back head, adding crew, numbers, vacuum pipes, cab glazing, coal, tender pickups and the all essential weathering in order to soften the overpowering blackness. First stage of the latter has been to put a coat of Humbrol 27004 [metalcote gunmetal] on the smokebox. Unfortunately, it probably a bit too grey - but would make a fair representation for GSR battleship methinks. Still, getting there.
-
Wish my first coach was that good!
-
A really interesting and enjoyable project to follow. Nice one, Ken.
-
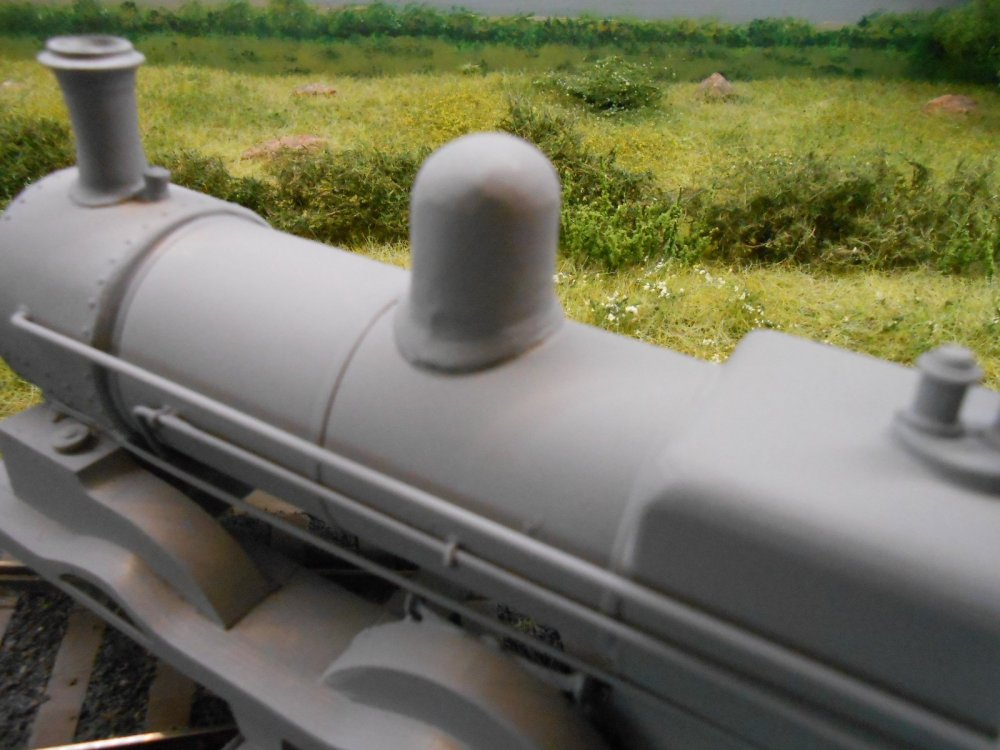
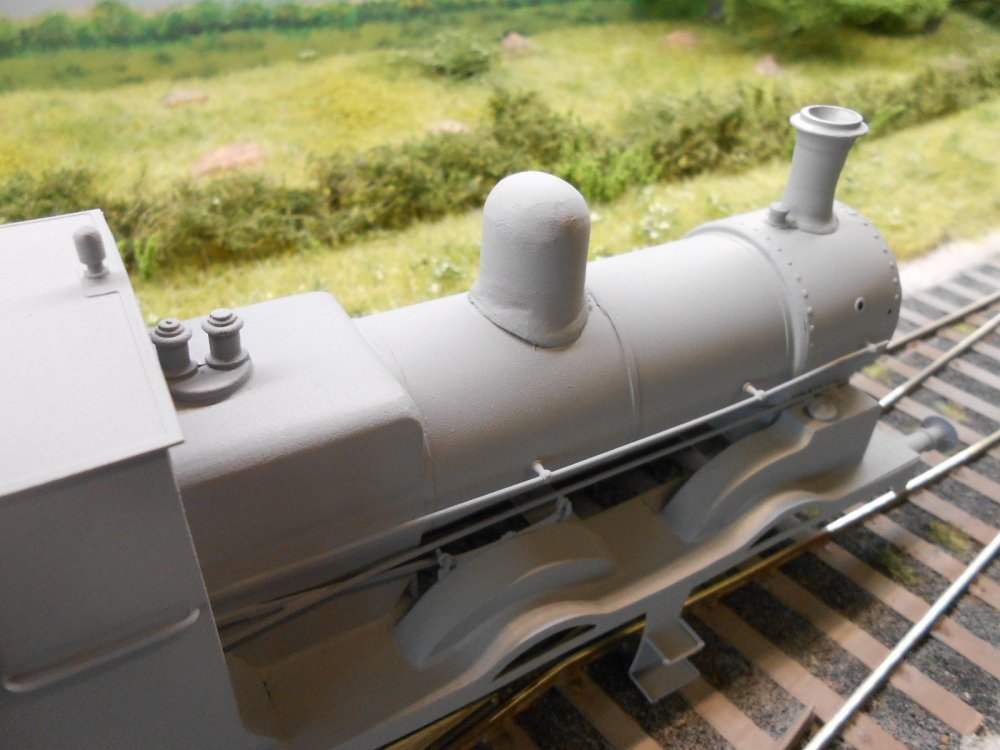
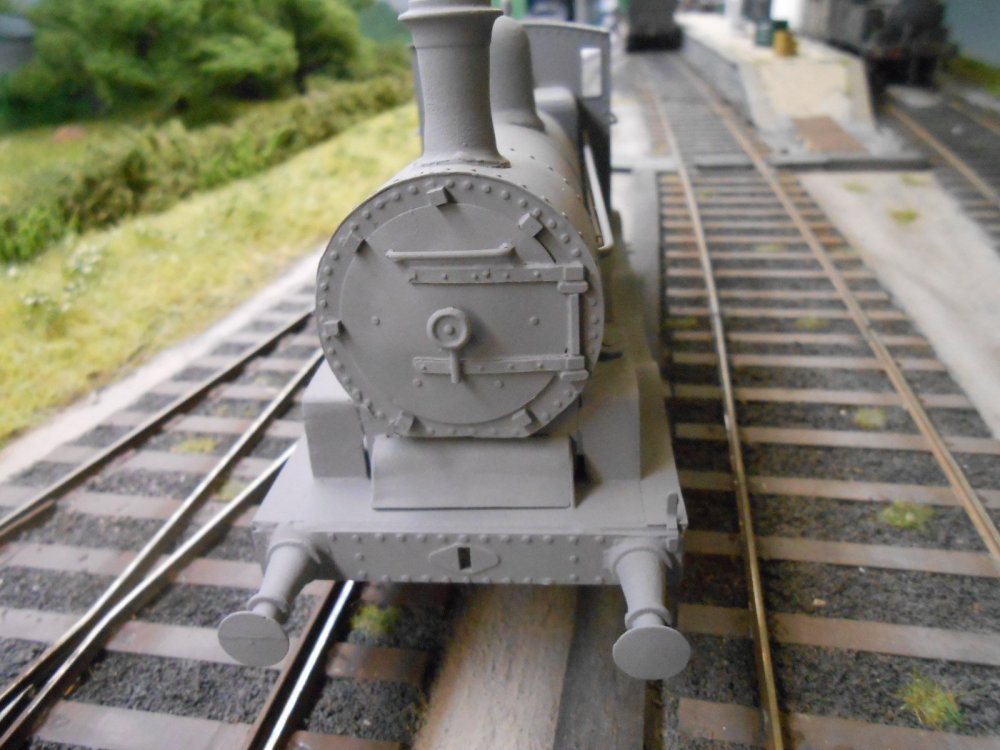
Not a lot to show for quite a lot of effort over the last few days. The witness coat of primer turned out mostly as expected, with a few gaps around the footplate and boiler/smokebox joins. What I hadn't seen was the mess I'd made of the dome, where I'd been somewhat over enthusiastic in trying to reshape it, plus a far from perfect fit on the boiler top. Oh well... So, it was out with the filler again and while I was at it, added some cubes of 60thou Plastikard to the smokebox door to simulate the fixing clips, though still needs some 0.5mm wire for the handles. A second witness coat was then applied, followed by a bit more fettling around the dome and middle splashers and what I now hope will be the final squirt of primer.
-
Subtle, understated - how it should be.
-
Don't do the Circumvesuvio line to Sorrento then JB. No idea what the livery was as everything was completely obliterated! Great way to get around though.
-
This is turning into a fun exercise. Five non Irish locos? Deltic - gave me my best stop watch trip the ECML. Aberdeen mail, 15 on and Grantham to Newark, 15 miles in just over 12 minutes, start to stop. The howl of the twin engines through Peascliffe tunnel was astonishing! 9F 2-10-0 Denver and Rio Grande 2-8-2s A Chapelon pacific Any Shay logging engine, but the 3' gauge one I had a cab ride on at the Forest Museum, Vancouver Island was very special.
-
Slurry! Reminds me of our first trip to Ireland. We were driving into Roscrea and found ourselves behind a cattle truck. It was spring and the beasts had clearly been enjoying the fresh new grass, so prudence dictated we stayed a sensible distance behind the truck which was leaking a steady stream of slurry on to the road. Roscrea was busy and we were held up for several minutes, during which time a sizable brown pond formed. Two ladies, who had clearly been busy sweeping their front steps and pavement were not amused!
-
Good to see Sir Henry getting plenty of votes and likewise the Swilly 4-8-4Ts. A little surprised the GNRI S class not mentioned more, or anything in that fabulous blue livery. For sheer charm, Argadeen, the little 2-6-0T on the T&C is on my list, likewise the Achill bogies in original form.
-
As I understand it, 'vaping' offers a great range of tastes and smells, so potentially you could have something like a fried breakfast e-cigarette. On that basis we need to get folk interested in cowpat, steam oil, diesel exhaust, etc flavours so that our models could sport additional olfactory experiences! Equally am sure there is every chance that Noel's weathering is going to plant the Isle of Wight ferry thought anyway. Remember the old joke - what is brown and comes steaming out of cow(e)s?
-
I had one and converted it to EM gauge. Ran without any problems, so guess I got lucky! Also used a Crown line detailing kit. Replacing the chimney was a nightmare as at the time didn't have the tools to cut through the cast Mazak body, which was unbelievably tough. The little diesel is indeed the Triang/Hornby 'Diesel Dock Shunter'. My one was a fearsome thing with a top speed of Warp 9 and sounded like an angry hornet. Had a working light though and would pull five coaches, which was more than my Princess Royal ever could! Strange, knurled wheels too.
-
Don't normally get Model Rail, but will certainly try this month. Courtmacsherry is a fine layout, while for me the prototype is the ideal branch terminus.
-
Sounds like a fine project MM. As well as any prototype information, suggest you get hold of Iain Rice's book 'Cameo Layouts'. Tells you all you need to know about building a layout like Fintonagh and helped me enormously on things like planning, wiring and presentation.
-
Now that is really rather splendid! Makes for an interesting and unusual model that looks fairly simple, but clearly isn't. Those fine details are little works of art in their own right.
-
Find that abrading the resin surface to give a key for the glue works well, Noel. A fibreglass stick or a bit of gentle filing is all you need, hopefully.
-
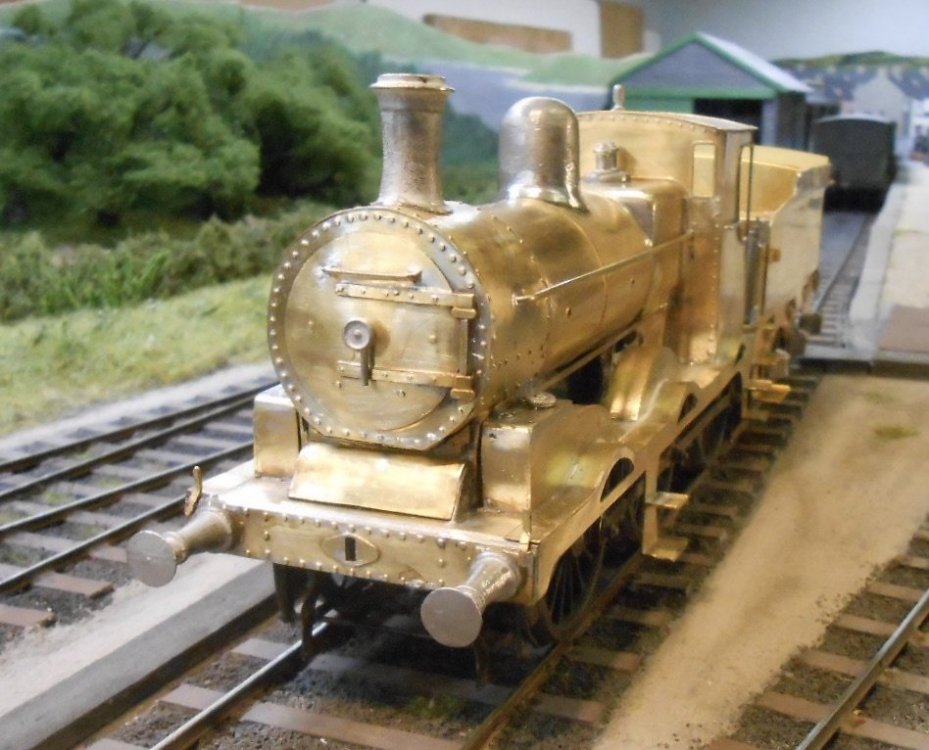
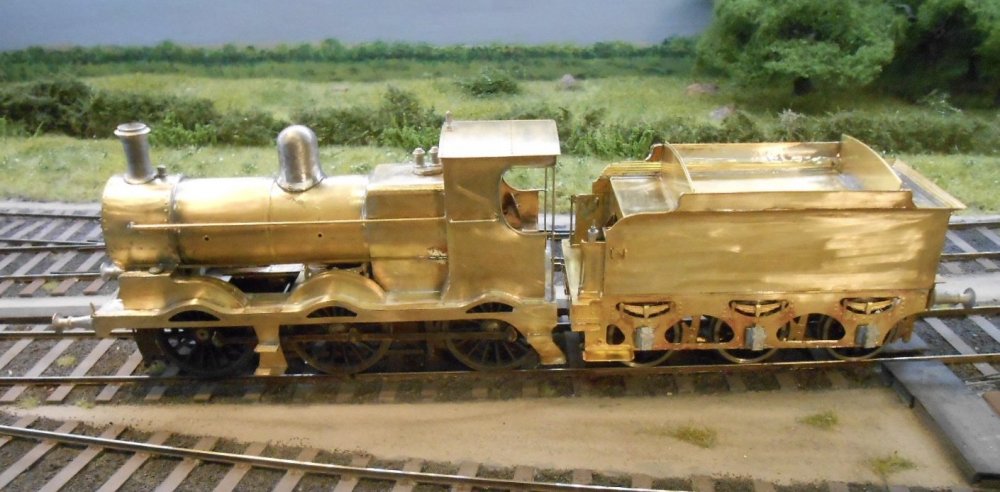
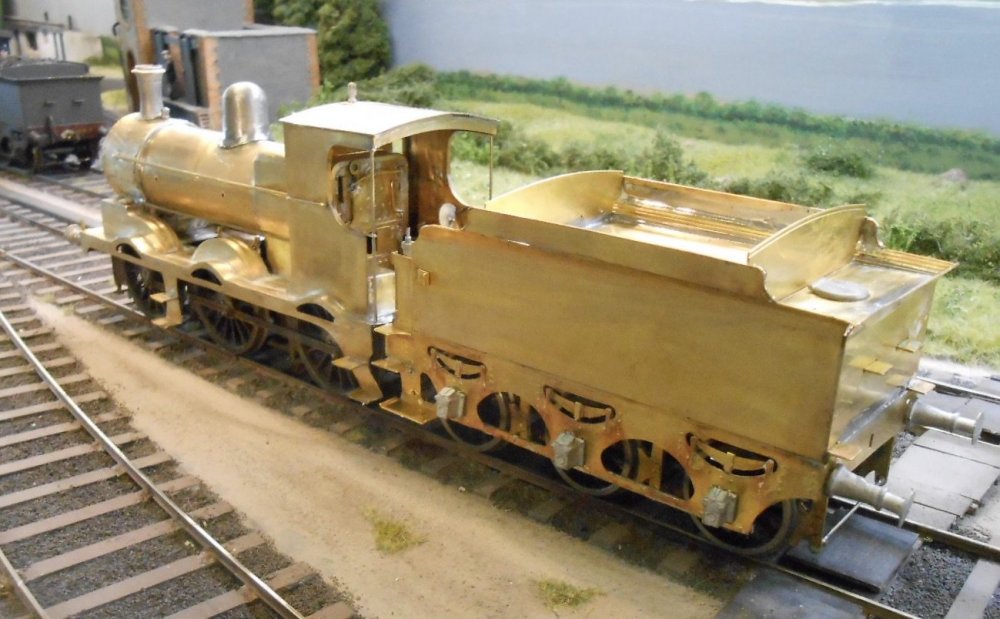
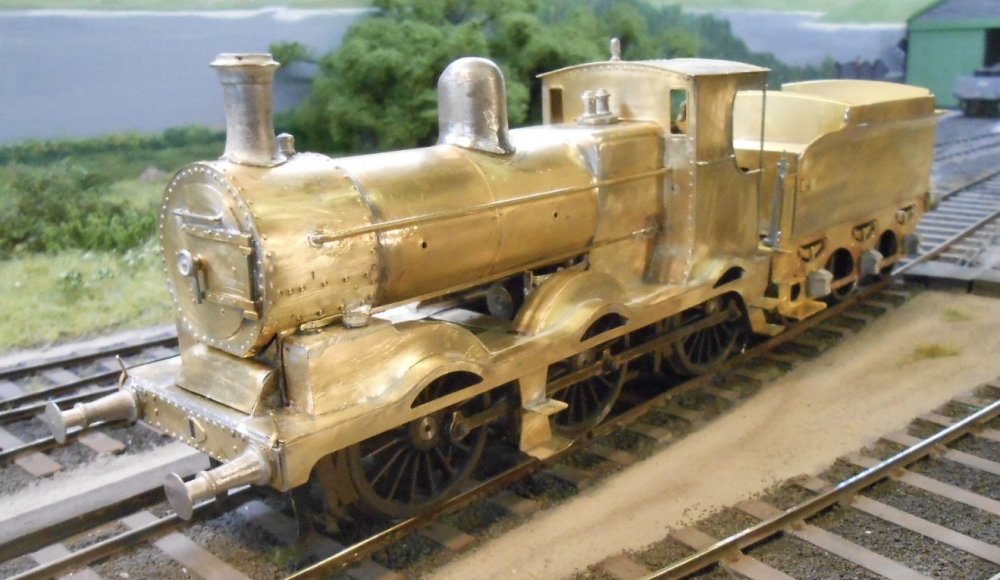
Ready for the paint shop? Well, a primer/witness coat anyway. Thanks again for the reassuring messages about the look of the J19, they gave me the confidence to press on and complete the model. On the loco, most of the soldering work was done, so it was out with the 5 minute epoxy to add the boiler fittings, buffers etc. The chimney and safety valves were fine, but the dome was certainly not at all like the prototype. However, as it was too big, it was a fairly simple case of filing and sanding it down to something more acceptable. A good trick when fitting chimneys and domes is to wrap some sandpaper around the boiler and use this to get them to sit properly. Have always used 5 min epoxy for boiler fittings - even the turned/cast brass ones - because it gives you just enough time to set them up, rather than using solder. Another slight anomaly with the kit is that if you are modelling a J19, the sanding operating rods are too short, though brass strip is easily substituted. After that, it was a case of tidying up - lots of it. I try to be really careful here, not least because of my mediocre soldering, but also because it is rare to get a kit where everything fits perfectly. It may have been designed with close tolerances, but half, even a quarter of a millimetre here or there in construction and you soon start getting unsightly gaps that need filling. Unwanted blobs and runs of solder too, while the paste flux I use always needs an extra clean. So, lots of work with files, emery boards, scrapers and the like, followed by applications of car body filler and then back to more sanding and scraping. There are still one or two obvious bits left, but after a while it all gets a bit tedious and fingers protest at the number of glass fibre brush splinters they pick up. Plus, over the years, have come to realise that you never get it right first time, so stop, wash and clean with 'Shiney Sinks' cream cleanser. Very occasionally, the first coat of primer does cover everything, but mostly you need a second round of filling, so why torture yourself for too long? There was the tender to do, of course, so the loco body was put to one side for a while. As with the loco, the tender chassis is a delight to make, being another single, fold up etch. Indeed fitting the brakes took most of the time, but the chassis was easily done inside a couple of hours, including springing for the centre wheels. The tender body is likewise pretty straightforward. Half etched lines help with curving the flare on the top edges and there are not that many parts anyway. The only two additions I made were firstly to reinforce the bottom edges of the cosmetic outside frames and secondly to make the brake standard stronger. The outside frames etch is very thin, probably only about 5 thou, so they warp when you solder them to the body. Thin brass strip soon beefs things up. As for the brake standard, always wonder why anyone tries to make these things in cast whitemetal - a material that is far too weak. Sure enough, the handle broke off almost immediately, so replaced it with some wire, soldered to some brass tube which was then fitted into a hole drill in the top of the standard. A few more castings to fit & all that was left was the drawbar. Not sure what went wrong here, but the model fireman would need to be an Olympic athlete to jump the gap with a loaded shovel - it must be about two scale feet! So, made a new one from brass strip. There are still more things to do of course - a raised cab floor and fall plate, plus some dummy inside motion. At least it runs fairly well [better when run in and properly cleaned], though it sits 0.5mm high as have needed to use some 20thou Plastikard to stop the driving wheels shorting somewhere inside the splashers. Then there is the painting, lettering and weathering, adding coal, crew, couplings and so on. So, still a fair way to go, but the next time you it, the shiny brass will have gone. There is something rather nice about a polished brass model, but needs must! The final picture shows the J19 next to my G2. Hopefully, they will make a nice pair.
-
The Tyrconnel chassis is really well thought out - rather like the model of the Sligo saloon!
-
Nice work Noel, will look forward to seeing the paint job.
-
Not always the destination that is important, the journey should be enjoyed too and this is definitely a good 'un! Lovely work.
-
The Worsley Works portfolio is vast, covering as it does, many scales too. Am guessing that Alan uses CAD, so once a drawing is made, 're-scaling' is largely a click of a mouse. However, to create all the drawings in the first place is quite remarkable, not least in sourcing originals to work from. As for the Jeep, very much looking forward to seeing progress, while the photos of loco s at Scaleforum remind us that there is a wealth of quality modelling out the that rarely gets seen. Well done Ken and keep posting!
.png.c363cdf5c3fb7955cd92a55eb6dbbae0.png)


