David Holman
Members-
Posts
4,359 -
Joined
-
Last visited
-
Days Won
117
Content Type
Profiles
Forums
Events
Gallery
Everything posted by David Holman
-
Wagon and coach stock on Fintonagh [7mm scale but 21mm gauge] uses 4mm scale wheels with axles replaced with 2mm brass rod. I twirl the ends of the rod between my fingers against a spinning slitting disc in the Dremel. Crude, but effective, while using brass instead of steel for the axles means they aren't attracted to uncoupling magnets I use with Kadees.
-
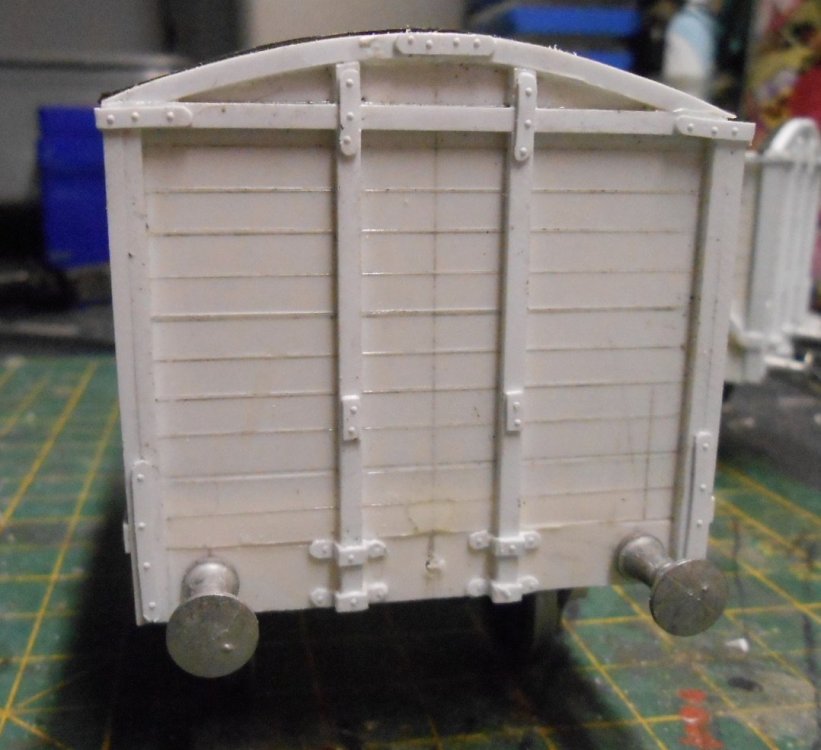
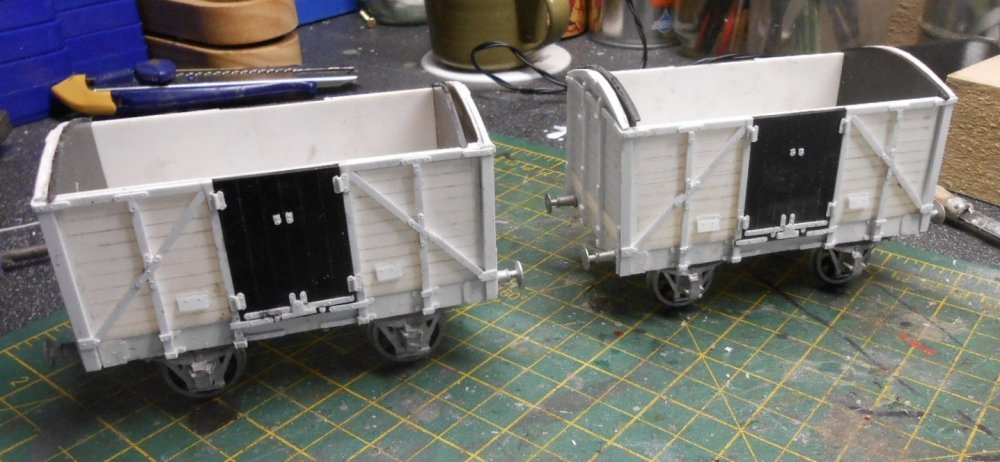
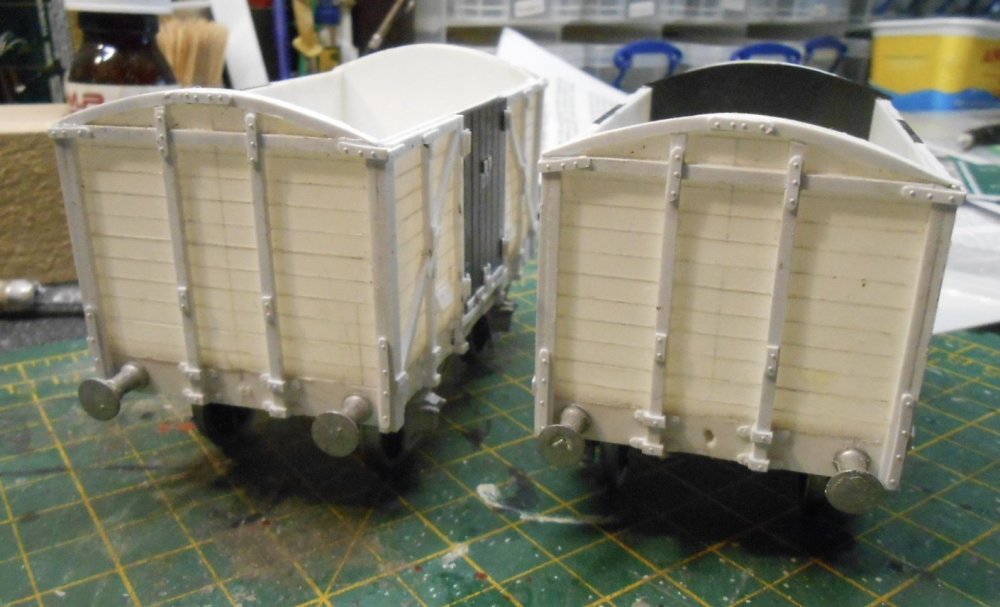
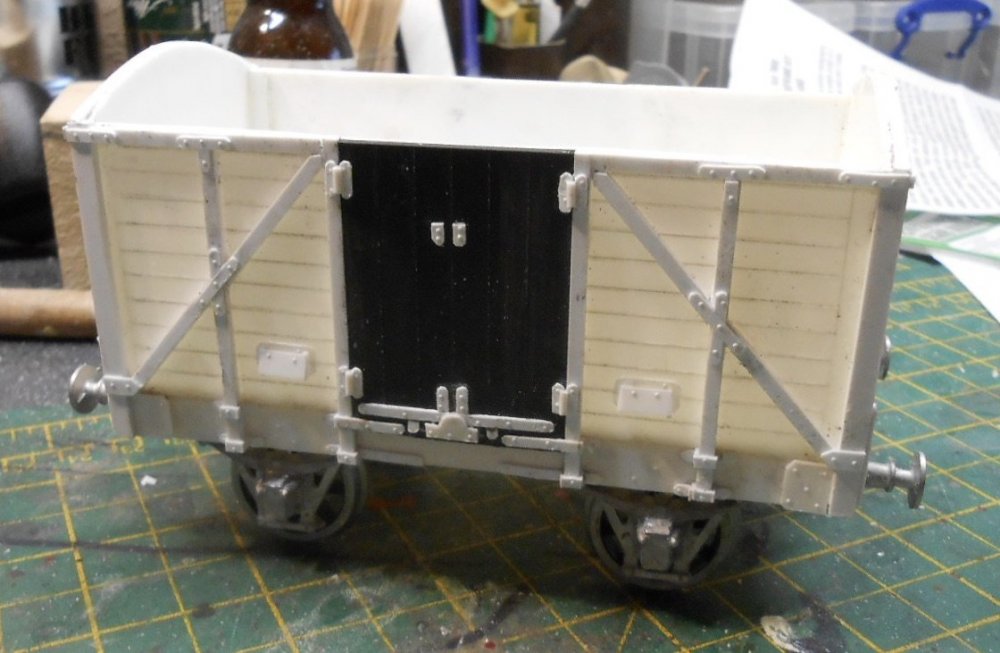
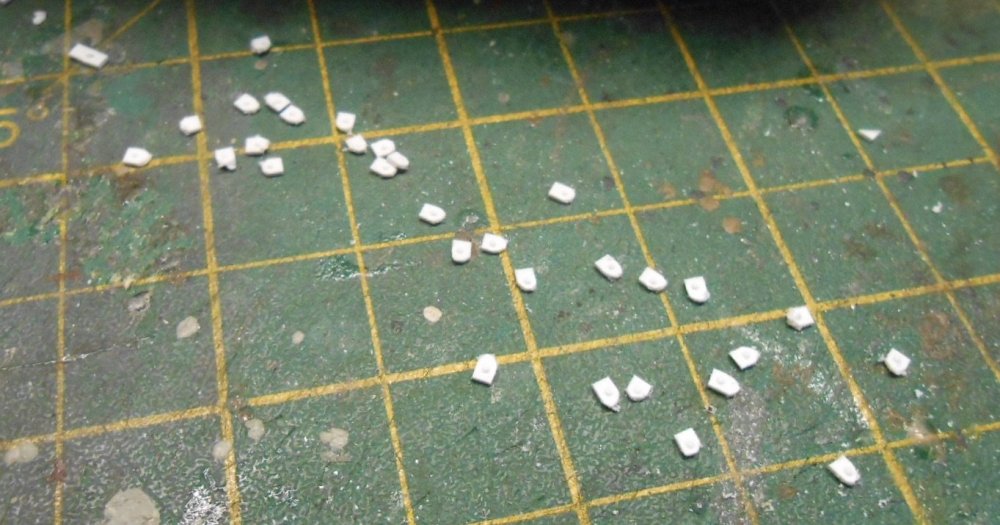
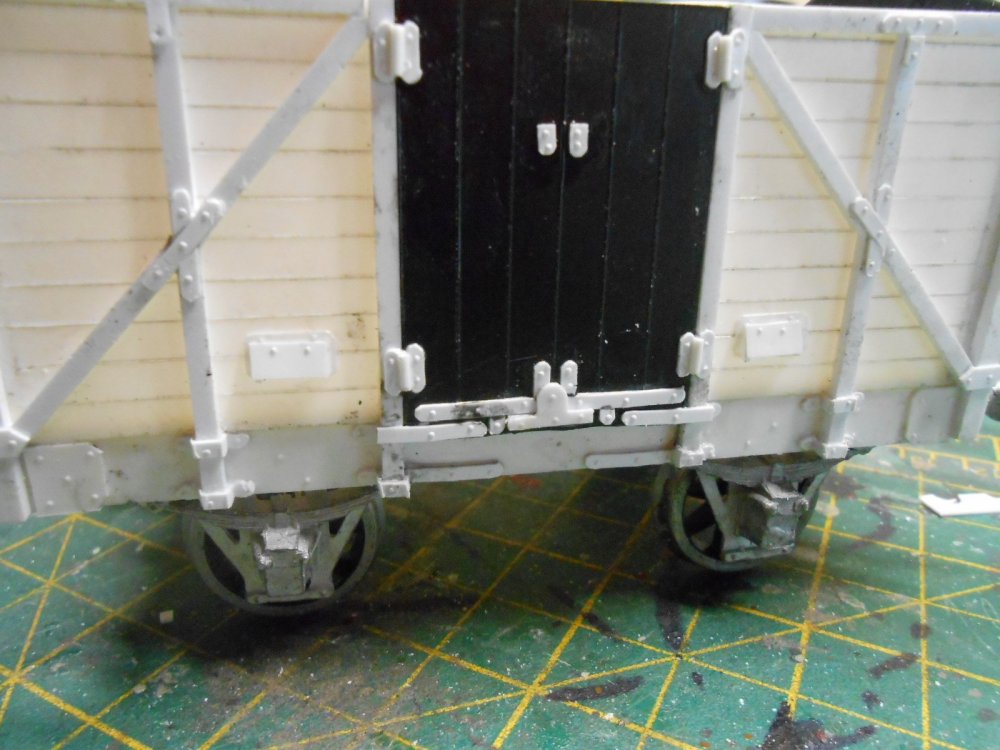
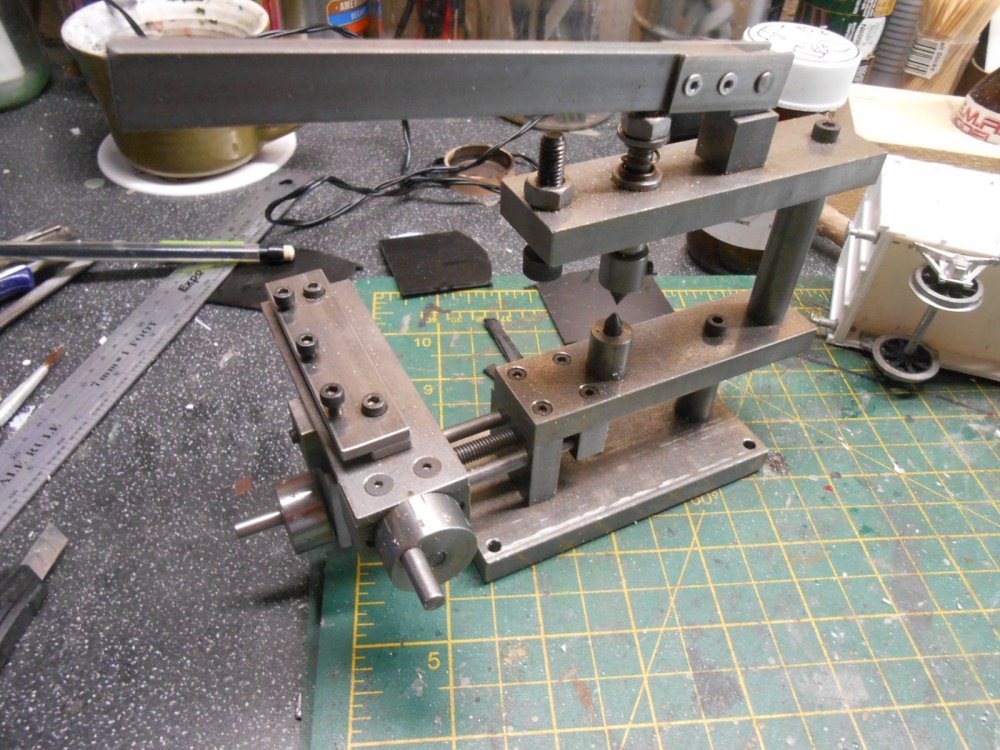
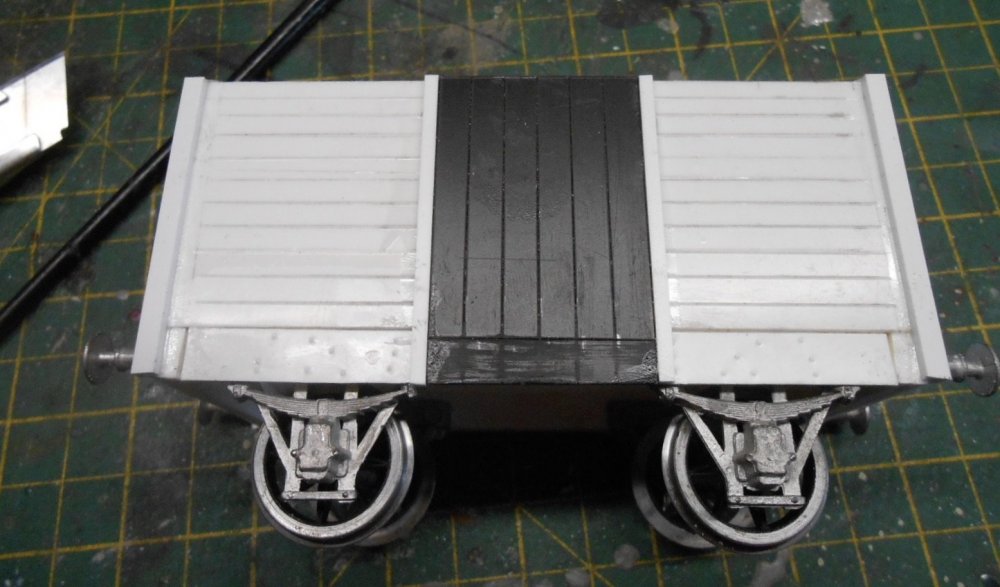
Less than a week ago I wrote of how adding micro strip strapping to wagons could be therapeutic. However, since then have been doing little else and it is quietly driving me nuts. The two MGWR vans only have about 80 [!] pieces between them, but the plates that hold everything together add up to over a hundred separate pieces for each van, while there are over 200 rivets too. Take the small plates that go round each length of strapping - often two or three to each - it involves five separate pieces [four of them just 1.5mm square] with three rivets - plus two of the small squares have rounded ends. Ok, it only takes a few passes with a file to do the latter, but believe me, it all adds up! Thus far, I think I've got all these bits done, along with what appear to be two metal vents on each side - each of these comprising another five individual parts and four rivets - but there still remain two louvres on each side, with one more each end. Had I thought ahead a bit more, I really should have resin cast the body work, for even with just two of each van, making just a side and end for each would have cut the work by 75% AND I could have made my fortune marketing them to other 7mm scale broad gauge modellers. Well, maybe not the latter! Oh well, slowly getting there and, fingers crossed, the GSWR vans appear much simpler. The photos hopefully show what I mean and include some pretty cruel enlargements of some of the detailing.. There is also my GW model rivet press, without which this work would be a lot harder. This really is a quality piece of kit and if you use the added table can not only churn out straight lines of rivets less than 1mm apart, but [if your maths is up to it] create circles of them too.
-
Sounds like nice balance you have planned, John. Three six wheelers would look good and easy enough in 7mm scale from the Alphagraphix kit catalogue. Not sure if there are any rtr in 00, but am sure someone can enlighten.
-
230 x 4 = 920mm, which is indeed about three foot in old money. Wouldn't worry about exact measurements though, because even the largest railway room will always incur a compromise somewhere. Better, I think, to follow the Iain Rice rule of a train needing to travel at least three times it's own length across the scenic part of the layout to look realistic. Rice would also counsel against long platforms as they take up a lot of space for little operational value - but then he has always favoured freight traffic over passenger as being more interesting. Anyway 230' of platform is enough for three modern coaches, or around seven six wheelers, which sounds like a nice amount to me.
-
Should have mentioned Giles Flavell. Two layouts, The End of the Line and The Yard. Both significant for their radio controlled, 7mm scale road vehicles. Giles is also into working cranes too. As for narrow gauge, Pempoul of course, but Bridport is pretty special.
-
Favourite Layouts I'm not entirely sure what it is that attracts me to a model railway, but I suppose the simple answer is that it needs to be interesting in some way. I remember once seeing a comment on RMWeb that this particular person was not going to come to the Chatham Show because 'there wasn't much N Gauge'. Well, how narrow minded can you get? Actually, don't answer that, because of course narrow mindedness is probably behind many of the world's ills and not for this forum. What I will say is that anyone who limits themselves to only following a single strand of our wonderful hobby is missing out big time, because there is so much to enjoy. One of my all time favourite layouts was Bramblewick Cove, by Tom Harland. Tom, who sadly is no longer with us, was a professional artist and we persuaded him to bring the layout to Chatham. Beautifully presented, it was in many ways not much more than a diorama, but on a grand scale. It featured a section of the North Eastern Railway near Whitby, I remember standing in front of it, in the company of Gordon Gravett as we marvelled at its scenic beauty and stunning back scene. 'Not a lot going on though, is there?' I said to Gordon. 'No,, it doesn't matter does it?' he replied - and how right he was. However, what I will say is that, generally any layout which has little movement on it and especially any layout that doesn't run well [finger poking and derailments in particular] is not going to hold my attention for very long. The Guildford Club's 'Normandy Junction' may not be the most scenic, but for continuous action it is hard to beat. 0 gauge, about 40' x 20', with at least five tracks, there is always something running and they have enough stock between them to make it interesting too. That said, when next to them at Tolworth a few years ago, there were times when it got a bit noisy, especially when a Heljan 33 and eight brass coaches was roaring round! Dainton Bank was another great 'watching the trains go by' layout. Incorporating the prototype's severe gradients, it presents a calvacade of big [0 gauge] trains, often double headed, or with a banker and I remember going back several times to enjoy the spectacle of a 9F and 30 oil tankers, or a King and a Castle on ten pullman coaches. Each train easily worth the thick end of four or five grand and beautifully done. The ultimate in this genre for me goes to Stoke Summit. No station, just the double track East Coast mainline, with a slow road for uphill/northbound traffic. Fully signalled and properly run, you regularly saw folk actually trainspotting and writing down loco numbers! With at least 30 roads in the storage loops, there was plenty of variety too. All of the above fall into the fine scale category, but I can get just as much enjoyment from historic stuff. Hornby tinplate and Hornby Dublo never cease to charm and still run well too, as their operators happily sit in the middle of a cloud of ozone. A few years ago the Chatham Club was gifted a collection of American Flyer models. These are S gauge [1/64th] and in many ways somewhat crude. They also need somewhere between 3 and 5 amps of power to run and need a garden railway controller to run them. Despite the steamroller wheels they have a charm all of their own and include some remarkable animation. For example one of the box cars has a brakeman that actually vibrates his way along the roof and a similar strategy enables both cattle and people to move about on platforms! Another favourite is a 2-6-6-2 Mallet, where the boiler is not fixed to the front engine, so when it goes round a sharp curve, it seems like the boiler is carrying straight on for a second before suddenly veering away! I quite like some of the fantasy layouts, like 'Wensleydale' in the current RM, with mice and cheese mines, while somehow I find the Lego layouts can be very good - perhaps a throwback to my childhood, Equally many of last year's Great Model Railway Challenge efforts left me cold, I'm afraid. Guess there is a thin line between charming and naff in my head... What else deserves a mention? Gordon Gravett's layouts, of course - a peerless mix of art and museum quality modelling. Anything by Iain Rice also works well for me and likewise Barry Norman - probably for the same reasons. Barry's Lydham Heath is an S gauge tour de force of the wonderfully decrepit Bishops Castle Railway Indeed, if I have a favourite scale, it is probably S gauge and if I was starting again, I'd like to think it would be where I'd go. Hence, if I was asked to name my all time favourite, it would be Trevor Nunn's 'East Lynn'. Mixing Great Eastern, with Midland Great Northern, everything on it is scratchbuilt and runs likes a sewing machine. The locos all have working inside valve gear, the track is fully signalled, using miniature lever frames that are a delight to operate - all using rubber band linkage beneath the baseboards. Everything is built to museum standard, so goodness knows what this lifetime's work is worth. Have had the great pleasure of helping operate it a couple of times and working the harbour section is a particular delight because you have to chain shunt. The loco of choice is usually the 50 year old GER tram engine and manual dexterity is essential because you have to work out which bollards to use to get wagons on/off parallel and perpendicular tracks. There's no lever frame here either, you use locally sited ones because, as Trevor says, 'that's how it was on the prototype'. Magic. Am sure there are others that deserve a mention, for all sorts of diverse reasons. If any of you have your own favourites, why not share them with us and especially why they do it for you?
-
On my! Again.... Love the way the whole scene hangs together.
-
Excellent stuff - many thanks Robert and John. Must have crossed paths with both of you at some point, but when you are exhibiting or organising, you have a sea of faces many of whom know you, but not necessarily the other way round! Only did Warley once, but having helped run the Chatham Show [100+ stands] am in awe of what you guys achieve. Remember there were a few grumblings when I was there, but the fact is you can't please all of the people all of the time and the perfect exhibition hall has yet to be invented, not least because different people want different things. When Chatham stopped using the Dockyard loads of people wanted us to go back, but the Fitted Rigging House was no longer available and though visitors seemed to like its replacement, the Number 5 Covered Slip, exhibitors did not. For one thing it was essentially a Dutch barn - open at the ends and even in June the wind whistled through. If it rained, the roof often leaked, while at very high tides, water could come up through the floor. Pigeons roosted there too, with the inevitable calling cards. The floor was uneven, unsealed concrete, so you feet were black by the end of the weekend and levelling baseboards was more often achieved via house bricks rather than beer mats... The public loved its atmosphere, but many layout owners declined to risk their pride and joy. Add in the fact that it cost around £6000 in todays money to hire it and we also had to hire in portaloos and it is easty to see why we went elsewhere. As a small aside, I once asked Nick Freezer [son of the great Cyril] how much it cost The Model Railway Club to hire Alexandra Palace. His reply was that not only did he not know, he was afraid to ask! Allypally is underwritten by Warners Magazines [BRM amongst them], which is probably the only way it can happen. Speaking of Allypally, the setting is quite magnificent, while access is significantly helped by the fact that you can drive your vehicle right up to your allocated space. Great at the start, but less good at the end when you can often be waiting around for ages while other folk knock down their displays. For the exhibitor, good access is paramount, which is why sports halls can work so well and anything with stairs is a complete pain. The original Expo Narrow Gauge show was held in Greenwich library where access for some was via an external fire escape. Yes really. The Folkestone show is still held in the Leascliff Halls, where if you are unfortunate to be in the Channel Restaurant, you are faced with 87 steps from the road above. There is a narrow access track, but it is one vehicle at a time, so doing the stairs is often the only option, especially as the lift is very small too. You did get to see Dave the dolphin though and the hospitality is great. Have done a few churches and church halls too. Beckenham is one that springs to mind. Their main show is in October, when the church itself can be decidedly cold, while the attached halls are very warm. You can soon tell who is where by the layers of clothing! However, two places are memorable for all the wrong reasons. One was Bexley, where we were in an unheated sports hall, next to the outside door, which was open the whole weekend, in December. It had been snowing and we'd unloaded the layout from the car and sackbarrowed the boards through 50 yards of slush. Chatham's Covered Slipway gets the award for coldest though. The club was supporting the Museum's Steam and Transport weekend. It was an early Easter and the mercury never rose much above freezing the whole weekend, added to which there was a stiff breeze blowing through. Operating Chatham Dock, the club's 0 gauge shunting layout, was a trial of endurance even Amundsen might have baulked at. In the end we simply ran trains non-stop - shunting with three link couplings while wearing gloves and five layers of clothing simply wasn't an option. My favourite venues don't always have the best access though. Sports halls are ideal in many ways for their flat, level floors, but all too often you spend the entire weekend without knowing what is going on outside because of the lack of windows. Uckfield is a great show to be part of, not least because the standard of exhibits is so high. It's a relatively small show and space is tight and access likewise, but the quality is as good as the hospitality, so it makes for an excellent weekend. York, set in the racecourse grandstand is awkward to access because of all the steps and space at Manchester can be tight - though not as tight as the old St Alban's show, but again quality and hospitality make up for it. Years ago, the Colchester show probably took the crown. The college venue was far from ideal, but the Saturday hospitality more than made up for it. A double decker bus was laid on to take us to a pub restaurant, where a fine and boozy time was had by all. On Sunday morning, a bottle of mineral water and a pack of painkillers was thoughtfully placed on each layout! Top of the pops for me though are Derby, which was held in the old Midland Railway roundhouse and Cultra. The former is no longer available, so no more shows will be held there, a great shame as the place simply oozed atmosphere. For me though, Cultra stands head and shoulders above any venue I've exhibited at. The railway hall is just magnificent and when I took Arigna Town there four years ago, to be put on the central turntable, with the County Down Atlantic tank behind me was just the bees knees. This year, Fintonagh was going to be placed between Phoenix and the CVR Railcar [Co Donegal 10], another honour. Hopefully next year. The halls can be a bit chilly and it can be a bit of a yomp from the loading bay entrance to your layout, but in such a setting, who cares?
-
Building a convincing model railway can require as much artistry as practical and technical skills. Knowing what to leave out can be as important as what to put in and for me, this certainly has 'the look', so always enjoy seeing updates.
-
Fine work indeed - everything is so sharp and clean! Keep those pictures coming.
-
Very clean, precise work. Nickel silver always seems to look better than brass to me. Perhaps because it is more like the steel of the prototype? Well worth the time and effort. I sense something special is brewing here.
-
Couldn't find any white 60 thou, Popeye!
-
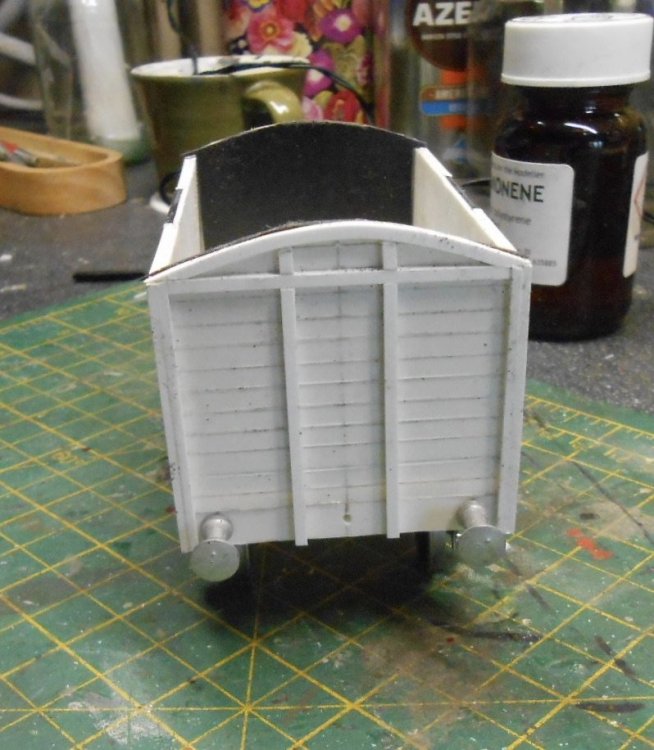
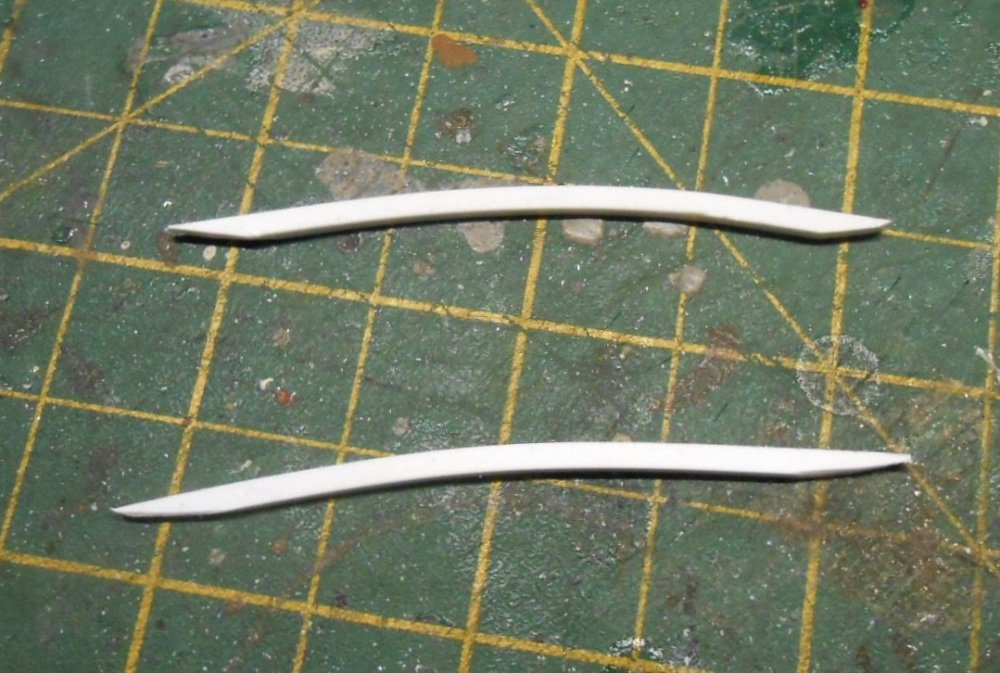
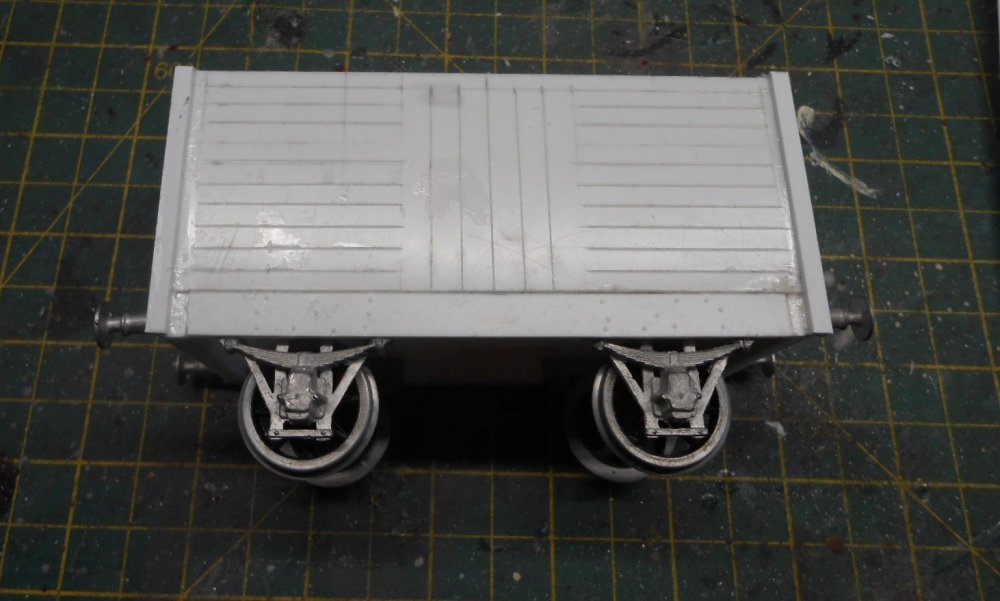
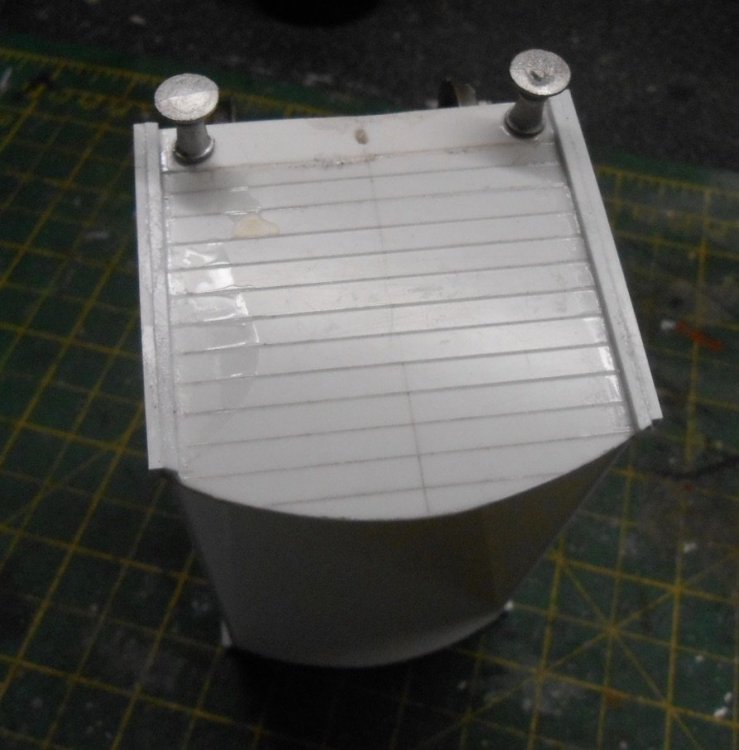
A little more work on the strapping. More 60 x 80 thou strip, but a little more tricky, especially the end profile below the roof. One photo shows the pieces used. They have fitted quite well, but suspect a coat of primer will reveal some filling is needed. The diagonal strapping on the sides also needed a little thought, but in the end simply marked and cut them in situ. The black pieces you can see inside the van bodies are profiled so that they can provide roof supports either side of the canvas/corrugated central roof section.
-
Over the last few years, I've average around ten shows annually - until now. Managed a couple of shows at the start of the year, but of course nothing since March with Alexandra Palace, Nailsea, Salisbury, Bexhill, Milton Keynes, Faversham, Uckfield, Tolworth and Cultra all falling by the wayside. All but Uckfield were for Fintonagh, with Belmullet supposed to be making its debut at the last mentioned. I have a bit of a love-hate relationship with shows, as I very much enjoy the camaraderie, but am less enthusiastic about loading everything back in the car at the end, especially if the weather is bad. Last year, I clocked up my 100th show with one of my own layouts, though helping others and being part of the team that organised the Chatham Show probably adds half as many again. Therefore thought it might be interesting to start a thread of exhibition memories, which others could add to over time in the hope that we'll eventually be able to get out and about again. The Chatham Show For me, the best place to start. It was my first ever exhibition, in 1987 - a year that saw the Chatham & District Model Railway Club begin its relationship with the Historic Dockyard Museum. The naval dockyard had not long closed, with much of it being sold off for commercial and residential use, but the historic core was reserved to eventually become a world class museum. The club had previously used the Town Hall in Chatham for its exhibitions and am not sure how the Dockyard first became the venue, as this was the year I joined, but somehow, what is known as the Fitted Rigging House was procured. The building itself is VAST - a thousand feet long and over five stories. The bit we hired was just one section, with a newly carpeted ground floor for the show and a totally bare section of the first floor for exhibitors catering. We must have been mad in those days, for pretty much everything was done 'in house'. For catering, all we had was a cold tap, but members loaned/donated cookers and the kitchen sinks too, while wives and girlfriends took on all the cooking. The exhibition halls were a forest of pillars holding up a Georgian warehouse, so fitting everything in was a bit of a Chinese puzzle. To help exhibitors during the show itself, we installed the 'tea run', where mobile trollies did the rounds throughout both days to keep exhibitors well lubricated. Meanwhile, for the first few years, club members were pressed into doing 'bed & breakfast' for many. Thus it was that my wife & I hosted Barry Norman and his wife Jill in the first year, Les Darbyshire [esteemed historian of all things Colonel Stephens] the next and finally Gordon & Maggie Gravett - the latter firm friends ever since. The exhibiton manager is those days was the redoubtable Graham Baseden, whose mission was to get all of the best that was available. To that end, he reckons he racked up around 2-3000 miles a year, visiting shows all round the country and beyond - so much so that many exhibition managers used to come to Chatham rather than pound round motorway network themselves. Graham certainly got us some start attractions. Barry Norman brought Petherick, the EM gauge layout with lifted scenery several levels at the time. Gordon & Maggie brought Ditchling Green. Over the 12 years were used the Fitted Rigging House, around 300 layouts visited. One of my favourites was Wenford Bridge - an early 2mmFS layout with a working gantry crane. Graham also made a point of gathering together the very best of trade support at the time. Hence we had a range of what were mainly 'cottage industry' stands, but which covered etched kits, specialist suppliers of bits and pieces along with the best of local model shops. I'll need to delve into my journals [have kept a modelling diary for years], to pick out other names, but what certainly stands out from those days were the characters we met. When the Pontefract club brought their circular 0 gauge layout, based on Robin Hood's Bay, it wouldn't fit inside the many pillars around their allotted space. Their remedy was to saw a bit off to make it fit, while the crate of light ale we provided as compensation went done well. We had a club dinner on the Saturday and they turned up with dickie bow ties, flat caps and such Yorkshire accoutrements as a stuffed pigeon on one shoulder, an invisible whippet on a lead and it was rumoured, a ferret down someone's trousers! A great bunch - though it took a while to get used to the rich accents of the rhubarb and liquorice triangle they hailed from. Barry Norman's Petherick was memorable for various reasons and not just the scenic excellence which was years ahead of its time. The baseboards were five feet deep and only three feet wide - hence the railway ran through the scenery. Goodness they were heavy though! Helping to dismantle at the end of the show showed how robust the boards were - frames made of a sandwich of 9mm ply and one inch softwood did not make for easy manoeuvring. How did I end up exhibiting amongst such excellence? As with most shows, club members who had layouts available always got an invite, provided you met Graham's criteria of reliable running, good presentation and [preferably] a back scene. I'd created a small EM gauge layout called Oare, that was based on the Davington Light Railway - a short lived line to some gunpowder works near Faversham. Eventually, I worked it up to a reasonable layout, but that first show was not without incident. My K's Terrier was far from being a good runner, though at least it didn't catch fire like the Adam's Radial from the same stable! My Wrenn R1 0-6-0T did most of the work that year, though as I gained experience a few reliable commercial locos were converted to EM like the Dapol Austerity, while I also built the Taurgem kit of a pair of Ford railcars and scratch built the Muir Hill tractor from the Weston, Clevedon and Portishead Light Railway. The following year, I got invited back, because someone had dropped out and things must have gone better because I got invited to Expo EM. That show was actually held in Bletchley Park, which was certainly an interesting venue, this being well before it became a museum. Next time, I'll go share some experiences of other venues I've visited over the years - the good, the bad and the interesting, but if others have tales of exhibitions they've attended, either as paying guests, or operating a layout, then it would be nice to share and maybe help fill the gap until we can meet up at shows again.
-
Long time no see, but certainly worth the wait! Fabulous paint job.
-
That's the one. Notice the spectacle plate lower down the post. It showed a clear white light to proceed I believe.
-
Sister's wagon and coach axles plenty long enough, Ken. I just move the wheels out to the correct 33.98 back to back and there is still enough to go in the bearings. As for pace of work, that pretty much sums up scratch building in this scale, indeed any scale - though the larger to model, the more the detail than can be incorporated and hence the time it takes. On a short sabbatical at the moment, while domestic chores/decorating take over - it helps to keep the domestic authority happy!
-
Add a fair bit of skill too, those tile lines are excellent. Not much room for error in 4mm scale before such things start looking wrong. Proper job!
-
The Sligo had a three armed signal to control the same number of adjacent level crossings. Copied it to use on my Arigna/Belmullet project. Will try to post a picture later.
-
Further to the Ulster & Connaught idea, a few notes are in the Clogher Valley book, because the U&C would have traversed some of its track, along with the Cavan & Leitrim and Bessbrooke and Newry. The railway would have gone westward to both Galway [dual gauge possibilities here] and Clifden [somewhat less busy]. It would have crossed the 'western corridor' line at Tuam, where there was a sugar beet factory of course. Cork meanwhile offers possibilities, as there were two narrow gauge lines there and a total of three standard gauge termini as well - Bandon, Macroom and GSWR. Some kind of link line offers all sorts of possibilities, including a prototypical background to a line going along the riverside.
-
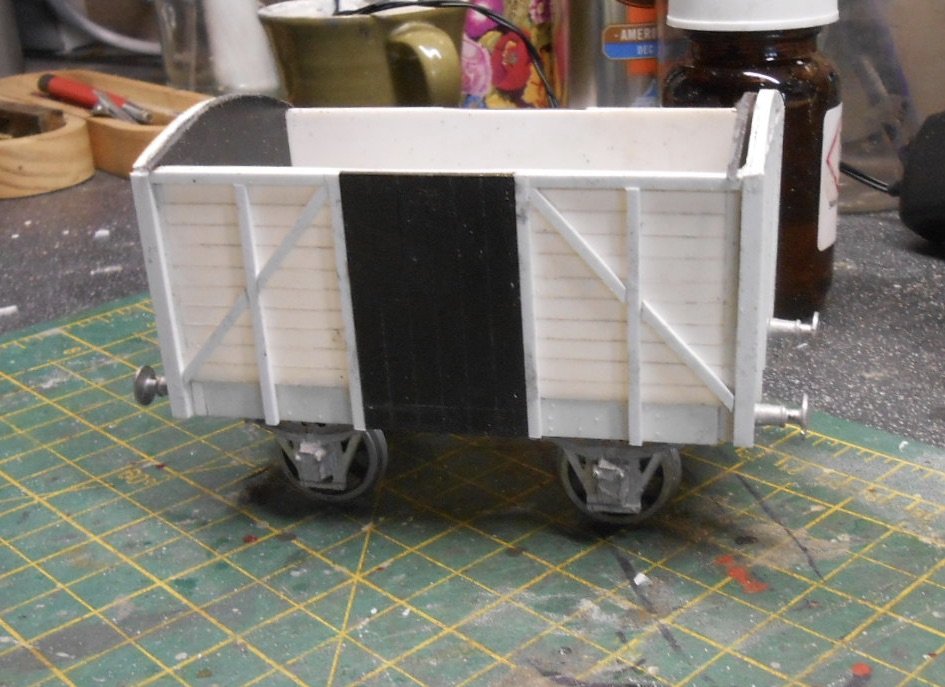
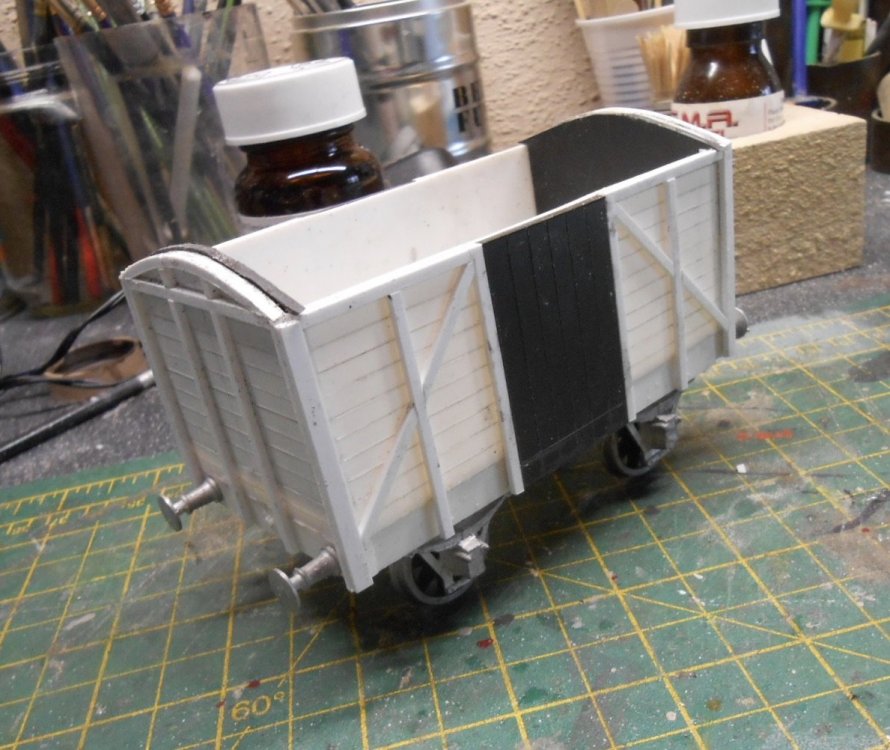
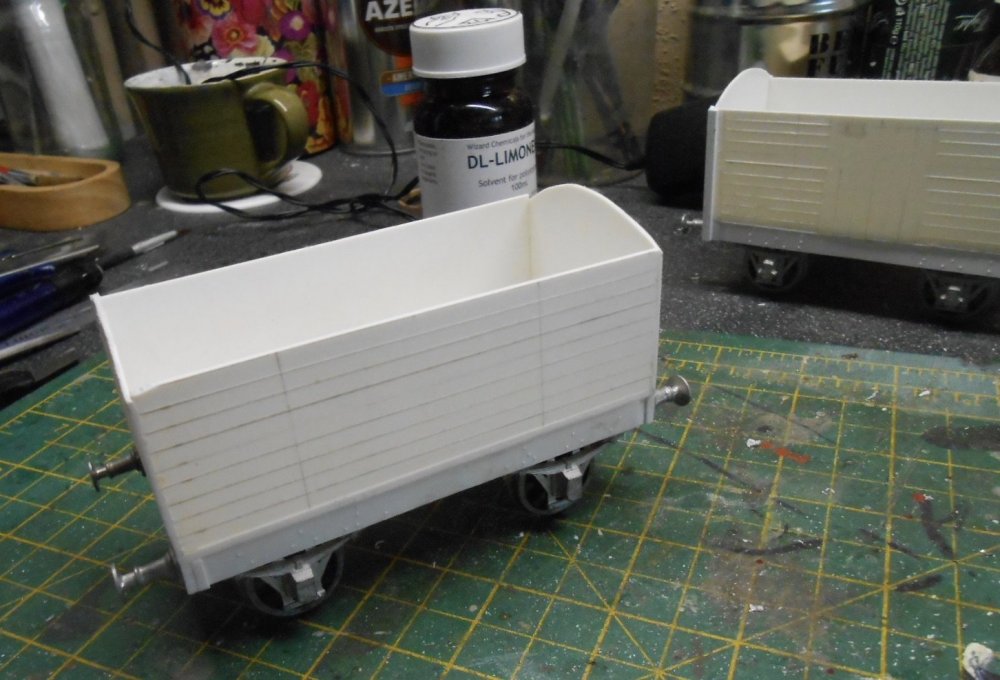
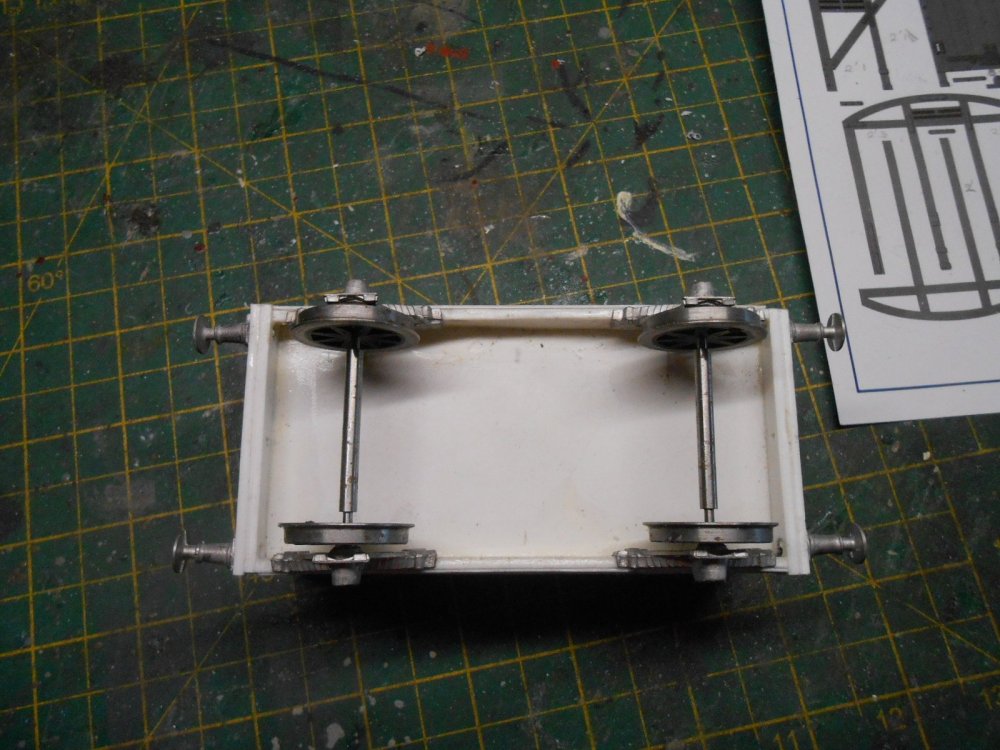
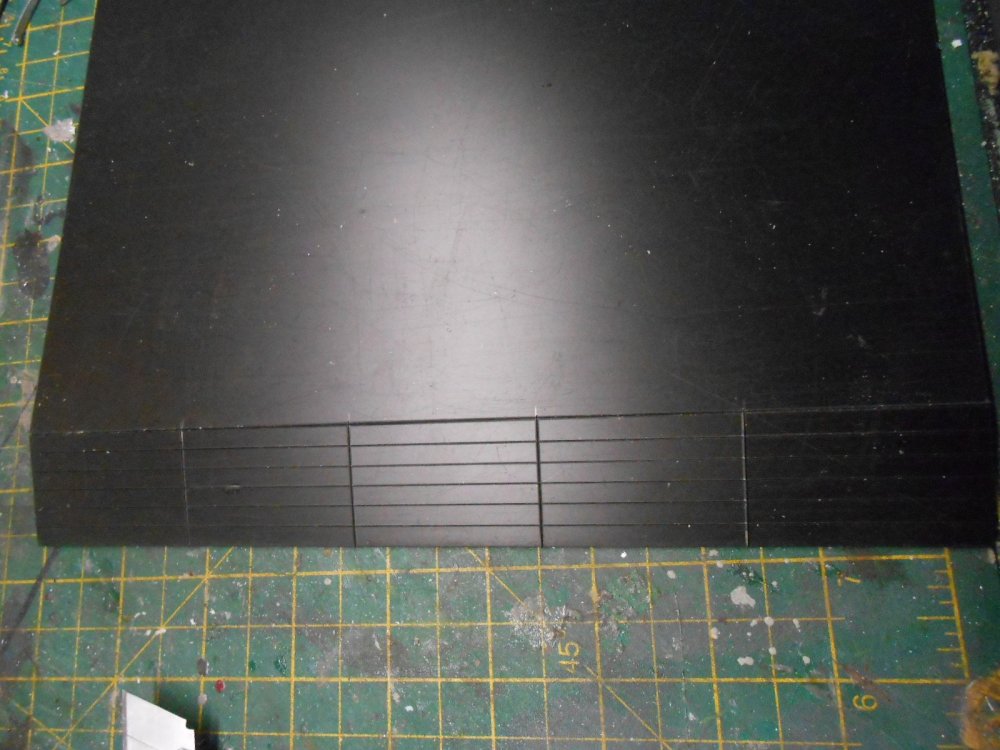
Following on the from the hearse/fish van and glasshouse brake, have now started on some vans to complete the train for the J19. Apart from a few GNRI vans, most of my wagons are SLNCR, so seems appropriate to add some from the MGW & GS&W railways. Alphagraphix do a card kit for a 'semi' from each company, so have used these as drawings to scratch build two of each. For those who might be interested, will do a stage by stage account of how I build them - though whether any of this is good practice, or an example of the strange ways my mind can work, I'll leave others to decide! I use 40thou [1mm] plastic sheet for van bodies and 80thou for the floors. Sides and ends are drawn out, complete with any planking lines, which are then scribed prior to cutting out all the pieces. Assembling the box is straightforward, so you soon have a basic shell. I added the under frames next - 80thou strip for the sole bars and buffer beams, then cast white metal W irons fixed on with cyano, with the wheels going in at the same time. The important thing here is to make sure the axles are parallel. Whitemetal castings likewise used for the buffers. I used ones supplied by Alphagraphix in their wagon chassis packs and interesting to note that of the five packs I bought, there are three different types of buffers. When I first started modelling the Irish scene, this would have worried me a little, but photos seem to show that variety was indeed the spice of life on many old wagons, with some having different types on each end! The rest of the model is about adding detail and the two MGW vans I'm doing at the moment were very 'strappy'. However, there is something curiously therapeutic about building up such detail with micro strip. I used 60 x 125 and 60 x 60 for the corners, then 60 x 80 everywhere else. The doors are 60 thou sheet - black because that was all I had available, though have since found a sheet of white - of course... So, photos show progress thus far, about 10-12 hours work, which also includes some 20 thou overlays on the solerbars, which have been riveted where appropriate. Lots more riveting to do as the vans are festooned with additional plates and strapping, so probably only about halfway in terms of time taken thus far.
-
Some of the current ready to plant buildings are very nice indeed, but a project like this shows how one can be made bespoke and much more interesting.
-
Looks much better to me. Low relief buildings can be made to work, but need carefully blending into the back scene, with (especially) something to hide the lack of depth at the ends. Trees, or a deeper building can do this. The silo, having more depth anyway, clearly doesn't have this problem.
-
The Limerick market branch could be one inspiration, though for mixed gauge might have beens, the city of Derry has more than a few options. Another thought is the enormous white elephant that was the Ulster and Connaught Railway. Had that been built, there would have been several mixed gauge opportunities right across Ireland.
-
Dare I say that all this fun you are having with 4mm scale would translate very well into 7mm narrow gauge! On a slightly serious note 0n16.5 has much to offer anyone who enjoys model bashing, especially if freelancing. Second hand stalls provide a wealth of materials, while right curves and tension lock couples look fine. Plus you can build a 7mm narrow gauge layout in pretty much the same space as an 00 one. Worth remembering for the future, though looks like plenty of fun is being had with the current project to want to change any time soon.
.png.c363cdf5c3fb7955cd92a55eb6dbbae0.png)

