David Holman
-
Posts
4,359 -
Joined
-
Last visited
-
Days Won
117
Content Type
Profiles
Forums
Events
Gallery
Blogs
Everything posted by David Holman
-
Always looks good!
-
Shades of Ballydehob and Roaringwater Bay. Fine work.
-
As others are saying, if the back to back measurements are consistent, then most likely the problem is the point itself. A single wagon might have a twisted chassis, so check if it rocks when on a known flat surface. If it is just one point, not all of them, then it might not have been laid flat, which as Mayner says will upset everything. Problems with running have to be dealt with by a process of elimination. Note where any faults are and record the stock which has problems. Same with areas of trackwork. Eventually you will isolate the problem(s) and be able to take appropriate action. Being methodical is really important.
-
Not bad at all. On a Terrier chassis?
-
It's the same in 7mm scale (where ready painted figures can be £5 or more each), proper sized people can be a tight fit. Fortunately, Slaters do a pack of 16, unpainted, figures which are probably closer to 1/48 than 1/43. Crude, but they are ideal for putting in coaches and other right spaces where you just need an impression. Even so, several have had legs cut off at the knees to fit. Needs must!
-
Lovely stuff!
-
Interesting re the footboards - your experience is pretty much like mine. The current ones use 0.8mm brass wire in holes drilled in the floor. Initially held the wire in place with solvent, which meant it was adjustable so I could get the levels right. Fixed the boards to these with thick cyano, plus more of the latter to fix the wires in place, so everything is actually quite solid for once! As for the buffers, some Markits ones are very nice, though you pay for it - anything up to £20 a set of four, whereas white metal castings are more like a fiver and under a coat of paint not always easy to tell the difference...
-
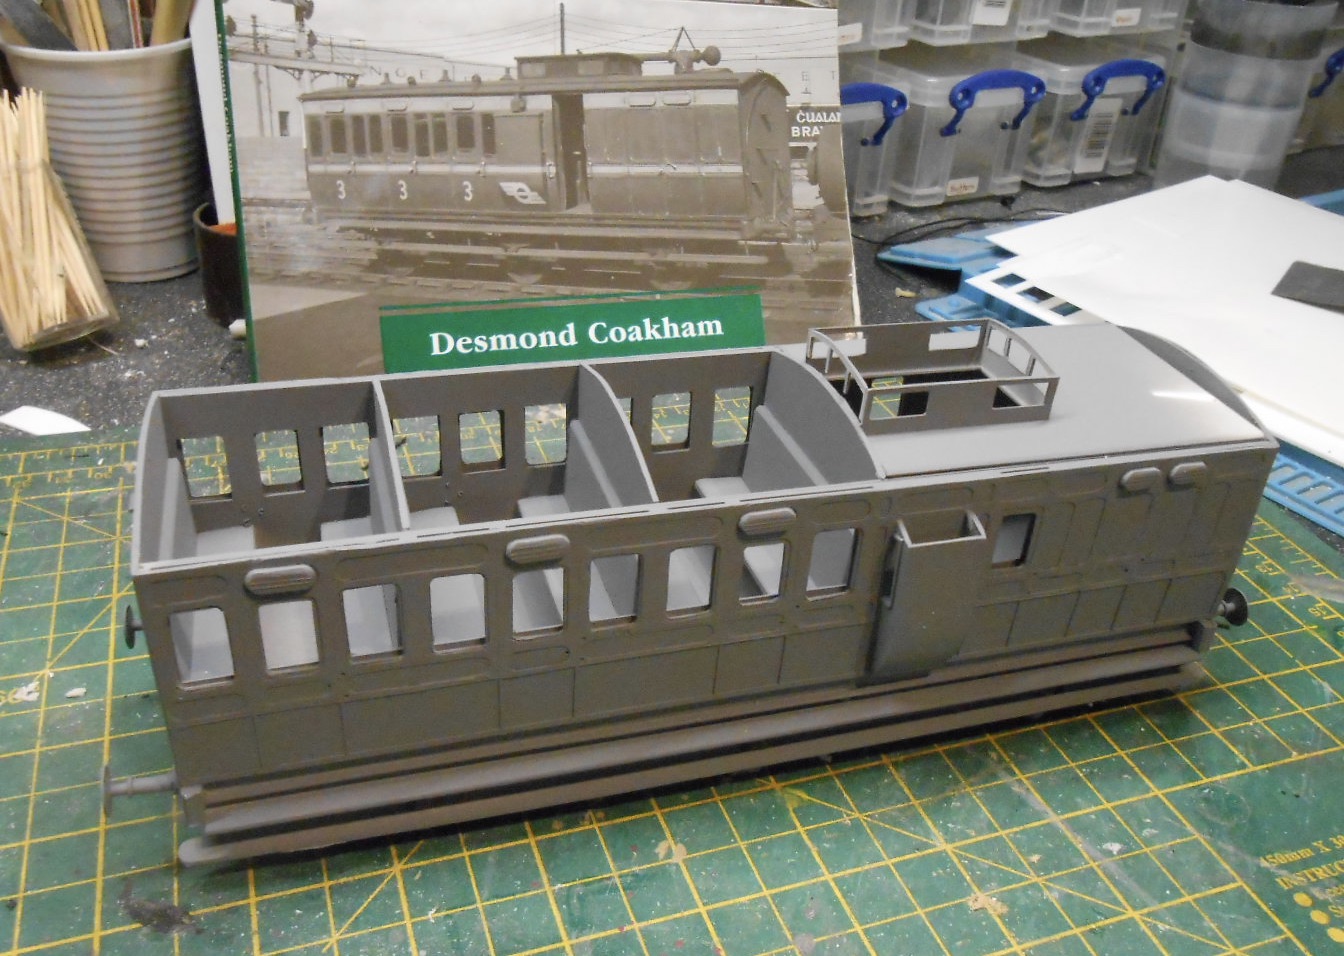
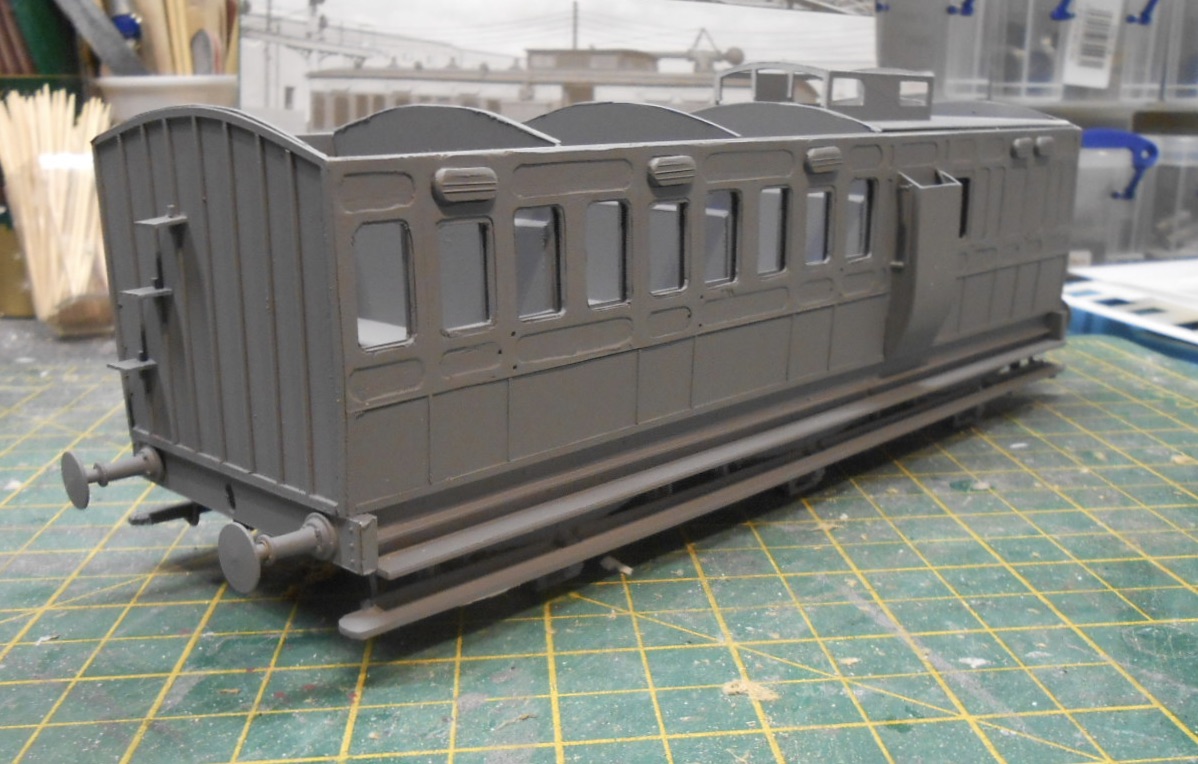
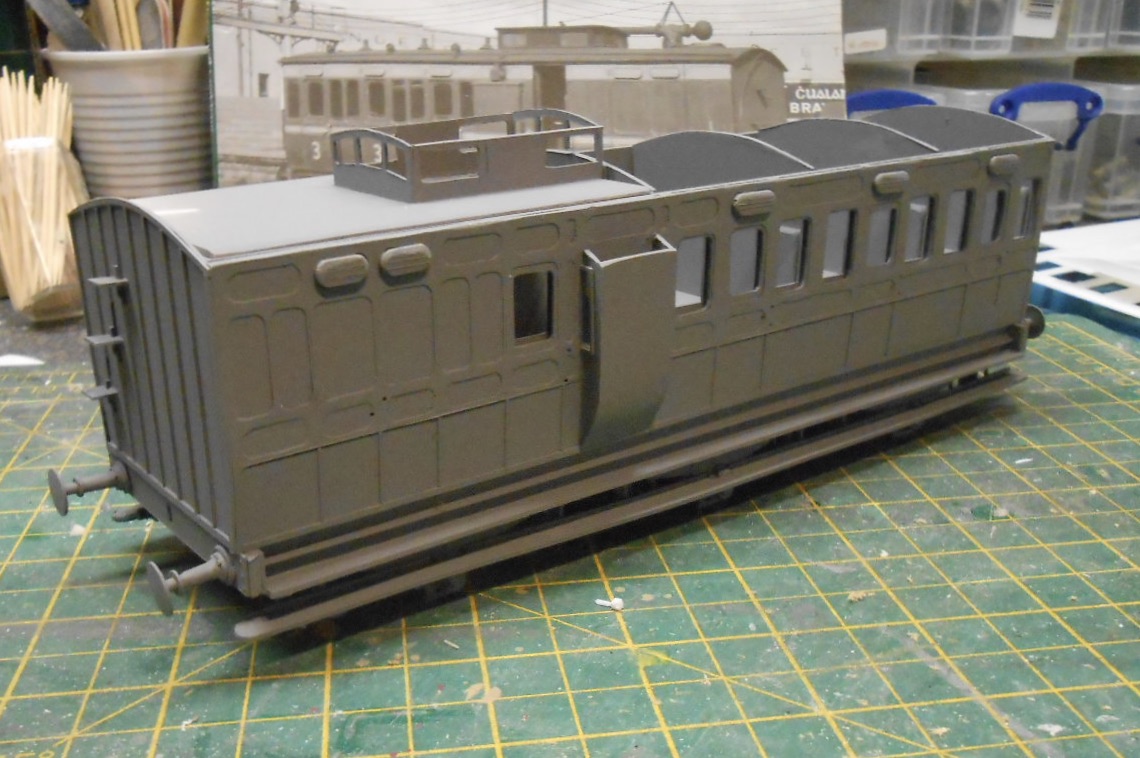
Slow progress with the GS&WR brake third. The Markits buffers were decidedly disappointing. Being lost wax brass castings, the shanks had a huge lump of sprue attached which needed a slitting disc in the Dremel to remove. Then the shanks needed drilling out to take the buffer heads, which eventually took five [yes really] different drill bits in four different drills. Finally managed the process by using my pillar drill, when even the Dremel failed. After that, it was a case of tidying up the sides and ends, including drilling many holes for door and grab handles. Door ventilators were crafted from lozenges of 40 thou plastic, filed to shape, then went over all the panelling again, to check for for errors. One job I particularly dislike with six wheel coaches is making the footboards and especially their brackets. Am sure there must be a better way than my usual bodging with wire and cyano, but have yet to find one. The last job before the paint shop was to make a false roof for the guard's lookout to sit on. I sometimes wonder if it is worth doing too much cleaning up before spraying on a 'witness' coat of primer, as no matter how thorough you think you've been, blemishes still show up. Hence some more rubbing down before what I hope is the final coat you can see below.

-
Clear that those who knew him are richer for the experience, while the rest of us at least had the pleasure of seeing his work online. RIP indeed.
-
Salivating already....
-
What is best product to glue brass etch to plastic?
David Holman replied to LARNE CABIN's question in Questions & Answers
Cyano works well too, though you need the right stuff - probably one of the more viscous, slower setting ones. -
What a joy and mine of information this forum is! Thanks everyone, and yes please to any plans, Ken. The drifter looks fun too, but will certainly get the Scalescenes one to see if I can enlarge it. As I said earlier, £200 is more than a bit steep, plus I can always pick Gordon Gravett's brains - he made model ships for a living back in the day.
-
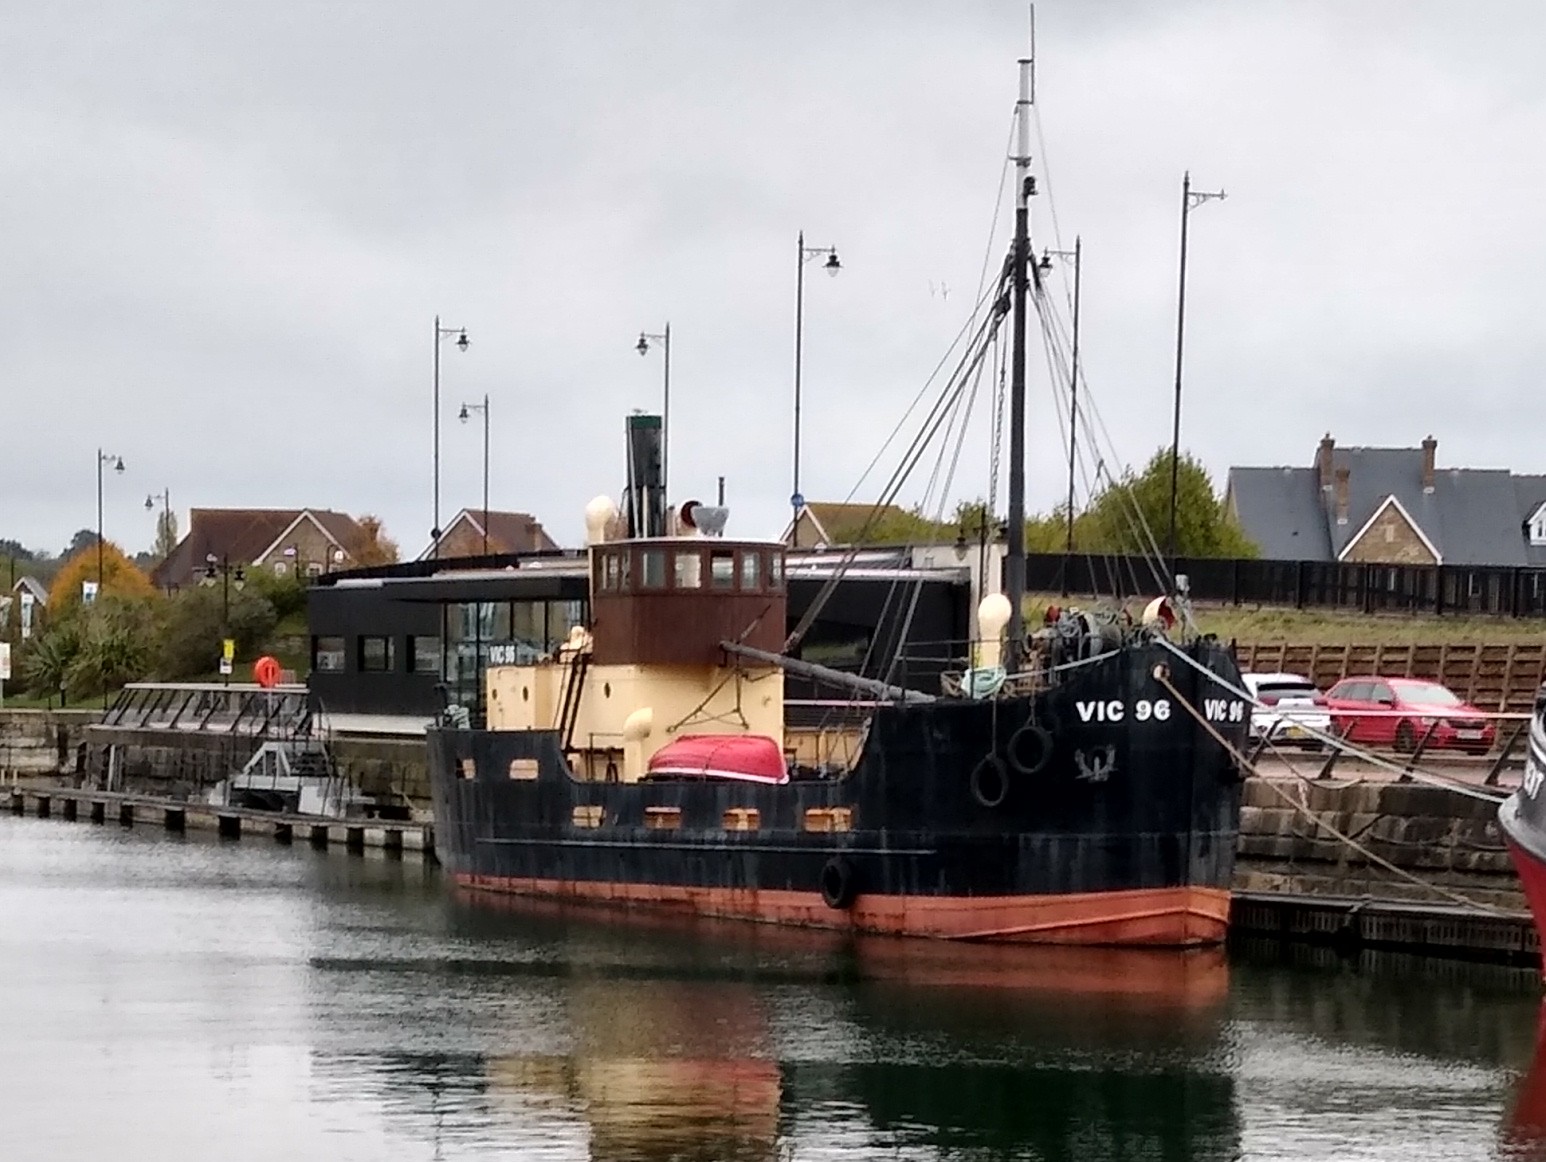
Am interested to know if the coasters known as Clyde Puffers made their way around Ireland? Reason is that in Chatham Maritime, there resides Vic96 (see photo below), a stunning little ship that would be ideal as a modelling project at just 80' long and 19' wide. A former Admiralty supply ship, it is now preserved and has its own websites. Amazingly, it wasn't built until 1946, but the fact that it looks much older is because the design was based on the Clyde Puffers. Langley models do a kit of a Puffer, though it is a fairly eye watering £198 - rather a lot for a static, waterline model methinks. However, one of our Lockdown walks takes us past Vic96 and it is becoming an itch I may need to scratch!
-
Mmm. About 48x21" in 7mm scale or 13" x 6" in 2mm scale, to go with Ken's 26x13.
-
Really impressive. Am starting to think everybody should build one of these!
-
That looks like the 4-4-0T in Cultra. Currently rereading Boyd's Saga by Rail and on the C&L chapters. Lovely stuff - as is No12. Got to be really pleased with it! Just needs a long mixed train now and a trip to New Zealand for a run on Mayner's layout, though fairly sure the CB&P locos weren't allowed on the tramway.
-
Less of a problem these days, but go back 20-30 years and back to back measurements could be very important for good running. The B2B could vary quite a bit from different manufacturers and a gauge was an important tool to set wheels. Indeed, still is on my Fintonagh layout. Track gauge is 21mm, B2B needs to be around 19mm and if I get any derailment at a show, that is the first thing I check. More than 0.3mm out can cause problems.
-
Interesting. My 30 second videos are around 200mb and when I try uploading them direct to IRM, firstly it is much slower than photos, probably because the latter are less than 1MB, but then after a few minutes, I get a 'cannot be done' message. Hence have gone along the YouTube route, which is really slow. I've got fibre broadband, though only copper wire to the house, so get around 10-15MBps download speeds and only around 2-3MBps uploads.
-
A fine lady indeed. Layout space, workbench, storage - excellent! Make haste slowly and enjoy.
-
Many thanks everyone. That's it for my film making for now. Not only does each clip take a long time to set up, but then (for whatever reason), it needs an average half an hour or more to upload 30 seconds of video to YouTube, so it's back to the work bench for me. However, may do something on Fintonagh at some point in the future.
-
The Slater's tank wagon appears to be pretty accurate for 'over the water', while Alphagraphix card kits can get you started for other wagons. At £3 or so, plus £10 for a chassis and another tenner for wheels, they are good value, or do what I do and use the card kit as a drawing/template to build the model from plastic. Bodywork is pennies - chassis and running gear costs the money in this scale! Dare I say, the recent Scalescenes micro layout download, as outlined by Ken in that section would make an ideal project to start off in 7mm scale.
-
Three more short videos, this time the turf train. The J26 brings the two turf vans, plus an H and a GSWR brake, while the G [Deutz] shunter collects them and takes them down the harbour siding to the distillery.
- 179 replies
-
- 13
-

-

-
More than a few exhibition layouts are not presented as well as this.
-
Might be better looking at the Hattons generic six wheelers?
-
Fascinating and looking forward to seeing things develop. Signal boxes are always awkward things to build, so taking advantage of what York Model Making now offer is certainly food for thought. Is it still scratchbuilding? Absolutely! What we are starting to see now though is a quiet revolution in embracing modern techniques like laser cutting. Still a lot of skill and planning required though so the challenge is in learning these new techniques. Results speak for themselves! As for the Burma Road, already salivating. Always been drawn to these sorts of railway and interesting to learn about the Atlantic tanks. Have at least one more slot for a early 1900s loco and been considering one of the Sligo 0-6-2Ts, but a WL&W 4-4-2T would also be tempting.