David Holman
-
Posts
4,359 -
Joined
-
Last visited
-
Days Won
117
Content Type
Profiles
Forums
Events
Gallery
Blogs
Everything posted by David Holman
-
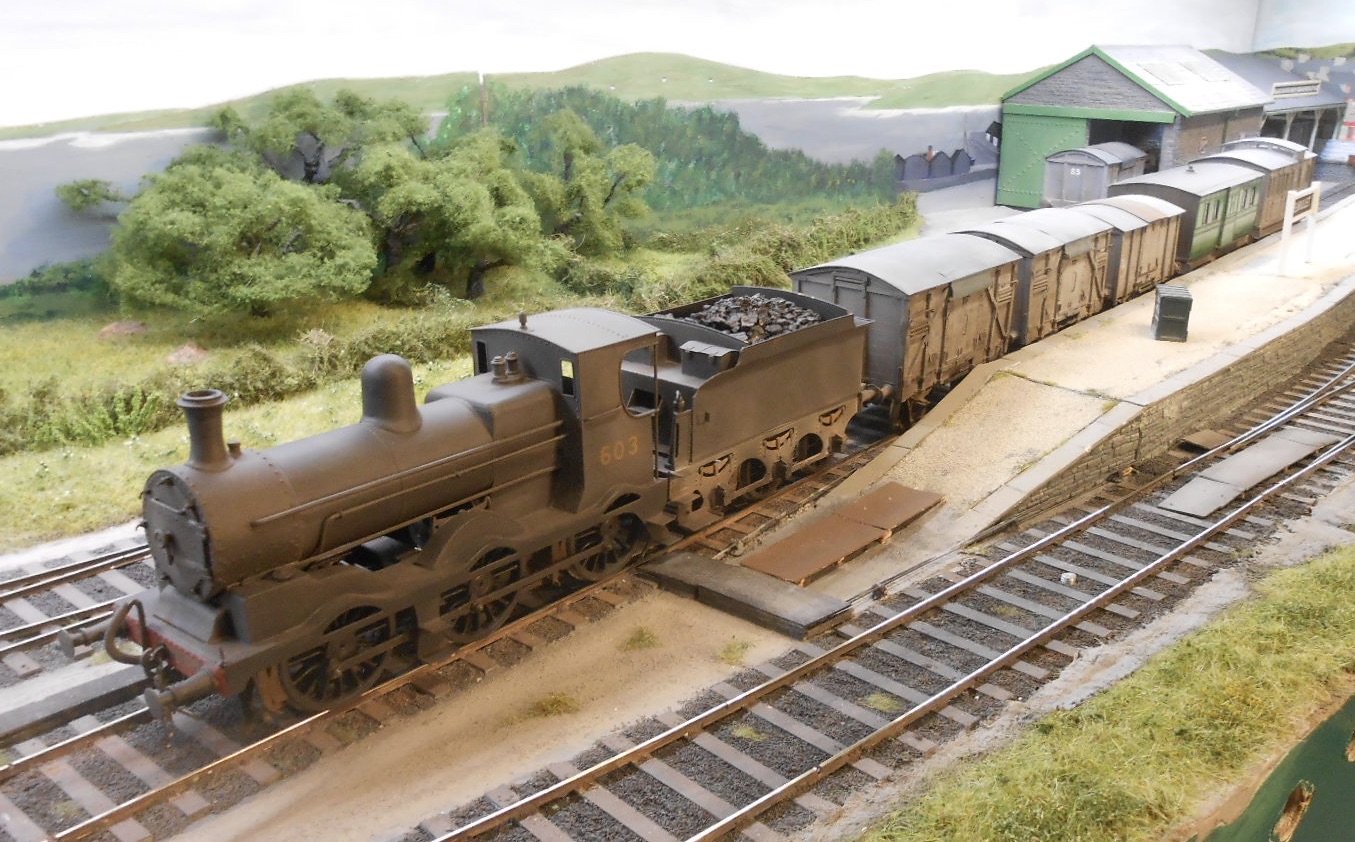
Already been scribbling! However, not Irish this time, but as a means of using my Wantage tank. Scratch built from the MRJ articles several years ago, it would be nice to give it something to run on.
-
The new, November Railway Modeller has a fascinating article on the above. For £9.99, you buy a downloadable set of printouts which enable a delightful canalside/warehouse scene which fits in a foolscap boxfile. Backing card, cork sheet and a small amount of track, including a Y point, also need to be bought, but the article shows that a really convincing scene can be created as an ideal backdrop for any of the small industrial locos now available. Could also be done with 009 or 00n3 and likewise given an Irish flavour too. Never say you don't have room for a model railway!
-
The latest Railway Modeller has a review of the above. Based on the RCH 1907 10'6 wheelbase prototype, it seems to fit the bill for an Irish tank wagon very nicely. Will need a repaint, but £22 seems a decent price for what is quite a complex model. If you work in 16.5mm gauge, it could be a fine alternative to the usual vans, opens and semis.
-
Wagon tarpaulins in Britain usually had the company name and some sort of identifying marks on them, to ensure they got sent back to their owners and probably for accounting purposes too. Was this also the case in Ireland? If so, did markings change from pre-grouping, through GSR and CIE? Needless to say, have some open wagons I'd like to cover. Thanks.
-
The mark two version is certainly on the money. Had similar issues when I did Sir Henry - the inner faces of the side tanks are fully (if not prettily) riveted as I made a mess of the first effort. Great work!
-
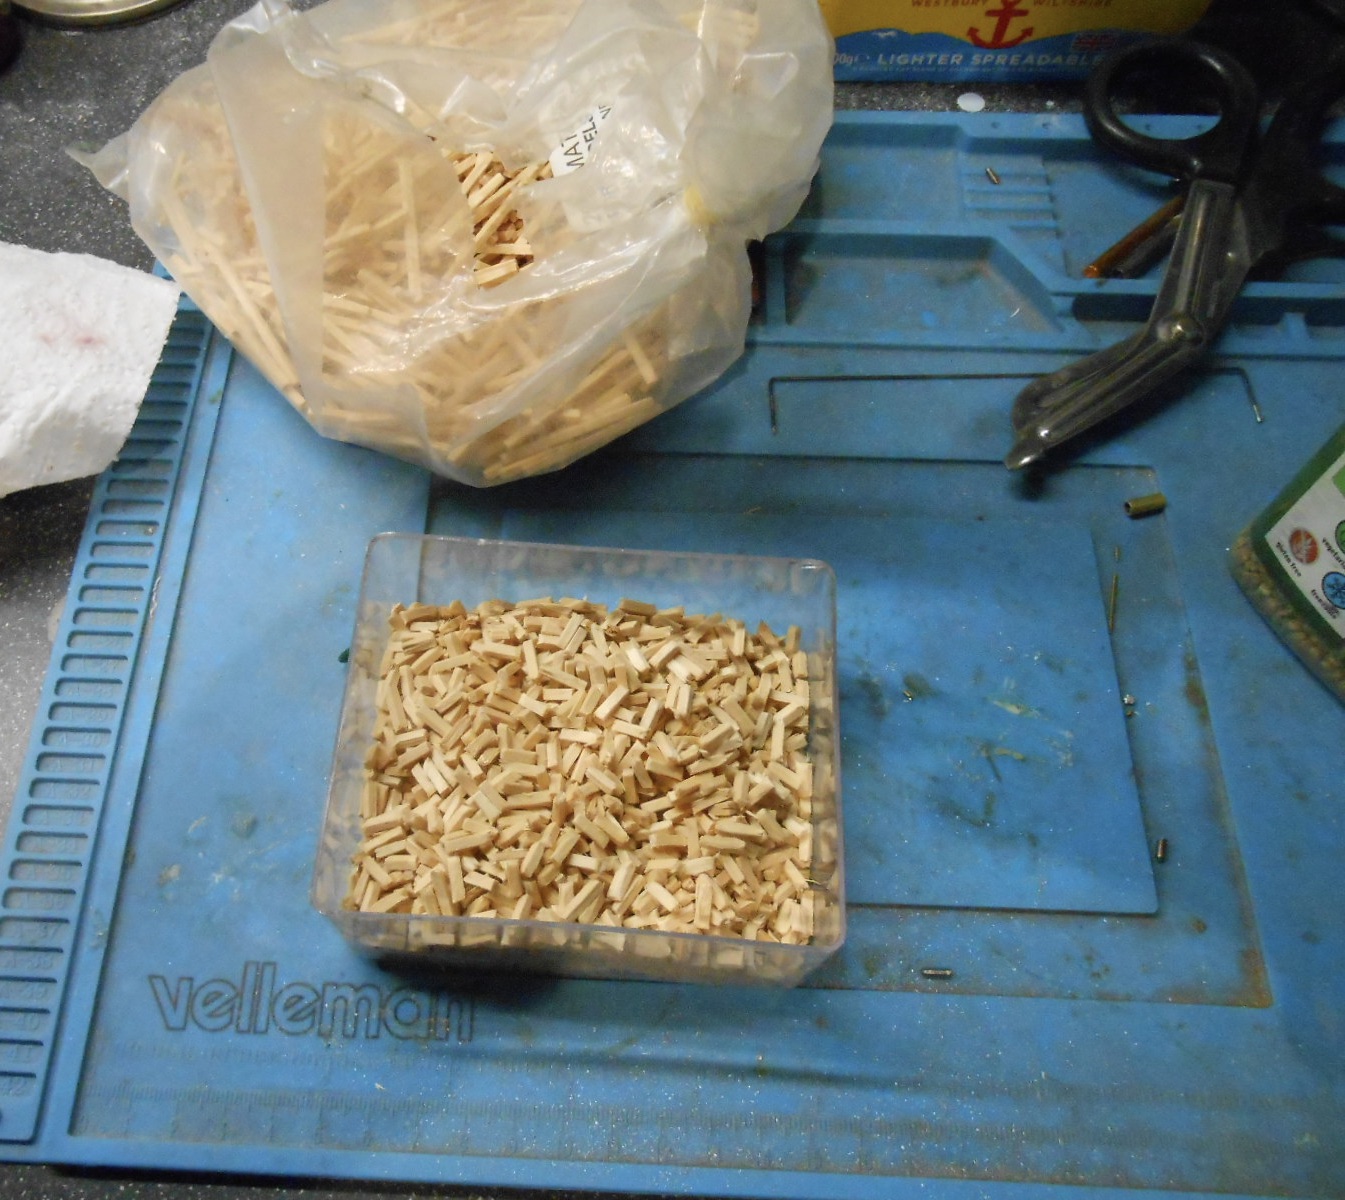
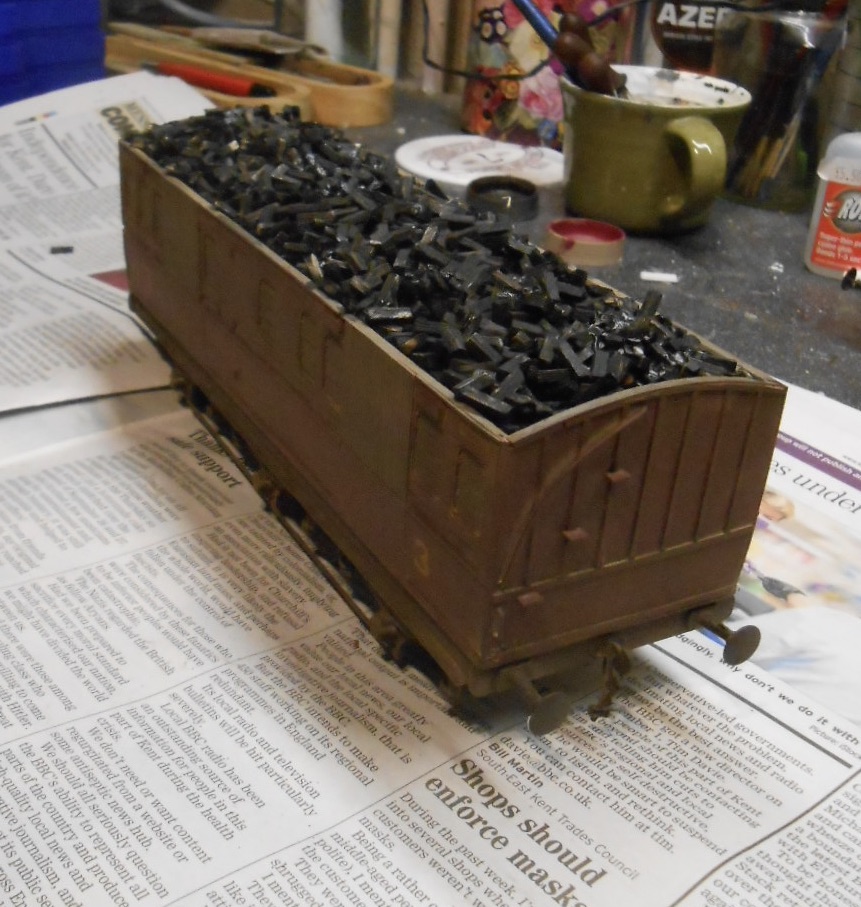
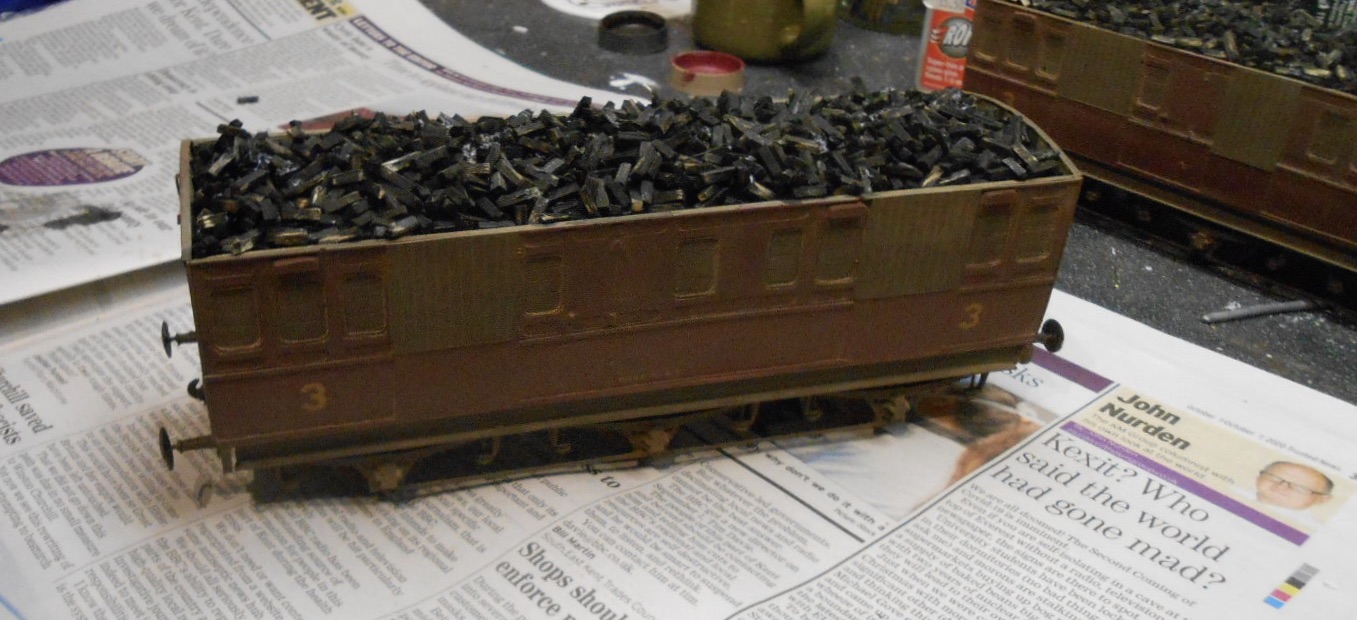
The turf vans have progressed through the paint and weathering process and now await final detailing. Started with a coat of grey primer, then the wheels and under frames were treated to the standard weathering mix. For the body work, am guessing that as emergency conversions, any new woodwork would not have been painted. Hence both inner and outer planking was done with a mix of Humbrol 110, 64 and matt black. The main body colour has been described as 'faded maroon', so delved into my collection of tinlets and found a Precision BR Coach Maroon and Wagon Grey. Mixing these together in the ration of 3:1 seemed to give a reasonable effect, so two [thinned] coats were brush painted on and left to dry. After, the same weathering mix [heavily diluted this time] was washed on to the sides & then weathering powders were dusted on - rust around the under frames and a mix of grey and brown tones for the bodywork. For the load, decided that matchsticks, suitably chopped up, might work. Got a bag of 2000 of these many years ago, which have gradually been used for fence posts and the like, but several fistfuls have now been laboriously chopped into short pieces with strong scissors. A somewhat mindless task, but gave me the opportunity to think about how I might fix them in place. As can be seen from the photos, a false inner floor has been fitted to each van from black 60thou plastic sheet. This was initially covered with PVA and a layer of matchstick pieces sprinkled on top. Once this had dried, the rest were carefully piled in place & then a diluted mixture of PVA, black acrylic paint and a couple of drops of washing up liquid was dribbled all over using an eye dropper - same as ballasting or adding coal to a tender. The colour isn't right yet, but I figured that this way it stood a better chance of soaking into the wood. Standing the vans on newspaper proved to be a good idea, as, inevitably, some of the glue/paint mix worked its was through the bodywork and out the bottom. Suspect I'd better leave things as they are for a couple of days, to fully dry out before I attempt anything else. The weathered colours are not as dark as they appear in the photos, because there is more shadow on the workbench and I daren't risk moving them at the moment, having already made a puddle!

-
Remarkable. The windows are pretty darned good too, as is all the gingerbread stonework. Modern technology has certainly revolutionised our hobby, but when put in the hands of a modeller like warb, it just moves things to another level.
-
That looks very close indeed! Many thanks, I feel an order to Slater's coming on!
-
Moulded in - the master has a flat 40 thou inner side, then there's a second piece of 40thou half the height of the side, full length, at the top. The outer skin goes on this and when pressed down on the inner, you get the tumblehome. A David Jenkinson trick.
-
Yep, a real beauty.
-
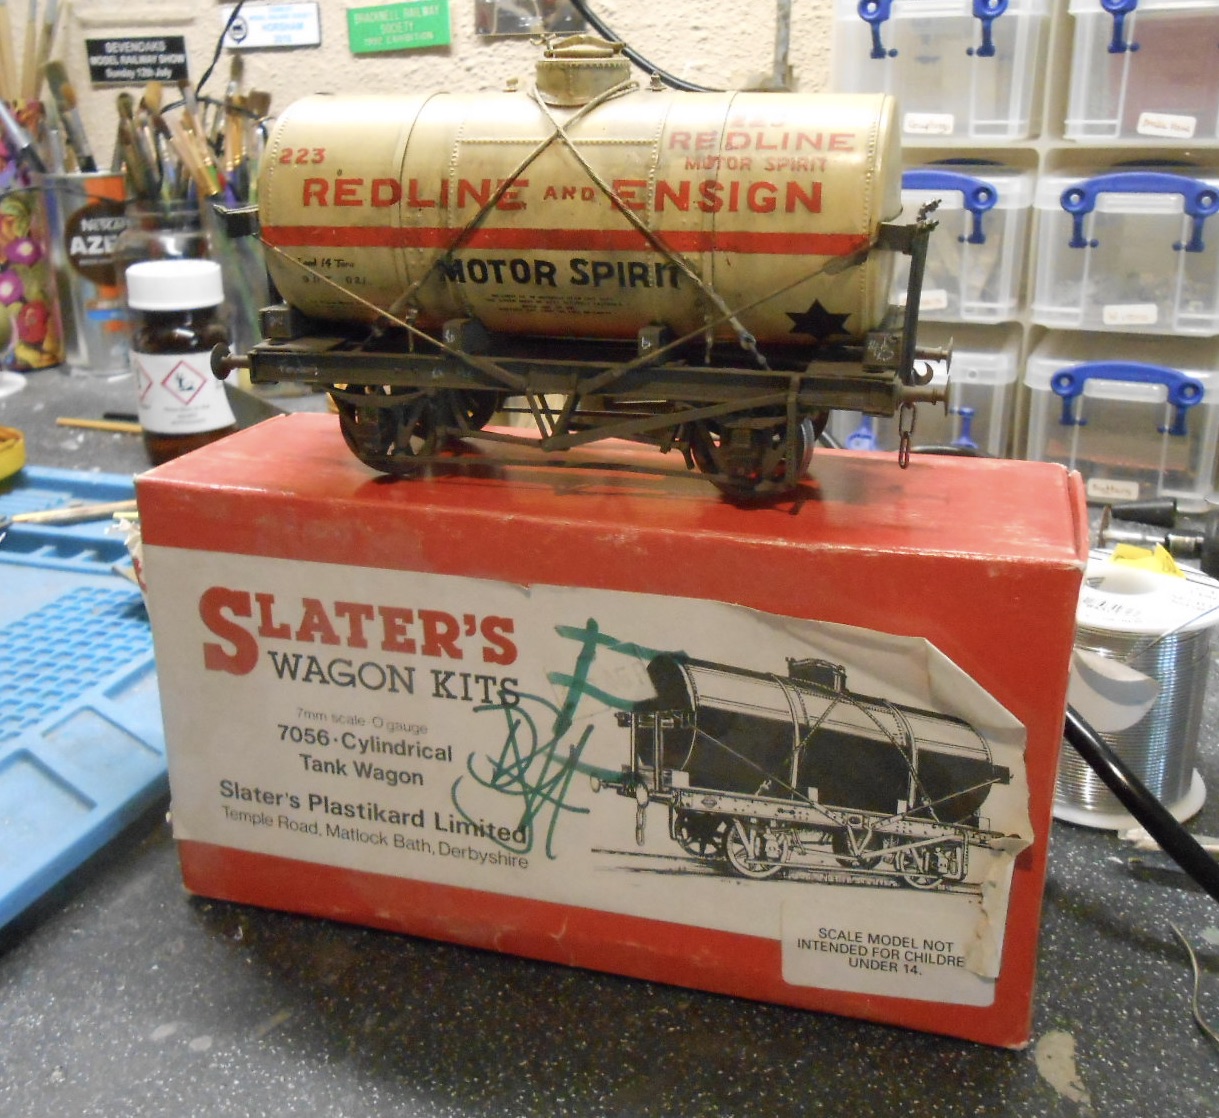
Below is a picture of a Slaters 7mm scale tank wagon, for 'standard' gauge. Ignore the lettering, which is not Irish, but was wondering if this type of tank wagon made it over the water? Unfortunately, it will not be possible to adapt it to 36.75mm gauge, but this wagon is a very nice kit that I should be able to adapt if starting again. Ideas and thoughts welcome!
-
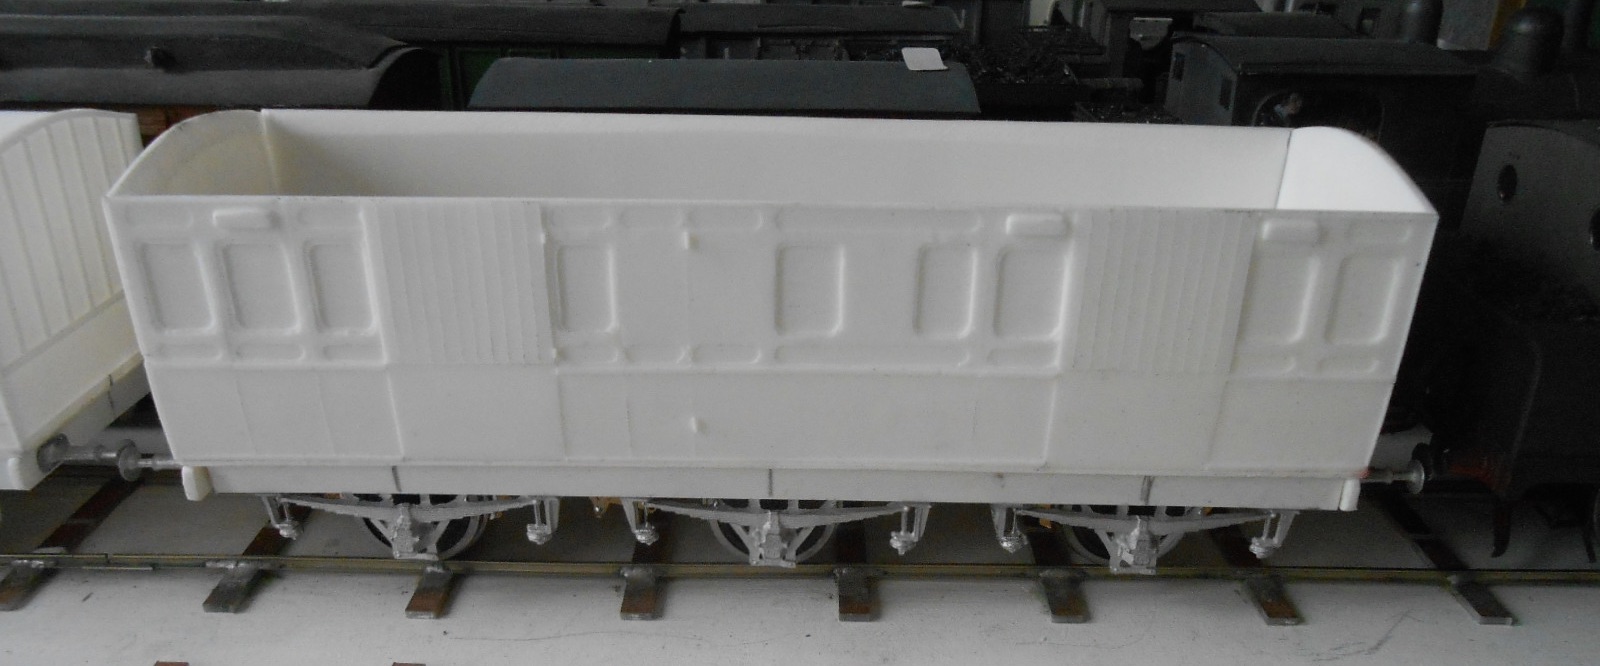
A few pictures showing how the turf vans are progressing. Most of the work has been around cleaning up the resin castings and enabling the corners where the ends and sides meet to lock together nicely. Just occasionally I do actually plan ahead a little to help myself! The bodies, once assembled sit on a sheet of 40thou plastic, with everything held in place with Rocket super glue - the most liquid type, which I'm still getting off my fingers. Everything was going well until I realised I'd put one side in upside down, which was a bit of a bummer to say the least - and I did say a lot more that is best not shared in polite society. The under frames came next, with 80 thou plastic used for the buffer beams and sole bars. Before the axle box castings [JPL Models] were added to the latter, I soldered up and fitted Alphagraphic 'Cleminson' type etched axle holders. These include brake gear and are simply bolted to the floor, once made up. Wheels are Slaters, that I got from the Richard Chown estate a couple of years ago. Was surprised to find that the back to backs are set to 35mm, rather than the 33.98mm recommended by Slaters themselves. The Castle Rackrent system had curves down to 4'6, I believe, but am guessing that Richard used a tighter back to back to improve running through points and crossings. Maybe someone can enlighten? Found what I hope are some suitable cast white metal buffers in my stores and have added a door handle each side. These vans are purporting to represent brake coaches, with the guard's van doors left in place to help with unloading. Plenty of work still to do, especially in terms of painting & weathering, but getting there.
-
http://www.asahi.com/ajw/articles/13696482 Guess somebody had to eventually, but won't be part of my modelling any time soon! Clever though.
-
Brings a fine model to life. Top job.
-
Suspect that if you removed the trains, the photos would still look good, such is the quality of the ballasting, trackwork and scenics. Sets off these wonderful trains so well.
-
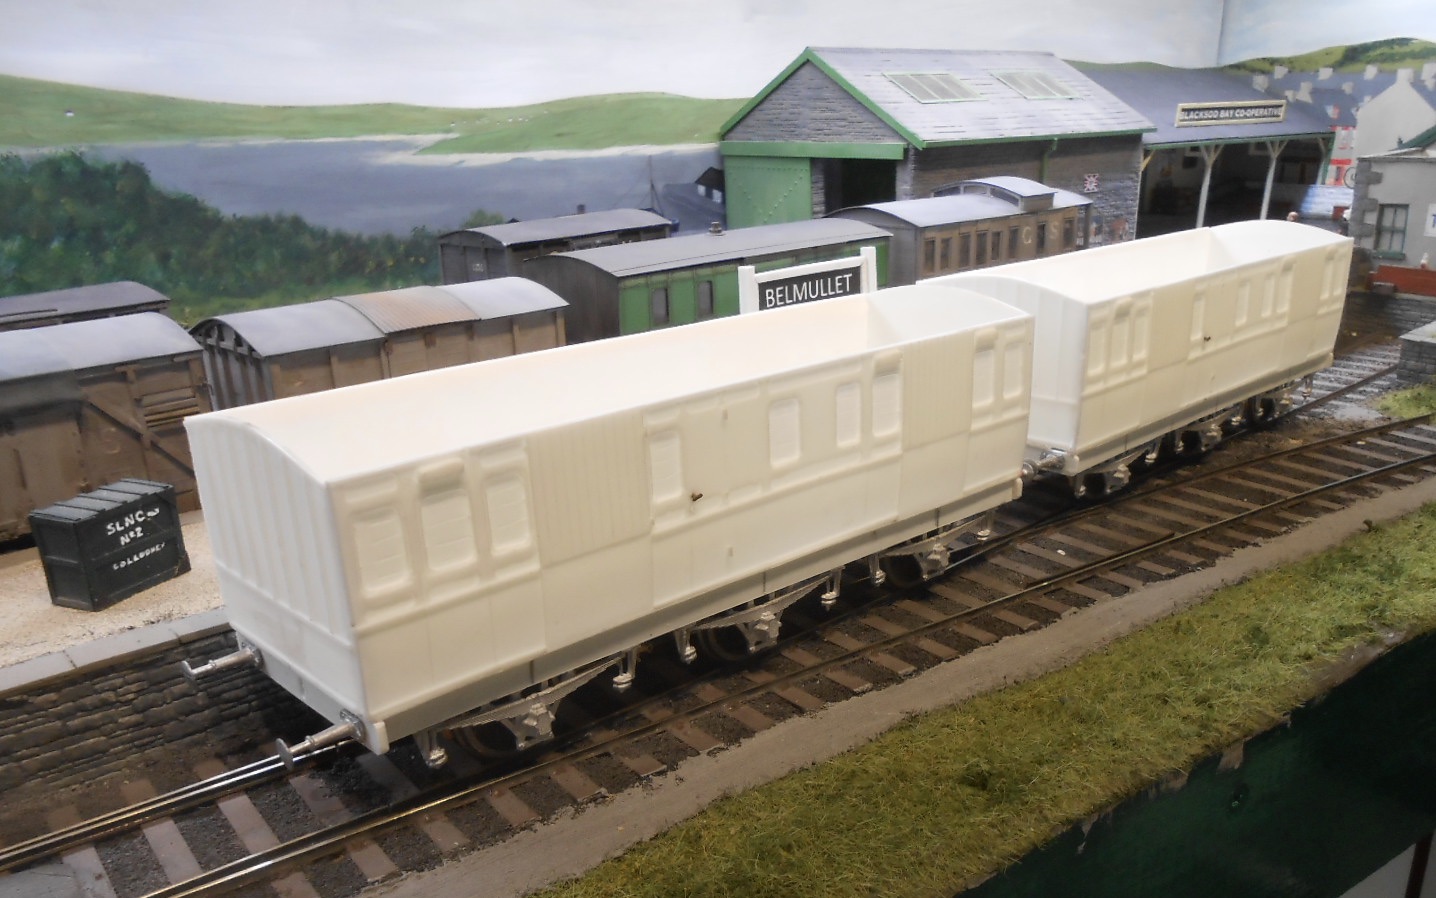
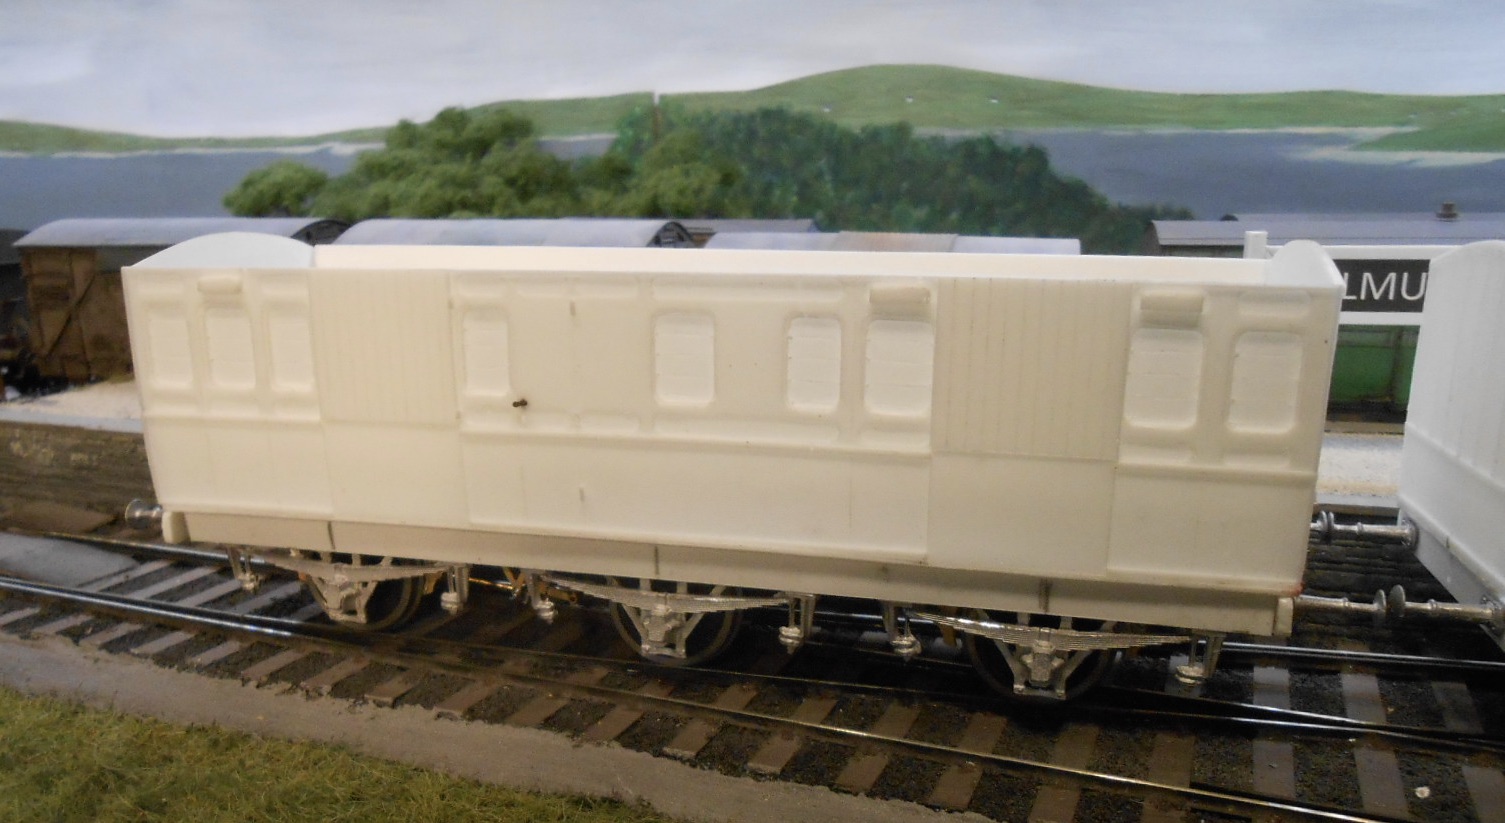
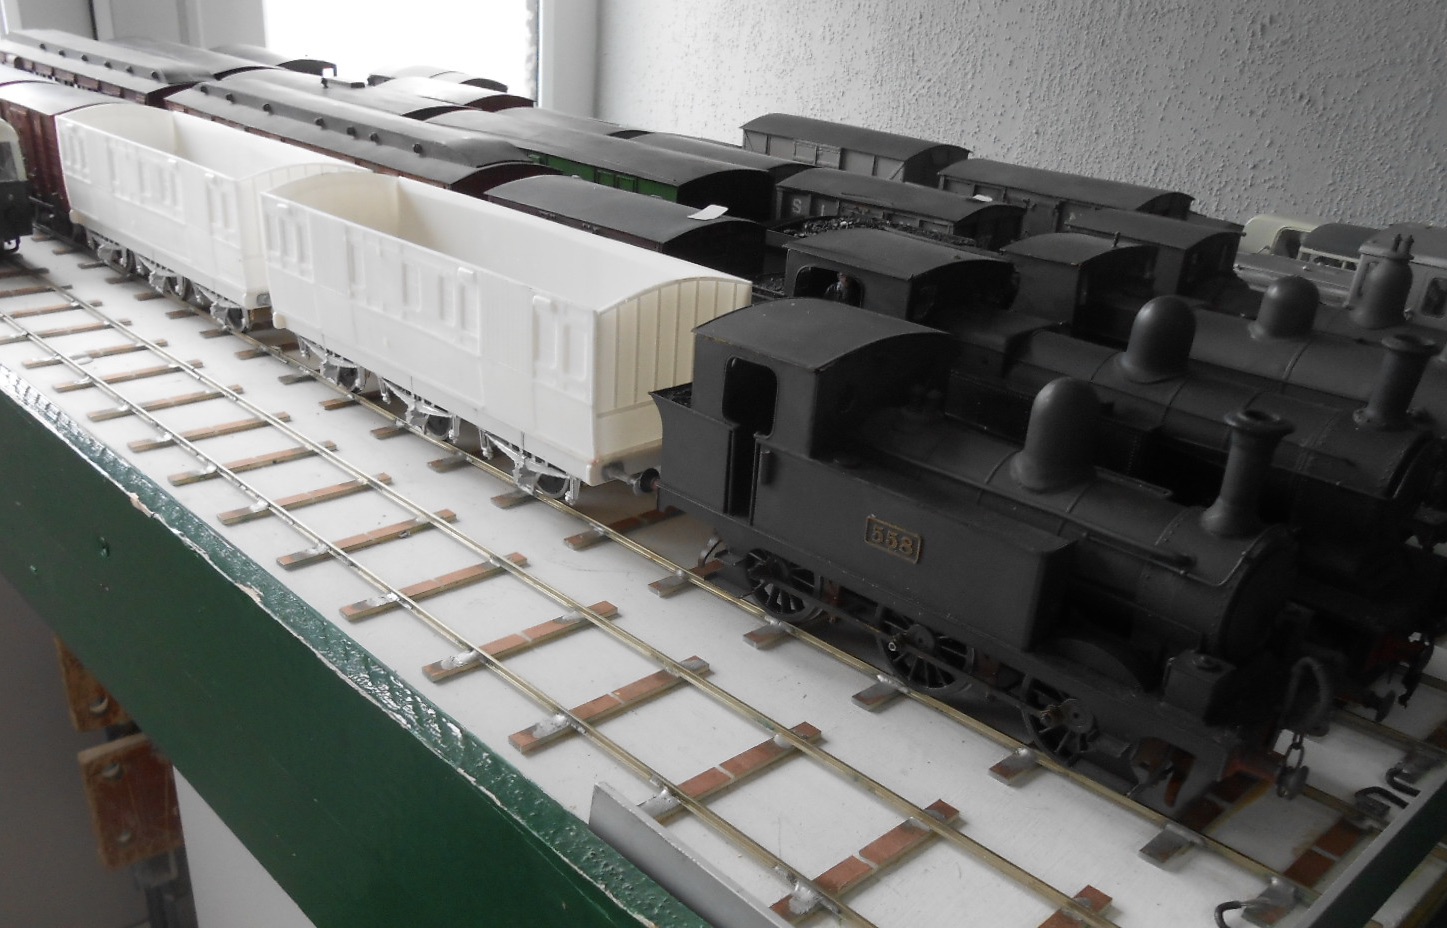
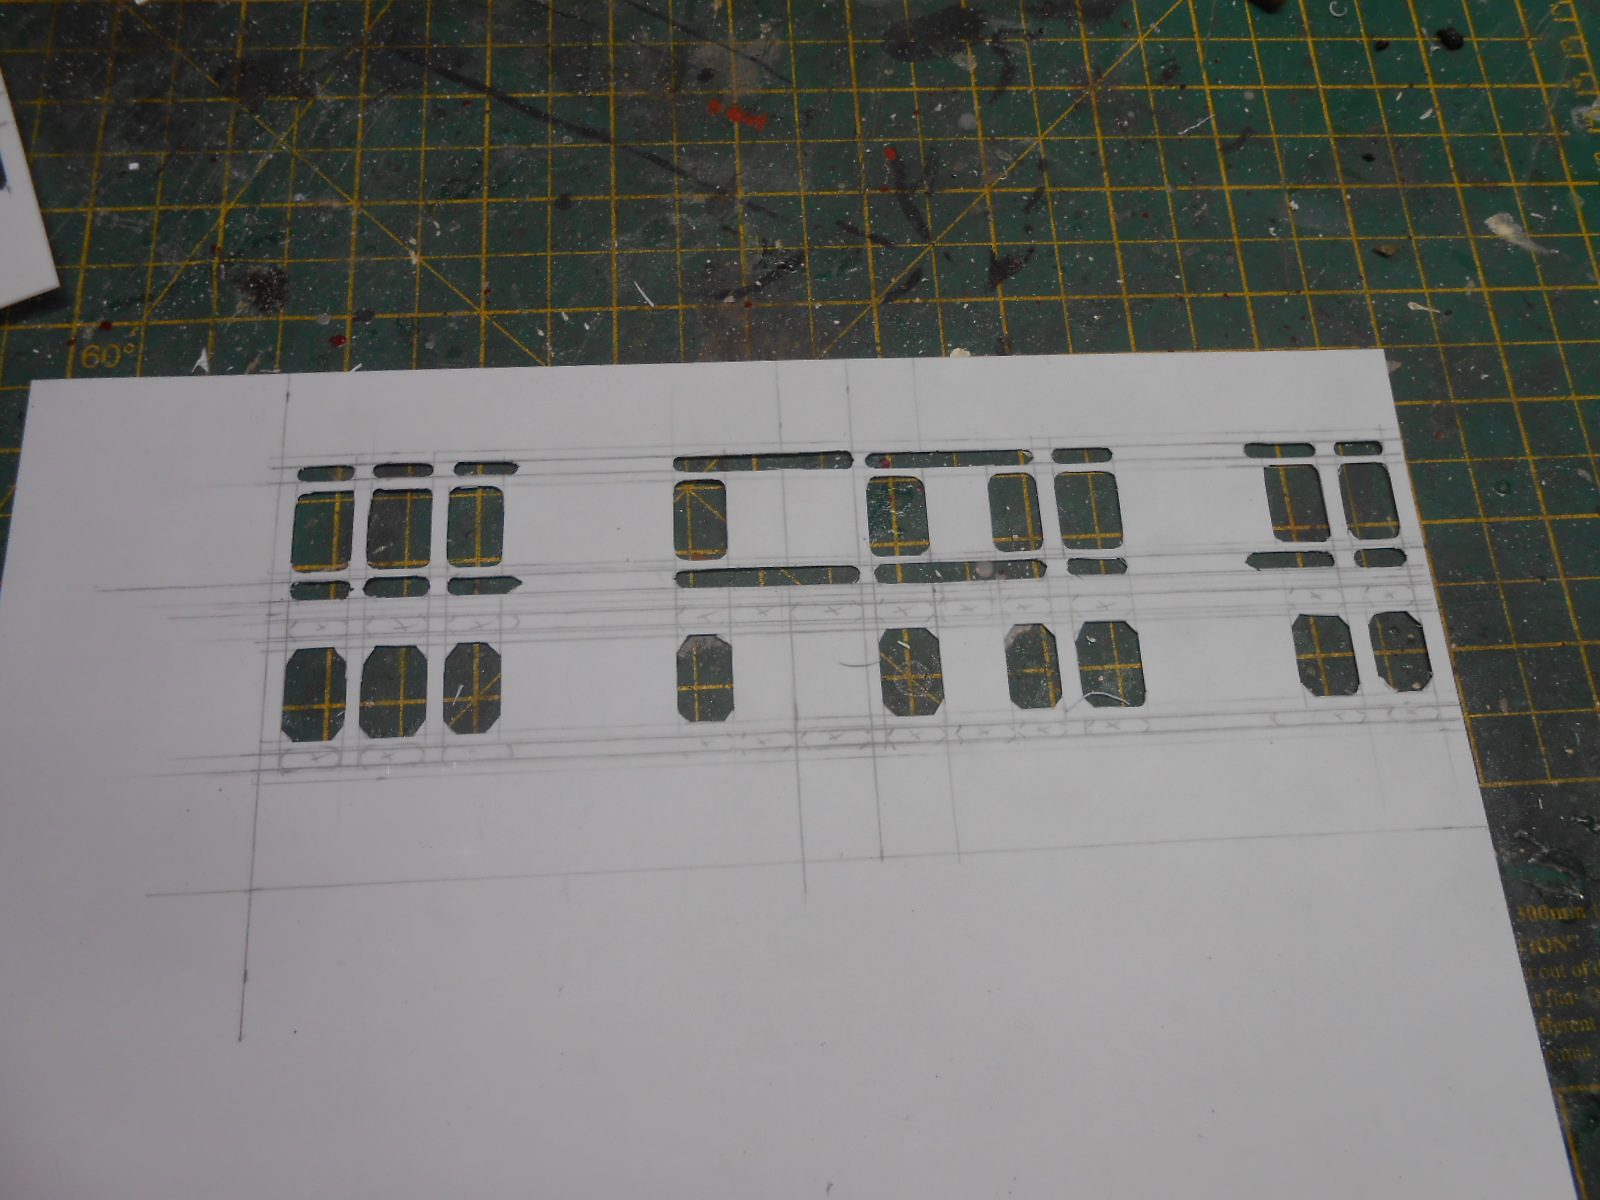
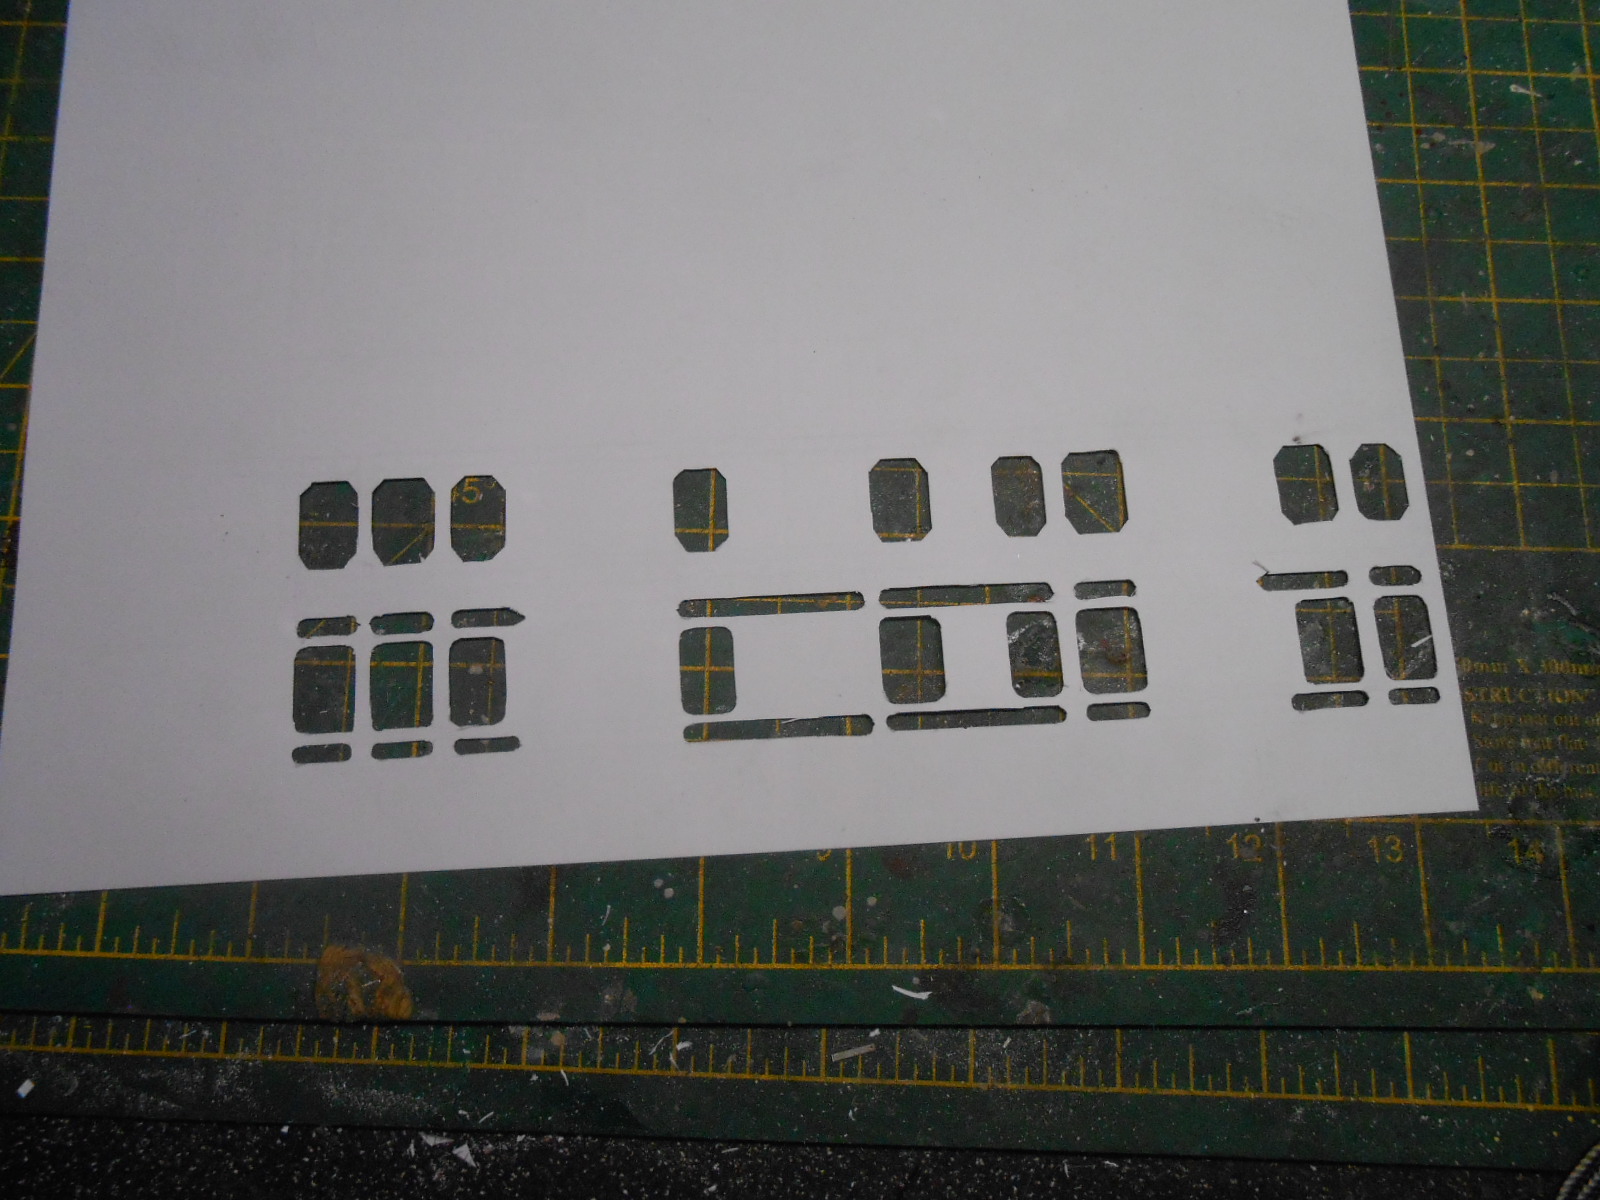
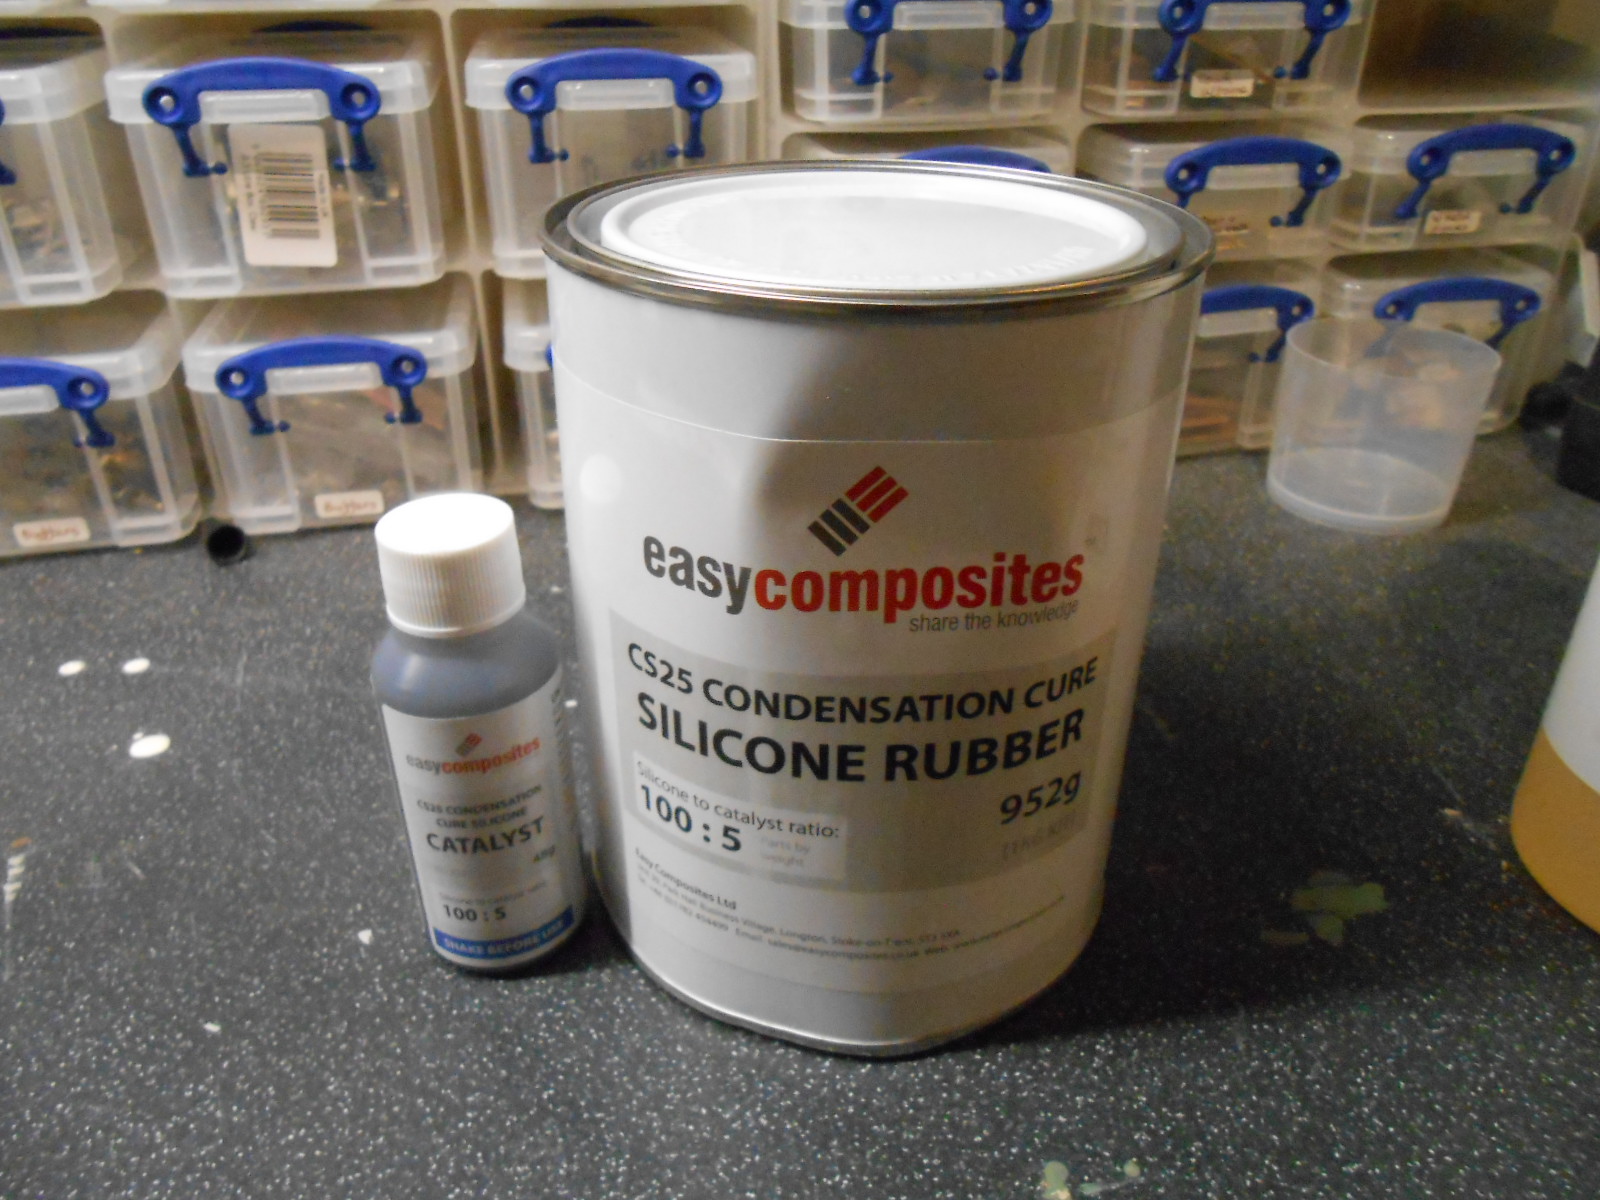
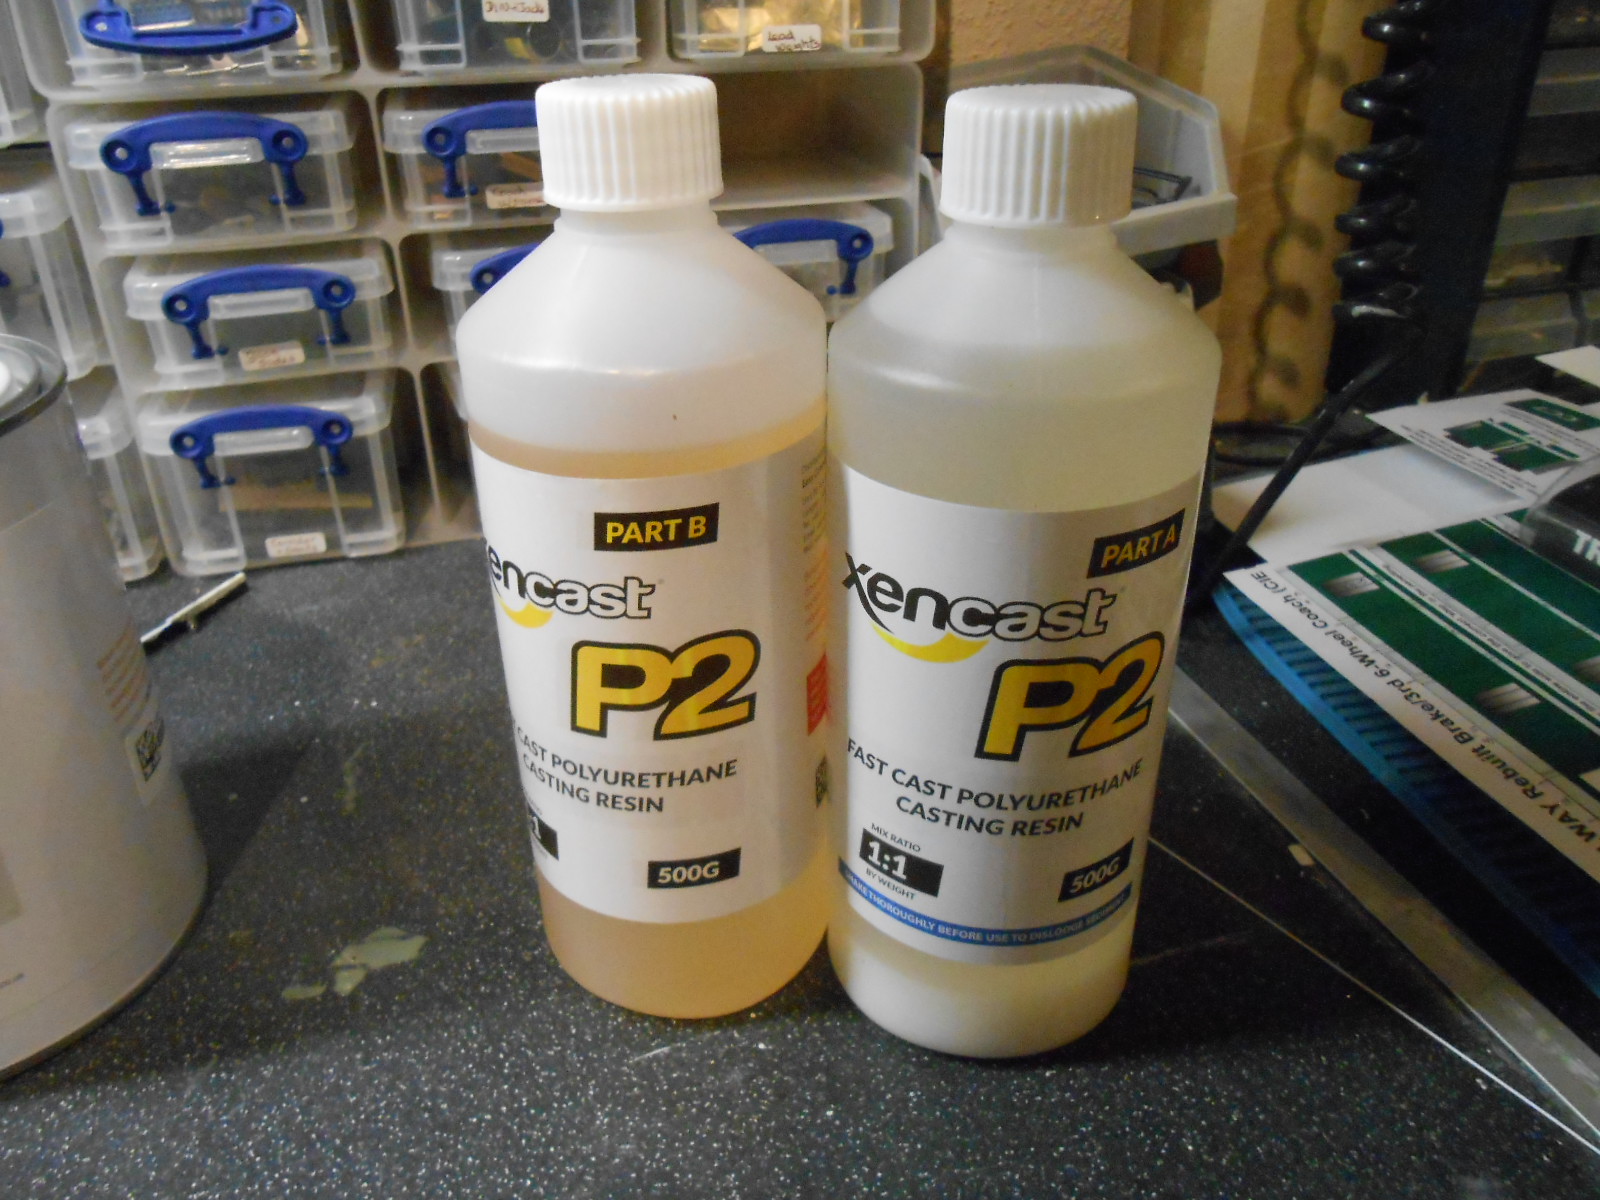
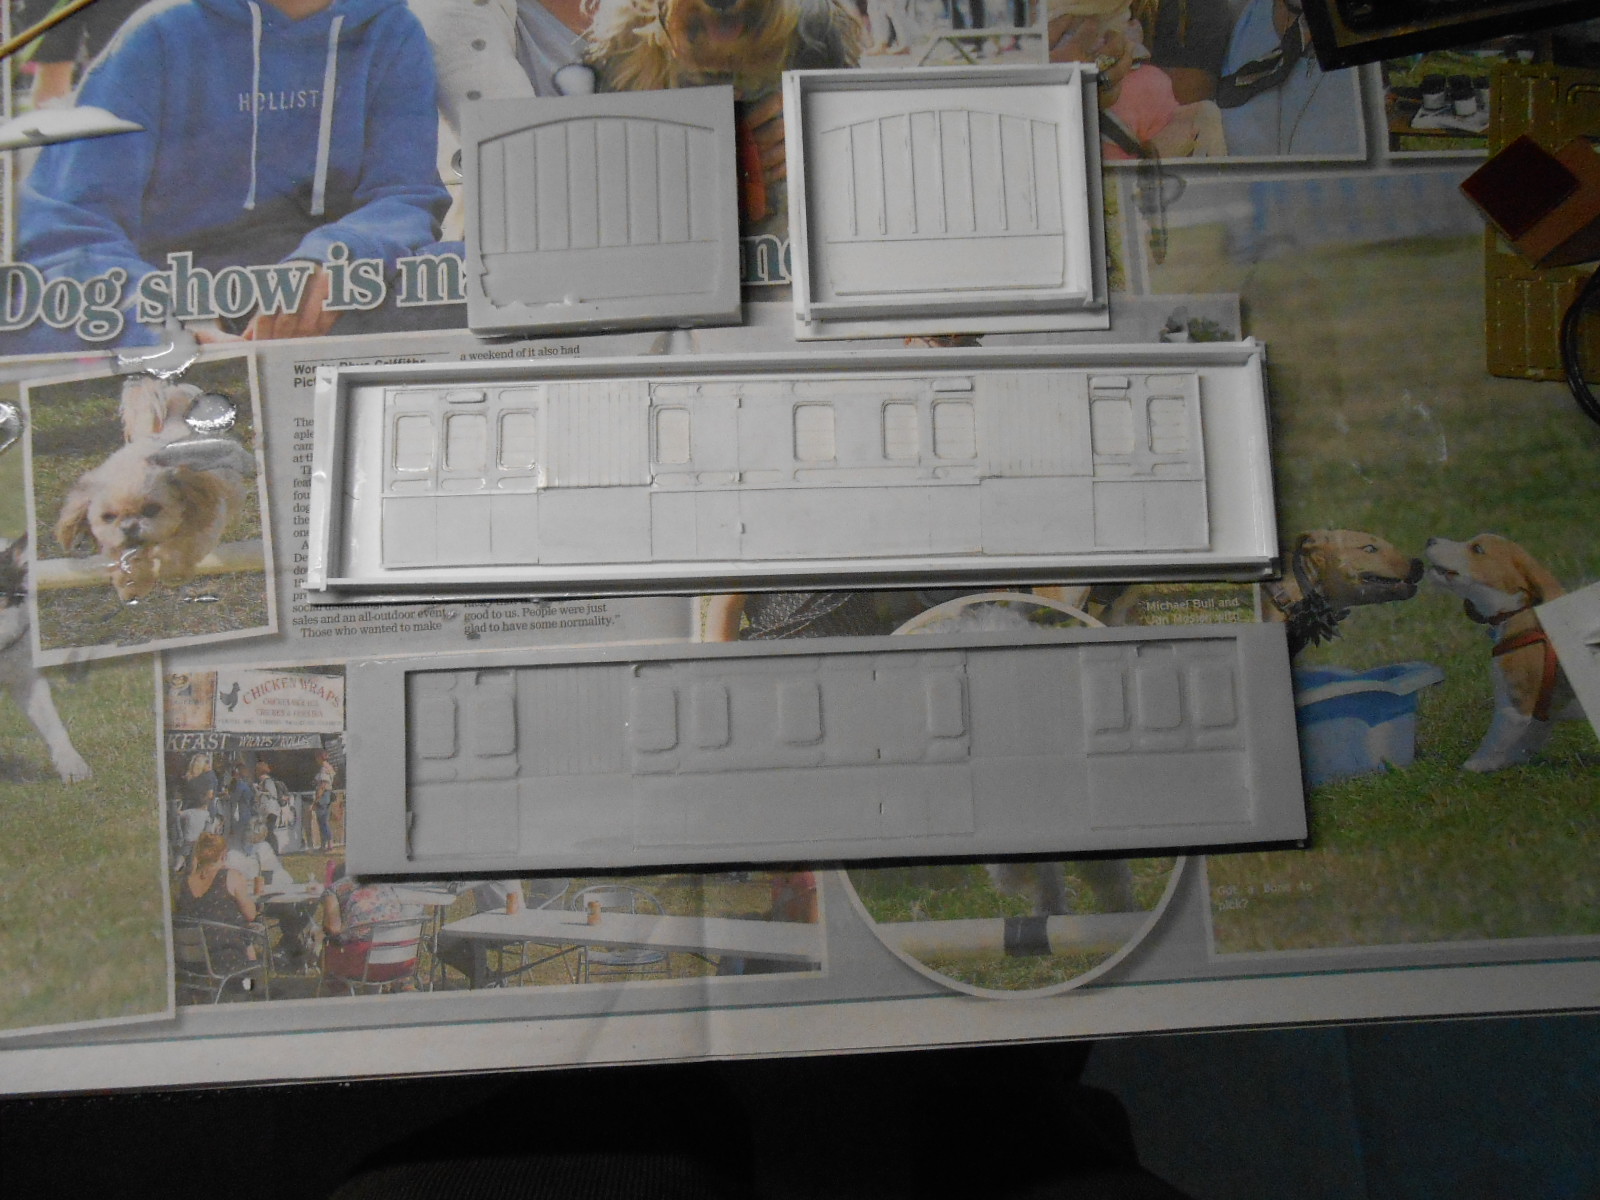
And now for something completely different. Those of you who follow my ramblings will know that I have been interested in 'turf wagons' for some time. Considered building a couple for Arigna Town, but being next to a coal mine that didn't really work. However, Belmullet is not far from two major peat deposits that have been exploited since the middle of the last century and my 'Black Sod Bay Distillery' is deemed to have been peat fuelled since the start of the Emergency. Now, in the chosen 1950s period, turf is still brought to the distillery in a couple of the last remaining converted six wheel coaches. Well, that's the theory, anyway. After the endless bits and pieces that went into the MGW & GS&W vans, I decided to go back to doing some resin casting. At the moment, I'm only planning on building two vans, but such is the amount of panelling on these vehicles, it seems easier to just produce one side and one end [as opposed to four or each]. The first stage is to produce a couple of masters. The end is simple enough, just a suitably shaped piece of 60thou plastic sheet, with some micro strip to provide the panel lines. The side though, is more complex and follows the guidelines in David Jenkinson's book: 'Carriage Modelling Made Easy' - another one of those seminal tomes that is increasingly well thumbed over the years. First up, you make a simple inner side out of 20thou plastic, with just the window cut outs made. Not all of them are necessary, as these converted coaches have extra panelling on the outside, covering the some of the windows. However, the tricky bit comes next - a lattice cut out of 10thou plastic, which represents all of the original panelling. The GS&WR, annoyingly had panels with curved edges, so these are much more complicated [and tedious] to cut out than the Midland, who had mainly square edged panelling. Anyway, this takes quite a while to draw out and even longer to cut out, because all the curves need filing out with a rat tailed file - and there are lots of them. This is where making just single master helps, because you can concentrate on getting things right, safe in the knowledge that you don't have another one/three/five/etc of the damned things to do as well. Once completed, this lattice is then welded to the 20thou piece - carefully lining up the window openings. These vans were all boarded up on the inside, so a sheet of 40thou, suitably scribed with planking is welded to the first two sheets. finally a few extra planked boards are added to the outside. This is what is covered in the first three pictures. The next two photos show what I use for the moulding and casting. I get my stuff from 'Easy Composites', who are quickly found on an internet search and provide a next day service. What looks like a paint tin is the silicon moulding material. The little bottle next to it is the setting agent, which you add in the ratio of 5:100. A cheap set of measuring cups and paper cups from the local pound/euro shop come in very handy for mixing. The picture with the two bottles is of the resin casting material, which you mix 50/50. The latter sets in around half an hour, but the silicon mould takes 24 hours to cure. To make the mould, I fix the master to a piece of 80th plastic sheet and then build a wall round it with plastic strip. Obviously, it pays to make sure the master is as good [and clean] as possible, because any imperfections will show up on the castings. So, the silicon mould mix is well stirred and then poured onto the walled up master, then left for 24 hours to set. Over the years, have found this material has improved in quality, especially in terms of how easily any air bubbles float up to the surface. Once set the mould can be peeled away from the master. If there is any 'flash' [same as on plastic kits, but rubbery], this can be pulled off with your fingers, otherwise, the mould is now ready for use. The casting resin is mixed together and poured in. Half an hour later the casting is ready to have the mould peeled from it and you can start on another immediately. The last few photos show the results thus far. There are a few bits of flash to clean off, while the backs of the castings will need sanding down so there are all the same thickness. After such a lot of preparation time, it really is very satisfying to be able to produce multiple copies at will in fairly short order.
-
What a difference! Really brings out the quality of the mouldings.
-
Yup, also a beauty, as are all these new freight vehicles coming out. Judging by many recent layout threads, they are inspiring folk to make buildings and scenery just as good too.
-
Although I don't buy ready to run, as I enjoy making my own stuff, there is no doubt that current models are exponentially better in both appearance and running qualities than their predecessors. If I was starting again now, feel sure I'd be saving my pennies to buy locos, rather than build them myself. However, would still be keen to convert to the correct gauge, I think, though the new Peco 75 looks so much better, especially when properly ballasted, painted, weathered and viewed from a shallow angle. Guess the only question mark against current models might be their longevity and, especially, how easy they are to service and repair when things get worn or break. A bit like modern cars - at the start of learning to drive, I did my own servicing and most repairs (though there always seemed to be a part of two left over afterwards!), nowadays, the only time I lift the bonnet is the check the washer fluid and the oil. Going back to the 121, it looks stunning and if ever one is brought out in 7mm scale, I'll be forming a queue to buy one.
-
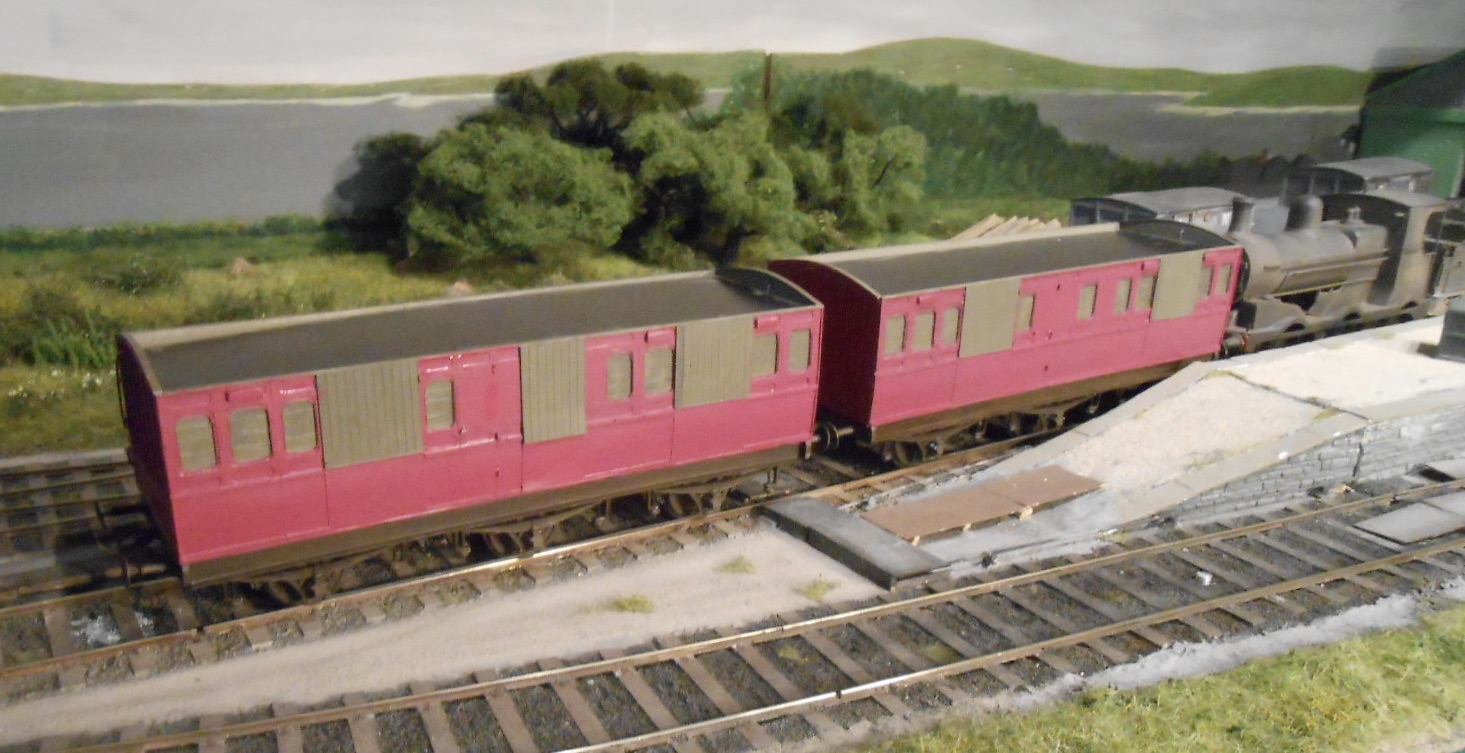
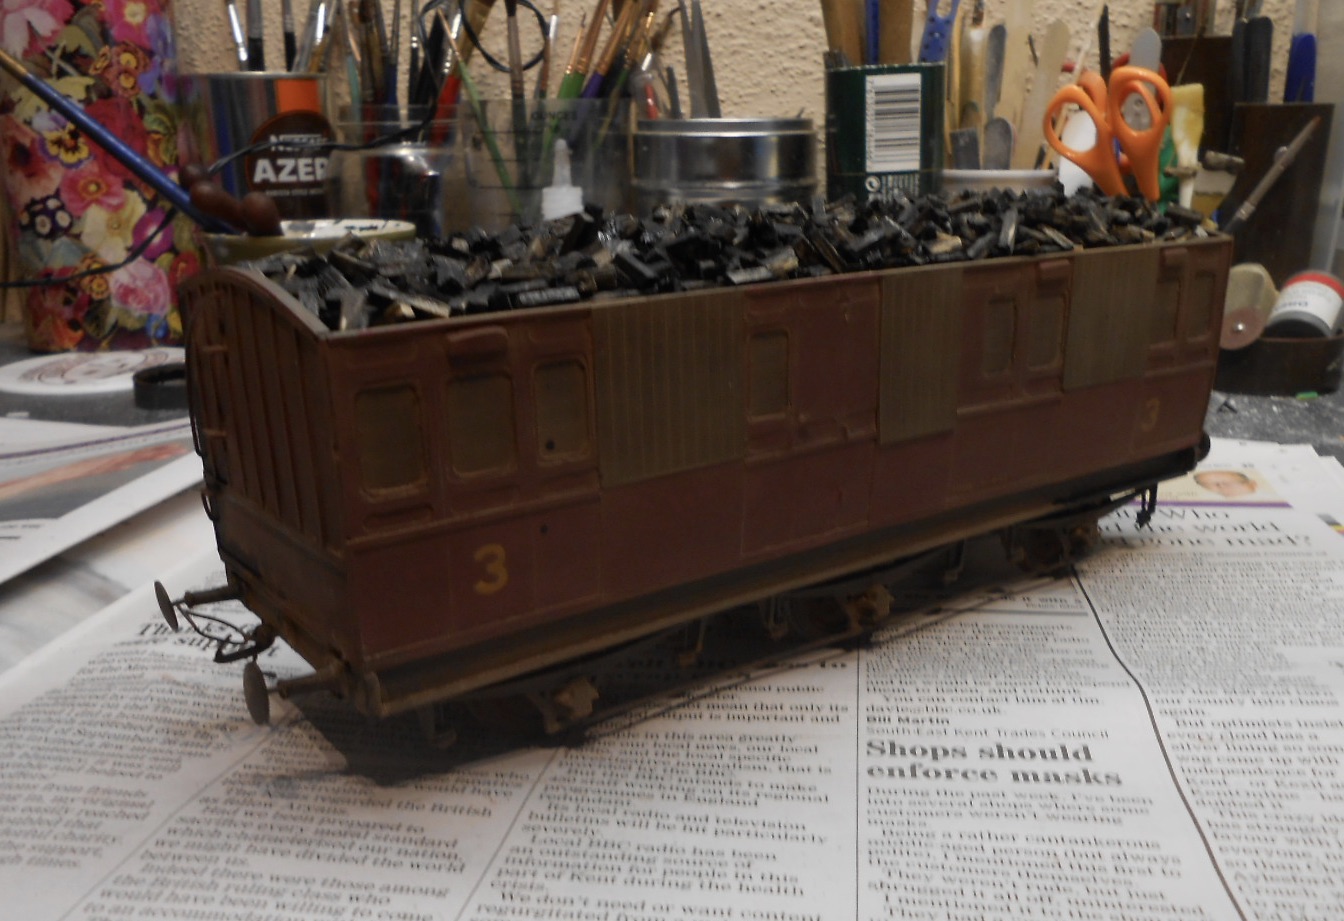
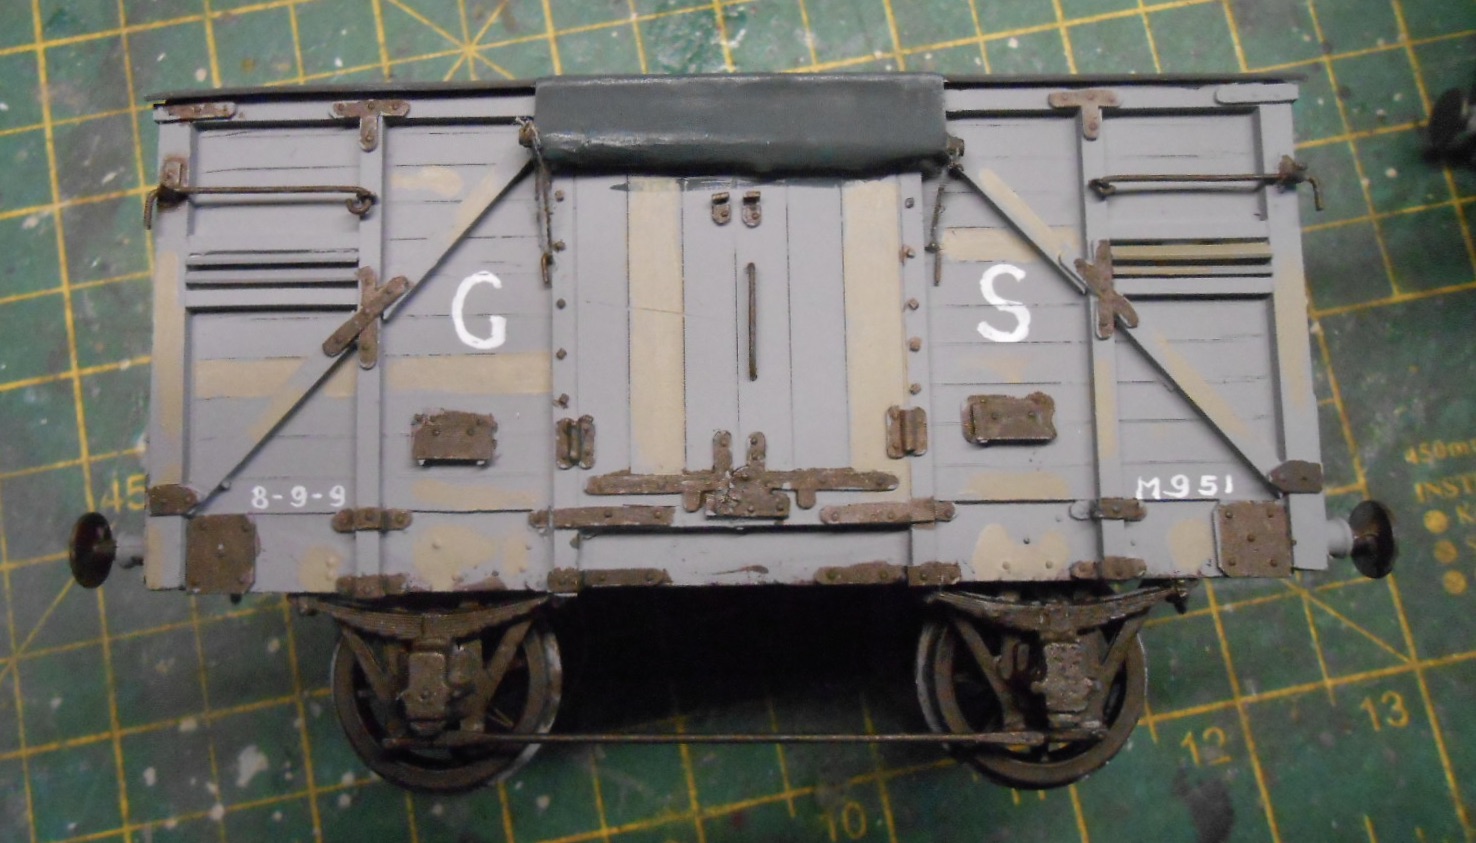
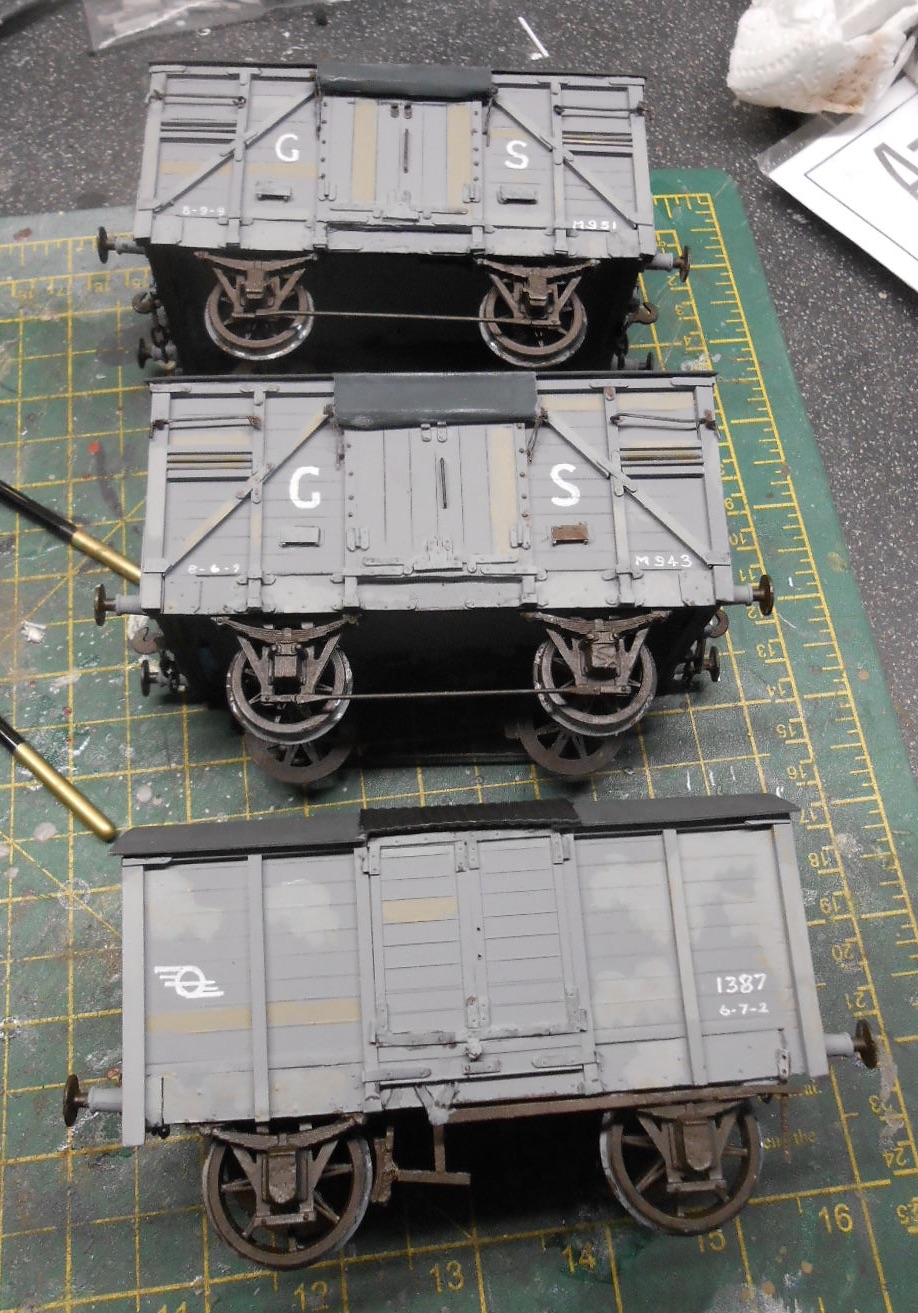
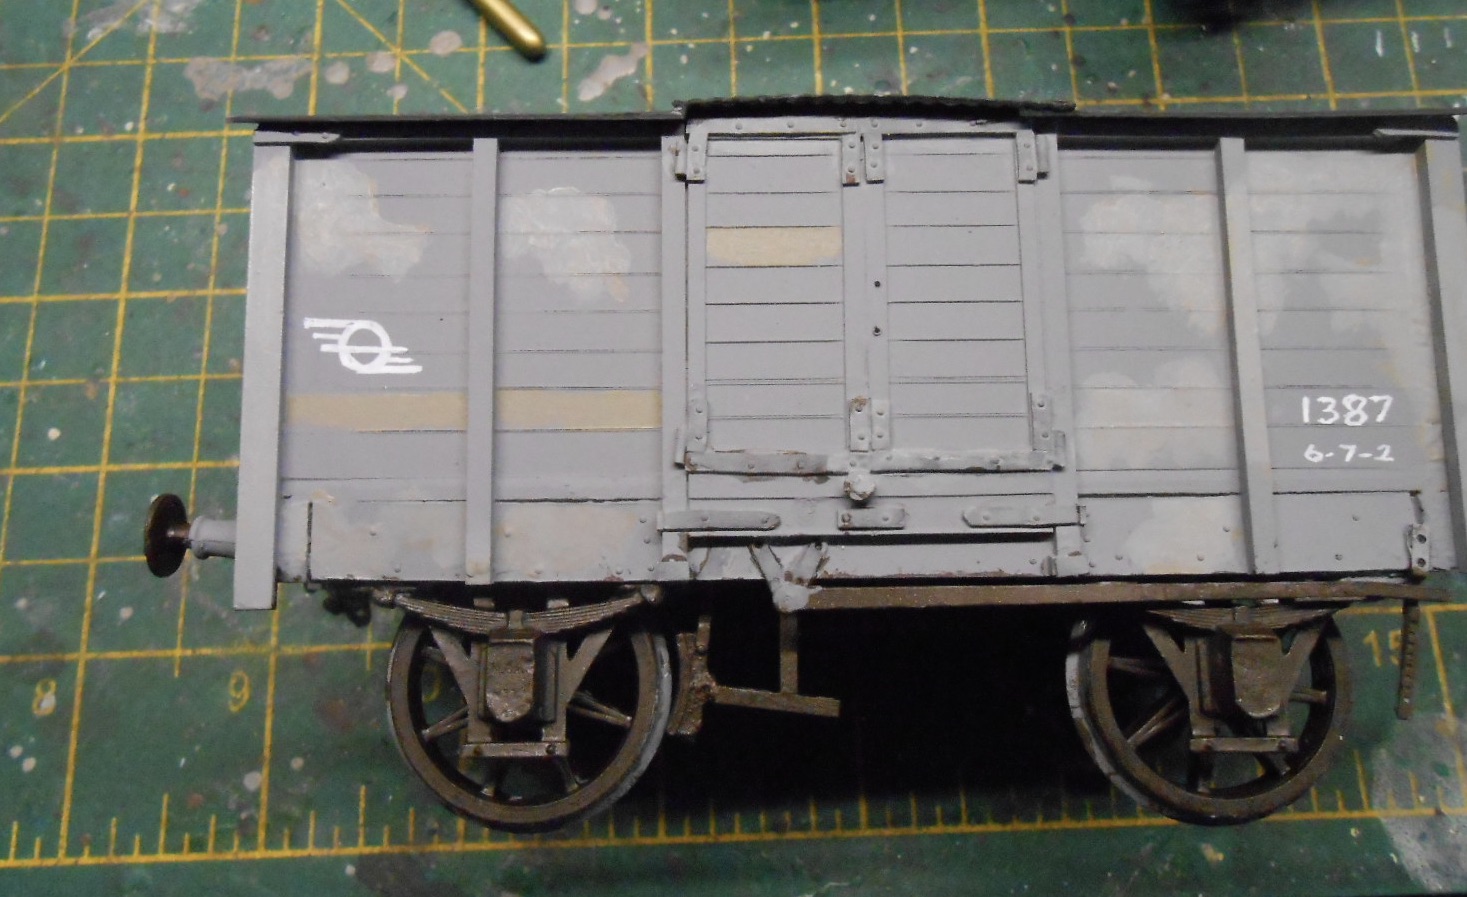
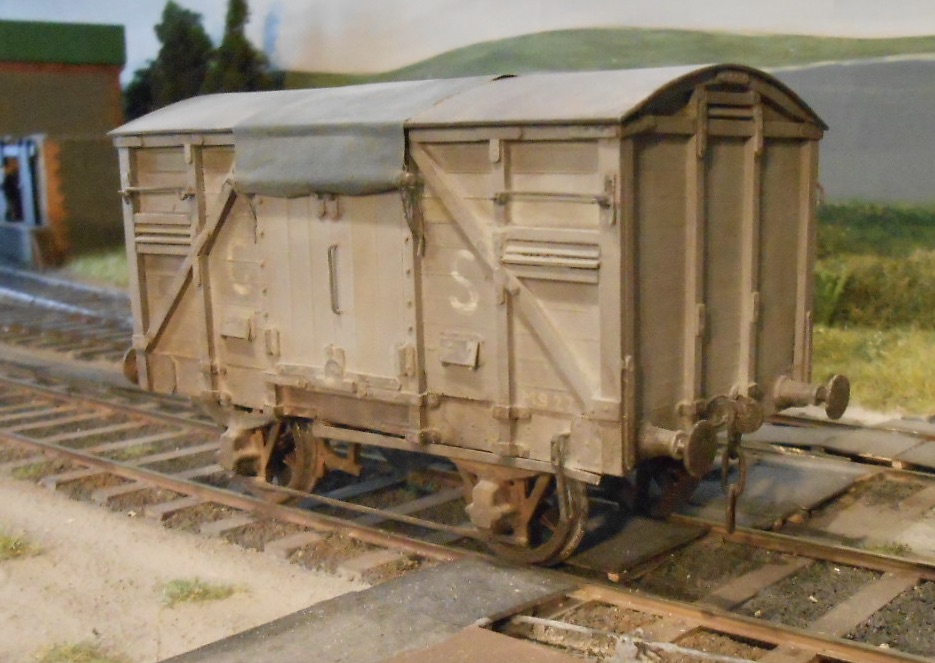
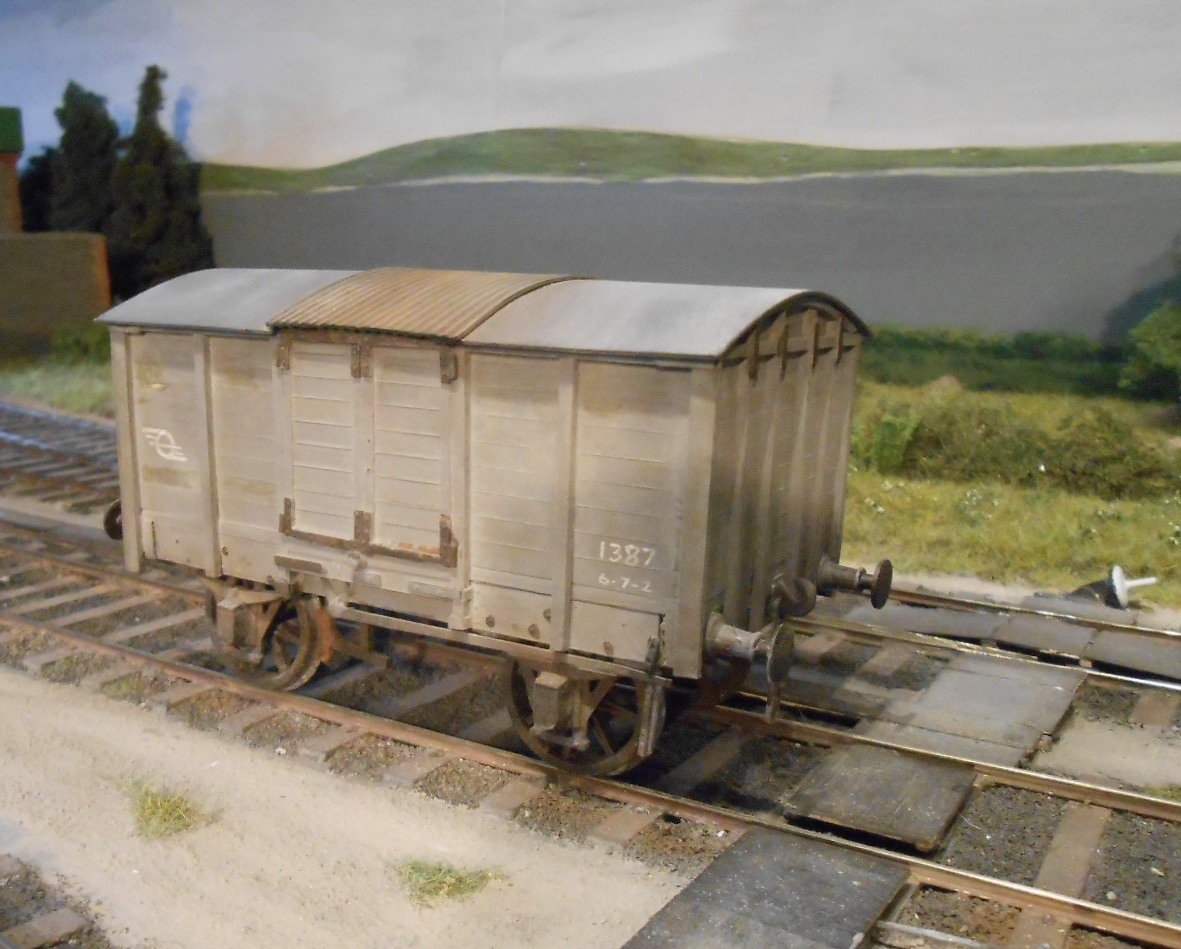
The vans have now been through both the paint shop and the weathering process. First step was a spray of Halford's grey primer. Next came the lettering and numbering, using a dipping pen and white acrylic ink. Rather than just use weathering powders, I wanted to give the vans a more detailed treatment, taking my cue from Martyn Welch's bible on the subject. Many of these vans were long lived, so I wanted to give them a well worn and slightly battered appearance. The key stages were as follows: First add some rust to the [many] metal plates and strapping. When you think about it, rust comes through from below the paint, so using a fine brush I gave all the metalwork a covering with the standard black/bauxite/gunmetal mix. Similarly, I wanted the woodwork to look like the paint was wearing off and that a few individual planks had been replaced, but left unpainted. To represent the latter I carefully painted a few planks with a mix of 'natural wood' and grey [Humbrol 110 and 64]. Other areas were splurged with the same mix and then the vans put aside for a couple of days for this paint to harden. Next I painted over the rusty metal work and worn wood with Humbrol 64 and again left this for a day to harden. Now comes the clever bit from Martyn's book. Using a small glass fibre pencil, you abrade the grey paint covering the rusty metal work, allowing the latter to show through. The other trick is to use plastic solvent - the strong stuff, not DL Lemonine, and dab this onto the overpainted grey areas, which causes this top coat to craze and peel. More work with a craft knife and abrasives ends up with the rust and bare wood appearing underneath. I also used the glass fibre pencil on the lettering - especially the large GS ones, so they likewise look worn and faded. The final two stages involve a wash of the weathering mix over the whole of the bodywork - with heavier applications from the chassis, becoming lighter towards the roof. Once this is dry, a dusting with weathering powders follows - rust for the axle box covers, springs and brakes, then grey over the whole of the body and roof, to tone things down. So, there we are, a longer term project that started with the J19, then the MGWR 'hearse' [both etched kits], followed by the glasshouse brake and the three vans. The final picture shows the train in full, with some close ups of the three new wagons, which hopefully show up the detail and weathering nicely.
-
Thanks Colin. The Worsley portfolio is enormous, though by no means all of it is available at any one time. Have built several models from Worsley etches and they are a great aid to scratchbuilding. However, certainly not kits, as no instructions or castings, so a lot of work required to complete the model. The wee Donegal not on my radar at the moment, as the stocklist for Belmullet in the 1900s is extensive, but a full on kit for a 2-6-4T would certainly get me thinking!
-
signal part needed not sure what to use.
David Holman replied to Buz's question in Questions & Answers
Try Wizard Models, who have an extensive on line catalogue and ordering service for signalling parts. -
Nothing, I'm afraid. Was simply responding to how the concept of such a thing could set my imagination working. Alphagraphix do a range of card kits, castings and whatnots that could make the possibility of modelling the Donegal in 7mm scale very tempting.
-
A 7mm Donegal tank could seriously disrupt my modelling plans!
-
Here's a thought, did a Sligo fuel train exist in the 1950s and if so what wagons? Fine work as usual!