David Holman
-
Posts
4,359 -
Joined
-
Last visited
-
Days Won
117
Content Type
Profiles
Forums
Events
Gallery
Blogs
Everything posted by David Holman
-
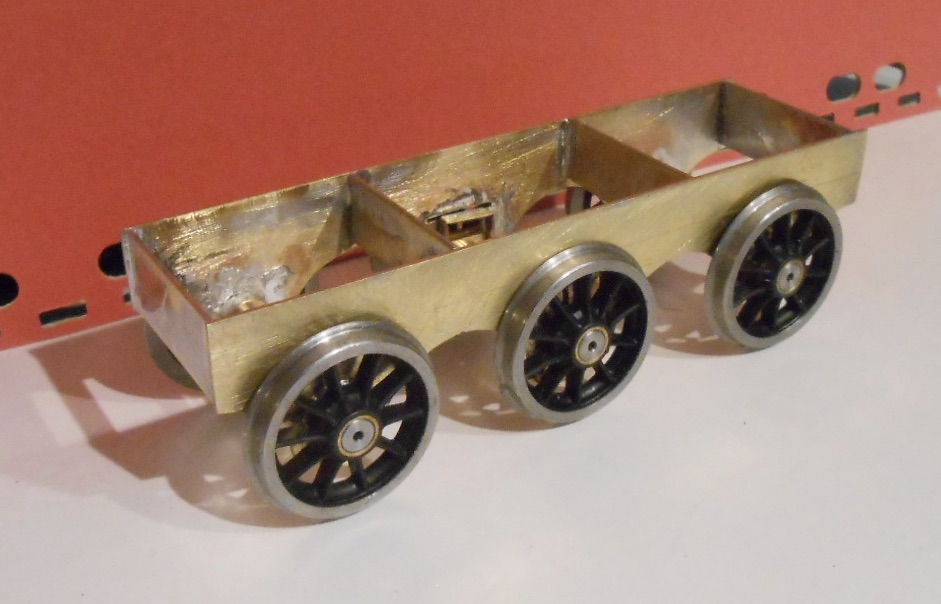
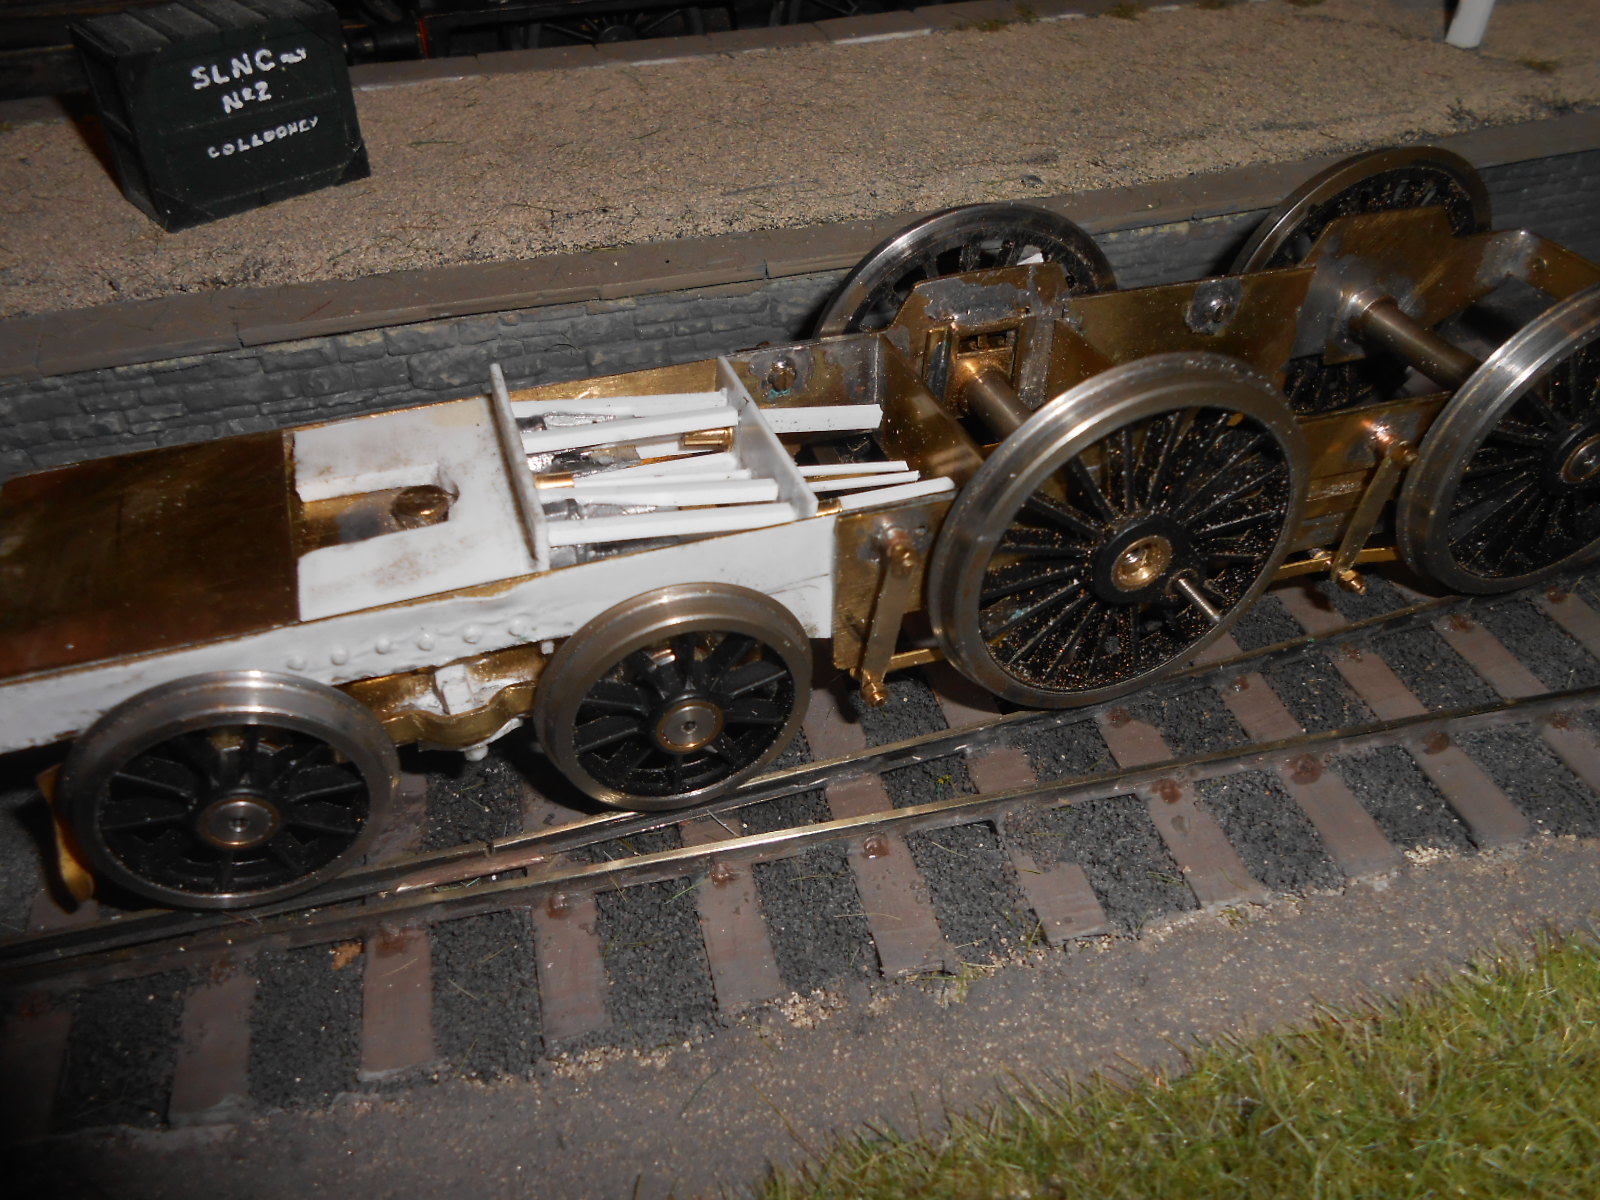
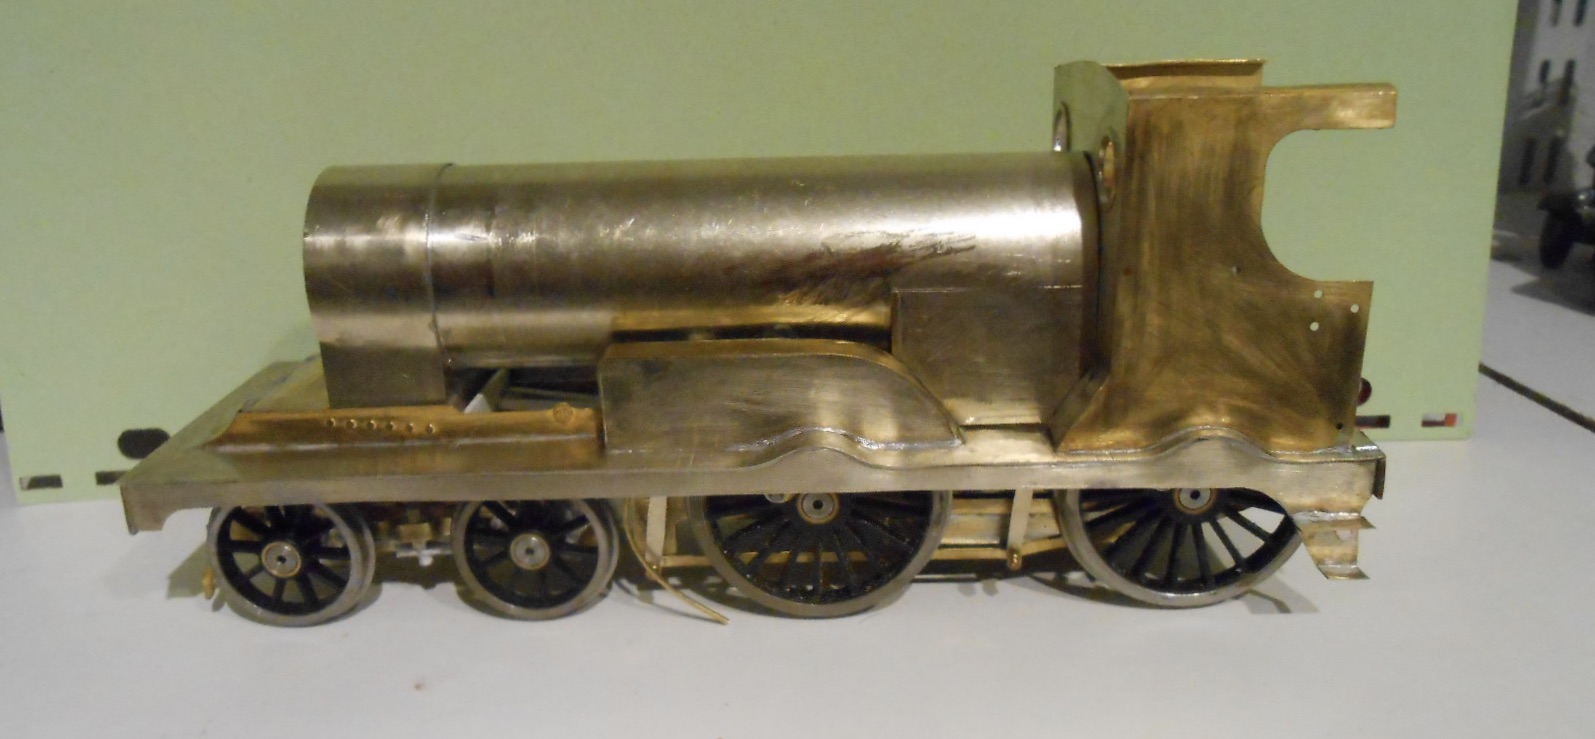
Tendering The loco is currently about as far as I can take it at the moment. No sign of the motor/gearbox I've ordered, while am still investigating things like chimney, dome, buffers etc. A bit more detailing has gone in - the sanding operating rods and filler caps, plus the reversing wheel and seats in the cab. So, made a start on the tender - first remembering to read what Geoff Kent says in his books and making a couple more drawings. Thus far have made the chassis/inside frames. Used 28thou nickel silver strip, with two pieces soldered together, then drilled/sawn for the axles. The outer ones use top hat bearings, with the middle one running in a set of Slater's sprung brass hornblocks.

-
A loco emerges! Sounds like it has been a battle at times, but got to be worth it. As for that long boiler, with the firebox perched behind the rear drivers, these locos must have been the last 'long boiler' engines ever constructed - and around 100 years after they went out of fashion everywhere else! Well done -really starting to take shape now.
-
Very much my favourite part of the layout. The shiny concrete, tyre tracks and general atmosphere all work well together. Pretty it ain't, but bucket loads of character for sure.
-
So well presented - must be a joy to operate. As Robert says, proper time travel.
-
Both sound mouth watering Paul. Still love the overall concept of S, with that strangely attractive track gauge of 63/64ths of an inch - presumably you still have all the stock too? If I was starting again, especially with what I know now, feel sure it would be my choice. However, much to like in 7mm. Yes, you still have to make a lot yourself, but there is plenty to help, both from generic bits and pieces, plus Alphagraphix and Studio Scale too. Goes without saying that, when exhibitions can start again, Belmullet will be offering running rights to any visiting locos, though the headshunt is only big enough for small tender locos and tank engines! Reminds me of when you and Richard Chown were watching his Lissadell perform on Arigna Town at the Manchester show a few years back. At that point, we representing 60% of Irish broad gauge exhibitors! A few more have joined the fold since then and who knows, one day it might be possible to do a broad gauge show?
-
On Fintonagh the back to back is set at 19mm. Am guessing much will depend on the wheels in use, so it could need to vary according to type. A gauge is easy enough to make from thick brass or aluminium, alternatively use a vernier gauge. Didn't say earlier, but think it is great you are going for 21mm ish, because it will make all the difference visually, but likewise applaud your desire to extend modelling skills. Nothing wrong with 'out of the box', but there is much satisfaction to be had for taking things to a different level. Enjoy!
-
For my Fintonagh project, have used standard wagon and coach wheels, but replaced the steel axles with 2mm brass wire. Easy to put pointed ends on to go in bearing cups, in W irons. Though 7mm scale, the layout is 21mm gauge using finescale 4mm clearances.
-
I think the issue between P4 and EM wheels is that P4, being 18.83 (for the standard gauge) has thinner, pretty much scale, wheels, but these are nearly a millimetre wider, because EM is 18.2mm. When doing 5'3, 21mm track the choices seem as follows: Use P4 standards, which require very fine, accurate track building and some form of springing and/or compensation in ALL stock because flanges are very small Use 21mm gauge track with 4mm finescale standards. In other words flangeways through point crossings/ frogs of 1mm, the same as 00 finescale. Works perfectly well without going to sprung or compensated chassis, BUT the slightly thicker wheels will mean some fettling may be required in chassis designed for the narrower gauge. This might just mean thinning W irons, but could mean a new chassis. The latter not as dramatic as you'd think, especially for a 4 wheel wagon. Diesel locos should be OK, but steam outline locos could be an issue, especially ready to run ones if they have splashers which could be too narrow and therefore need a substantial rebuild. Use 'Irish EM ', yes, it does exist, a track gauge of 20.2mm. Templot has drawings for points and crossings. Some of the issues above may still apply, but the 0.8mm narrower gauge will still look way better than 16.5 but give that little bit extra space for existing wheels. Hope this helps!
-
That's quite a project!
-
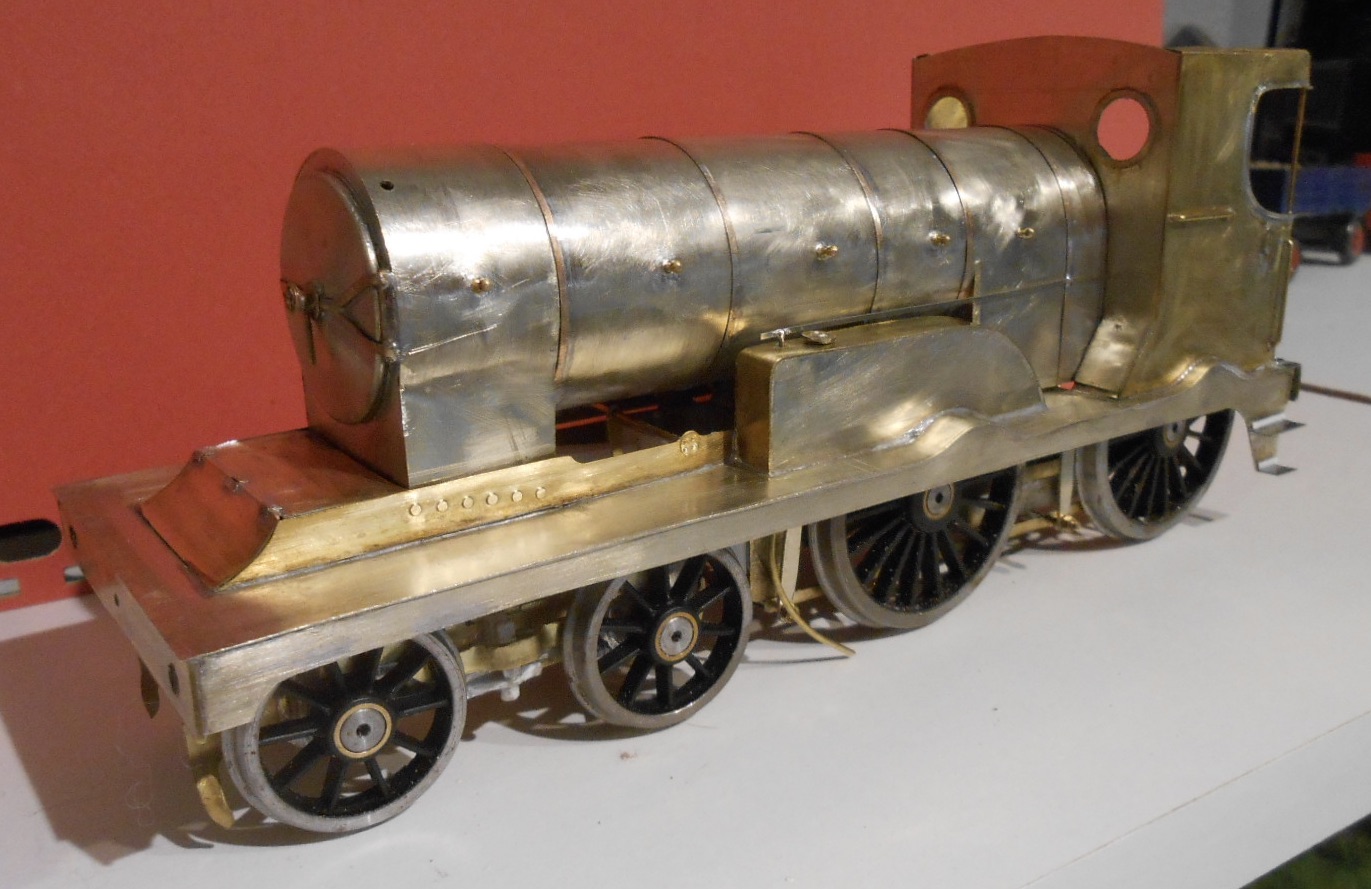
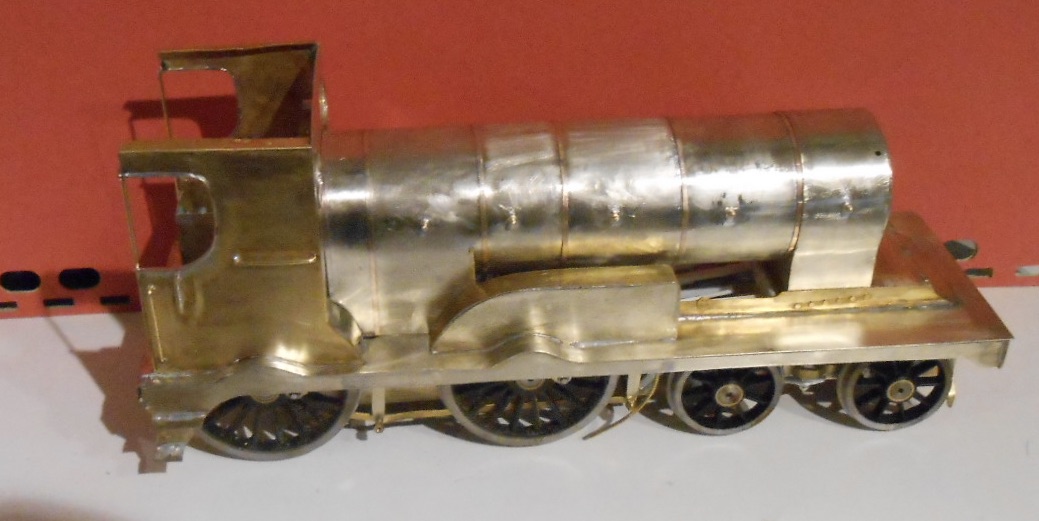
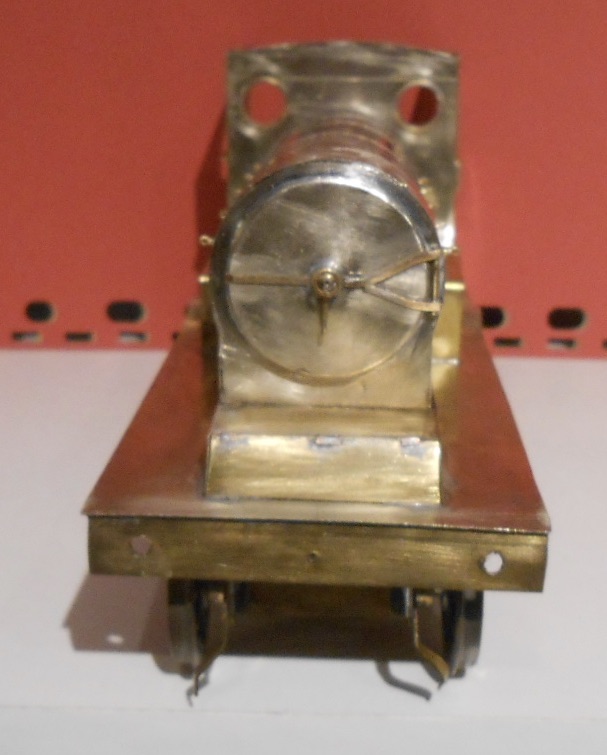
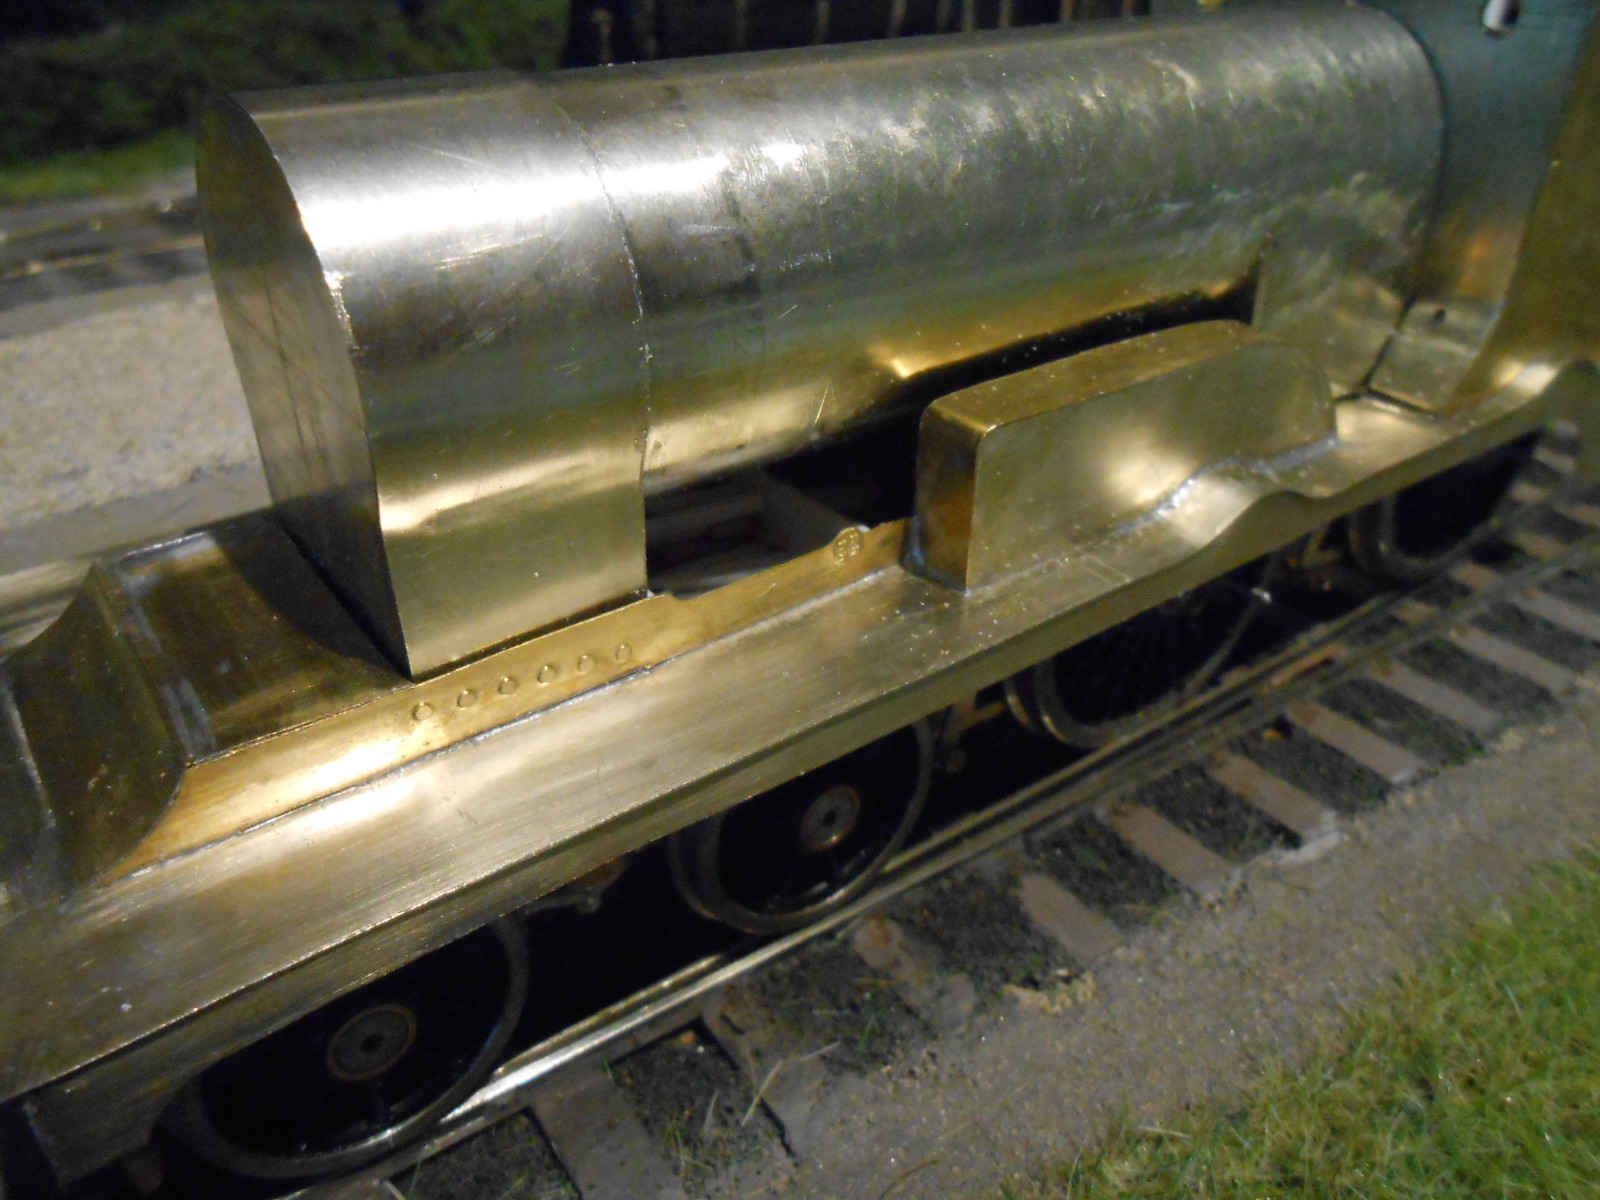
More details Not much in the way of distractions over Christmas round here. Tier 4 severely limits who you can meet, and as for the TV, unless you like soaps, reality nonsense or cookery, there's not much to tempt me away from the workshop before food and wine take over! So a tour round the loco reveals the following: Cab beading was made using 10thou nickel silver strip - am learning from Geoff Holt's books and made a basic former from thin timber. After tinning with solder it was fairly simple to sweat into place Cab hand rails next, from 0.8mm brass wire, plus what I guess are holders for single line tokens - 1.2mm wire this time Boiler hand rails will go on later, but fitted a run of short knobs down each side. Struggled to solder these neatly, so rather more cleaning up needed than I would have liked. In the early 1900s, D16s had a single handrail running round both sides and then over the top of the smokebox. Two more knobs here, but can't fit them yet, as the handrail won't go on until after painting. Smokebox front - this is the loco's 'face' and therefore very important to get right. I made the door from three separate circles of nickel silver. The outer one was made slightly larger, so I could create a dished shape, by using the rounded end of a file handle on the metal while held against a computer mouse mat. Once the three layers were soldered together, they were drilled through the centre for the 'dart', in this case an adapted lost wax casting with one handle clipped and filed off, then a hand wheel soldered on to the centre. Strapping is more NS strip, with a short length of wire for the hinge. Couldn't decide whether to just use transfers for the boiler bands, or metal strip. In the end, have gone for the latter, in the hope of making lining simpler - though this really will be a major challenge. The bands are strips of 5 thou phosphor bronze.
- 124 replies
-
- 10
-

-

-
Some very nice 'gingerbread' there. Excellent detailing - should there be a coin or some such to give scale to the pictures?
-
Really interesting to read about the trials of kit design, but (assuming you are using it as an aid to scratch or batch building) certainly shows the value of this approach and definitely something to think about. Ideal models for a small space layout too - am guessing three of these would barely take up the space of two 'standard' wagons. The fine work, as ever!
-
A Christmas tease from JHB? Clearly a 4-10-2 from the Ulster and Connaught Railway, on display at Shanes Castle!
-
IRISH NARROW GAUGE RAILWAY ALBUM (Michael Whitehouse)
David Holman replied to leslie10646's topic in News
Saved mine for Christmas and just spent a pleasant hour reading through it, with many hours of pleasure to come. Some familiar photos, but many new ones, to me anyway, and very inspiring. Add another dozen or so locos and layouts to the wish list!- 33 replies
-
- 2
-
-
- narrow gauge
- book
- (and 1 more)
-
The light at the end of the covid tunnel? Very apt! Have a good one, everybody. This forum remains a small island of sanity in an otherwise strange and challenging going world.
-
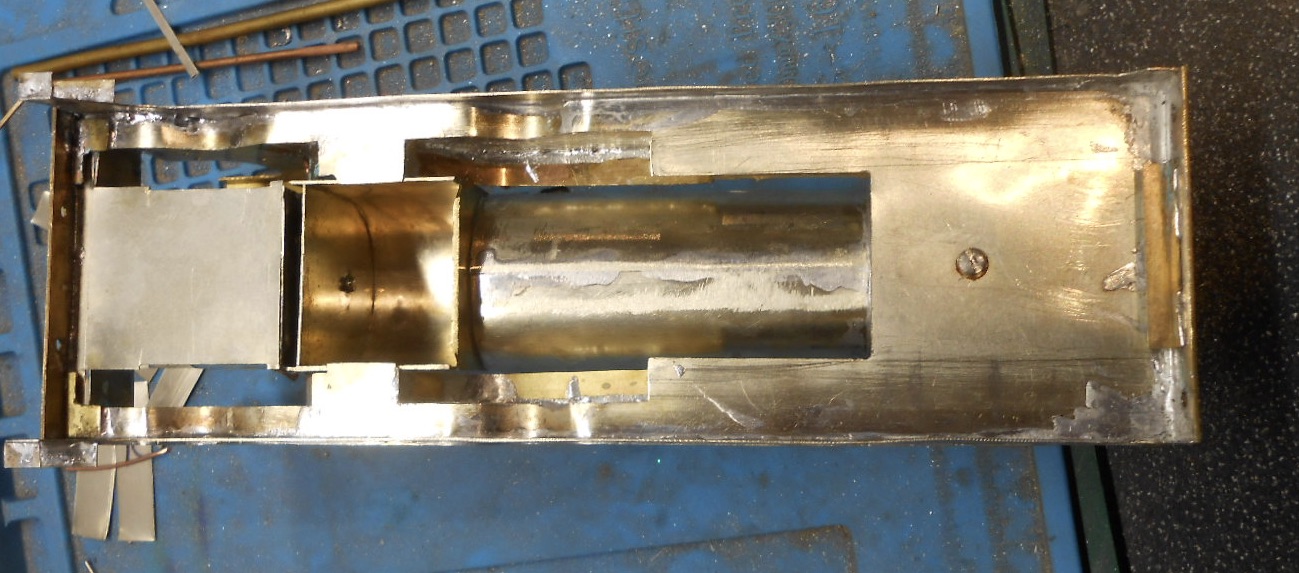
Thanks Ken and everyone. The possible plate you mention is, I think, a support for a cross shaft, supporting the reversing mechanism to the inside valve gear. The reversing lever itself appears to go below the frames, but as I understand it, in most cases this joined a cross shaft above the frames on which was a lever/link to moving the valve gear. I assume there would be a top and bottom cross shaft, but hopefully knowledgeable folk on this forum will clarify. The GSR Bible has a nice side on photo of this, though the same photo is much more clearly produced in JHB's Rails to Achill.
-
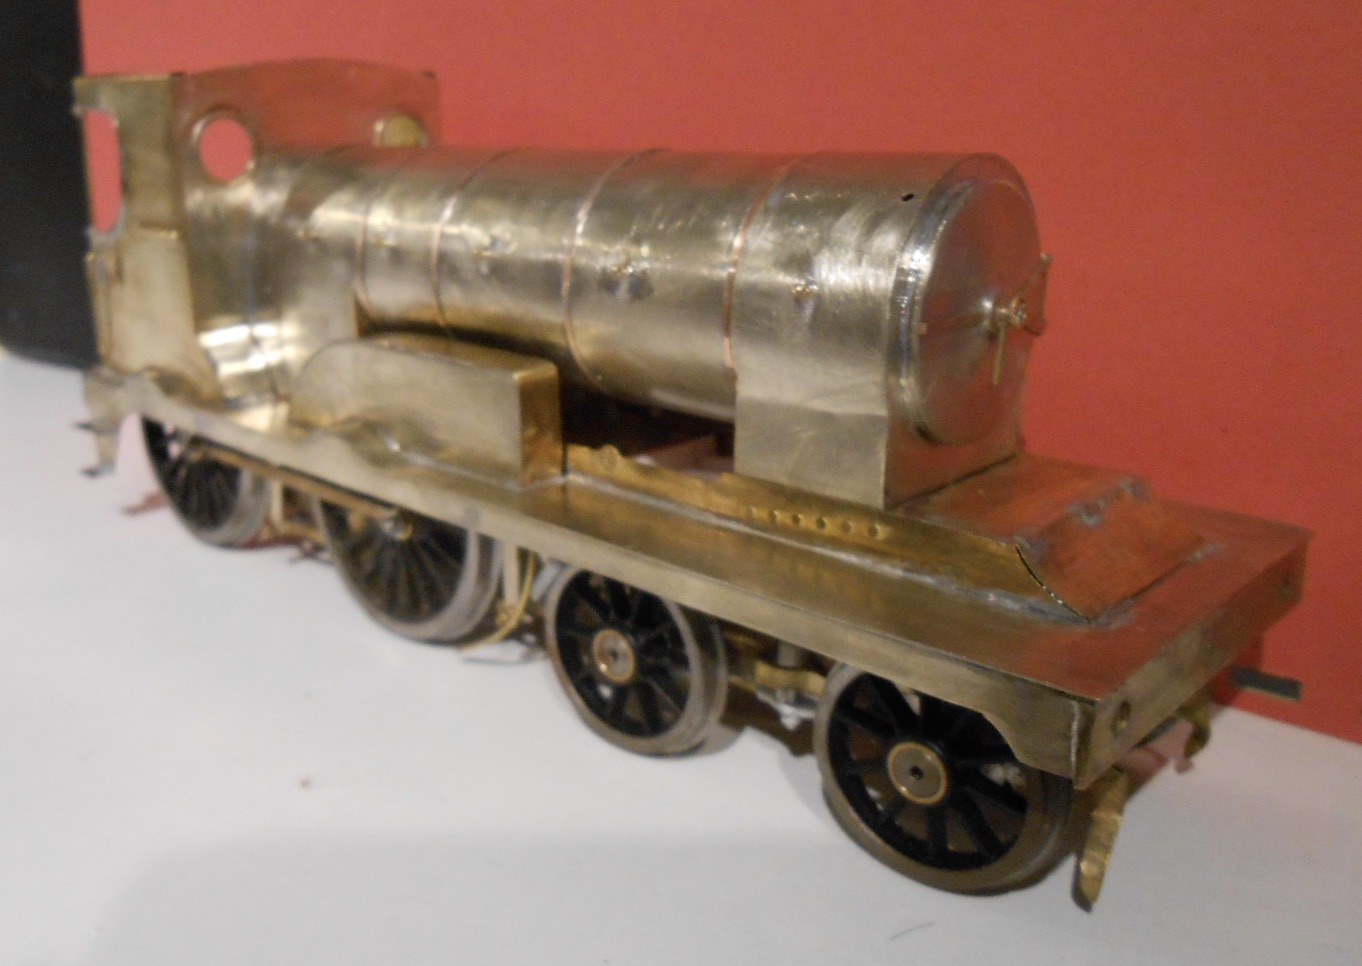
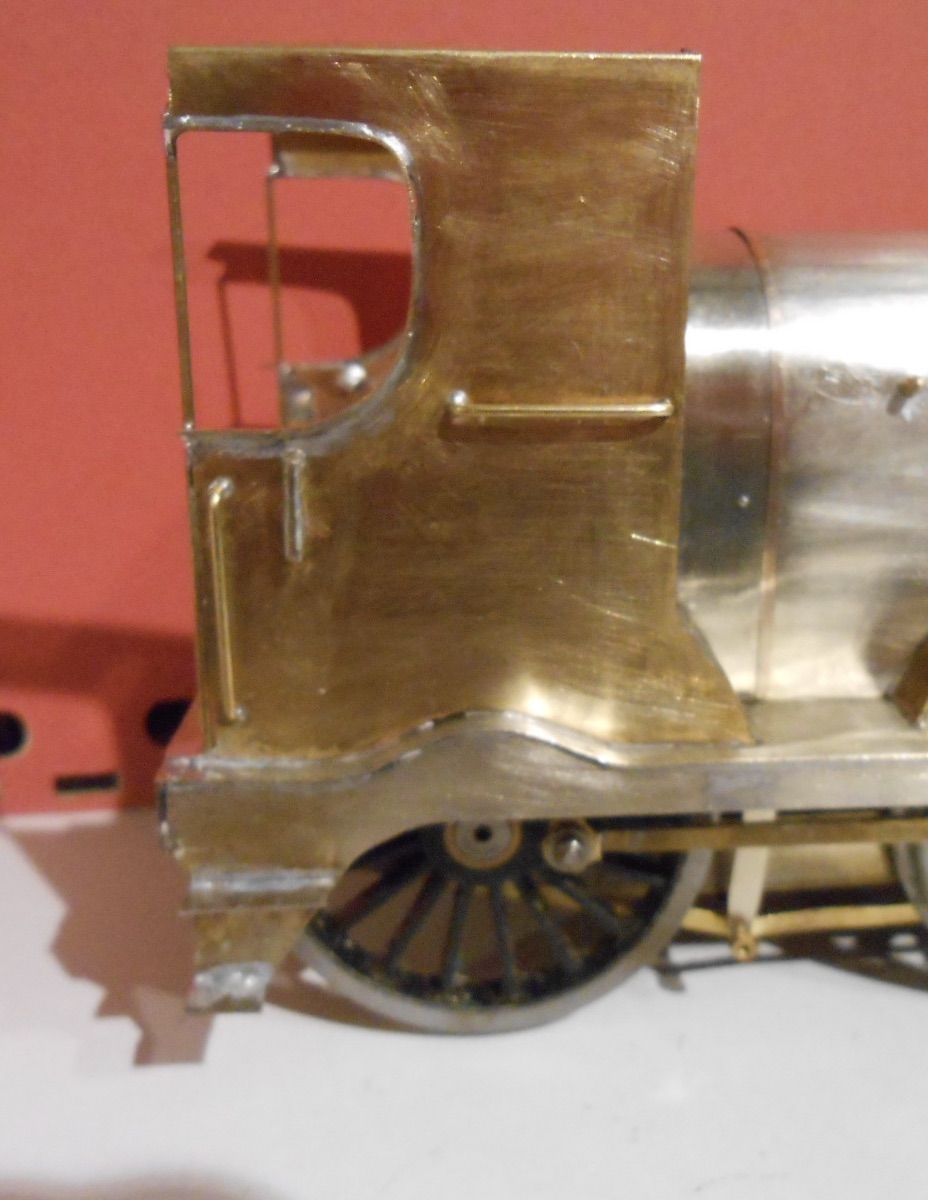
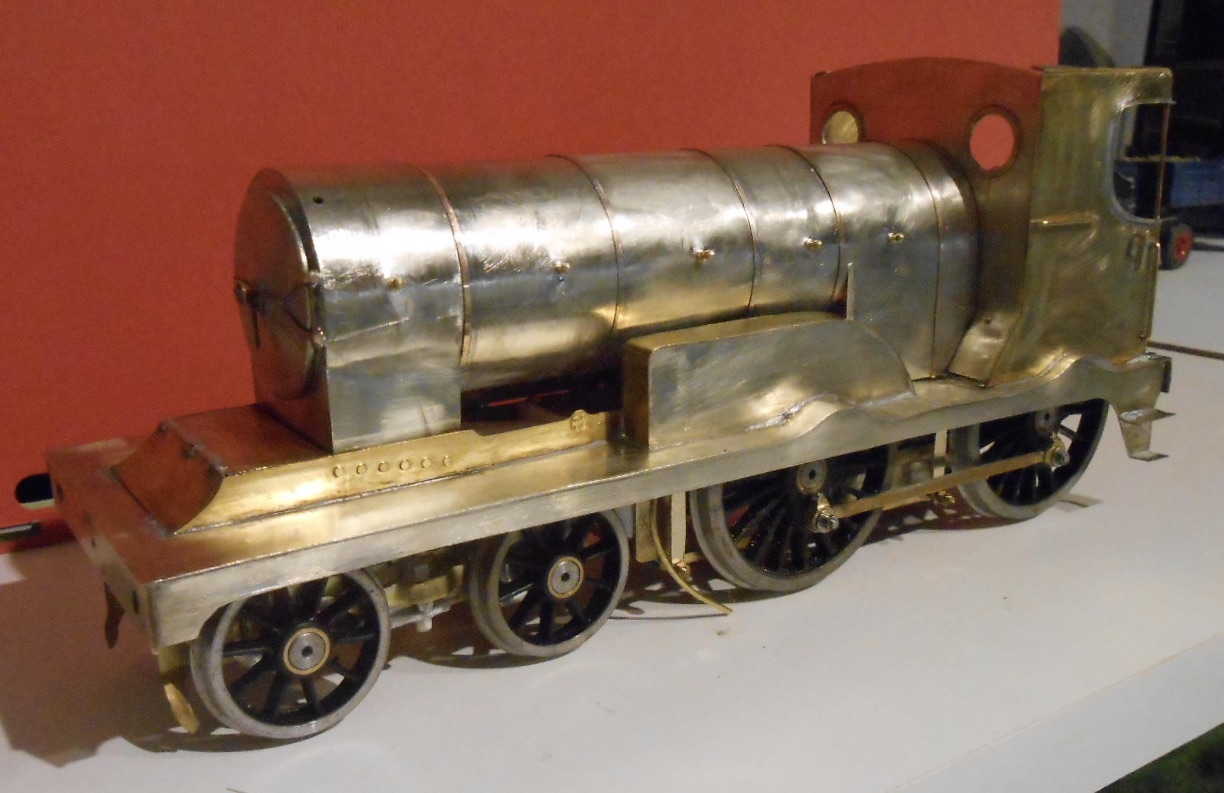
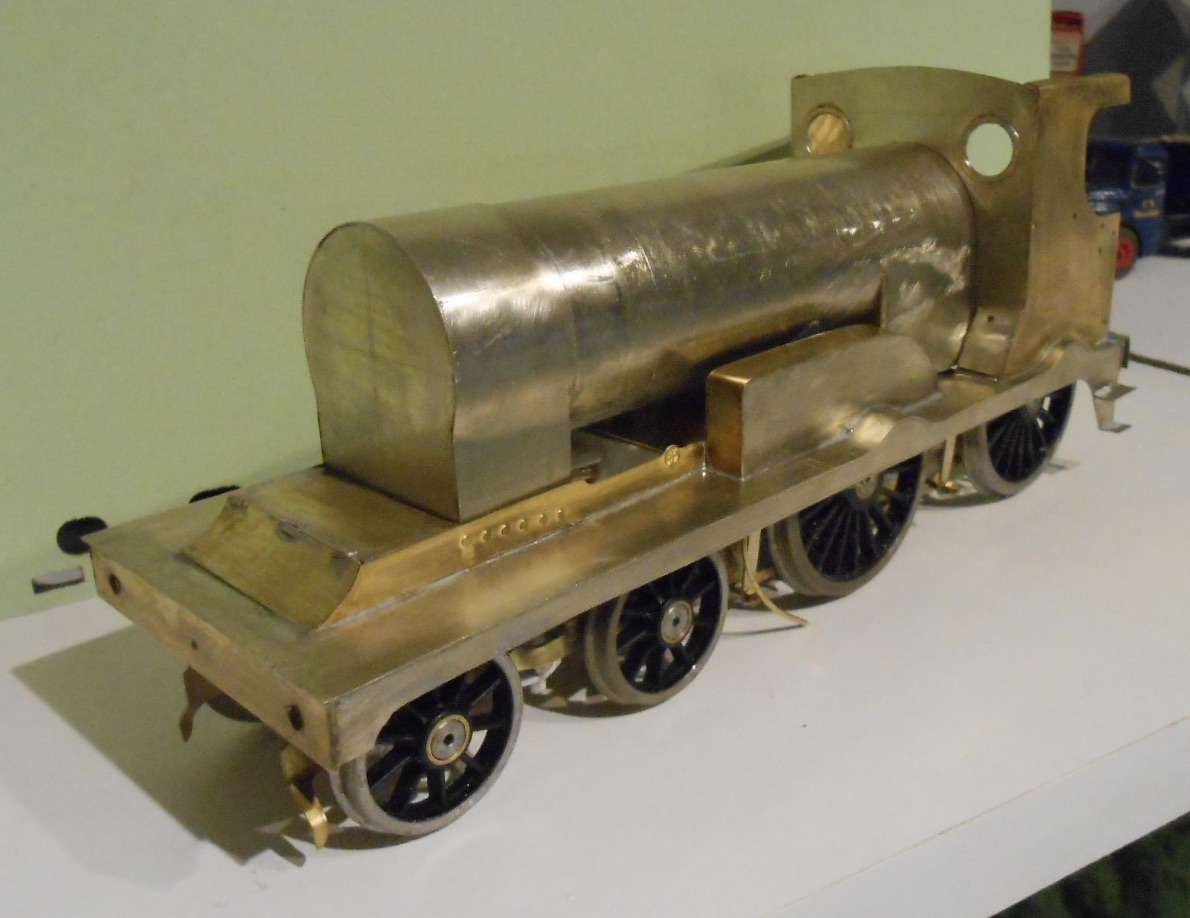
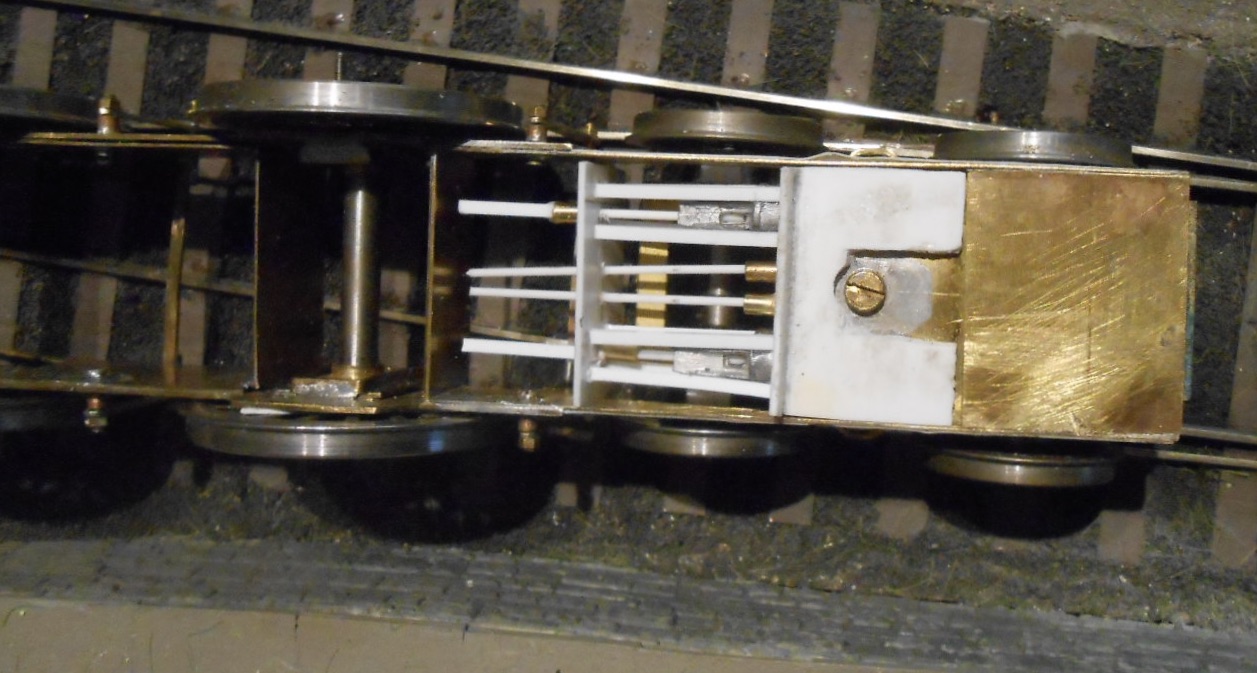
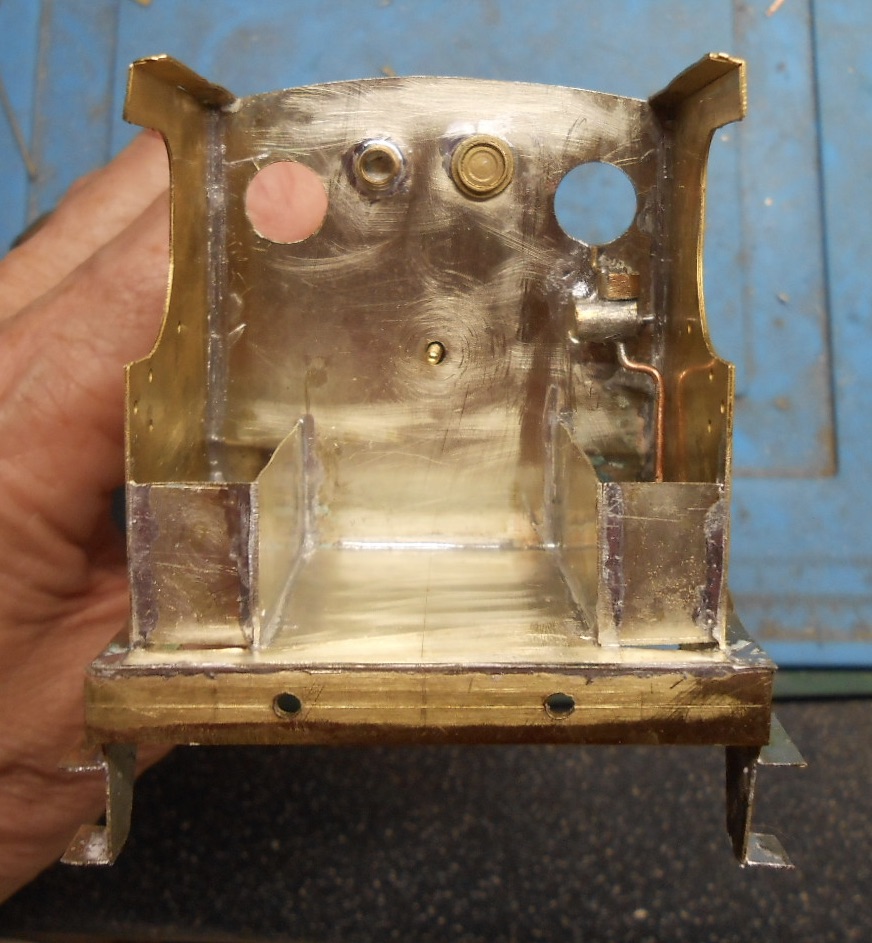
Bits and pieces Have had some fun with various bits of detailing over the last week or so, though also spent a fair bit of time simply making sure that the boiler unit and footplate/cab sit nice and square with each other. The latter is important at this stage, as experience tells me that once the details go on, it makes any corrections so much harder. The boiler/smokebox/firebox unit has a 10ba bolt to fix it to the cab front while another bolt is screwed into the base of the smokebox from underneath. Anyway, the various additions are as follows: Inside motion: decided to make this from plastic strip and used the working motion on my SLNCR Sir Henry as a guide, though for the D16, it is only dummy because the low pitched boiler means that you can't see a great deal of what is going on between the frames. The motion stops short at a frame spacer, but this isn't really noticeable either as it is between the big front splashers. Then decided it was time to tidy up the wheels and coupling rods, filing down the latter's bearings and trimming the fixing bolts. The chassis is remarkably free running, so much so I have to be careful when carrying it around on my work board as the slightest tilt will set it rolling. Next up was the cab floor, which is a piece of 10thou nickel silver & then was able to build up the splashers inside the cab floor from the same material. You can cut thin nickel silver with strong scissors, which speeds up the process, especially for simple rectangular parts like these. The cab interior came next, starting with the back of the firebox. Cut a piece of 15thou NS to shape, then wrapped a 5mm strip of 10 thou brass which was formed and soldered in place to make it look like the firebox extends into the cab. This was where the fun started as I now had to make the main controls and gauges. I must admit they are more generic than anything, but include the two water gauges, two injectors, the firehole door, vacuum and boiler pressure gauges, regulator handle and the brake valve, plus associated pipework. The boiler pressure gauge is a brass casting from the scrap box, while the vacuum gauge is a 1/8th inch wheel bearing. The injectors and water gauges were cut and filed from square and round brass strip, carefully soldered together, by using first 240 solder and then 145 for the later additions, also using various clips as heat sinks to stop bits falling off as fast as I was attaching them. These were all attached to the 'backhead', along with the firehole door, this a circle of nickel silver with some added strips for detail, hinges etc. The driver's brake valve was made in much the same way and is fitted to the right hand side of the cab front sheet, as MGWR locos were all right hand drive - or so I read. I'd been intending to make the cab spectacle windows from brass tube, but while rummaging through my spares boxes [there are many], was delighted to find an unused cab front with two etched circles still in place. What's more, they are exactly the right diameter too, thereby saving me quite a bit of work. I carefully soldered these in place and the opened the holes in the cab front with a combination of a tapered reamer and rat tailed files. So decent progress, helped no end by the fact that, unlike the Sligo tank that Galteemore is building, this little 4-4-0 has very few rivets, though there are quite a lot of handrails now awaiting attention.
-
Fascinating and excellent stuff, Ken!
-
Having done two Small Tanks from kits and a scratchbuilt Large Tank, I can testify just how much time and effort has gone into those few bits of nickel silver! Great work, the loco is indeed emerging.
-
A fine bit of work, Ken. Hangs together really well and makes an excellent setting for your locos and rolling stock.
-
Clever and very classy. Every home should have one!
-
Yep, looks a bit of alright. Good model.
-
A fine combination of traditional and modern techniques, which works really well.
-
Think you are right about pre curving the sheet metal. I found I had to slacken the rollers enough to get the sheet all the way through or the rollers wouldn't grip. Hence the flat sections on the seam I guess. Obvious when you think about it! As for soldering, my new temperature controlled iron, with a pointed bit has certainly helped, not least because it helps getting into tight corners when soldering from the inside. Cuts down significantly on excess solder too, which then means much less cleaning up.