David Holman
-
Posts
4,359 -
Joined
-
Last visited
-
Days Won
117
Content Type
Profiles
Forums
Events
Gallery
Everything posted by David Holman
-
Mayner is right, even in basic form this model has real atmosphere. Looking forward to seeing things progress.
-
Am sure it is organised chaos, Leslie! Still working on the assumption that Belmullet will debut at Uckfield in October, though shows still dropping like flies, so who knows? Very much keeping fingers crossed for Cultra in November, but that is a Fintonagh trip.
-
That's really good to know Robert. Have ordered some but the postage almost doubled the cost. DCC supplies definitely the way to go in future.
-
That's good John, was only intending to renumber it, but even that would have been awkward, being under a layer of weathering, so thank you, as ever.
-
Looks good to me. Have been using cool white LEDs for several years now and they replicate a cloudy day quite nicely, while warm white creates the sunshine. Love the roadside section - iconic C&L, or any number of other roadside sections for that matter!
-
That's looking good - and an interesting use of a broken handled coffee mug too!
-
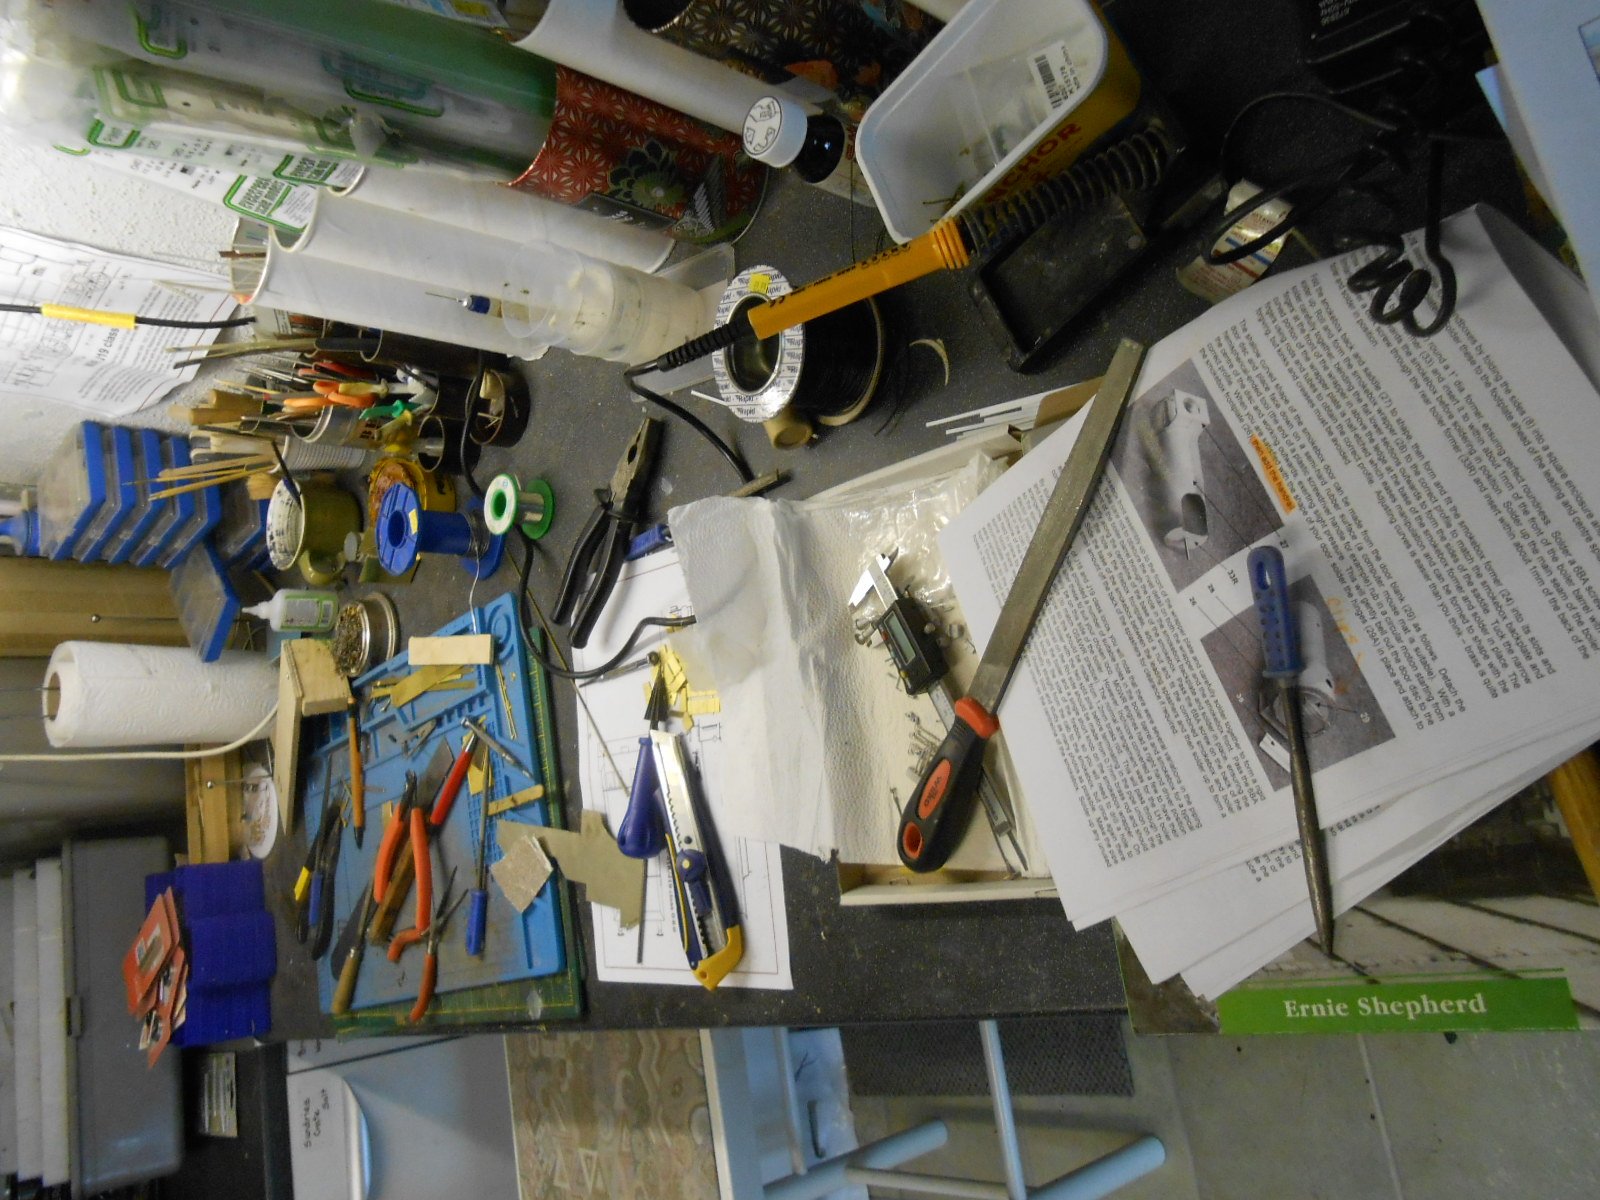
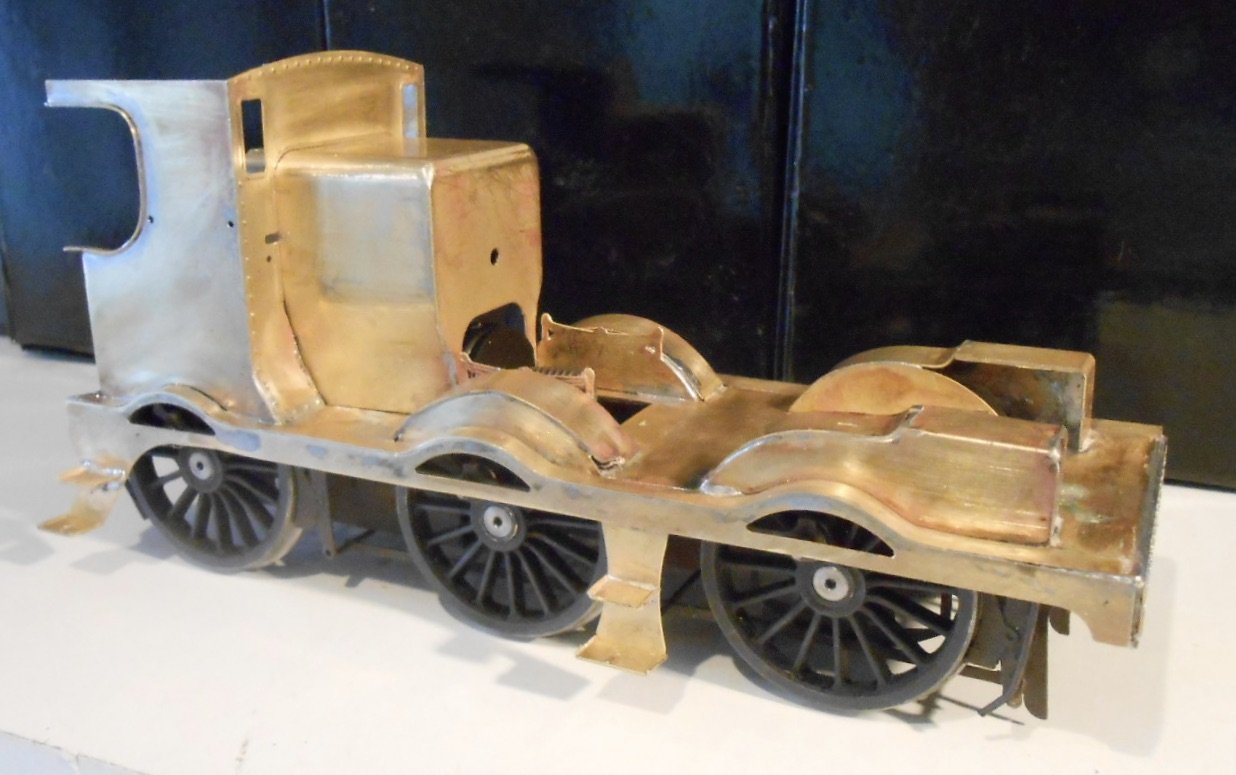
Many thanks for all the help everyone, finding the comments very re-assuring. Roger is wondering whether or not I might have been sent the original test etches, but have sent him the photos below to see what he thinks. Have tack soldered everything together and followed Eoin's idea of raising the sandbox tops by a millimetre or so with some nickel silver. The valve chest cover at the front makes a difference too. You should be able to see that I've cut out a rectangle in the frames and footplate, which seems to open things up nicely and will look better once some dummy valve gear has been added. The boiler fittings are just perched at the moment! Thought it was probably time to tidy up the workbench a bit this afternoon as I was starting to lose tools and materials! No doubt, within a few minutes of starting again, it will be just as messy, but at least I know where things are again.

-
A definite case of 'if only!'
-
Is it me or has there been a real upsurge in model making on the Forum during lockdown. Lots more people seem to be having a go and I think it is wonderful. Inspiration comes in many forms, much as we admire the creations of our top contributors, such skills are not achieved overnight as you need lots of practice. In many ways, a bit like learning a musical instrument I guess. However, I think it is just as inspiring to see folk taking the first steps towards making something, or indeed returning to the fold after a sabbatical. Mine by the way was pushing up the value of brewery shares and chasing girls in my late teens/early 20s - a common affliction I hear. I few years ago, remember talking to a trader at the Chatham show about the decline in people making their own 'stuff'. His response was to show me a model greenhouse, complete and painted, but which a customer has just rejected because 'it had no plants in it.' I can appreciate why somebody would want to buy a locomotive rather than scratch build it, but actually the journey to that starts with things like putting plants in a model greenhouse or having a go at a wagon or building kit. How far you go along that route depends a lot on how you get on and where your interests lie, but personally I think it is great to see new and returning contributors on the Forum. It is the ideal antidote to not getting to exhibitions, while the advice and support that is so readily given is just wonderful.
-
Freeze dry them first, then put in a coffee grinder.
-
Love all the detail in that picture.
-
Worth the wait! Beautiful work.
-
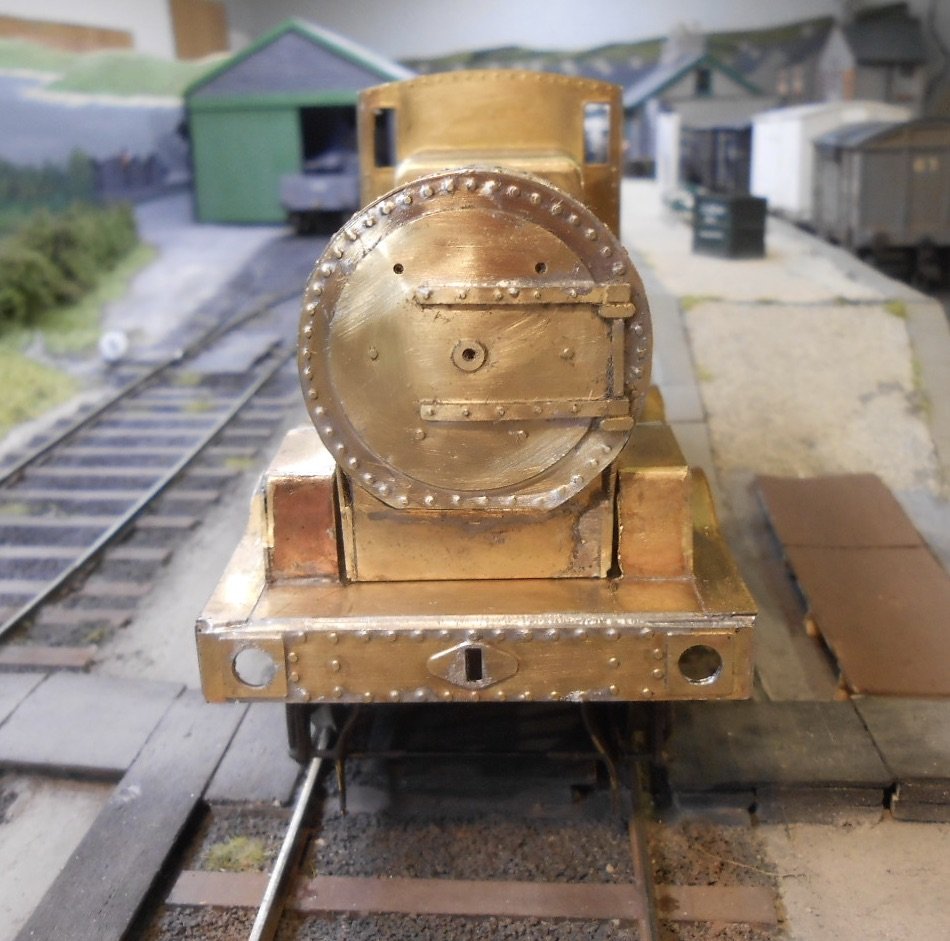
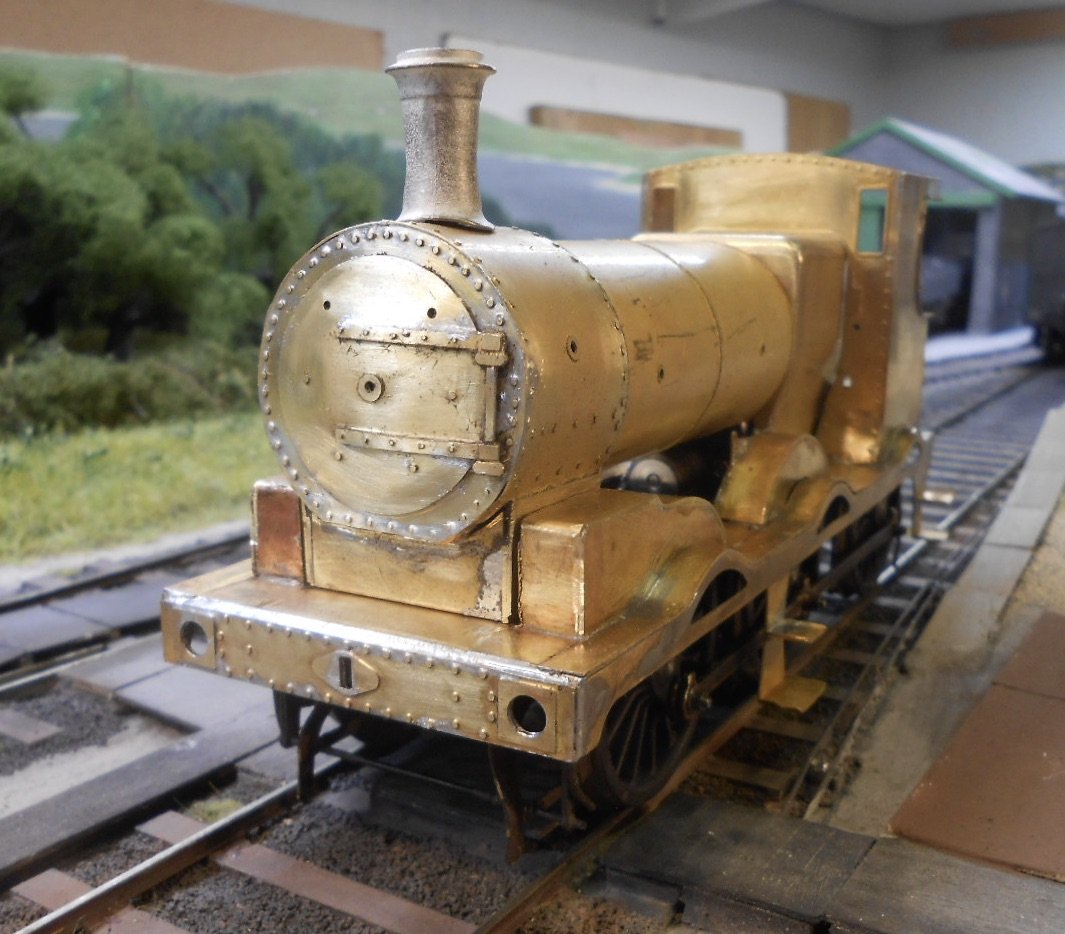
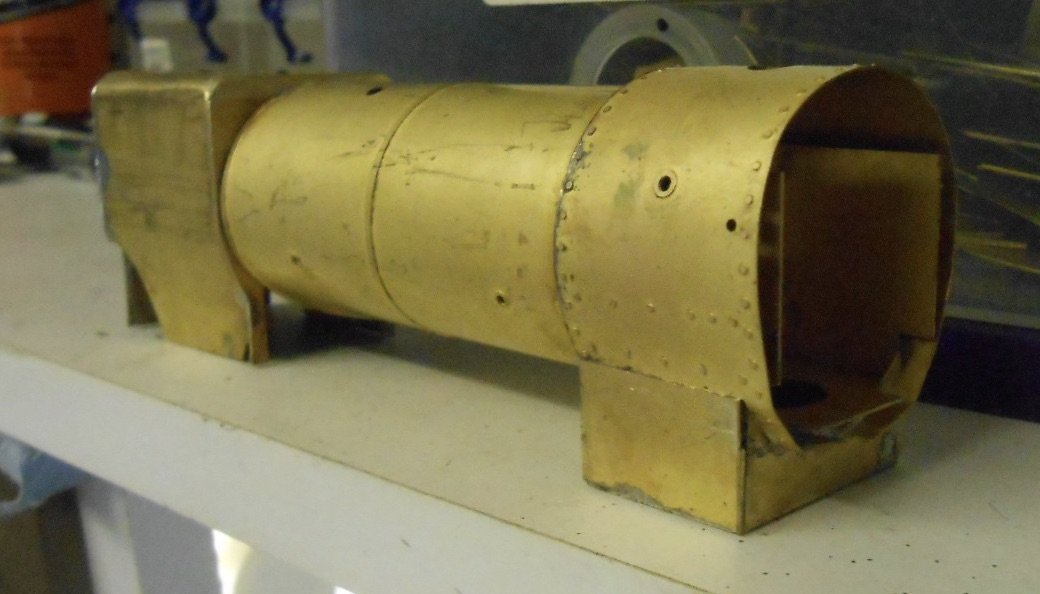
Rightly or wrongly, decided to press on with the boiler and smokebox unit. Just made one addition, a disc of 1.5mm nickel silver to go between the boiler and smokebox, as a flange. Then added the smokebox door [dished, with the brackets soldered on] before bolting the boiler to firebox, with the smokebox just loose at the other end. This enabled the combined unit to be trial fitted on the footplate, to which I now offer for judgement. There are plenty of you out there far more knowledgeable than me, so will be interested to get opinions. My own feeling is, while it looks ok, compared to photos I have, I think the smokebox looks a bit slim. Have included a photo of the prototype for comparison - the drawing supplied with the kit shows a smokebox 5'6 in diameter, whereas on the model it is only 5', so something is not quite right somewhere...
-
Class.
-
Probably 603 - there are several photos of it with the Z type tender common to the G2, including one at Sligo.
-
Being retired and Lockdown both help MM, especially when there is little to watch on TV too.
-
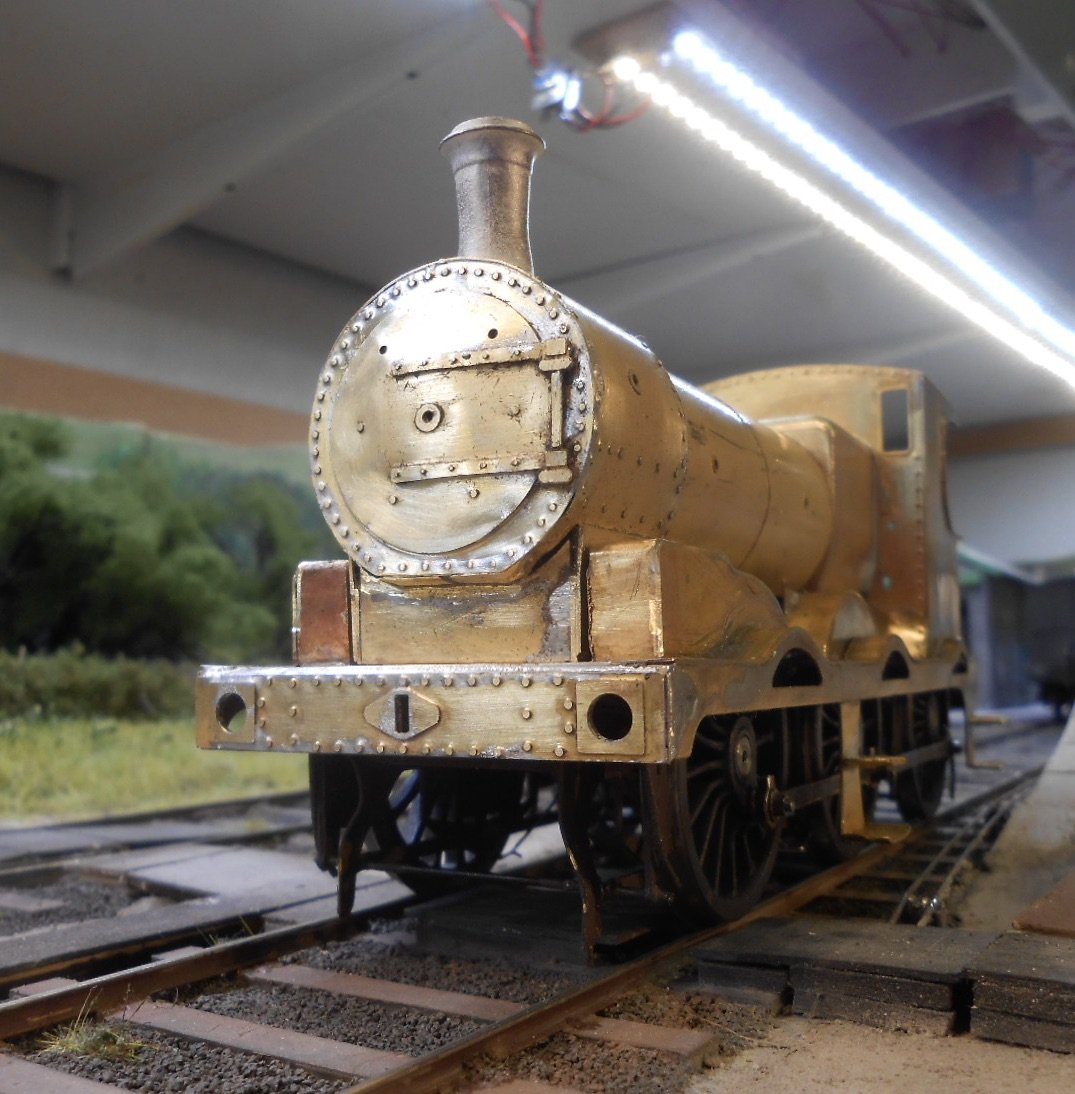
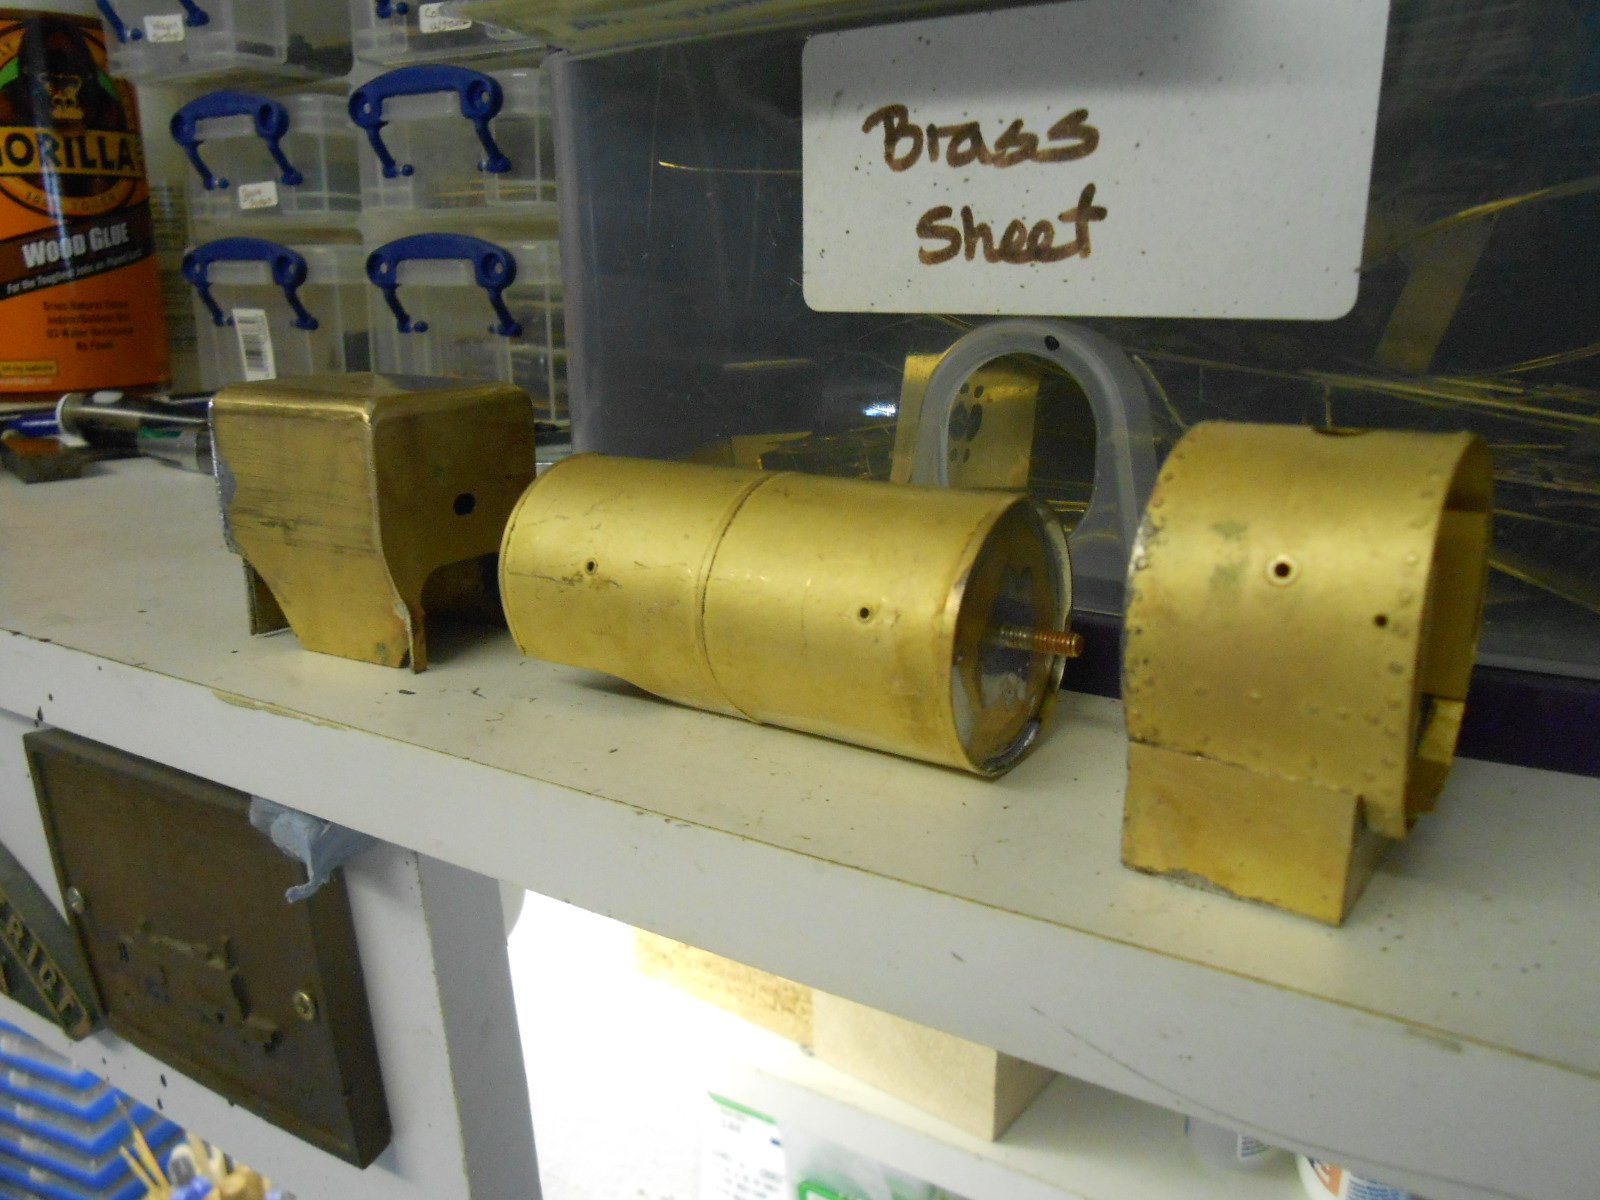
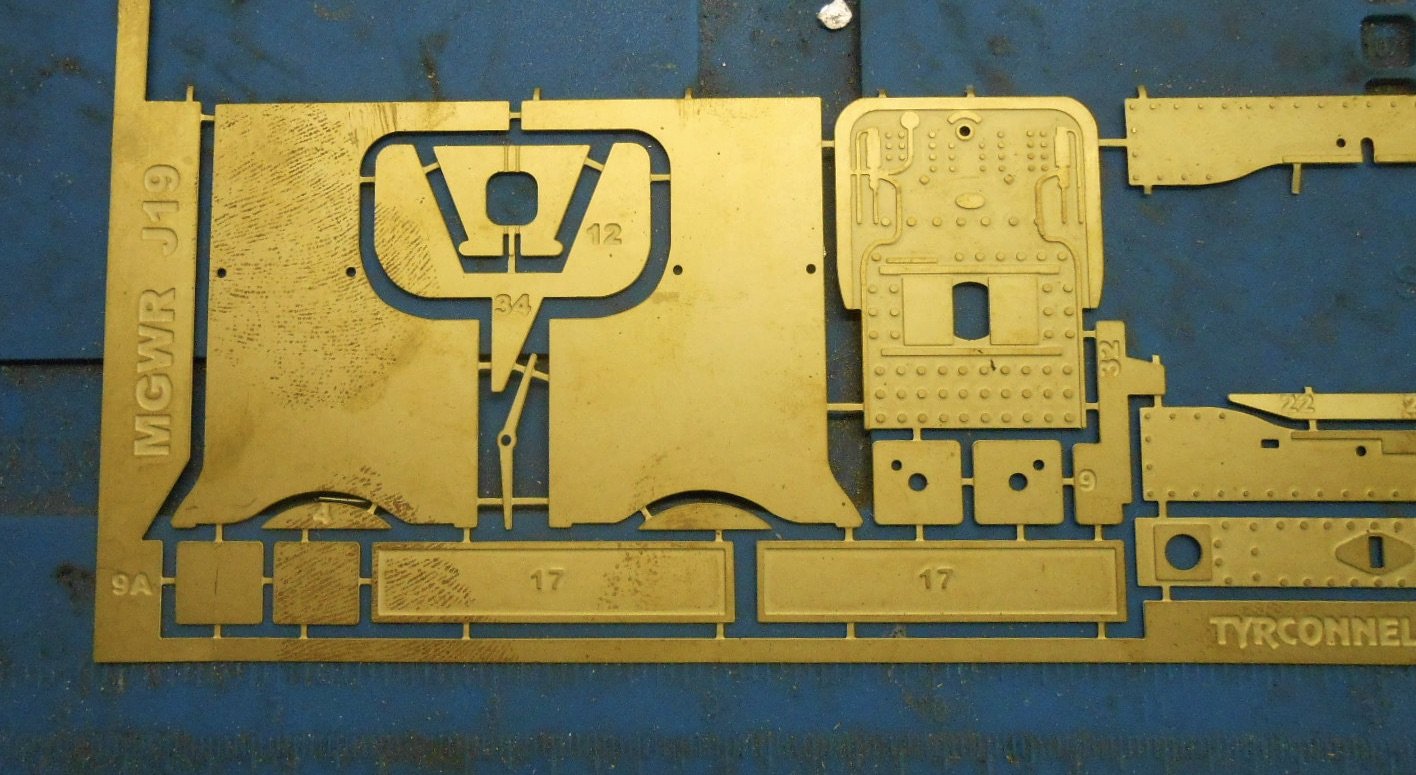
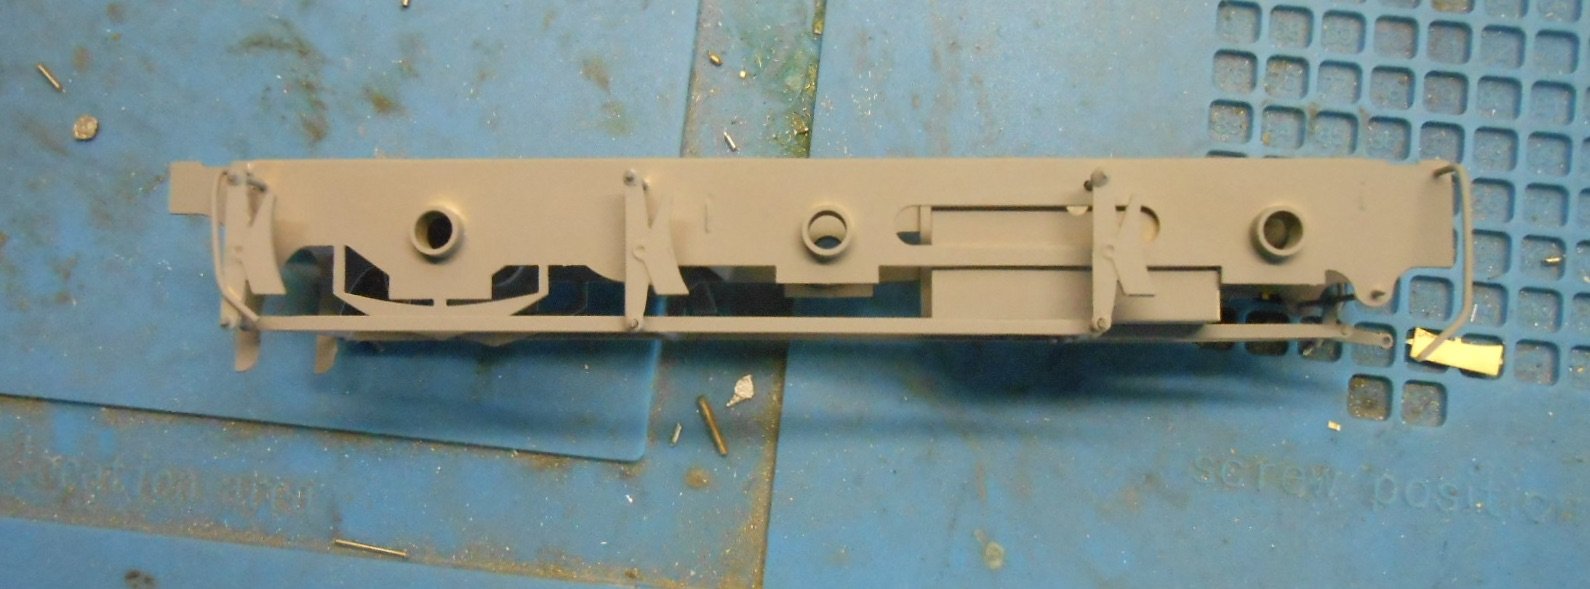
Chopping and changing It was only on Wednesday when I mentioned how building a kit eventually reaches the stage when things start to hang together - or not, as the case may be. Soldering up the boiler and smokebox has created a couple of issues, that were outlined this morning - namely the width of the splashers and the diameters of the boiler and smokebox, so efforts have been diverted to trying to solve these. As the kit is designed to be built for both 32mm and 36.75mm gauge, this inevitably creates some compromises as the narrow gauge means the splashers are too wide, with additional danger of the springs fouling the boiler because they are too far inboard. No such problems with broad gauge, but decided I couldn't put up with the extra wide splashers, plus the smokebox unit would have needed trimming to fit between the sandboxes. So, out with the slitting disc and Dremel to slice a scale 3" or so off each side. This of course leaves large holes in the footplate, so I used some nickel silver strip to cover these and then soldered back the rear of the splashers to them. Not pretty, but once tidied up, it will mostly be hidden from view anyway. As a bonus, the nickel silver strip serves to strengthen the footplate, which is useful because I want to cut a rectangular hole, between the front and middle splashers, which on the prototype would be open between the frames and allow access to the inside motion. Briefly considered adding working inside motion, but the motor drives on the middle axle, so that saves me £100 and instead will make up some dummy motion from plastic strip. At the moment, less sure about the boiler and smokebox, because as I said earlier, the dimensions of the etches don't match those of the drawing supplied. What does seem clear is that the kit uses the same etch for the boiler, smoke and firebox as the Tyrconnel G2 kit. Fine if the parts were common to both prototypes, but not so good if not. Interestingly, in trying to investigate, discovered my G2 needs renumbering as 659 had a round topped firebox! Mind you, nobody has thus far mentioned the error, but now I know, feel duty bound to alter it at some point. So, decided instead to fit the pickups and wire everything to the motor, so I could check to see if there was any fouling inside the splashers, which would be a pain to remedy. Thankfully, all was ok - the only sparking coming from one of the brake shoes touching a wheel. I've used 0.5mm nickel silver wire for the pick ups and also took the opportunity to ream out the coupling rods a little and file down the crankpin bearings [to cut lateral movement]. The result seems to be a smooth running chassis which hopefully can only improve as it gets run in.
-
Can anybody give me a couple of basic dimensions for a J19, please. Need the boiler and smokebox diameter for the Belpaire, X type boiler. Reason being, the Tyrconnel kit etched boiler works out at 4'6 and the smokebox 5'. However, the plan supplied with the kit shows a 5' boiler and 5'6 smokebox... Everything crossed in the hope it is the drawing that is wrong! Already finding I need to do some serious butchery on the footplate, for as Galteemore mentioned the other day, the kit is designed for 32mm gauge, hence the splasher tops are way too wide and the smokebox saddle won't fit between the leading sandbox/splasher unit. Shame the instructions didn't mention that, but hopefully easy to remedy. Have also noticed I need to cut a hole in the footplate to allow the inside motion to be seen - dummy as the motor drives the middle axle...
-
When I built my Sir Henry, it took around 180 hours in total and never thought I'd see a body kit, let alone in 2mm scale! If one day that means we could see a large tank at the head of the mixed train from Eniskillen, or a long cattle train, I will happily queue to see them.
-
Not sure about the soldering David, it is still as untidy as ever! What I have learned is to make the joins on the inside wherever possible, so they can't be seen too much. These days, I also aim to clean up after every session (using Shiny Sinks cream cleaner), hopefully keeping those hard to get at areas to a minimum.
-
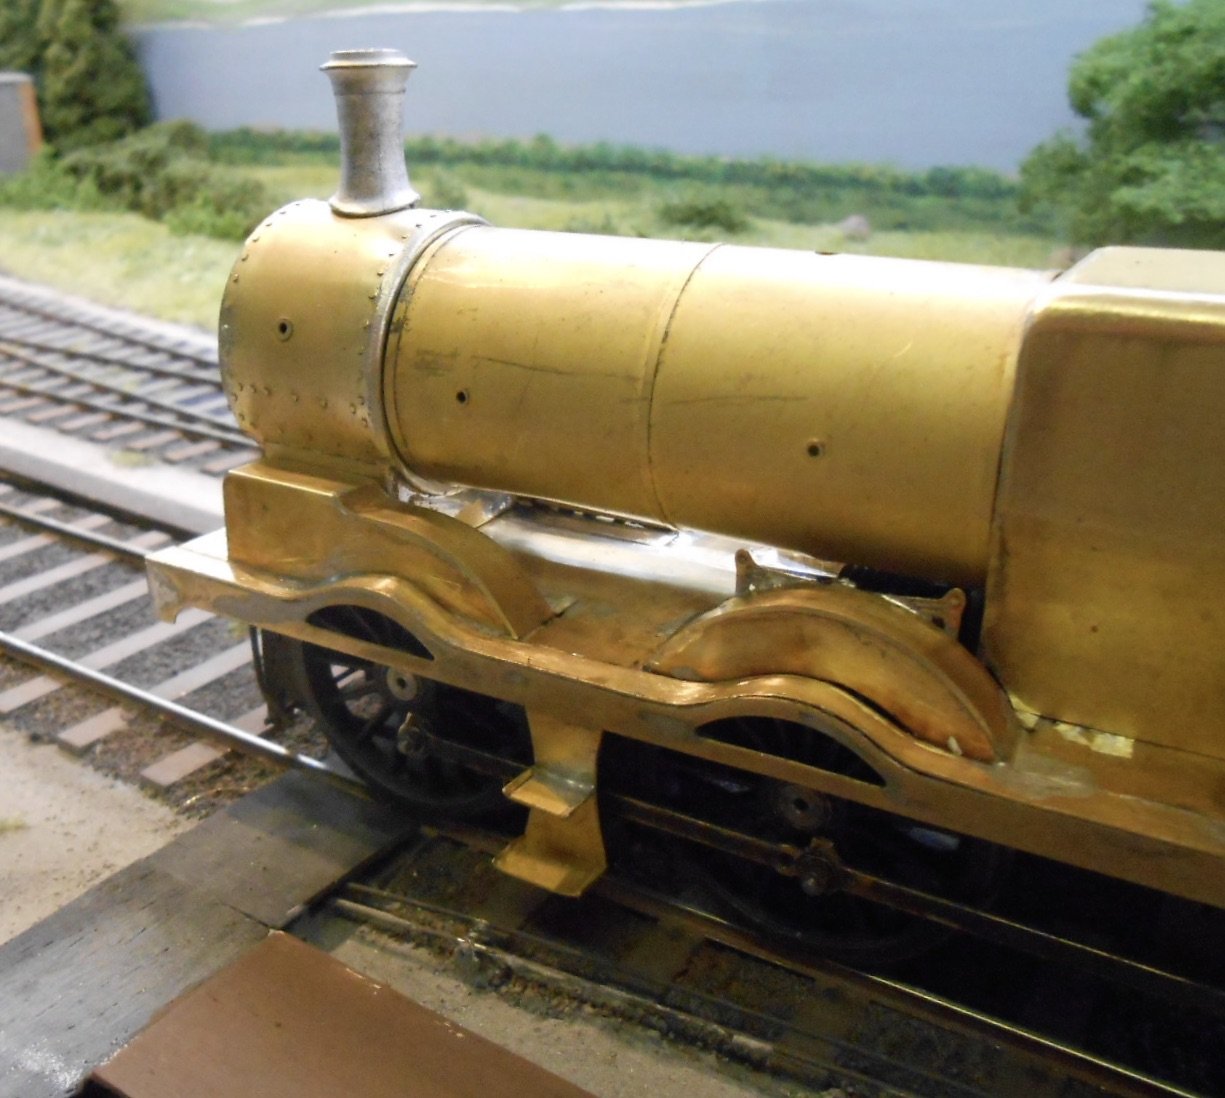
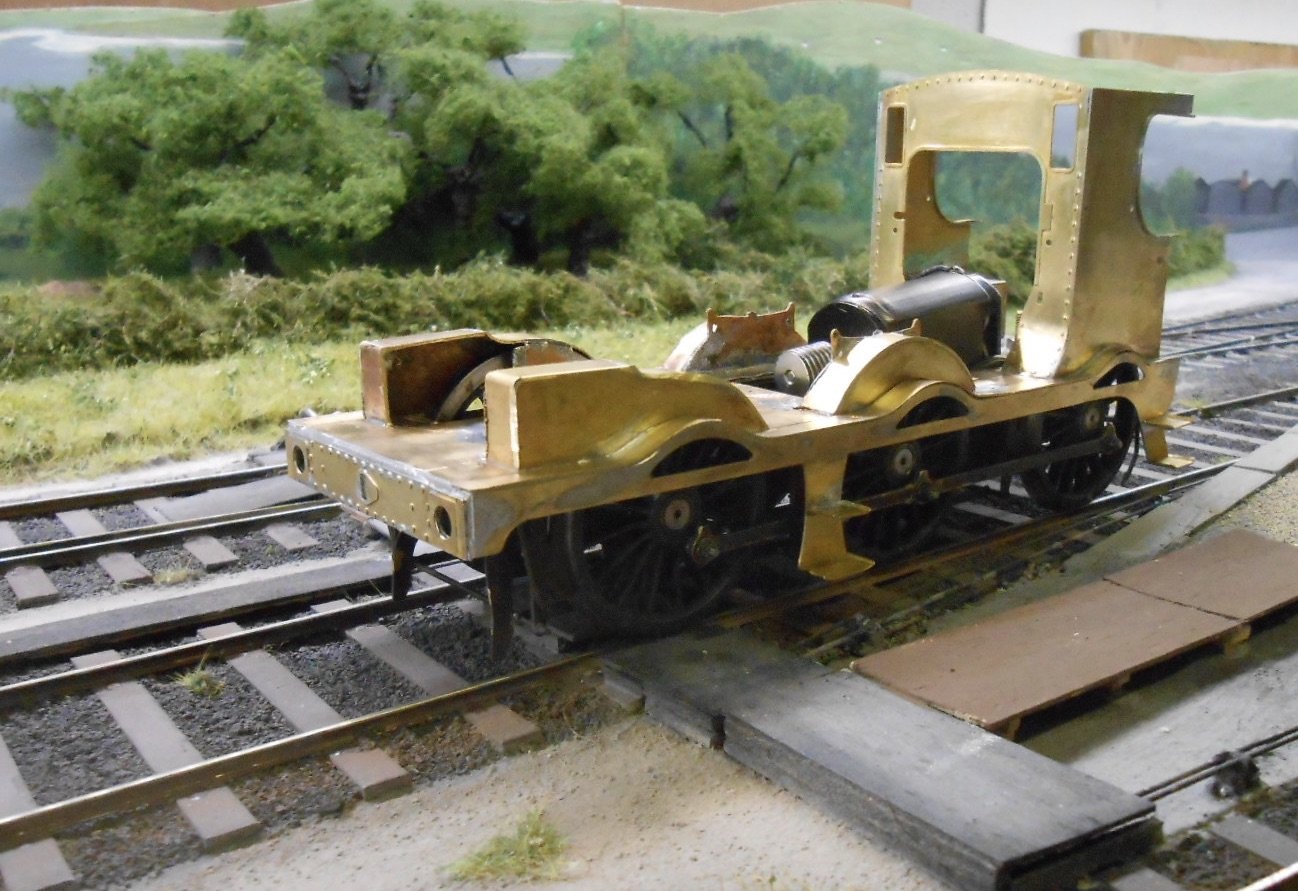
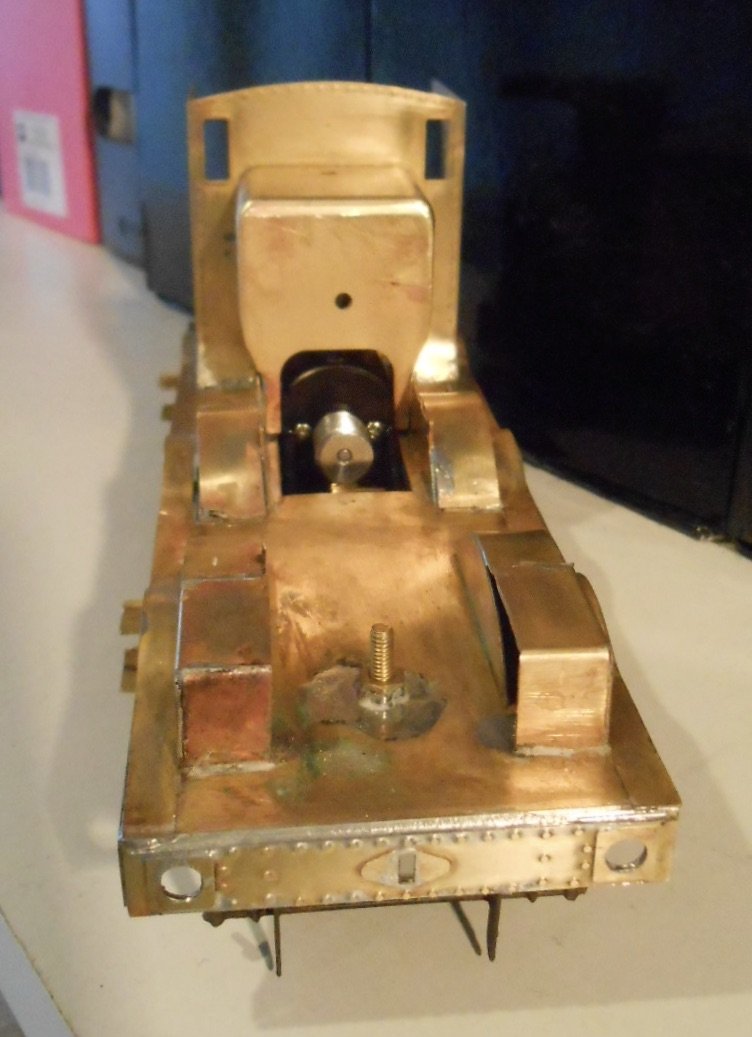
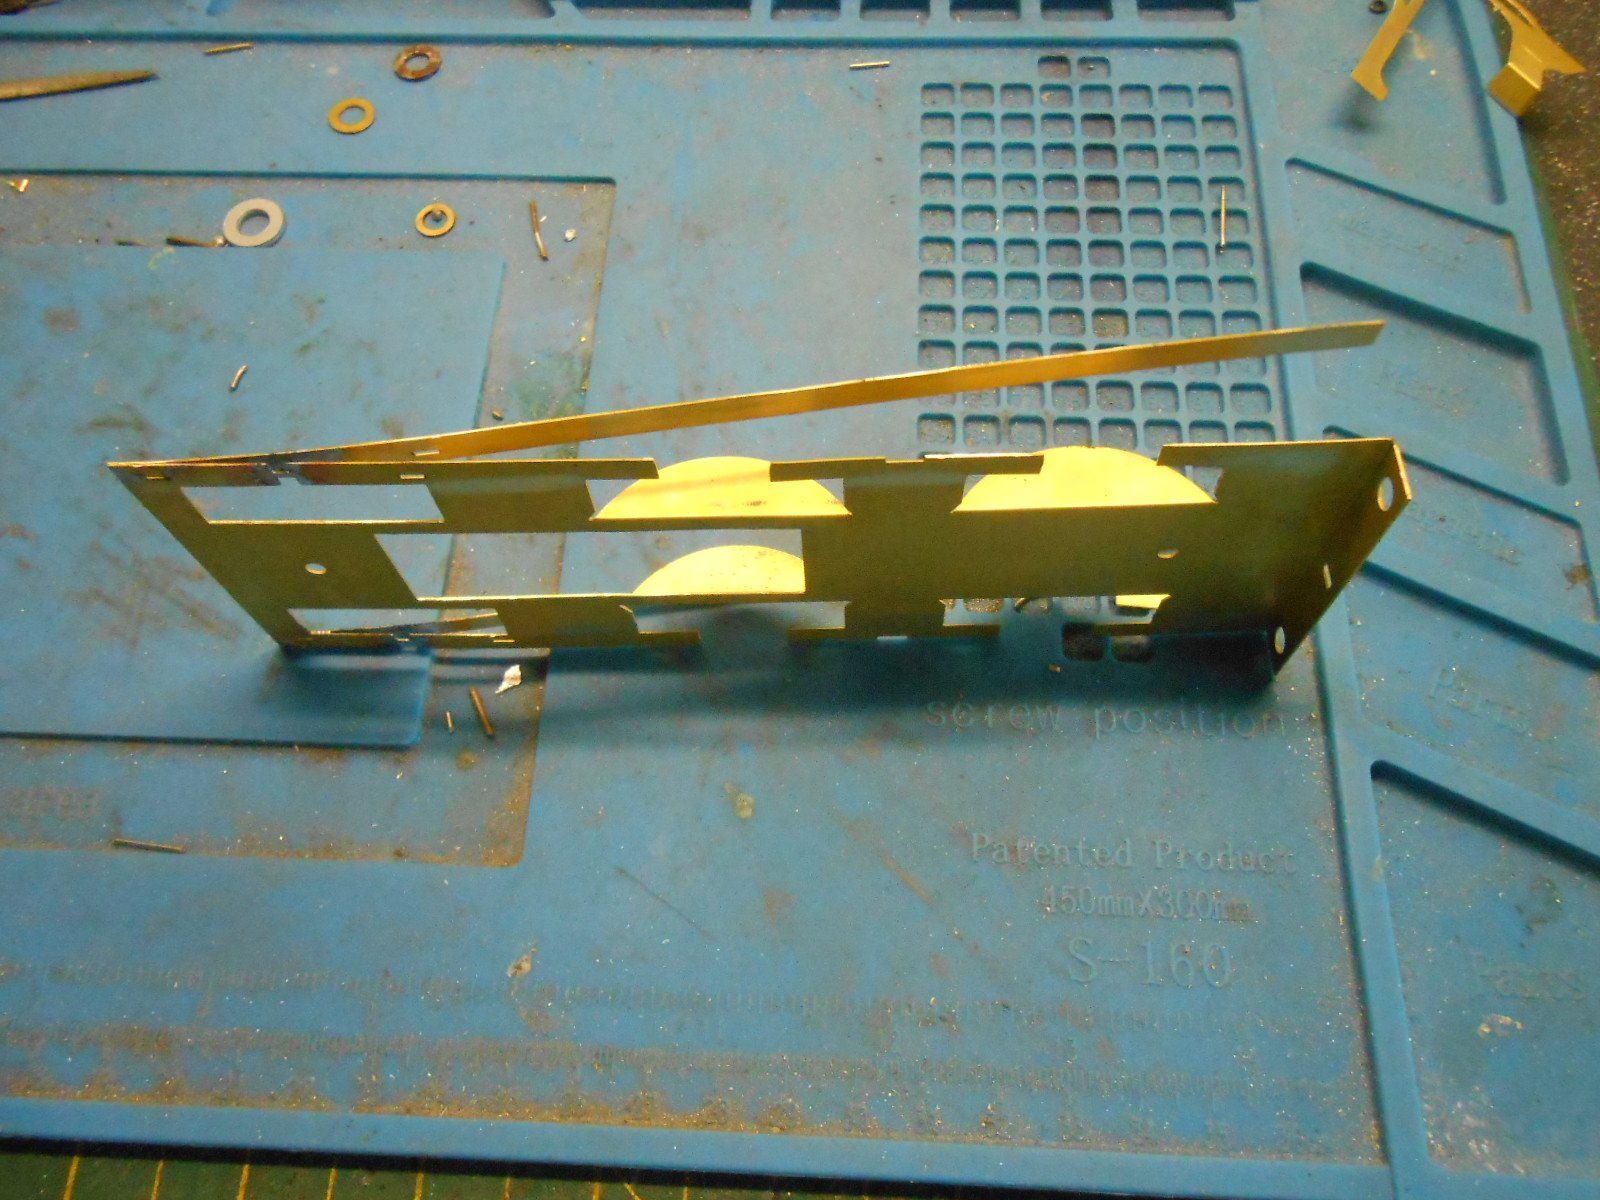
Fettling! After the fairly quick job with the chassis, things have since required a lot more care and patience. Galteemore's advice really useful in minimising finger singeing, though it's probably fair to say I've suffered less pain at the dentist... The half etched overlays for the footplate curves worked quite well - the problems mostly came with the splashers, which were decidedly fiddly to fit, but a lot easier once I'd screwed the footplate to a piece of wood. Moving the latter about also meant I could use it to line up the splasher tops too. That took much of Monday and Tuesday - probably about five hours in total. After this came the cab. Sides, front and inside splashers were fairly straightforward, though I departed from the instructions by making the cab itself as a simple sub unit, which was soldered to the footplate afterwards, rather than build it in situ. Next came the Belpaire firebox - again a simple fold up. However, this was where the fettling came in. The tolerances on this kit are pretty tight and the firebox is a really snug fit into the cab front. It also has to sit between the rear and middle splashers too. So, file and check, file and check until eventually the half a dozen or so variables are gradually reduced and the unit starts to fit. That wasn't the end of it though, for the instructions now [sensibly] suggest a test fit of the chassis. Earlier, I'd primed and painted this, followed by a hefty weathering mix - Humbrol gun metal, matt black and bauxite - so back went the wheels motor and gearbox. This showed that the rear armature of the motor needed removing, plus bits shaved off the underside of the footplate where the wheels were fouling. The crankpins needed trimming too, but [crossing everything], I think everything is ok, apart from a slight tightness in the crankpins, which is to be expected at this stage. Hopefully, a bit of gentle reaming will get this sorted. The firebox hasn't been soldered in place yet, because the model is now at the crucial stage where you need to be sure that everything will hang together properly. Next up is the boiler/smokebox unit, so I want to make sure everything will sit nice and square on the footplate before I fix things in place. You can probably see from the third picture that the motor/gearbox is a pretty tight fit in the firebox, so in terms of running, am not out of the woods yet, because until I've fitted pick ups and wired these to the motor, I won't know if there are any shorts lurking in the splashers of firebox. Certainly hope not, because the only solution may be to raise to footplate half a millimetre of so to increase the clearances. As I said earlier - cross everything.
-
Amazing project and fine modelling!
-
Love long and prosper, Leslie - just beware the Klingons off the starboard bow!
-
Fine work. It just looks 'right'.
-
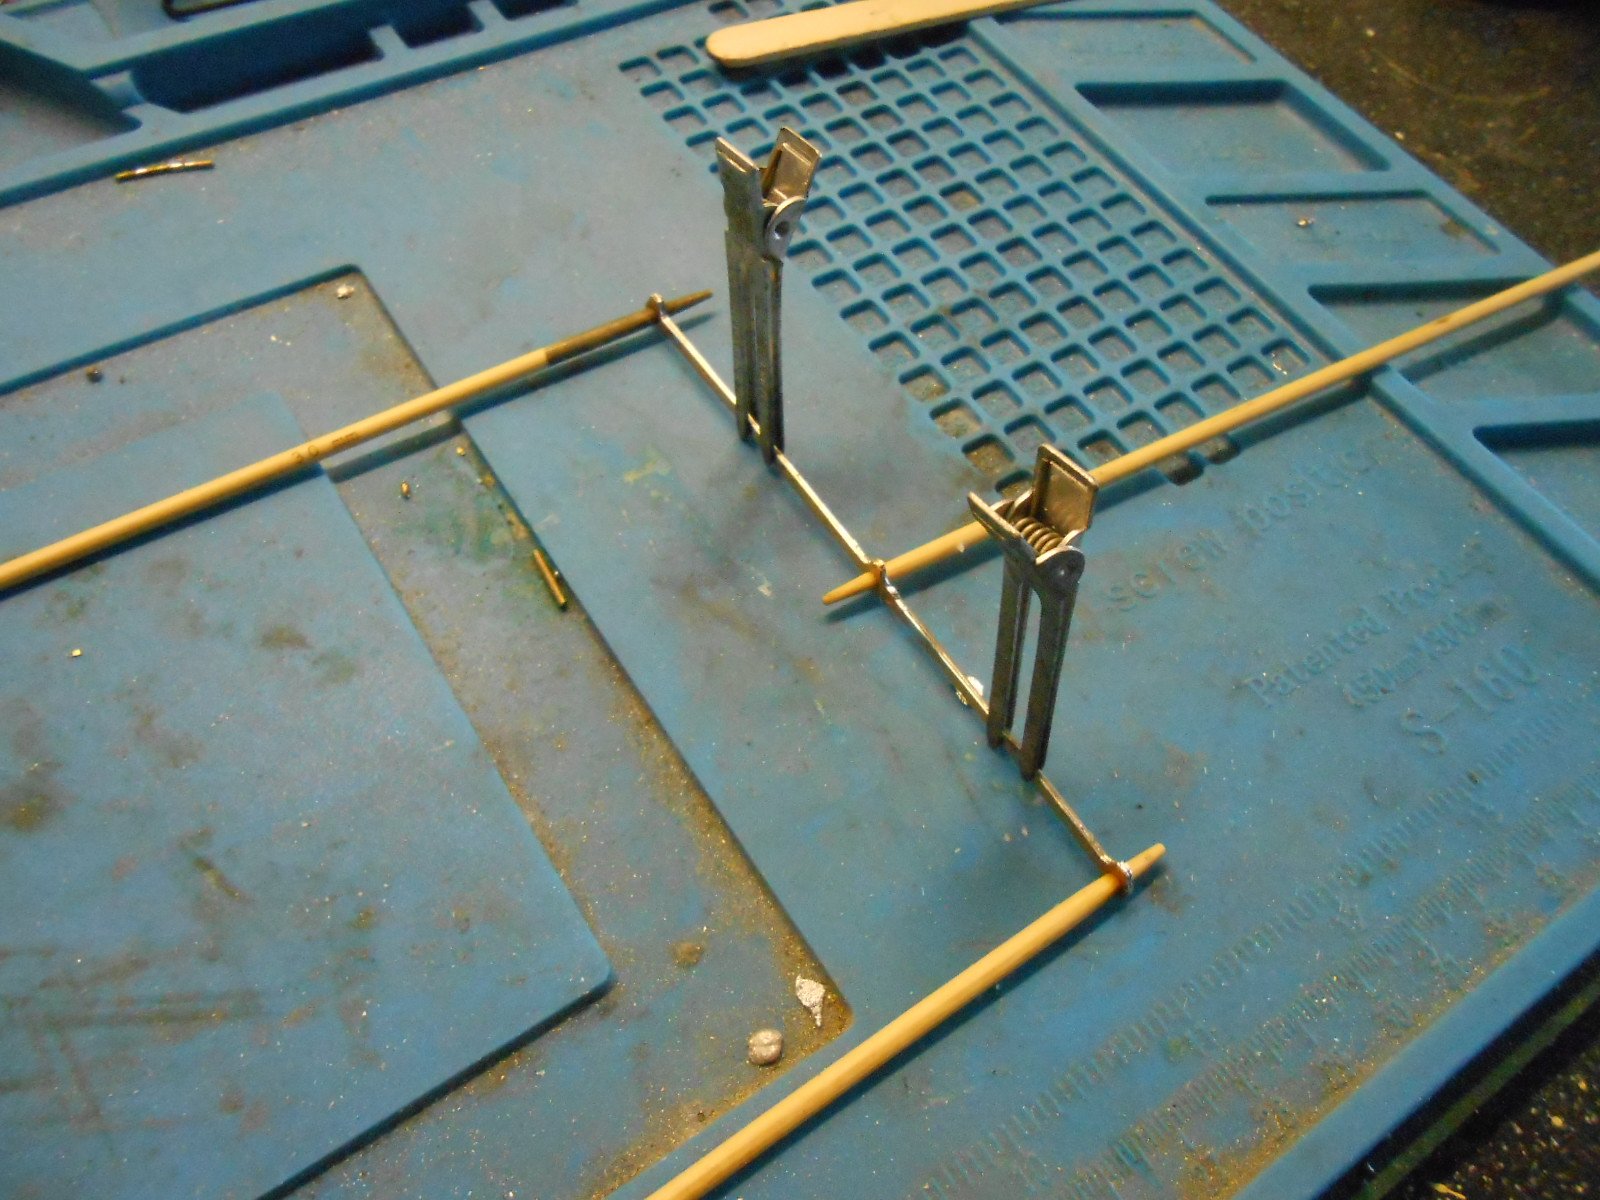
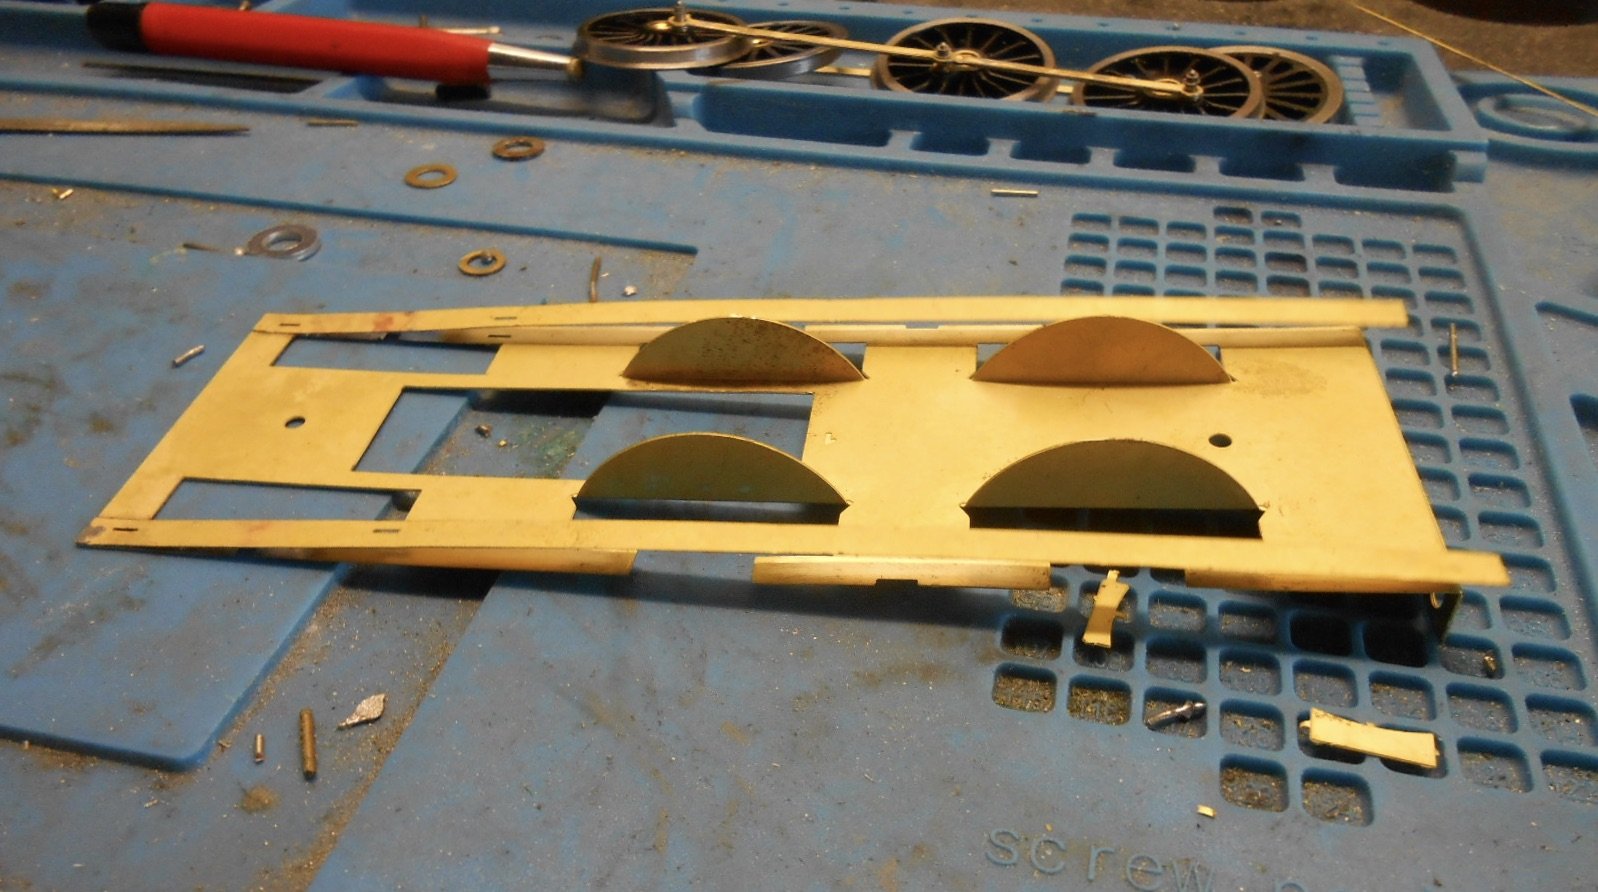
Research, Rods & Stuff Have spent a couple of interesting hours trying to decide which loco I'm going to model. The GSR 'bible' is initially a little confusing in that it suggests both U and W tenders were paired to J18/19s, whereas my Tyrconnel kit has the same type Z as used with the G2 2-4-0. Later, it says tenders were rotated almost at whim, while the instructions certainly show at least three photos of locos with the Z type tender. Hence the dive into my 'library'... As far as I can tell J18s 590 and 588 fit the bill as having the Z tender and the correct cab sides for those supplied in the kit [see photo below]. Likewise, J19s 603 and 597. The others that I have photos of either have the wrong tender, wrong cab, or both. Note that my chosen model also requires it to be a J18/19 rebuild with the X type, Belpaire, superheated boiler. The main reason for sharing this of course is that there are among you people far more knowledgeable about such things than me, so am hoping someone can confirm that the following is a good choice: Either J19 597, as my photos suggest this would fit the parts I have, or J19 598, for no other reason than [like my Castle Rackrent WL&W loco] was also once called 'Shannon'. 598 is also shown as lasting until 1965, whereas 597 succumbed in 1959, but this is not a deal breaker. Meanwhile, the loco chassis was completed in another 75 mins this morning - just two hours in total - by the adding of the coupling rods and brake gear. The former are shown in one of the pictures, being 'sweated together', using hair clips and barbecue sticks. A little light reaming was required after, but once fitted to the wheels and with a light oiling to the gears, when power was applied, they turned smoothly, with no evident binding. Given my locos are expected to work for their living and in particular stand up to scrutiny at exhibitions, I can't begin to say how reassuring this is! Brake gear, on the other hand, always seems to be a bit of a faff for me, but for once all went well here too, so, as per instructions, the next step was a general clean up, prior to a coat of primer from a rattle can. By way of 'celebration', I cut out the footplate and valances from the etchings this afternoon. This is one of those steps that, no matter how often I read the instructions, a 'dry run' is essential for me to understand them. The footplate is not unlike that of the GSWR 101/J15, in that there are small splashers over the coupling rods - always a bit of a challenge to create. Here, the outer edges of the footplate are etched to half thickness, to which you add a further, half etched overlay. At first, when you tack solder it to one end, it looks too long, but once the curves are formed, it should fit perfectly. All I can say is wait and see for now, but it certainly looks like a clever way around the problem.