David Holman
-
Posts
4,359 -
Joined
-
Last visited
-
Days Won
117
Content Type
Profiles
Forums
Events
Gallery
Blogs
Everything posted by David Holman
-
new year new layout 1990s container terminal and tmd
David Holman replied to Sean's topic in Irish Model Layouts
Apart from the sharp curves, there looks to be plenty of operation potential here, with up to five sidings to give traffic variety. My exhibition layouts keep me amused with just a loop and two sidings, plus another deemed off scene, so should be lots of fun to be had here. Enjoy! -
21mm gauge track; the pros and cons?
David Holman replied to jhb171achill's topic in Irish Model Layouts
Good advice! Alternatively, depending very much on the overall plan, consider building a specific section like a branch terminus, then gradually add other sections as you go along. Cyril had some great ideas for track plans, though if your preference is more for freight traffic, look at Iain Rice's diagrams. Cyril preferred passenger traffic on most of his and was happy with tight curves too. -
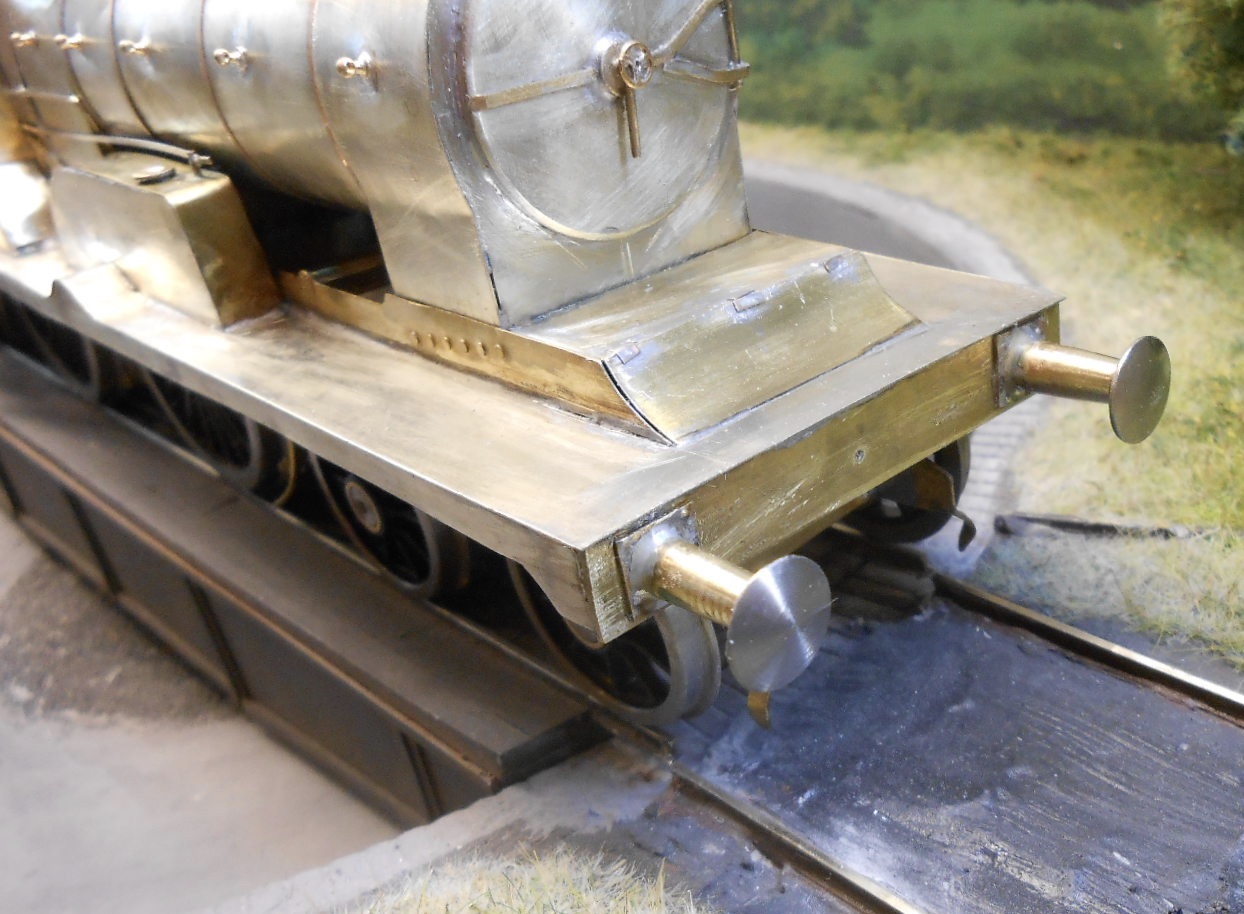
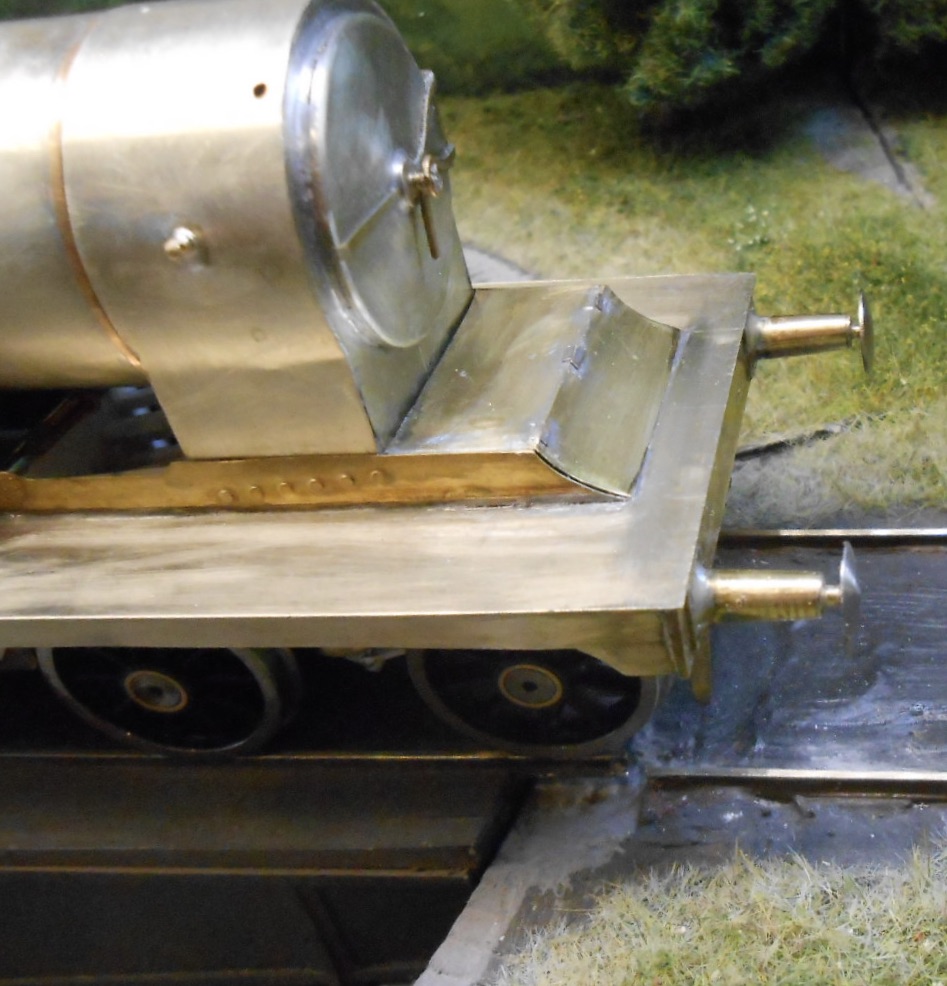
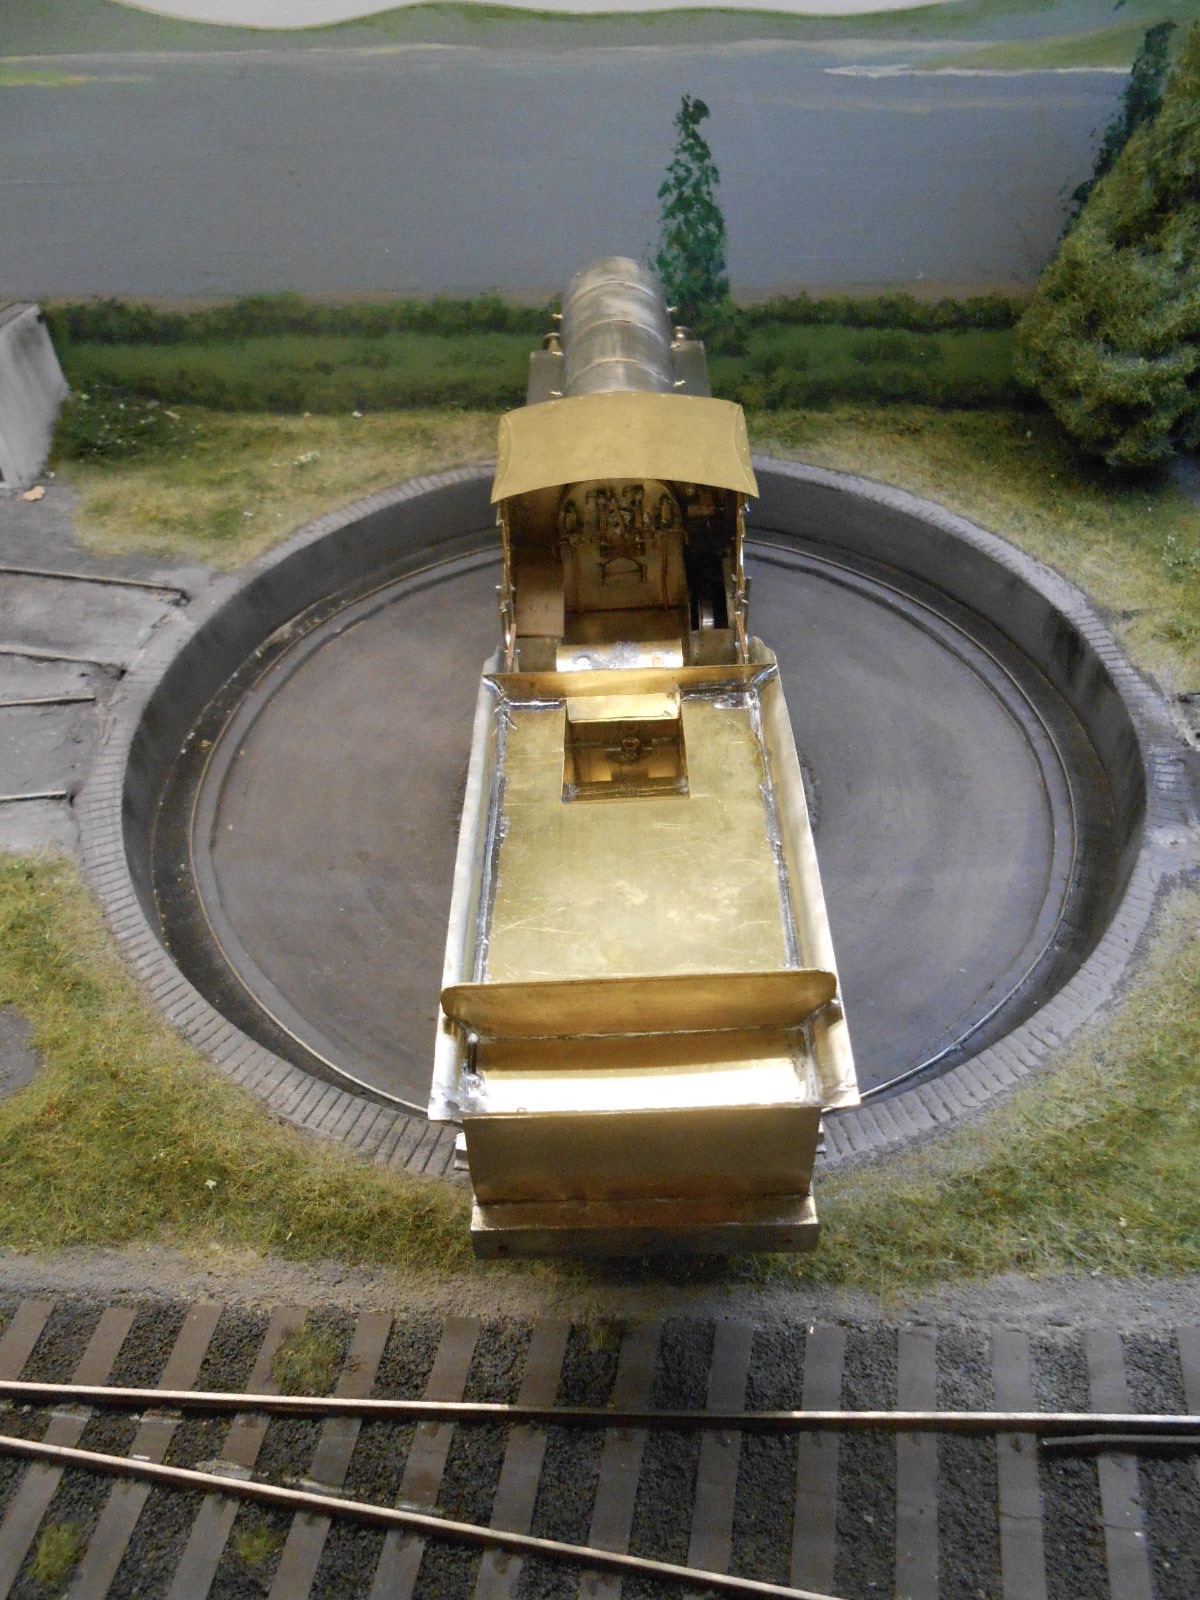
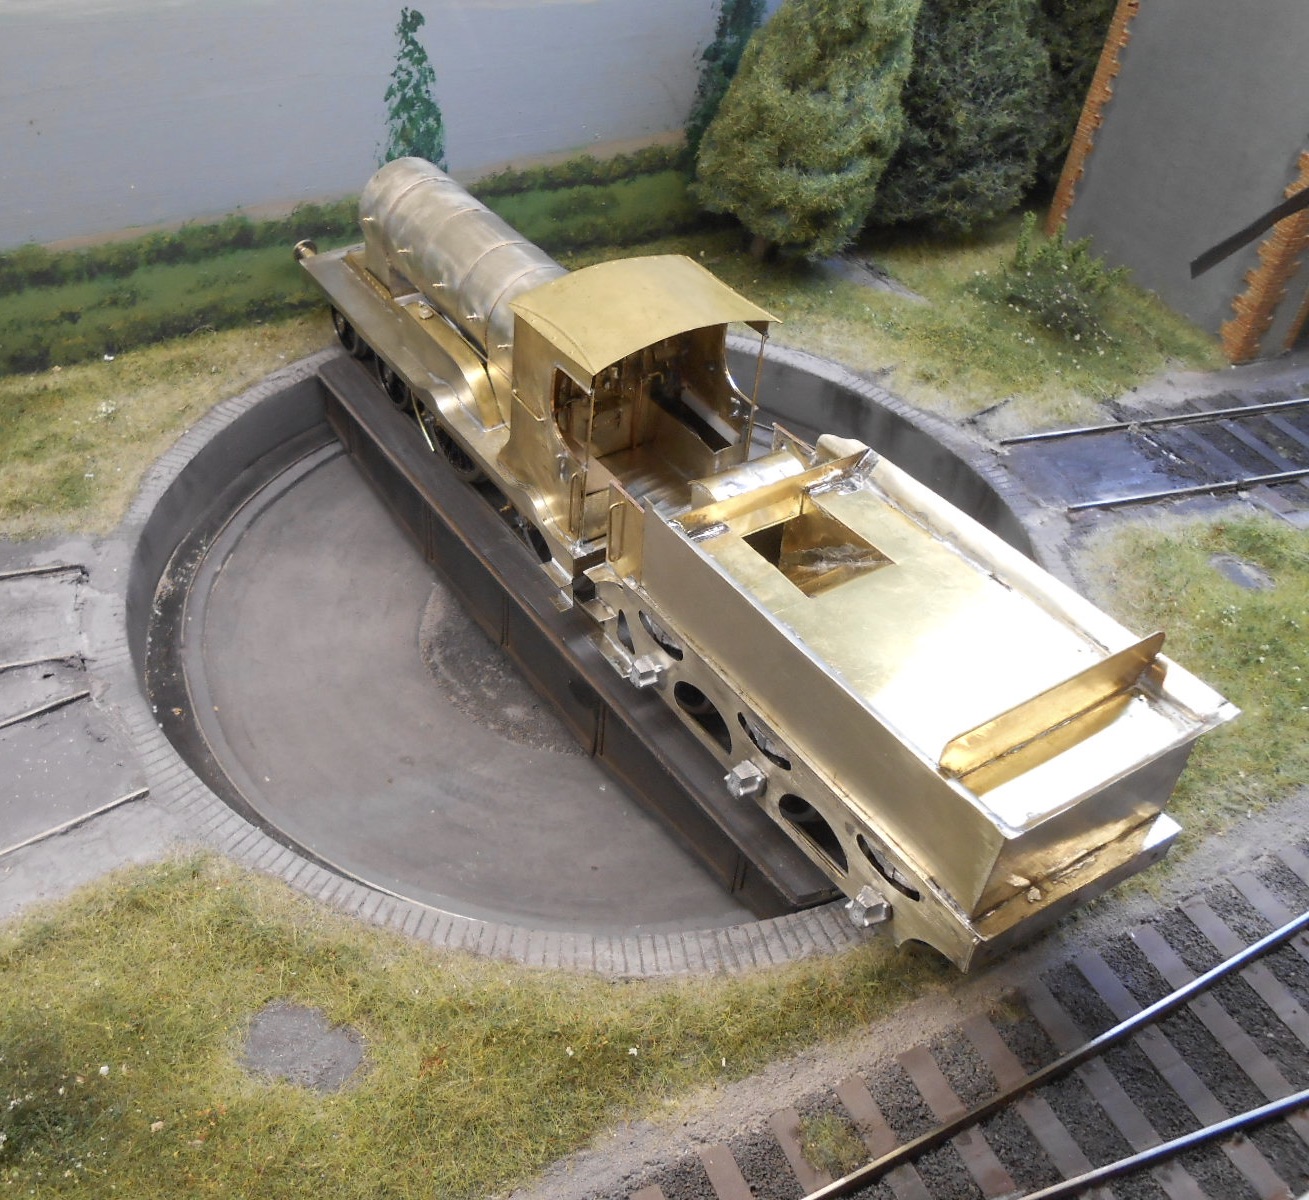
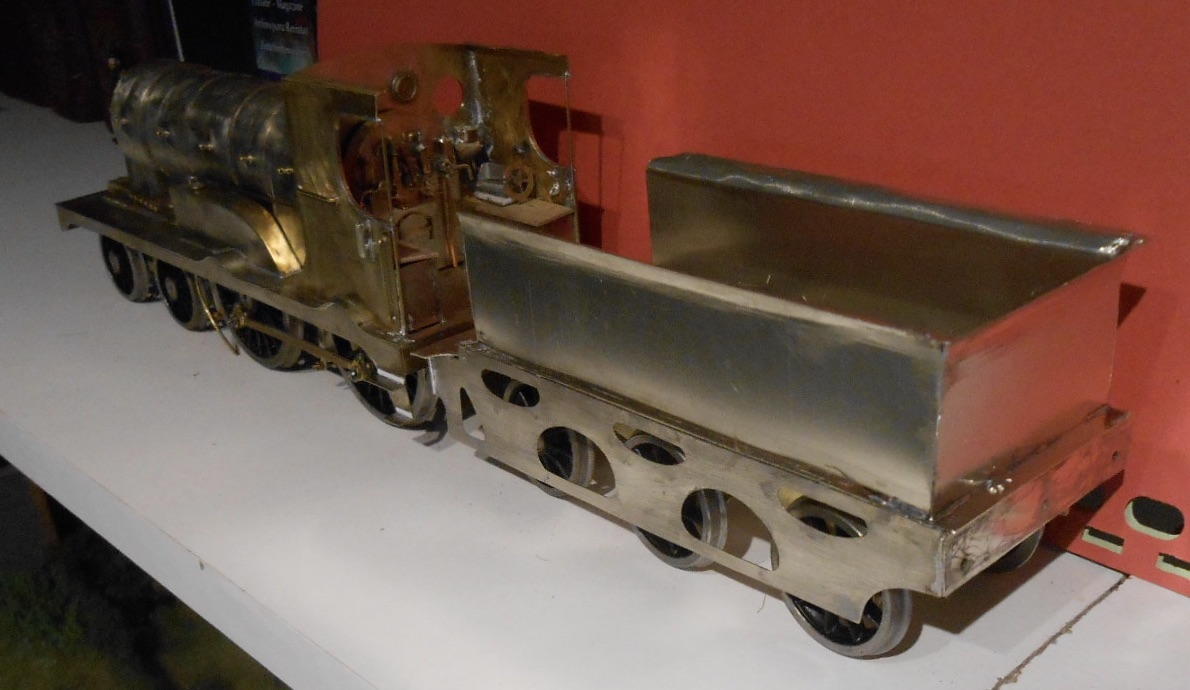
Slow progress on the D16, as is often the case with detailing. Many thanks to those who have provided help with info on the tender, especially Leslie [of the Syndicate] and Mayner. I think I've got the general idea for the front, though it still needs the timber cladding to be added. The overall shape is quite complex, so much faffing about has gone on with various shapes cut from thin brass and nickel silver. Other tender detailing has included the axles boxes and springs. The former came from butchered white metal wagon W irons, while the latter came from the scrapbox. Neither are perfect, but hopefully pass muster for now. The loco buffers are the result of my first experiments with the new lathe. The main body is 6mm brass tube first tapered with the cutting tool, then finished with files and sanding sticks.. Next drilled the narrow end to take 1.6mm brass tube, which was itself drilled out 1.2mm to take a drawing pin for the actual buffer head. This was turned down to 8mm diameter using files in the chuck of a mini drill. Crude, but it seems to work. This assembly was then soldered to a square of brass, with a rivet punched in each corner and then the whole thing stuck to the buffer beam with 5 minute epoxy. Am quite pleased with the result, not least because it shows how a complex shape can be created by breaking it down into basic sub sections. However, the buffers are nearly a scale two feet long overall, which caused a minor panic when I tried the loco and tender on the turntable. As can be seen from the photos, clearances are [very] tight, but it will just fit - albeit invoking the Westport rule again as, like that prototype, the loco will foul the running line when being turned.

- 124 replies
-
- 11
-

-

-
“Locomotives of the GSWR” by McMahon, Clements & O’Rourke
David Holman replied to jhb171achill's topic in General Chat
I'm terrified of Ikea as a whole for the same reason. -
Very much the Beyer Peacock face. Those rivets just keep on coming, don't they!
-
All gleaned from the good Mr Gravett. If you've seen Arun Quay, you'd never believe there was a join down the middle, such is the way he's used the car body filler. There's always Iain Rice's jigsaw joins, but they don't lend themselves to crating up for transport.
-
As it is a slate roof, I'd be tempted to use either strips of photocopier paper, snipped every 4mm, or one of the downloaded printed sheets.
-
Top quality running! The track looks really good too.
- 490 replies
-
- 1
-

-
- ballyercall
- layout
- (and 1 more)
-
Fantastic! Reeks of atmosphere and feel sure Pat Whitehouse must be lurking somewhere.
-
Good to know there were slips, Paul. As for the backscene joins, nothing fancy here, I just hide them behind trees or buildings. Another trick on a painted backscene is include a church spire or similar, with the join between two angles coinciding with the baseboard join. Easy on a made up layout, where you can choose where to put things, but less so if copying a prototype, where there may be no convenient view blocker to use. That said, the backscene doesn't have to line up with the baseboard joint, while following the likes of Gorden Gravett, one could always use roller blind material to make a full length backscene. Bit of a faff to set up at shows though. Check out my Fintonagh thread where I've used many of these tricks to hide the join.
-
21mm gauge track; the pros and cons?
David Holman replied to jhb171achill's topic in Irish Model Layouts
31x10? Sounds wonderful! Enjoy! -
Thanks Eoin, have been looking at the Banggood site, so much checkout Arcueurotrade too. Another bit of learning as I go along!
-
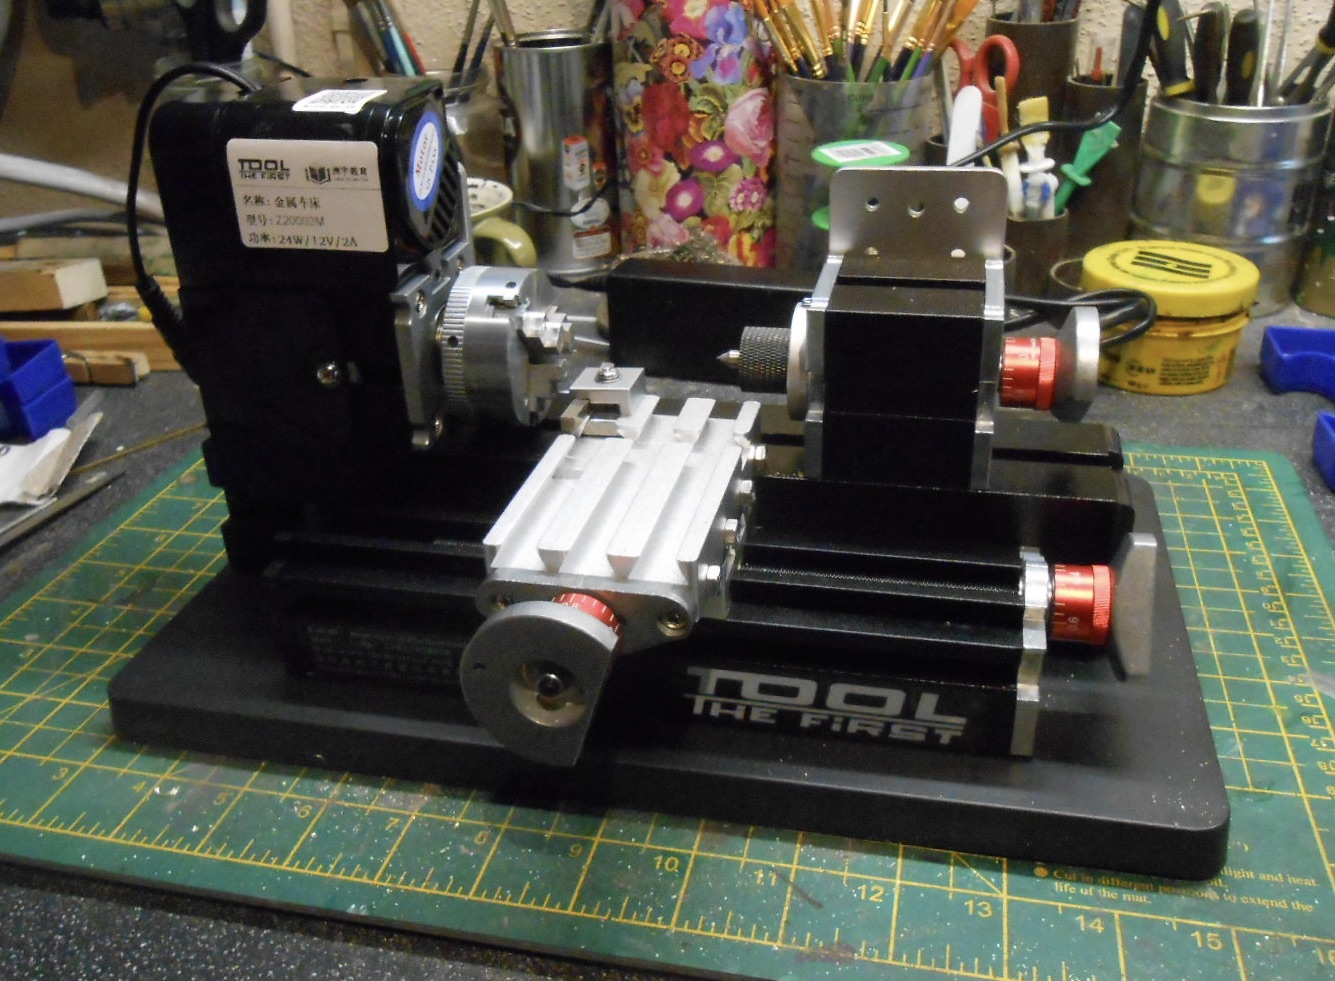
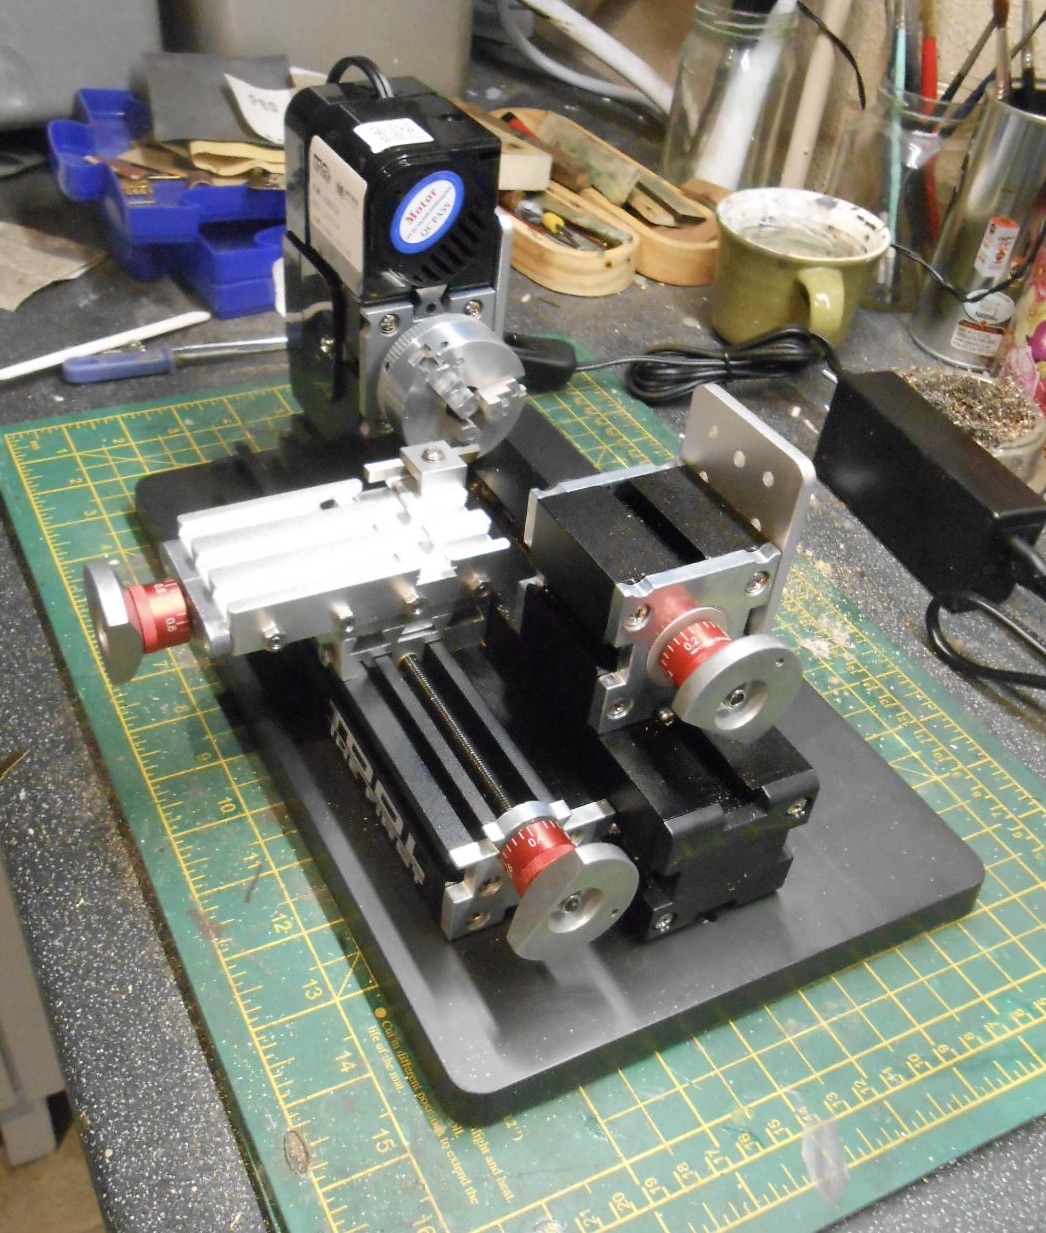
New Toy I now own a lathe! Ok, probably a good idea for proper workshop people to look away now, because this is certainly no Cowan's, or even a Unimat. And it is small too, with a footprint barely bigger than a sheet of A4, but it only cost me £200, a third of the price of a Unimat or Proxxon and, fingers crossed, will do what I need. Had spent several weeks before Christmas musing over this 'mini lathe', which comes from the land of Amazon, aka China. The bed is max 135mm and the largest diameter it will turn is 50mm, but given that what I want it for is to do things like chimneys, domes, buffers and so on, then this should be more than enough, plus it is rated as man enough for brass and aluminium. It took me several weeks before I took the plunge, because I couldn't decide whether it was better to: a] do nothing, because my model club has a proper lathe b] spend real money on a 'proper' lathe or c] take a chance on this basic machine In the end, another Lockdown sort of forced my hand, as I can't see me getting down the club until Easter, plus the reviews I read of the Proton and Unimat machines didn't suggest that spending the extra money would ultimately do any more than this model. Time will tell... I wasn't expecting it to arrive for at least another week, so was somewhat surprised to be given a well wrapped box which my wife had found in the garden waste bin! Usually on these mail order things, you get multiple alerts on line and by text, telling you of progress - as per the new LSWR locomotives book. Just as well we did some gardening, prior to the bin men coming on Monday. From the Amazon web pages, it appeared that it would be a kit of parts, but everything comes pretty well assembled and it just needed bolting to the baseplate. However, instructions left a bit to be desired, so for once, I resisted my usual temptation to set up and start using immediately and instead reached once more for Geoff Holt's loco building book [part two] where he takes you through basic lathe operation. Indeed, it was from reading this in the first place that I decided that a small lathe might be something I could cope with - plus this mini lathe certainly isn't going to take up much storage space. The only problem this morning, when it at last was time to have a go, was finding suitable material to turn, not least because my order of brass road from Eileen's hasn't arrived yet. Eventually, managed to find some 5mm brass rod and, carefully following instructions in Geoff's book was able to spend a happy hour reducing the rod in diameter in various ways. Have since managed to turn two tapered buffer shanks for the D16. The main downsides thus far is there doesn't appear to be an option to add a drill collet to the tailstock and there is only a single cutting tool, which currently makes 'parting off' difficult. Hence, need to go on line to see what I can find, but even so, am confident I should be able to use my little lathe to turn up things like chimneys, domes and the like, while it is certainly happy enough with brass. Guess the main question will be how robust and long lived it will be, but hopefully, if I treat it carefully, I should get some good use out of it.
-
21mm gauge track; the pros and cons?
David Holman replied to jhb171achill's topic in Irish Model Layouts
Makes sense to me Phil. If you really want the gauge to look right, then Irish EM is a sensible compromise. Yes, P4 has been shown to work well in 'standard' gauge, but it is arguable that it took many years to get there and many exhibition visitors will attest to the fact that layouts that ran well in the early days were pretty rare in P4. There are many more aids available now, especially through the Society, but the facts remain that an extra degree of skill is required to make P4 work compared to EM. Some may disagree with this and I'll be the first to apologise if I'm wrong! My own experience is that I started off in EM, with no prior experience, and was able to build an effective exhibition layout having only basic tools and no prior workshop skills whatsoever. One of the most important aspects of doing Irish EM for me is that wagons, coaches and especially RTR diesels are fairly easy to adapt. Yes, track has to be hand made, but even then, C&L do point kits, with ready made crossing vees and machined point blades. While neither of which are that difficult to make, if you've not done it before, then a kit is a great way to learn, not least because there are instructions to follow. The key component is of course the track gauge, so finding someone to do a suitable roller gauge is essential. After that, there is nothing that should deter an enthusiastic beginner. A final thought, which I read somewhere recently is that when you buy something, you are the owner, but when you make something you become a creator and I rather like that! -
“Locomotives of the GSWR” by McMahon, Clements & O’Rourke
David Holman replied to jhb171achill's topic in General Chat
Just arrived! A hefty tome and first impressions say to me that this is a genuinely academic piece of work, work by of a doctorate of PhD. Arise therefore professors Clements, McMahon and O'Rourke! -
21mm gauge track; the pros and cons?
David Holman replied to jhb171achill's topic in Irish Model Layouts
There are a few things to consider with track beyond getting the gauge right. As Galteemore shows, ballasting and weathering make a huge difference, but choose you rail carefully too. Am fairly sure Rosses Point uses Code 100 flat bottomed rail, same as Belmullet, whereas the norm in 7mms scale is Code 124. Years ago, did an 0 gauge light railway with Code 100 track and got asked several times at shows if it was broad gauge, so just goes to show the effect of finer rail. Indeed, Peco 75 makes a big difference compared to 100. - though the improved sleeper spacing help too. Overall, for standard gauge, never mind broad gauge, Peco 100 is probably the least good option, followed by their 75, then the likes of EM and P4. For those who are too committed to 00, or just happy with the compromise, reducing the viewing angle helps a lot, as does careful ballasting and painting the rails and track the right colours. Things anyone should be able to do and probably a key step in turning a train set into a model railway. It remains however down to the individual and as long as you enjoy it, that is all that matters. No prizes for guessing where my own preferences lie of course! -
All looks good fun.
-
Indeed, though love frog points and impeccable cleaning will be important. Might be a challenge to make 21mm gauge!
-
Plus the nearest track seems at a slightly higher level, which also makes a difference.
-
“Locomotives of the GSWR” by McMahon, Clements & O’Rourke
David Holman replied to jhb171achill's topic in General Chat
Mine too - expected tomorrow! -
You could always cut the roofs off, add some internal and external bracing (plus a repaint and considerable weathering) - then Robert is your father's brother and a turf train emerges!
-
Wow, thanks Leslie. That picture is in Rails to Achill and I've been trying to look at it with a magnifier, but this is much better.
-
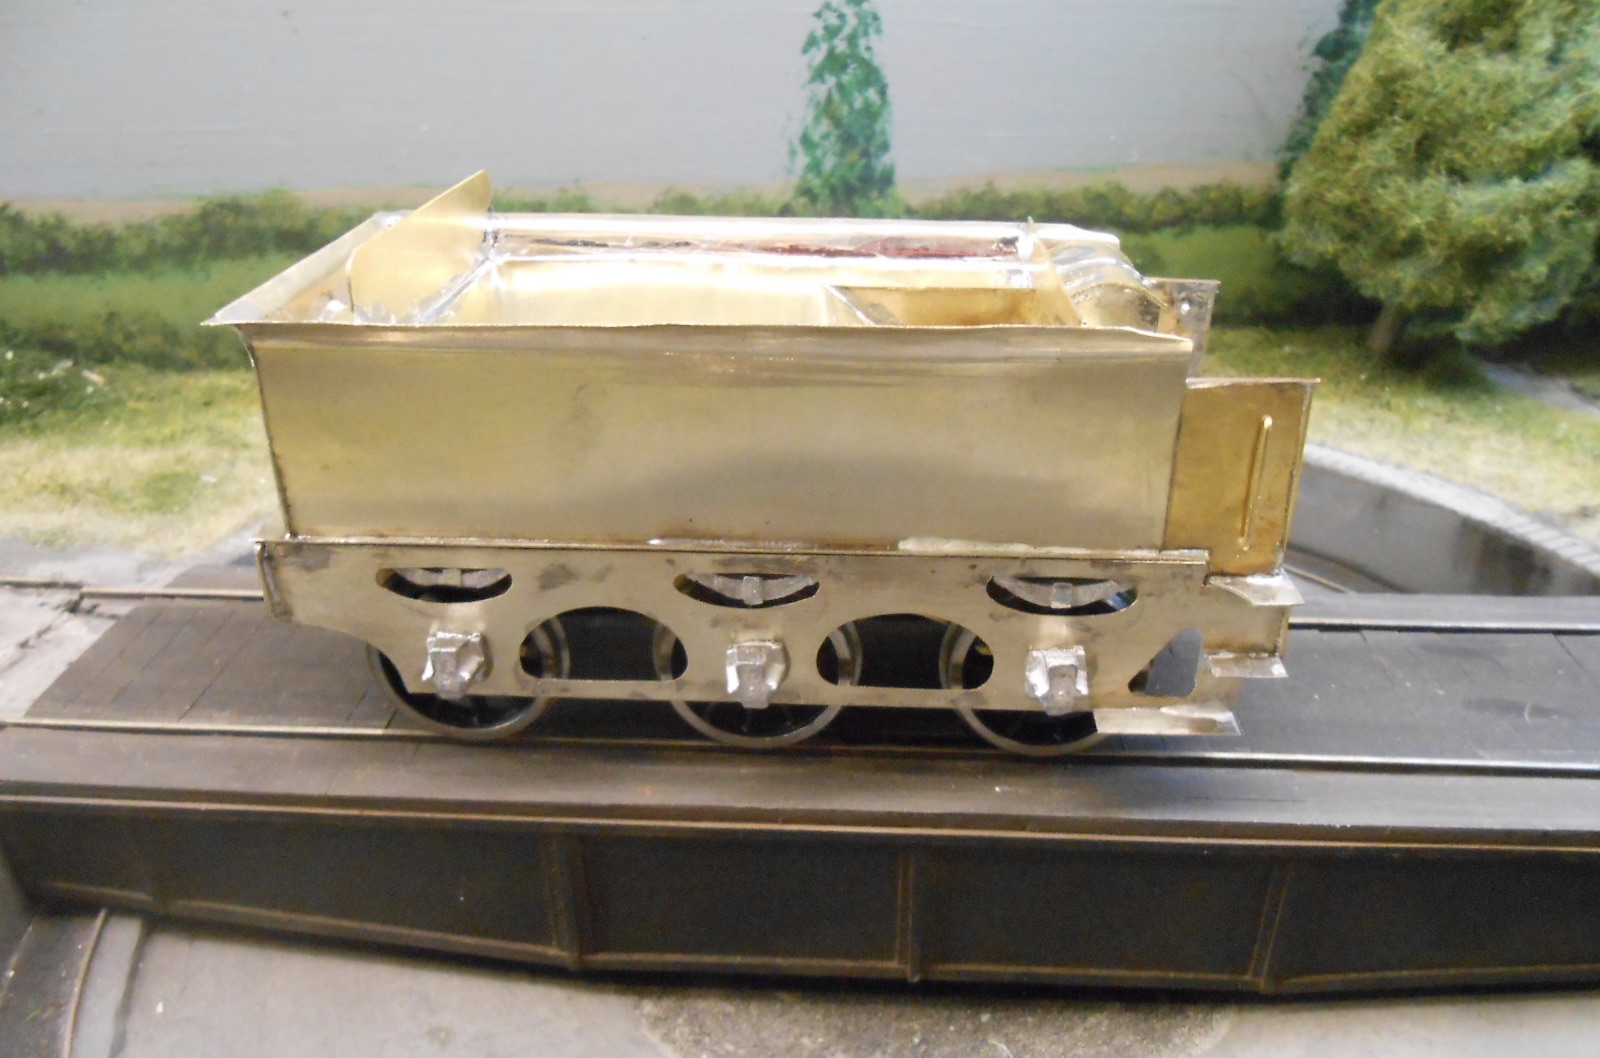
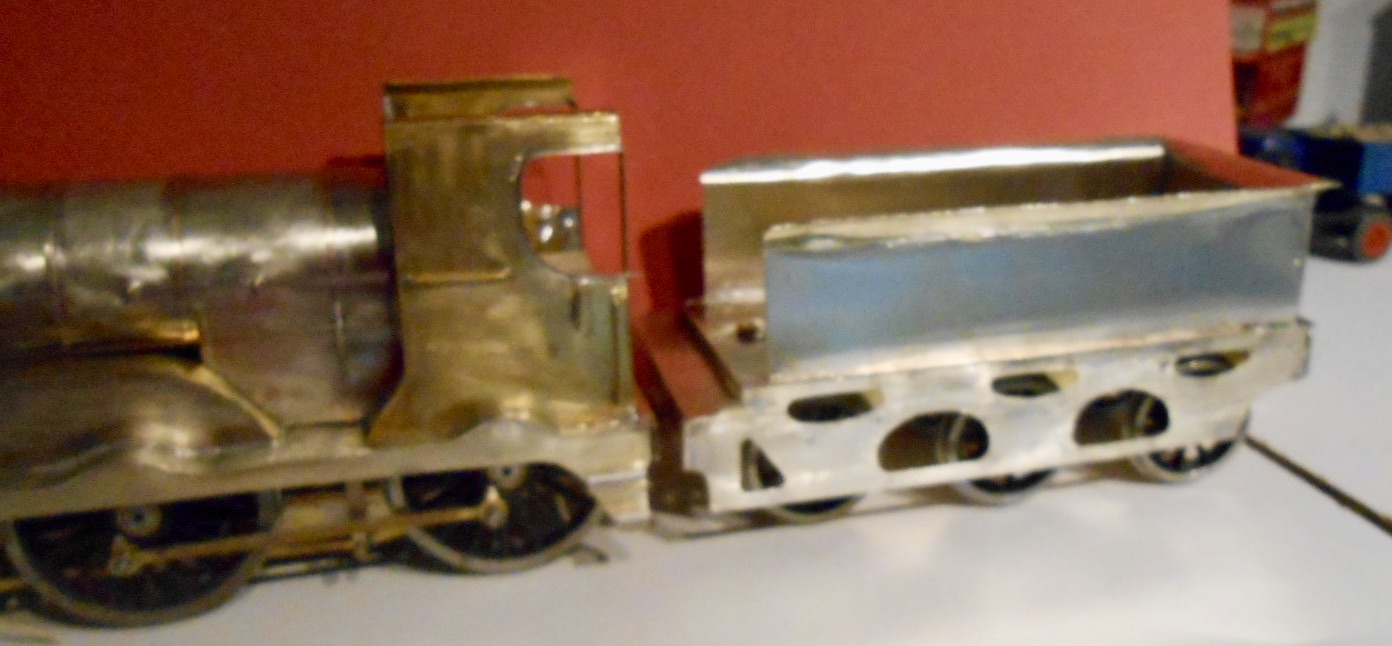
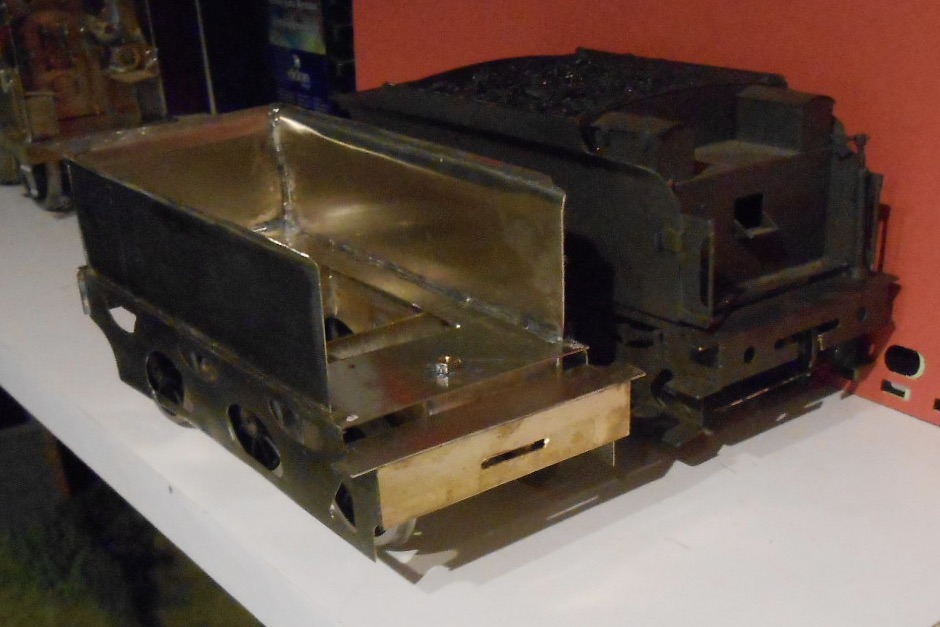
We had the first bit of sunshine this year today, after three solid days of it raining cats and dogs and donkeys. Don't you folk over the water tell me it was just a soft day - it's been 'orrible. The upshot of the grim weather is plenty of modelling time - plus the fact that, in lockdown again, we can't go anywhere either. Oh well. So, did some more to the tender. Had thought I'd got through most of the challenging bits, but had forgotten about the outside frames - five lozenge shaped holes and one rounded triangular one each side. Did the usual two bits of 10 thou NS soldered together and then proceeded to drill a few holes so I could fret out these awkward shapes. Five minutes and five broken saw blades later, finally realised that the two pieces of metal were not completely joined in the middle, which caused the saw blades to catch and break. Plan B turned out to be a bit drastic, as I used a slitting disc in the Dremel to cut slots in each lozenge shape, so I could then nibble out enough space with the Xuron cutters to get a file in to finish off. Some unwanted excitement with the Dremel as I didn't properly tighten the collet, which caused the mandrill to vibrate and it actually then bent at right angles and flew off across the workshop. Fortunately no damage done, apart from needing a new mandrill. A friend who volunteers at the Kent & East Sussex wasn't as lucky before Christmas when a piece of clothing got caught in one of the big lathes, so he is now nursing a broken arm, cracked kneecap and multiple abrasions. Safety first, methinks... It took two goes to add the outside frames to the tender footplate, because I initially made the latter a scale foot too wide. Second lesson of course - measure twice, cut once. Have since completed the the two upper sides and rear, while also adding captive nuts, front and rear, to act as fixing points for the body and chassis. Now, for those of you who have read this far, a question, please. Does anybody know what the front [cab end] of the tender looks like? The GSR Green Bible tells us that D16s had the Type R tender, which is not entirely unlike the ones used with the J18/19 and G2 classes, but it seems to lack the vertical plate at the front, which presumably stopped the coal sliding into the cab. There don't appear to be any tool boxes sitting on top of the tender either, though, so far, I can't find and pictures showing whether there was a coal chute on the tender front, or if the fireman simply shovelled the coal from the top. Any thoughts and info welcome, please and apologies for the poor photos, one of which shows the Z type from my G2.
-
Am sure there are many of us who would be interested in that.
-
That or witchcraft.