murrayec
-
Posts
2,735 -
Joined
-
Last visited
-
Days Won
70
Content Type
Profiles
Forums
Events
Gallery
Blogs
Community Map
Everything posted by murrayec
-

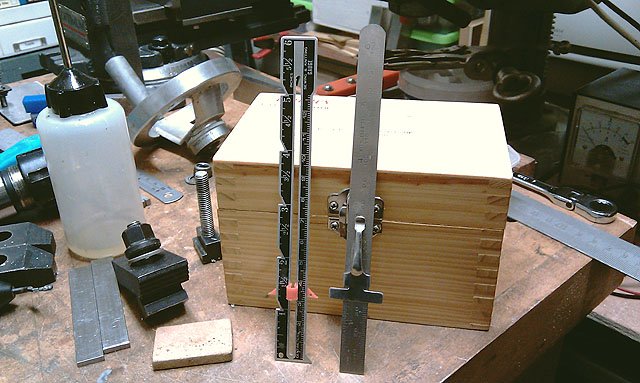
Masking tip - aligning tape height for livery bands
murrayec replied to Noel's topic in Tips & Tricks
Hi Noel There is a very handy tool for this- a height gauge;- Full engineering model at around €100.00 it's nice and compact at 150mm high Or the economic versions, on the right is a Draper rule with height gauge at €5.00 and on the left is a Hickeys sewing gauge at less than a €5.00- the Hickeys has a plastic height gauge which is good for model protection from scratches and you can measure your sewing stitches with it!! Eoin
-
Hi JHB Some time back myself and Mr Tierney- refer back in this thread, made representation to the Minister, the custodians, the local authority and the friends of the Fry Model- all to no avail. In my submission in the planning process I again offered assistance- I reckon what happened in the past has made the custodians vary guarded and they feel we just want to take away their goodies! With the limited size of the proposed facility I reckon the complete Fry Collection just will not fit. The hall for a Gauge 0 layout is restrictive in size, so as you say a Gauge 00 layout would seem more appropriate, of course there could be a O track incorporated to allow Fry Models run on special occasions- maybe! This would be sad and disappointing, but for the patrons that visit the new facility- they would not know the difference! Eoin
-
See here Noel The layout stock that ran in the Castle was more Mr Tadhg's than Fry, the majority of the Fry models were in the display cases and storage- some of his diesels ran on the layout until they wore out the WM wheels..... Eoin
-
Hi Borithe Add 2 years to the 50- a French man in America flew his- well it actually looked like a boat, 2 years before the W Brothers. I reckon the record books didn't credit him because he wasn't true American- if there is such a thing (not including the Indians in that) Eoin
-
Hi JHB I do stuff like that- drawings to cad, cut stuff out, make moulds to cast more, but time is the problem! A man gave me a box of kits to build n paint- I think you know him! so cannot look at anything major for years, but do pm me and let me know what you thinking..... Eoin
-
Wow David Your elbow grease has done wonders Eoin
-
Not to be opened until Wednesday morning What it could have been like if they stayed..... Eoin
-
Ah aliens did play trains then,.... Michael Tsarian wrote a book about his theory on Newgrange;- the mound was a landing pad for the space ship that landed there and seeded earth civilisation from there many moons ago! It always puzzled me- who built the mound before the space ship landed? Oh hail the Messiah Let me see if I can whip out an early birthday card....... Eoin
-
Hi Borithe Ah there you go, alien technology- it is a message in the hggle-de-biddly (alien spelling) paving on the platform Look out for sparks from the top of that, you know they used them for transmitting electricity and having telephone conversations with Orion!! Dam aliens leaving messages all over the place Hay! I wonder did they build trains? Eoin
-
Excellent Broithe Are there any pyramids close by? if so it must be aliens Eoin
-
Well now that's 'just amazing'! someone is very interested in his/her job!, or he cant spell, or do Irish, or colour blind- they even got the soldier course wrong. Eoin
-
Hi MikeO An excellent model, more than 'passable' and 'reasonable'- it's brilliant next- now to get it up to an 8 coach Eoin
-
Hi Broithe Not sure about a flywheel, have to wait till he has a look- the blown motor had the shaft completely cut back! and not sure about the make of track he gave it to me for testing, it's nicely made with the metal shoes and slim sleepers but the rails are a bit chunky to my eye, though I will ask on make and report back... Eoin
-
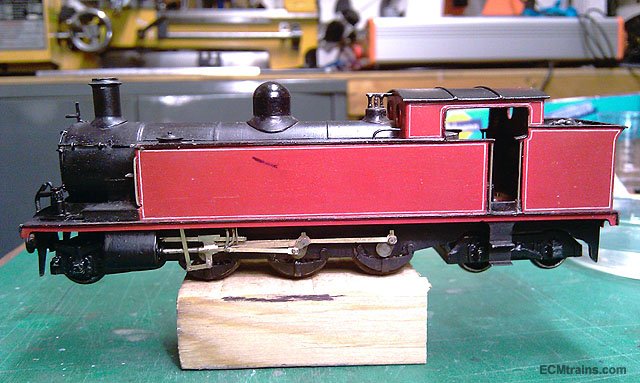
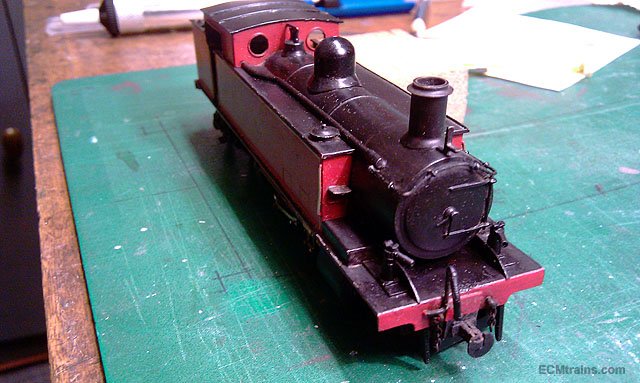
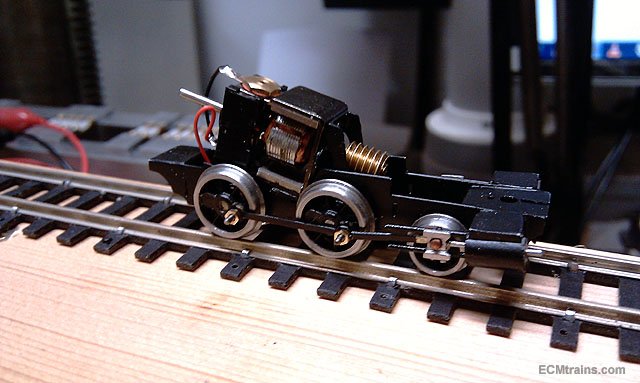
Here's a couple for the gallery, a chap is modelling OOn3 and I had them in the shop for repairs;- A lovely Class 5 Tank requiring attention to dropped valve gear and a 2-4-0 chassis requiring a new motor and full restoration, not sure what goes on top of this! but this might spur him on to post up pictures of other stuff? Eoin
-
until
-
Hi All Next Fair;-
-
Hi MikeO Keep an eye on here, when I do the longer units and work out the cover I'll be posting options and prices Eoin
-
Hi Borithe I do have a design for doing that- the Greystones Layout originally had an elevator storage yard but the powers that be decided against it, it will surface elsewhere in the future! Eoin
-
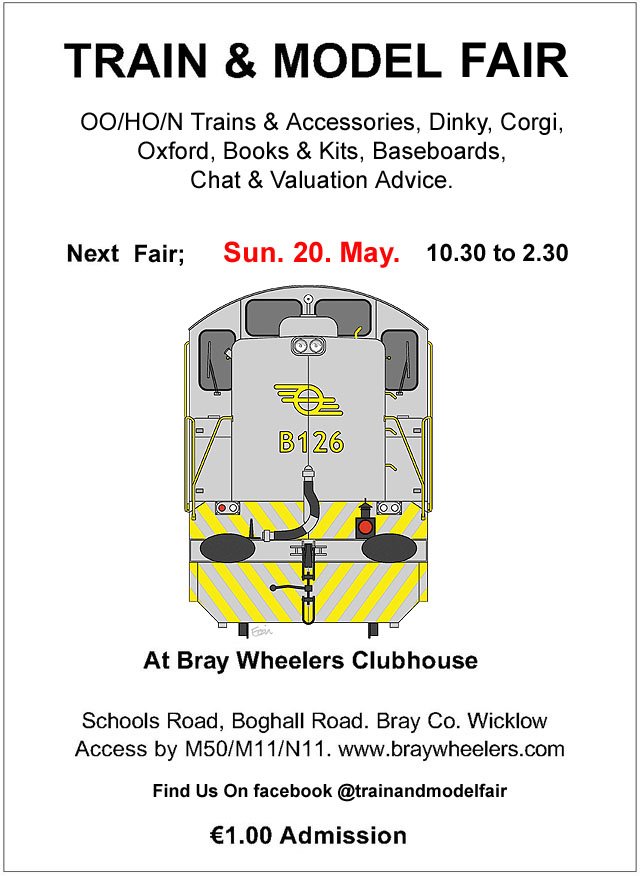
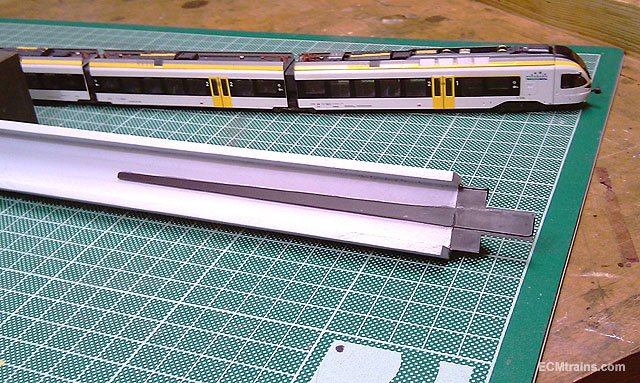
Hi Here is my prototype Storage Cassette, I have made this for a chap who has a number of slinky long trains on his layout, every time he goes to remove them from the track another coupler breaks or springs go flying- as for the Tram in the photos! It is also a manual loader to get the trains off/on the track without lifting them- one drives the train backwards into the cassette until the motor bogie disconnects from the track and then its pushed by hand the rest of the way, going onto the track is the reverse. Each cassette with train in can be stored on shelves to the side...... This one is 610mm long and will be used for testing the idea, the next ones will be much longer for ICE and Eurostar trains and will incorporate a mod to the loader- which will be recessed in the base so the sides of the cassette will protect it. Perspex covers will be available also so the dust will be kept at bay and the trains can be transported in the cassette- though adds to the work & cost Design work still in progress....... Eoin
-
Hi David If it was me I would leave all as is, except for the coal load I would upgrade, give it a good clean n oil and then treasure the model in its current condition..... Eoin
-
Hi David Congrats on your purchase, you have a fine piece of model history there, also delighted to see it added to the history your making with this layout and stock. I browsed through the brochure also and was very tempted on one or three items but decided to hold off as the Midland Railway Centre announced another run on their 12in. precision guillotine which I reckon I'll go for instead....... Eoin
-
Hi John These sheds are generally leased out to local business for storage or to run business from like a fabrication shop if not used by CIE themselves. I know a chap who ran a manufacturing company in a leased loco shed in Dublin for many years...... https://www.cie.ie/property.html I see a container at the far end of the shed, the ivy removal on the gable, the upper window coverings, and the infestation prevention leads me to believe the shed is used in some form or they wish to preserve it- though the ivy is working its way up again! The proprietor of this thread may have further information or photos to assist in this investigation....? Eoin
-
Hi Dave That's bird nesting and pigeon access prevention House Martins and Swallows love these kind of locations for nesting, and pigeons love the interiors to roost in, if they can find a way in they'll take over the place and do other things all over the place! And now with H&S rules it can be expensive to have the place cleaned up. Eoin
-
Is Tomytech TM21 a suitable Chassis for N scale 141?
murrayec replied to purple's question in Questions & Answers
Hi purple The TM-21 is about the right length, a 141 is about 82mm to cab fronts (at 1:148), but you'll have a problem with the 141 walkways between the cabs with a chassis that has stuff above footplate level and flush with the sides- the width needs to be 10 to 12mm max in this area to keep in scale and you'll have to allow for the thickness of the 3D print!! Eoin