KMCE
-
Posts
540 -
Joined
-
Last visited
-
Days Won
29
Content Type
Profiles
Forums
Events
Gallery
Blogs
Store
Community Map
Everything posted by KMCE
-
The photos were superb - this brings it to a whole new level. Fantastic!
-
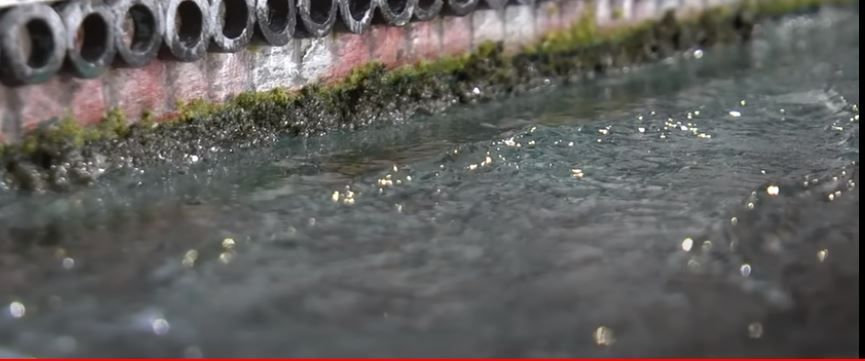
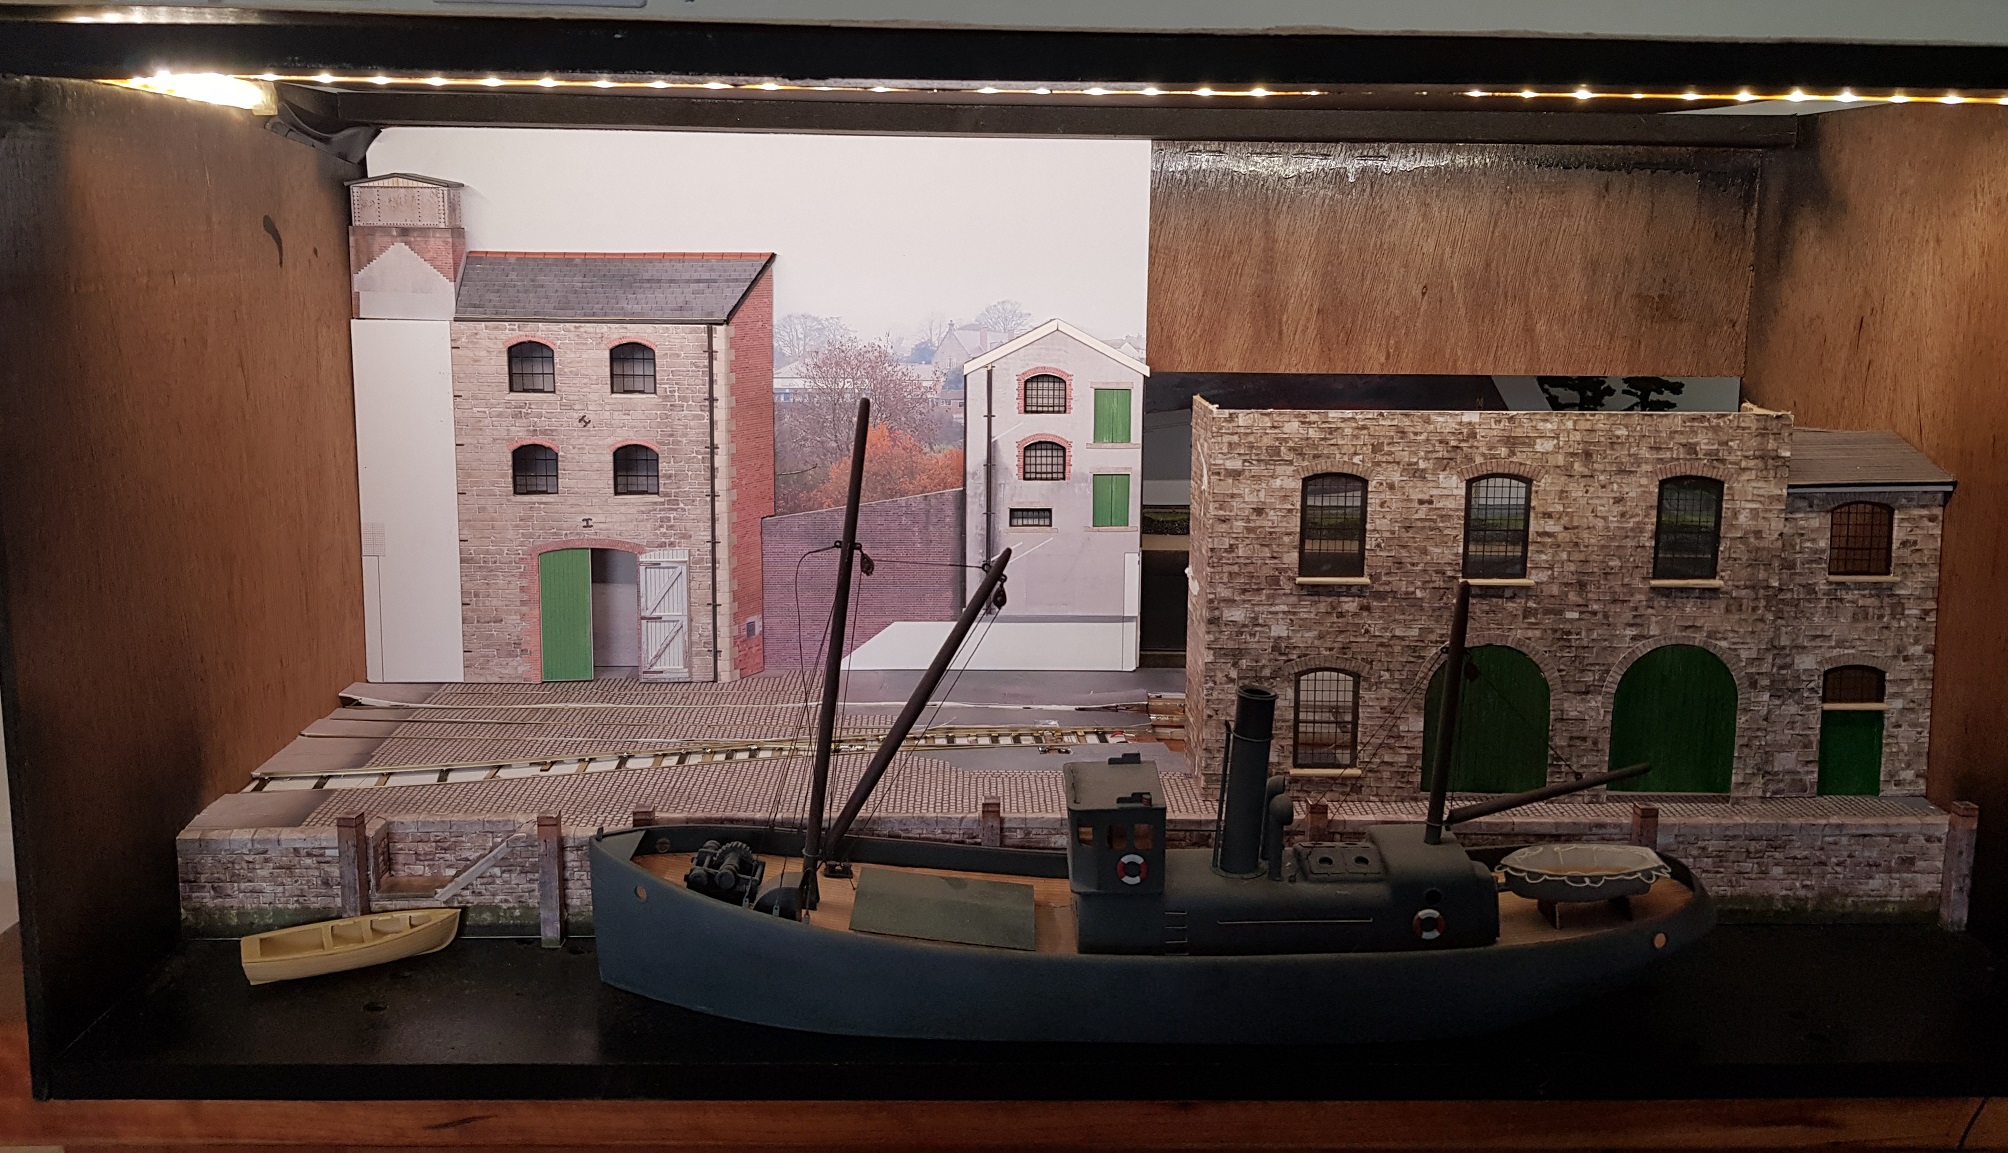
Ok, so a bit of progress. Some work done on the LHS building. Still more work to finish out the roof, etc. What does need work is the central column on the LHS buidling to accommodate the wider loading gauge; the point & track build makes the space for he front covered wagon too tight. Cutting the column back & recovering (thanks to being able to re-print the cover) solved the problem, howeever the doors will not fit - leaving them off is the easy solution! Sea detail is as per MarklinofSweeden (youtube) tutorial using PVA glue and toilet roll to create very realistic sea & waves. Painting and varnishing to be completed to get to a finish similar to this - hopefully!! Making progress. Anon, Ken

-
I wondered if the Wharf micro layout possible in 21mm. It is!
-
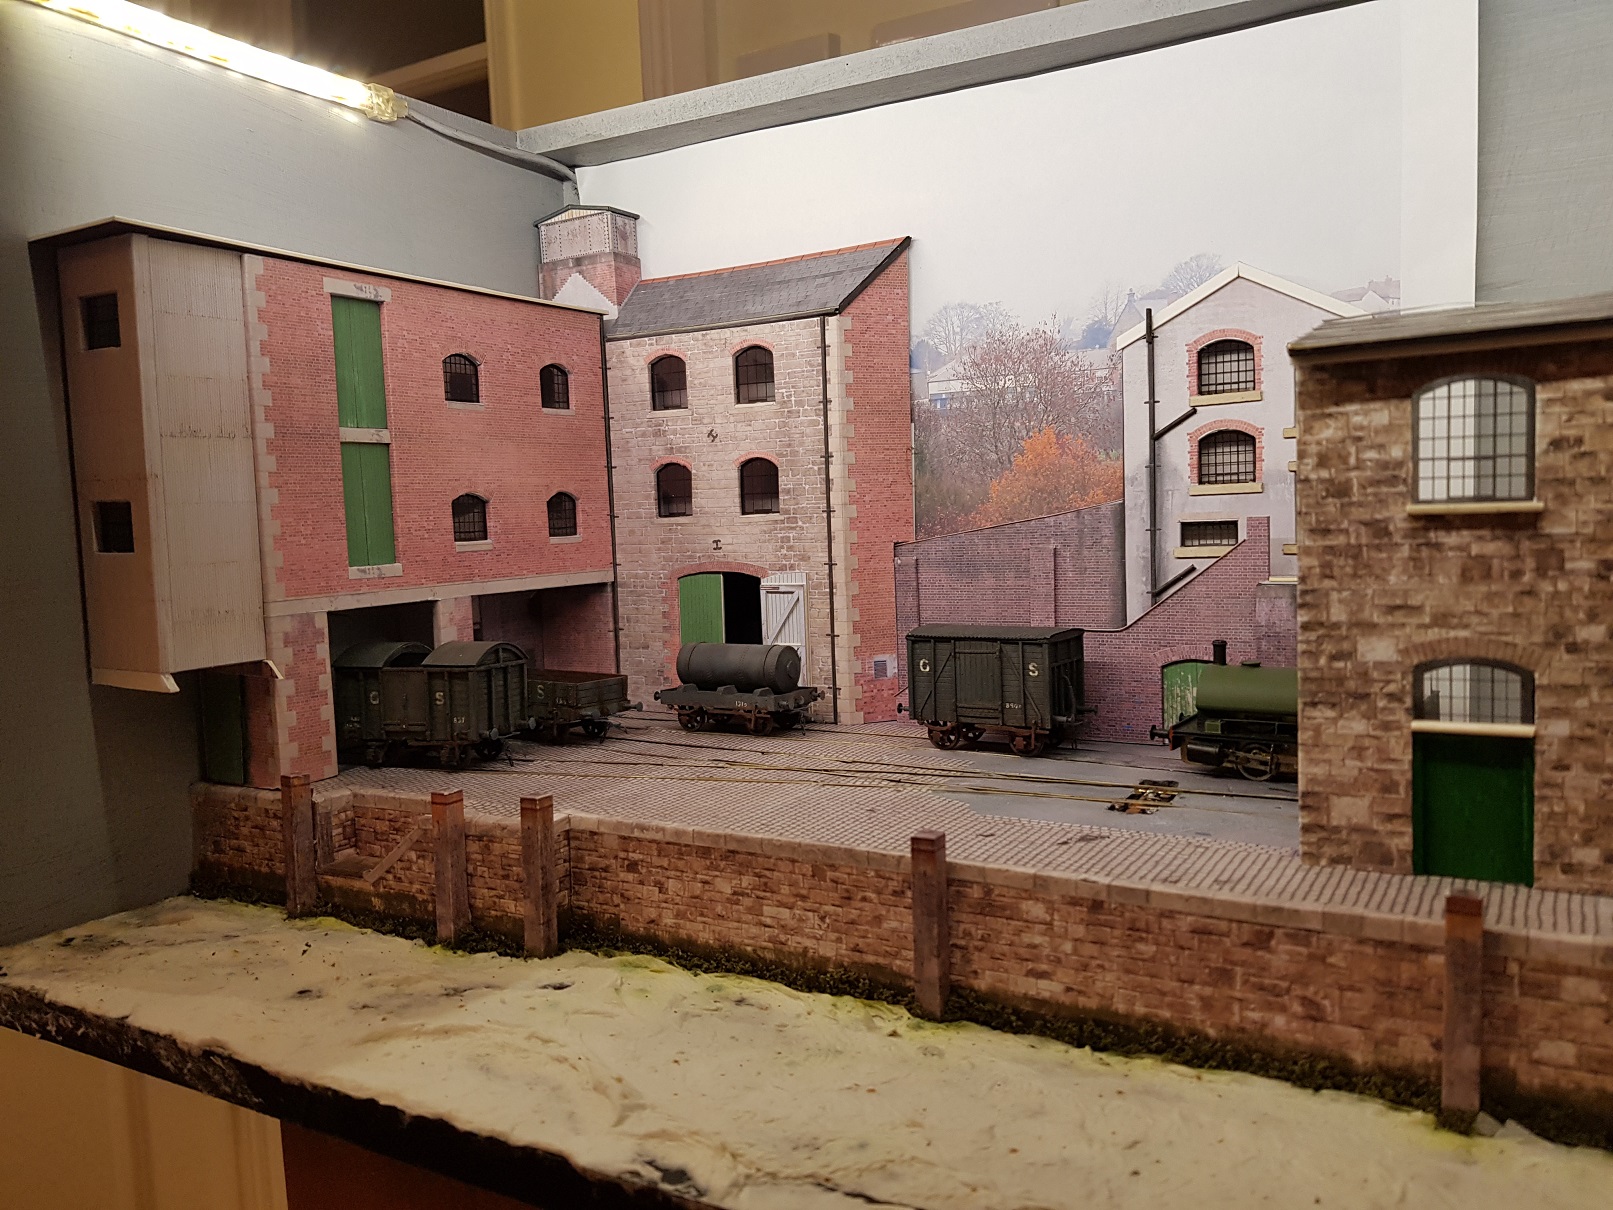
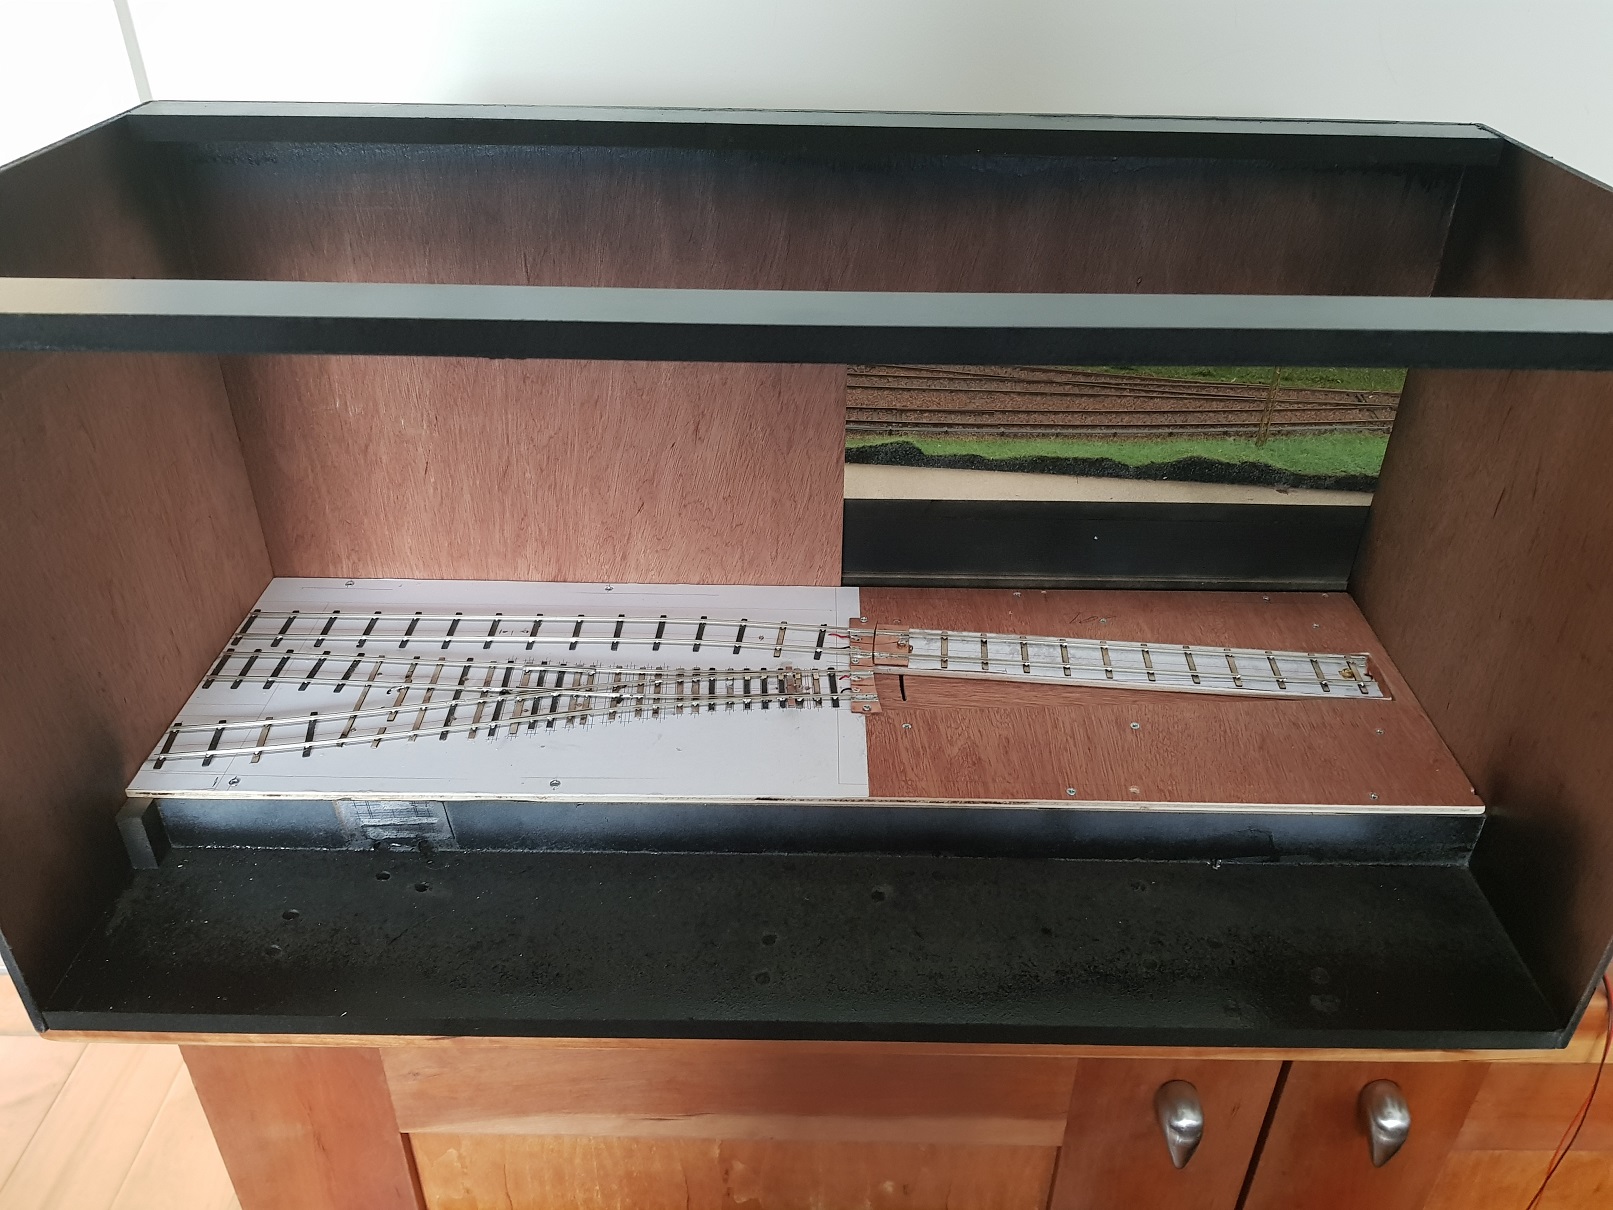
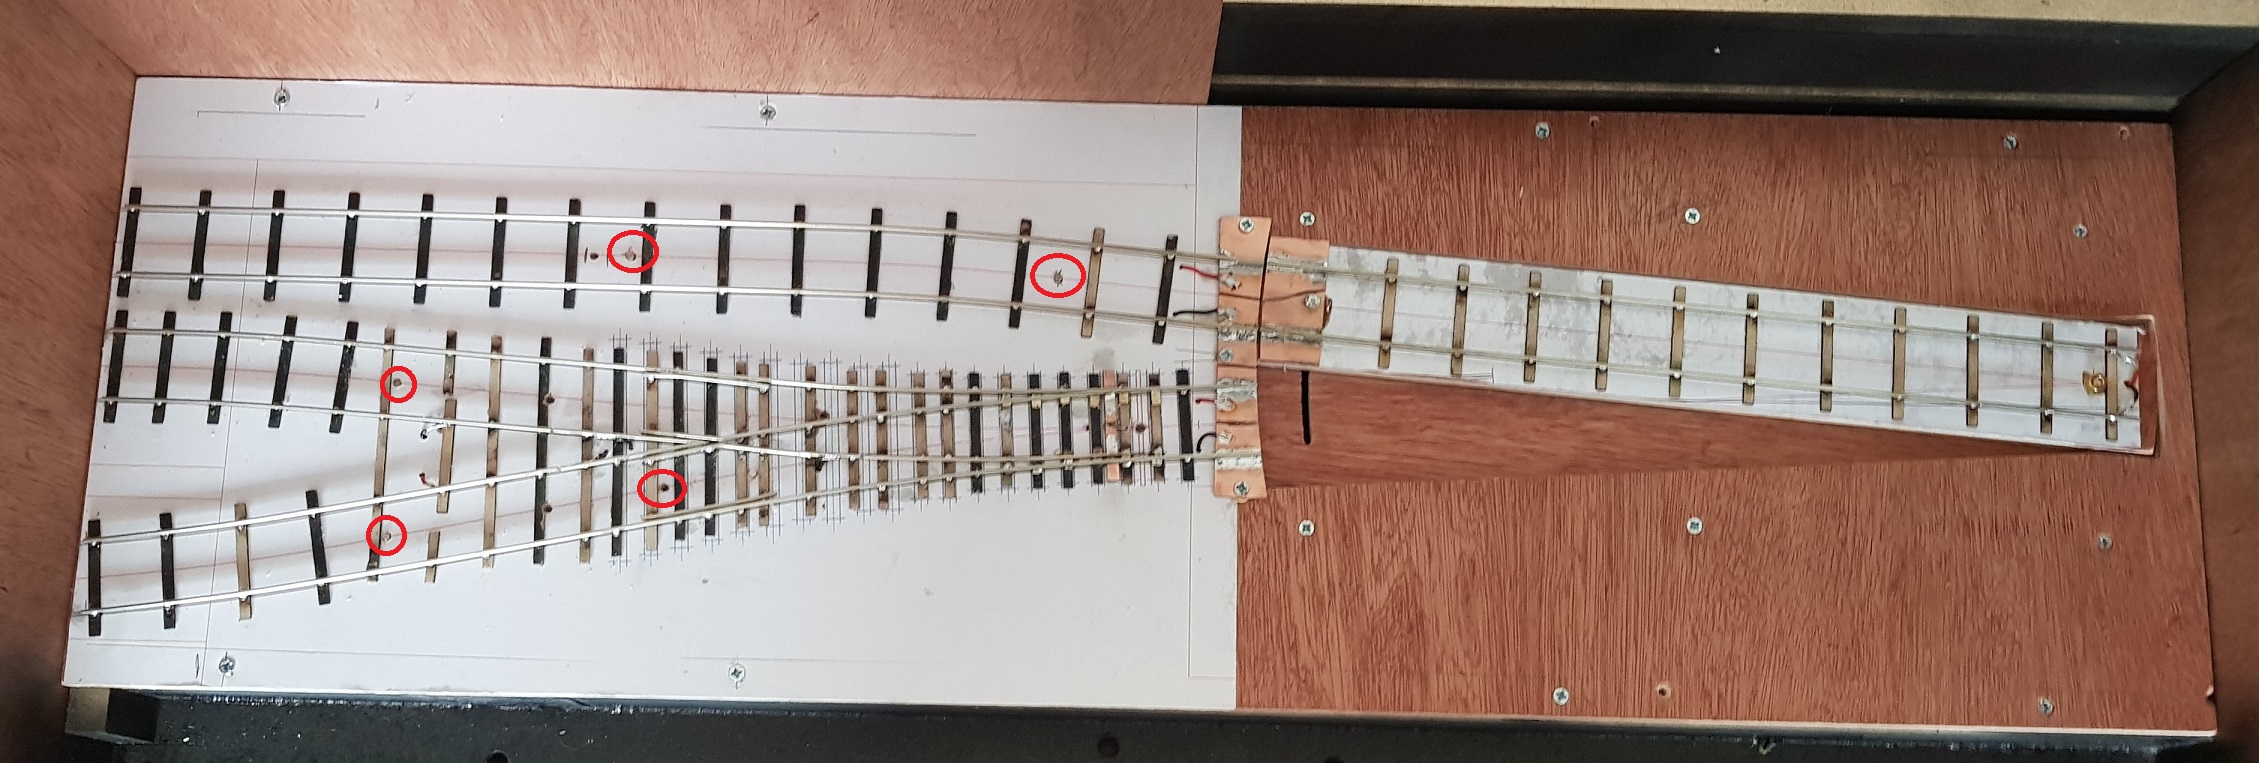
The brief discussion on micro layouts in the "Irish Models" section got me thinking. I rather liked that Canal Wharf micro layout by Scalescenes and decided to take a closer look at it https://scalescenes.com/product/ly02-canal-wharf-boxfile-layout/ and at £10 I though, why not? Question was, could it be done in 21mm - as it turns out, yes, and proves to be quite a shunting puzzle. The Scalescene layout in the box is of limited operational use, however they do recommend using a sector plate or traverser to provide some level of operation. I opted for the sector plate and incorporated it into a single layout, which will be twice the size of the scalescene proposal and I could use some other buildings to hide the sector plate. The wharf space was limited, and as I already had the dock scene from Scalescenes, I could extend the wharf and convert to a port - in this case a small fictious port somewhere in Ireland. As the track will be covered by the kit base scene, there was no need to provide all the sleepering - just enough to hold the track in position. A Y-point was created, and even though it is short, it has the equalivent of 800mm radius (as does all the track) which means locos & wagons travel through quite well. This was wired up for DC (or as the layout is so small, it could be DCC). Sector plate will be operated by a simple push rod, as will the point. Uncoupling positions (magnets) are noted by the circles and the layout operates with 4 short wagons. Each small siding can only hold one wagon without fouling the points, while the top road can just about hold all four wagons. Sector plate can hold the loco and two wagons, so shunting options are quite limited. By using the uncoupling position on the point exit, it is possible to make up trains of 3 on the long road, from the 4 wagons and still provide quite a challenge. This is then put into a box to contain the scene and make it portable. Box overall dimensions are 660 mm long x 300mm deep x 320mm high, so quite small. The scalescene kit is very good and buildings come together well, albeit with a lot of cutting and sore fingers! I'm planning on using the drifter I have as part of the scene, plus a modified version of a building I had built for the Port Cumtha layout, which has since been dismantled. This building will be exteded to incorporate the bridge section which will then hide the sector plate from the normal viewing position. This is still a work in progress and will be complete once I get a better indication of how the bridge will tie the two together. Some strip LED lighting was added to light the scene. Further progress on buidlings and rolling stock added to give some scale. Loco used is my model of 495 with mixture of wagons. I need to build more box / open wagons as they would be more appropriate for a dock scene. Plenty of work to be done as the building on the left is to be constructed, building on the right to be completed with the bridge, backscenes added, and water detail to be started. Very enjoyable project and with the scalescene kit, it comes together very quickly. More as progress warrants..... Ken
- 71 replies
-
- 14
-

-

-
Seriously impressive work. The detail and accuracy in the cutting and filing is laudable. You must have fingers of steel - I have been cutting card recently & my fingers are aching!!! Well done.
-
They do some very nice buildings - I have purchased quite a few of their models over time & while they take some time to make up, they are very well put together & look quite convincing. They have two micro layouts; an industrial layout and the dockscene you mentioned. https://scalescenes.com/product/ly01-industrial-boxfile-layout/ https://scalescenes.com/product/ly02-canal-wharf-boxfile-layout/ Good value, and once you purchase the files, you can print them off as may times as you like, so those building could be use in different scenes. I would imagine with a bit of scaling on the printer, these could be scaled up to 7mm?
-
Guys, Many thanks for the information. @Billycan & @Mike 84C - I have subscribed to New Irish Lines & hopefully I will be able to work with them going forward. @Mayner- Thanks for the link to the HRMS John. I have had a quick look and they appear to have some good information, but not the model in quesiton. Interestingly, they appear to have drawings of the very early tipping wagons which would be very nice to model. I'll need to get in touch to get the drawings as they have no previews available. The brakes were built by DWWR in the Grand Canal Works, so were an in-house creation rather than sourced from English companies. @jhb171achill- I have planned to drop back in to the IIRRS once they open again. As noted above they wagons / coaches were built in the works so it's a bit difficult to establish how they were built. My guess is that given they are listed in the list of 3rd Brake Coaches, they may resemble coaches rather than wagons. The information I have is that they had 3 x 3rd Class compartments for drovers and the brake - so perhaps a modification / developemnt of a 5 compartment brake, either 28 or 30' overall? Ken
-
Looking to build a DSER cattle brake but seriously lacking in information. I know they were built in the Grand Canal work between 1875 - 1888, have three third class drover compartments, are numbered in the list of third class brake coaches, but other than that not much more. Would anyone have any images, or other information they would care to share? Many thanks, Ken
-
Fantastic modelling - that weathering is sublime. I really like the effect on the corrugated sheet over the third van! That's a superb looking train. Ken
-
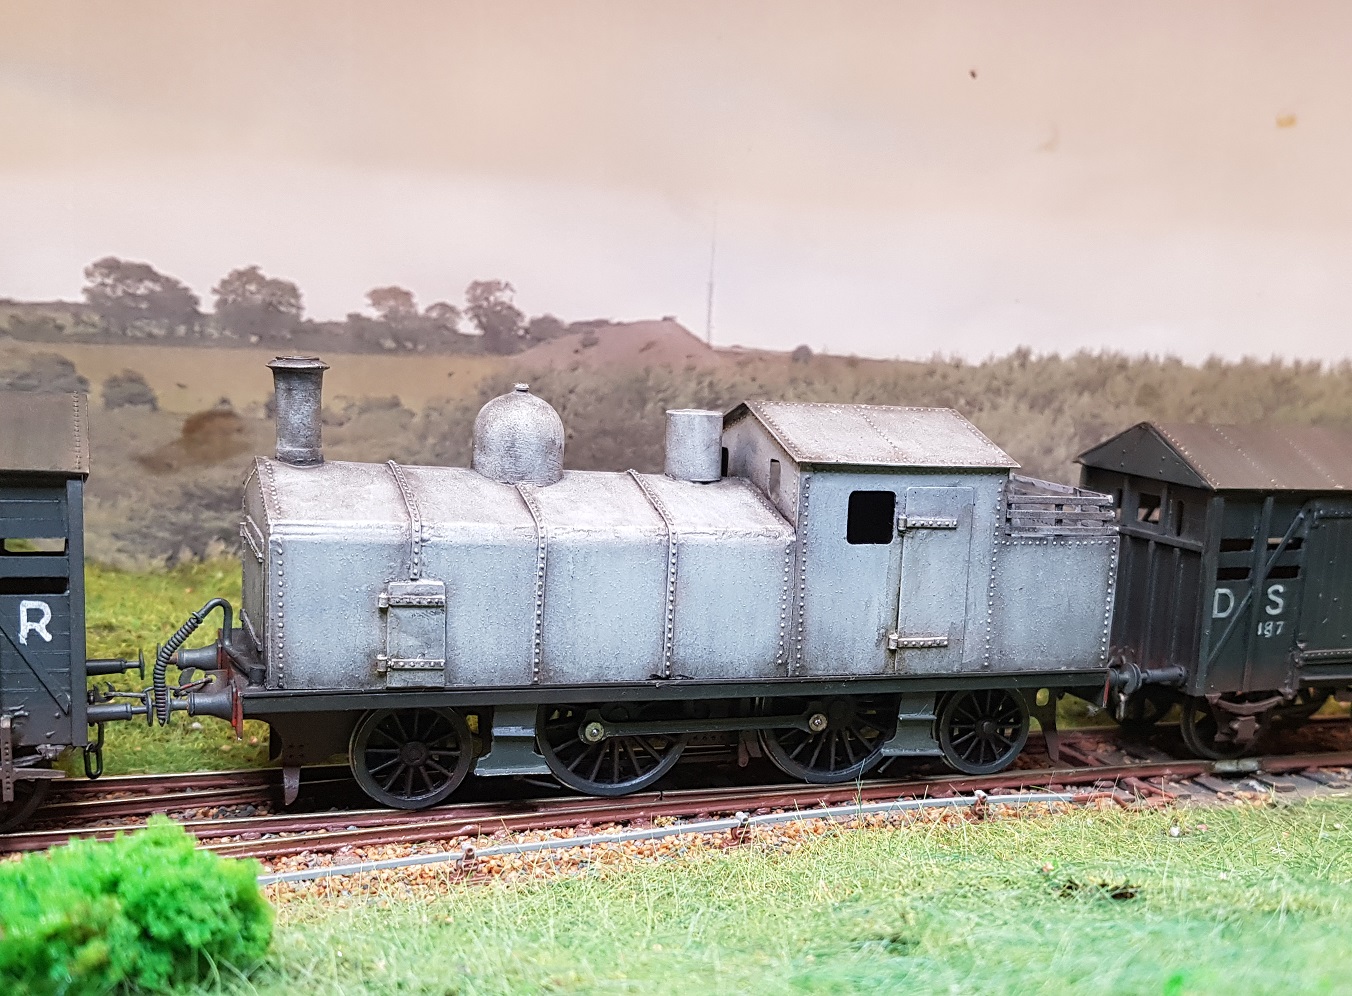
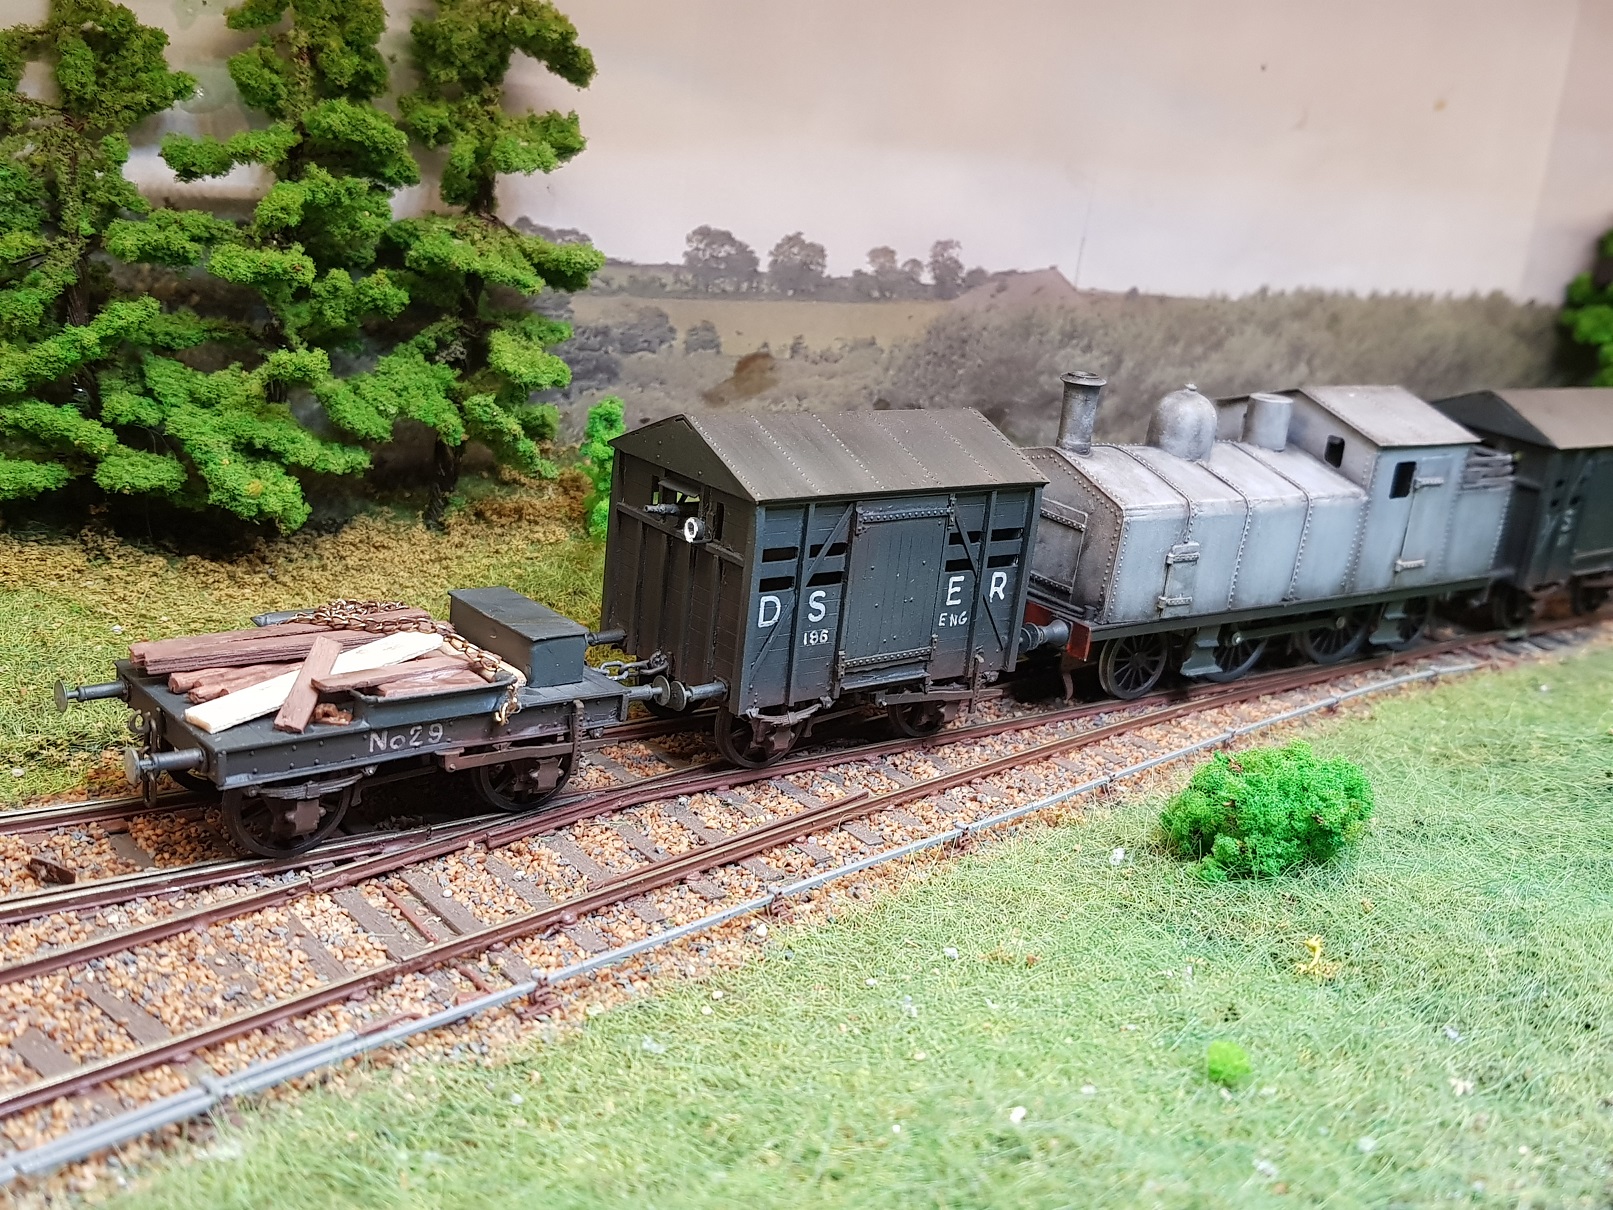
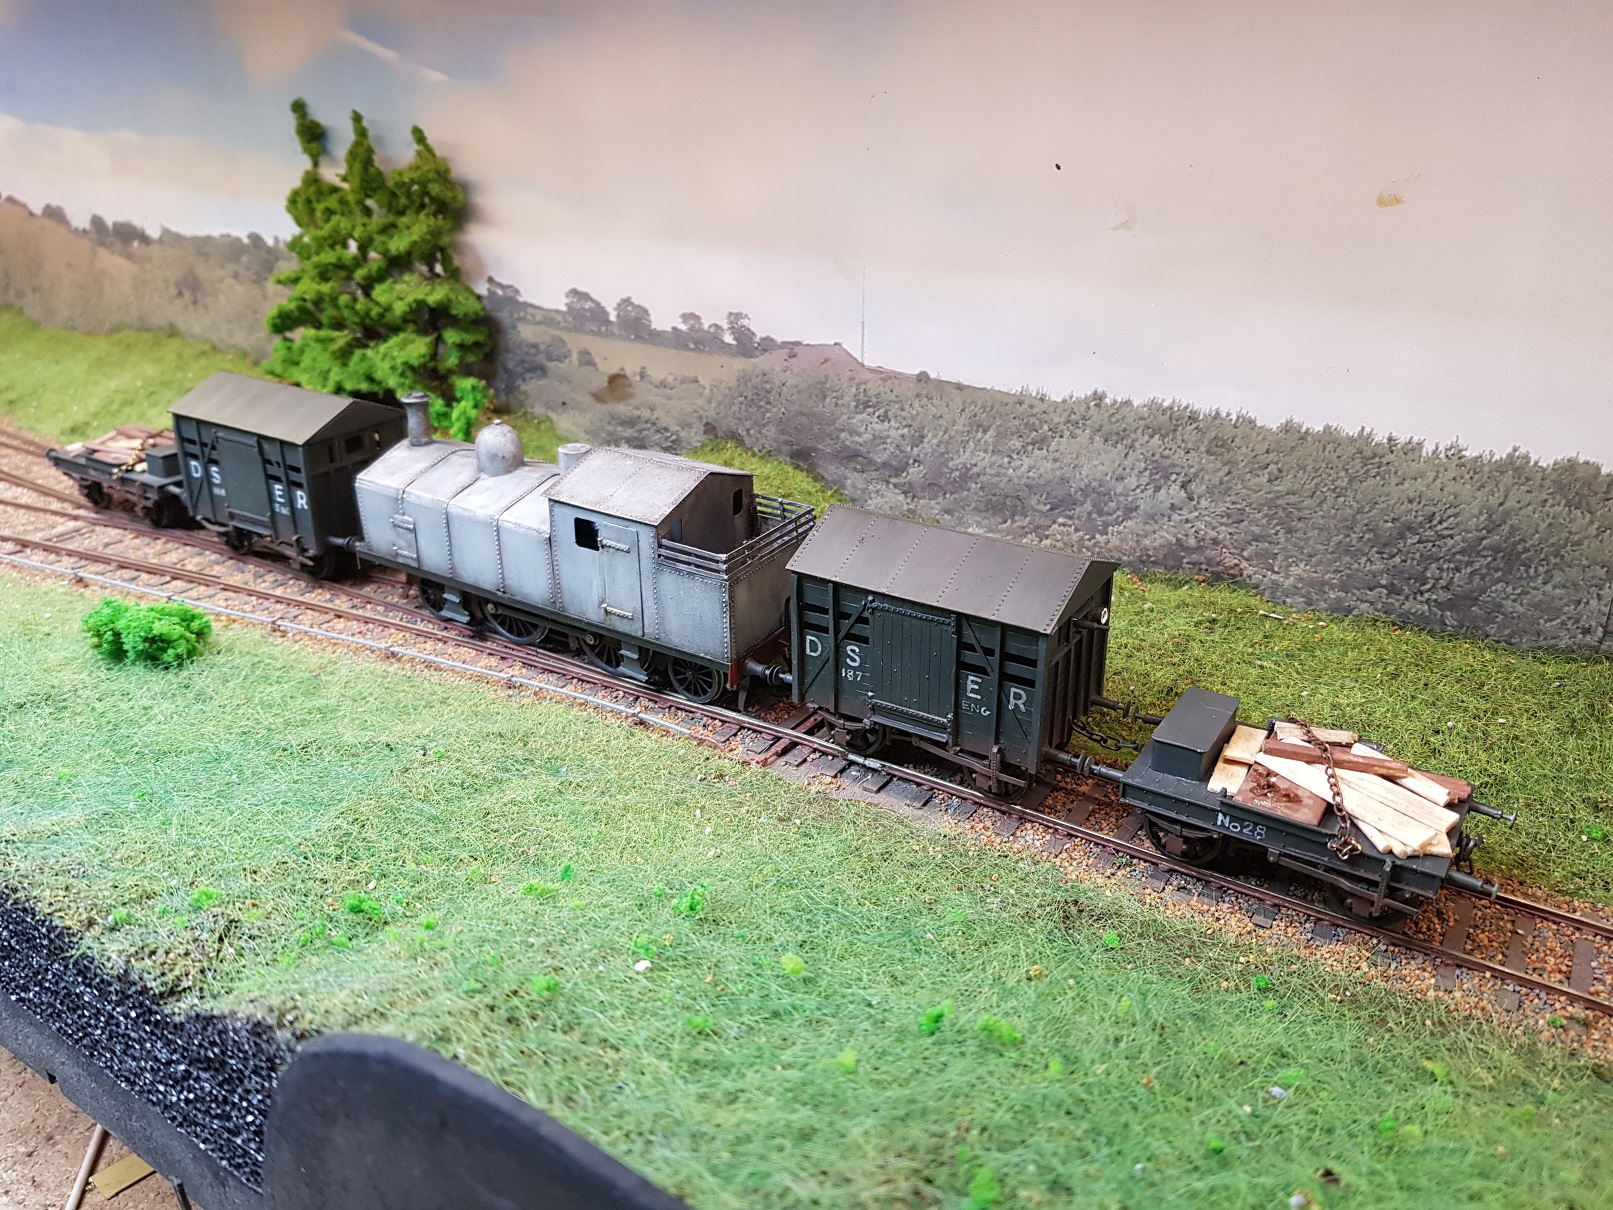
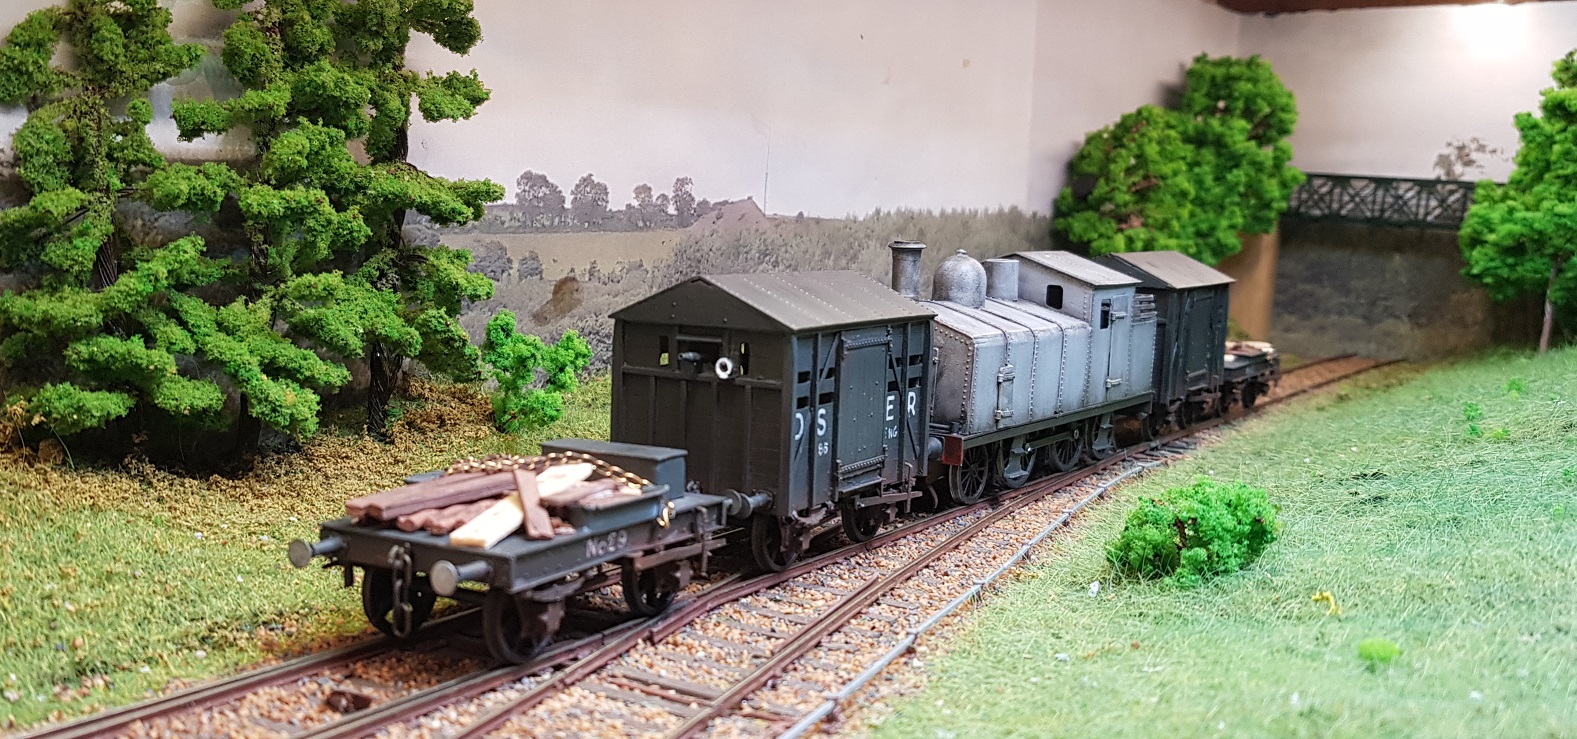
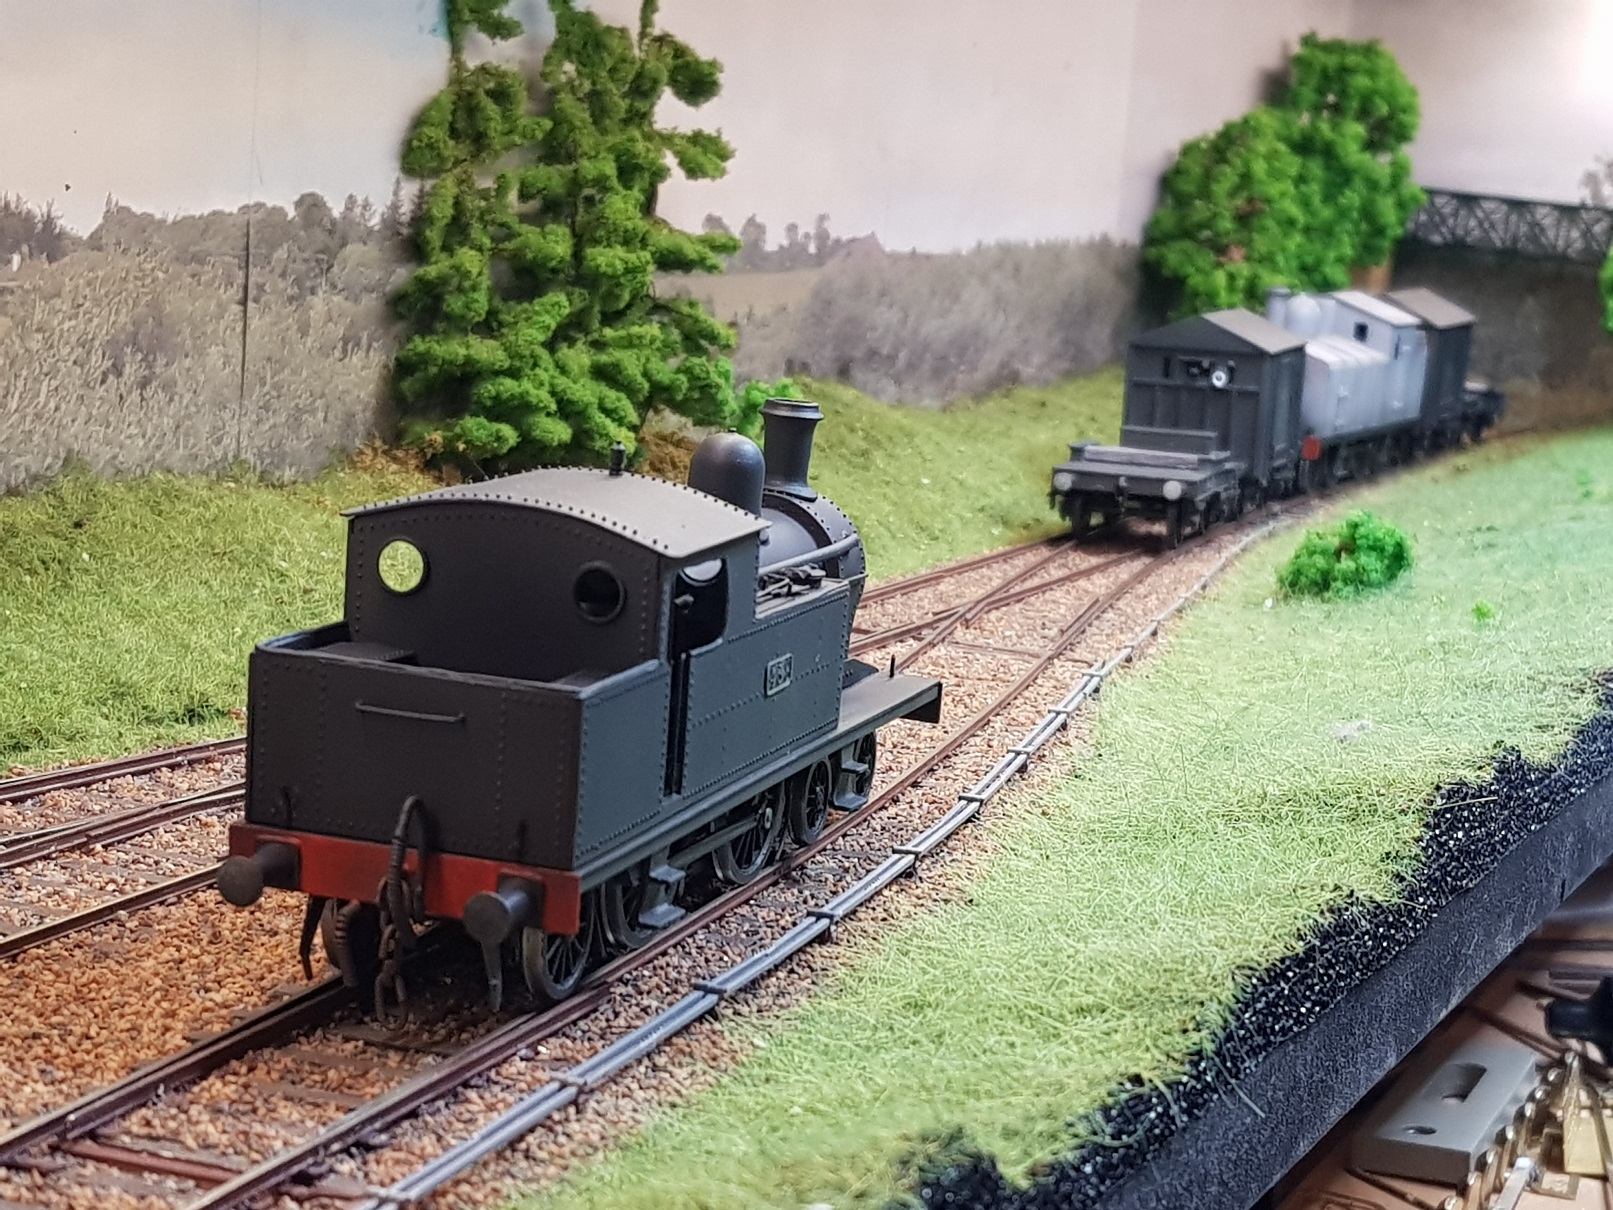
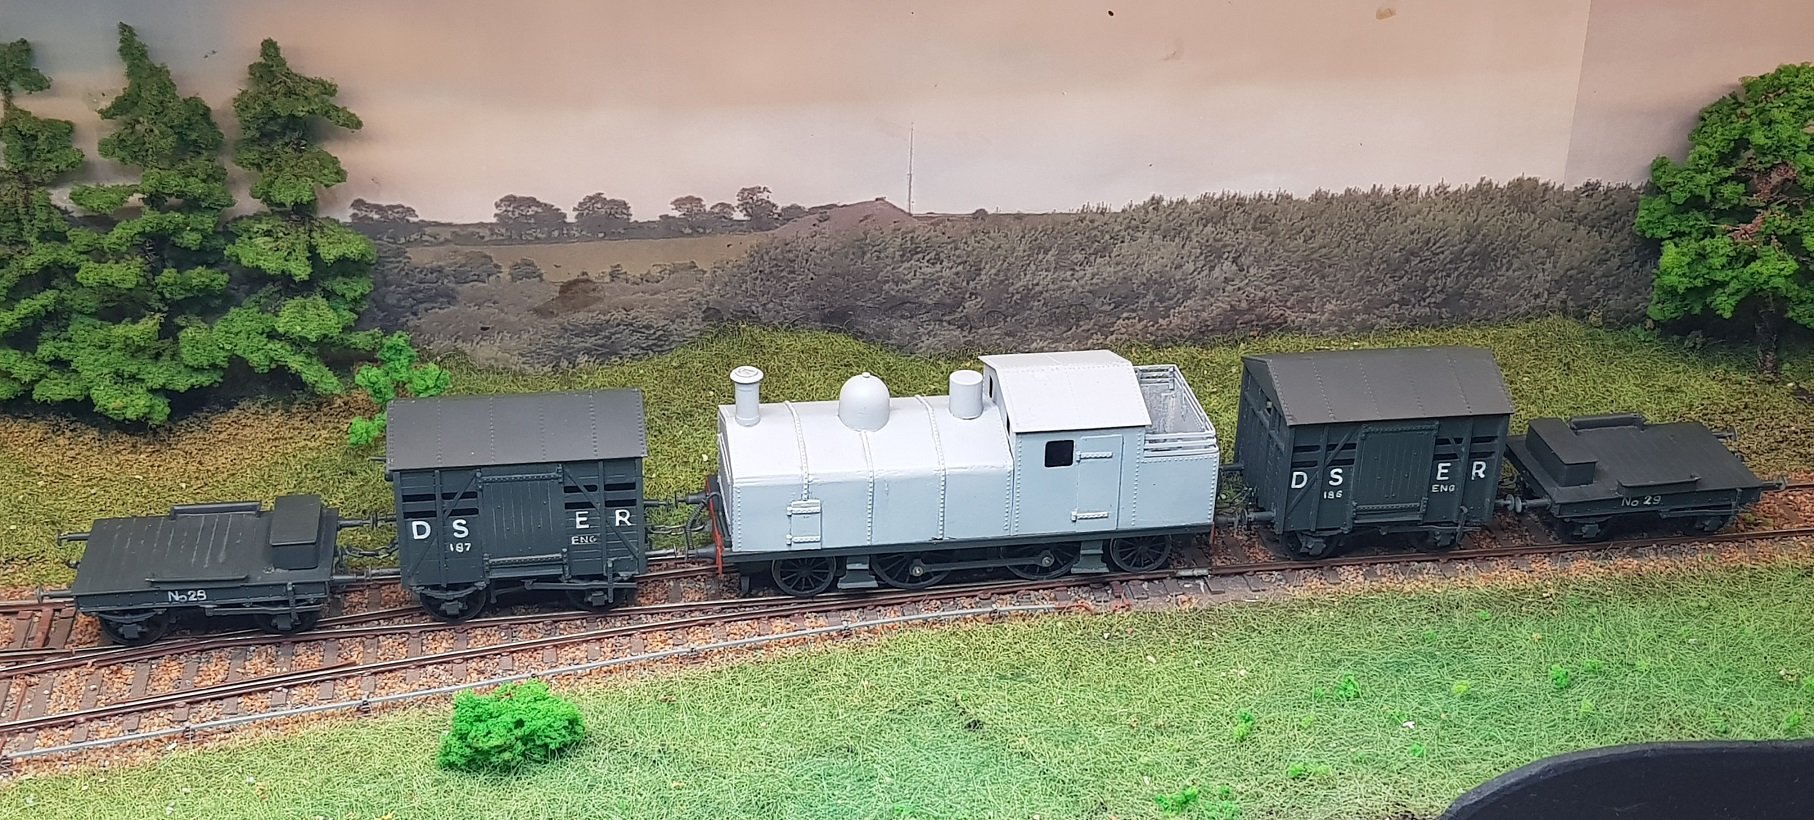
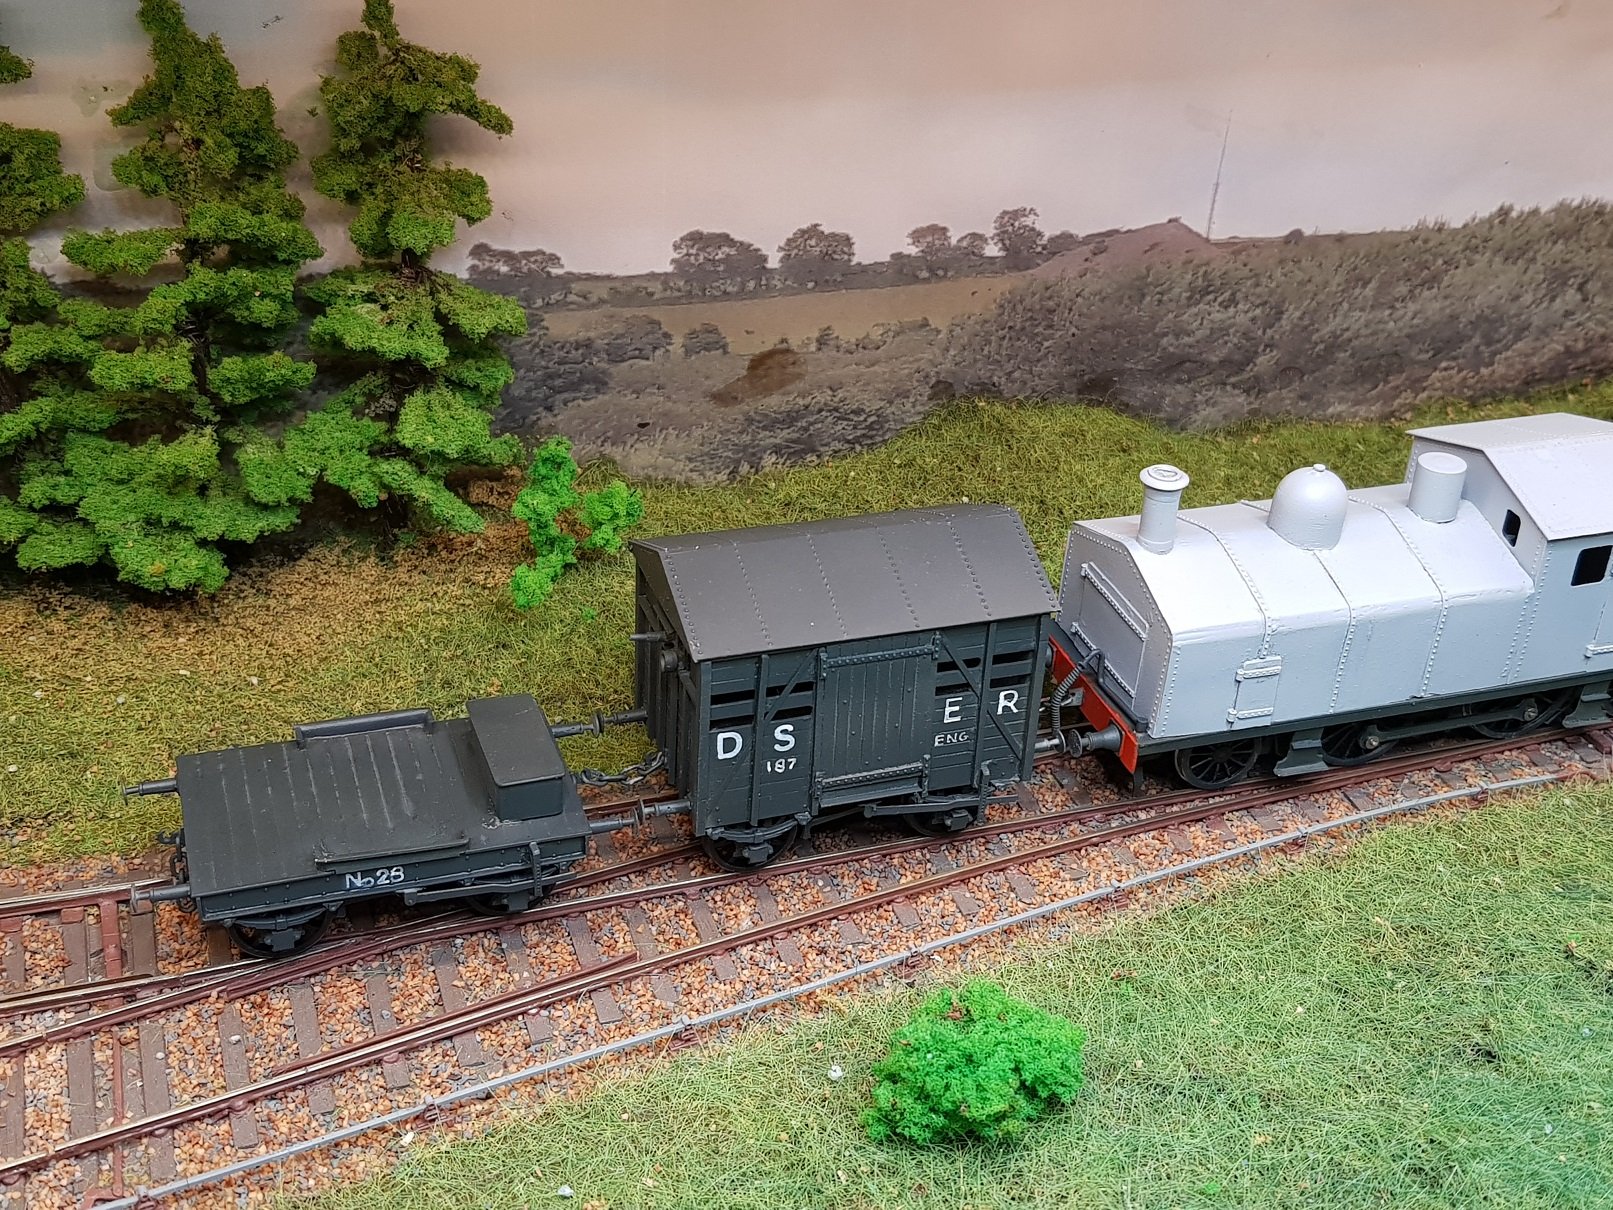
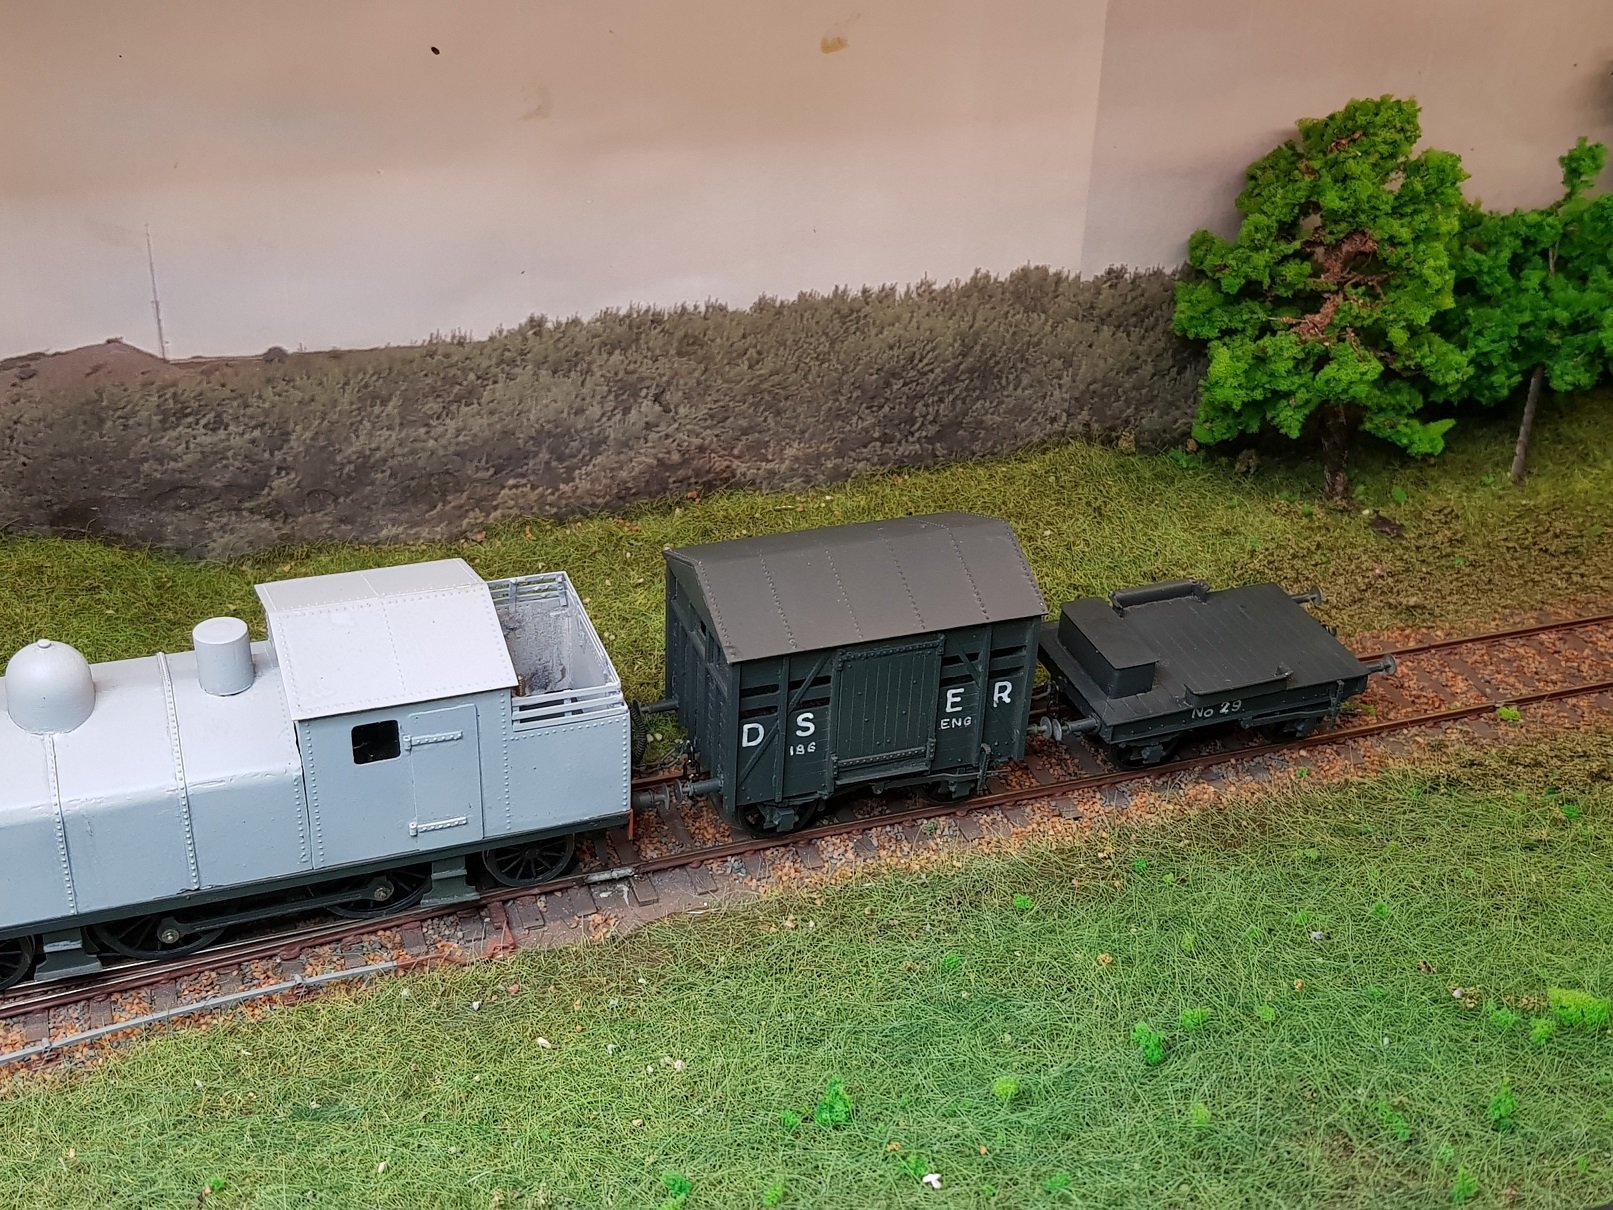
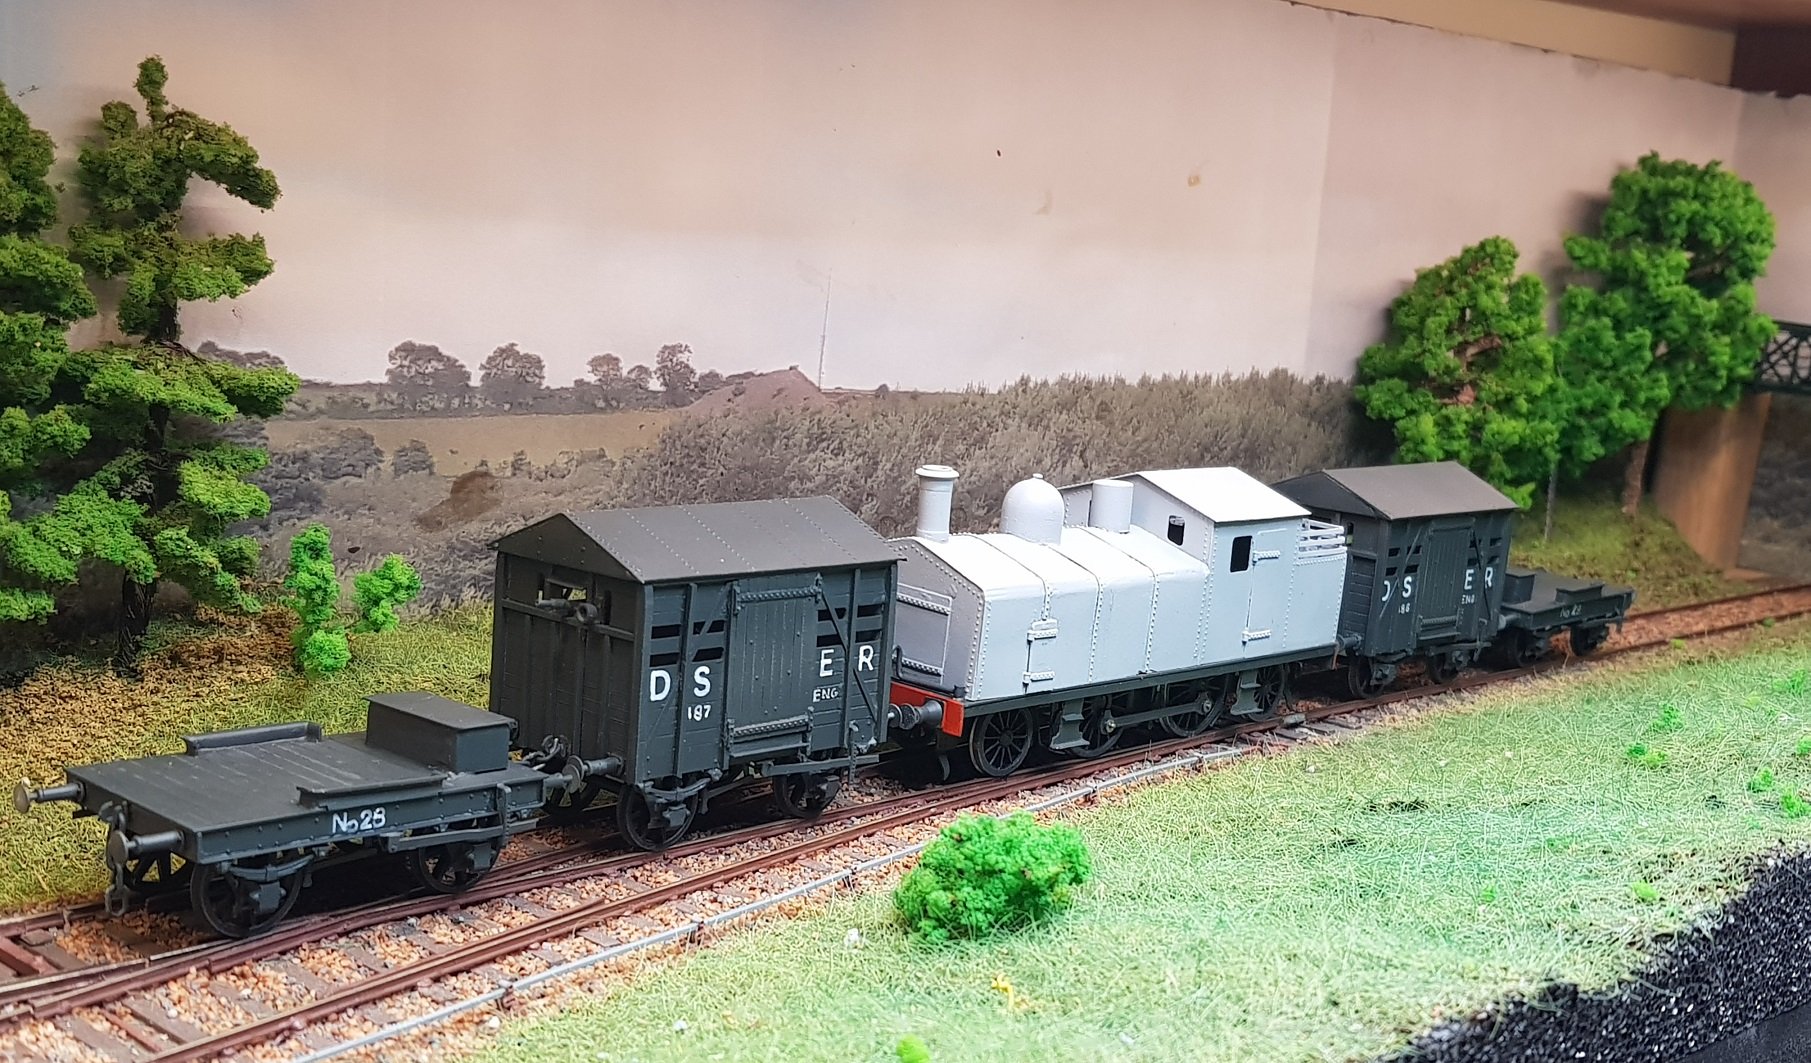
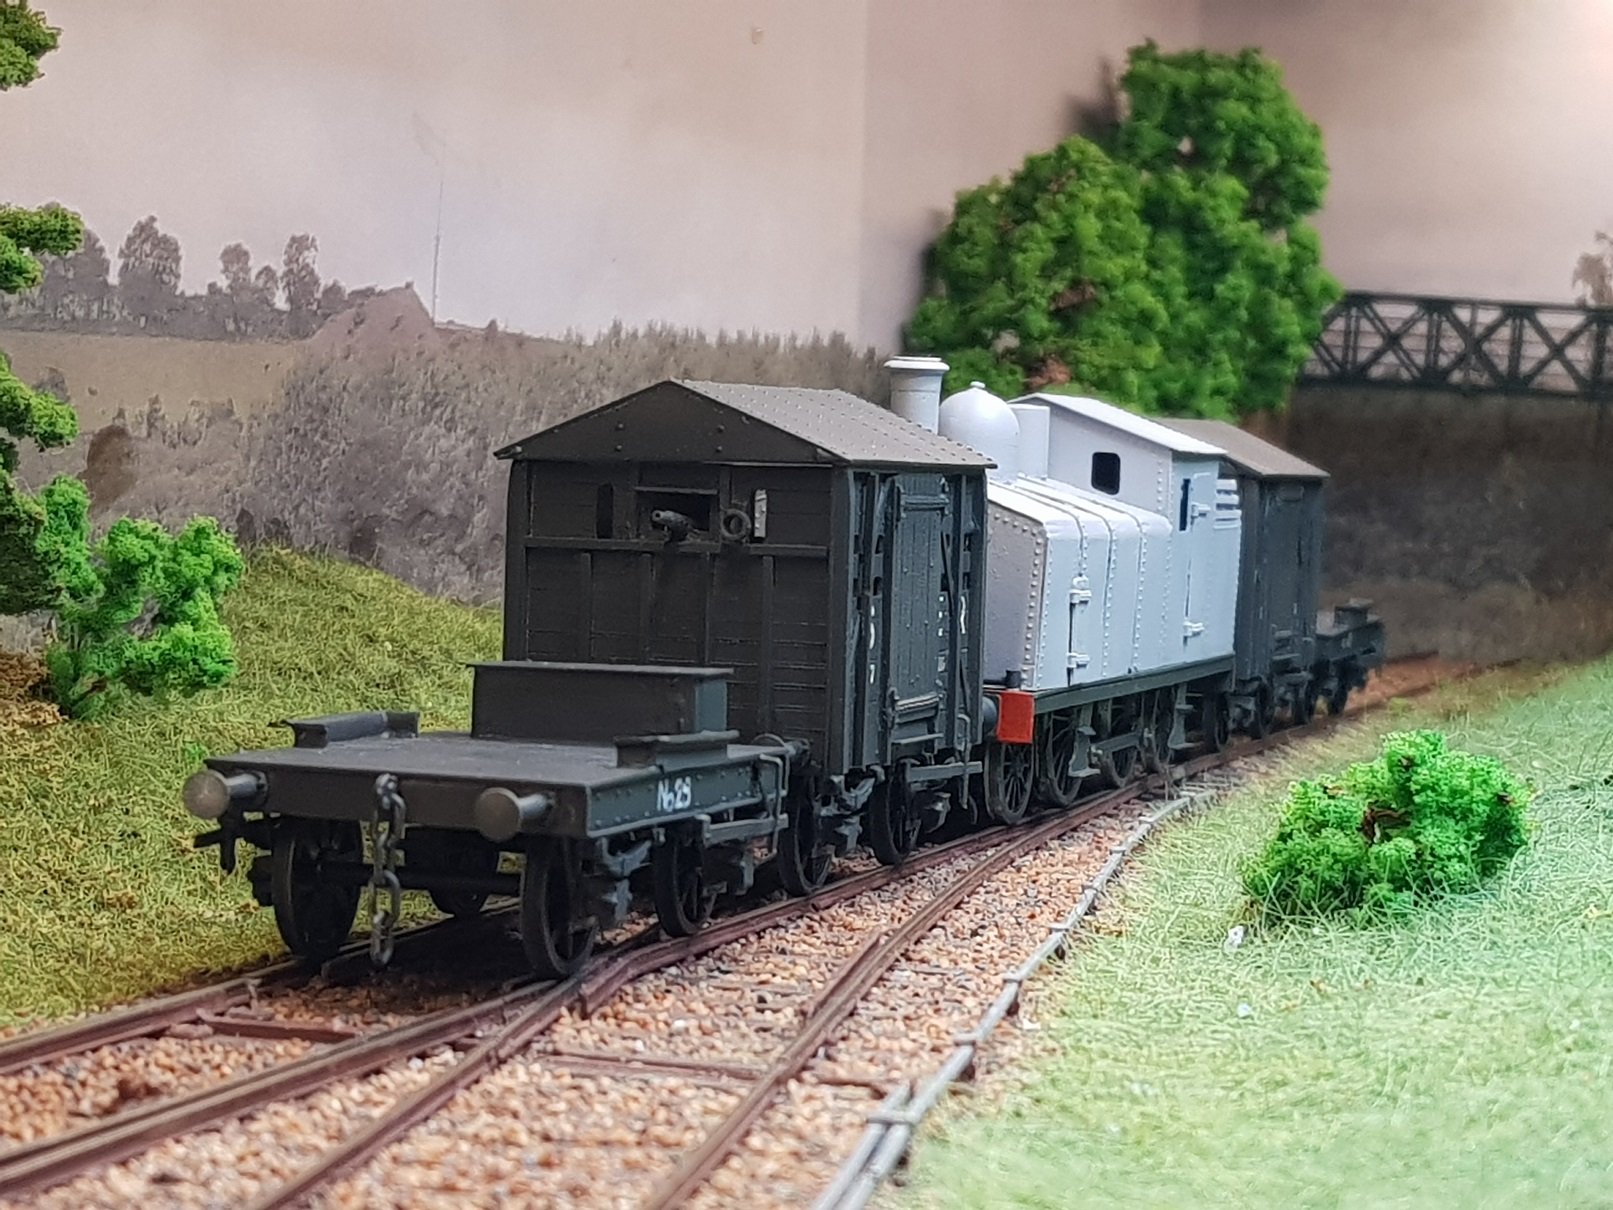
My understanding is that it was only finished in works grey and never got a coat of paint. From the few photos I seen, it only ever appears to be in unmarked works grey. I kept the chassis dark, as this came from one of the DSER tanks (No. 64) which was quickly plated in the works to work the train. The wagos appear to be standard DSER 13'6" box wagons with some plated added. There does not appear to be much information on this train, so it's the best interpreation I can come up with. BTW, many thanks to all for their likes and comments. Ken
-
Bit of weathering done & loads added to the flat wagons. Few more details & we should be there. I kinda figured that the loco would not last too long in works grey so dialled up the dirt on the loco. Material on the wagons is just a random load of timber, sleepers, chairs, chains etc.
- 379 replies
-
- 15
-
-

-
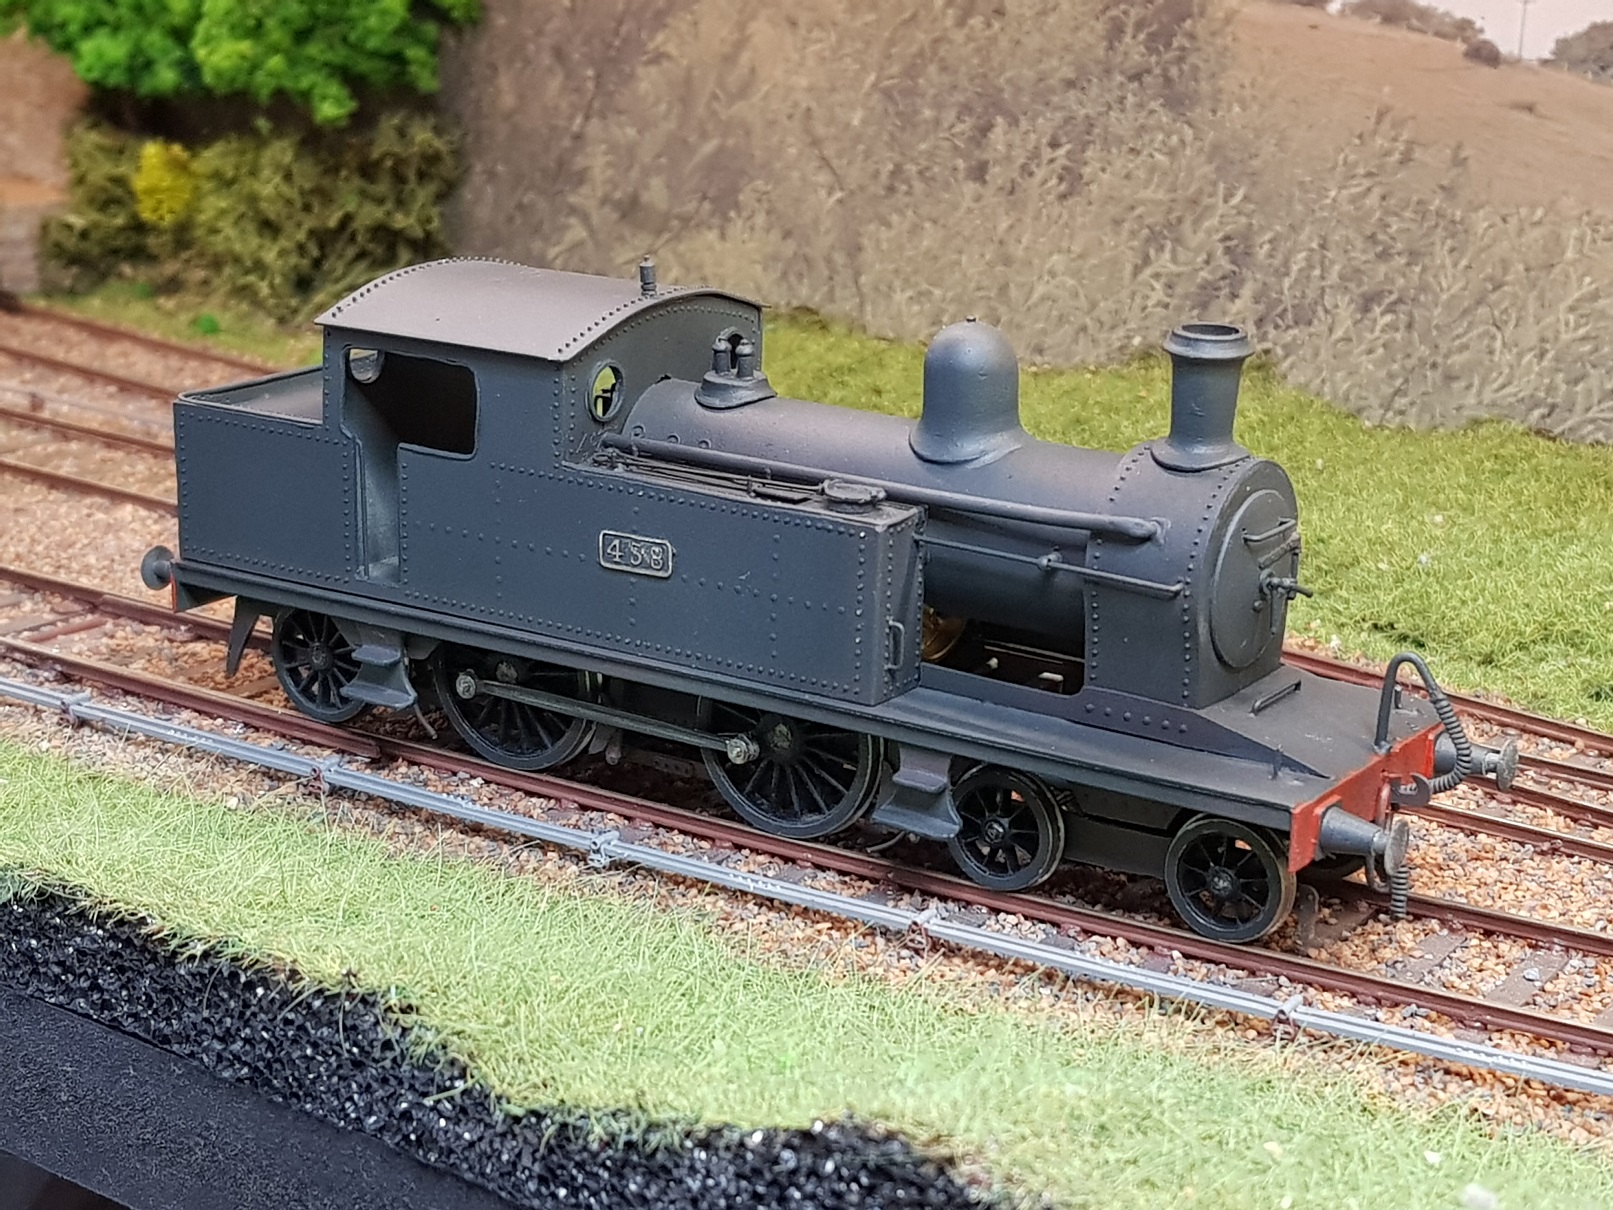
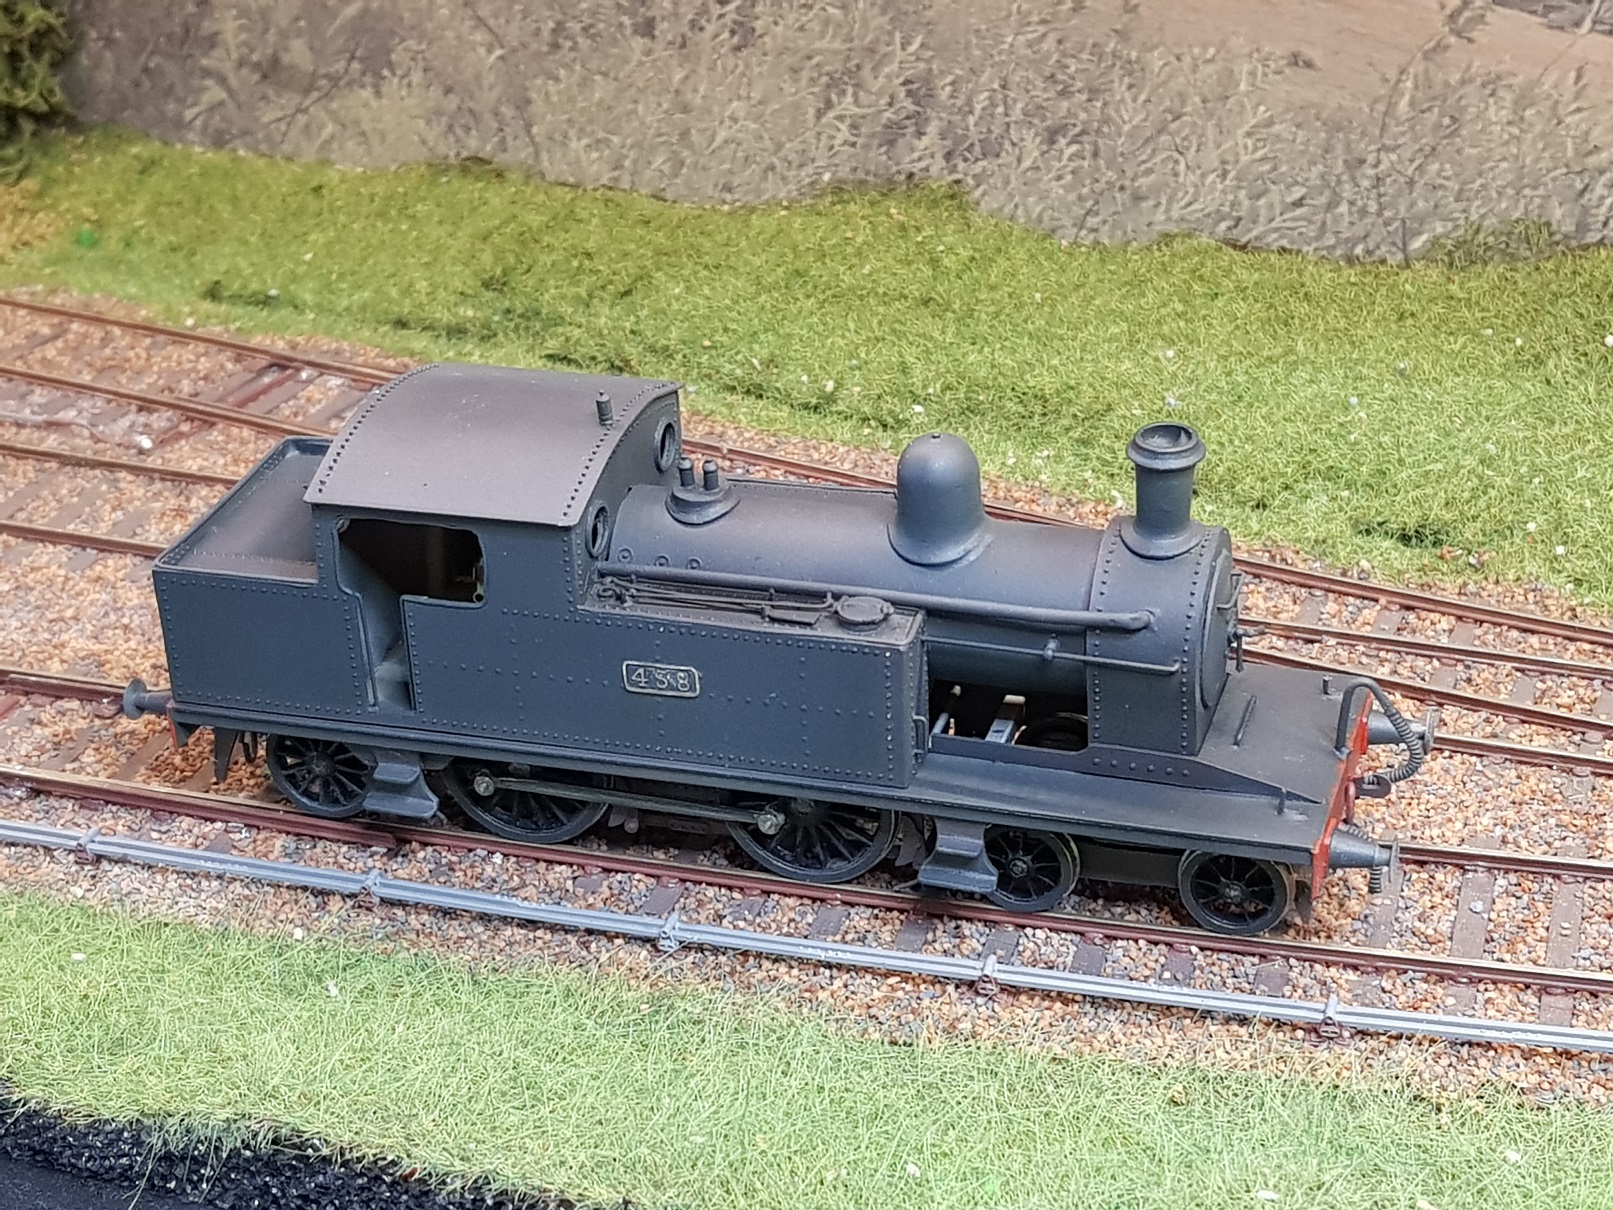
Thanks Eoin, that method would work & could be done quite quickly. May redo the connection on the 458 as it looks a bit poor. Ken
-
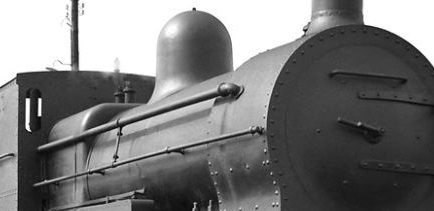
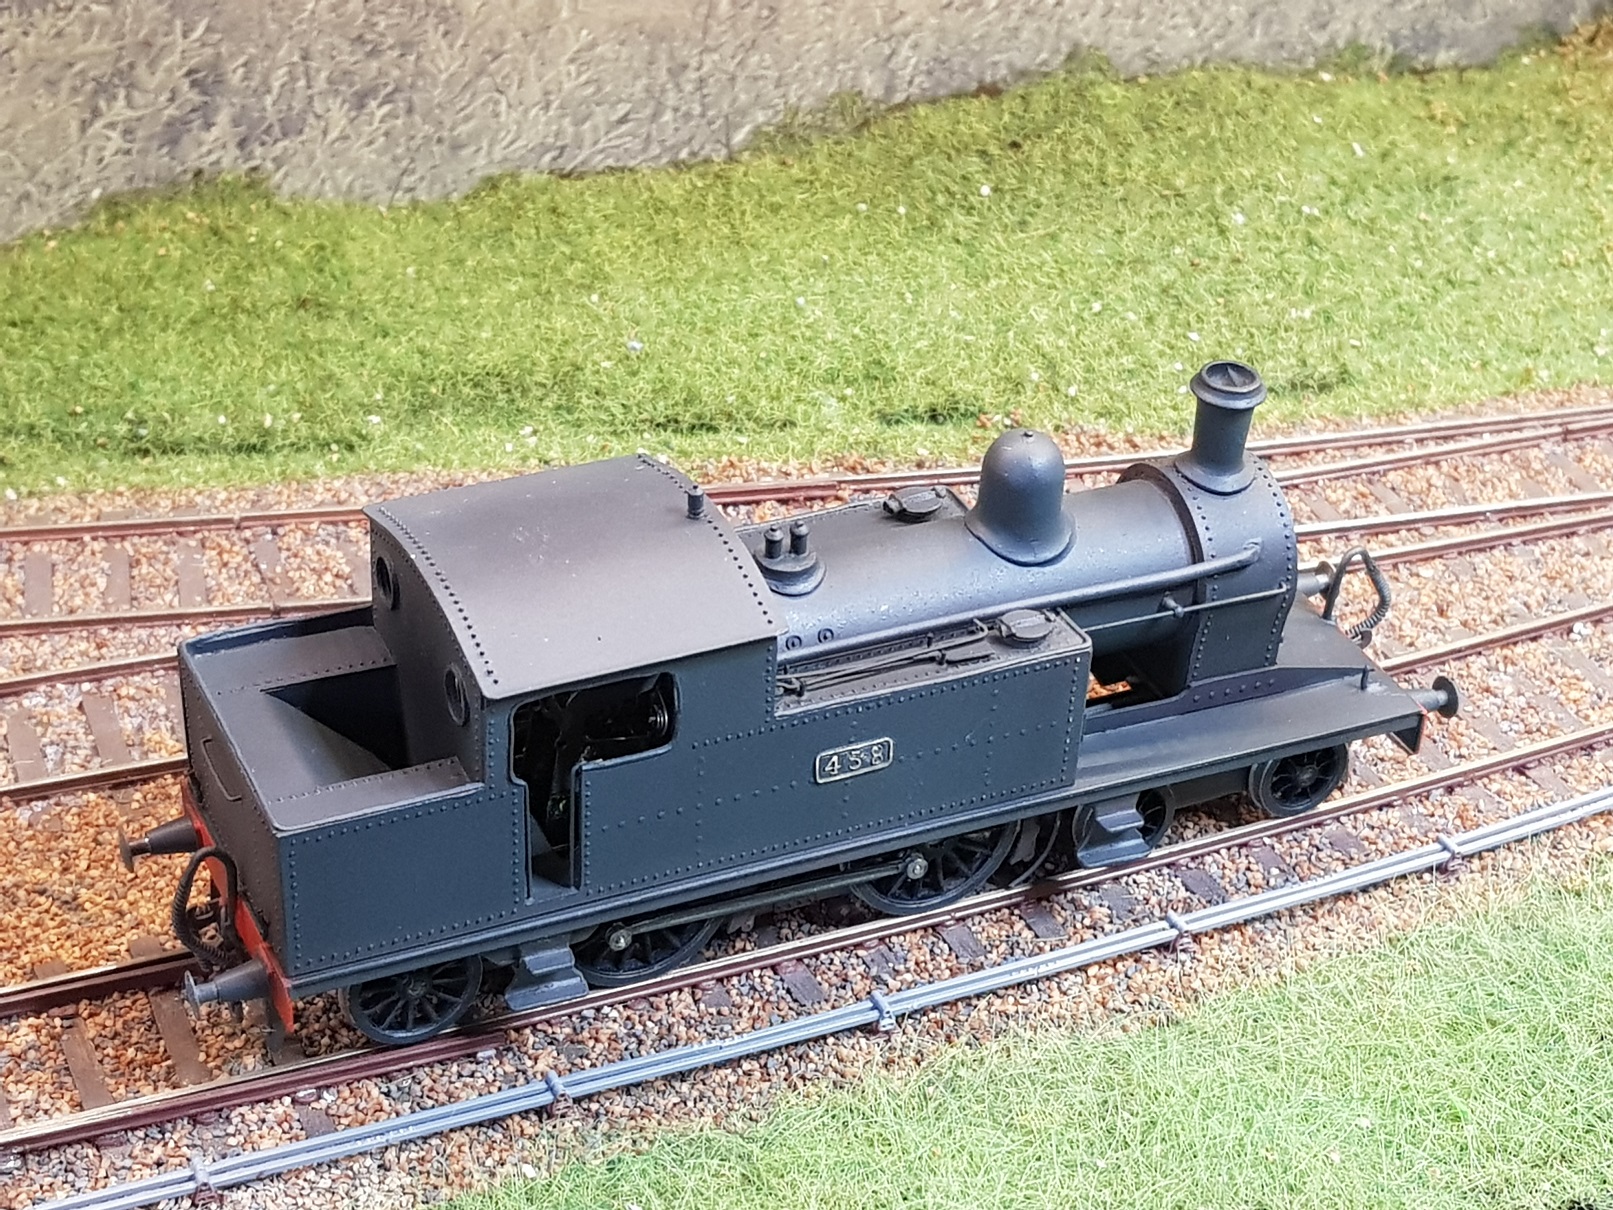
Anyone know where to get a 4mm scale fitting for the steam pipe connection to the smokebox as per the image below. It is basically a cast elbow connecting the pipe from the cab to the smoke box. Difficult to do with brass pipe as it kinks when bending to such a tight bend. Thanks in advance. Ken
-
458 got a lick of paint whilst painting was on the go. Photos really do show up some items that need some attention. Although it does not show up very well in the photos, I have started weathering lightly with the airbrush to take the edge of the new paint and to tone down soem areas. Ready for some washes & weathering powders to get that lived in look. More as time permits. Ken
- 45 replies
-
- 13
-
-
-
Funny that - I've been using Vallejo Panzer Dark Grey for locos recently - comes up a nice dark grey with a blueish tint as if rubbed with oily rags. Add a bit (a lot) of weathering & you start getting to that level of filth @jhb171achillis rather fond of
-
I'm just going to leave this here....... https://www.youtube.com/watch?v=cWs4WA--eKU&t=1s
-
David, Seriously impressive detail, and I'm with you on the "should I mould & cast" as I thought the same with the wagons on the armoured train. I ended up making both from brass, and perhaps it worked out better as there is a much better weight in the wagons. These will make (already are) very impressive wagons - well done. Ken
-
Jonathan, Many thanks for that - great help,. It will be back to the paint shop however, as I painted the ends & roof black Ken
-
@jhb171achill - Been searching through the archive here to get information on GSR Coaches in the 30's and this seems to be the most comprhensive I have found thus far. I am finishing out an ex GSWR 6 Wheel all third and have gone for the deep maroon colour, but now need to look at lining. Any advice on what lining this type of coach would have hadi, if any? Im assuming by this time, these would have been relegated to branch lines, and possibly commuter routes, so may not have been as "aesthetically pleasing" as mainline stock? An assistance would be greatly appreicated. Ken
-
Very nice buffer beam & I like the safety chain detail. That rivet press is an impressive looking tool. Makes my Kettering model look like a toy!!. Ken
-
So, finally made it to the paint shop. Have to confess, painting is not my favourite part of this hobby. Having said that, I think the results are not too bad. Wagons got W-irons replaced with SSM compensated units as I could not seem to get the wagon to sit level with the RCH units from Scalefour shop. These units will also not take 14mm wheesl, while the SSM can with a little bit of tweaking on the compensated axle. Springs, axle boxes, brakes and sprung coupling hooks added to finsh the wagons. Loco got vacuum pipes and sprung coupling hook. The intention is to run this as a complete train, so three link couplings used to look closer to the prototype. Weathering needed to soften the shapr look of the paint and blend the elements to a whole. Some construction materials needed for the flat wagons to complete the working look. Overall, I'm very pleased with how it is coming together. Nearly there. More as time permits. Ken
-
I generally follow your work out of a morbid sense of curiousity Seriously though - looking good, and it is a nice sense of satisfaction in creating something from nothing! Wagons are coming together nicely, however I suspect there is some work to go - I find you make great progress initially and then things slow down as the detail starts to build. Quick query on your axles - are you splitting & sleeving to get the "correct gauge"? I may need to do this now as i have ran out of 28mm axles, and cannot remeber where I got thiem from. Have loads of 26mm, so may split & sleeve to continue building. Will follow this with interest as I have another SSM GSWR convertable kit to complete, and I would like to build one or two DSER version also. Regards, Ken
-
Excellent brake David, a masterclass in understated excellence. The lettering is nicely done - are you doing by hand, or stencil? Ken
-
Jonathan, Good to meet you too & many thanks for your kind comments. Comments such as those expressed here and in other posts, provide considerable encouragement - thanks to all who have liked & commented. Ken
-
Once again, many thanks for the kind remarks - they are much appreciated. Yes, I will bring it along, however it will be in brass as there is not enough time to paint it before Sunday. I have to give credit to the excellent book by Mike Sharman - Flexichas for that work. He breaks down the principles and concepts into easily understood mechanics. The tricky bit is getting the weight distribution and height right; I will need to add more weight to the body to help adhesion. The other thing I need to make is a railer, because these are a bugger to get on the track with all wheels articulating. Anyway - hope to see people on Sunday at the fair. Ken