KMCE
-
Posts
540 -
Joined
-
Last visited
-
Days Won
29
Content Type
Profiles
Forums
Events
Gallery
Blogs
Everything posted by KMCE
-
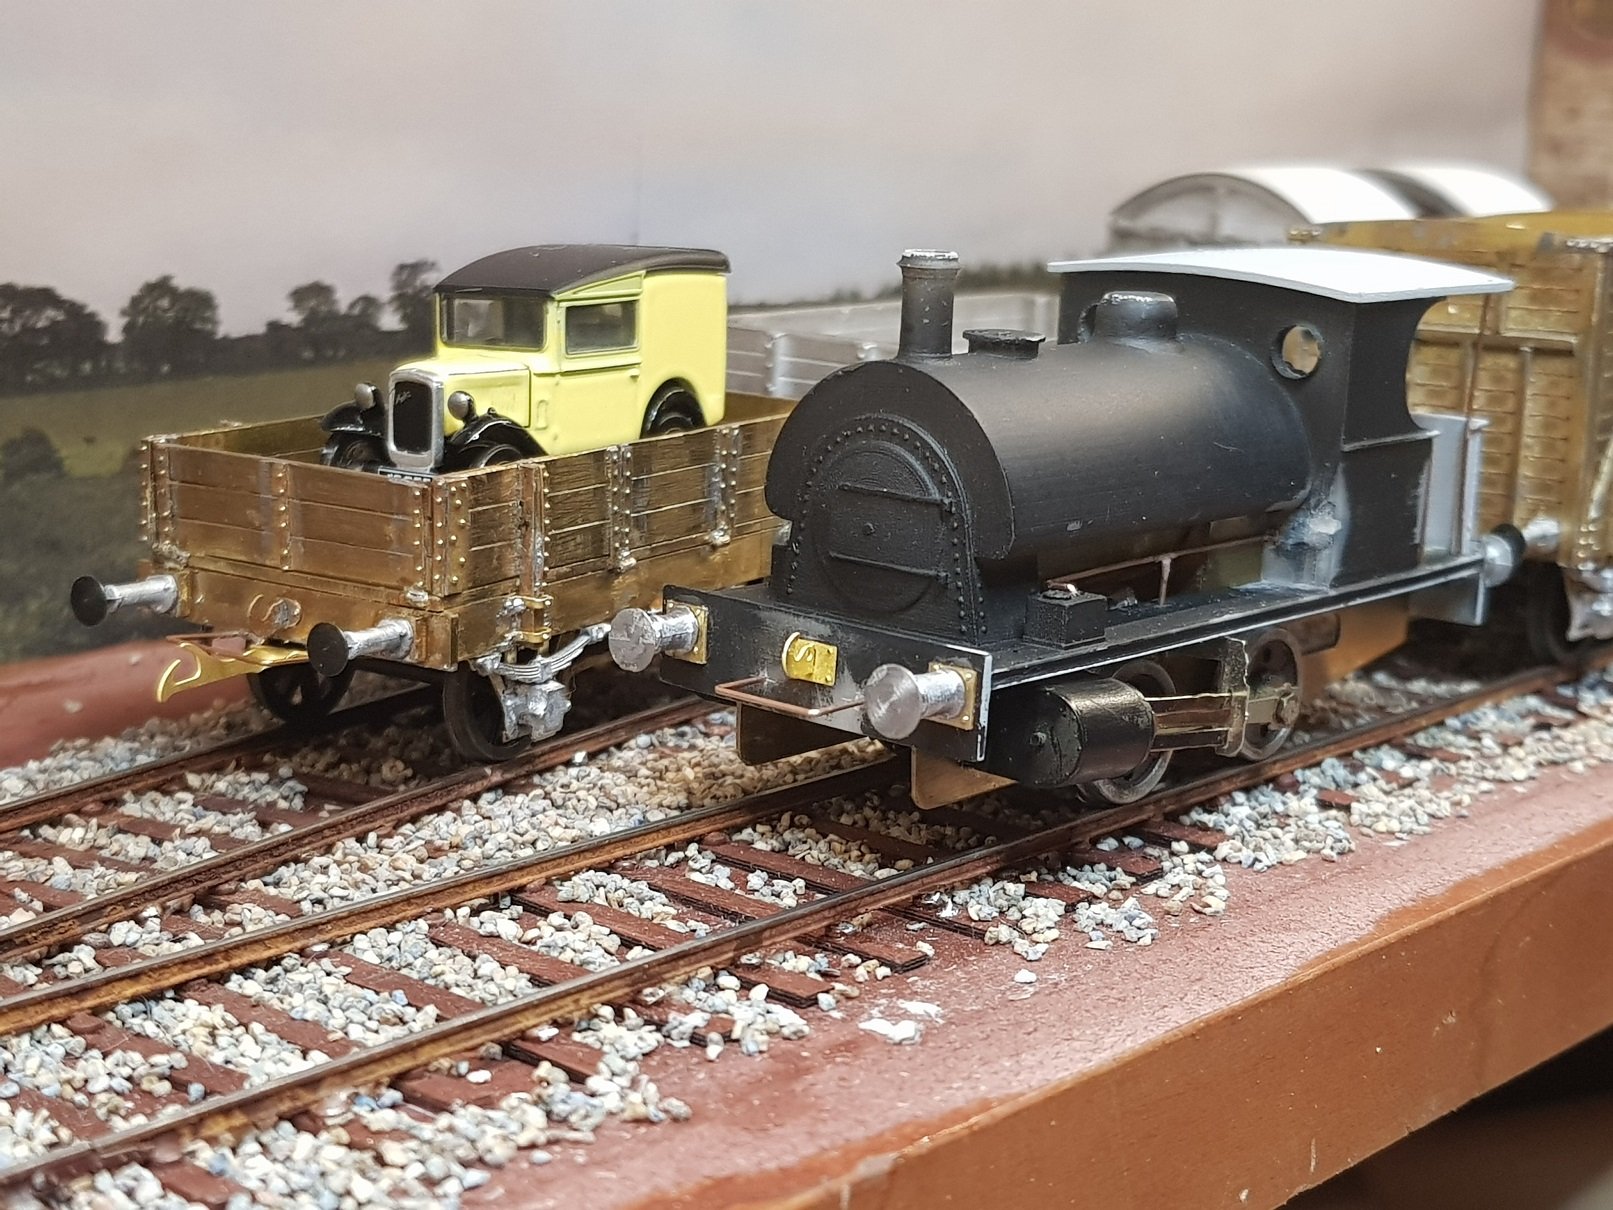
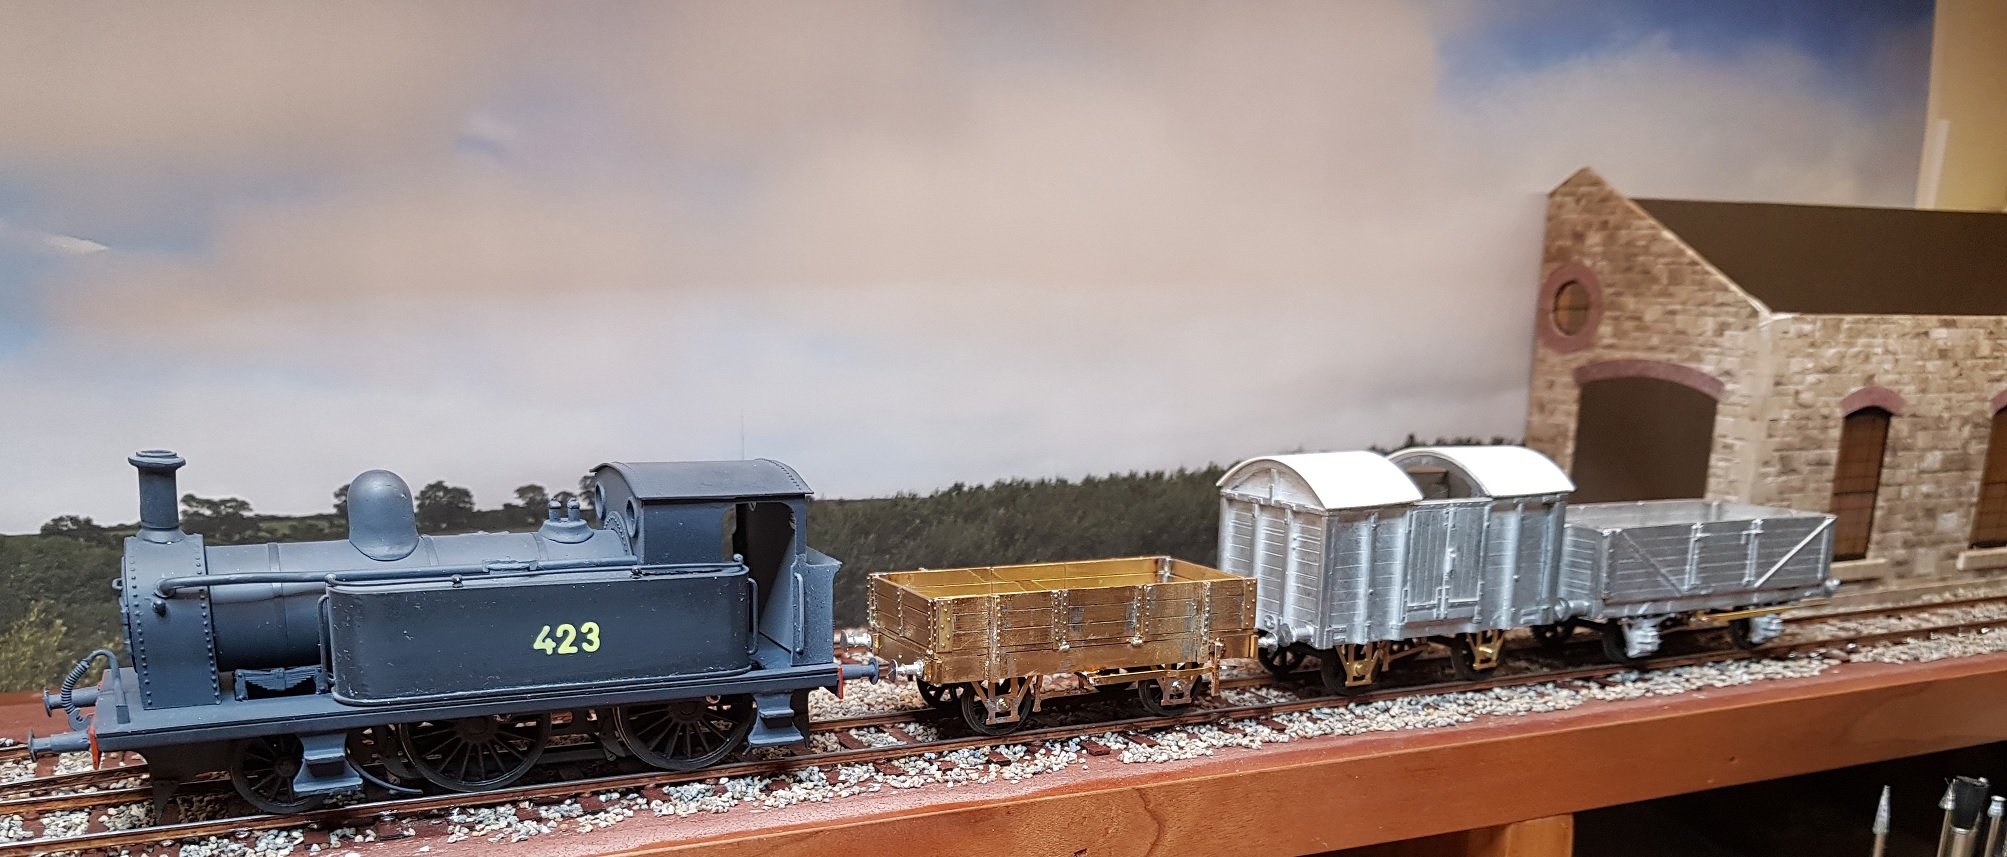
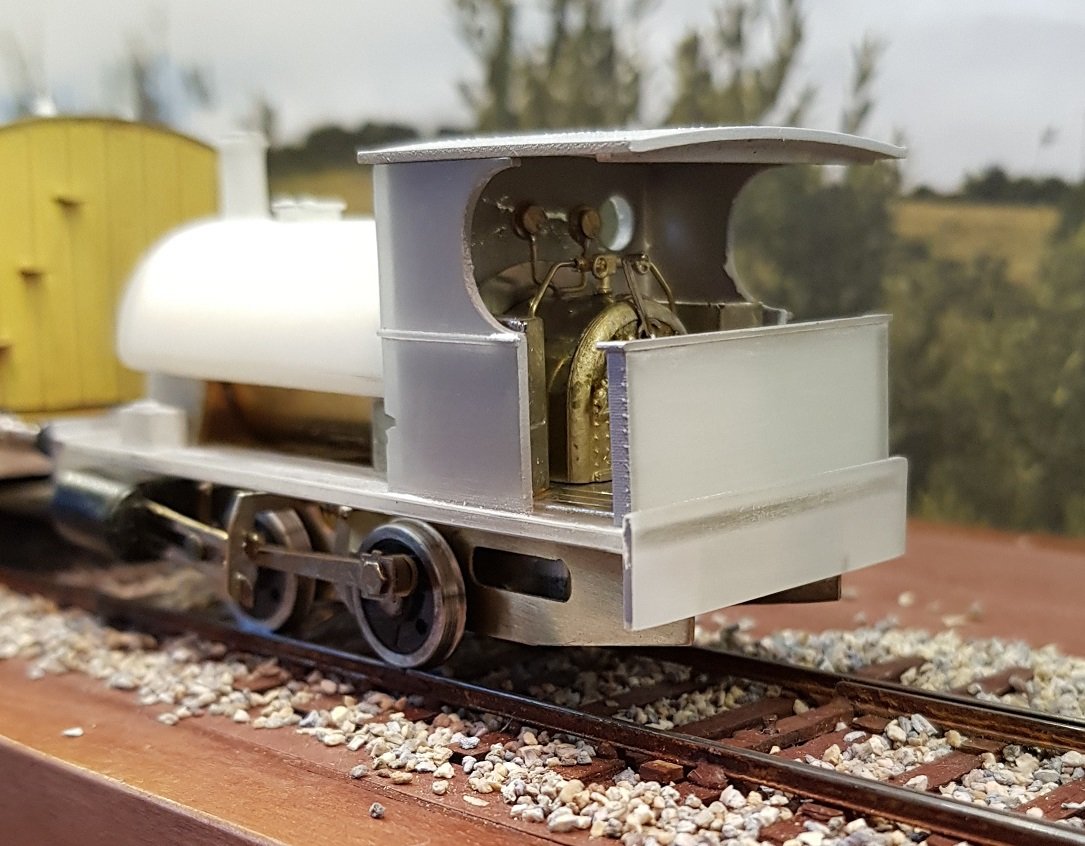
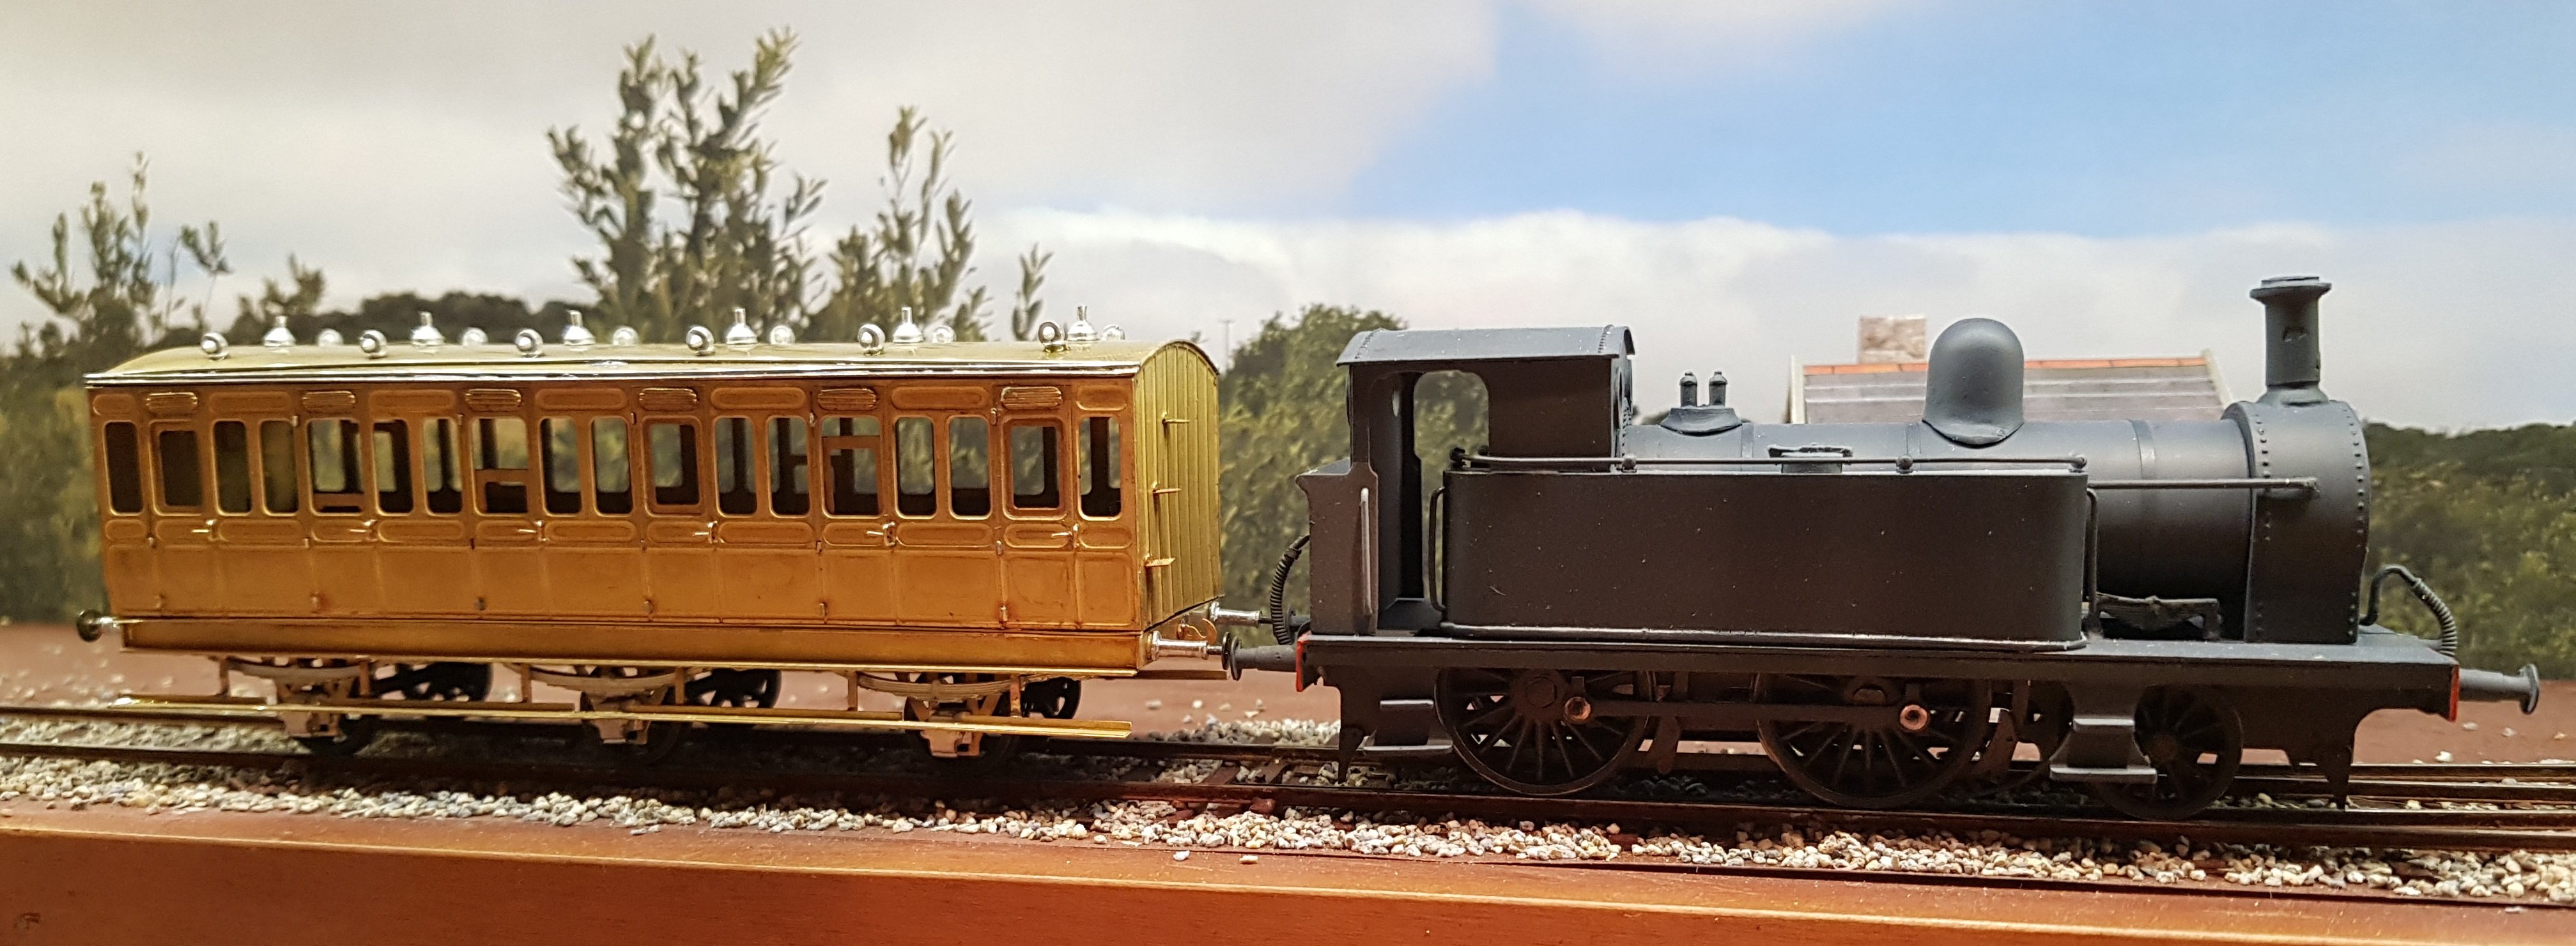
Some progress on 495. Chassis insert into the body is sorted which allows fixing of the cab interior in place. This then allowed addition of handrails, cab back and roof. Buffers, hooks, and sandbox operating rods were also added. I will need to add some weight as it is a little low on tractive effort. When pulling the 5 wagon rake, which in fairness is quite heavy, it does struggle on occasion. Some weight between the frames, front and rear should help. It does run well and looks well hauling the rake of wagons. Some more detailing needed before heading to the paintshop as it is looking rather scruffy at this stage. Quick shot of 495 on the siding with 423 on the main track. More as time permits. Ken

-
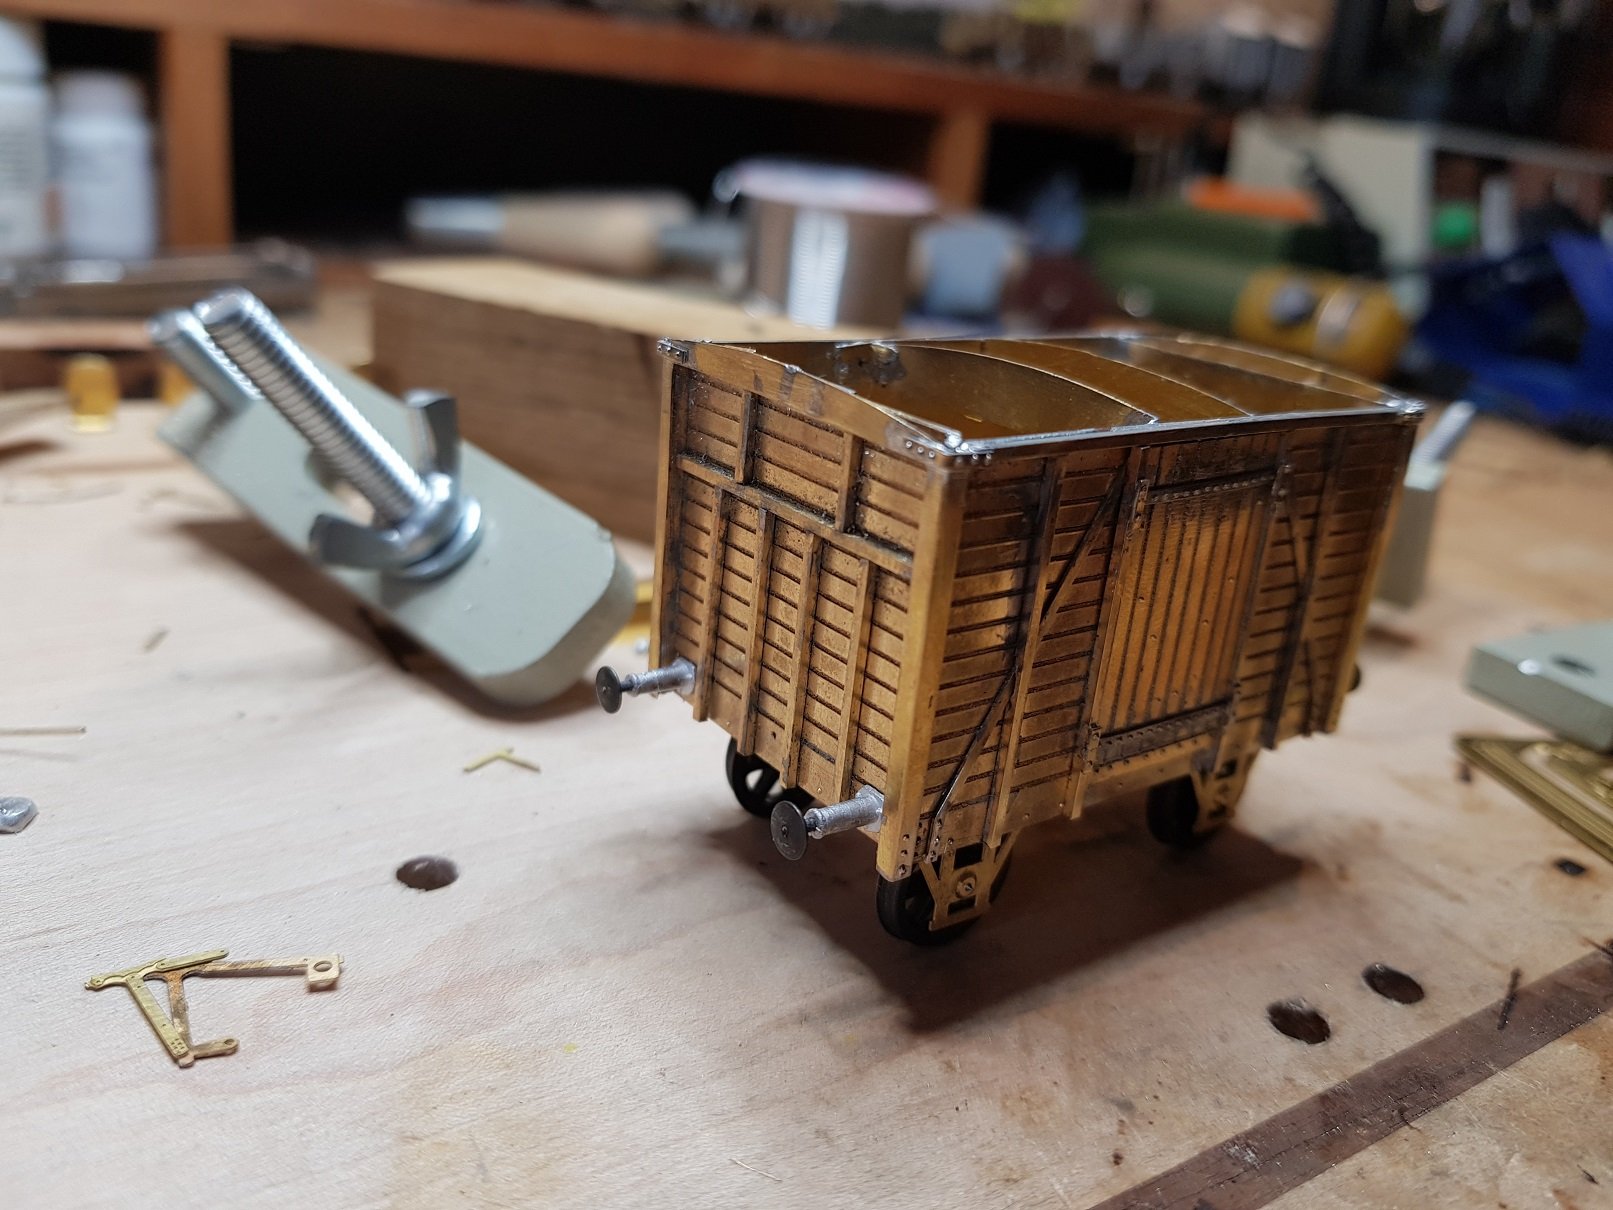
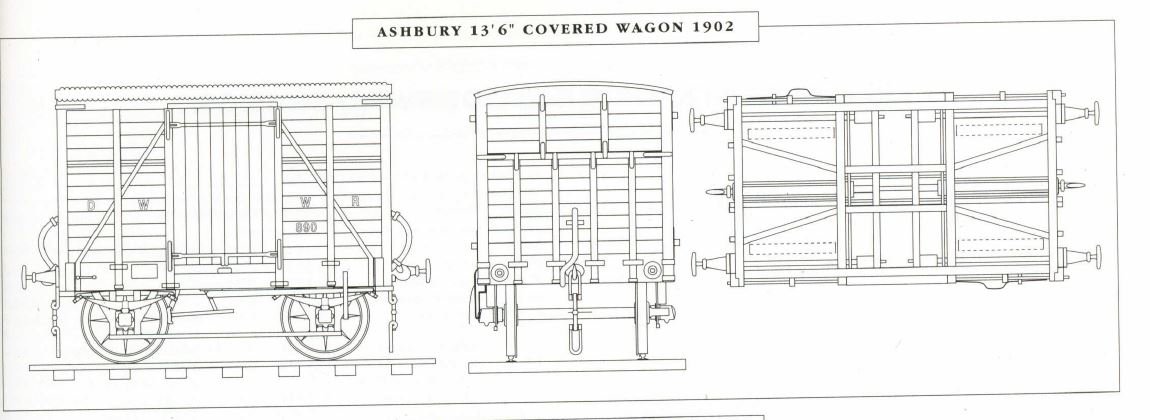
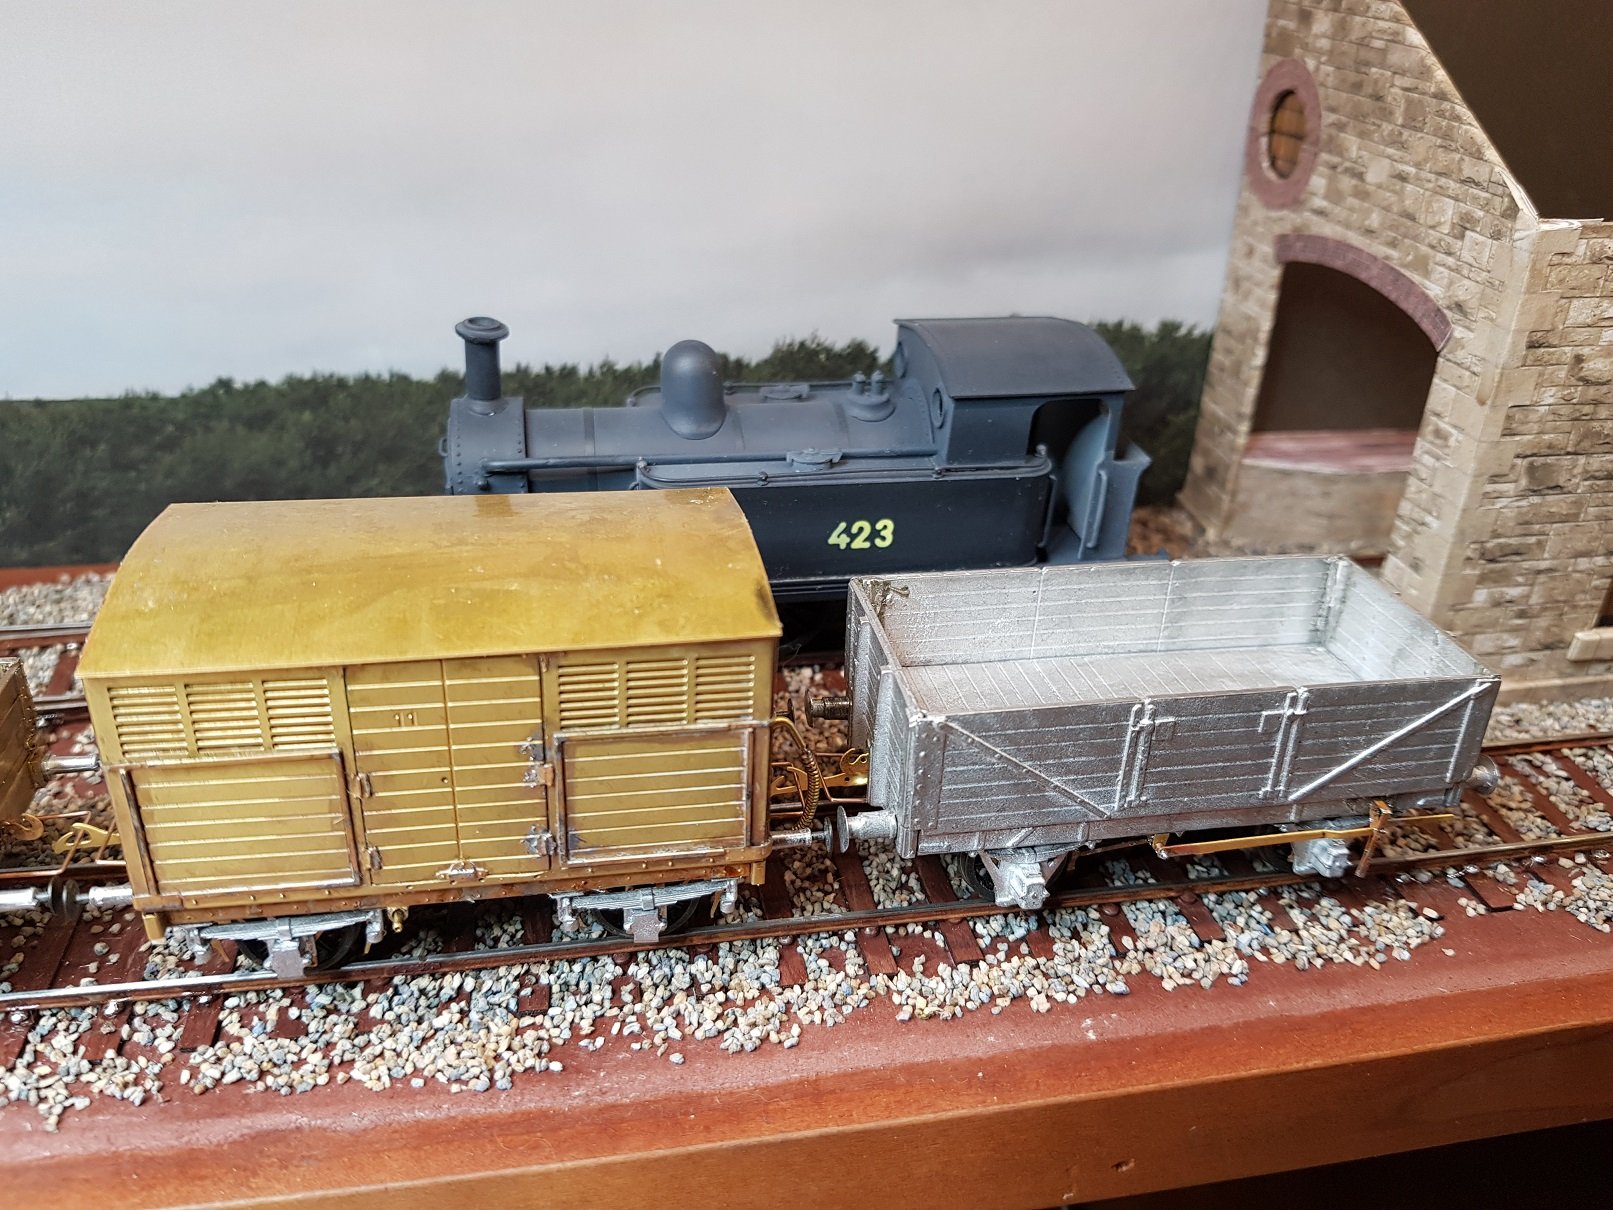
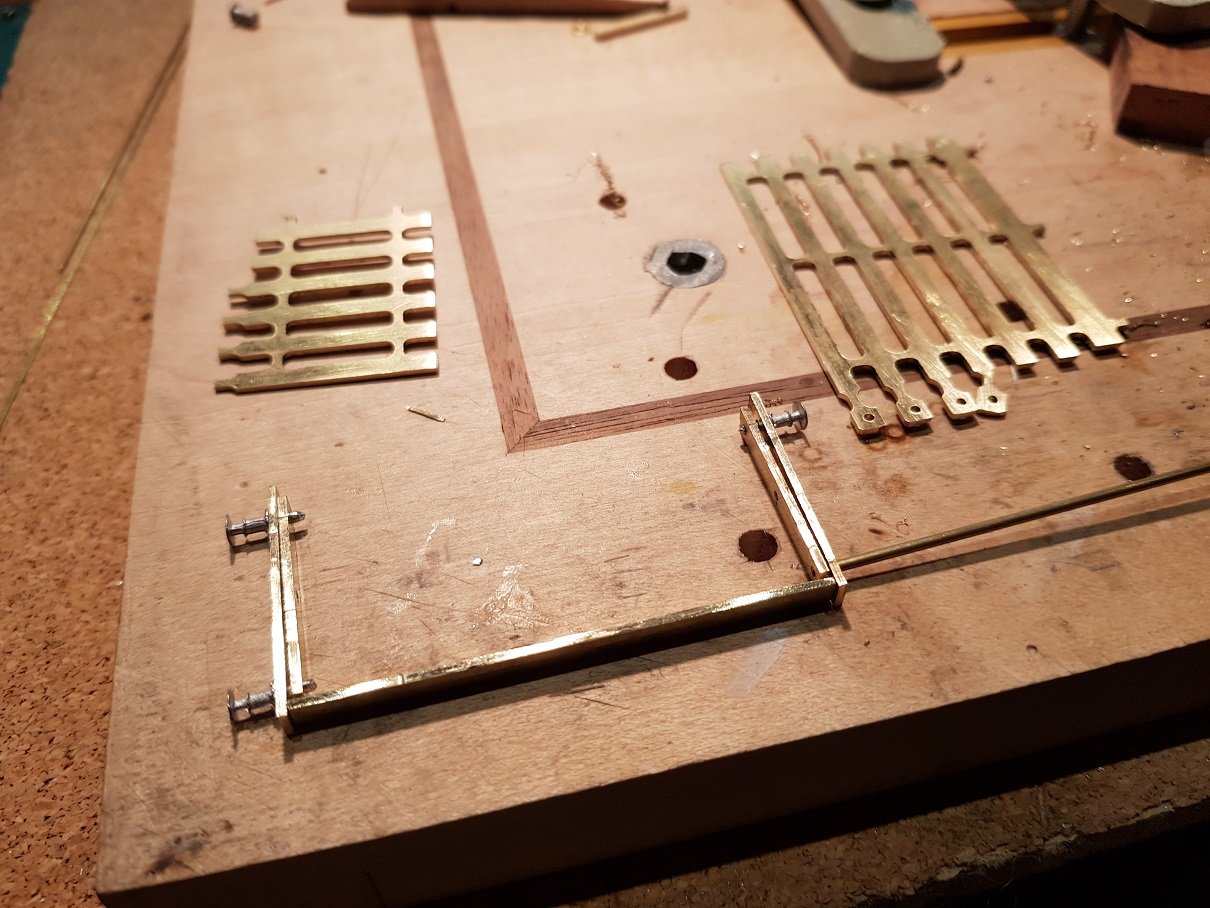
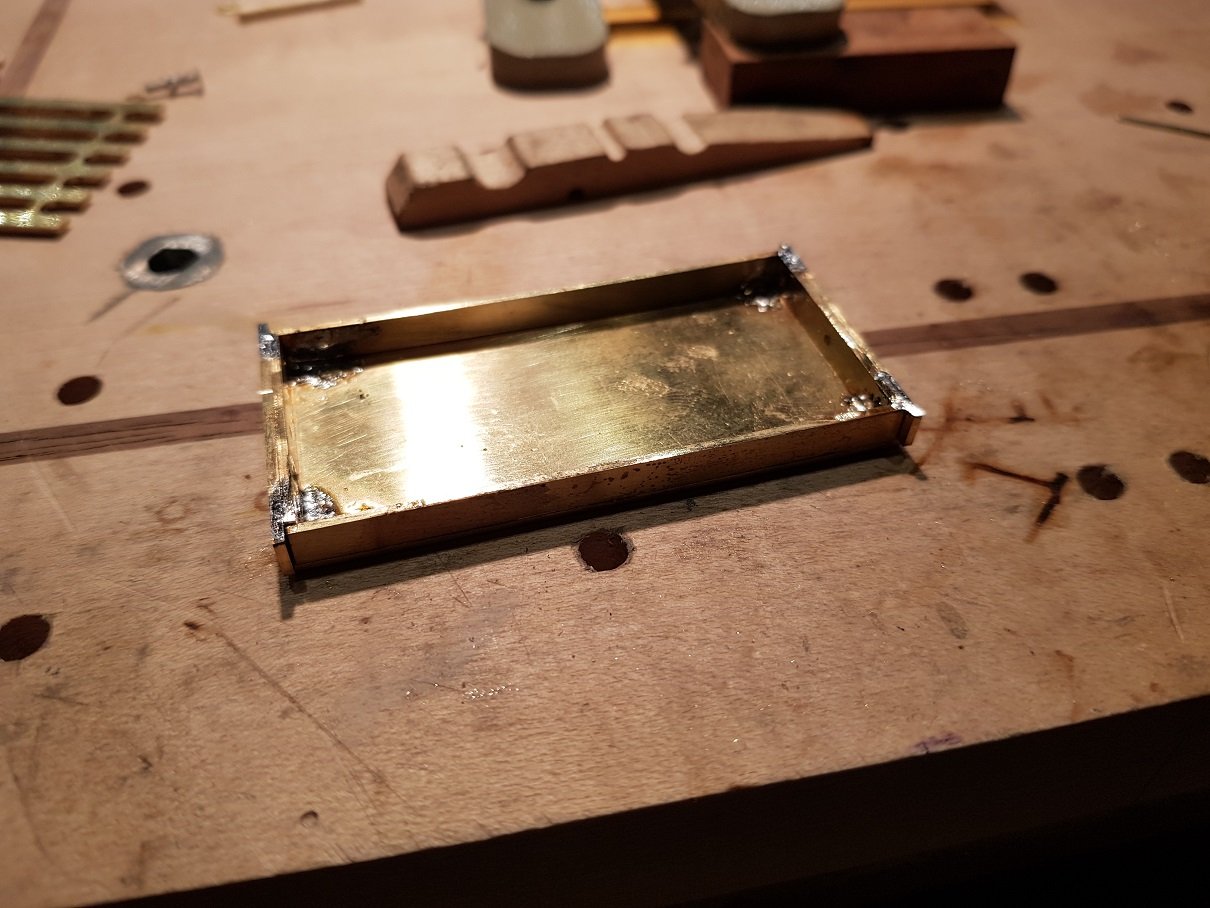
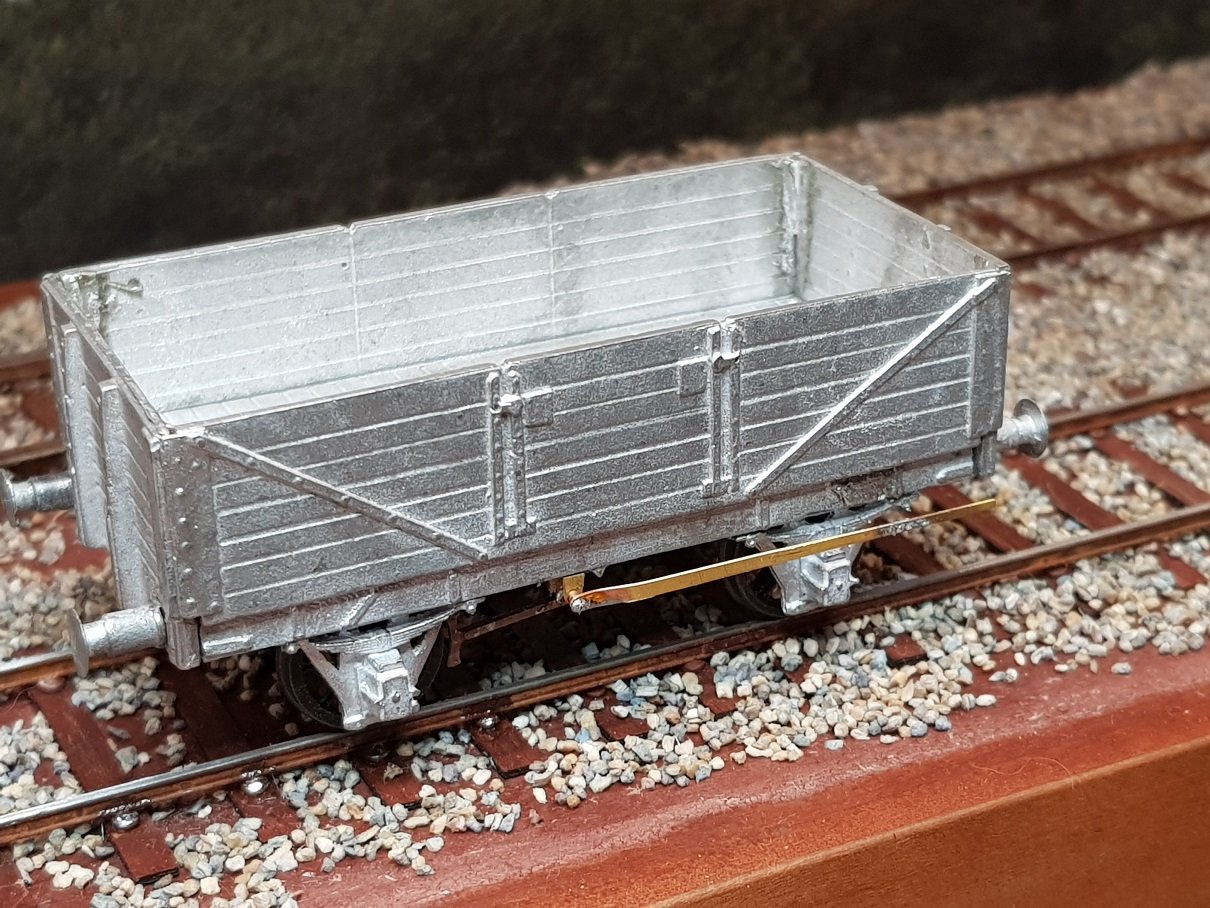
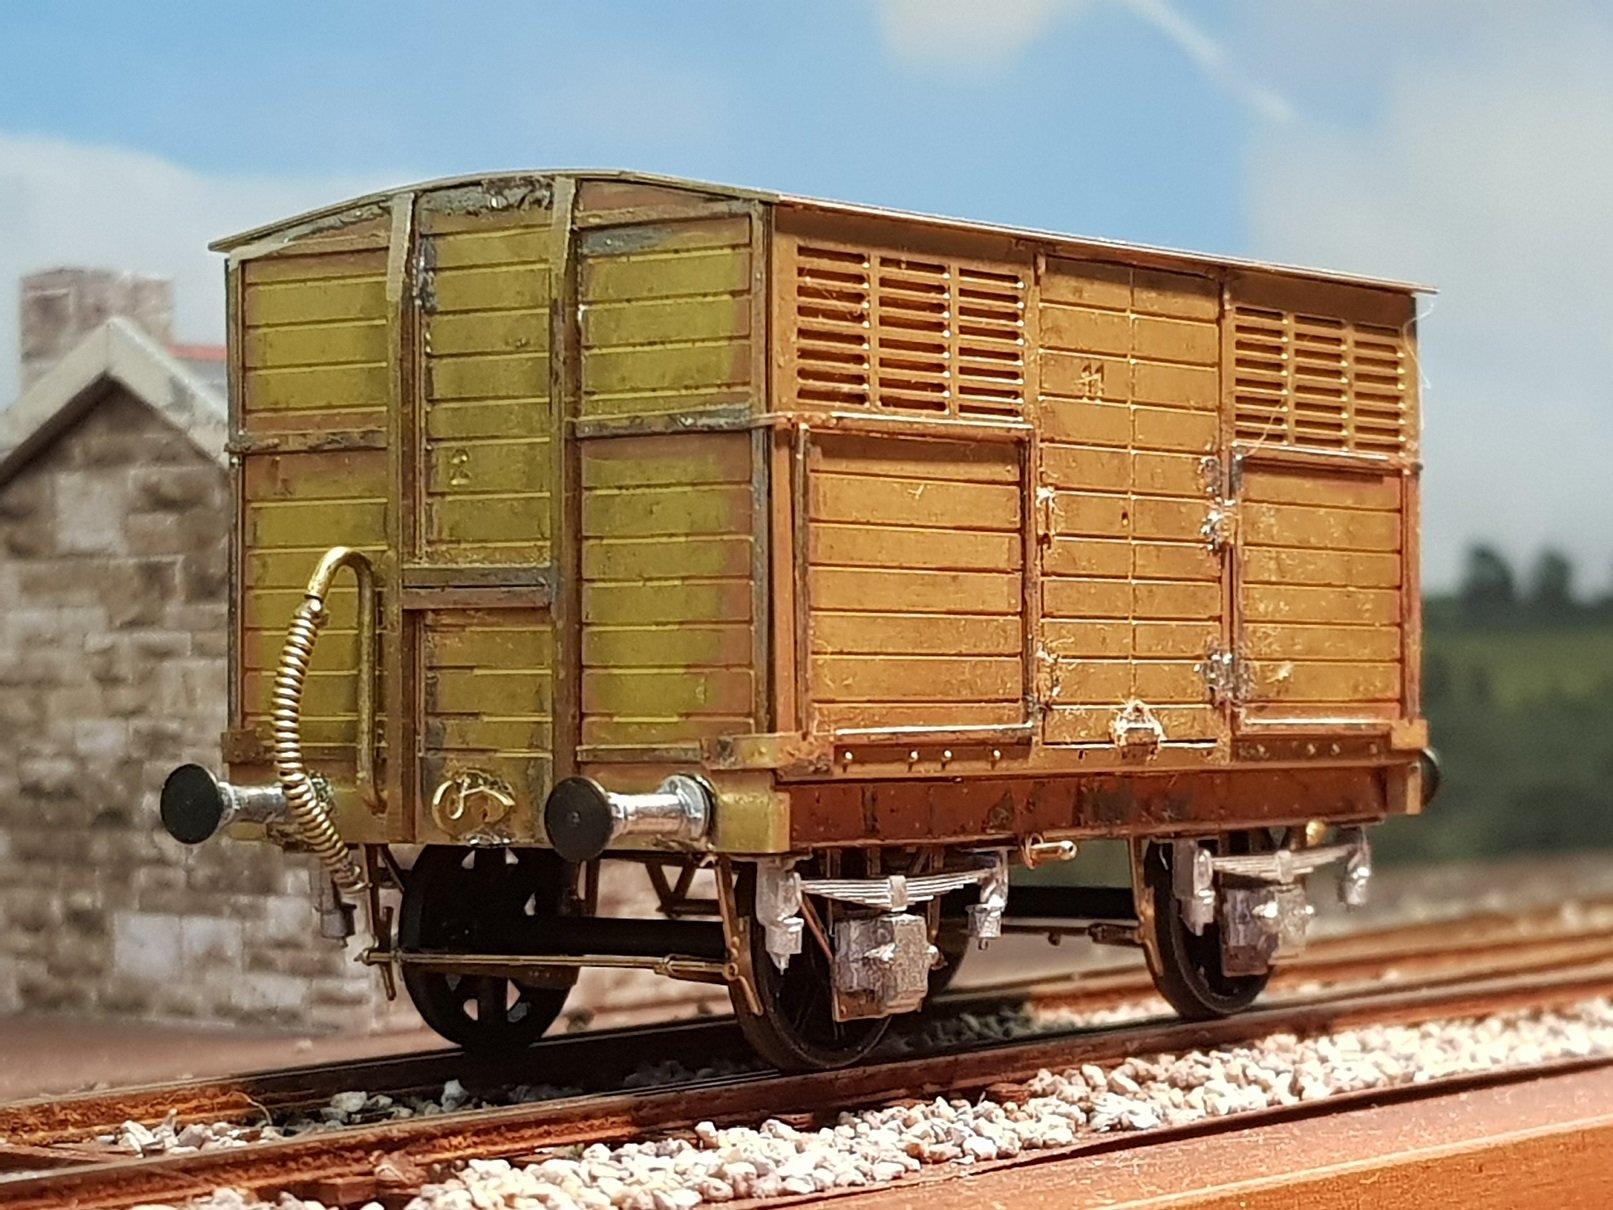
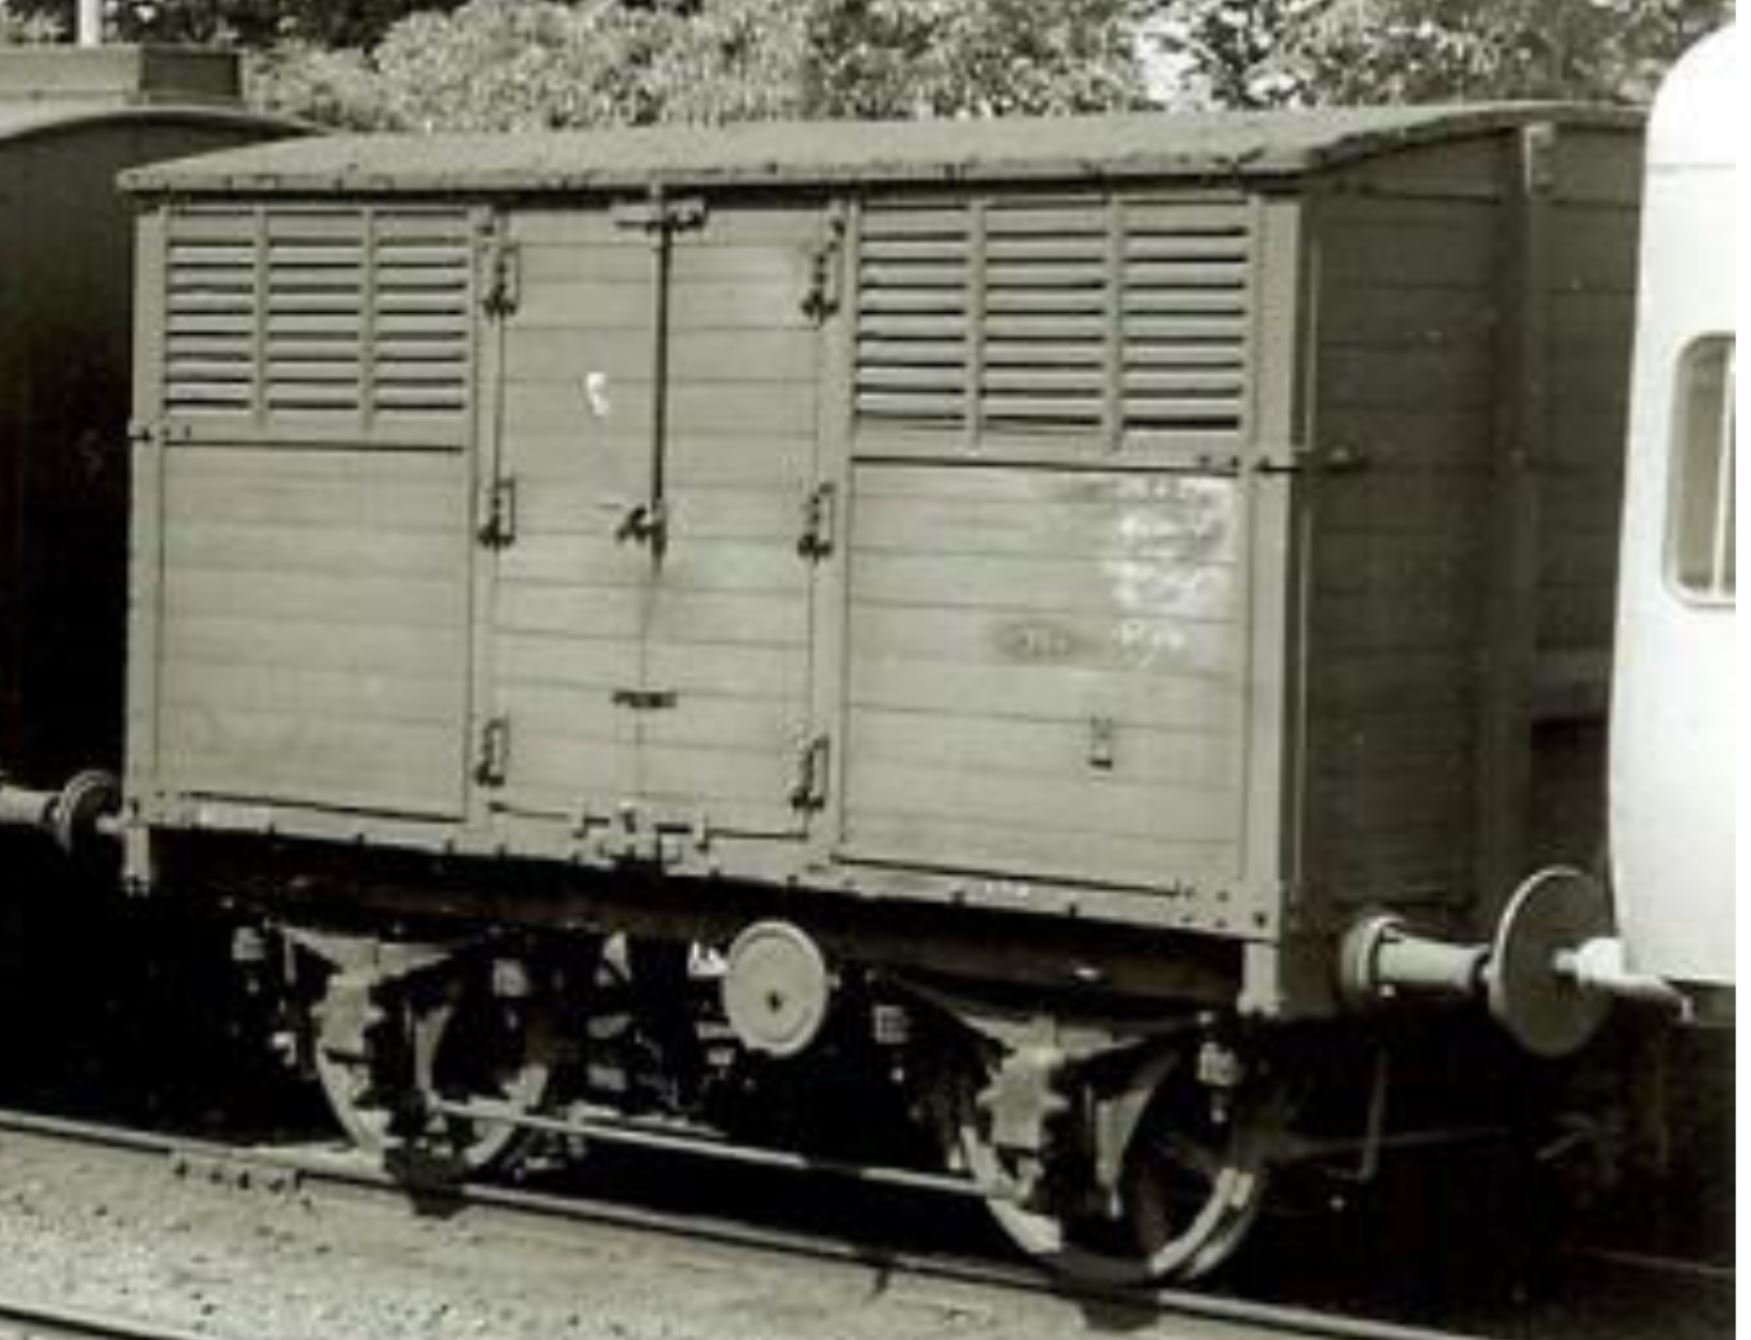
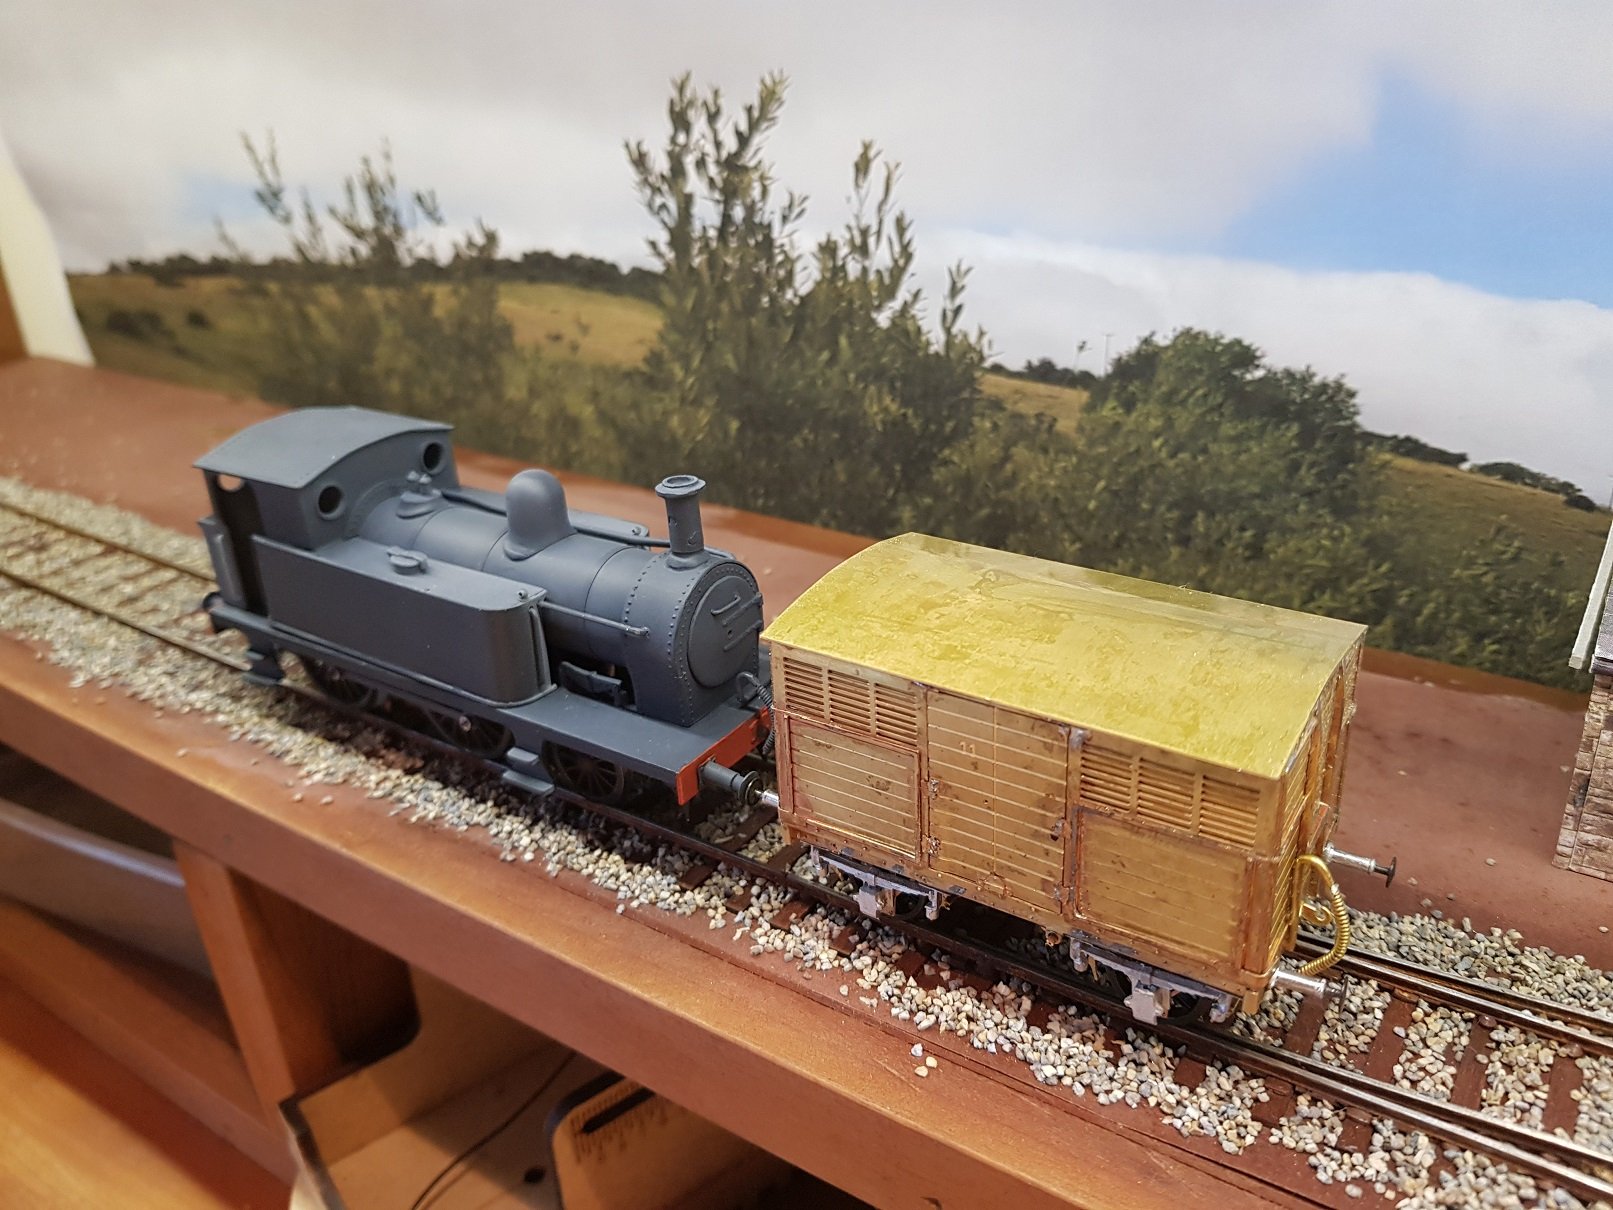
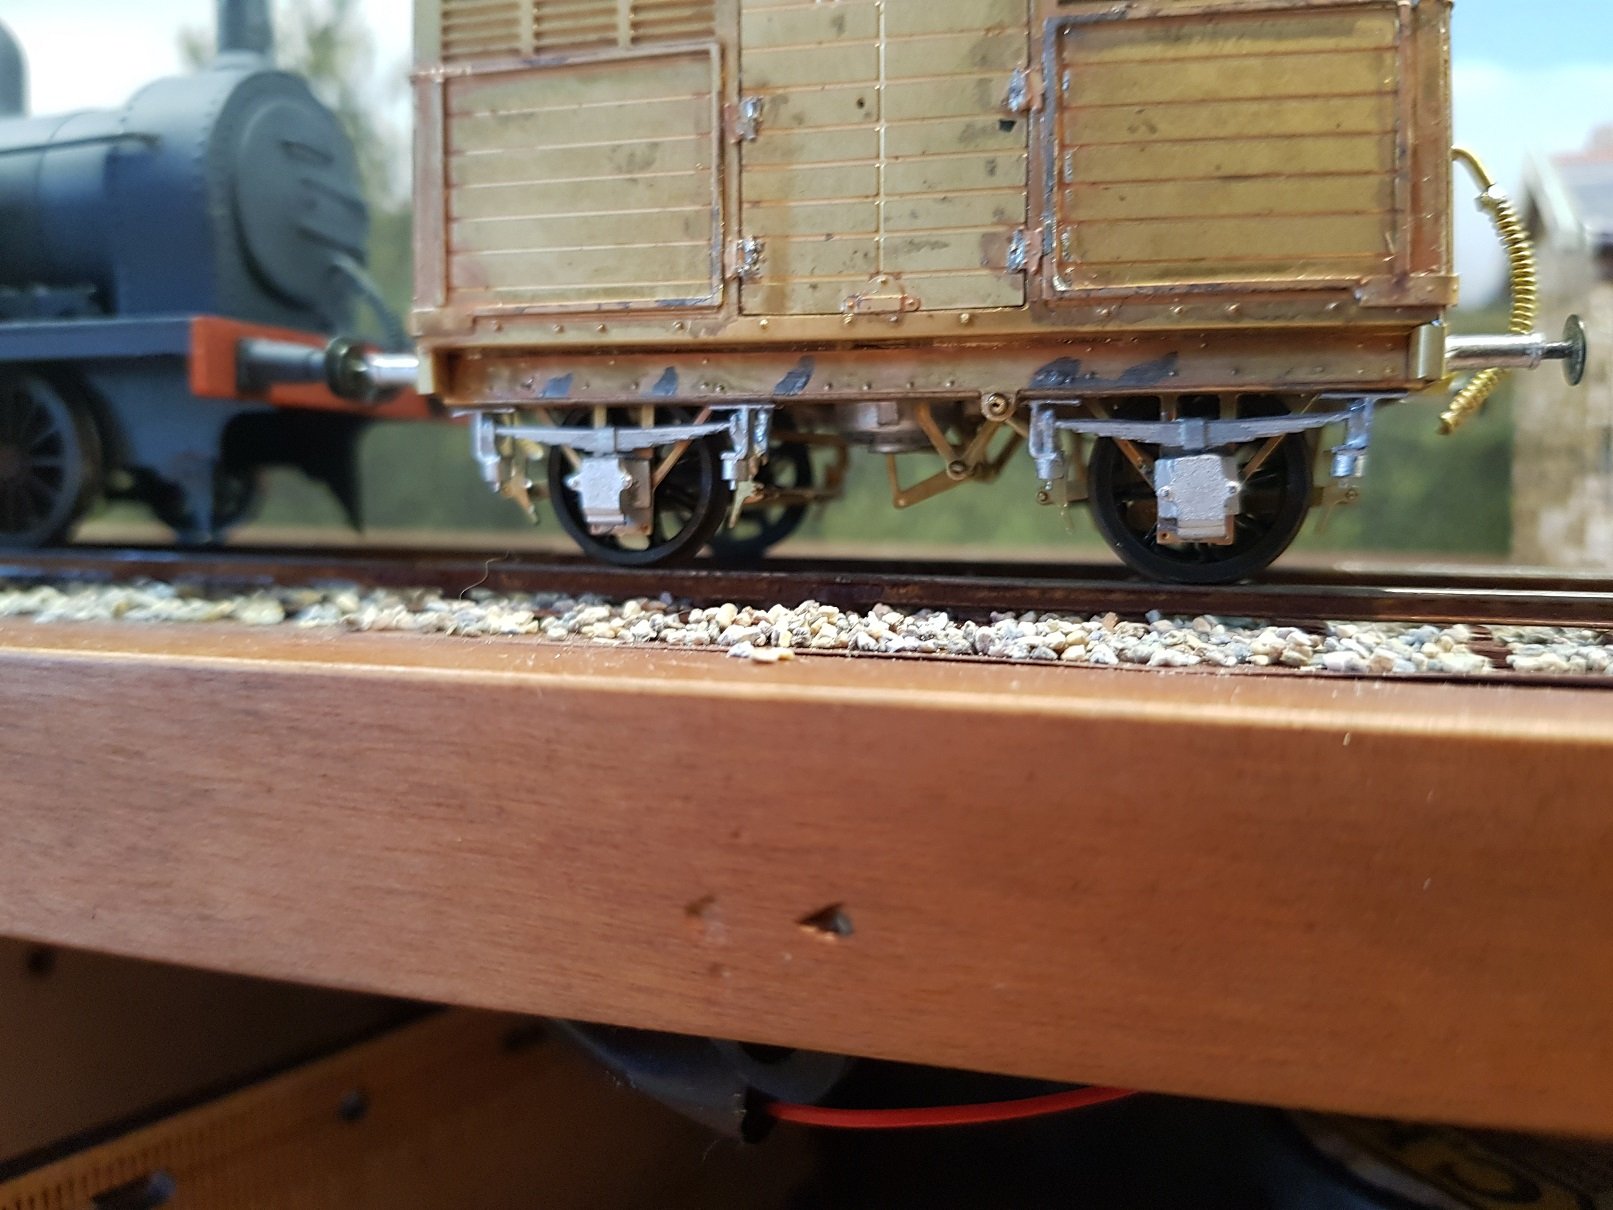
Got some work done on the covered wagon. Quite a lot of work went into this one, as all parts needed to be added to the base wagon shown above. Still waiting for a delivery of corrugated iron for the roof to complete, but all other physical work is complete. All uprights and cross members are 1 x 1mm brass. Corner posts are tri folded 0.3mm brass cut & groved on the mill. Hinges and corner straps are 0,5mm brass riveted to suit. It has come together rather well and just needs a roof and a good cleanup for painting. Some shots of the wagon with others which give an indication of how short it is. Wagons behind 495 which also has had some work done today - see Class 495 post in Irish models for more details. More later. Ken
-
Hello John, Ditto to Brian's comments above. Very nice parcel arrived this morning with the Postman, and also no duties requested. You were very good to roll the boiler, fire box and tender edges, which will greatly speed up work. Looking forward to starting on this one once I get some wheels. Kind Regards Ken
-
That 101 is looking seriously good. Well done on the lining!
-
The van in question is a Studio Scale Model (SSM) kit in white metal. It is quite heavy with thick castings; the detail is not a sharp as perhaps it once was (Sorry Des!). They are a really interesting wagon & it would be good to scratch build a version which may be a little closer to scale thickness I'll perhaps tackle that after the wagon I'm currently working on; a DSER 13'-6" covered wagon.. These are small wagons but have really nice detail and should provide a nice model once complete. Very nice small wagon which should look good in a rake with the other wagons. This would bring me to 5 wagons - an Inklenook Sidings shunting puzzle is beckoning!!!! Ken
-
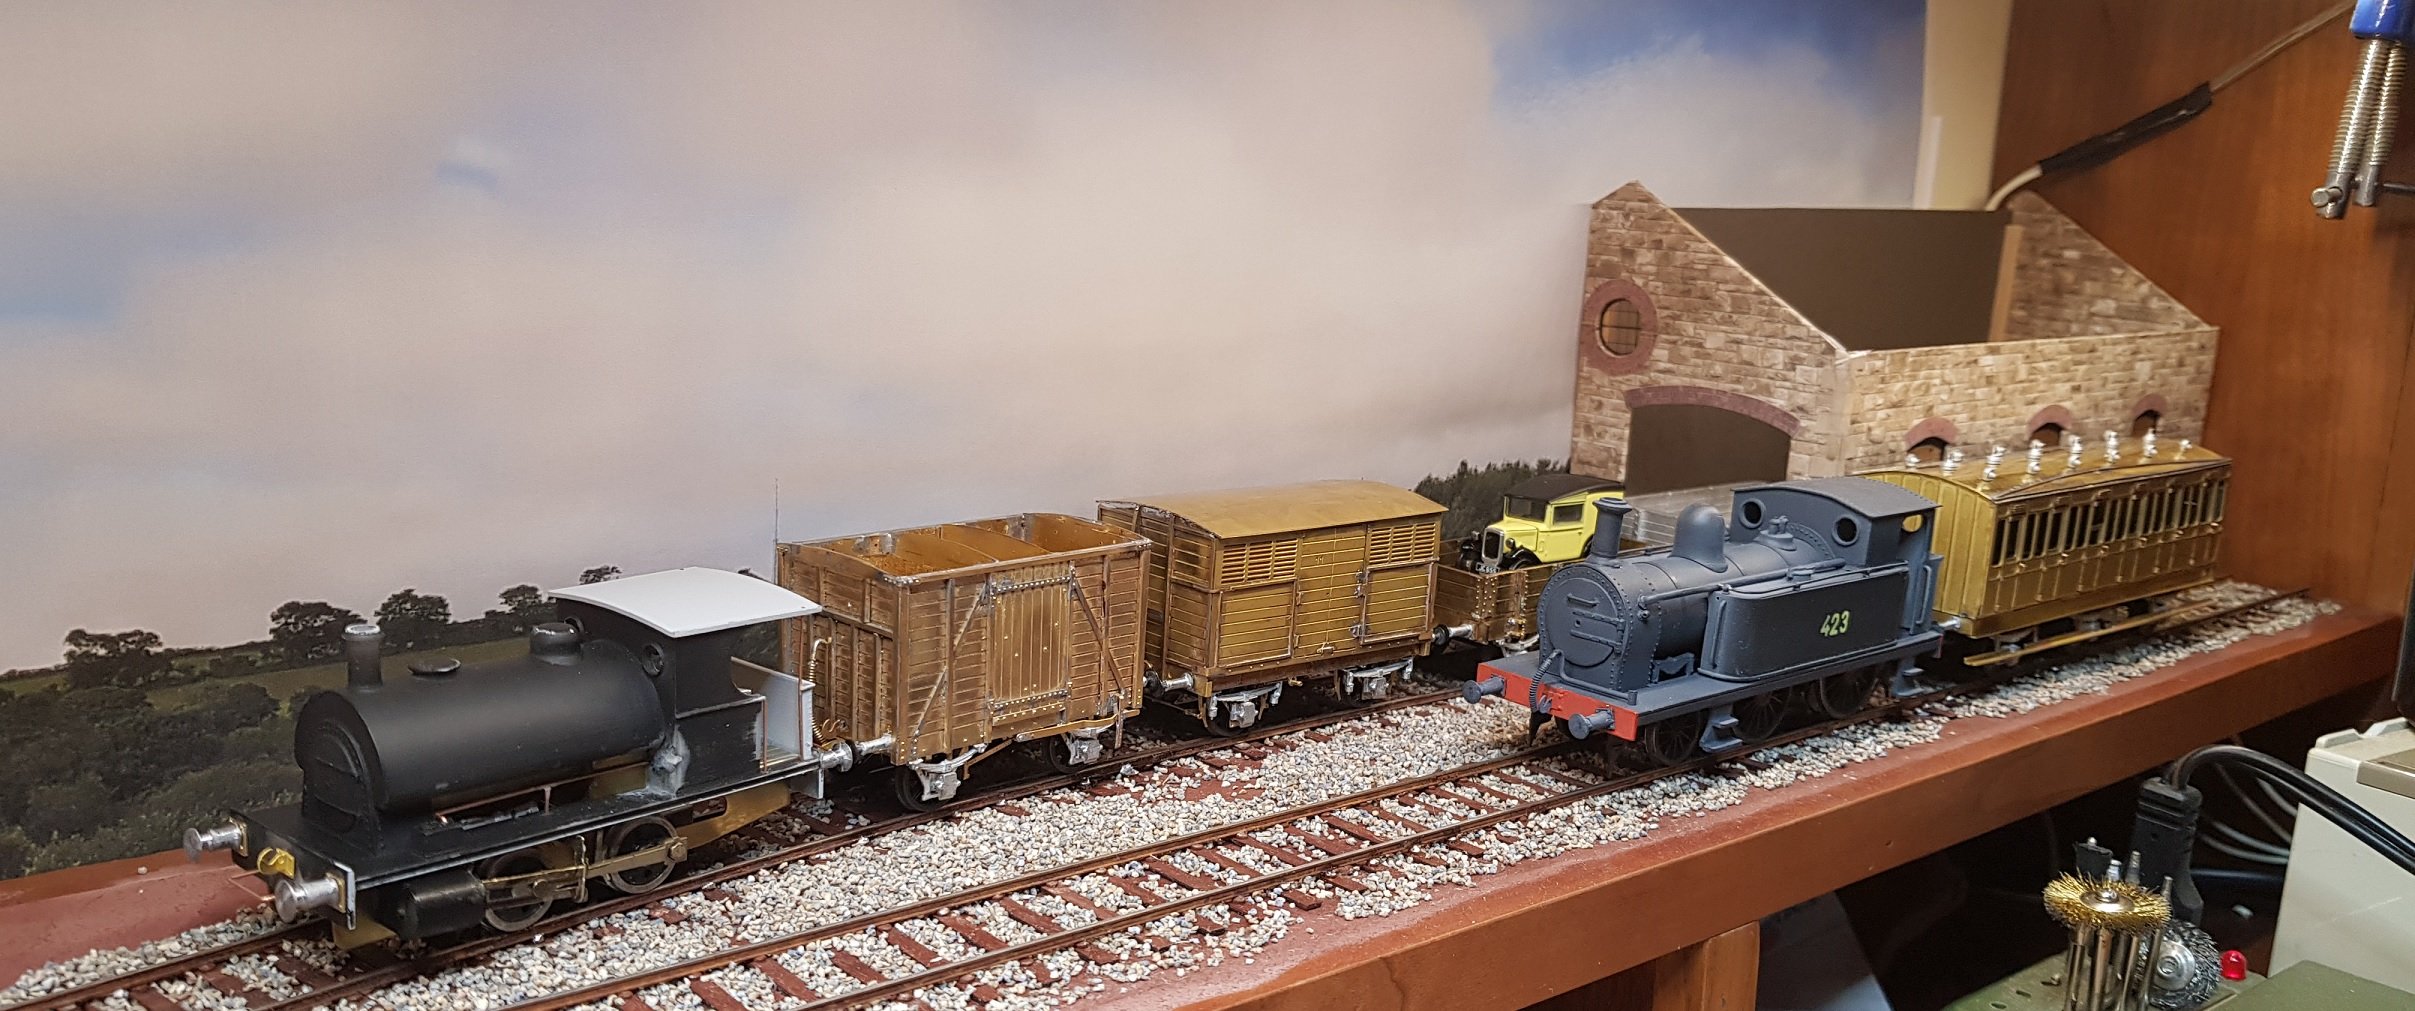
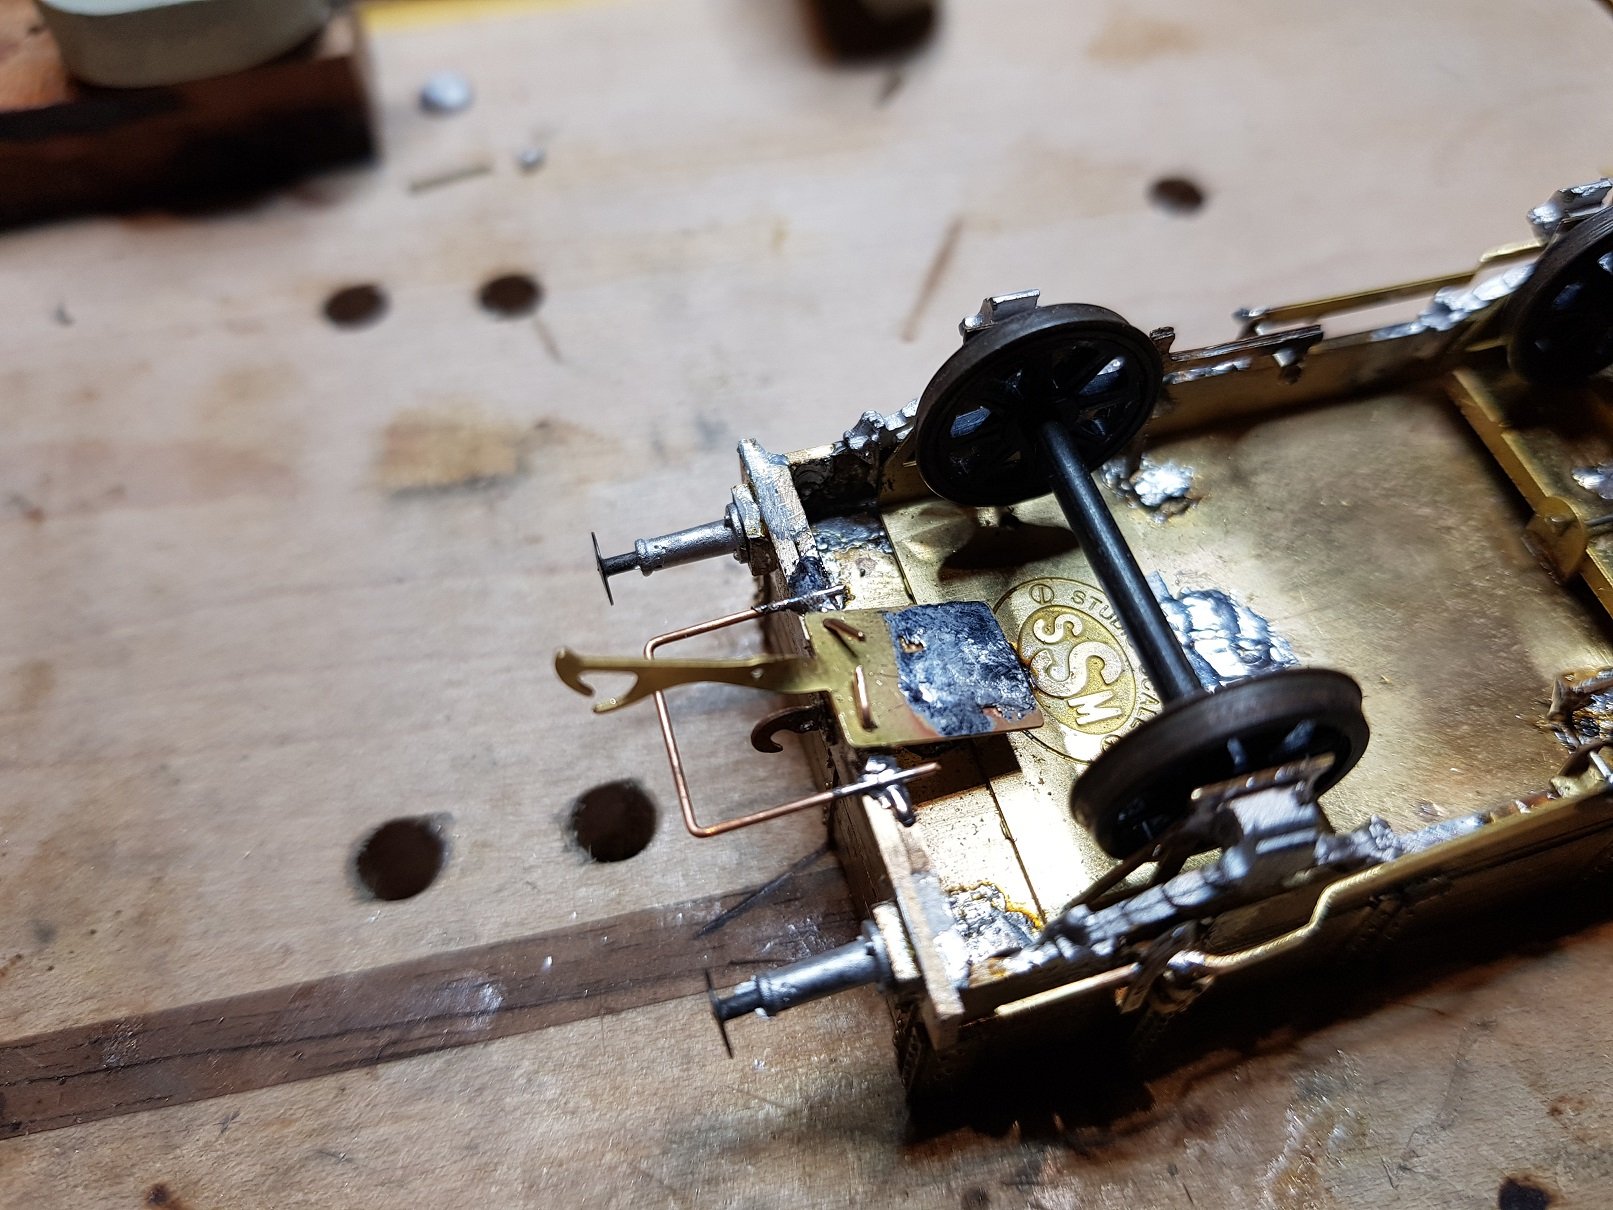
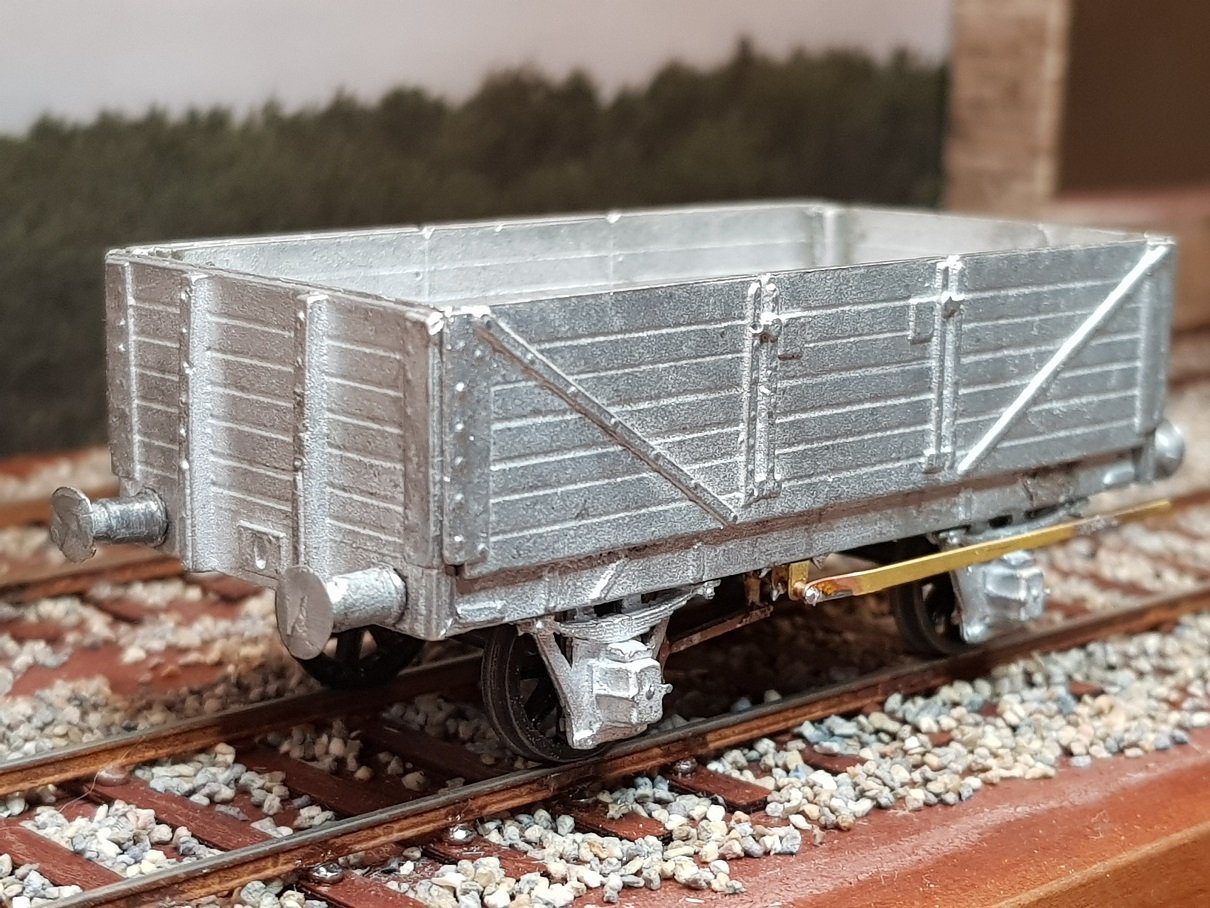
Some work over the weekend. Progress on the wagons. Finishing off with springs, axle boxes, brakes, and coupling system. I have been holding off on the coupling system, which I really shouldn't have, as some integration into the kits may have eased the installation. Not withstanding that, the installation was quite straightforward with adjustment based on buffer length. The coupling system of choice is the Spratt & Winkle system from Model Signal Engineering as it's unobtrusive but effective and allows remote uncoupling. It involves the fixing of a coupling paddle / hook to the underside of the frames, while adding a simple wire loop / hoop stops the hook from pivoting too high. On the other end of the wagon another hoop provides connection for the hook of the adjoining wagon. Remote uncoupling is by means of three links of soft iron wire connected to the hook (not done yet) which is drawn down by magnets buried under the track. The three links and very slim appearance of the coupling system provide a closer to prototypical look. S&W coupling hook / pivot. Connection between wagons Wagons are virtually complete and can now head for the paint shop. GSWR open wagon (Studo Scale Models) , with SL&NC Vehicle Wagon (Scratchbuilt). MGWR Fishvan (JM Design) and GSWR (?) 7 Plank Wagon (SSM) with Class 423 (Scratchbuilt) in the background. More soon. Ken
-
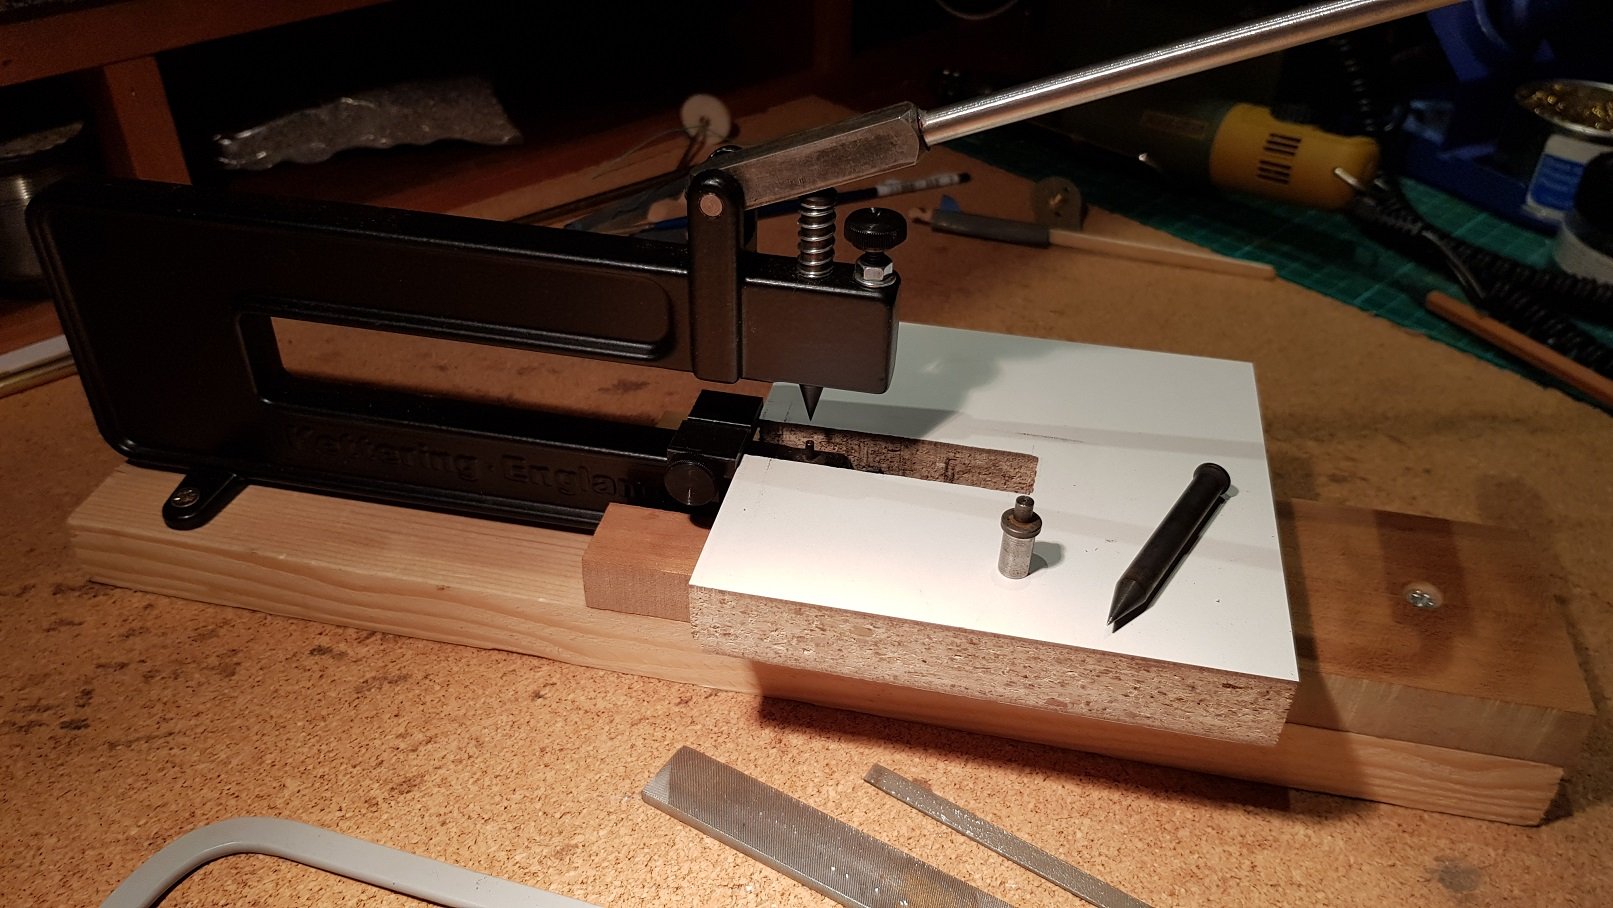
Hello Noel, Rivets were punched onto 1mm x 0.5mm strips using a Kettering Rivet Press supplied by Midland Railway Centre. Ken
-
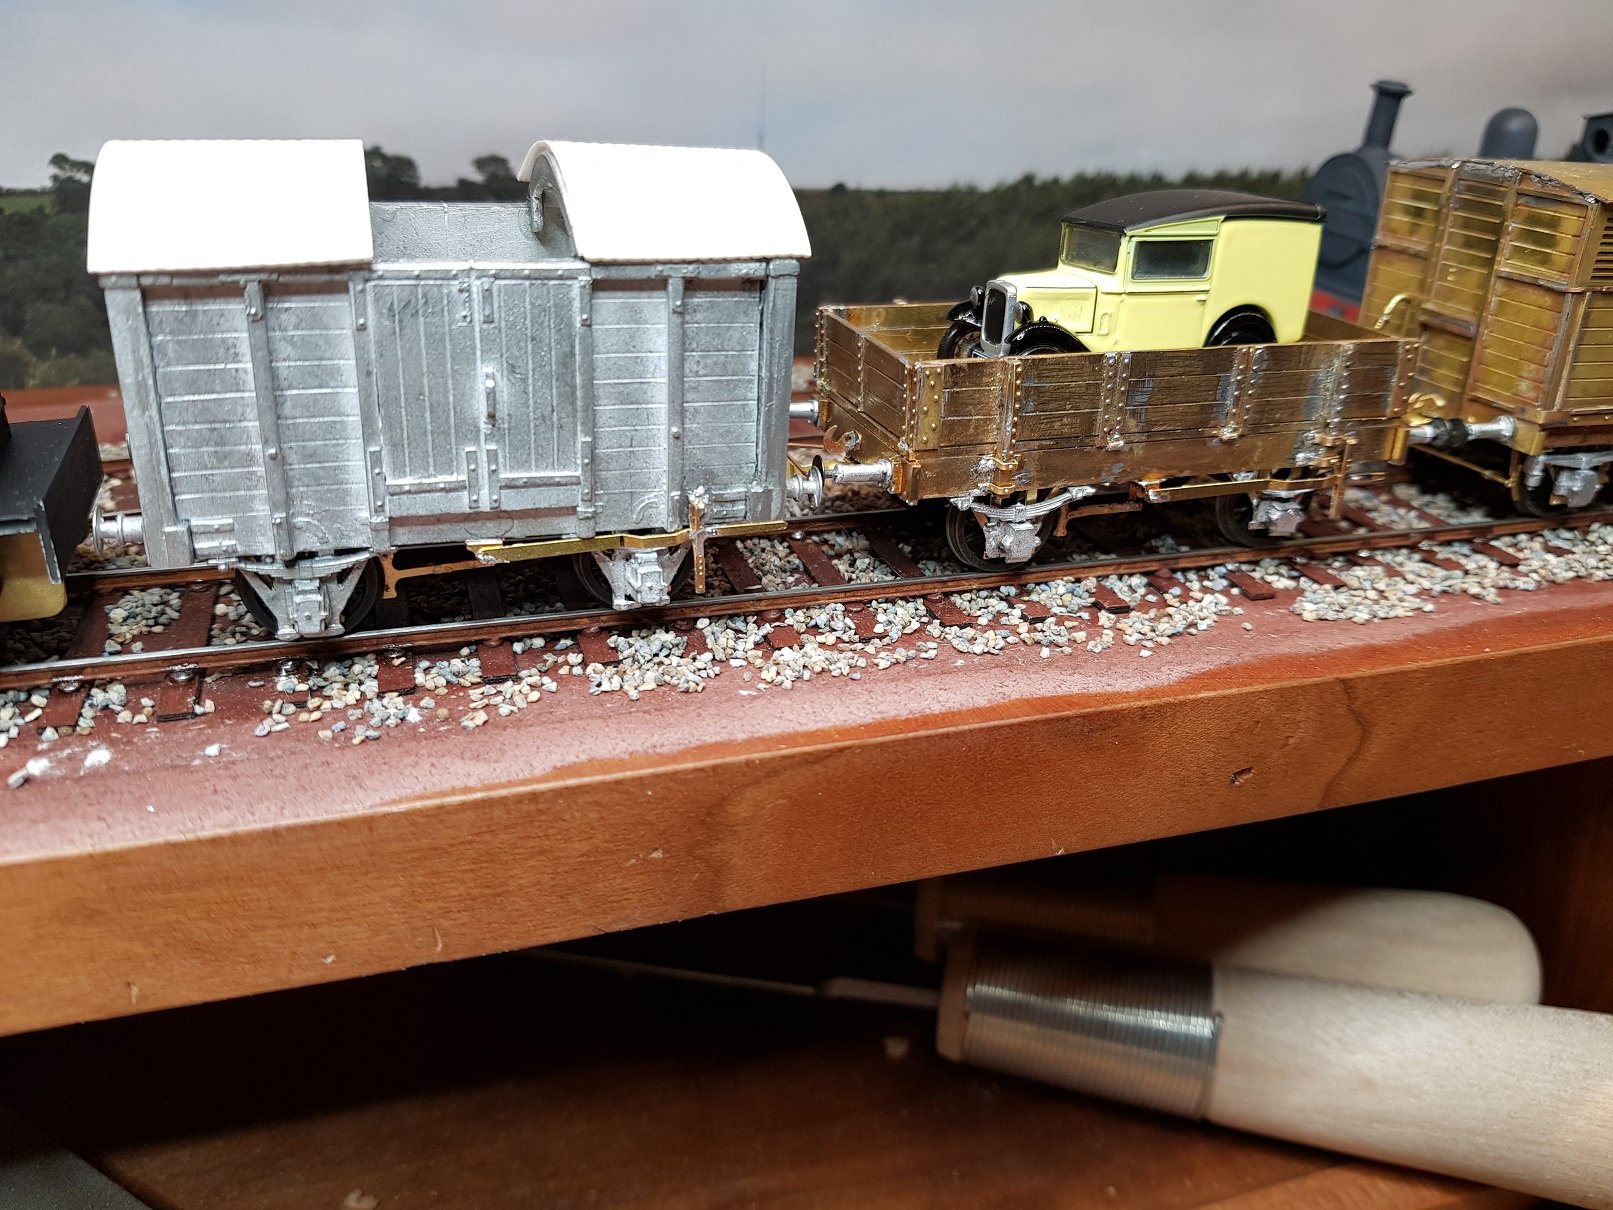
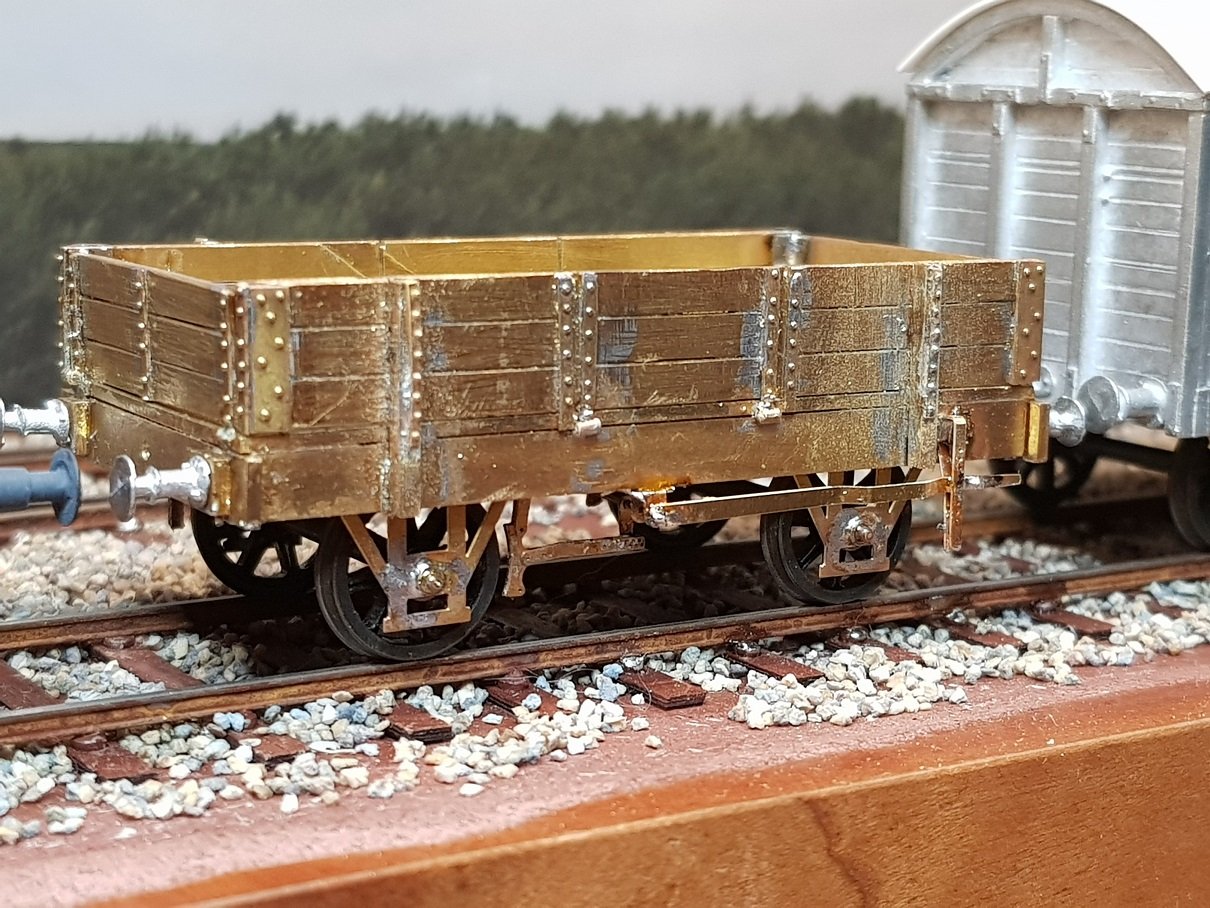
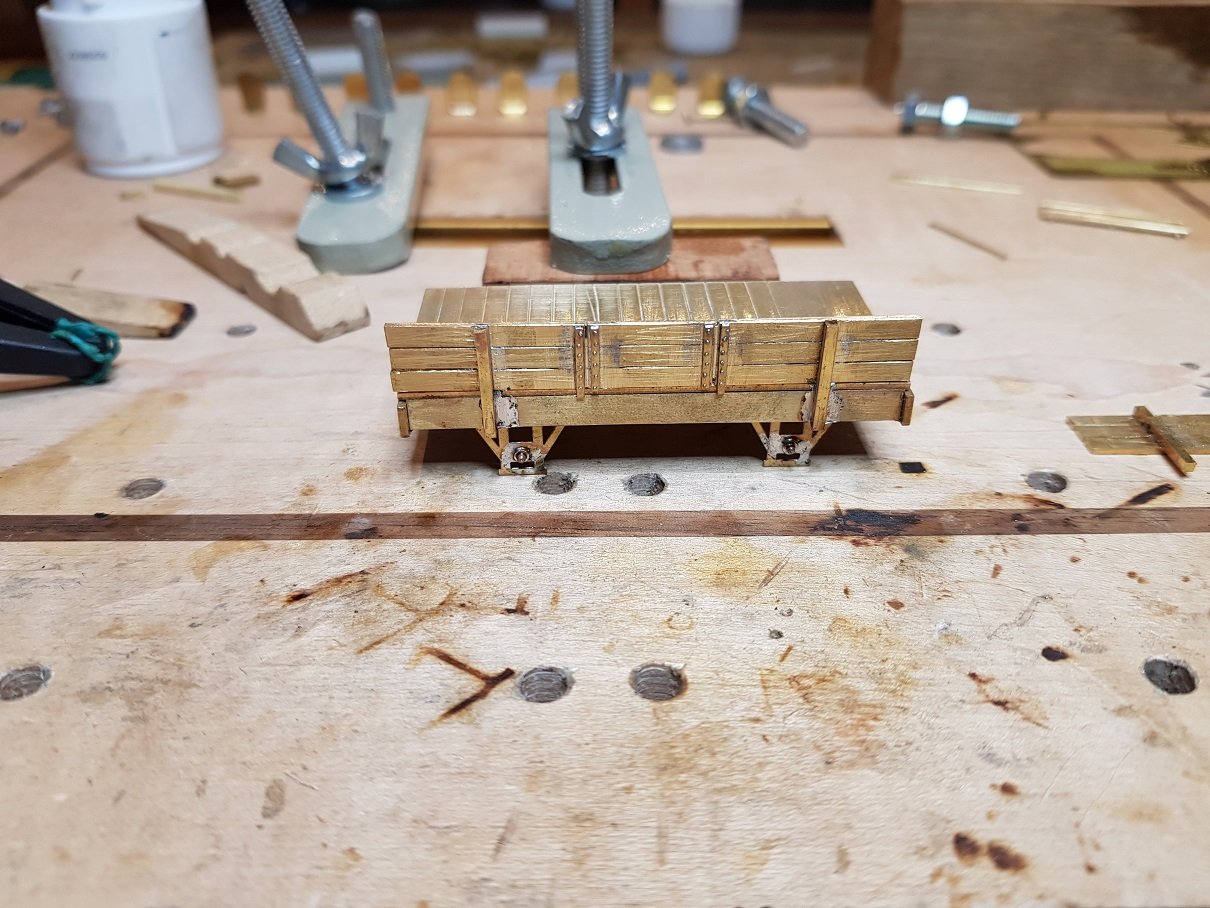
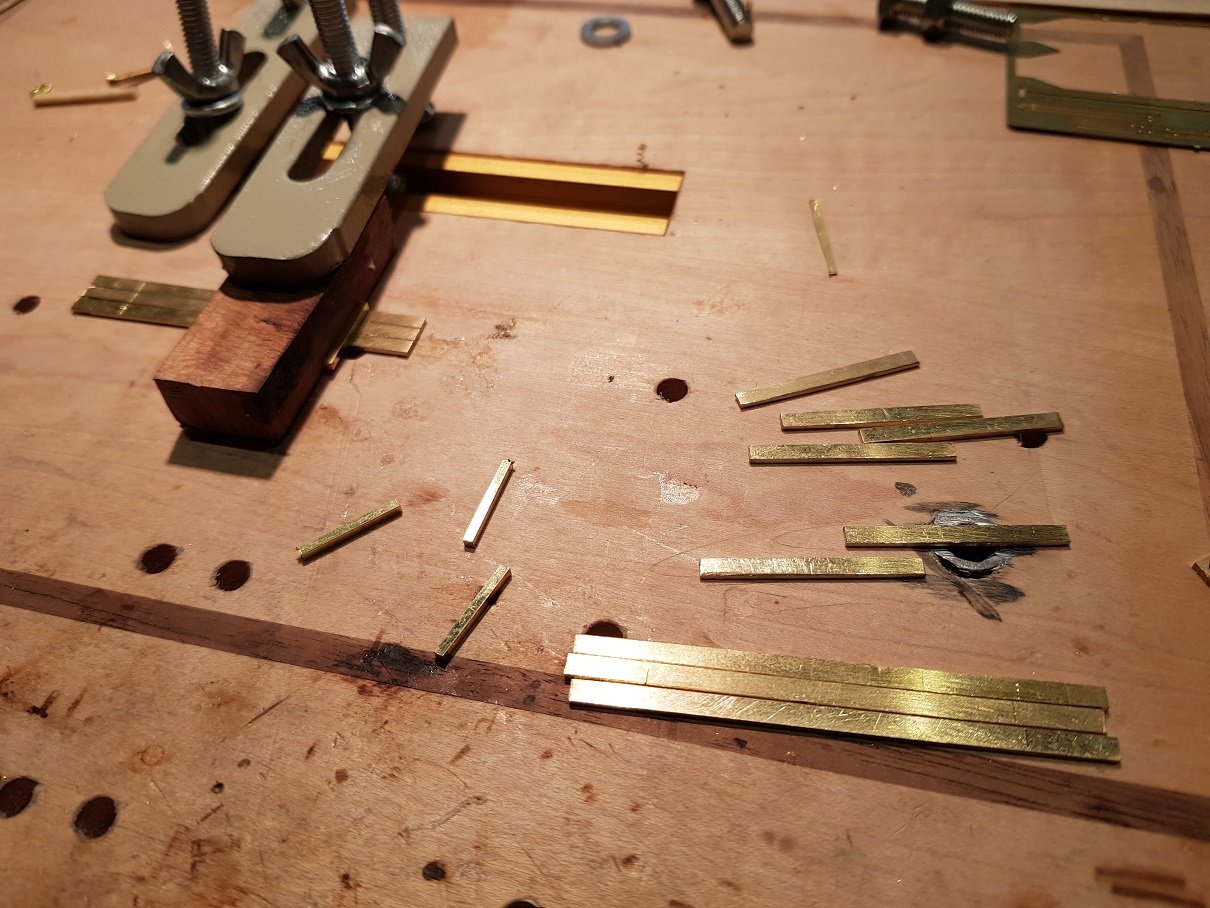
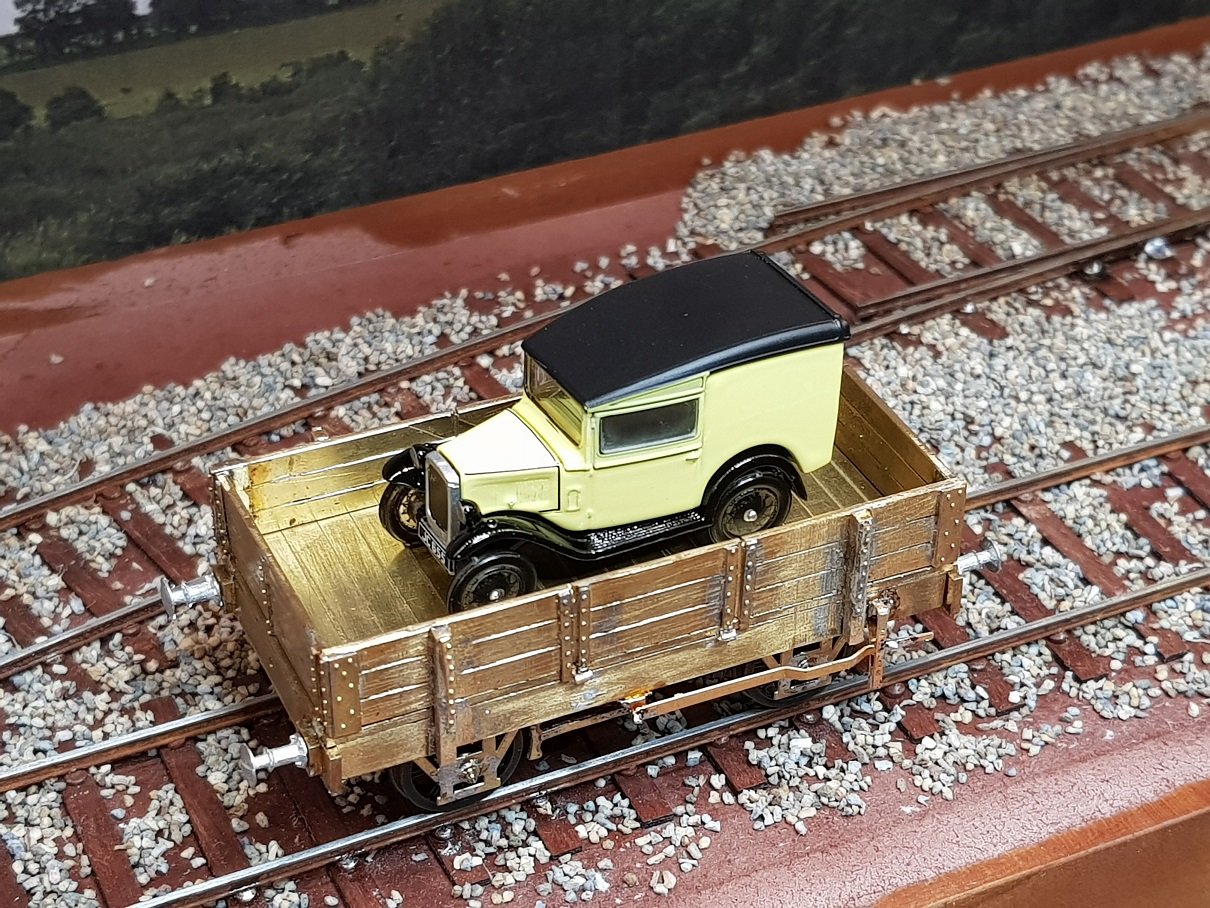
Some work to date: I rather like the look of the SL&NC Road Vehicle Wagon, and having some 1mm brass sheet, I decided to have a go at creating one. Drawing created of the wagon, which allowed a cut drawing be produced which was then cut out on the CNC. Really tough stuff, and many broken bits, trimming and sanding later we ended up with some reasonable parts. I bougth the 1mm some time ago thinking I would use it for loco frames, but 0.5mm is more than enough and closer in scale so this was surplus - I won't be buying it again as it is difficult to work with, both cutting & soldering. Floor, buffer beams and solebars/frames assembled. Sides are created from individual planks cut out, which is probably over the top, but will provide good detail. These were then assembled with some uprights and strapping added c/w rivet detail for the opening door section. The uprights were then used to fix the sides to the frames. This wagon is a little unusual in that the sides line up with the frames with no overhang. The sides were originally designed to be removed thus they lined up with the frames and slotted into straps on the frame. Other sides and additional strapping was added to complete the wagon body. Compensated W-irons from SSM were then added, including the brake detail and brake levers. Temporary buffers were added for effect and we arrive at this: Wagon with Austin 7 Van purchased at the show last Sunday. Some more strapping needed for the uprights, springs, axleboxes, draw hook and coupling system to be added to finish it off. A good cleanup is also needed ot get rid of excess solder, marks, etc before we get to painting. I also decided to assemble an SSM open wagon kit I have had for some time now. Whitemetal is a very different material to work with, but the kit went together rather well. Again SSM compensated W-irons and brake detail added - this needs to be completed as the lever is not shaped, so will need to come off again and lever guides to be added. Nice wagon and a hefty weight. Final detailing such as drawhook, coupling system, tidying up and into paint. All tolled, we are getting some nice rolling stock together. Numbering gone onto the loco, so final coats of varnish needed plus some weathering to finish off. More as time permits!! Ken
-
Hello David, Another option you might consider are draughting pens - I picked up two Rotring Isograph pens (0,5mm & 0.2mm) for lining as I have zero experience with bow pens, but quite a bit with pens. Rotring & others provide different colours so it should be possible to make a suitable mix to get the colour you want. The pen has a simple internal cartridge which is easy to fill & clean. I find the pens easy enough to use on a gloss finish, and propose to airbrush a light coat of varnish over the ink to finish it. Oh - they also work very well with lettering stencils, so those hard to get transfers, may be possible with stencilling? Just a thought. Regards, Ken
-
David, That is an impressive line up of motive power, all the more special as you constructed most of them. Well done Sir, and you're right not to hide them away in boxes - they deserve to be on display until their next outing. Beautiful models - you can be rightly proud of them. Ken
-
Edit to above. Ship in the foreground is HMS Warspite, an armoured cruiser which was a port guard ship in Queenstown between 1893 to 1896, and subsequently scrapped in 1905. Hopefully this gives a more accurate date than noted above. (Ok - I'll get my anorak and go!) Ken
-
Both photos appear to be of Queenstown (Cobh). Date is most likely during or around WW1 given the ships in the first photo appear to be Royal Navy Cruisers or similar. Perhaps liberty men returning to ship on the tender just leaving the quay? For the locos, I think Eoin and John have answered that one. Ken
-
Hello David, There is some very good information in the "Good Book" Clements & McMahon - chapter 11 on the various types of tenders used across the network. I think you mentioned elsewhere you picked it up recently - it may help? Ken
-
Fiddly little bugger! Parts from the High Level Pug kit - nice cast brass parts. Needs some tidying up and painting! Ken
-
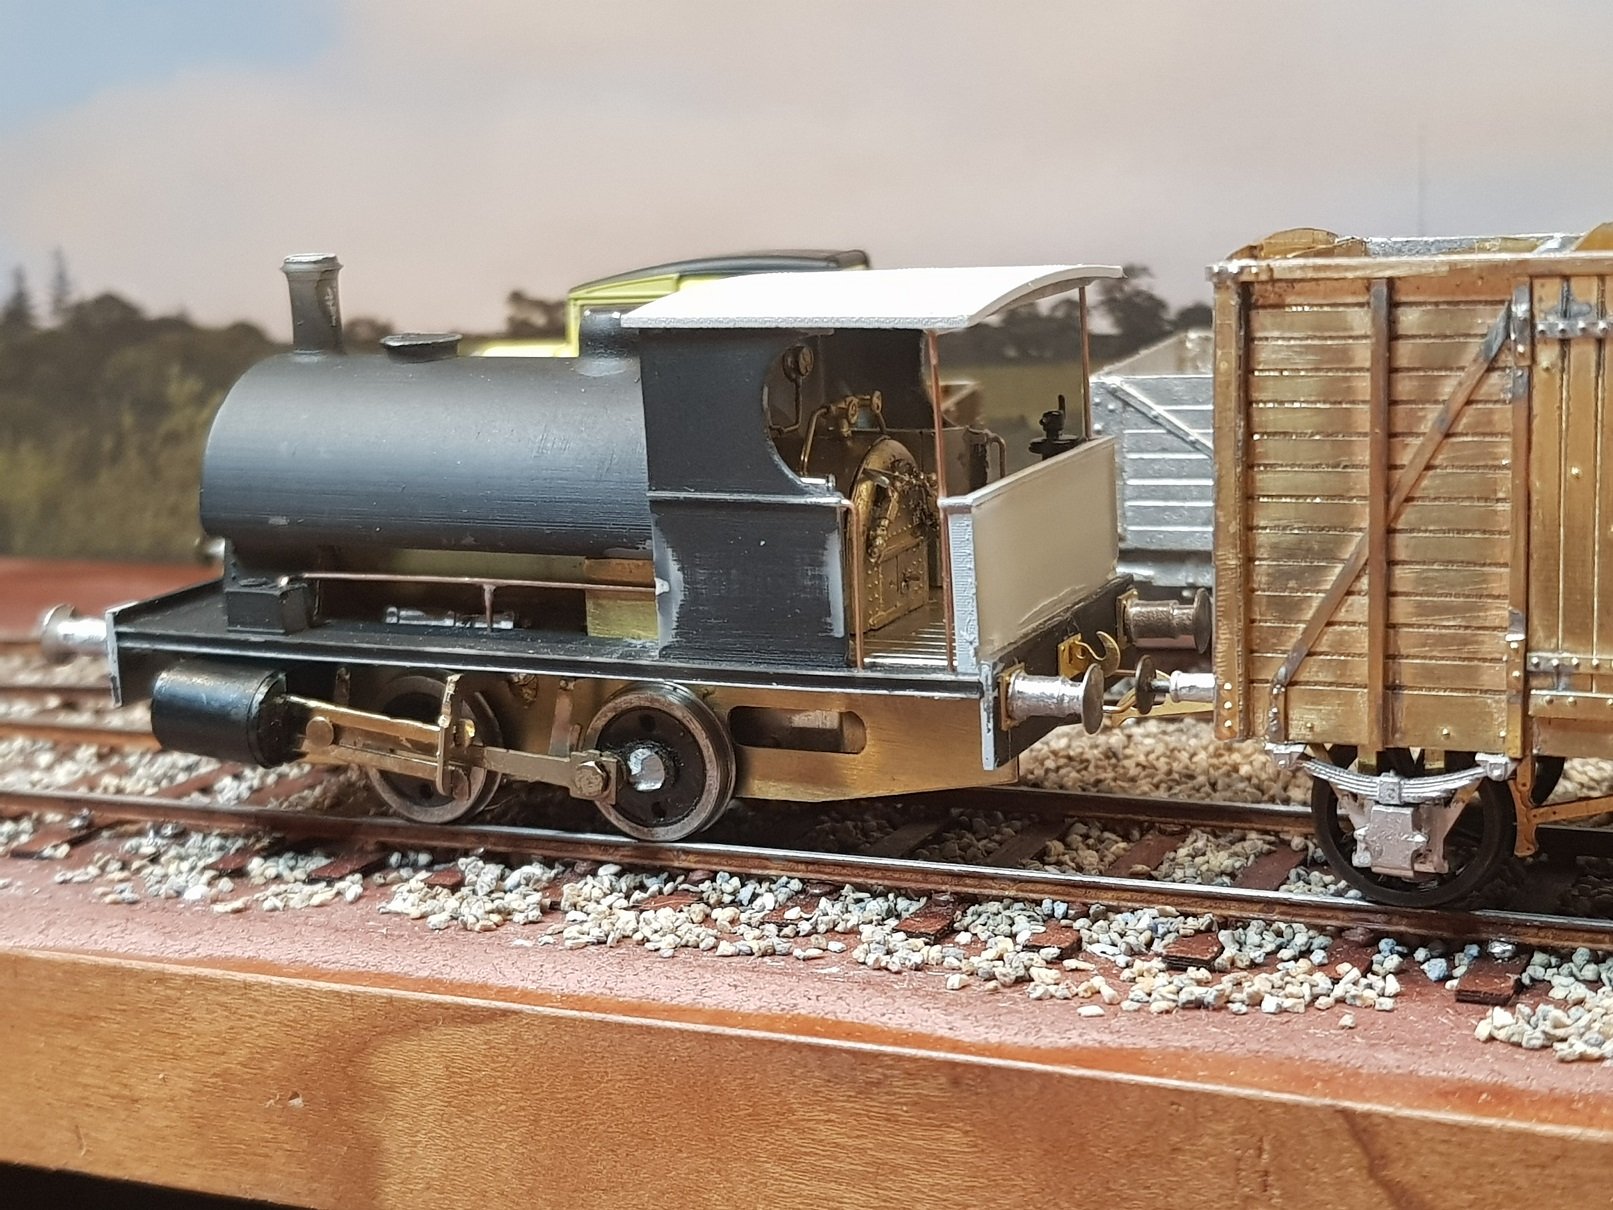
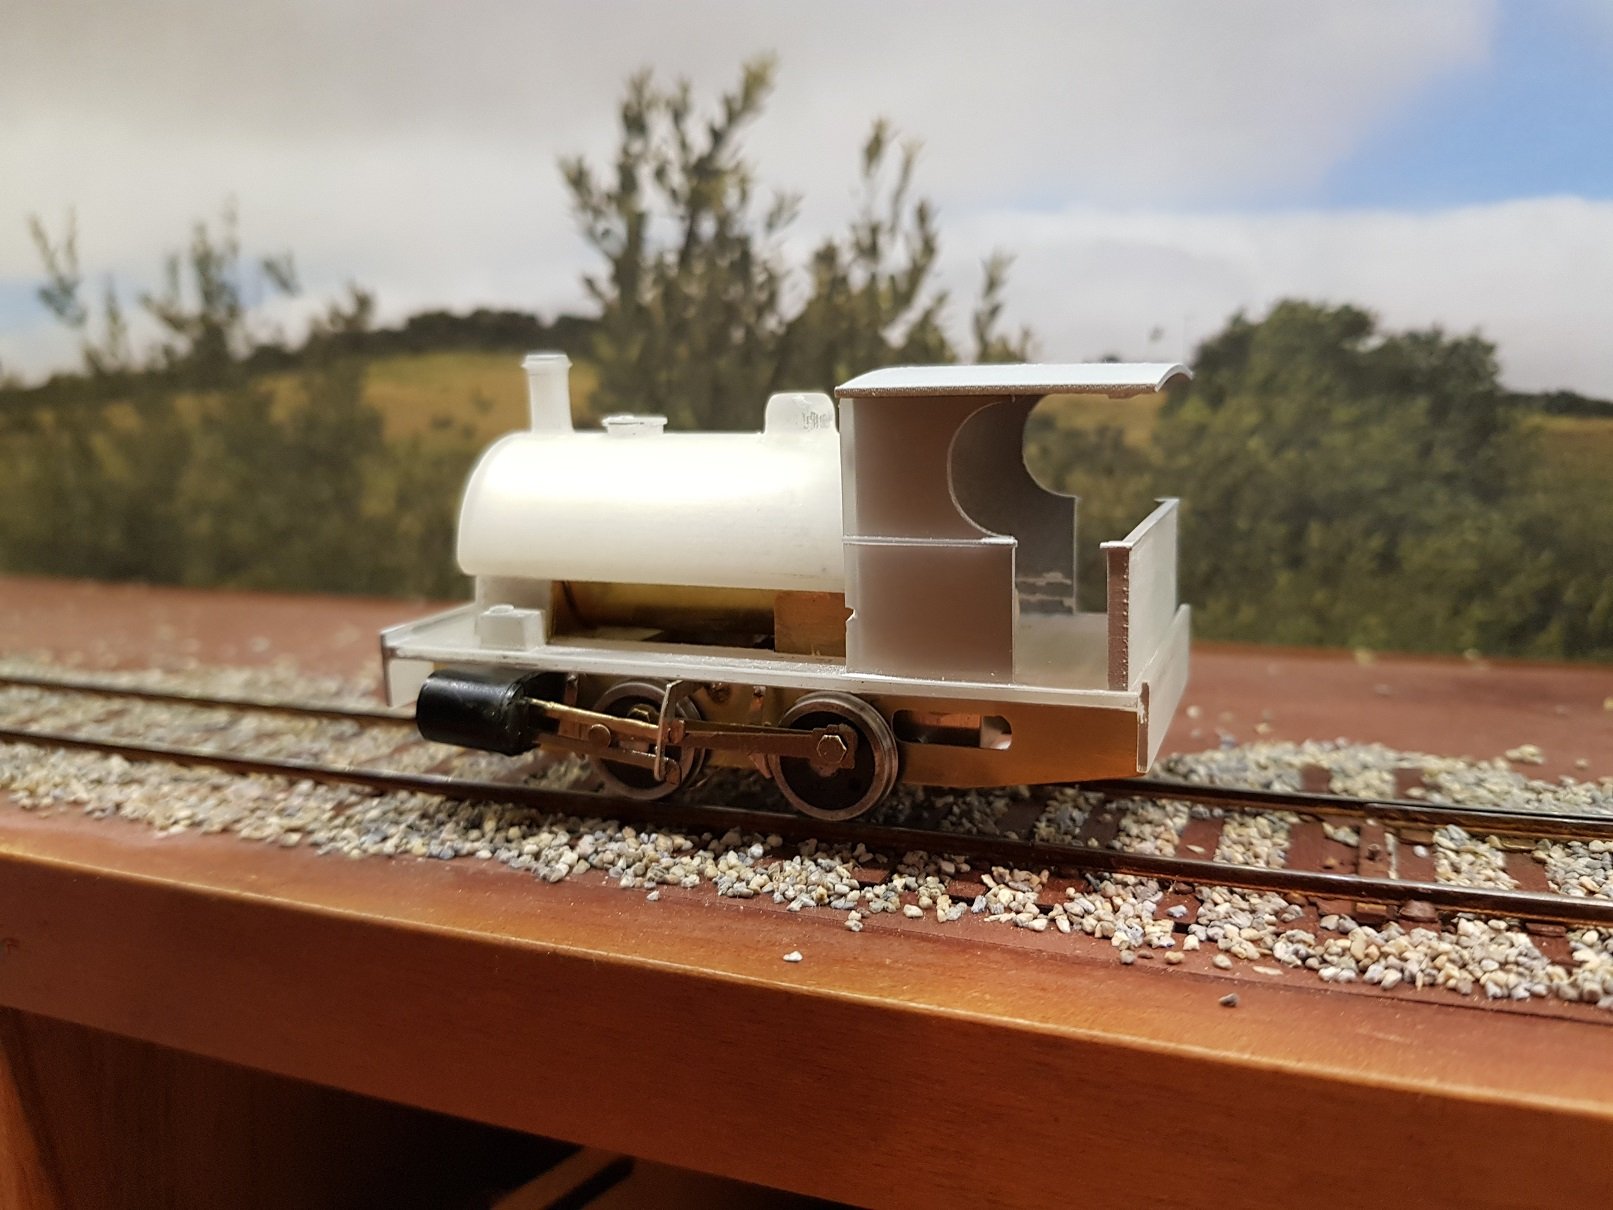
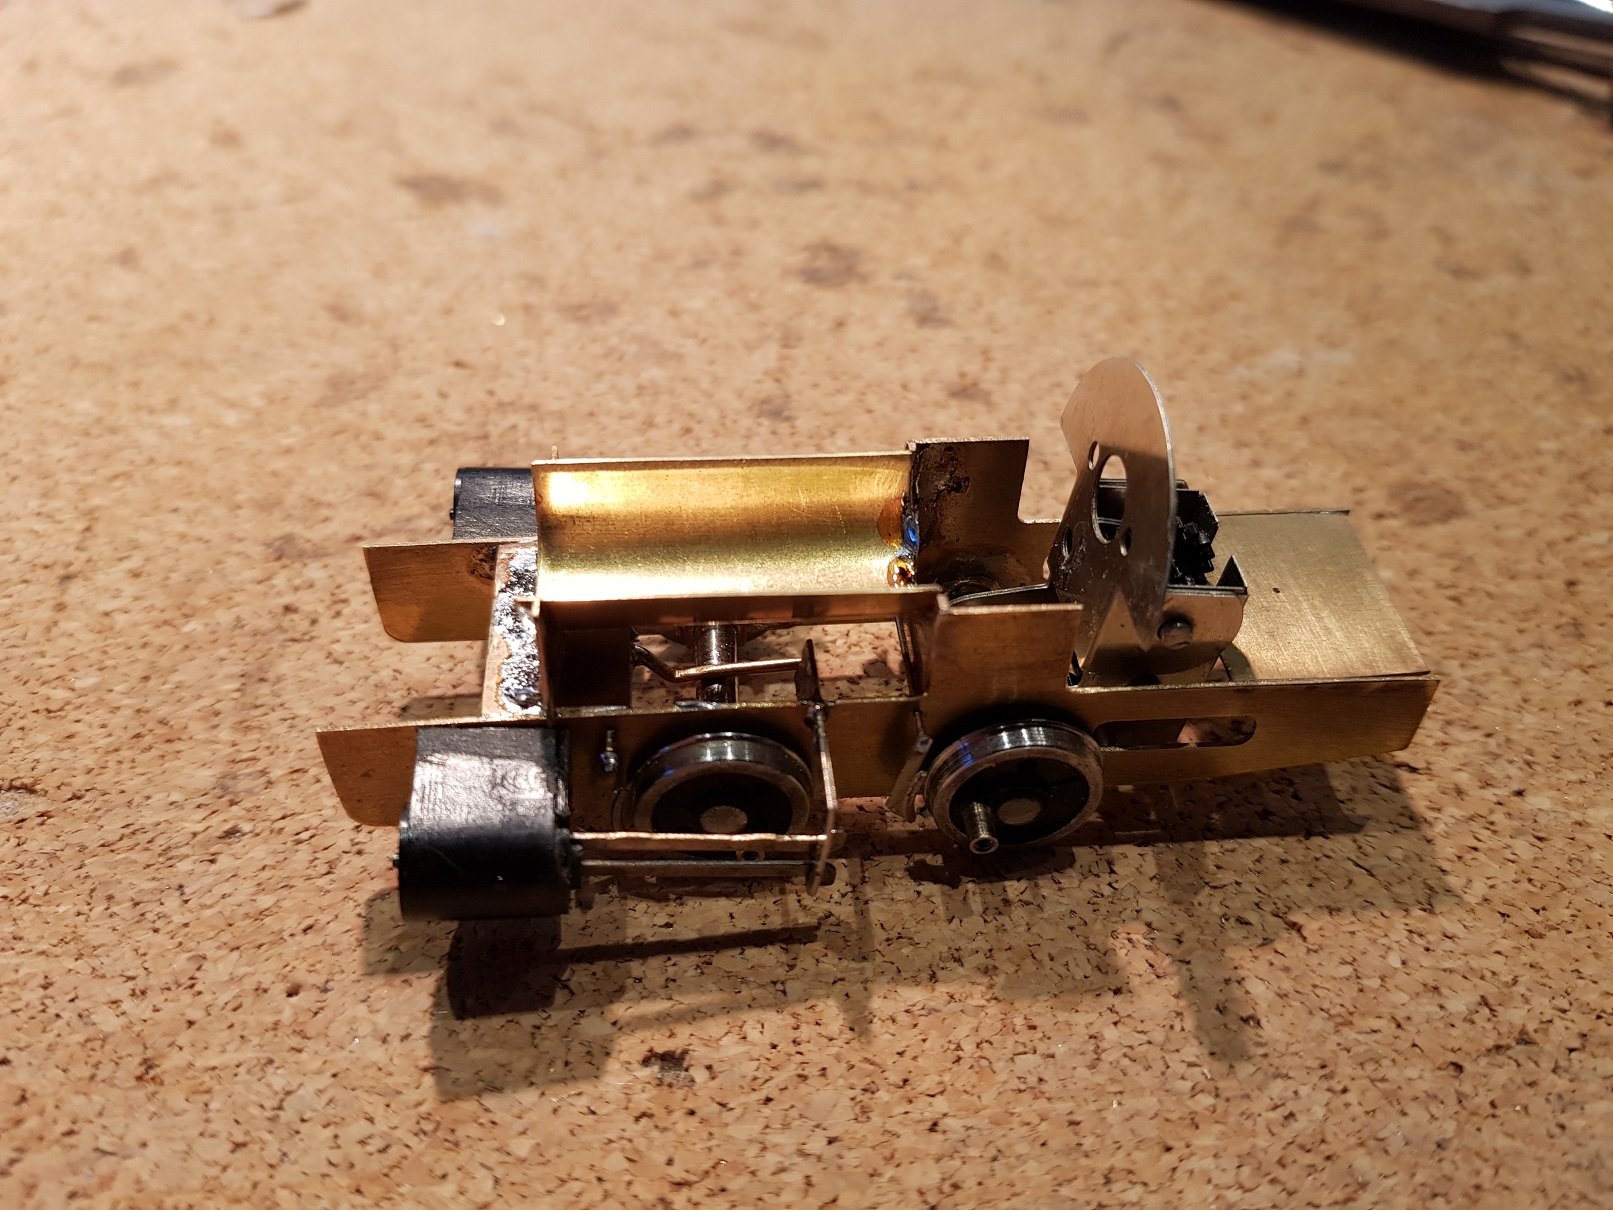
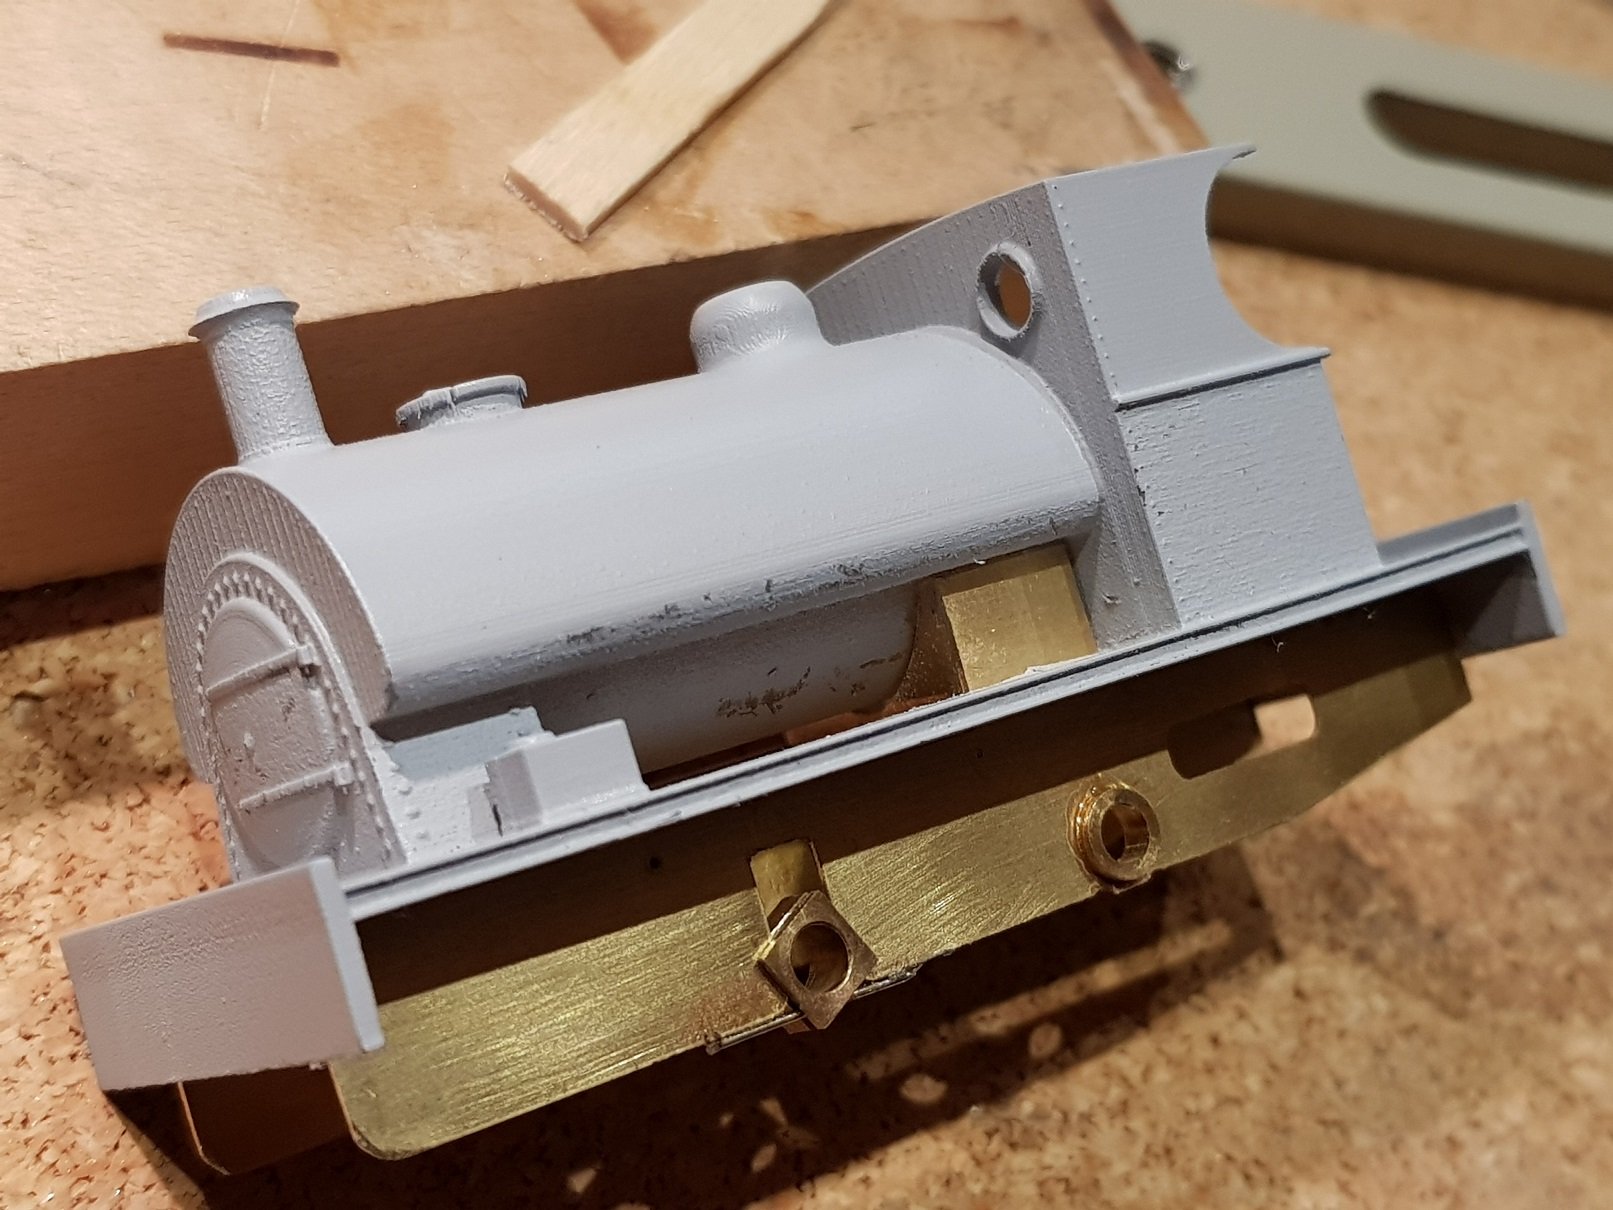
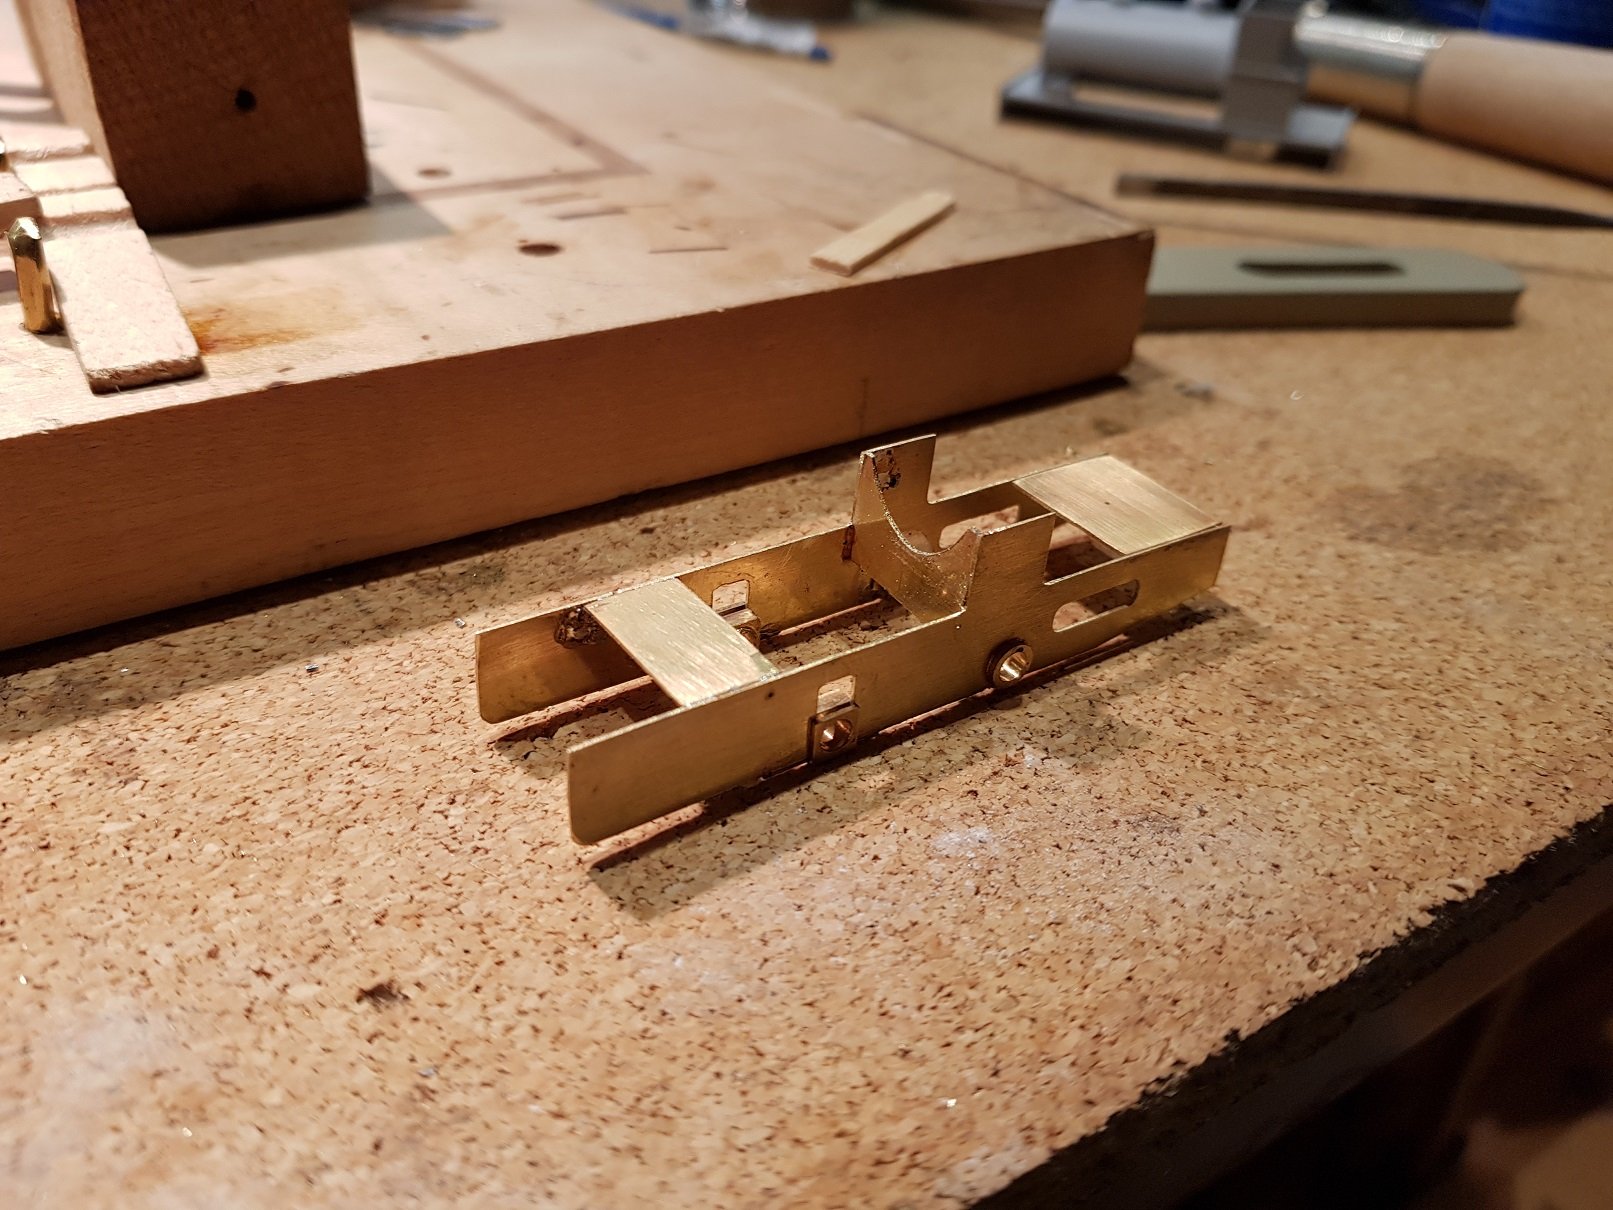
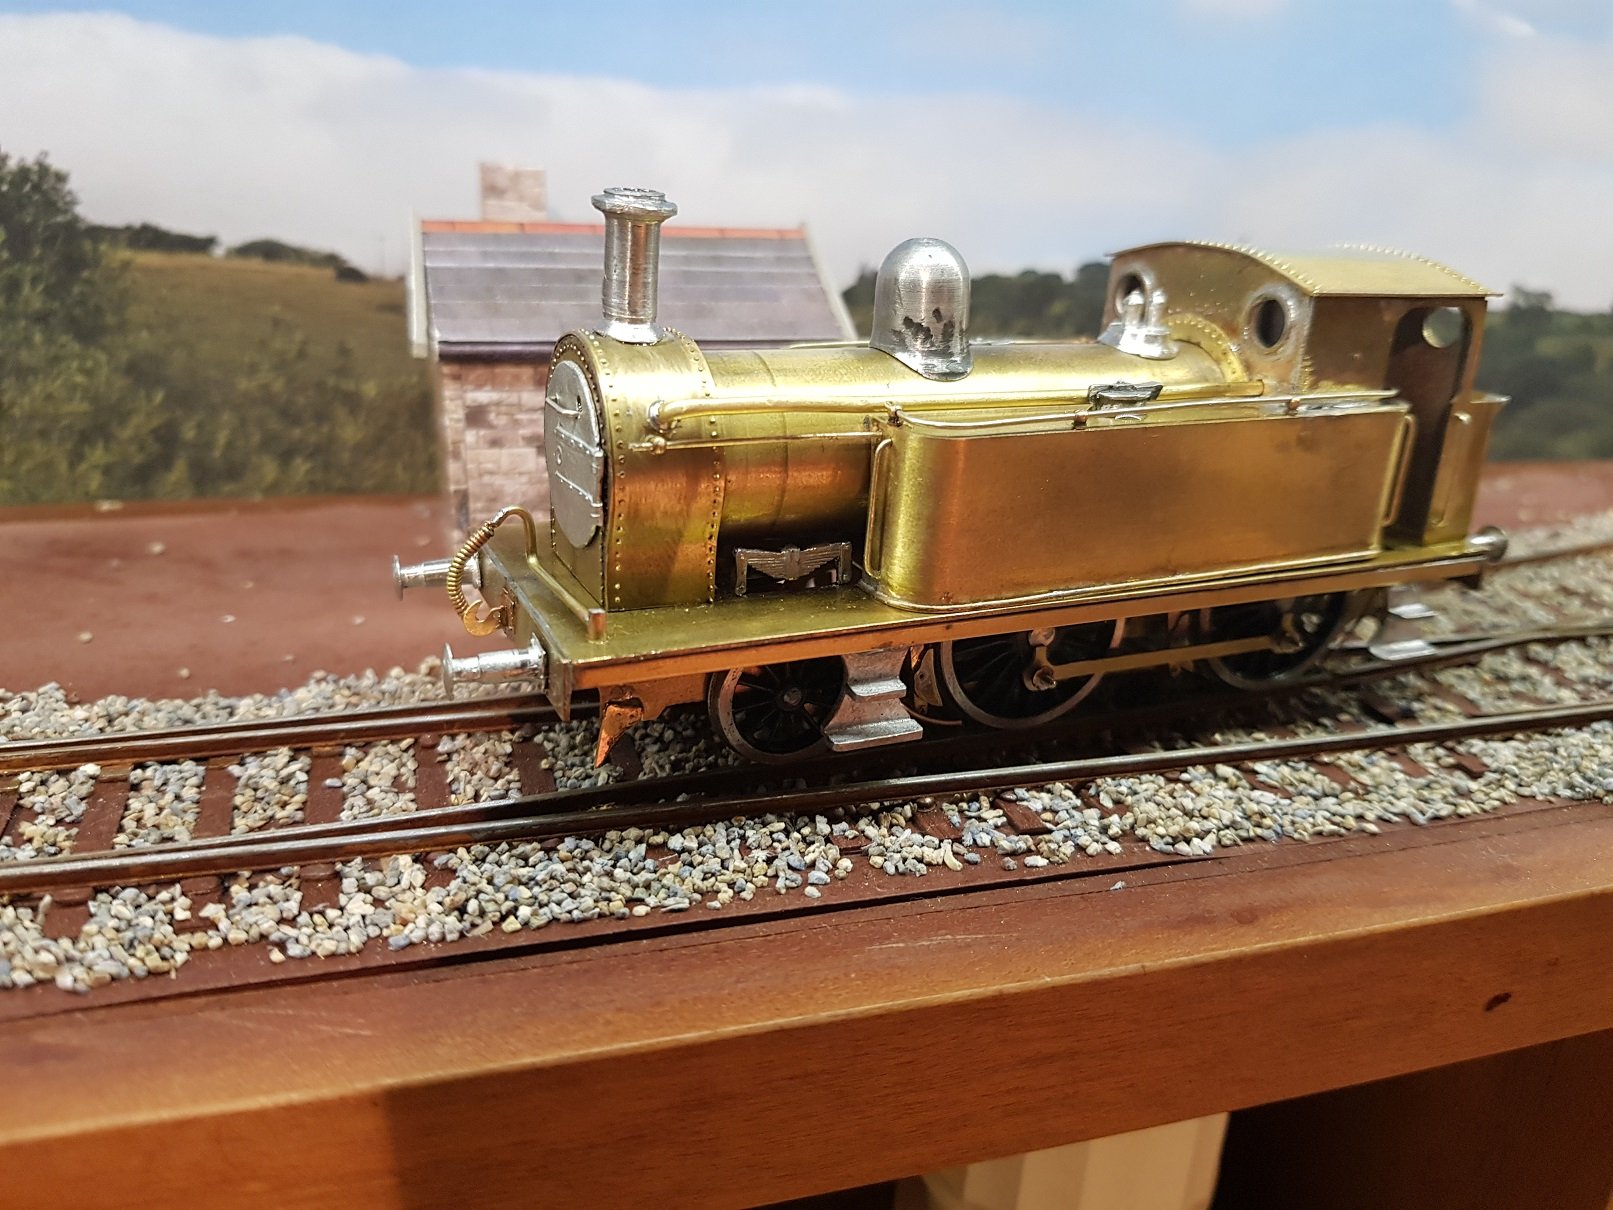
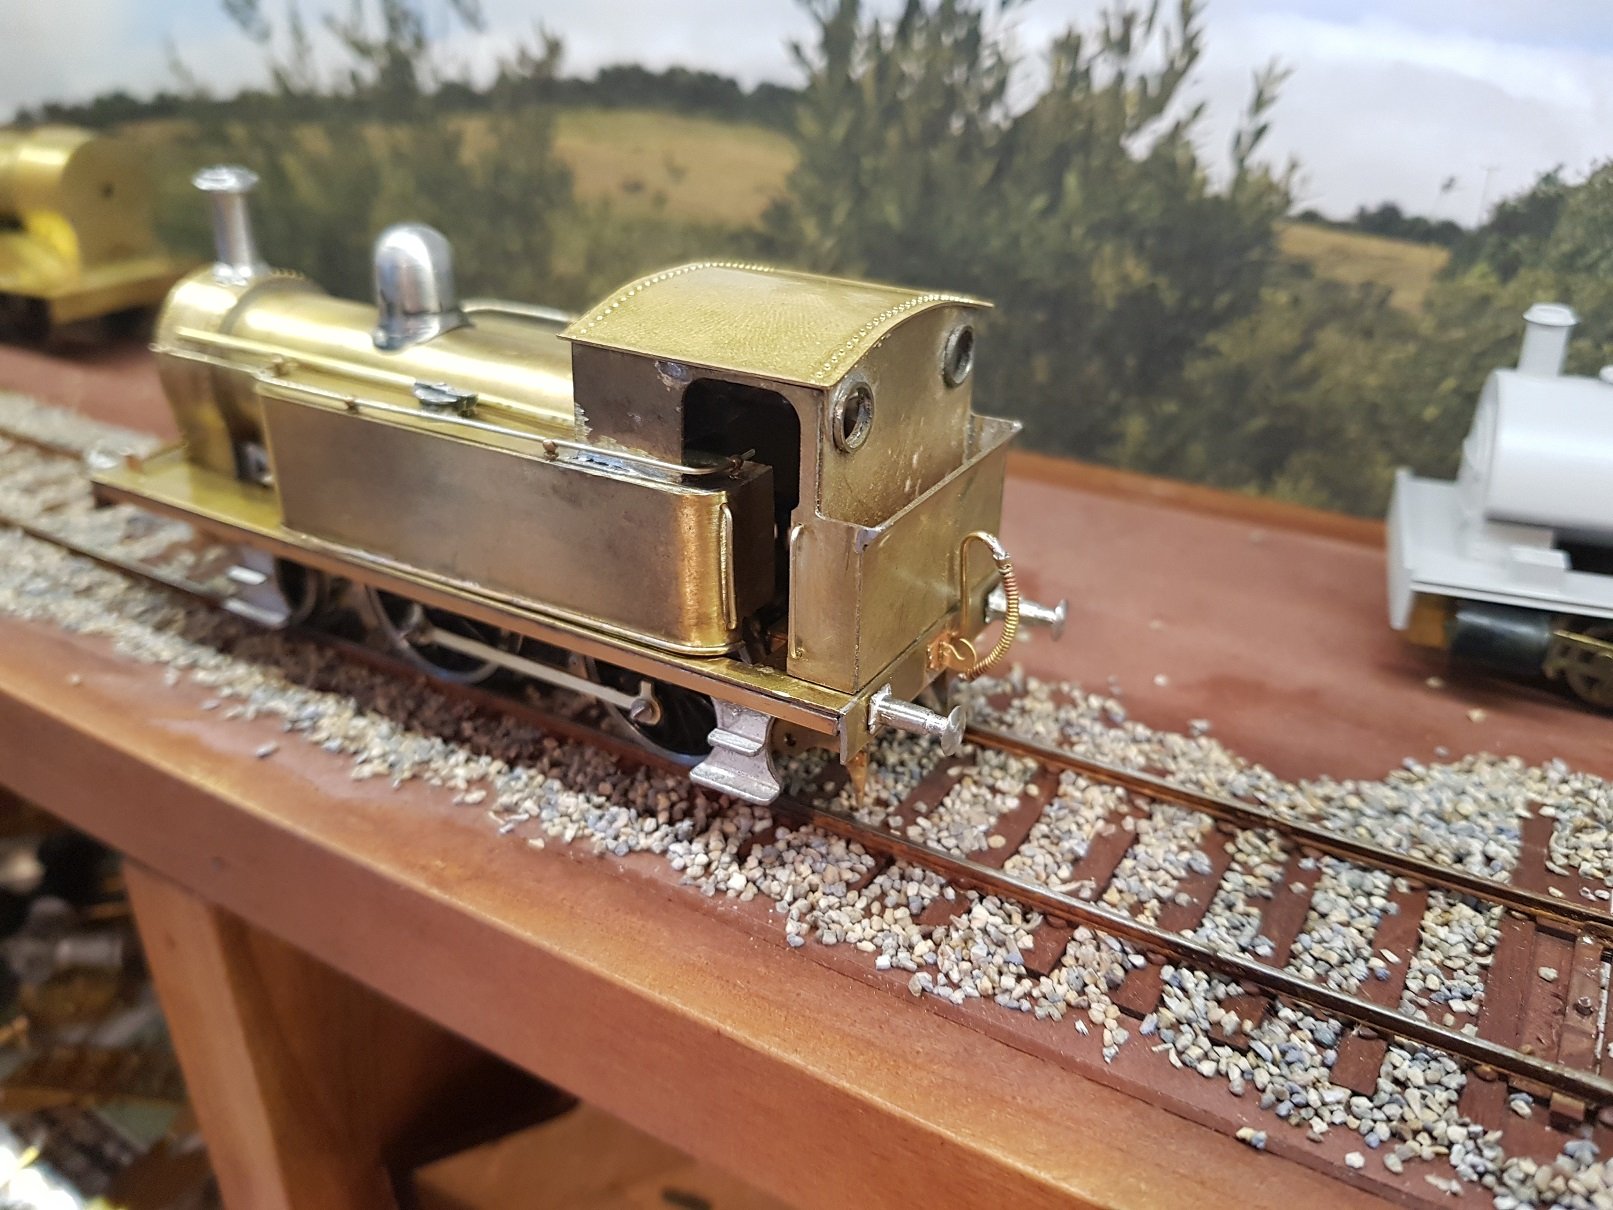
After much hoo-hahing with other projects, the poor 495 was shelved for a while. It appeared in the background of some of the photos of other models, but was very much on the back burner. As I got the correct final drive gear from High Level quite some time ago, I decided to have another go at making some progress on this build. The hgh level kit is designed to insert the motor into the boiler and complete the gearbox while the cab was off, however given the 3D print was constructed with a full boiler tube back to the cab and a fixed cab, this was not going to work. Thinking cap on, I decided to redo the frames, include the fire box sides and create an underside for the boiler, which meant I could cut away the boiler on the 3D print, and include slots to allow the top of the gearbox up into the cab area. This means a separate running chassis and drop on body. Brakes on, cylinders, slides and cross head supports installed, gearbox completed and set in place to arrive at this. A front plate, which will both support the front of the boiler base, and tapered to replicate the back of the smoke box was added. Not overly visible due to the angle, but it will be seen later in one of the shots. As mentioned in other posts, the finish of the 3D print was not really good, which was only highlighted by a coat of primer. Much scrubbing with a fibre pen and some 1000 grit paper helped to reduce this roughness which will need another prime to check to see how the flattening is progressing. Plate replicating the back of smokebox is just visible in this photo. Some nicks and dings to be addressed, but overall the finish is better. In the interim, pick-ups were added at low level using a small strip of copper clad and 0.35mm PB wire, motor wired and running gear added. Quartering is proving to be problematic with slightly erratic running not helped by wheels not being completely true on the axles. In fairness the wheels are pretty trashed having being on and off too many times. I will get a set of spoked wheels from Alan Gibson which will more accurately represent the prototype which will help running. In spite of all that the loco runs; with an 80:1 gearbox this loco can operate at very slow speeds. I think a flywheel may help to smooth out the running also. 20190120_190334.mp4 More soon, Ken
-

CIE Laminate Coaches - Worsley Works - ECMbuild in 4mm
KMCE replied to murrayec's topic in Irish Models
Eoin, Did the same thing myself on the 6 wheeler! Ken -
Got some work done on the 6 wheeler. Ditto here - roof did not fit so a new was made and rain strips added. Sides were also short when the tumblehome was added so ends needed to be sanded down to settle the body on the frame. The gap between the body and base was then strengthened and filled with a 1mm angle. Cleminson chassis built and underframe completed. Not the best chassis it has to be said, W irons were too far apart, even for 21mm gauge and required some tweaking to get right - it also seems to leave the ride height a bit high, and this is with 12mm wheels instead of the required 14mm wheel. There is no compensation, however the side play in the axles will probably be enough. I will leave it for now, but may look at re-doing the chassis if it gives problems. Even with said comments, it is developing into a nice coach. Brakes and a bit more detailing to the underframe to be completed and then off to the paint shop. Interior to be completed once painting is done. More as time allows! Ken
-
Thanks John, I'll drop them a line and see what they have. Regards, Ken
-
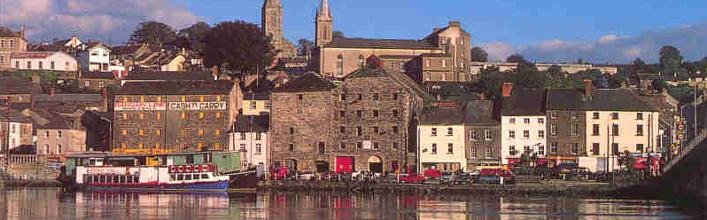
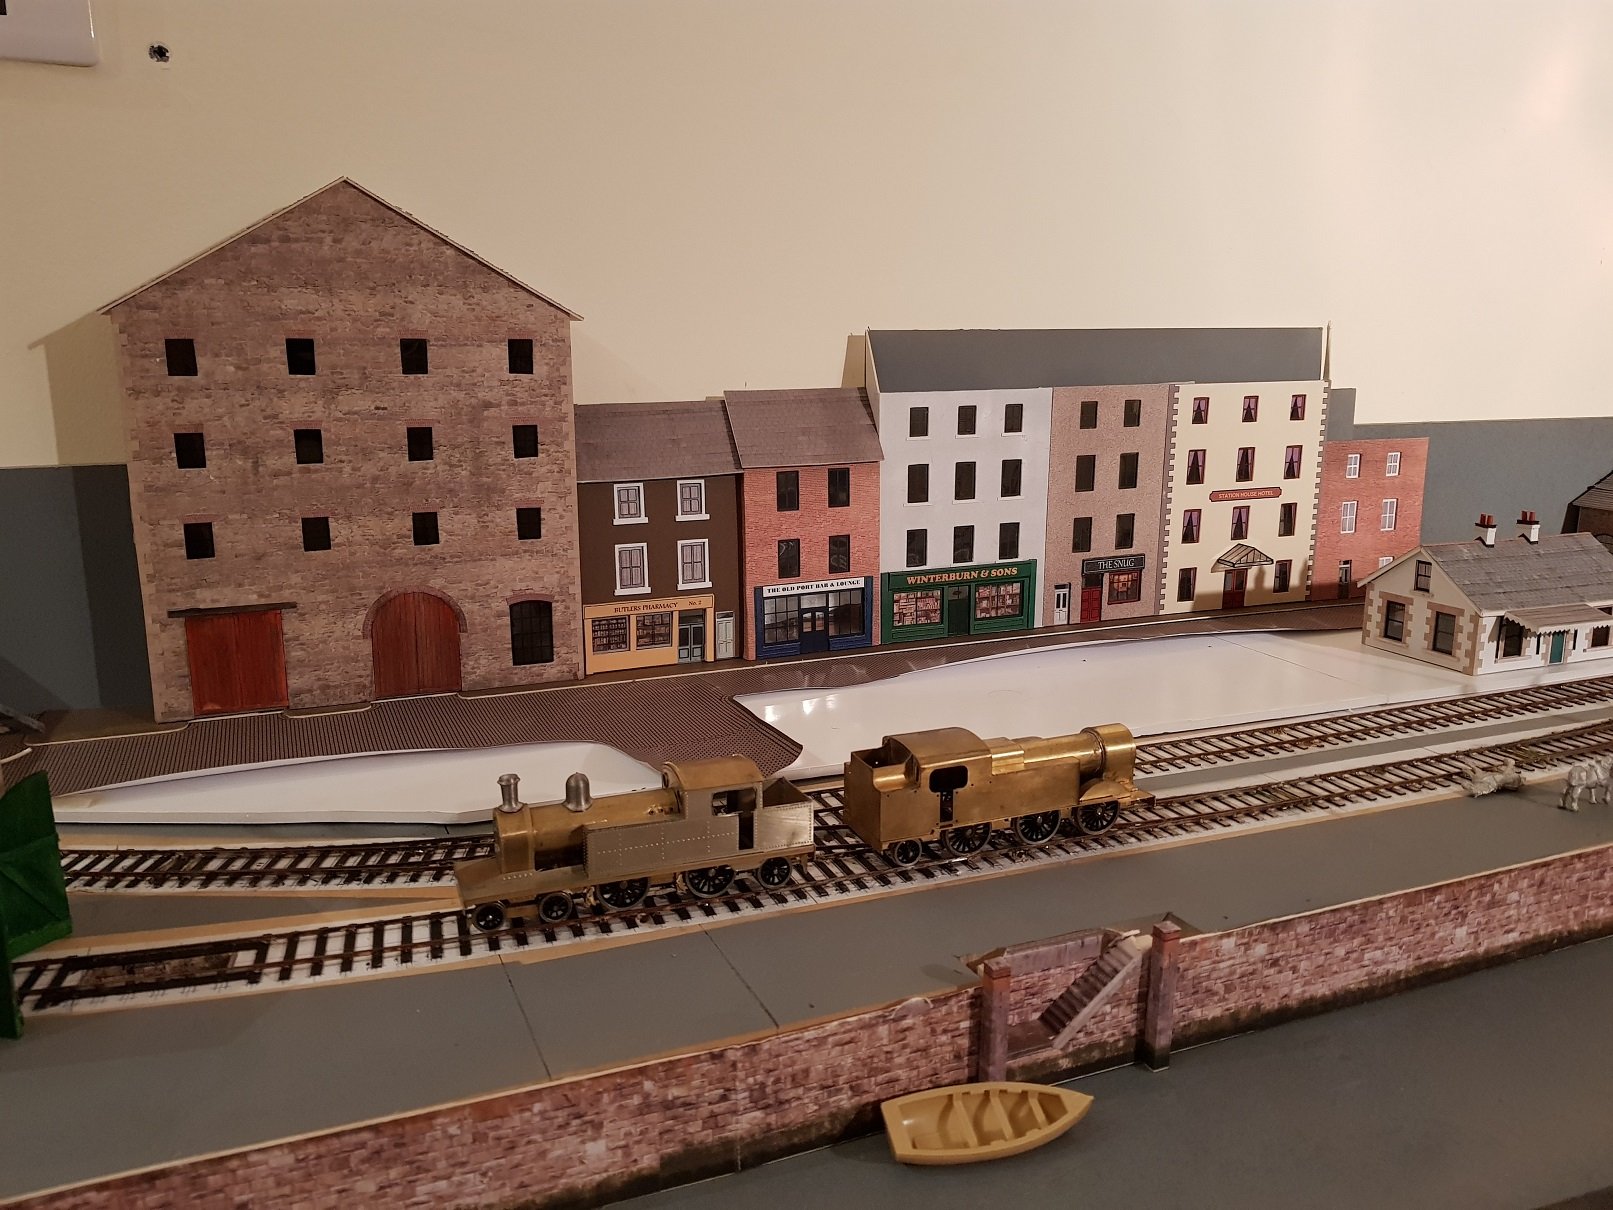
Jonathan, While looking for some inspiration for Port Cumtha, I looked for some photos reflecting a town /dock scene from somewhere on the east coast. What was suitable for some guidance was New Ross, as it can be seen from the other side of the river looking onto the quays. River looks like a calm sea if the bridge to the right is ignored. Just a wee measure of artistic licence used, but there are some good backgrounds which would provide useful footage? I may chop and use some of the photos for a backscene, as the background is quite dramatic. Ken
-
A heavily weathered version in GSR Maroon it is then! Ken
-
David, Looking well. I'm with you on the wheels on and off. Seems to happen more often that I think it should, yet I have yet to work out a solution to either leave them on or off for longer. I like to keep the coupling rods off until the very end as that just adds too much hassle. I'm interested in the frame spaces you're using - are they kit parts set for broad gauge, or something you fabricated yourself? As I am scratch building, frame spacing is of interest - I tend to keep the frames quite wide and use a slightly narrower spacer for middle axle, allow this axle to move a little more for curves. How are you handling axle side play for six coupled? BTW the backhead look excellent. Ken
-
Guys, Many thanks for the comments - very much appreciated. Agreed, there is a good bit of (enjoyable) work, and I have not checked the roof for fit at this stage - hopefully it will be OK, as there is rain water strips detailled on it which are very nice. I am kinda partial to the DSER side of things and there does not appear to be much stuff modelled that I have seen, so it seemed logical to start with these when scratchbuilding? Very kind offer and I will definitely take you up on the handbrake wheels. Could I trouble you for two sets rather than the end casings, as the horse box will also need them?? In the absence of the end castings I decided to scratch build frames to match the photo of the van with the later doors which appears to have a simple H frame. Really nice model to build and it looks well. Hope fully it will improve with a coat of paint. Possibly the Maroon mentioned in your instructions, or perhaps late GSR light grey for goods vehicles? Regards, Ken
-
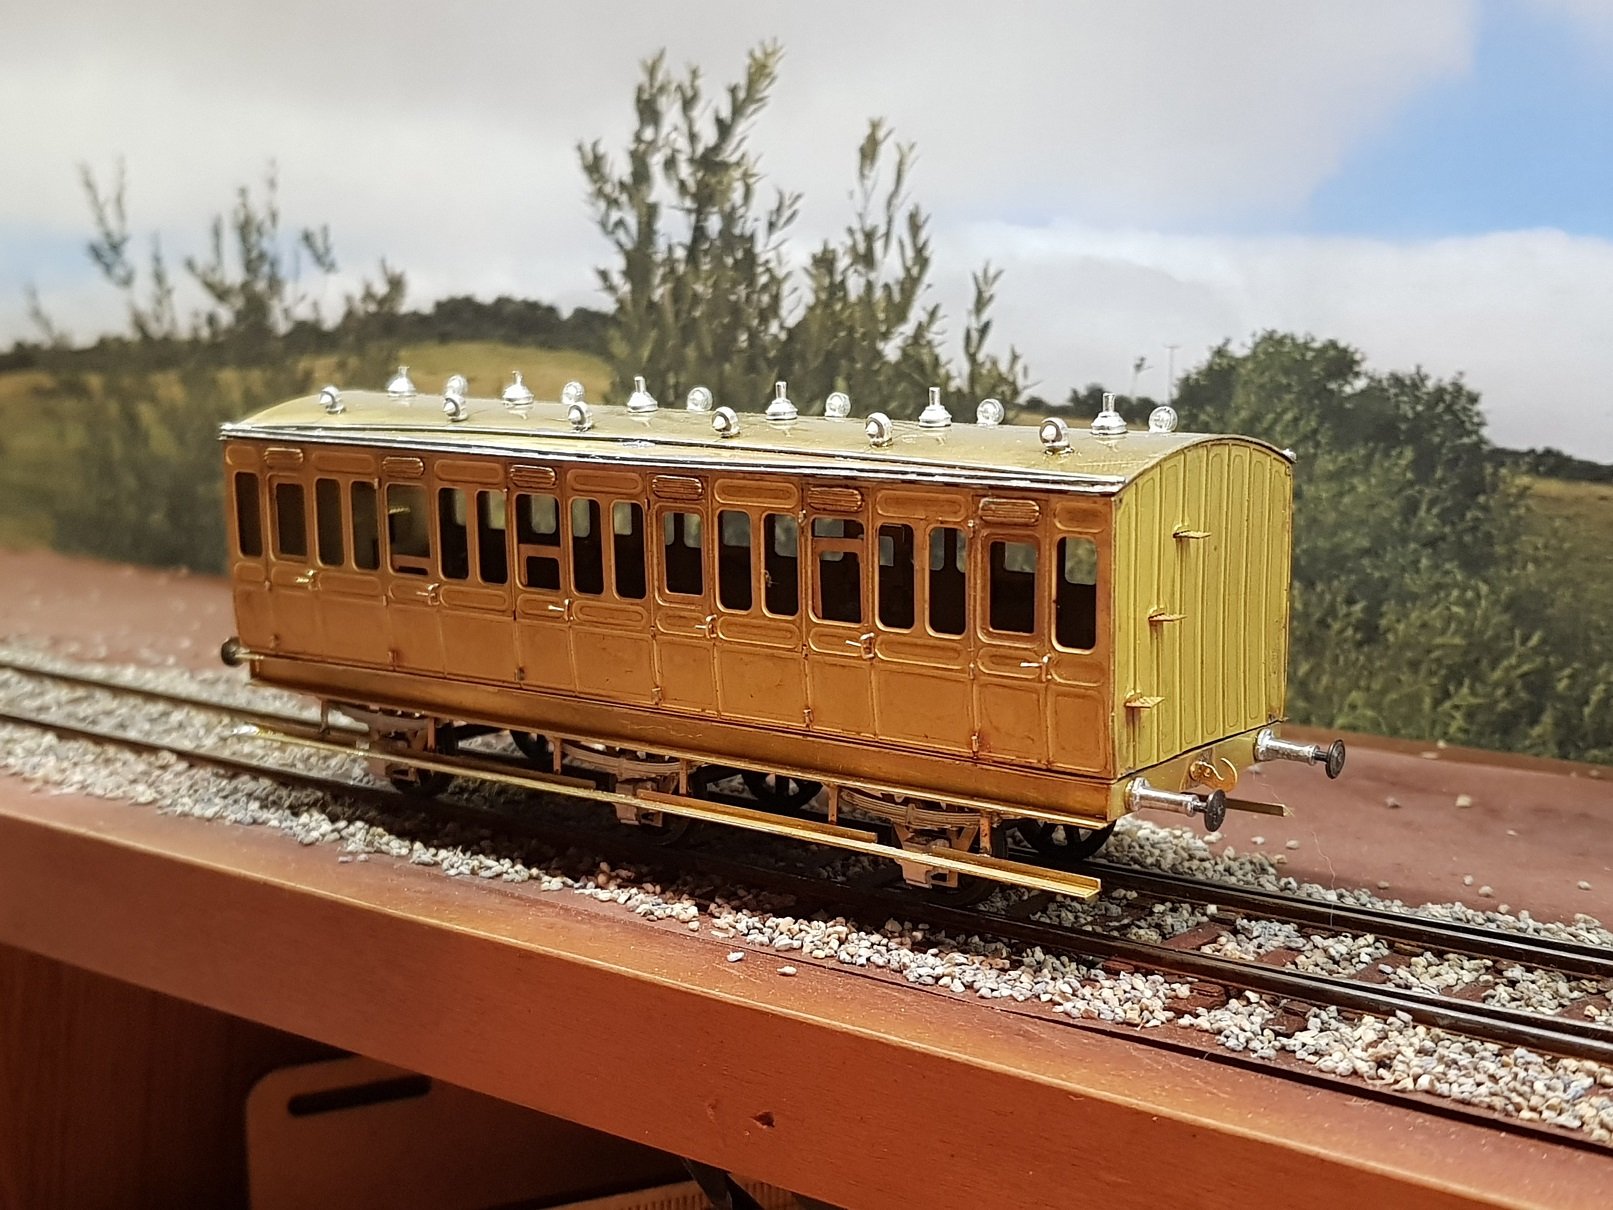
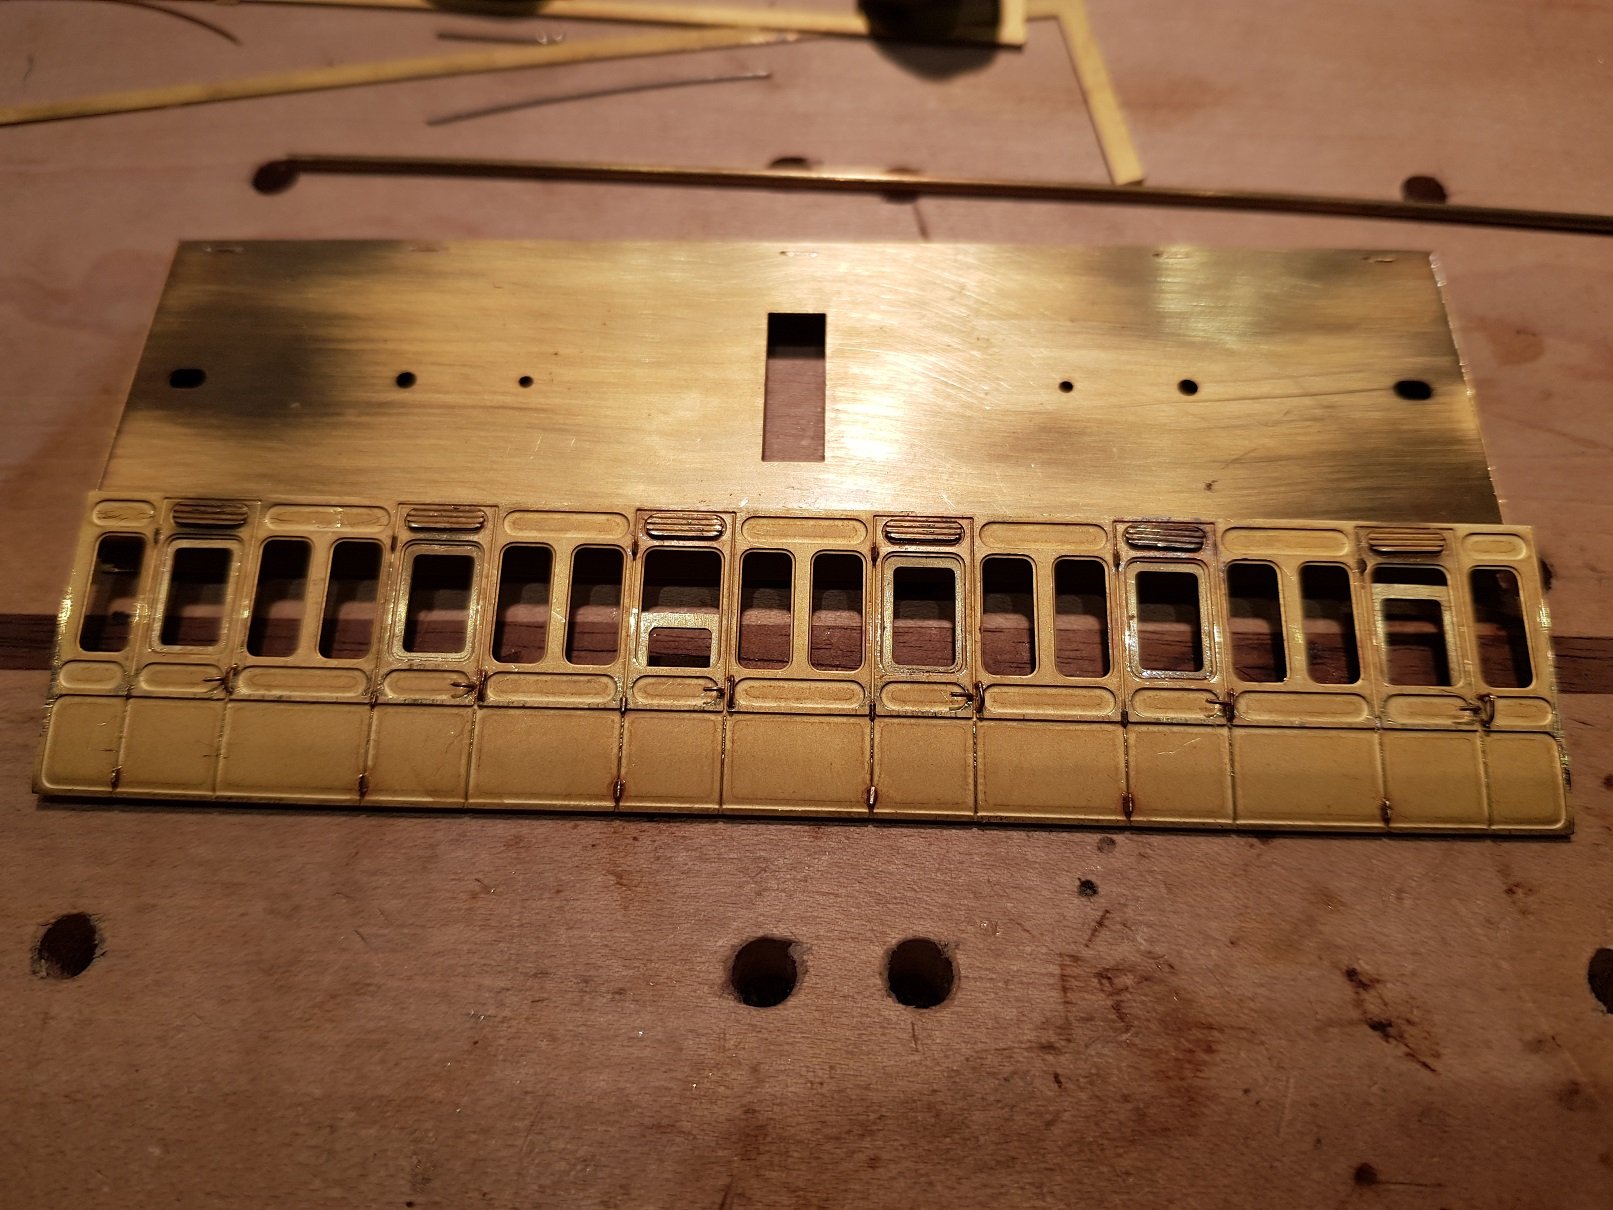
So....... 423 has been painted, however before finishing the weathering I want to stencil the numbers on, however I need to get some yellow ink to blend with the white I have to create the light yellow normally used. While waiting, I decided to move over to building some kits. Those lovely kits from @Mayner were not going to make themselves. so I decided to get stuck into the Fish Van. Really nice kit and very detailed. Started by cleaning up the fret as there was a lot of tarnishing from the etching process, however this did not clean up very well as will be seen from the finished van. However despite the tarnishing it did solder together very well. It will be painted anyway, so will not really make much difference. The detail for the underframes and brakes is very good, however quite fiddly, particularly setting up in 21mm and compensated - there is very little room left for all other elements. Thoroughly enjoyable build and came together in a day. It will add nicely to the layout of Irish rolling stock. A quick snap of 423 with the van. Paint job on the loco is coming together rather nicely. Given that the van kit came together so well, I decided to have a go with the Worsley Works kit of a GSWR 3 six wheeler. These kits are little more that the basic sides and ends, as it has the sides, underframes, roof, ends and six wheel chassis frets included. They are much more detailed that I was expecting with separate etches for the ventilators over the doors, pilot holes for hinges, grab handles and door handles. So while the sides were in the fret, I added the ventilators, door windows, and profiled the side. Hinges were then added, with door and grab handles inserted (well one side anyway - it's a bit fiddly). The underframes and buffer beams were added to the coach floor in preparation for the chassis. Nice to work on kits for a change as someone has already done the thinking and provided slots & tabs etc!
- 379 replies
-
- 11
-

-

-

-
423 Practical Completion. Many thanks for the comments guys - they are much appreciated. Finally reached the end of the construction phase on 423 - it has taken just over 2 months from cutting of frames to this point. Latest work included fitting of springs for front axle, draw hook and vacuum hoses. Box section and PB wire were added to simulate sand pipes. Pick ups and wiring for motor are complete and after much fettling we have pick up from all axles. Wheels quartered and coupling rods fitted followed by a test run to fine tune the quartering. Finally we have motion!! Off to the paint shop now........ 20181229_182156.mp4