KMCE
-
Posts
540 -
Joined
-
Last visited
-
Days Won
29
Content Type
Profiles
Forums
Events
Gallery
Blogs
Store
Community Map
Everything posted by KMCE
-
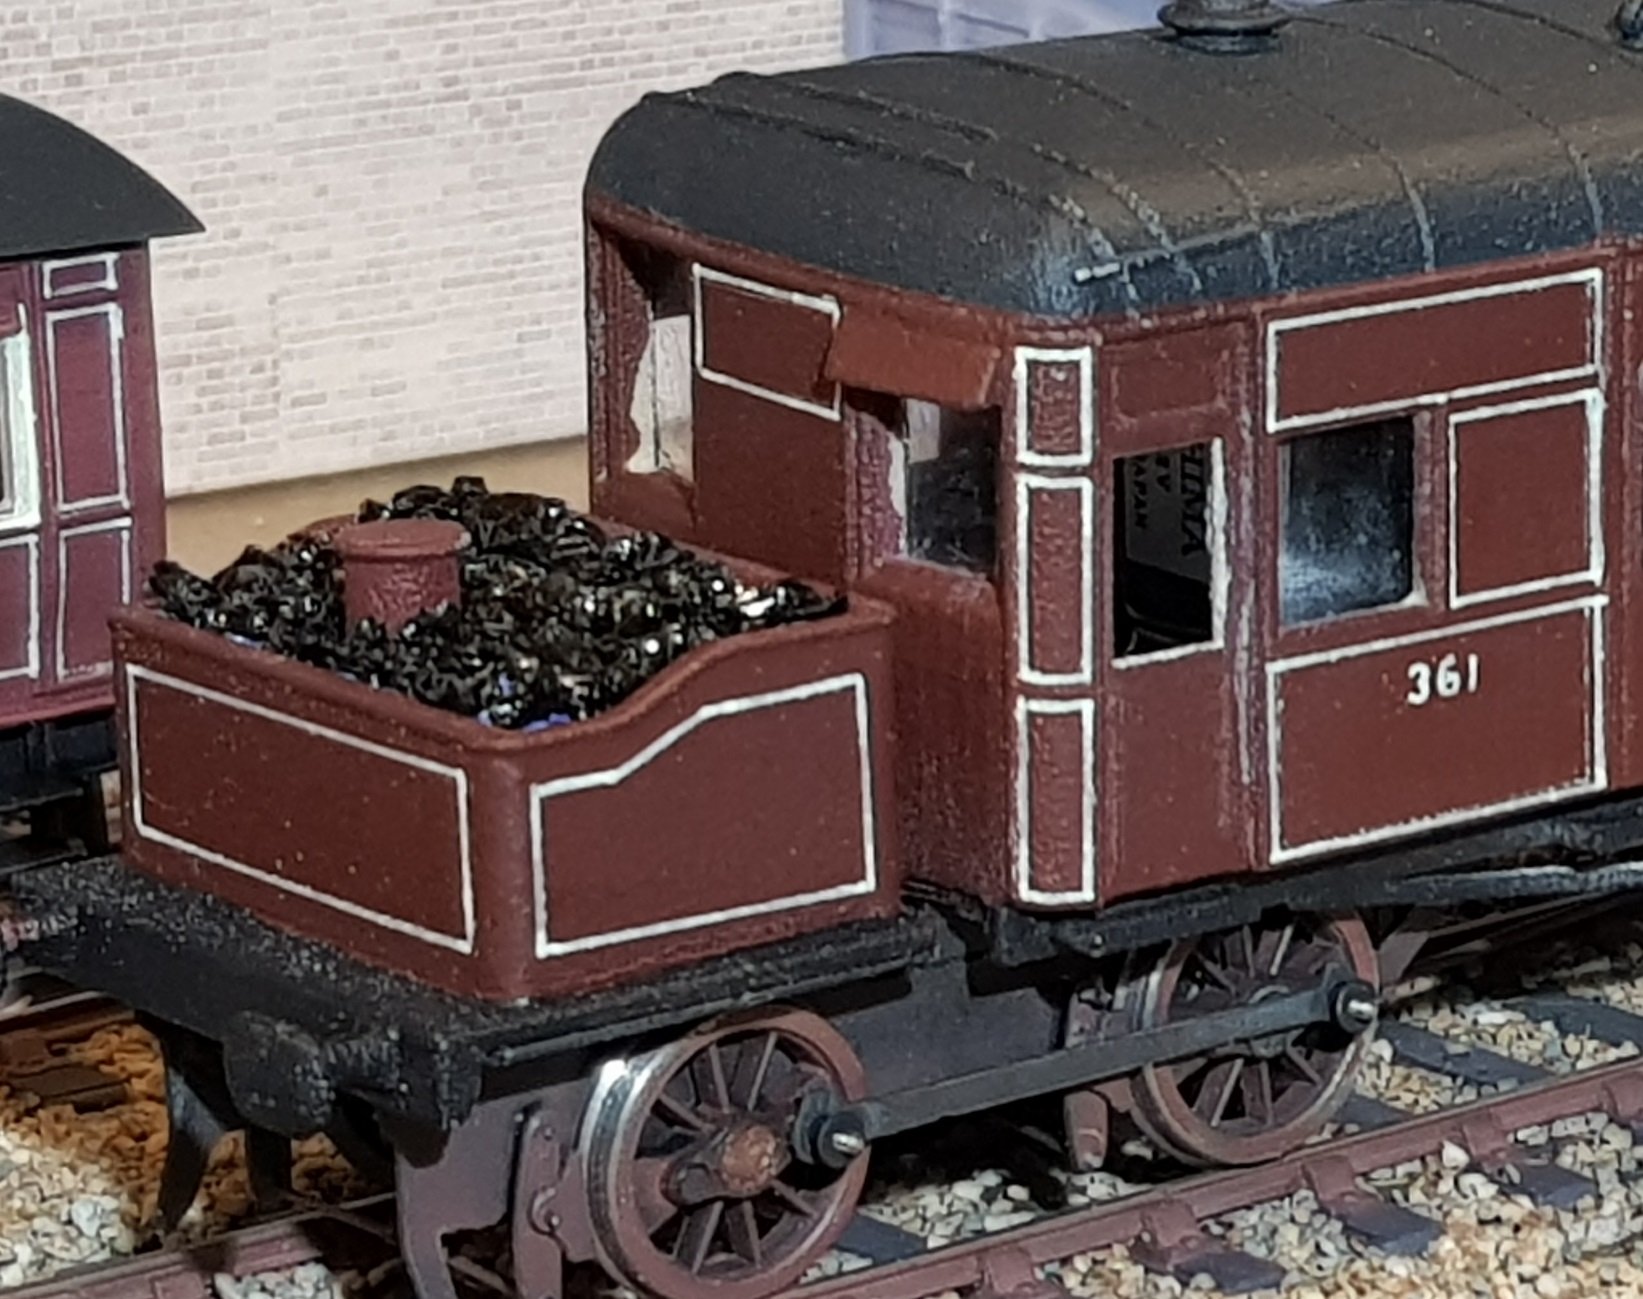
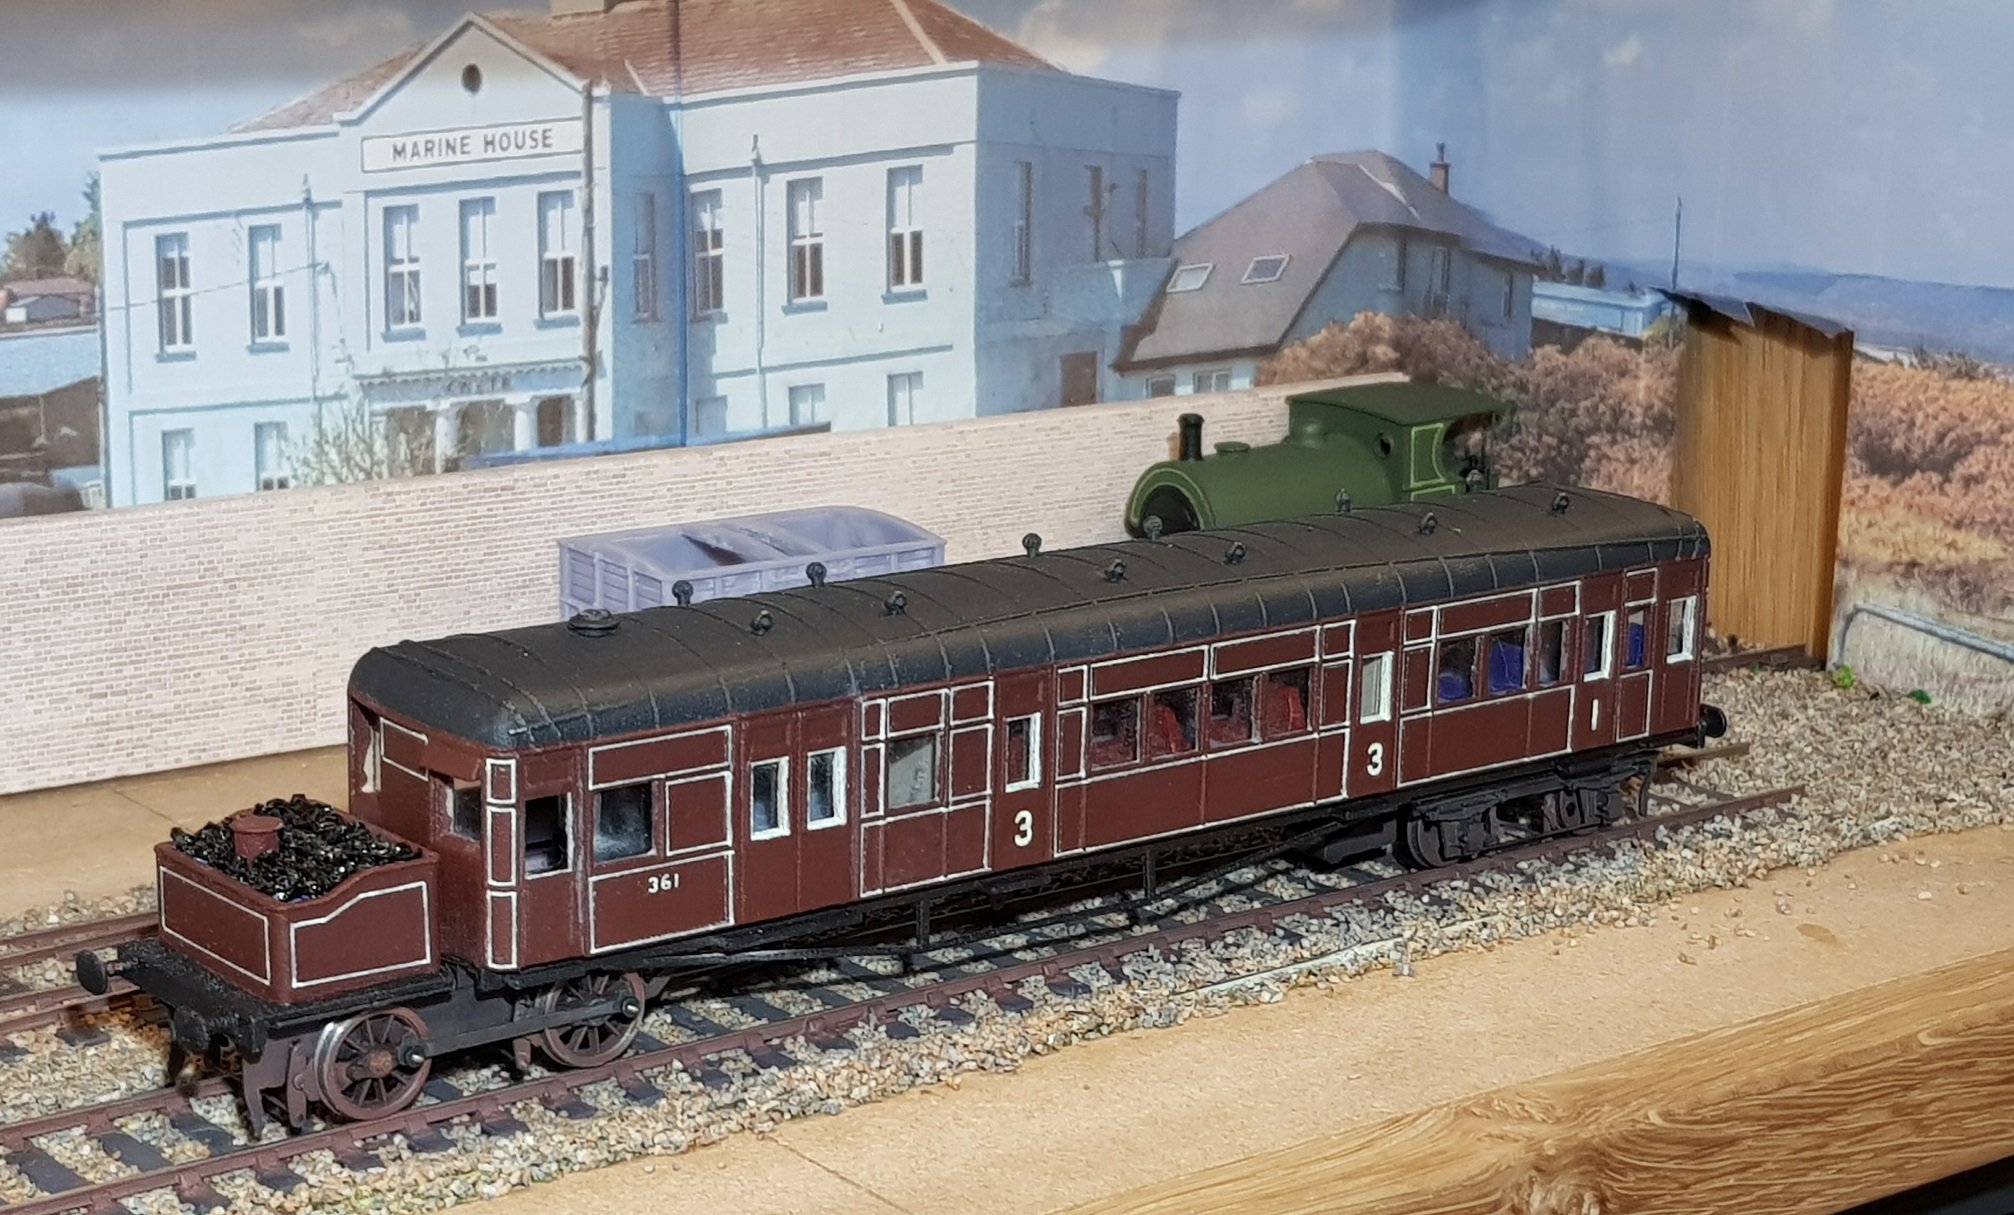
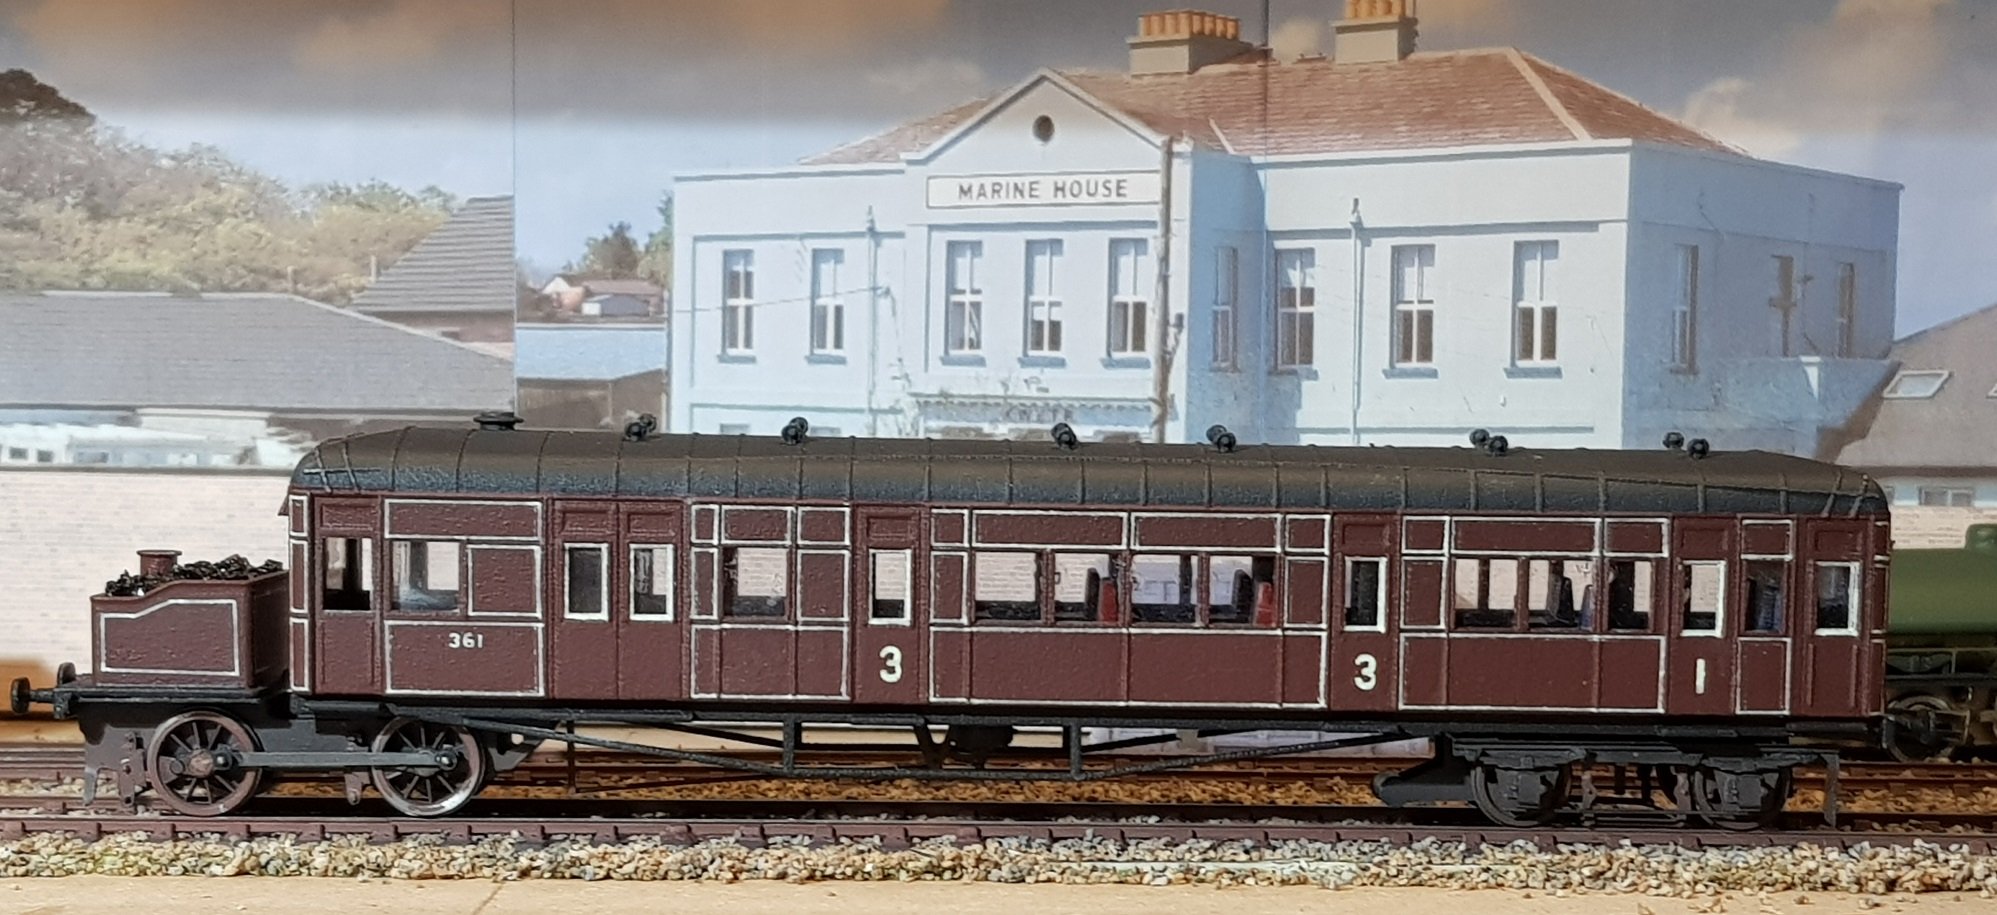
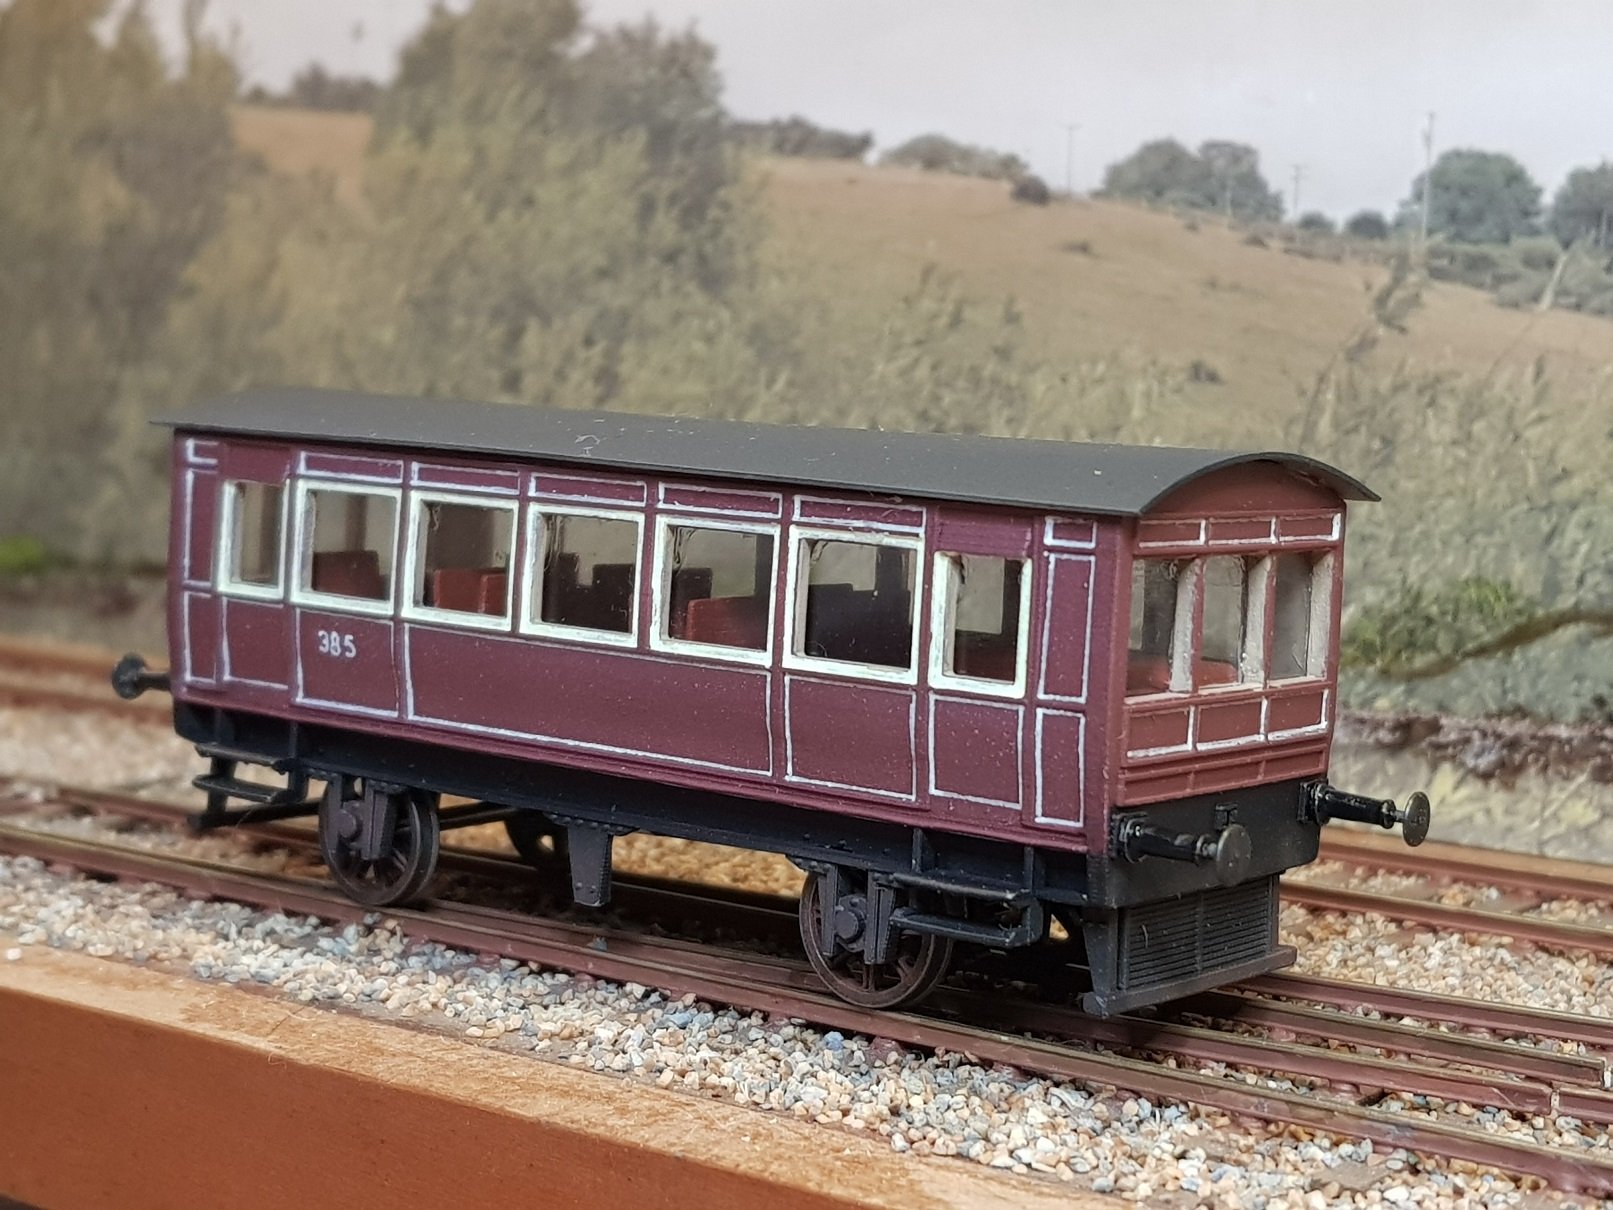
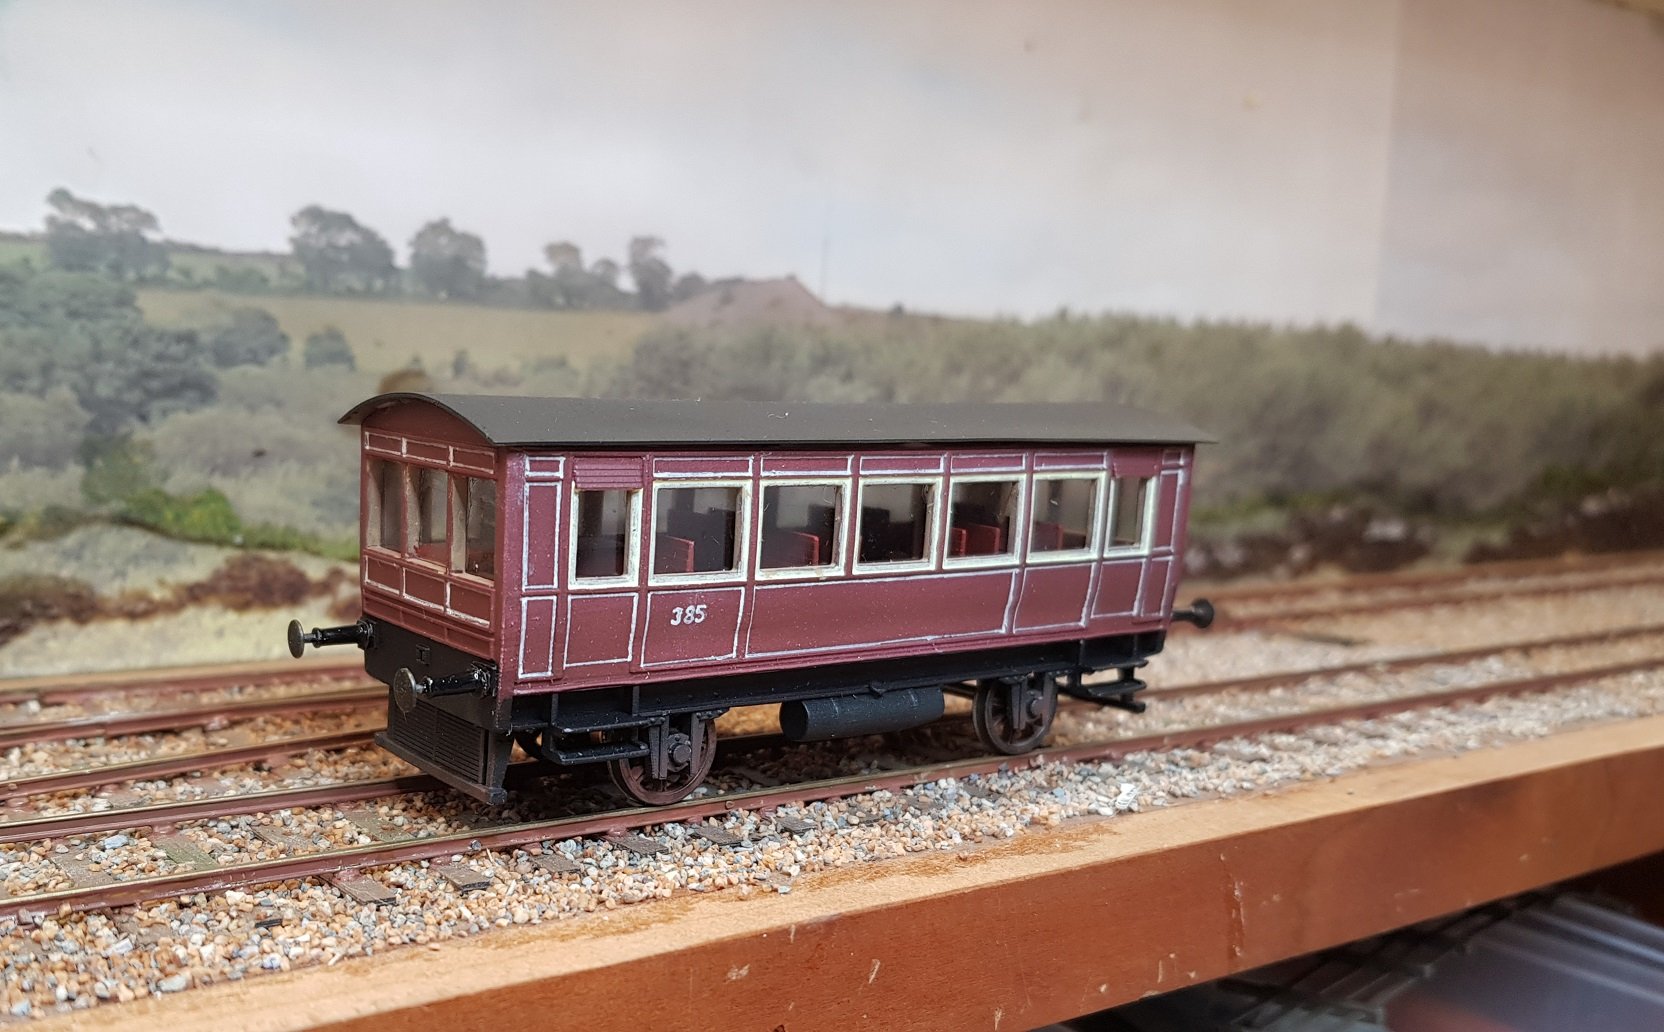
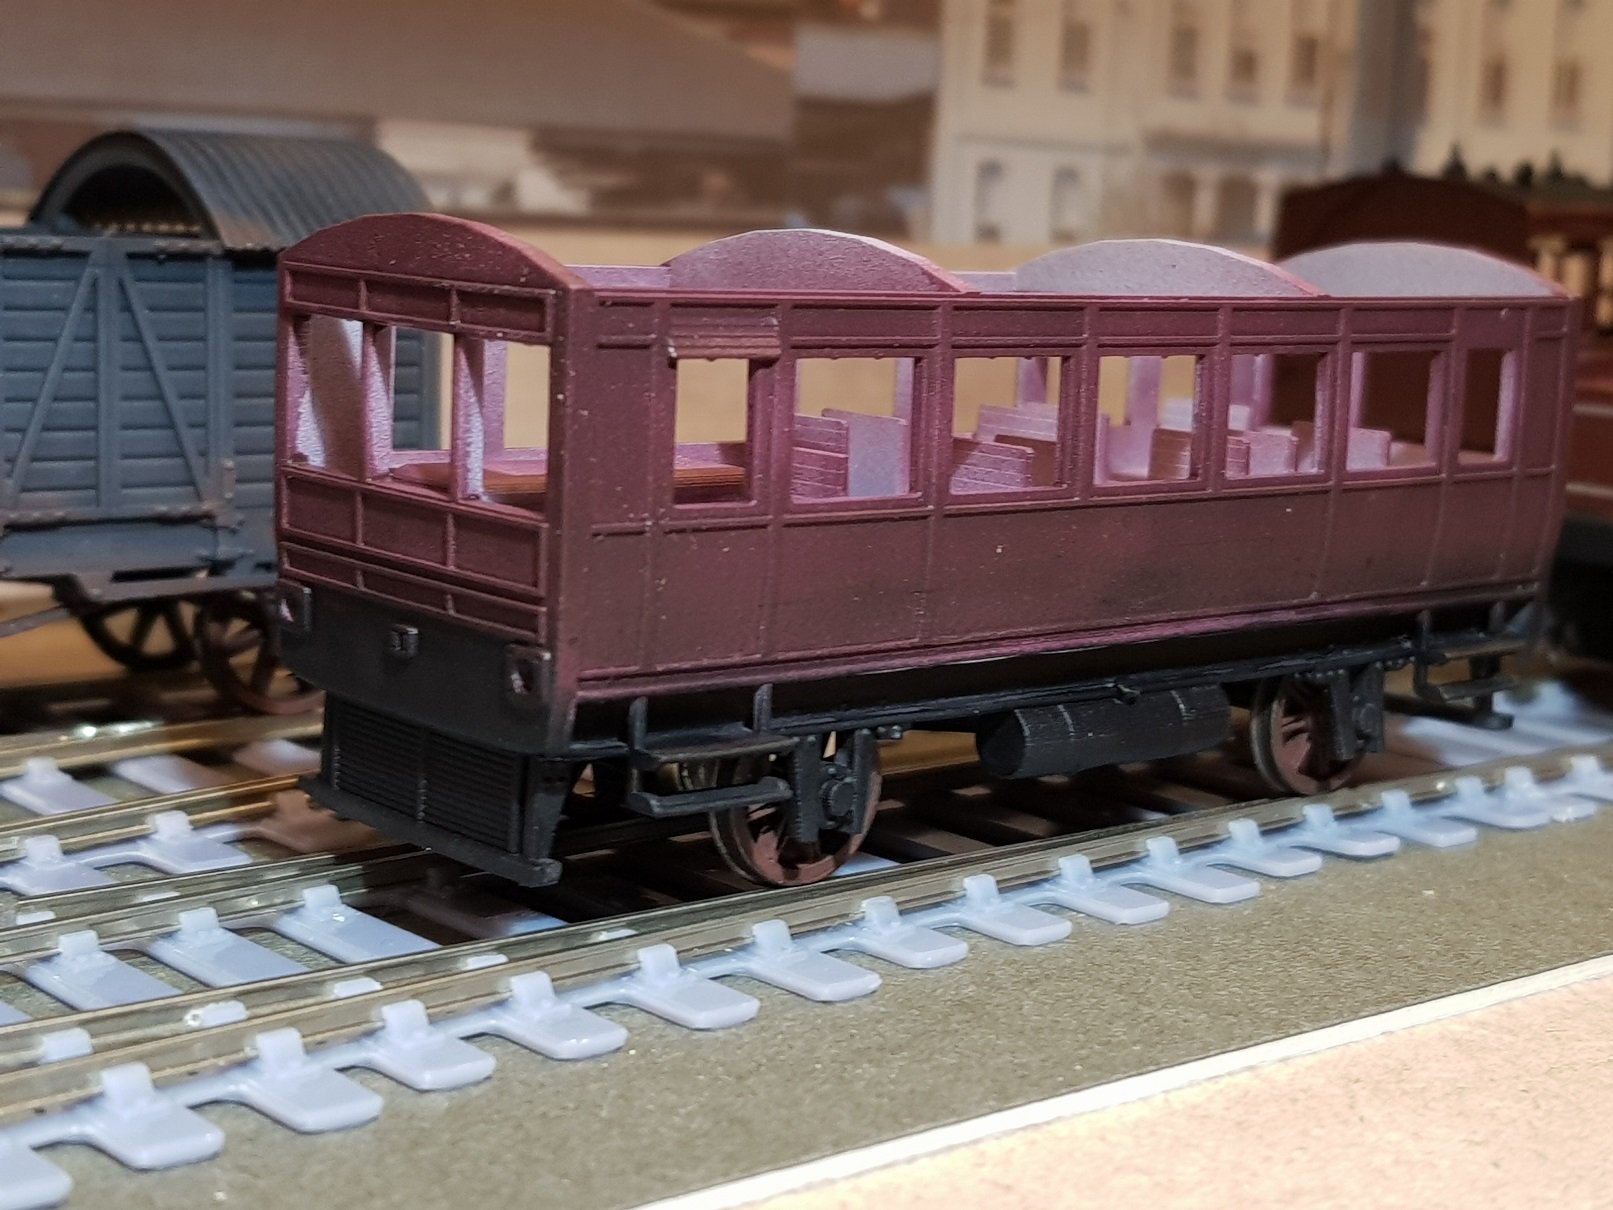
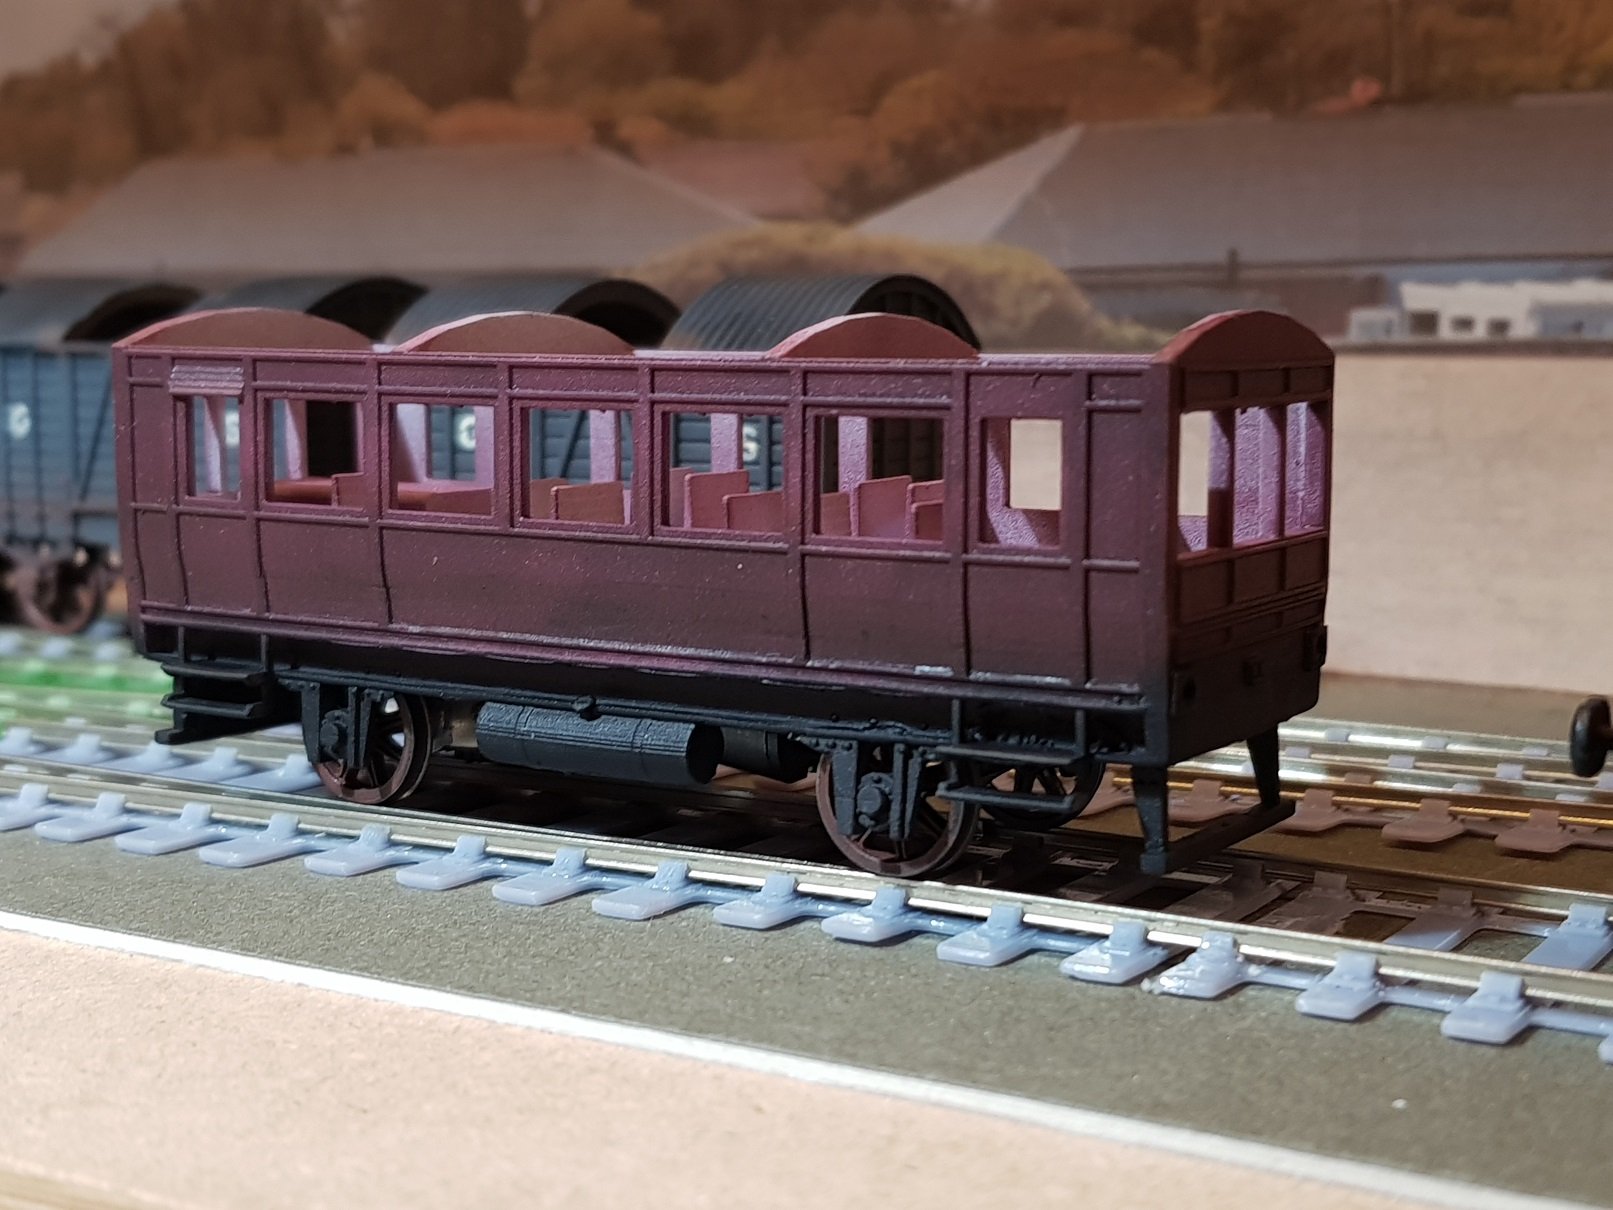
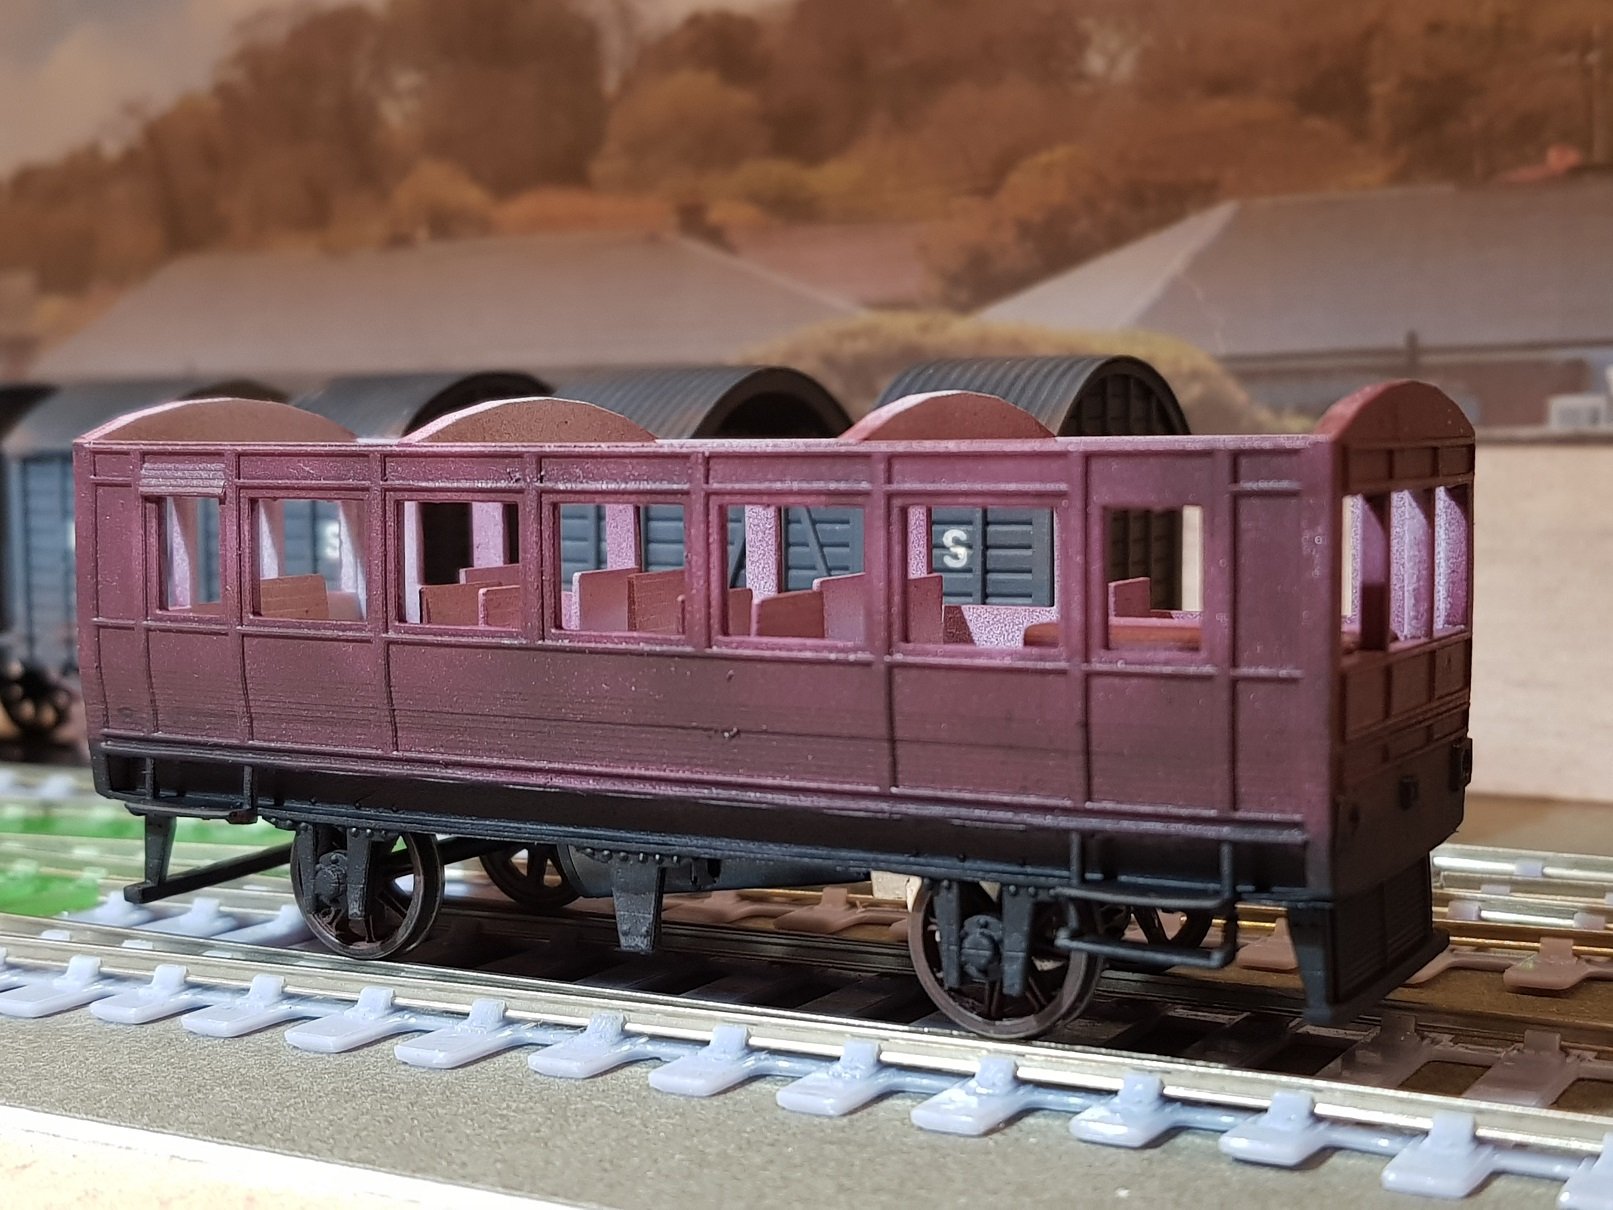
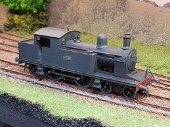
@jhb171achill, It is OO-P4, and it did prove difficult to get any form of reasonable finish. As noted, at the 1m range, it is passable and a model that was on my list to build, so I will keep it. From experience of printing my own models with resin technology, this model is of very poor surface quality. Detail was reasonable, but lost when trying to improve said surface quality. On it's plus side, the model is quite strong and up to robust handling - the stringers under the body have proved to be very strong and have not broken despite considerable handling. I know a similar detail on one of my printed models would not stand up. It seems to be a compromise between detail and strength - for my money, I would prefer to go for detail & take the risk on damage due to rough handling. If I were to print this model myself, I would print the body without the stringers, and add these to the brass chassis to provide strength. Hopefully this model will improve slightly with weathing.
-
So did I, and as Andy noted, the surface finish was very dissappointing. Basic airbrush primer (black) with two panels with various levels of surface cleaning - one using fine brass brush, second using light sand paper. Surface is quite tough and difficult to sand back, so an alternate was needed. The model cost €100 inclusive of shipping and I was not just going to throw it away. I resorted to using a heavy automotive primer used to smooth out blemishies in car repairs, which was an improvment, but does not stand up to close scrutiny. So, if I can avail of the 1m rule (rather than 2') I get a reasonable model I can live with. Full lenght brass chassis with veritcal motor where the boiler would be in the prototype and brass bogie at the other end. A 3D printed interior helped to give some internal detail. Tthe poor surface finish makes lining quite difficult, but as noted above, at the 1m viewing distance is not too bad. I need to add some handrails, door handles and steps which will help to finish this one out. Some weathering would also help to mask some of the imperfections. All in all a difficult model to work with due ot the very poor surface finish and I have been going back and forth with work on this one for some time now. I made a concerted effort to bring this one to completion & feel I have a passable model that will work in with the other models on a layout. Would I do it again - not a chance!! Ken

-
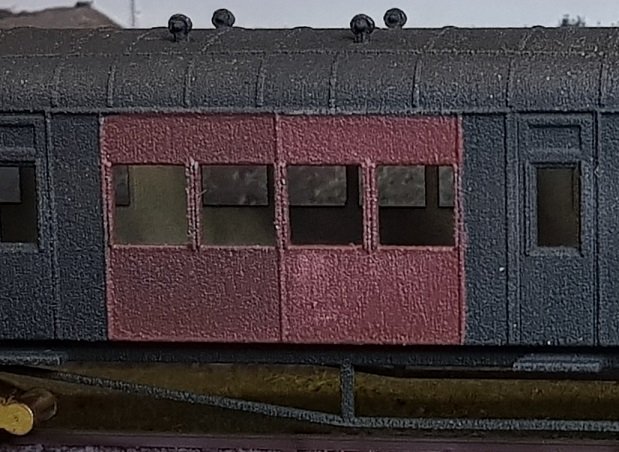
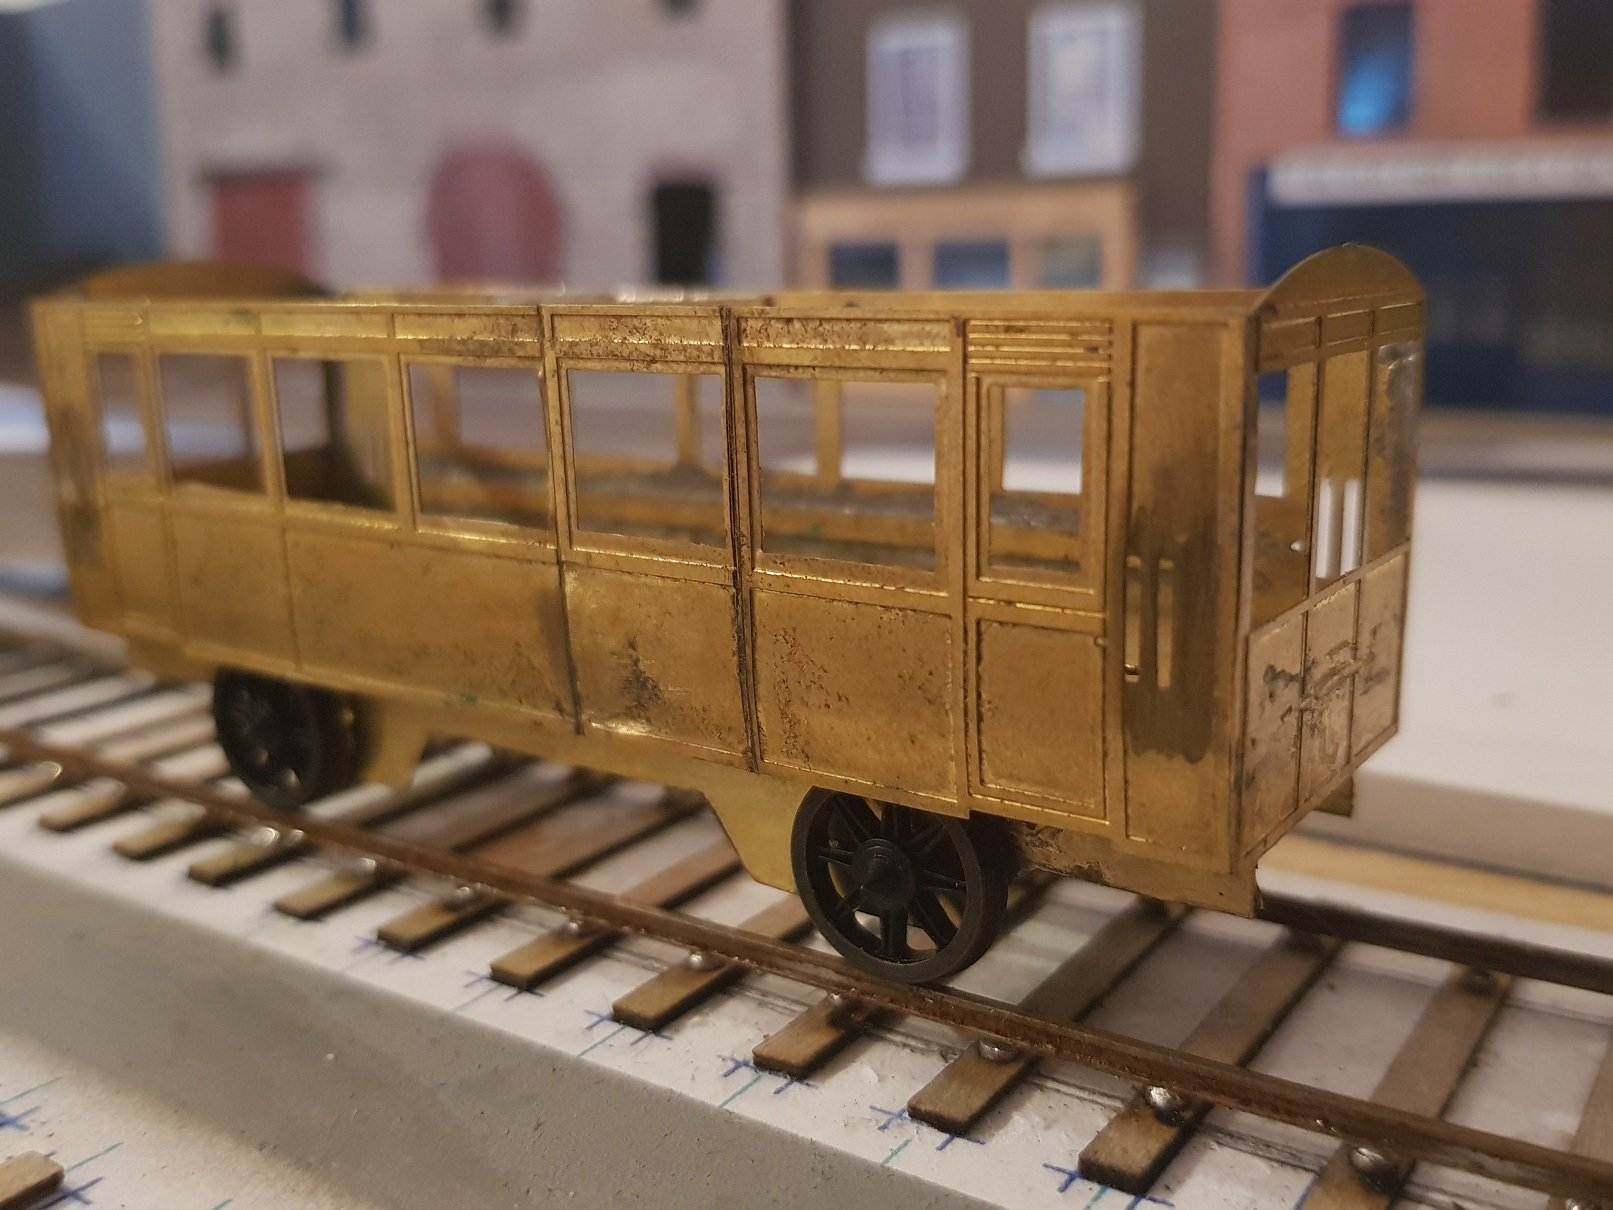
Good progress made on the Railcar. So - Mk 4 version picked up on the issues raised in my earlier post, however the rear crossbar is still somewhat fragile & broke off when working on the model. It is stuck back on and I am loathe to increase the thickness of the supoorts as it will start to look too heavy. Hopefully it should be OK. A basic brass chassis was built to carry the axles, gearbox and motor. It's rather tight under there, but it fit and doesn't impact on the visual appearance. I do have some brake hangars cut, but still need to fit them - it's a bit of a struggle to see the braking operation from the few photos there are. I'm not quite clear if both sides of all wheels were braked or just one side - still to decipher that one. Lining turned out quite well, however the camera can really be a bitch (as discussed earlier). On the track & at normal viewing distance, it looks well, but I am seeing issues once blown up in the photos. For context, this is 96mm long, so not a big model by any standards. Still work to do, but progressing rather well. Anyway - all for now. Time for a glass (or more) of wine & relax. Ken
-
And so for something completely different - I've been working on some other projects. For a long while I've wanted to build a model of the Drewry petrol rialcar and started with the Worsley Works kit, however this kit is really for the narrow gauge version and was taking conisderable modifications to bash into the 5'3" version. What transpired is that parts of the side, with some cut and shut, are the only part really suitable for the 5'3" version. Turns out the kit is too narrow, thus project was parked and re-started with a view to doing a 3D printed version. A project in progress, and is currently at the Mk 3 version, but still needs work. This one was worth a coat of paint to highlight problems to be solved, so worth sharing for information. Print lines on the tumblehome are rather evident - I smothed one side for the painting to see how it would turn out. Panels finish well, but I will need to sand down the panneling to remove the layer lines. Step supports need to be beefed up as one broke when removing from the print suport stucutre - it will be out of scale, but needed to provide more strenght for normal handling. The chassis will need more itegration to fit within the sole bars, and will most likely be a inside bearing, which is the next iteration. Progressing well, but still needs work. Ken
-
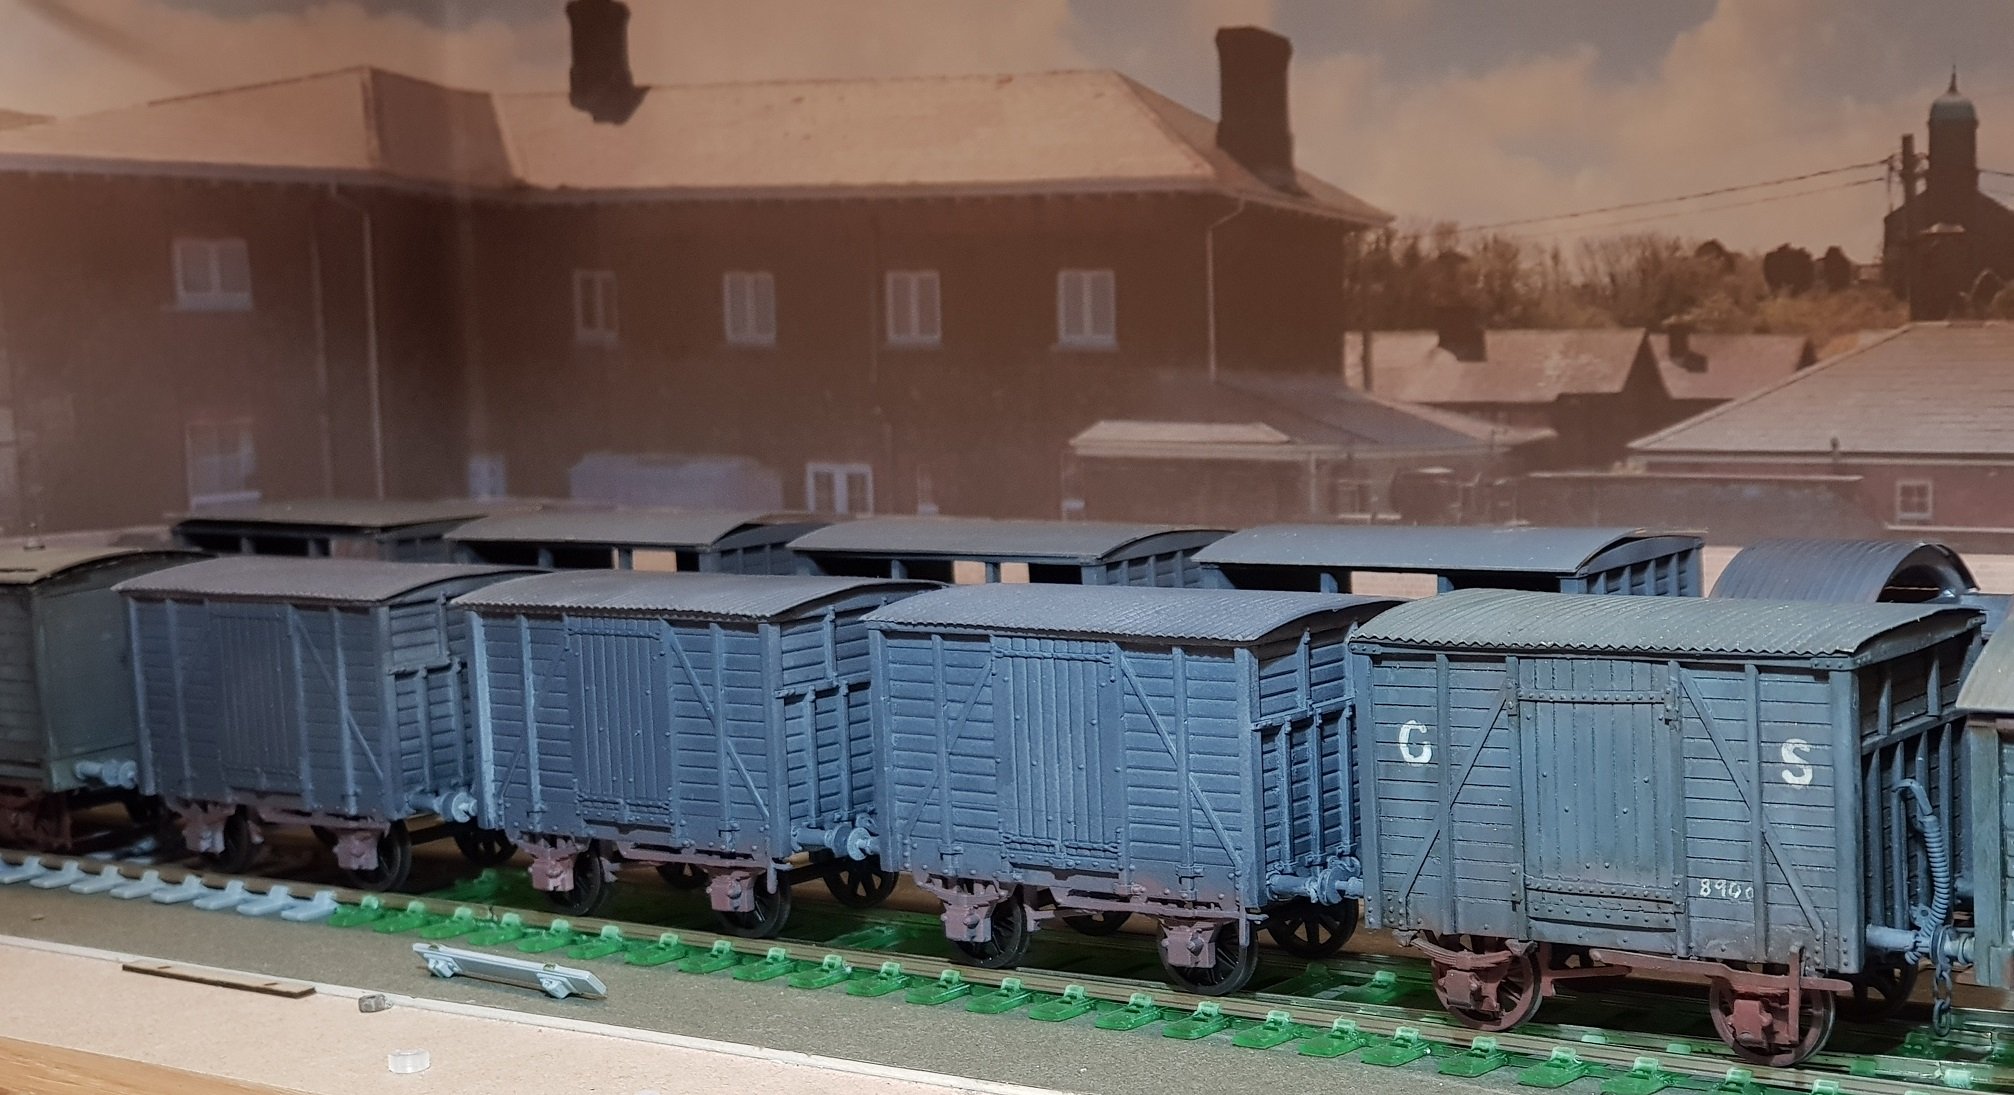
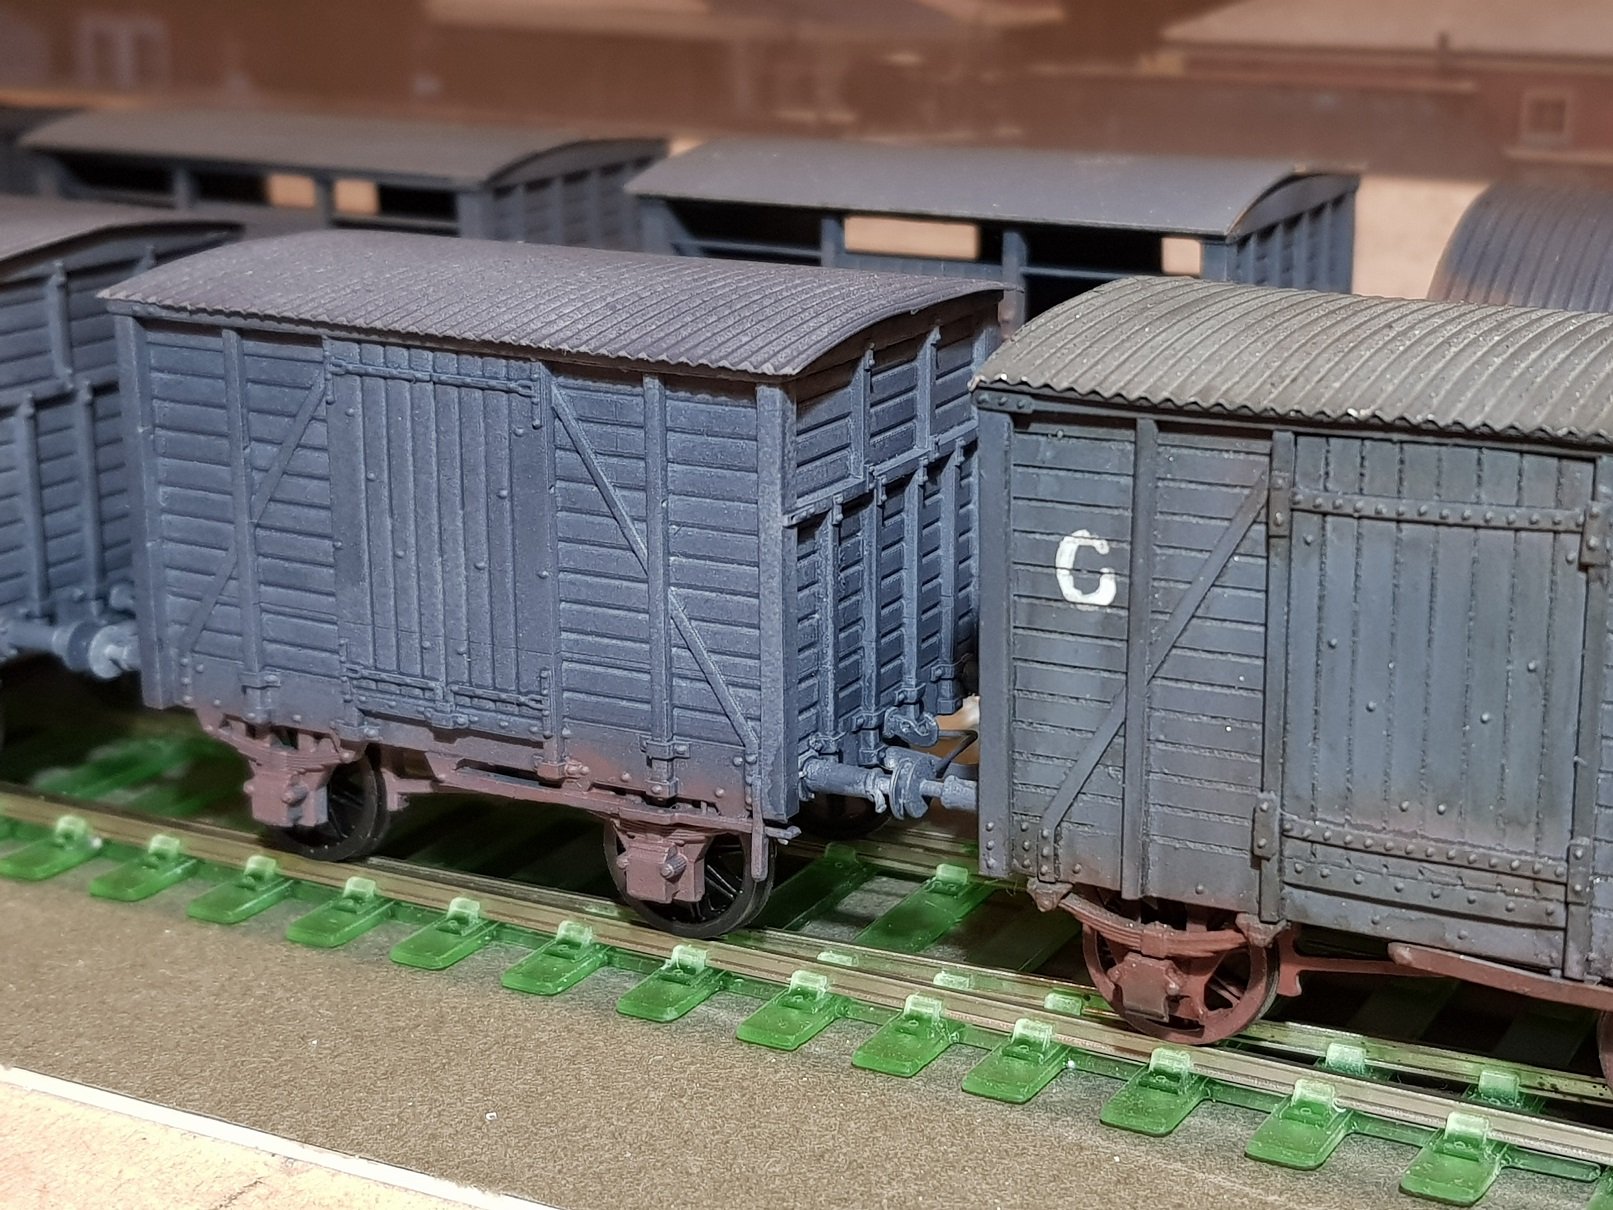
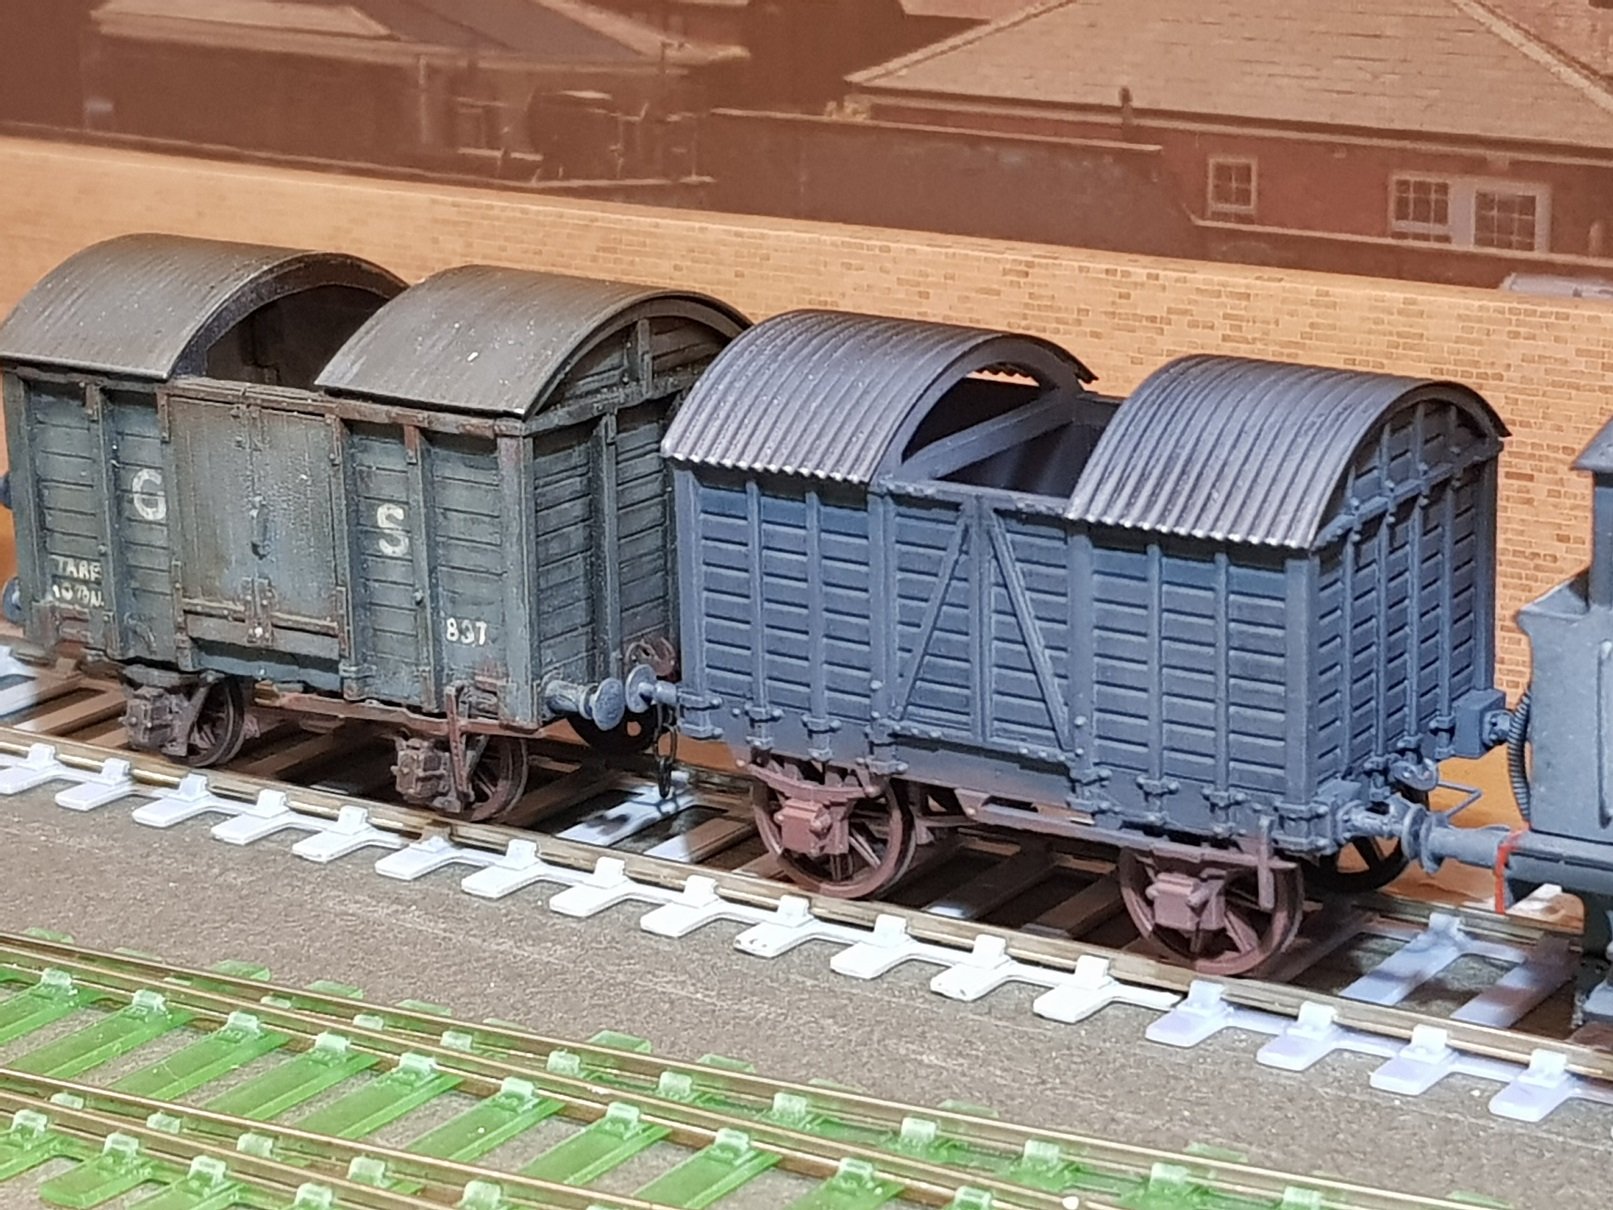
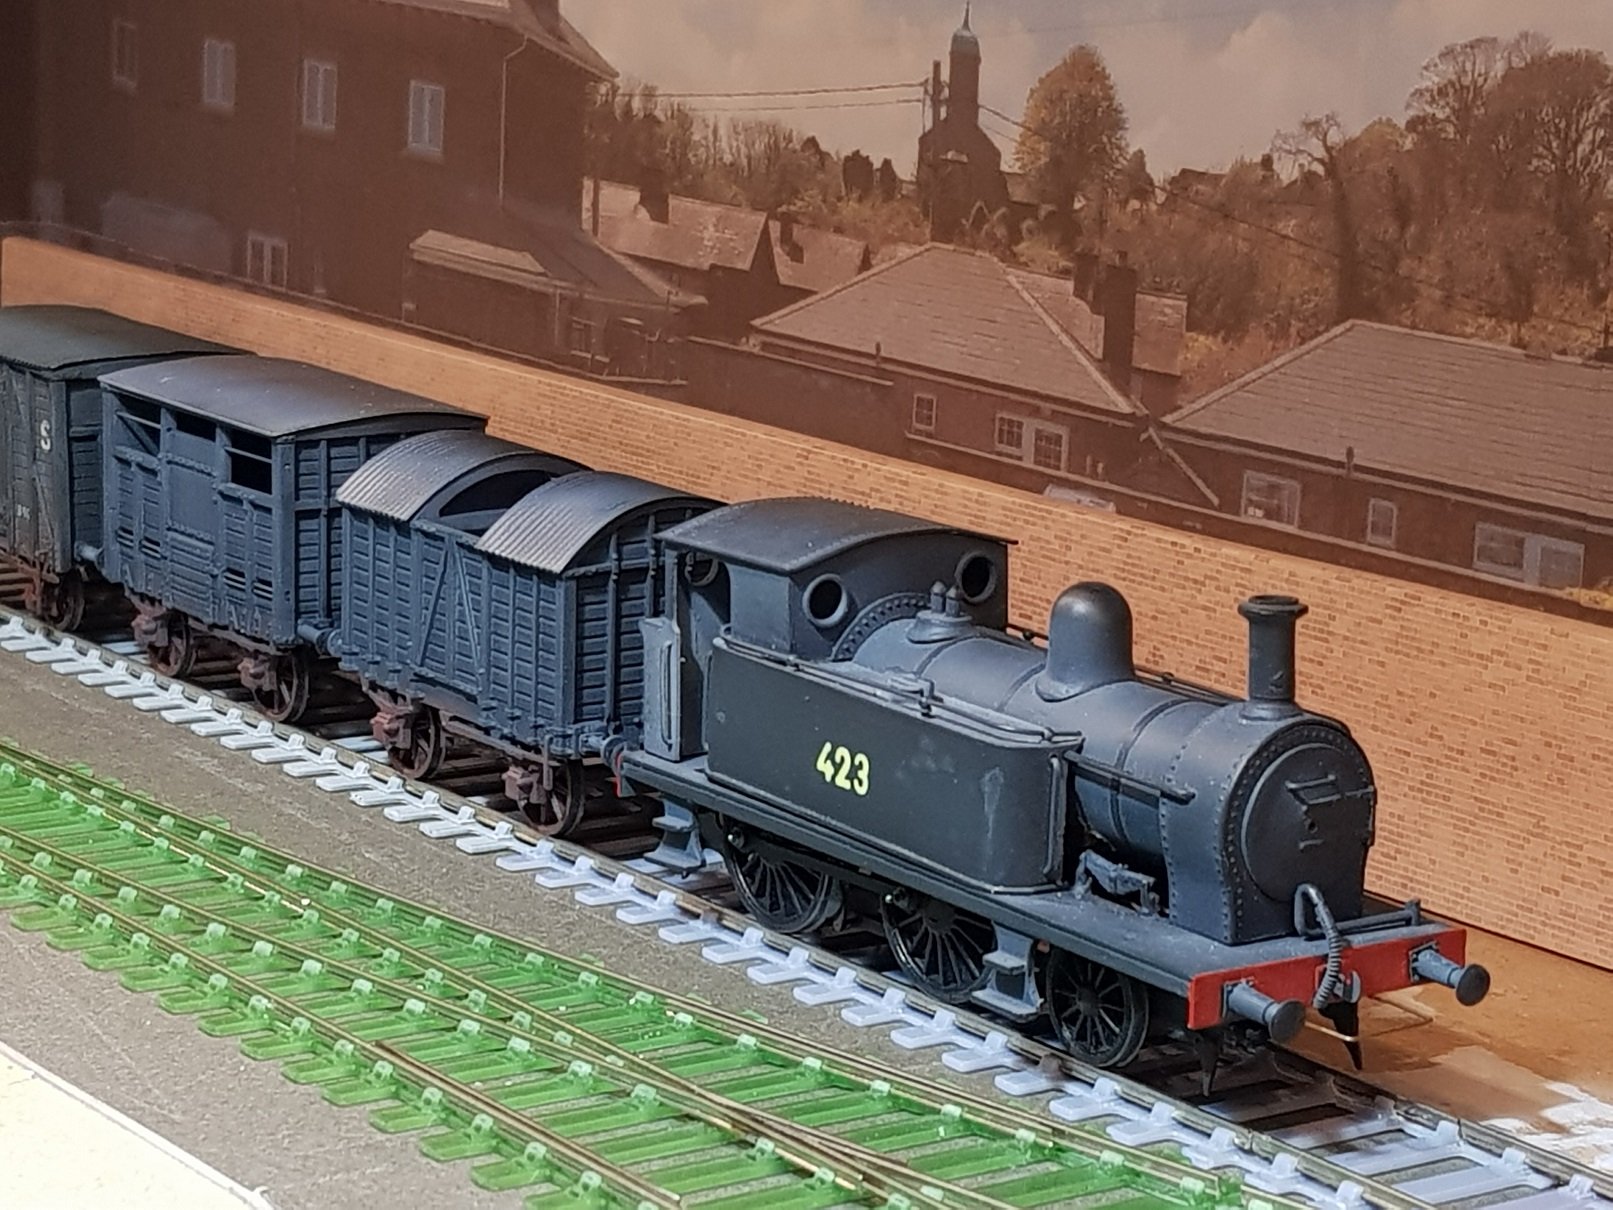
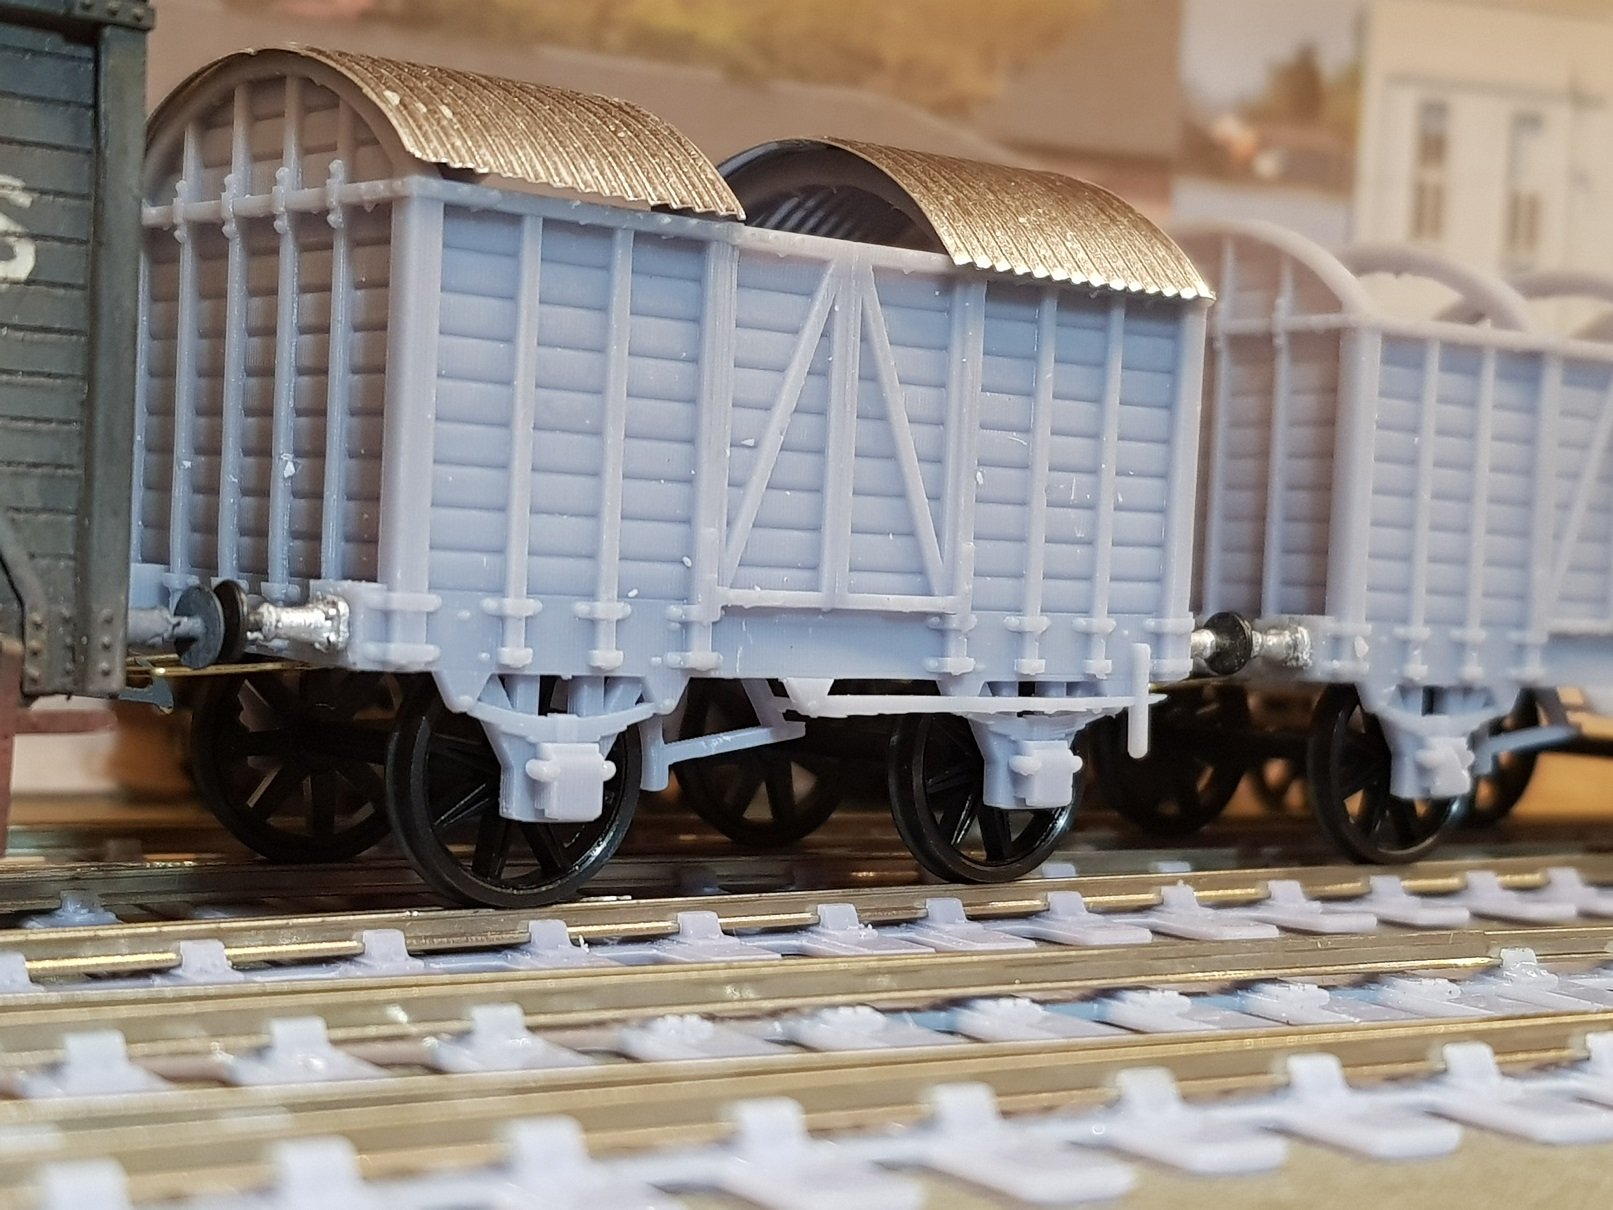
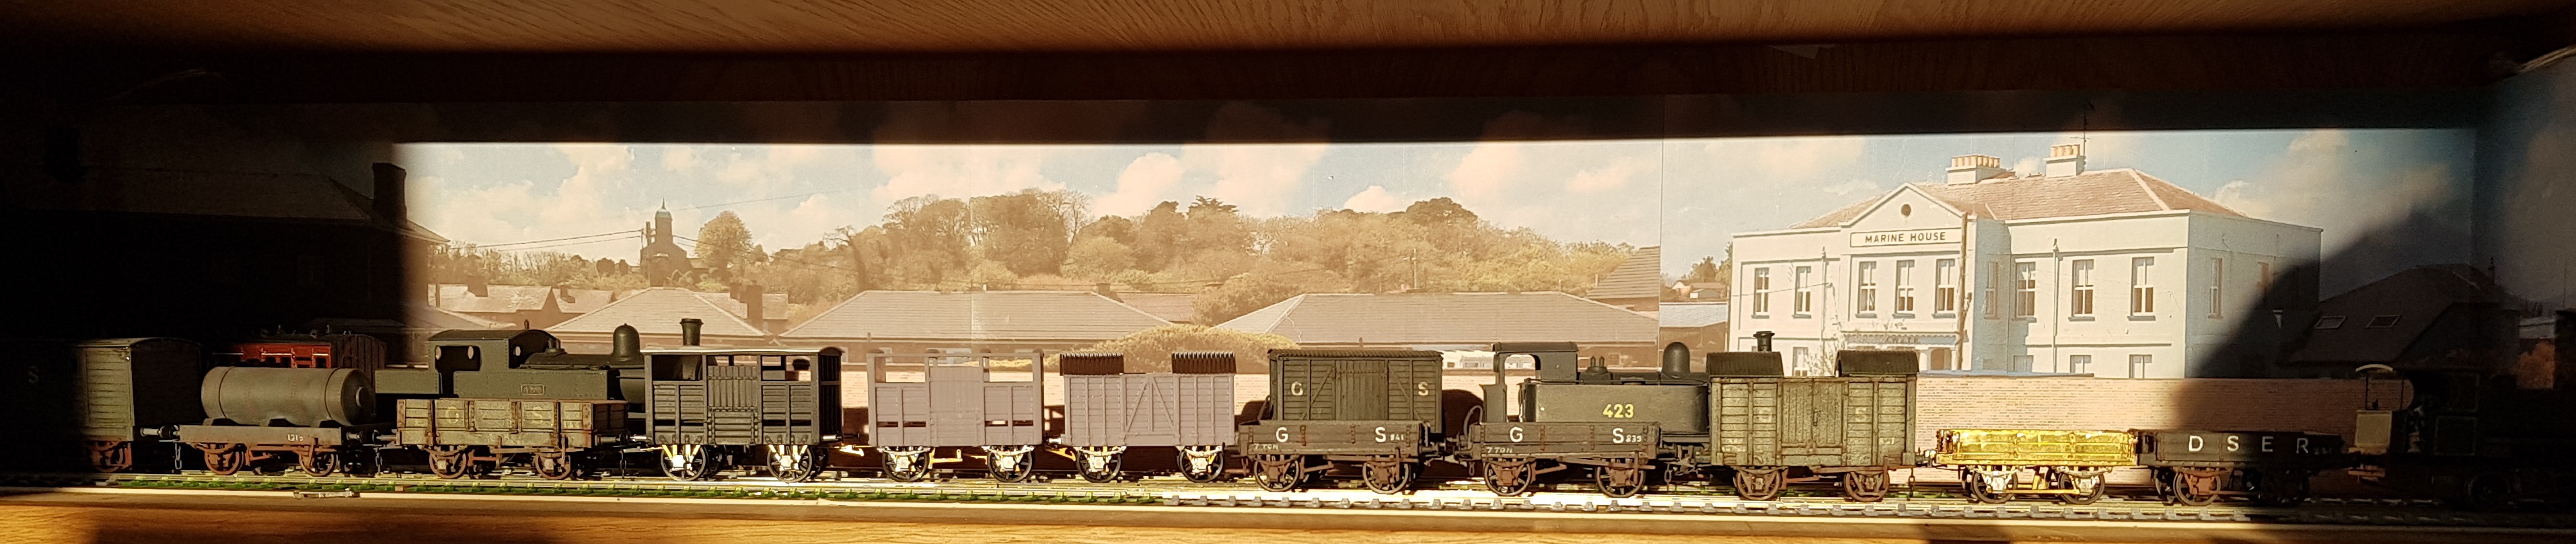
A little bit of progress with some lettering and a start on weathering - a lot more to do, particularly on the cattle wagons. Roofs still to be fixed down, most evident on the second wagon in line. Additional weight has been added internally to bring up the weight to c. 60g which is inline with the other brass wagons, so should run well with the others. As mentioned earlier, I have run off another revision of the Ashbury wagon to match the brass one built earlier. Still some lettering & weatheing to be completed, but they are good match for the brass version. All for this project now..... Ken
- 379 replies
-
- 14
-

-

-
No need to be sorry - good comment, and I appreciate the banter.
-
..............hours of work, multiple prototyping, integrating AutoCAD, 3d Printing & CNC Milling, but you make one spelling mistake...............................................................
-
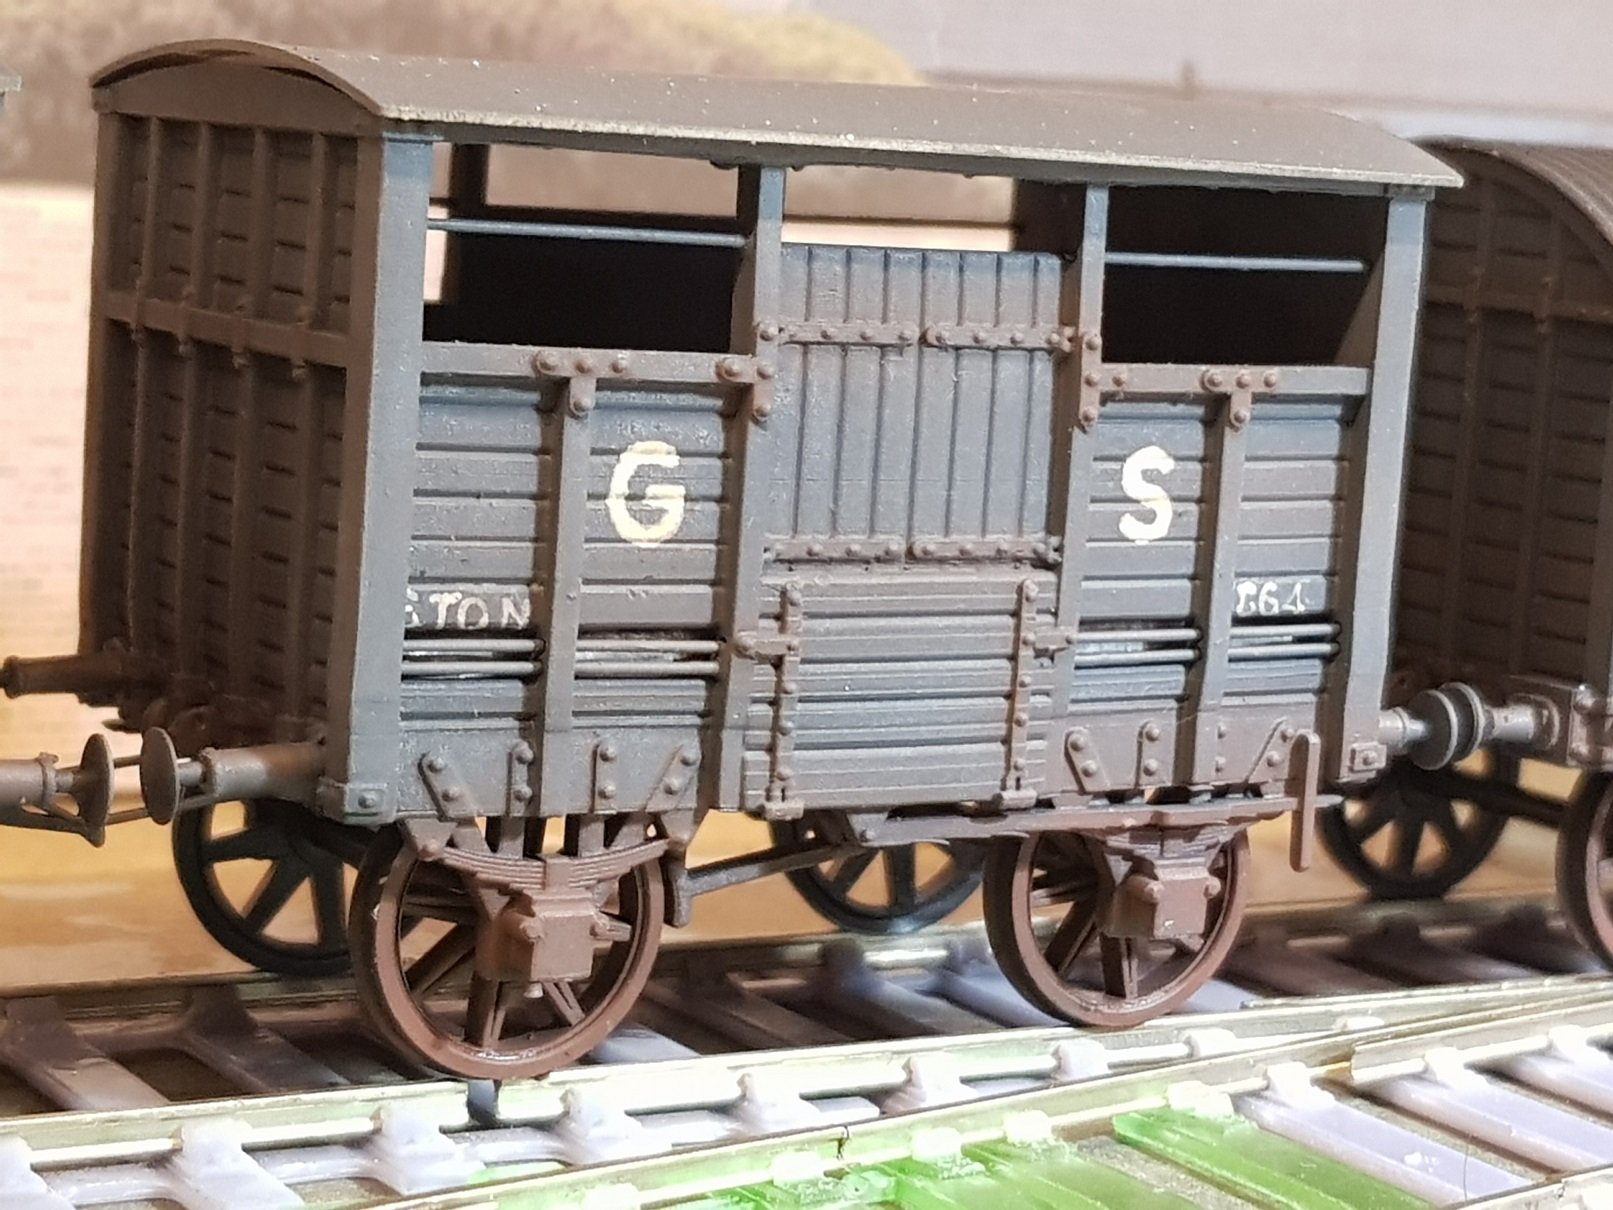
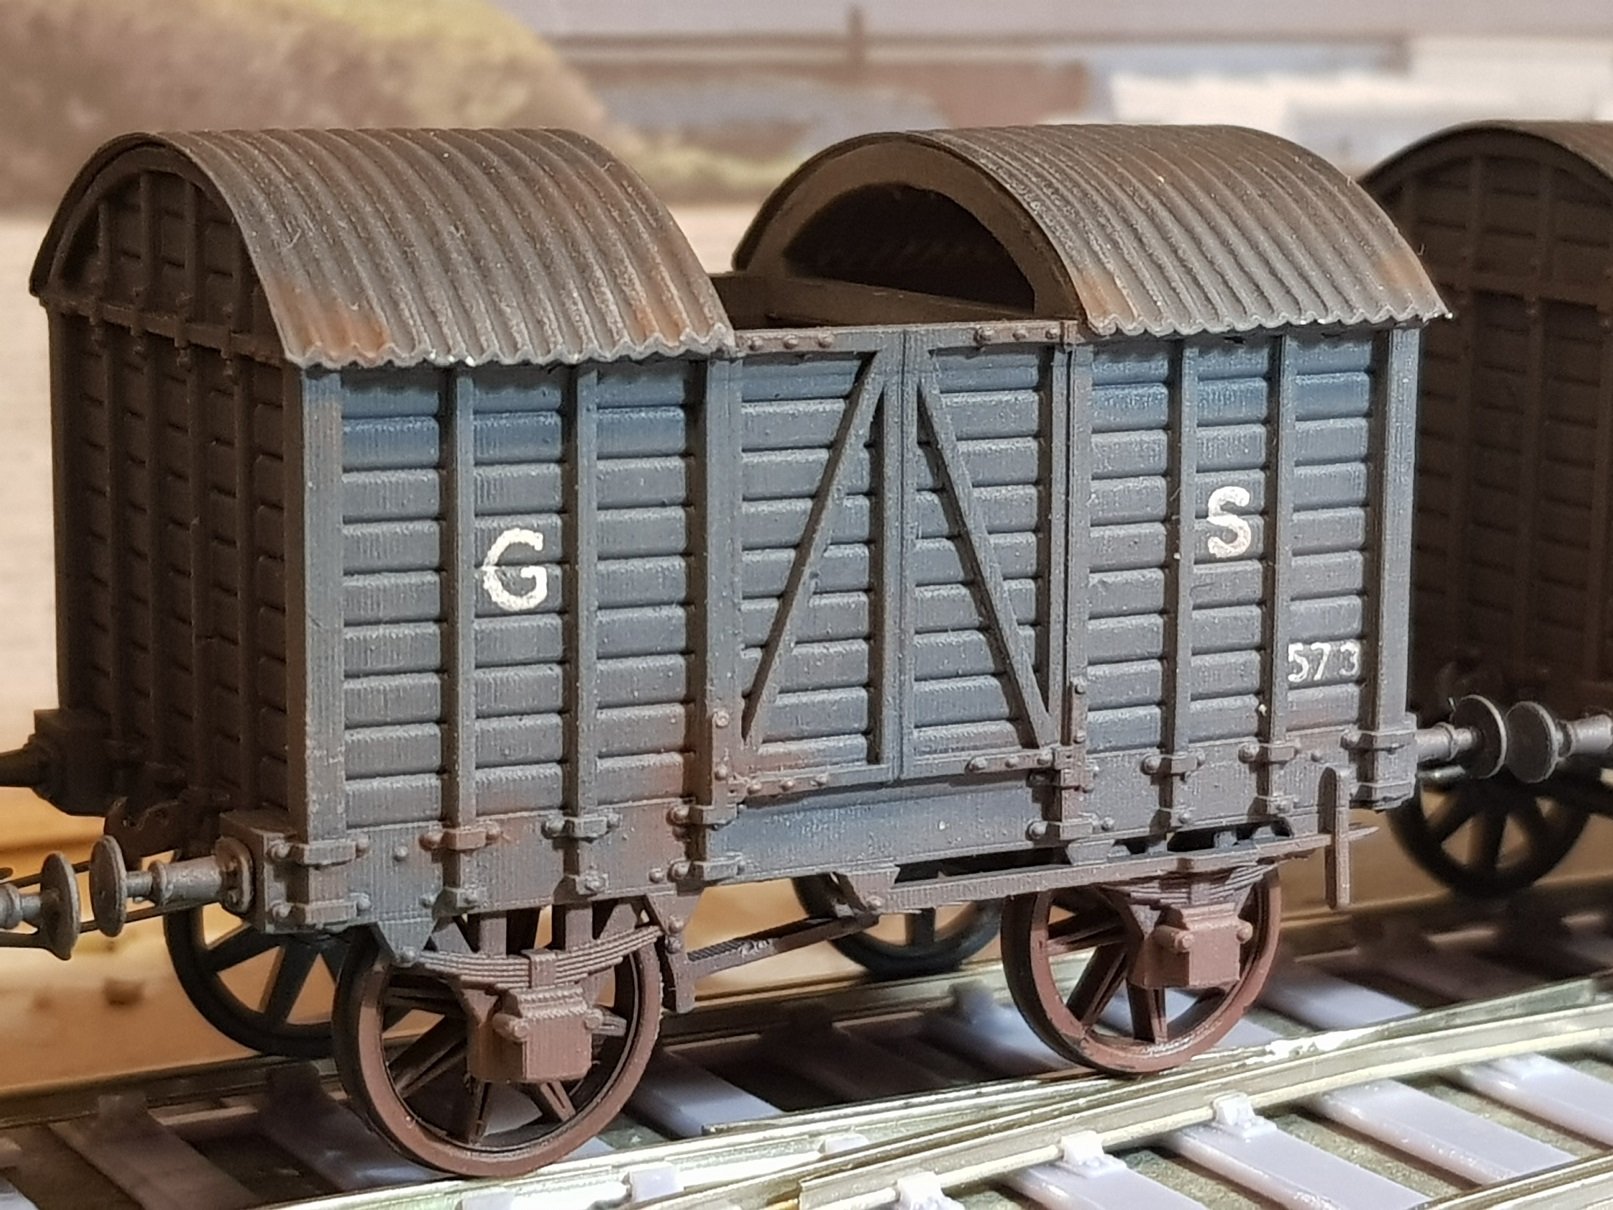
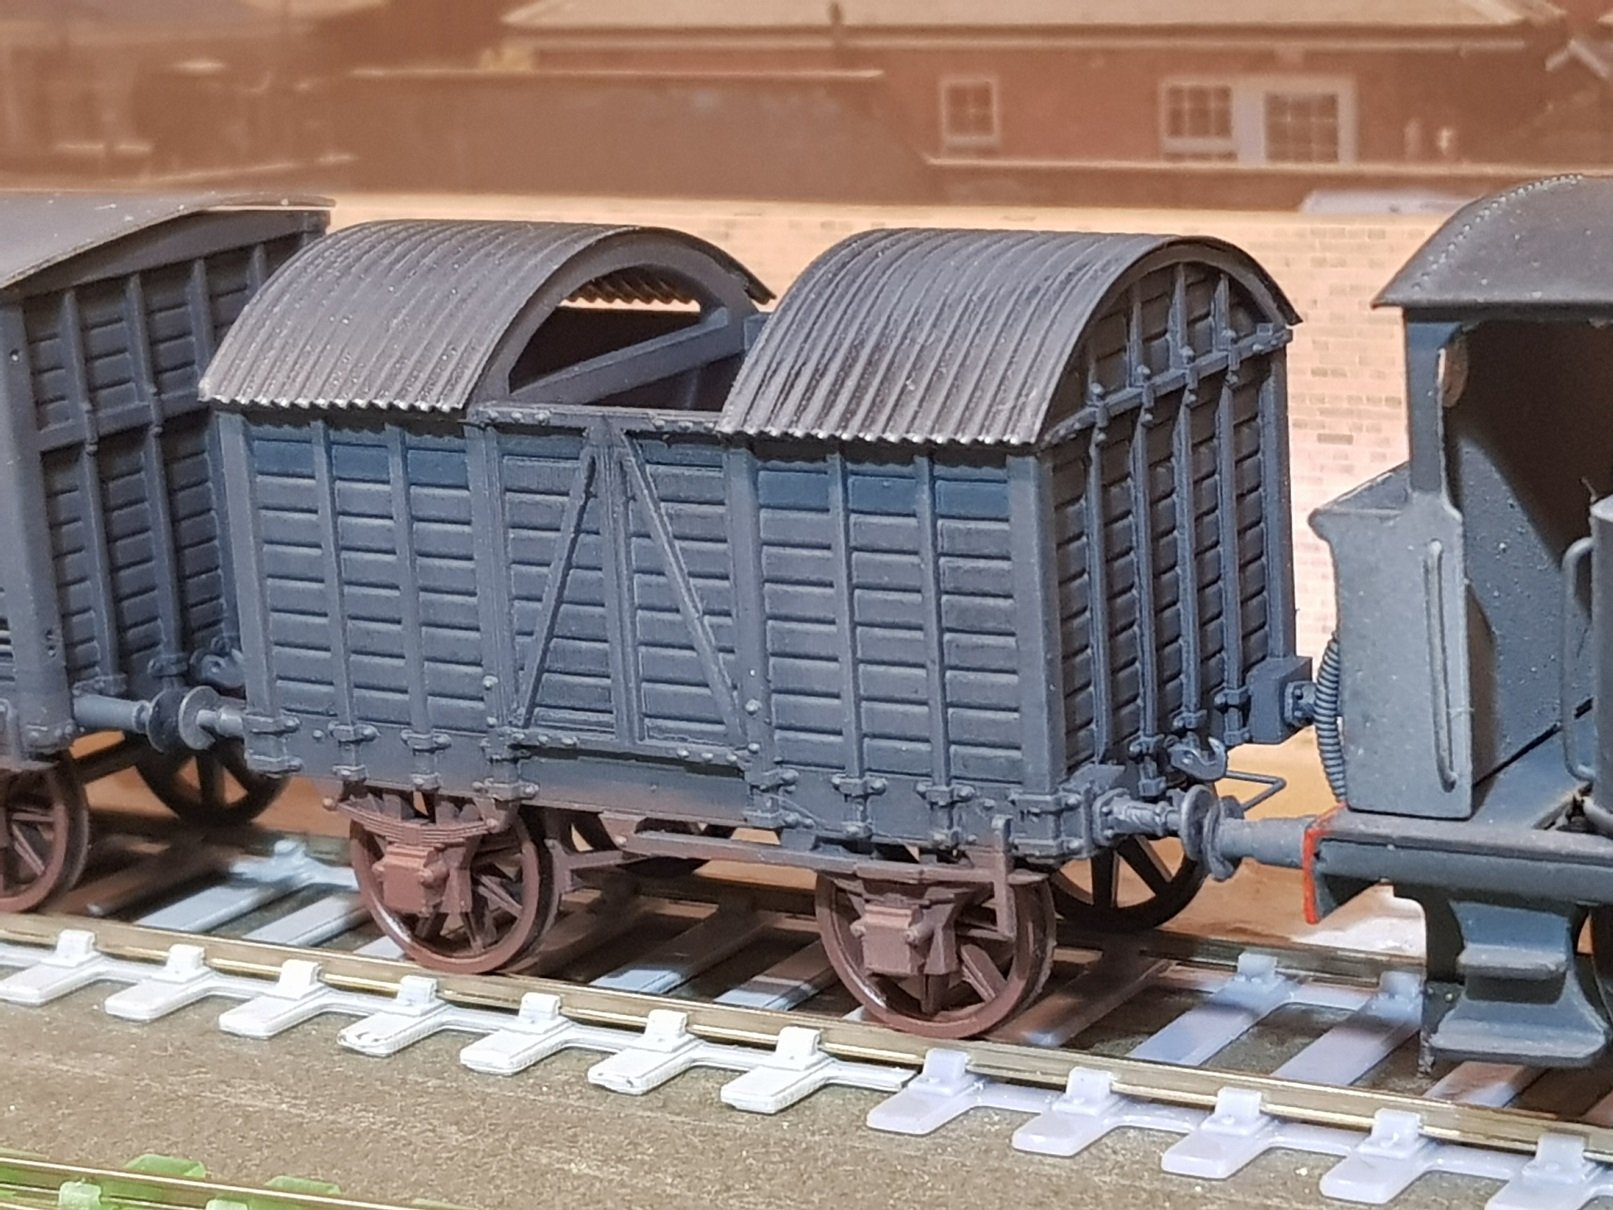
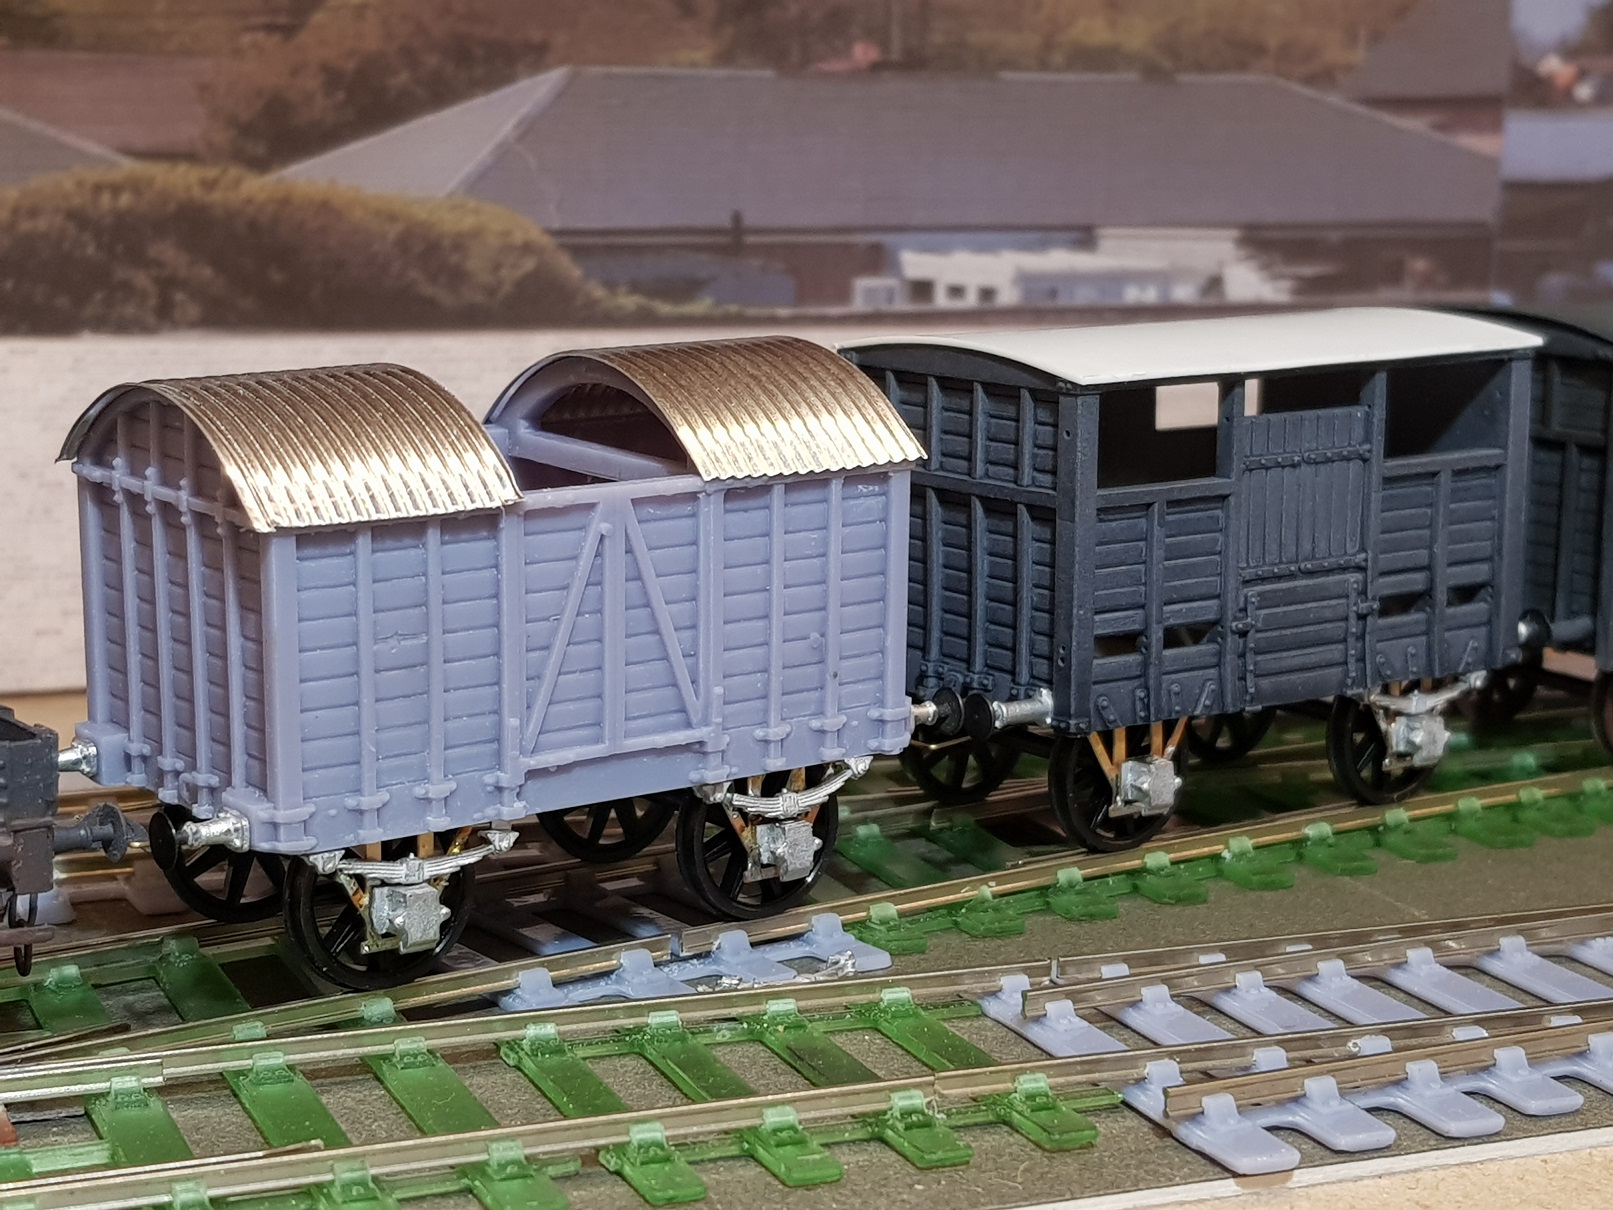
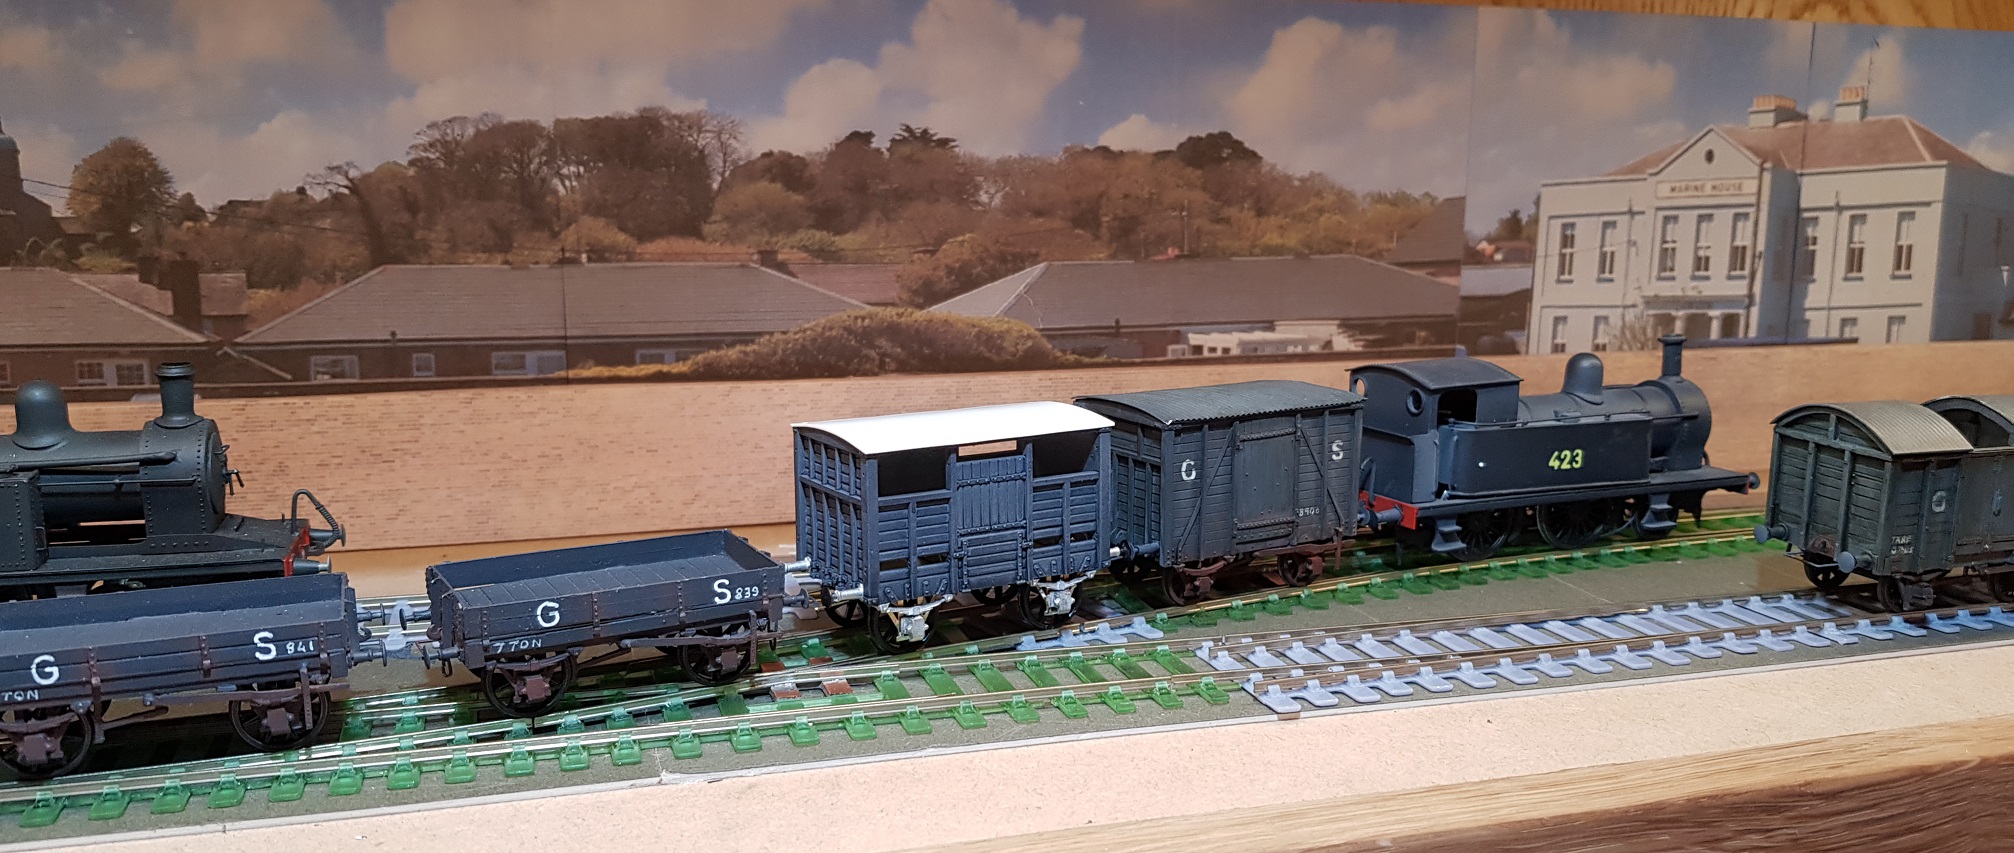
So, Some roofs developed for the wagons - corrugated aluminium for the convertible and rolled brass for the cattle wagon. A quick trip to the paint shop for a first coat of paint. Details are starting to pop out with the coat of grey paint. Roof needs another coat of paint - in this case it was painted, then rolled. It will be heavily weathered, so no issues with the marks visible. Slighly askew as it is not fixed down yet - I need to add some lead (and possibly cattle) before closing up. Convertible roof is quite tricky to settle down on the wagon - visible gap in the photo is not visible when the wagon sits on the track - camera really does show up all those little flaws. Not withstanding, the detail is coming out nicely. For comparison, I lined up the DSER convertible with the GSWR convertible - whilst they are both convertibles, there is a considerable difference in format and construction (GSWR model is a SSM whitemetal model). In fairness, the GSWR wagon probably should have 14mm wheels in lieu of the 12mm it currently runs with which would bring up the buffer and solebar levels. Another job to be done!!. Finally a quick pose with 423 to bring it all together. Very pleased with how the detail has poped out once painted - I'm really impressed with the fidelity of the printing process. To put this in context, the strapping, hinges etc stand 0.3mm above the flat surface and utilise 0.3mm half sphere rivet heads All in all, a good project and progressing well. More as time permits Ken
- 379 replies
-
- 16
-
-
-
Many thanks for the comments guys - much appreciated. Murph, they are pinpont axles running in the resin. So far they run freely, how well they will wear is hard to say - given the amount of running I do, they will last! I would anticipate that with a small amount of clock oil in the bearing cone in the resin, would provide sufficient lubrication to reduce wear. George, Corugated roof is cut from a sheet I bought some time ago - I will need to go back through my orders to try to find where I bought it as I will need more for a run of Ashbury vans I'm planning. What is nice, is it is a single sheet c. A5, without any seams so can be cut to various sizes. If I find where I bought it, I'll post up the details. Ken
-
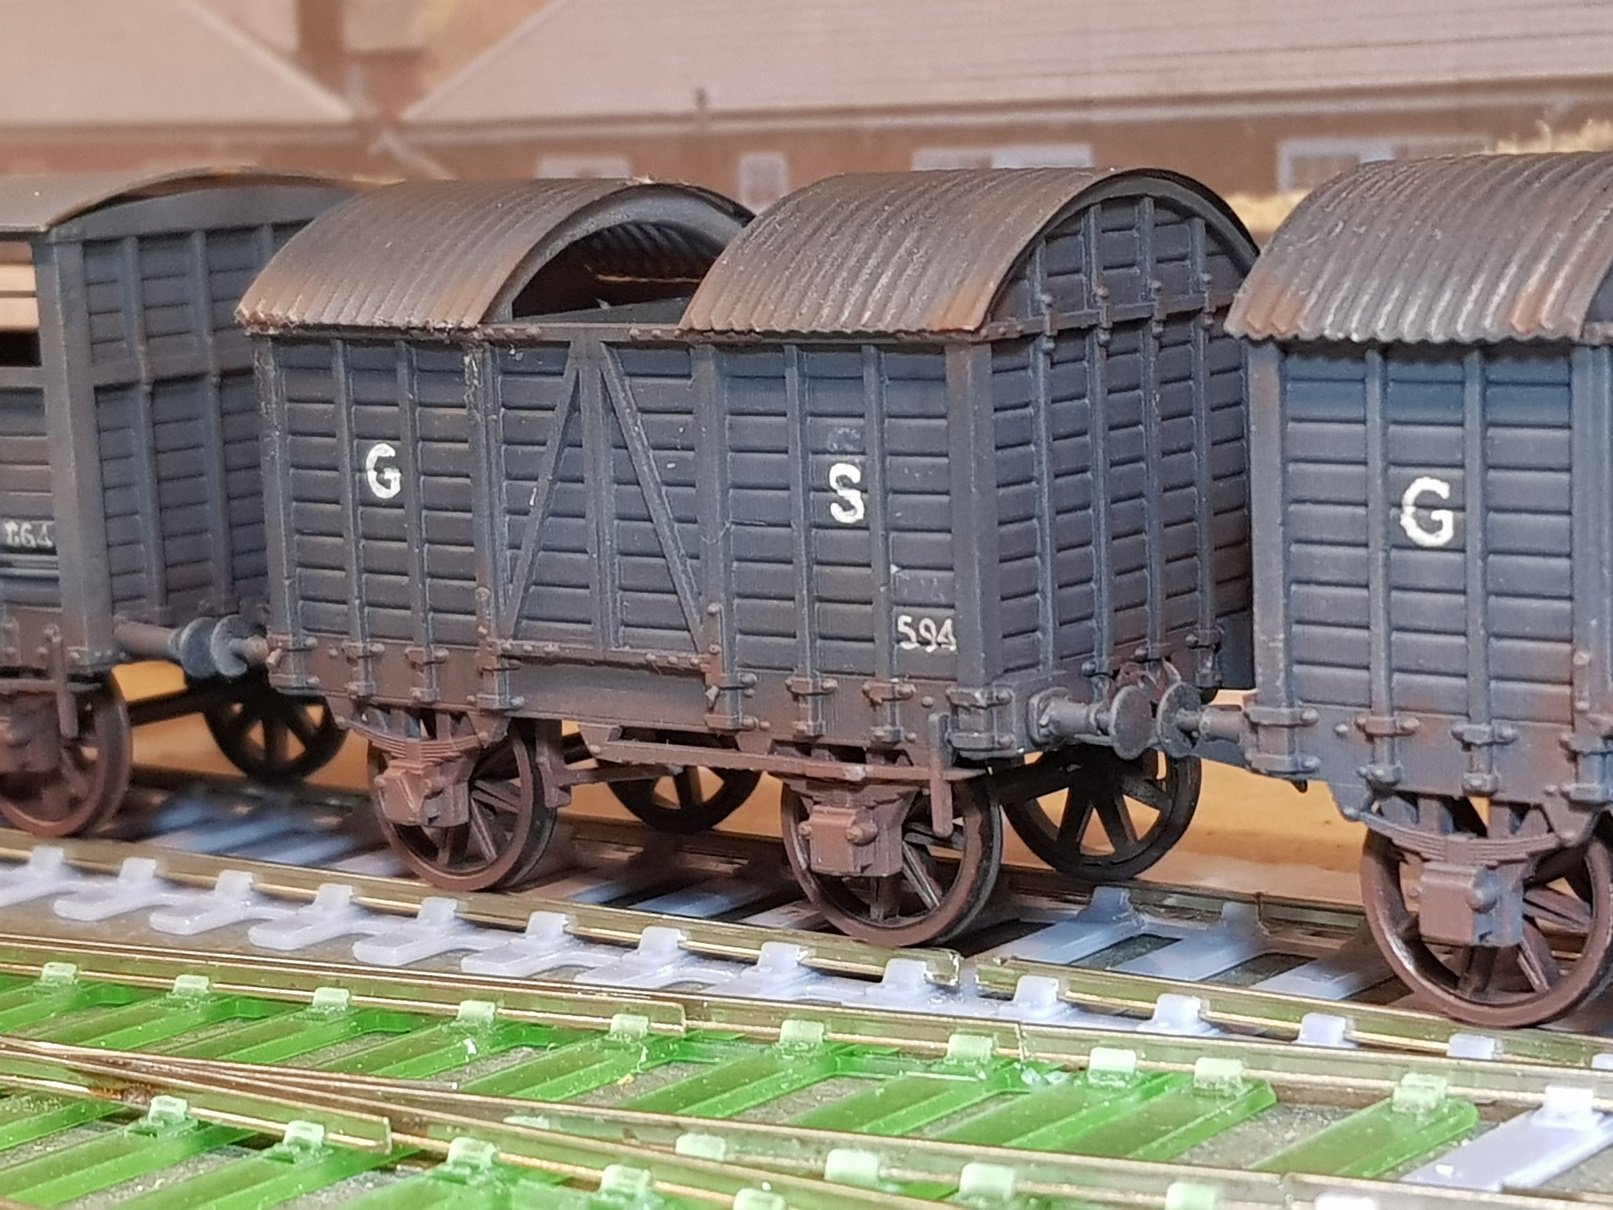
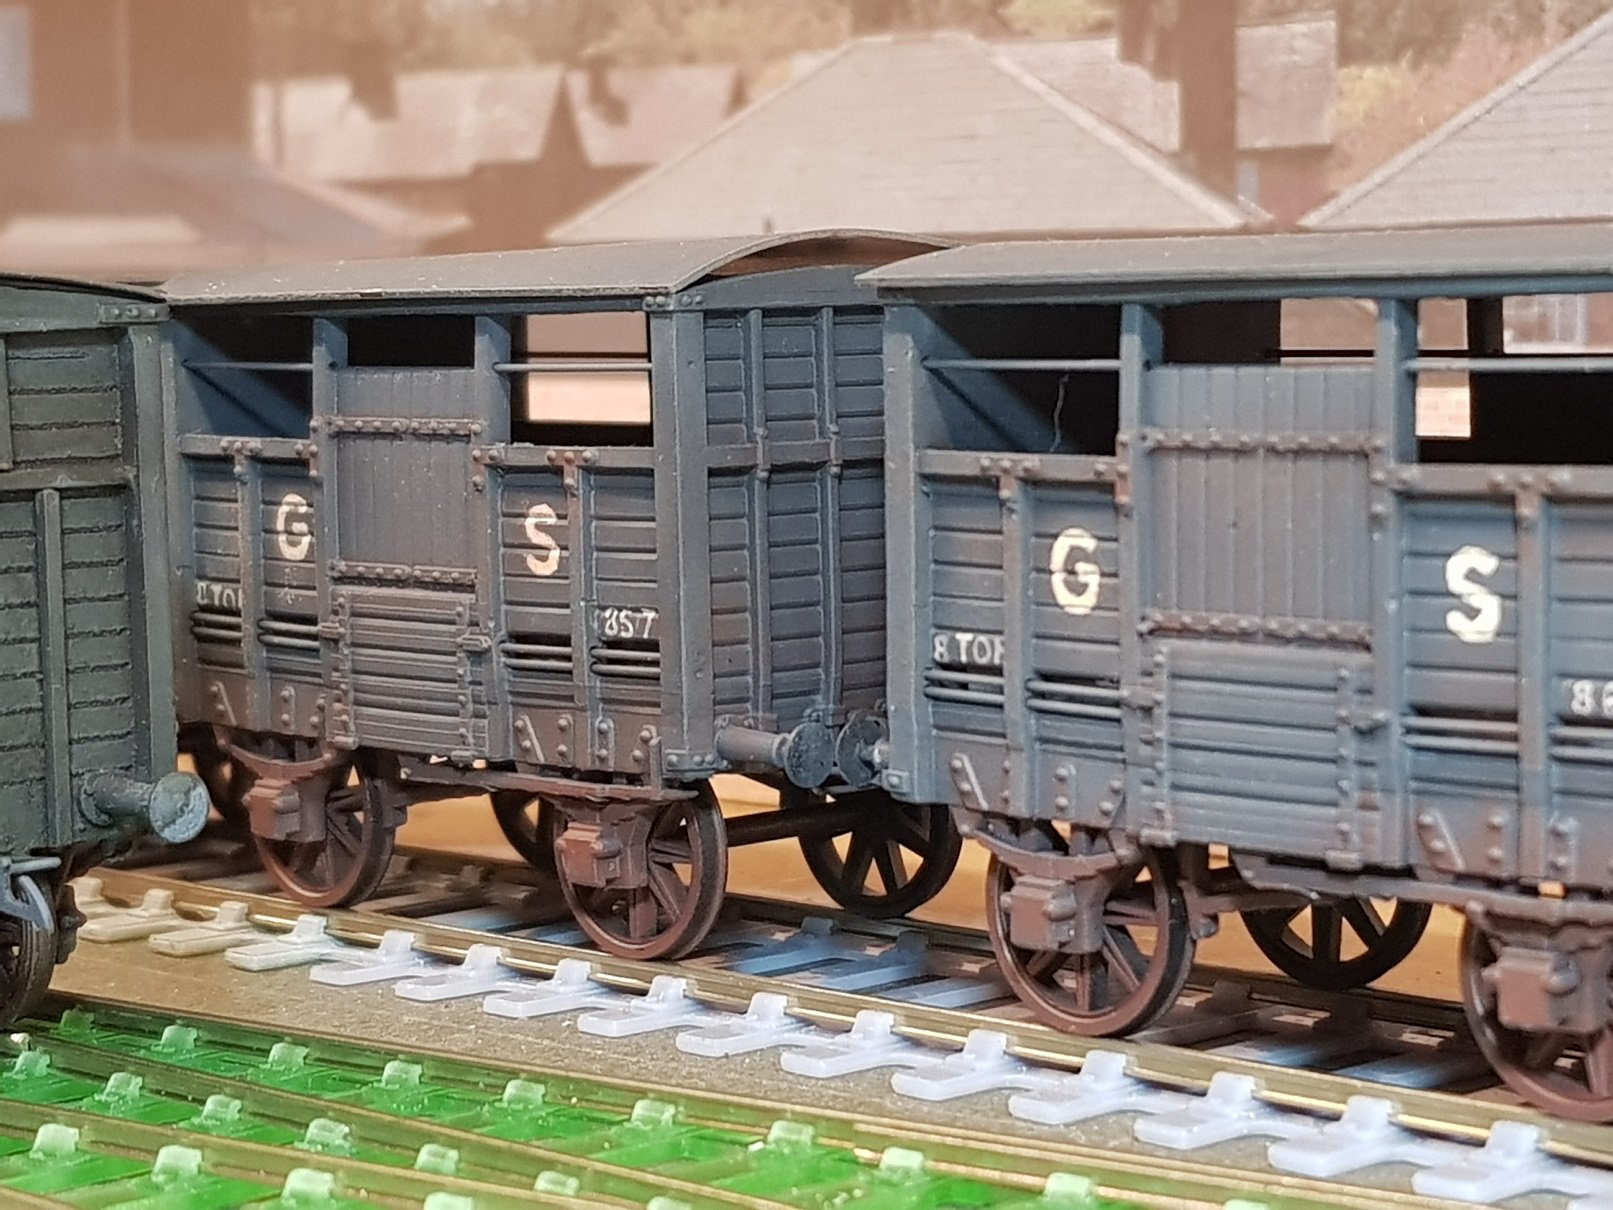
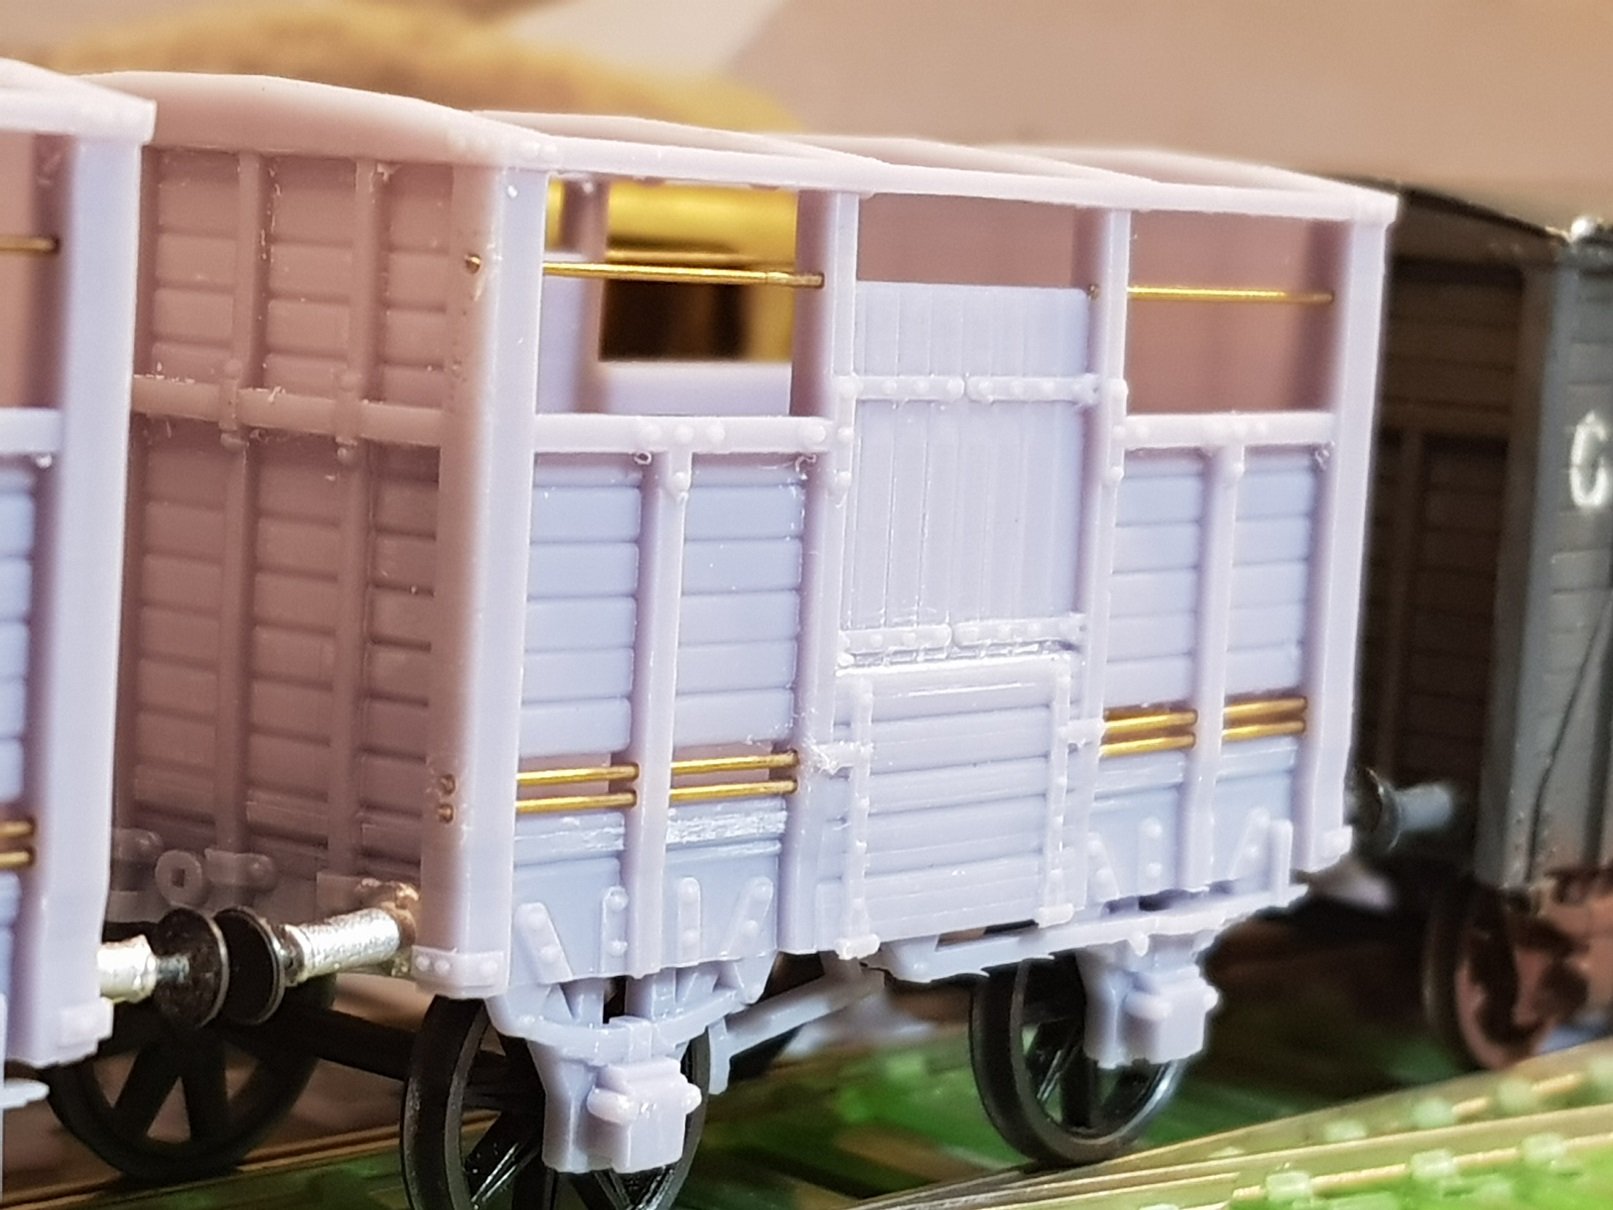
As a follow on from some earlier queries on printing a chassis for these wagons, I had a go at designing something that would work, both to capture the prototypical look and also working within the limits of resin printing. I wanted to achieve a realistic looks, however it does require some thickness to make sure there is strength both to hold the axles & tolerate handling etc. The chassis build allows for 28mm axles, so both 21mm & OO gauge is possible. I also integrated the chassis into the wagon bodies & re-printed following many trial prints to establish what would work for the chassis. Now we have the Mk V cattle wagon: Cast buffers and 0.5mm rod for the bars. Need to add a roof (either brass or plastic) and work out whether I want cattle inside or not. Convertible wagon can also benefit from this chassis design, so we now have the Mk II version Amazing what can be seen from close up photos - there is a lot of small particles & dust needs to be cleaned away from the modes prior to painting, along with some sanding / filing on the angled elements such as the brake lever. Rather pleased as to how these have turned out - they also appear to be good runners which is also good; there is some play in the axlebox for the axle to move which allows some compensation. They will need weight added however as they weigh in under 20g each; for comparison the brass built wagons are 50 - 60g. Better get the lead out!!! Ken
- 379 replies
-
- 14
-
-
-

Would you model in 21mm if RTR track and models were readily available?
KMCE replied to BosKonay's topic in Irish Models
Murph, Printer is an AnyCubic Photon Mono X. The vee is not touching the plastic diretly, the nearest contact being the chairs last timber back; thus with a quick solder, there does not appear to be any deformation from the heat. Vee is soldered in before wing rails are added. I was originally concerned with the lack of support for the vee & wing rails, but given the support from the chairs, there does not appear to be any deflection; then axle loading at 4mm is not huge. Hope that helps. Ken
- 272 replies
-
- 12
-
-
Would you model in 21mm if RTR track and models were readily available?
KMCE replied to BosKonay's topic in Irish Models
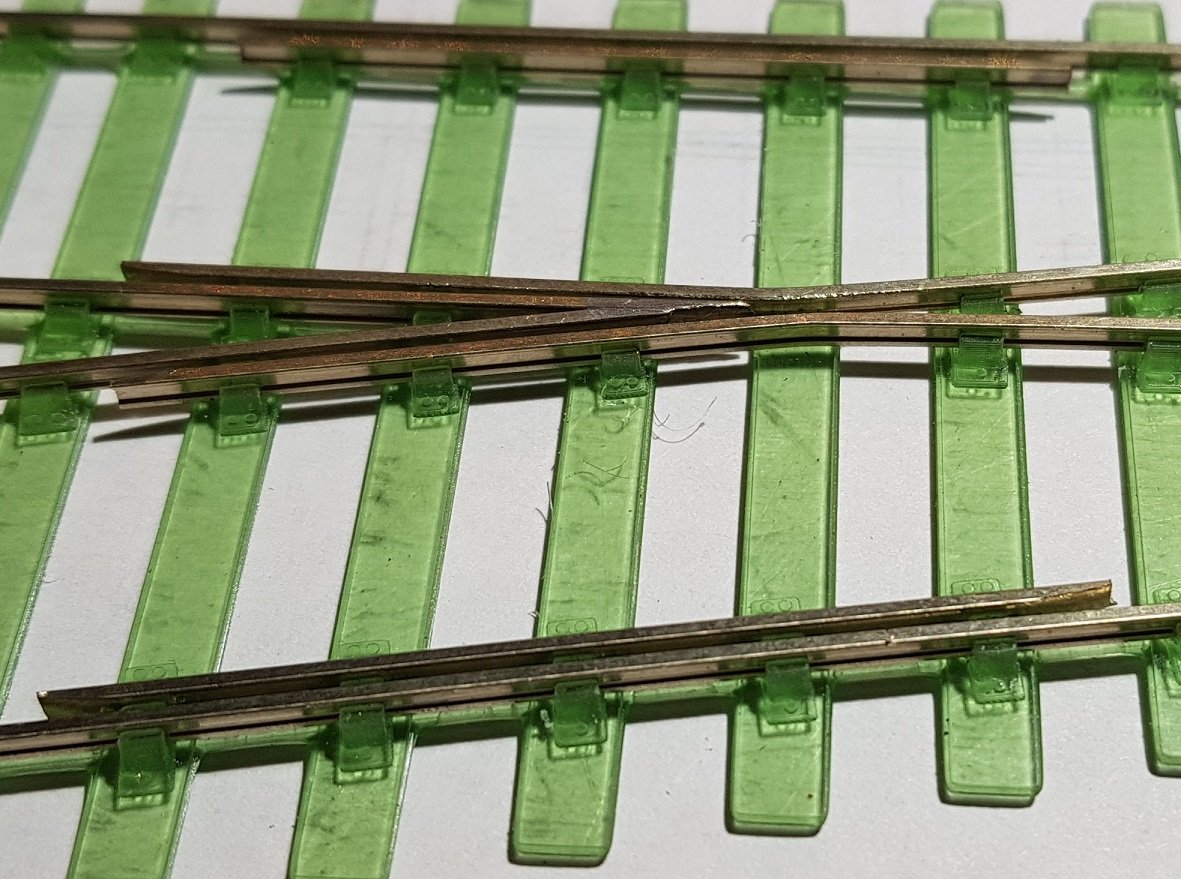
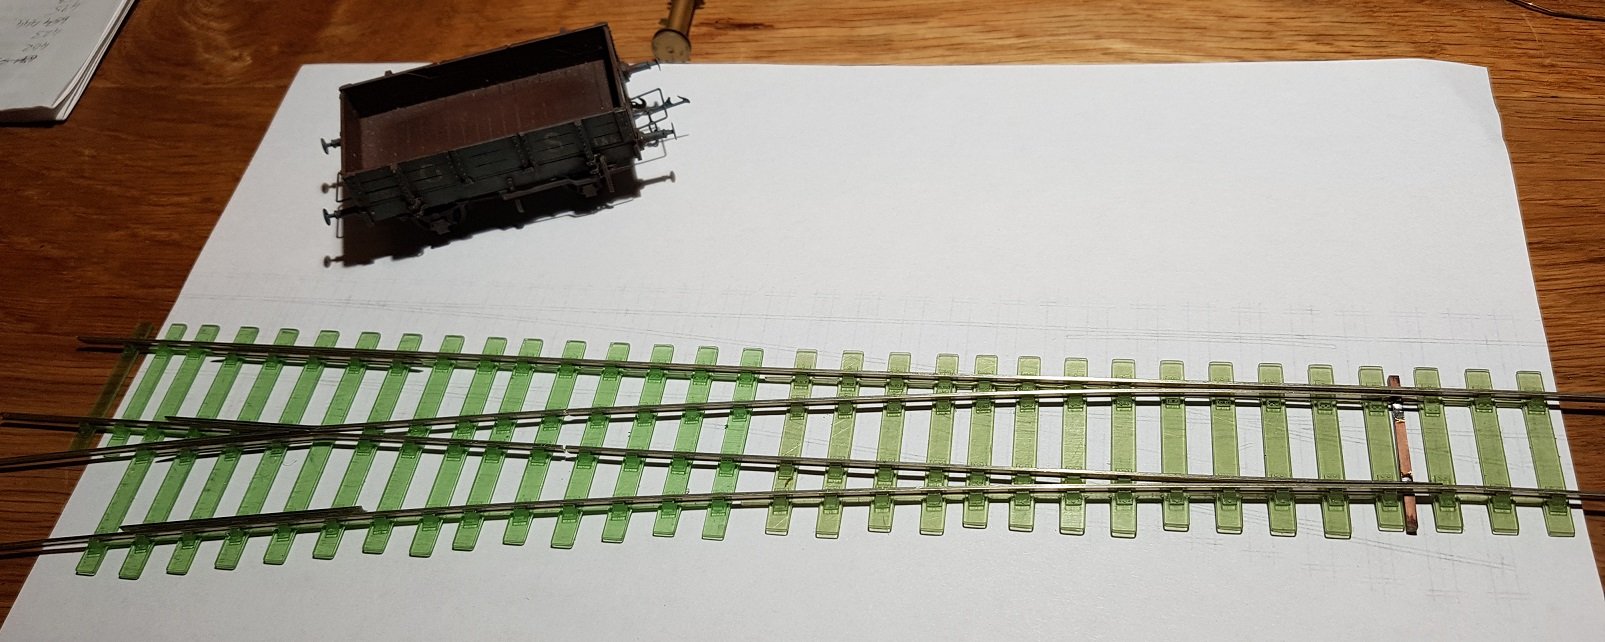
It's already possible to change check rail clearances under the real tab, and scrolling down to "adjust check rails". It's a bit fiddly, but possible. I soldiered on with the development of the points and now have a short 1:6 point c. 260mm, an A6 (300mm) and a B6 (325mm) which have also been upgraded around the frog. The next iteration of the frog allowed for a small amount of copperclad to allow soldering of the vee. However, this copperclad was not providing much benefit, so I elminated it and can now build with the only soldering needed is the crossing vee, which is done in situ, so no jigs are needed. This also removes unnecessary cross bracing on the sleepers. There are chairs for all sleepers except for one as it is both difficult to establish the exact position of the rail and threading in the canted check /crossing rail is rather difficult. It will be possible to add a cosmetic chair later, but missing one chair is not a big deal. Completed A6 point - some minor tweaking needed at the blades / rail for the diverging rail, as this is slightly under gauge - next iteration should sort that. The B6 point is operating perfectly and all wagons & more importantly 6-wheelers glide through on the main and diverging way. These are big points however. For comparison, below is the B6 point vs a Peco SL92 OO small radius point. Next up will be to look at a curved point / crossover as I need one for the extended Wicklow station layout. Ken
- 272 replies
-
- 10
-
-
-
Rail-mounted armoured car & armoured train at Inchicore
KMCE replied to Garfield's topic in Photos & Videos of the Prototype
I'll be there, and will have the armoured train with me on display. Ken -
Would you model in 21mm if RTR track and models were readily available?
KMCE replied to BosKonay's topic in Irish Models
Really like the look of this. Nice option to use the separate sleeper & chair which would be fine for most applicaitons - would it be suitable for P4 I wonder; he appears to be working on this though. The solution of printed chairs for the crossing vee of the point would make it easiser than the solution I am working with. I have found with the fixed chairs printed to the sleeper is quite strong and the gauge is very accurate however it's a bit fiddly completing the vee. Even so the copperclad solution I'm using allows me complete a point in c. 1 hour. I do like the option that he can generate any track formation, whereas, my solution is fixed at the moment for a B6 point & straight lenghts - Must work harder I may partake in the templot option & see how it works; don't know about you guys, but I do find Templot rather challenging for anything other that the most basic patterns. Worth a go! Ken -
Very Nice! Everything well blended together to develop the scene. Super work. Ken
-
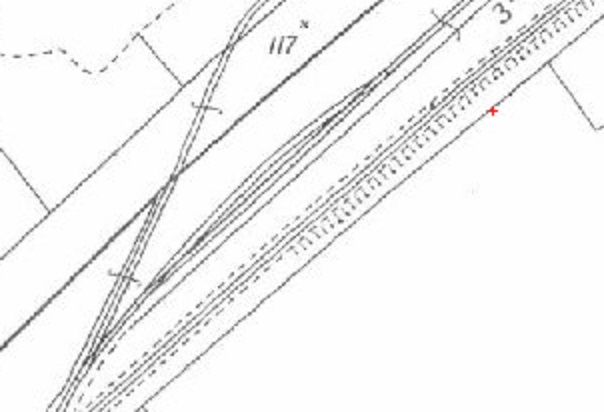
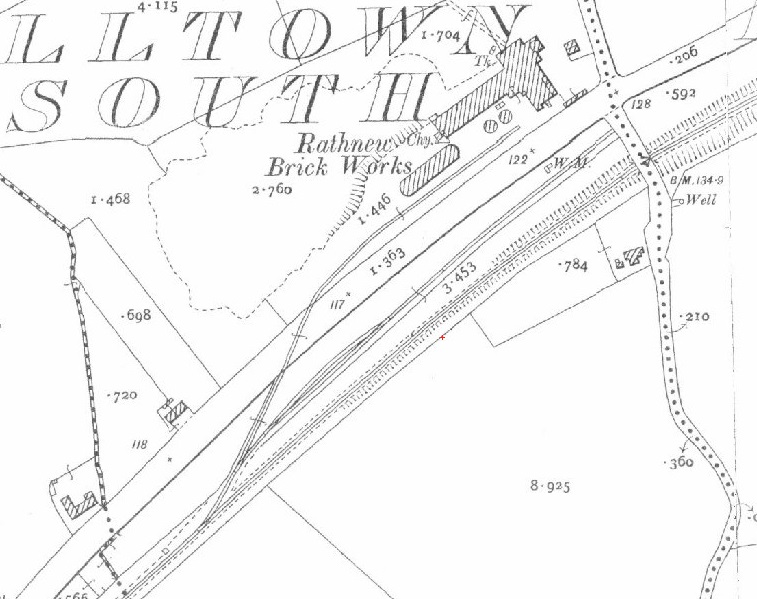
He must have had a good imagination. The layout for the Brick Factory outside Rathnew in Wicklow also had this arrangement. I assume it allowed a loco to sit on the siding to allow the siding be fillled by a mainline train and thus shunted afterwards? Seems too short for a passing loop. This could qualify as a minimally interesting track layout with an interesting industiral setting? More here - https://heritage.wicklowheritage.org/places/rathnew/the_rathnew_brickworks
-
But of course - Victorian naturally!! This is the old Militia Barracks located adjacent to the reminants of Murrough Station in Wicklow. This backdrop was developed from a series of photos I took a few weeks back of what's left of the old Murrough station house, station wall & Militia Barracks, now called Marine house (currently a non-denominational primary school). The houses just visible over the wall are new builds, but by just keeping the roofs, I can maintain a timeless backdrop. Another shelftop layout being developed to take trial the printed track etc.
-
Yes, this was noted in the 21mm survey on RTR track. I have managed to develop a print for 21mm which with a limited amount of work will provide 21mm track without the need for all the soldering & associated track gauges. Need to develop up the points a little further berfore they are a simple solution for 21mm development.
-
Busy yard in the evening sunshine......
-
Philip, I use the Valejo air range (great paint BTW) and always thin the paint - using straight from the bottle in my experience will not end well. The other thing to note is air pressure - I normally work with 20 -25 psi max with an absolute minimum paint delivery rate. It takes time to paint as the amount of paint is minimal, but you have much more control over the painting proces. This also works well for weathering once painting is complete. Just my experience so use as necesary! Ken
-
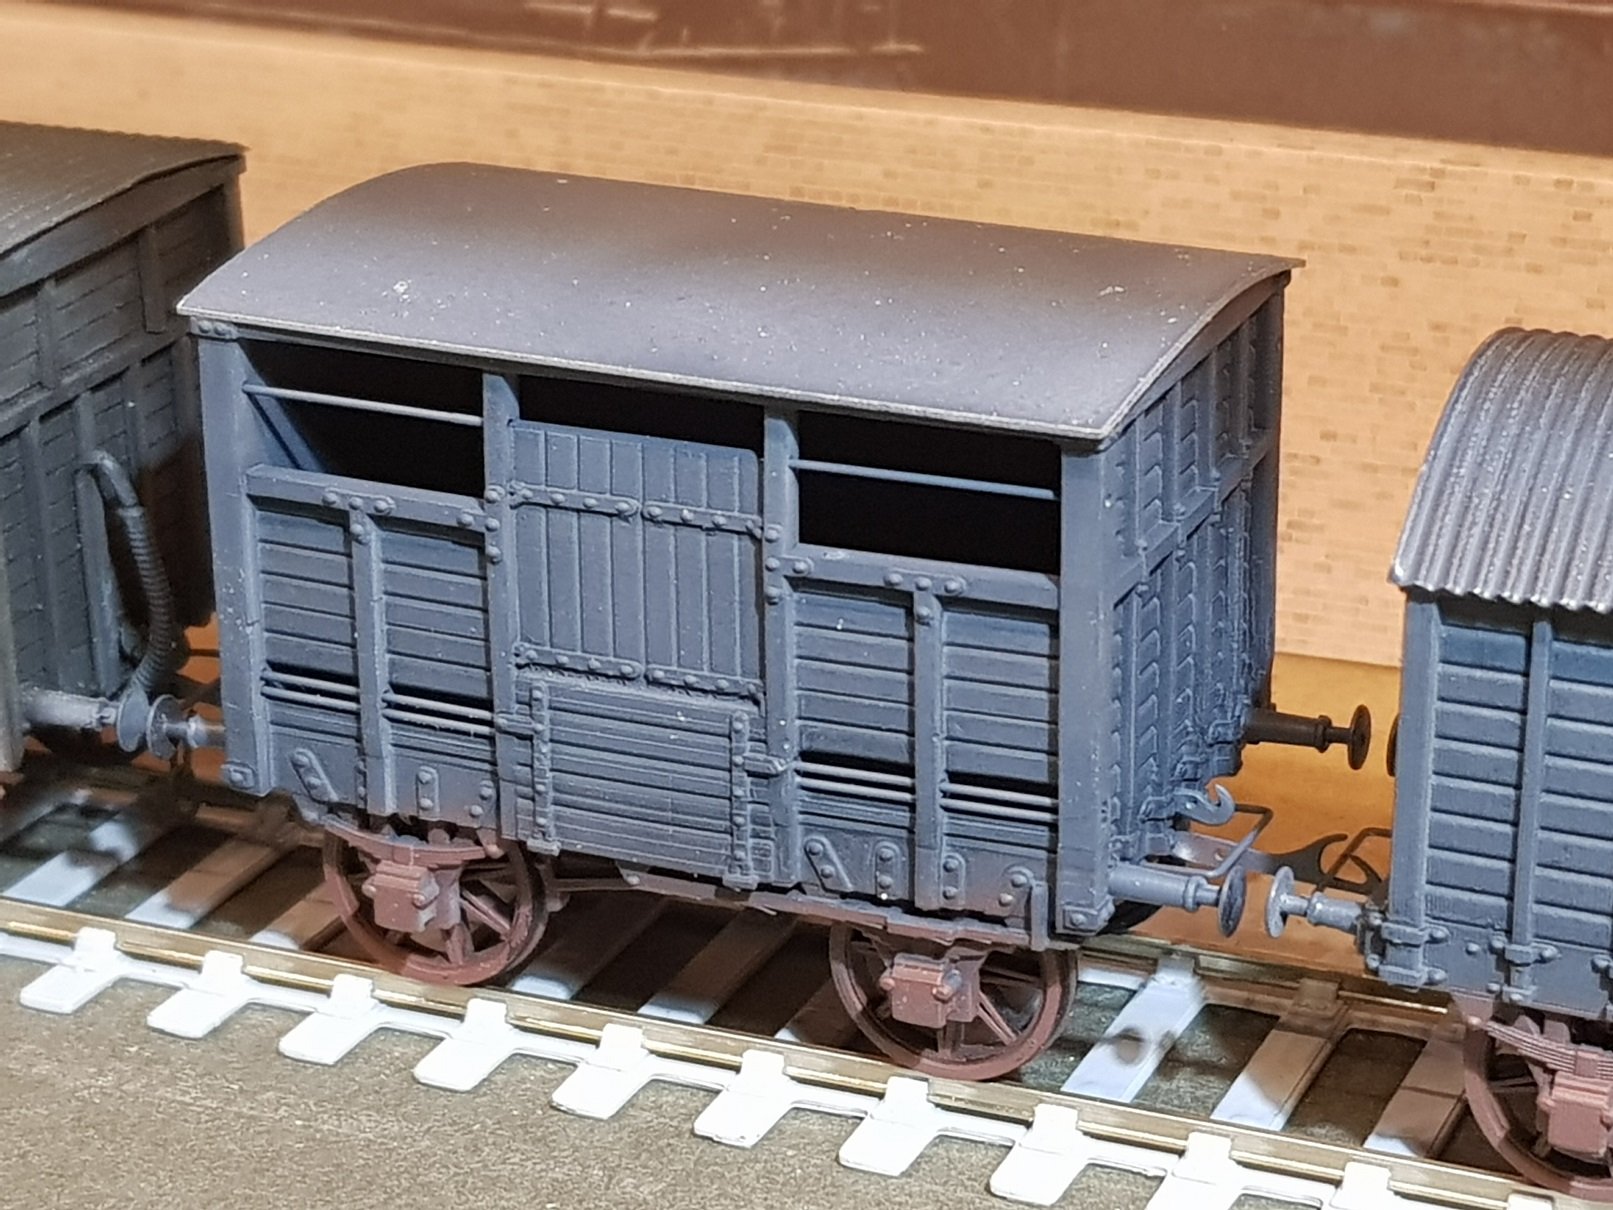
Some progress on the convertible wagon. Very pleased with how these are turning out - some light sand blasting followed by a coat of paint should help.
-
Little bit of progress. Wagon lightly sandblasted prior to a dusting of paint to get a feel for how the detail will work. Coming up rather nicely.
-
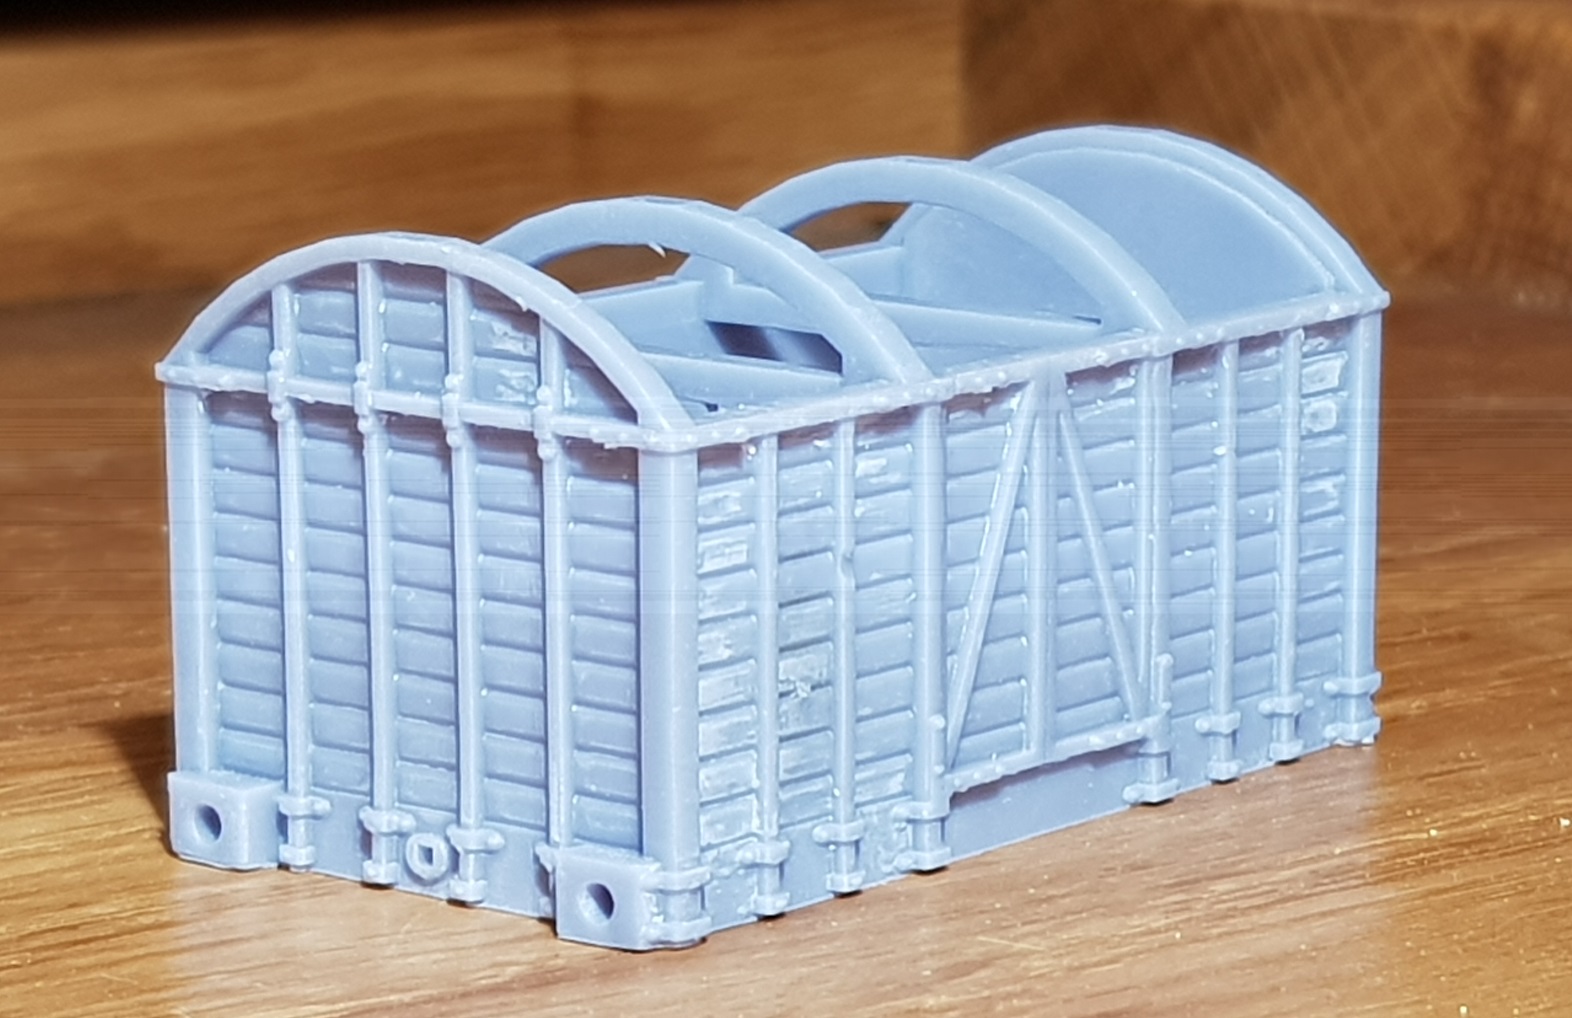
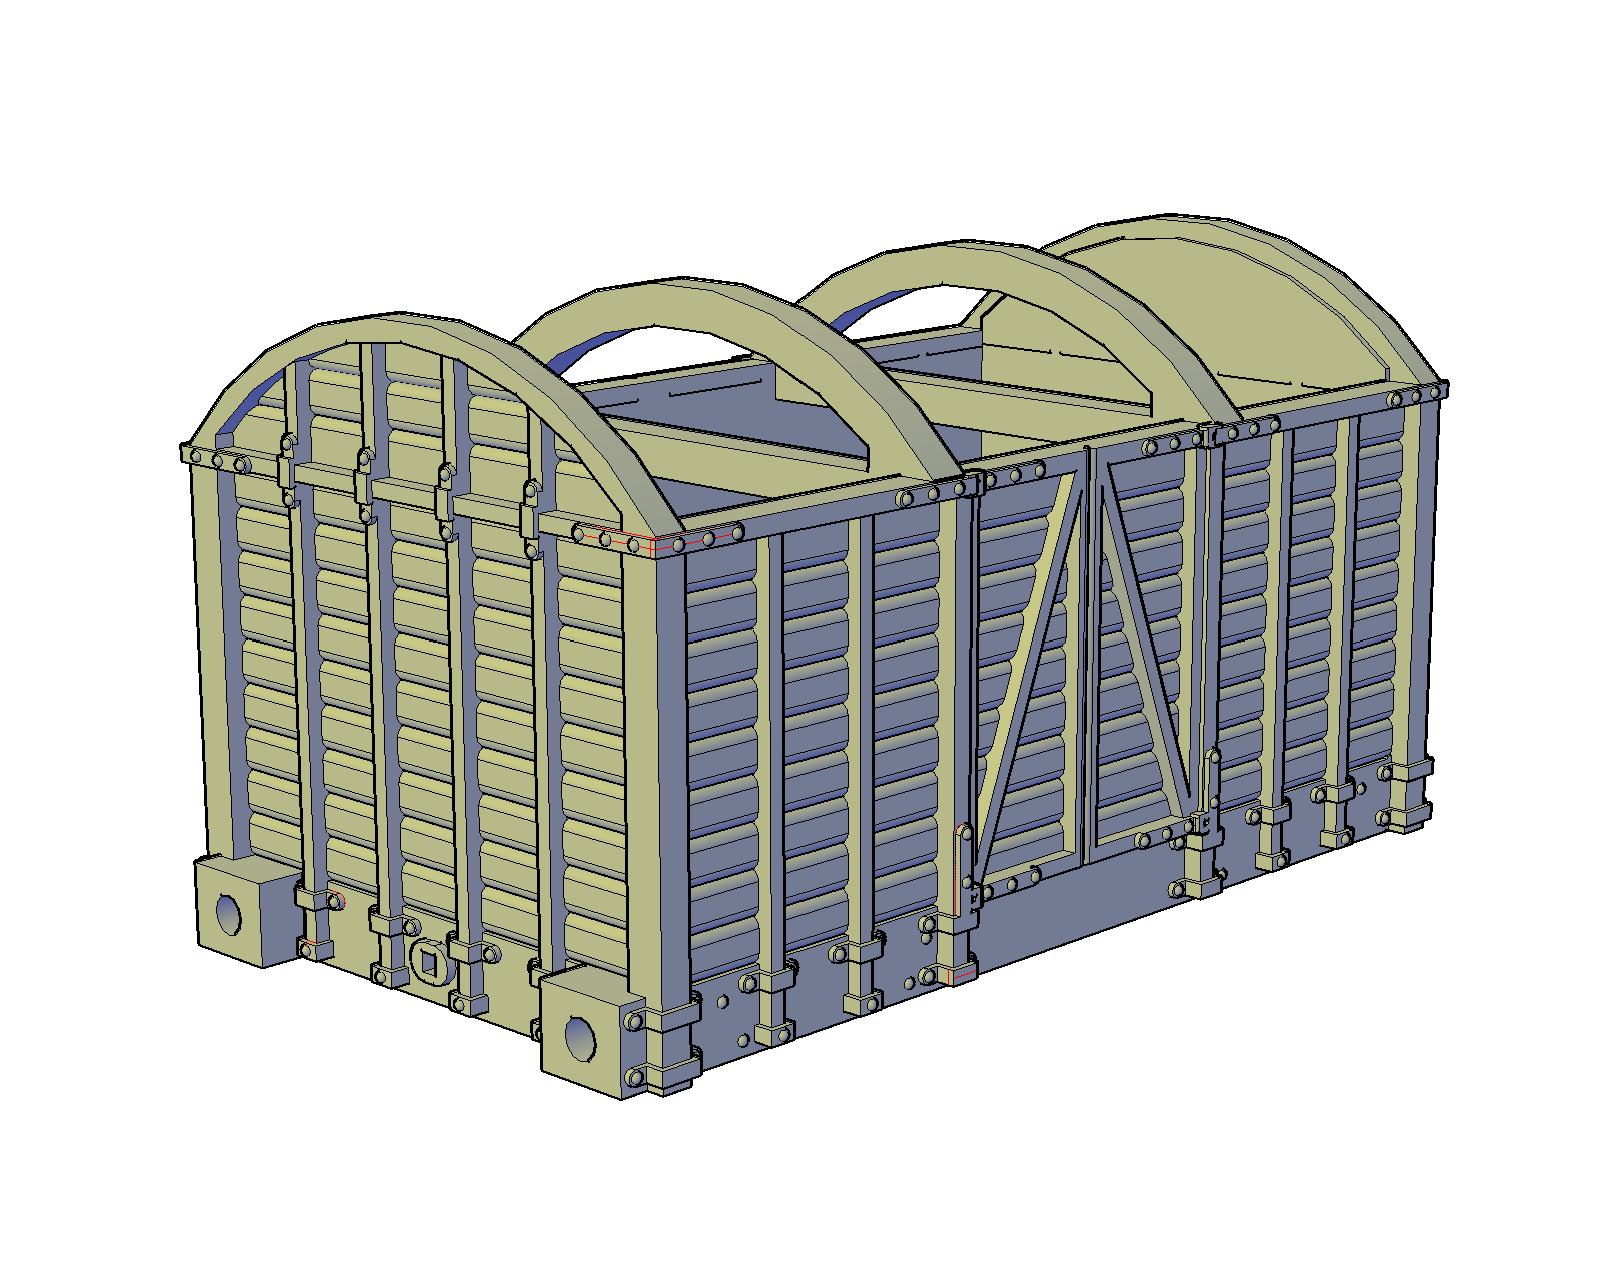
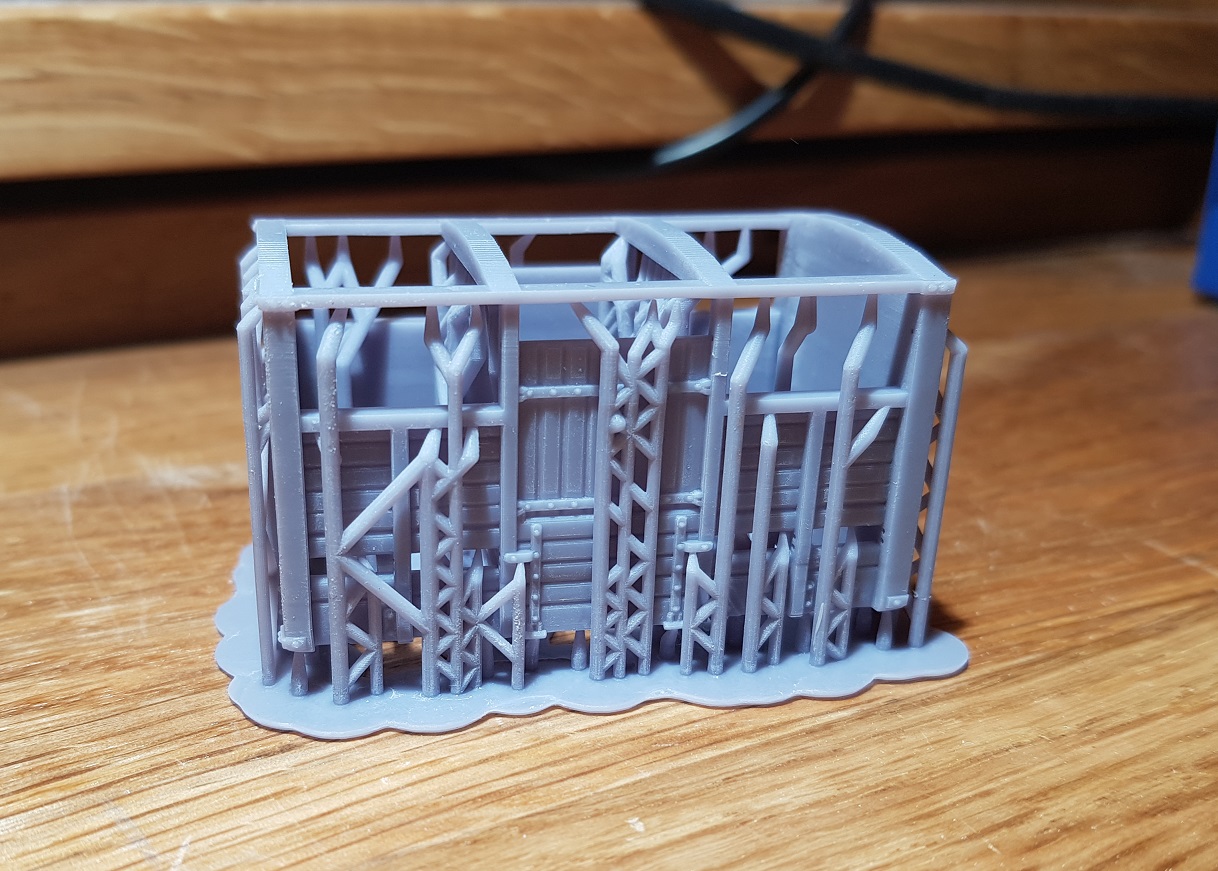
Given the success of the cattle wagon, I had drawings from HMRS for the DWWR Convertible wagon, which was quite easy to translate to CAD (particuarly for a model build). With the experience and methodology used for the cattle wagon, it was possible to develop a basic model in 3D for one of these wagons. Again run through the printer we get: There is a some tidying up needed on these models. The model is supported on the build plate by an network of thin supports (see below) - this is to ensure that each layer, particulary new layers are lifted of the base film without distorting. These supports leave very small marks that need cleaning up before the model can progress. Anyway, on to building chassis for these wagons. Should keep me busy for a while!!
-
Pop, Up to now, I had not considered printing as a venture, but if people are interested in the body only, they would be immediately available for order. I would need to think of a price - something reasonable naturally. The cost is not in the physical printing, but in the origainal design and development. David, If one were to print a single unit at a time it takes 3 hours, but my build plate can take up to 5 wagons at a time - the time is not per unit but the build height, irrespective of the amount of material on the plate (resin SLA printing). Thus I can print 5 bodies in three hours. As mentioned above, the time is not in the printing, and as John attested above, the time is in the design of the model and running of test prints to establish a final design. What looks good in 3D CAD, even if it is to exact scale, does not always translate to a reasonable looking model. Some tweaks are needed to provide a reasonable looking model whilst maintaining strength. John, Agreed. It did not even occur to me to print a chassis for this model for P4. I am very interested in your comments regarding the ABS type of resin; so far I have used three types of resin, a translucent green as seen on other posts which provides very detailed models, but is very brittle. The standard resin (Anycubic grey) proved to be less brittle but detail was not as good. The problem with both those resins was the need to use IPA (Isopropyl Alcohol, not India Pale Ale) to clean up, which really is a pain to use and then clean afterwards. The models above were printed with the Elgoo Mars water washable resin, which I have found to have good physical properties whilst holding detail - the ability to clean up with water makes the process much eaiser. The detail on your chassis is excellent - I assume these are gauged for OO? I may look at developing a simple OO chassis for these (and others) which will be suitable for the short wheel base of earlier Irish wagons.
-
Thanks for the comment. For OO gauge, it would be possible, however to provide enough strength the thickness of resin would make printing for 21mm difficult, but not impossible. The overall wagon width at the axle location is c. 30 - 31mm whilst the pinpoint axle dimension is 28mm, so it would be rather close. I am a fan of the detail in the brass underframes with cast axleboxes and springs, so made sense for me. Most of my wagons are compensated as I am working to P4 standards, with the exception being the very short DW&WR ballast wagons which have a 6' wheel base. I would consider an underframe print for an OO version if there was an interest.