.png.c363cdf5c3fb7955cd92a55eb6dbbae0.png)


Mol_PMB
-
Posts
3,869 -
Joined
-
Last visited
-
Days Won
239
Content Type
Profiles
Forums
Events
Gallery
Blogs
Everything posted by Mol_PMB
-
Bulleid CC1 3D printed stuff in N and 4mm scale from Oakhill Works
Mol_PMB replied to decauville1126's topic in News
I seem to recall that a Class 37 chassis is fairly close to the mark for CC1. -
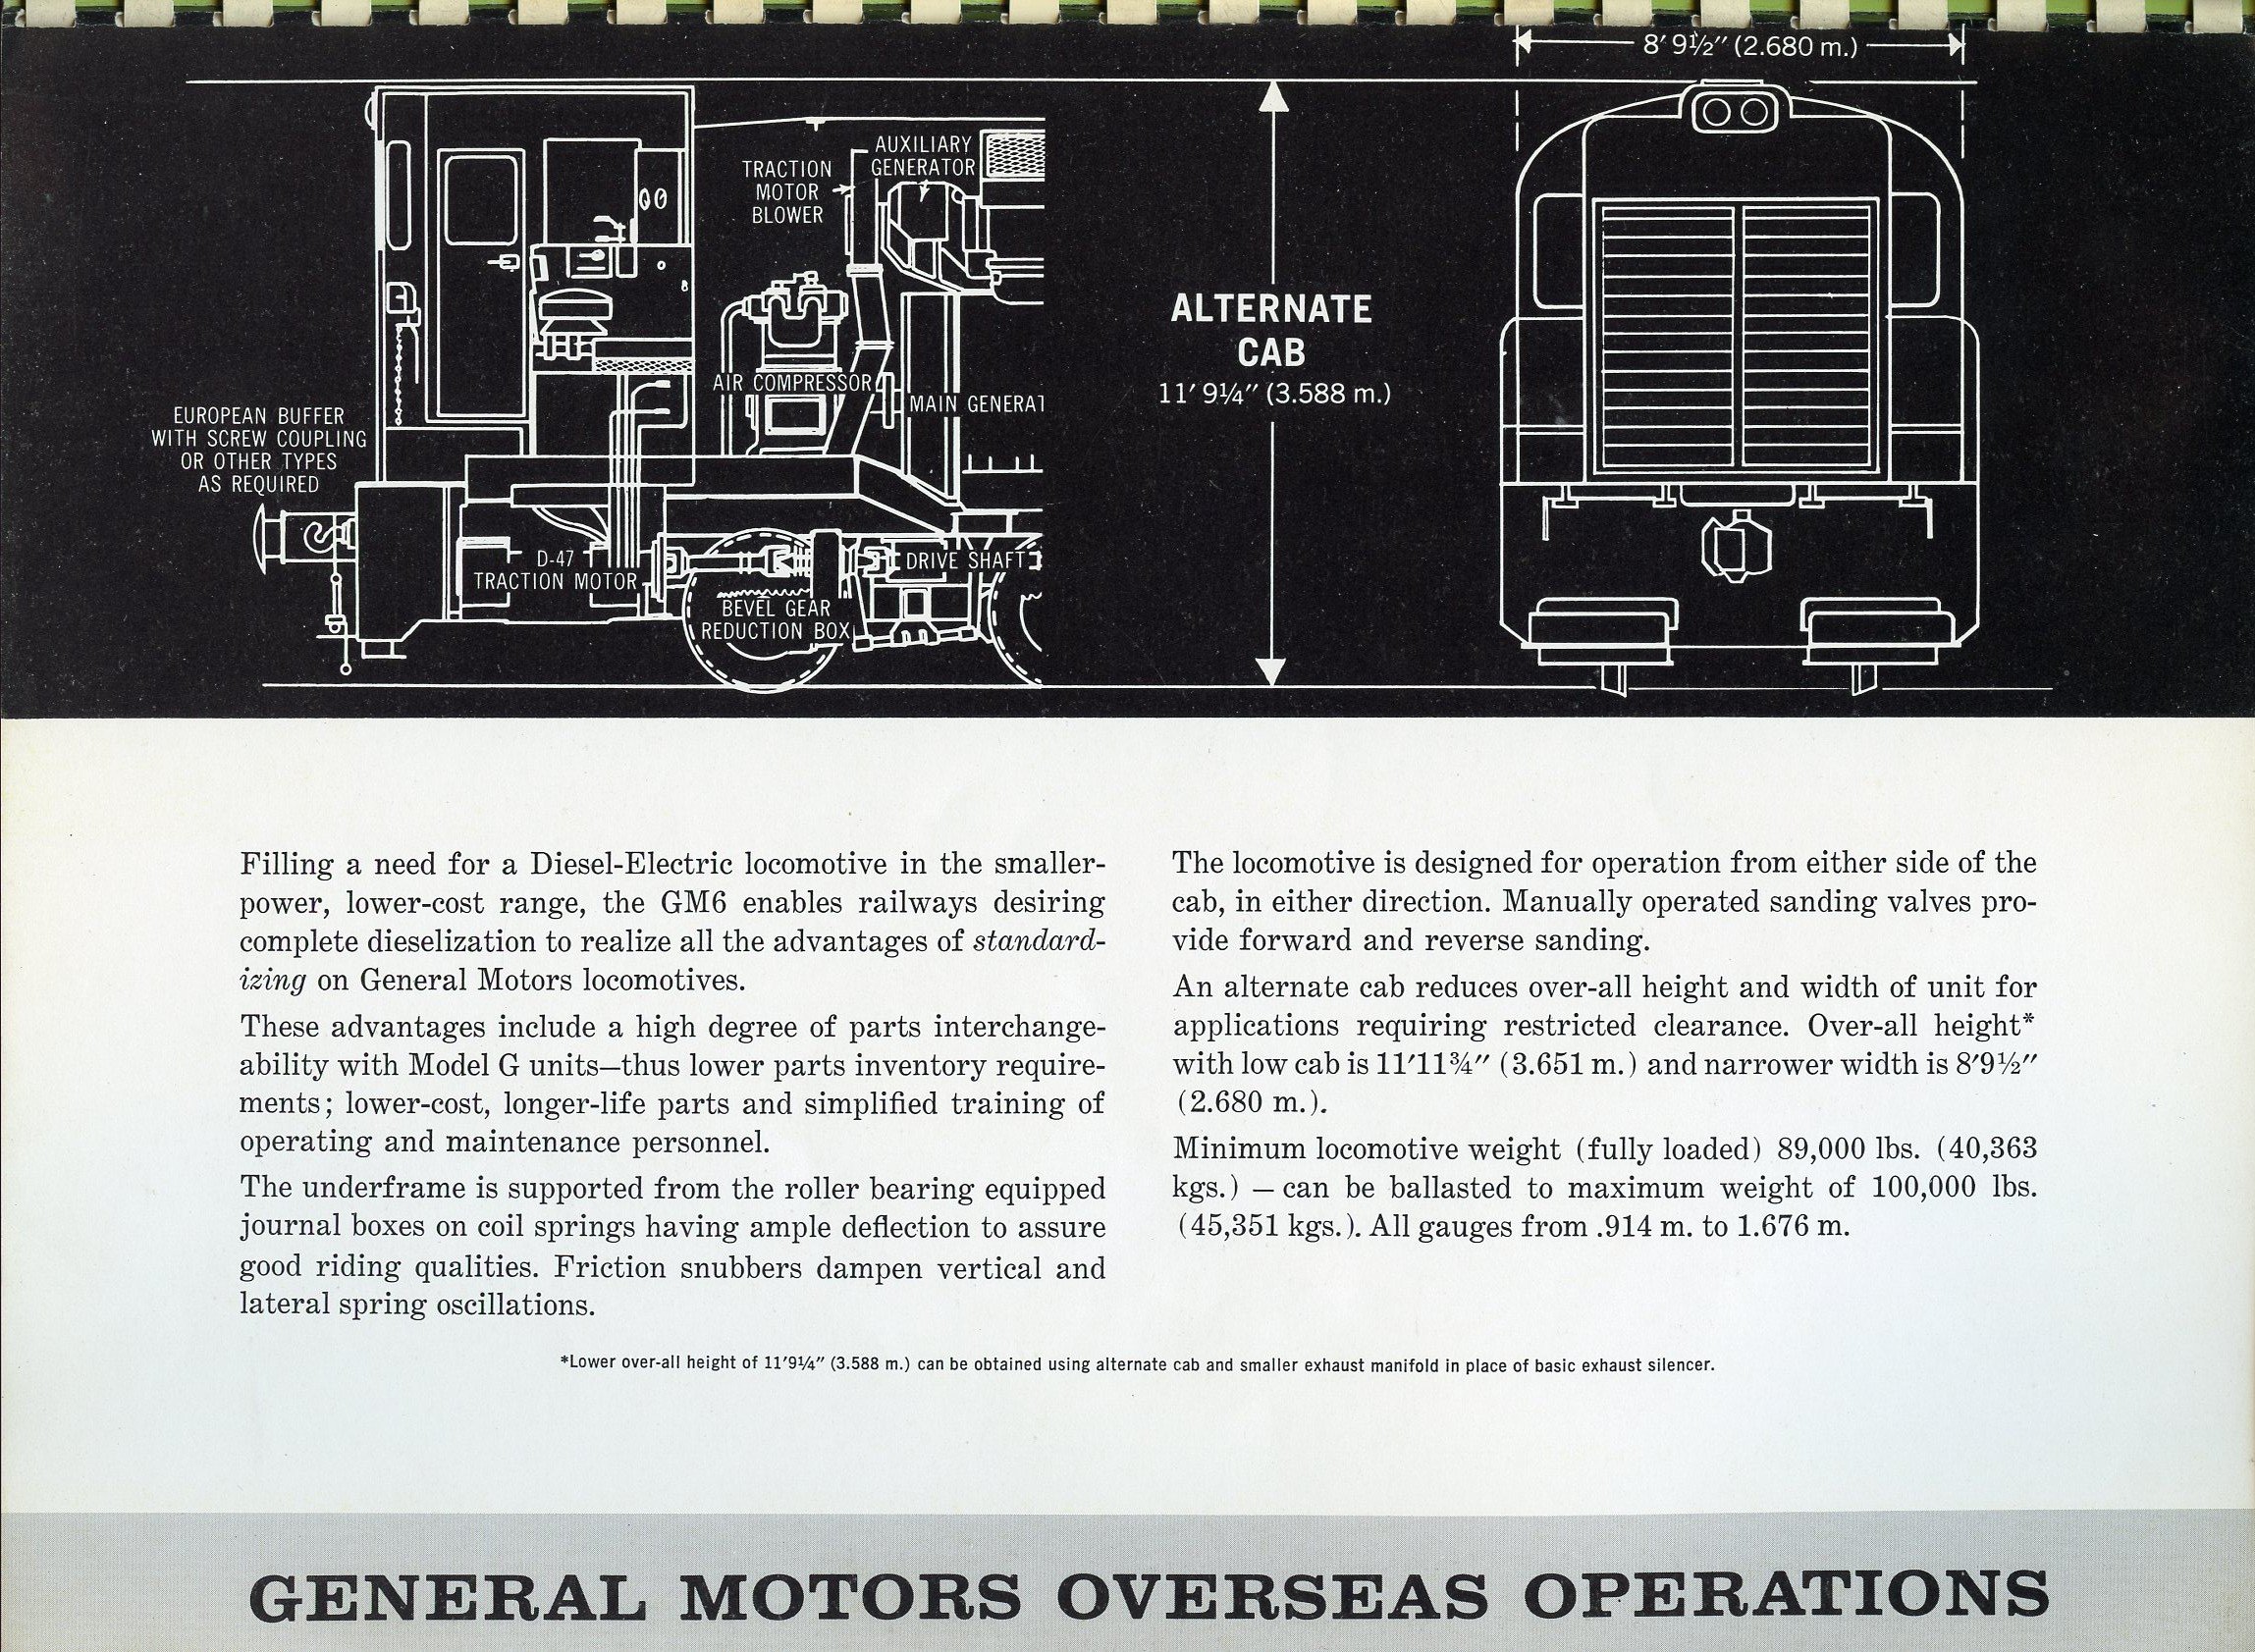
EMD GM6 locos - an Irish what-if?
Mol_PMB replied to Mol_PMB's topic in Continental European Modelling
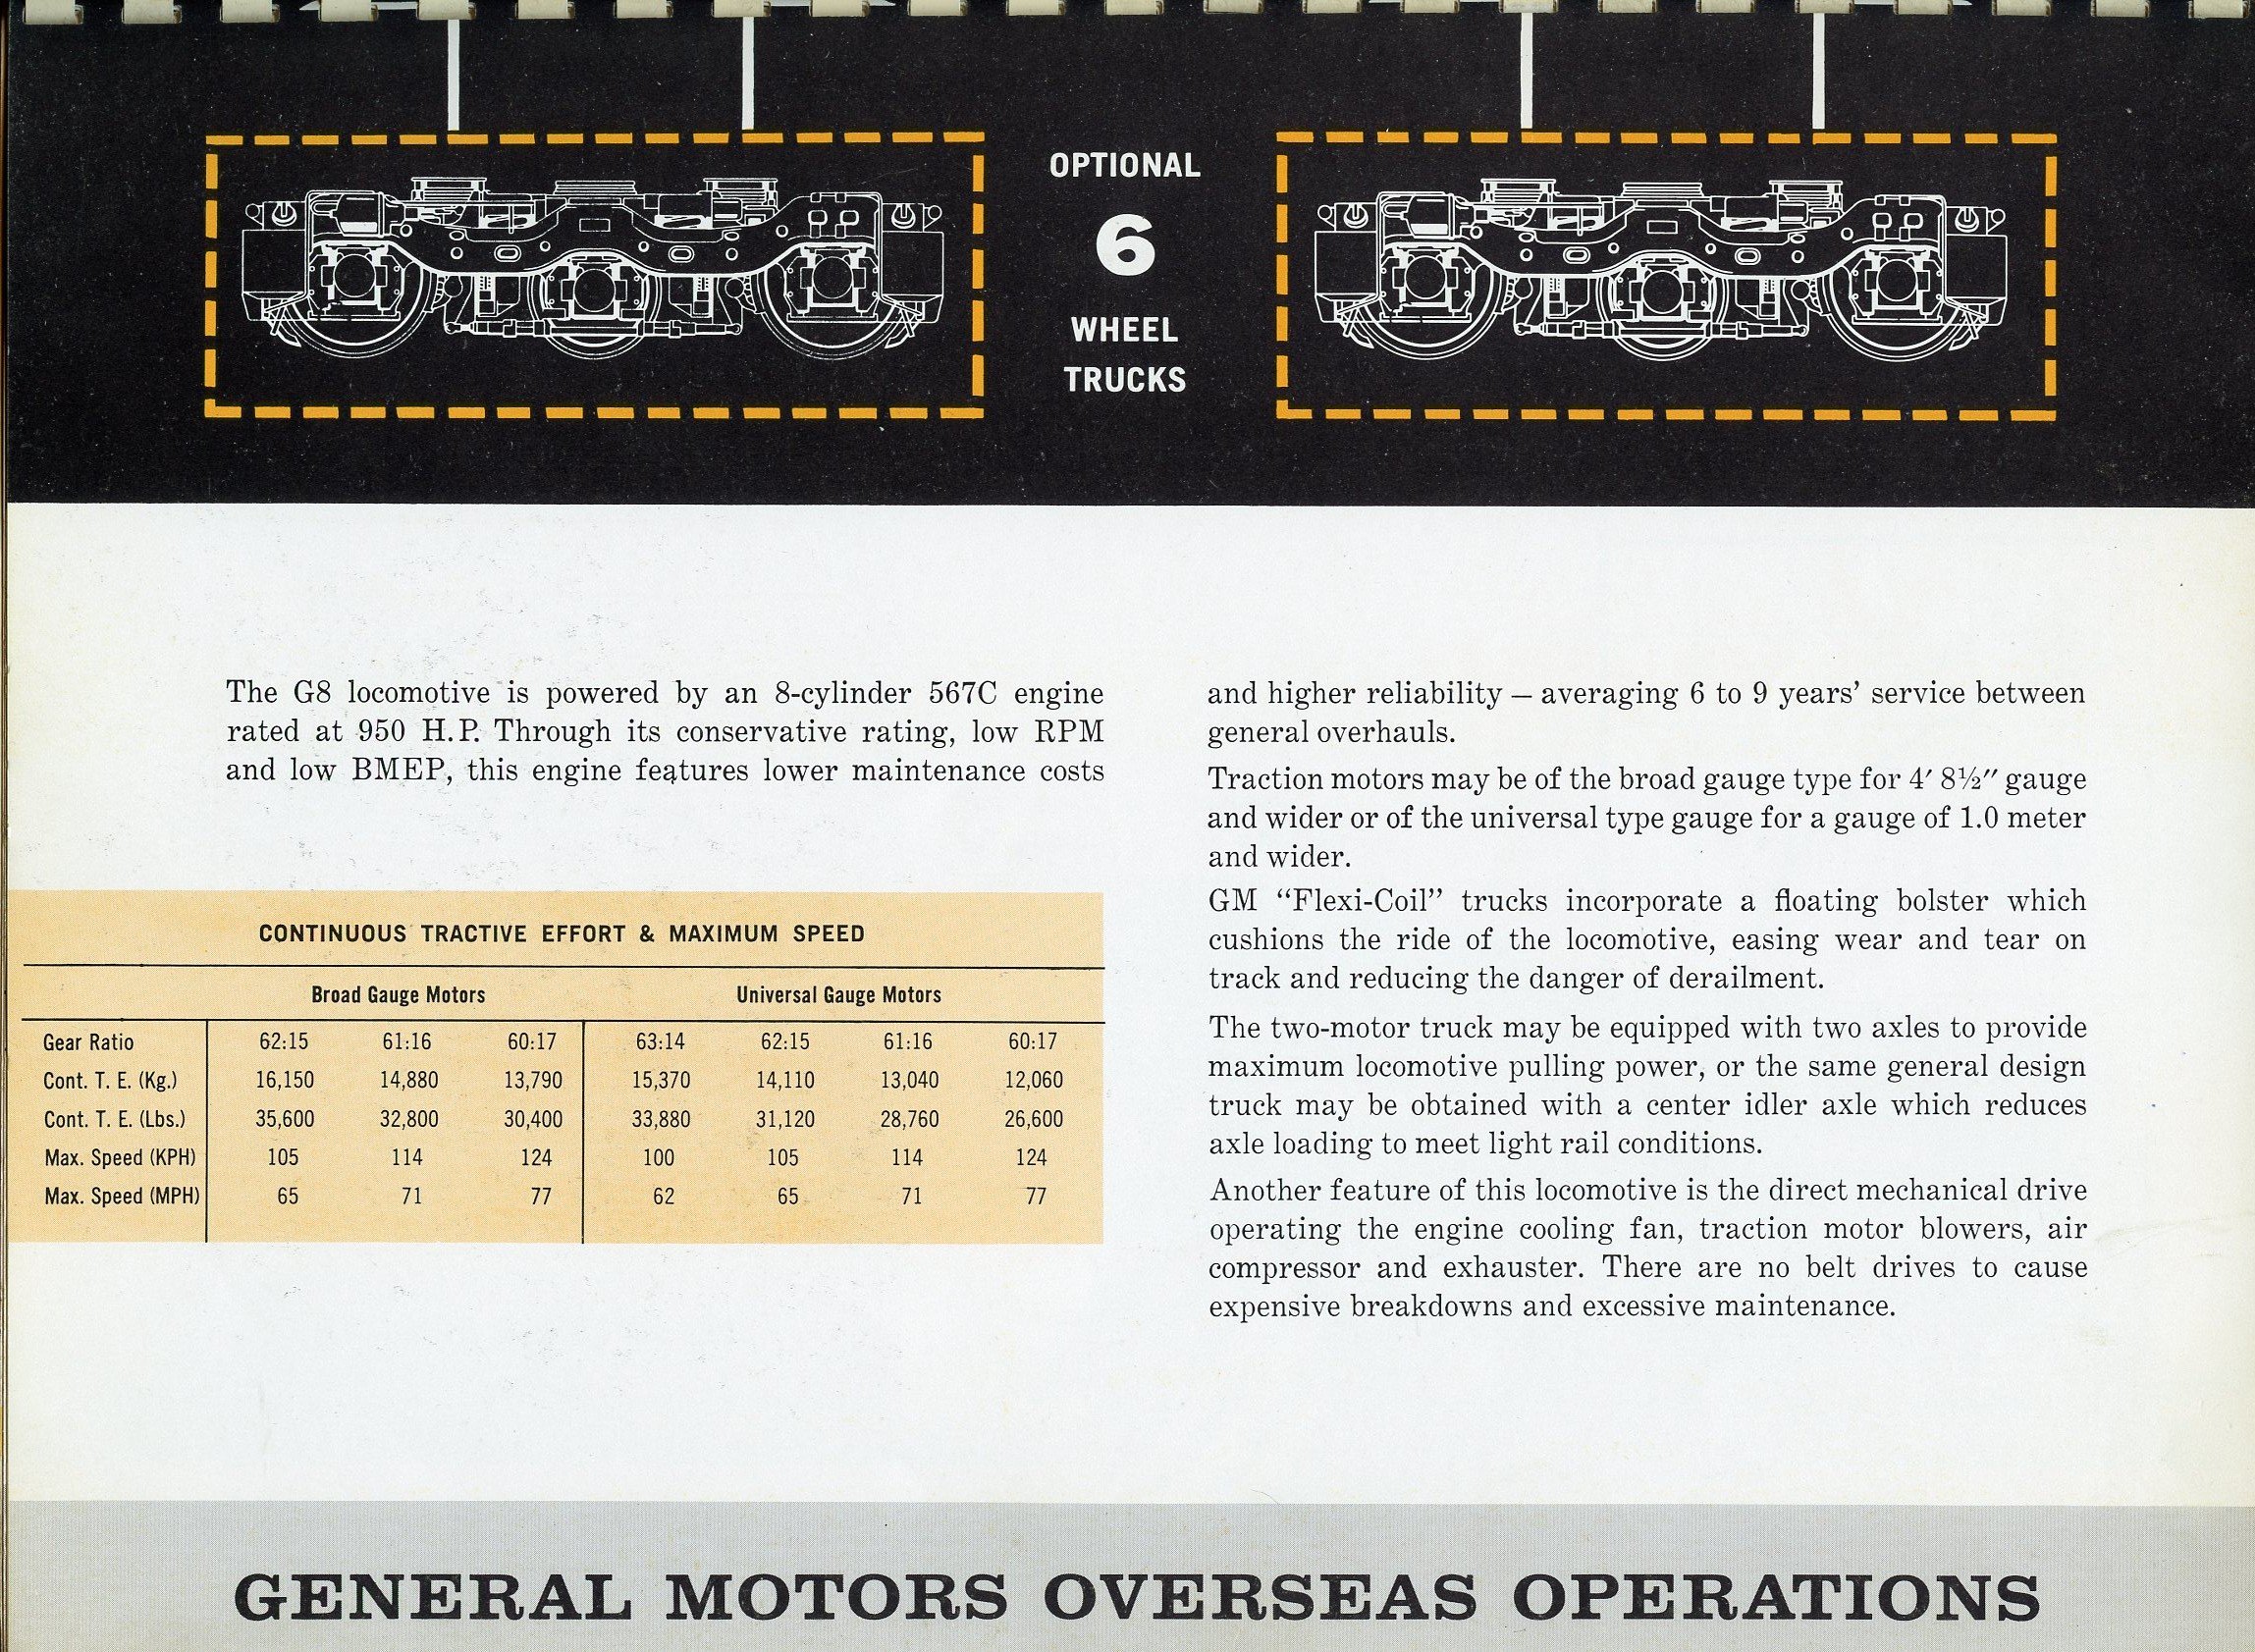
A G8 model is available from Frateschi in either wheel arrangement. Sold as HO it is apparently somewhat overscale and may be nearer OO. -
Alan's grubby little shunters thread
Mol_PMB replied to Tullygrainey's topic in British Outline Modelling
Most drivers would keep the oil cans clean. It helped keep their own hands clean when oiling, but it’s also very bad form to hand a loco over to a relieving driver with dirty oil cans. -
That may be the same guy one of my friends used for a couple of similar layouts. They are very nicely made and the trains run smoothly. But they can be a pain to wire up and switch frog polarity because (prototypically) all the crossings are close together and there’s a risk of momentary shorts as locos pass over. Probably worse on DCC. Hopefully yours will be fine, do some testing before sticking it down and ballasting. A few dots of nail varnish to lengthen the isolated sections can help.
-
That scissors with slip is a lovely piece of work. Is it custom-made from Peco bits?
-
There are quite a few good wagon drawings of this vintage in the IRRS archives. In some cases the basic construction and dimensions are similar, but with detail differences in vents, ribs etc. I also still have all my photos, measurements and diagrams of the 1900ish GSWR ‘big boy’ van that I need to draw up. That would male a good 3D print subject too. Hopefully I’ll get some time to catch up with life over Christmas.
-
Alan's grubby little shunters thread
Mol_PMB replied to Tullygrainey's topic in British Outline Modelling
It is beautiful. Looks just right. Well done. -
As with plastic/resin, there are several different 3D printing technologies for metal. they suit different sizes, materials etc. The metal equivalent of a filament printer is a bit like a MIG welder. It’s also possible to use chemical vapour deposition (as used for example to build up worn crankshafts) as a 3D printing technique. Then there’s the powder-based process which is basically laser sintering. For small and fine detail parts, investment casting using 3D printed wax masters is a half-way house. We have examples of most of these at the university I work at, but not in our department and I’ve never used them - but I’ve seen some of the results.
-
EMD GM6 locos - an Irish what-if?
Mol_PMB replied to Mol_PMB's topic in Continental European Modelling
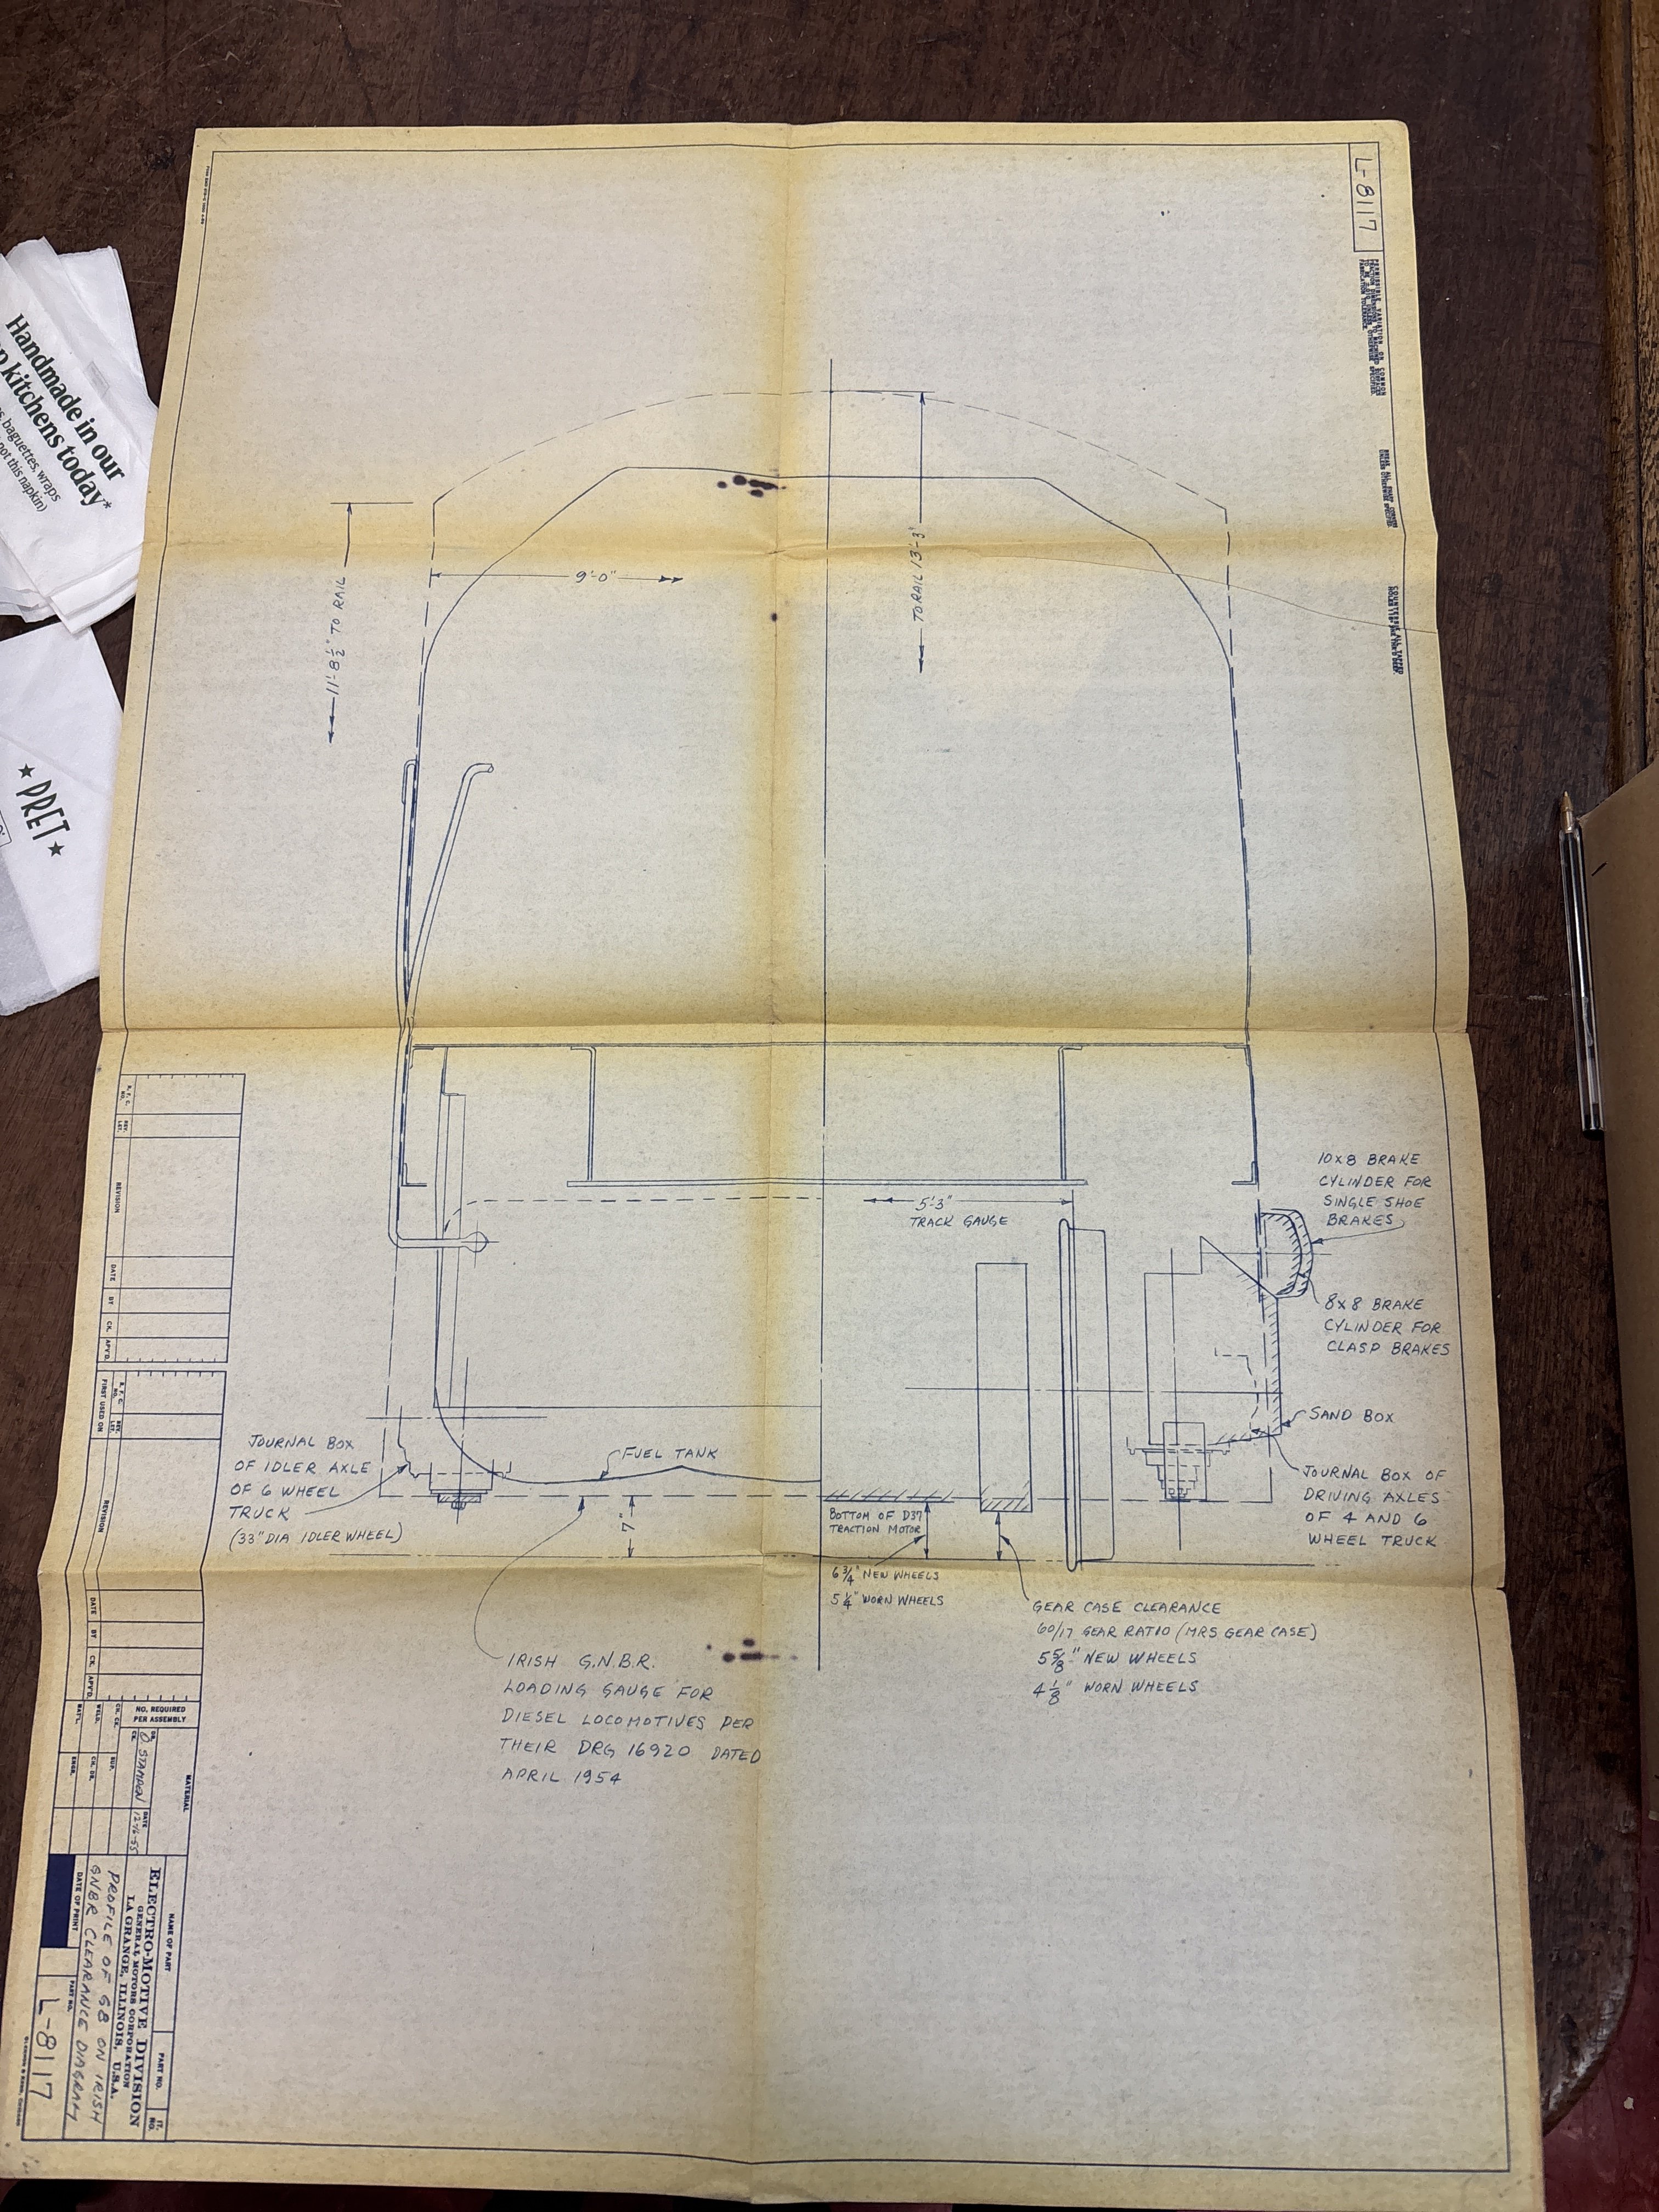
Going back to the G8 drawing for the GNR(B) in 1955, there's a good article in IRRS Journal 186 by Domhnall o'Muiri about the specifications sent out by the GNR(B) in 1954, and the responses of various manufacturers. They defined a lightweight and short loco (governed by the size of the Dundalk shops and the permitted axleloadings on secondary routes) and for main line use specified 800hp to 1000p. It appears that EMD offered the G8 which had the right power, would have met the axleload limits in its A1A-A1A variant, but would have been too long. It was also one of the more expensive options, and EMD not make it through to the GNR(B)'s second round of tendering. In 1954, the GL8 model had not yet been developed - that came in 1960. The GL8 (e.g. 121 class) would have been a better fit to the GNR(B) specification and as we know they were found quite suitable for operation on former GNR routes in the 1960s. I wonder whether EMD's failure to secure an order from the GNR(B) - and doubtless other overseas customers with limits on axleload and size - contributed to the development of the GL8 which would later have such an impact on Irish railway traction policy? From Ernie, a GL8 at Belfast GVS -
EMD GM6 locos - an Irish what-if?
Mol_PMB replied to Mol_PMB's topic in Continental European Modelling
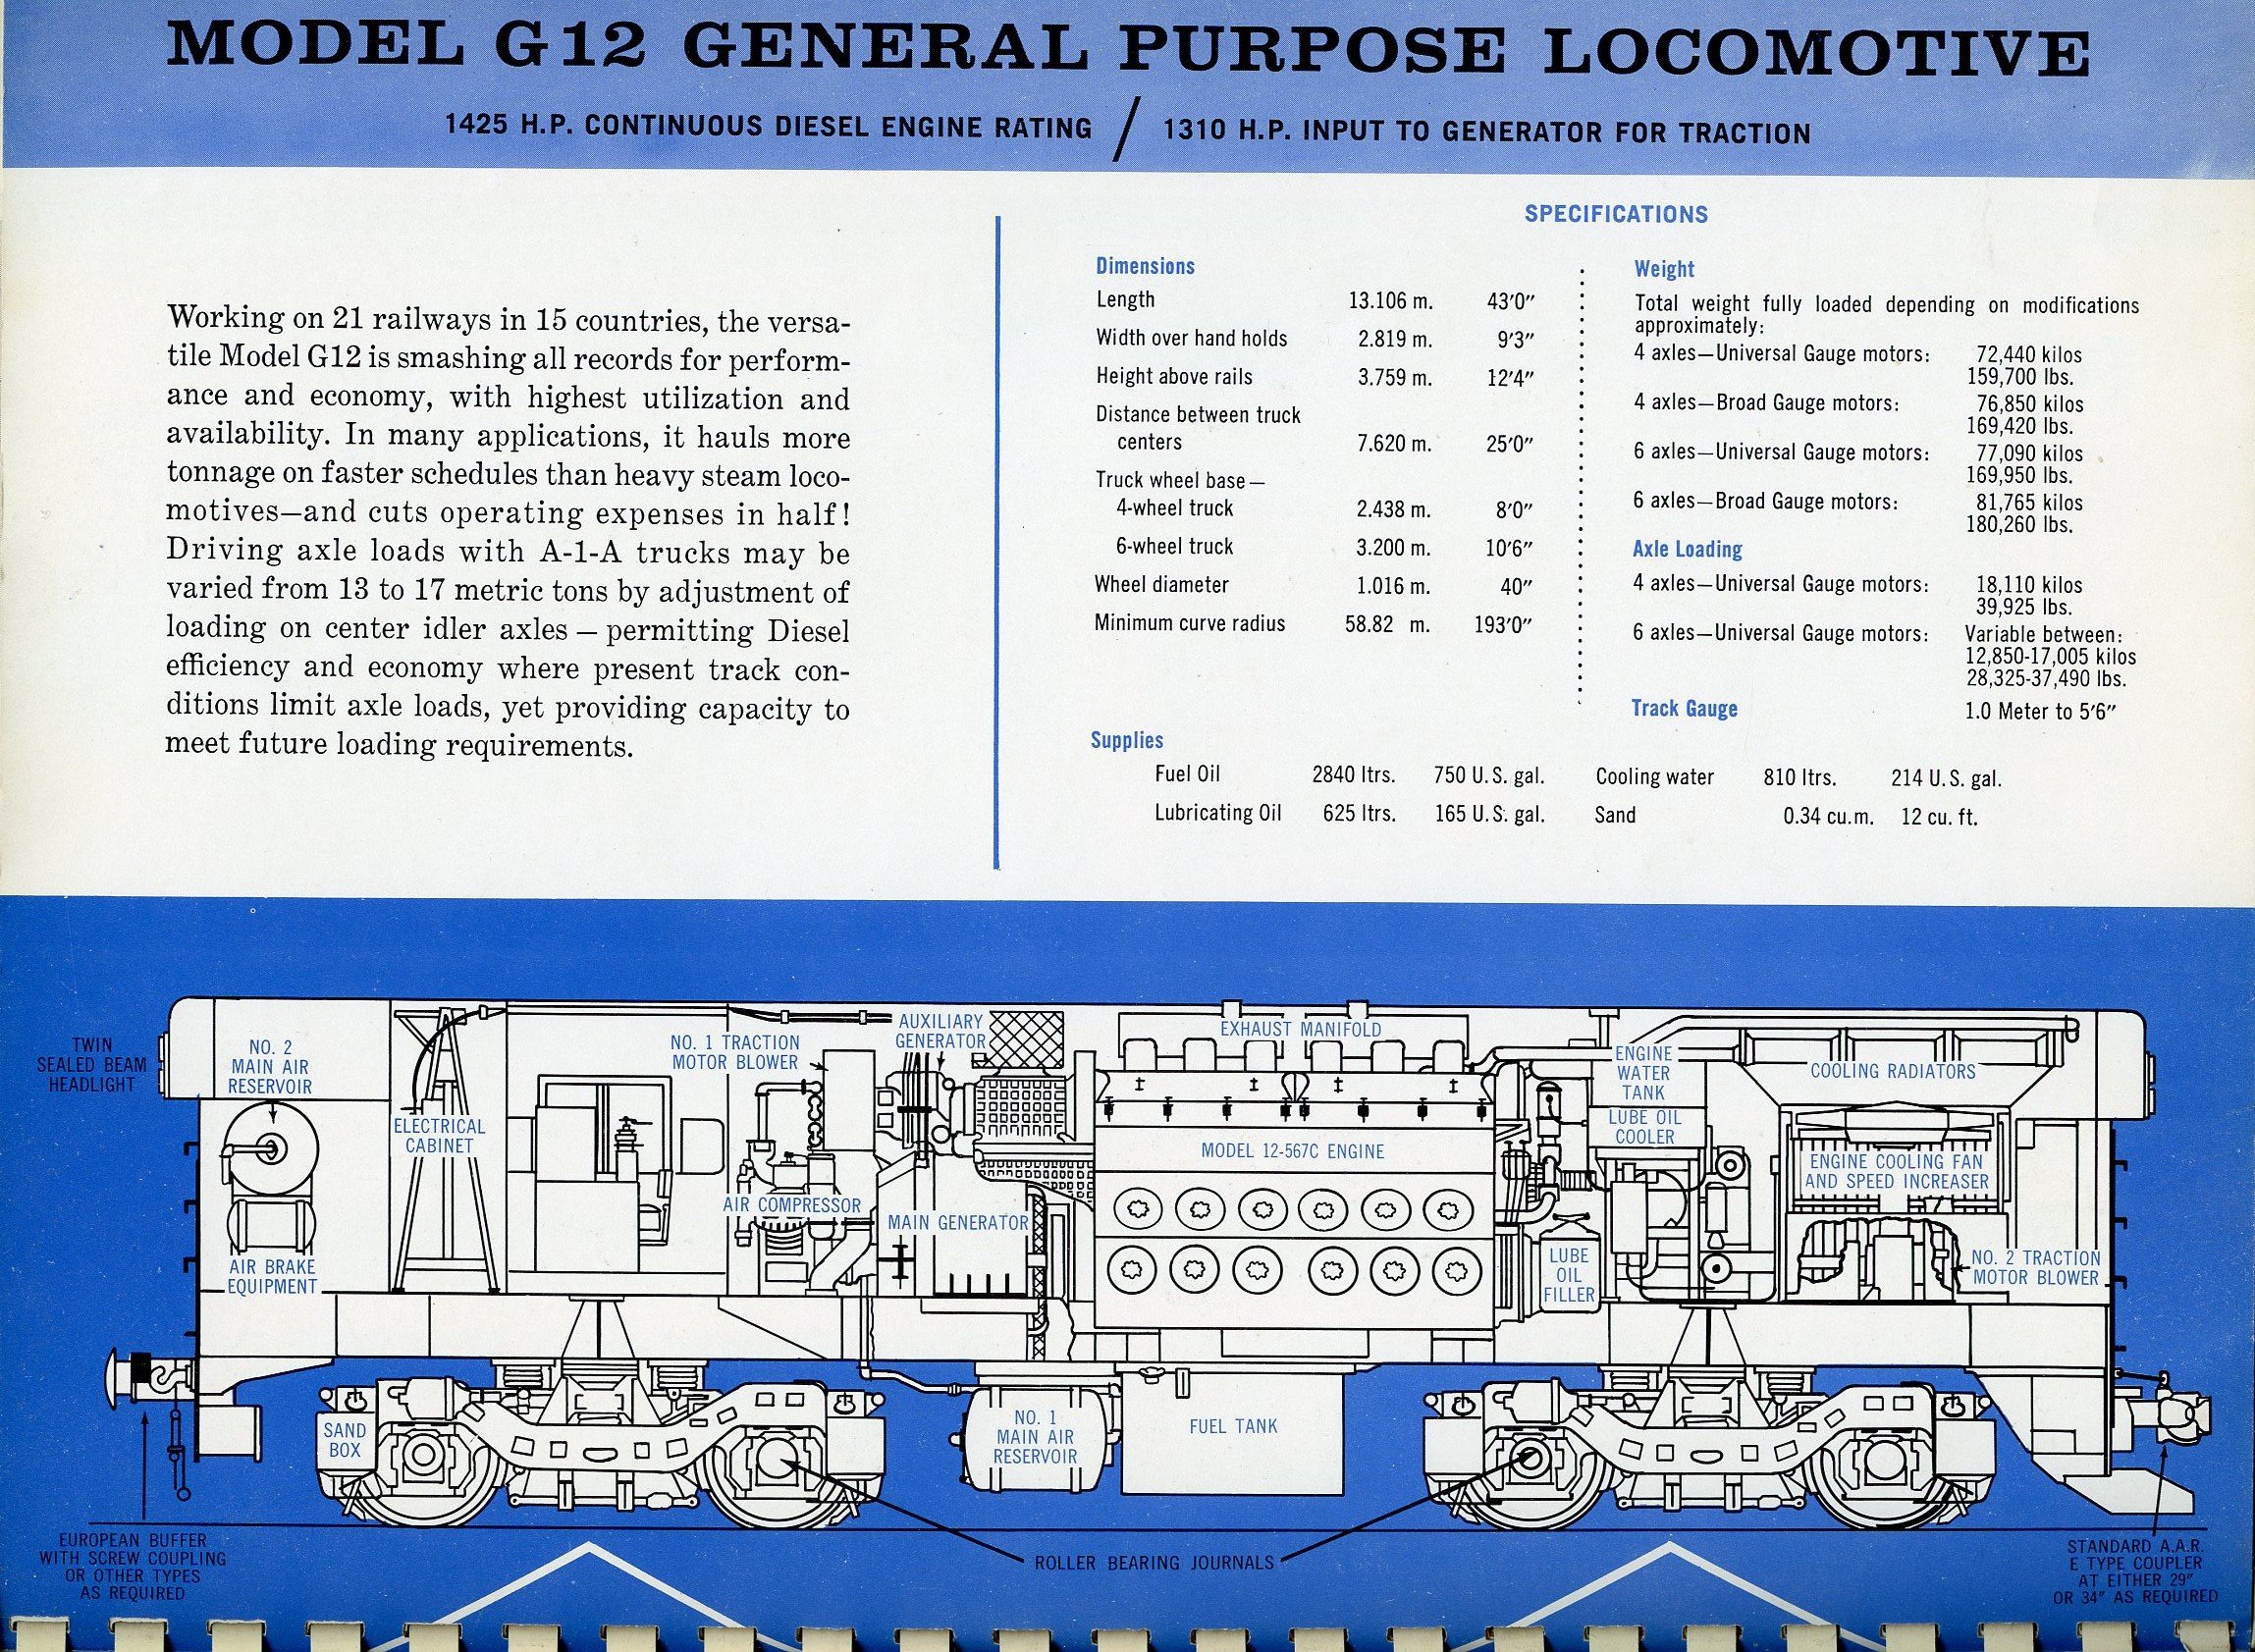
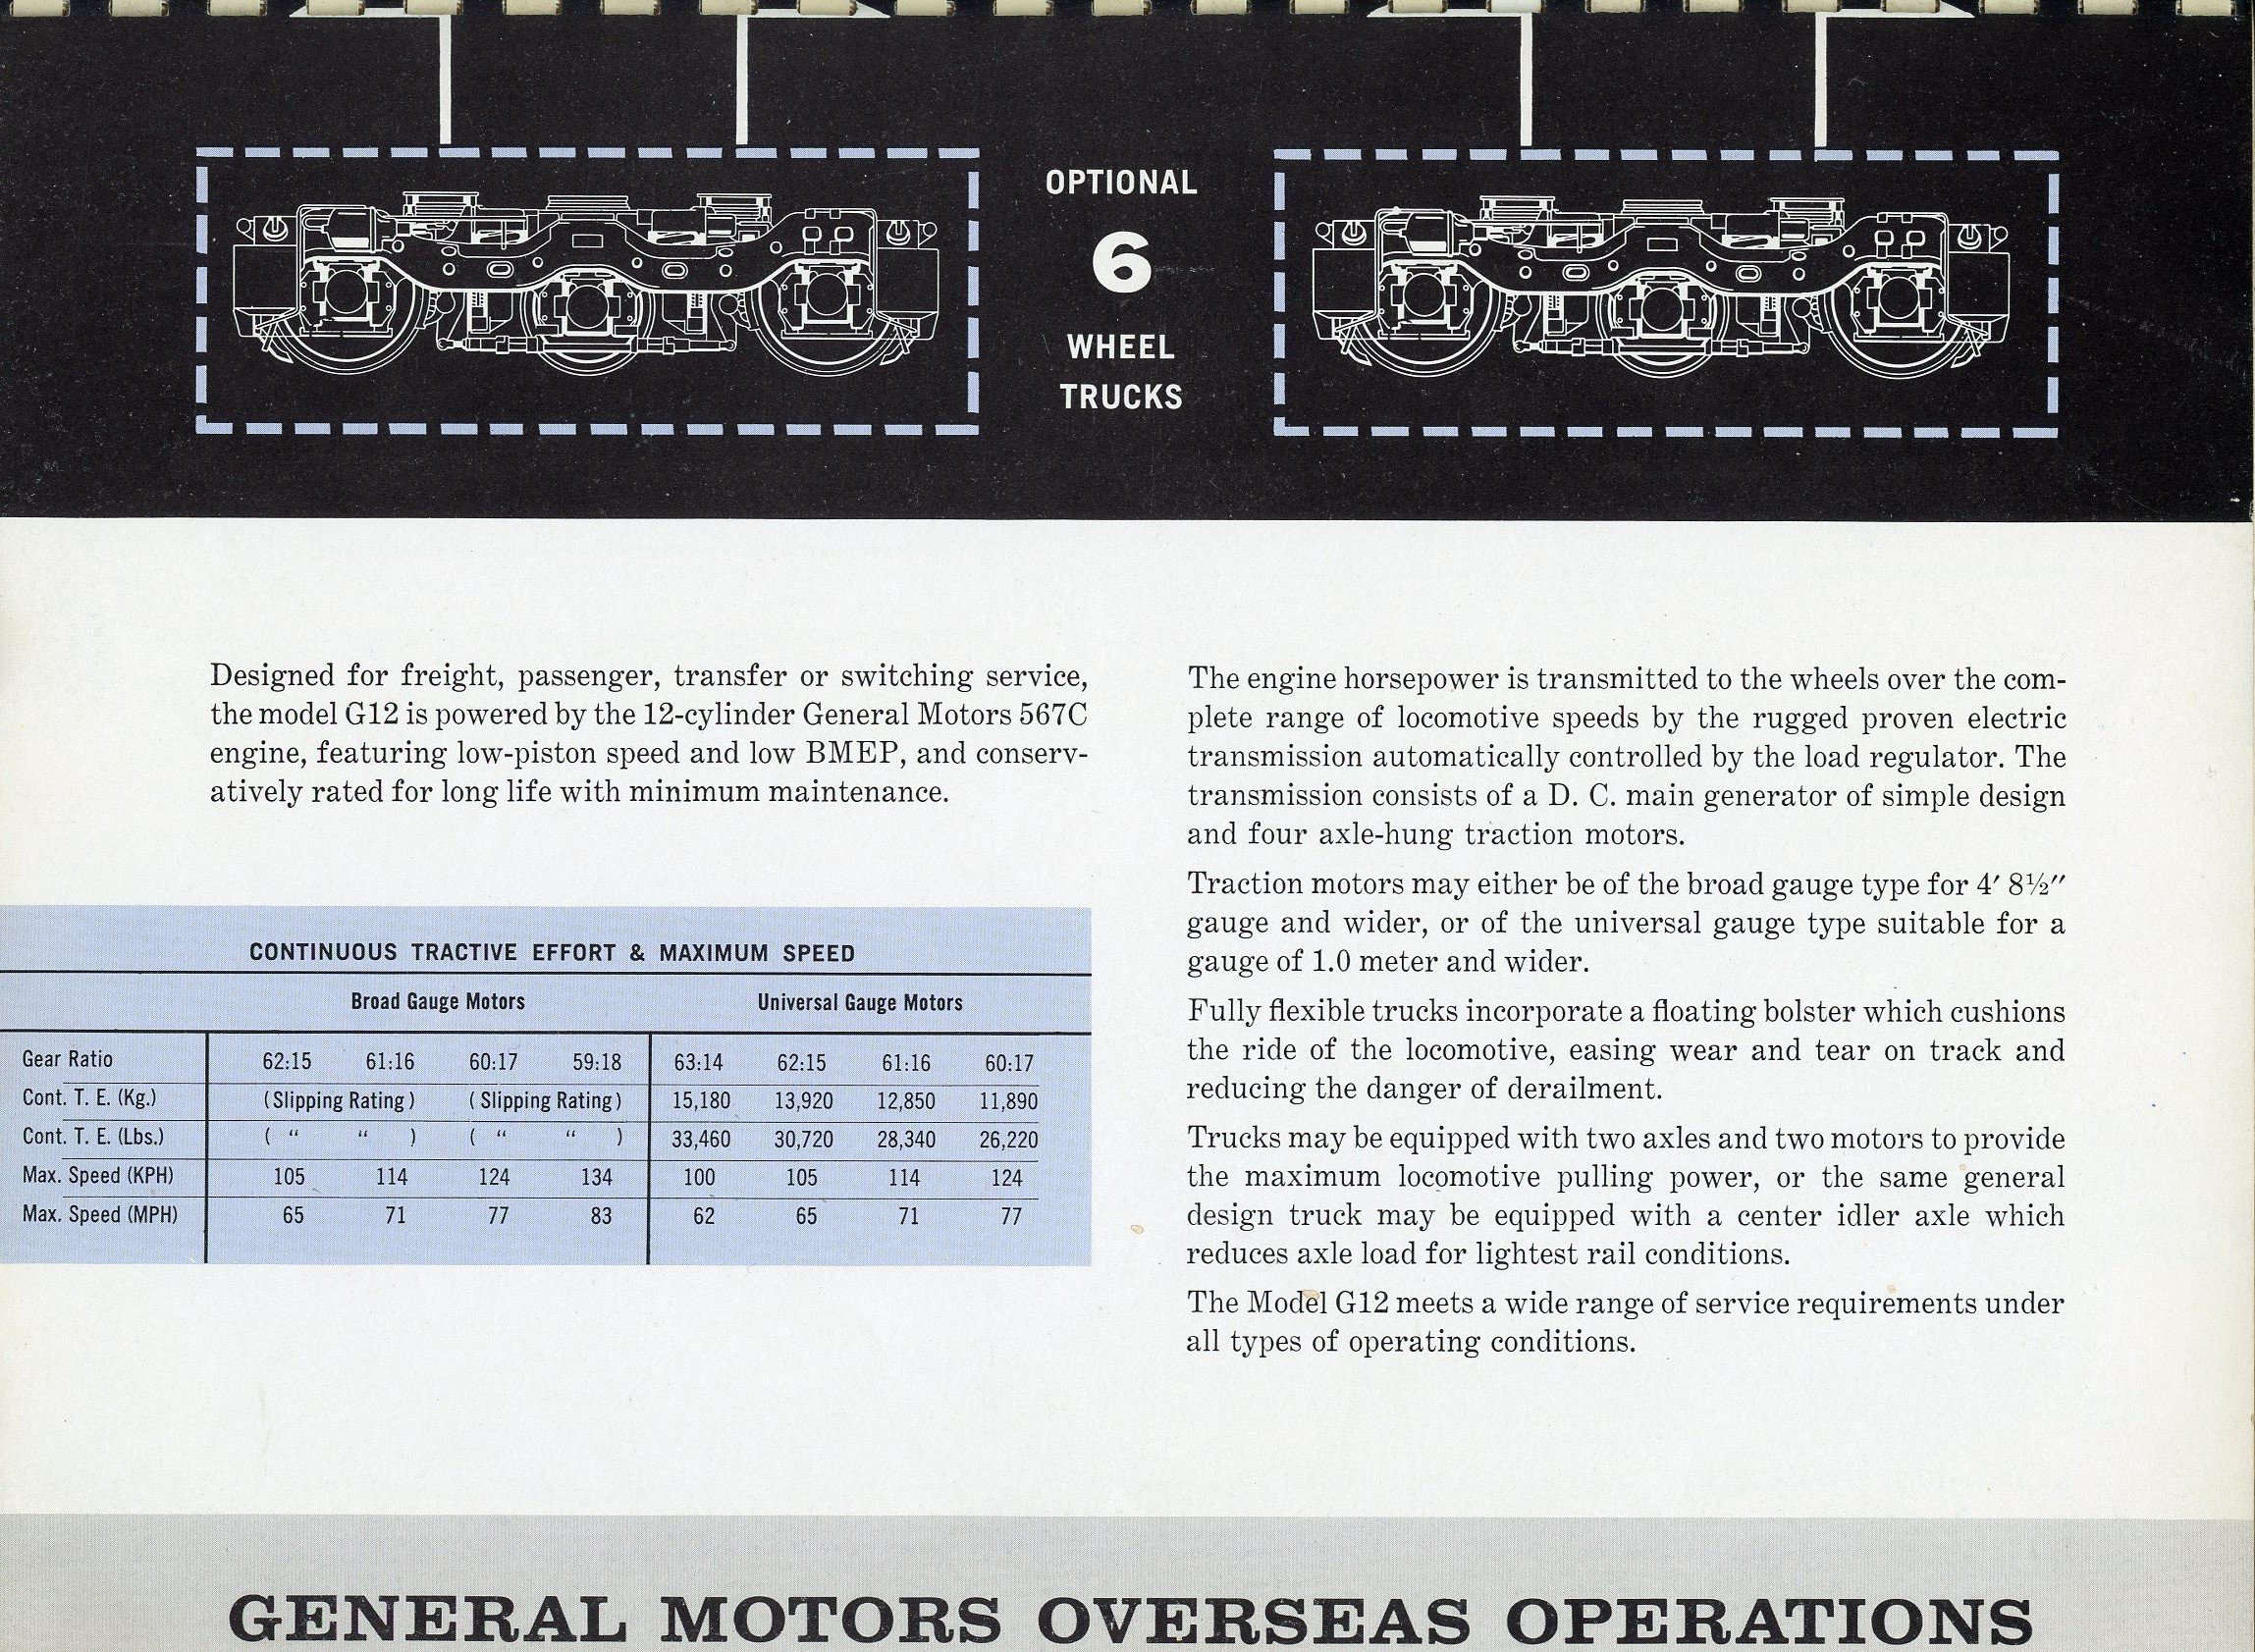
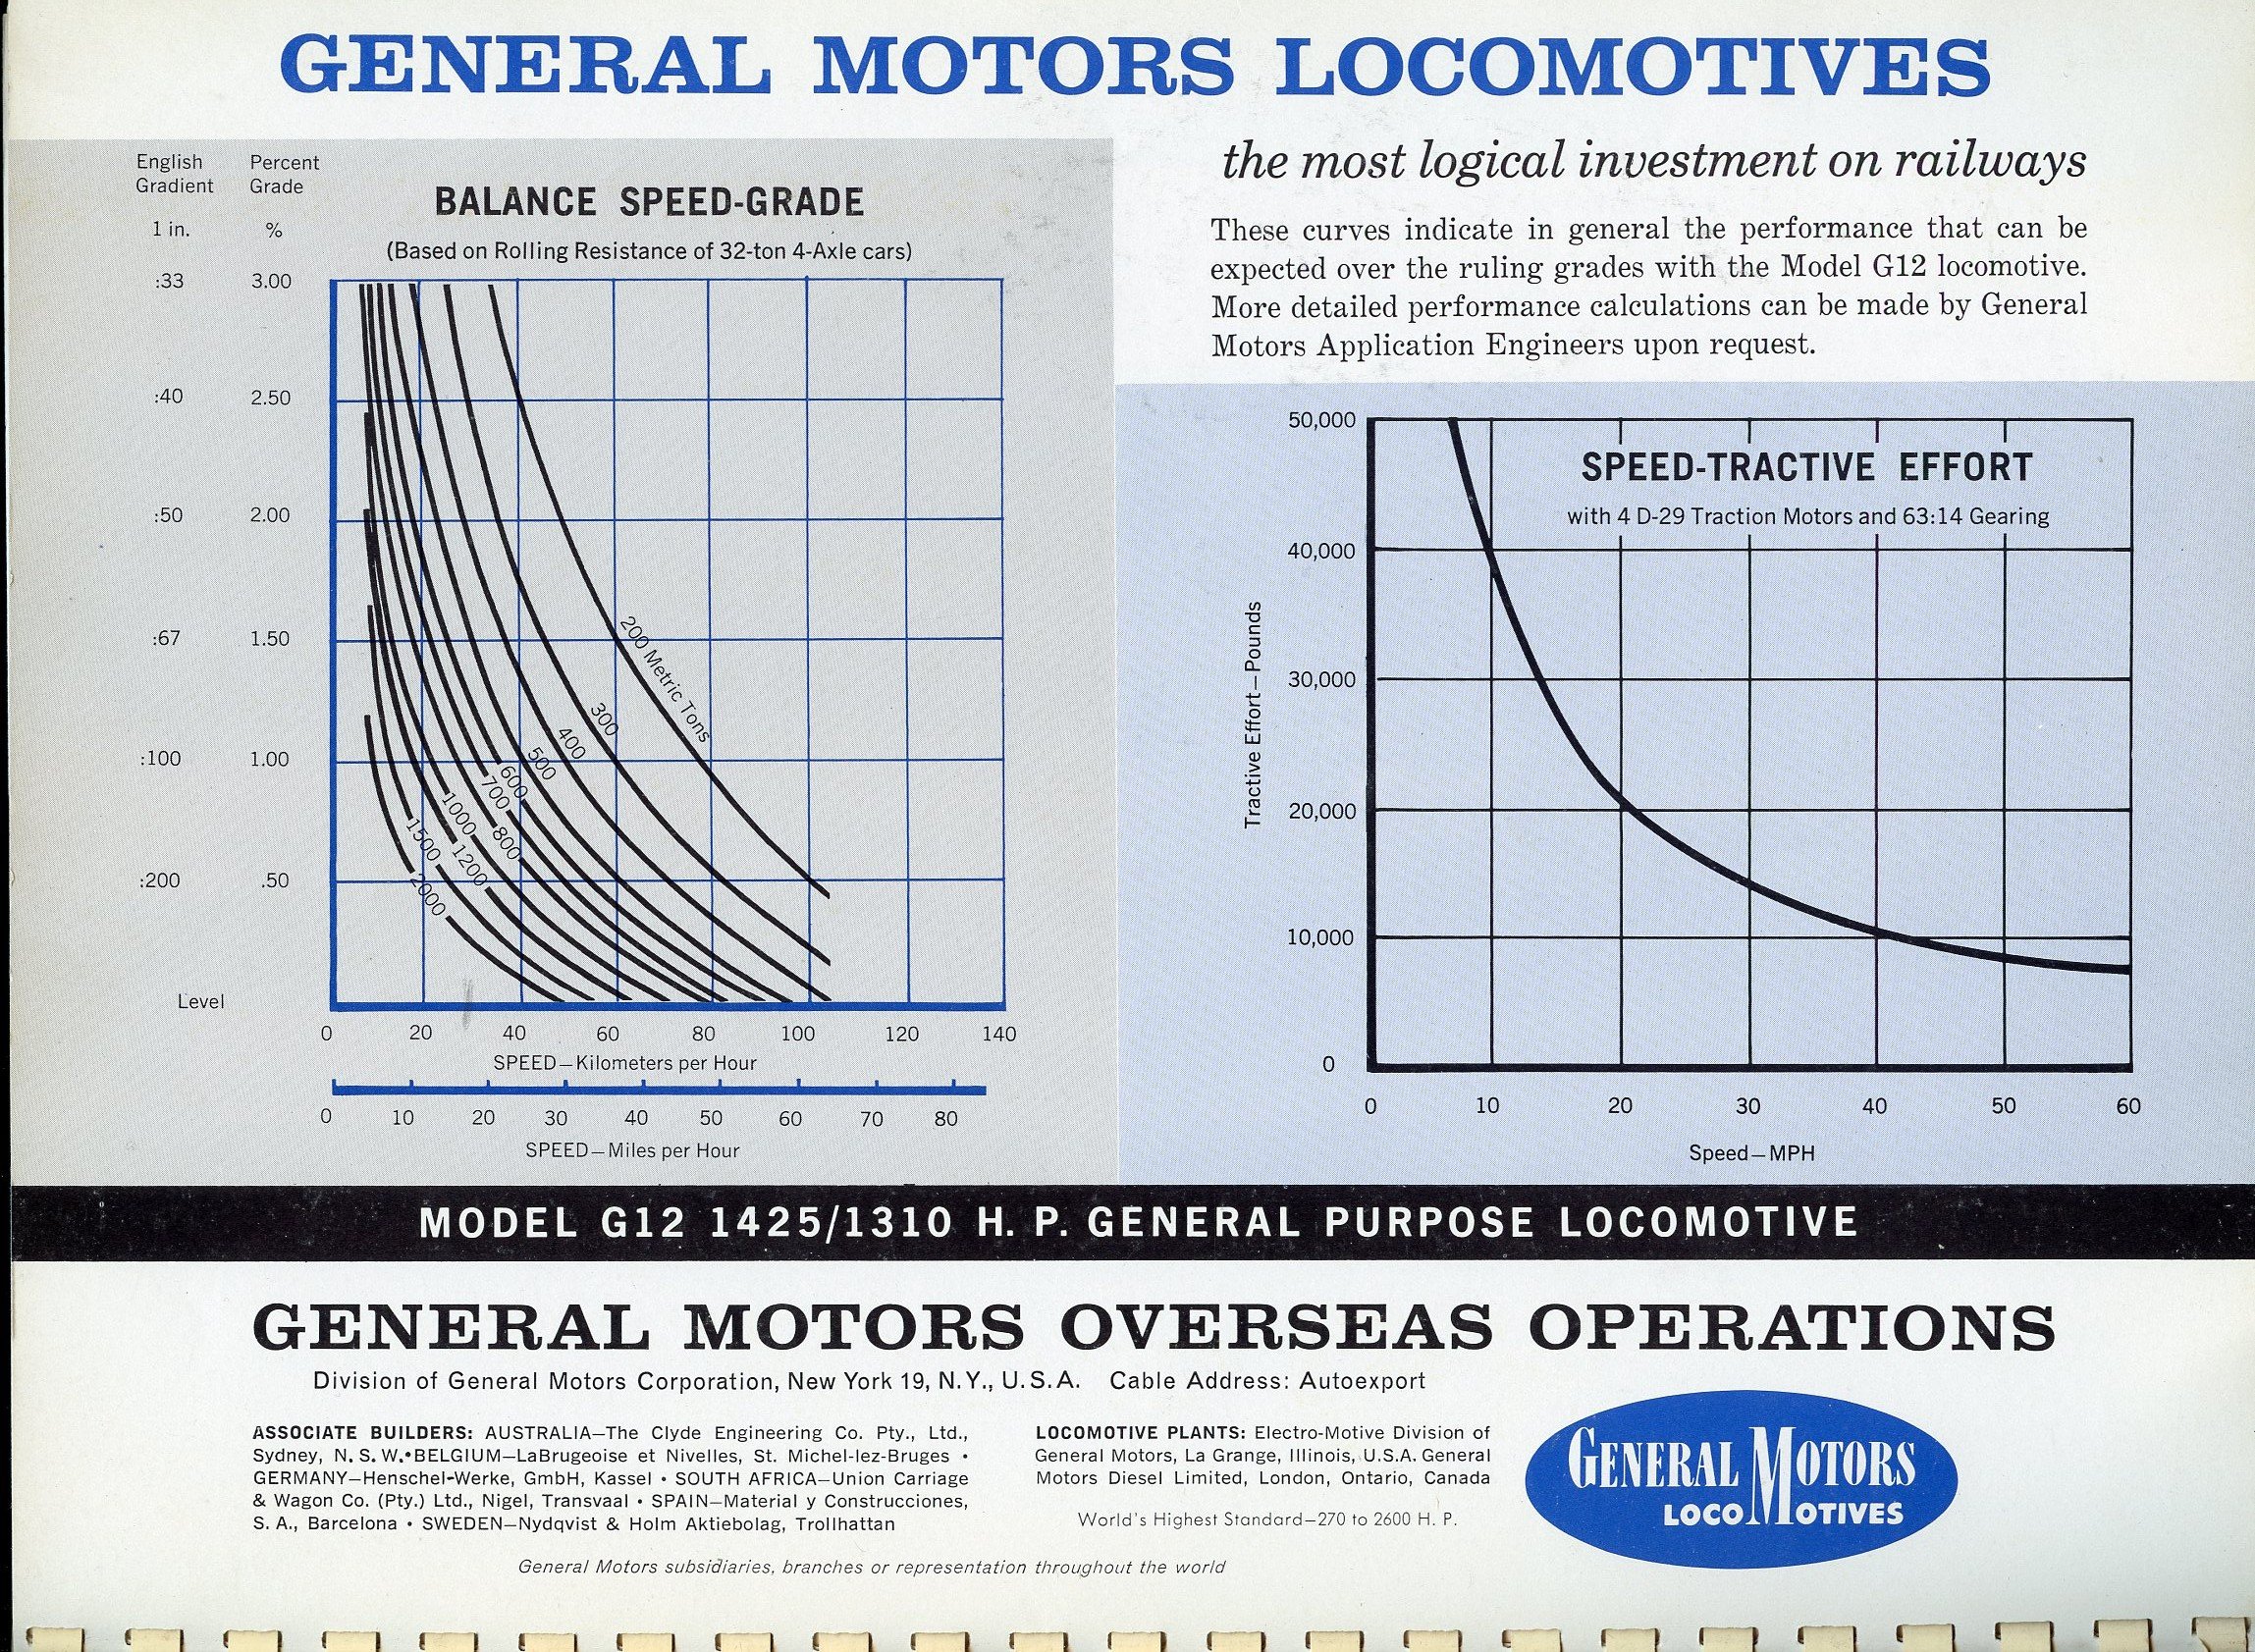
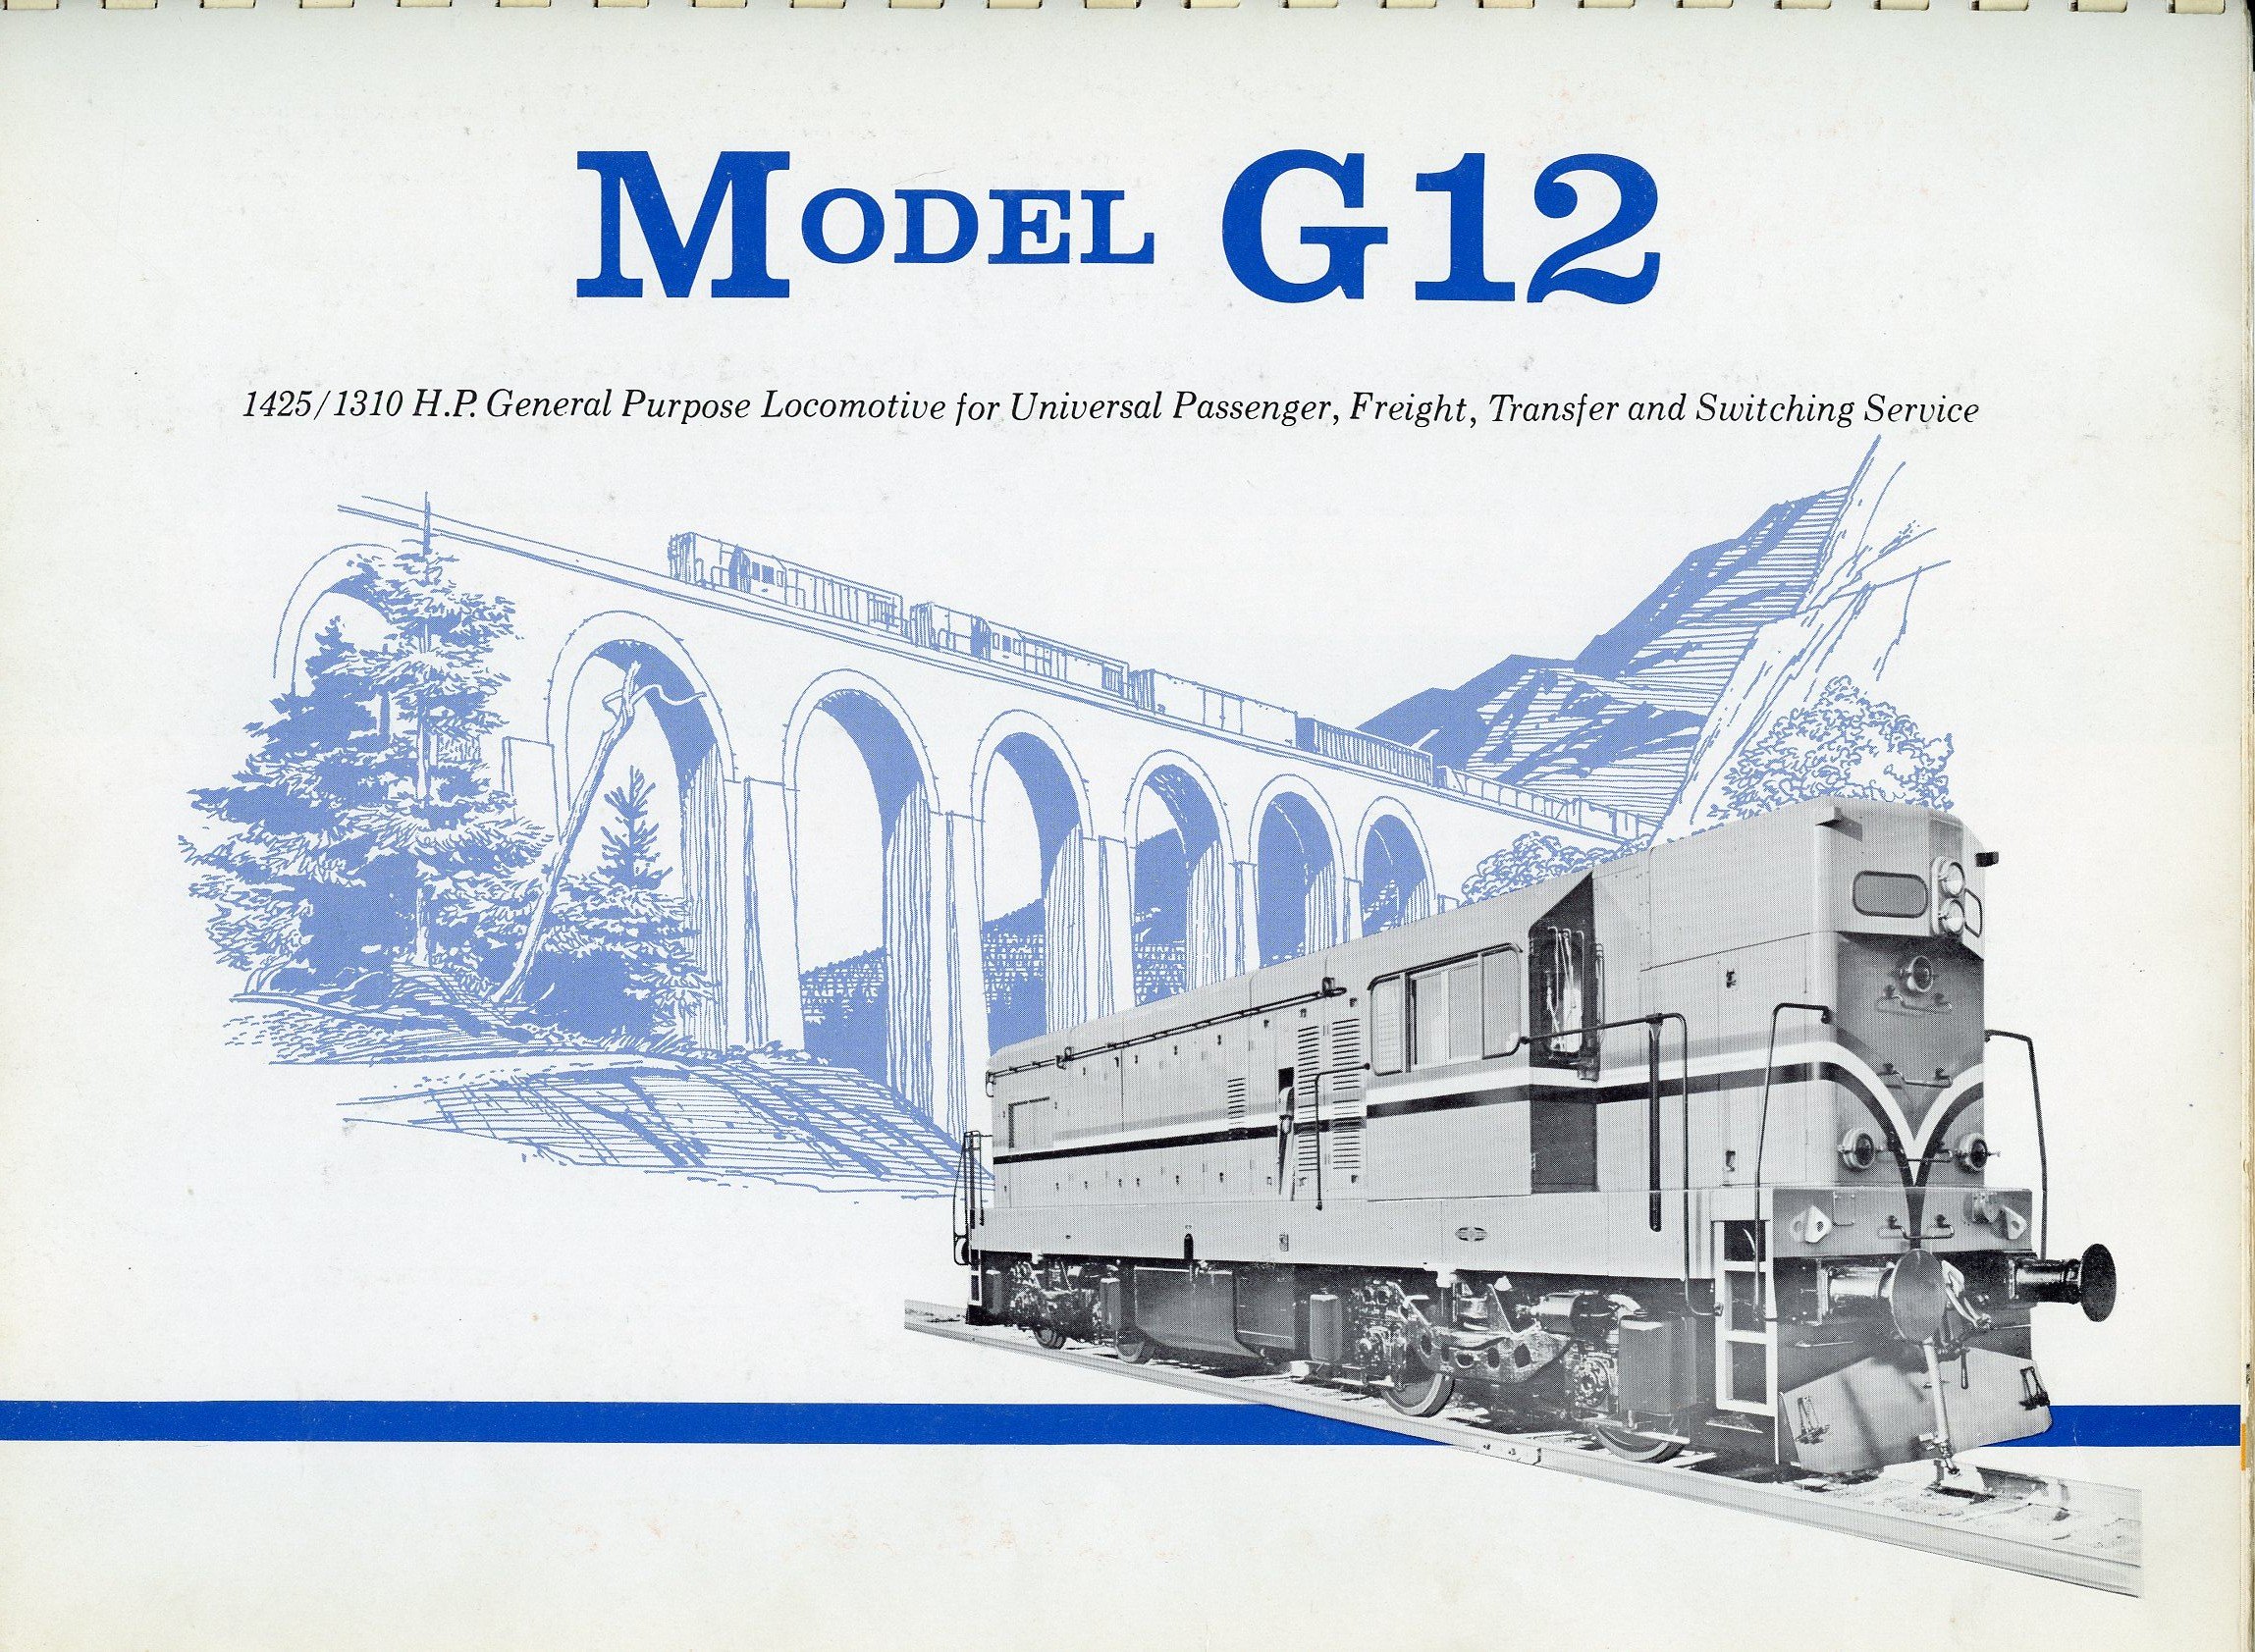
Here's the G12. The GR12 was very similar but 4'4" longer and Co-Co. I'm going to put the scanner away now!
-
EMD GM6 locos - an Irish what-if?
Mol_PMB replied to Mol_PMB's topic in Continental European Modelling
The larger sizes were as follows: G12: 1425hp 12-cylinder engine as a Bo-Bo (18t axleload) or an A1A-A1A (13t axleload) GR12: 1425hp 12-cylinder engine as a Co-Co (15t axleload) G16: 1950hp 16-cylinder engine as a Bo-Bo (22t axleload), an A1A-A1A (16t axleload) or a Co-Co (17t axleload) DT16: 2600hp turbocharged 16-cylinder engine as a Co-Co (19t axleload) (note: I've rounded the axleloads to the nearest whole number). The G12 A1A-A1A or perhaps the GR12 might have been of interest to Bulleid if Ireland had any dollars in the mid-1950s. The others would have been too heavy. Here's a G12 still in use, photo by my friend Rick Skateboard on Flickr: And from Neil Smith on Flickr, here's a G8, the type considered for the GNR: -
EMD GM6 locos - an Irish what-if?
Mol_PMB replied to Mol_PMB's topic in Continental European Modelling
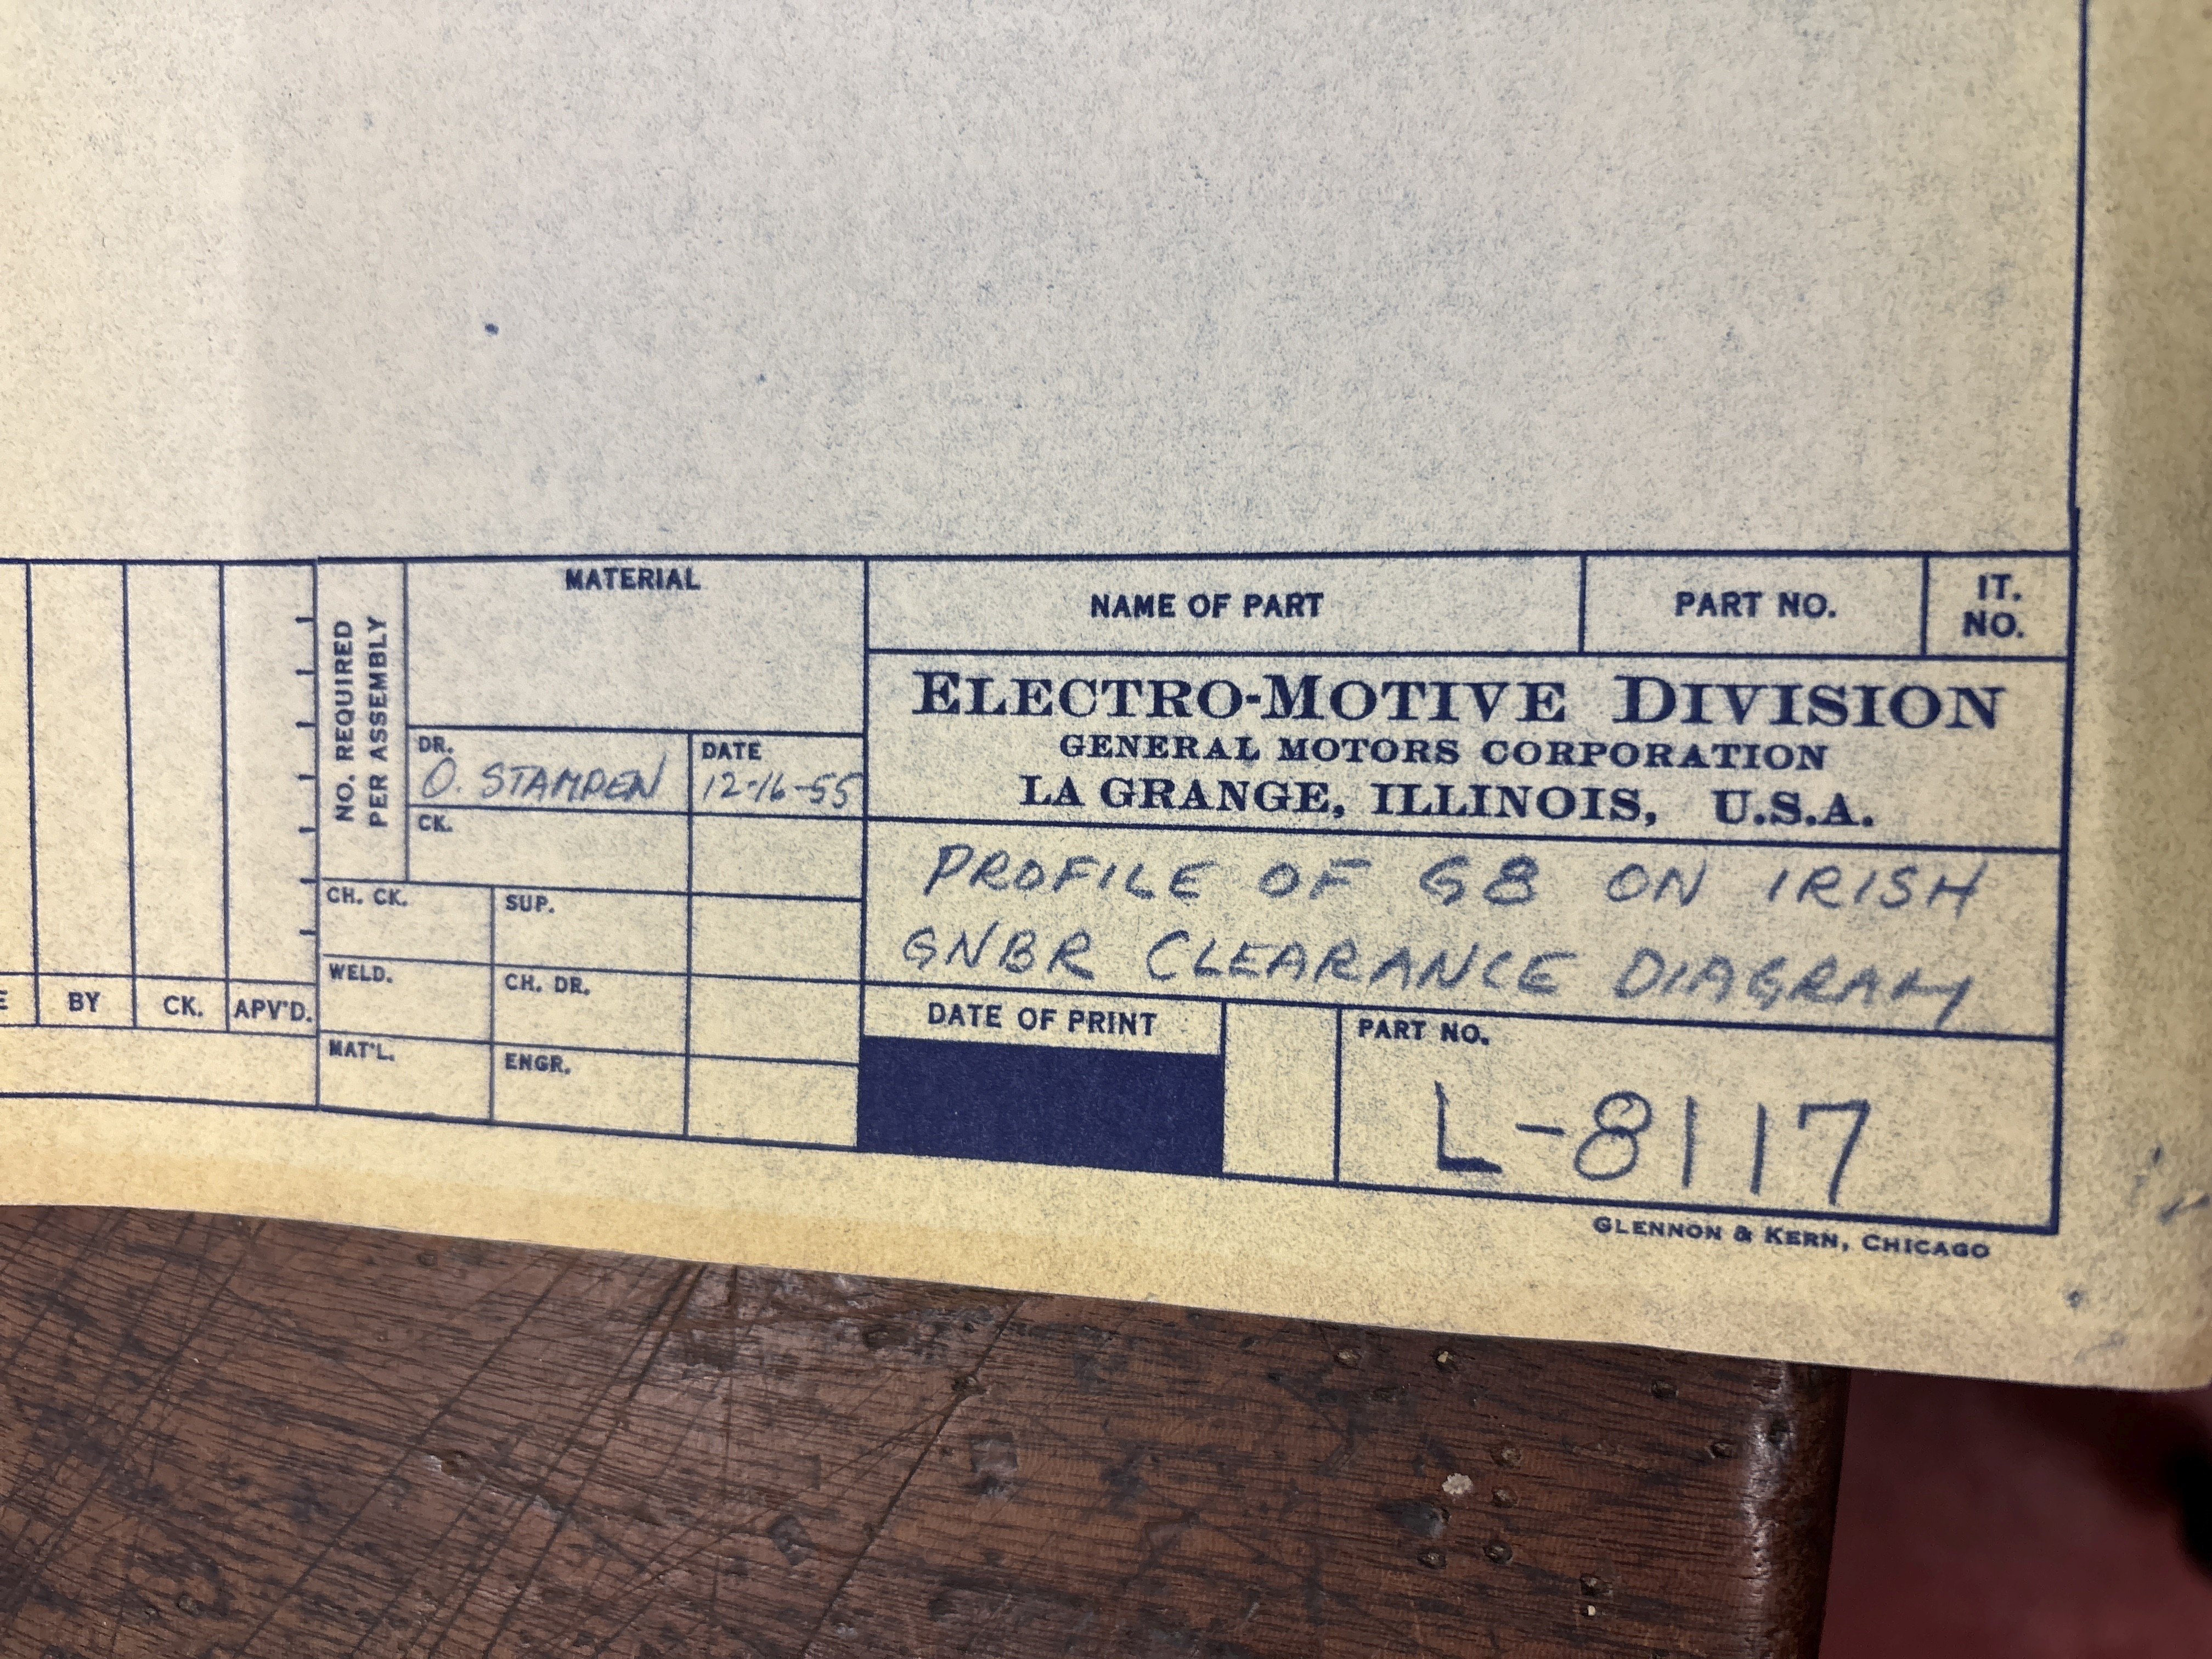
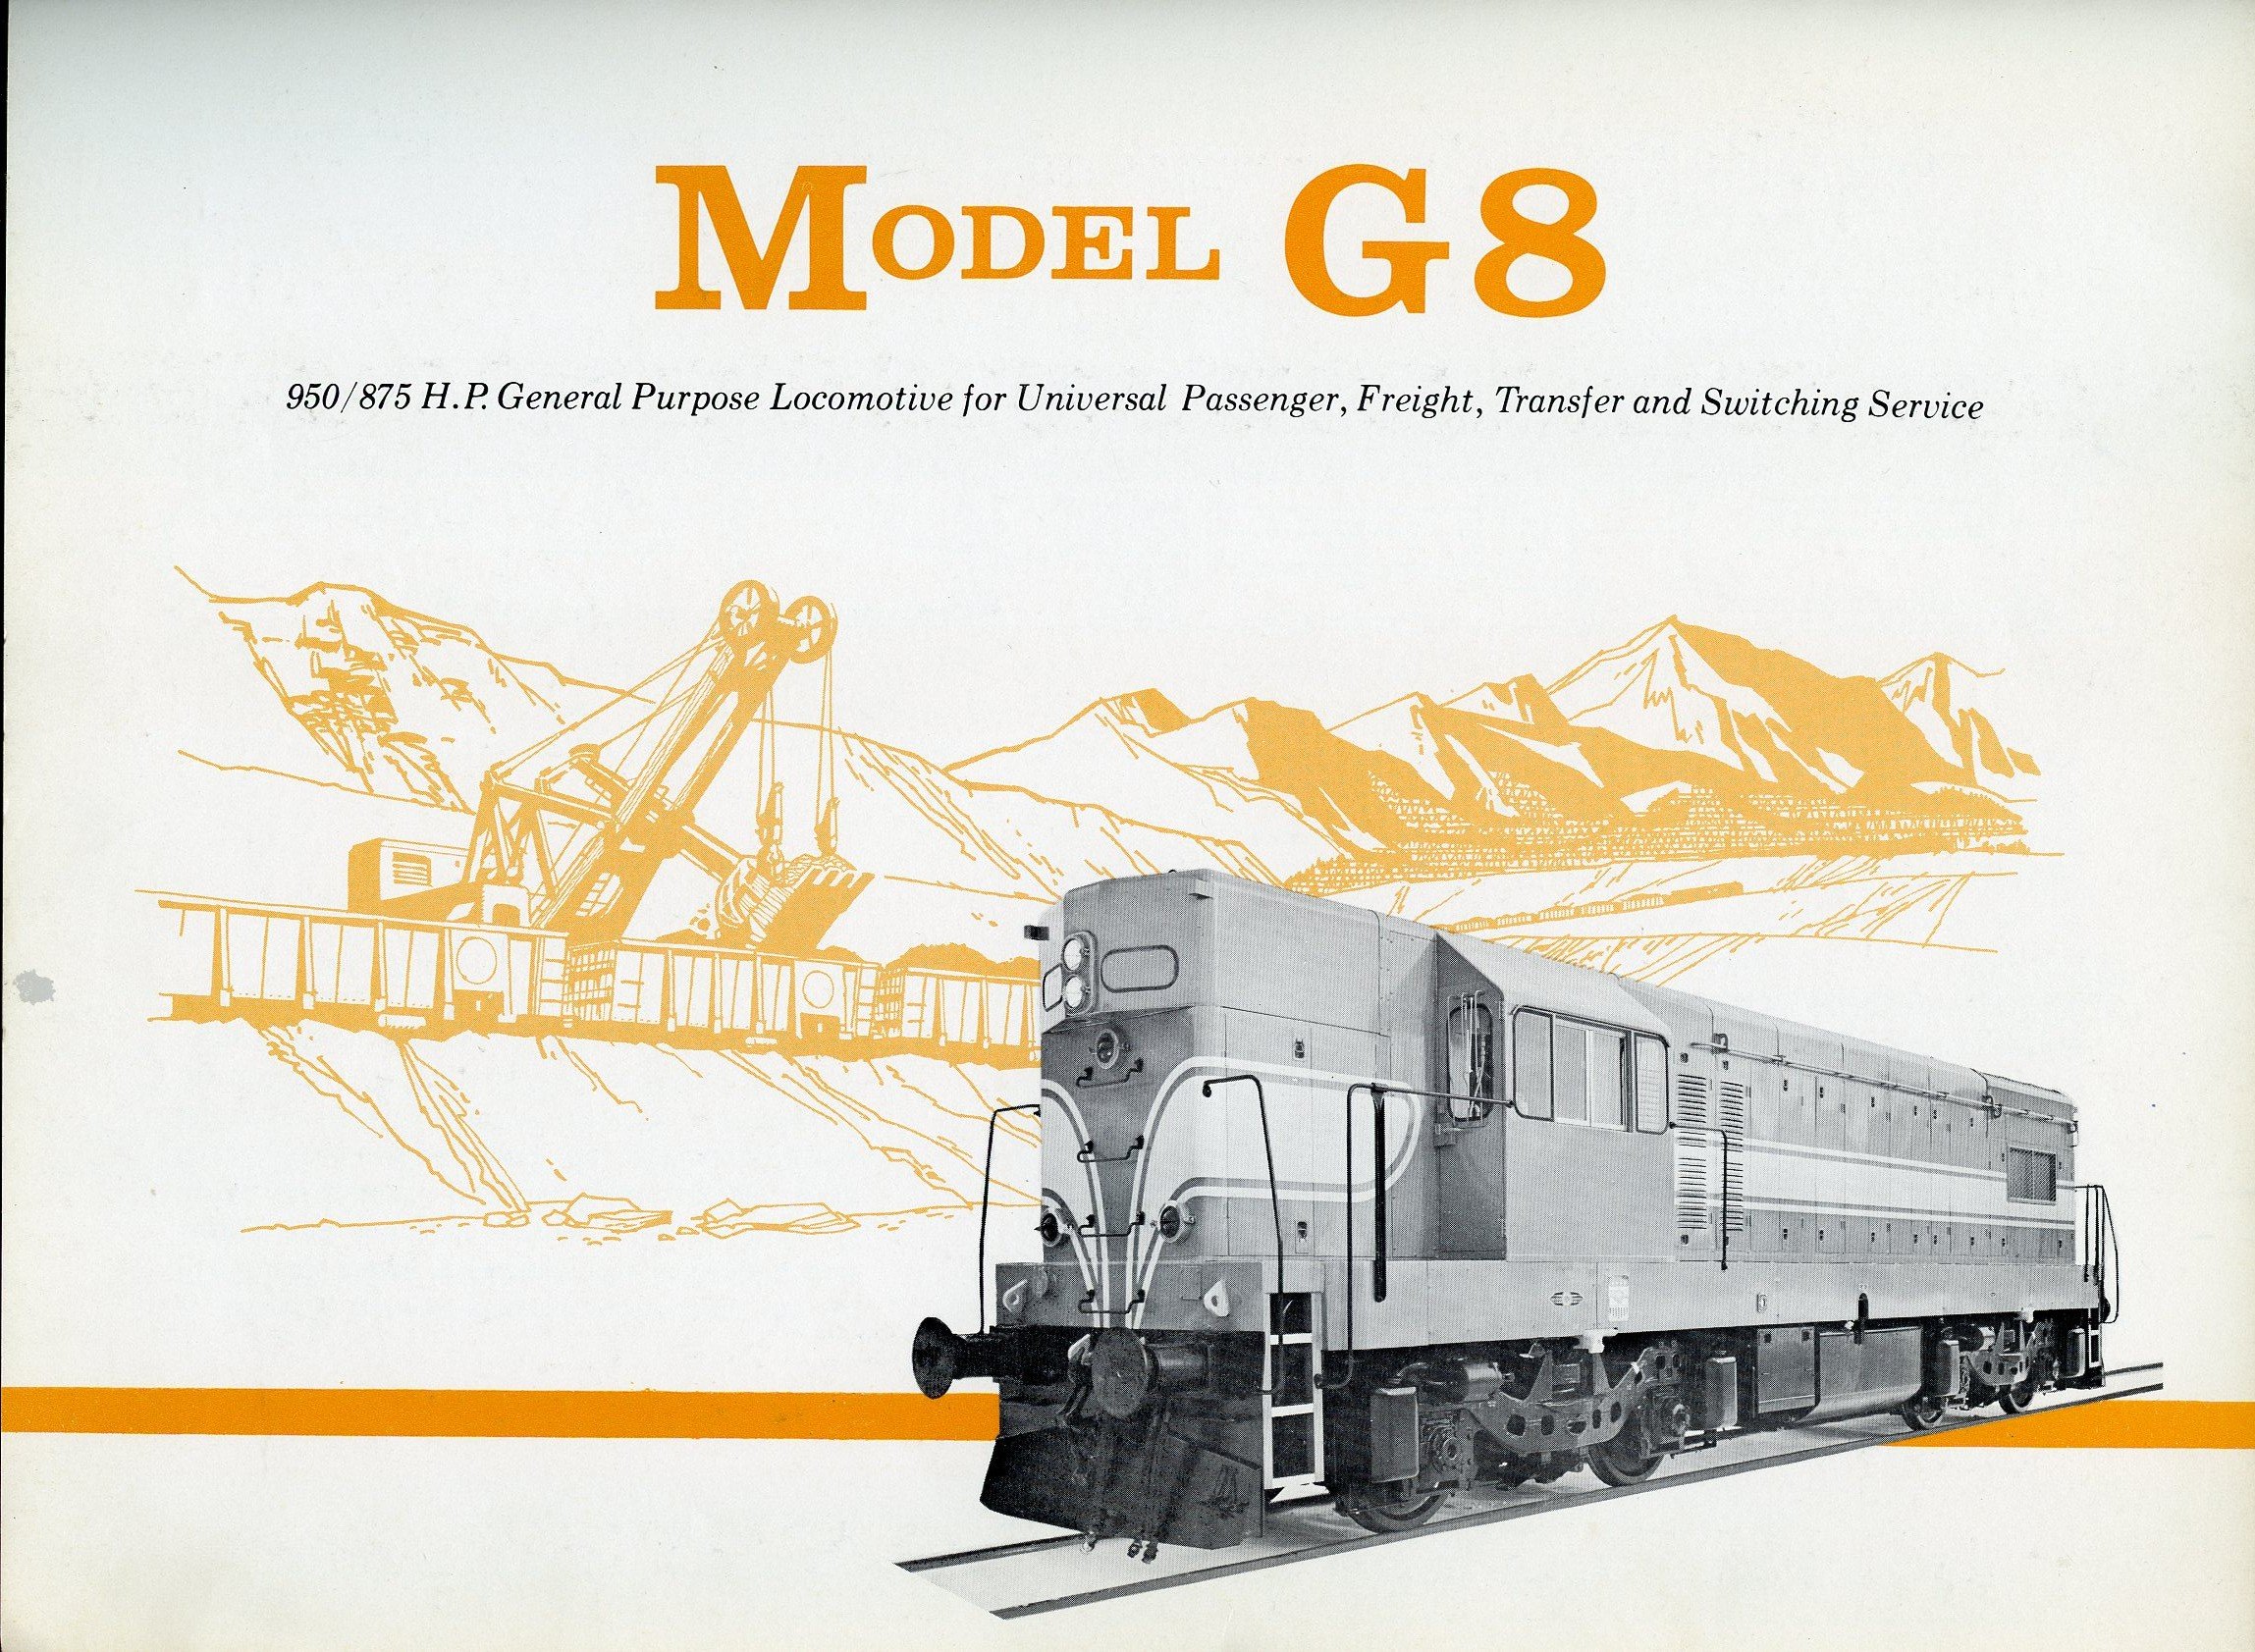
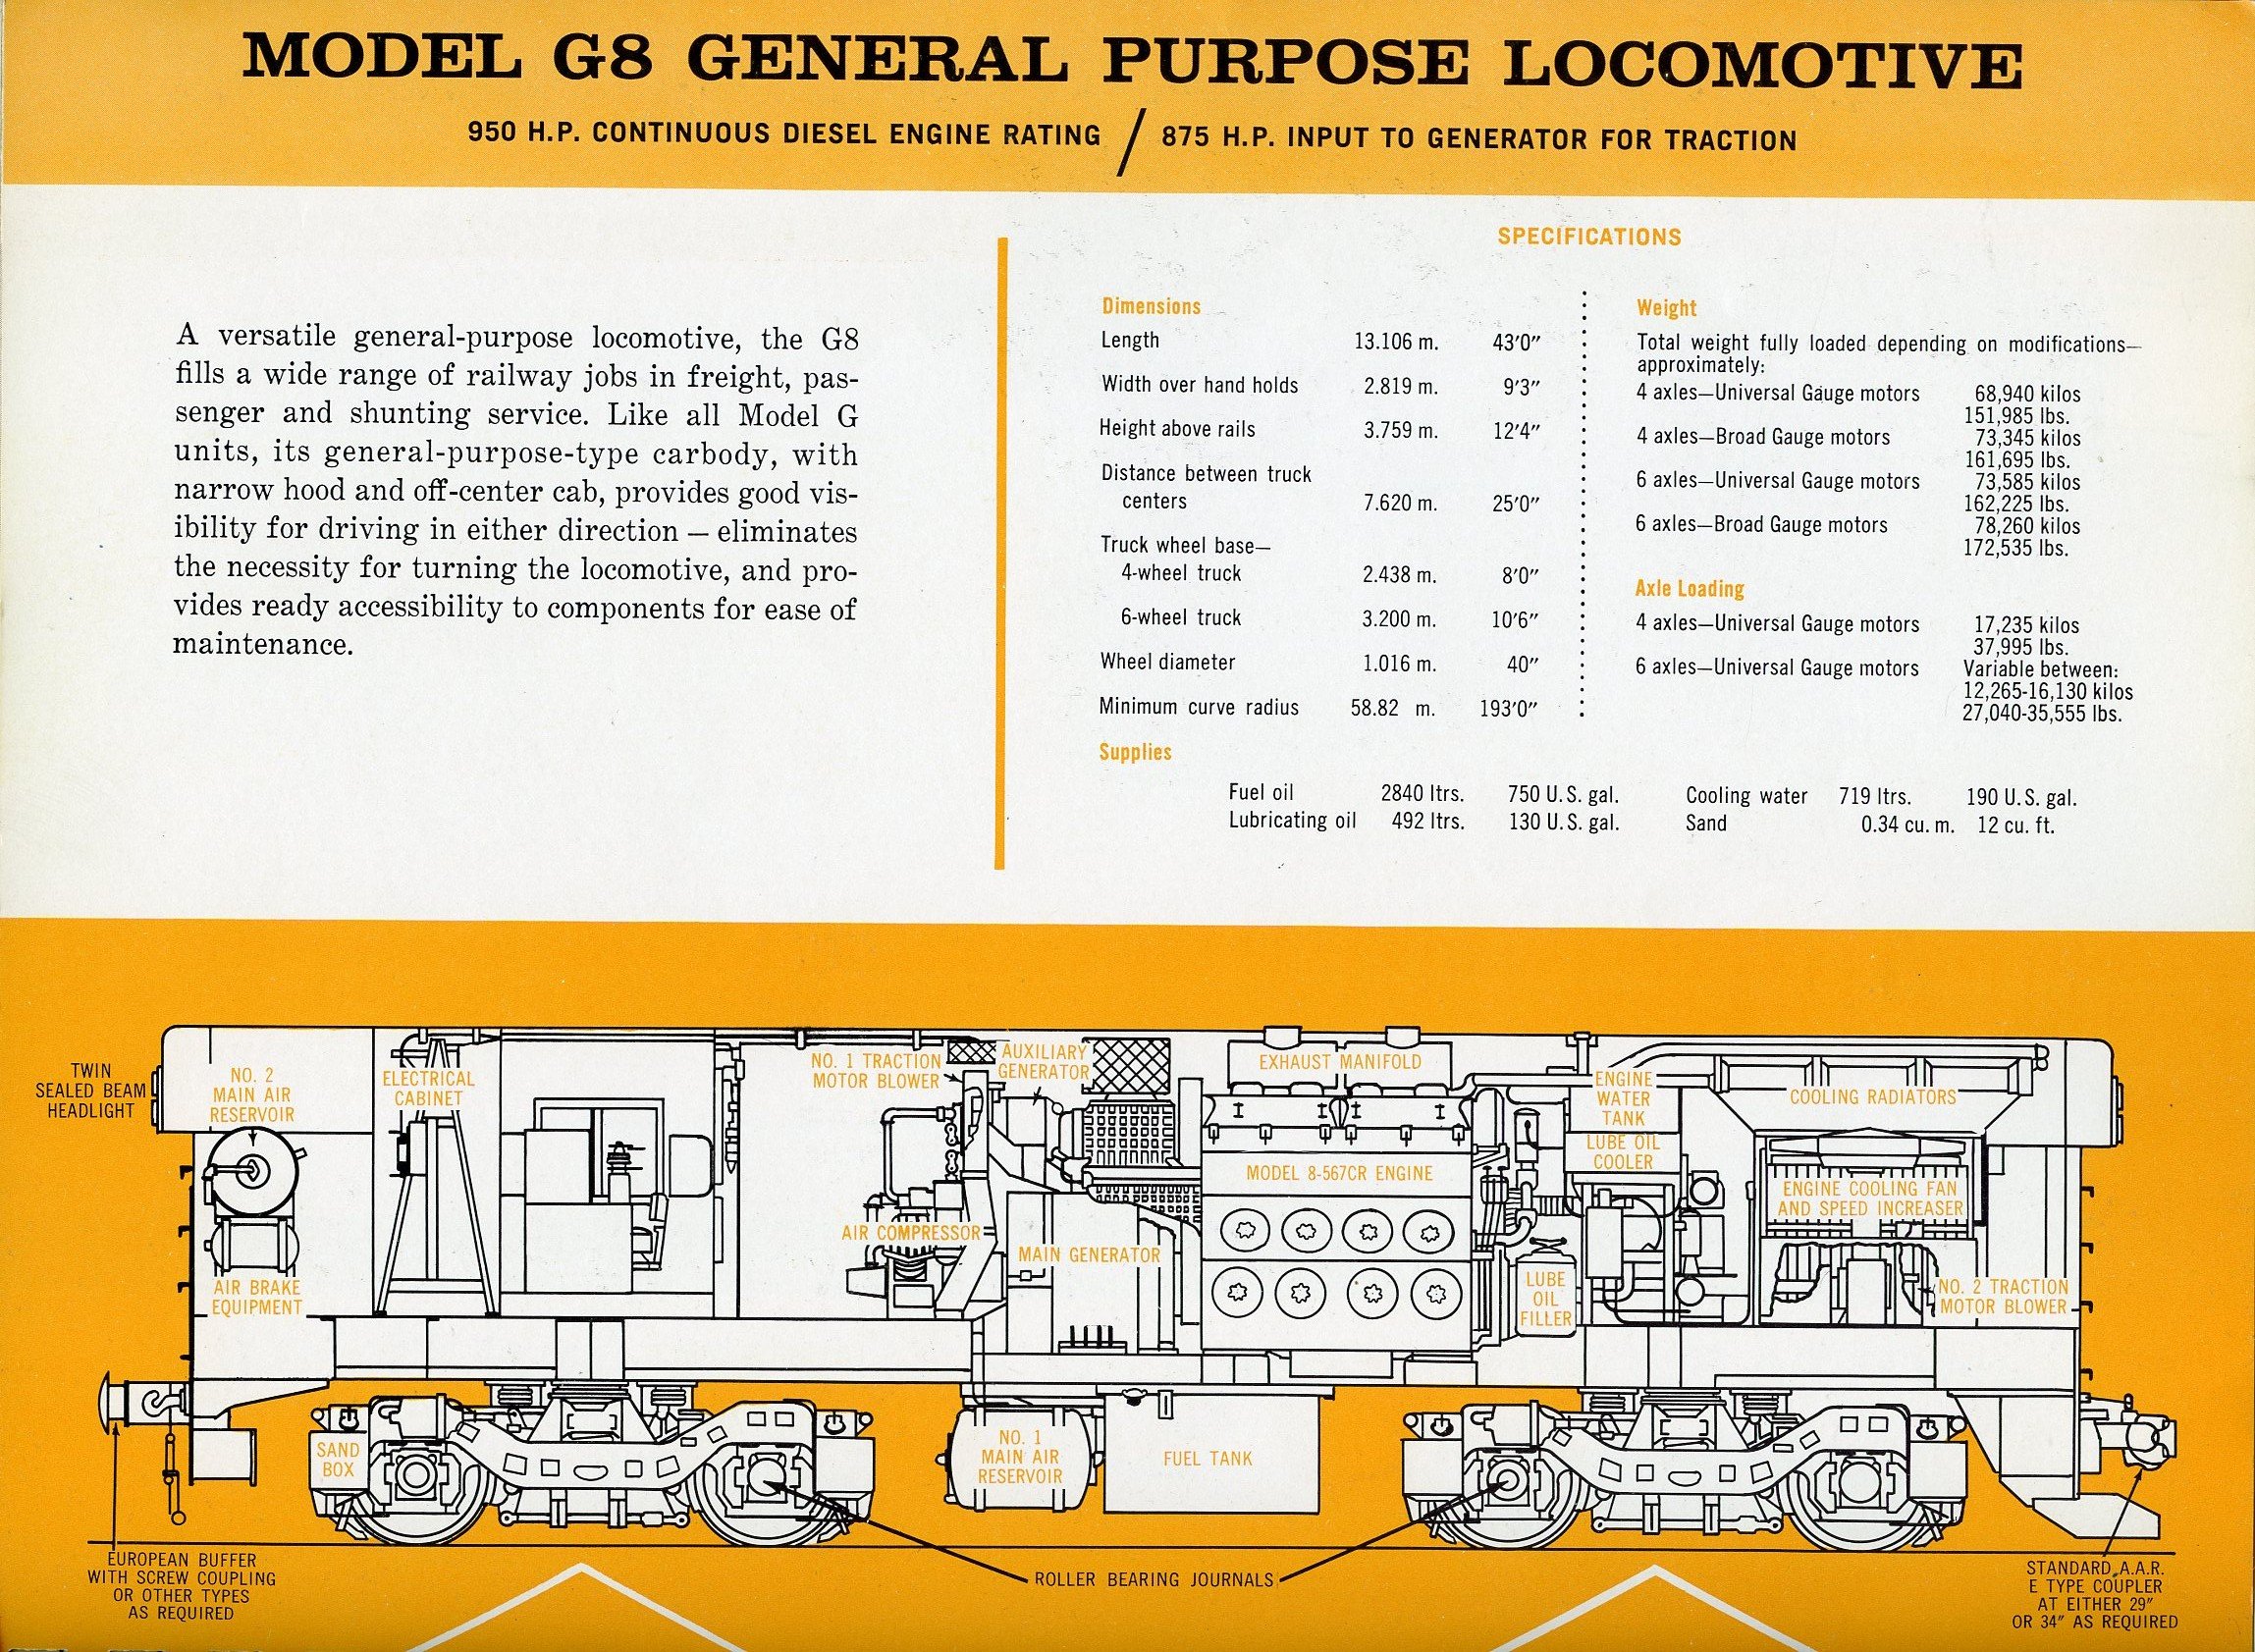
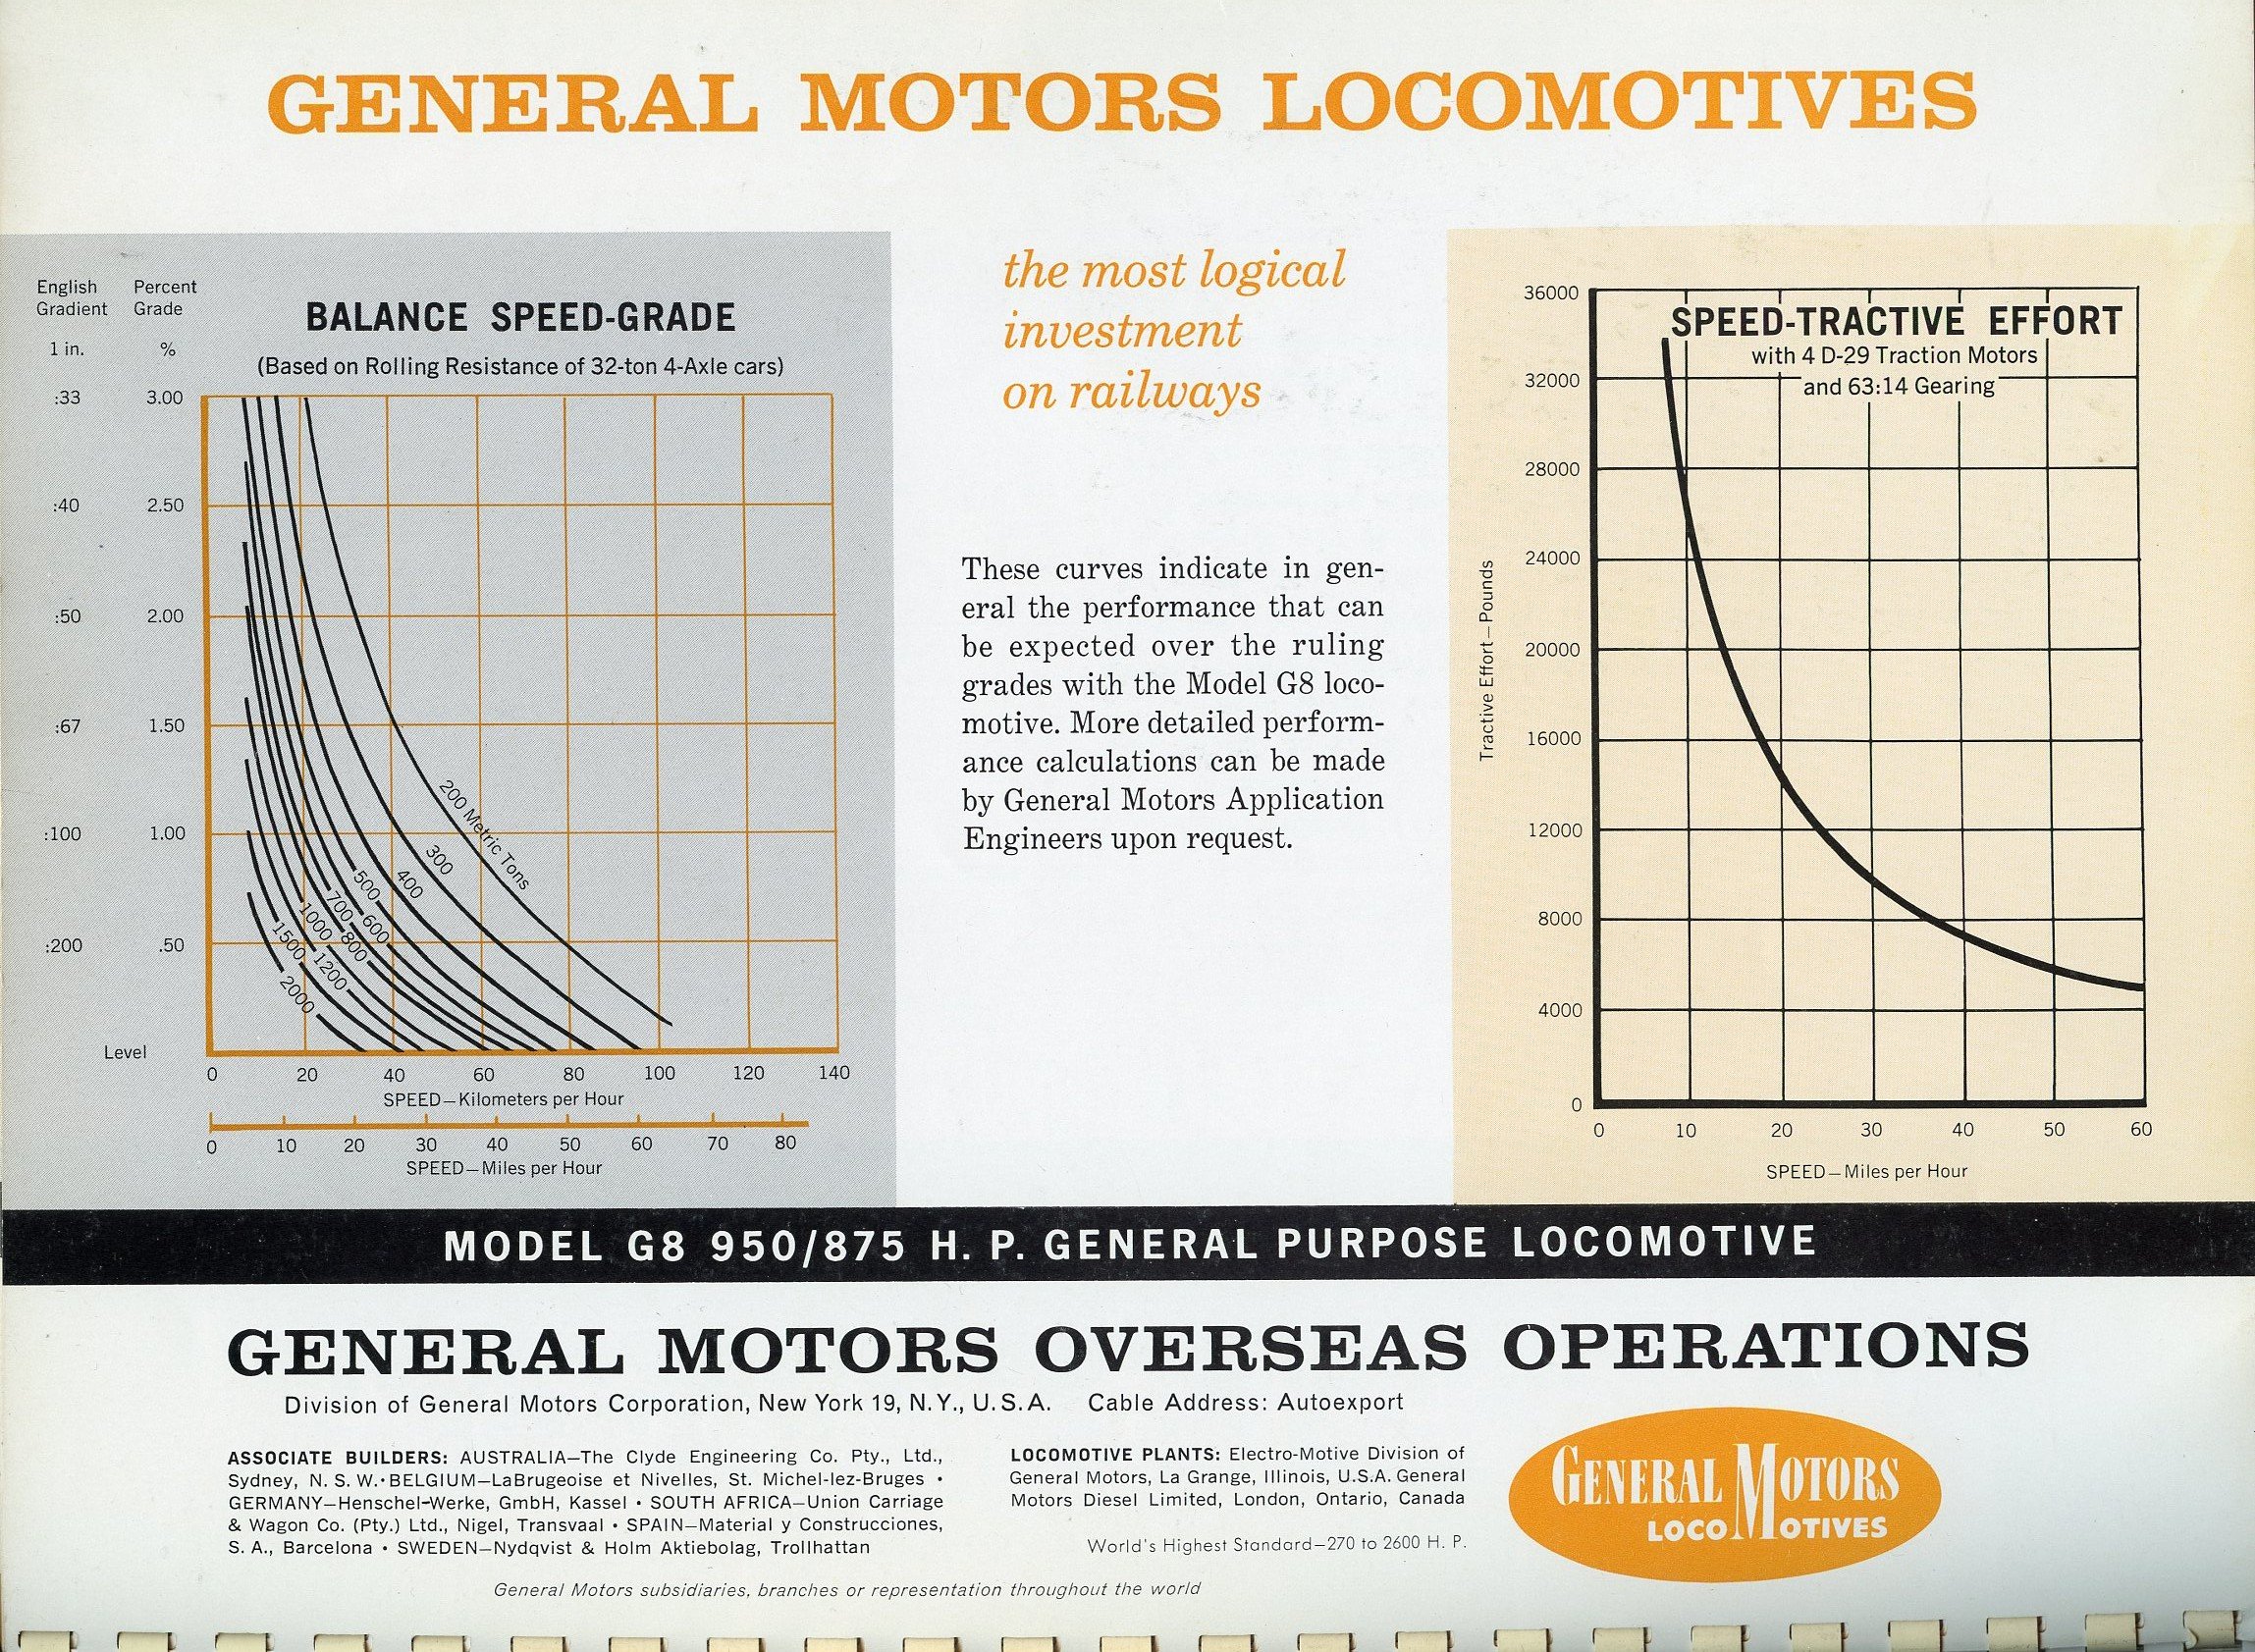
While I've got the scanner and the EMD Export catalogue to hand, here's the next size up, the G8: Why is this relevant? Well it's another Irish what-if... In the IRRS Archives is this EMD drawing dated 16 December 1955, comparing the size of the G8 to the Irish GNR(B) gauge:
-
EMD GM6 locos - an Irish what-if?
Mol_PMB replied to Mol_PMB's topic in Continental European Modelling
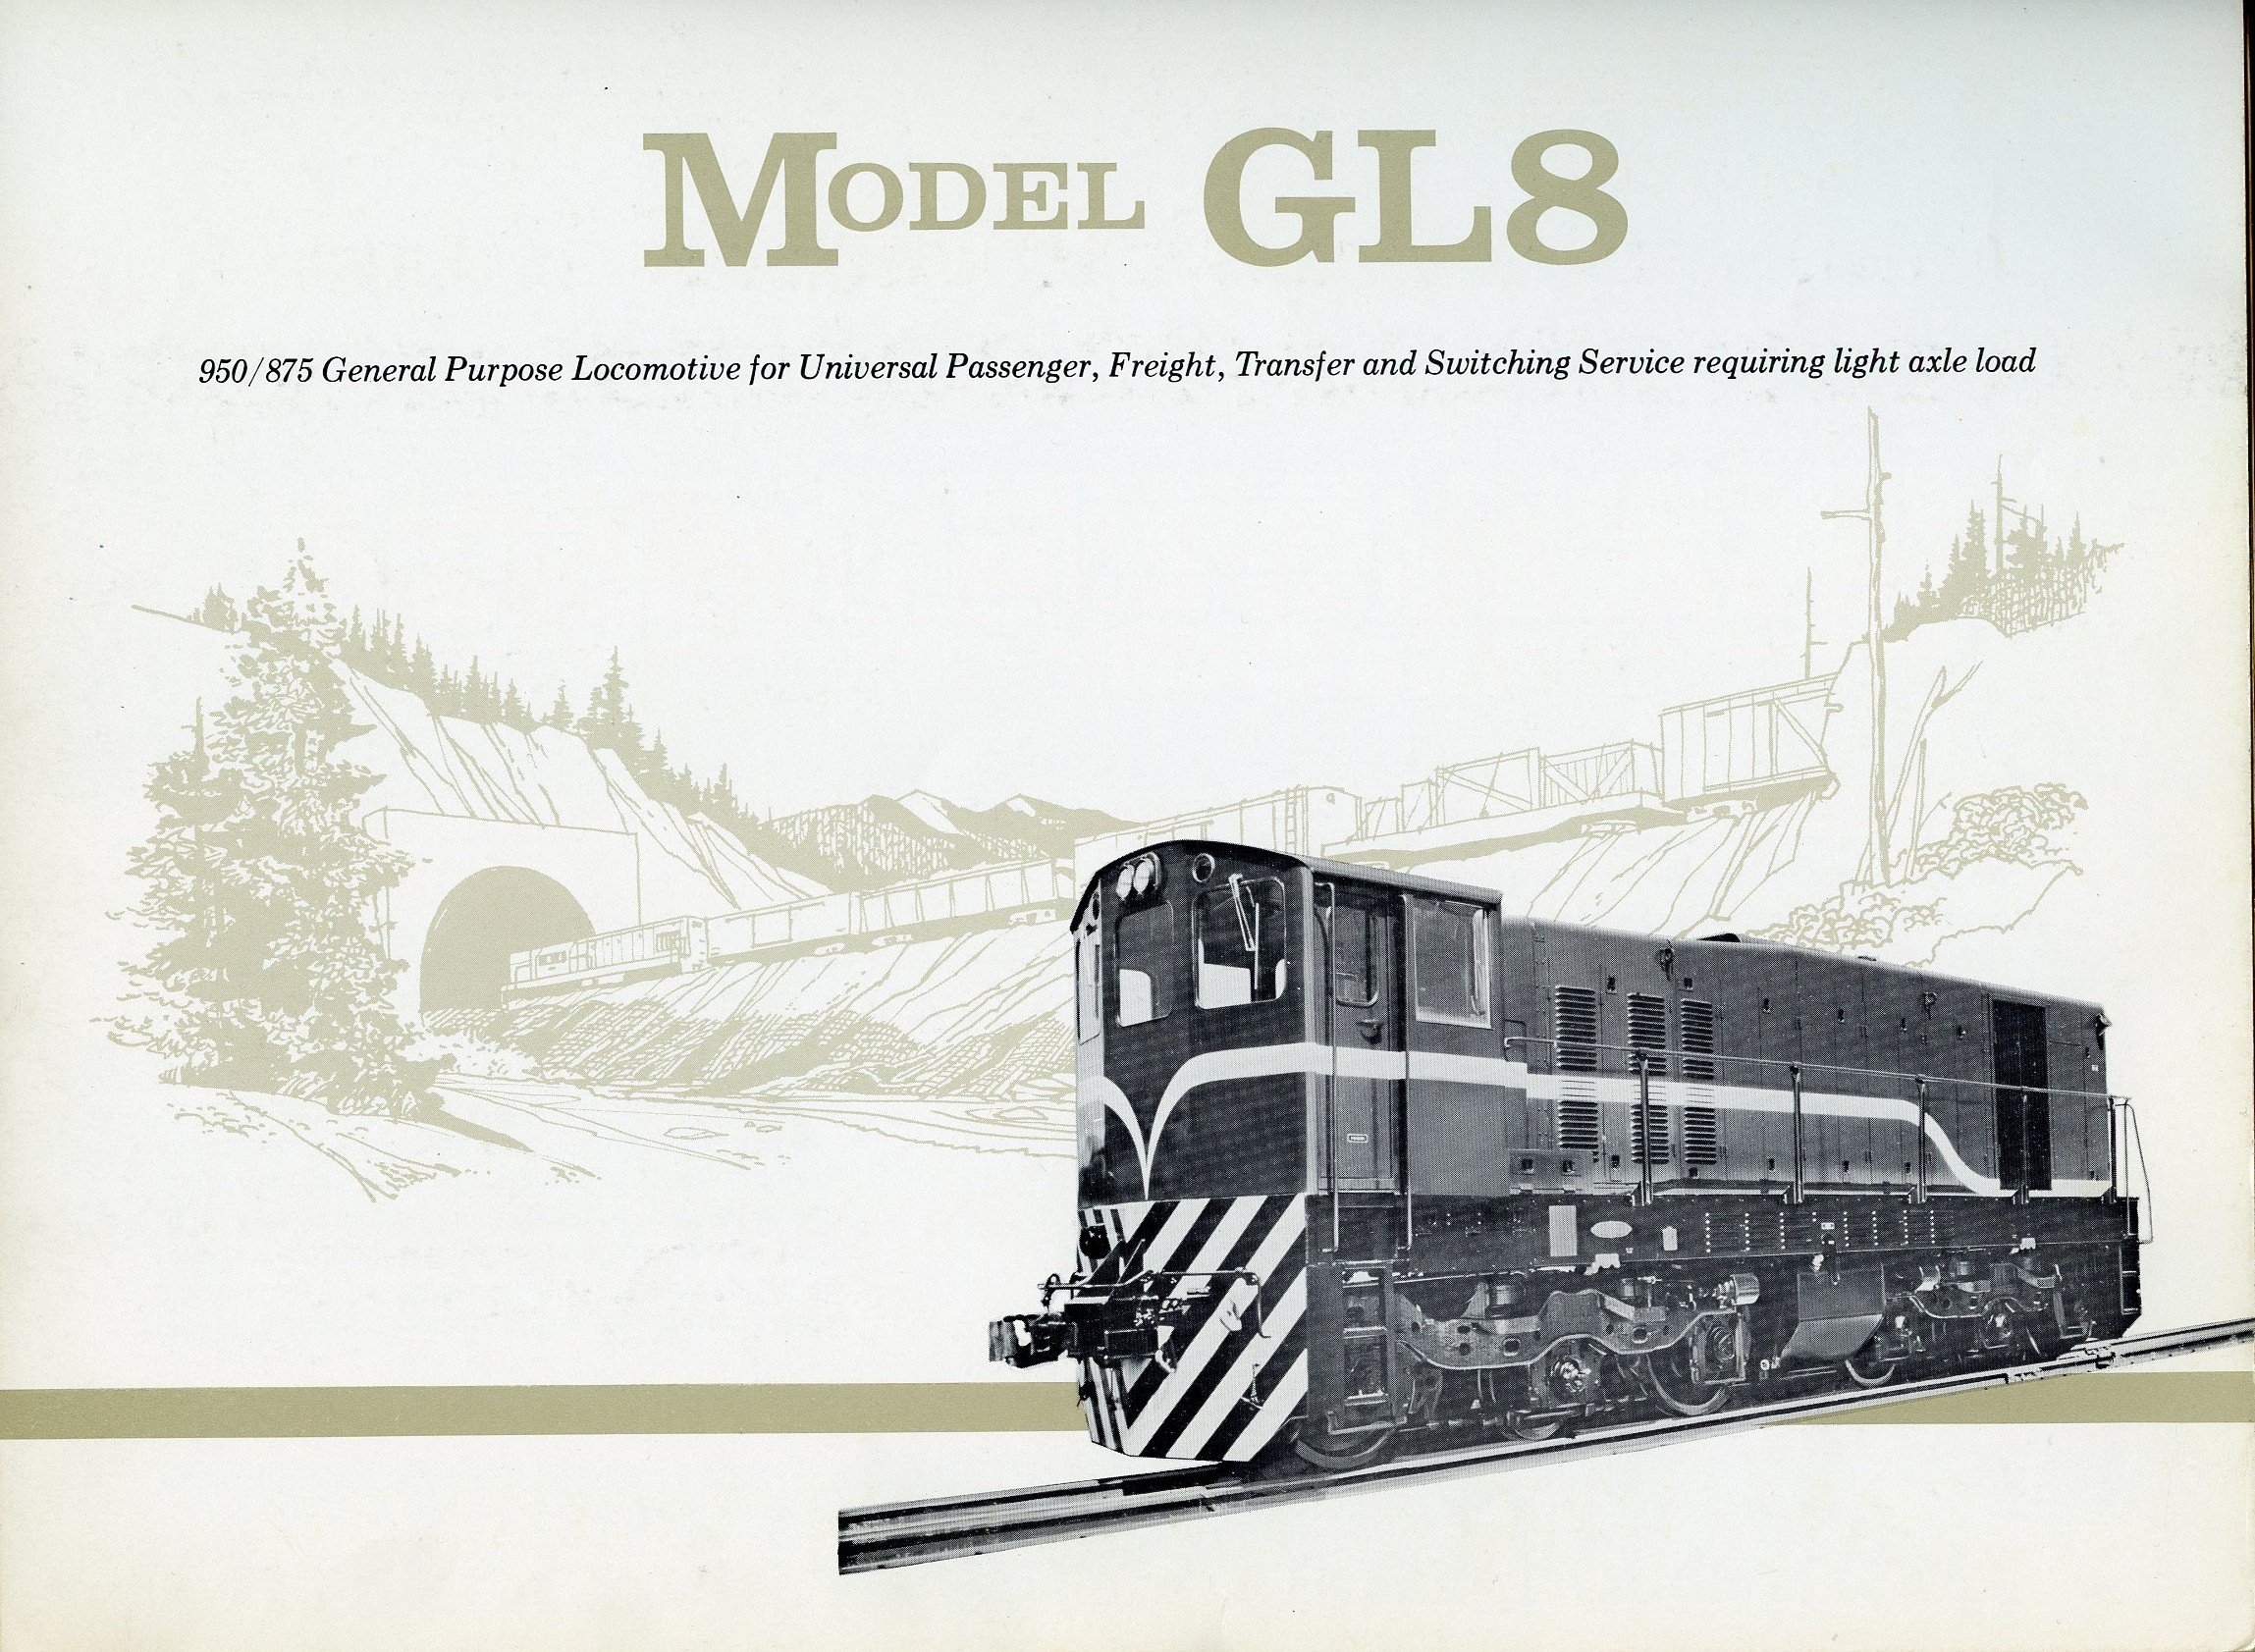
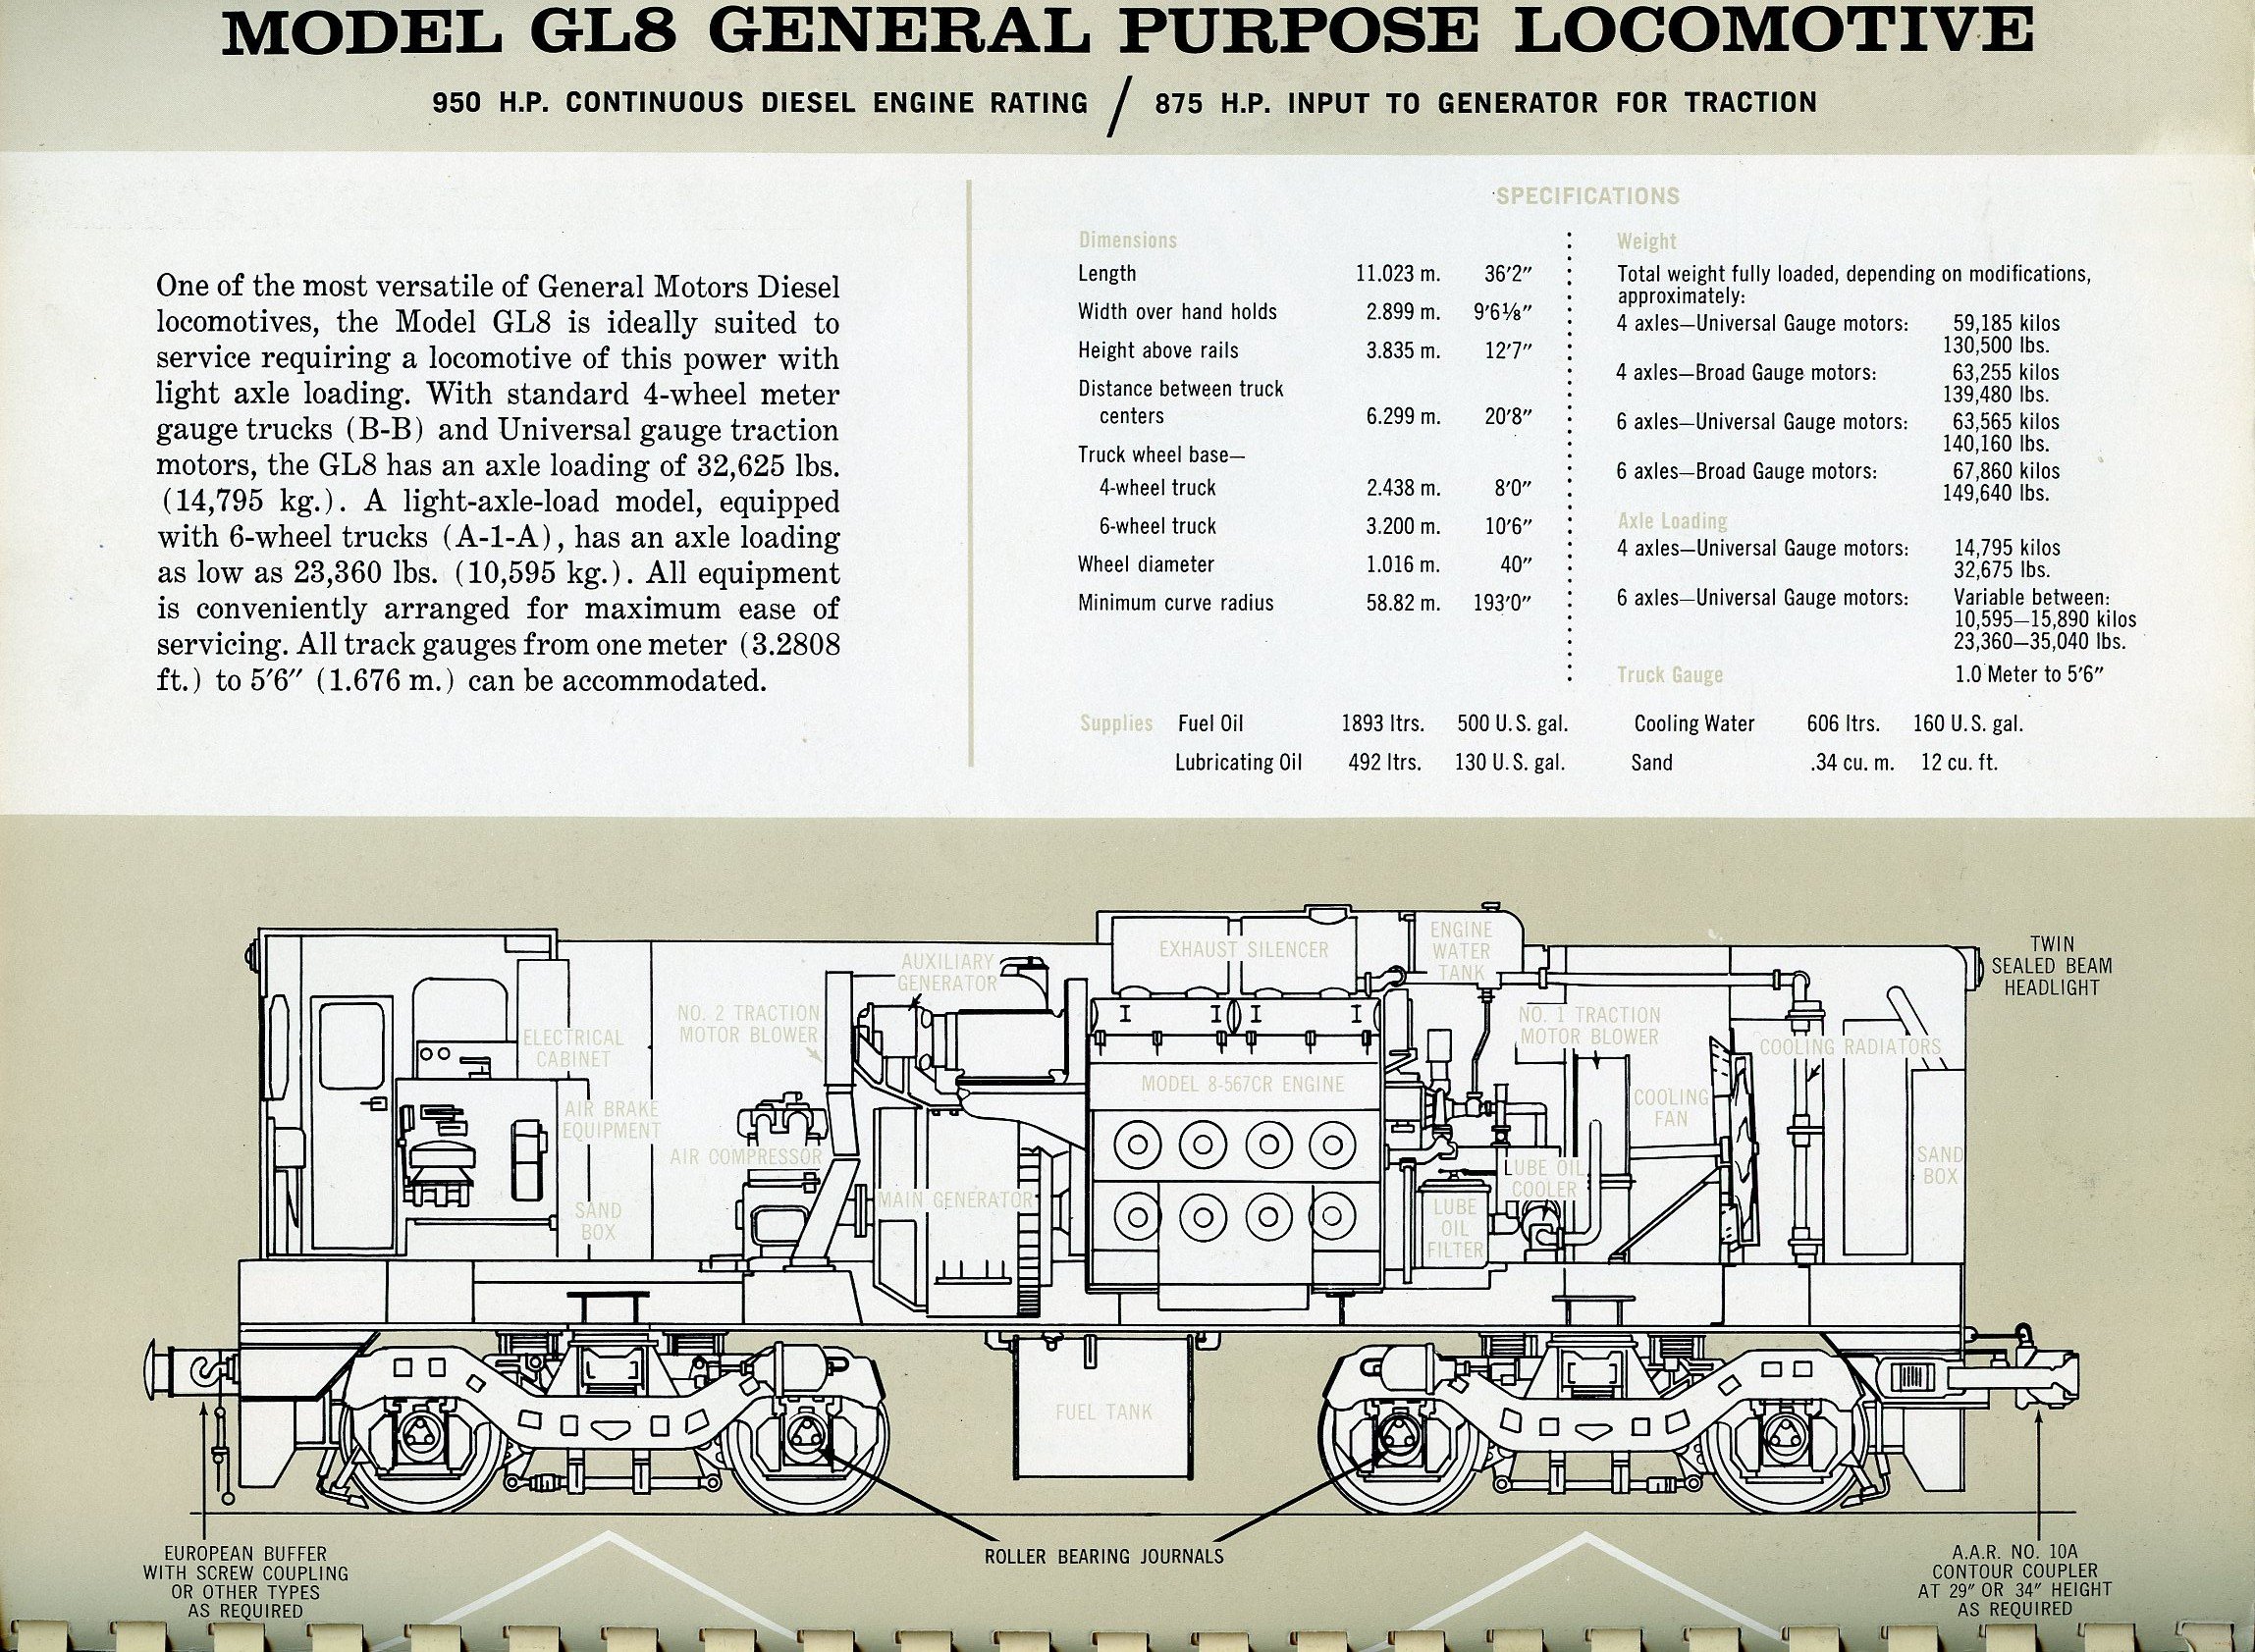
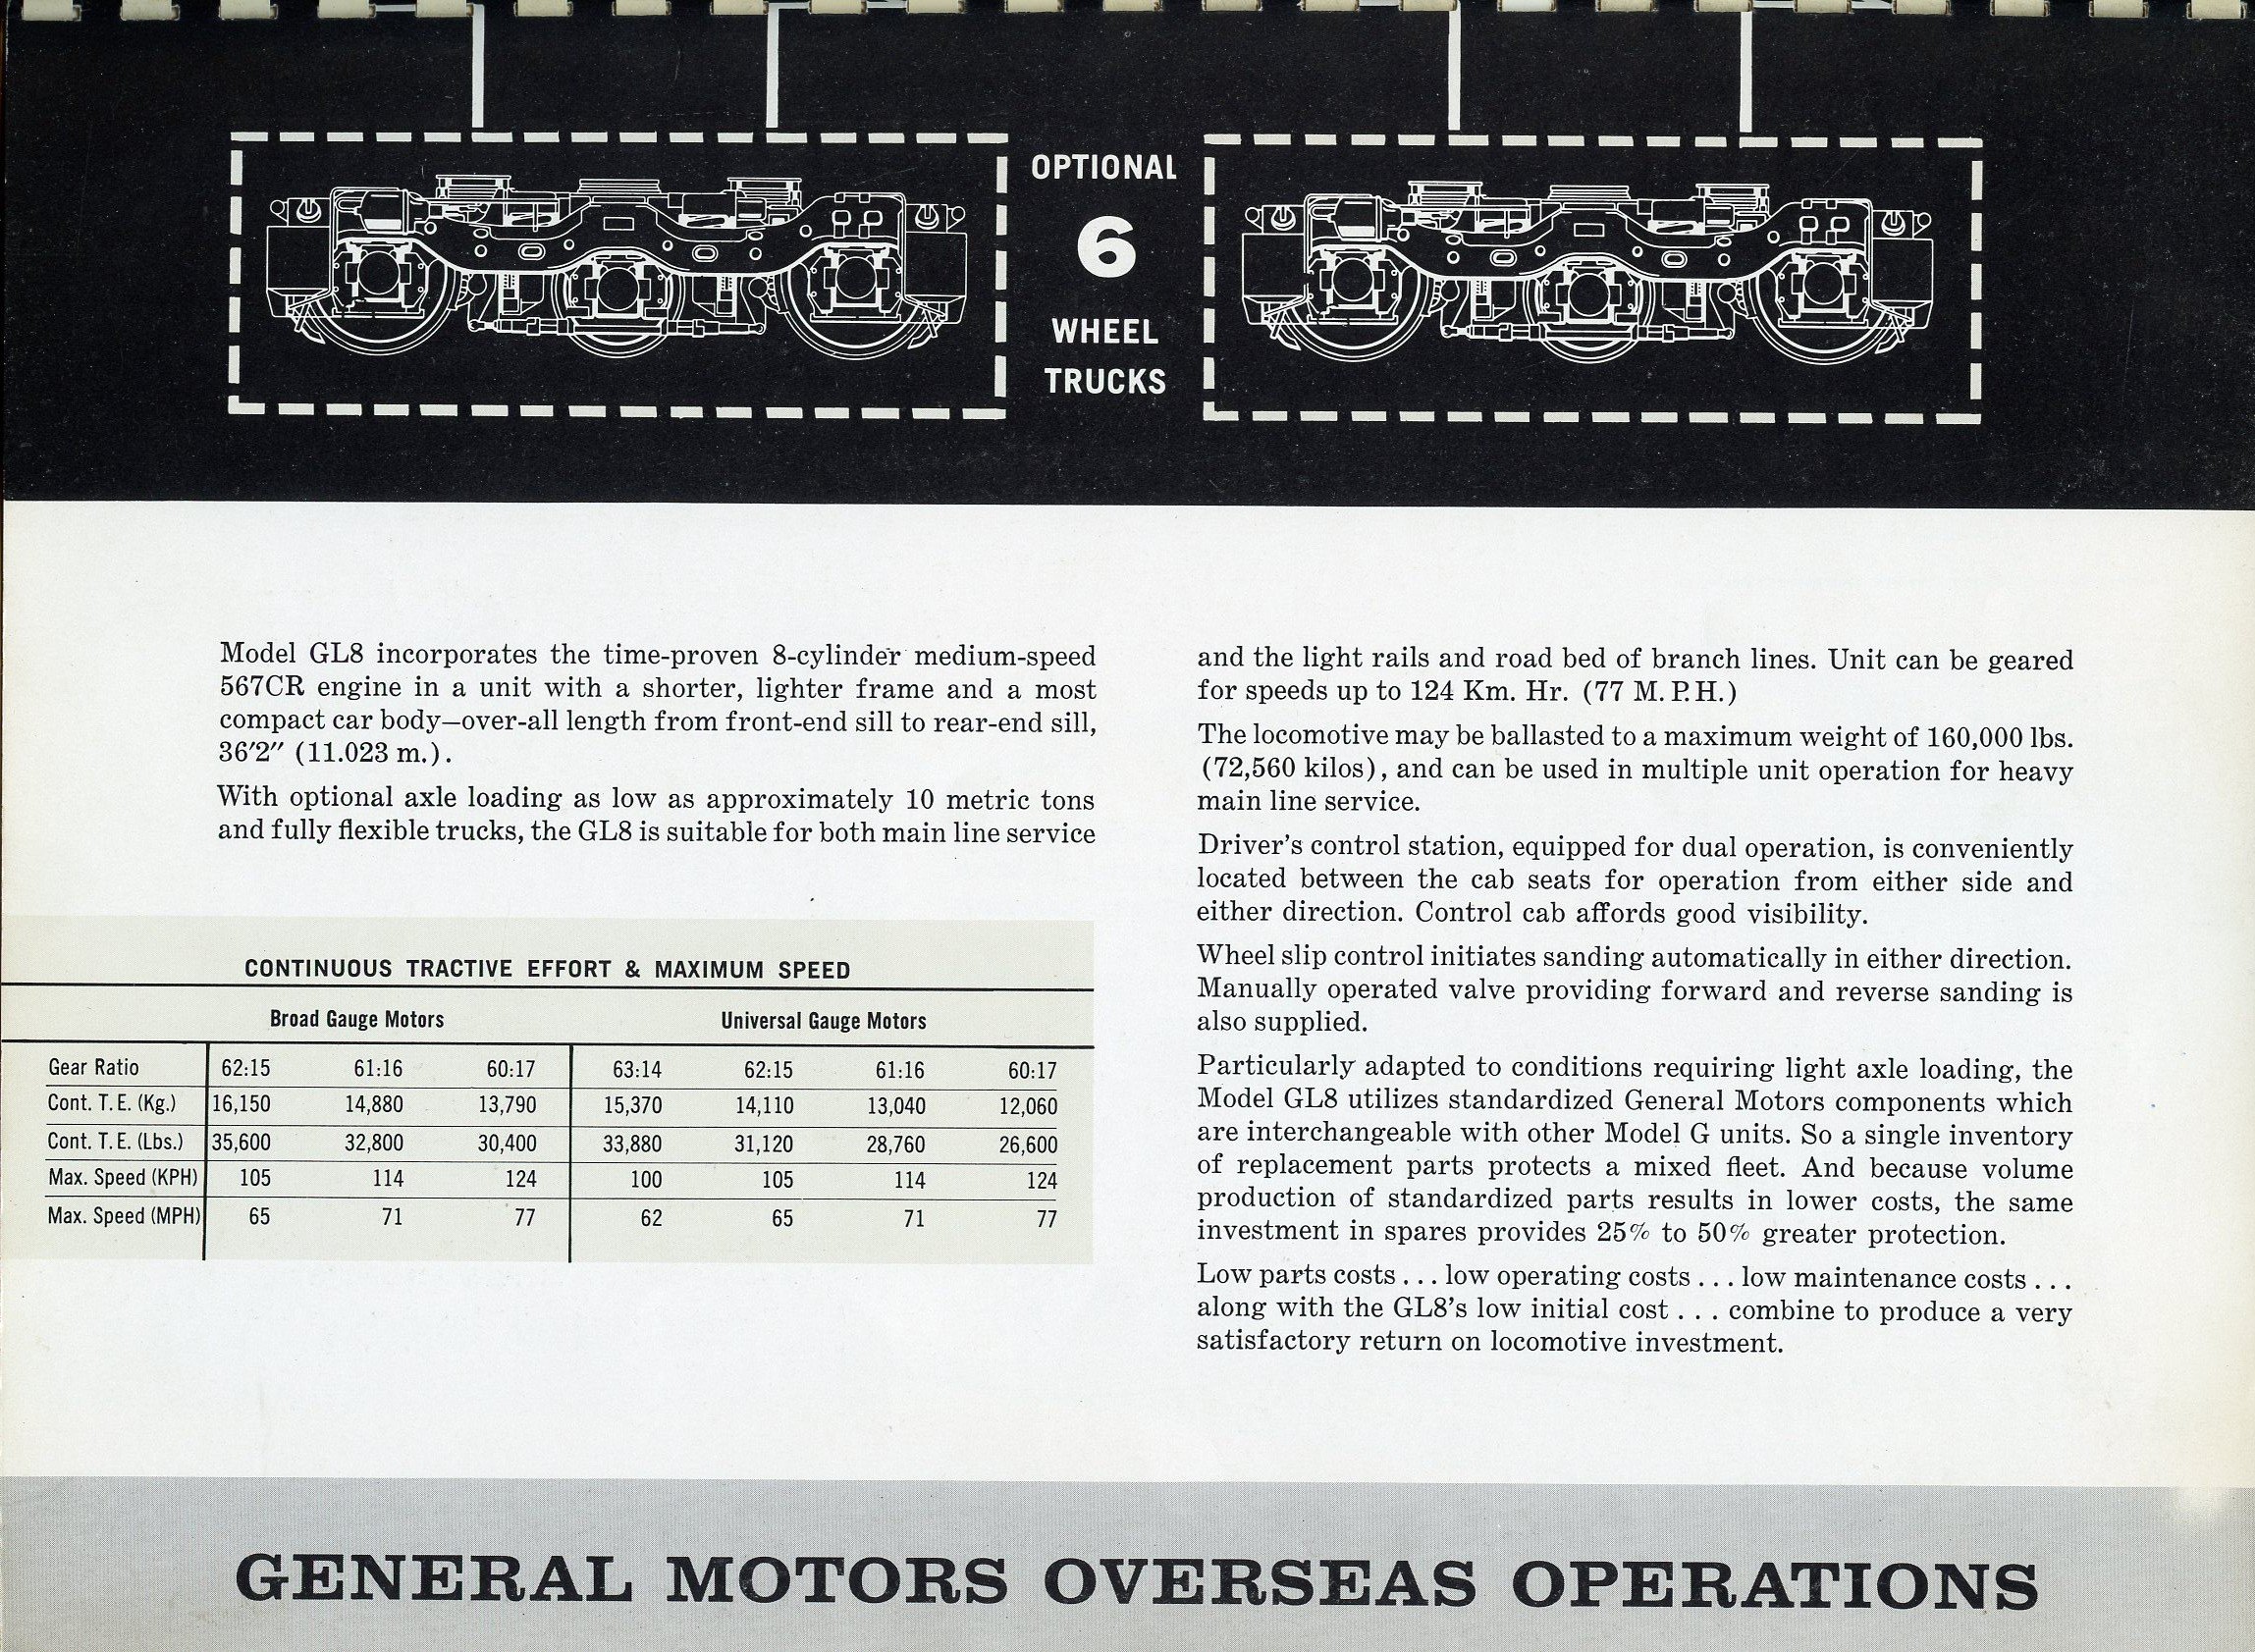
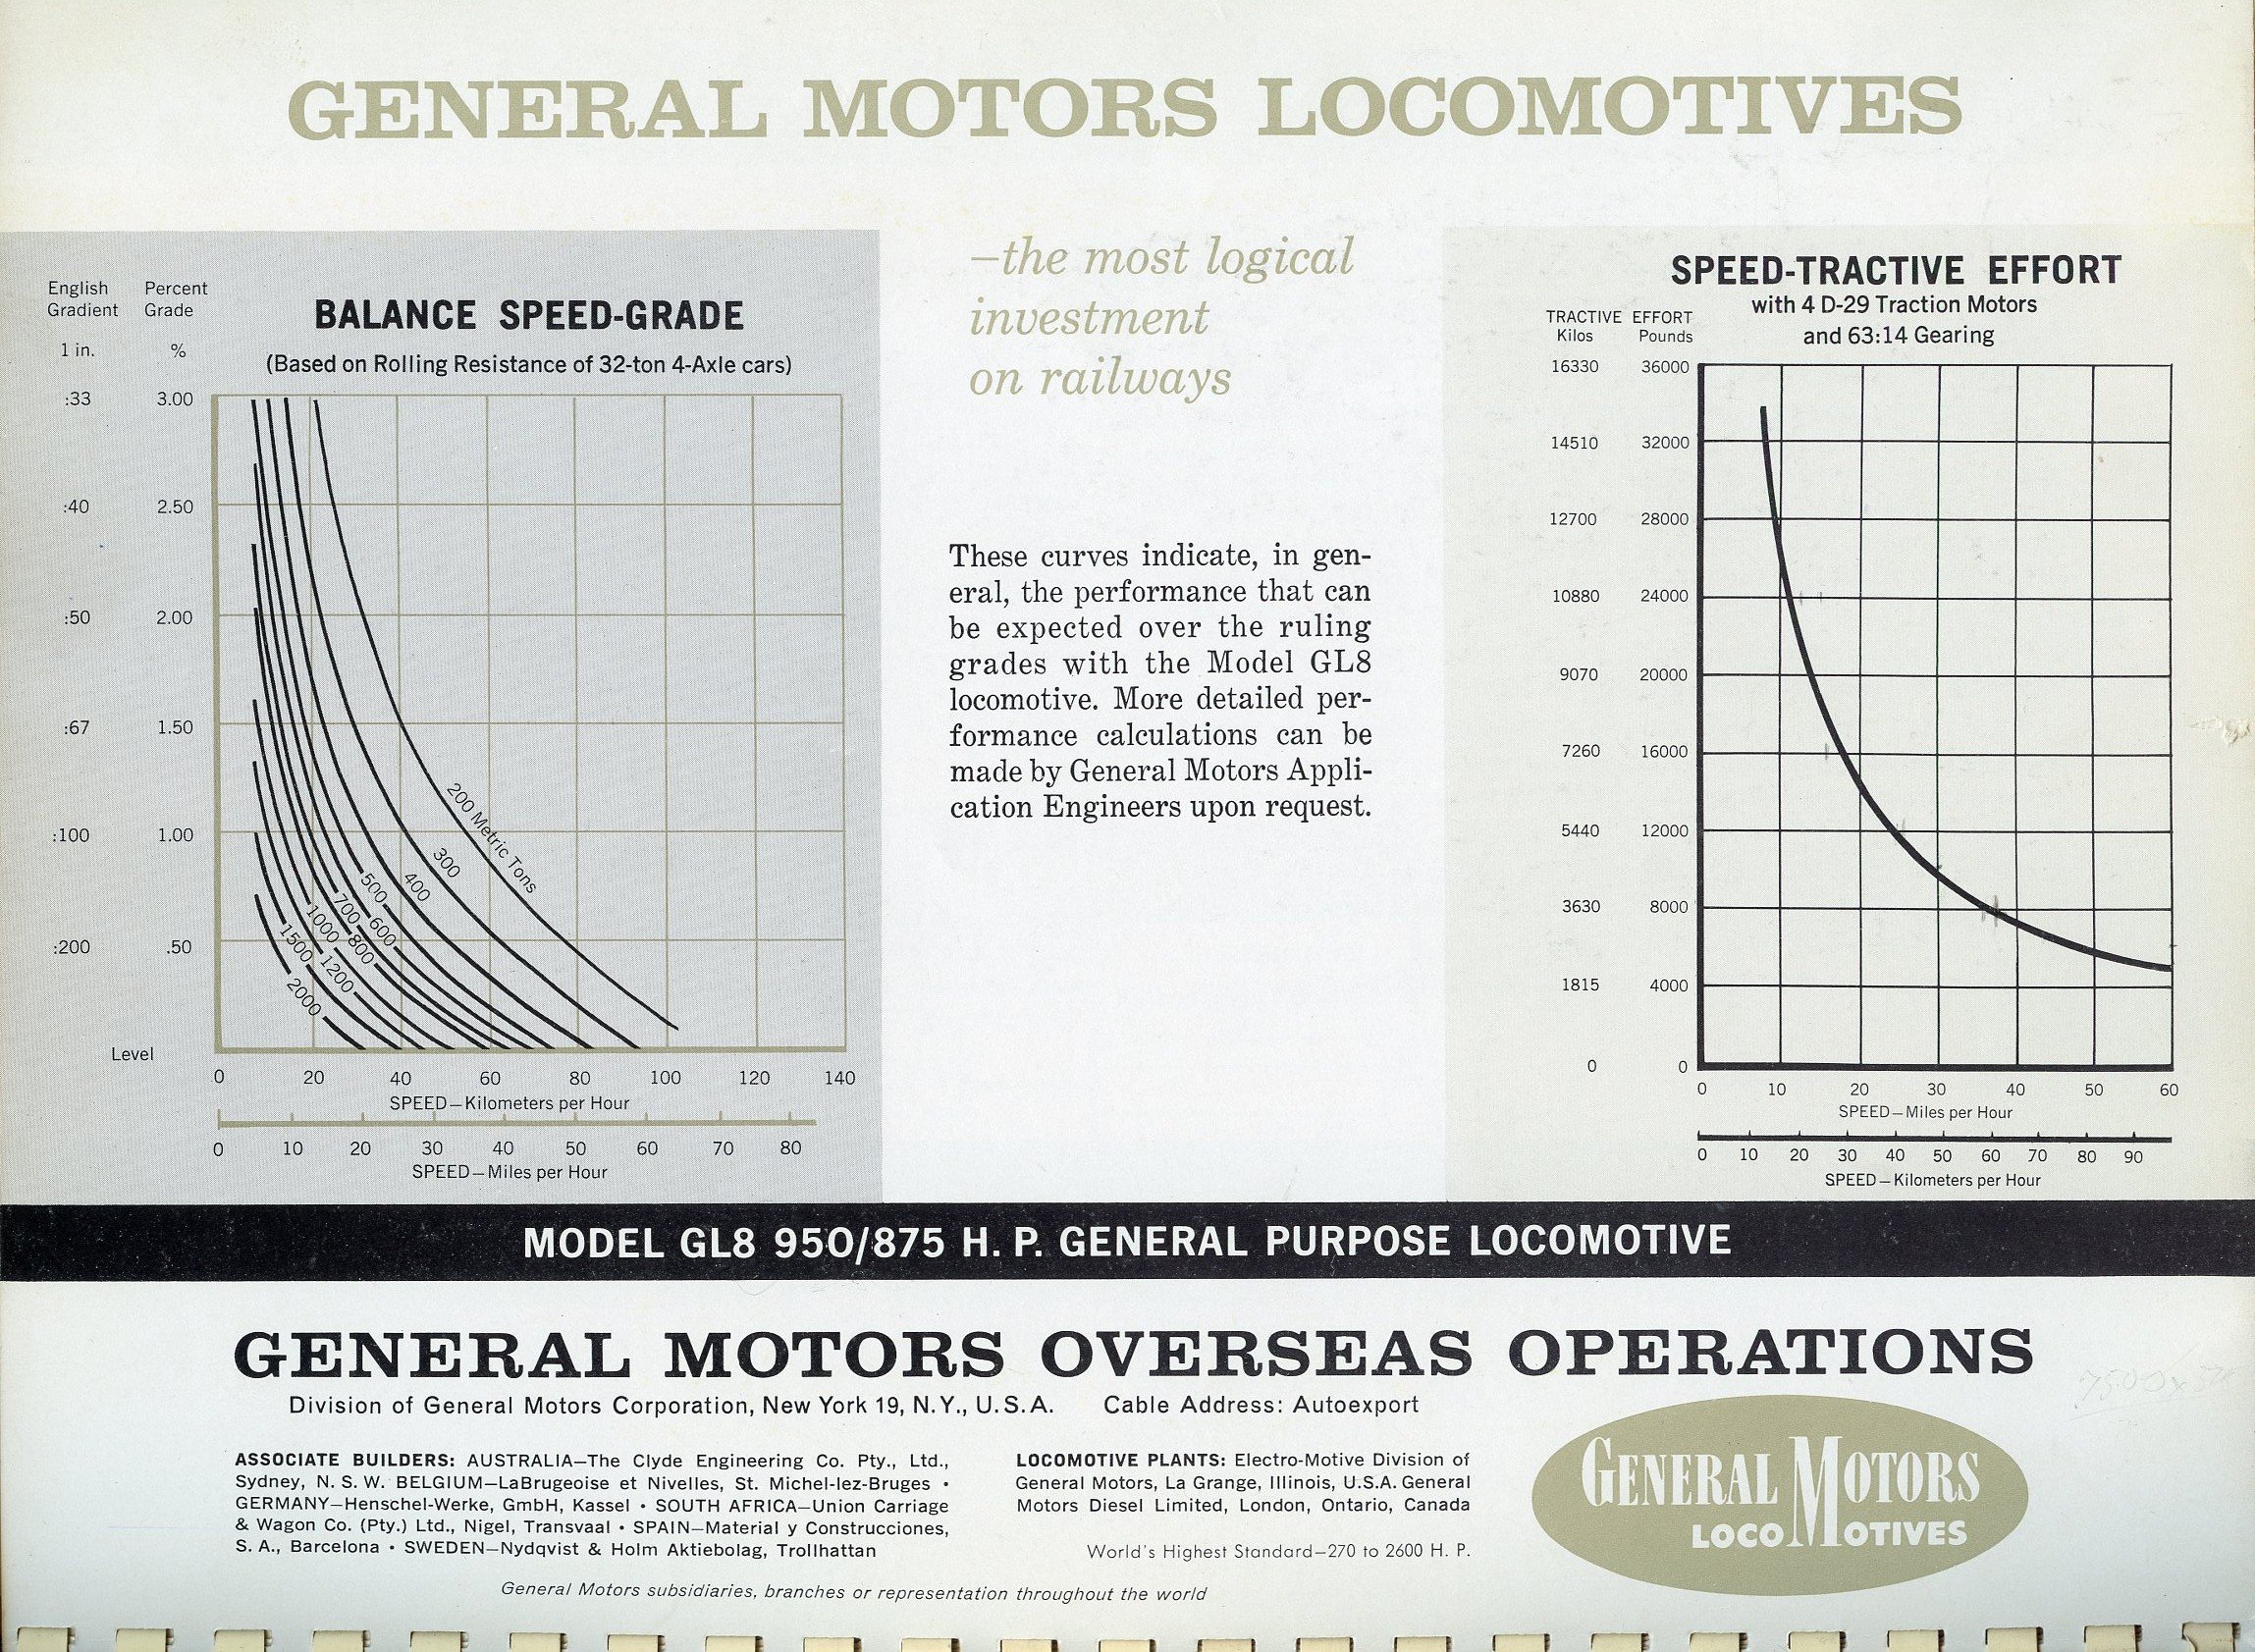
And to complete the set, here's the GL8 which was the basis of the 121 class:
-
EMD GM6 locos - an Irish what-if?
Mol_PMB replied to Mol_PMB's topic in Continental European Modelling
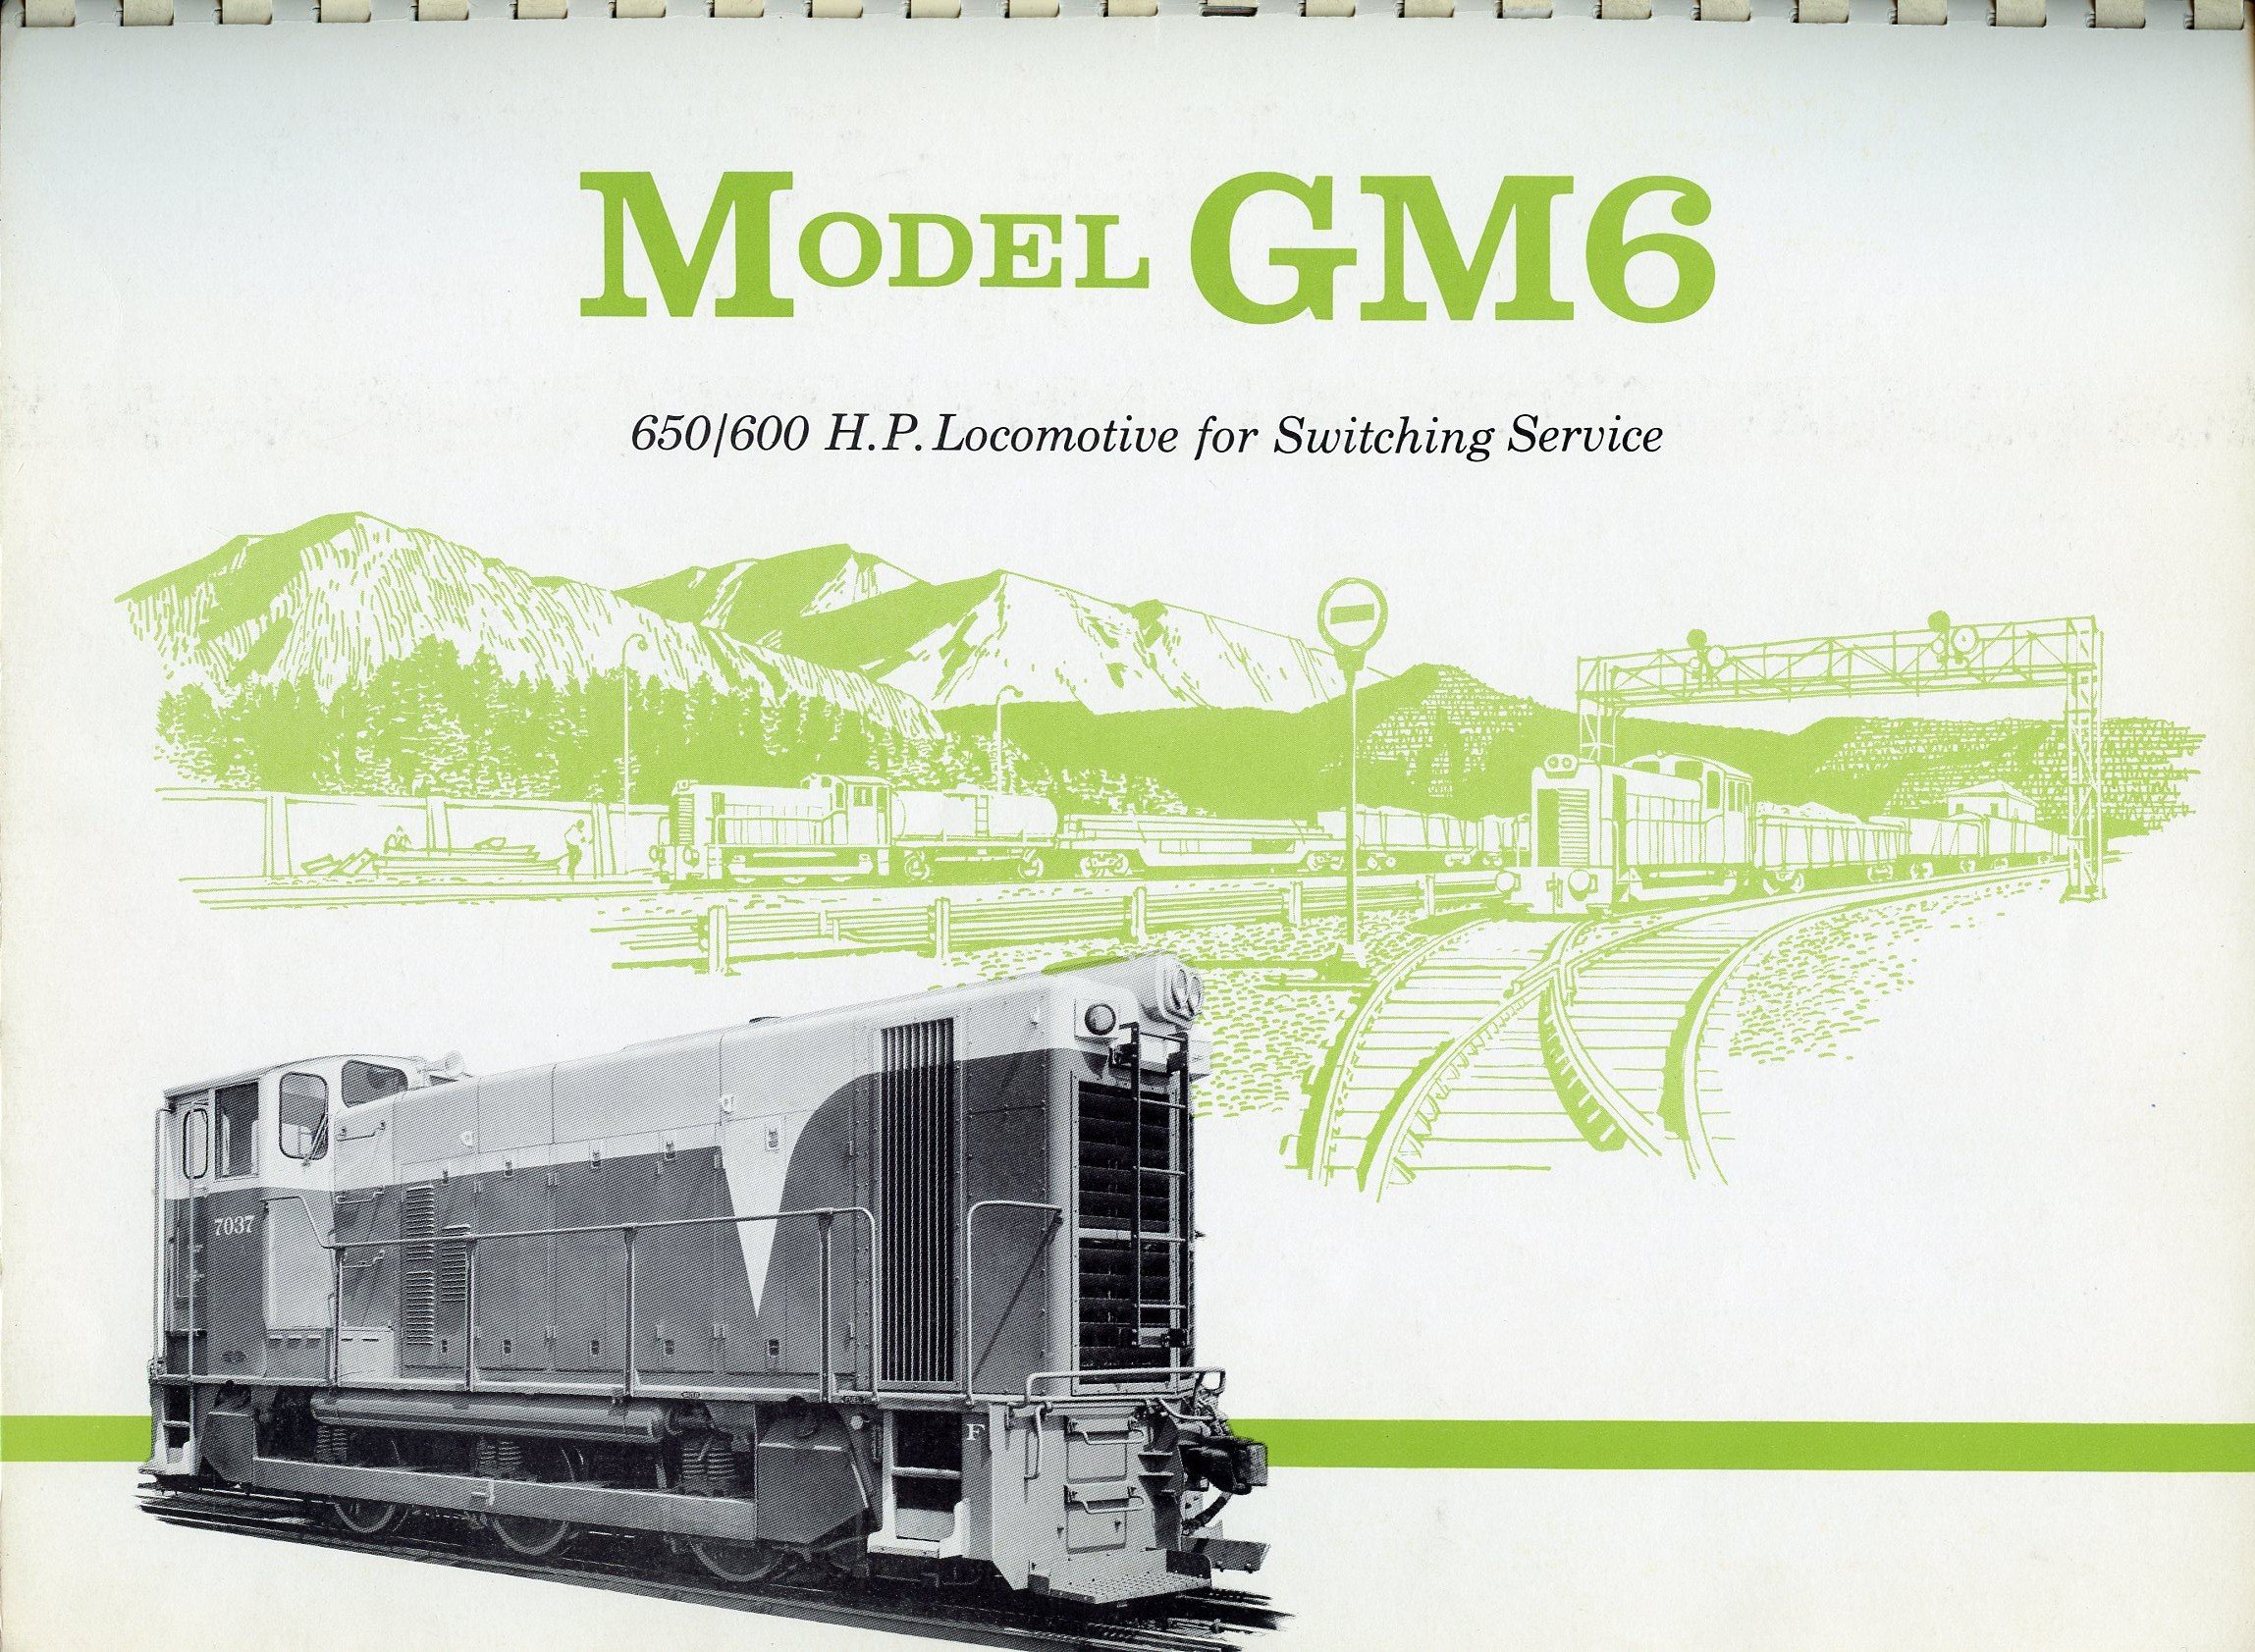
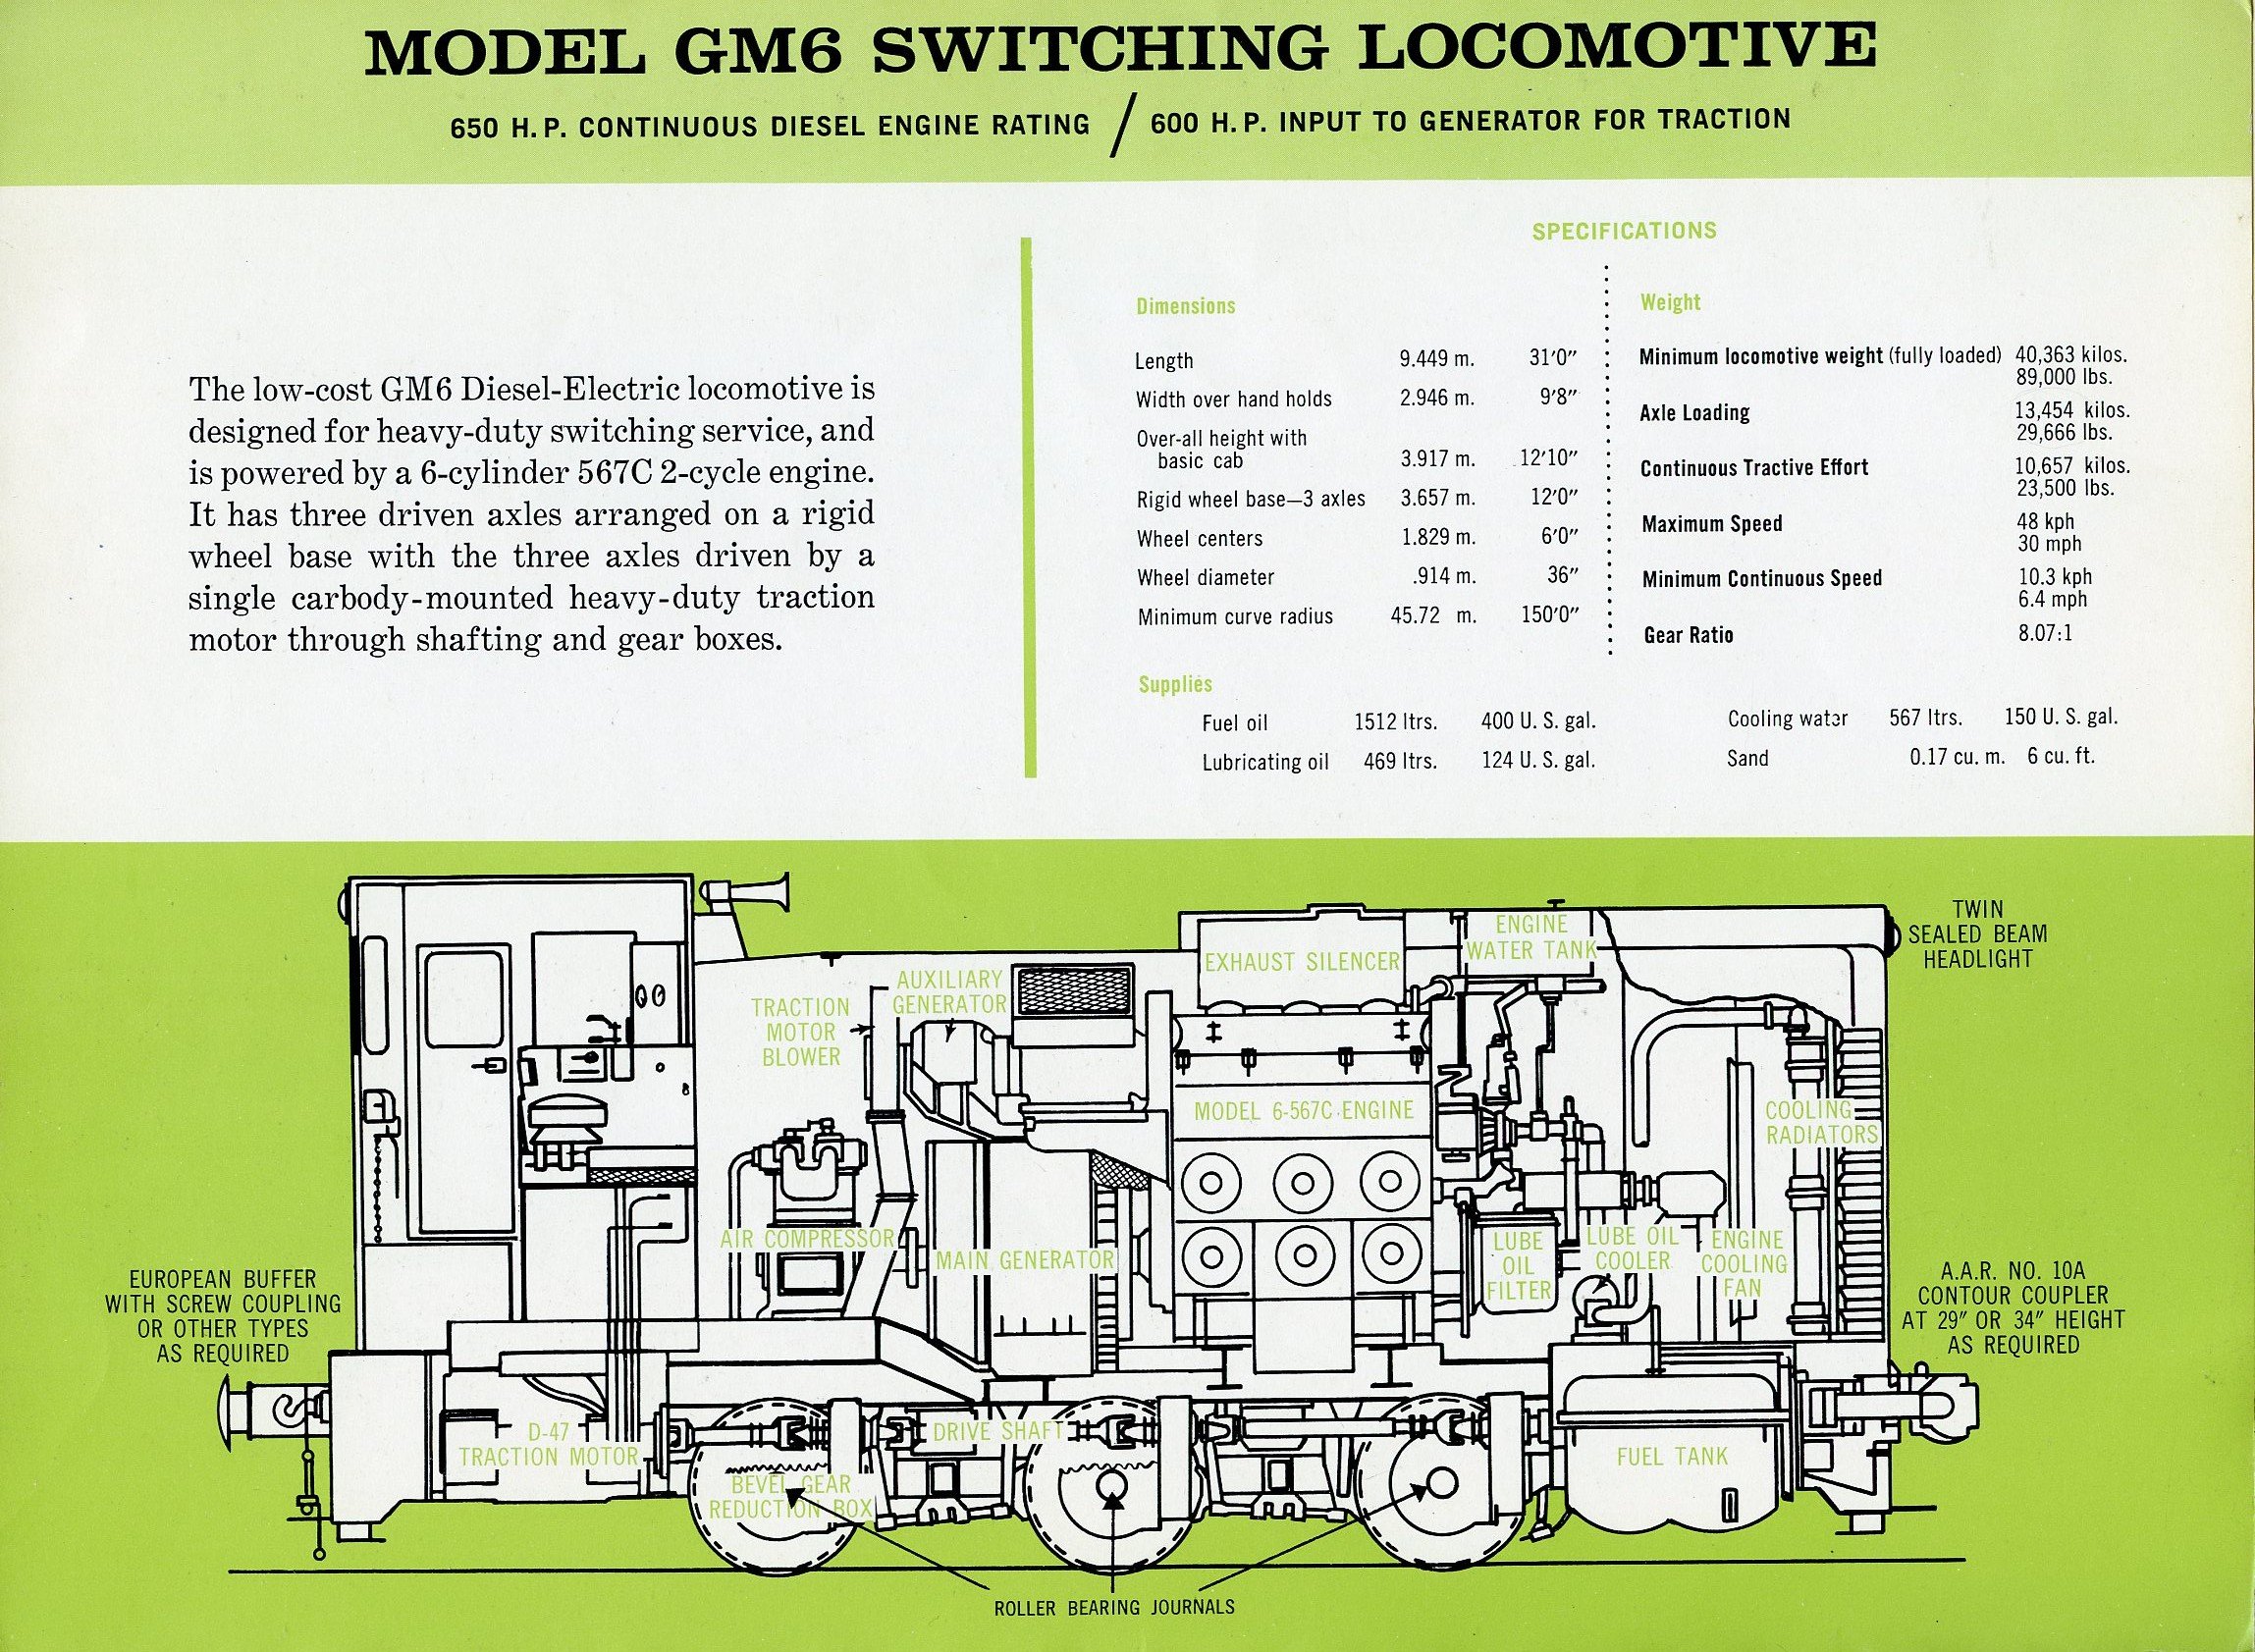
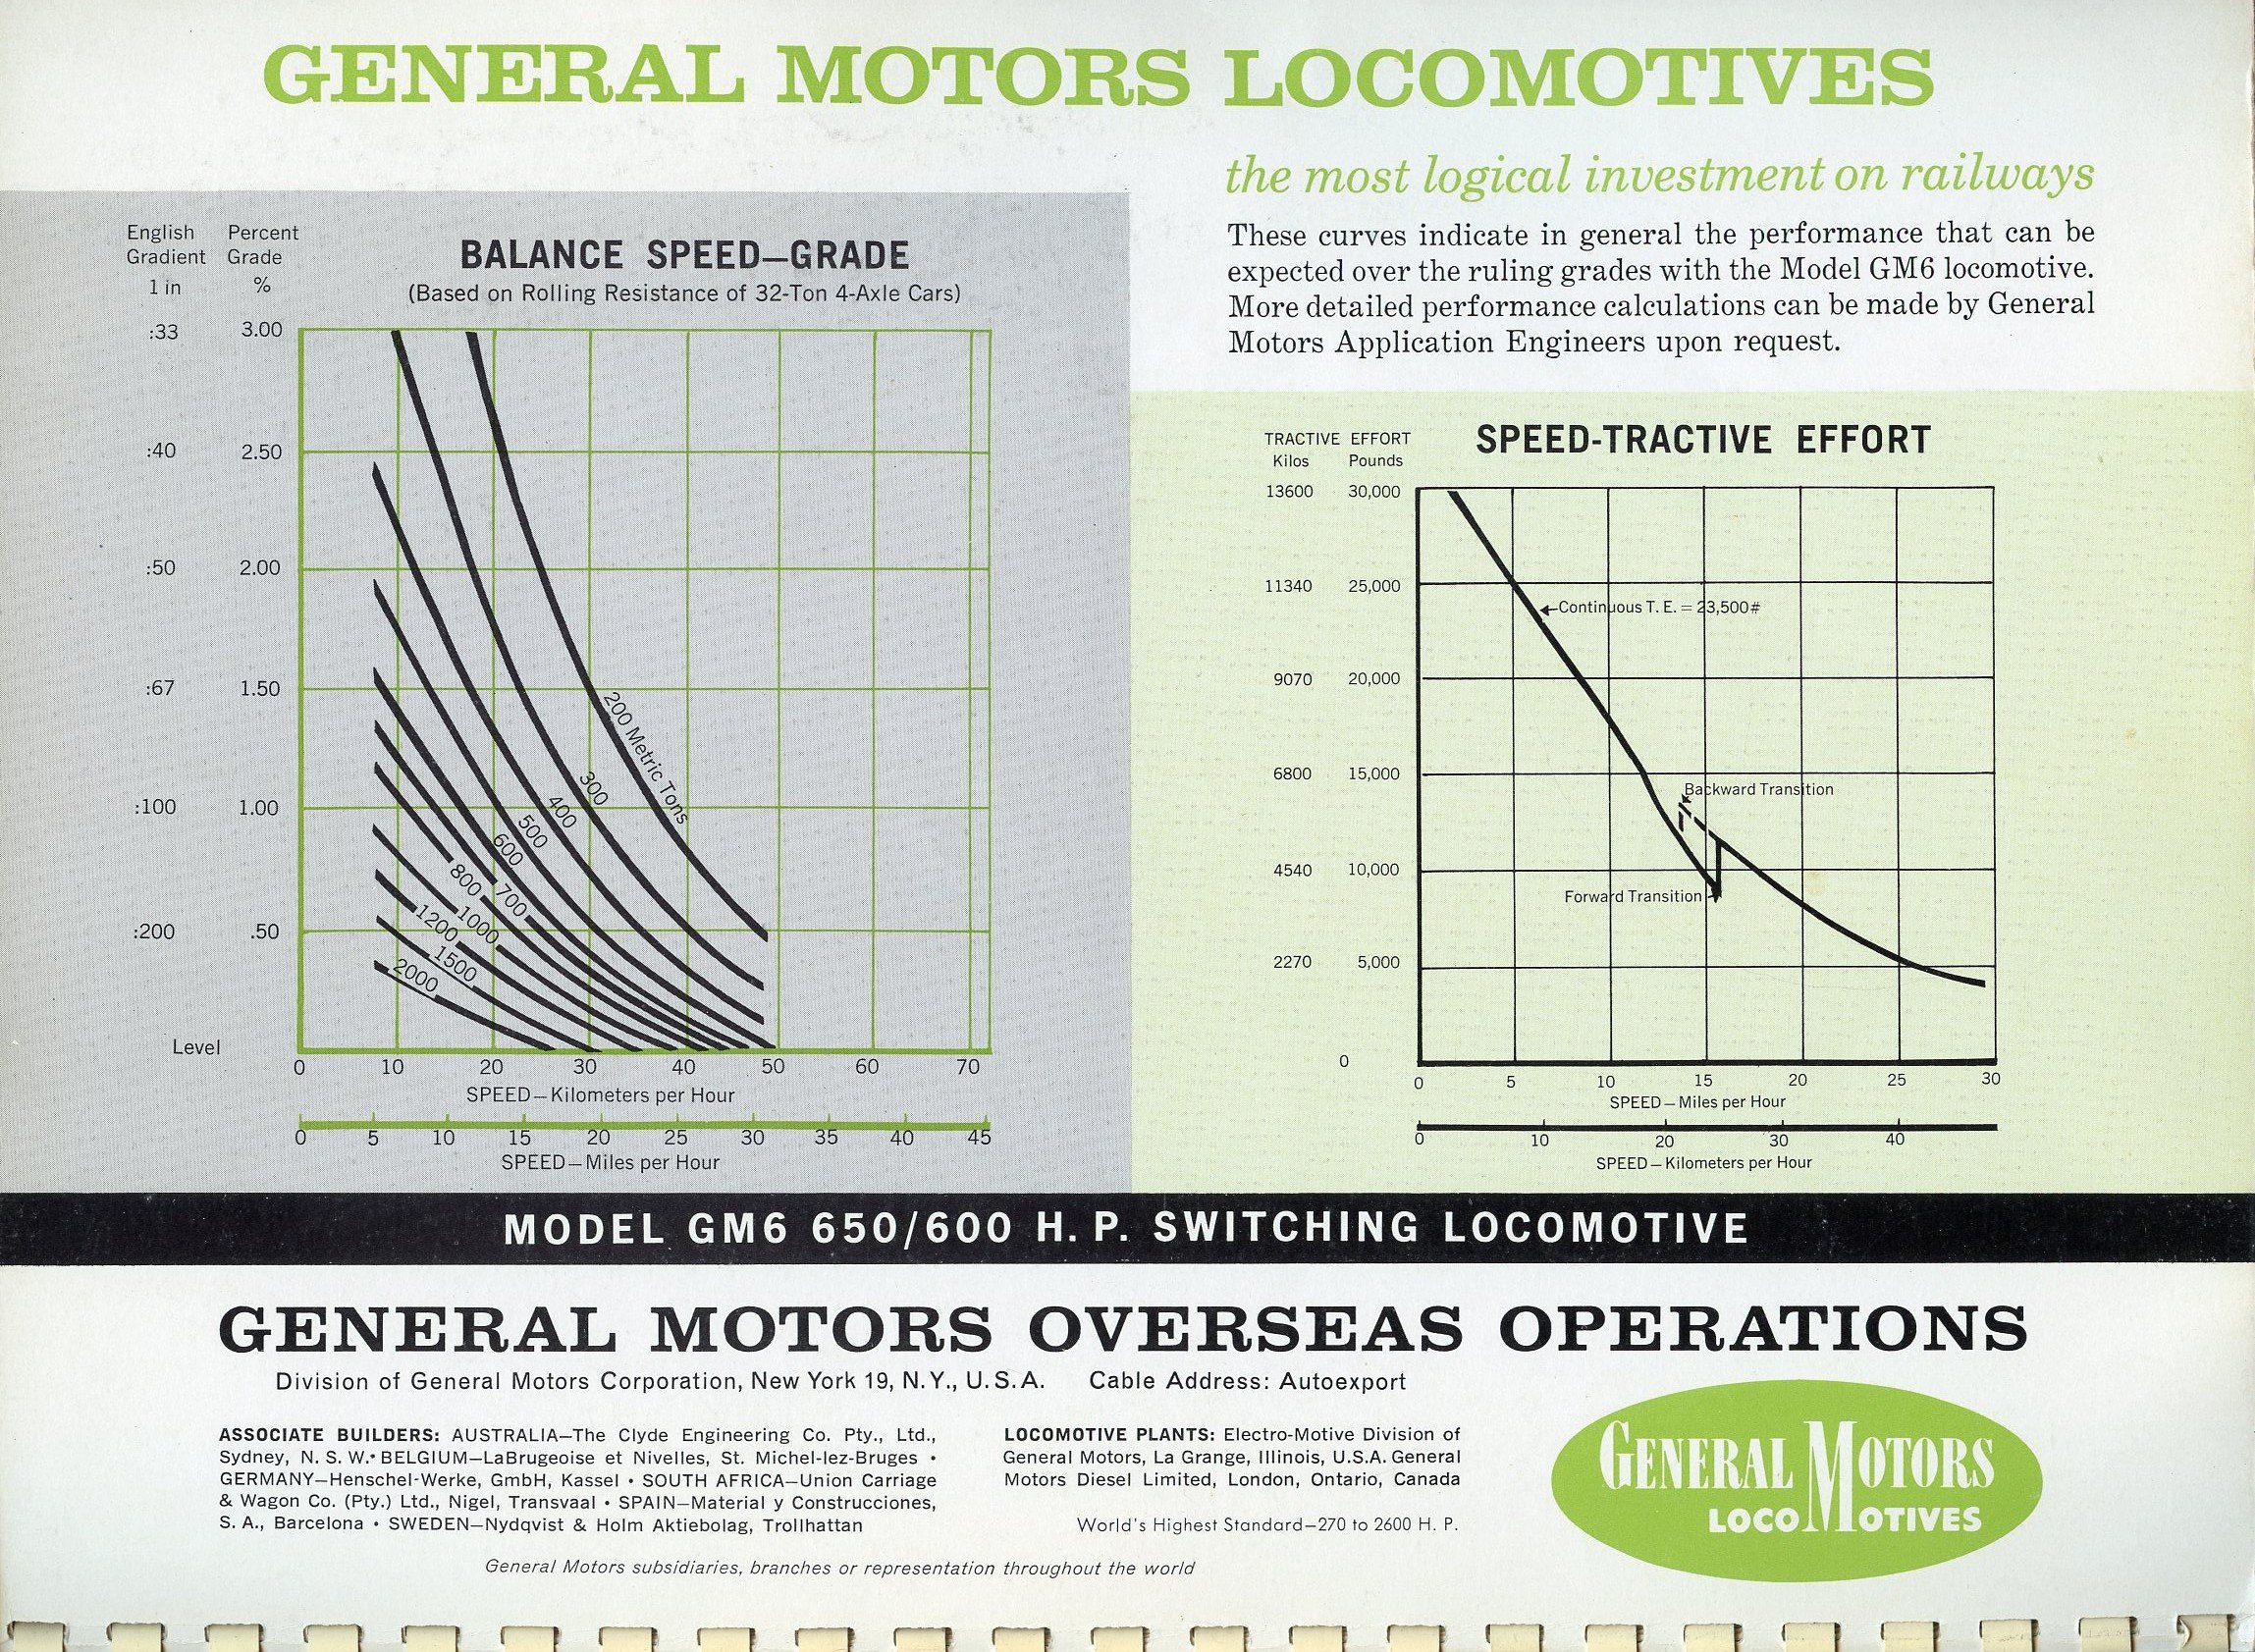
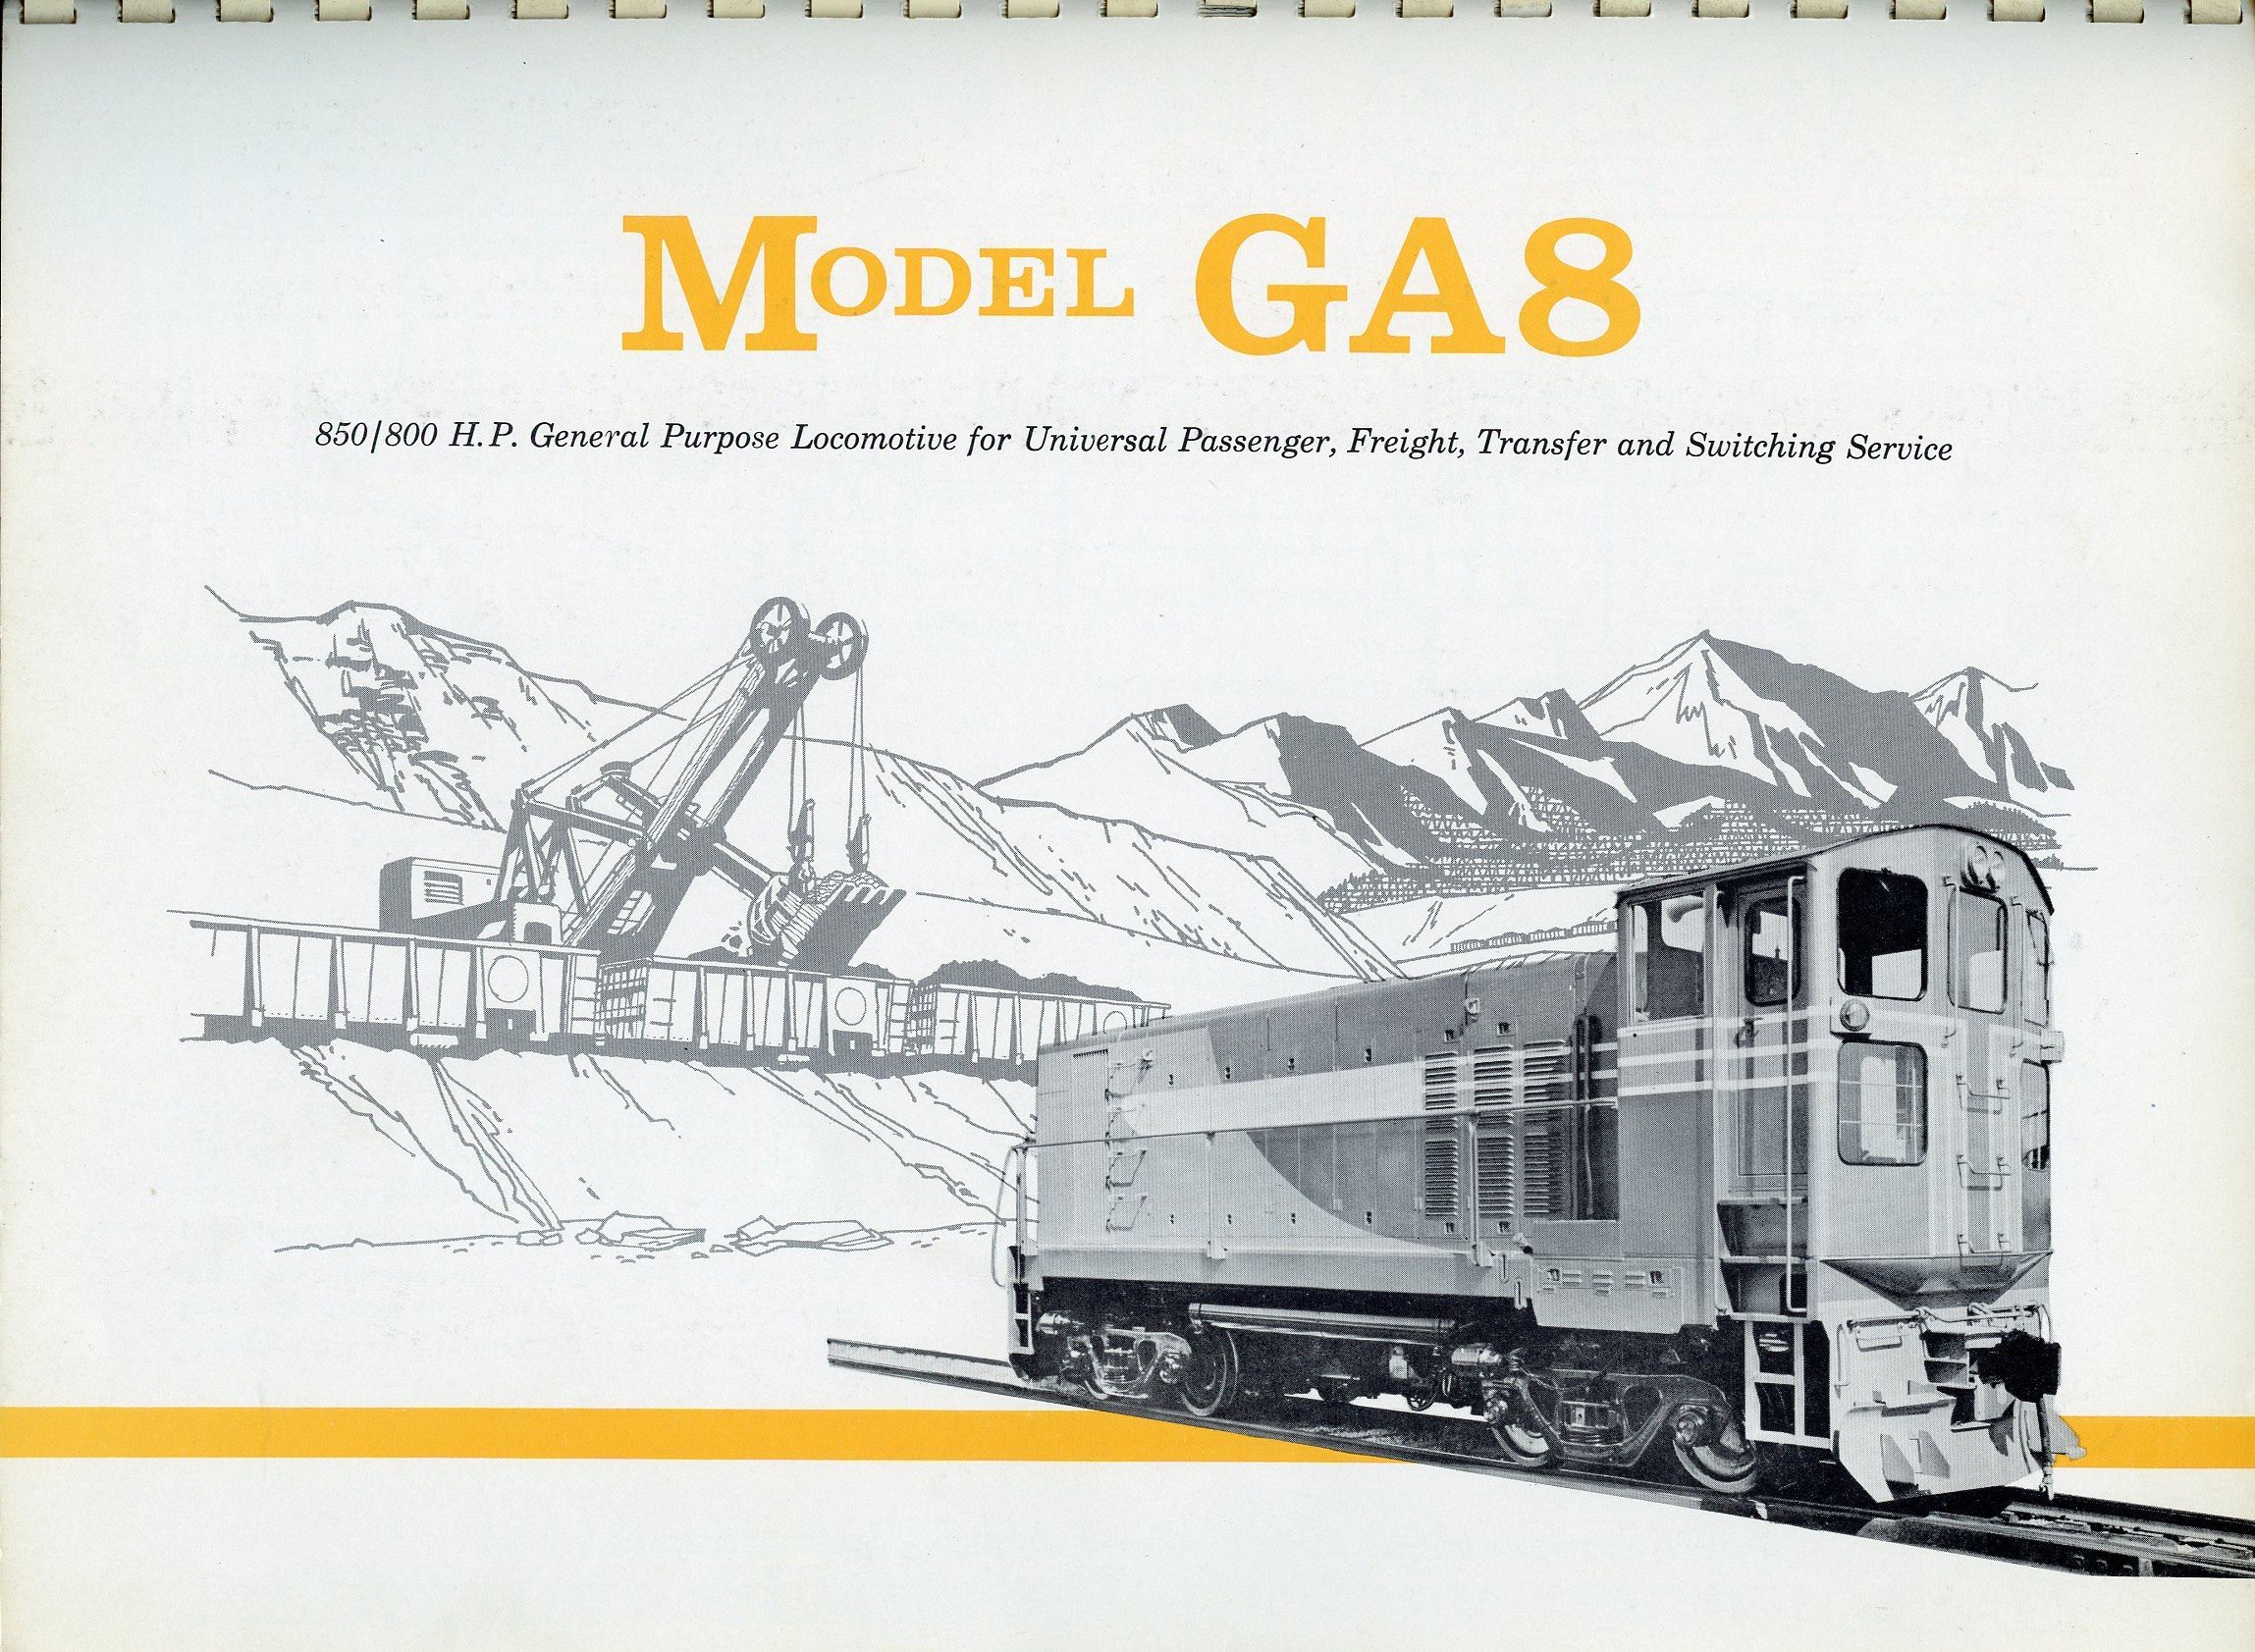
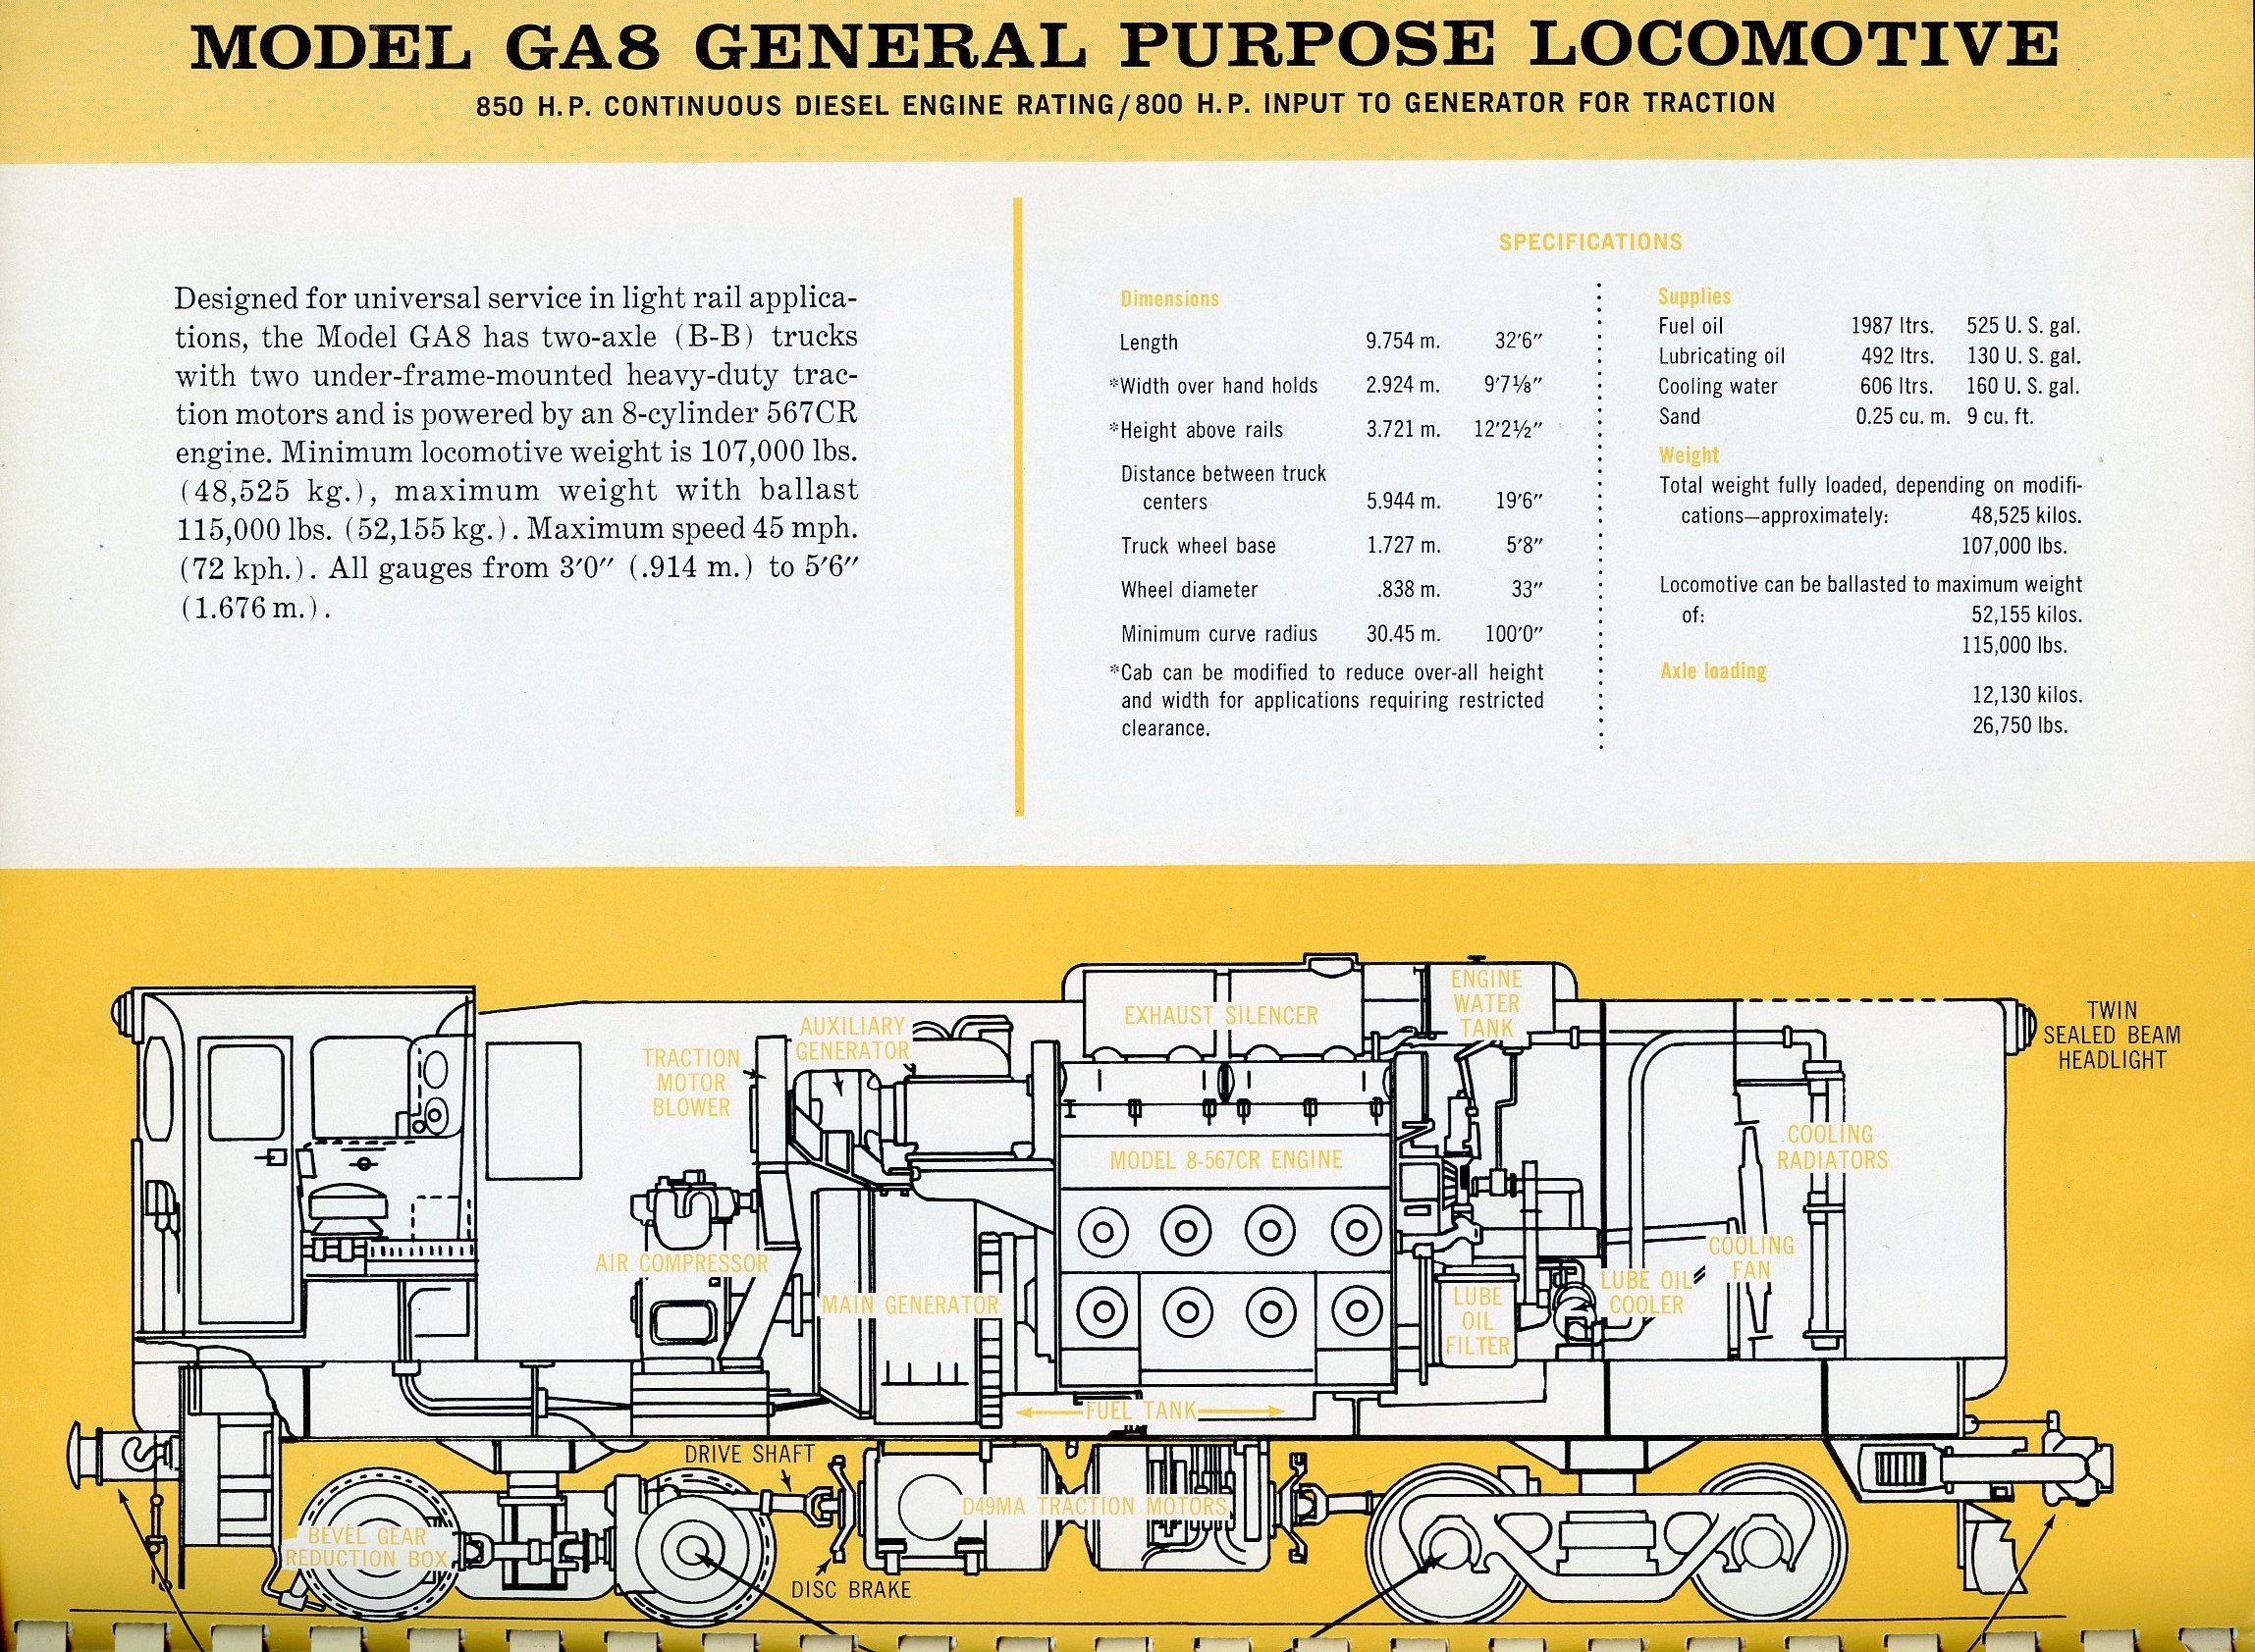
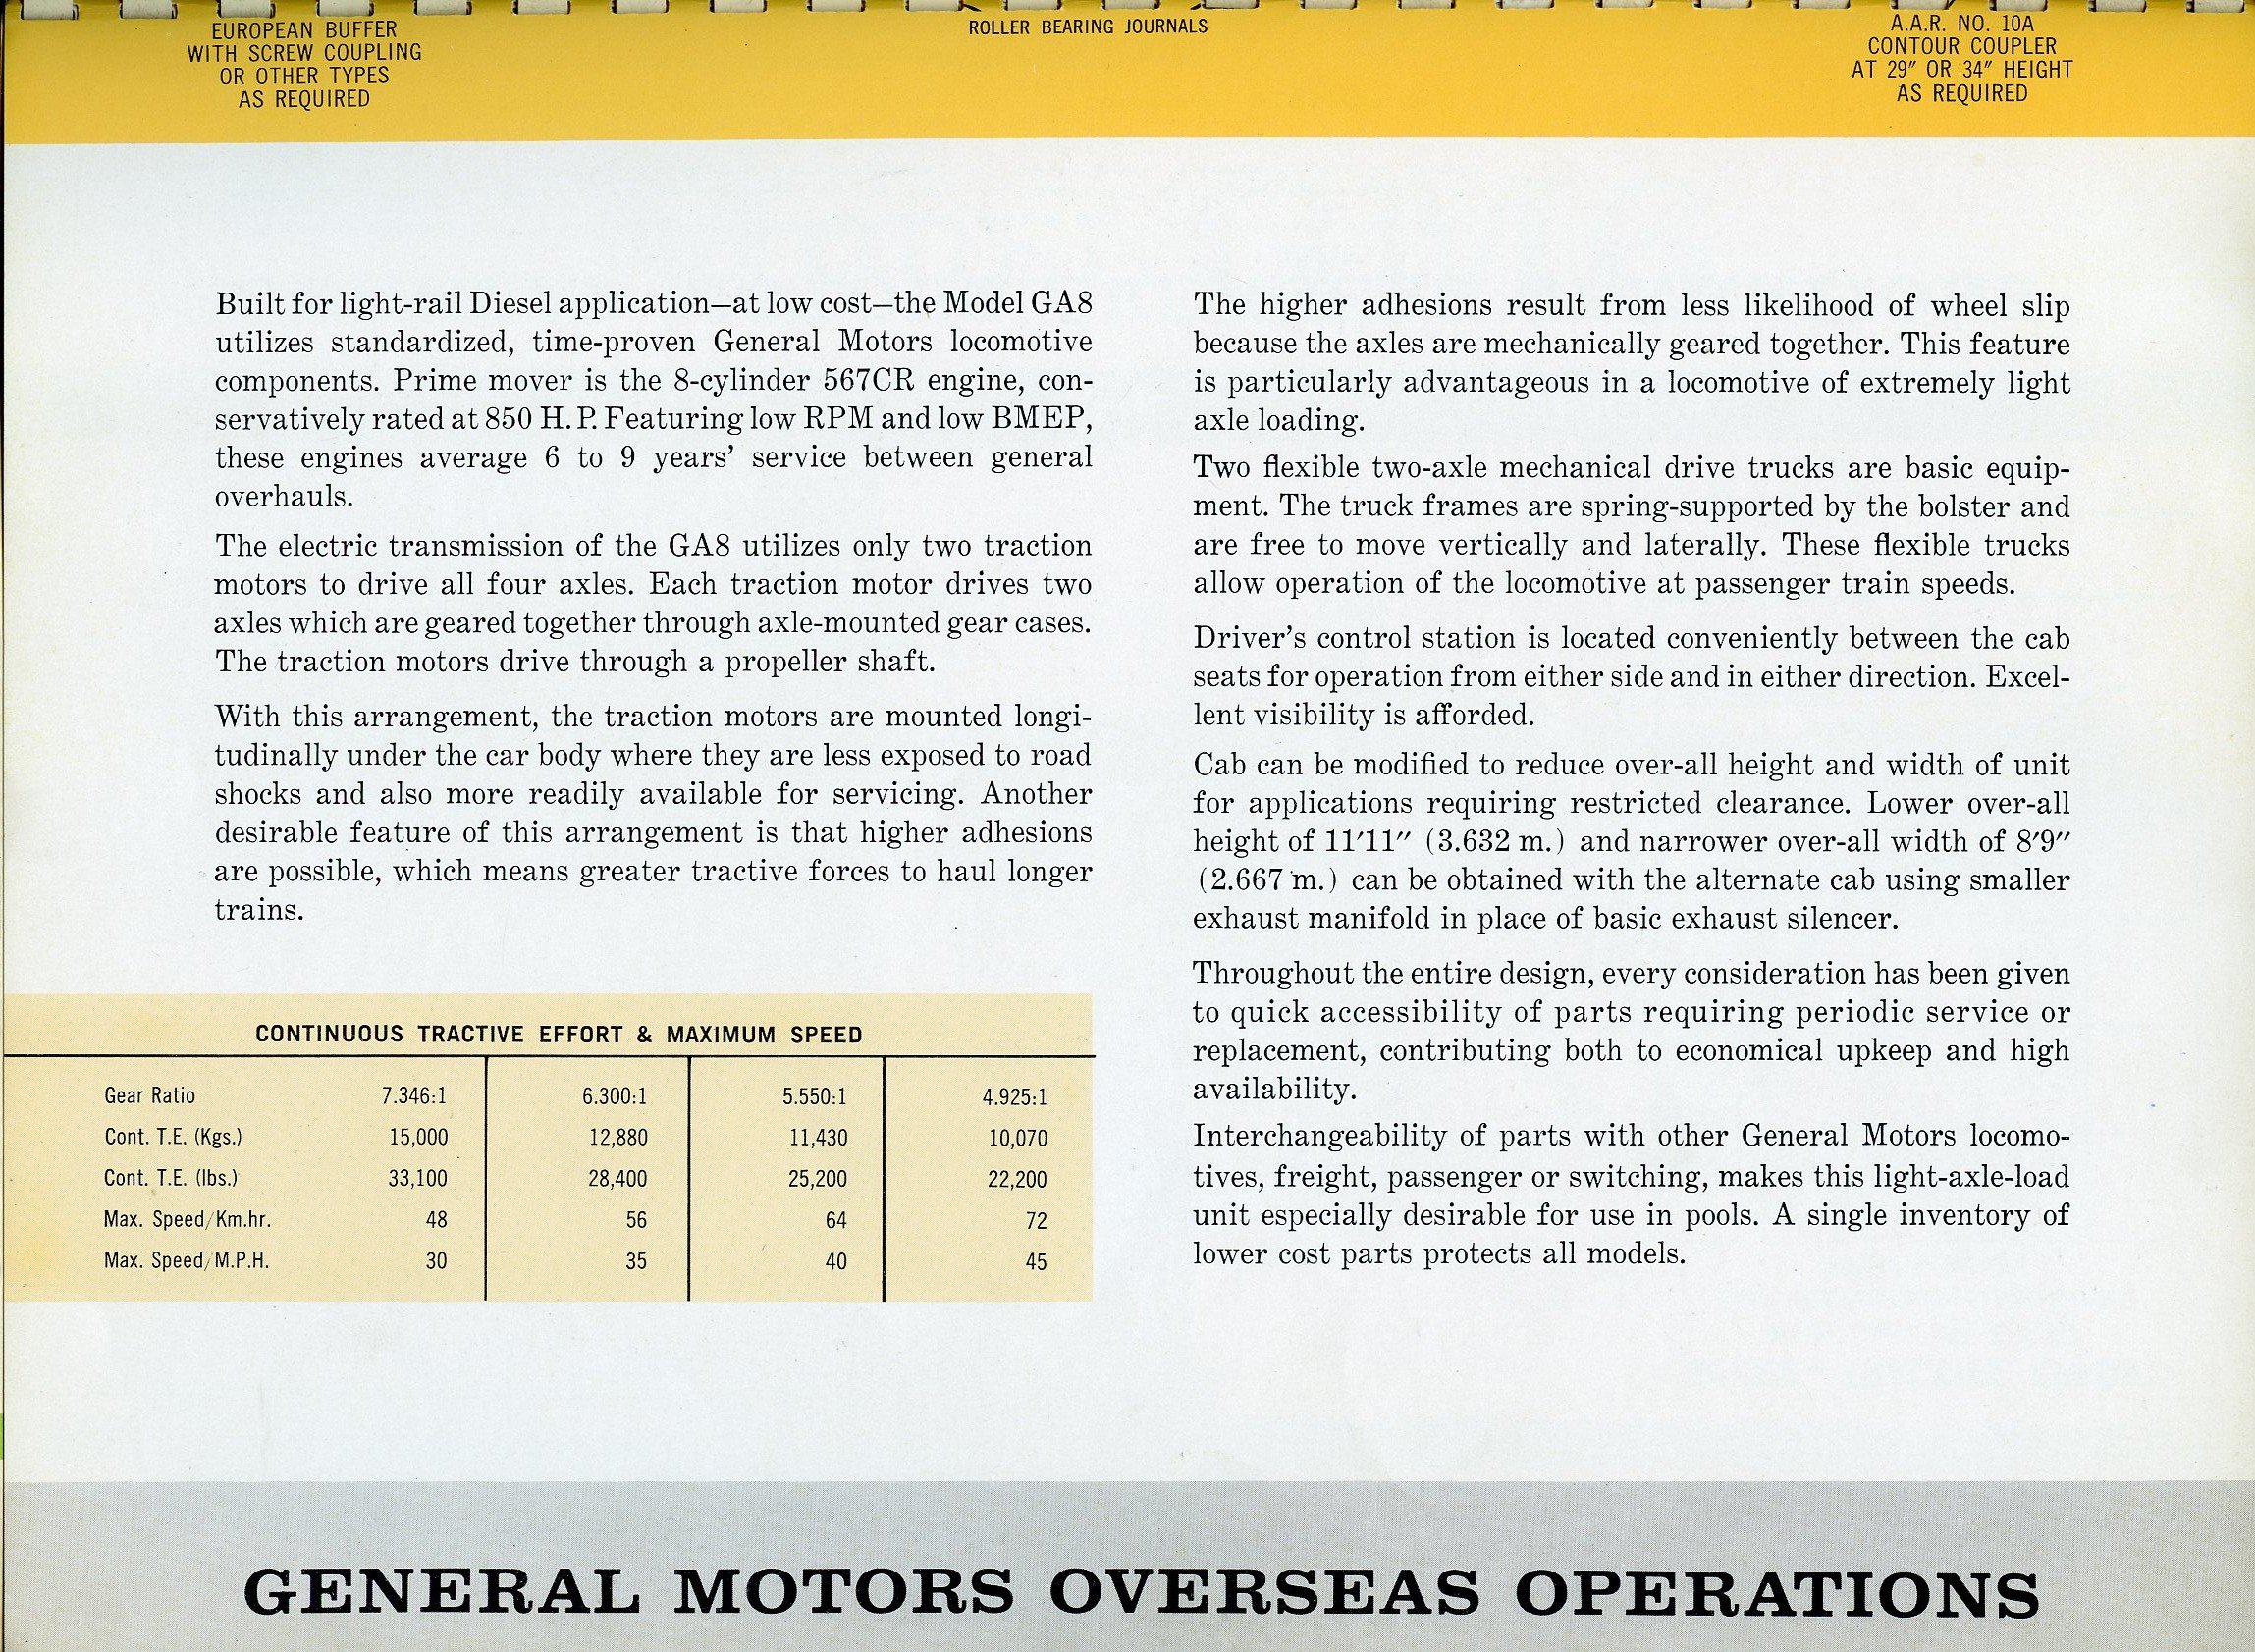
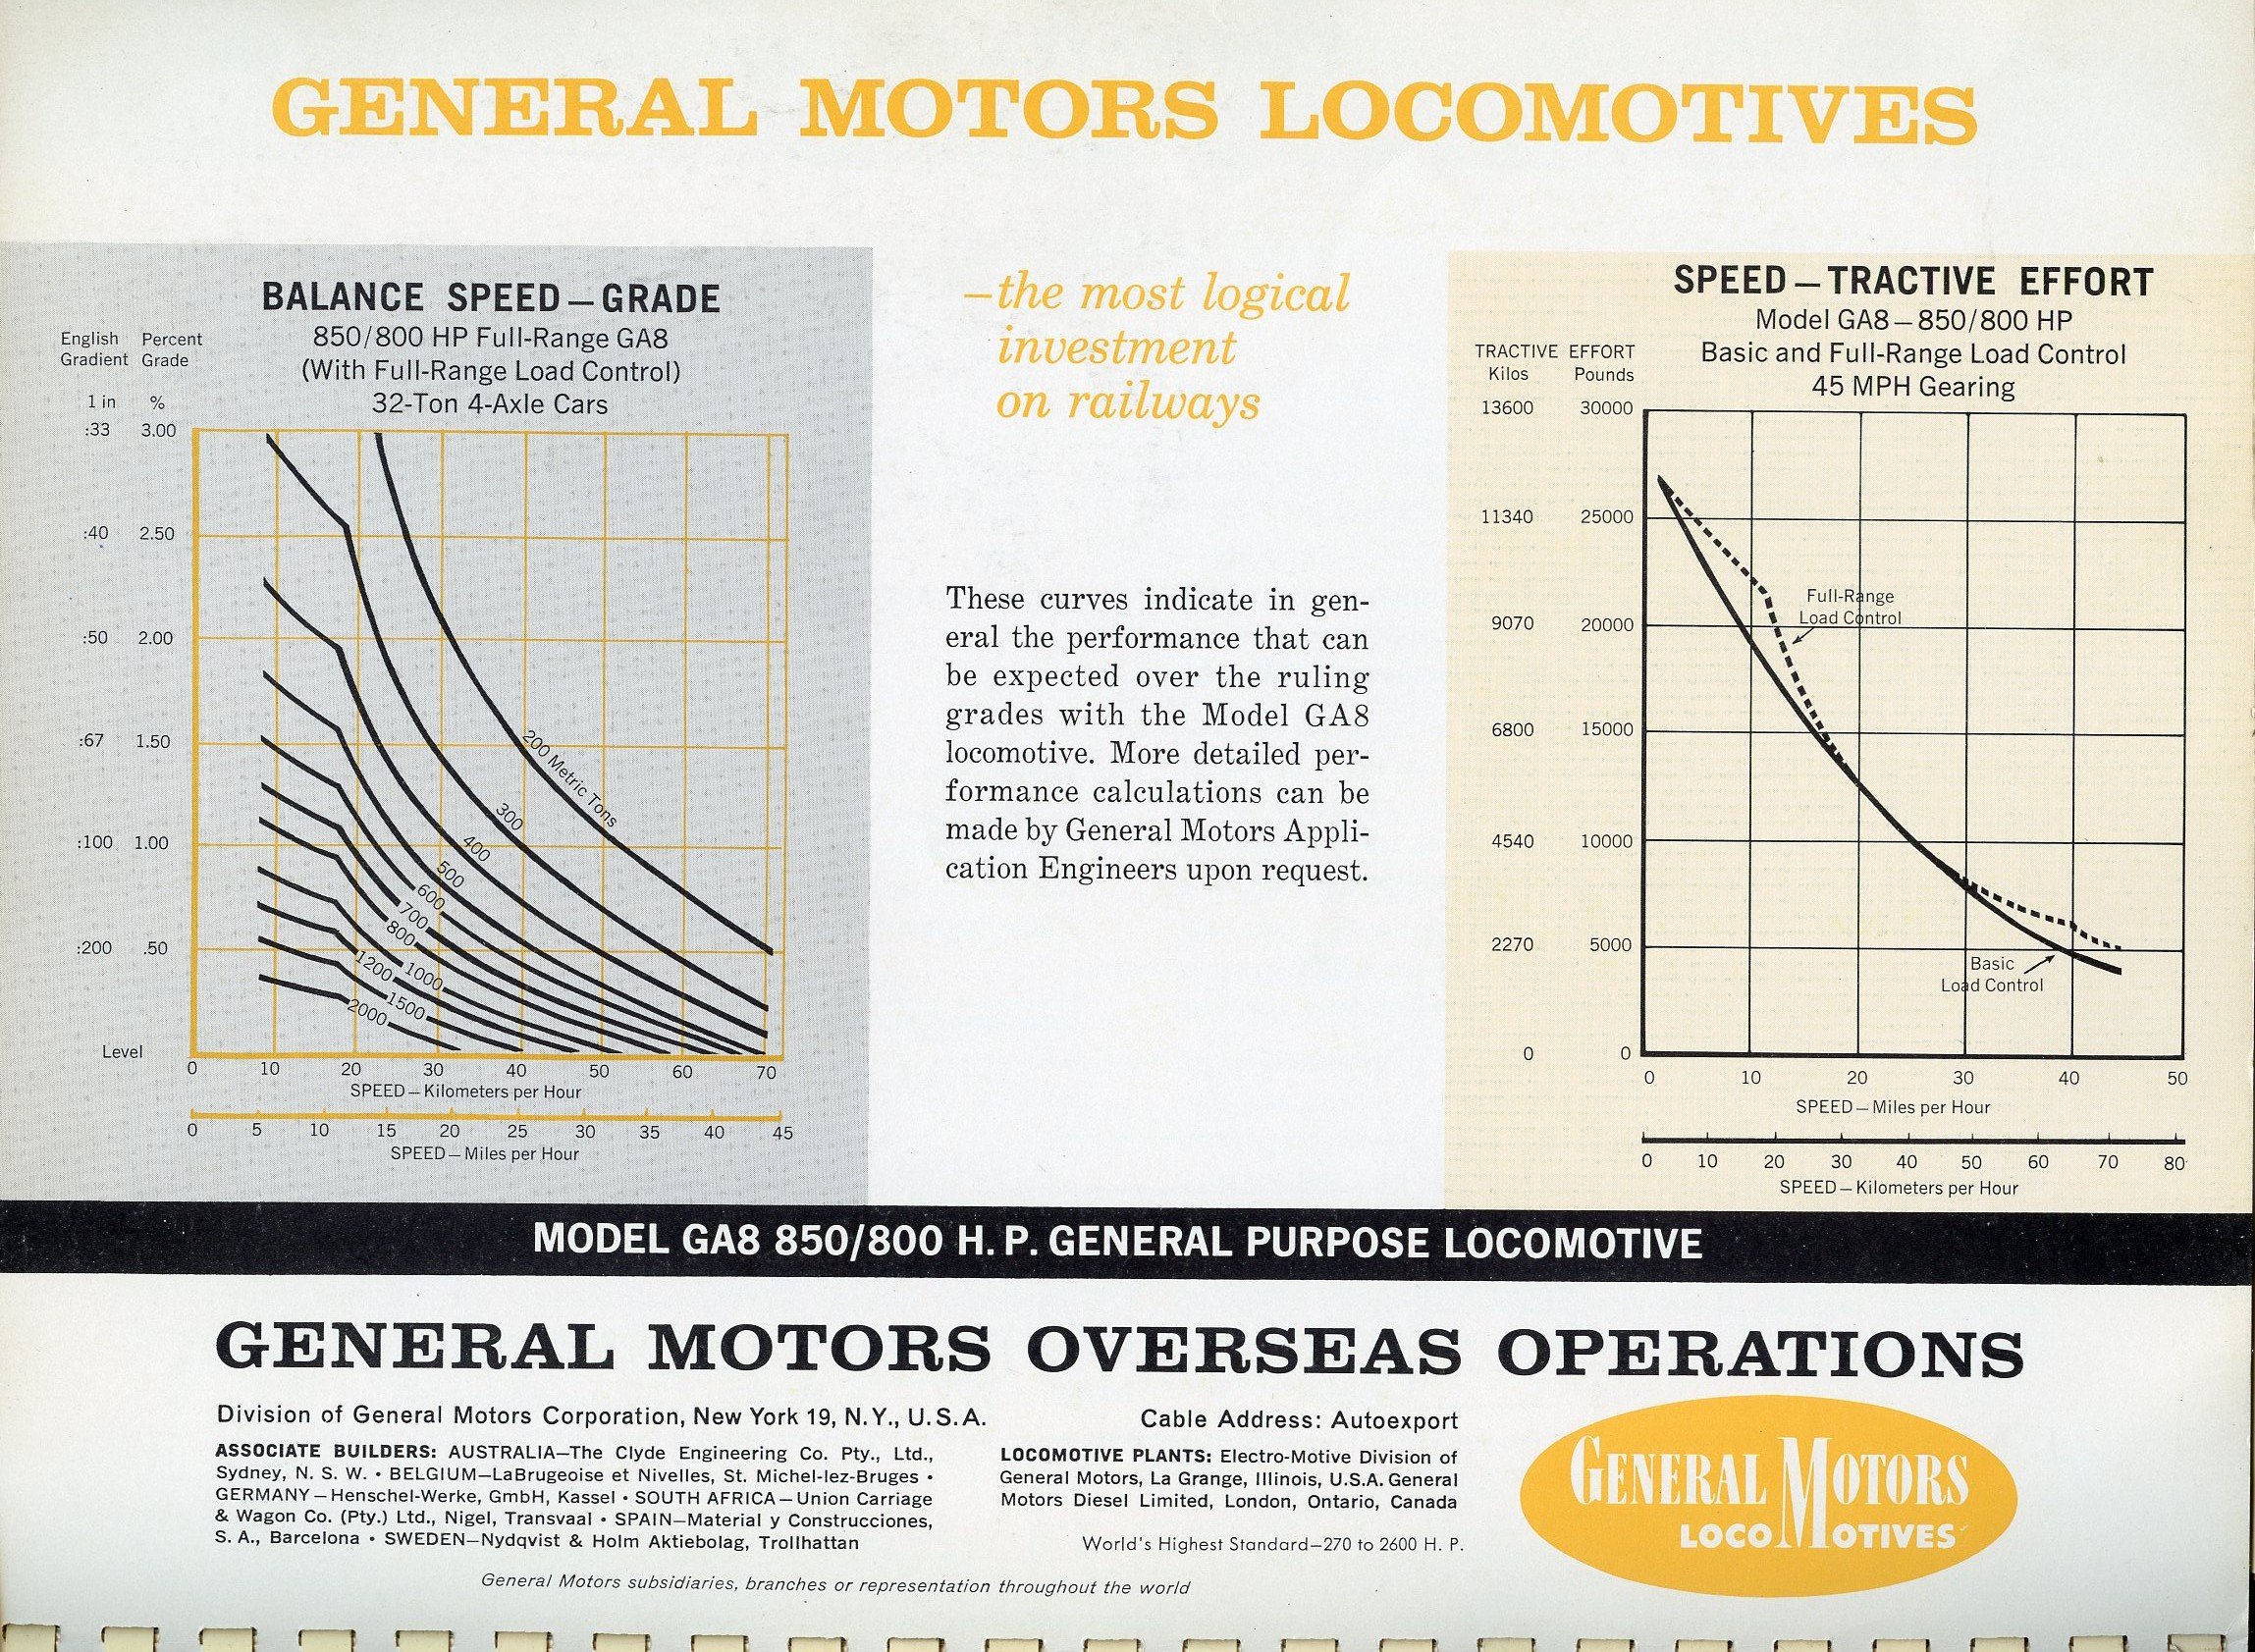
Proper scans of the catalogue pages for the GM6: Here's the slightly larger B-B variant the GA8:
-
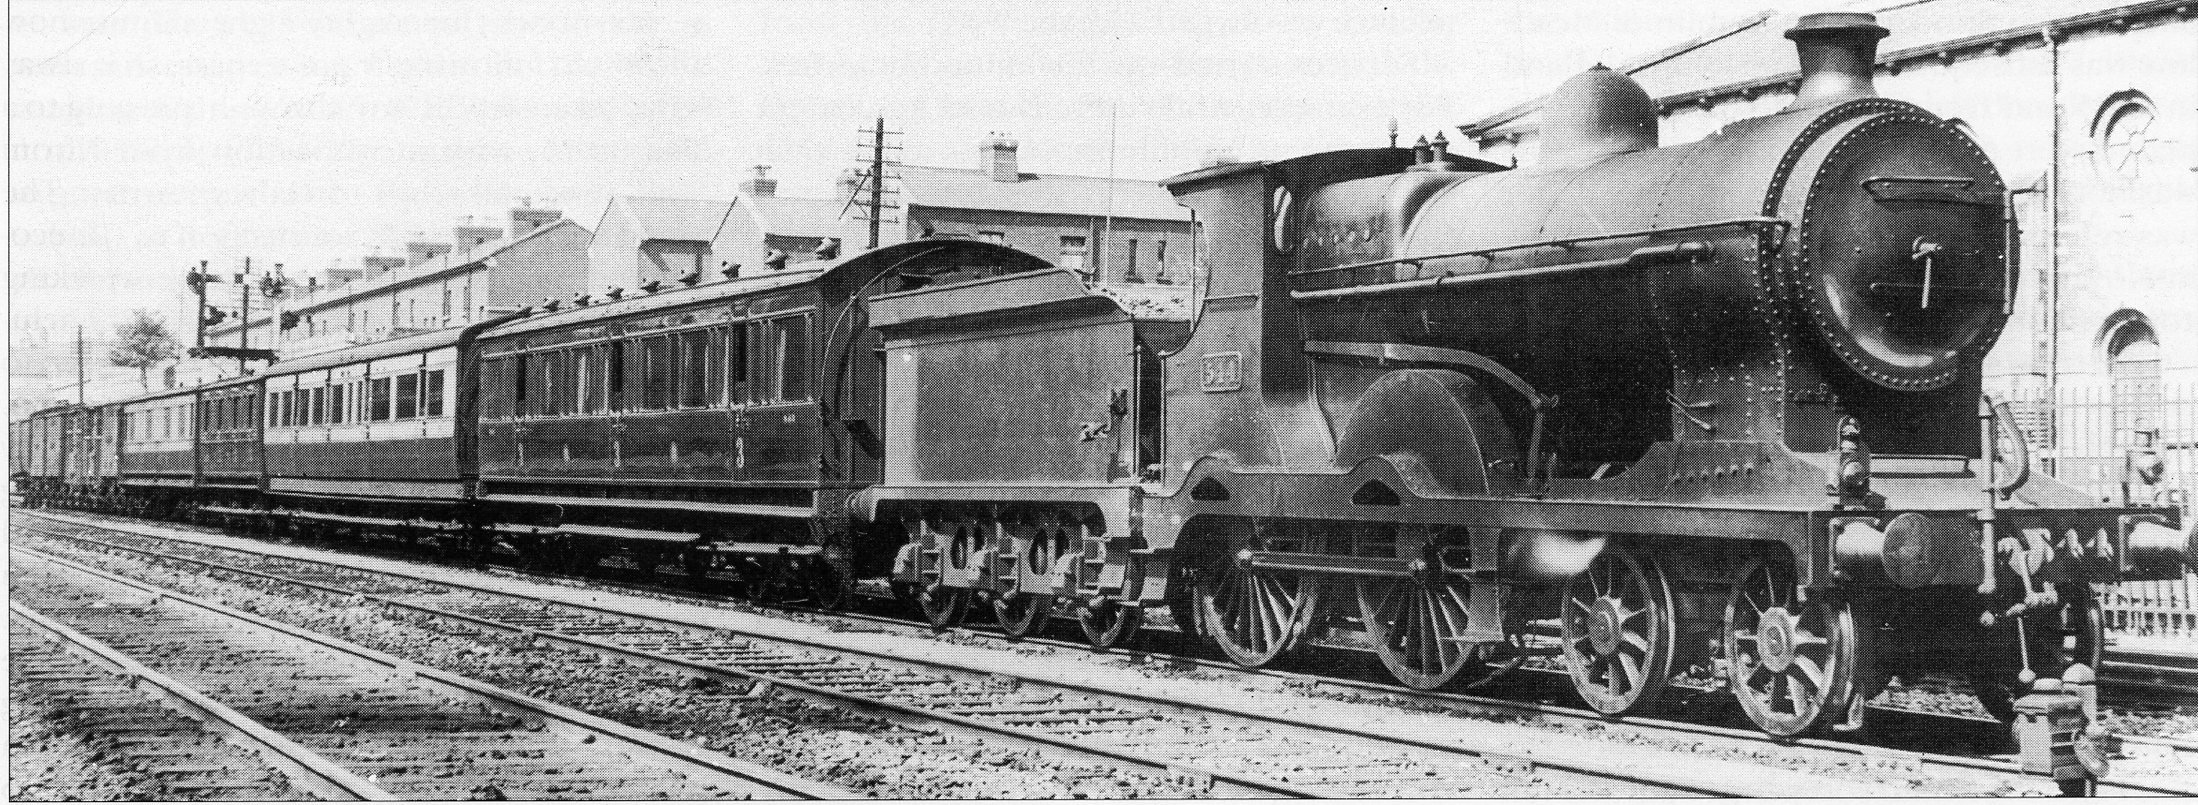
Here's a nice view of one of these coaches at Broadstone, looking newly-painted in 1930s maroon livery. This images appears in Ernie Shepherd's book on the MGWR and is credited to J Coughlan. The caption says that the loco was rebuilt into this form in May 1926, and withdrawn in December 1935, so the date must be in that range. This has the very large torpedo ventilators typical of these vehicles as-built. The communication cord is in the early position running along the outer edge of the roof, rather than inside. The number appears to be 843, and this would be before it was converted to a tea car. Here's another photo of one of these coaches in the GSR maroon: https://www.flickr.com/photos/irishrailwayarchive/53508875601 At least one carried the GSR two-colour livery of chocolate and cream, as seen here: https://www.flickr.com/photos/irishrailwayarchive/53508723596/ Like the photo at Broadstone above, the train is a mix of the maroon and chocolate/cream liveries. I posted this summary of liveries applied to these coaches on another thread but it is probably a good idea to repeat it here. 1. All-over dark "lake" (an extremely dark brownish red) with GSWR markings 1902-25 2. For any used on main lines after 1906, same with white upper panels. This is the livery 836 is preserved in. Being only a few years old in 1906, they were front line stock and it's likely that some of them received this scheme when repainted. 3. All-over dark lake but with GSR markings, 1925-early 30s. 4. Some of these did receive the short-lived GSR "main line" livery of chocolate brown and cream (late 1920s to mid 30s) - there is photographic evidence. 5. Standard GSR all-over maroon, same as LMS maroon in Britain (and for that matter NCC & BCDR here). 6. From around 1946, CIE dark green with elaborate lining, snails and 3 digits on the doors 7. From around 1951, CIE plain dark green with no lining, snails or class digits 8. From 1952, the tea cars used with railcars had CIE plain dark green with a single thin EdN waist line. No snails or class digits. 9. From 1954, CIE brilliant green with a single thin EdN waist line. No snails or class digits. 10. From 1956, CIE brilliant green with a single thin EdN waist line and 2 digits on the doors. No snails. 11. From 1959, some may have received snails on a livery similar to 10, but I haven't yet found a photo like this. I have not yet found a photo of any in 'black and tan'. It's possible; some other carriages of a similar era and shape did receive that livery. There were also some more liveries once they were withdrawn from passenger service: 837 was converted into a camping coach no.8 and was painted in a bright red and white/cream livery. Later it became departmental 530A and was painted red/brown (including ends, possibly freight wagon brown), and later again dark red (including ends). 836 was also subsequently in departmental use (463A). Initially repainted in dark green, it was later very dark grey with red oxide ends. 835 became departmental 540A and may have had had another different livery but I'm not sure what it was.
-
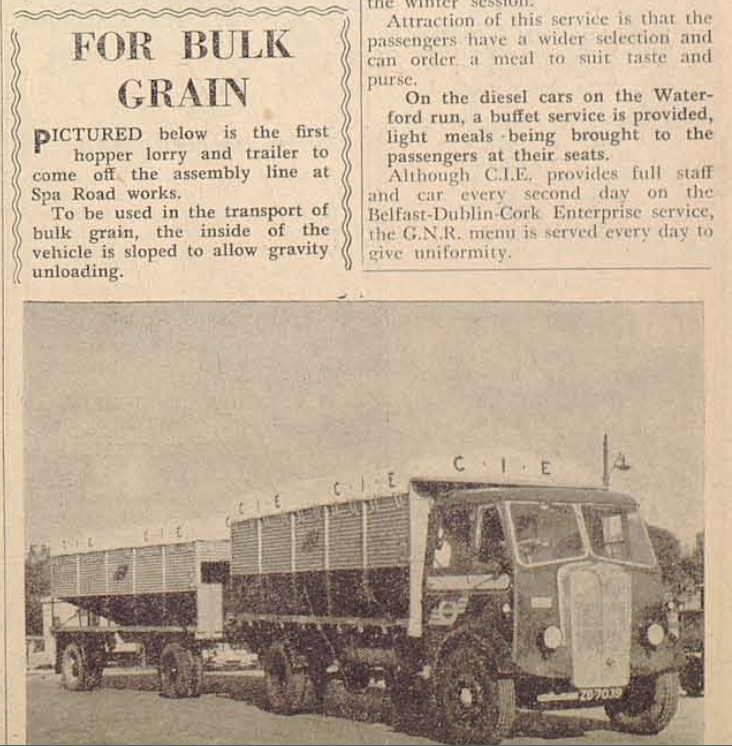
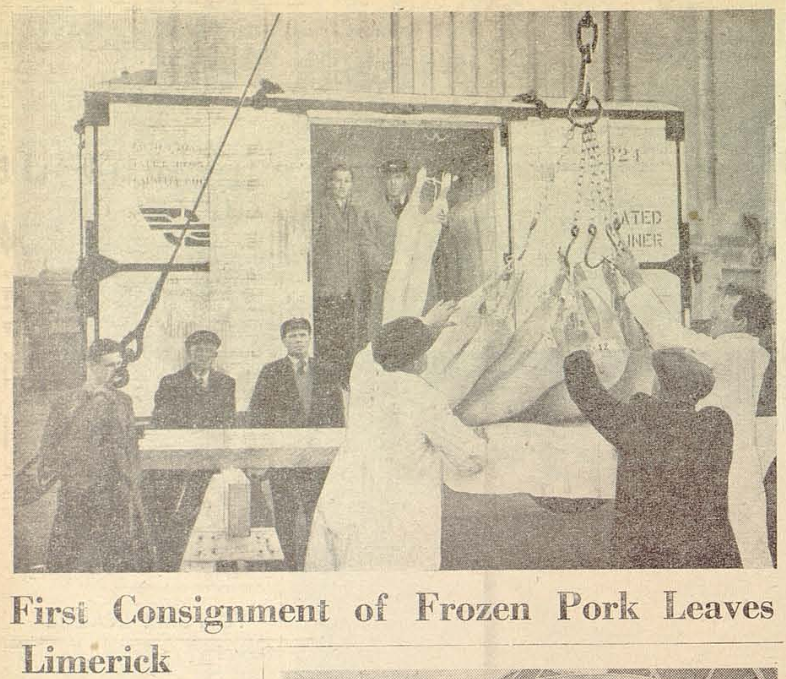
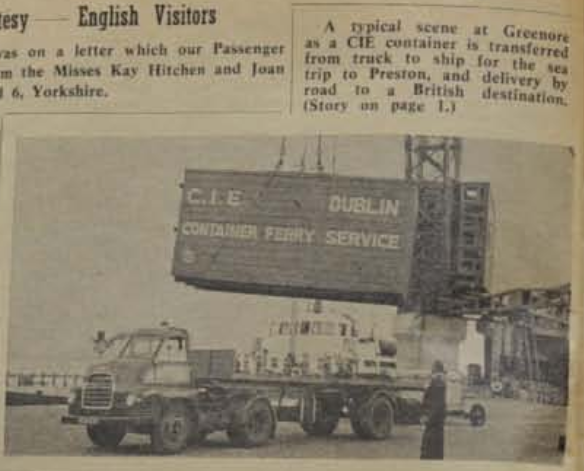
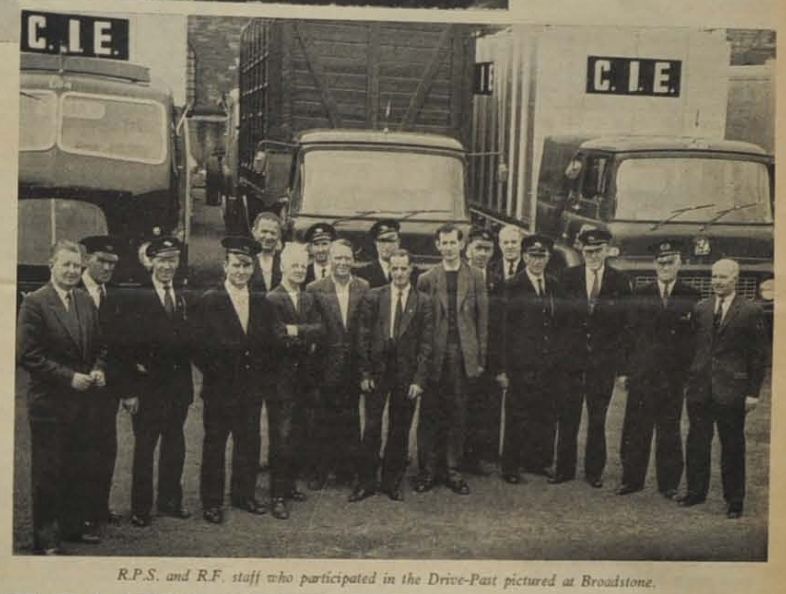
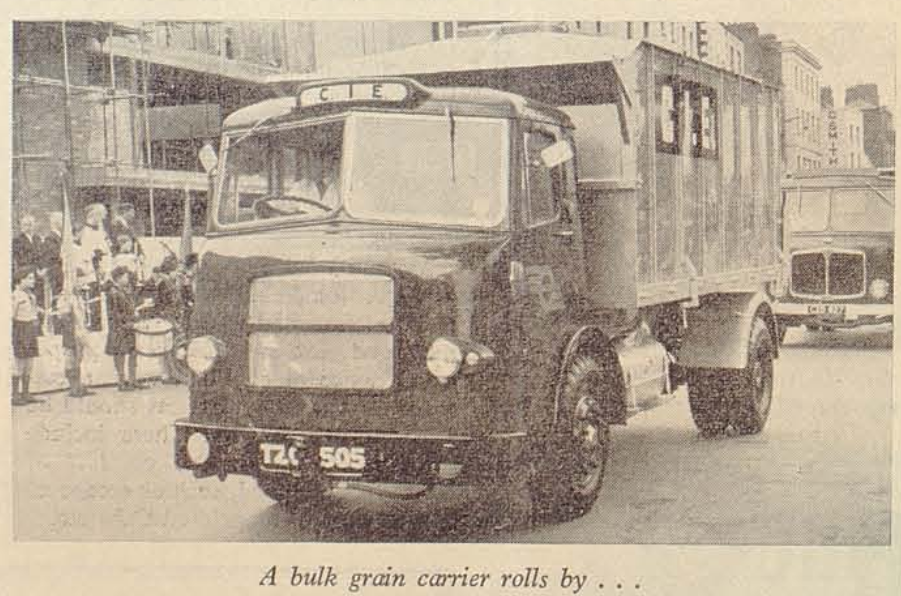
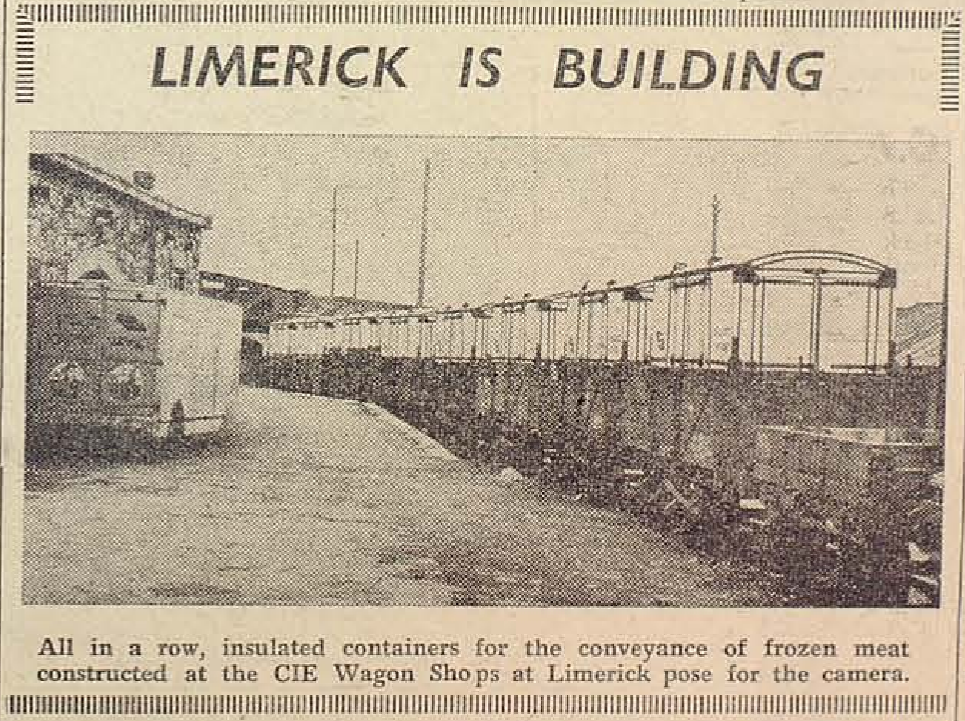
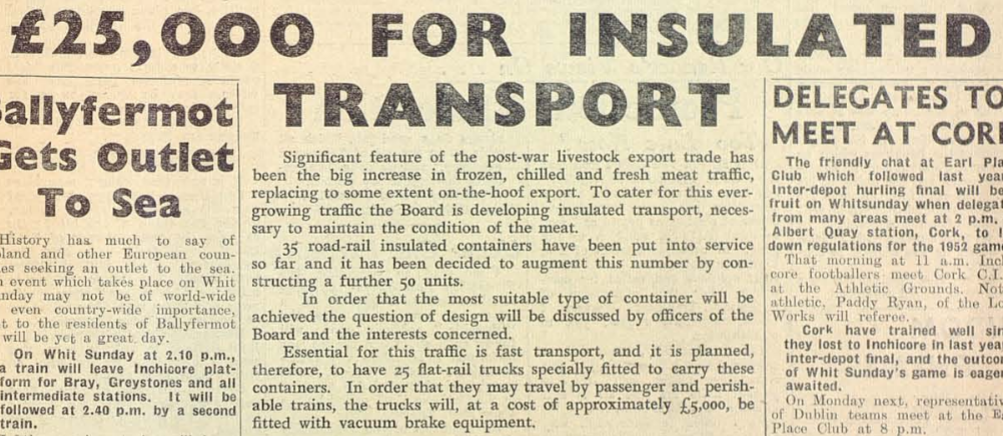
Some more from 'The Link'... Oct 31, 1952: These are more swapbodies than containers, but appear to be a predecessor of the ISO barley hoppers introduced later by CIE. Another photo of an insulated meat container in use, Dec 5, 1952: Moving on to the 1960s and the CIE magazine changed its name to Nuacht CIE, this appears in Nov 1960 Issue 3 showing the new container service from Greenore: September 1961 and the new aluminium containers are making an appearance: By July 1962 new bulk grain swapbodies were also being made from alloy in a similar style. It does appear to have lifting lugs on the roof, but probably a swapbody rather than a true container. A big zoom and crop on an IRRS photo of Barrack Street shows one of these in colour:
-
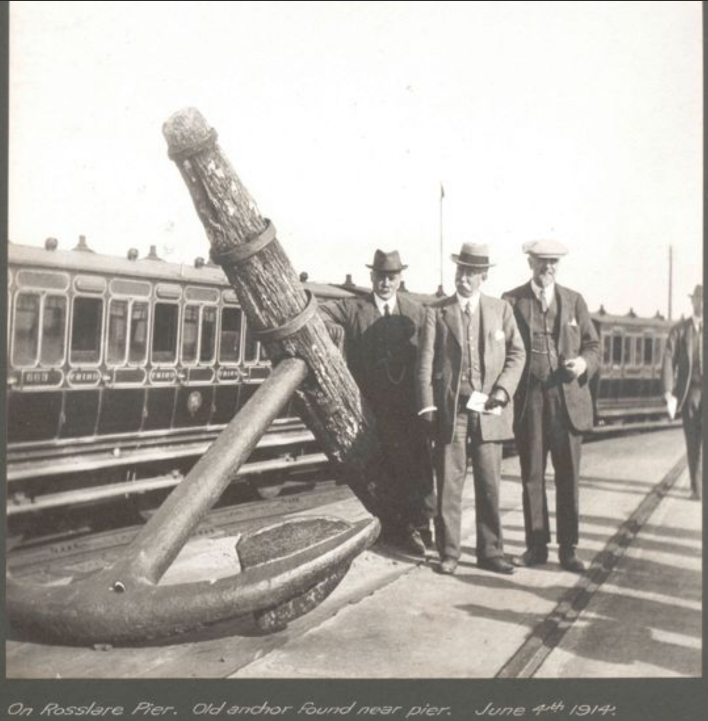
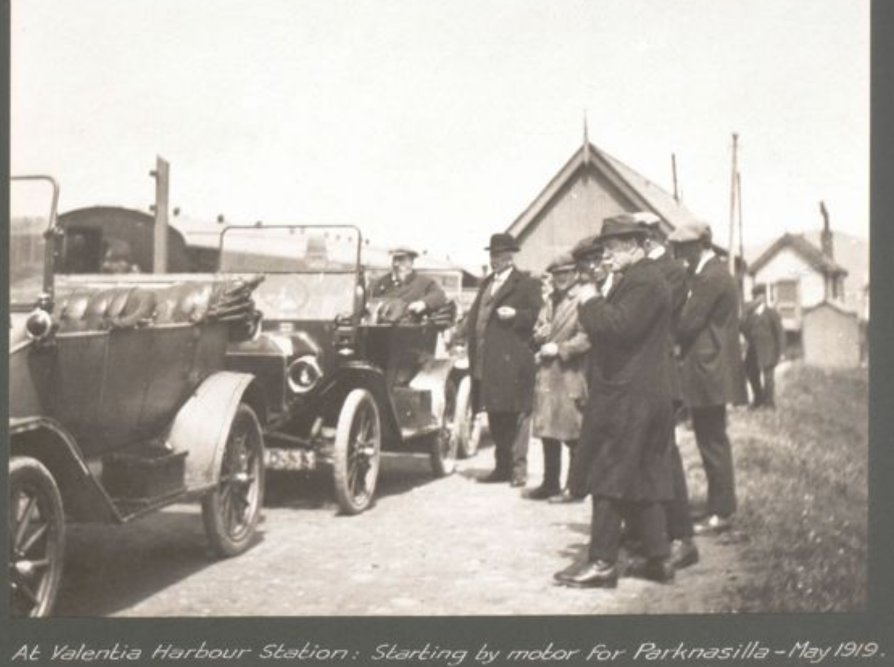
Looking behind the people (sorry, my sociopathic tendencies): Page 18 shows a GSWR 6-wheel passenger brake van in the 2-colour livery in 1906. Page 25 shows the directors posed on a step wagon on the Listowel & Ballybunnion. Page 45 has some detail of two covered carriage trucks. Page 46 has a variety of goods wagons. Pages 47 and 48 show details of inspection saloon 352 and the interior of Killarney train shed. Page 49 is the Rosslare image in my previous post. Nice view of 6-wheel coaches behind. Pages 55 and 56 seem to show narrow-gauge rope-worked railways at Lisduff Quarry. Page 66 shows the Cahirciveen fishing fleet - a huge number of small vessels! Page 67 is the Valentia image in my previous post.
-
Has anyone else discovered this yet? Photograph album, directors' inspection tours, 1902-1920 About 70 old photos, sometimes there's more of interest in the background than the foreground.
-
No 800s for me, they're the wrong gauge, but I'll have at least four (C)201s if that makes the maths work. If I had to buy an 800 I'd like this one please. It can even legitimately haul Park Royals: Thanks to Ernie for the photo.
-
My life is very busy at present with no time for modelling and limited time for research, CAD drawings etc. I have a massive backlog of half-finished projects and people nagging me for progress on other things. Work is also extremely busy at present and family matters are quite overwhelming. There are some things I can do on the laptop when travelling etc., but for most things I need time at home when I'm in the right frame of mind and not too tired, and those occasions have been hard to find recently. Sorry! In an attempt to convince you that I am making some progress, here's the current state of my photo reference list. Photo_list_draft.xlsx The trouble is, I keep adding more columns to catalogue the subtle variants (as I spot them), and it's extremely time-consuming to go back through the whole lot and populate the new columns. I will do this eventually... There are well over 600 photos here and I'm finding more all the time. In late October I will be visiting the IRRS Archives again and I hope to find some more original material - and I am led to believe there are some AEC railcar drawings that I haven't yet seen. So I'm reluctant to really get stuck into the drawings until I have that information in front of me. Please be patient with me - we will get there eventually. In the meantime I'd like to remind you of my IRRS Manchester talk on the subject on 19th November: https://irrs.ie/events/cie-aec-railcars-by-paul-molineux/ I'd always intended this as a 75th anniversary talk, but by a remarkable coincidence it is EXACTLY 75 years from the date when the first of the CIE AEC railcars arrived in Ireland - craned off the ship at North Wall on 19th November 1951. I didn't find the exact date until yesterday, well after the date of the talk was fixed.
-
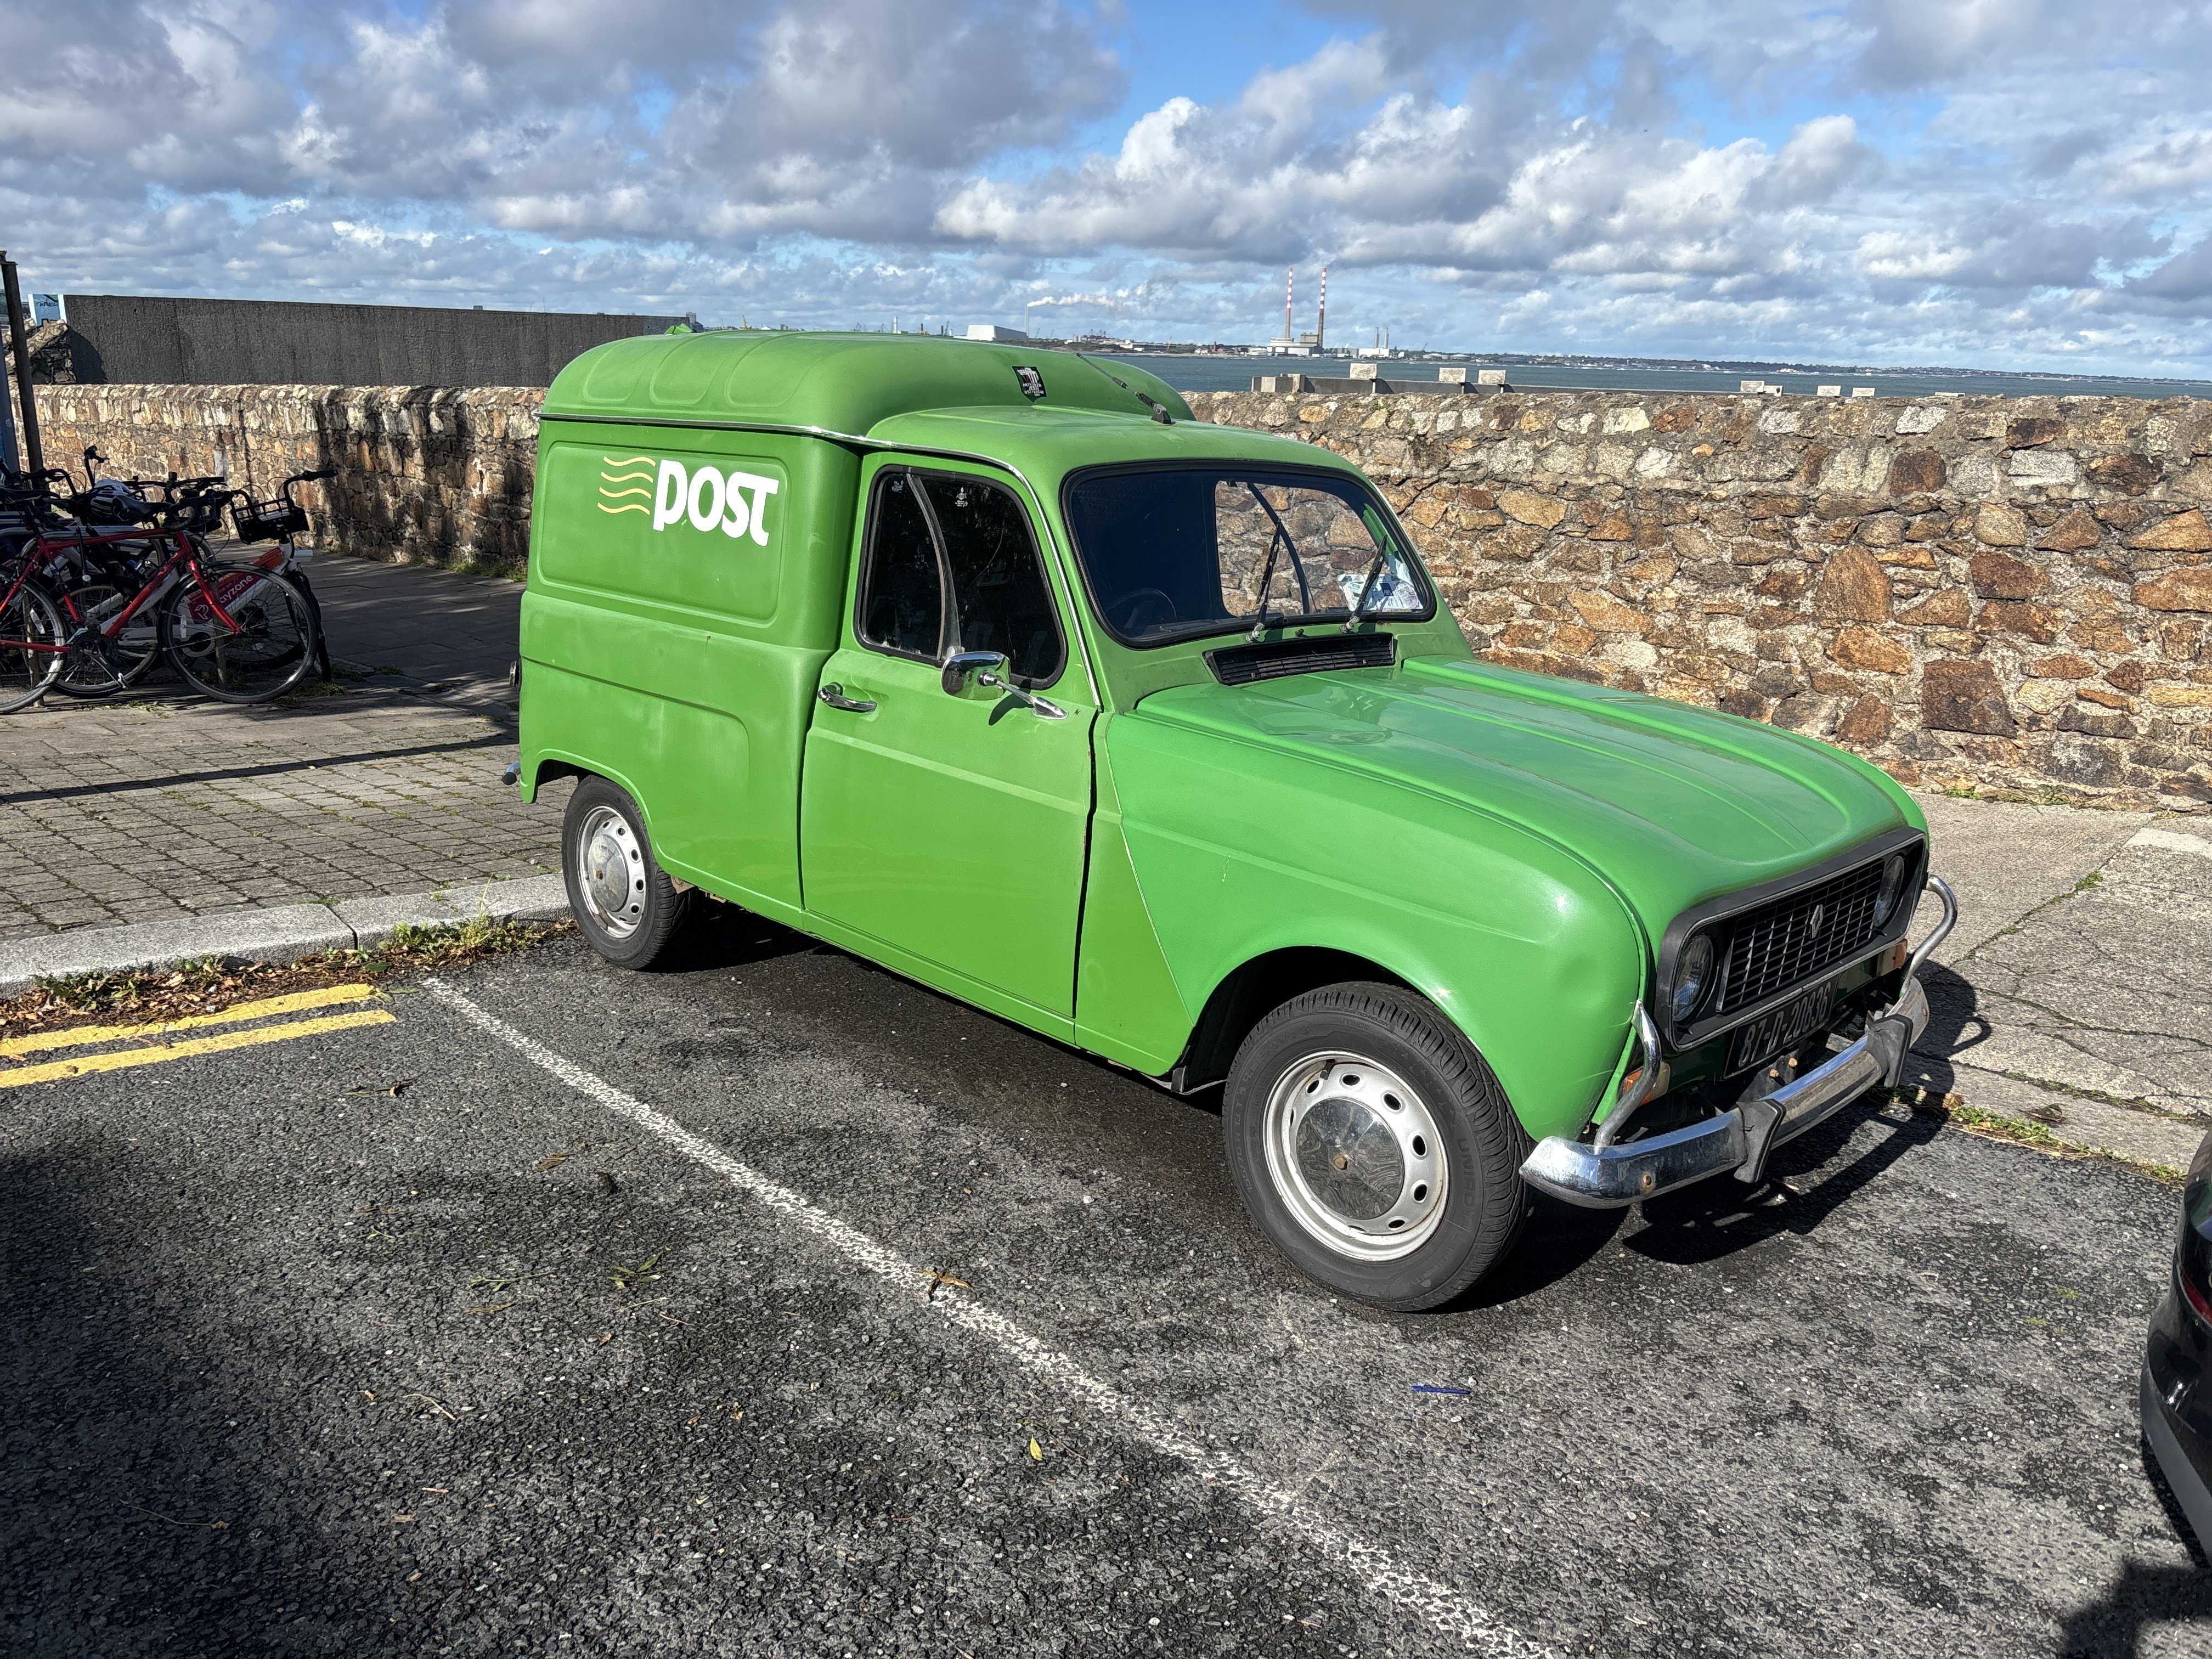
I spotted this in Blackrock at the weekend - certainly took me back to my childhood when these were everywhere: Have An Post van models been made in 1:76 or 1:72 scale?
-
071's at Fifty - 082 joins the retro club
Mol_PMB replied to thewanderer's topic in What's happening on the network?
Very nice! Black and silver for the next one? -
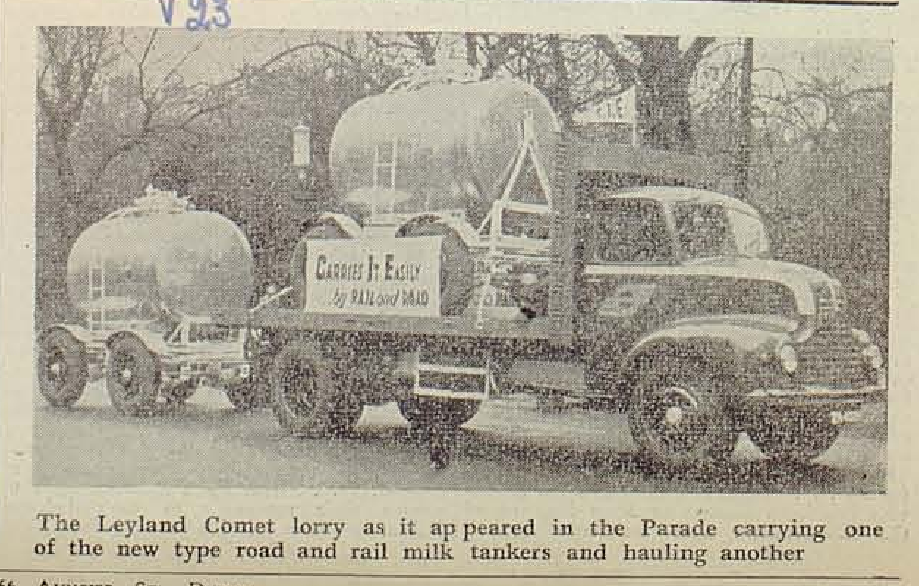
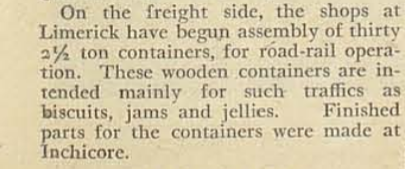
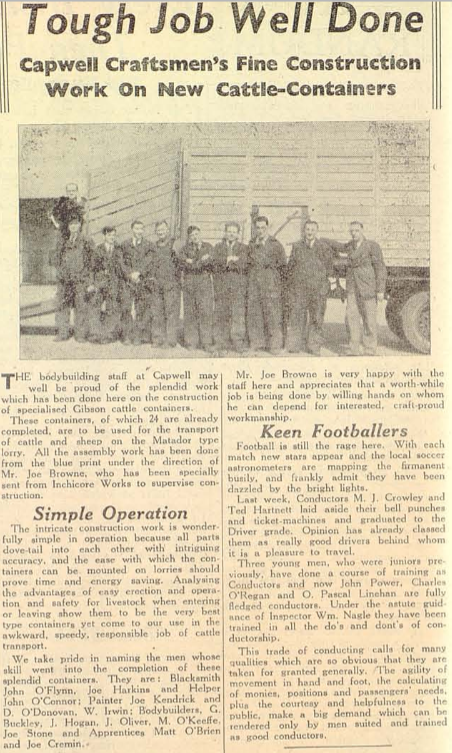
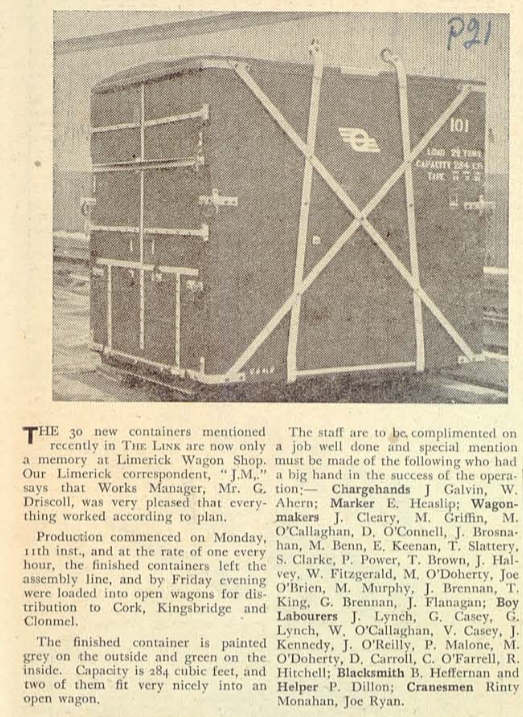
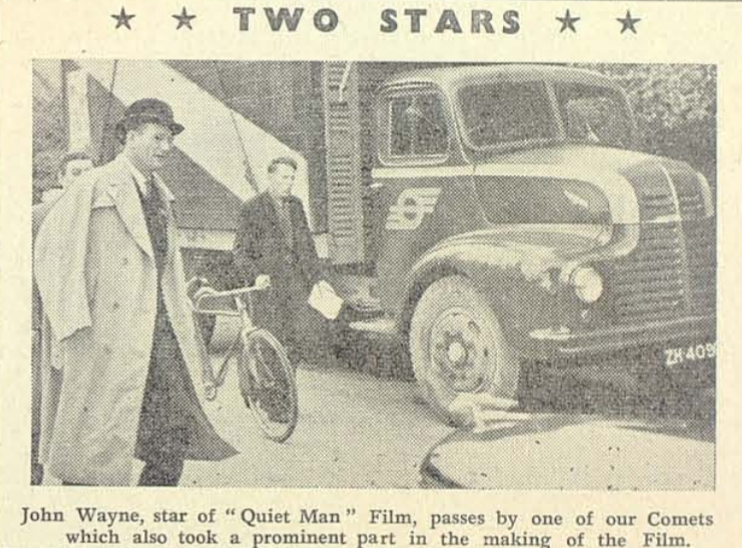
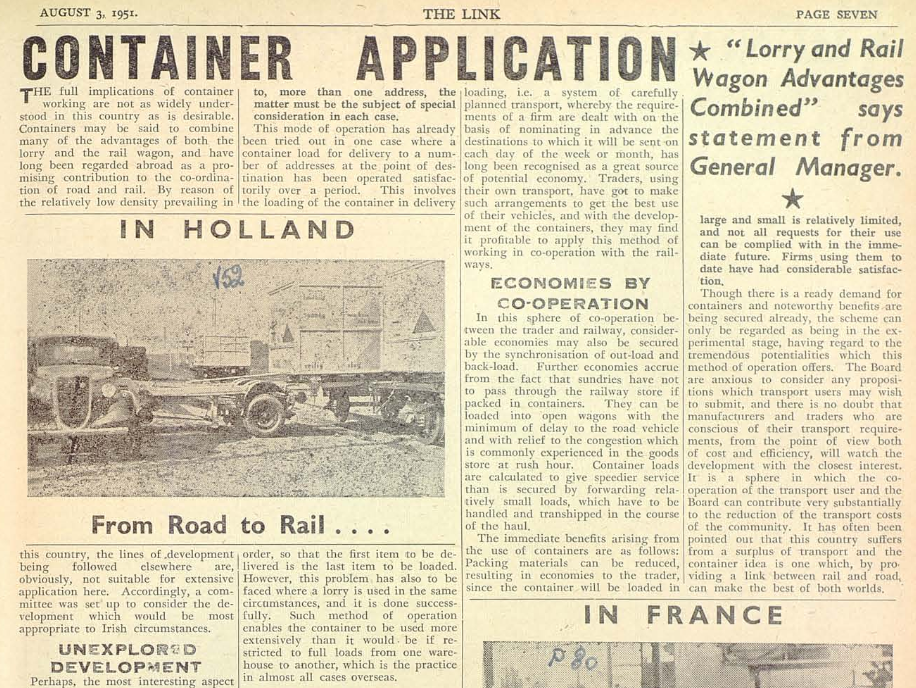
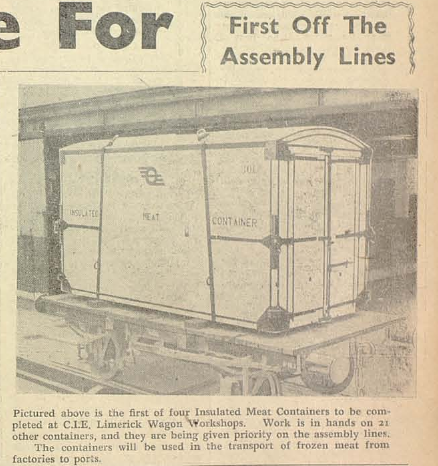
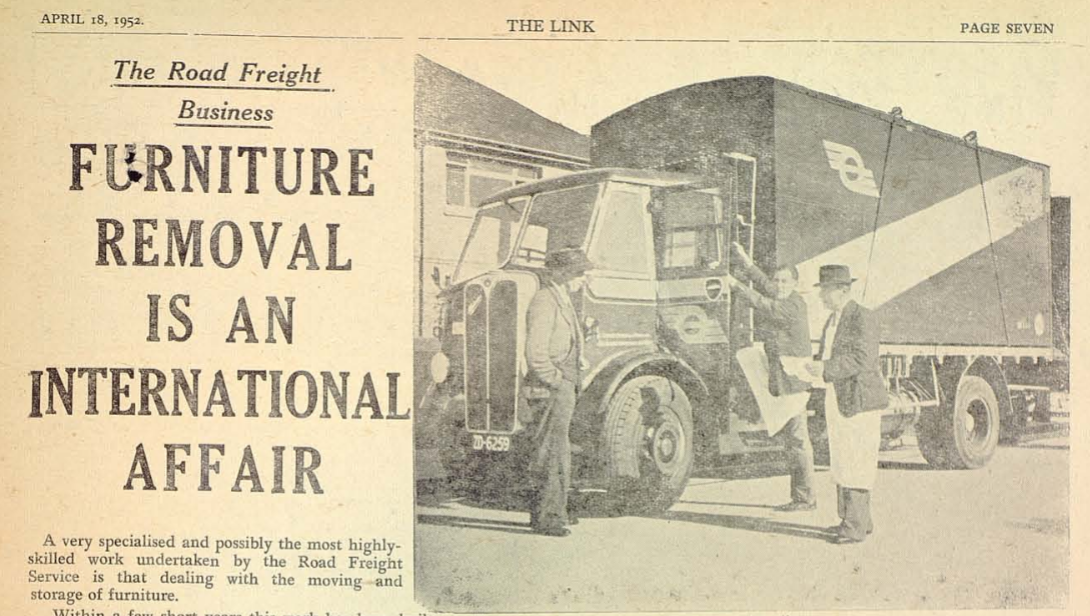
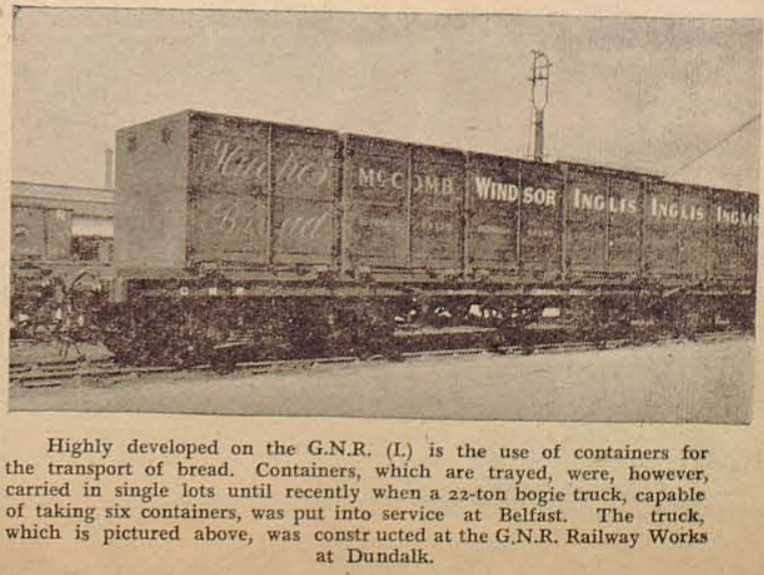
Some container-related snippets from 'The Link', available online here: https://archives.cie.ie/records/CIE/9/1/1 (I found these while trawling for material on AEC railcars, which was also productive!) Not quite containers, but intermodal - road/rail demountable milk tanks (March 23, 1951) April 20, 1951: June 1, 1951. I think these cattle containers were only used on road vehicles - they were more like swap-bodies: June 29, 1951: Film Star? CIE Comet lorry and Container; July 27 1951 August 3, 1951: January 25, 1952: June 20, 1952: April 18, 1952: May 16, 1952: May 23, 1952:
-
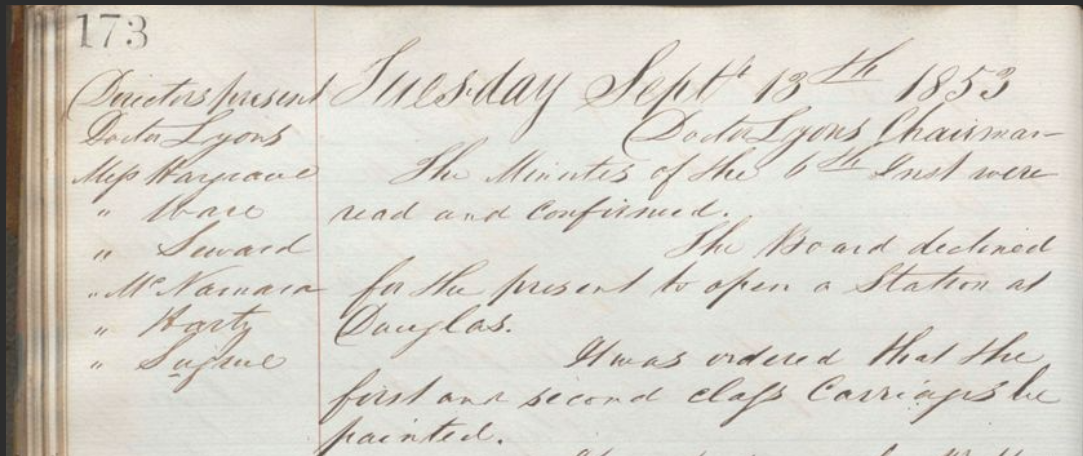
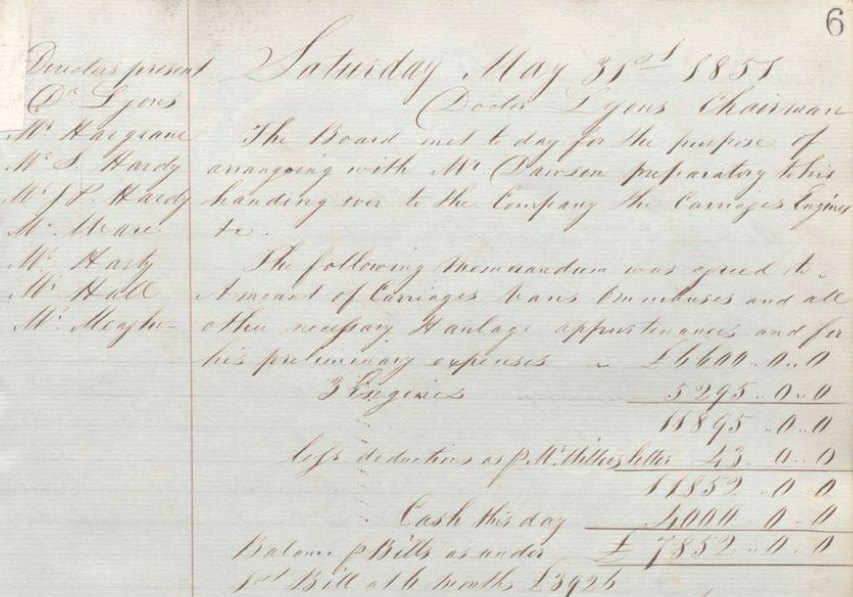
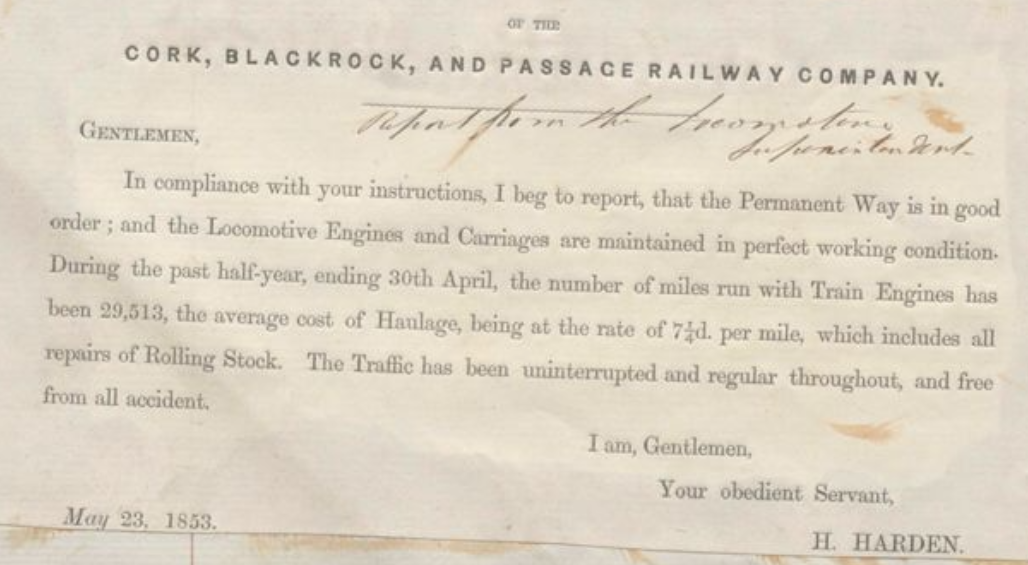
Some carriage snippets, no doubt there are more but I don't have time to go down this rabbit hole! 31 May 1851: Buying out Dawson including the carriages and engines: 13 September 1853: First and second class carriages to be painted: Every half-year there is a report giving the capital value of the rolling stock, but not the actual number of vehicles. However, it may be reasonable to assume that large increases in the capital value represent the purchase of additional vehicles. The revenue account also shows the amount spent on repairs.
-
EMD GM6 locos - an Irish what-if?
Mol_PMB replied to Mol_PMB's topic in Continental European Modelling
More pics here: https://www.rmweb.co.uk/topic/181696-les-caves-du-roy-beirut-lebanon-in-the-1980s-chemin-de-fer-de-letat-libanais-cel/page/10/#findComment-6268397