Mol_PMB
-
Posts
3,401 -
Joined
-
Last visited
-
Days Won
204
Content Type
Profiles
Forums
Events
Gallery
Blogs
Everything posted by Mol_PMB
-
Nah, it’s a Bury 2-2-2 as a counterpoint to the 800s
-
What a great post and I agree! Superb Hunslets and Park Royals landing now after much expectation, some more interesting models on the way, and hopes for what might be announced in October…
-
"Voiding the Warranty" - Mol's experiments in 21mm gauge
Mol_PMB replied to Mol_PMB's topic in Irish Models
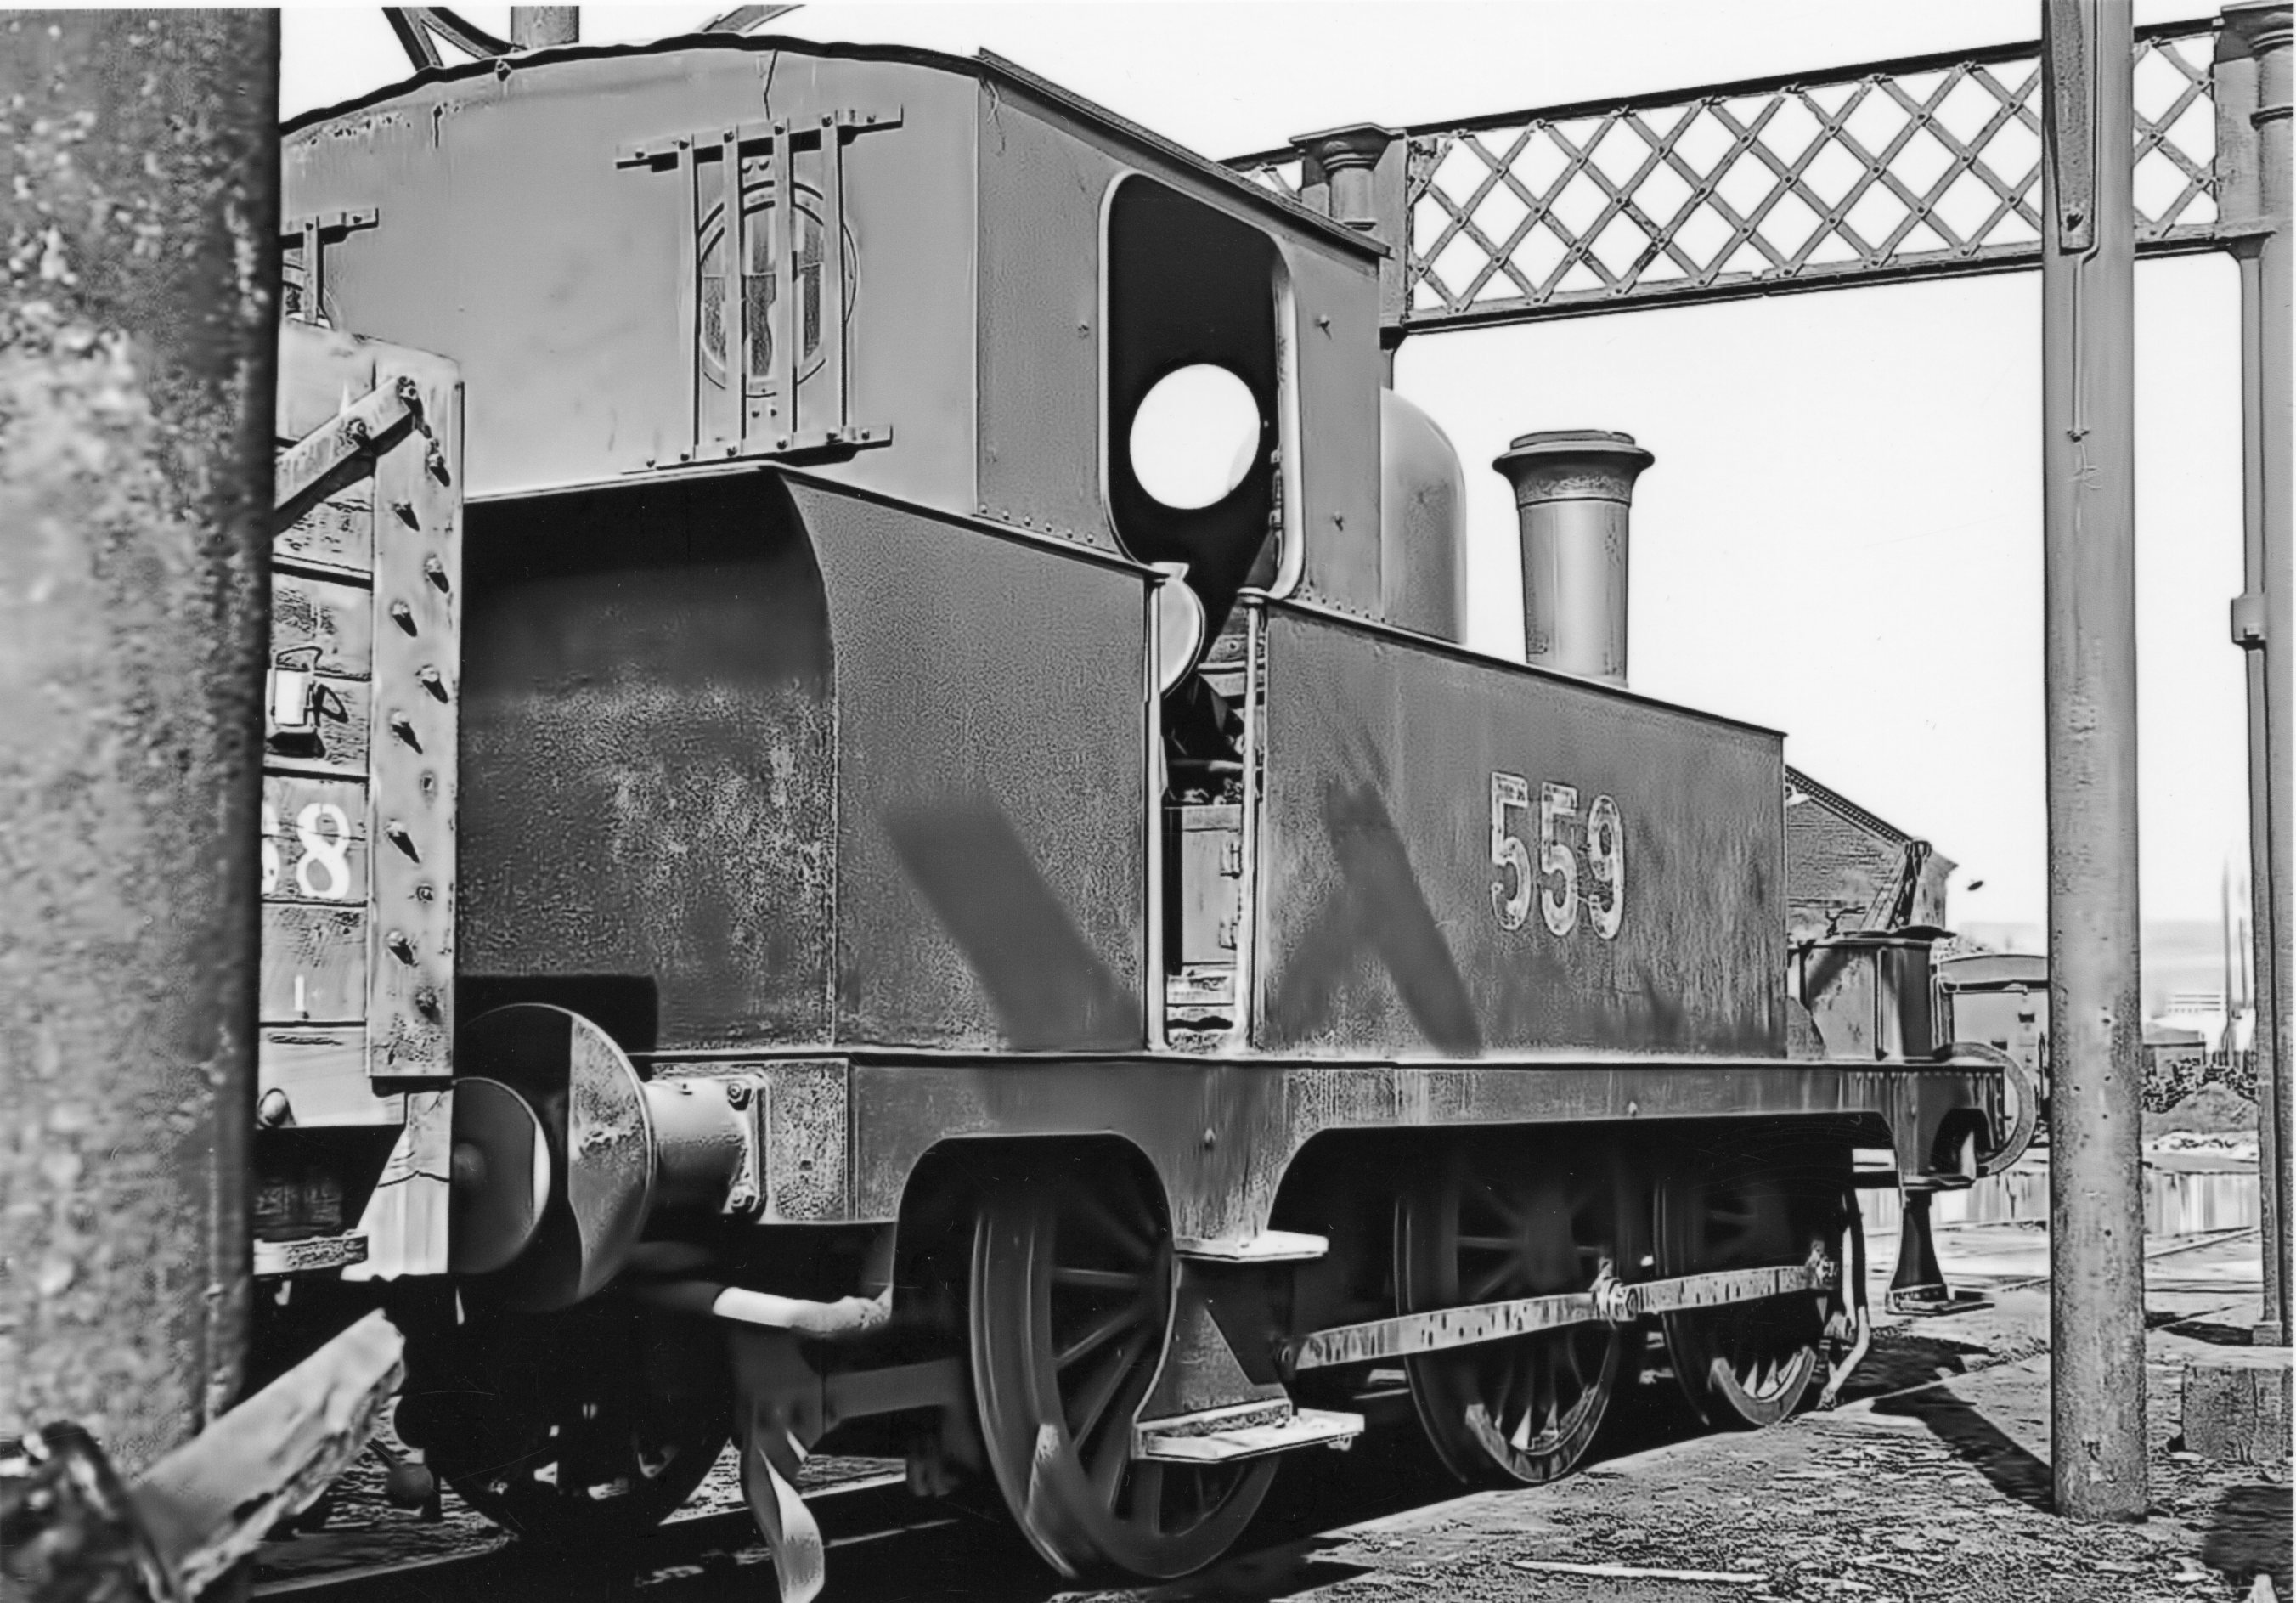
I have been rather neglecting 559 recently, and I'm about to head off on hols, but this photo I've just acquired will hopefully spur me to get back to the little tankie once I'm home.
-
Superb, takes me right back to the 1980s, especially with the Dutch van on the back.
-
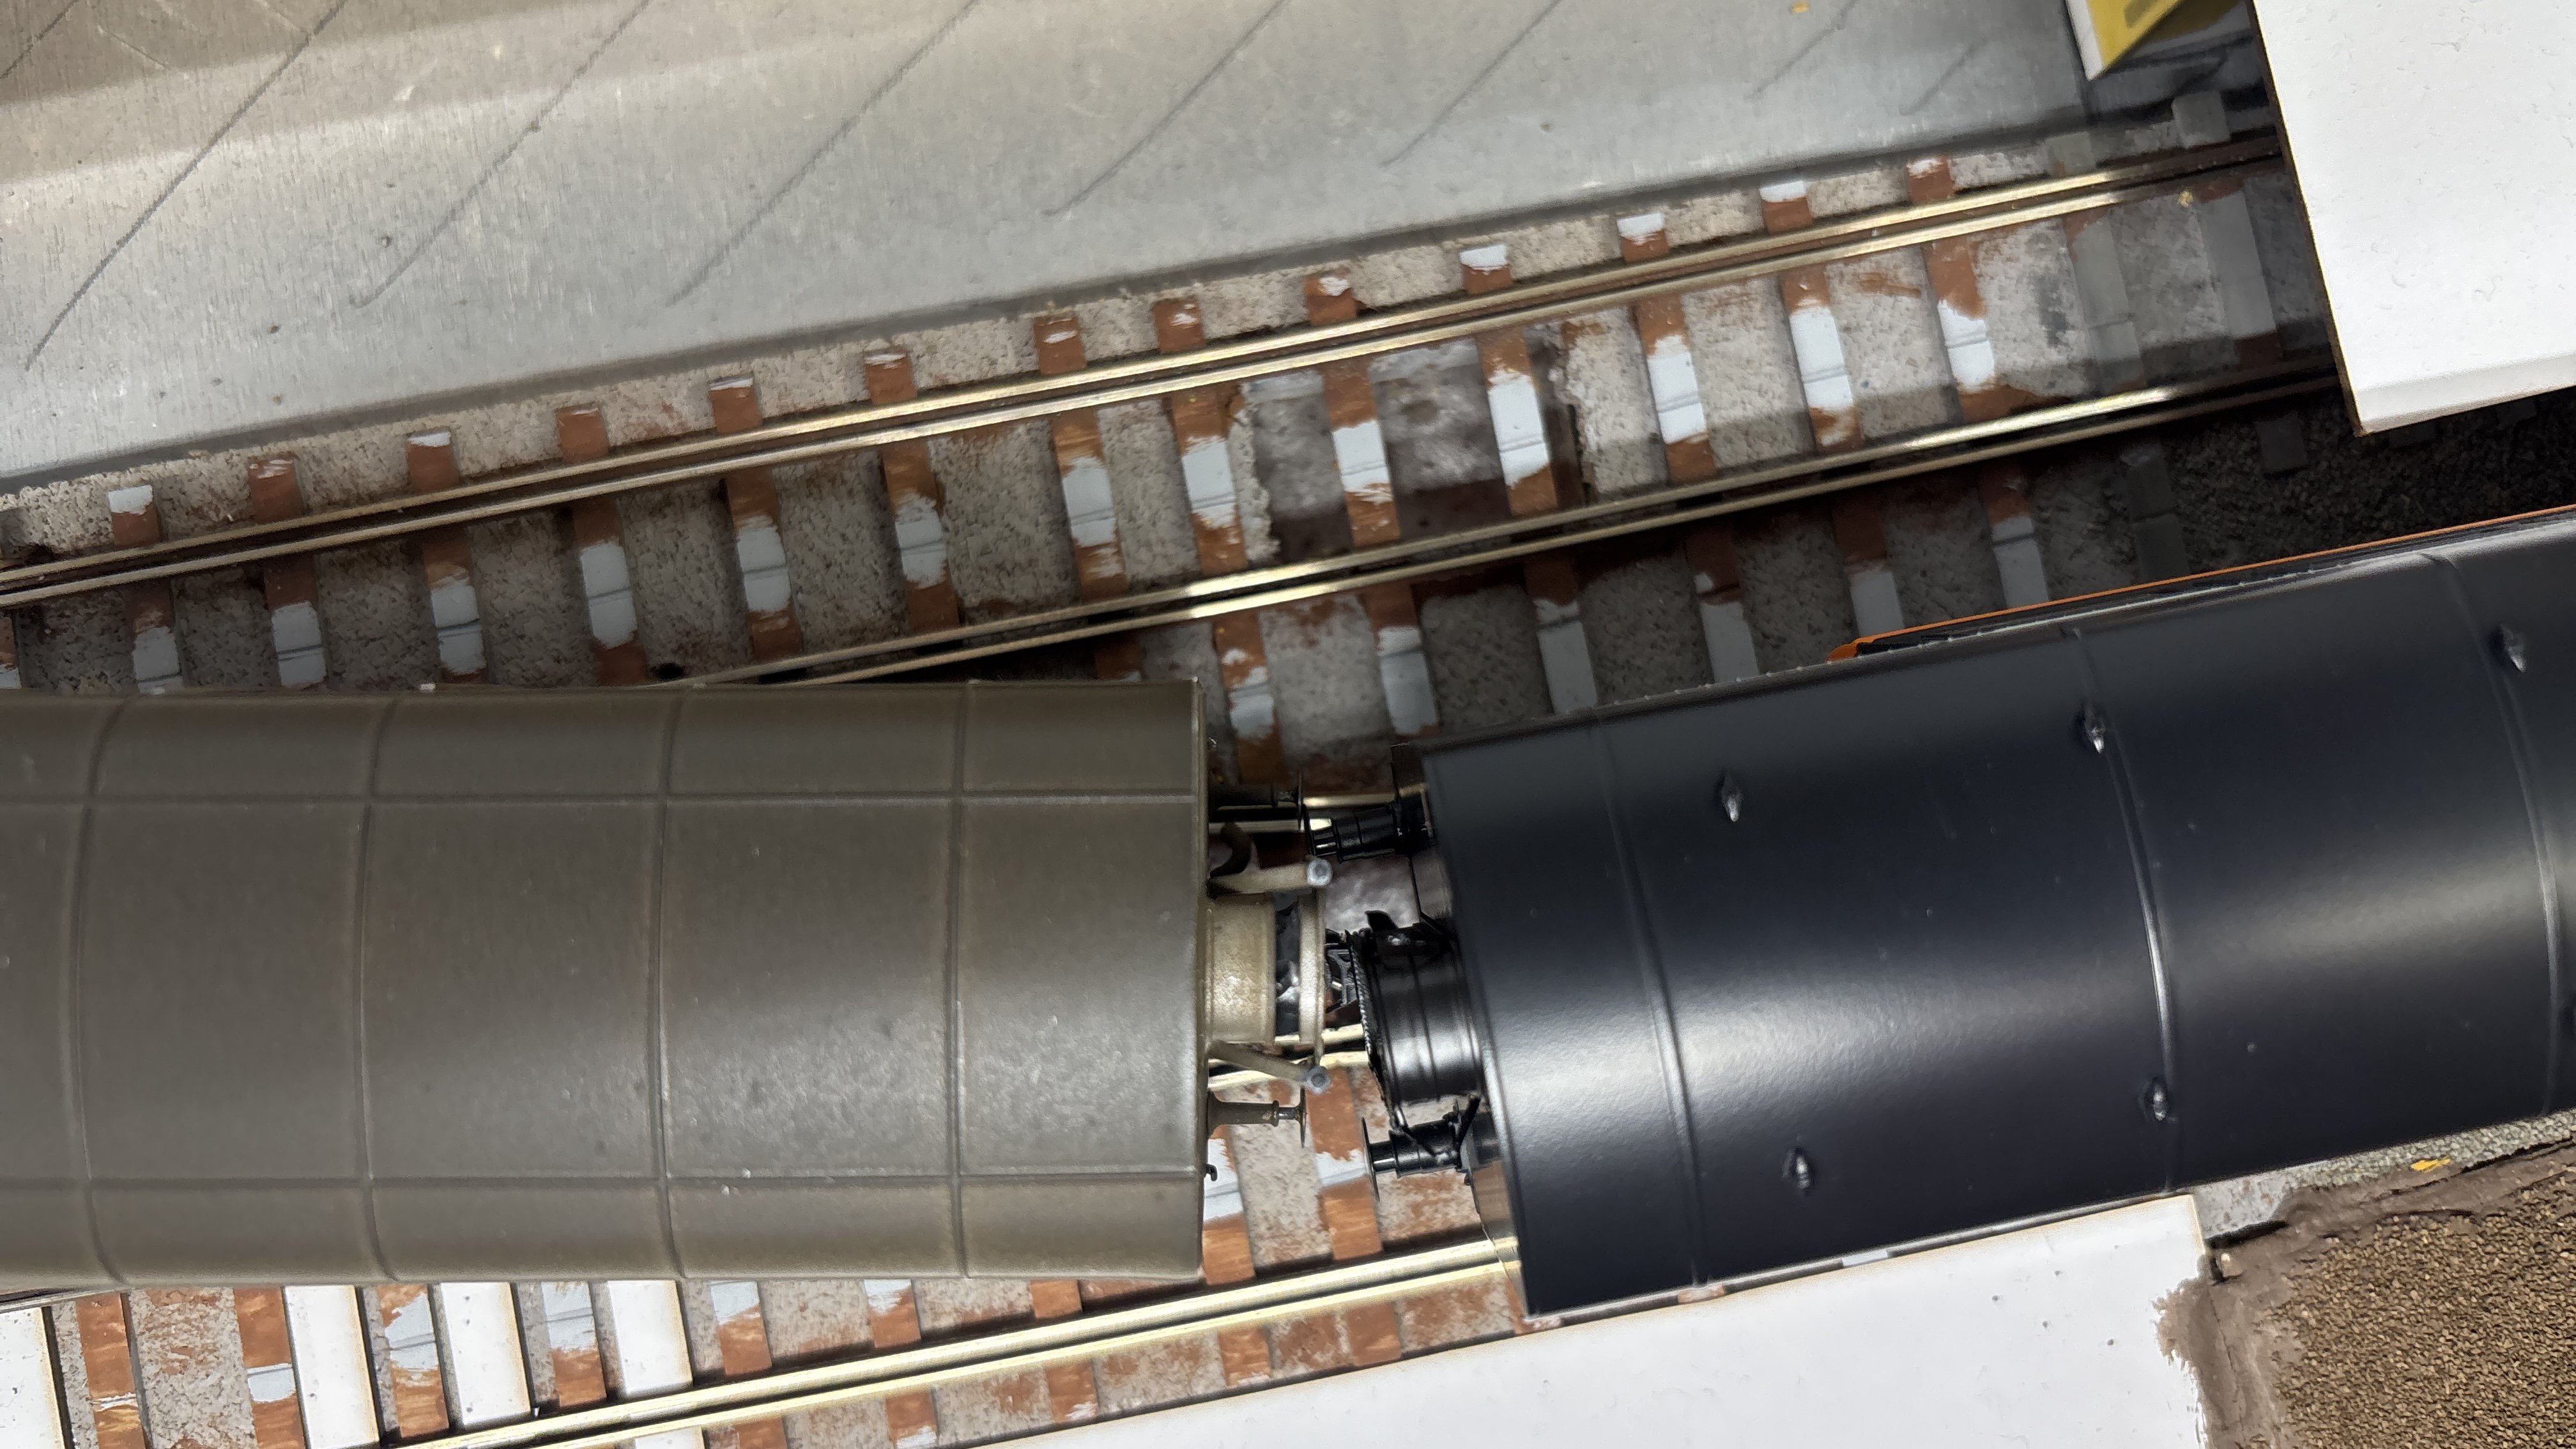
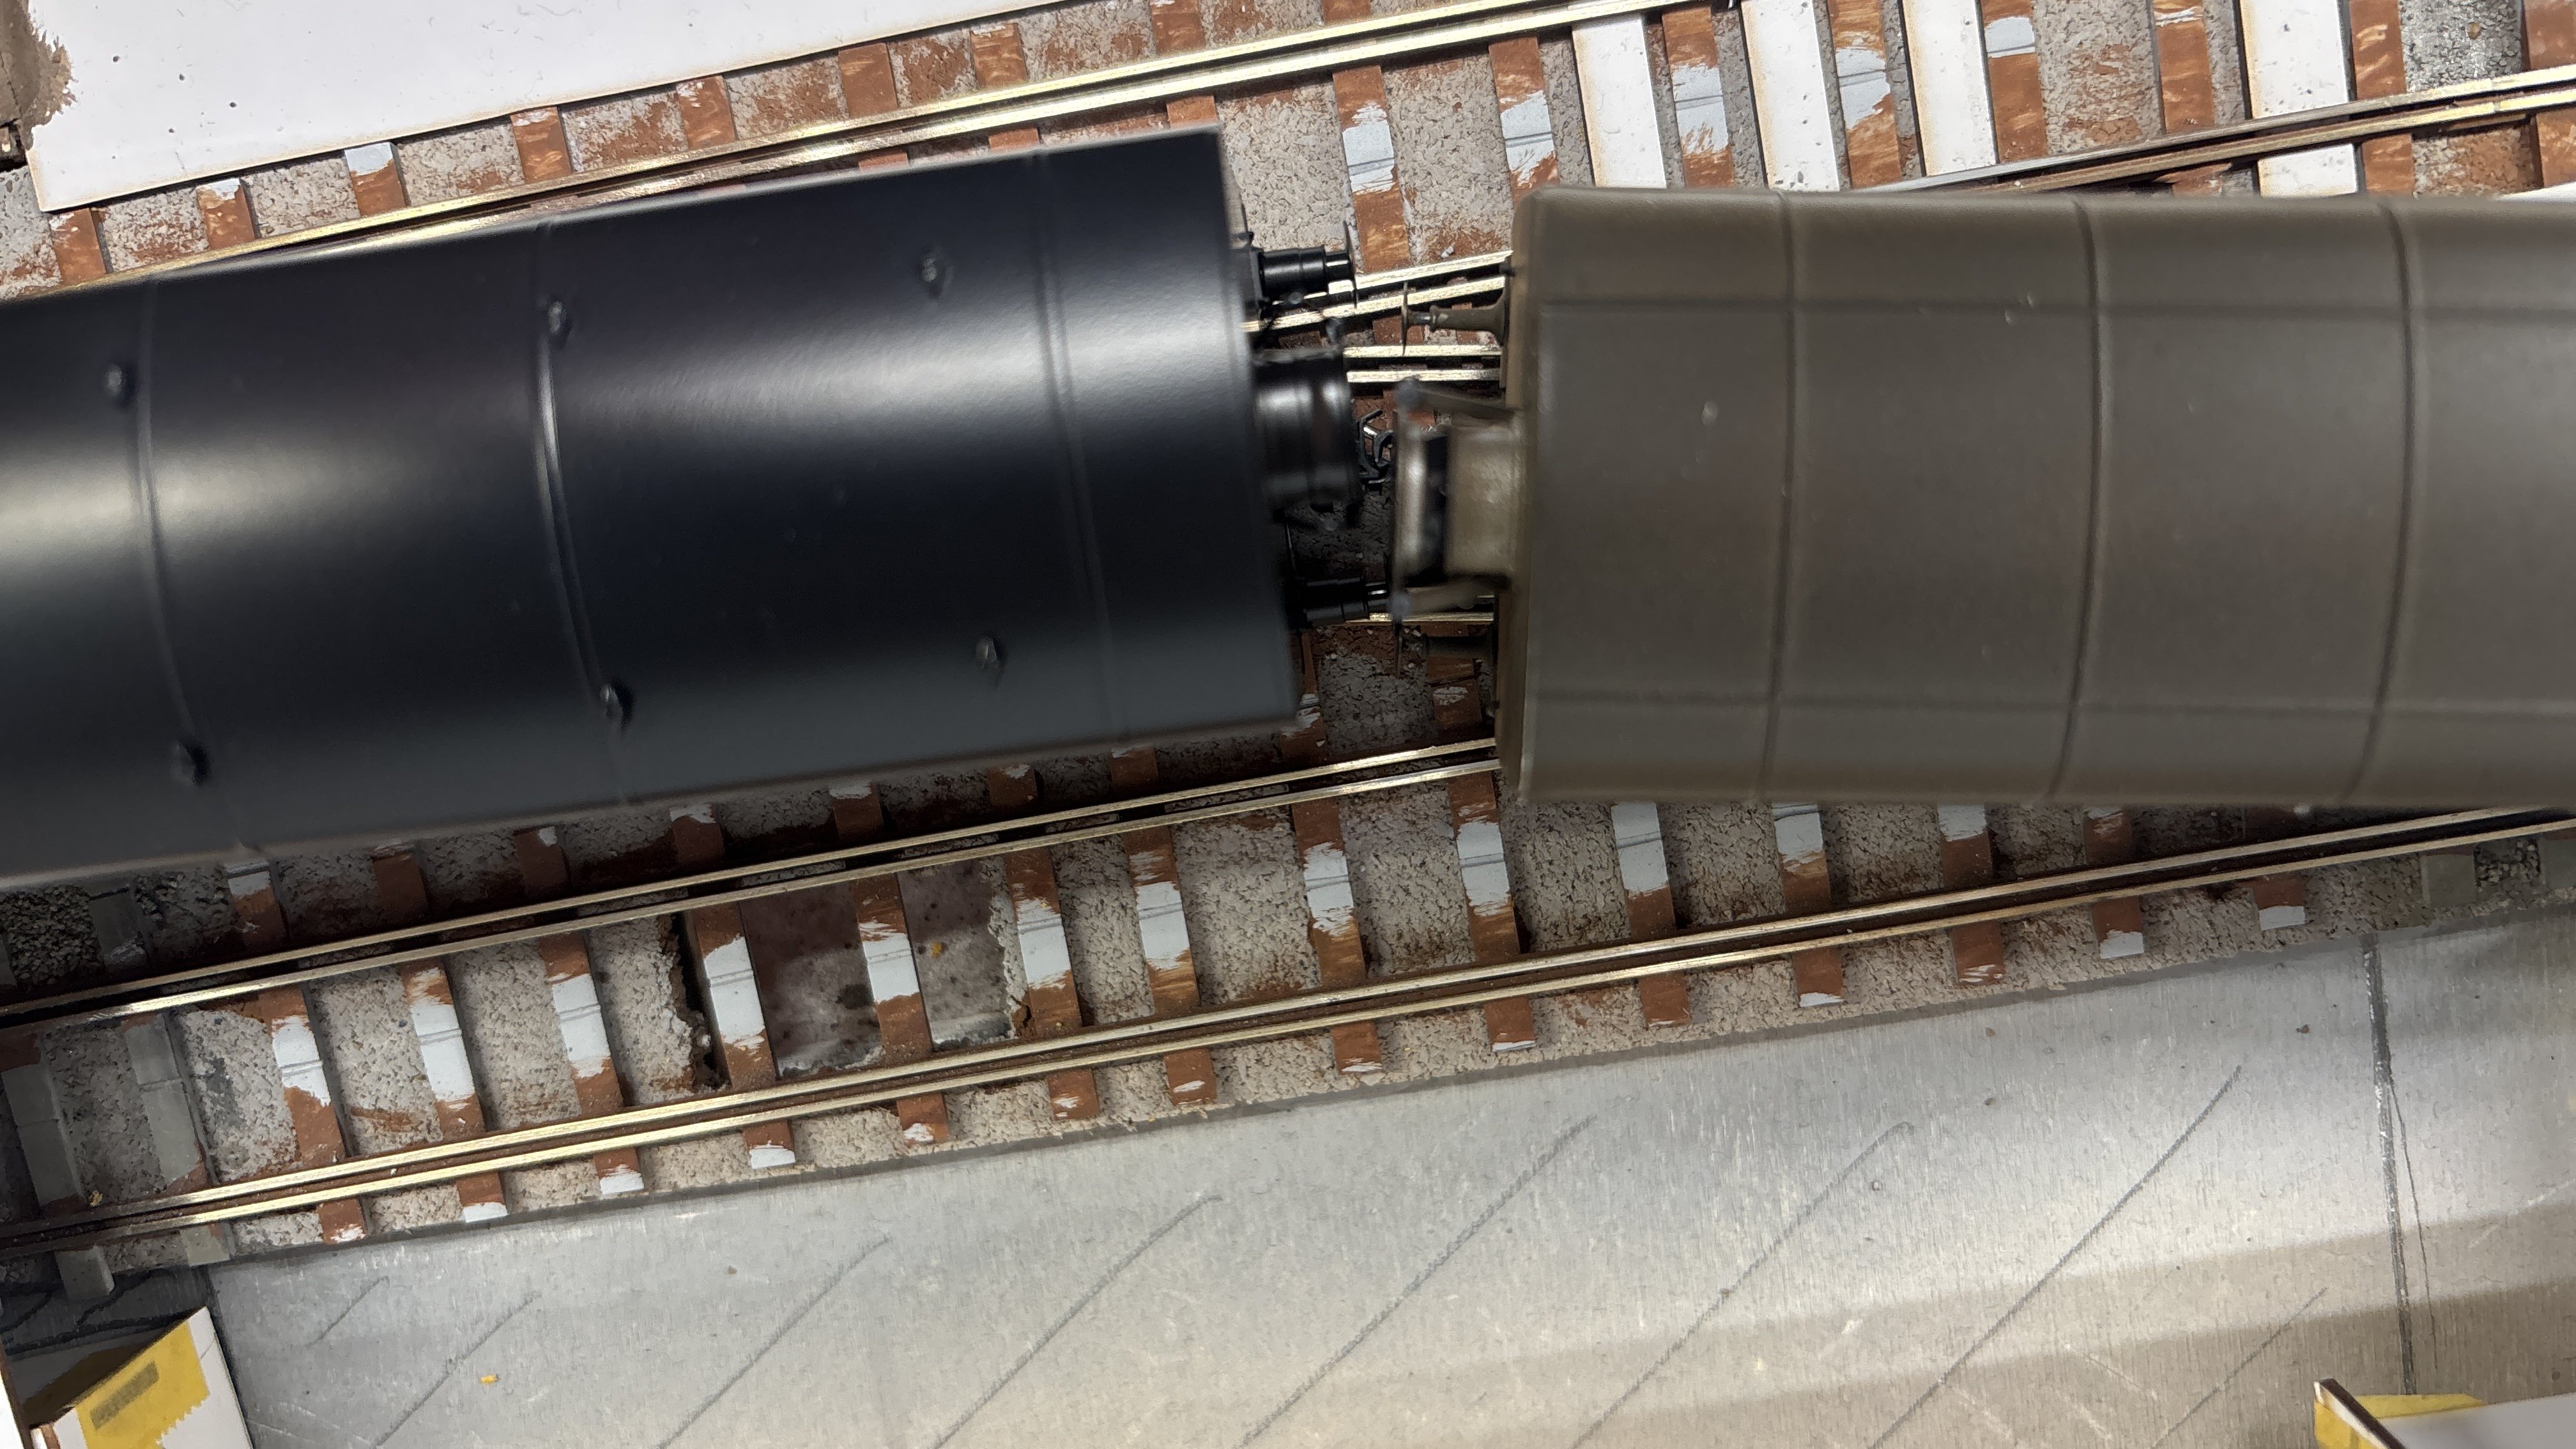
No problems here on my curves or reverse curves, even when coupled to a shorter 4-wheeler. The kinematic mechanism seems to work very well, preventing buffer lock or the gangways fouling each other, while giving a nice close coupling on straight track. I have fitted Kadee #19s but I don’t expect that would make a huge difference compared to tension locks. Possibly they guide the coupler swing a bit better? On the other hand, my crossover isn’t as sharp as a setrack one.
-
The coupling is mounted on a mechanism that should allow it swing it sideways when the bogie pivots. If you try this when the carriage is held upside down then the coupling hook can catch on the bufferbeam detail and stop it swinging. I wonder if there's something else catching in the mechanism that's preventing the coupling swinging sideways?
-
Wagon kits for 1960s and 1970s
Mol_PMB replied to west_clare_wanderer's question in Questions & Answers
Quite a lot of kits have been made in the past but are no longer available, including John's JM design wagons and most of Leslie's Provincial wagons range. Leslie may still have a few resin kits in stock: KITS Available – Provincial Wagons Enda's Past-Avenue / CK Prints includes some interesting wagons and hopefully more to come, some of which have their origins in John's or Leslie's designs. ckprints.ie Pre-Grouping Railways a couple of nice GNR(I) wooden opens; the 6-plank one can also be gently modified to MGWR or GSR types: Irish Railways – Pre-Grouping Railways https://irishrailwaymodeller.com/topic/17455-voiding-the-warranty-mols-experiments-in-21mm-gauge/page/4/#findComment-262452 Bitumen tanks got everywhere in small quantities and there are several options to modify them from RTR For the later period, almost everything was based on a standard 20' chassis (though these weren't all identical - there are variants of brakes, W irons etc). Originally the idea was to build around a thousand 20' flats and a whole load of different types of containers / swapbodies to fit on them, each suited to different traffics. In time, this evolved and many of the flat wagons were permanently fitted with bodies to suit a particular traffic. And more wagons with dedicated body types (especially for bulk minerals) were built. IRM have modelled some of these, and Enda has produced some of the flat wagons as 3D prints, which could be used as the basis of scratchbuilt bodies. That should be enough to fill your stash for a bit!
-
At the right price, those Heljan models seem very popular! From the sale, one 48DS is enough for me - my O gauge layout is only small and industrial, and I already had a Heljan 03. I need to save up my money for a fleet of IRM 4mm scale C class locos...
-
Wanted - IRM Supertrain A Class locos
Mol_PMB replied to west_clare_wanderer's topic in For Sale or Wanted
Those two were resin kits from Provincial Wagons (Leslie), slightly modified. They represent the 20' 27101 class, basically the same as the chassis for the later type of beet wagons. I also have three other types of 2-axle container flat, none of which have been completed yet! Old MIR whitemetal kits, these are the 22' 27301 class. Etched brass kits from J M Design (Mayner), these are the 20' 25436 class with floors. A sample 3D print from Past-Avenue (Enda), which represents the 20' 27101 class. I got all these with the intention of making a 1970s liner train, but my interests have drifted back in time and they have remained in the stash for now. I do intend to finish the 25436 flats fairly soon (they are the earliest prototype). -
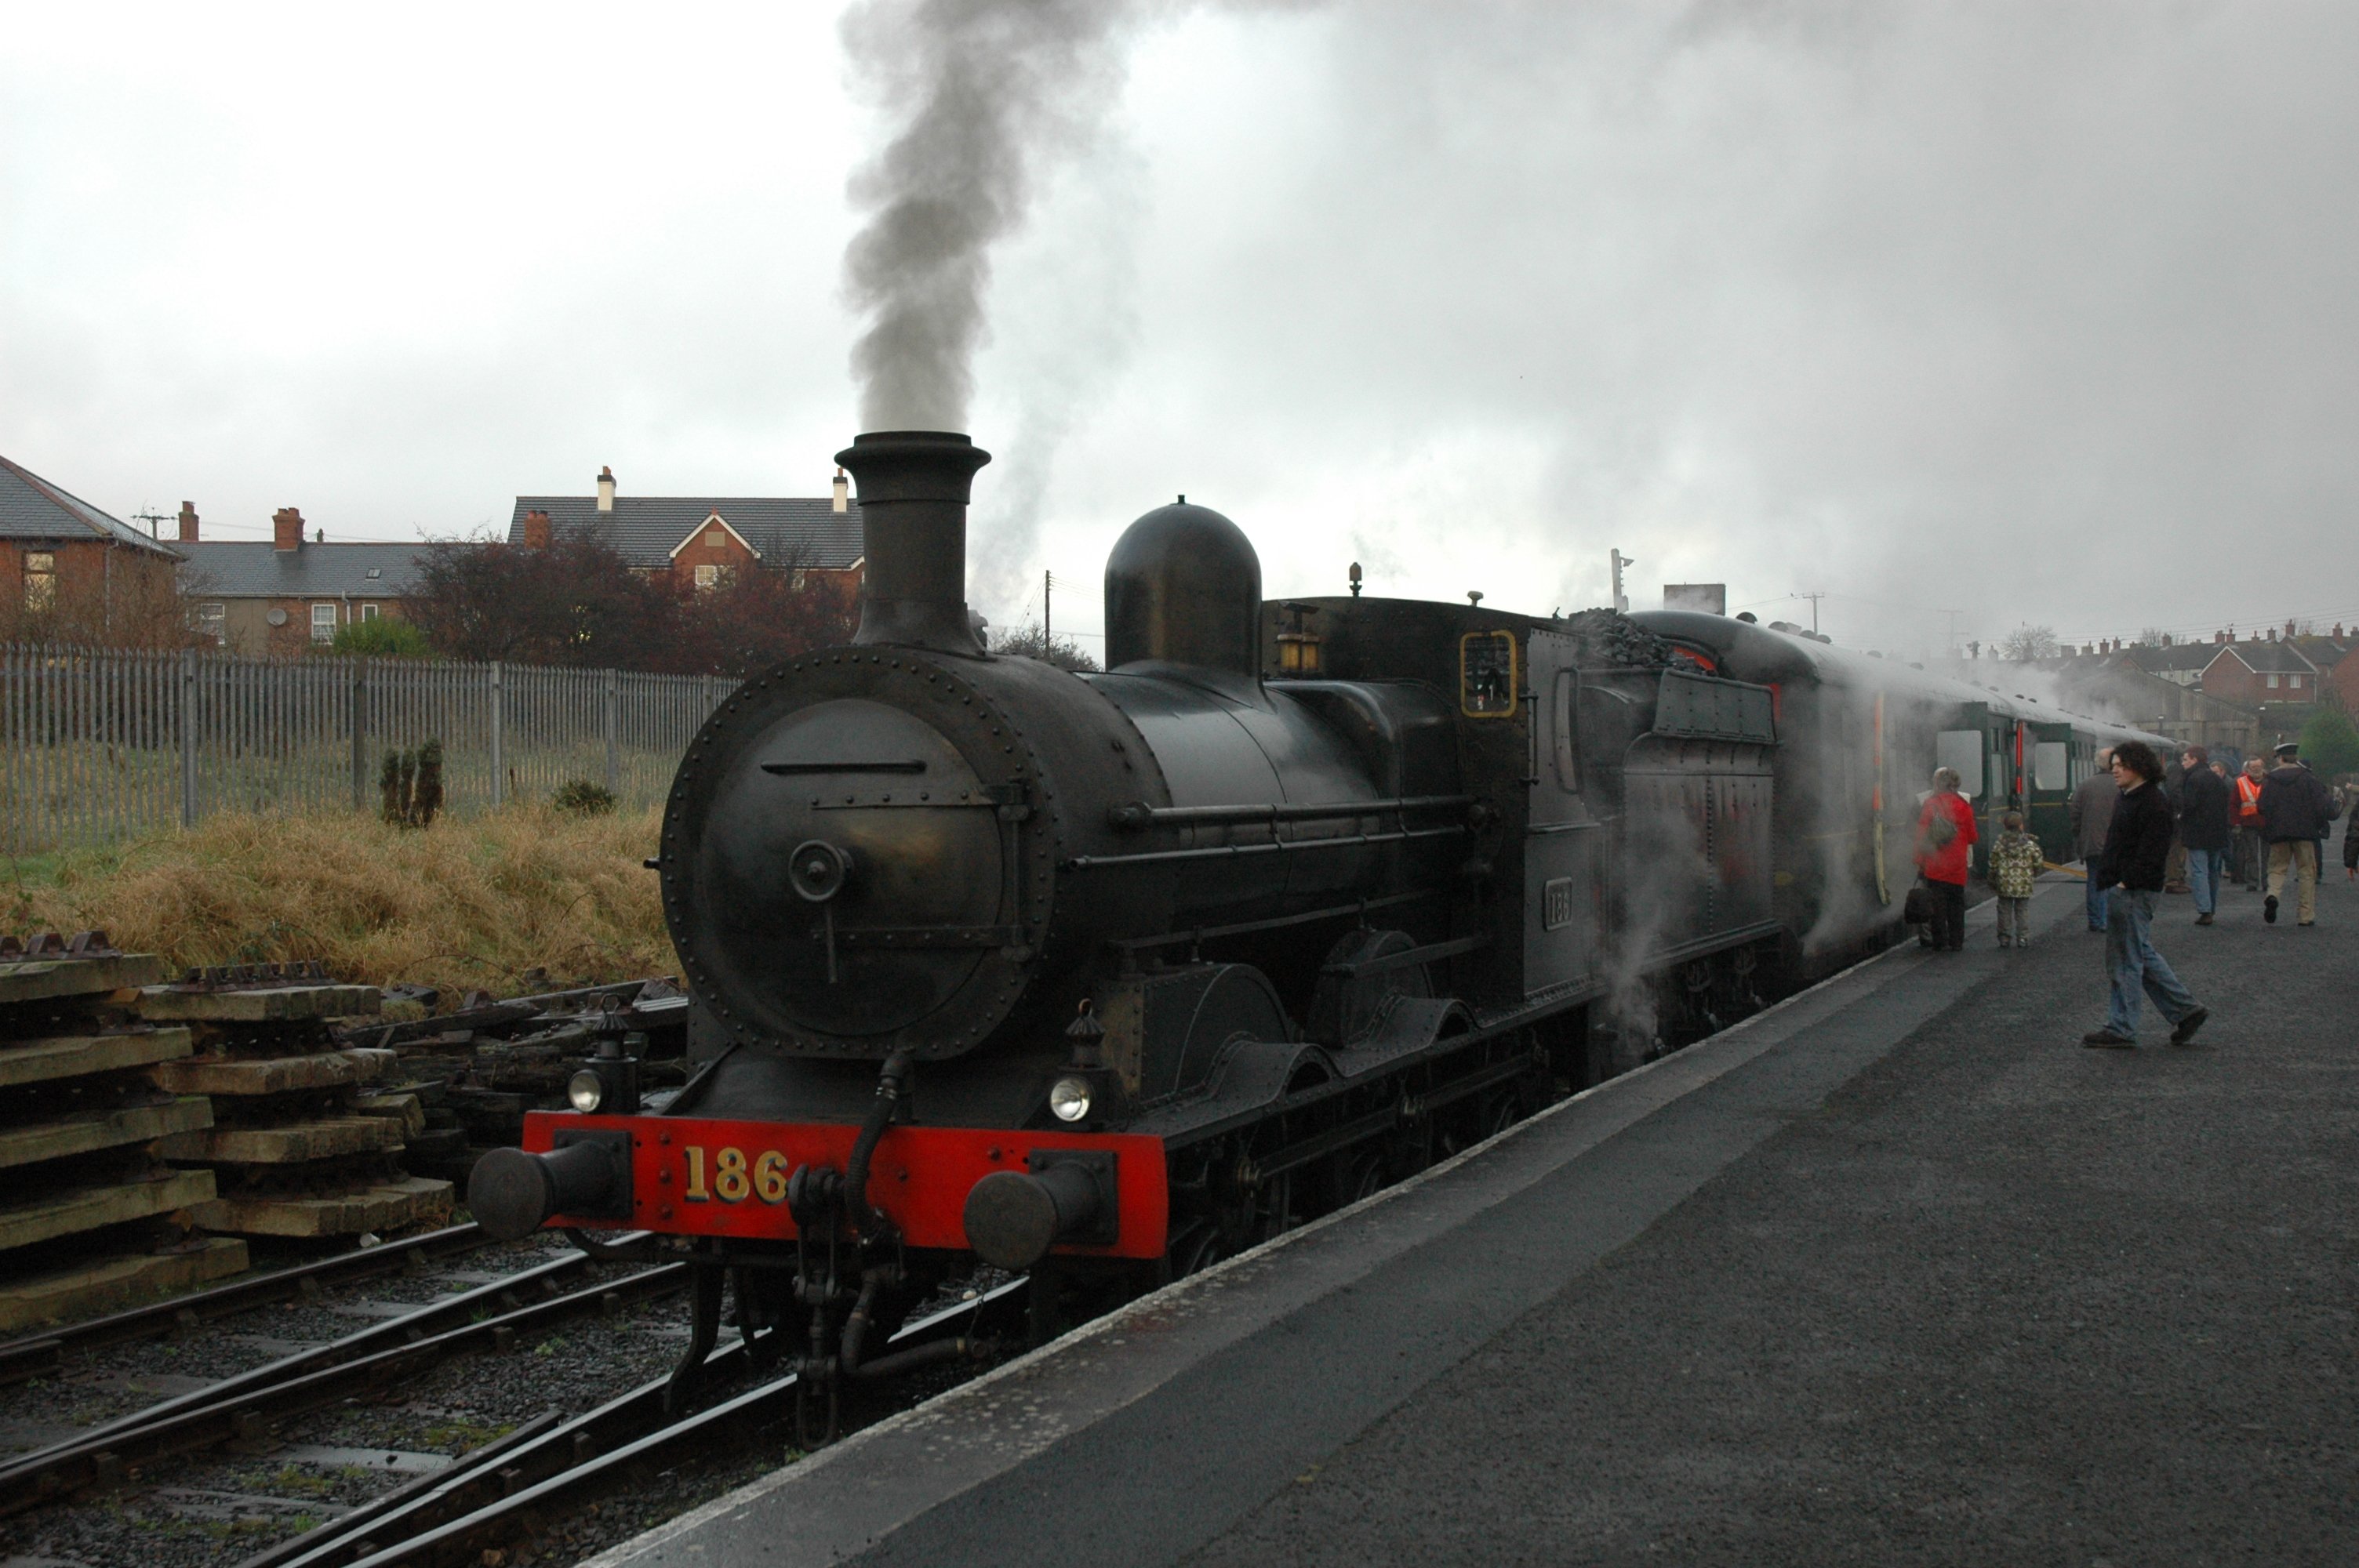
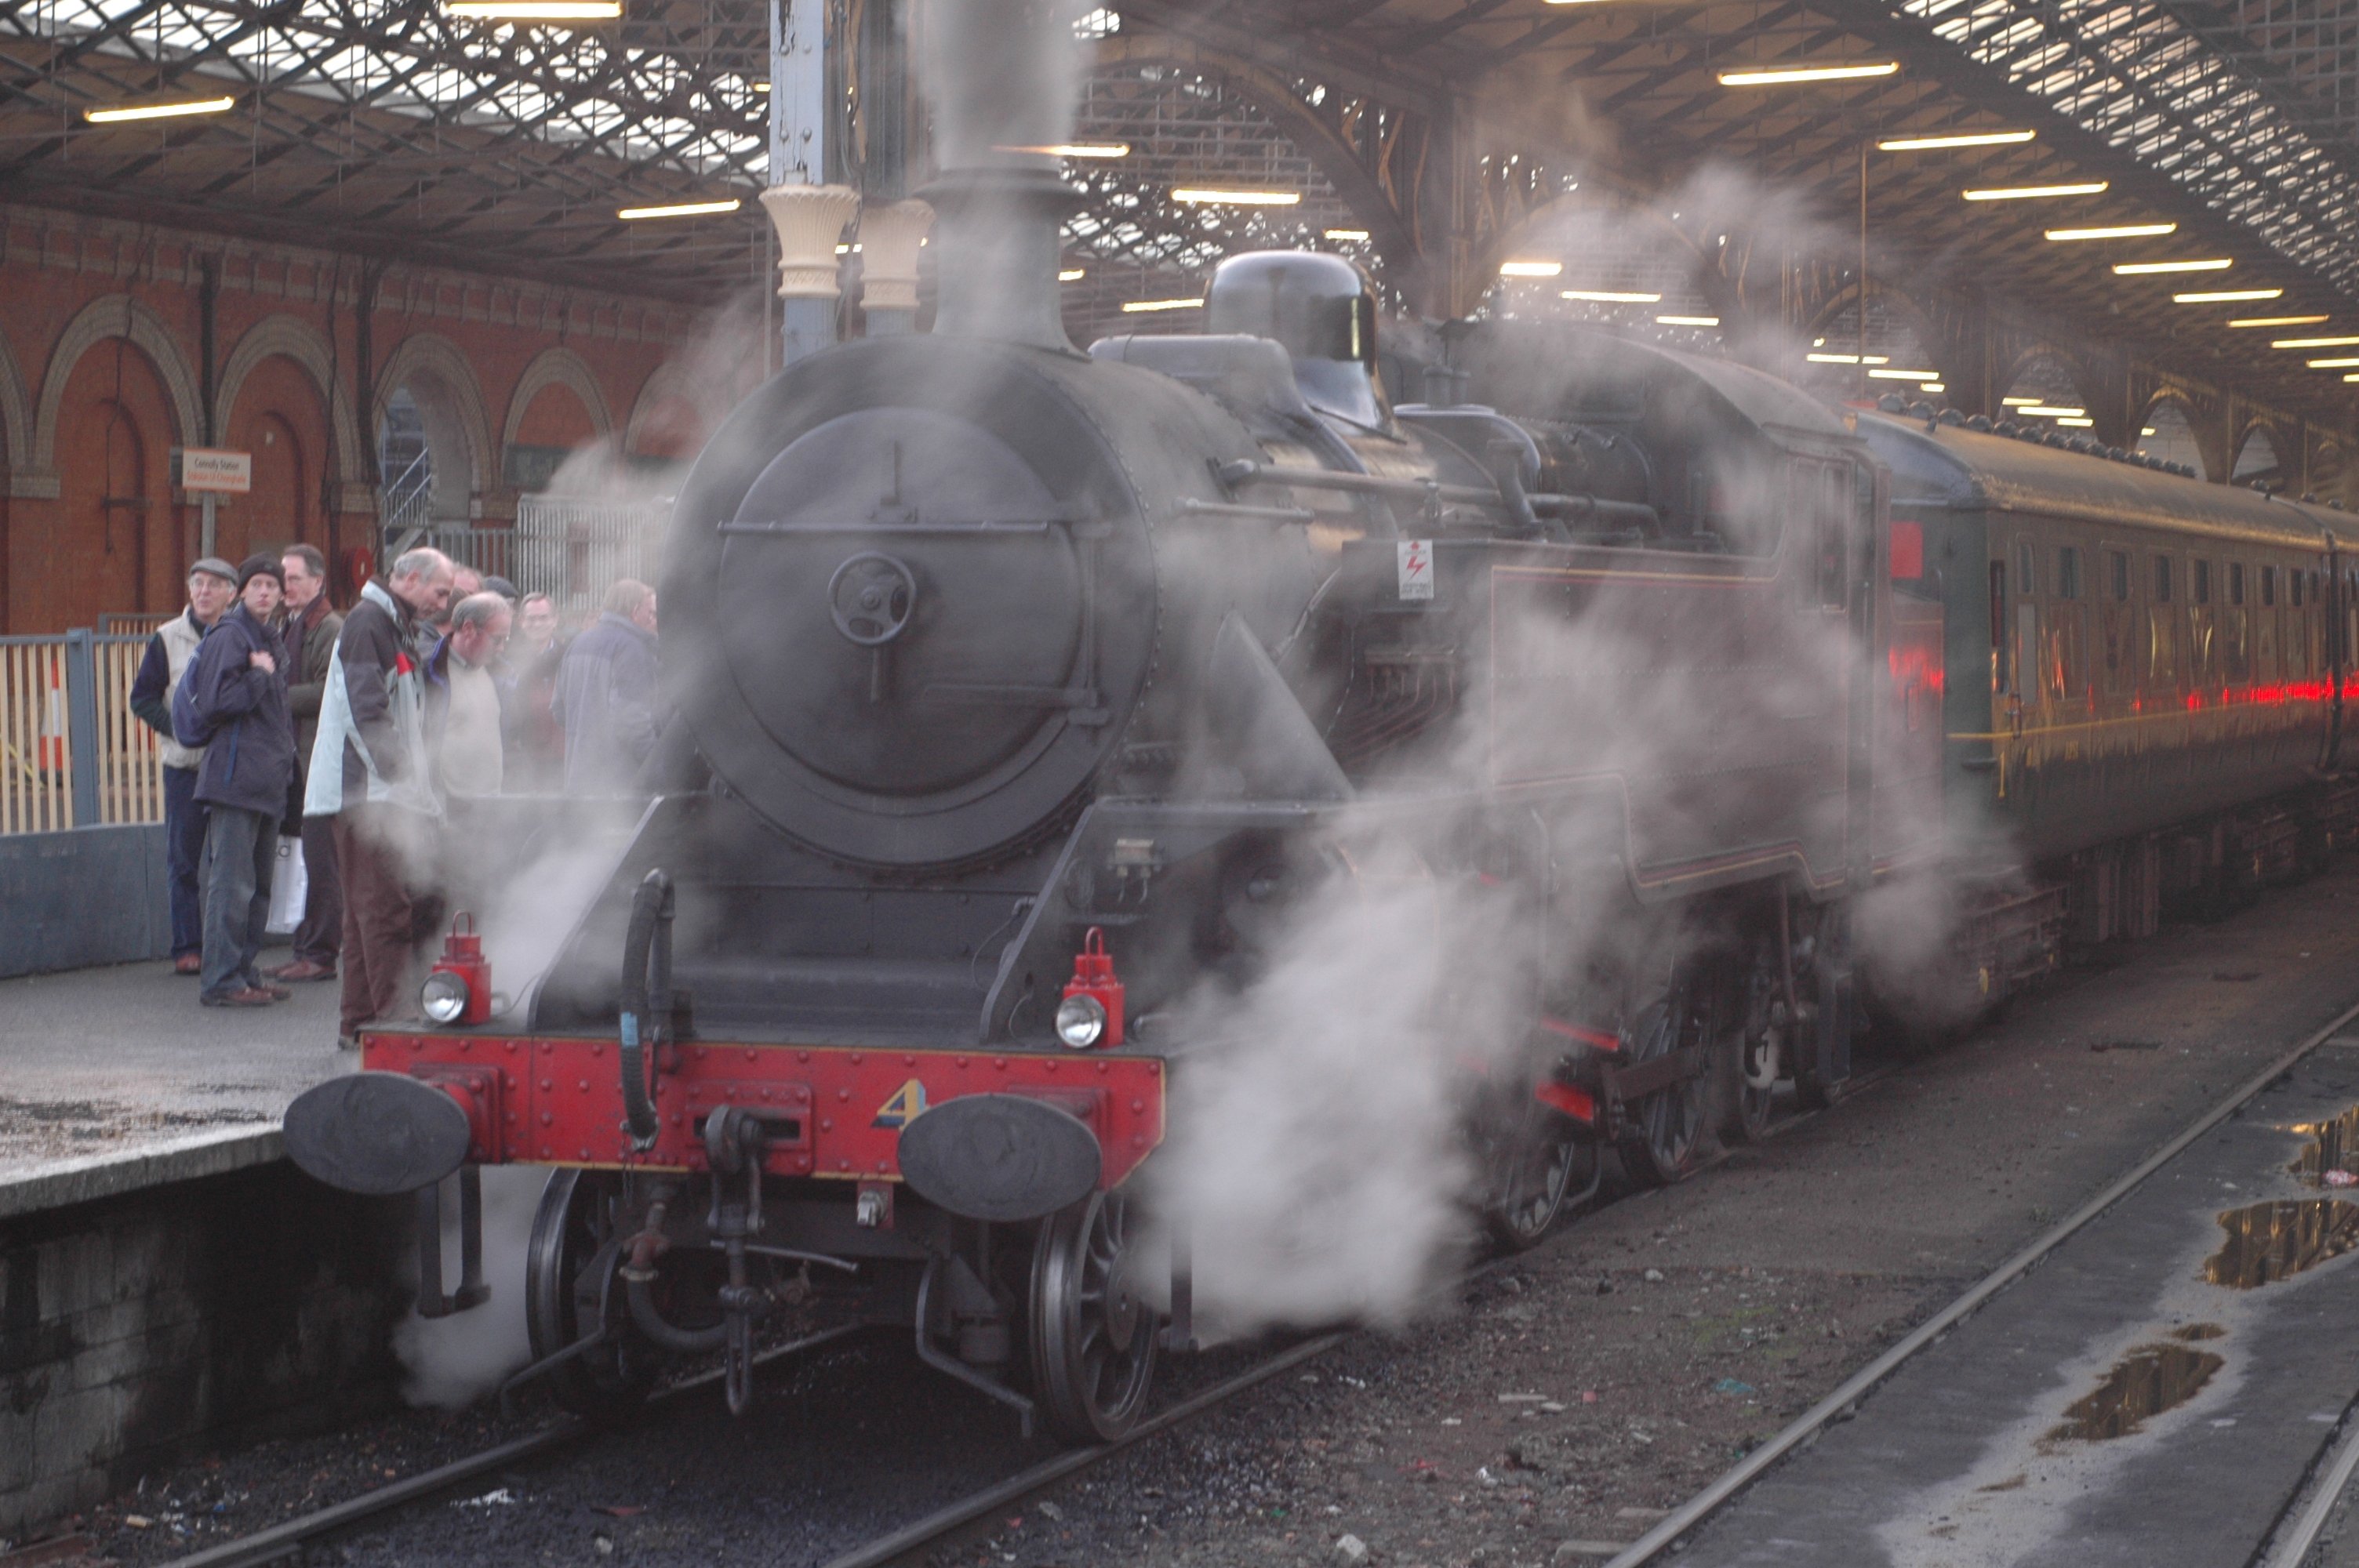
In a similar vein, this was an RPSI 'Mince Pie Special' in late December 2007, and here's 186 at Whitehead excursion platform with a direct train to Dublin Connolly: 171* did the shunt release in Dublin, and after a bit of a chance to stretch our legs, 4 took us back north: Both locos put in a superb performance, I think the driver must have hung his coat over the speedometer... * the diesel, not another kettle!
-
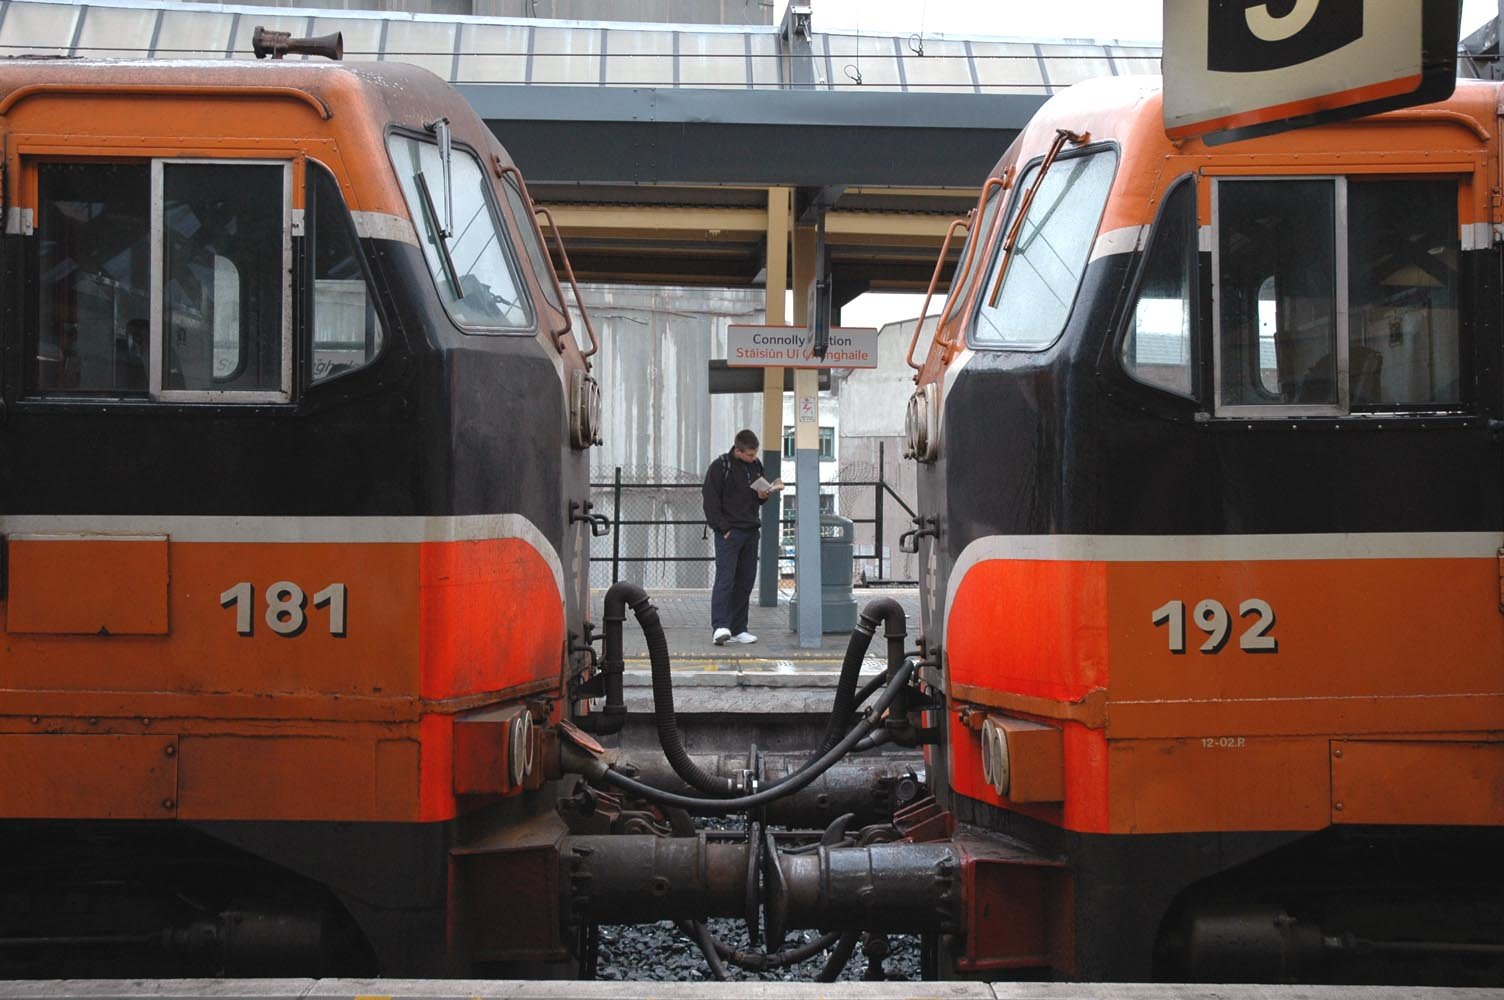
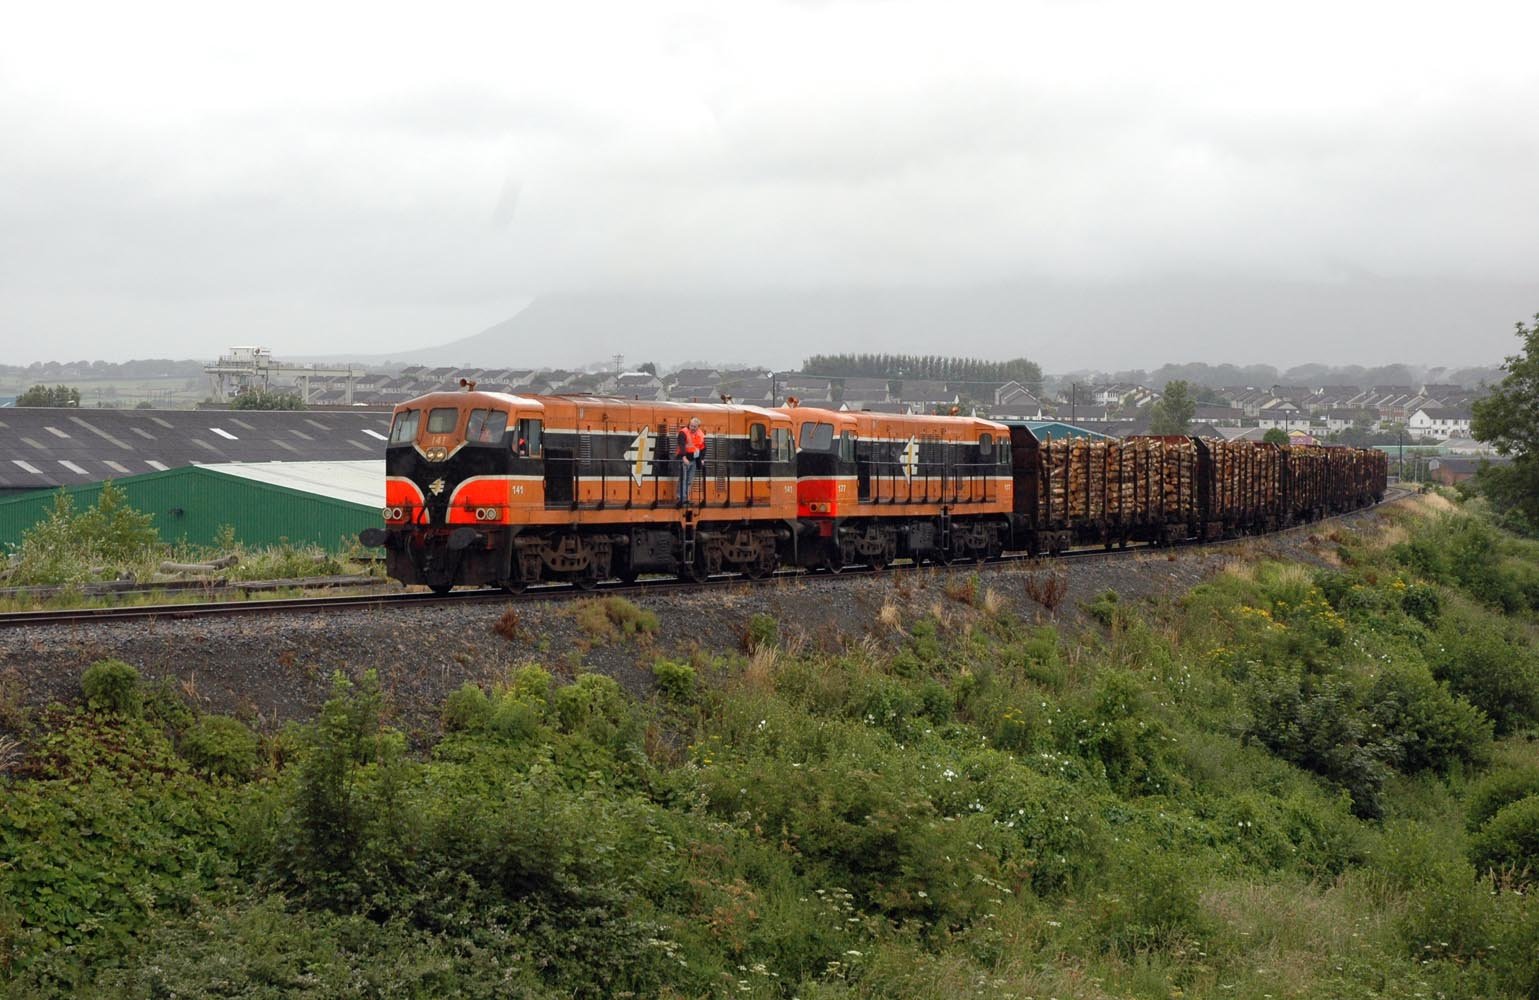
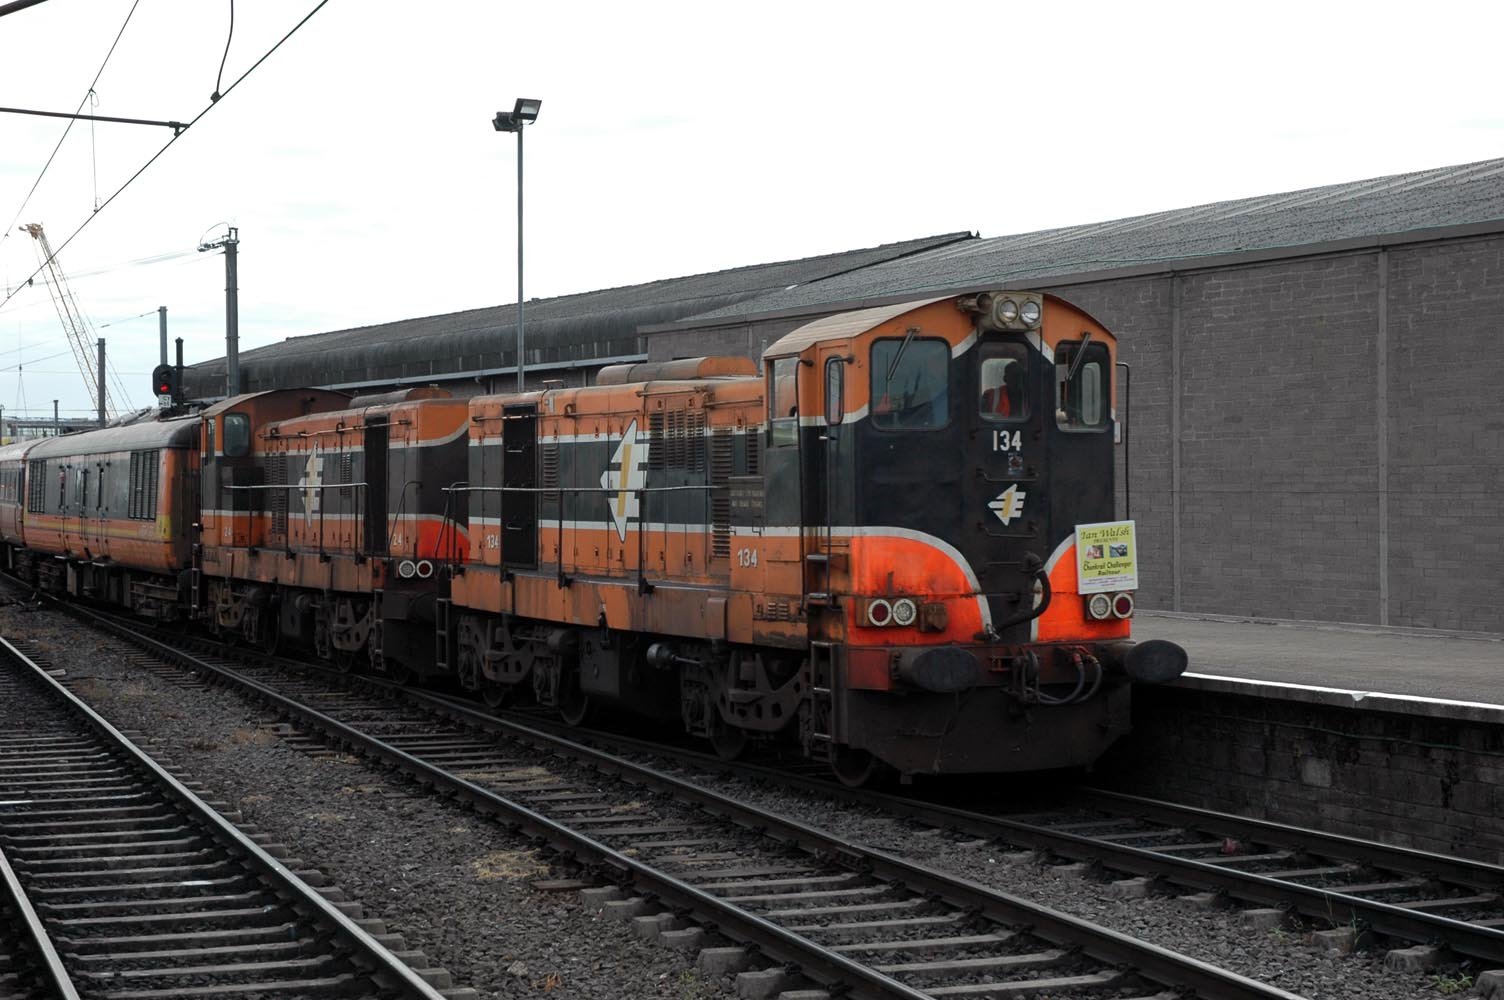
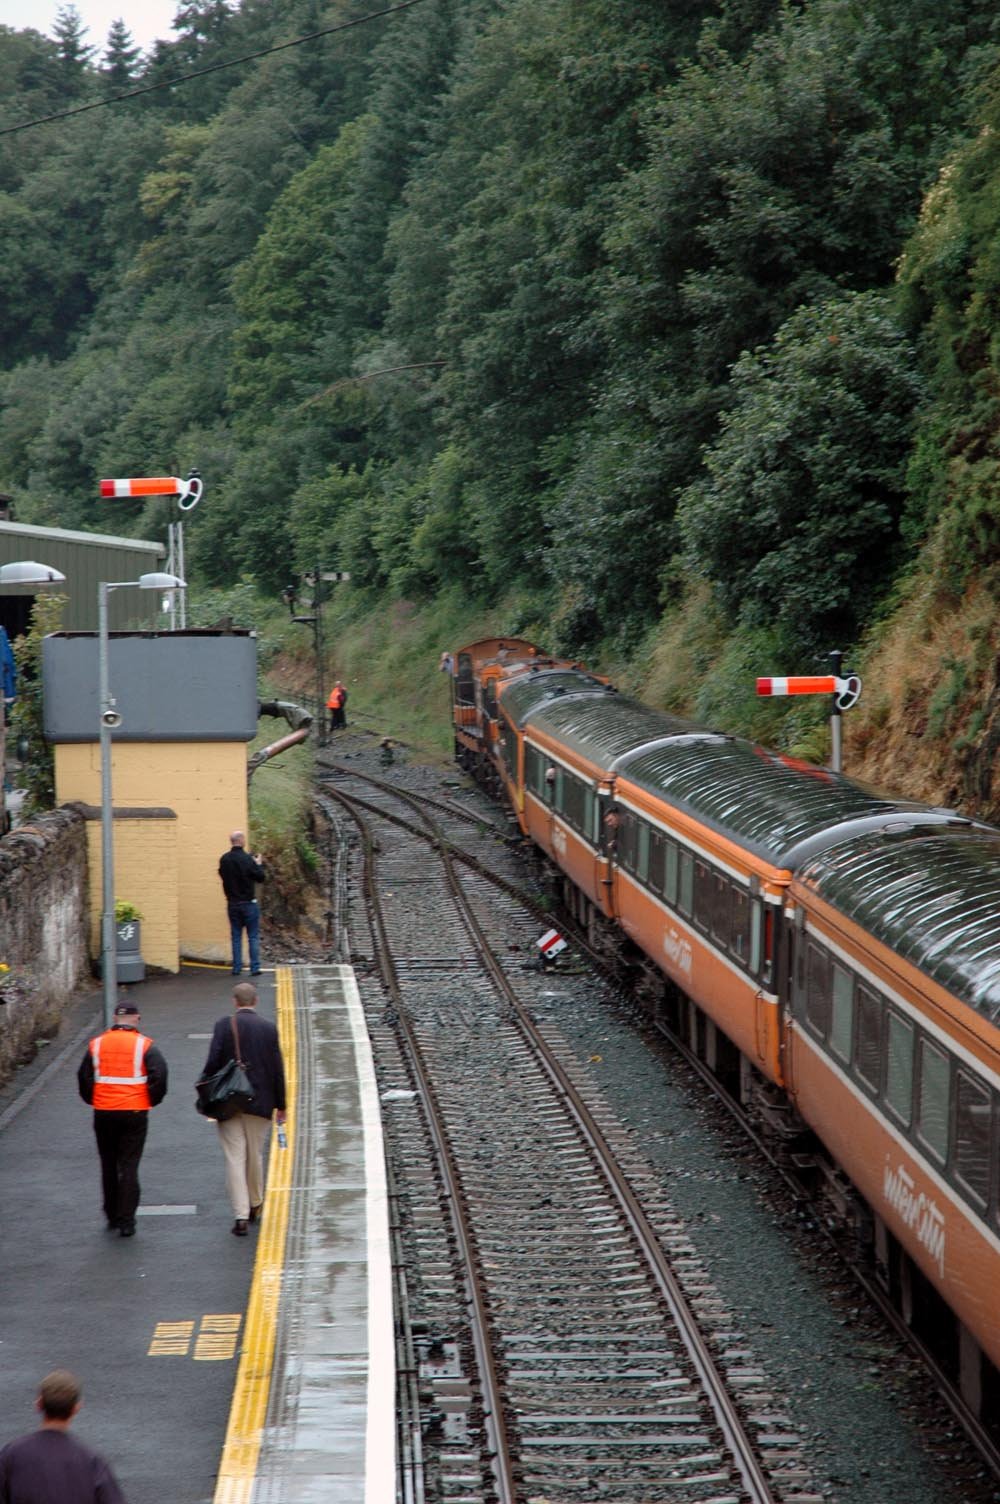
I don't know what strings had to be pulled to get all these locos, but you will note that they were paired up in as follows: 124 + 134 (last two survivors of the 121s) 141 + 177 (first and last of the 141 class) 181 + 192 (first and last of the 181 class) 142 + 134 (I think this was meant to be 124 + 134 again, but 124 had failed so was replaced with the nearest alternative)
-
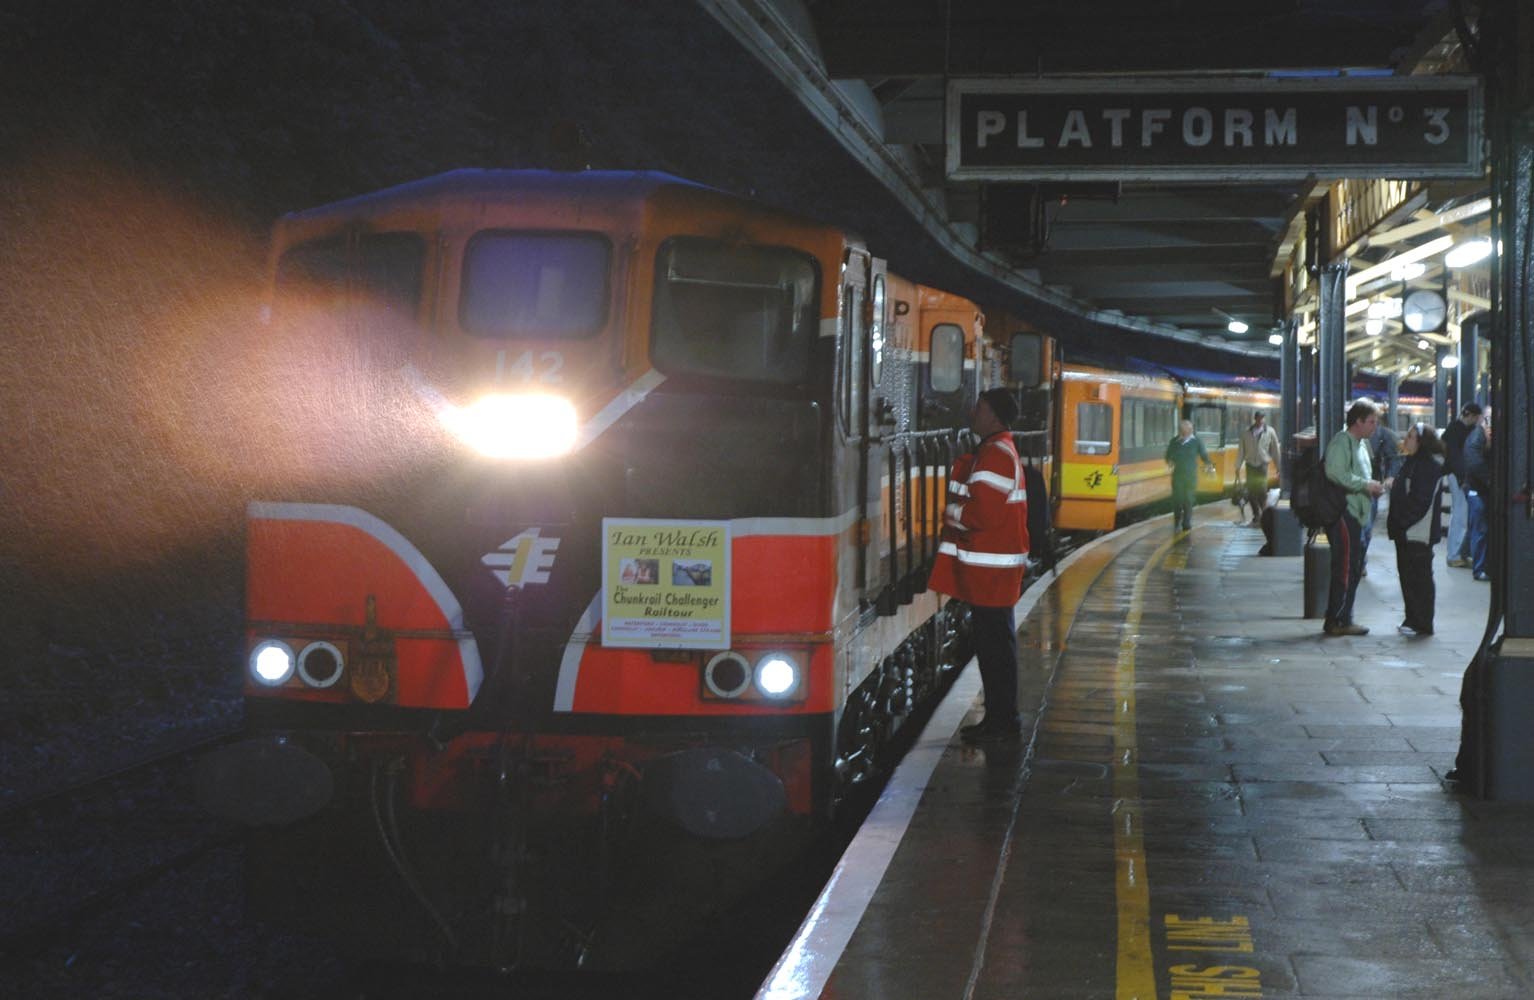
Whilst looking for something else on an old hard disc backup, I found some of my photos of a legendary railtour, the 'Chunkrail Challenger'. Thought they might be of interest or bring back memories. This was almost 20 years ago, the route was Waterford to Sligo and back via Rosslare and it was a long old trip. There were 4 different pairs of baby GMs involved. The Cravens had mostly been withdrawn by this stage, so the train was formed of 'coffin' Mk2 stock. Details from sixbellsjunction / Niall Kelly: 8th July 2006 Ian Walsh The Chunkrail Challenger Locos Used IE: 124, 134, 141, 142, 177, 181 & 192 Stock Used IE mk2d rake Route: Locos Route 134 + 124 Waterford - Dublin Connolly [P2] 177 + 141 Dublin Connolly [P2] - Sligo 181 + 192 Sligo - Dublin Connolly [P5] 134 + 142 Dublin Connolly [P5] - Rosslare Strand 142 + 134 Rosslare Strand - Waterford Hopefully one day, the RPSI will be able to offer us baby GM haulage on the main line again!
-
Yes, I visited Fota earlier this year and there were plenty of both. I think they have free run of the park but in theory aren't allowed outside the fence. Trying to keep a group of Lemurs inside an enclosure is obviously more of a challenge! Those are superb! I saw on RMweb that you had ordered some more. You need to get some wires up at Whiterock!
-
Nice! That 'steel furniture green' looks the part.
-
Sorry, I didn't win it! Thought you might be interested.
-
A little birdie tells me at @Darius43 might have something to show on that front, in due course.
-
I suspect the Oxford Rail model would be a challenge to convert to 21mm. The main frame appears to be diecast metal, and is unlikely to be wide enough for 21mm gauge wheelsets. Cutting it down the middle and widening it would be a challenge in that material, also noting that the pivot is in the middle and the mounting circular part would become an oval. A good reason for me not to buy one!
-
This seller has just listed a load of the earlier batches of cement bubbles and ballast hoppers. This in particular may be of interest as it’s a livery not repeated in the recent IRM batch of bubbles - the Irish Cement branding: https://ebay.io/m/Ccn2CB
-
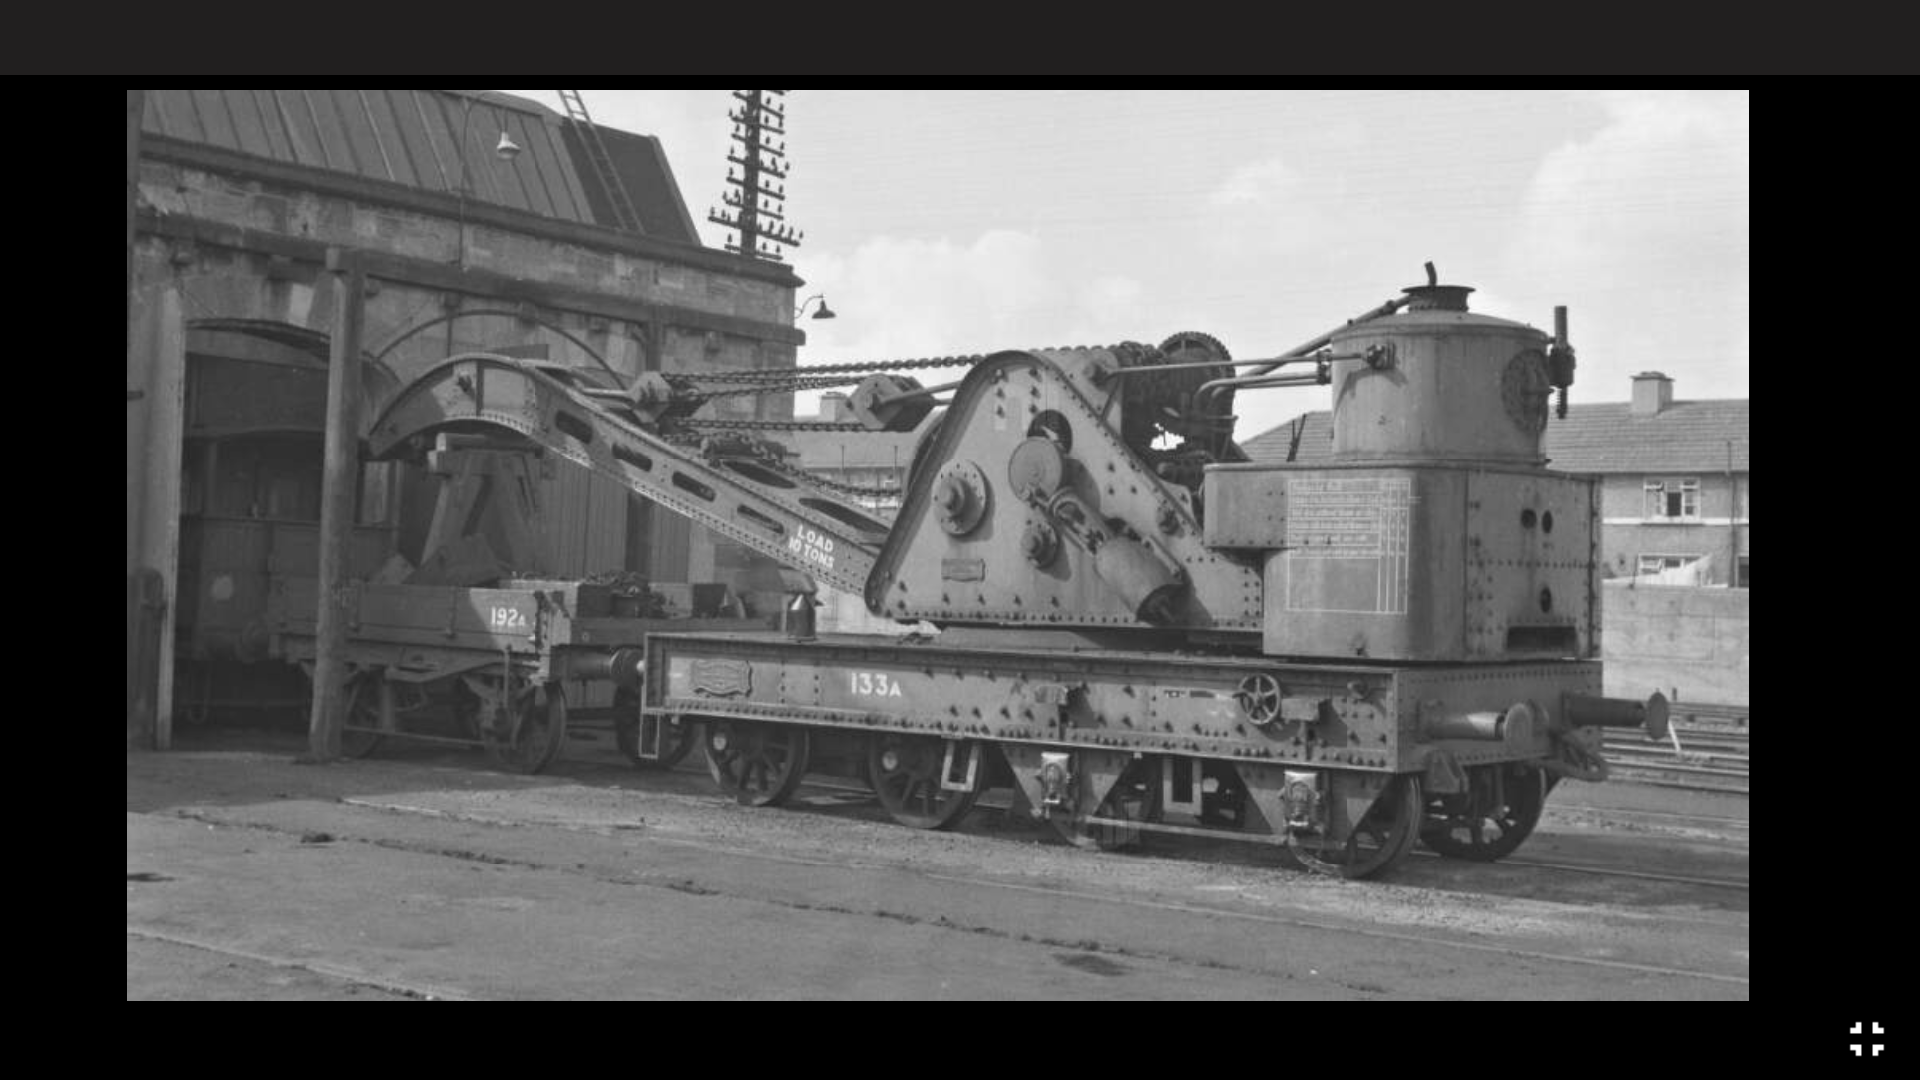
The Rocksavage crane appears in the background of many photos of locos, including these ones from Ernie: And these IRRS images: https://www.flickr.com/photos/irishrailwayarchive/53507915082/ https://www.flickr.com/photos/irishrailwayarchive/53507774942/ https://www.flickr.com/photos/irishrailwayarchive/53508875181/ The Oxford 'Wellingborough' and 'Stoke' cranes have the correct type of jib for this one.
-
"Voiding the Warranty" - Mol's experiments in 21mm gauge
Mol_PMB replied to Mol_PMB's topic in Irish Models
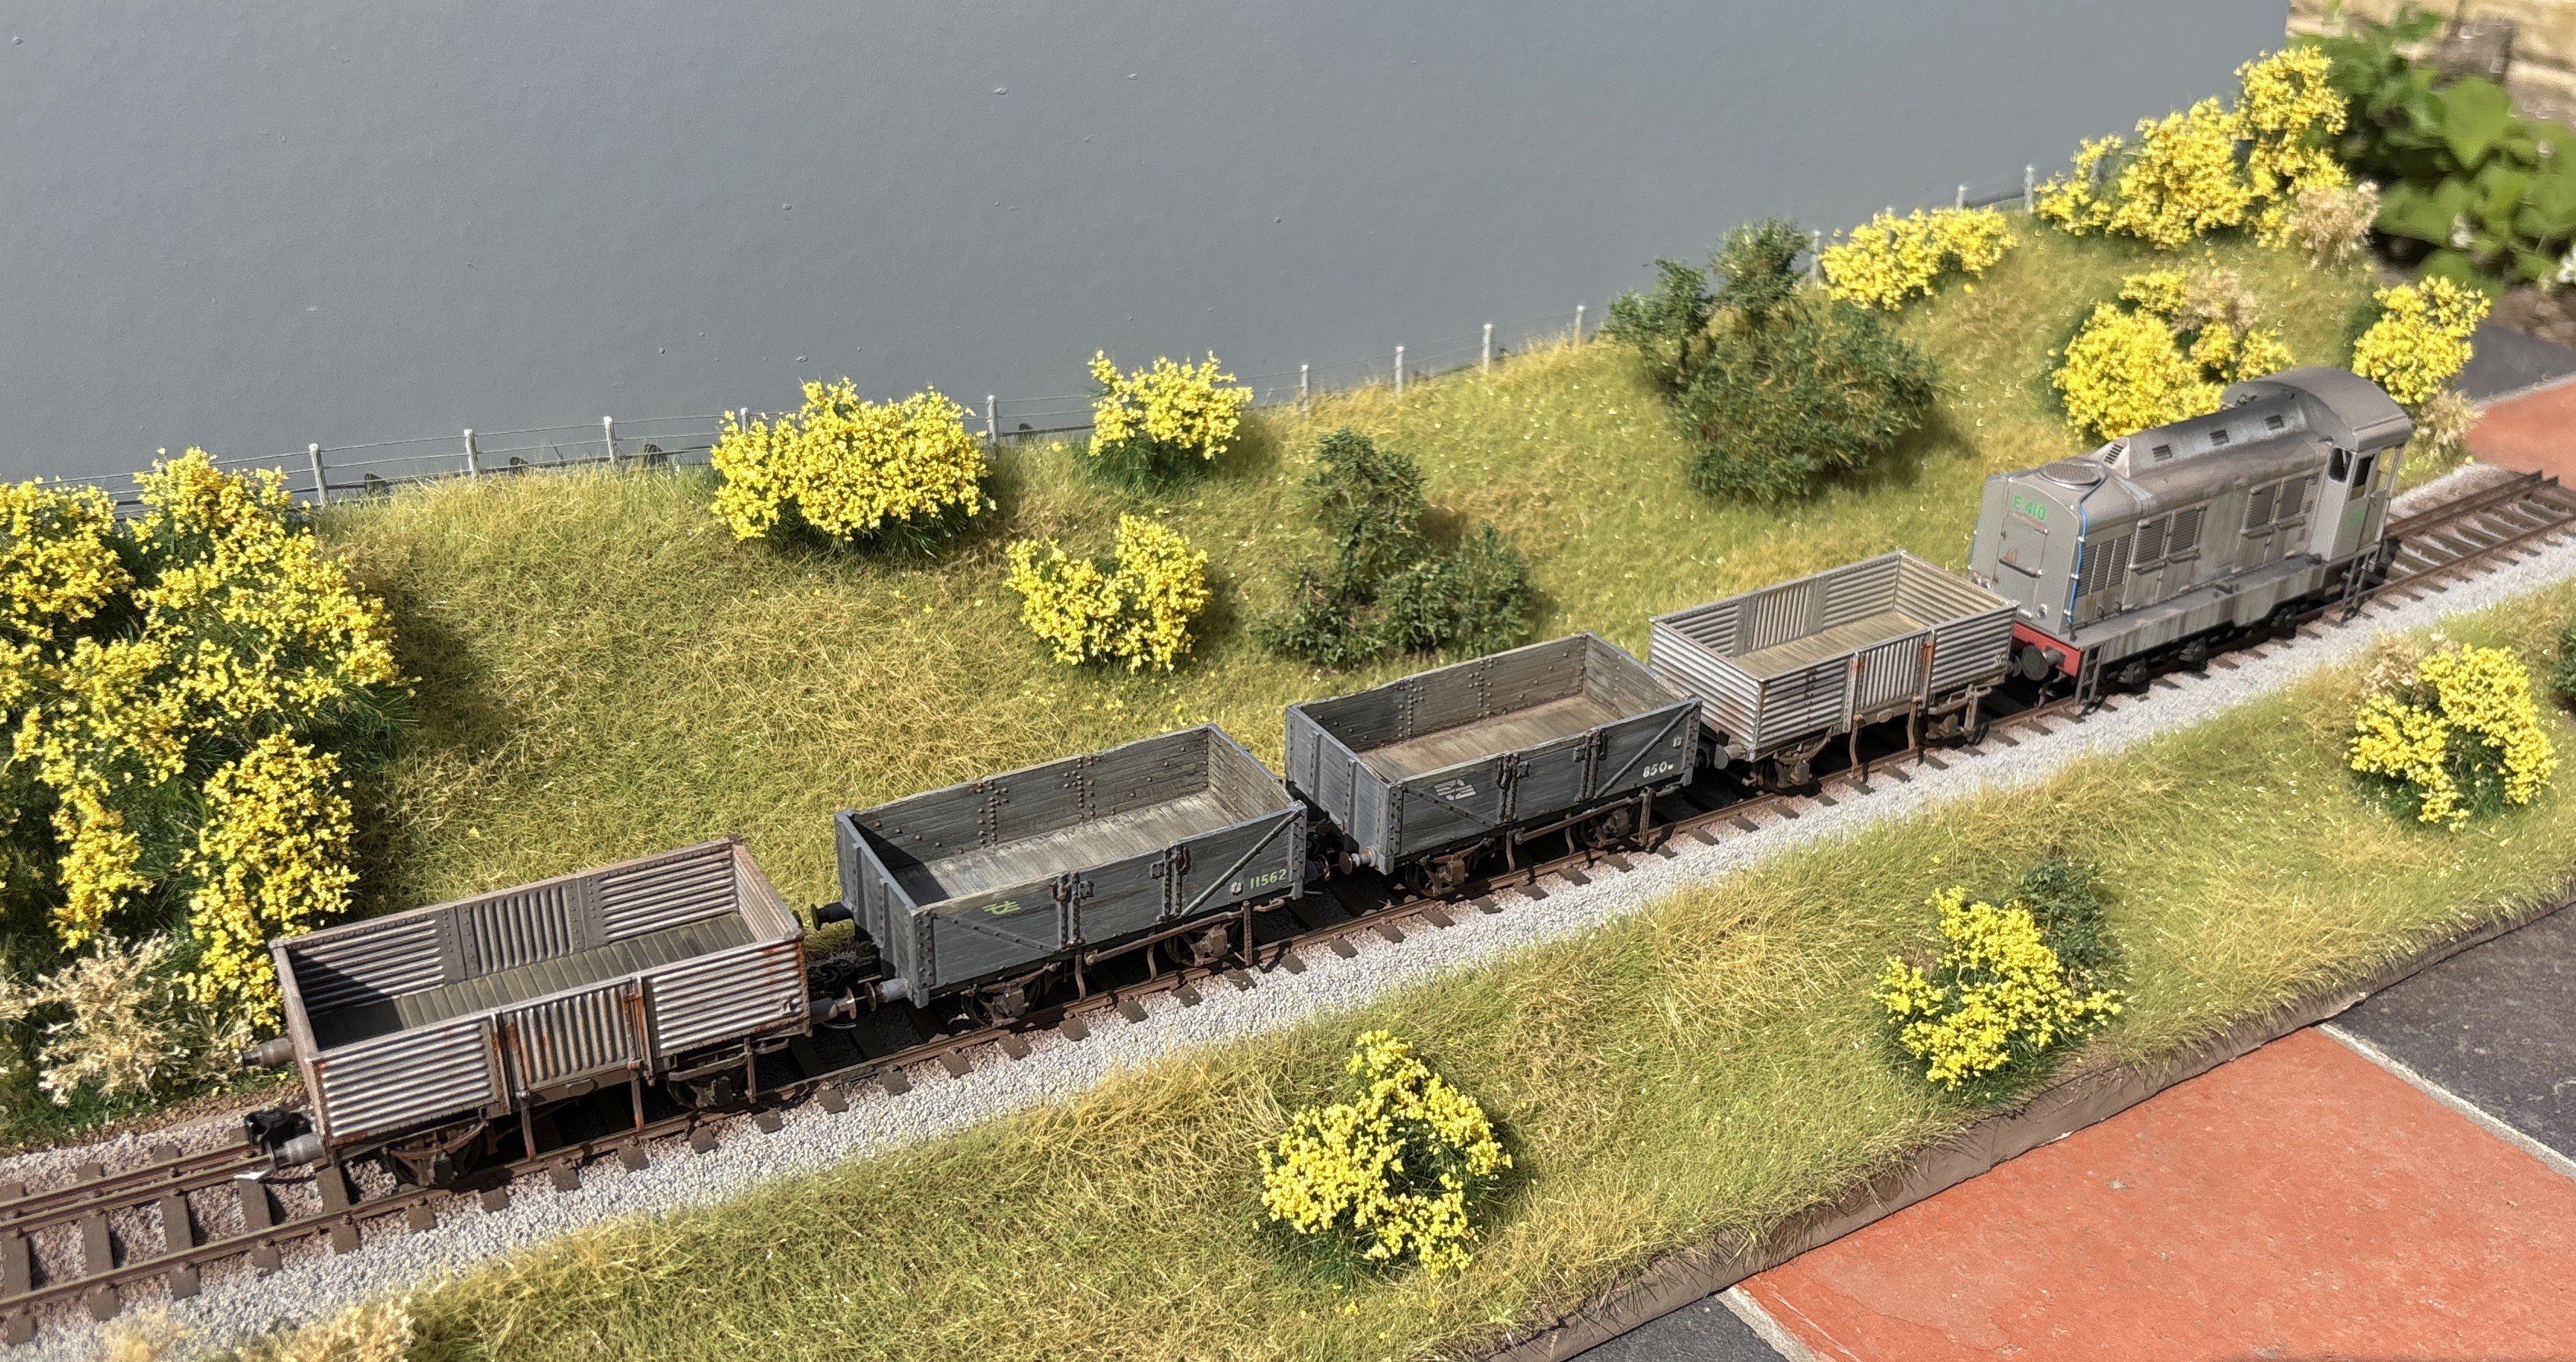
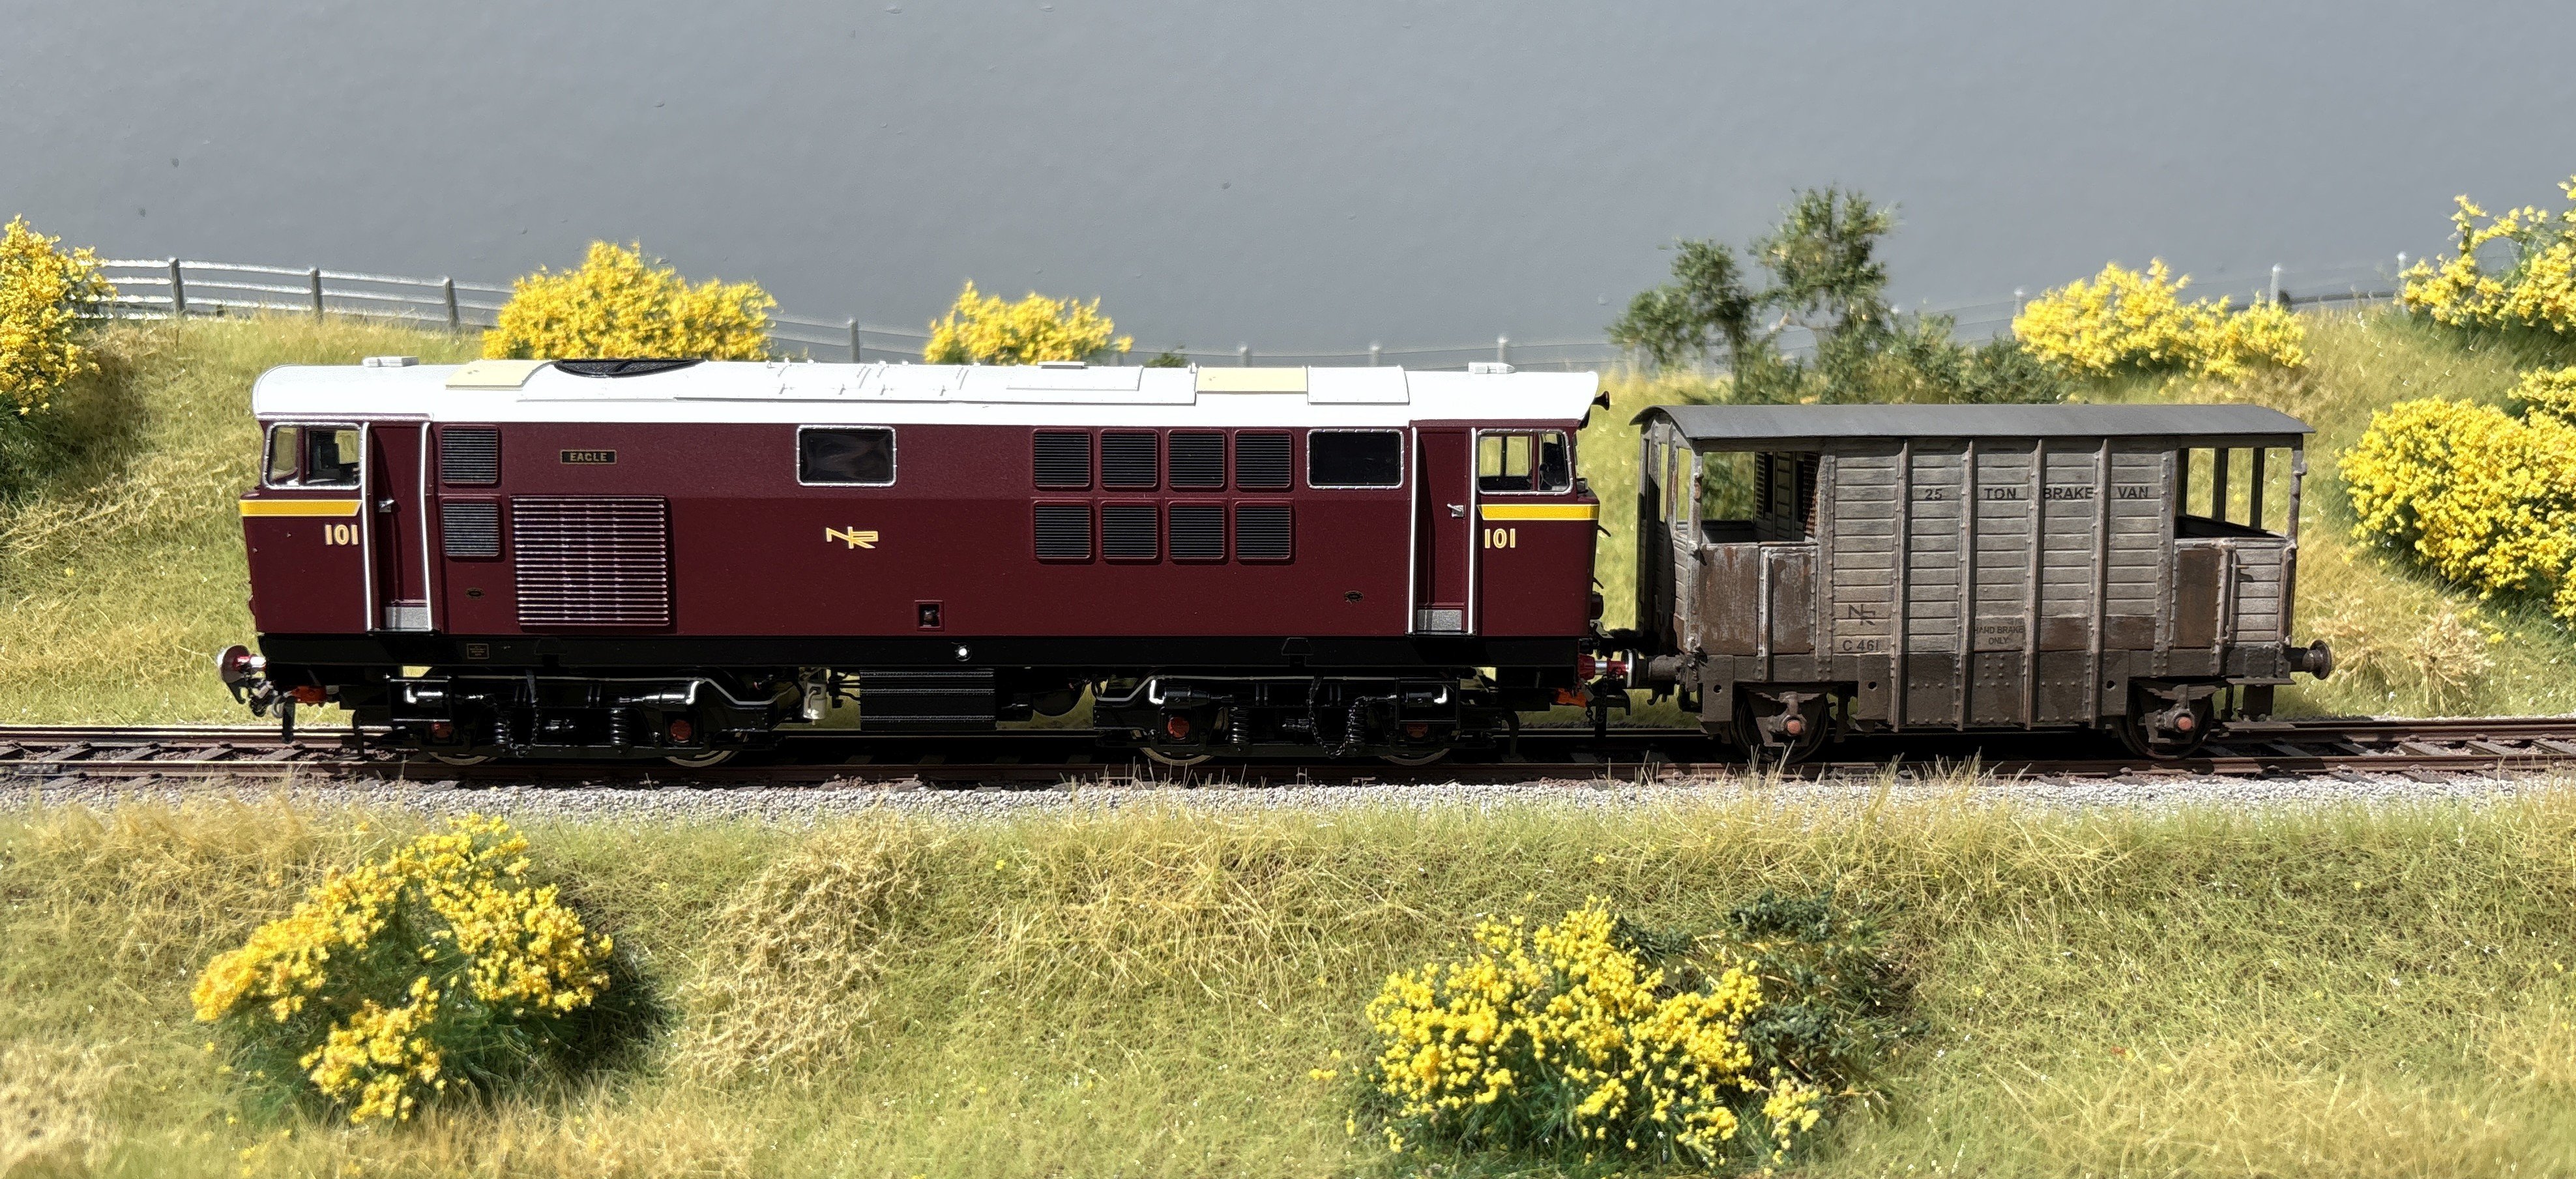
Well this is rather nice! I don't have much NIR stock to pose it with; IRM's matching Mk2s aren't ready yet, and Leslie's last batch of spoil wagons never happened. So it's just a tatty old brake van for now! It doesn't fit my modelling theme, one of the hazards of pre-ordering long in advance before I had settled on my preferred era and region. For now I'll keep it pristine until I make a decision what to do with it!
-
Yes, it's very close indeed to the crane preserved at Whitehead. There were several of this type in Ireland. 2 Crane Many of them were built for railways across the globe, over many years, and there were subtle design variations including two types of jib (both variants available from Oxford). Some were also to different tonnage capacities with other detail variants. Match trucks were usually locally made and differed from crane to crane - Oxford's one is generic but plausible. From the NLI O'Dea collection, here's another Irish one with the more elaborate jib design: Holdings: 10 ton crane x CBSCR, Inchicore, Co. Dublin. :: Library Catalog
-
For an 800-hauled express, most of the vehicles ought to be gangwayed. The odd extra van or strengthening carriage might be non-gangwayed. Internal arrangement would be a mix of corridor compartment stock and open saloon stock. The GSWR built quite a lot of gangwayed saloon stock in the 1900s, which lasted into the 1960s. The GSR preferred compartments for express stock. The roof line would also be very varied. Arc roofs (high and low variants), elliptical or 3-curve roofs, and two shapes of clerestory roof could all be mixed in one train. The IRRS has recently uploaded a super collection of photos by David Murray which include lots of whole-train images of passenger expresses in the early 1950s. That was before CIE's carriage programme had made much of an impact, so the train formations in these photos would be mostly stock from the 1900s to 1930s period. Click here and look at pages 4, 5, and there are some on page 3 too: David Murray [Collection] | Flickr When I get back from hols I will be building the trial etch for my GSWR 50' gangwayed open third. Not that I have an 800 to run it behind!
-
Wonderful!
-
There are plenty of marsupials in County Cork! It may even be possible to spot them from a train on the line to Cobh.
-
Nice! I'm looking forward to getting my green ones in due course. I've fitted #19 to my first one regauged, but I've now run out of them and I don't have any #20 so I need to get some more Kadees ordered. I'm hoping #19 will do on my more gentle curves as it will minimise the gap between the gangways, but I will need to experiment.