Mol_PMB
Members-
Posts
1,982 -
Joined
-
Last visited
-
Days Won
105
Content Type
Profiles
Forums
Resource Library
Events
Gallery
Blogs
Store
Community Map
Everything posted by Mol_PMB
-
Looking closer at the photo I posted, the loco has a load of coal in the tender, and is a bit grubby in places, suggesting that it may have seen a bit of use (trials?) in this condition. Note that it does not carry a nameplate, or the GSR crest on the tender. IRM's photo at the top of the thread has the cast GSR crest, but less (or no) coal in the tender.
-
Please let us know how you get on. I have one of their laser cutters which I have been very pleased with.
-
Excellent work! I’m presently planning to use sector plates for my little layout but you have got me thinking about cassettes as an alternative.
-
"Voiding the Warranty" - Mol's experiments in 21mm gauge
Mol_PMB replied to Mol_PMB's topic in Irish Models
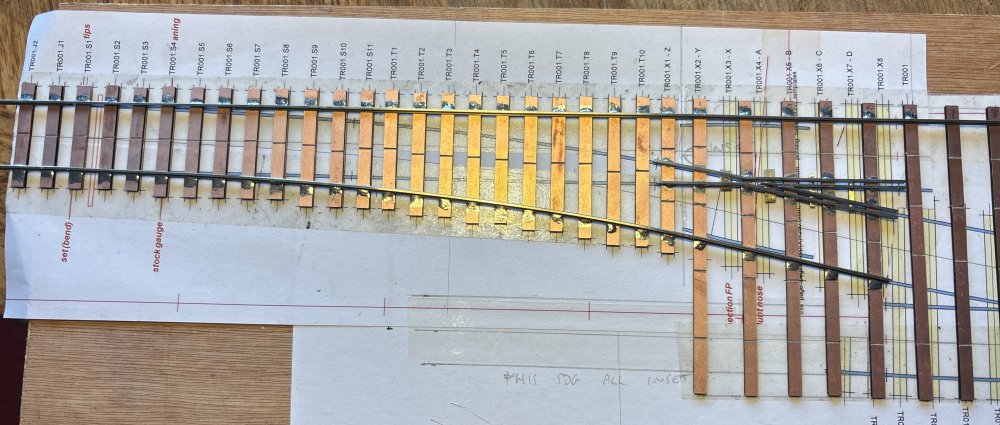
Switch blades now made and fitted, and some wires for power supply added too: I've tried a couple of wagons and they seem to run smoothly through it. The next job is a good clean up, and then I need to try and fill the insulation gaps in the 'timbers' so they're not so obvious. At the weekend I might put the baseboard together. -
That looks superb!
-
Given the recent publicity and IRM's support for its move and restoration, I'm wondering whether the small announcement will be a special edition cement bubble 25199?
-
Great photos. Coach 1130 was a kitchen car, originally built by the GSWR in 1914 and it survived until 1968. Seen in your photo sandwiched between two of the 1497-1503 series open standards which were built at Inchicore in 1962, just before the Cravens. Coach 1319 S was an 8-compartment corridor third built by the GSR in 1926. It was in front-line service in 1961 but the S suffix indicates that it had been demoted to secondary stock by the date of the photo (1965). In 1969 the secondary stock was renumbered in the 4000 series and 1319 became 4035. The coach to its right appears to be one of the 1119-1131 series, also 8-compartment corridor thirds built by the GSWR in 1914/15. These were also demoted to secondary stock and some survived until 1969/70.
-
Especially with the current scandal about the grand old Duke of York, royal connections may not be something people want to admit…
-
"Voiding the Warranty" - Mol's experiments in 21mm gauge
Mol_PMB replied to Mol_PMB's topic in Irish Models
Some more progress on the 21mm gauge pointwork, with the crossings and stock rails in place. The middle part of this crossover is embedded in concrete so the checkrails are a bit more extensive than usual. I have a day off tomorrow and I’m going to tackle the switch blades. I think they will be the most challenging part. -
I have once seen a layout where the builder very carefully made all the stock with suspension or compensation capable of coping with really terrible track quality, and then deliberately built the track to be prototypically awful. It did work, derailments were avoided, and the locos and wagons rocked and rolled over the uneven weedy track in a very convincing way. In its own way, it was a remarkable piece of modelling and really stood out at an exhibition. But I think you would struggle to achieve that in the small scale you're working with - not enough space for the suspension and the rolling stock wouldn't have enough inertia to rock and roll convincingly. Mass and inertia don't scale very well. MIP has enough character of its own in the locos, wagons and scenery!
-
Those locos and stock are very characterful! I can see the appeal of modelling MIP and look forward to watching your progress. Are you going to try and replicate the terrible track quality? Could be a challenge keeping things on those rails in such a small scale.
-
Another 2' gauge peat bog system was the Marconi railway at Clifden, which was unusual in being steam-worked by a very smart little 0-4-0 saddle tank. Although originally built to help with construction of the radio transmitting station, the railway's later use was transporting sod peat from the bog to the power station that generated current for the radio transmitter. I've never seen a model of the line, but often wondered about making one!
-
There were 2' gauge Irish bog railways, including some operated by BnM.
-
"Voiding the Warranty" - Mol's experiments in 21mm gauge
Mol_PMB replied to Mol_PMB's topic in Irish Models
Yes, but used as an unskilled amateur and probably not in the way it was intended. Hopefully there will be some more progress to report later this week. Real life keeps getting in the way. -
Thanks. The model overall looks great but I have the impression that a few things aren't quite right: The vents on the ends are way too small. They should be about one third of the width of the van end, but they looks like less than a quarter of the width. The ends with X reinforcement - the angles of the top and bottom X are the same on the model, but different on the real thing. The split line should perhaps be a bit higher up too. See photos below. My impression is that the curve of the roof is too shallow - it should be a smaller radius and higher in the middle. This is harder to judge but it would be interesting to put alongside an H van and/or compare to some of the more end-on photos. On one side, the brake lever should have a Morton clutch arrangement to reverse the direction of motion. My impression is that the fittings on the solebar below the doors are too large - on photos of the real thing their appearance is more subtle and they don't protrude much beyond the front face of the door. I guess the correct buffer spacing is too much to hope for! Hopefully some of these can be looked at - if not, I'll just have to do some modelling... Cheers, Paul https://www.flickr.com/photos/irishrailwayarchive/54403662846 https://www.flickr.com/photos/irishrailwayarchive/53570883250
-
Some more examples of the 'two small snails' wagon livery, from the IRRS Flickr archive. A flat wagon, and on the siding behind it, an unroofed cattle wagon: https://www.flickr.com/photos/irishrailwayarchive/53509288110 A brake van: https://www.flickr.com/photos/irishrailwayarchive/53509037643 A turf wagon (we can only see the right-hand part, on the left margin of the photo): https://www.flickr.com/photos/irishrailwayarchive/53507982292 An open wagon (we can only see the right-hand part, on the left margin of the photo): https://www.flickr.com/photos/irishrailwayarchive/53508886221 A goods van (left background): https://www.flickr.com/photos/irishrailwayarchive/53508884216 A horsebox (unusual positioning of the two small snails here!): https://www.flickr.com/photos/irishrailwayarchive/53507996077 An elderly open wagon, just to the left of the loco smokebox: https://www.flickr.com/photos/irishrailwayarchive/53511476951
-
"Voiding the Warranty" - Mol's experiments in 21mm gauge
Mol_PMB replied to Mol_PMB's topic in Irish Models
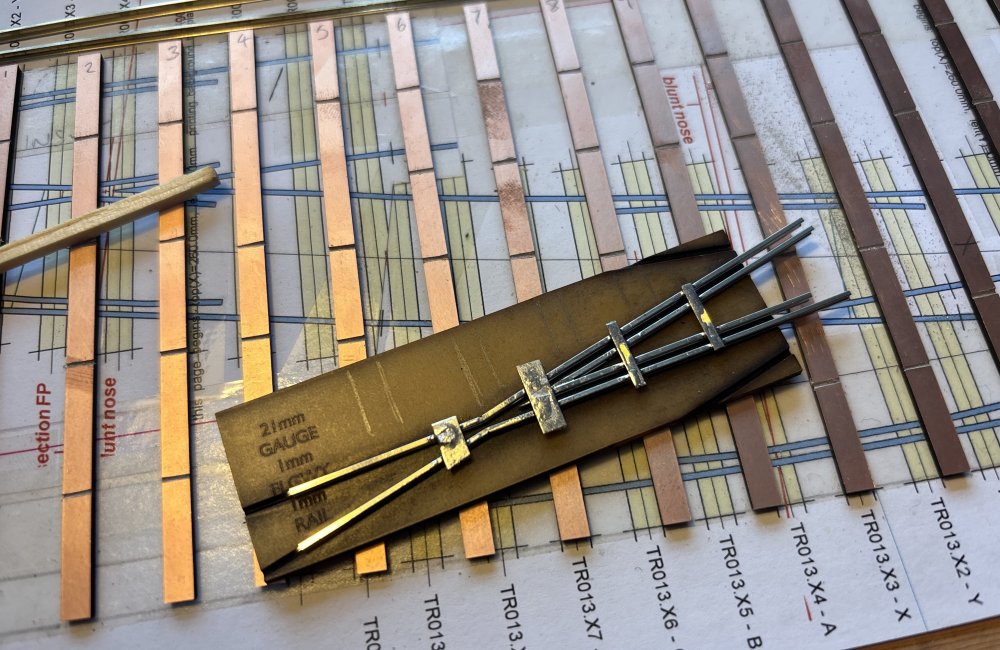
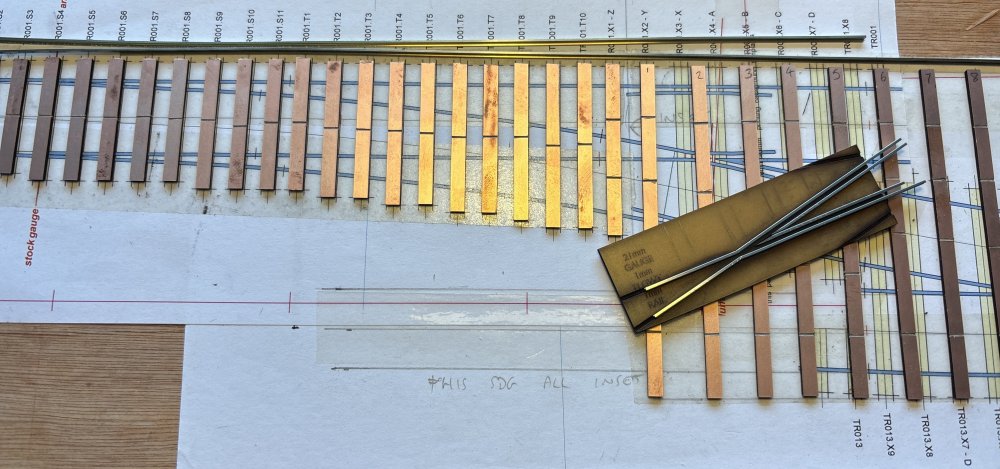
Today I have made a start on some pointwork. I’ve been putting this off for far too long. So far, it seems to be going OK. I have used my laser-cutter to make a couple of jigs to help.- 223 replies
-
- 17
-

-

.png.c363cdf5c3fb7955cd92a55eb6dbbae0.png)


