irishthump
-
Posts
1,890 -
Joined
-
Last visited
-
Days Won
9
Content Type
Profiles
Forums
Events
Gallery
Blogs
Everything posted by irishthump
-
Murphy Models 071 with sound chip won't move
irishthump replied to RobertRoche's question in DCC, Electrics and Electronics
Yes, Hornby DCC is hit and miss AT BEST! Get yourself either the Powercab or the Gaugemaster Prodigy 2. -
Preorders of IRM Tara Mines Wagon begin this weekend
irishthump replied to Warbonnet's topic in News
Bummer! But not IRM's fault for sure, and thanks for the update!- 188 replies
-
- 2
-

-
- wagons
- tara mines
- (and 1 more)
-
@Dave Yeah I get that, but to be honest I find that to be a lot of messing around. The Kadee magnet is plug and play and I can deal with how it looks. Also easily removed if needs be.
-
It's also dependent on which couplers you use. The neodymium magnets work fine with the NEM couplers as the sideways movement is more limited, but draft box Kadees get pushed apart too far to reengage for delayed uncoupling. Also, NEM and draft box couplers don't like to be mixed and matched.
-
But again they tend to be too strong for the couplers and push them too far to the side. Also, when you increase the area you start to get problems with the magnets attracting the metal axles of the rolling stock. All methods have their drawbacks but the Kadee uncoupler's problems are purely cosmetic, they work well.
-
The neodymium magnets are a cheap alternative but they create their own problems. Like Noel said the uncoupling area can be way to small making uncoupling difficult. it get's even more messy when you're driving a sound equipped loco with lots of momentum as it makes it very hard to stop in the right place! Also the magnets can be way to strong which forces the coupler knuckles too far apart. This means the couplers won't reengage correctly when pushing the stock which causes buffer lock and derailments! The electromagnet uncouplers are a good alternative but again but are near impossible to retrofit to an existing layout. The between track magnets not be visually appealing but they simply work best.
-
Murphy Models 071 with sound chip won't move
irishthump replied to RobertRoche's question in DCC, Electrics and Electronics
Everything can be restored after a reset and the sound file is not affected in any way. He should not lose any settings as these are usually locked in as the default setting if the sound is factory installed. -
Dave, 1 set of 141 handrails and 3 sets of horns. Will the full detail pack for the 141 be available?
-
They're nice! Found similar ones here: https://www.ebay.co.uk/itm/20ft-Oil-Tank-Containers-Shipping-Container-Freight-Cars-HO-Scale-LOT/371677769041?hash=item5689b8ad51:m:mr6Ve-OWtLxUl1Ad44AMFhg They'll come on the "slow boat" but they're a bit cheaper.
-
Certainly seems a viable alternative. I'm about to start ballasting my own layout and I'm dreading it! The toothpaste is a clever idea! I've been experimenting with various techniques including mixing talcum powder and pva or varnish to simulate cement dust. I've been doing this with old Hornby tank wagons, I want to have the method right before I touch my lovely new bubbles...
-
Looks fantastic! Very hard to tell it's not regular ballast. The weathering job on those cement bubbles is great too. What techniques did you use on them?
-
The main cause of that "bounce effect" is that the wheelsets on UK stock are being attracted to the uncoupling magnet. It's the axles that are at fault, Bachmann and Hornby use a magnetically attractive metal in their axles. US manufacturers make a point of manufacturing non magnetic wheelsets. It really only happens with the large undertrack magnet as it's long enough that the couplers are still pulled to the side just as the wheelsets roll over the magnet and you get a small jerk which separates the stock. Bloody nightmare! I'm actually in the process of switching out the undertrack magnets for the ones that slot between the rails. If you use small neodymium magnets you won't have this problem either as the "magnetic footprint" is tiny. I've done something similar with this brass strip but the drag really builds up over a rake of 6 or 7 coaches!
-
Again, great info.Thanks for clearing that up.
-
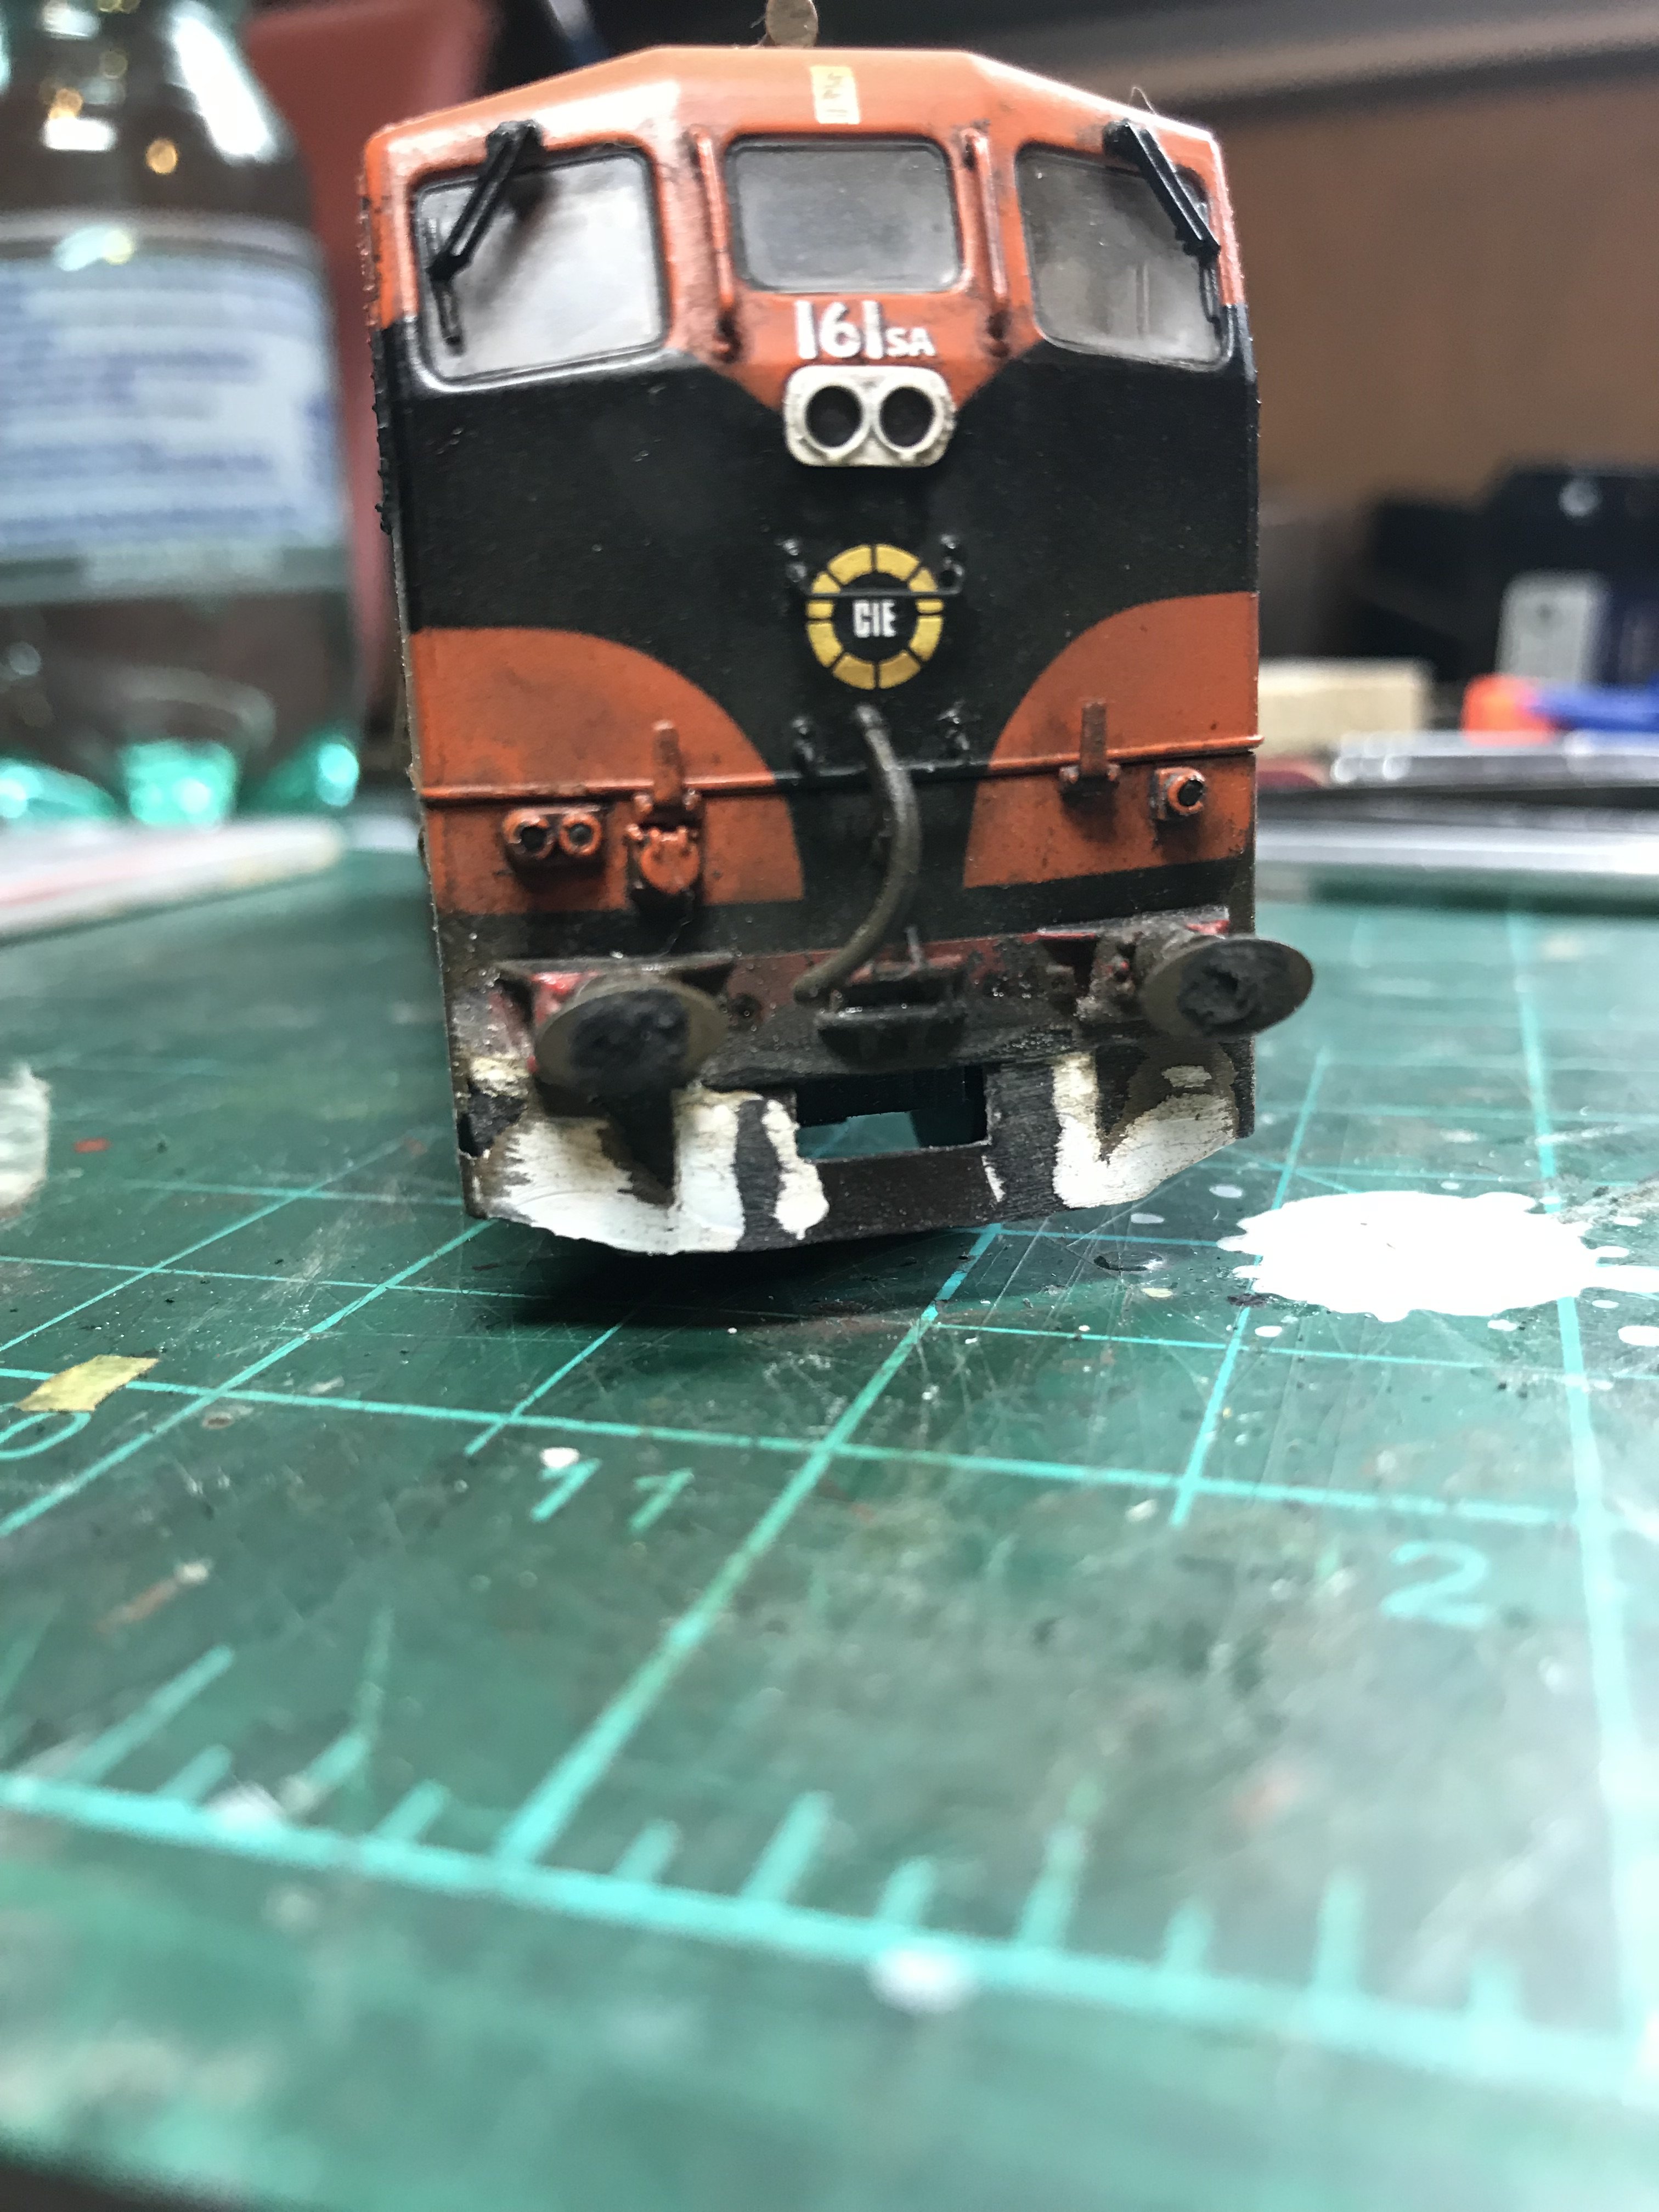
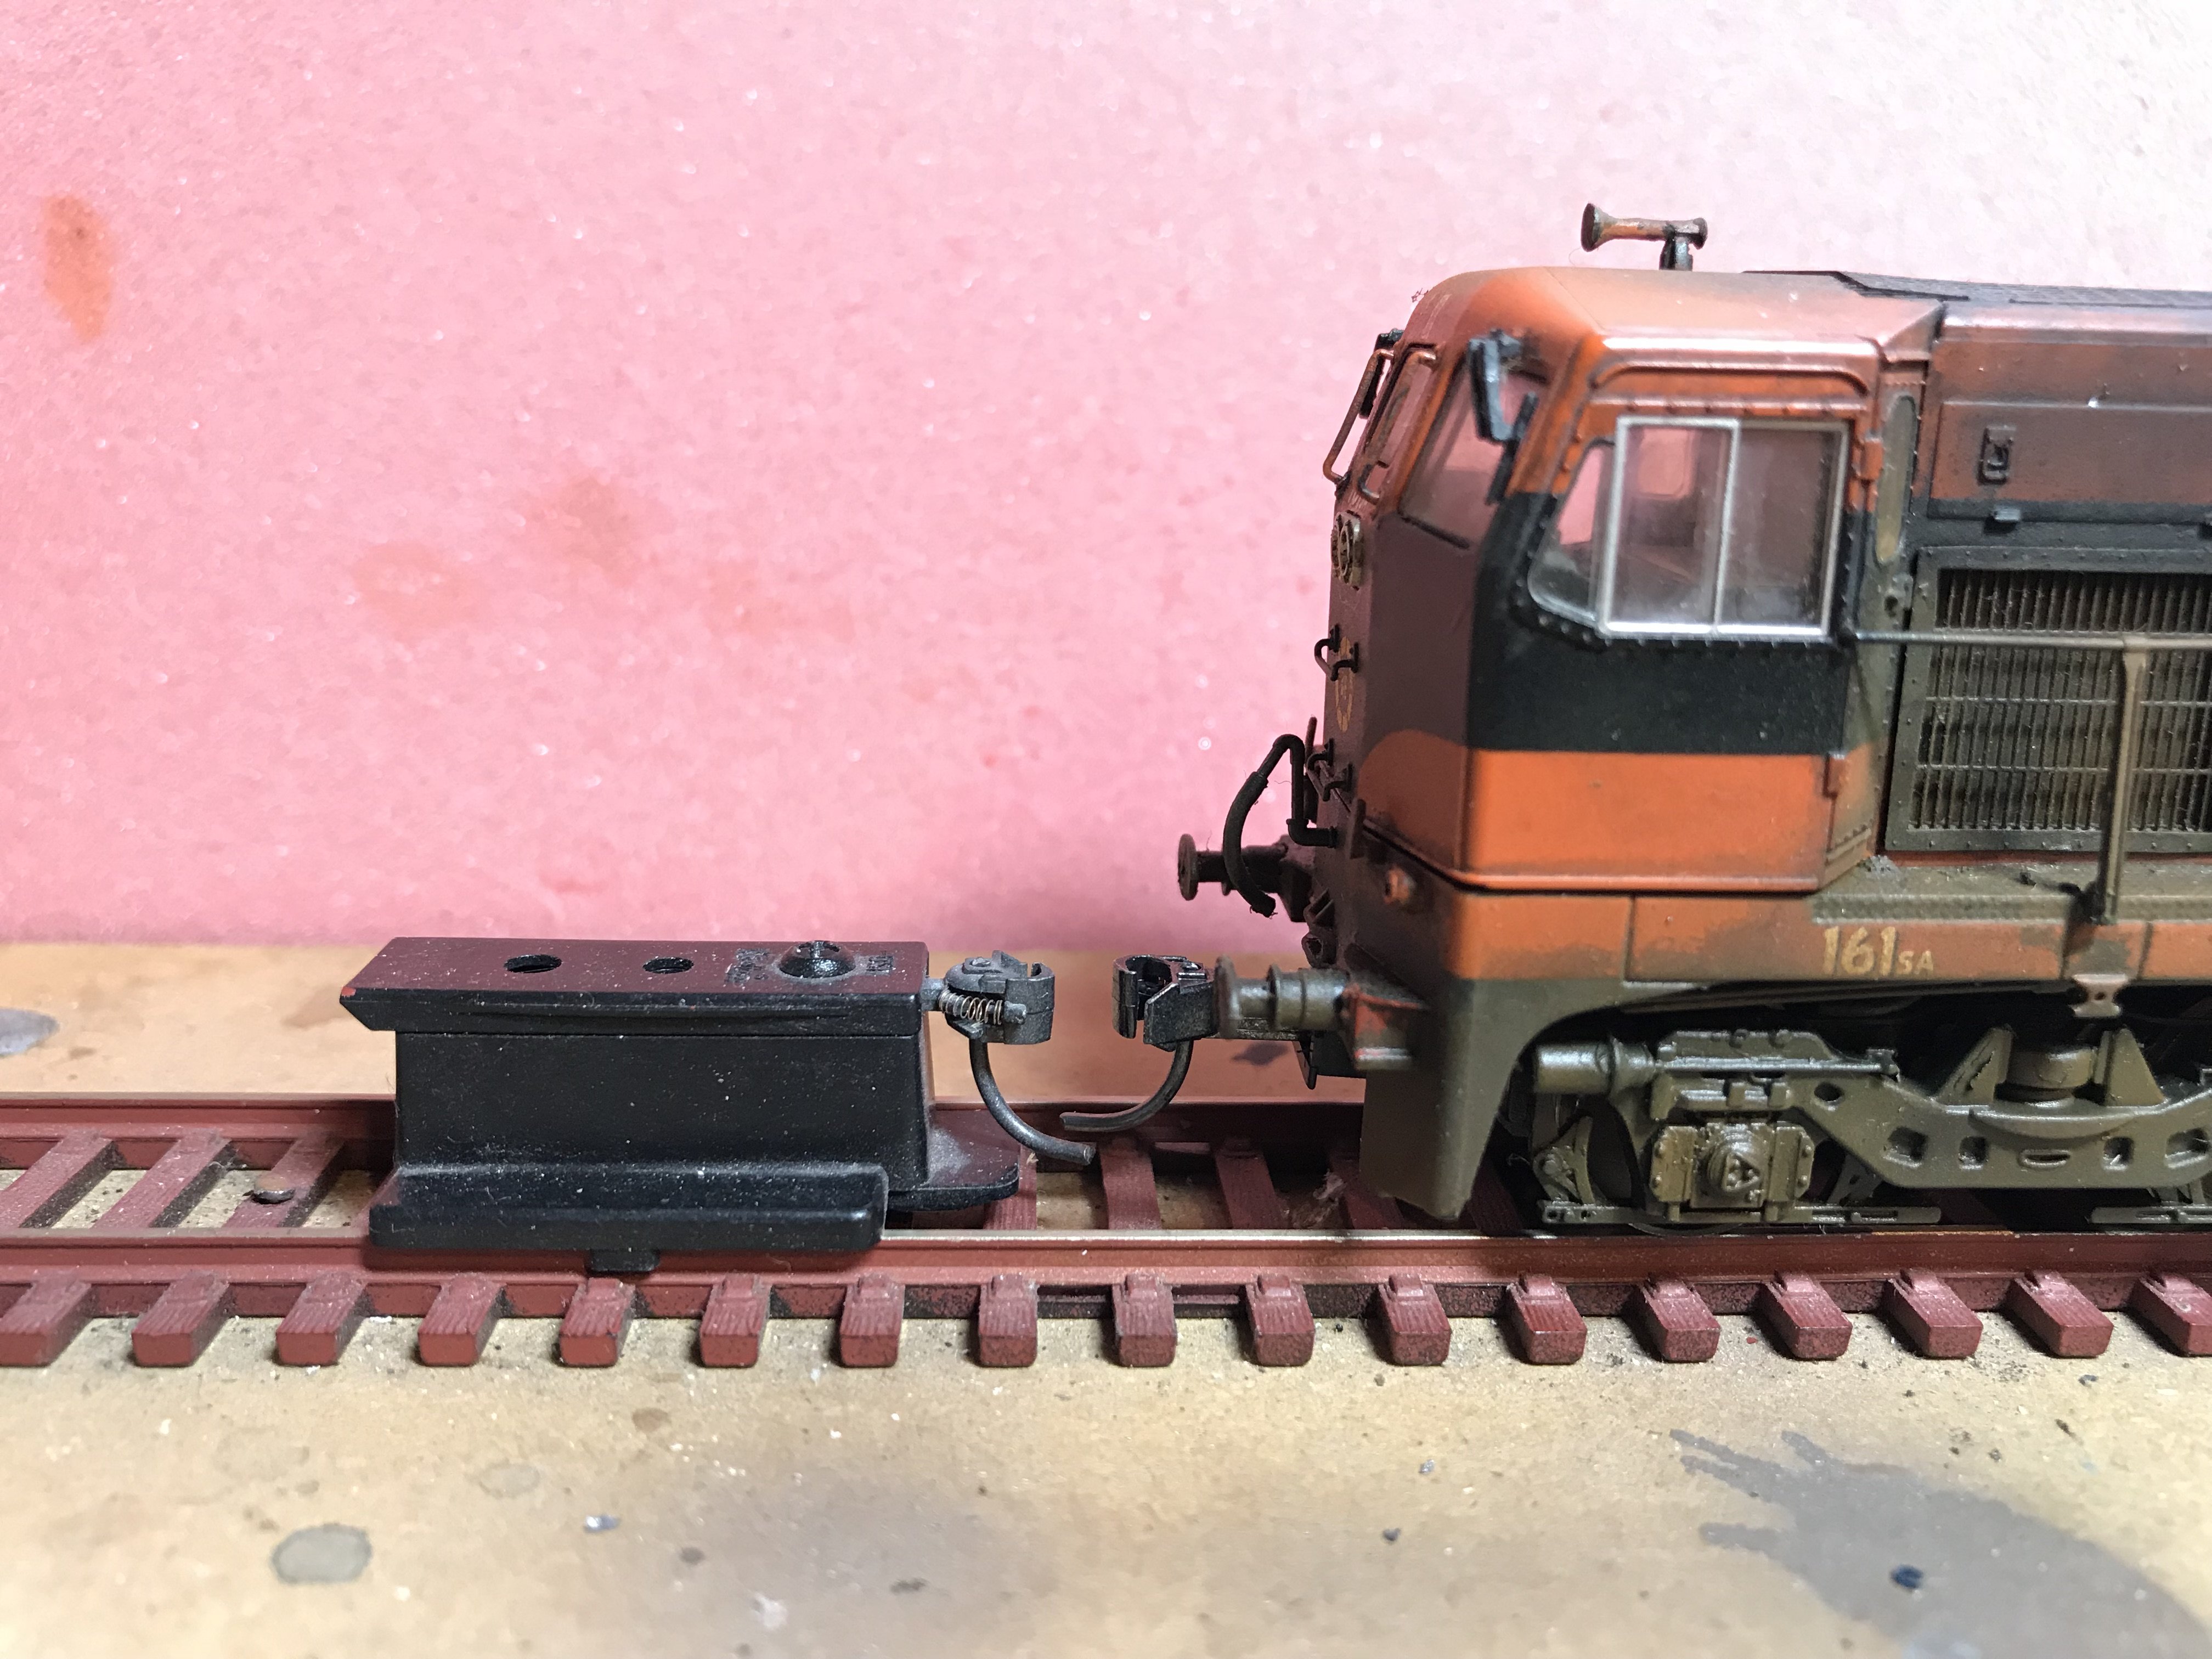
Thanks Raider, great info. So were all 141’s fitted to run on trains with air brakes or was it just locos that had the A suffix after their loco number? For instance 161sa. I believe the S was to indicate it could work with suburban signaling and the A demoted it was fitted for air brakes.
-
Ah right. So these are air lines? Are these for loco control or air brakes? So more will need to be added, you only get 6 per loco!
-
While fitting the buffer details to my locos I notice with the 141’s that there are holes for 5 MU cables at each end but only 6 cables are supplied. Looking at photos of the real thing I see the number of cables varies. Anybody know the reason for this?
-
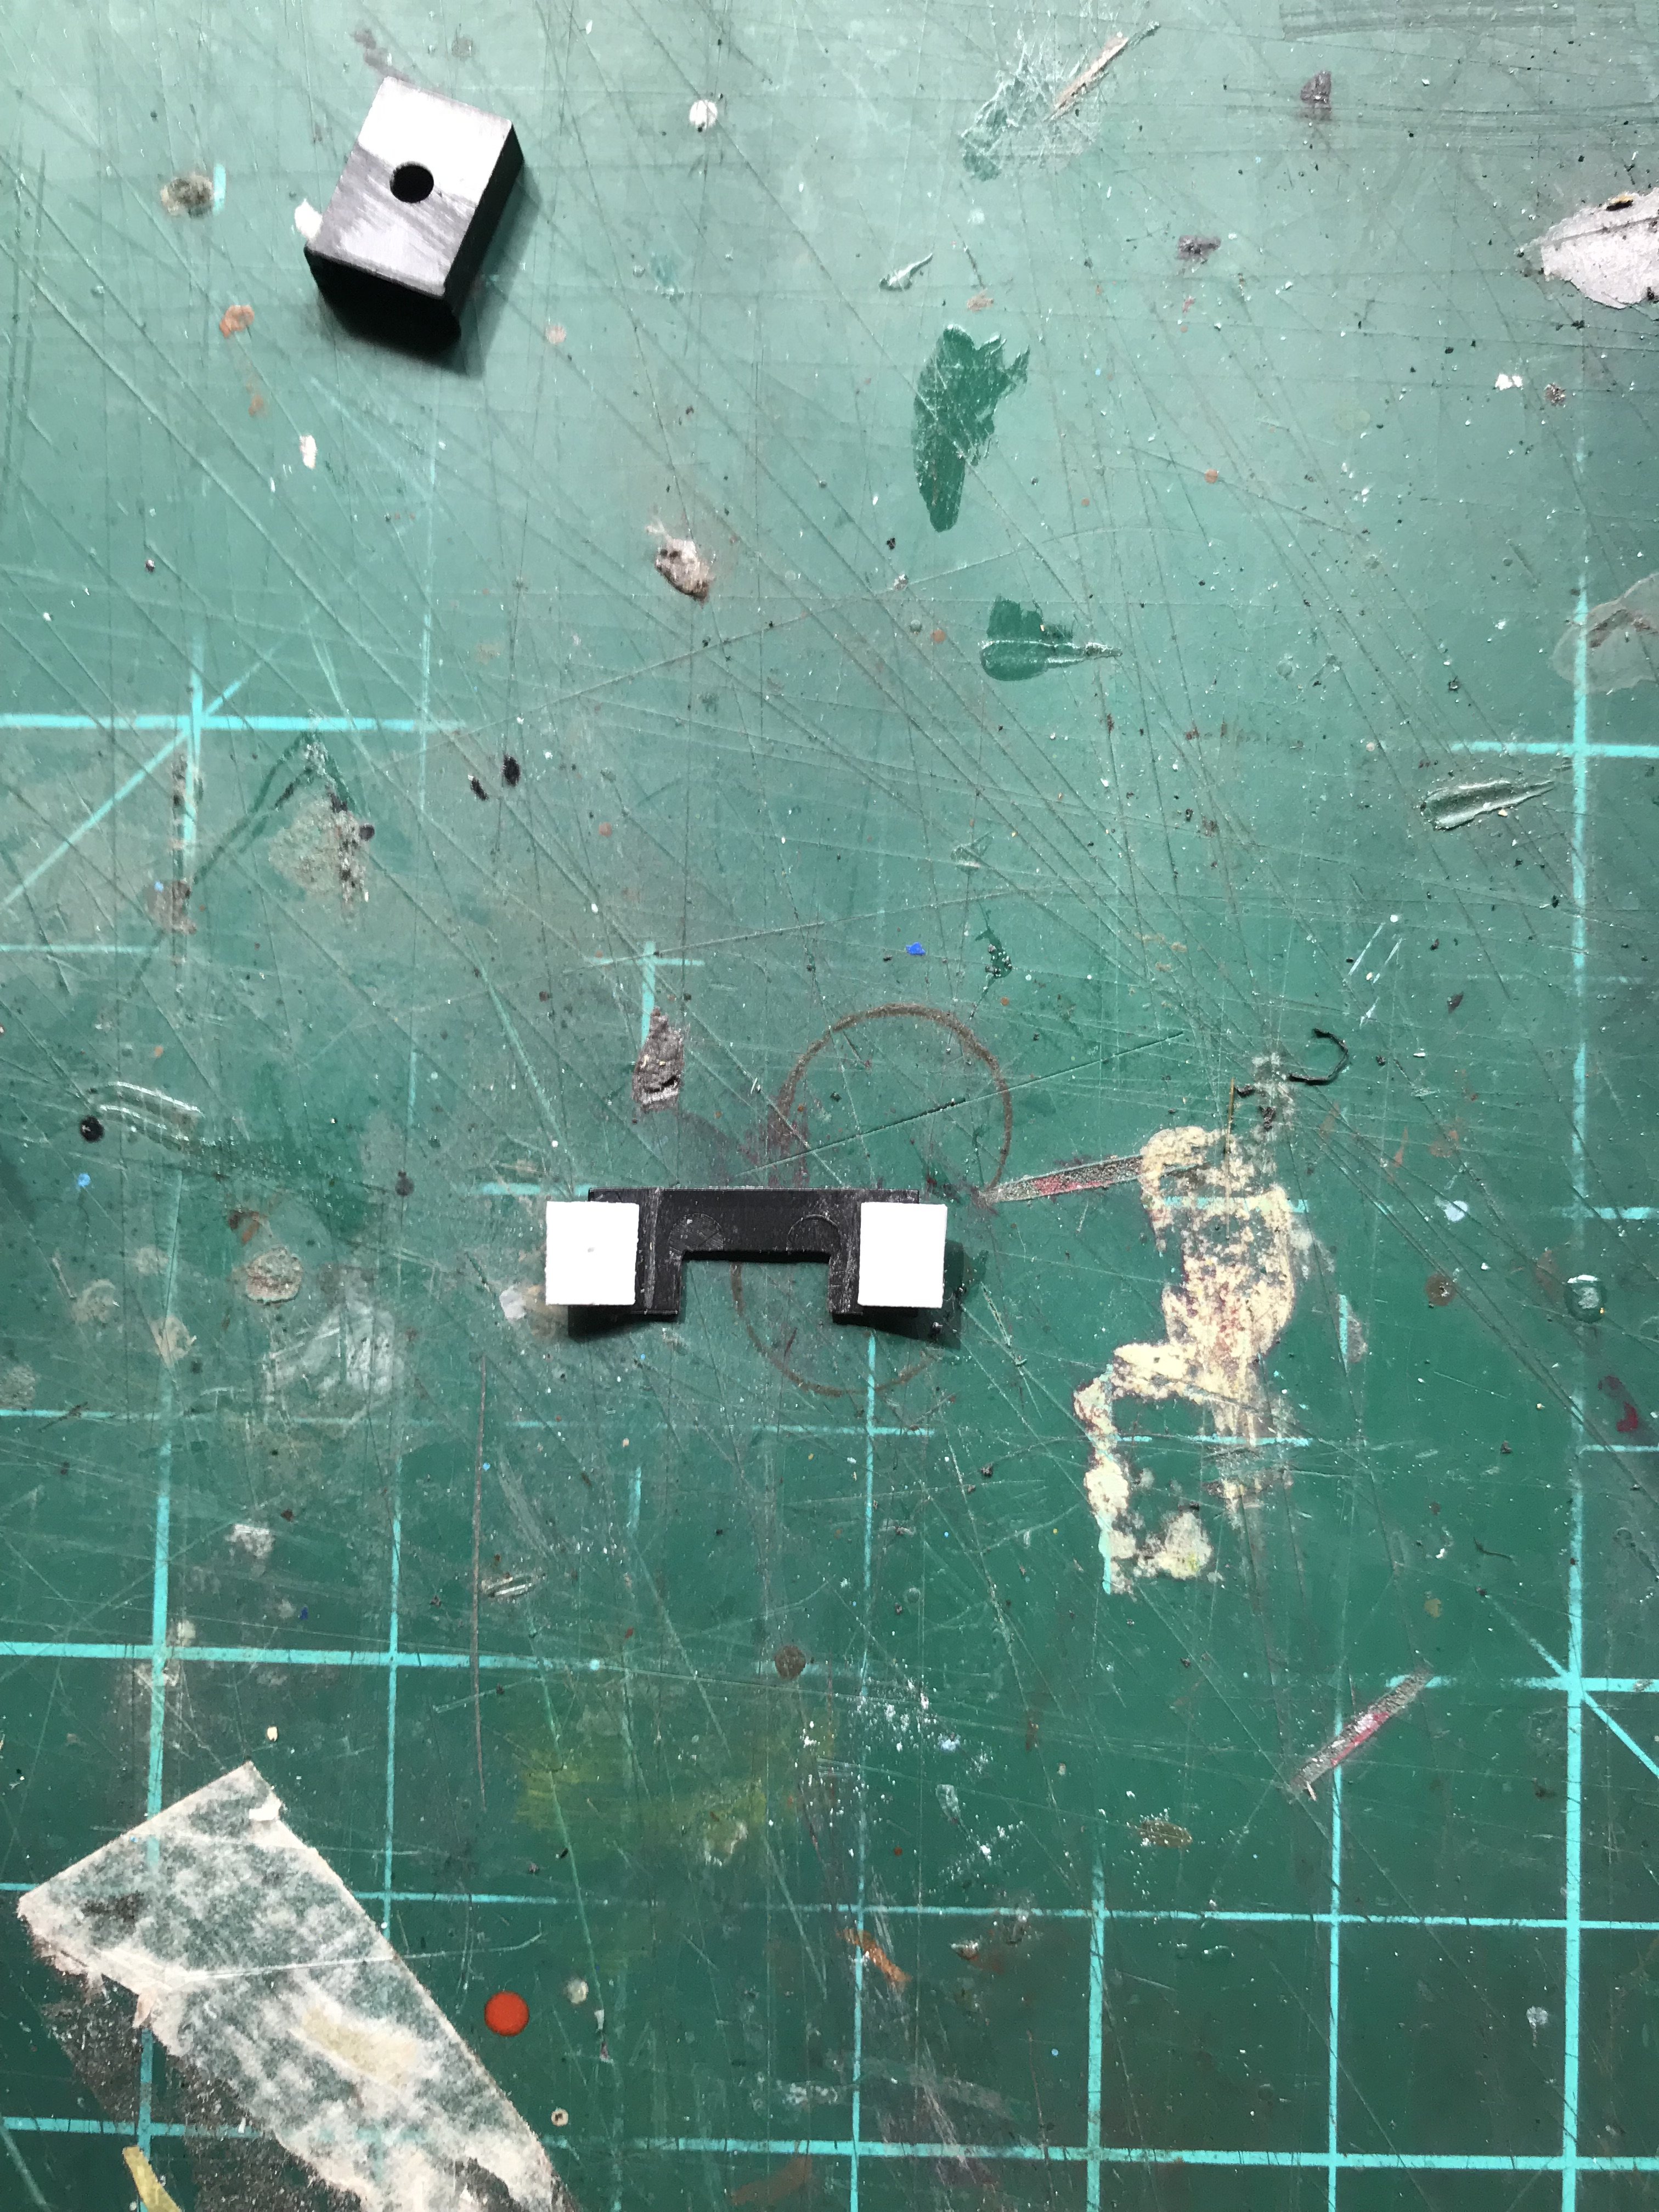
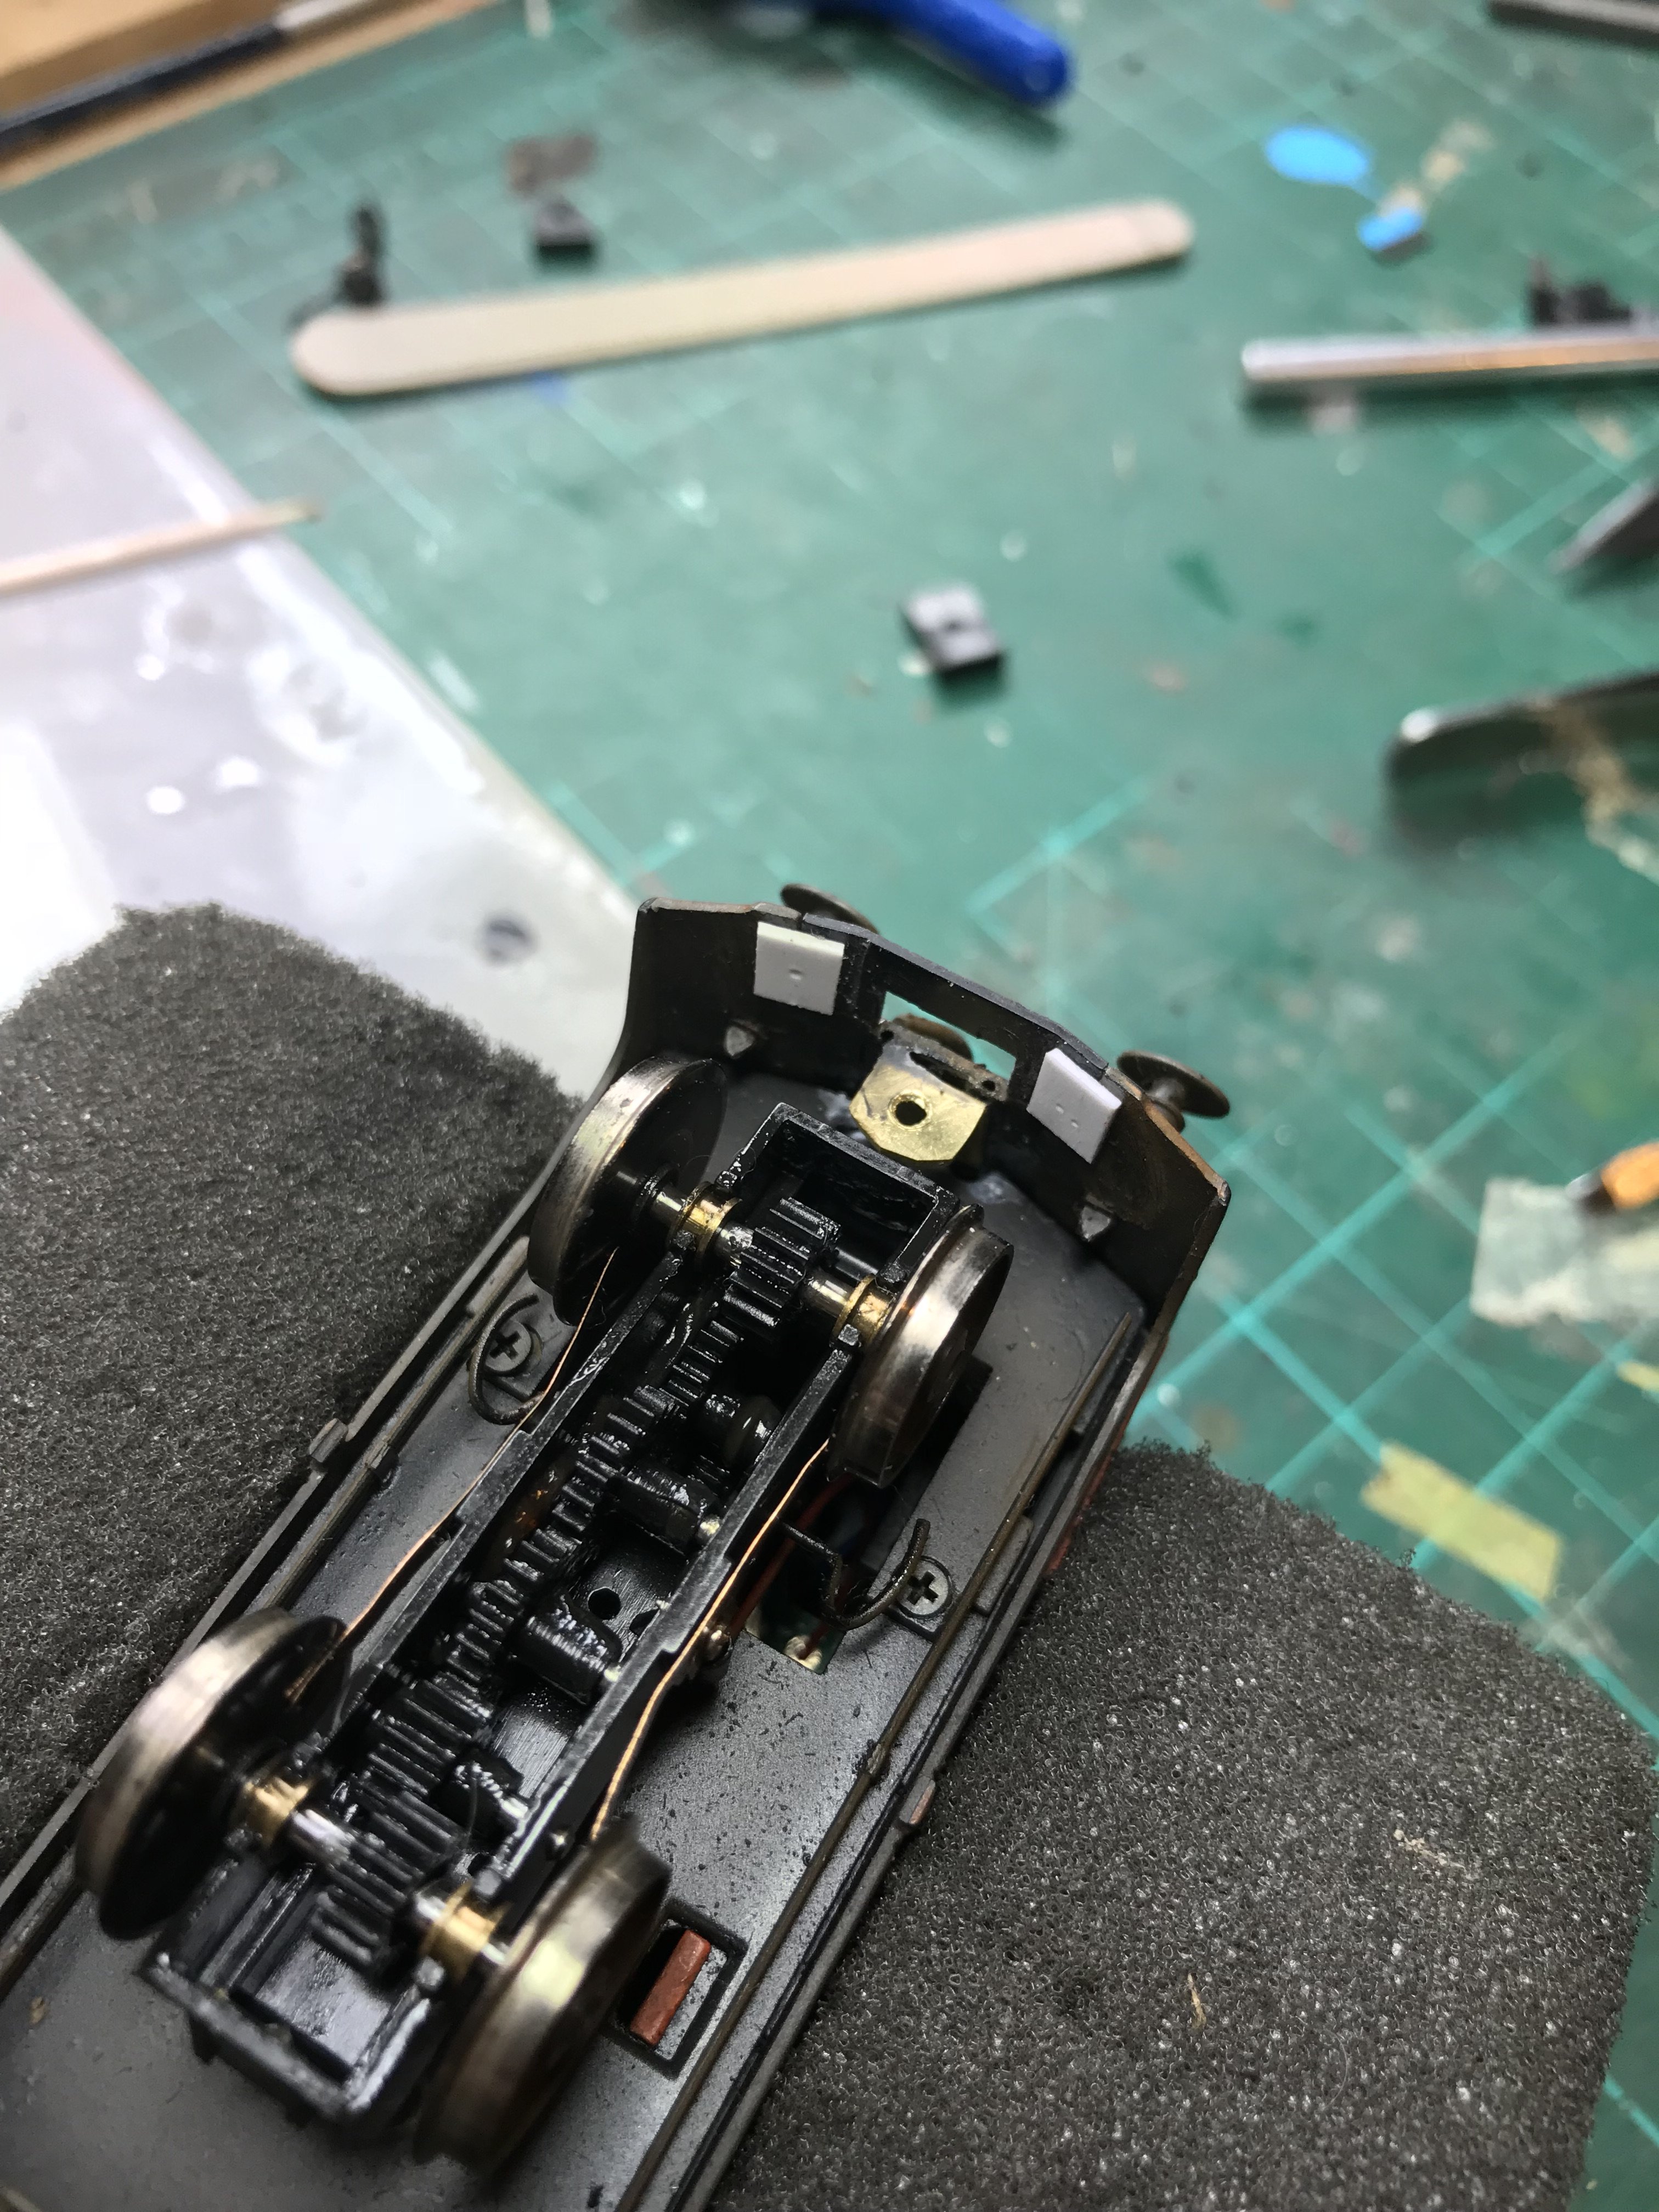
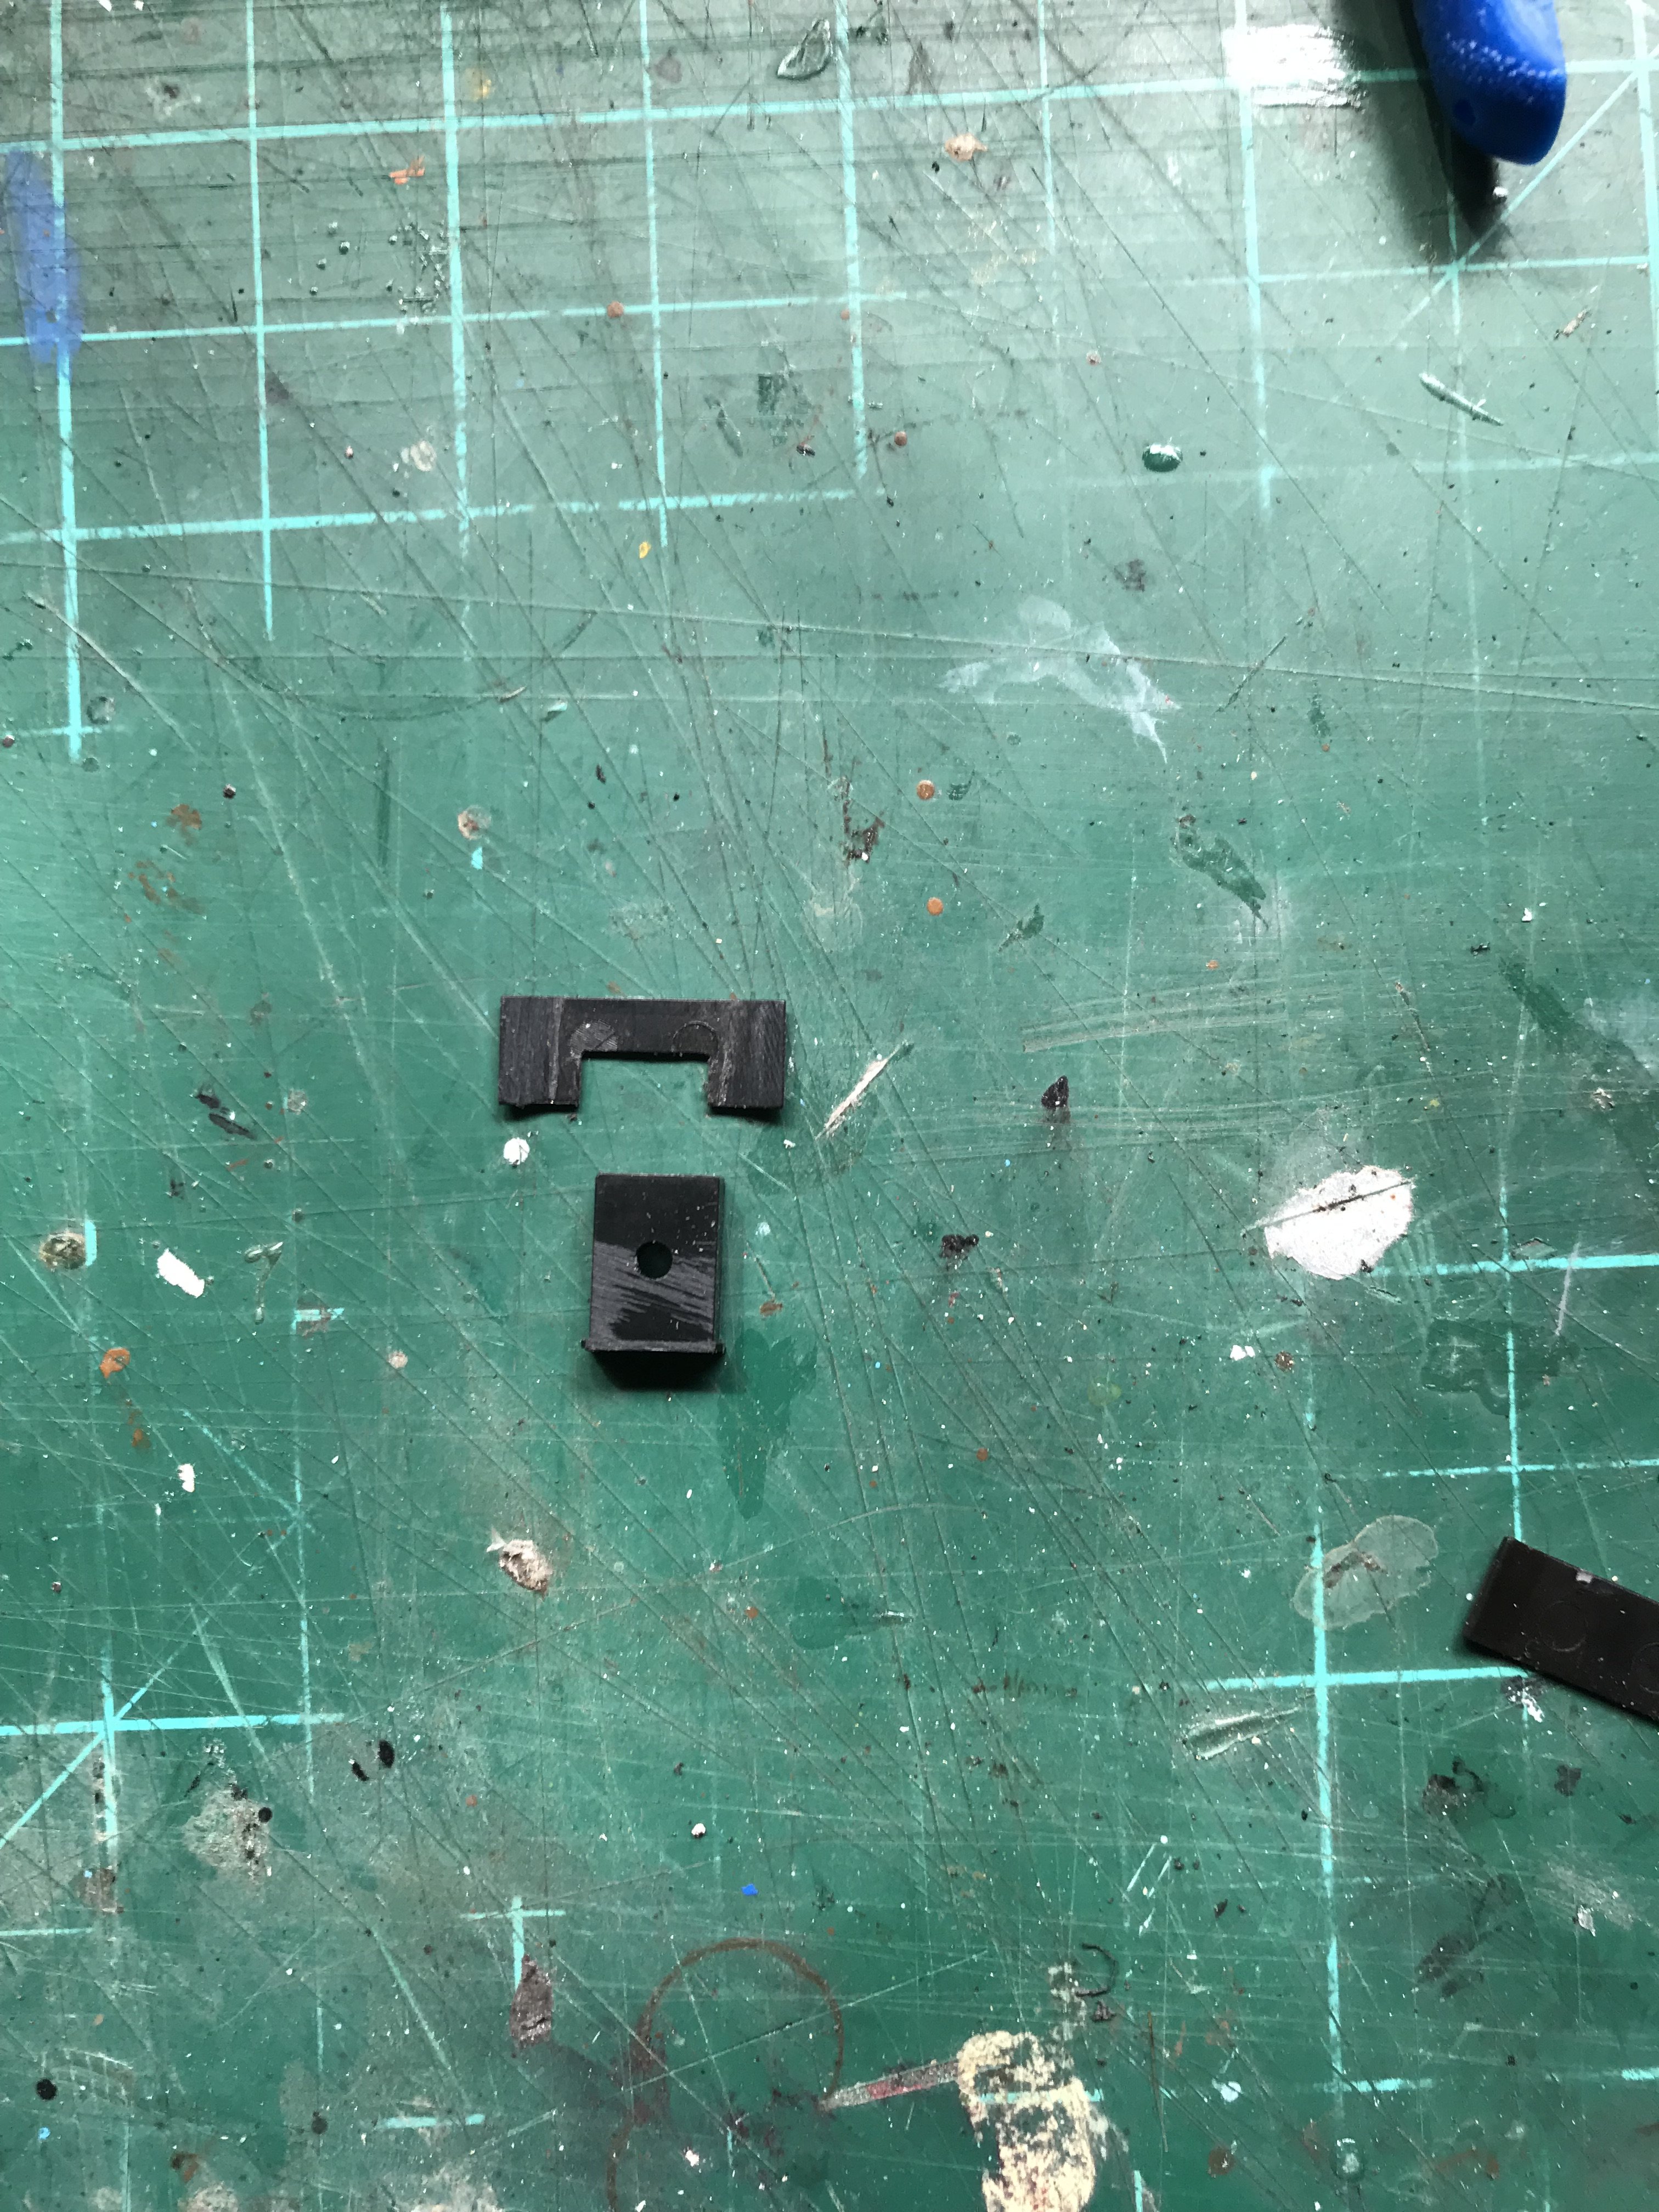
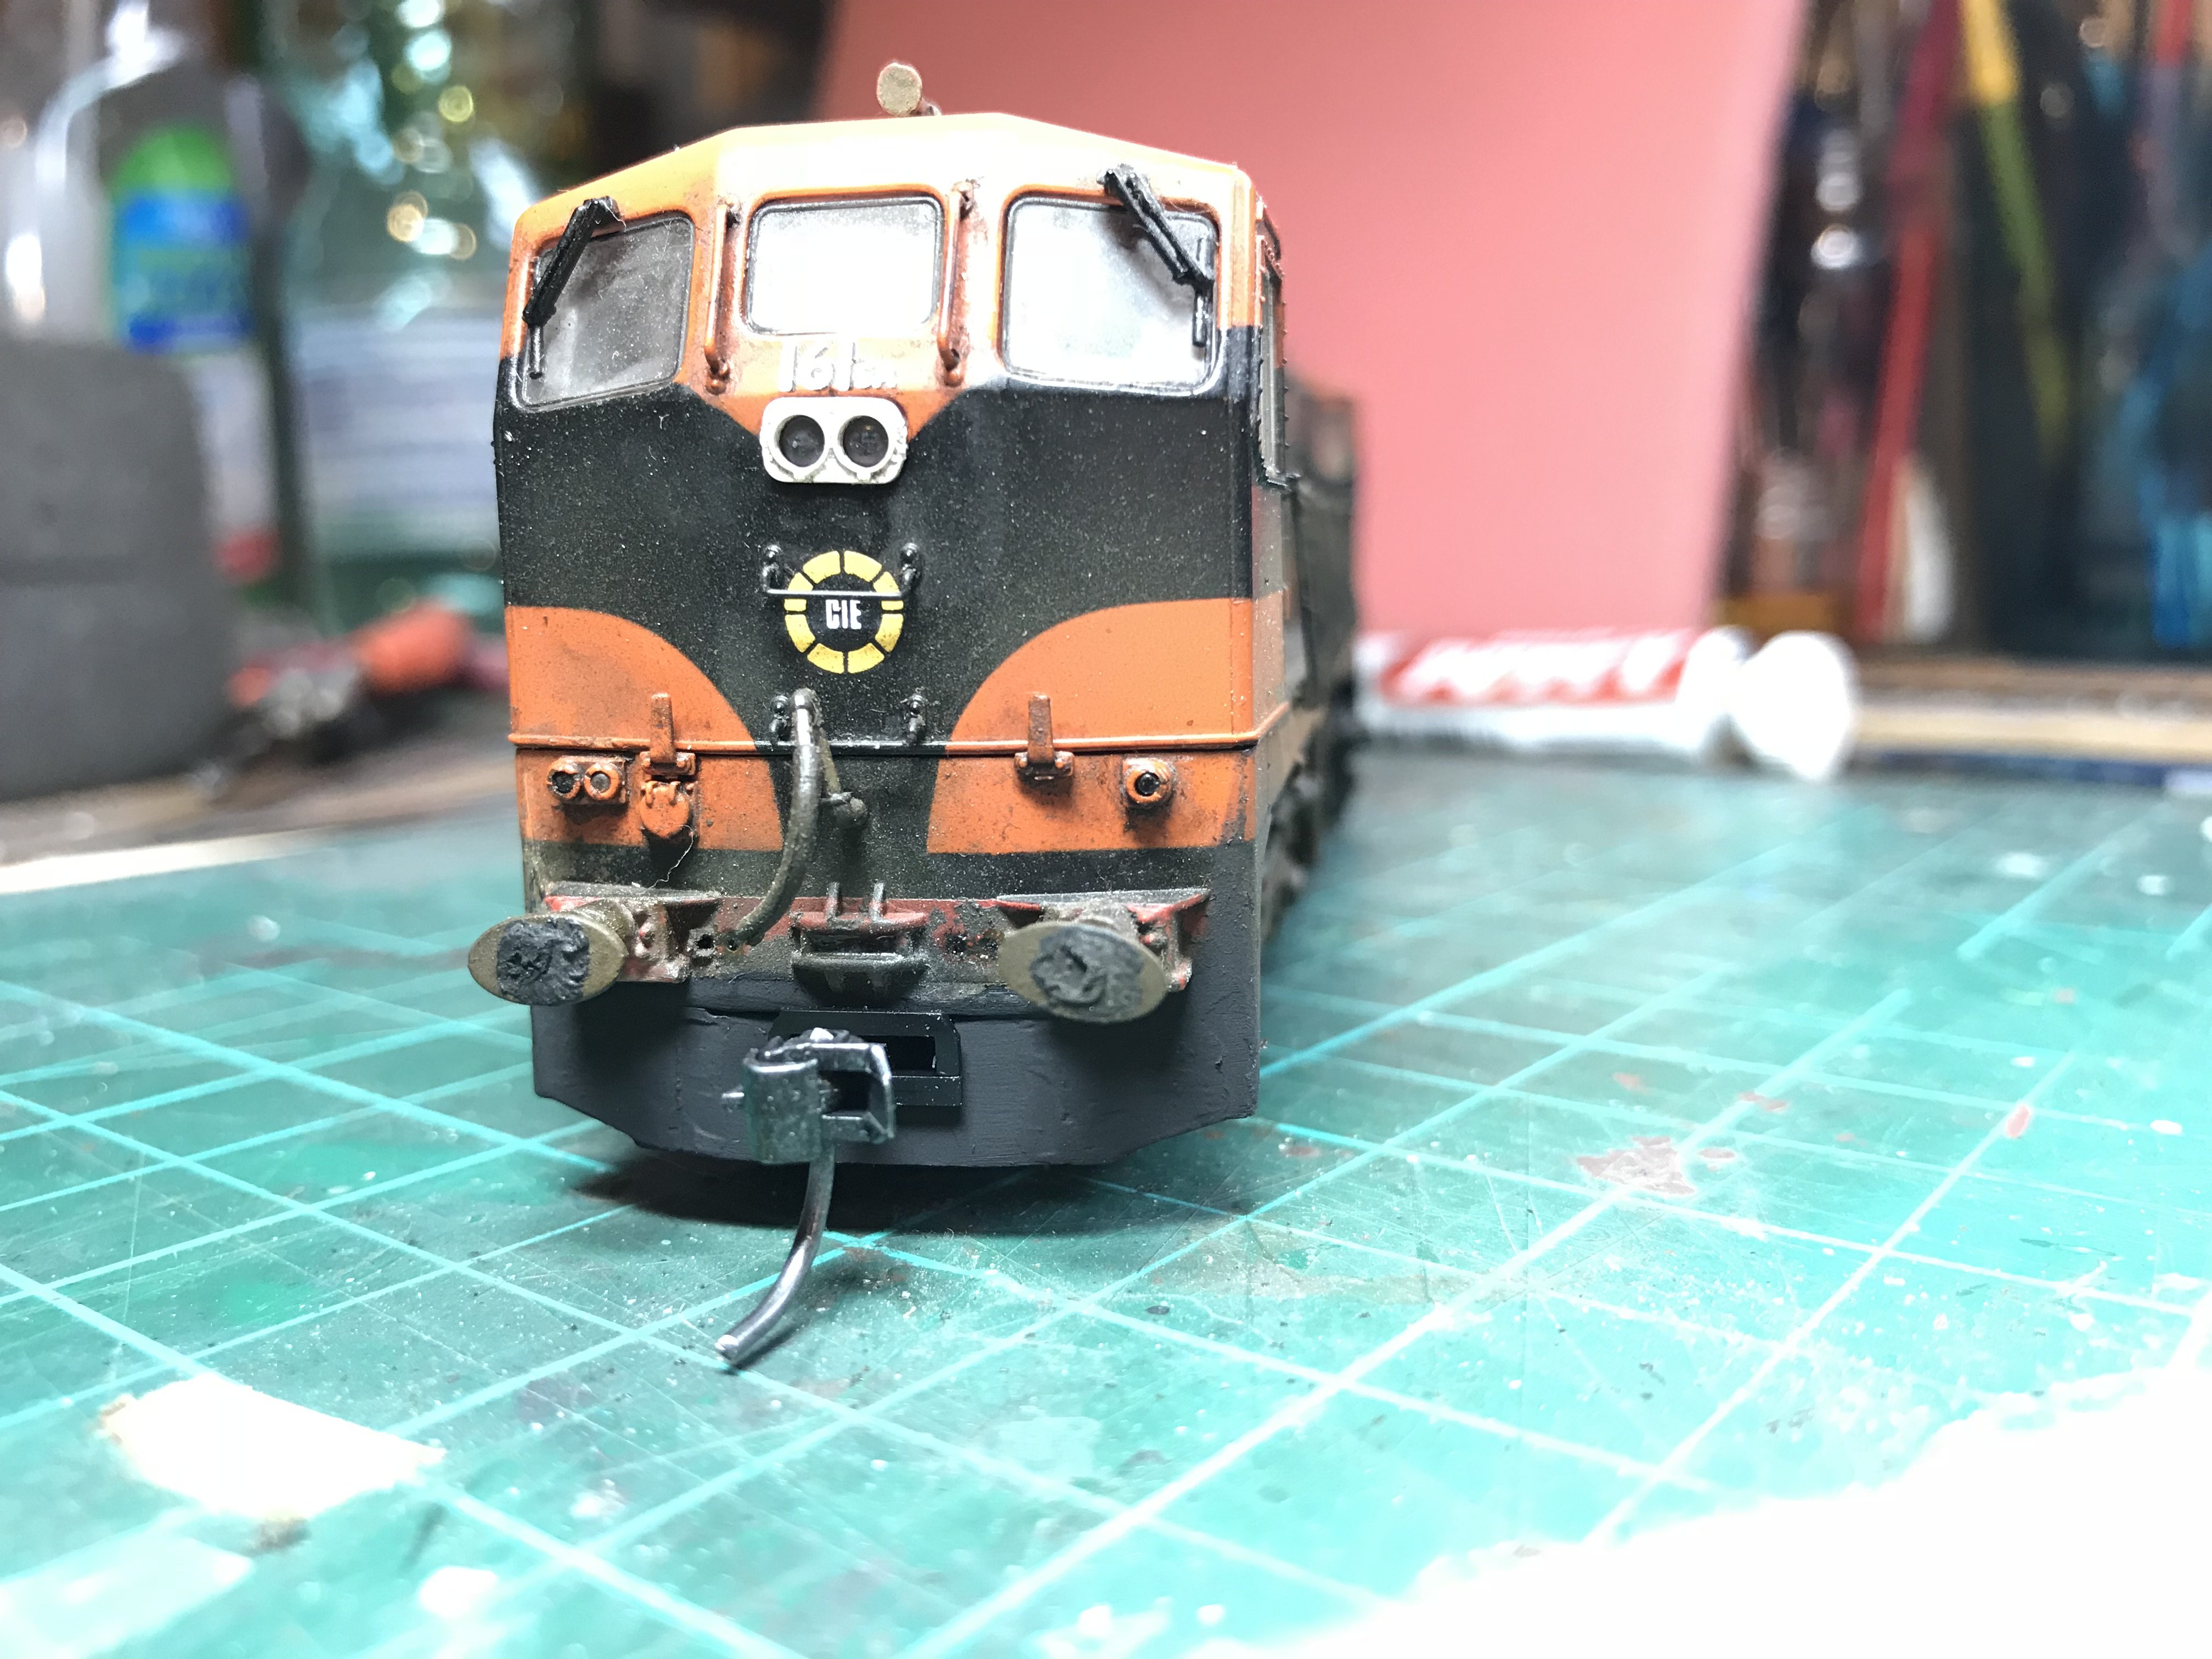
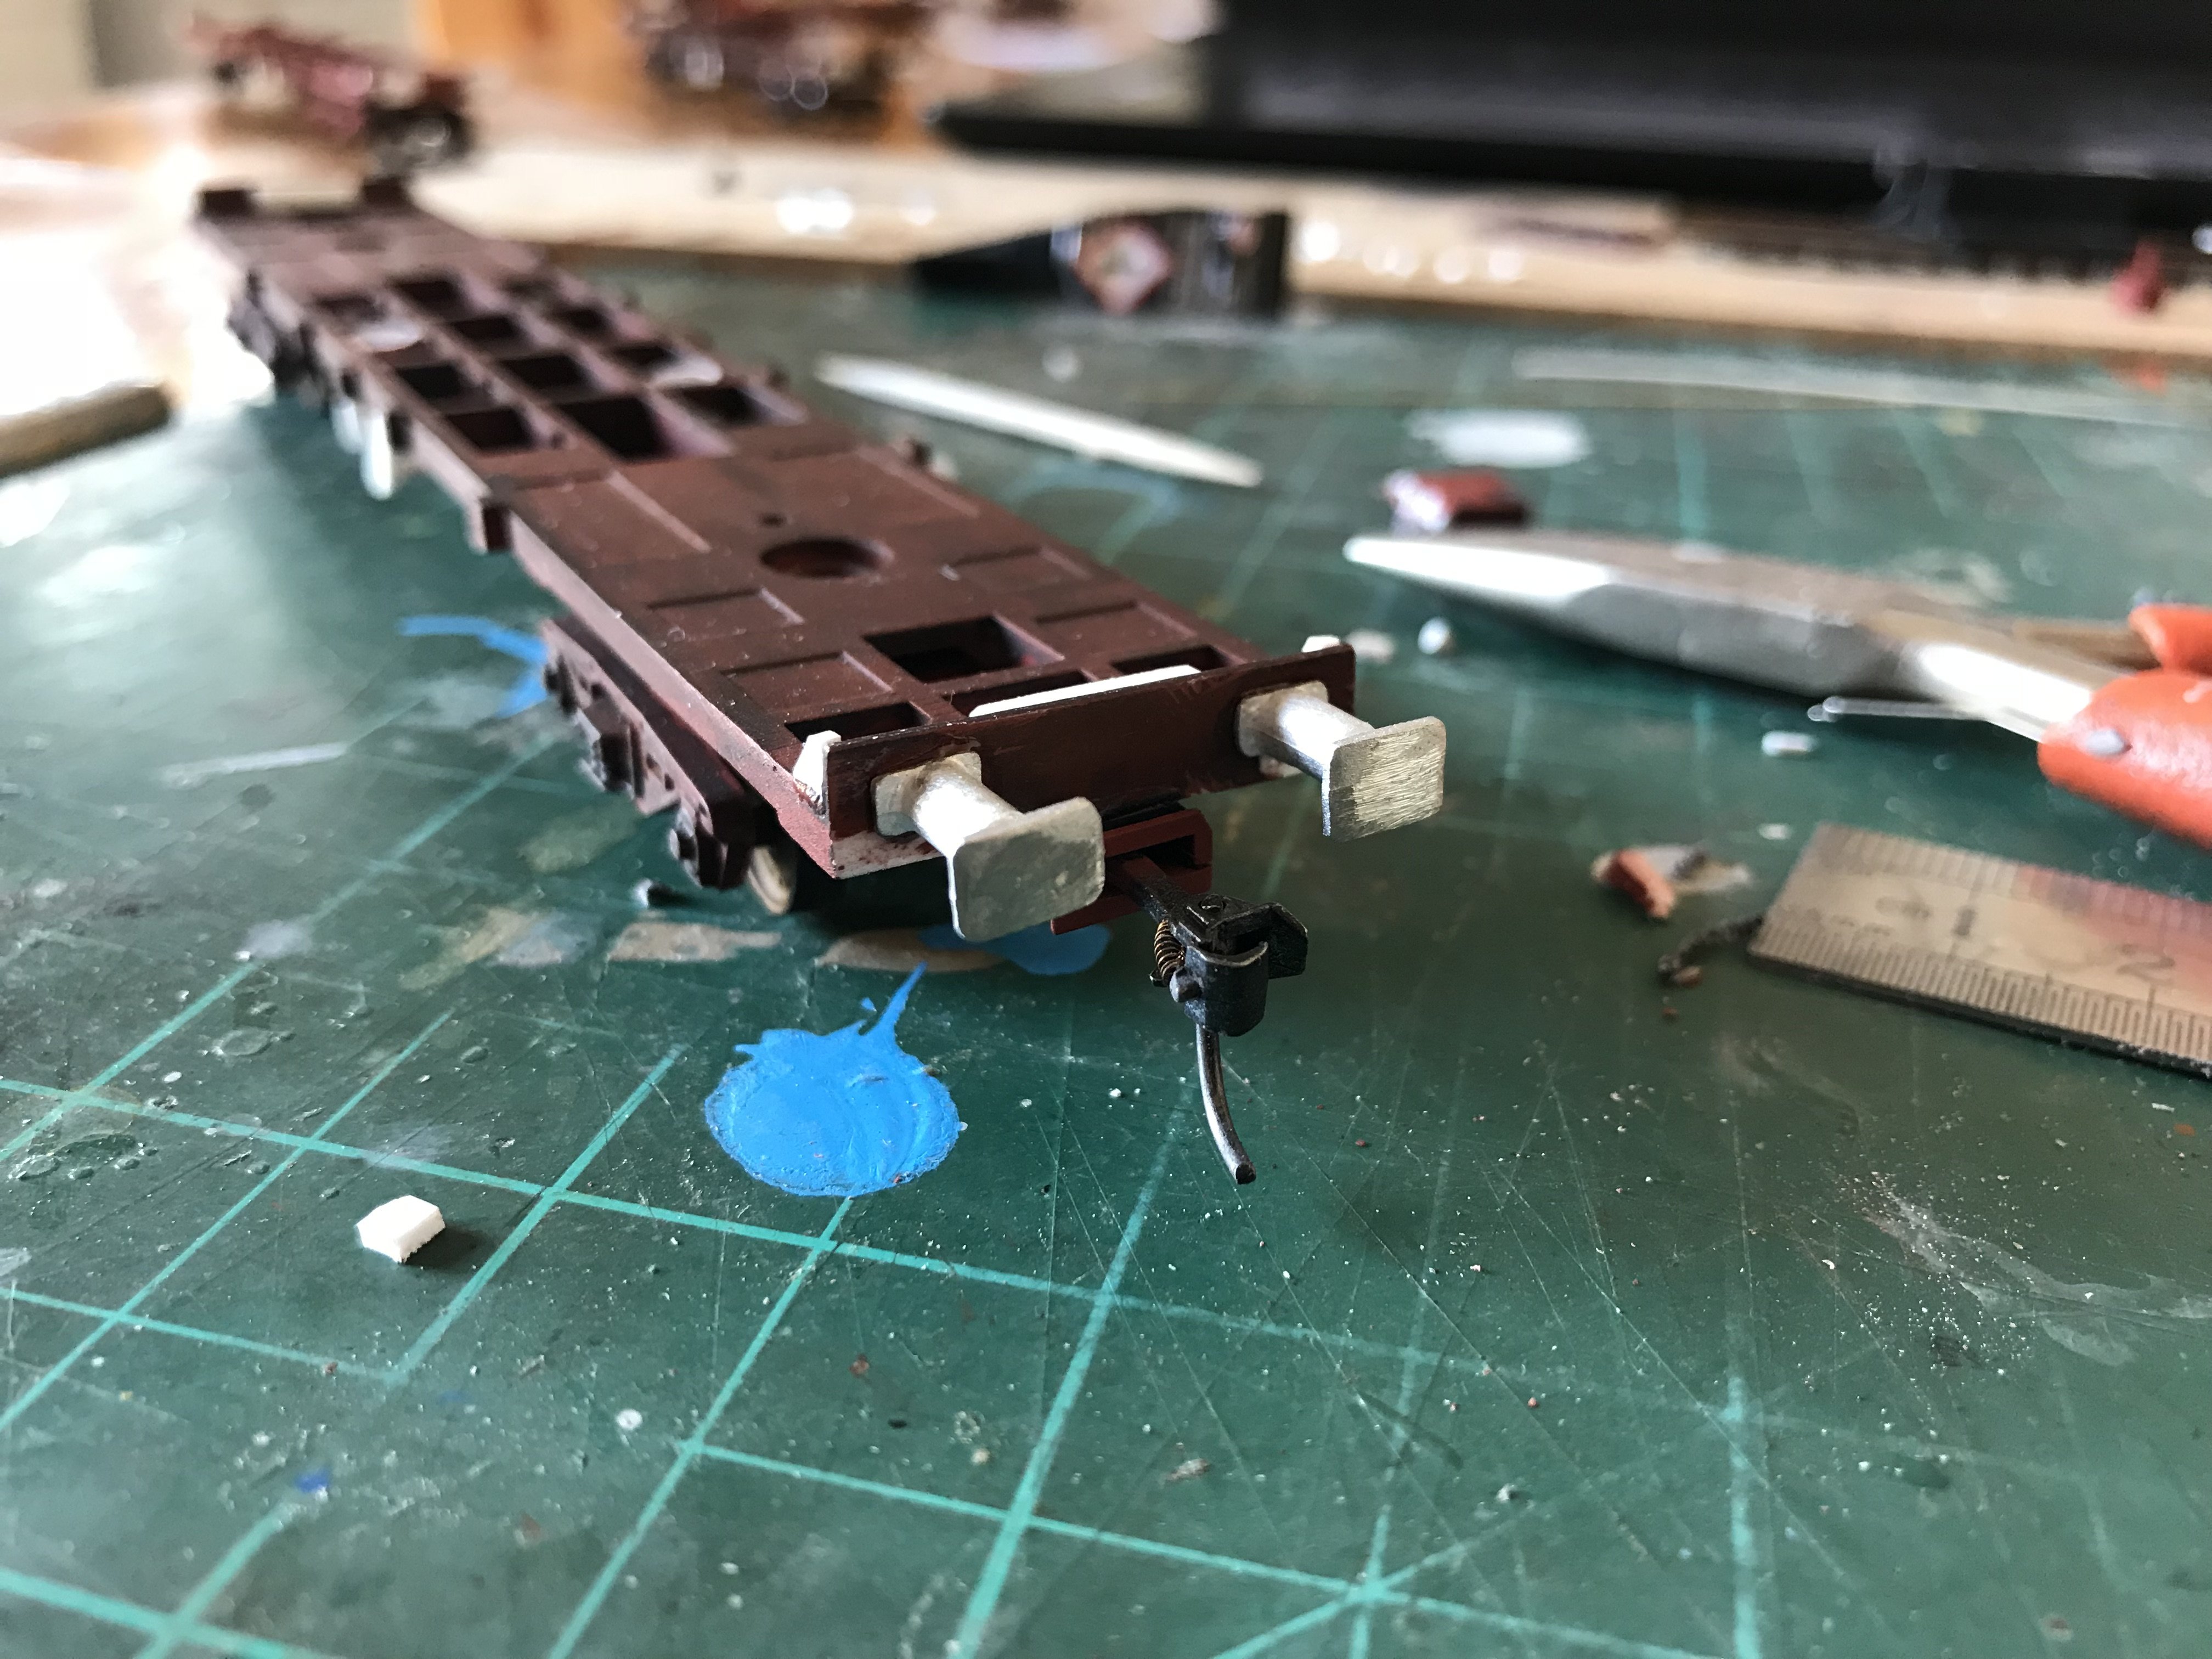
Made a start on fitting the valances to the 141's. First a notch the width and height of the coupler needs to be cut in the valance. Since the mounting holes for the valance are now covered by the coupler the pegs have been cut of the insert and a couple of pieces of styrene will be used to fix it in place. These were attached with cyano glue. Like so..... Plastic filler is then used to fill any gaps and is sanded smooth. A bit of paint and job done!

-
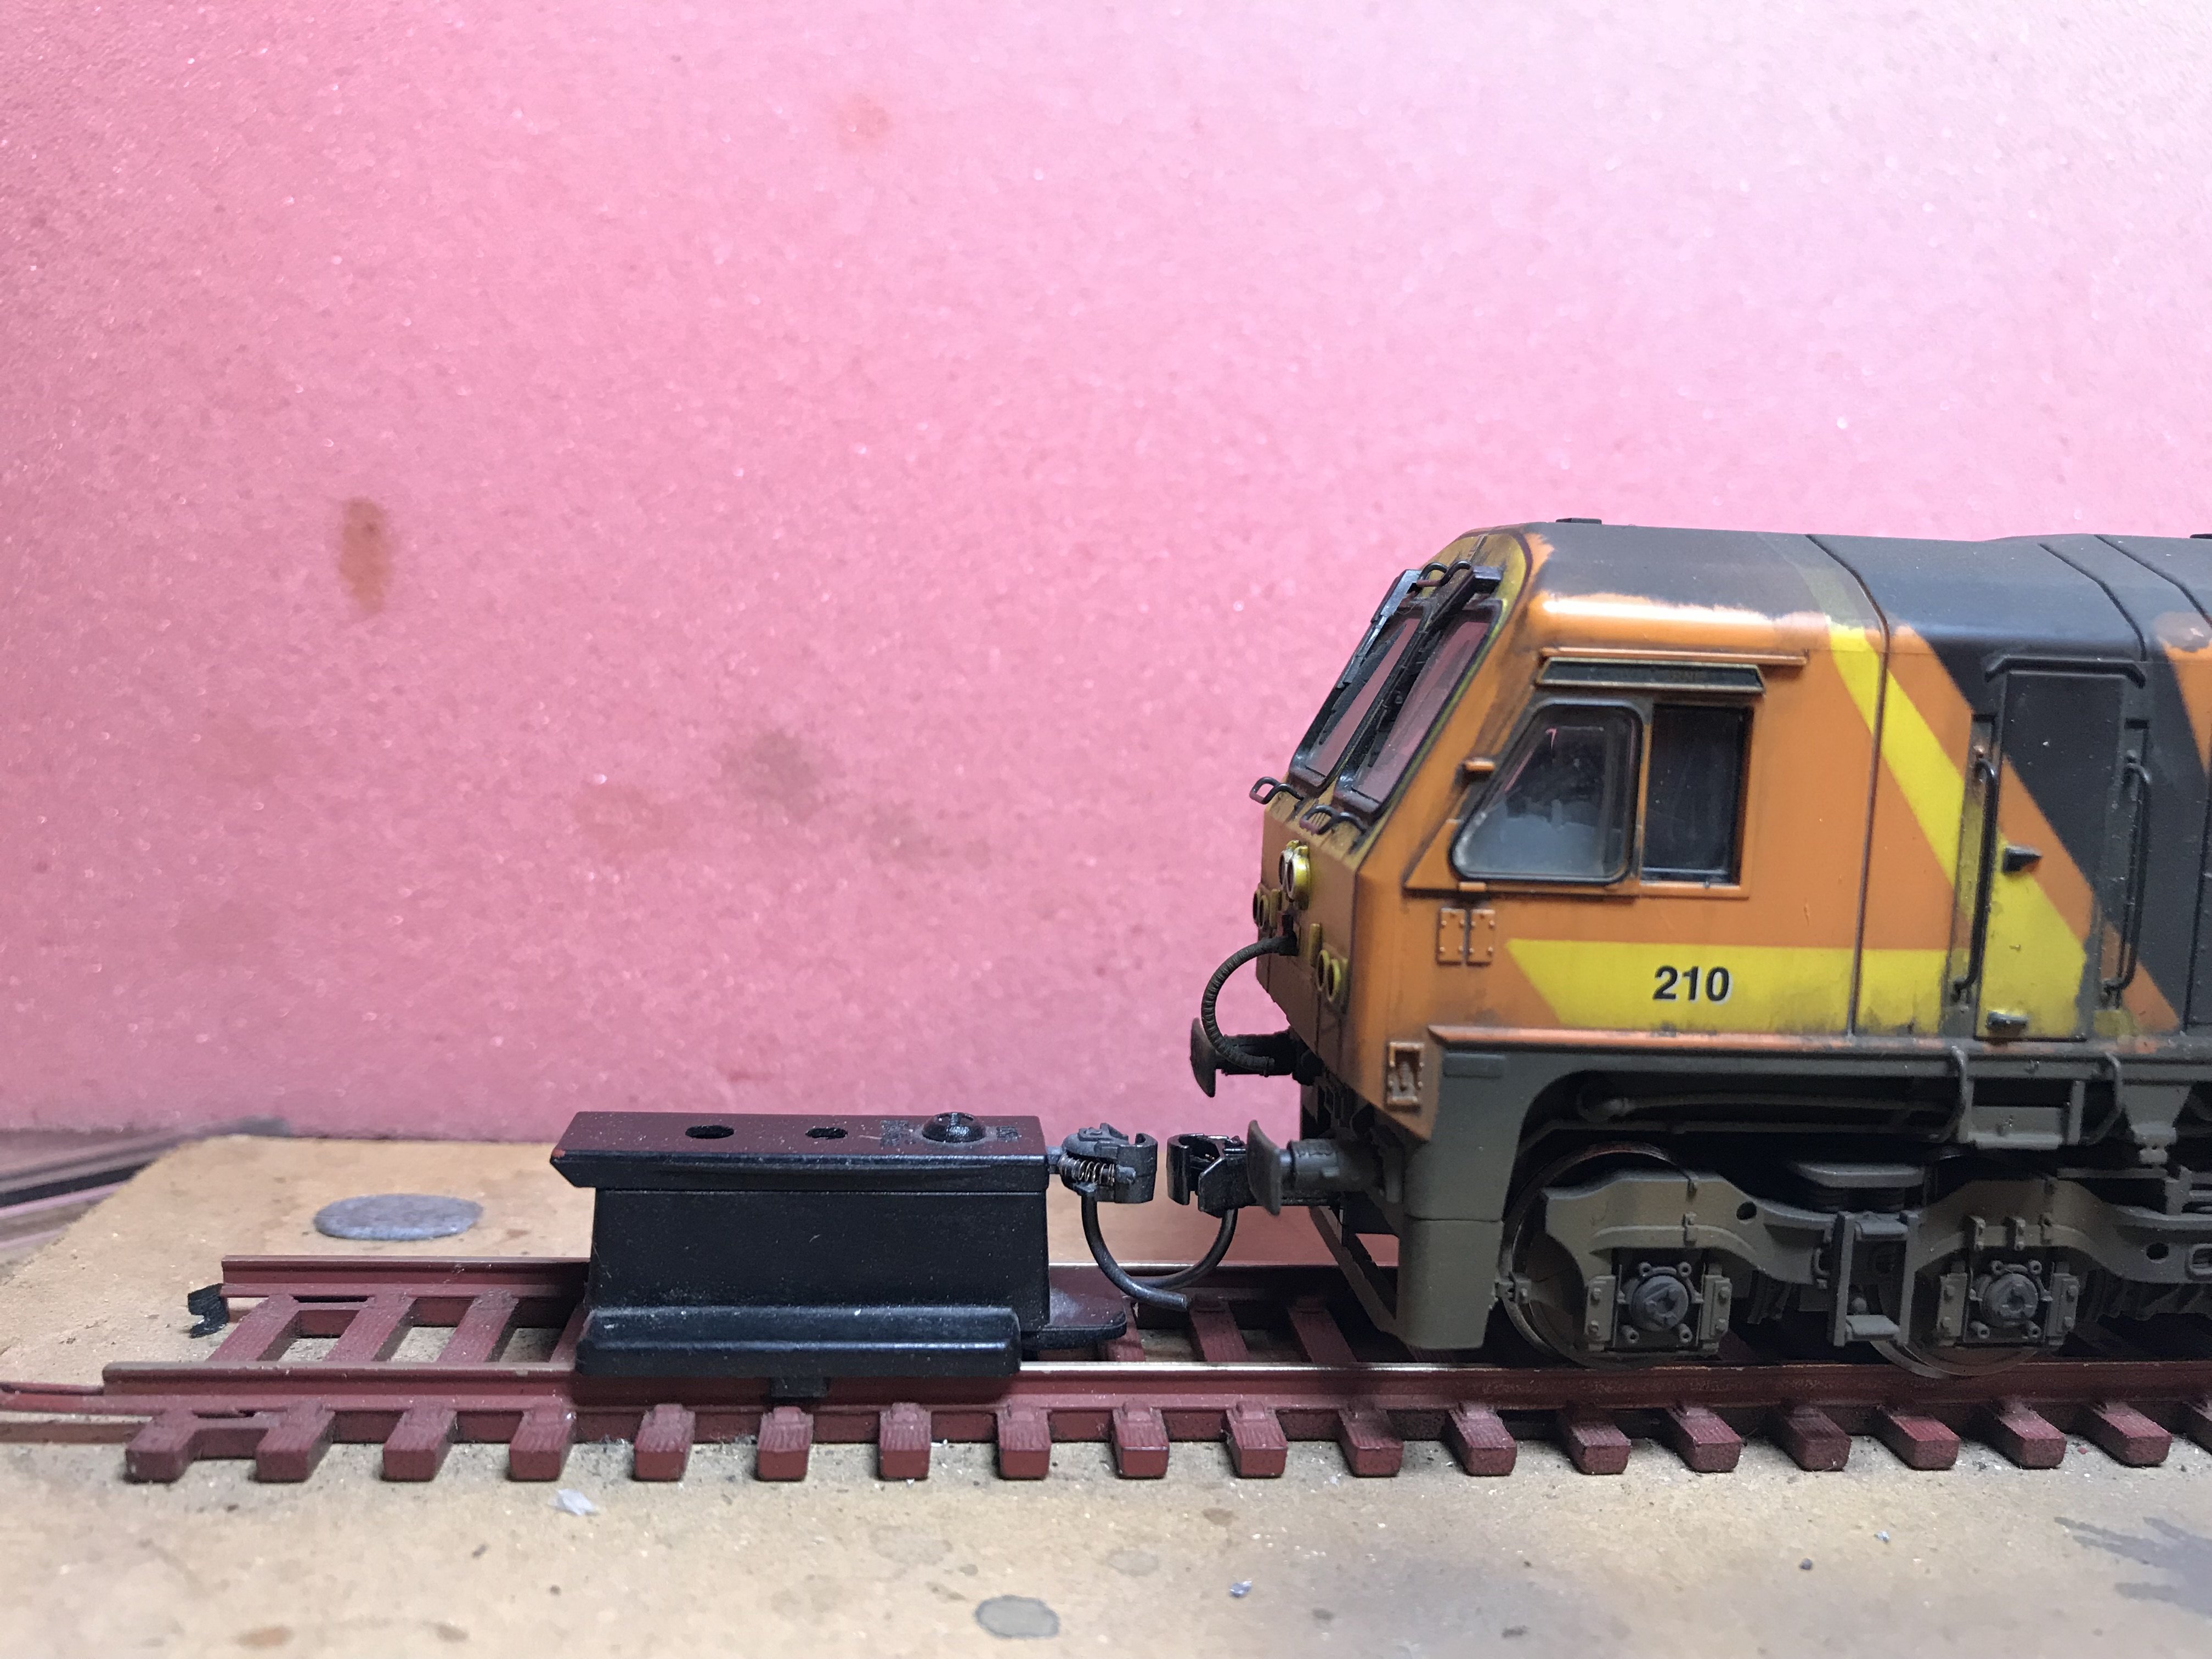
I was finding that uncoupling was hit and miss with the NEM Kadee. The coupler head has very limited movement compared to even a short shank draft box coupler and when they did uncouple I found they would often RE-couple when trying to shunt the wagons/coaches to another position on the track. The coupler heads just didn't move far enough to stay uncoupled. I also noticed the combination of bogie mounted NEM couplers and body mounted couplers is prone to derail when pushing the stock back over crossovers, especially when using bogie stock like coaches or container flats. That has disappeared when used draft boxes.
-
Yeah I don't particularly like the NEM couplers, they can cause problems when you mix them with regular, body mounted couplers. I run lots of US stock on my layout and they're all fitted with body mounted Kadees. They run very reliably. Yes I plan to fi all the valances and buffer detail as soon as I get the chance.
-
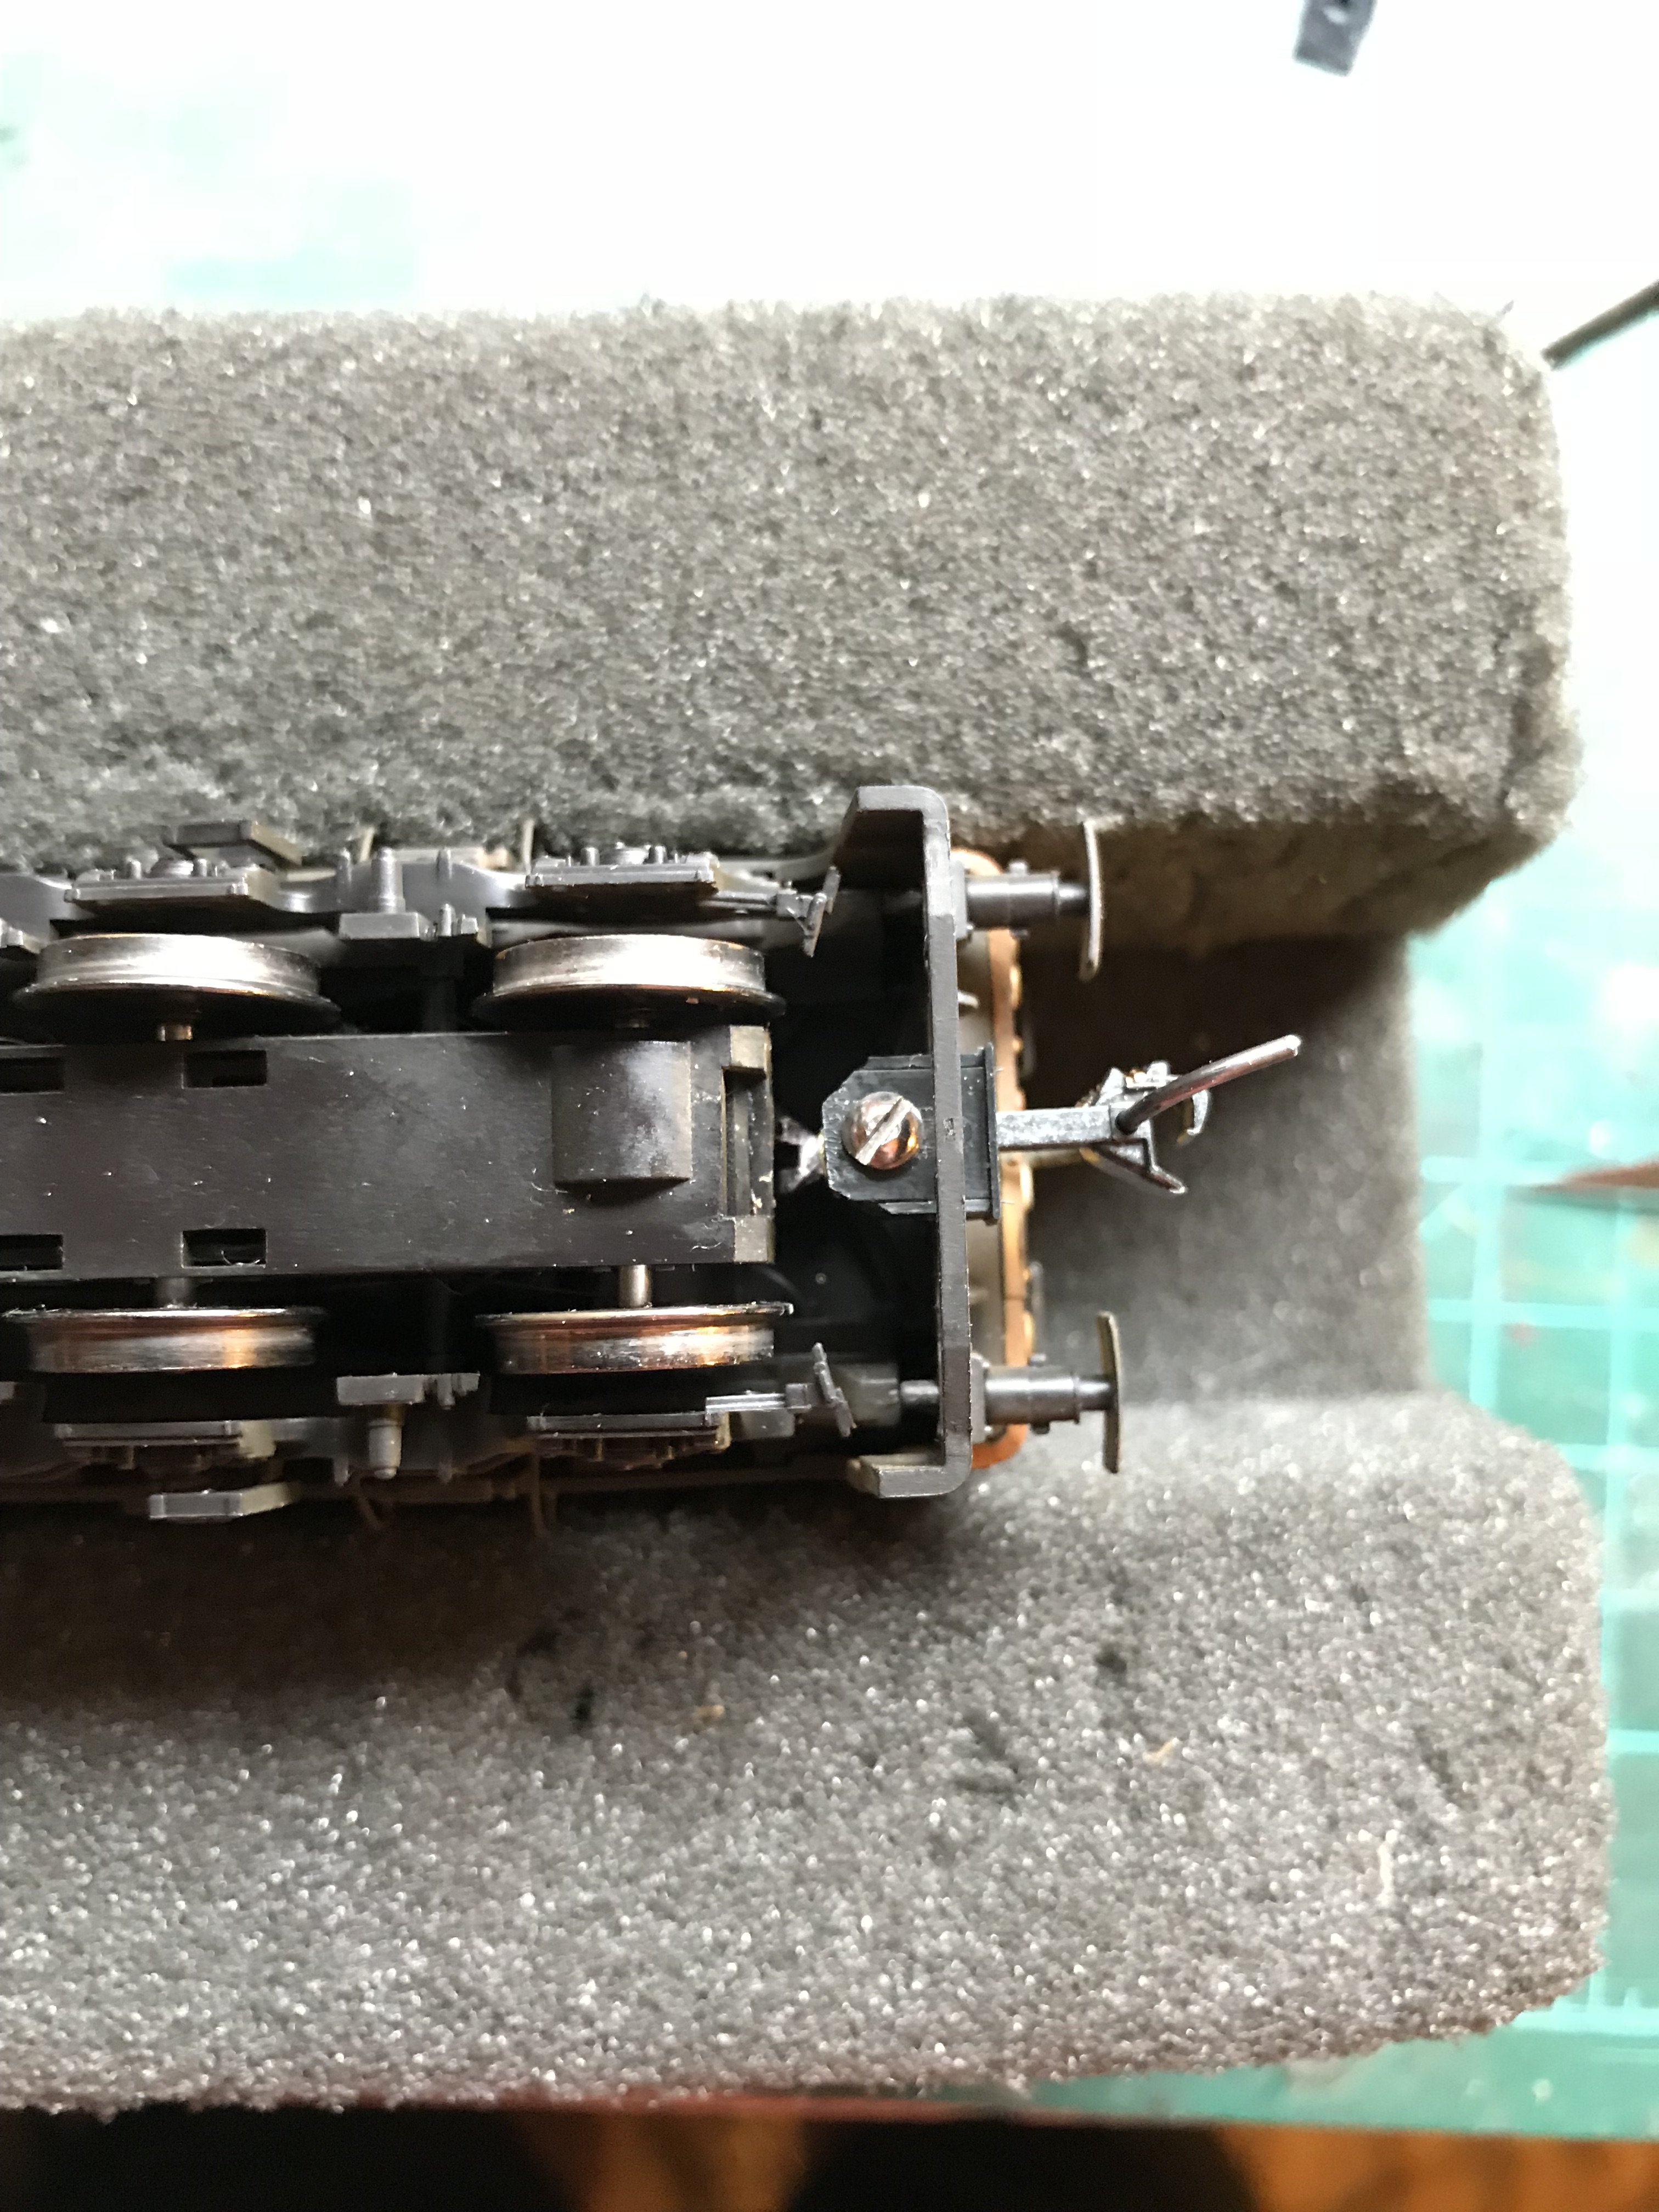
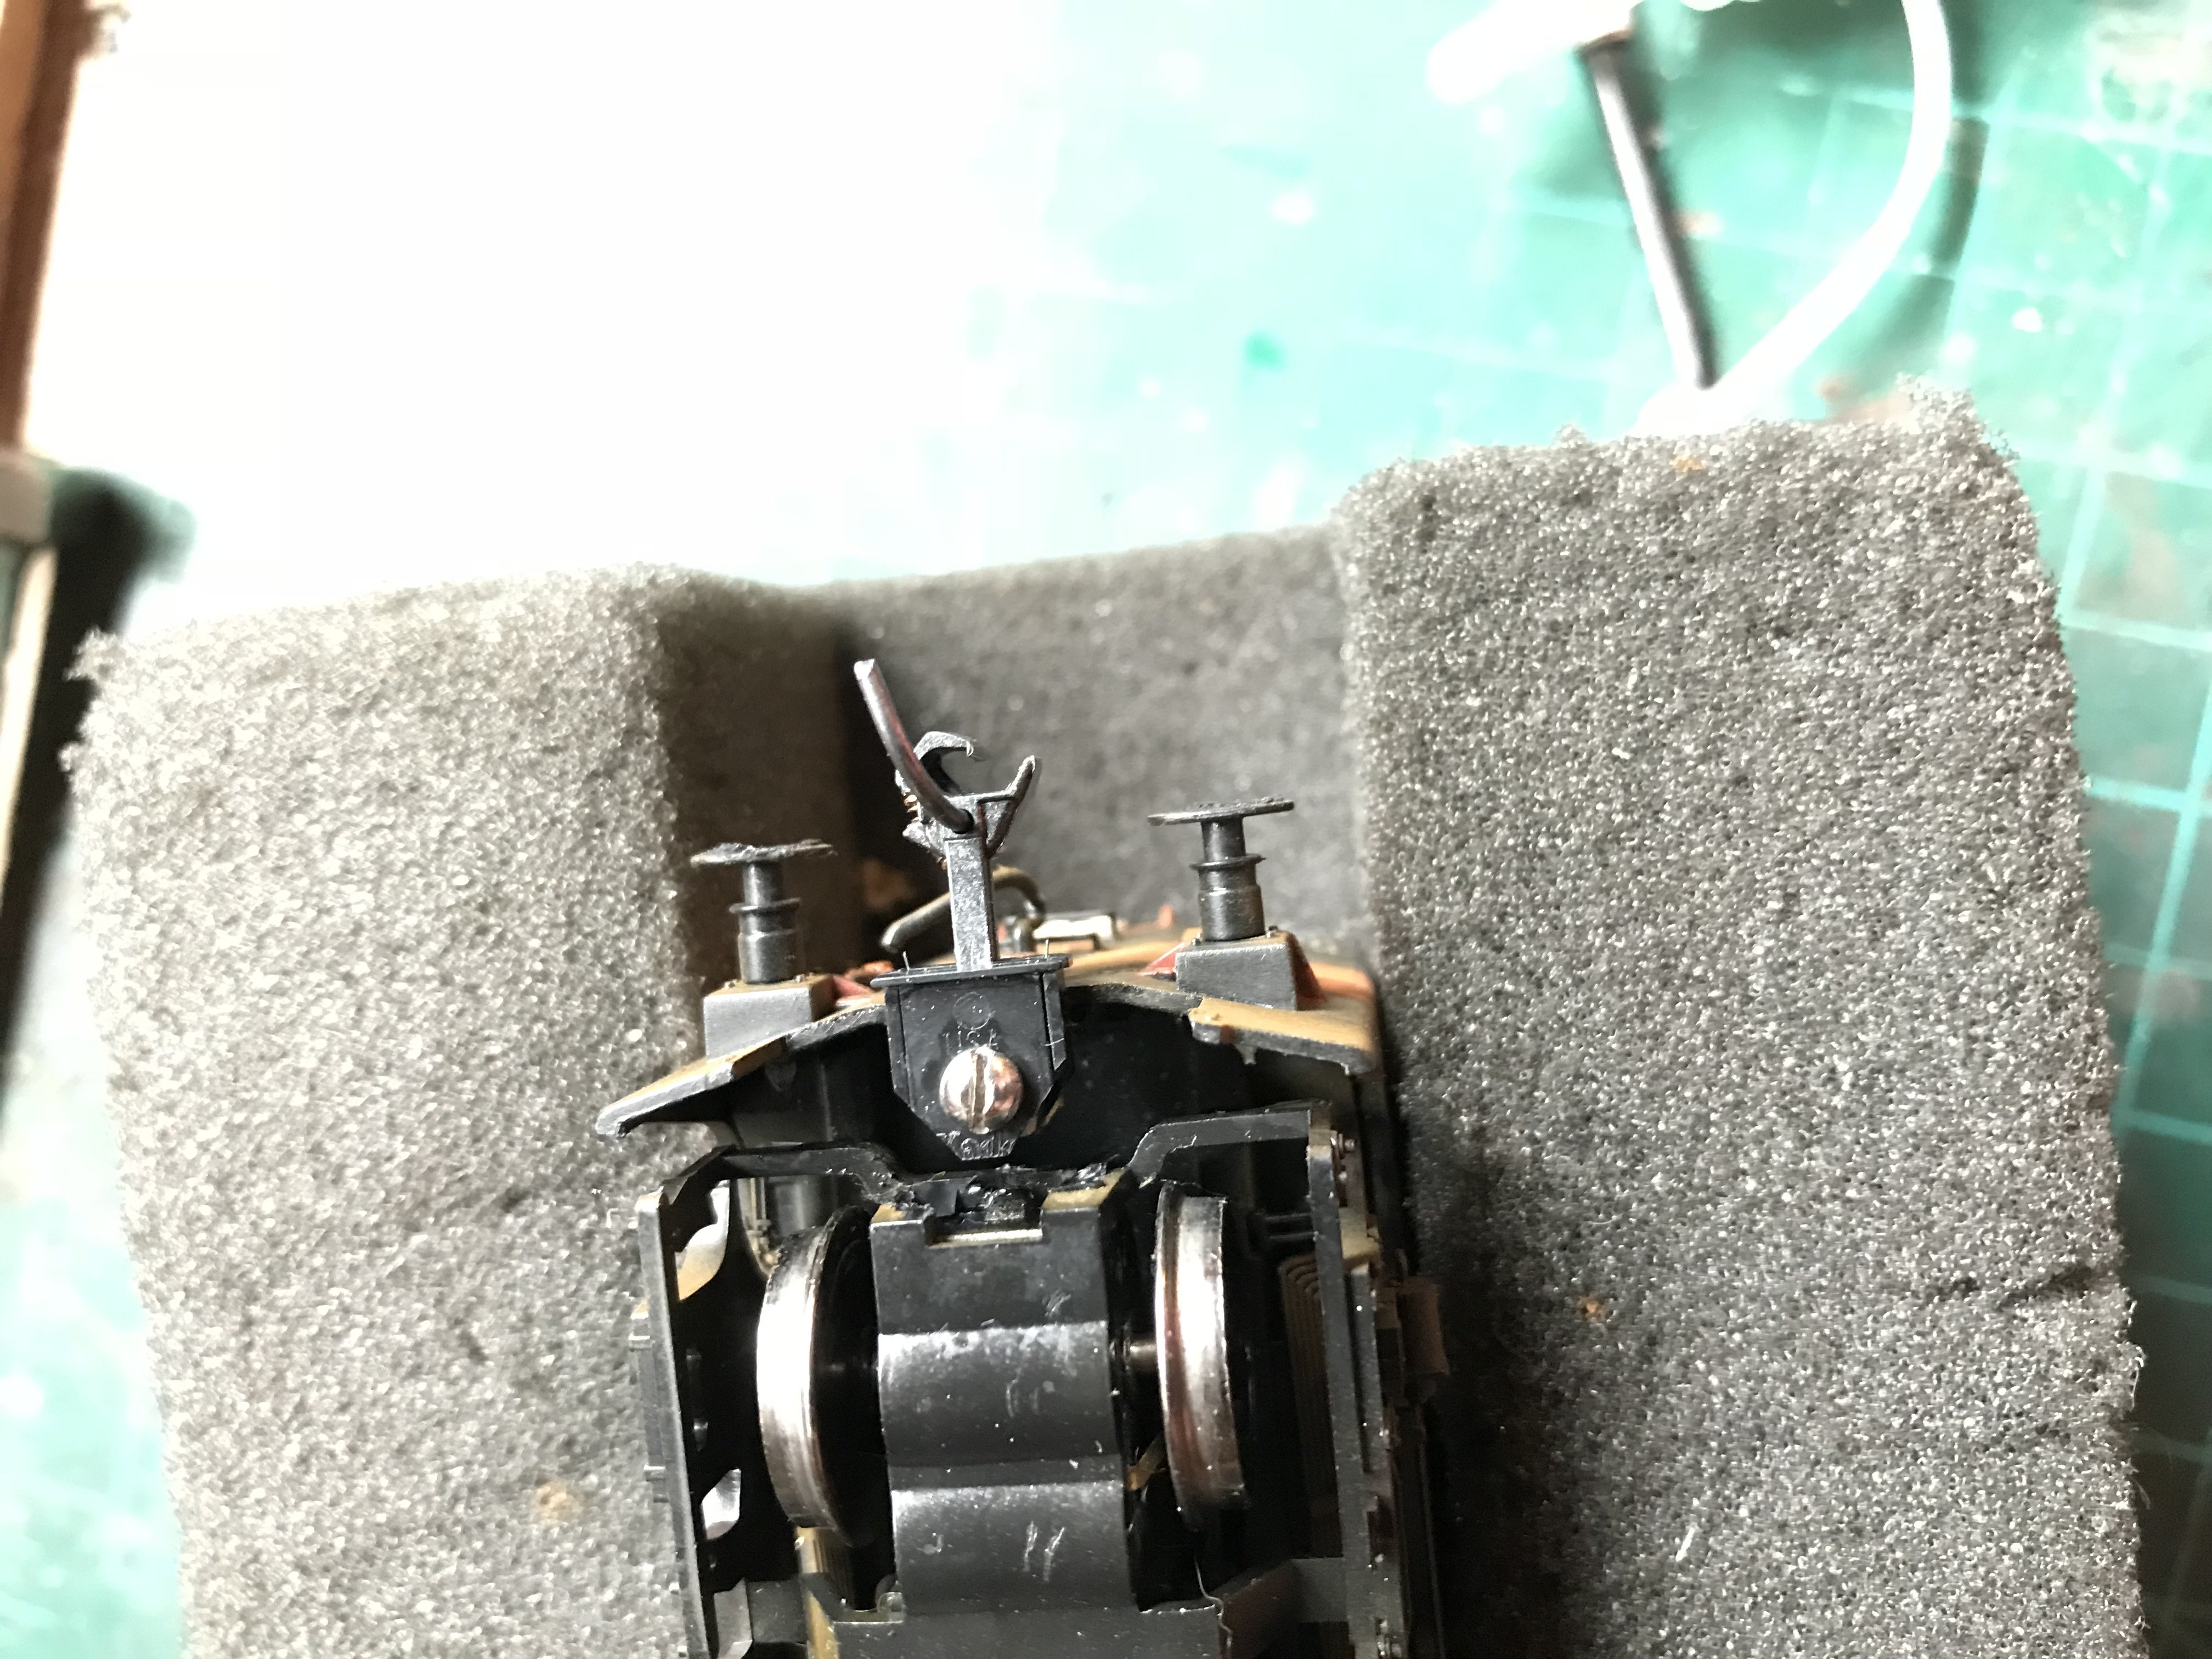
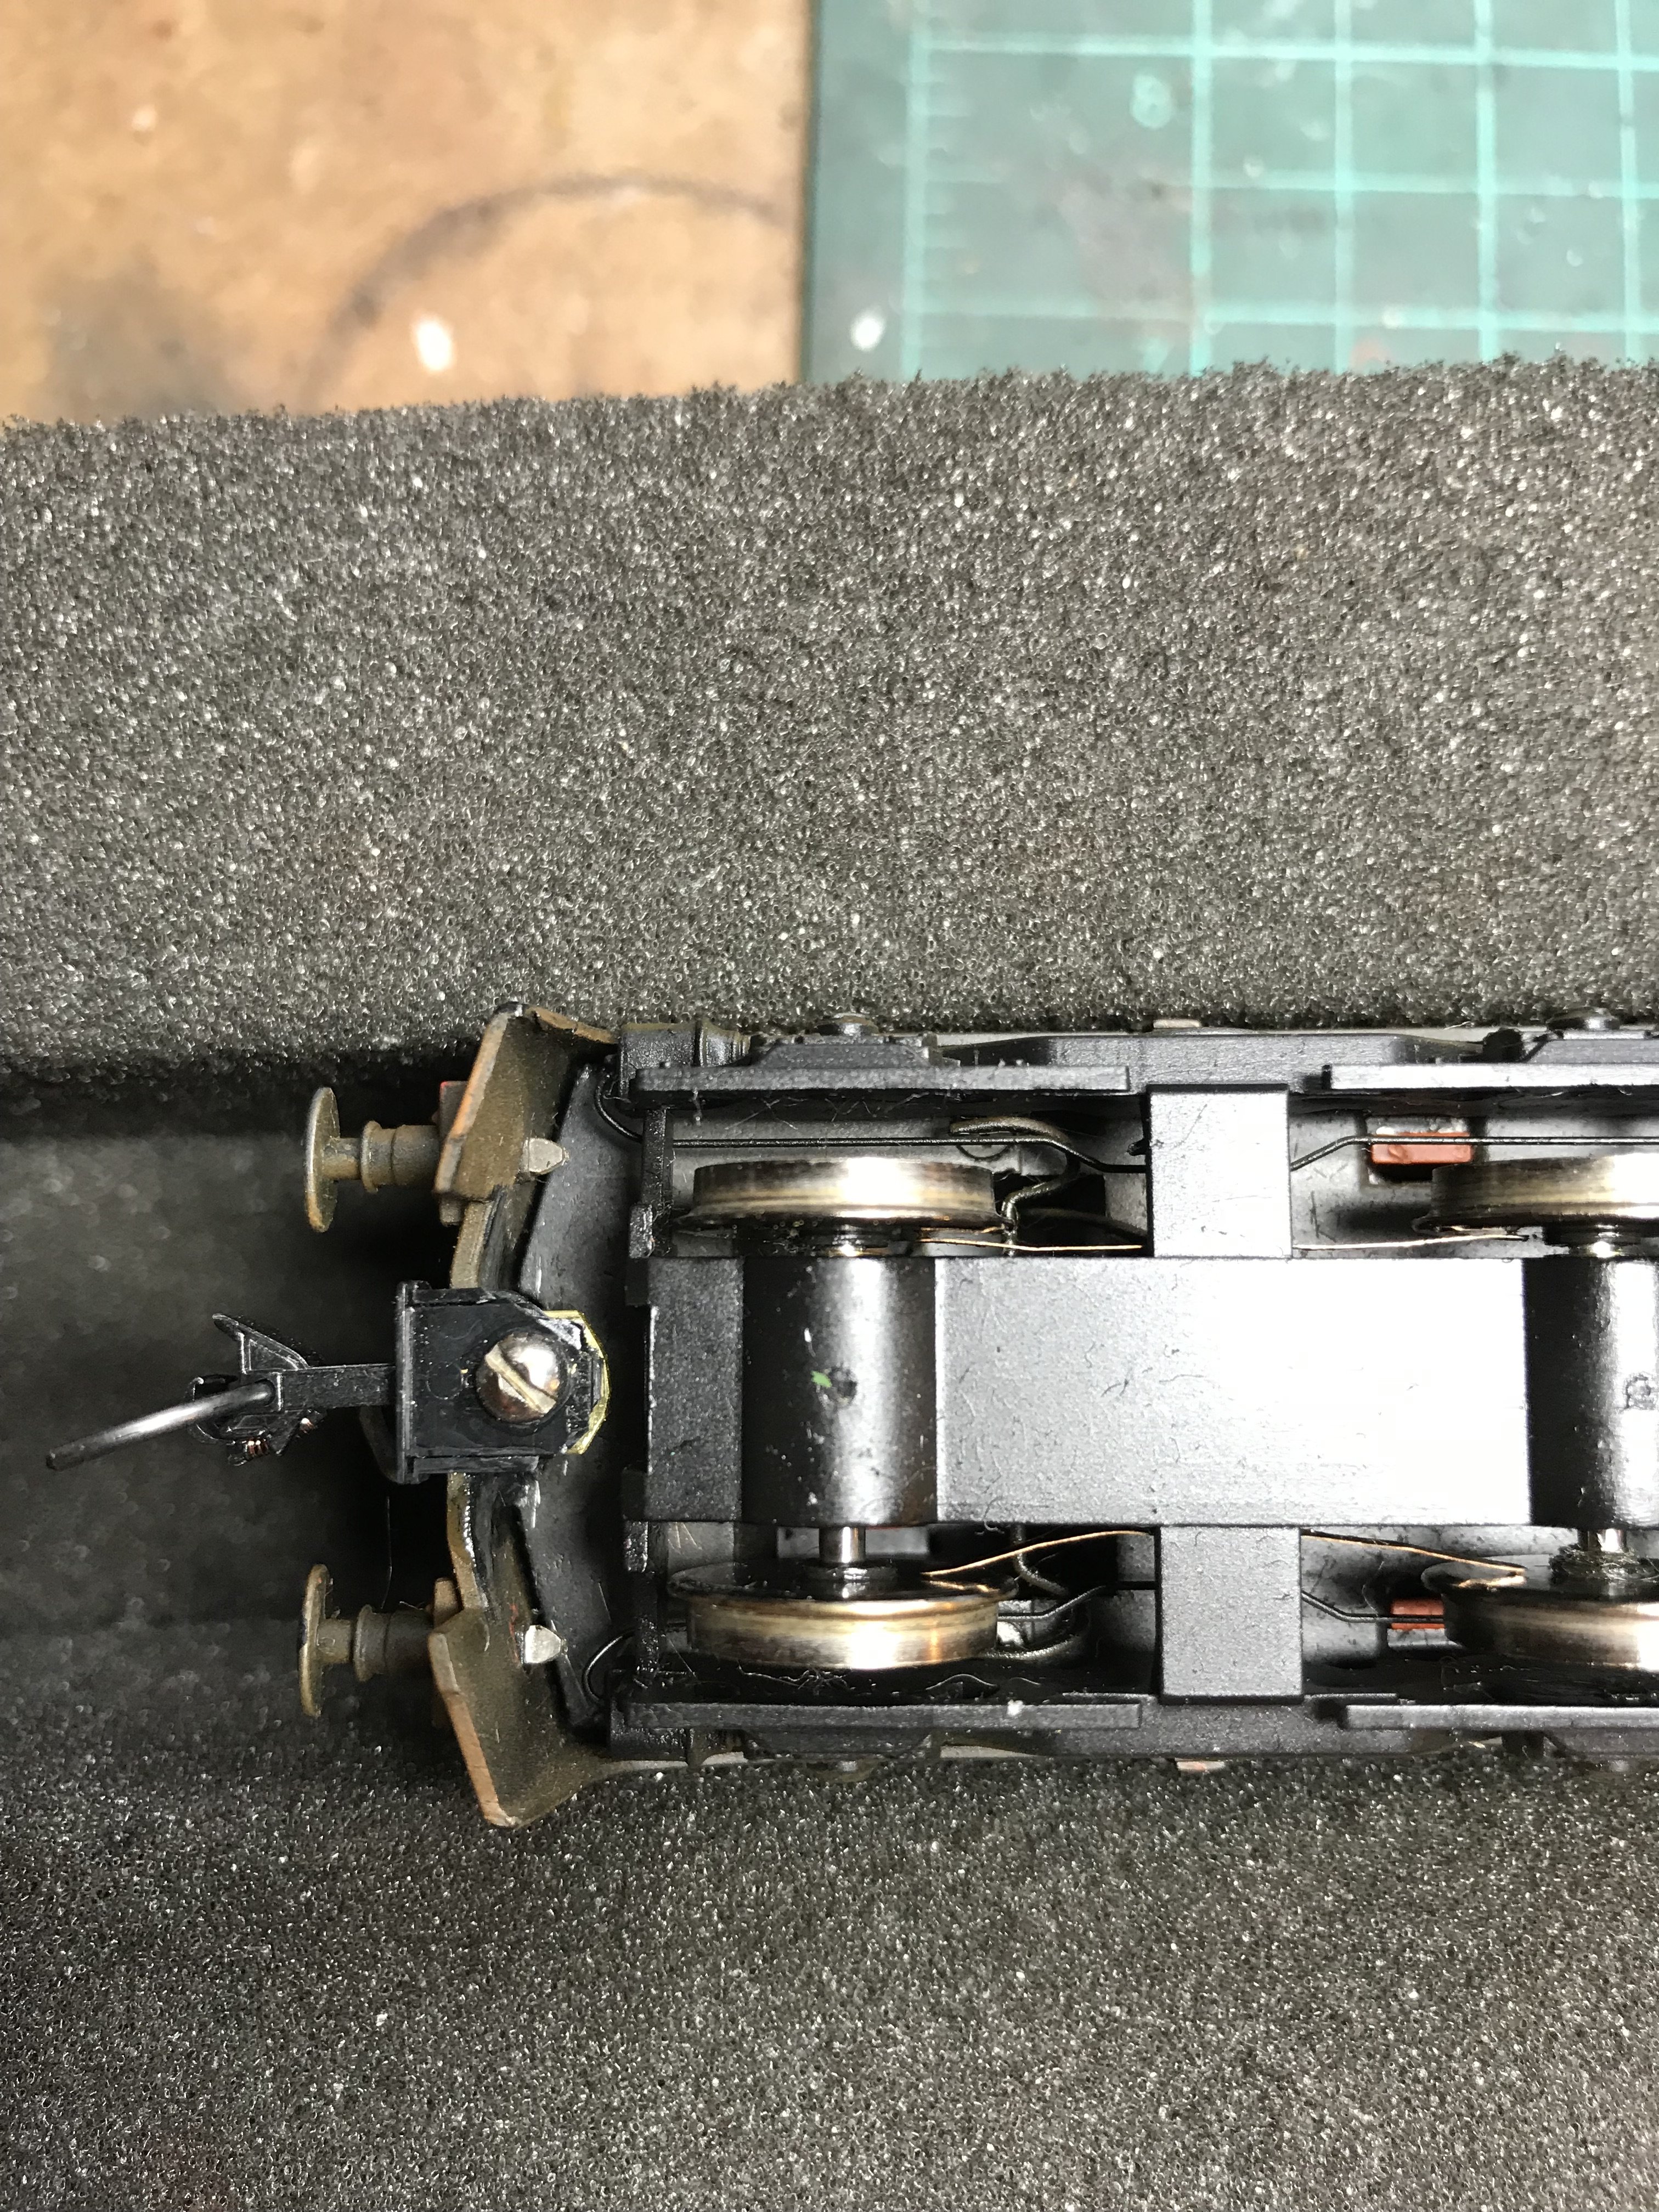
The process is pretty much the same for the 071, but it's a little more hassle as the sideframes are harder to remove and are slightly bulkier than the ones on the 141. This makes space a little tighter so careful measuring is needed. They also seem to be made of a harder plastic than the 141's sideframes so are more difficult to cut. The 201 was interesting; I originally tried to mount the coupler box to the pivoting NEM pocket but this made the coupler sit way too low so I made the decision to remove it. I used the exact same process as the 141/071. While there is a little more room to work with the couple box still needs to be trimmed. Again the coupler height is bang on. So I've taken the plunge and fitted all of my Irish locos with the Kadees and I'm very happy with them. The running is excellent and I haven't had any come away from their mountings yet even though I had doubts about the strength of the cyano glue. Hopefully over the next few days I'll get the aprons and buffer detailed installed on a few on them.
-
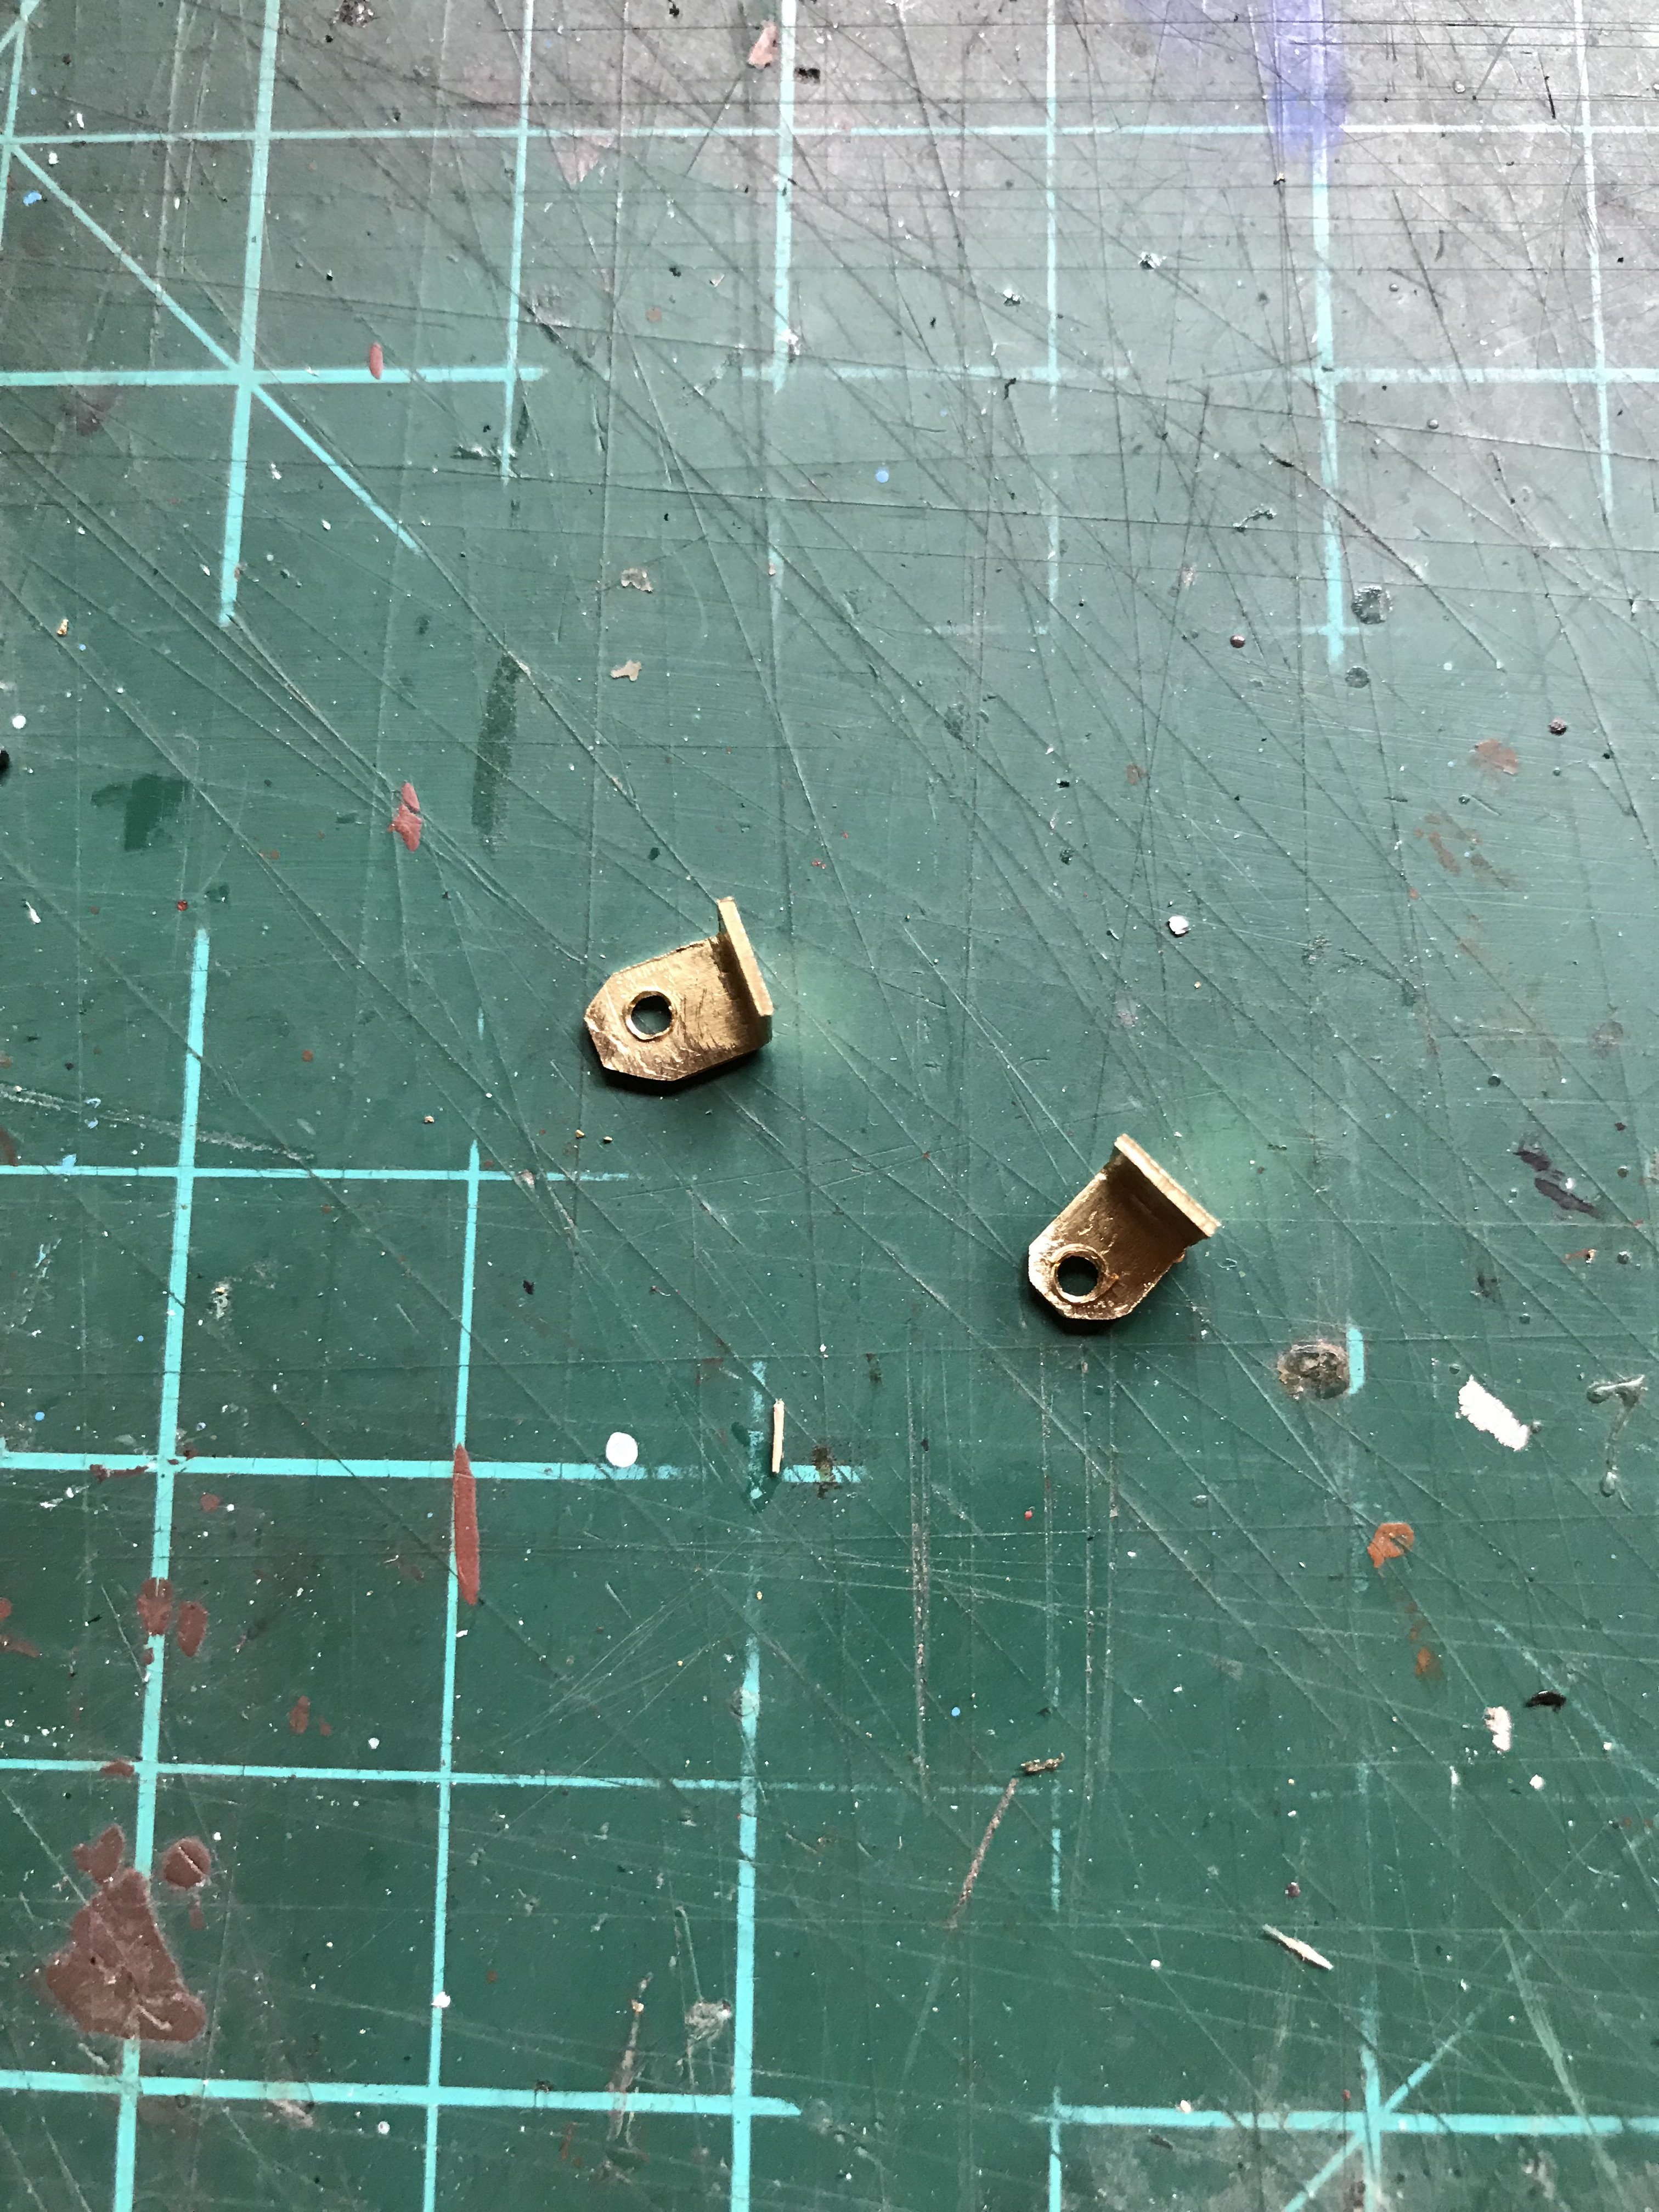
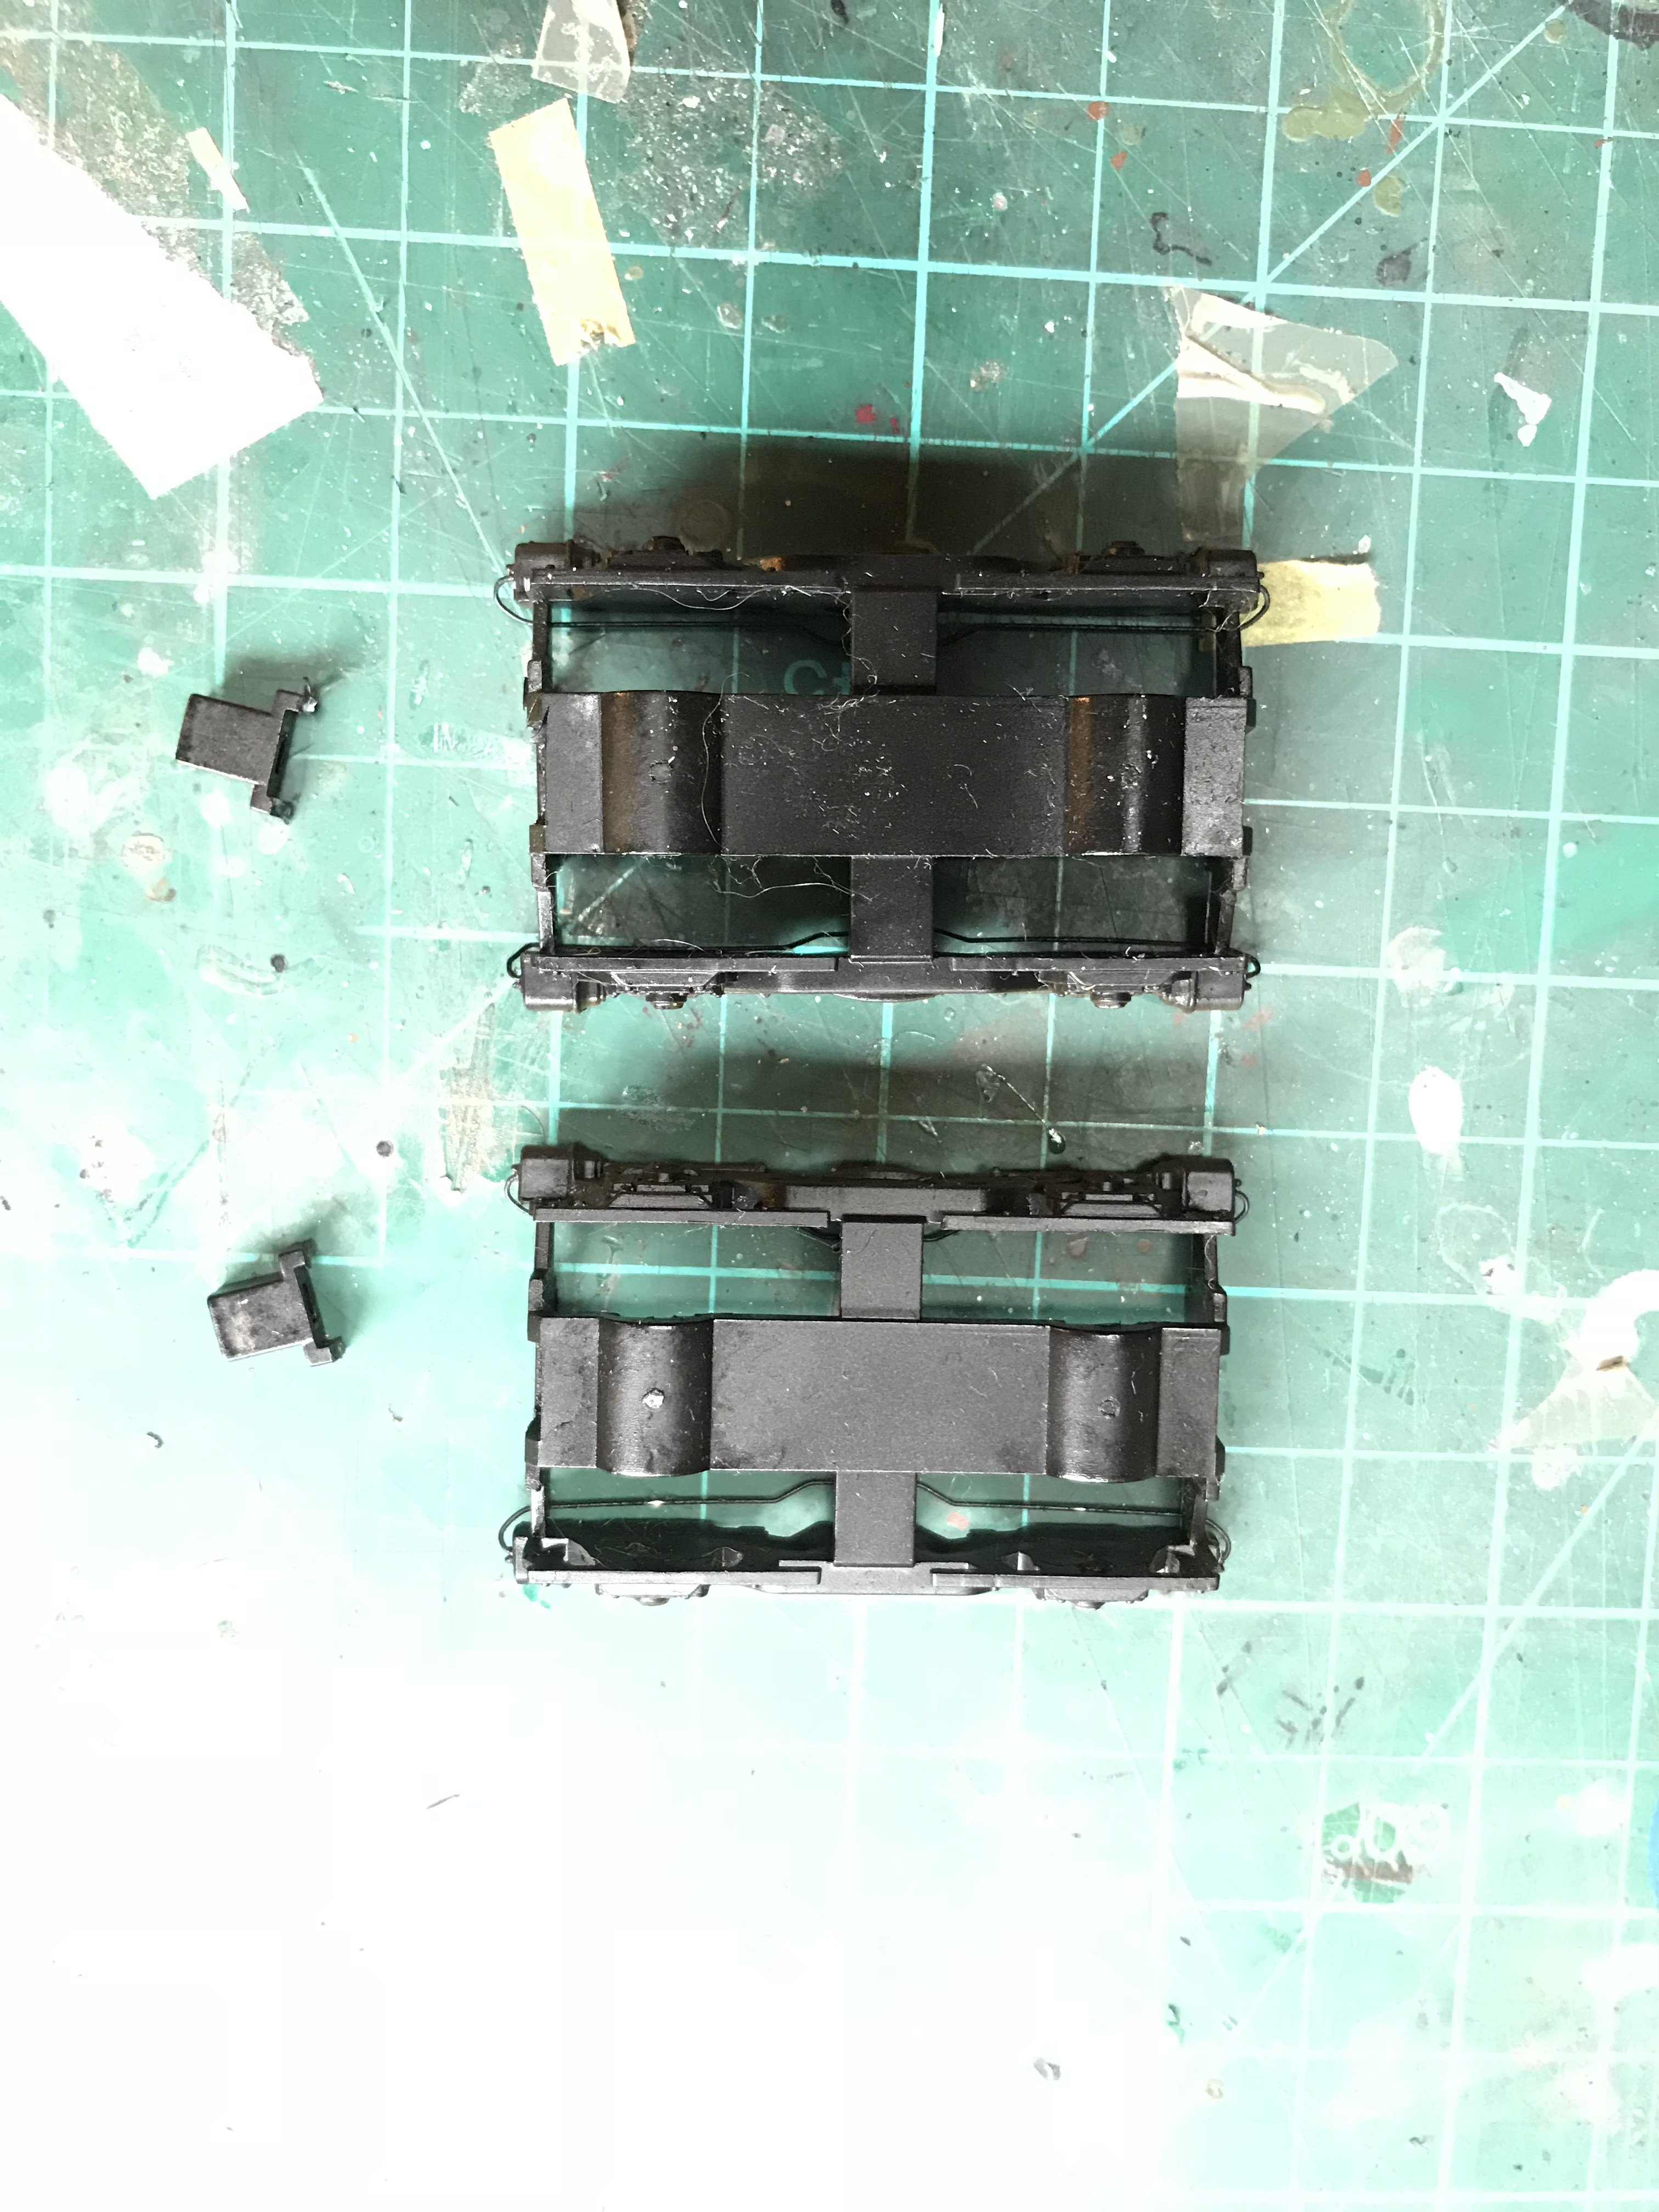
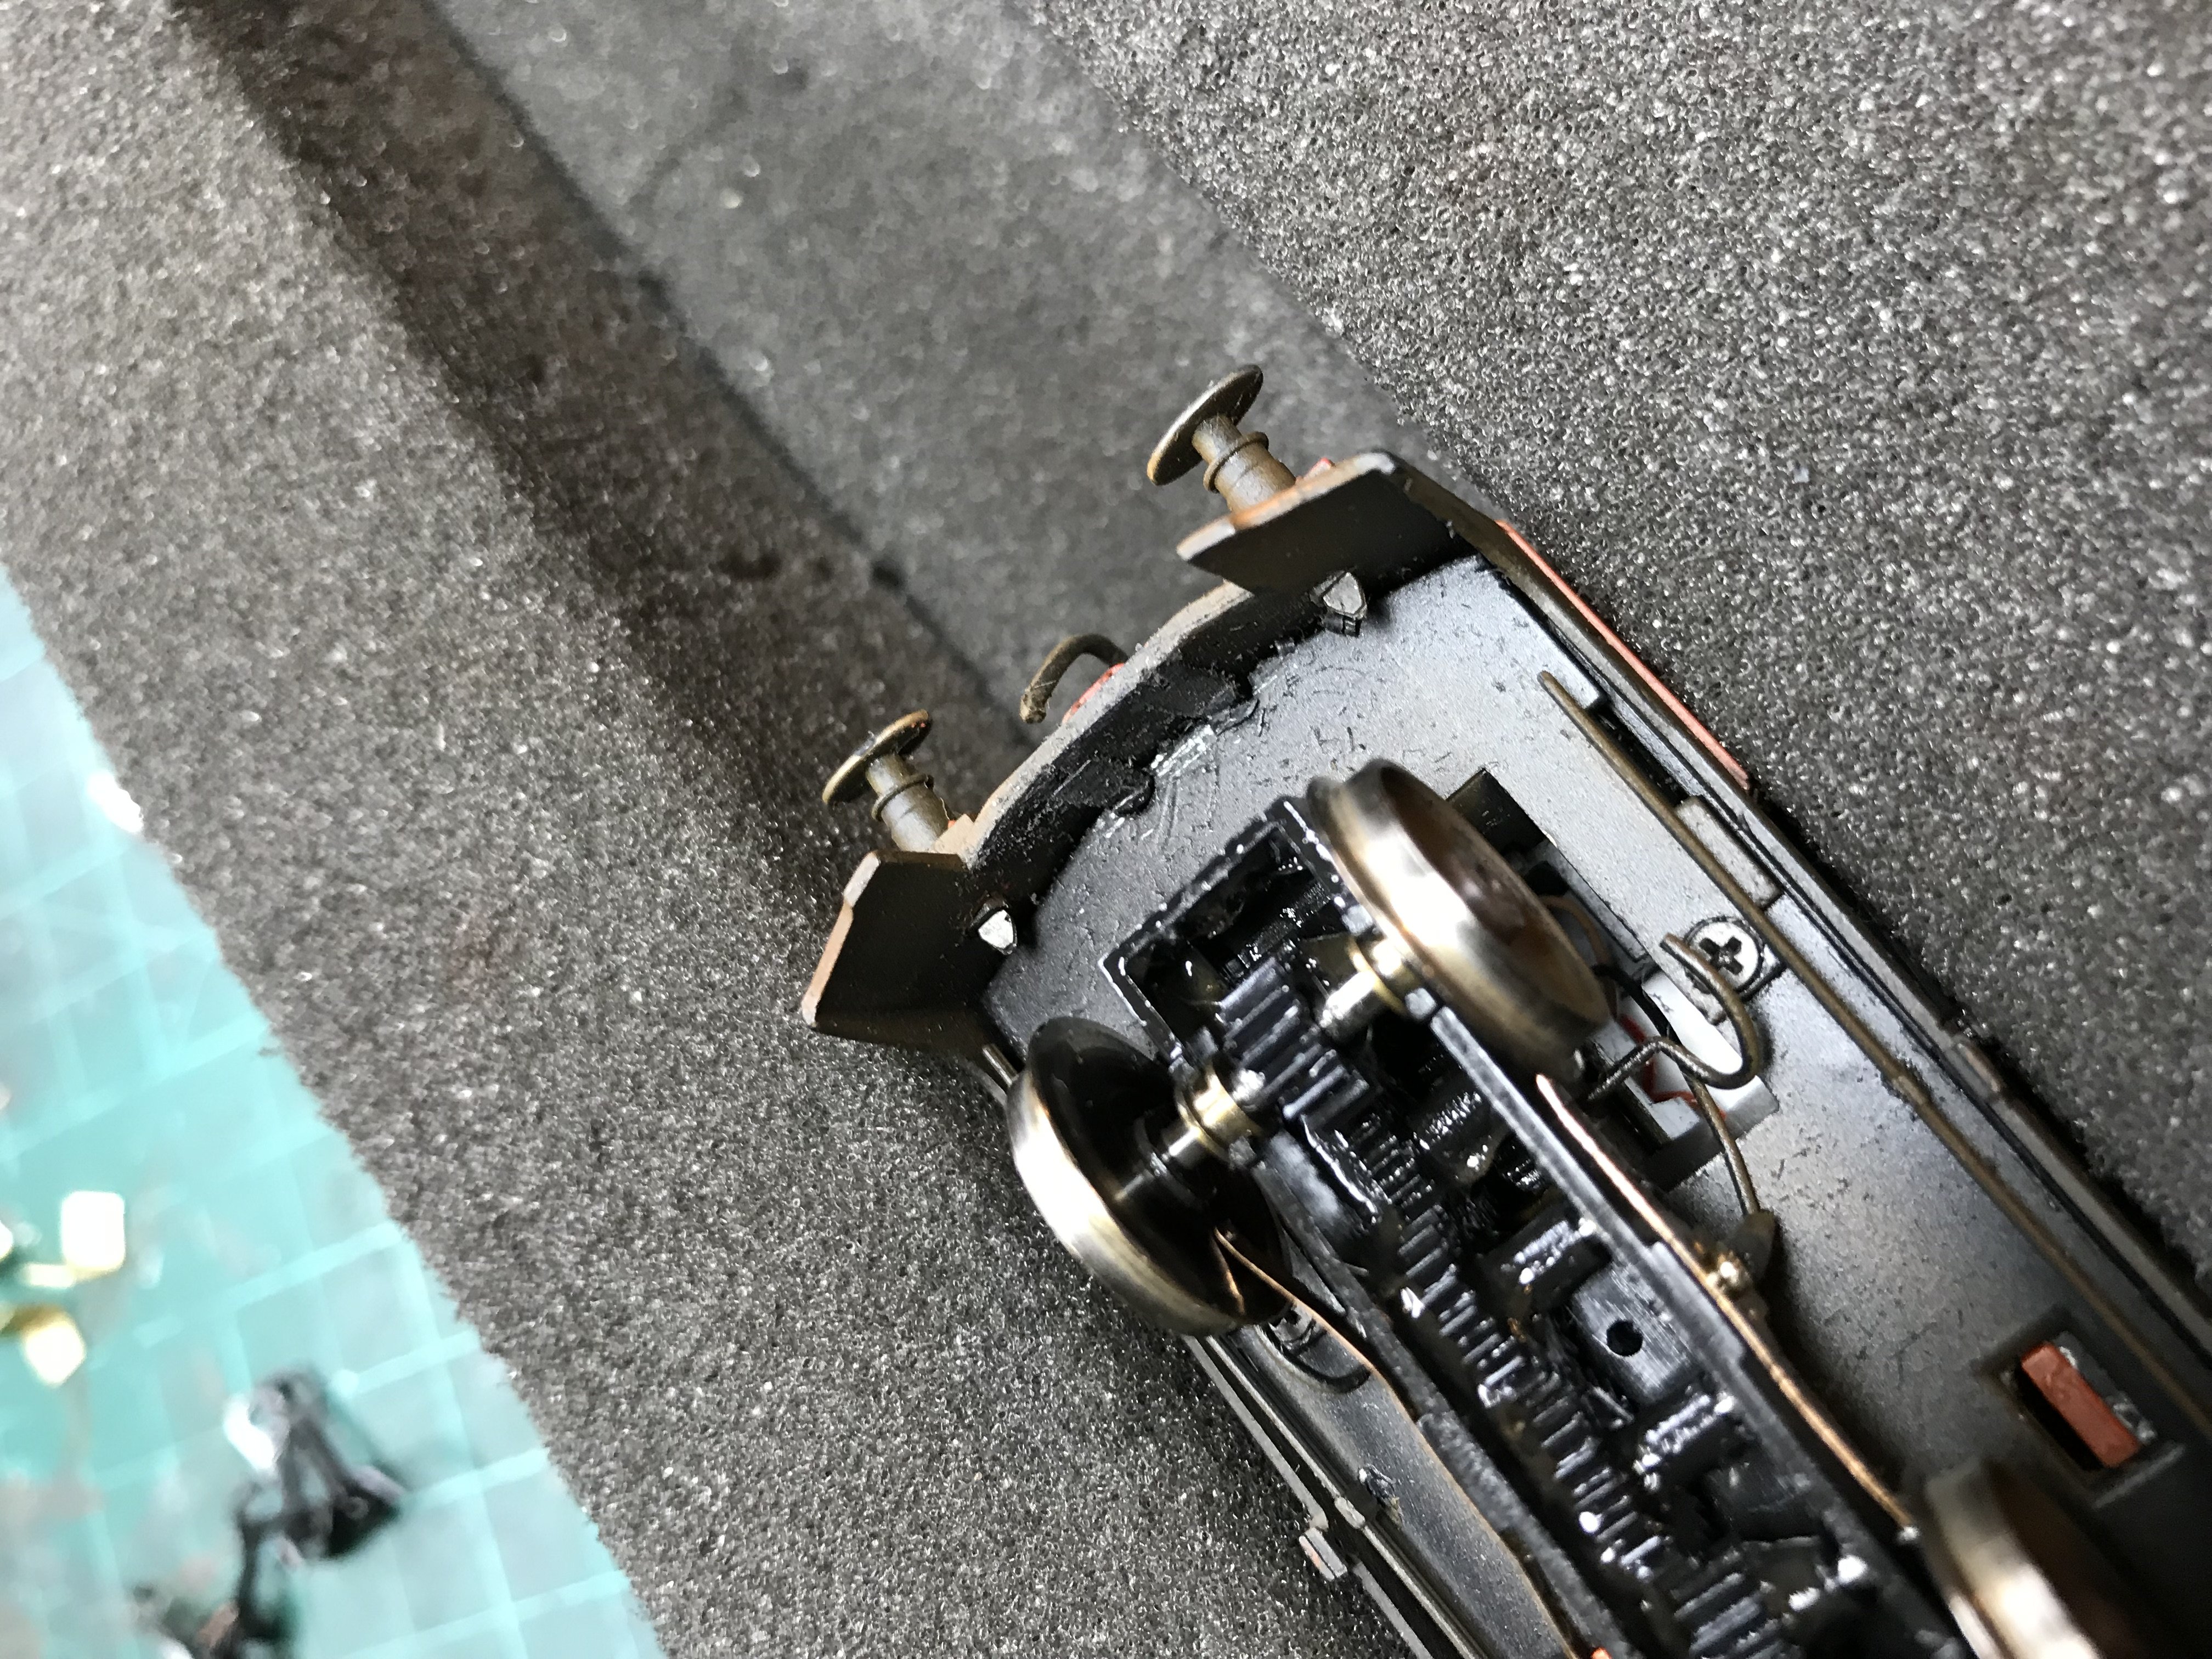
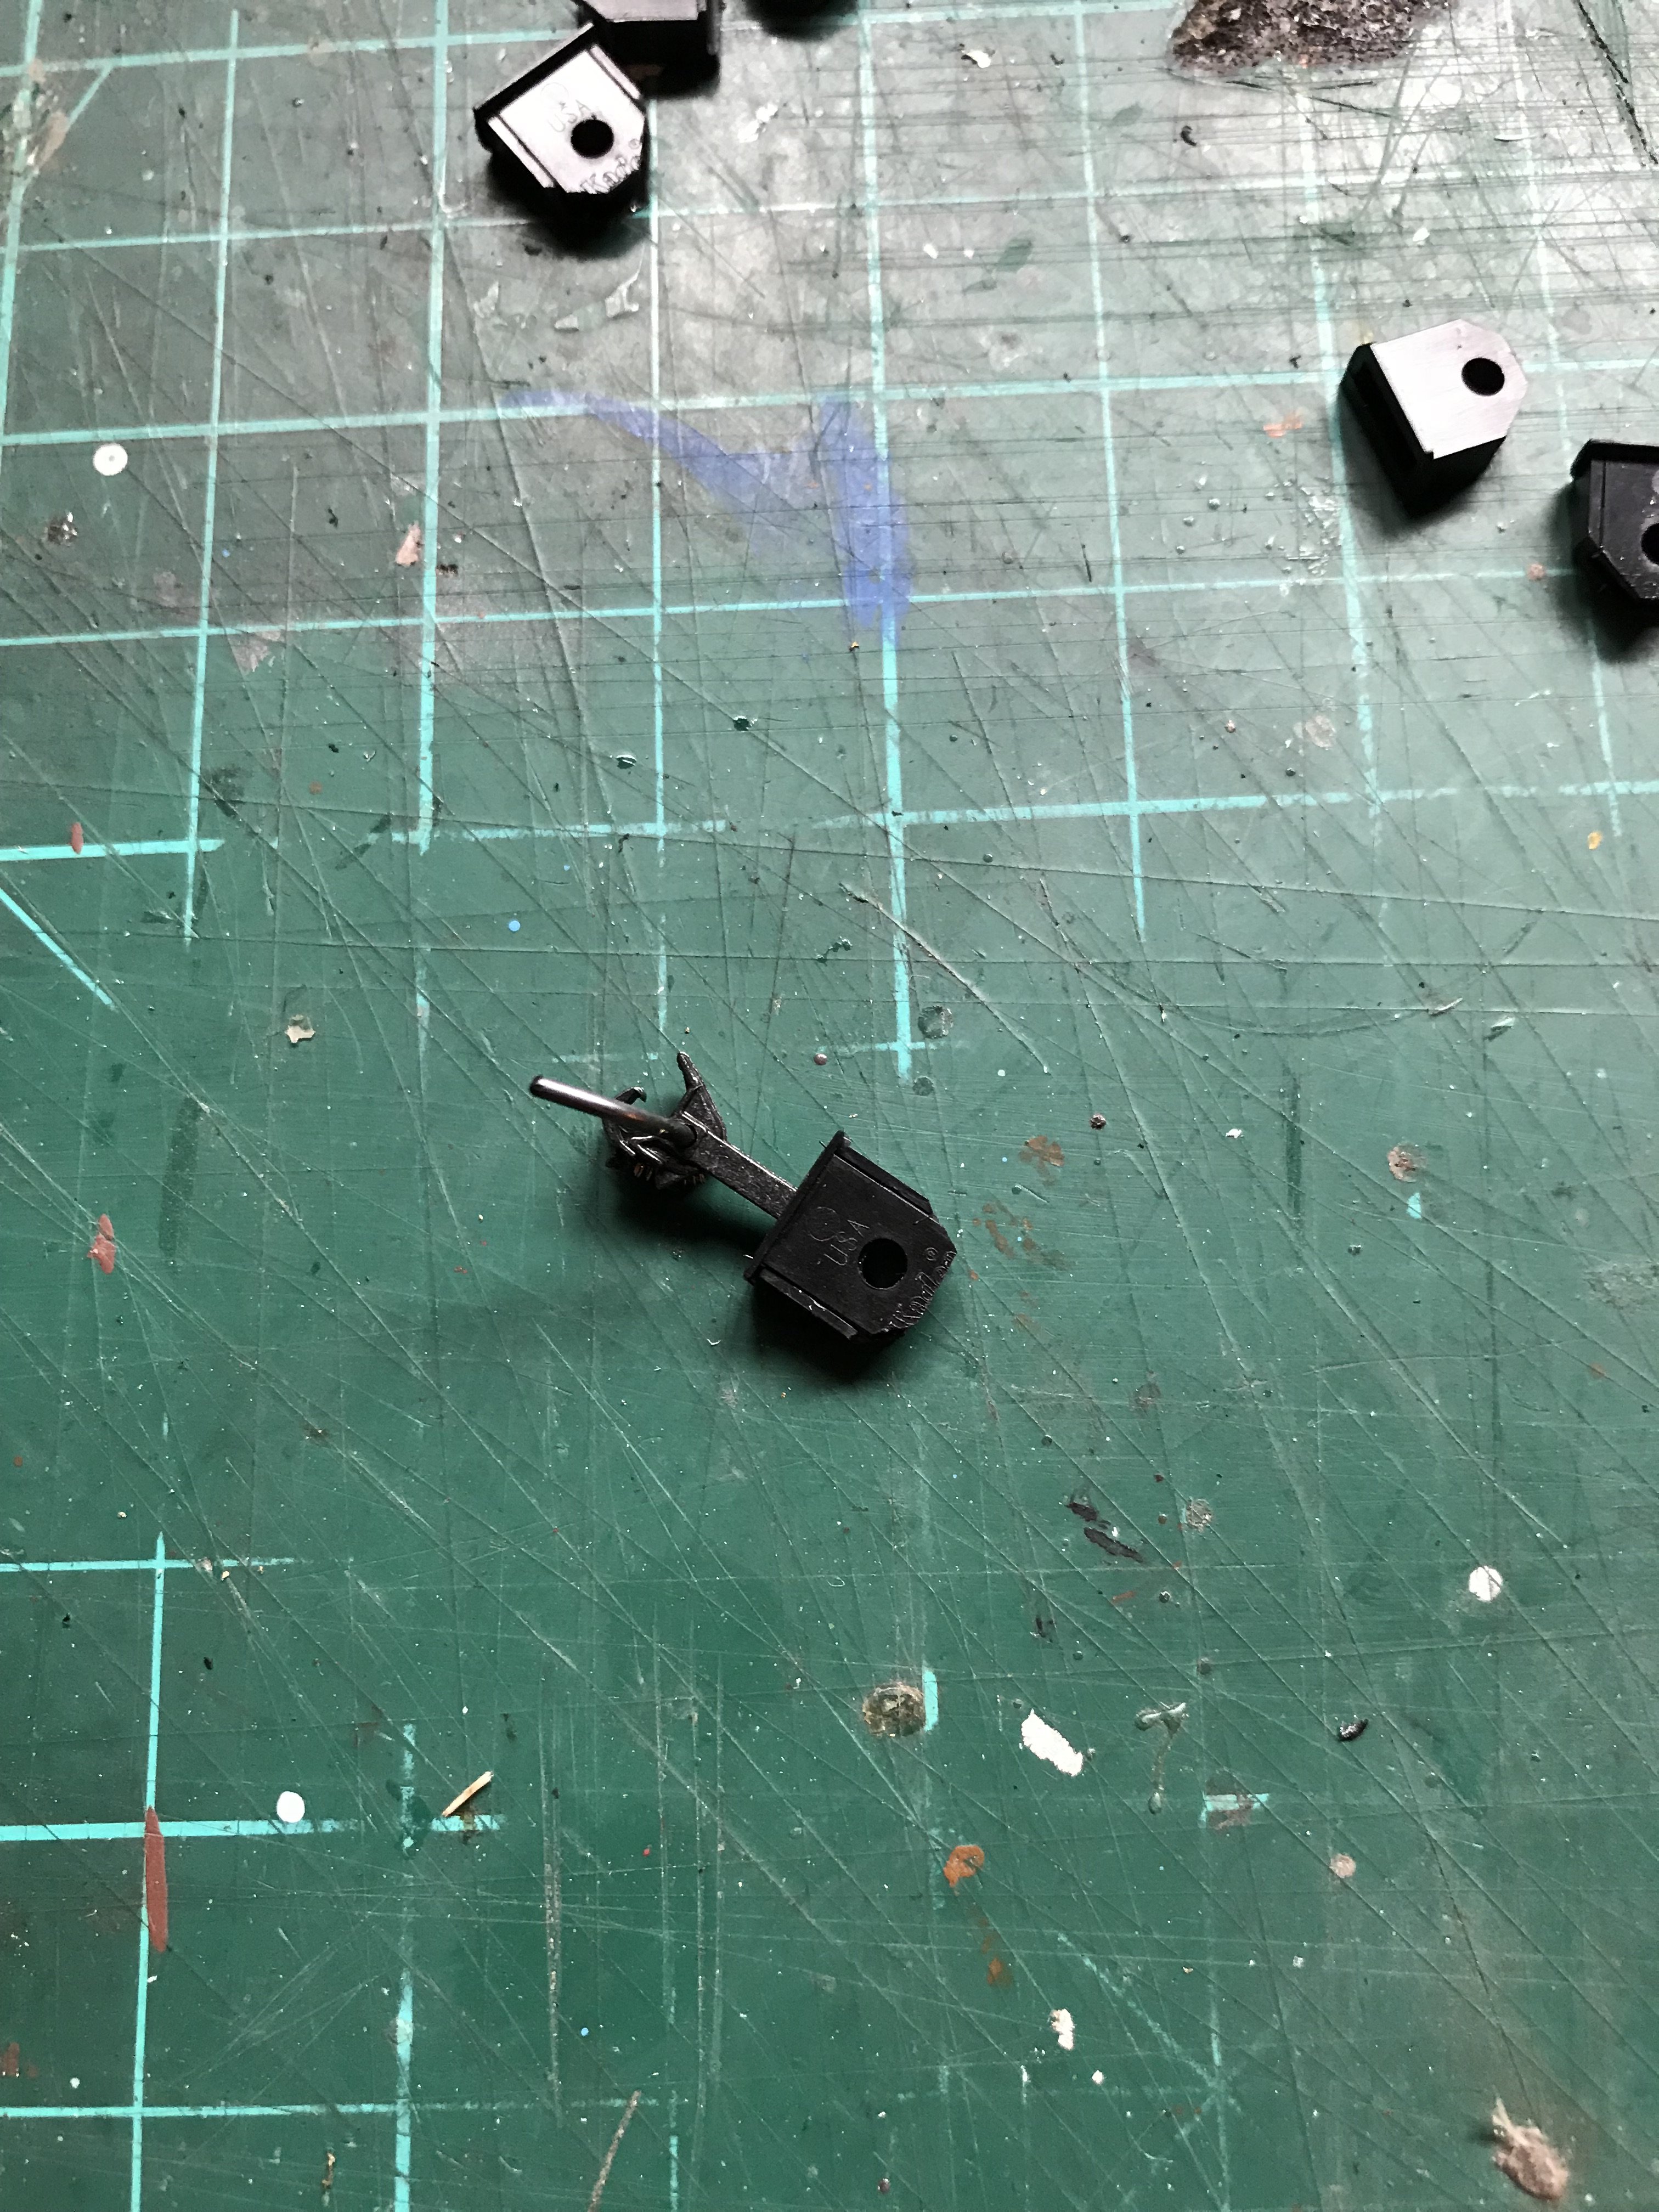
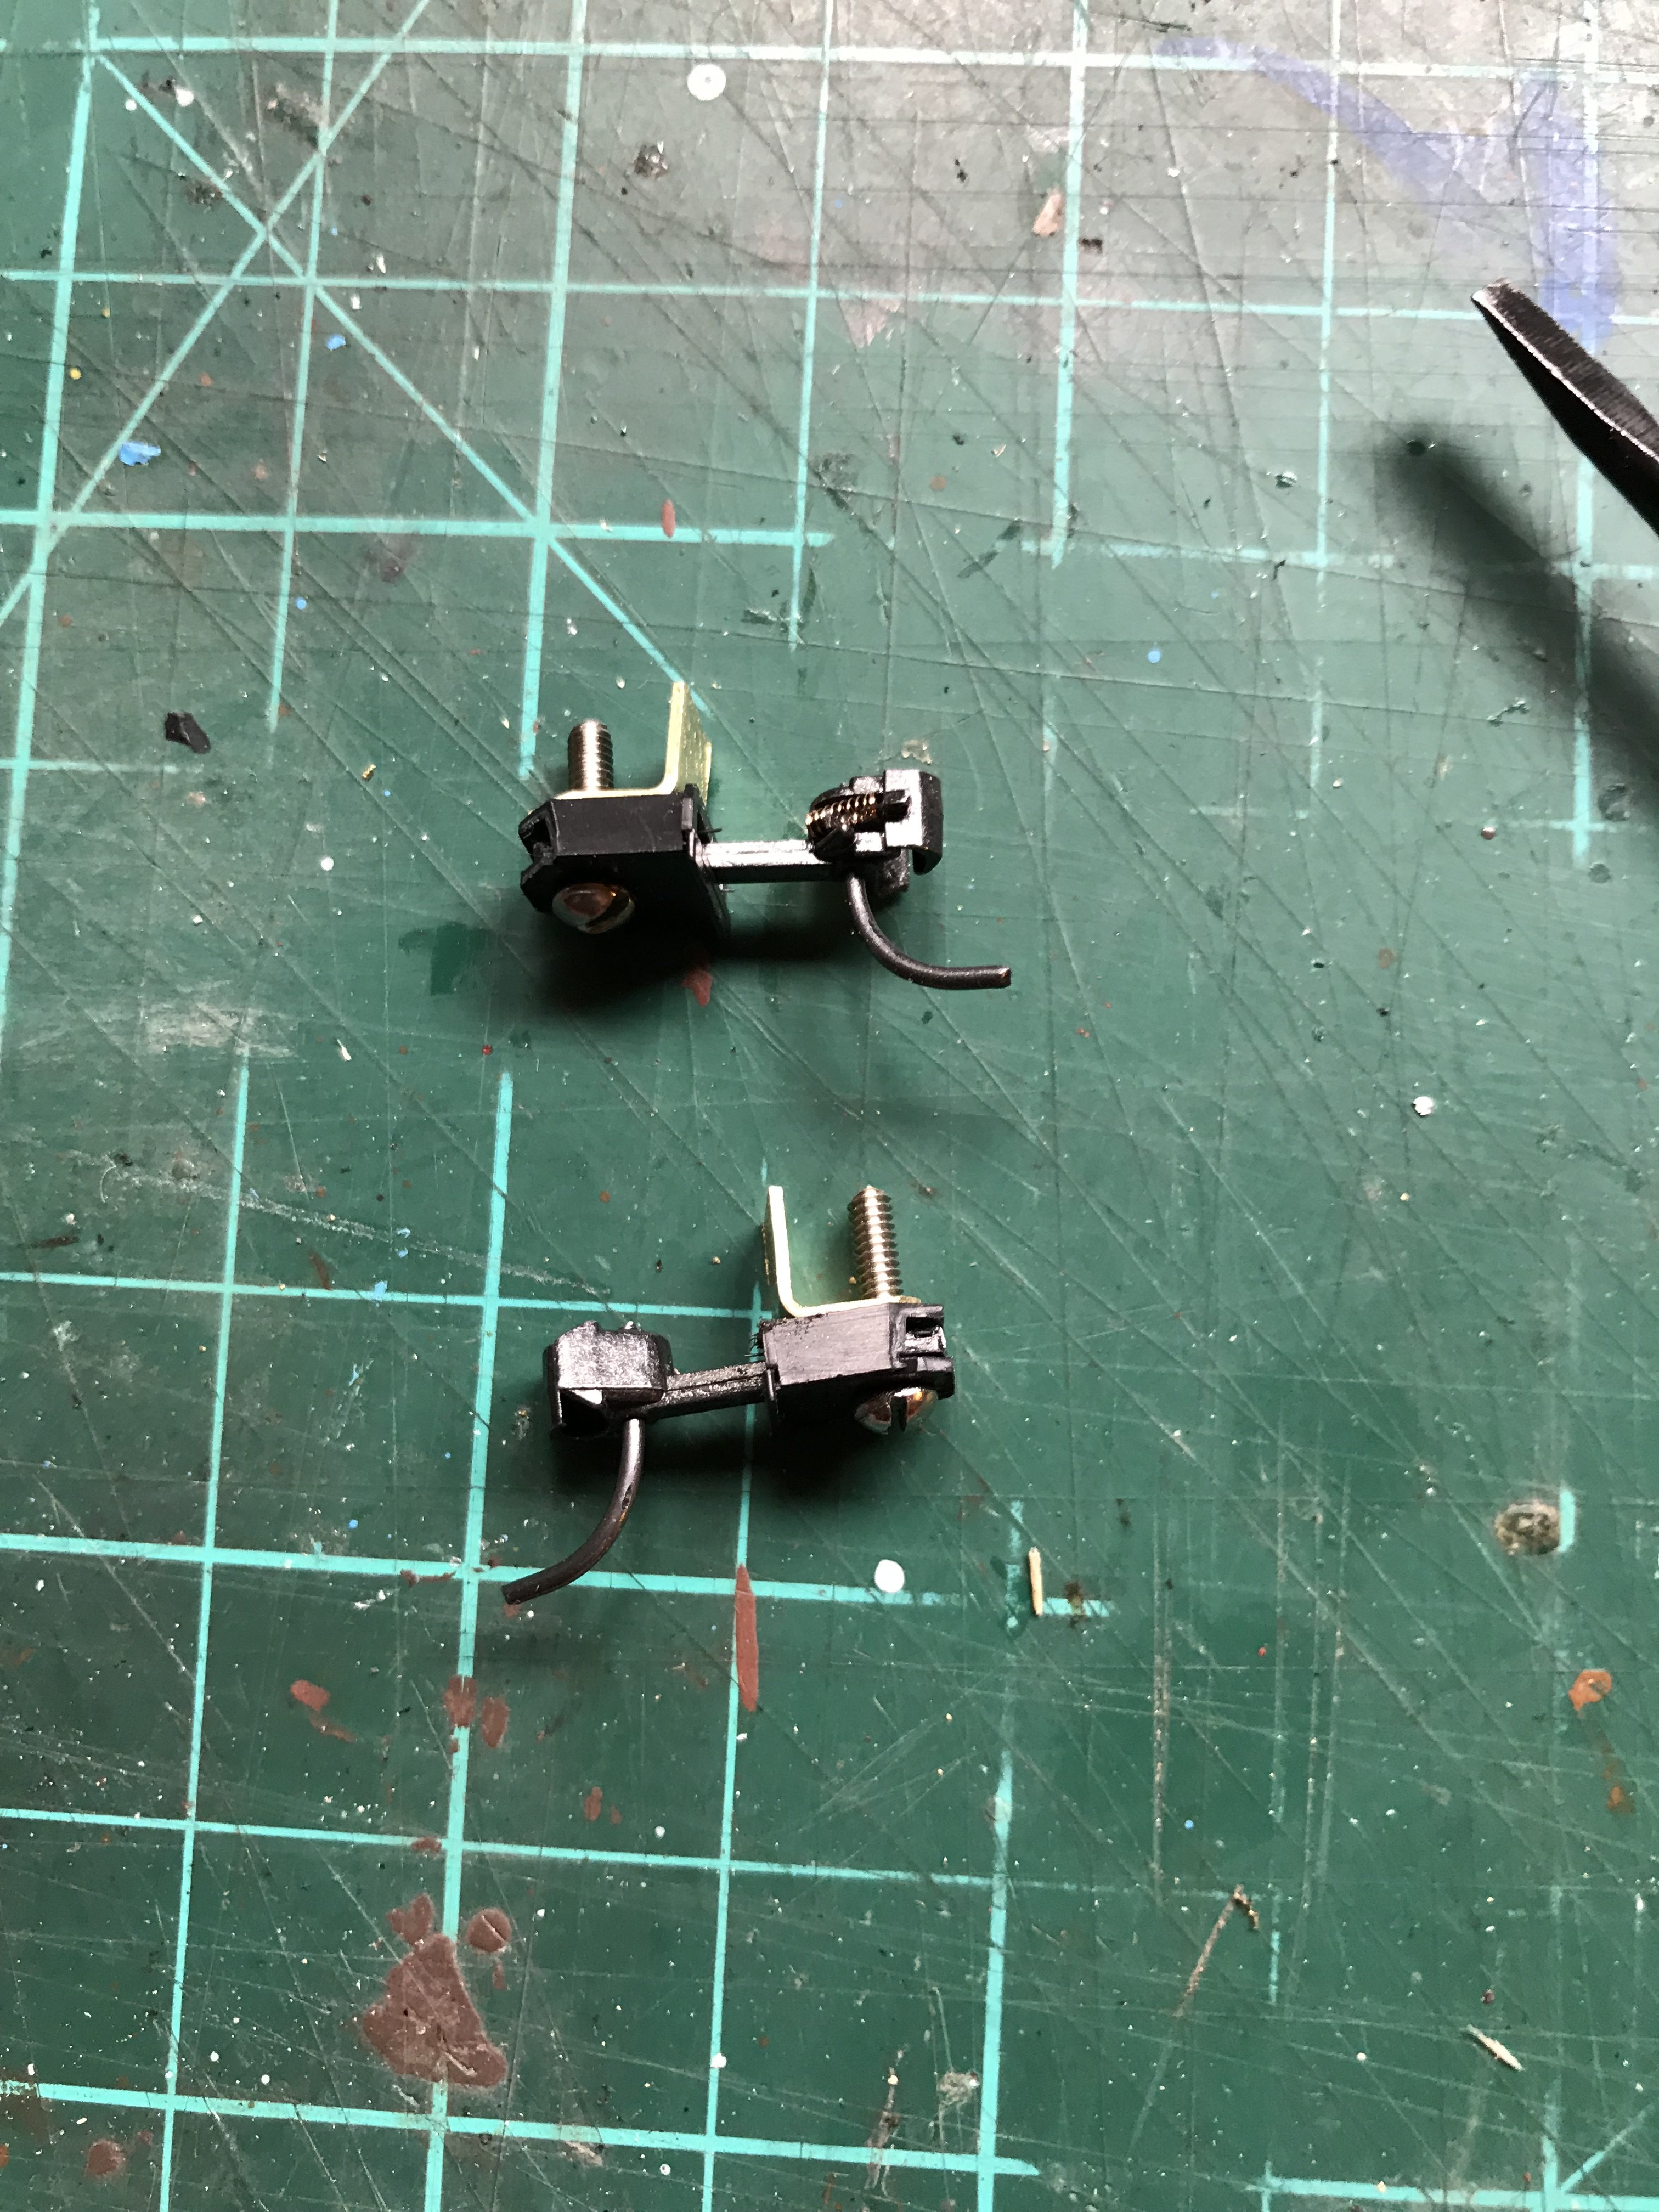
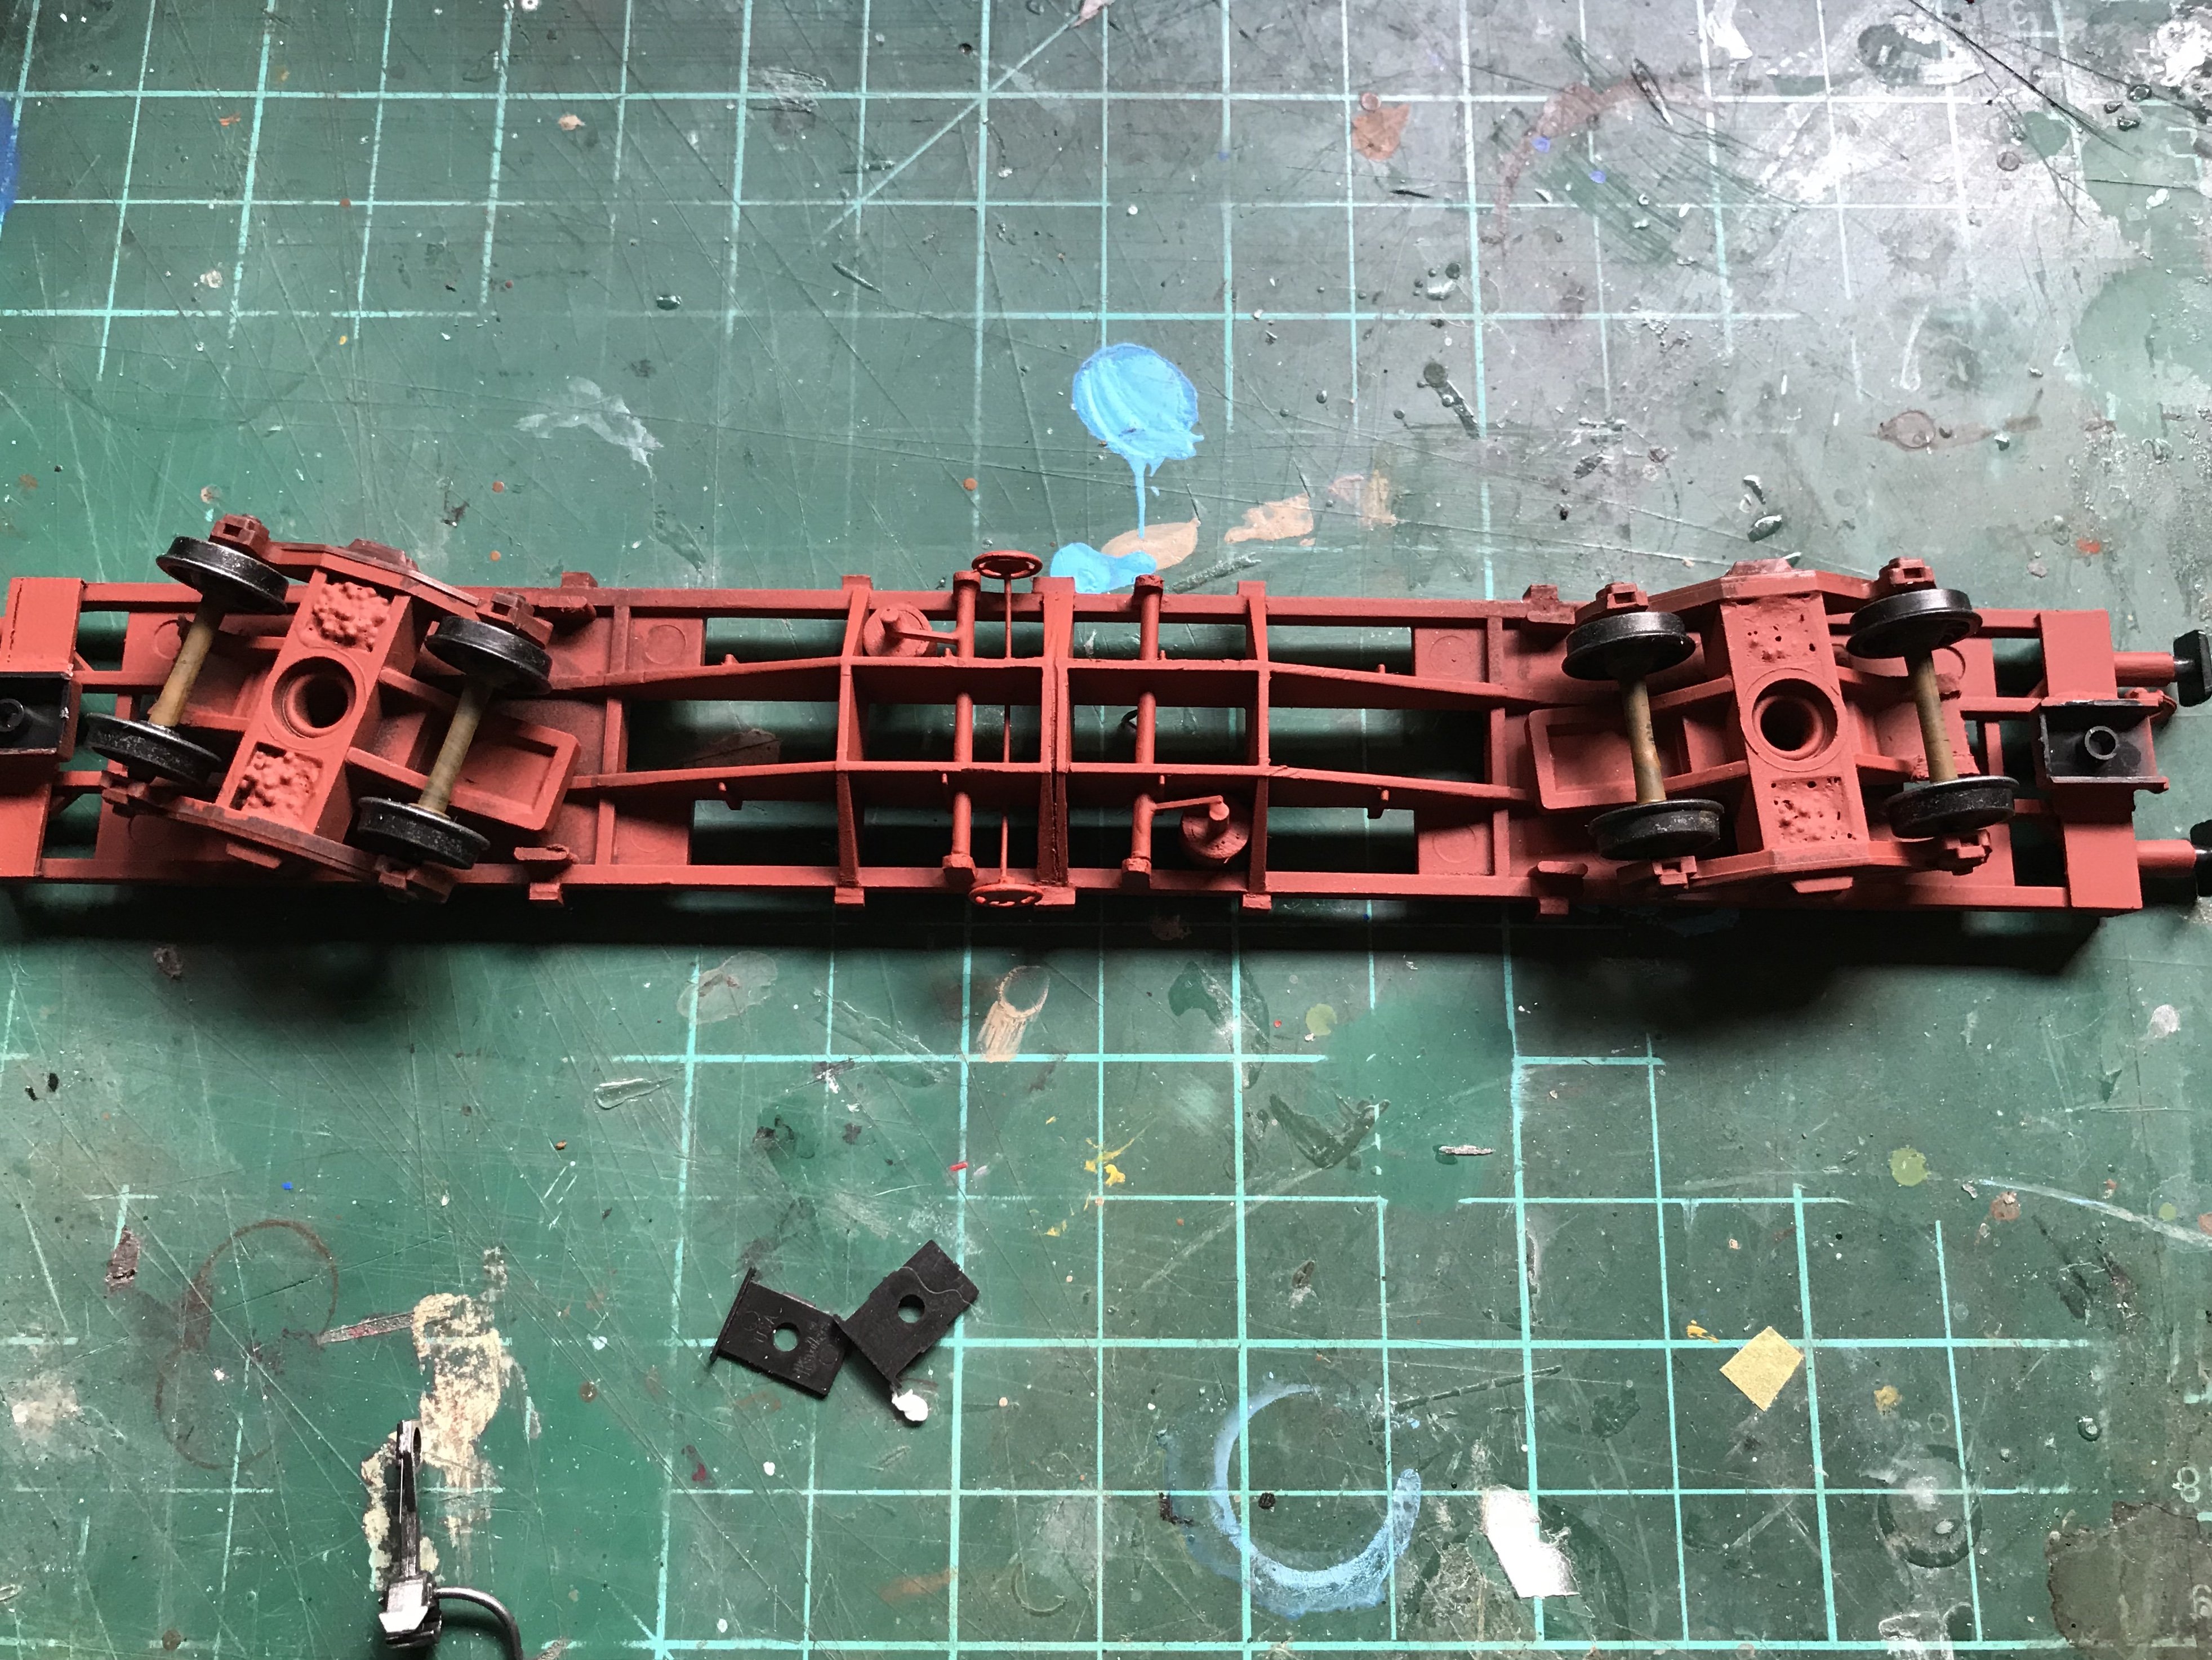
I had been toying with the idea of fitting body mounted Kadee couplers to all of my Irish Locos. I'm not a huge fan of the NEM couplers and I wanted to add all of the buffer detail to my locos. The Irish locos are a bit of a challenge as most of them don't have a huge amount of space under behind the buffer beam and I was reluctant to perform major surgery on them. But after some experimentation I found a method that's as painless as possible. I'm not reinventing the wheel here, a couple of forum members have done the same with slightly different approaches. First up is the MM 141. I am using Kadee 141 whisker couplers (handy to number to remember). These have an underset shank which places the coupler head at the perfect height when the draft box is fitted to the underside of the cut out in the apron of the loco. Unfortunately the box is too long and will interfere with the bogies but there's enough clearance at the back of the box to allow it to be trimmed. Here's how it looks afterwards with the coupler inserted. I next made up some mounting brackets from brass strip. A hole was drilled and tapped to accept a screw for the coupler box. The coupler attaches like so and the face of the bracket will be fixed to the back of the loco apron. The small mounting tabs for the apron insert need to be removed to allow the bracket to sit flush. The bracket is fixed to the back of the apron. I used superglue for this, if I find it's not strong enough I can use epoxy but I've had no problems so far. The NEM pocket on the bogie sideframes needs to be removed. A sharp blade takes care of this. Some of the purists among us might wince at this so avert your eyes! The bogie frame back in place. It looks tight but there is plenty of room, the shaping of the coupler box and bracket provides clearance. A quick check with the Kadee gauge shows that it's spot on.
-
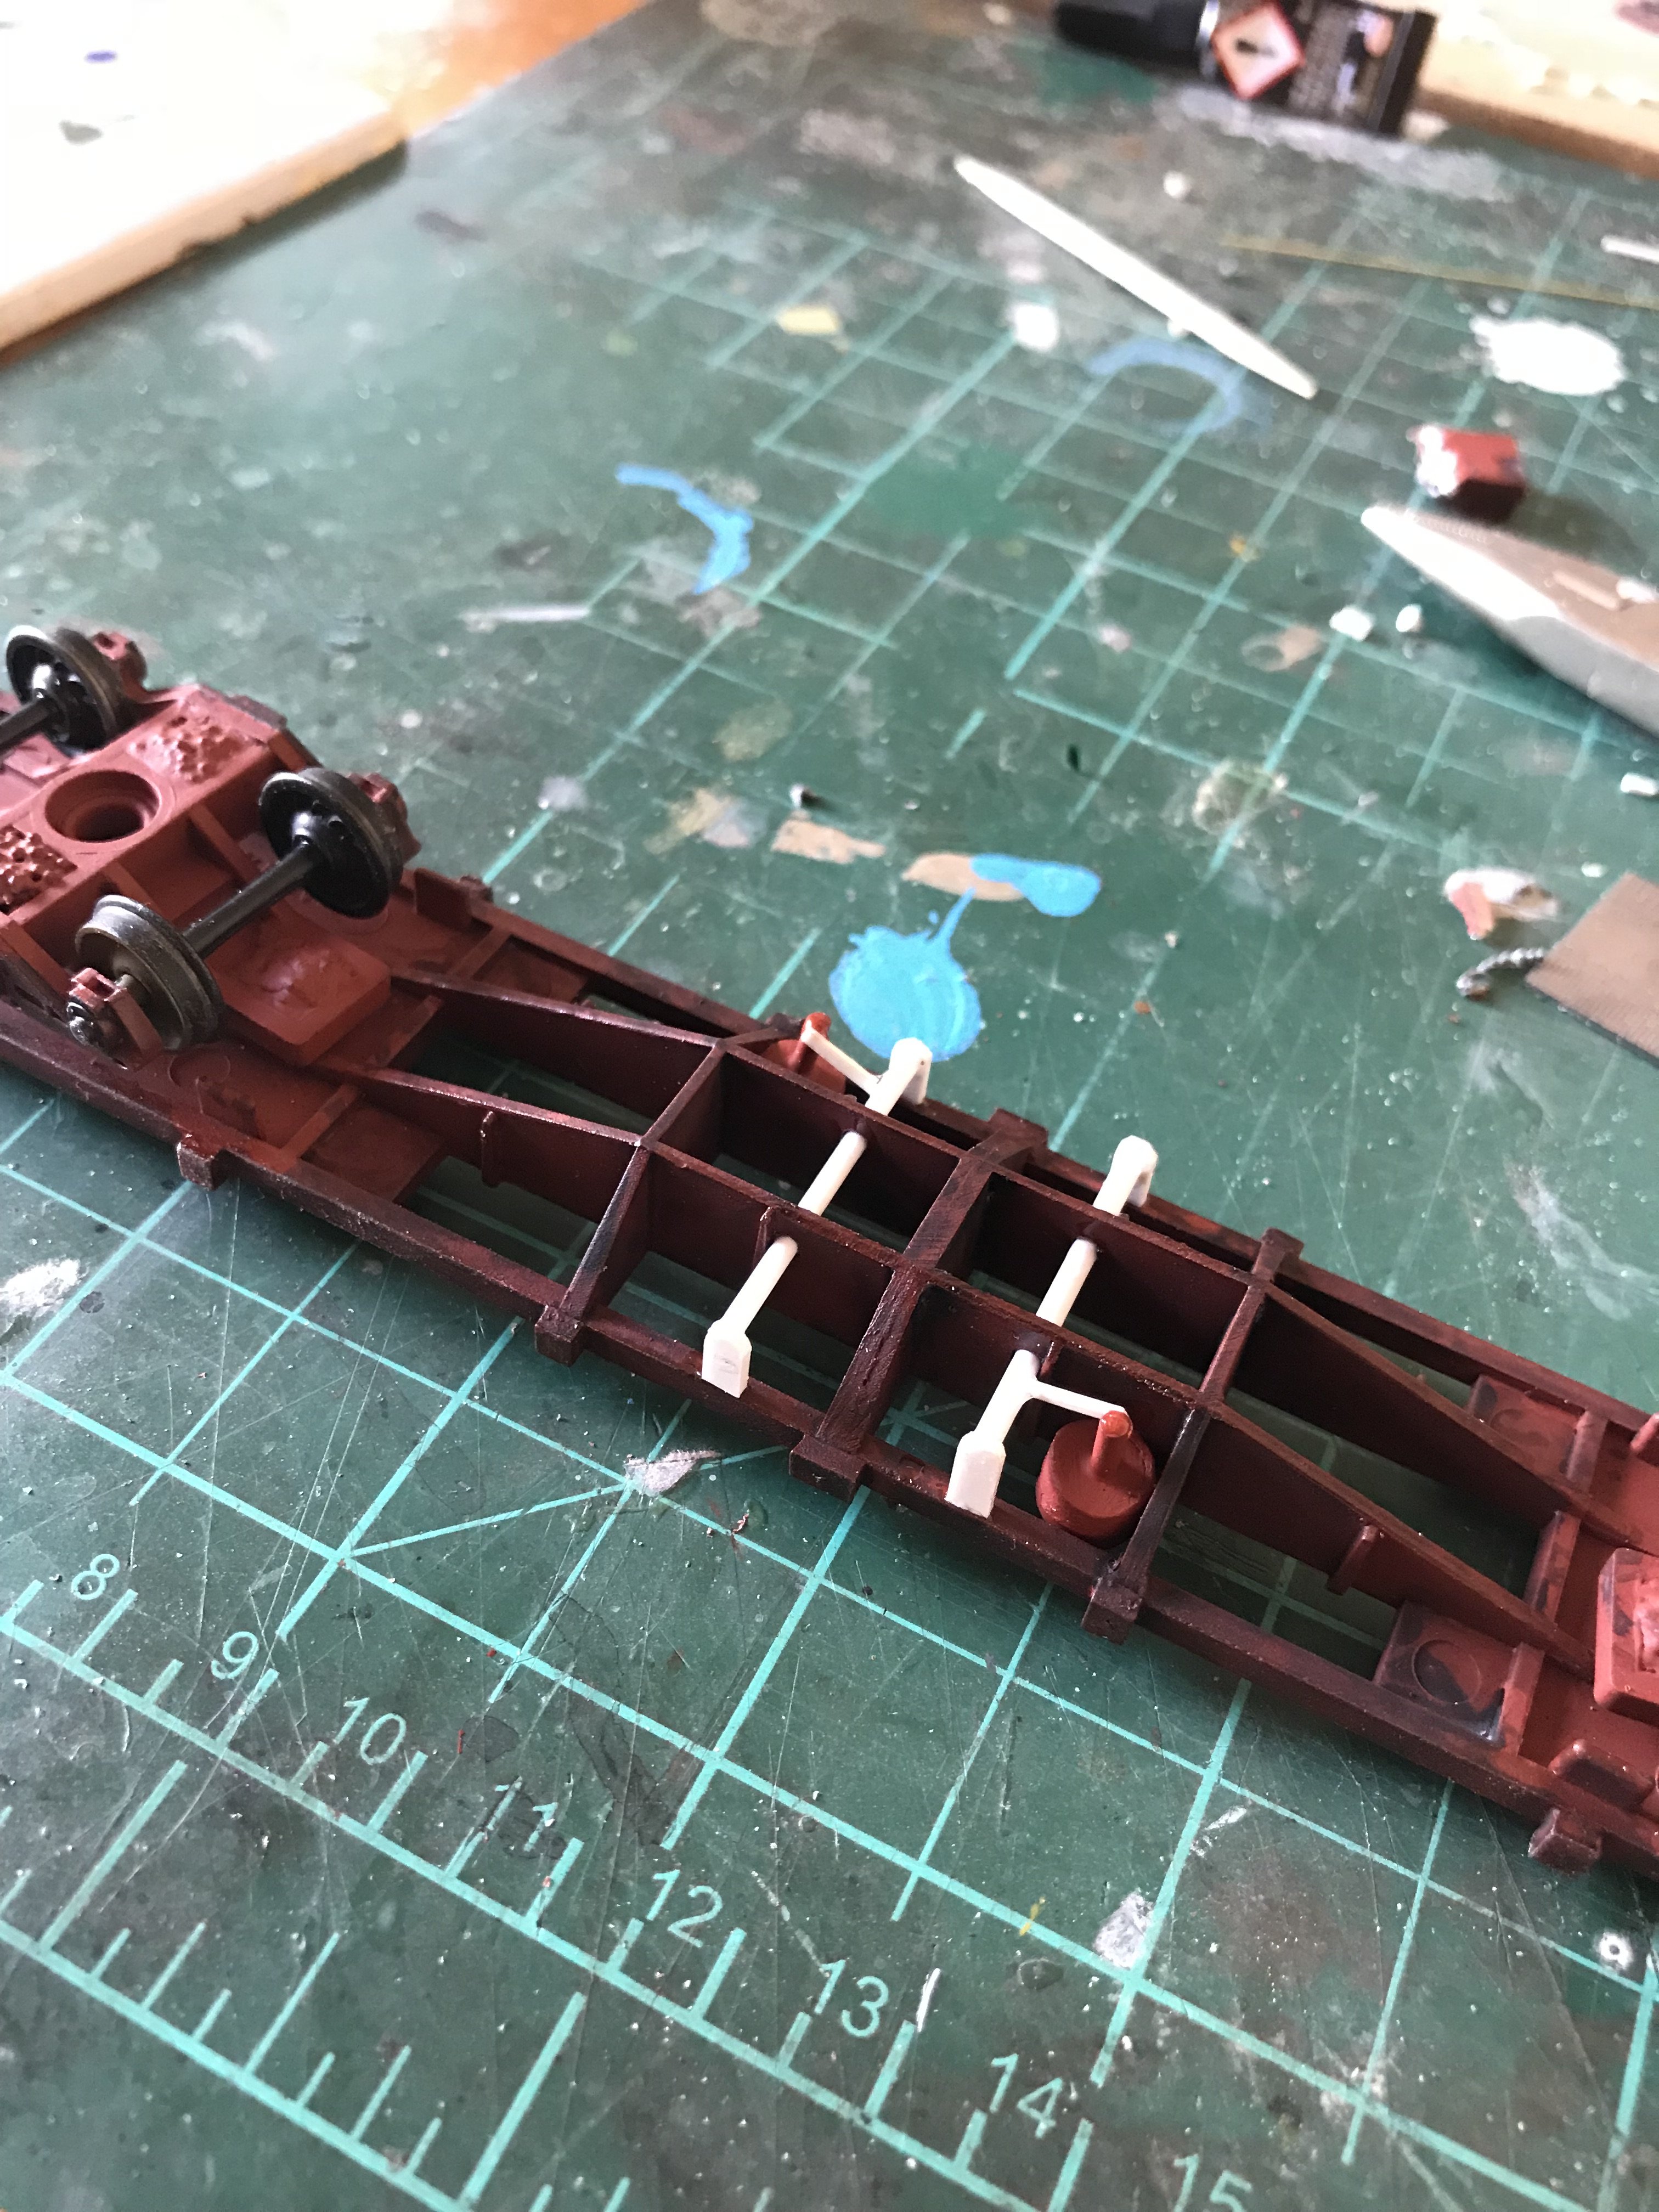
Well over a year since my last update and I've finally got some more work to show! A couple of years ago I had made a rake of 42' container flats by converting Hornby freightliner wagons but was never happy with the lack of detail so I decided to try and improve them a little, so I scratchbuilt some brake cylinders and rigging from styrene. I also picked up some white metal buffers and vacuum pipes from Genesis kits. Finally I added Weshty's brake wheels using brass wire and popped on some metal wheelsets. Still far from perfect, but overall a big improvement IMHO.
-
dcc voltage too high for 12v motor?
irishthump replied to controller's question in Questions & Answers
DCC decoders generally don't even supply a full 12v to the loco's motor. The track voltage with various DCC systems can vary widly but the decoder regulates the voltage supplied to the motor. -
Some nice work there, Noel. Just wondering, do you have any issues when mixing and matching NEM Kadees with the regular draft box Kadees such as the 146's? I found that sometimes the two different types didn't "play nice" when pushing stock over points and tight curves and especially when using delayed uncoupling. Crossovers in particular can be a nightmare! I also tried using neodymium magnets instead of Kadee's magnets but also encountered problems where the neodymium magnets where too strong and would pull the couplers too far to the side so the couplers heads would miss each other when trying to shunt. Again, this is mainly a problem with propelling stock into sidings etc. To be honest I'm tending to pull away from using the NEM Kaddes, preferring to body mount the draft box type where possible. I'm working on a way to fit the draft box to MM 141's but it may involve a lot of surgery!
-
New Jim from MM. A gentlemen and always a great help. RIP