amdaley
-
Posts
519 -
Joined
-
Last visited
-
Days Won
4
Content Type
Profiles
Forums
Events
Gallery
Blogs
Everything posted by amdaley
-
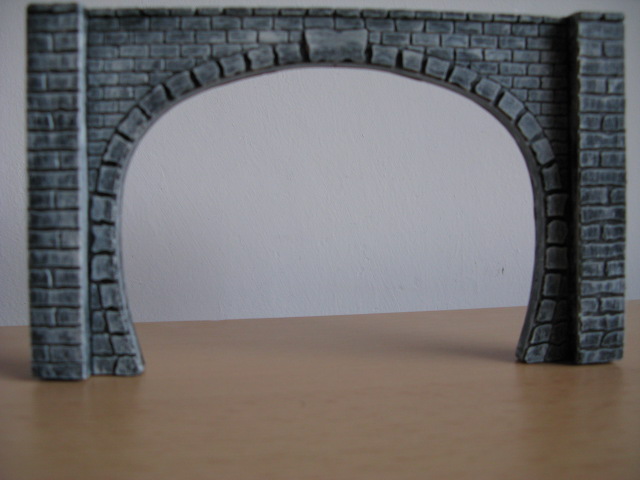
Hello Everyone. Have the following for sale. Unused Double Tunnel mouth in resin. It is coloured & weathered & looks very well. €2.49 + €3.40 postage to Ireland & €4.80 postage to UK. The resin is quite heavy hence the postage costs.

-
These items are now sold. Thank you.
-
These items are now sold. Thank you.
-
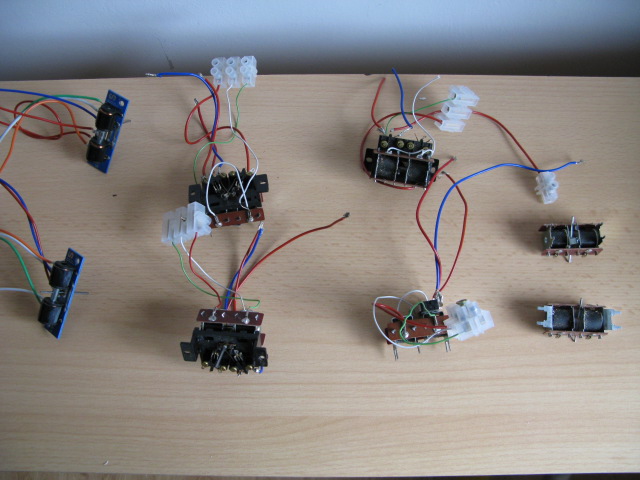
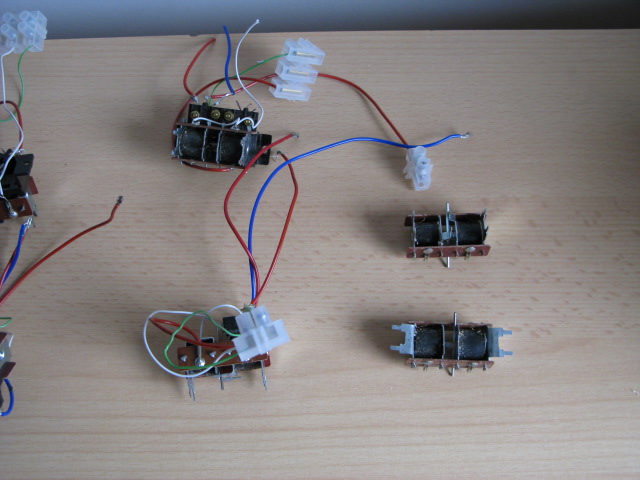
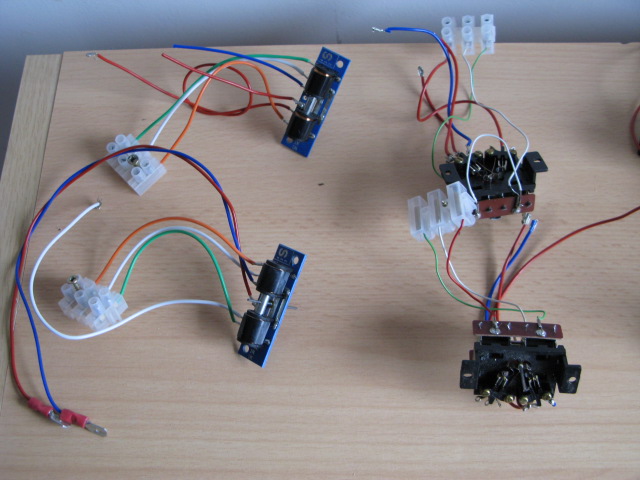
Hello Everyone. I have the following for sale. Peco Point Motors with switches attached x 4. Peco Point Motors x 2. Seep Point Motors (Switching type) x 2. Six of the motors have cables attached so all that needs is to put them in & connect the wires. The other two motor are just plain motors. They all work fine. I'll take €20 including postage to anywhere in Ireland. Postage outside of Ireland at cost. Payment by Paypal (gift) Postal Order or Cash. Thanks for looking.
-
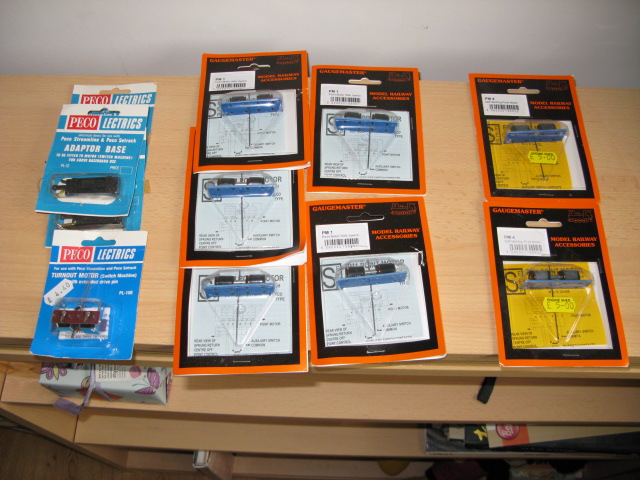
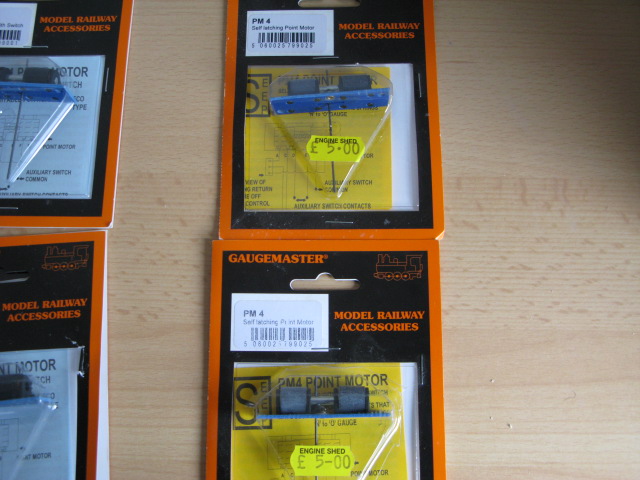
Hello Everyone. I have the following Point Motors (New) for sale if anyone is interested. Gaugemaster Seep PM1 x 5. Gaugemaster Seep PM4 x 2. Peco PL10E x1. Peco Adaptor Bases x 3. These are all unused in original packets & never opened (See photos). Cost in Marks nearly €70, Hattons £40. I'll take €40 + €5 postage to anywhere in Ireland. Postage outside of Ireland at cost. Payment by Paypal (gift) Postal Order or Cash. Thanks for looking.
-
He's always the same. There's another seller there as well called micman who has similar high prices.
-
Look who's selling it. That explains a lot. All of his stuff is mad money.
-
Do you get a free defibrillator with that I wonder
-
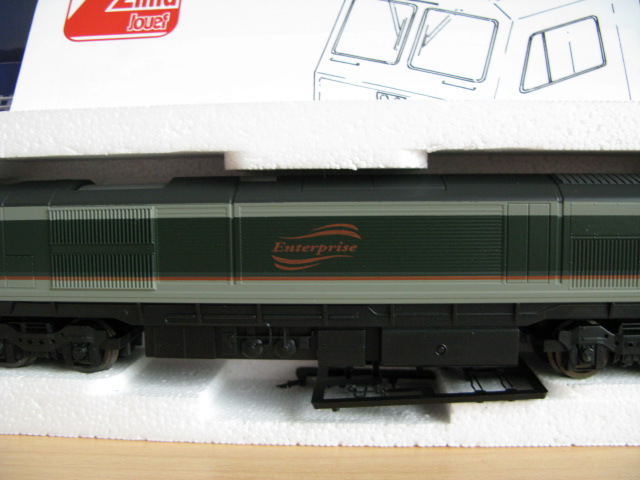
Hello Everyone. I have the following Lima Irish Rail Class 207 "River Boyne" for sale. This model is new unused boxed condition. Ideal for someone interested in collecting. €80 + €10 standard postage to anywhere in Ireland or UK. If you want postage to Europe or the Rest of the World then please ask me for a quote. Payment by Paypal or Other if agreed on but no cheques please as they take too much time to clear etc. If the buyer wants registered signed for postage it will be a little extra so please ask. Models will be very well packed for posting. If anyone has any questions them just Pm me & I will do my best to answer them. Thank you.
-

Irish Craven Coaches x 3 (Triang Professional Resprays)
amdaley replied to amdaley's topic in For Sale or Wanted
These items are now SOLD. Thank you. -
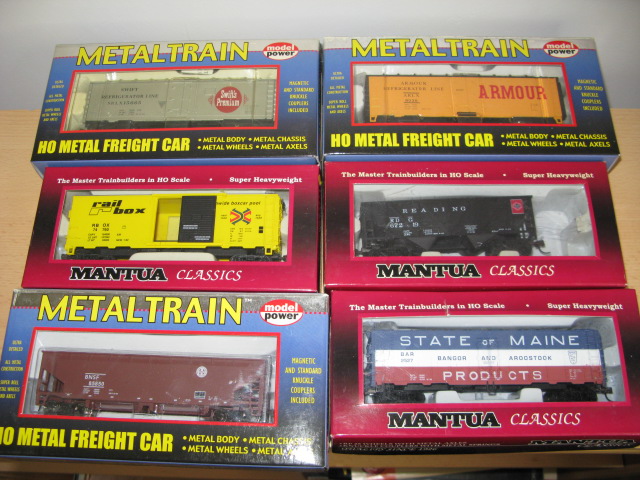
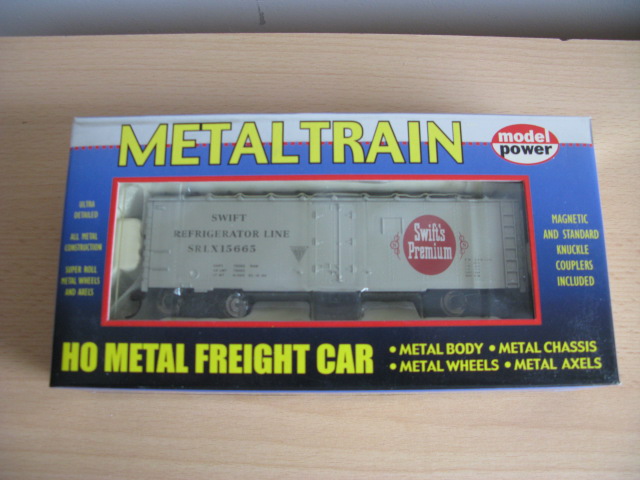
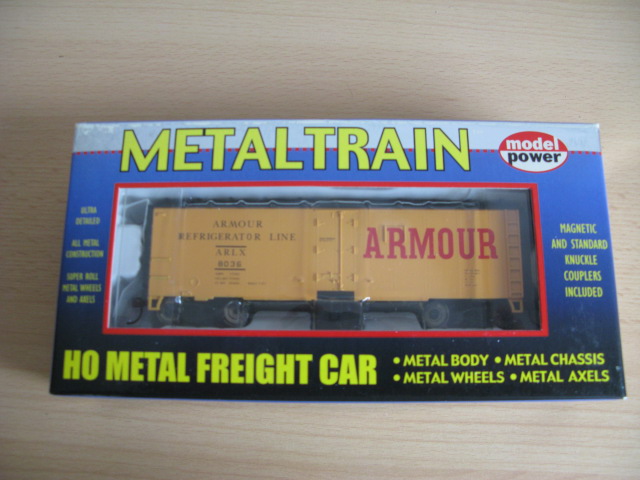
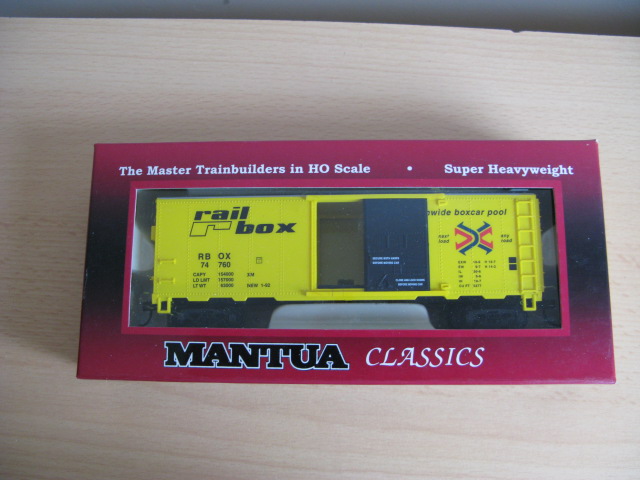
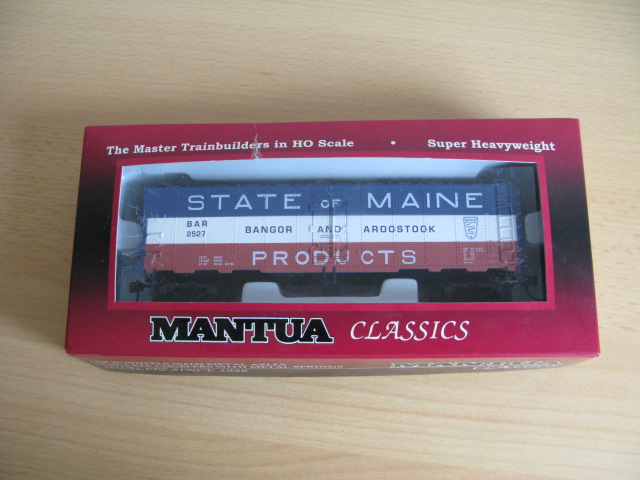
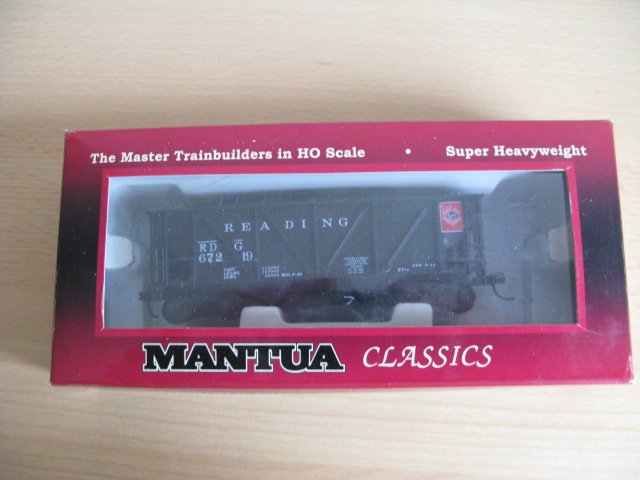
Hello Everyone. I have the following 6 US HO gauge boxcars for sale. All are new unused in beautiful condition. These are all metal models so are very very heavy models. €15 each + postage or €75 for the six + €10 standard postage to anywhere in Ireland. If you want postage to UK, Europe or the Rest of the World then please ask me for a quote. Payment by Paypal or Other if agreed on but no cheques please as they take too much time to clear etc. If the buyer wants registered signed for postage it will be a little extra so please ask. Models will be very well packed for posting. If anyone has any questions them just Pm me & I will do my best to answer them. Thank you.
-
Irish Craven Coaches x 3 (Triang Professional Resprays)
amdaley posted a topic in For Sale or Wanted
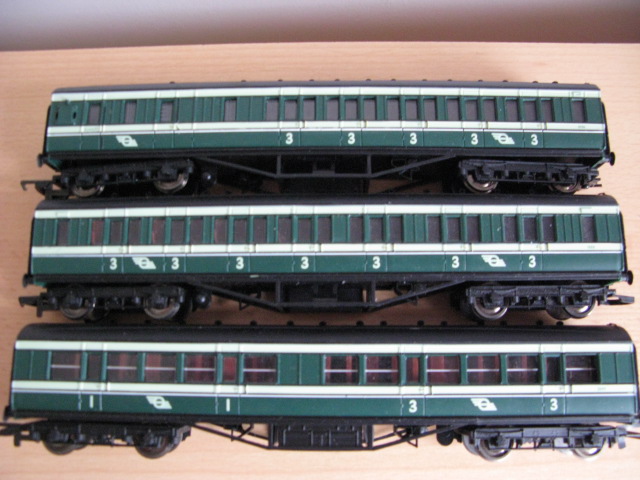
Hello Everyone. I have the following 3 Professionally resprayed Triang Craven Coaches for sale. These are professional resprays done to a very high standard. They come un lettered but I am including a set of transfers for the coaches. It was something I planned to do myself but never got around to it. €120 for the three including the transfer sheets + €10 standard postage to anywhere in Ireland or UK. If you want postage to Europe or the Rest of the World then please ask me for a quote. Payment by Paypal or Other if agreed on but no cheques please as they take too much time to clear etc. If the buyer wants registered signed for postage it will be a little extra so please ask. Models will be very well packed for posting. If anyone has any questions them just Pm me & I will do my best to answer them. Thank you.
-
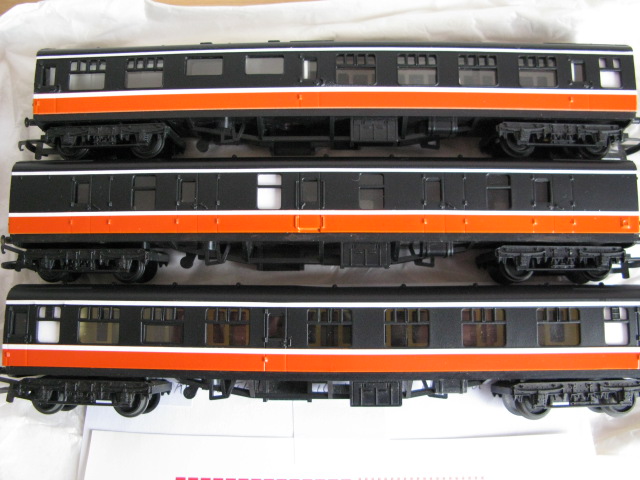
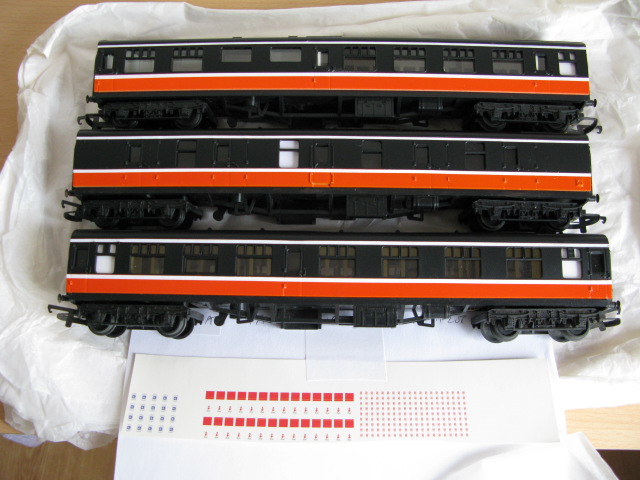
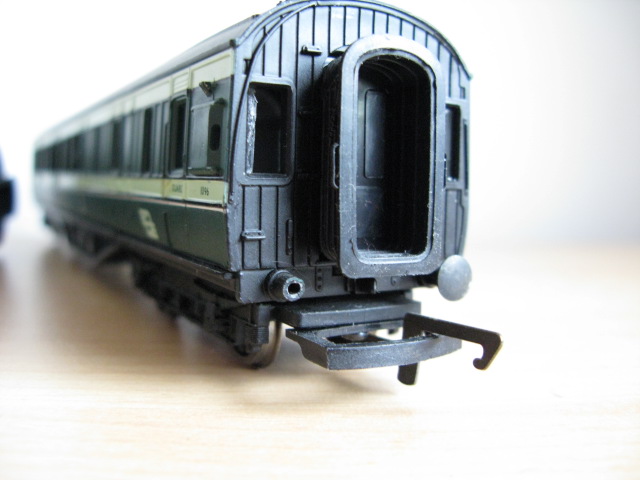
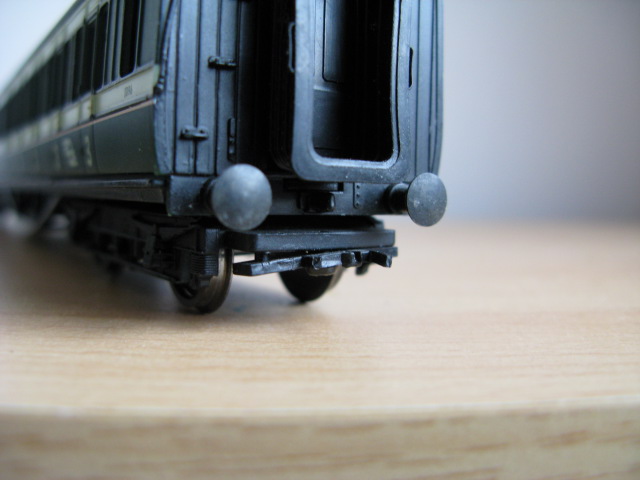
Hello Everyone. I have the following Bachmann 57ft Corridor Irish CIE Córas Iompair Éireann Coaches for sale. They are in excellent unboxed condition with the only fault being a missing buffer & damaged coupling to the brake coach. You can see the condition by the photos. €75 for the three + €10 standard postage to anywhere in Ireland or UK. If you want postage to Europe or the Rest of the World then please ask me for a quote. Payment by Paypal or Other if agreed on but no cheques please as they take too much time to clear etc. If the buyer wants registered signed for postage it will be a little extra so please ask. Models will be very well packed for posting. If anyone has any questions them just Pm me & I will do my best to answer them. Thank you.
-
Dapol "Provincial Wagons" Limited Edition Container Truck.
amdaley replied to amdaley's topic in For Sale or Wanted
This item is now sold. Thank you. -
Bachmann MK2 Coaches "RPSI" Livery. Unused & Mint.
amdaley replied to amdaley's topic in For Sale or Wanted
Anyone interested in the these coaches please let me know. If not I'll just store them away. Thanks. -
Bachmann "Murphy Models" MK2A Coaches "IR Intercity" Livery
amdaley replied to amdaley's topic in For Sale or Wanted
Anyone interested in the these coaches please let me know. If not I'll just store them away. €120 for the three including postage. Thanks. -
Murphy Models "Craven" Coaches. New unused.
amdaley replied to amdaley's topic in For Sale or Wanted
Anyone interested in the remaining coaches please let me know. If not I'll just store them away. Thanks. -
Corgi Trackside CIE Scammell Scarab. New / Boxed.
amdaley replied to amdaley's topic in For Sale or Wanted
Anyone interested in these please let me know. If not I'll just store them away. Thanks. -
Anyone interested in these please let me know. If not I'll just store them away. Thanks.
-
Hello Everyone. This item is now sold. Thank you.
-
Murphy Models "Craven" Coaches. New unused.
amdaley replied to amdaley's topic in For Sale or Wanted
Hello Everyone. No's 1529, 1533 & 1544 are now sold. No 1523 Standard x 2. No 1508 Snack cars x 2. No 1521 Standard. Still available. Thank you. -
Both these sets are now sold. Thank you.
-
This item is now sold.
-
Dapol "Provincial Wagons" Limited Edition Container Truck.
amdaley replied to amdaley's topic in For Sale or Wanted
PM received. Will keep it in mind. -
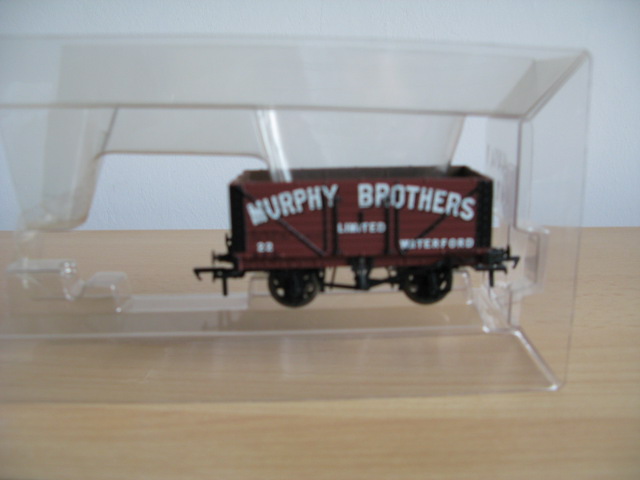
Hello Everyone. After looking through my stock I have the following for sale. All are new unused unless stated otherwise. All these items are further to what I already had for sale. "Murphy Bros" 7 plank wagon No 22. New from set but never used. Comes in plastic container section as per the photo. €10 including postage to anywhere in ireland. Postage to UK or Europe please ask for a quote. Any questions please ask. Thank you.