Angus Posted May 15, 2021 Posted May 15, 2021 I've decided to create a workbench thread as I expect my Irish modelling to outlive my Dromahair layout and its associated topic (layout always feels too grand a word for a 2' long module!). I'm hoping it will act a reference should anyone else be mad keen enough to model Irish Railways in 2mmFS to 10.5mm gauge. The initial builds will be: a 101 class from a shot down TMD/SSM 4mms scale etch to be built in early GSR condition and C class diesel built form a 3d printed body and a converted commercial Japanese N-scale chassis. I've also a couple of six wheeled coach build mid- construction, one a 3d print (MGWR brake third) the other a Worsley works etch (GSWR luggage compo) I tend to jump around a lot with my modelling so expect to see progress in fits a starts. why the 5p? Well...... 7
Paul 34F Posted May 15, 2021 Posted May 15, 2021 Angus, You’ve got a lot further than I ever managed. I had built a chassis for a GNRI Class A 0-6-0, but I couldn’t get it quite level and then I started to need glasses and lost interest. I’m now fiddling around in S scale instead. If you’d like the wheels and other bits I acquired your more than welcome to have them. Paul 2 1
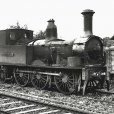
Angus Posted May 16, 2021 Author Posted May 16, 2021 (edited) Looking to start work on the 101 class requires some research as these loco varied a lot in condition through their lives. So which one should I model? I've spent some pleasant hours in the past few days wading through my relevant books, The tome that obviously missing is the recent Locomotives of the GS&WR, it has been ordered and is eagerly awaited. I'm intending to focus around the Sligo area which offers rich pickings for the modeller, as evidenced by the work of David Holman and Galteemore. The GSWR (WL&WR), MGWR and SLNCR all ran into Sligo with a strong presence of GNR freight stock and the occasional passenger coach. Photos of 101s at Sligo are rare, I've only found one of 121 late in CIE days, however it would be reasonable to assume they would have worked up from Limerick via Tuam. So I need to look for a loco based there. The GSR loco book gives allocations for 1938 and 1945 which suggests these were relatively static so I have a list of 101s based in Limerick. I'd also like to model a version as rebuilt with a 4'4" boiler retaining the iconic GS&WR double smoke doors, so I am looking for an engine so graced during the period from the creation of the GSR to the early 30s. Ideally I would like couple of decent photos of the loco to work from. I've chosen no 106, there are good three photos in the books of her in the early 30s around Limerick albeit on the lines to the west rather than the north. She does have an ugly stove pipe chimney in one picture (but we'll ignore that insult to her appearance) there are also photos of her at a later date after acquisition of her Z type boiler in 1937. On to the build: I've collected the parts together, I find it easier to keep all the parts this way so I can remember which parts go with which project. The loco and tender will be split frame for current collection (as is standard 2mm practice) with the motor in the tender driving the engine via a universal jointed shaft to a 1:38 gear box. This will enable plenty of weight to be added to the loco. She will be DCC chipped with a stay alive. The etches came with some nice cast parts with a selection of chimneys and domes which will save some time turning these up from brass rod. The etch has lost 2 of the coupling rod layers. fortunately the 101 used a fairly standard wheelbase so replacement etched rods are available from the 2mm scale association shop. These line up well with the kit's rods. I'm intending to start the build with the tender, which looks quite a complex build. There are a couple of build threads for 4mm and 7mm versions on here that will prove invaluable, so thanks to those who have taken the time to log their progress. Right, enough waffle, heat up the soldering iron and get cutting some brass! Edited May 16, 2021 by Angus 3
David Holman Posted May 16, 2021 Posted May 16, 2021 Very much looking forward to following this. At first, I thought the lost wax castings were whistles and safety valves till I looked closer and realised they are chimneys and domes! That's the difference between 7mm and 2mm scale for you... 1
Angus Posted May 17, 2021 Author Posted May 17, 2021 The first bit of progress to report. The bearing holes have been successfully broached out. I was dubious that there would enough brass on the etches to accommodate the standard 2mm association phosphor bronze bearings but there was. Just. I've used the standard approach of double sided PCB frame spacers, in this instance 8mm wide to allow for the broader Irish gauge. All clamped and ready for solder (I can only find one of my axle alignment rods so I bodged one of the axles, I'll need to find my other rods before I attack the loco chassis, I'm not bodging that!) So I've now got the basic inner chassis and the outer chassis all soldered. I've also bent up the tender flares and the inner partitions, I was hoping to get a rolling chassis and the superstructure soldered up but a late finish at work prevented that. Not much but a solid start. 4 3
Angus Posted June 27, 2021 Author Posted June 27, 2021 A modicum of progress can be reported. The easing of lockdown in the UK has meant days away for work, the opportunity to catch up with relatives along with a holiday (in the UK) has left little time at the workbench. A grotty day today gave the excuse for a few hours at the bench this afternoon so more progress was made with tender. A lot of forming and fettling to fit needs to be done and it was one of those days where everything seemed to need fitting twice, still persistence paid off. Most of the tender body is now complete with only the detailing needed. A bit of cleaning up is needed but it's coming along nicely. The motor will be mounted in the tender so I will need to form an opening in the coal plate for the drive shaft. I'll do that once I have the gears mounted in the loco chassis and the motor fixed in the tender. This will help me get it in the right place. In other news, my appeal for any unbuilt J15 etches turned up another two with one set of casting. This will let me build another J15 in the future, it will built as running in the early 60's hopefully with a superheated boiler so I can run it alongside the C Class diesel. With the etches came a nicely assembled footplate. This should speed up the body construction, which is useful as I really want to crack on to get to my next project. One I'm really looking forward to. John Mayner kindly agreed to reduce a couple of his etched locos to 2mm scale for me so I'm now in proud possession of MGWR K class, I've already bought the wheels, motor and gears but need to resist the temptation to start and just focus on the J15 until it is complete. 8 3
David Holman Posted June 28, 2021 Posted June 28, 2021 Exquisite. Am sure the 5p is getting bigger. 1
Angus Posted June 30, 2021 Author Posted June 30, 2021 Some more progress with J15 tender, decent photos of the standard GSWR A type tender do seem hard to come by for detailing purposes. The rear is nearly finished, just the lamp irons to add. The rear steps caused a problem as the etched ones pinged off into the wildness after I'd very carefully bent them to shape. Some 1mm x 0.5mm brass channel was used as a substitute. When cut 1mm wide it is on the edge of what is visible to manipulate into position. I am also not sure about the buffers, they look a bit over scale. In some photos that buffers are large in comparison though. The front is also progressing nicely, I just need to add the handrails (a job I'm not looking forward to) and the brake standard, then all soldering on the body is complete. I can then add the plastic details. I have some 3d printed springs that look the appropriate dimension and the toolboxes will be from plastic strip with the etched ends and top glued on. The etched bodies provided with the sheet were way oversize, anomalies like this quite often occur when etches are shrunk to a smaller scale. I've a feeling the sandboxes on the front have a similar issue as I am struggling to find space to fit the brake standard. I've just noticed the righthand top steps needs bending back horizontal, the joys of model photography! 6
Mayner Posted June 30, 2021 Posted June 30, 2021 You did a nice job on the sand boxes they are difficult enough in 4mm. I chickened out and used lost cast casting from 3D printed masters for the tender tool & sand boxes on the 52 Class kit. The MGWR K Class appears to have shrunk down nicely to 2mm, it will be interesting to see how the foldup elements fold up so to speak. 1
jhb171achill Posted June 30, 2021 Posted June 30, 2021 That is an EXCEPTIONAL bit of micro-engineering! Very impressive! 1
Angus Posted June 30, 2021 Author Posted June 30, 2021 8 hours ago, Mayner said: You did a nice job on the sand boxes Thanks Mayner and JHB, Actually the photo is a bit deceptive, I deliberately took it from a low angle as I've managed to dish the sandbox lids slightly. A touch of filler and a quick sand off to level will sort before the primer goes on though. The 101 etch is a bit a weird in that some parts fold and fit fine, others don't. I have experienced this before which shot down etches, I think the process removes any tolerance. That said your MGWR horsebox and meat van went together well so I've high hopes for the K class. 1
David Holman Posted June 30, 2021 Posted June 30, 2021 Really enjoying seeing how the 101 progresses, especially having done the same kit in 7mm scale. A whole different set of problems but, much as I don't enjoy doing them either, I can certainly appreciate how difficult they must be in 2mm. As for a K class, am ashamed to admit I had to look it up in the green bible before I realised it was a G2,. If you ever want to do an original K class in 7mm scale John, let me know. 3
Angus Posted June 30, 2021 Author Posted June 30, 2021 It's alright David, over on RMweb I called it a G2 then edited it to a G3 leaving a comment that any fool would know it was a G3 before finally realising my mistake and corrected it back to G2 Confused? I know am! I blame the gin...... 2
Angus Posted July 4, 2021 Author Posted July 4, 2021 Time to tackle one job I've been putting off, the tender handrails. There is no easy way of doing these, initially I drilled the tender base then added the uprights in 0.3mm brass wire. For the handrail tops I tried 0.5mm strip, but accurately drilling the 0.3mm hole in the centre of a 0.5mm strip proved too difficult so I just went with some more 0.3mm wire. I also realised why I couldn't fit the brake standard between the sandboxes and handrail, it actually fixes to the handrail. I've also removed the buffers, I decided I couldn't live with them and await a smaller set in the post. Apart from the rear lamp irons, which I will fit with the new buffers, that will finish the soldering on the body so I can start adding the plastic details. I've still the tender brake gear to fit to the chassis, another job I'm not looking forward to...... As I've reached a hiatus with the tender I've started on the loco chassis. Experience with the tender chassis showed that the etch is too thin to provide enough rigidity for the loco, it's ok for the tender chassis but not the loco, any twisting would jam the coupling rods. So I'm going to cut the chassis from sheet using the etched version as a template. Two layers of 30 thou phosphor bronze sheet (using phosphor bronze avoids the need for bearings in the frames) and the chassis etch were solder together with a blow torch then the coupling rod soldered on top to provide a guide for drilling the axle holes. Once the holes are drilled for the axles and the brake gear I'll cut out the chassis shape with a piercing saw. It's the first time I've attempted to do this, it could be interesting! 6
Mayner Posted July 4, 2021 Posted July 4, 2021 1 hour ago, Angus said: Once the holes are drilled for the axles and the brake gear I'll cut out the chassis shape with a piercing saw. It's the first time I've attempted to do this, it could be interesting! I had fun and games with the tender handrails and handbrake in 4mm let alone 2mm. It would be worthwhile to incorporate the ashpan into the main frames when you are cutting out the profile of the chassis, this will provide some added strength in the area around the rear driving axle the weakest part of the main frames. 3
David Holman Posted July 5, 2021 Posted July 5, 2021 Am wondering if a resistance soldering unit (RSU) would help with the hand rails, brake gear and other fiddly stuff? Not readily available, or cheap for that matter, but the foot operated switch does give you that third hand for delicate work. You do have to be careful with the settings though - too high and small parts get vaporised! Been there, t-shirt, etc... 1
Angus Posted July 5, 2021 Author Posted July 5, 2021 Thanks both for the advice. I'll look at adding the ashpan. I was planning to incorporate this as a separate layer behind the frames to give some depth. Although given the frames are a scale 4.5" thick that might be too much relief. I've considered a RSU on several occasions David, more for my 7mm modelling though. I see the benefits there, particularly when soldering overlays onto large chunks of brass. For the finer 2mm stuff I would be worried about the vaporisation effect, some of the metal thickness used are wafer thin. There is also the faff factor. A unit would be too big to keep out on the workbench so would need to be unpacked and put away each session whereas a soldering iron just sits at the side waiting to be switched on. Most of my problems occur from rushing and not clamping firmly and using heat sinks. I am getting better though! For the tender brake gear I am not going to use the items from the etch. Trying to make up the separate components would be too taxing. Instead I have some etched brake shoes complete with arms purchased from the Worsley Works scrap box at a show. I am hoping these will make life simpler.
David Holman Posted July 5, 2021 Posted July 5, 2021 Know what you mean. Don't use mine anything as much as I should... 1
Angus Posted July 11, 2021 Author Posted July 11, 2021 A productive day has been spent drilling out the chassis and cutting to shape. I did take a couple of photos of the process but either my camera or computer has managed to corrupt them. The chassis assembly in the post above was set up in the mill and the axle holes drilled to 0.5mm then 1.0mm and finally 1.5mm before being reamed, the reamer didn't seem to take any material so I suspect my 1.5mm drill is slightly oversize. I then drilled out the brake holes, I tried using a 0.3mm carbide drill but manged to break this in the frame (I really cannot get on with these drills!). As my HSS 0.2mm drill was too short to drill through 1.7mm of the frames plus etch I reverted to the 0.5mm diameter. The holes will slightly oversize, but not seen behind the brakes. I also had to re-drill under the snapped drill so this will be slightly out of line, but again hidden under the brake gear. The frames was then roughly cut to shape with a piercing saw, I am always amazed how quick this is now I've learnt some proper technique, I only broke one blade in the process and that through stupidity. After attacking them with some files I've a presentable pair of frames. They just need separating and cleaning up. The chassis assembly can then commence. Three of the tender springs are photobombing the picture, I must get them soldered in! 3 2
David Holman Posted July 12, 2021 Posted July 12, 2021 As with all small bits, guess the moral is don't sneeze! 1
Angus Posted July 13, 2021 Author Posted July 13, 2021 It's more a problem when you inhale....... 2 1
Angus Posted November 28, 2021 Author Posted November 28, 2021 (edited) As I've mentioned in his work bench topic I reached a deal with KMCE to send me some his 3d printed 4mm Vans scaled down to 2mm. The Postie arrived with these gems on Wednesday: Unfortunately work commitments got in the way of playing, other than taking them out of the box, but with a free(ish) weekend thanks to the weather I spent some time at the bench getting the vans ready for painting. For the short wheel base vans I've used the photos in Rail to Achill as a guide, the vans are slightly different to those photographed but I've followed them anyway so one has a corrugated roof and split spoked wheels whilst the other has plain roof and plain spoked wheels. Apologies for the poor images, it's been hard getting enough light on the models, the white rooves don't help with focusing either. As an aside, were the corrugated rooves painted, or just left as plain galvanised sheet? It would seem a bit pointless to paint them. I'm pleased with the bars on the cattle truck, KMCE has printed dimples to locate the drill holes which makes drilling them and fitting the bars a doddle, the top bar is 0.3mm and the bottom two 0.2mm For the corrugated rooves I pondered a bit, I thought about using silver foil formed on a corrugated sheet but figured this would easily prone to damage. In the end I just thinned down some corrugated plastic sheet I had to hand, it was about 2mm thick so need thinning right down to bend to the curve of the roof and look the part. The corrugation are a bit wide mind. I need to work out how to make the canvas covers for the middle, I've previously used a technique described by Gordon Gravett in an edition of MRJ a few years back for some 7mm scale wagon tarps, I'm just struggling to lay my hands on the copy. All told I pleased with result, I might add a bit more detailing, some of the rivet detail is a bit lost (this is 2mm scale so asking a bit much of the printer to produce full rivet detail) which I might add using rivet transfers, and there are some grab handles to add but a couple of afternoon's work to produce five wagons gives my Irish Stock a much need boost. If I was building these from a kit or scratch I doubt I'd be half way through the first van by now. I was worried this might feel a bit too much like "open the box" modelling, but there was enough to do to make it interesting. I'm definitely sold on 3d printing now (even if does mean re-learning CAD), I just need to save my pennies. I've still another cattle van to do but have run out of wheels, so that will have to wait for another day. Just need source some decals now. Edited November 28, 2021 by Angus 3 3
Galteemore Posted November 28, 2021 Posted November 28, 2021 That’s brilliant Angus, and a great way to build up a mixed train quite fast. They look really good. 1
KMCE Posted November 28, 2021 Posted November 28, 2021 Angus, Your work with the models is really superb & they have come out really well. I was a little concerned they may be sub par, but looking at what you have done with them, I don't think I need to worry. Delighted to see how these have progressed. Ken 1
Angus Posted November 28, 2021 Author Posted November 28, 2021 Thanks Ken, I'm just happy to be doing your design work justice. 21 minutes ago, Galteemore said: a great way to build up a mixed train quite fast I've been pondering how best to build the fleet of SLNCR cattle wagons I will need. I didn't fancy scratch building multiple vans so have been reading up on resin casting, however I'm now convinced that 3d printing is the way to go (certainly for small scales anyway). I just need to get on with it! 2
David Holman Posted November 29, 2021 Posted November 29, 2021 Lovely stuff! See to remember Gordon used masking tape for canvas roofs and tarpaulins. Once painted, it has just enough texture, though this was in 7mm scale. As for resin casting, it has worked well for me in 7mm scale, just making masters for a side and an end. Am wondering if 2mm scale vans could be cast as a single, solid, body with an etched underframe and the same for loaded or tarpaulin covered opens? 2
Angus Posted November 29, 2021 Author Posted November 29, 2021 Hi David, I've since found the article, it's issue 227. In it Gordon uses newspaper covered in dilute PVA. The texture is less corse and the wet paper hangs and draps more effectively. He covers the wagon in clingfilm first mind, otherwise it would be reduced to a gloopy mess. As regards resin casting I was wondering about the approach you outlined. I might still give it a go but in all honesty for small scales such a 2mm I think the 3d resin print will work better. 1 1
Angus Posted December 7, 2021 Author Posted December 7, 2021 (edited) A while ago I was gifted a 3D printed C Class body. I've always liked these little diesels and found them very charismatic so I've been contemplating what to do with it. I've bought a Tomix chassis which is dimensionally close to the prototype dimensions, the bogie wheelbase is correct but the bogie centres are 2mm (a scale foot) to close together. That's a compromise I can live with. I still need to fit the correct diameter wheels to finescale standards and widen the gauge to 10.5mm from standard N. The body looks to be an old print, I'm not sure what the material is as it is tough and flexible rather than usual hard and brittle product from the likes of Shapeways. it certainly is not a modern resin print! It does suffer from striation in the print, which given the smooth sided appearance of the real things needs work. Looking closely at the body the details are quite naïve and also in need of improvement. I was struggling to find detail shots of the locos, particularly in original Crossley engined format which is the version I want to model, there are plenty of 3/4 photos in the stunning Irish scenery but roof shots in particular are hard to come by. There is a drawing widely available but not the most detailed: So I was struggling a bit until I found this little gem: This clearly shows some great detail on the roof and some interesting comparisons between the pre and post engine conversion body detail. The drawing above for example appears to have the post conversion roof vents but with the earlier sized radiator grills and fan housing. I had never appreciated the difference in size of the fan! I decided to bite the bullet and remove all the detailing from the body (barring the marker lights). This made sanding the body back to a smooth surface relatively easy. A couple of evenings measuring up the various detailed photos got me a set of dimensions that check out against the various sources so reconstruction could begin. First task has been to recreated the roof panels from a single piece of 10 thou brass sheet. This is the first time I've used the cross slide on my GWR rivet press in anger, but I'm pleased with the result. The rivet impressions are probably a bit oversize, but again a compromise I can live with, I've also drilled out the lifting eyes, fan housing and exhausts. These can be fitted once the roof panel is attached to the body. I just need to roll the roof panel to the correct profile for the body (which is proving a tad tiresome!) Edited December 7, 2021 by Angus 5 1
Galteemore Posted December 7, 2021 Posted December 7, 2021 (edited) Nice, fine work Angus. Will really show on the finished model. The trusty GW press…. just taken mine out of its box this week for an upcoming task. What a great little gadget it is. Edited December 7, 2021 by Galteemore 1
Angus Posted December 7, 2021 Author Posted December 7, 2021 Agree about the rivet press Galteemore. It's a great piece of kit and a pleasure to use. I just wish mine was as shiney. I made the mistake of leaving it in a damp garage for a few months so it quickly became covered in a coating of rust that took some cleaning! 1
David Holman Posted December 8, 2021 Posted December 8, 2021 VERY neat work, especially when you think that, in a straight line, even a 0.5mm deviation would be a scale three inches out of alignment! Not sure the top of the stair post is the best place to do riveting though! 2
Galteemore Posted December 8, 2021 Posted December 8, 2021 Clearly Angus is getting on better with the press than I did at first. On many nights I was ready to chuck it down those stairs!!
Angus Posted December 8, 2021 Author Posted December 8, 2021 Hi Galteemore, the roof in the picture was the third attempt. In the first I didn't get the roof section square enough so the rivets wandered of the edge at the extremity from the starting point. On the second I realised cutting the roof to size then applying the rivets was a pain in ar£e as I had to keep remounting the roof in the cross-slide making it really hard to keep everything in line. For the final, successful attempt I cut the roof (squarely) on three sides with a waste section on the forth to enable mounting the roof in the cross-slide. All the rivets were then applied from the one fixture and the excess brass cut off later All part of the learning curve. Thankfully this time my learning curve wasn't flat! 1
Angus Posted January 5, 2022 Author Posted January 5, 2022 (edited) Over the Christmas break I managed a bit more time at the workbench. First up was a job I've been putting off for a while. A few years ago I bought a watchmakers lathe in need of a bit of TLC. Over time I've got it properly set up and working and have gradually invested in various parts (you can spend eye-watering sums on these if you are not careful!). All my turning to date has been done with hand gravers, and whilst I have produced some loco domes and chimneys in this manner it is a slow process and difficult to make repeatable, multiple components. I did invest in a cross-slide going (relatively) cheaply (also on need of some TLC) and whilst I'd got this working satisfactorily I couldn't find a tool holder that fitted. So, over the holidays I set too and turned and filed down one I had until it fitted, then with some shims found I could use some 3.5mm lath tools available commercially (this saves grinding your own, difficult when you don't possess a grinder!). For practice I turned up a couple of button gauges, these are useful to act as track gauges on curves (they push the track apart between roller gauges) they also assist in setting the crossing nose on points. My attempts are shown here. The ones at the back were turned using hand gravers, at the time I only had some very cheap Vernier callipers and managed to leave them way over-size rendering them quite useless. The ones on the foreground were turned using the cross slide and are much nicer, however one is just (0.05mm, 2 thou!) too thin so will need to be re-done. I'm quite happy for a first attempt though! I've also been addressing some of the short comings with the C Class body. The 3d print is missing the distinctive cut aways run back from the buffer beams and finishing under the drivers door. These are particular visible in the green paint schemes I am intending as these are coloured black and contrast against the green body sides (as seen in the photos below linked from Irishswissearnies's Flickr site) The areas that require removal are shown on the photo below. The return under the drivers door is curved so would be awkward to create with files. In the end I carefully set the body up in my mini-mill and used a 3mm milling bit to remove 0.5mm from the required area in stages so as not to over-stress the plastic body. I was pleasantly surprised how successful this was, I was half expecting to be left with some melted gunk only suitable for the bin! Whilst I was at it I also took out the notch on the underside of the buffer beam. The body is looking a lot more C Class like now although I still need to add the footplates at the front either side of the coupling (with lamp irons) and the thickening on the buffer beam that the coupling is mounted on. Then I need to start work on the Chassis and grills etc. Edited January 5, 2022 by Angus 11 1
Recommended Posts
Create an account or sign in to comment
You need to be a member in order to leave a comment
Create an account
Sign up for a new account in our community. It's easy!
Register a new accountSign in
Already have an account? Sign in here.
Sign In Now