Northroader
-
Posts
356 -
Joined
-
Last visited
-
Days Won
2
Content Type
Profiles
Forums
Events
Gallery
Blogs
Community Map
Everything posted by Northroader
-
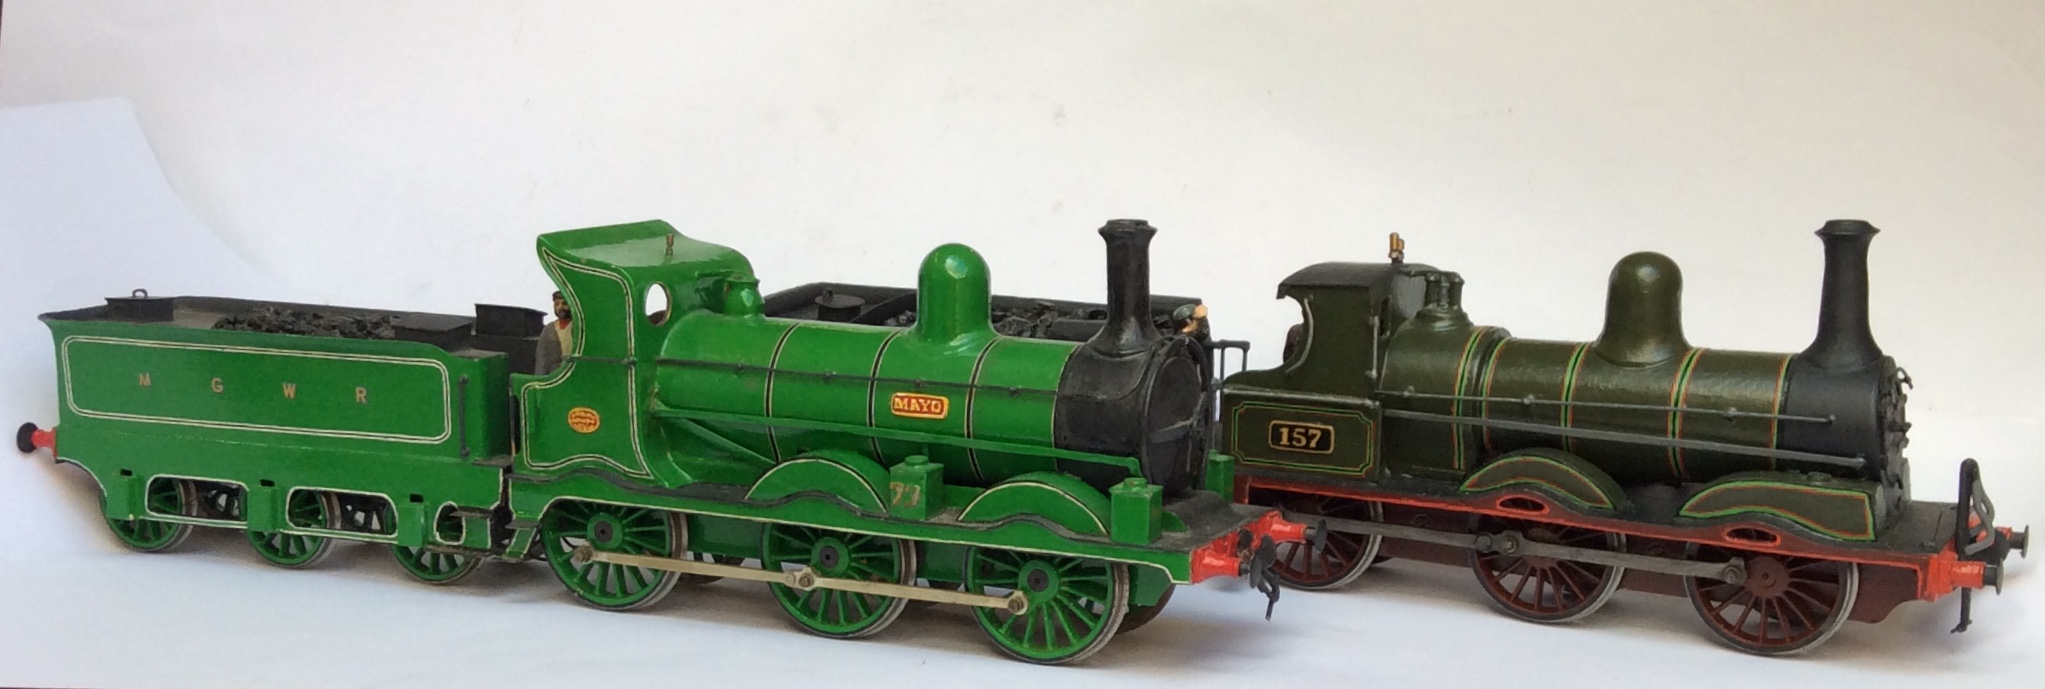
It’s 0 scale (7mm) but the gauge is 32mm, rather than about 37mm for the 5’3”.
-
Furthest North I got to in Dublin was a place called Amiens Street, well, back then that was what it was called.
-
I just hope when the juice is switched on the little b****rs turn their wheels and behave themselves.
-
I get the idea that it slows down in office hours, late afternoon -evenings it picks up.
-
Well, the photo I gave says it all, really. You can make a simple layout based on microlayout design and take it to a show. If you do a search for gauge 1 kits, you’ll find there is stuff available which is a realistic price. Remember that the layout shown is managing quite well on a limited number of models, and because of their size, each one gains a personality and individual interest which you cant get with smaller scales.
-
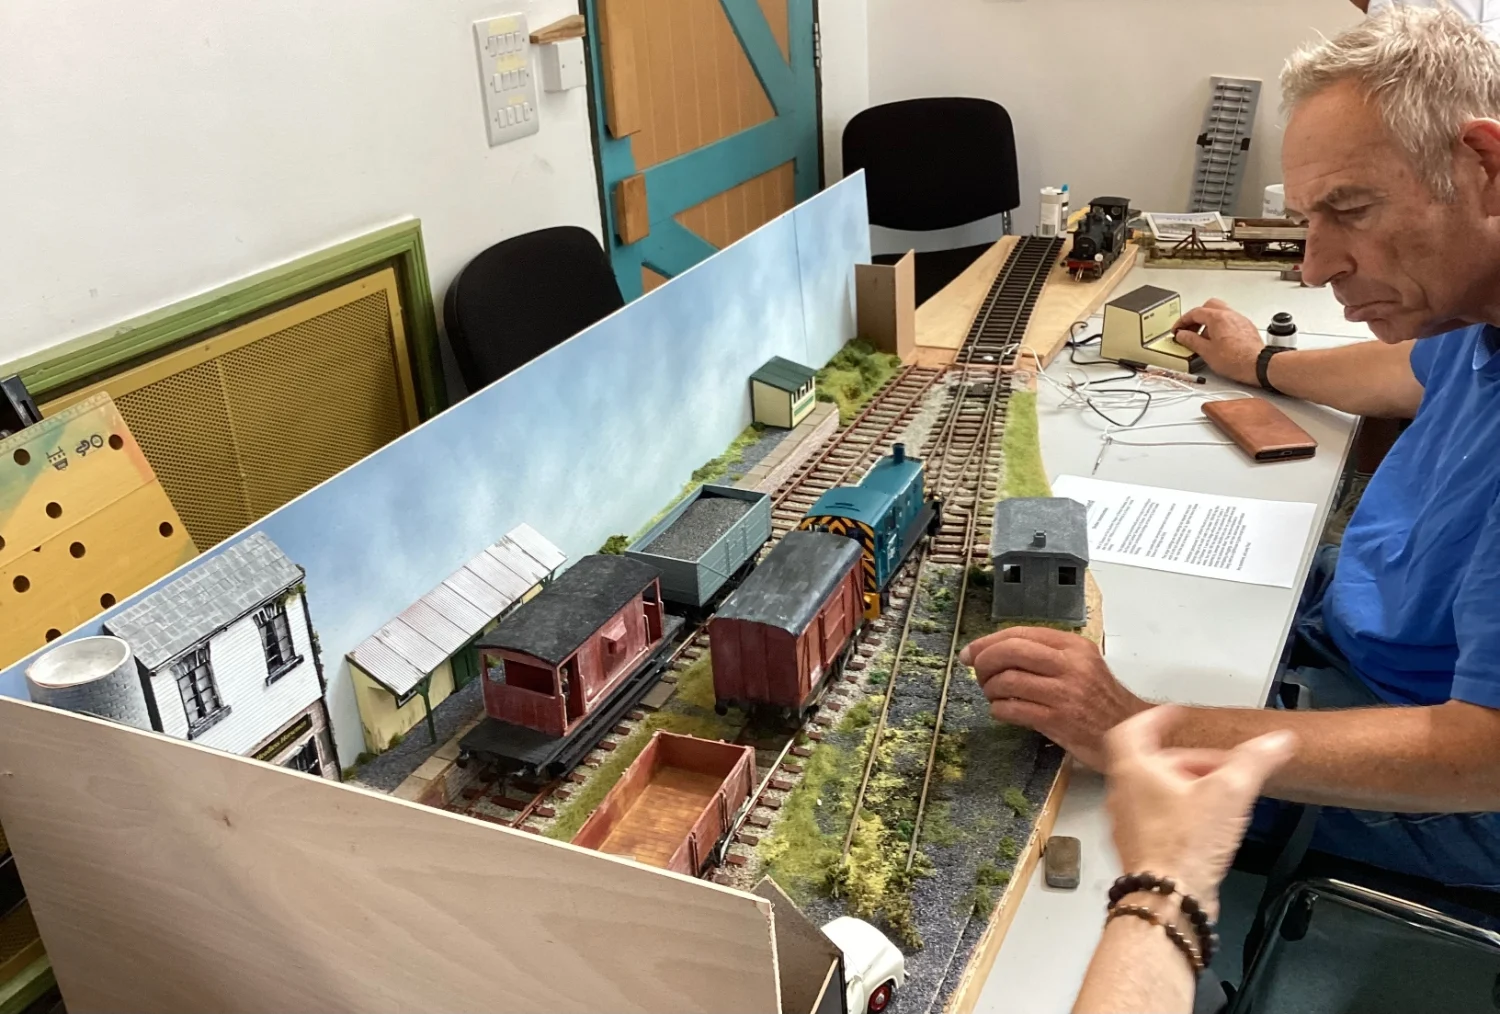
July, 2024, and I went to Larkrail, to me quite a special model railway show in Bath suburbs. One line really caught my interest, a small gauge 1 branch line terminus, by a guy I regard as a mate. You’ll see it’s pretty well a standard arrangement excepting everything just a little bit bigger, and to me more attractive as a result. Discussing it with its builder, and I mentioned expense, and he laughed and picked up a Terrier 0-6-0T. All the superstructure was made from cardboard! This aroused my interest enough to go along to the gauge 1 association do at Swindon steam that summer. The bulk of the show was, I admit, bloody scary when you looked at the price tags, but the association admission desk were selling white metal castings for standard axle box/guard/ spring units at very reasonable prices. Slaters do wheelsets, plus loco wheelsets at fairly normal prices. I would say if you can do fairly simple scratch building, you can put together a basic branch line arrangement without breaking the bank, and be able to fit it in along one wall of a room. If you go for RTR items, a win on the football pools would be a help. Me? I’m very tempted, it’s just there’s a lot of 0 gauge tracks in my railway room, and a layout in a different gauge would be a bit too much of a good thing.

-
There’s all.the old MECCANO magazines available for free viewing here: http://meccano.magazines.free.fr you can pick out any article quite quickly, and it makes for a very interesting read
-
Just thinking about things last night, I struck me some folks might be interested in travellers tales, getting to Ireland back over seventy years ago. It was a tale I did over on the RMweb thread, before they had the great picture crash, I’m sorry to say. It’s what started me off with a real liking for the place. https://www.rmweb.co.uk/forums/topic/107190-“washbourne-plus-deepfield”/page/60/#comment-4380728
-
The Lancashire and Yorkshire did a similar thing, converting coaches into aeroplane vans. It would appear that side doors were secured, windows blanked off, all interior items such as seats and partitions removed, and full width end doors fitted. This would turn it into a Covered Carriage Truck, but a bit longer. You could then end load items such as wings or fuselages, possibly in a supporting framework, which could be taken out and bolted toghether. https://www.lyrs.org.uk/images/uploads/Modelling_-_Aeroplane_Van_in_7mm_scale_-_Magazine_257.pdf
-
Ahh.. the old bangers. They were about 3-4” length of guncotton, a soft fabric cord impregnated with gunpowder, put in a thick cardboard tube, the whole lot no more than an half inch diameter, and say four inches long. They could still pack quite a punch, best illustrated if you put one in the top hole for the wire of one of the reinforced concrete fence posts. You could blow the whole top off the post, leaving the reinforcing rods splayed out like a banana skin.
-
When we were kids, you could buy calcium carbide at the chemists, a sort of soft brown crumbly substance. Bike lamps used to use it. Put it in with some water, and the acetylene gas would come fizzing out. I think doing it on a coach would be a bit of coming in fits and starts, quite how they would get a steady flow at even pressure would be problematic. Then you have to clean the black goo out of the container before recharge. How did we use it? (Forgive me, father) you could get a glass screw top bottle, half fill it with water, drop a lump or two of carbide in it, then screw the cap down, put it on top of a wall, and run away. (We forgot Mrs. Pearce’s washing was out….)
-
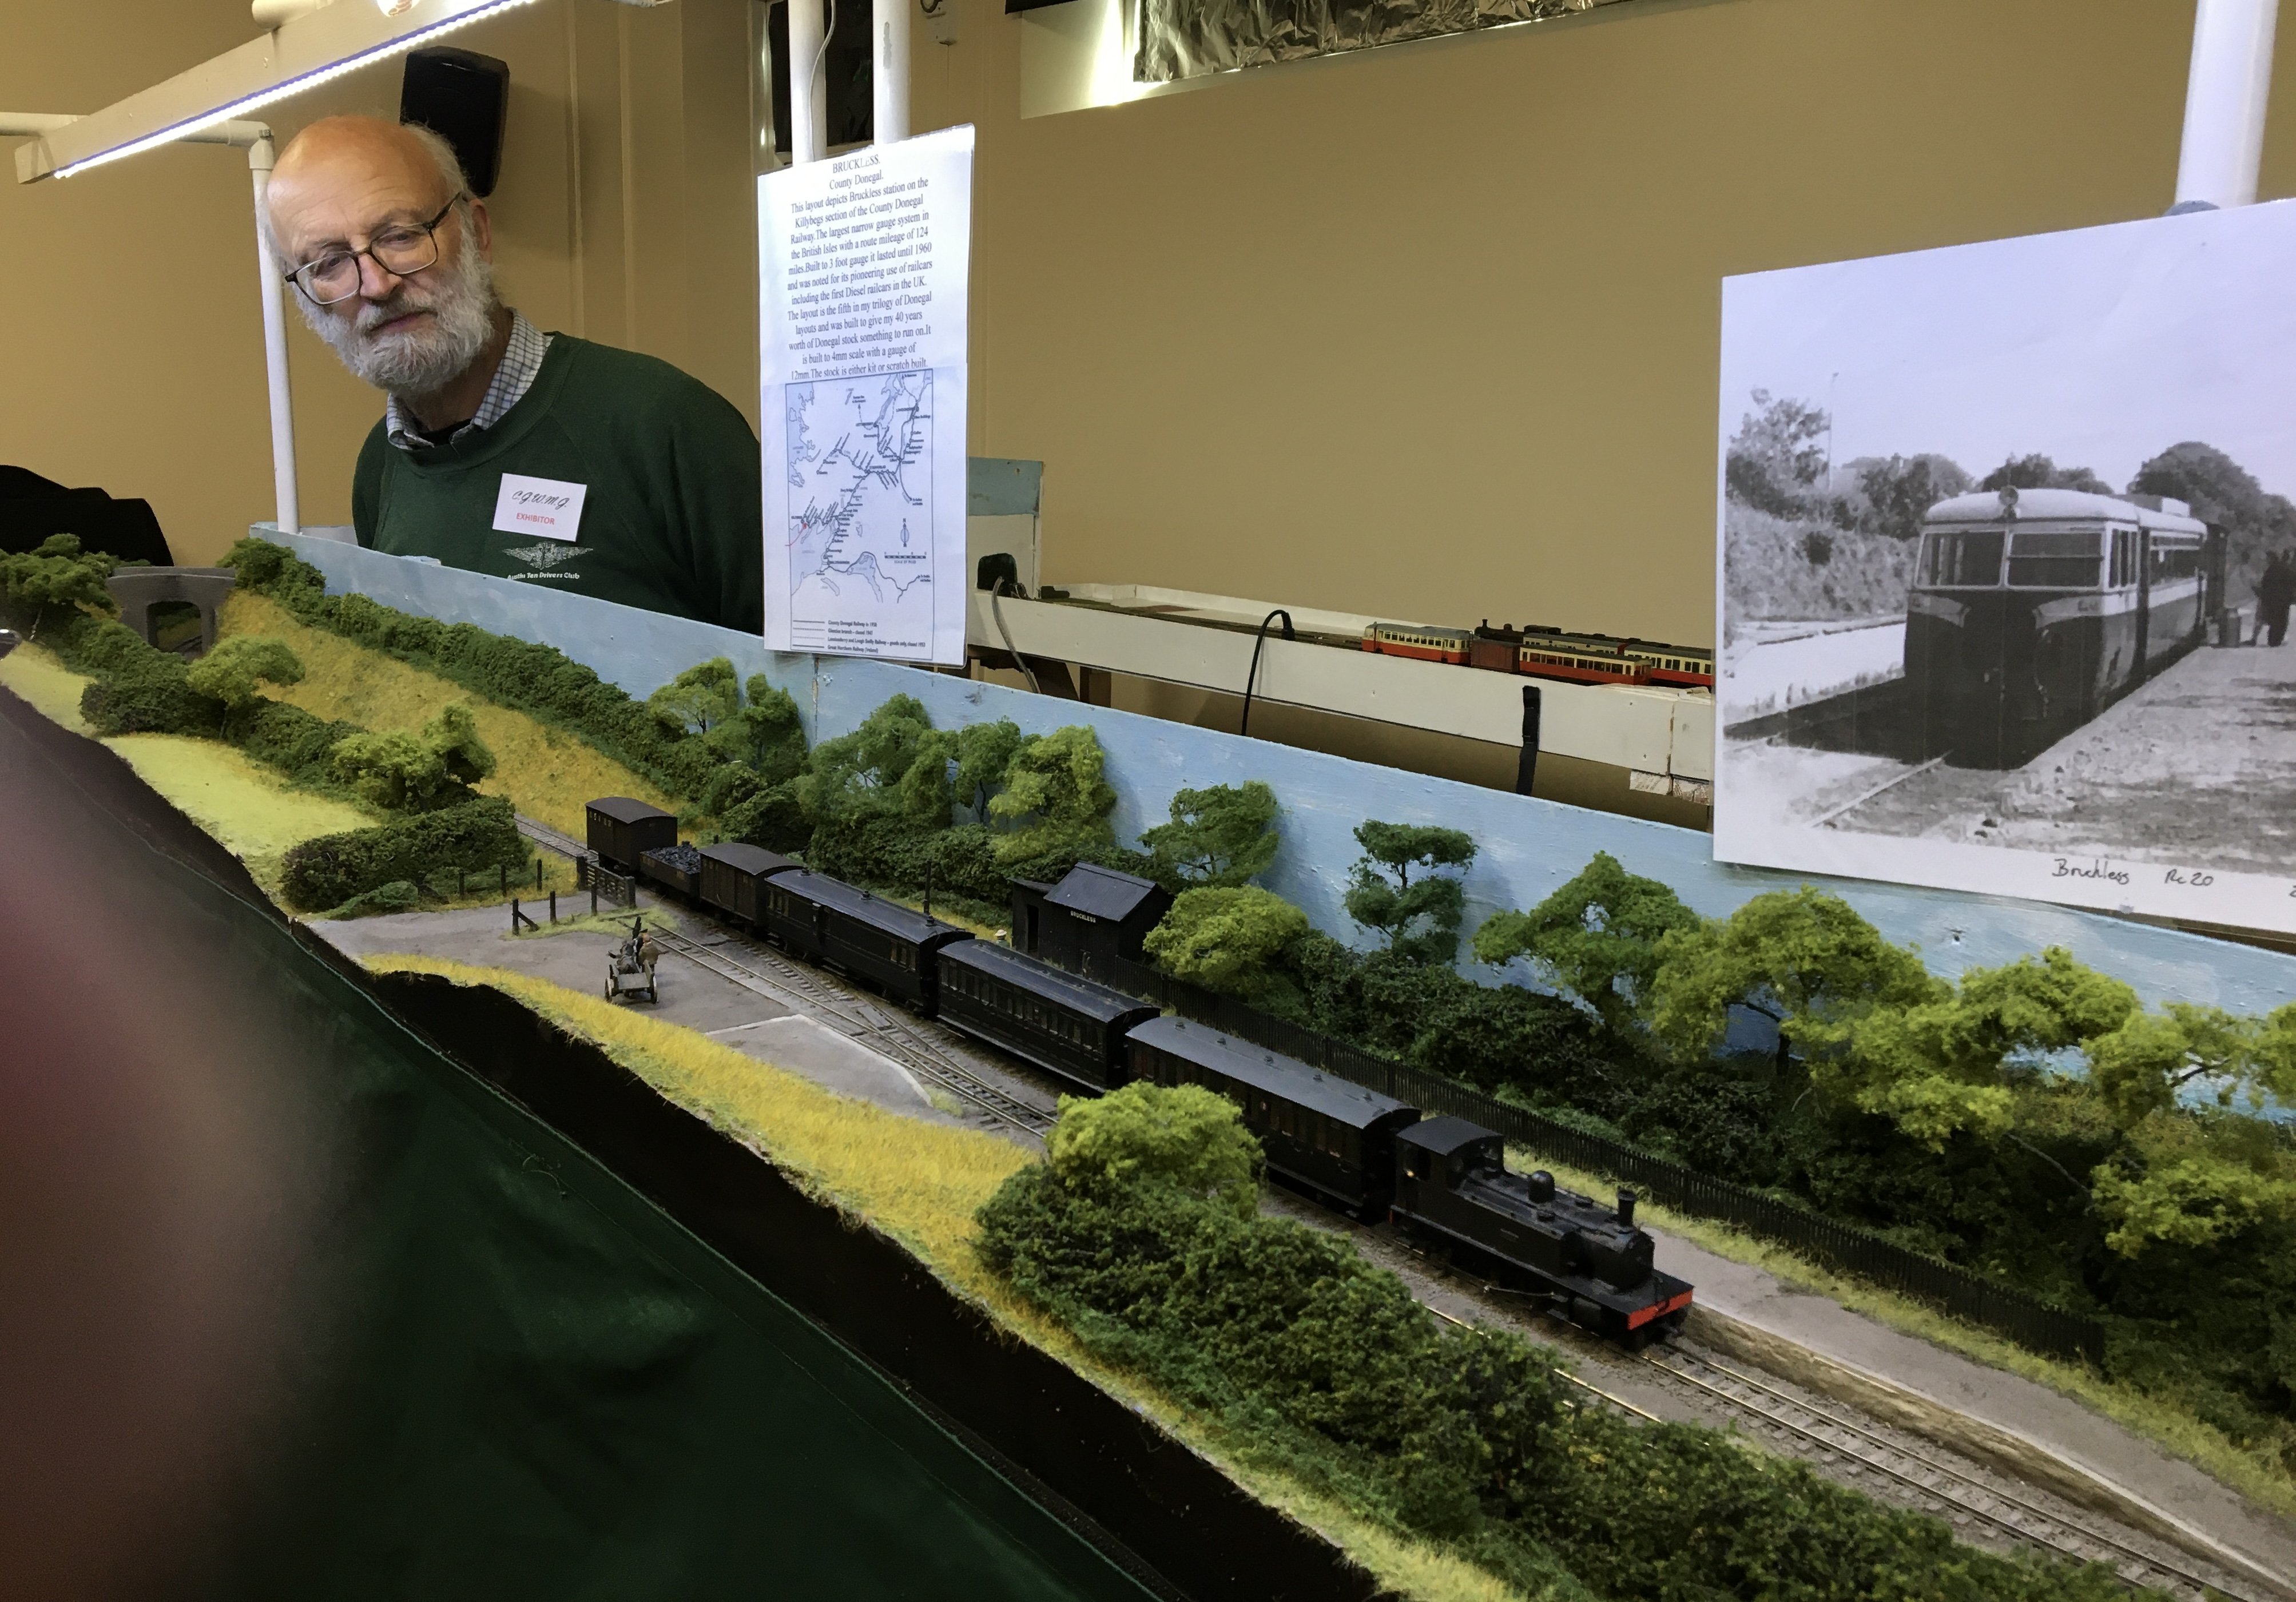
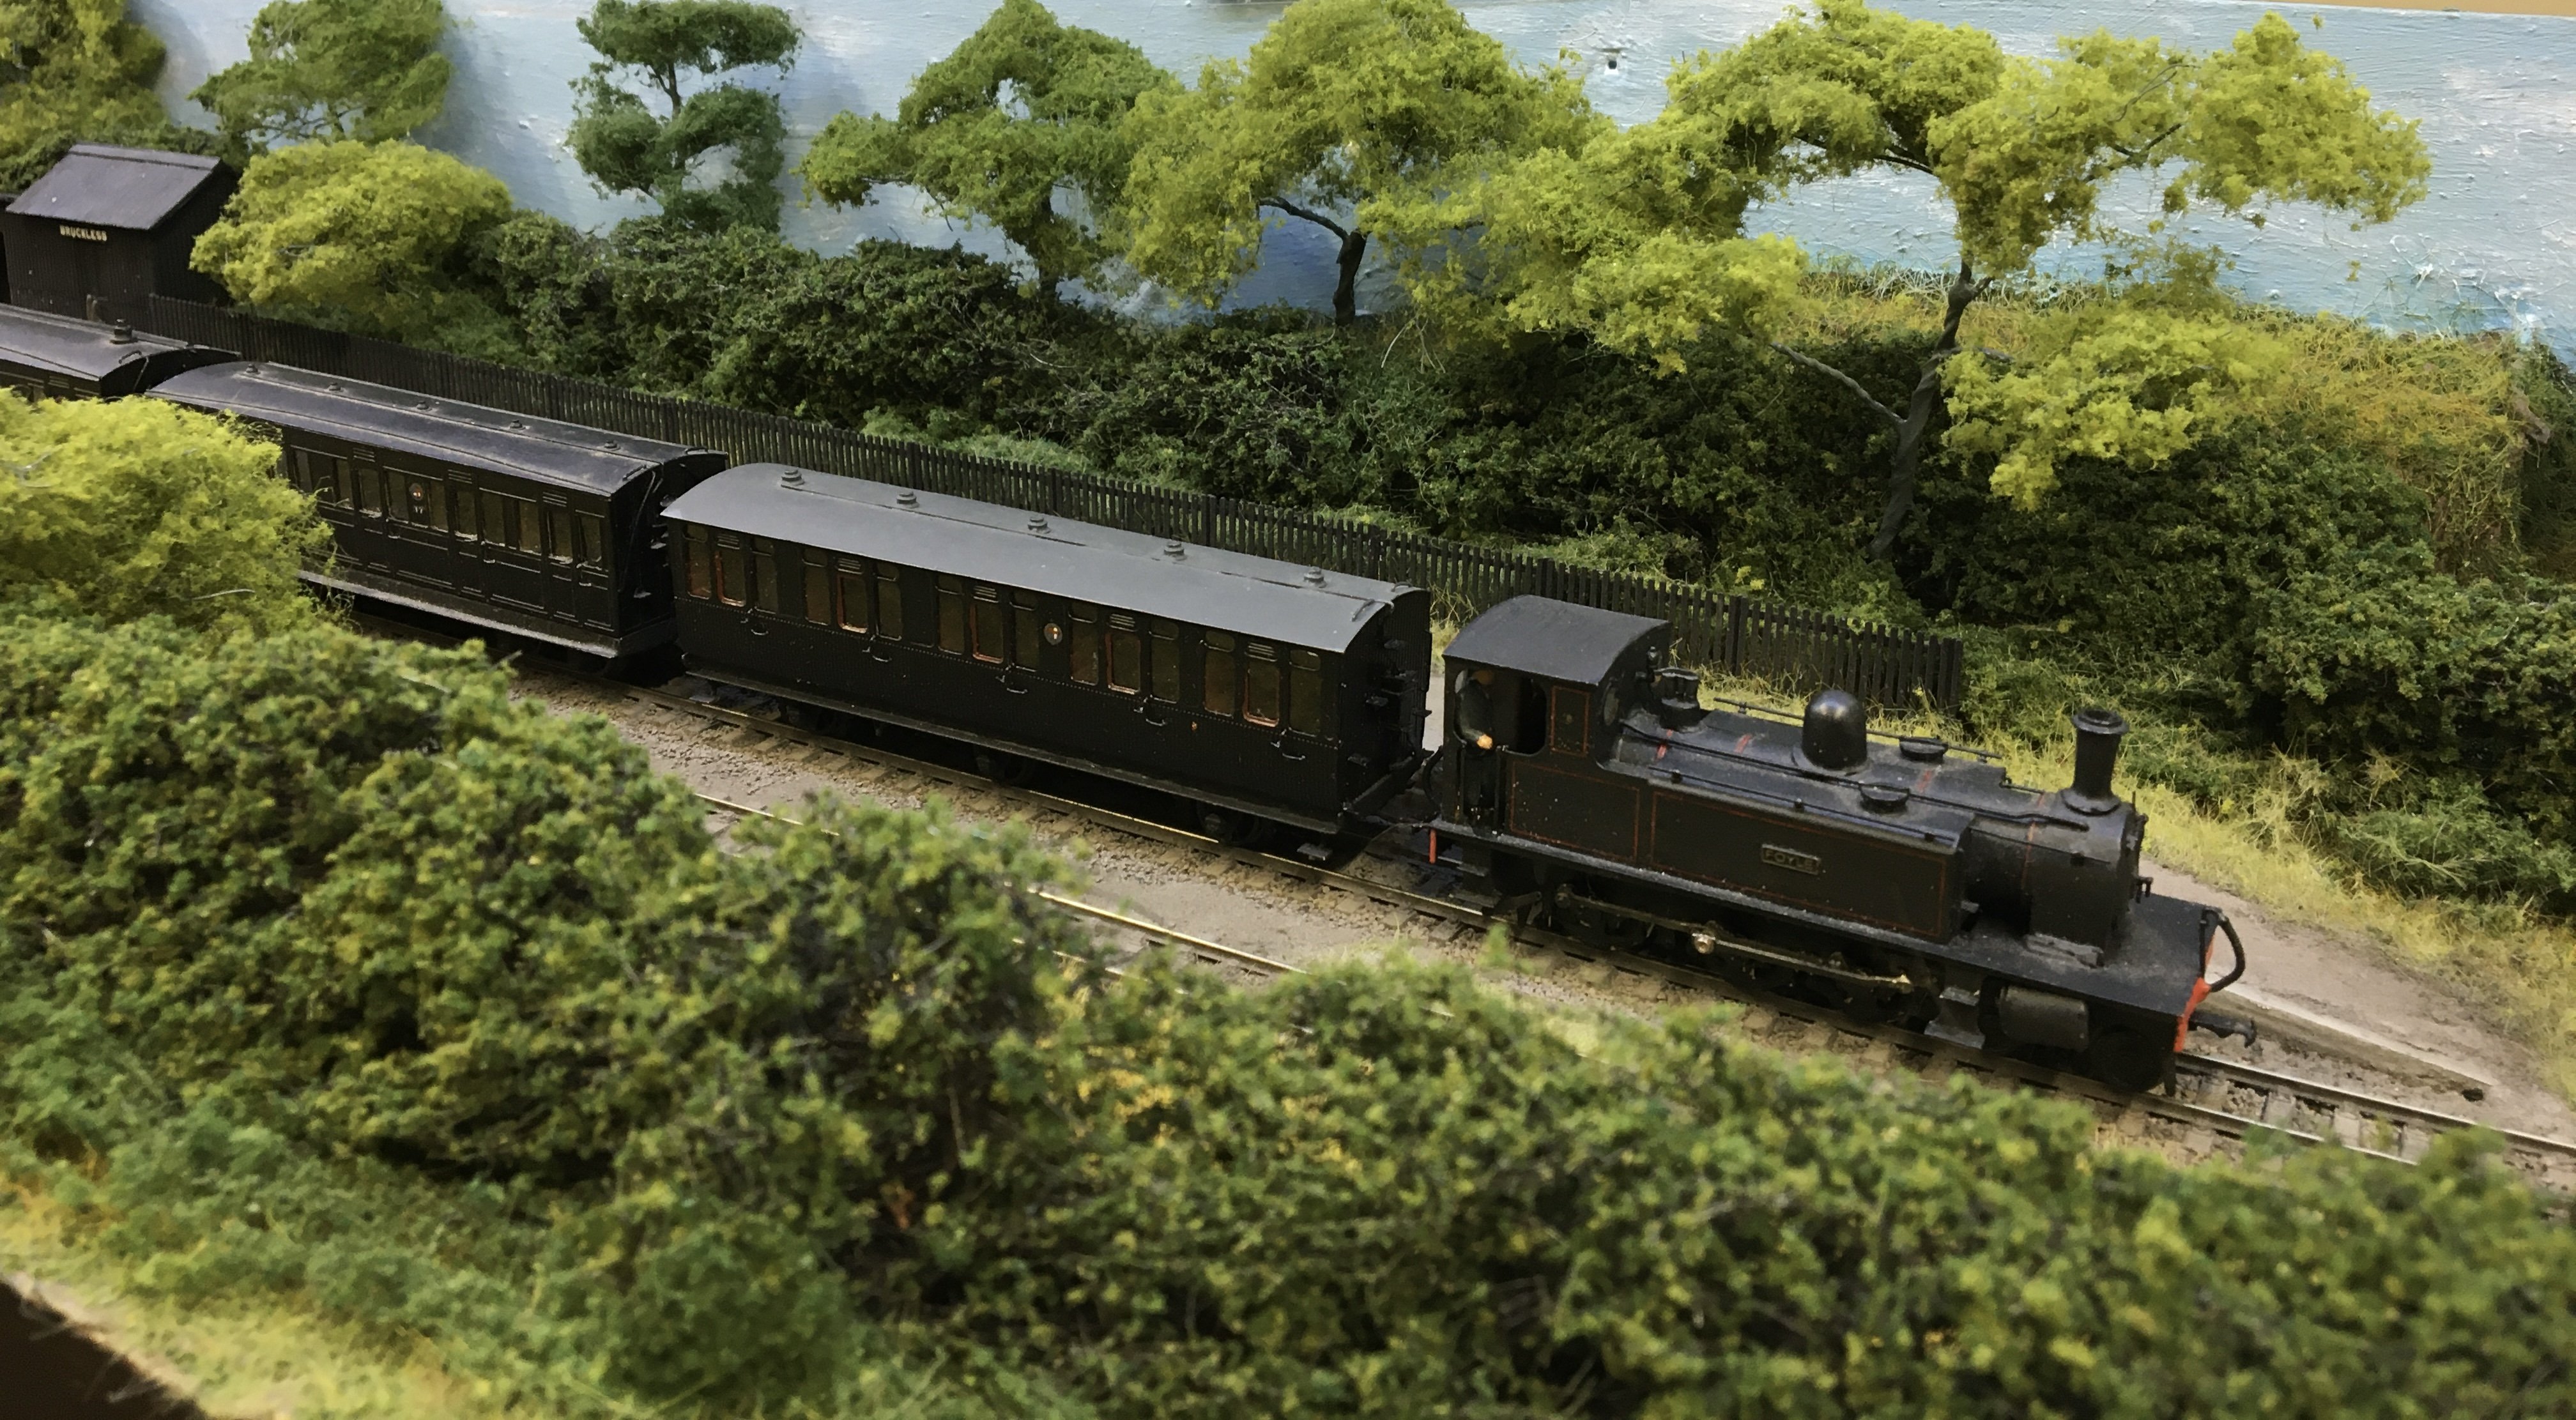
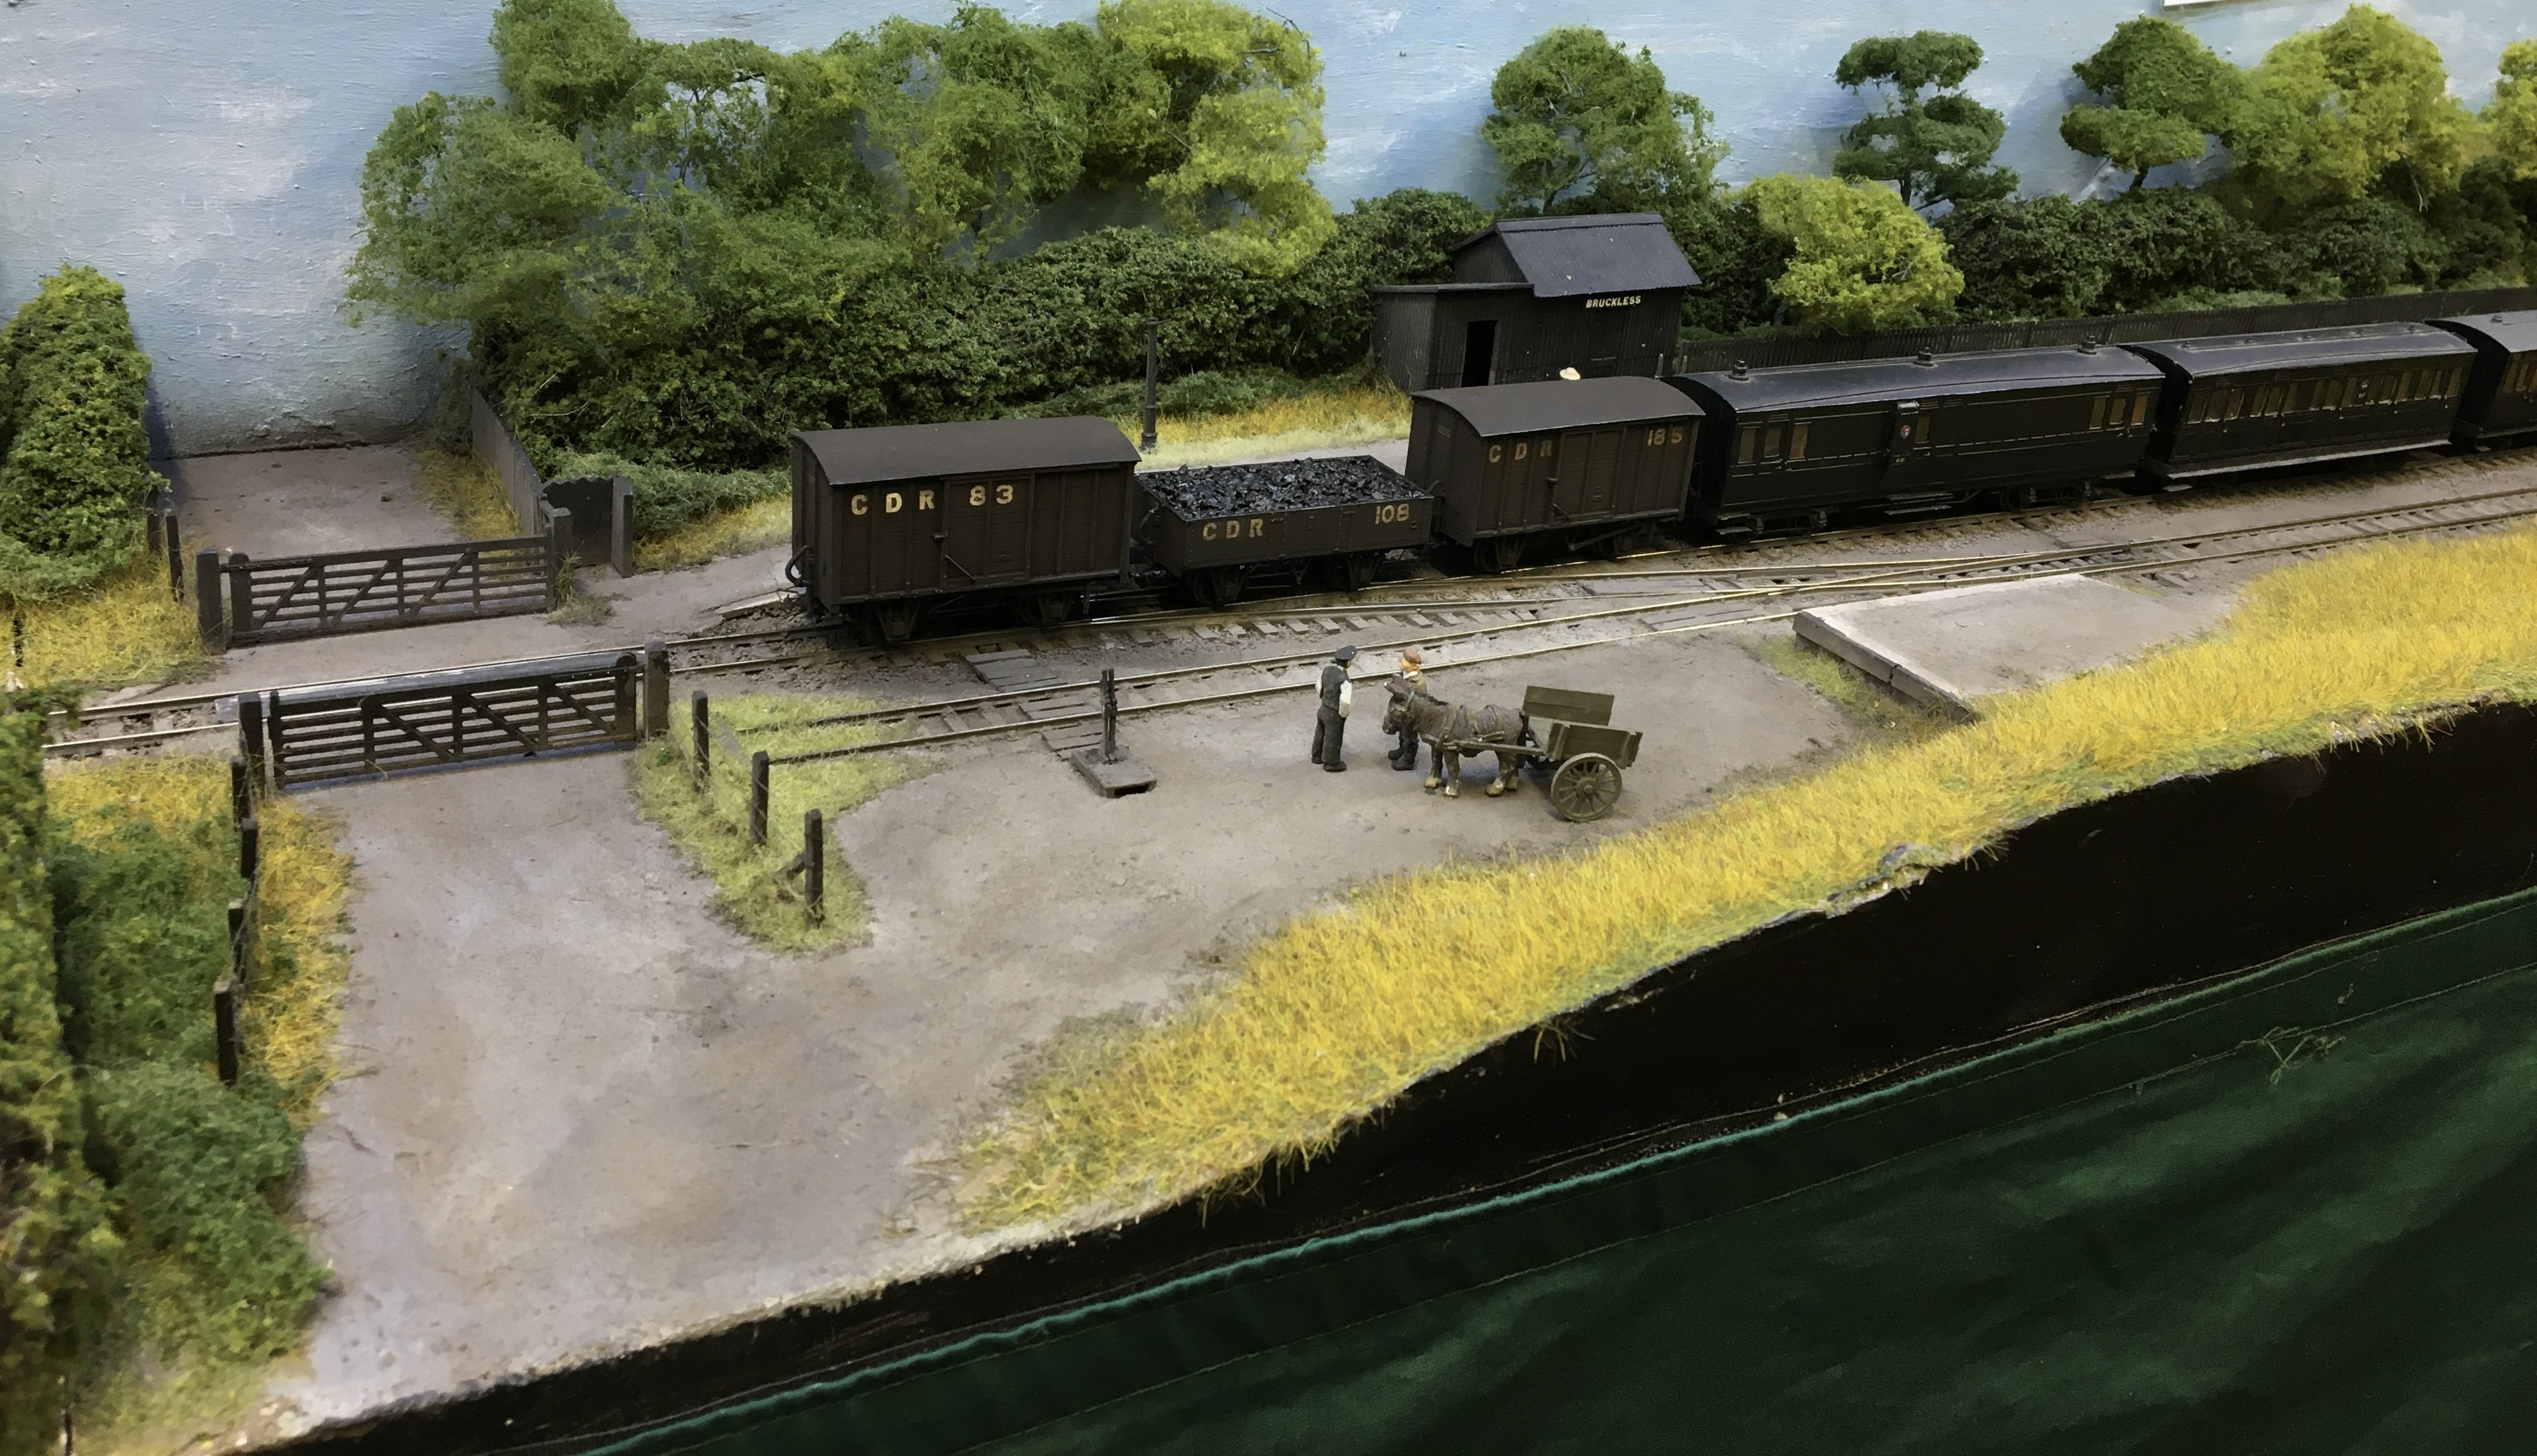
Lovely day today, so a short bus hop to the local modelling clubs show. (Cheltenham) The real treat was Andy Cundick was there, with one of his layouts. This one is CDRJC, based on Bruckless on the Killybegs section, a big oval with staging sidings at the back, and a simple station with just a siding in front. Scale 4mm/ft, gauge 12mm.
- 160 replies
-
- 16
-

-

-
To me East Lynn was just too big, though perfect modelling. Trowland to me is everything a model of a branch terminus should be. http://www.s-scale.org.uk/gallery27.htm
-
I found screwing aluminium angle to chipboard (in my case) that one material wants to expand and contract and the other doesn’t, so you end up with concave or convex banana sort of pieces, although with yours being fairly short it shouldn’t be too bad.
-
I took the shell off a snail to get it to go faster, but it just made it more sluggish.
-
Small and simple and a Mills building, by the look, sounds alright to me.
-
Ticks all the boxes.
-
If you’re after ideas for a small industrial layout, you can do something boxfile size, which keep costs right down, trackwork and rolling stock, but give you some operating fun, until you want to upsize, or maybe build another. Useful ideas in here: https://micromodelrailwaydispatch.com A good example by a fine modeller on this site:
-
 It’s nice in the engine room of one of those when it’s going top lick. Besides the engines, you’ve got stuff like cardan shafts rattling round. Reminds me, my hearing aid batteries are getting down.
 -
Well, thank you for that, such a long time ago now. Me, expurgated in a model book! It did go quite well, I suppose the weak link was the sector table, my attempt to save space on the runaround. They could be found in real railway usage, in practice I found the sliding end made it very stiff to move with a loco sitting on top. The other drawback was really you needed to line the table up with whichever road you were shunting on, or sooner or later you’d get a wagon down in the pit. I moved on to a traverser table, three roads on the table which slid under the platform on one side or the other, so the pit was always covered. The table being mounted on a couple of drawer runners facing upwards, the ball runners making for a really smooth operation. The whole lot had.quite tidy, believable look. These days I seem to moved towards “off stage” runrounds, even shorter layouts.
-
OK, give me a bit of time to fix some wiring in, and you’re on. No DCC here, mind, we’re Primitive Fundamentalists.
-
Hours running, five minutes shunting, (and that’s it) and an hour back. Good use of your time? Still ,you’re quite welcome, it’s all in a state of flux at present. (It always is, though) Do you ever get to the place in Gloucester? Maybe call by then.
-
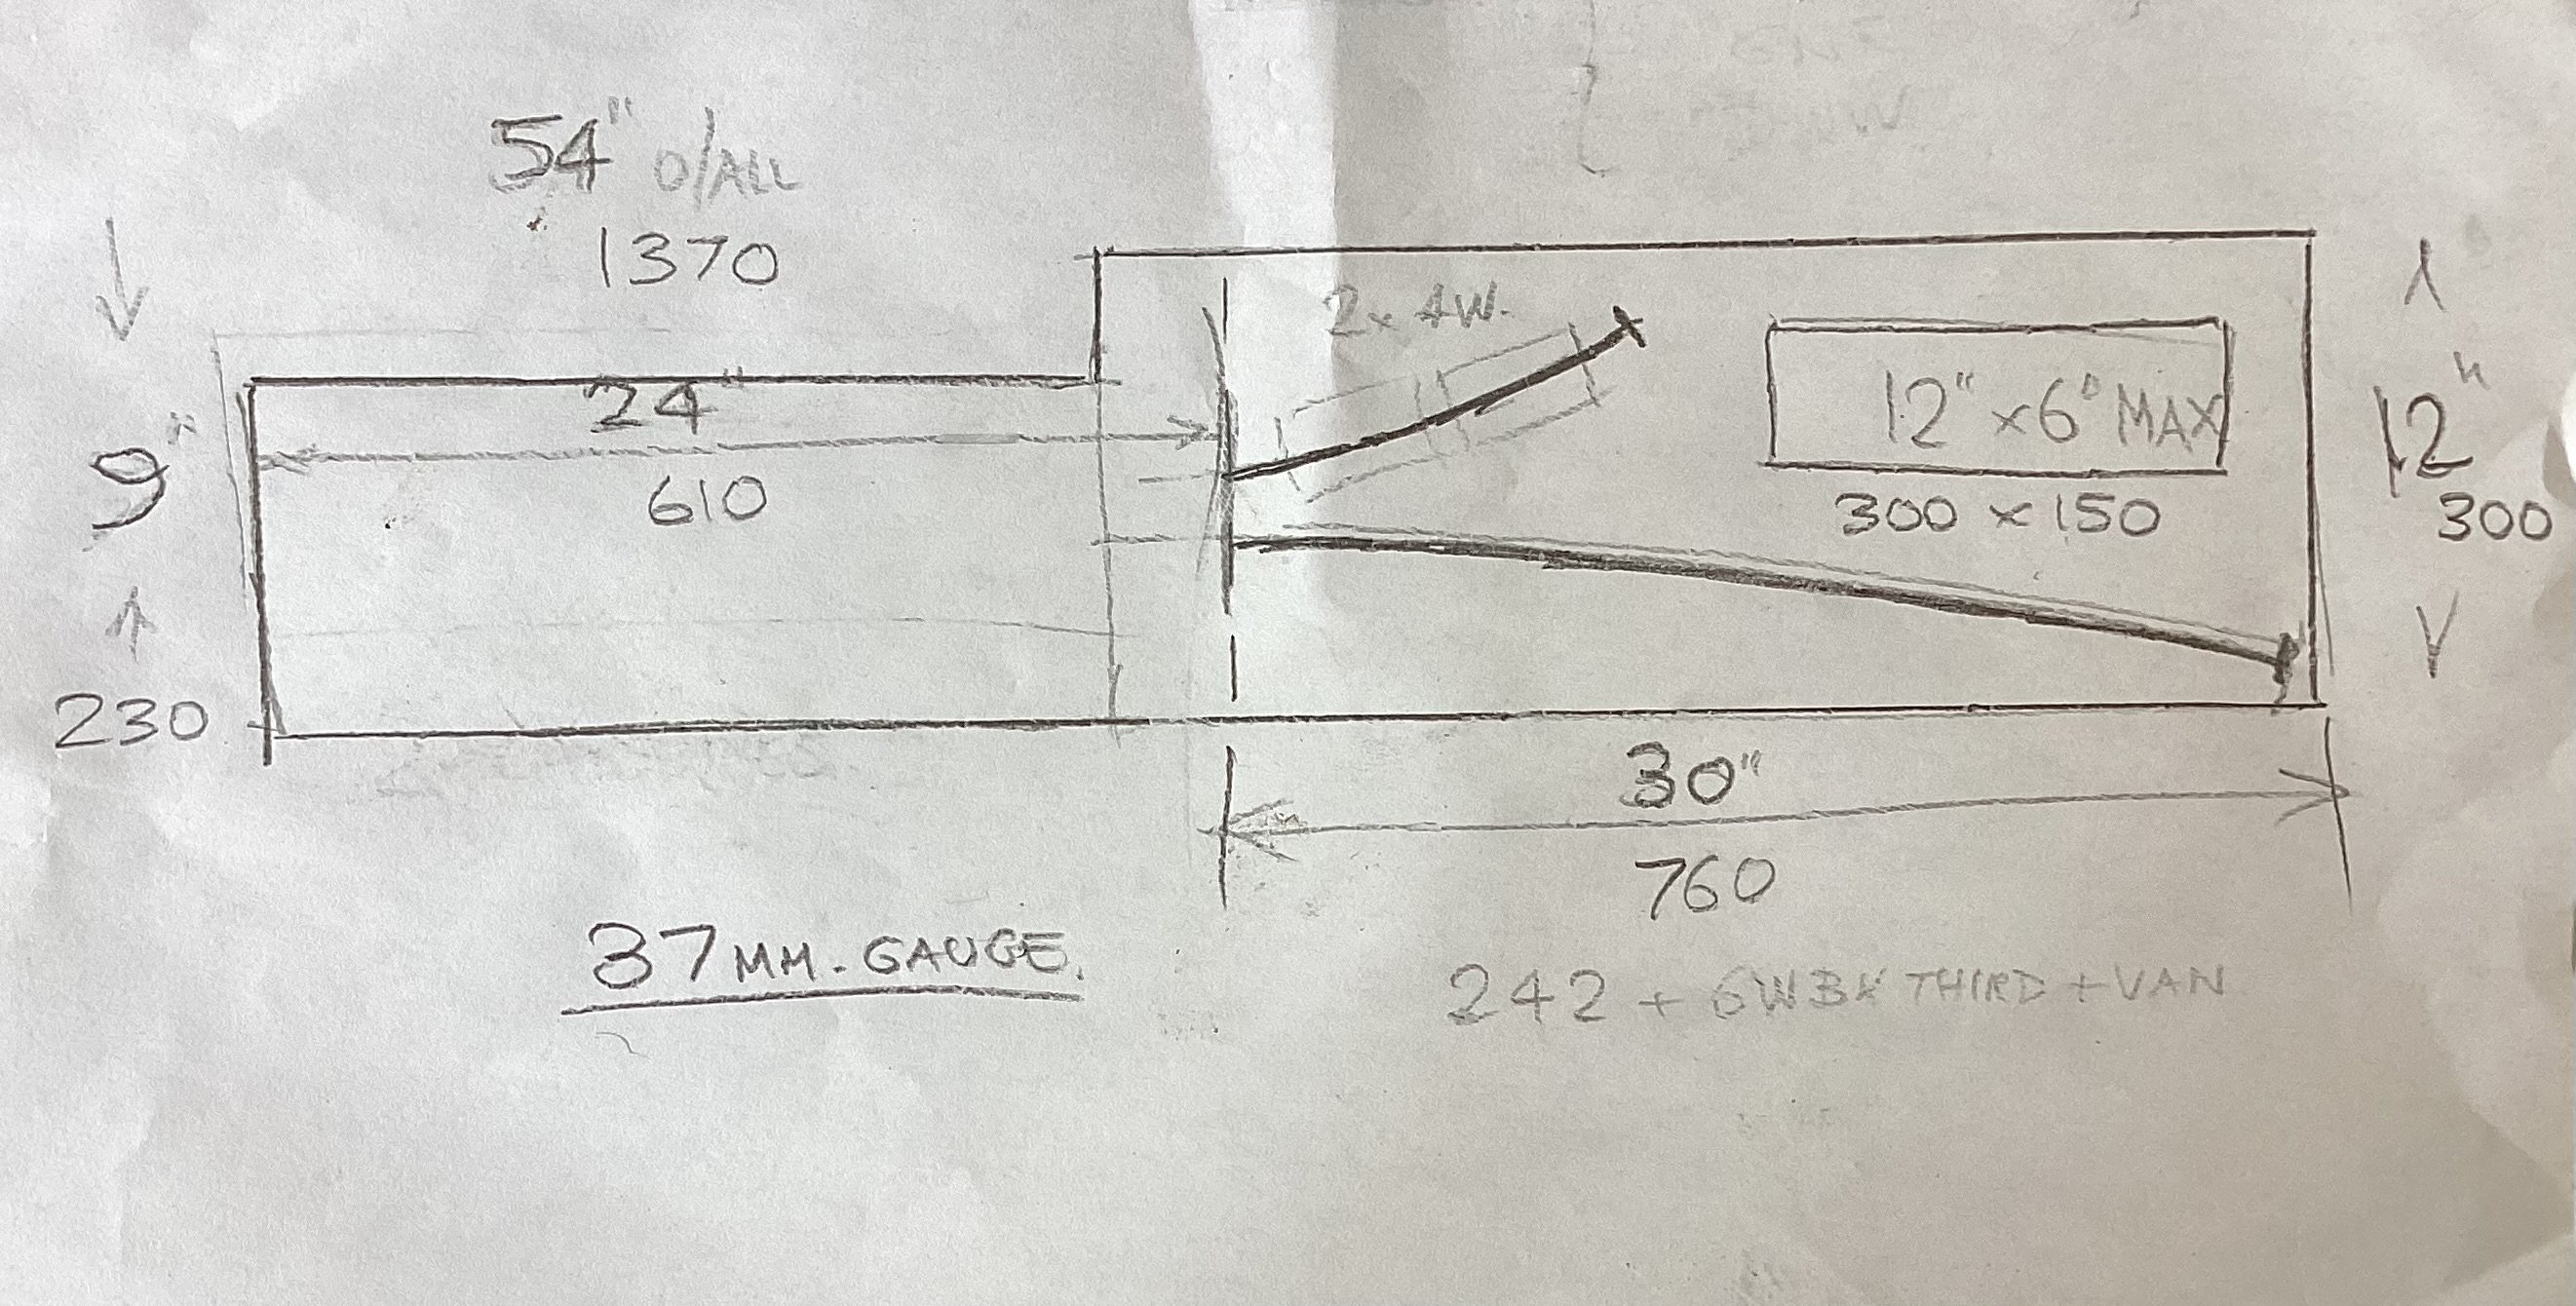
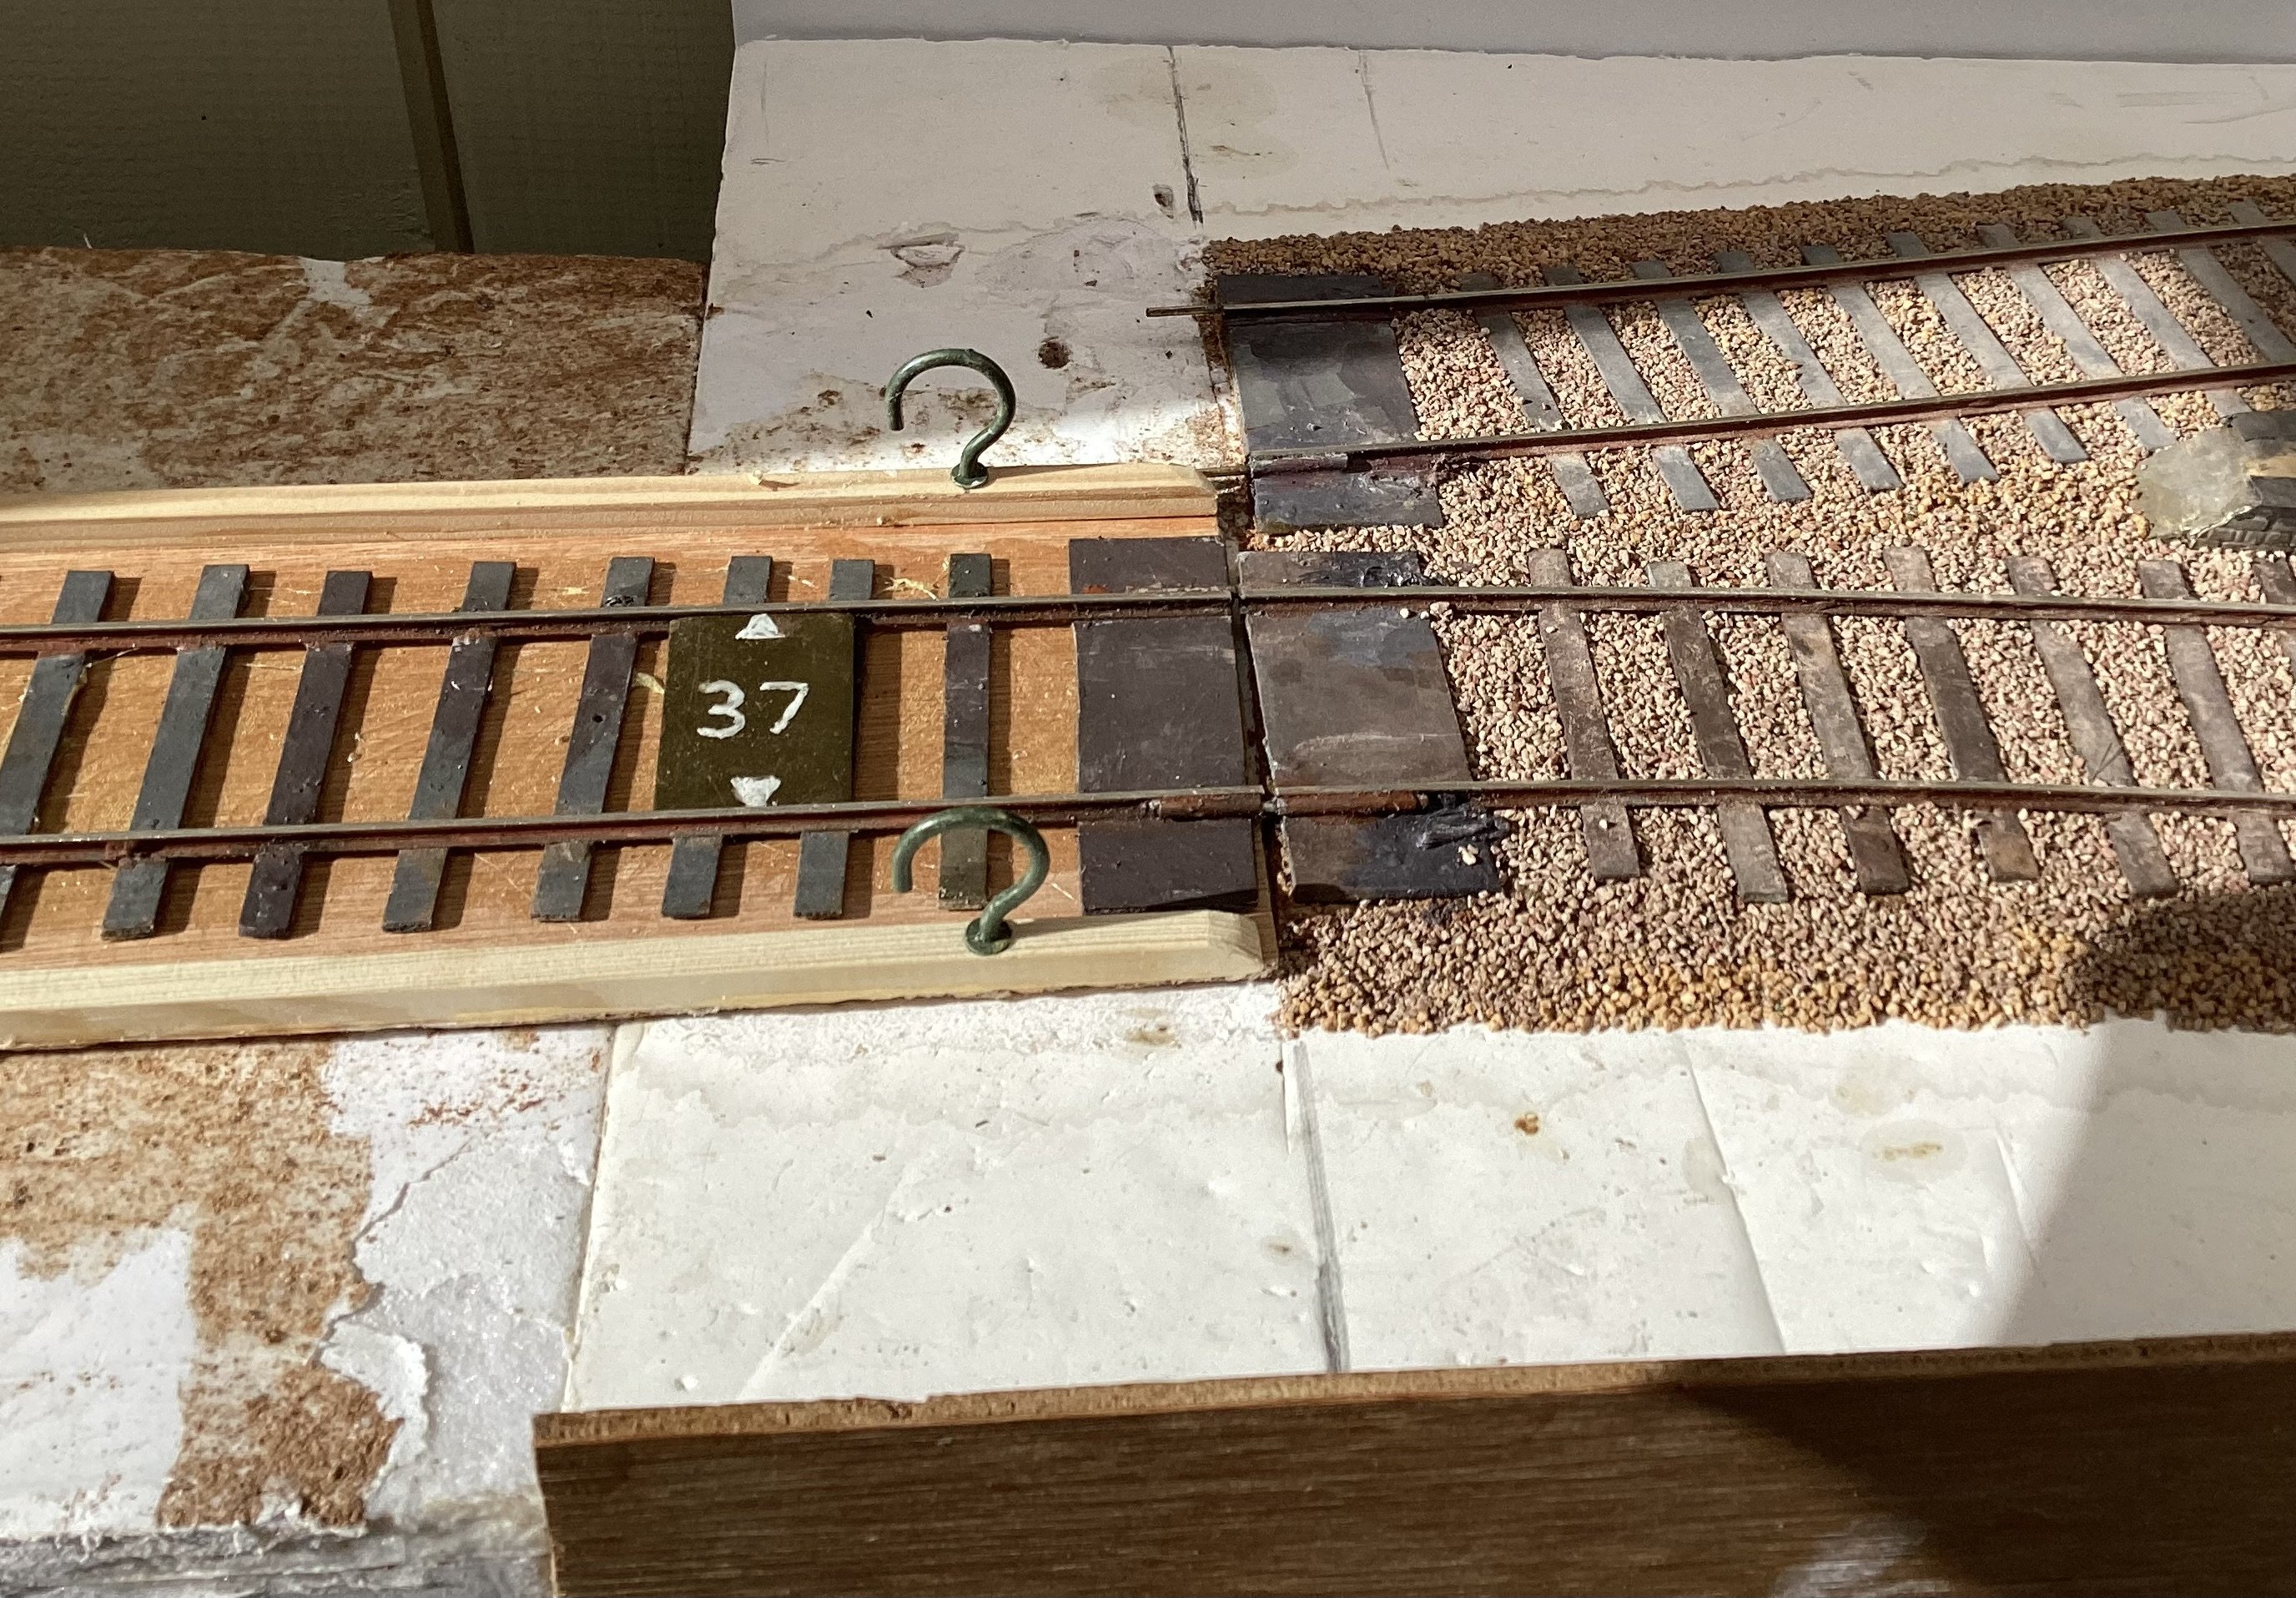
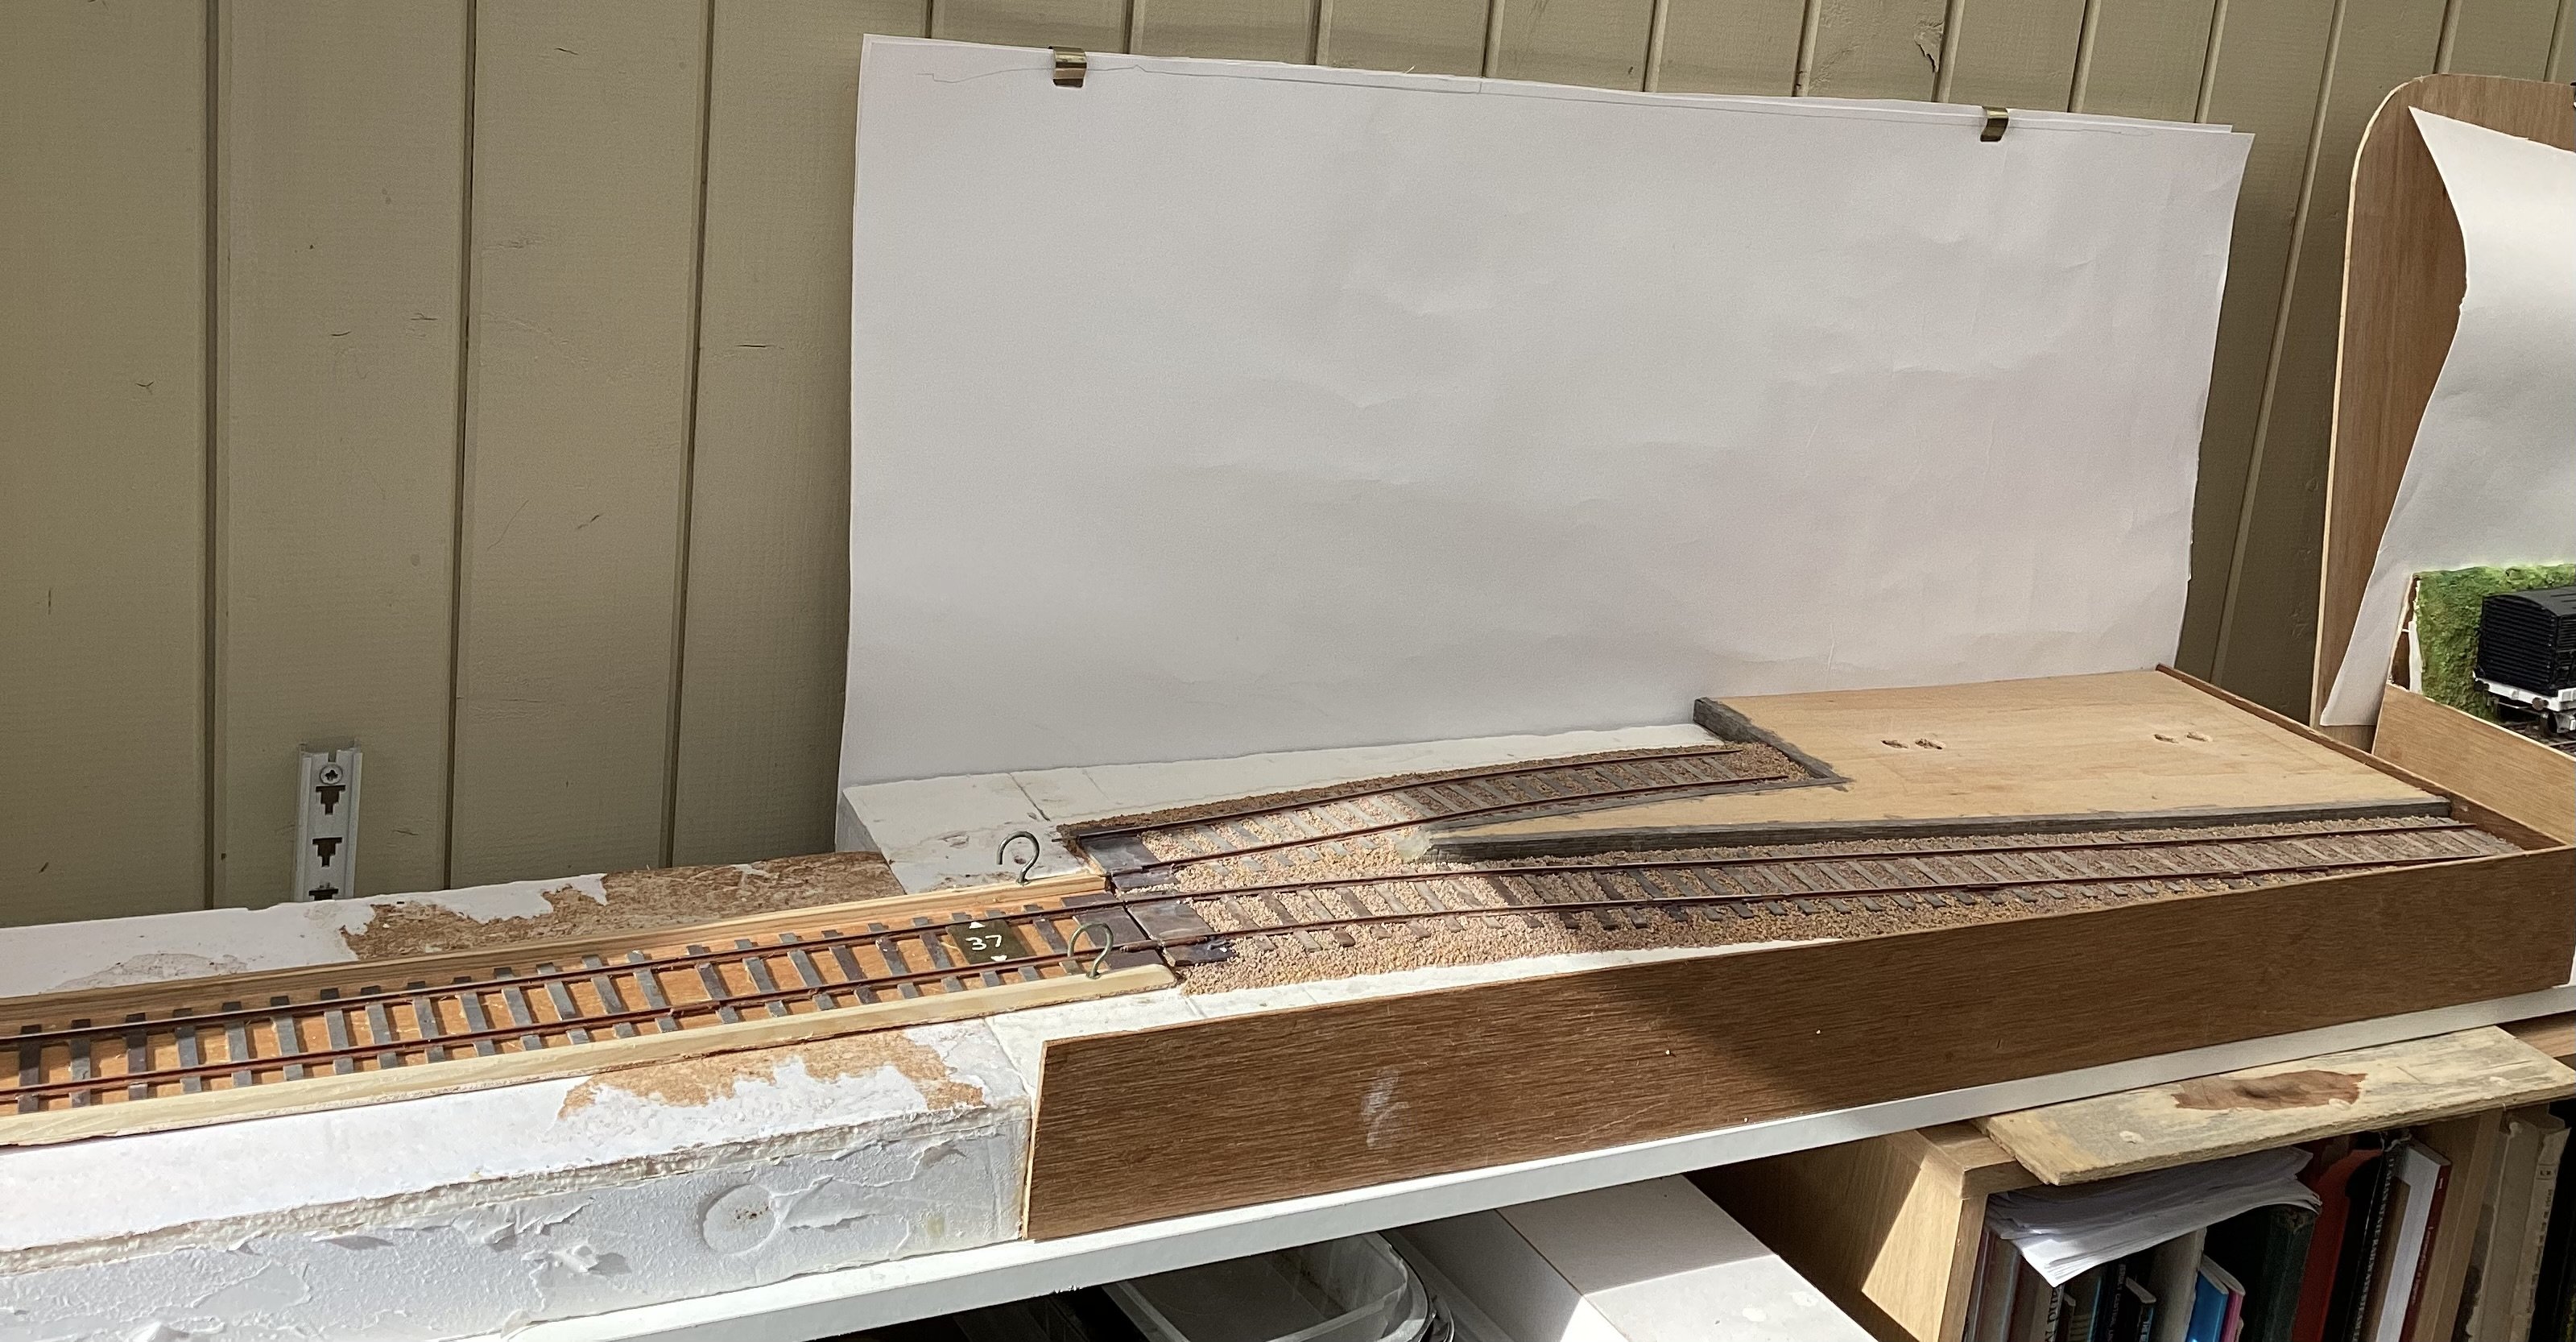
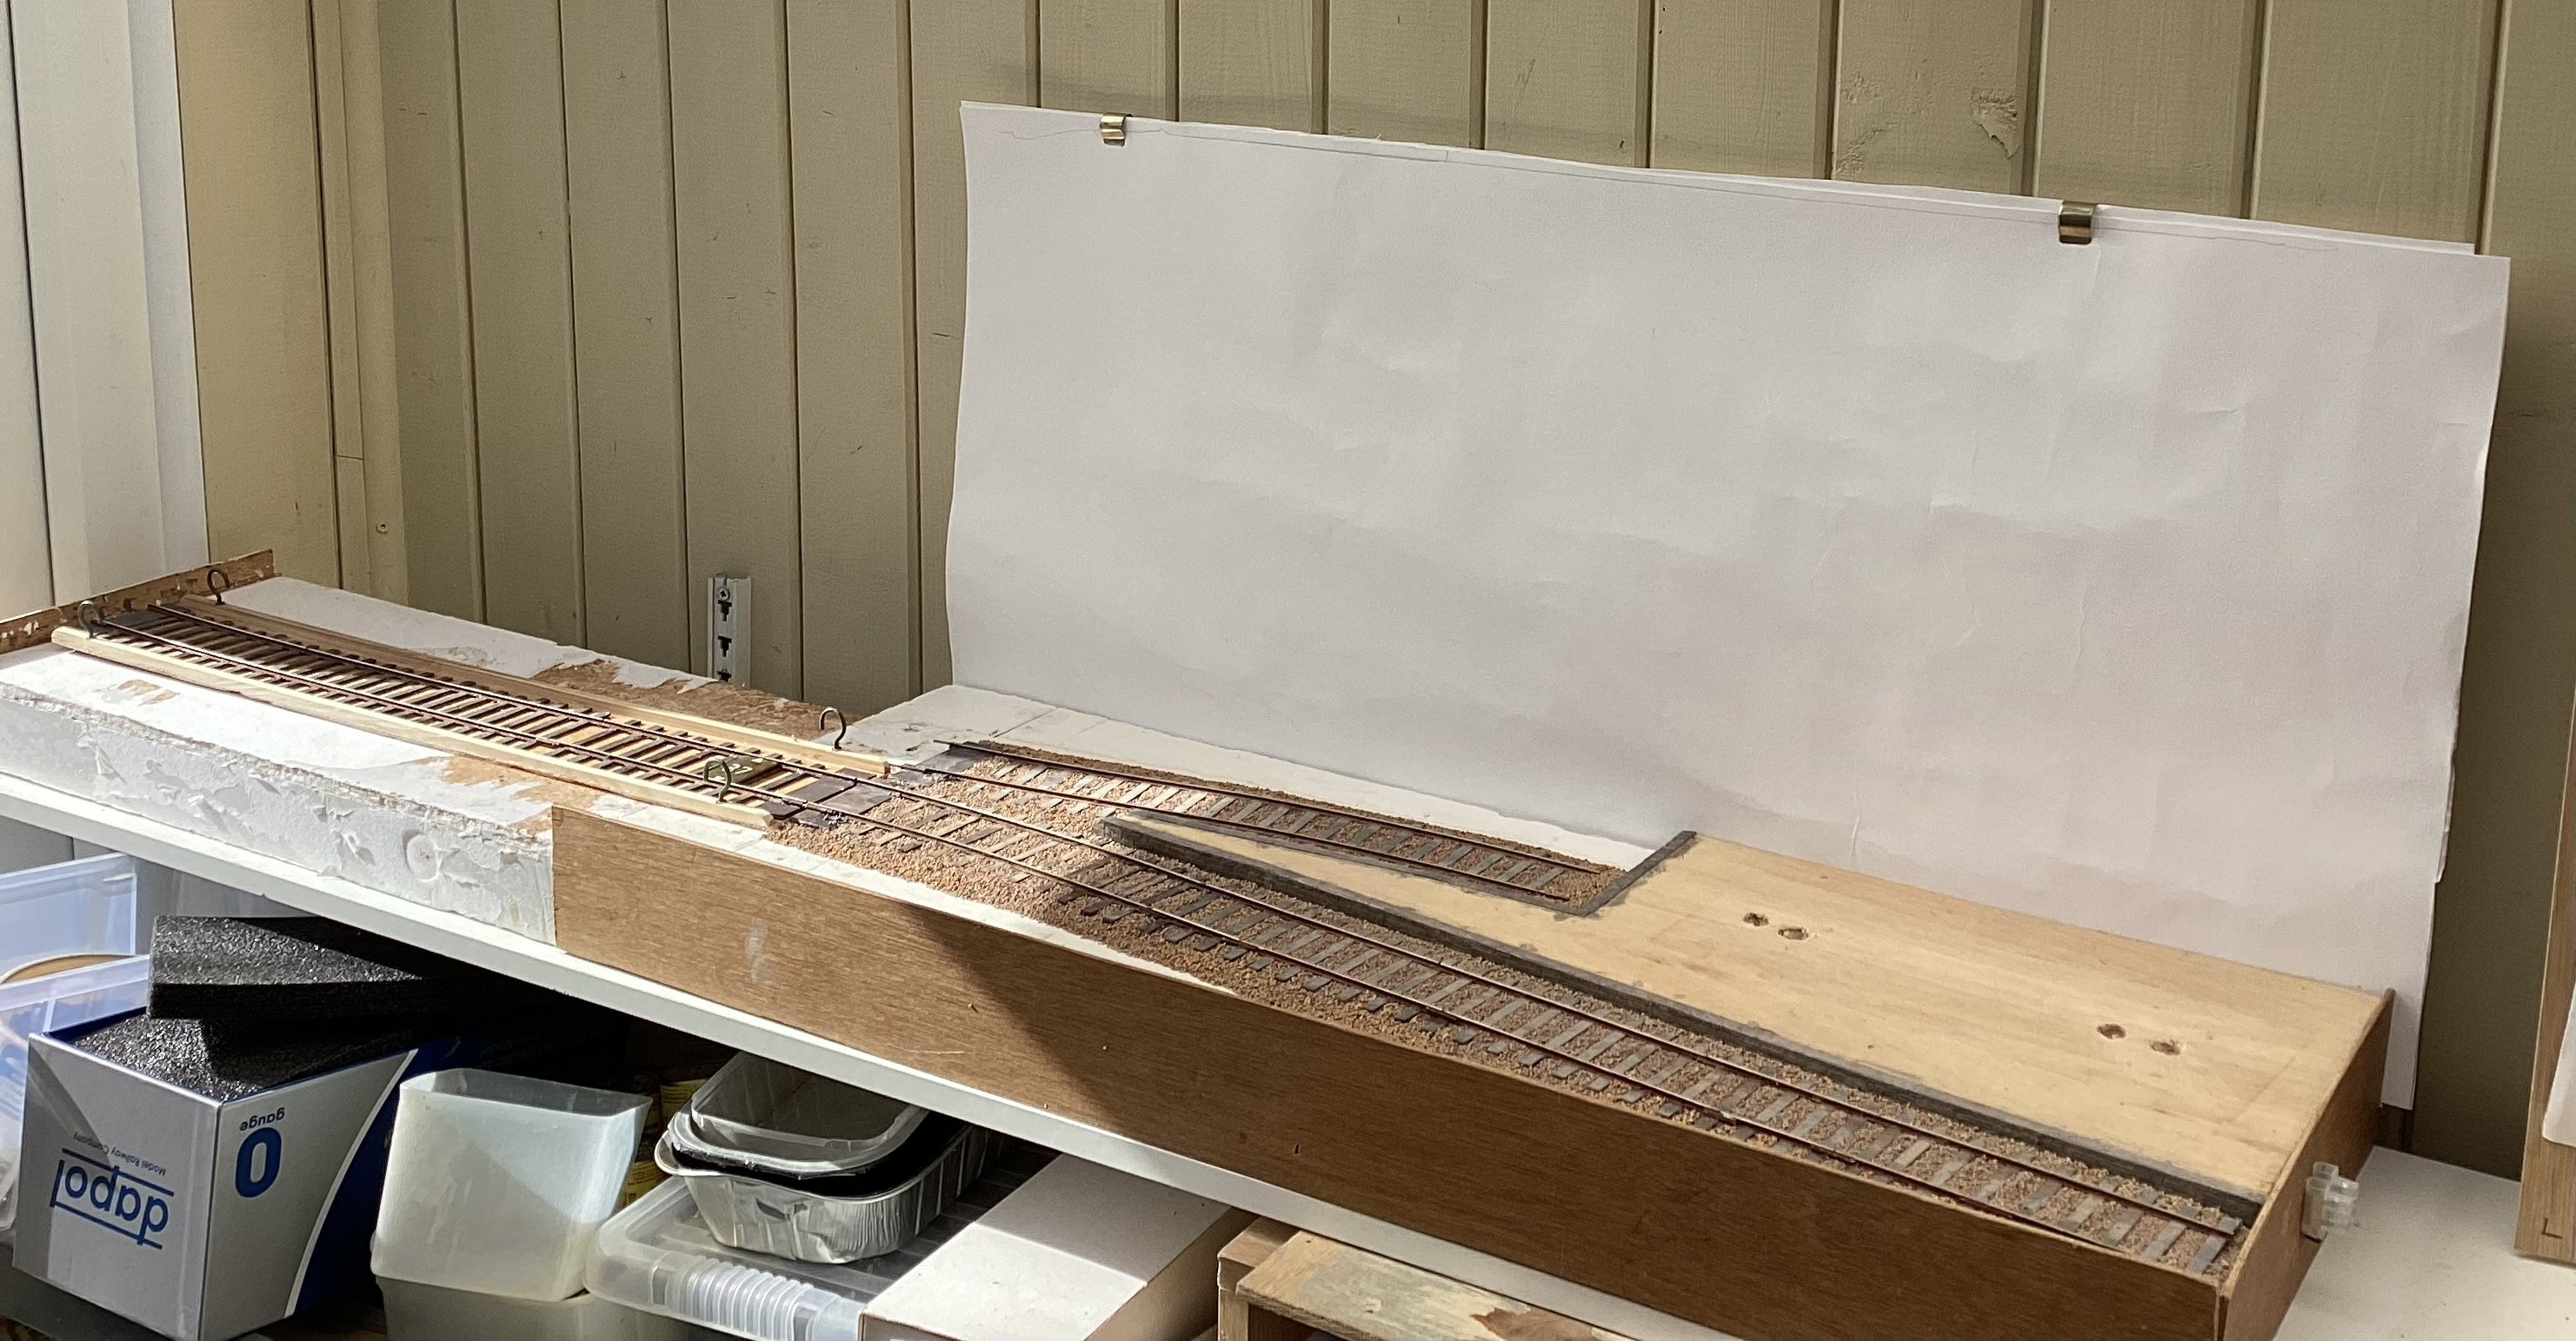
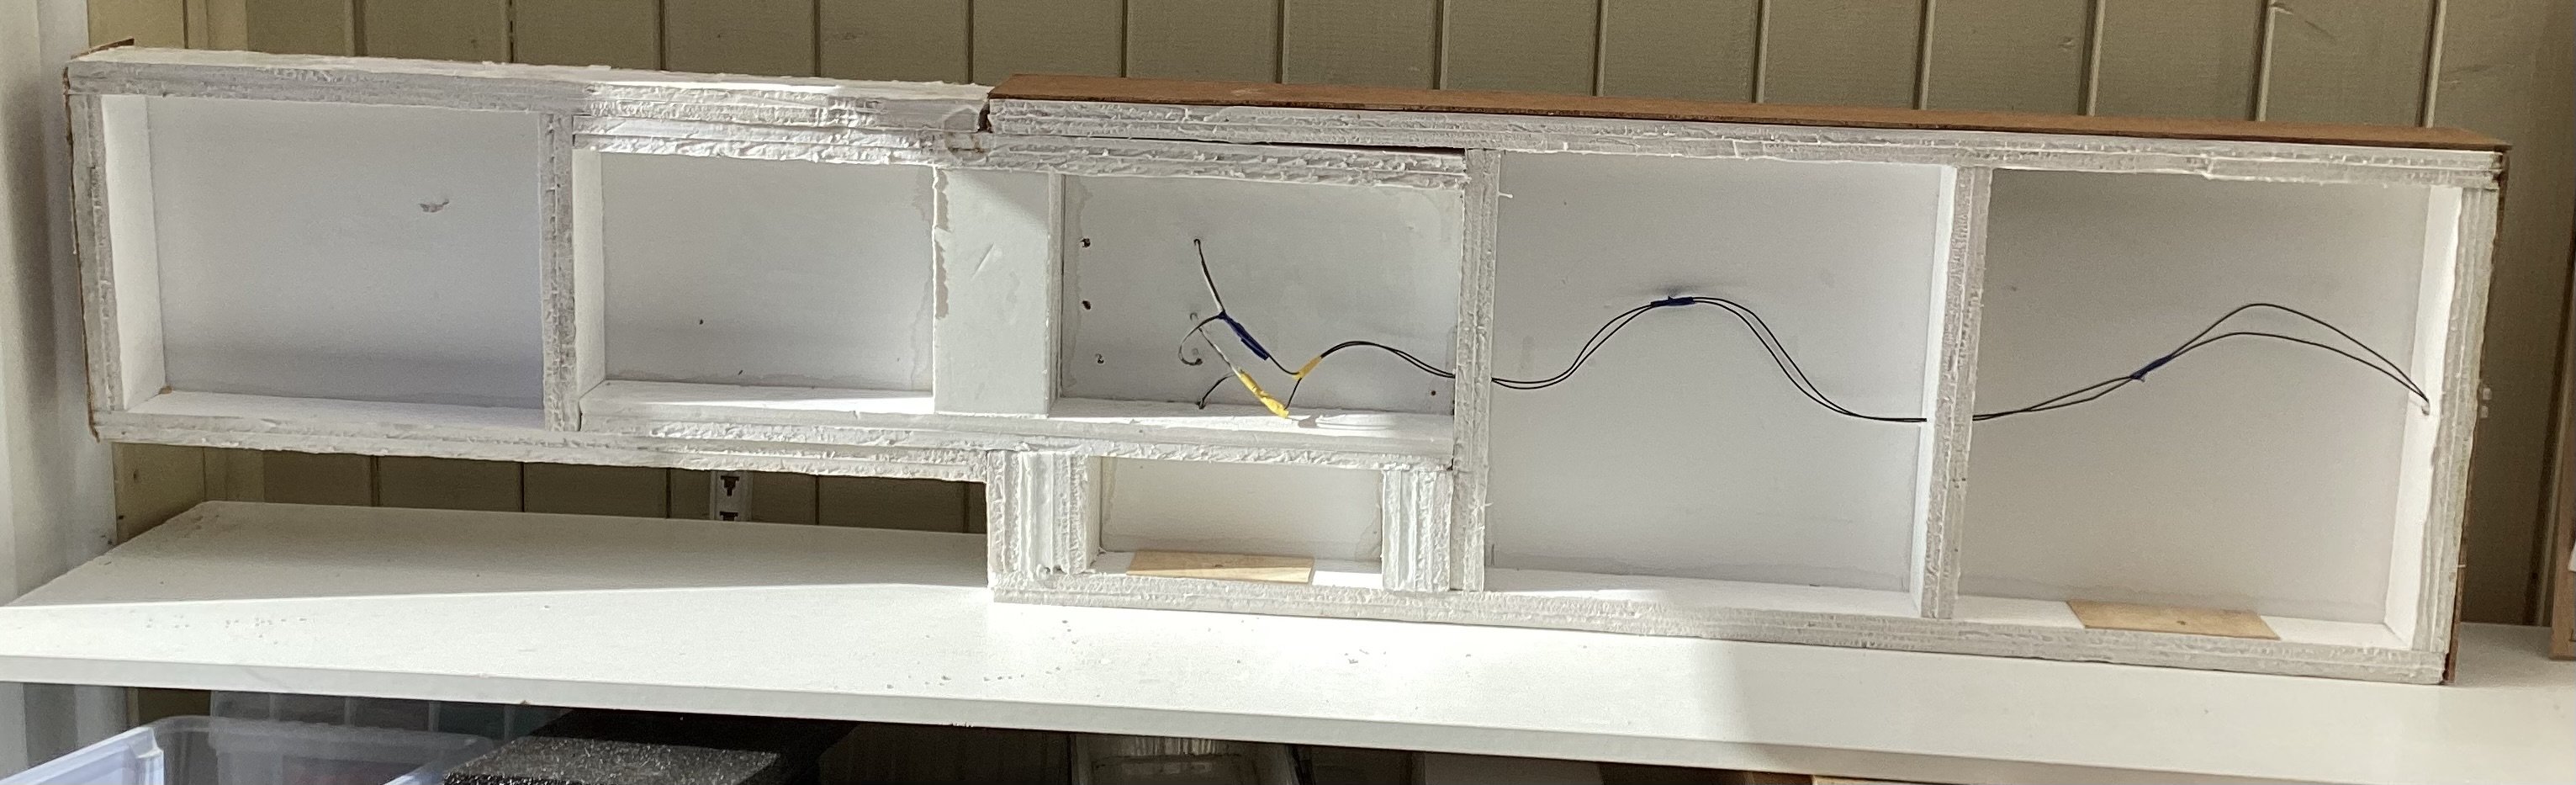
There’s a bit more been done on the line. I wanted to join the station unit of the baseboard to the fiddle yard piece, to get something that’s well aligned and giving a flat surface. The two units dimensions were off what you could do with a single sheet of foamboard, but Ive been splicing it to get a better single unit. I’m in my eighties, and building baseboards from 10mm foamboard suits me fine, as all I need is a Stanley knife and a pot of PVAbond, so I can go on kicking the can down the road for a bit longer. The layout is in an unheated extension to the house, so there’s a close season approaching when you need to bring the PVAbond into the warm house, and stop gluing over the winter months. So here’s a sketch of the layout size now, and what the underside splice looks like: It’s a bit shorter than it was, the two tracks in the station cut back a bit. The layout is faced with some 4mm ply, and there’s ply pads where the screws go through to attach the backscene support. The tracks in the station are laid on 4mm cork tiles, and the cassette has a 4mm ply base, so it all lines up. The tracks are stuck down with some Evostik. There’s stiffening strips along the sides of the cassette, and a hook screwed into each corner to help handling it. Here’s some views, with a closeup of the join, with a track gauge. Now I just need to make something with wheels to go on it.
-
My only bogie coach was done with a hardwood roof and the coach weighs far more than it should. Balsa sounds a sensible approach, would it have helped to face it with a few layers of paper to get a smooth run? Anyways up, the sides look good, and the paint job is lovely. Glad to hear the bogies contributed to the success. Me, I’m sticking to four and six wheelers.