David Holman
-
Posts
4,359 -
Joined
-
Last visited
-
Days Won
117
Content Type
Profiles
Forums
Events
Gallery
Blogs
Everything posted by David Holman
-
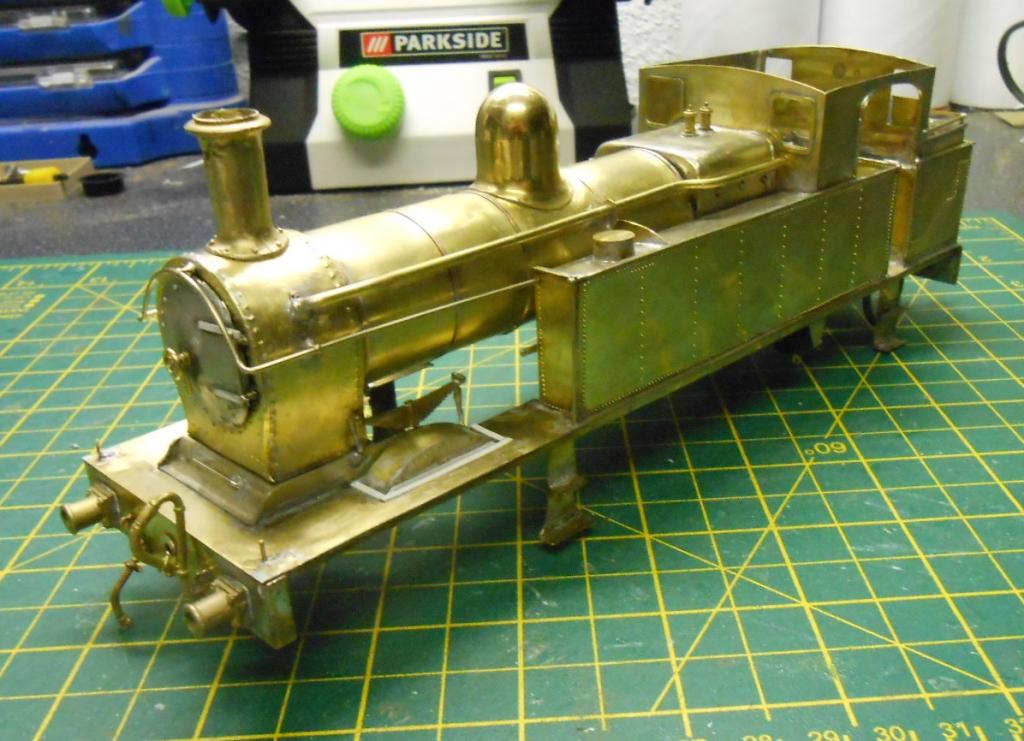
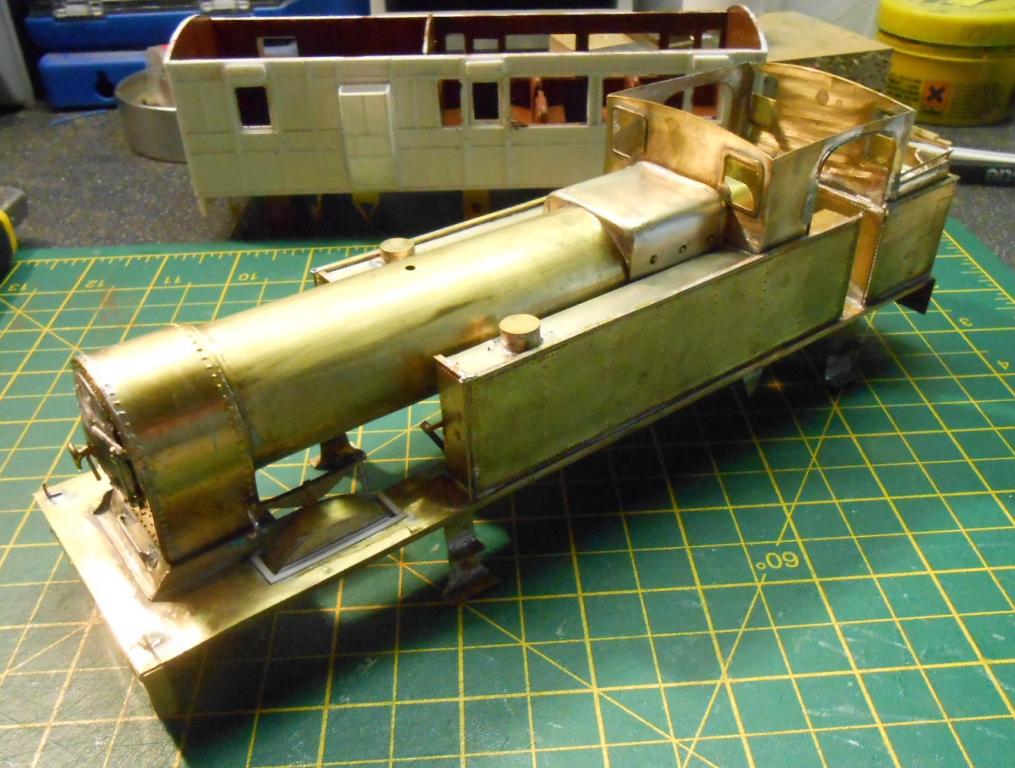
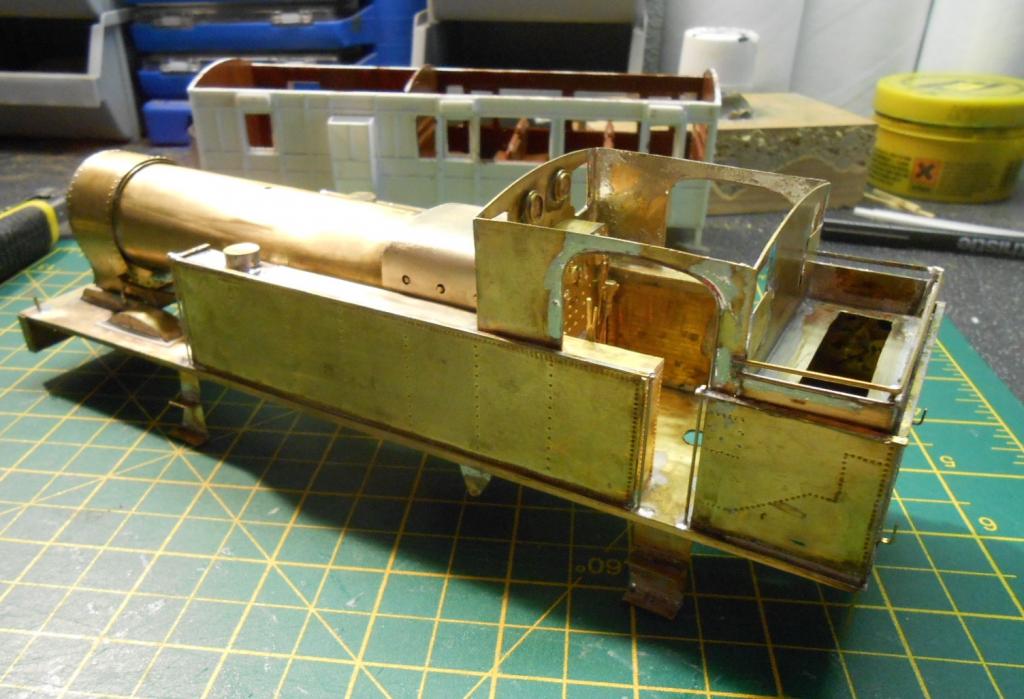
After my trip to the Reading trade show on Saturday, it was impossible to resist going back to Sir Henry, especially as I had a few lingering doubts about whether or not I was going to capture the essence of this fine engine. When kit or scratch building, there are times when the character of the model is apparent from the start; with others, it only comes through as the detailed bits get added - especially the 'face' of the loco in its smokebox door etc. Chimney, dome & safety valves came from Laurie Griffin Miniatures. A former Chatham Club member from way back, Laurie is a very fine modeller and his range of cast and turned parts is massive. Not cheap, but quality, as hopefully the turned brass dome & lost wax chimney & safety valves attest. They didn't take long to add with 5 min epoxy and at last the character of the engine began to emerge. So back to my 'to do' list & from it the boiler bands went on next [phosphor bronze strip], then the various pipes and brackets could be added to the boiler, followed by the handrails & knobs. Never seem to get these right first time & it was the 5th attempt before I was happy. Always the same with ones that follow the curve of the smokebox... Time then to add the boiler to the rest of the superstructure. Am now in danger of doing things properly, as had pre-planned for the two to come apart for painting. Hence have a countersunk 6BA bolt in the back of the firebox, which enables me to bolt it to the cab - the nut being hidden by the back head. At the front, a 10BA bolt is screwed into the base of the smokebox, while the handrails & pipes on the boiler slot into the cab/tank fronts. Finally [for now] smaller details such as the brackets between boiler & tanks [scrap brass], brake & heating pipes [lost wax castings], safety chain loops [etches from Roxey] and steam brake cylinders [plastic] went on, though before this, spent much of yesterday evening fettling off excess solder & giving the body a a bit of a polish. Still some work to be done on the cab interior & roof, but the body is now not far off being ready for the paint shop. Next step though will be to gird up my loins & attempt to install working inside motion. Laurie supplies a nice kit of parts, but though I've done outside motion a number of times, this scares the bejaysus out of me. Will just have to go carefully.

-
Seems to me that you have not yet made a decision on whether to go along a the prototype route, or go 'freelance'. If going prototype, then there are a fair few things available for 4mm scale/3' gauge [ie on 12mm track, which is also generally available]. Donegal in particular. The Backwoods miniatures stuff IS lovely, but not, I would suggest, for the beginner. Very delicate, much detail, plus often locos with outside valve gear etc. When I moved from 4mm to 7mm scale in the early '90s, I initially went on the freelance route, building locos that were vaguely of an area, but not being a slave to total accuracy. Learned a lot in the process. One advantage is that you can use proprietary chassis & hopefully choose stuff that is known to run well - important once you start running trains. Likewise for coaches and wagons. Re these, would recommend doing wagons first. Coaches are not as simple as you'd think and can easily take as long to build as a loco. Rather than try to use an 009 loco/coach on a 12mm chassis, consider using small standard gauge locos/stock on 12mm. Eg the Dapol/Hornby L&Y Pug, being very small, may convert downwards. Use a butchered body on a 12mm chassis? Don't forget, some of the Irish 3' stuff was pretty big. Alternatively, why not consider 7mm NG on 16.4 track? You can easily get away with 600mm curves, the track is very available and you can have a lot of fun [very cheaply] converting 4mm scale models to 7mm. Here the Pug, Smokey Joe 0-4-0Ts come into their own. Likewise Hornby coaches, while Ratio wagom underarms are an ideal starting point for NG. 2mm plastic water pipe is ideal for loco boilers, while plastic sheet is ideal for other bodywork. I don't have any digital photos of my early stuff, but will dig out some photos to give an idea of what can be done.
-
Arigna Town Exhibition Blog
David Holman commented on David Holman's blog entry in David Holman's Blog
Visited the Reading Trade Show yesterday. No layouts here, just a splendid gathering of many of the key 7mm scale traders, large and small, something that gets rarer and rarer these days because of internet sales. Indeed, am wondering if you folk over the water have anything equivalent & to be honest, there is not a lot similar in other scales over here. Only the biggest shows like Warley, York, Ally Palley etc have anything like the trade on show yesterday. As well as an opportunity to catch up with old friends, there is the all important chance to see/discuss before buying. Overall, there were around 100 stands, including the big firms like Slaters, C&L, Eileens, Tower Models etc, plus purveyors of high end stuff like Masterpiece and Loveless. These last two produce state of the art, ready to run models, for folk with deep pockets, while the rest of us stand, look, dream and dribble... You also get to see folk who rarely attend exhibitions. Hence was pleased to see Ragstone Models and pick up my next loco kit, a Clogher Valley Sharp Stewart 0-4-2T. it will of course be built to 21mm, though not until I've completed my current projects as per the Workshop thread. Another thing about Reading is the abundance of really specialist traders like Northant Models, who do a huge and ever increasing range of white metal castings. So, buffers for my two coaches & interesting to see that the SLNCR used ones very similar to Midland Railway types. The Beyer Peacock large tank too. For the latter, a visit to see Laurie Griffin [who was a Chatham Club member many moons ago], to raid hid vast store of castings. So, Sir Henry will at last get his chimney, dome & safety valves, plus [whisper it quietly] a full set of working inside motion. The thought of the latter scares the bejaysus out of me if I'm honest, but there is such a clear view between the frames I decided I had to give it a try. The above amounted to my current 'needs', so hopefully well set for the next few months. If I'd gone for the 'wants', then the bill could easily have topped five figures. Dream on, my wife says! -
Thanks JB, feeling reassured! The next step with the coach will be extensive dry brushing to create the range of hues on different parts of the body. Plus there are the weathering powders, crayons etc etc. A newly painted finish is so much easier, if not necessarily quite so interesting.
-
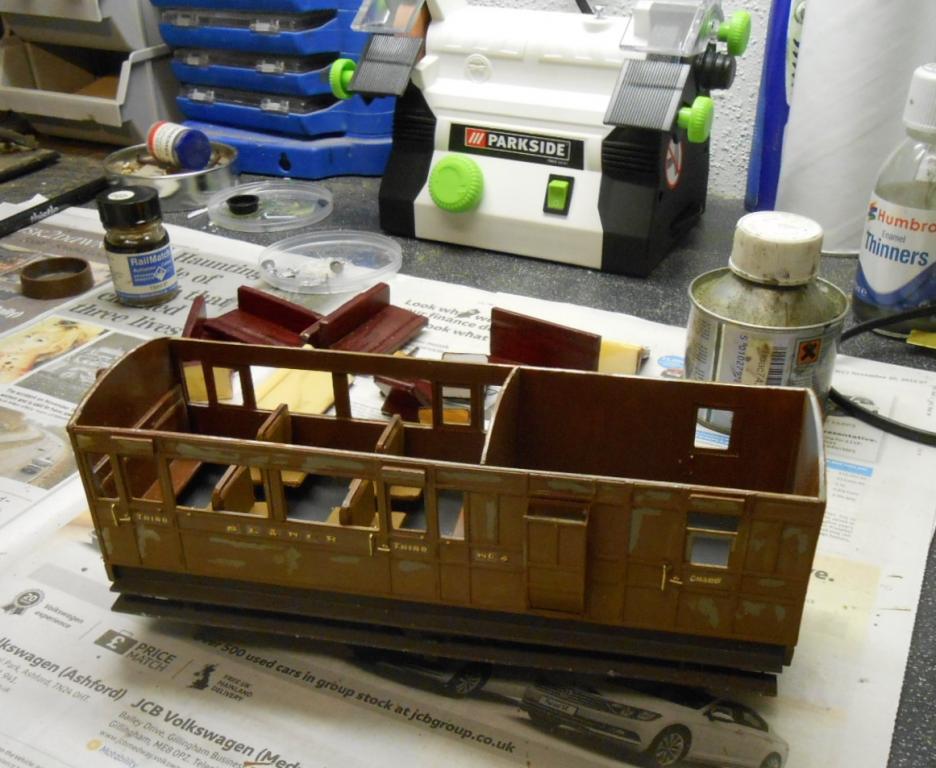
The above picture was the basis for painting number 4 - it comes from one of the Tom Ferris colour albums. Seems clear that this is a very long way from the SLNCR's dark red, that I painted my earlier model of number 9. The caption says it was late 50s. Looking at the background colours,the roof tiles seem about right, as is the track colour, so am guessing that the photo hues are reasonably authentic, though am only too aware of the effects of time, light, printing, weather etc etc. The only photo I have of number 4 is in Sprinks SLNCR album and is in black and white, so whether it is as far gone as number 10 is debatable. Perhaps I need to go for something in between? Am very much aware that I am the outsider and pupil here, when it comes to what constitutes authentic colours, so am always grateful for the advice from JB and others. I am in no position to argue, other than the occasional colour picture and colour in the 50s was a challenging subject for photography with slow film. Re your interest in the Jenkinson approach JM, would definitely say go for it. The basic box provides an easy way of fitting glazing and tumblehome also works well - though not required on the Sligo coaches. As for panelling, in 4mm would think that 20x10 strip should work well and that plain [rather than half round]strip would be perfectly suitable. The six wheeler uses 40x20, but have since noticed that I used 30x20 on the bogie. From any normal viewing distance, flat strip v half round will be pretty difficult to distinguish, though a wipe with a glass fibre pencil should soften the edges well enough. Jenkinson's philosophy was that life was too short to waste on unnecessary details [sadly all too true for him personally] and though he did make some fabulously detailed models, many of his coaches were devoid of stuff like interiors [bar compartment walls], brake gear, sole bar details etc. Each approach has its merits, of course - it just depends on what you are personally trying to achieve, which ultimately is one of the great joys of our hobby.
-
Interesting to hear about El Capitan - the website reviews are not exactly encouraging & as a fairly recent Mac user, I'm still getting used to all the foibles of Yosemite. As for early computers, in my teaching days, persuaded my headteacher to invest in a Sinclair ZX81. Now there was a machine! The handbook was bigger than the 'computer', the 'hard drive was a cassette player and the internal memory was 1k - yes, 1000bytes, or three fifths of five eights of sod all. Not good, but it was all we knew [& could afford] at the time...
-
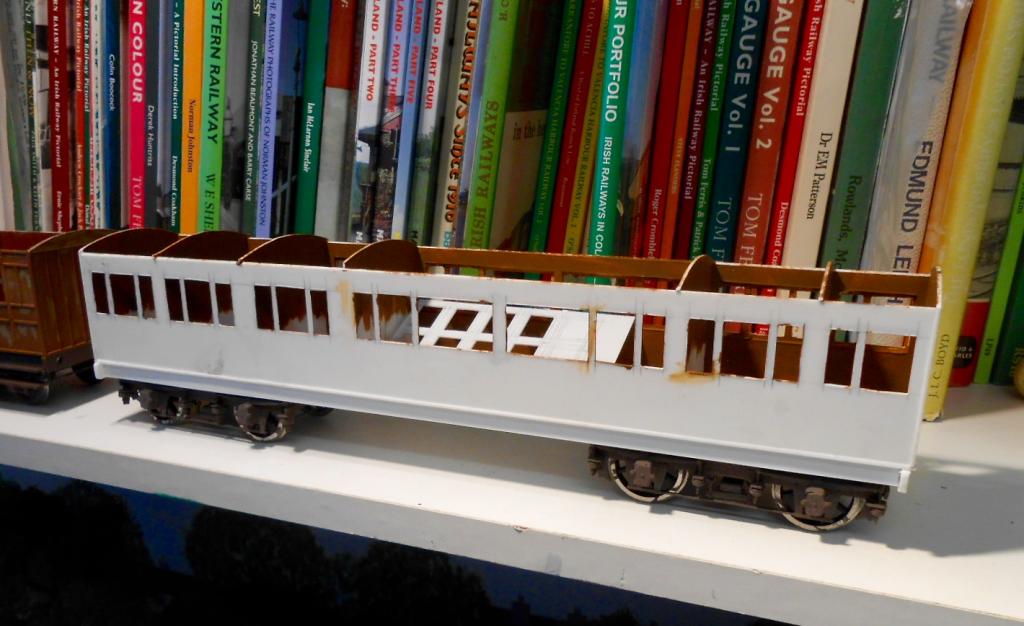
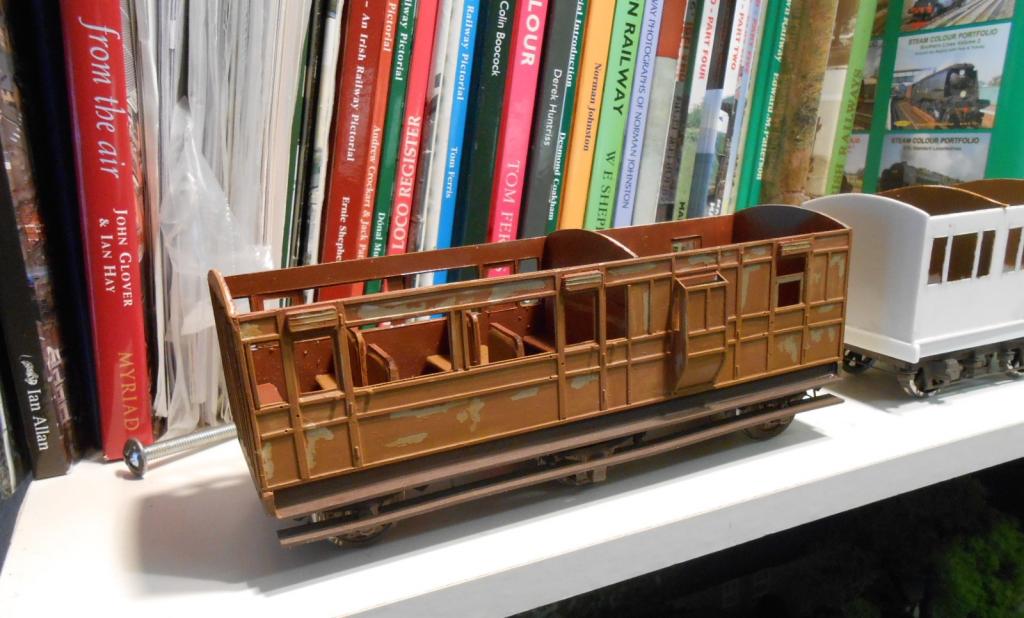
The body of bogie number 10 is as far as it can go at the moment, as my stock of 30x20 strip is almost empty, so cannot do the panelling until after a visit to Eileen's at Reading on Saturday. Evergreen is my first choice, but is becoming hard to get in these parts, as well as expensive. Local model shops are turning to Plastruct, which appears cheaper at first, until you realise the strips are only 30cm long, compared to 45 for Evergreen. Instead, had a go at the bogies. These are Slaters 8' SR plastic kits. As with the previous number 11, I cut them down to the correct 7'6". However, I don't remember the process being half as fraught as this time - despite having two finished ones to copy. I take solace in the fact that little will be seen once the footboards are in place, and at least they run well. A gentle push is enough to take one full length of the layout. Other work on the bogie was to cast a set of seats for the compartments [i still have the moulds I made for the previous version], and make four sets of side by side seats for the saloon. The six wheeler also had some attention, with the under frame fitted. This is a Tryconnel etch, though again needs adapting as the Sligo coaches had brakes on the middle wheels and one end, as opposed to each end on standard six wheelers. This put the coach ready for the paint shop. An initial coat of primer was followed by 'bare wood' [Humbrol 110 & 64] brushed on. Once dry, I added patches of Humbrol Maskol to those areas where I wanted peeling paint to show the bare wood, then brush painted a mix of leather, teak and brown to try and replicate the colours in one of the Ferris albums. This shows number 10 in a very run down condition, where the original dark brown/maroon has weathered to more like a teak colour, with lots of bare wood showing through. Have since added the lettering [Fox Transfers SECR - a fairly close representation], door and grab handles, so the coach now awaits final detailing [inside & out] and further weathering. Behind the models you will see some of my collection of Irish railway books, plus my latest acquisition, a Parkside model bench grinder, bought in our local Lidl this morning.
-
Arigna Town Exhibition Blog
David Holman commented on David Holman's blog entry in David Holman's Blog
Fixed the cattle dock turn out last week. Had to not only replace the tie bar, but also the operating wire, which had developed a slight kink in it, resulting in a very stiff action. Happily, this was easy to do - simply cut off the L shaped end [which attaches to the tie bar] and pulled the wire out of the tube. Then unsoldered the tie bar and replaced it with a new one, making sure the space underneath was clear of any crud which might impair its movement. Rather than drill the new tie bar to take the end of the 'wire in tube', I filed a slot in the end. The new operating wire [with end bent to an L again] slides into the slot & then a washer was soldered over the top to hold it in place. Future replacements will be easier than trying to manoeuvre the tie bar over the operating wire, now than the scenery is in place. Needless to say, the point now works smoothly again. -
Thanks for this info Eoin - looks like they are due in my part of the world this week. Certainly sound better than a wire brush in a Dremel or similar. Learned about flying bits of wire a while ago: sort of effective, but not for long!
-
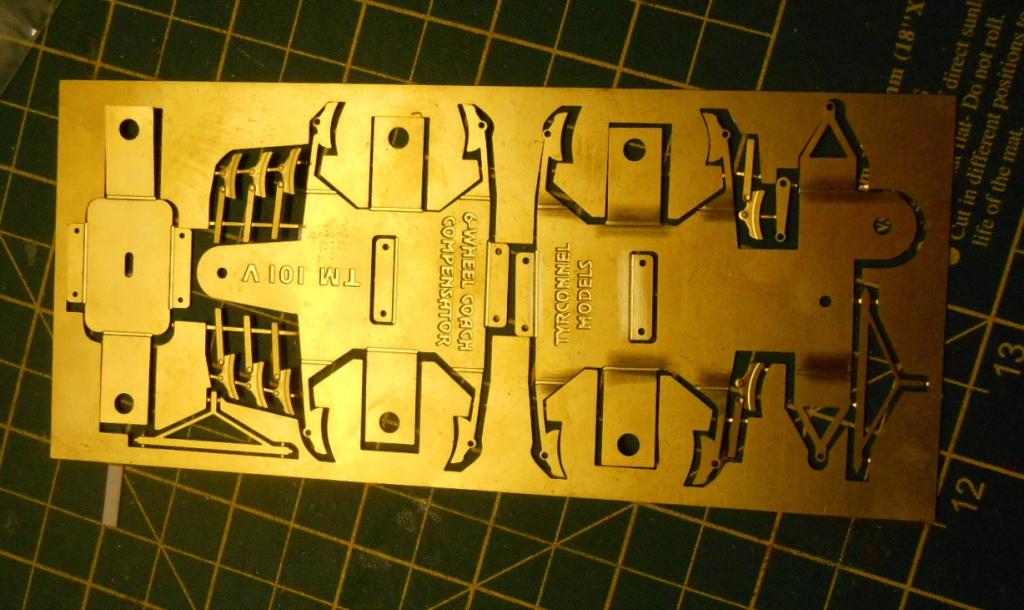
Tyrconnel/Alphagraphix do a 7mm one JB. One in brass and a couple of others in card. Same three you helped me with livery I think, though suspect you want something smaller.
-
Much useful info. Thanks chaps. Maidstone had the bench grinder, plus a drill stand for 15 squid. That said my old pillar drill is still going strong, touch wood. Got the Dremel last year and despite much use and abuse, it works fine and wouldn't be without it. The Proxcon was cheaper and is fine on light work. Have often been tempted by the high end versions, but am happy to get by at the moment.
-
Thanks Eoin, but sadly the Maidstone branch of Lidl does not stock them. Shame. That said, there is an ever changing range of stuff there, so it pays to keep an eye out. Just wondering on the power of those tools. I have a very nice Proxxon drill, but it has limited torque and [especially with a slitting disc] will soon stop on any heavy work. Hence also have a Dremel, which seems to have enough oomph for anything. Actually used it for cutting out the frames of Sir Henry, where it went through doubled 22thous nickel silver like the proverbial knife through butter. not subtle, but it works!
-
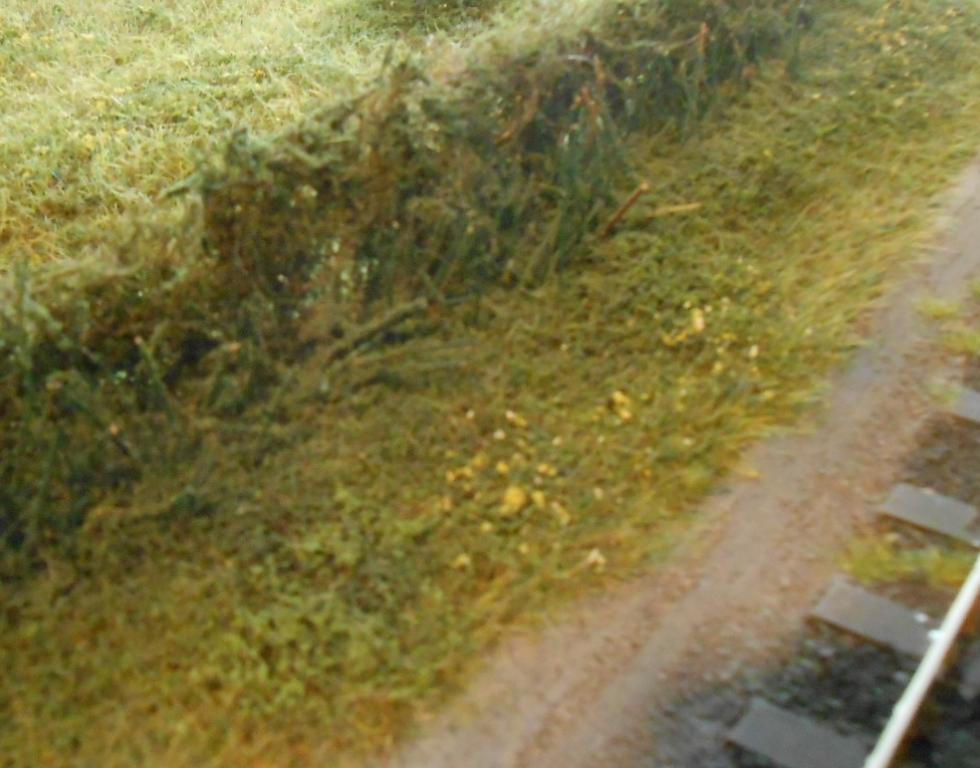
Should be relatively dimple as it is quite a dense plant. Hence suitable scatter, such as fine, dark Woodlands ought to work. As a base, suggest you use the same brand's foliage matting. They do a dark conifer green, which should work well. Tease it out over your rock face, fixing with PVA, then use spraymount to sprinkle on the scatter. For a denser covered, go over it again. As always, worth experimenting on a test area first. Hope that helps.
-
Can't help thinking that things were better when a phone was a phone and cameras were what we used to take pictures. That said, when Apple or Androids make a phone with a time machine and a card reader, I will be first in the queue for that trip to Burtonport, with a ride on the Clogher after...
-
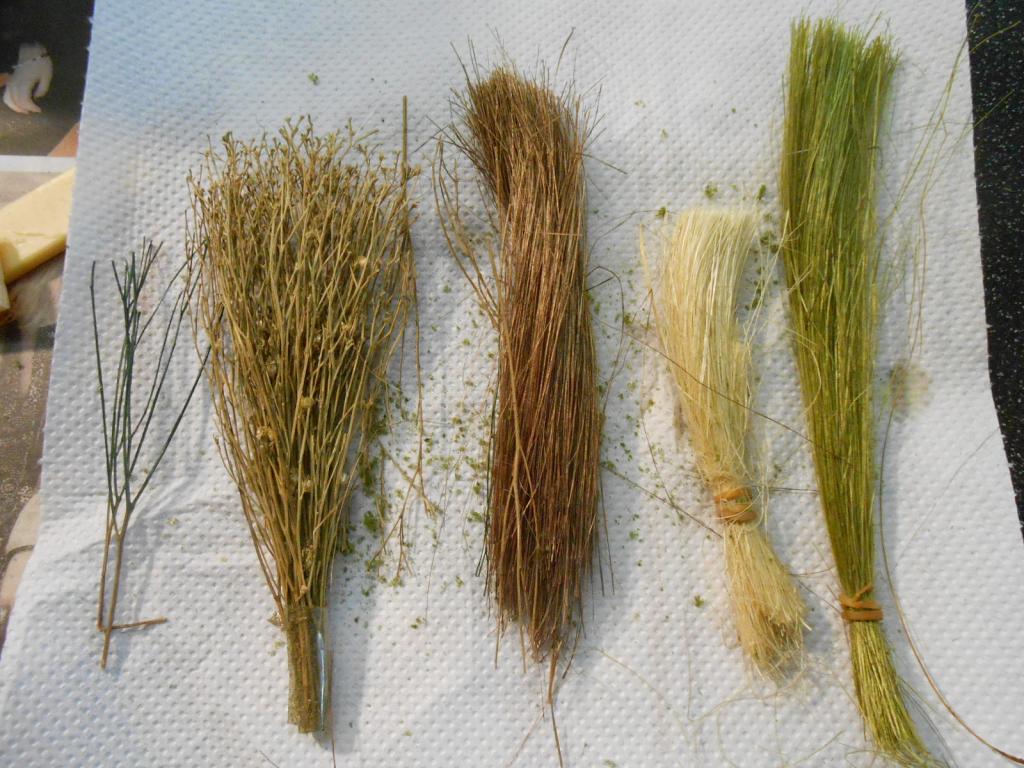
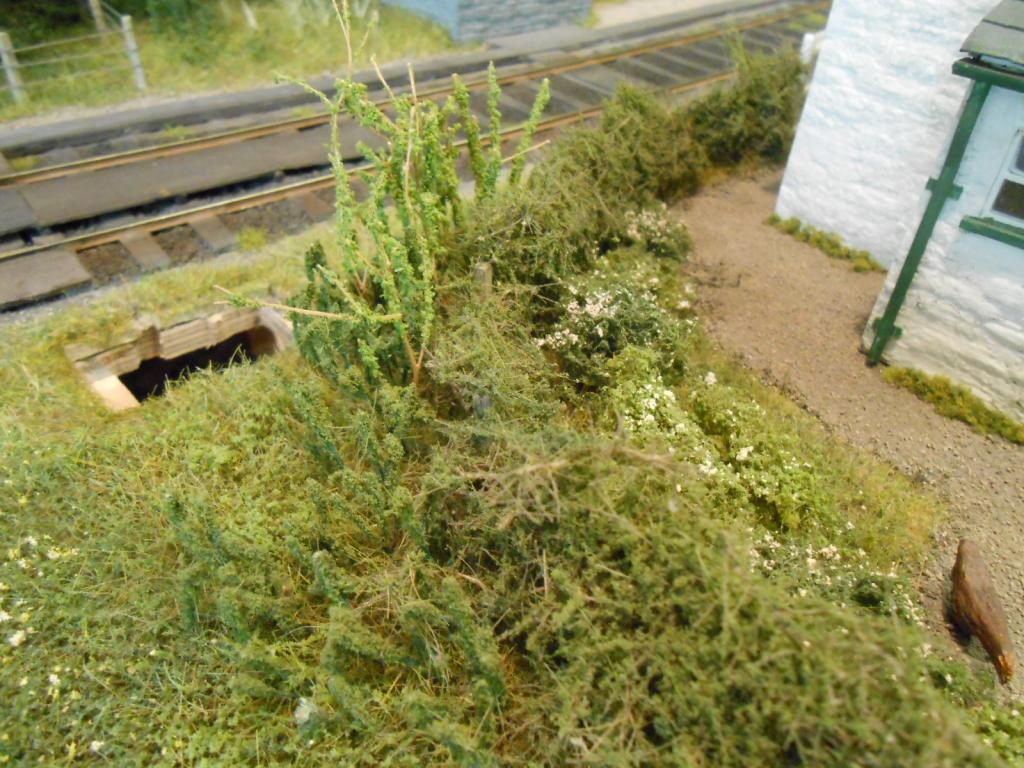
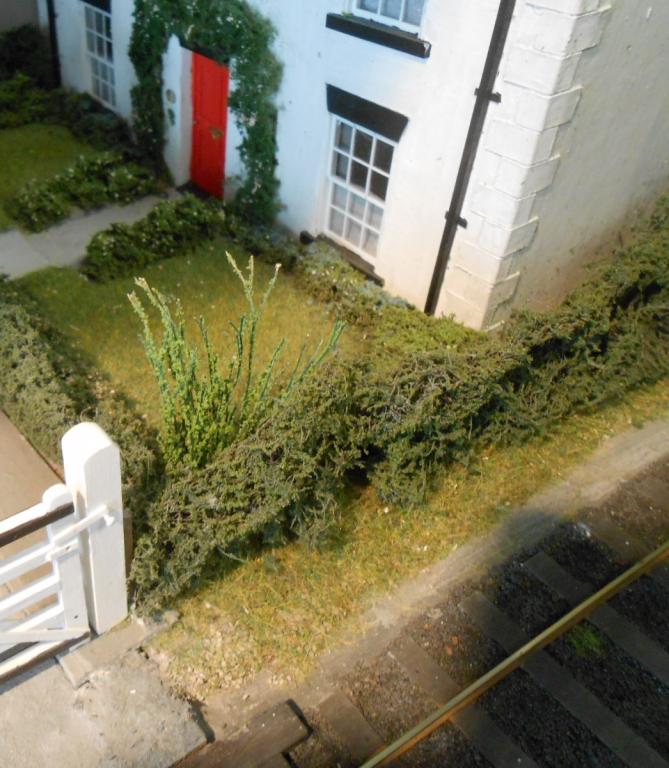
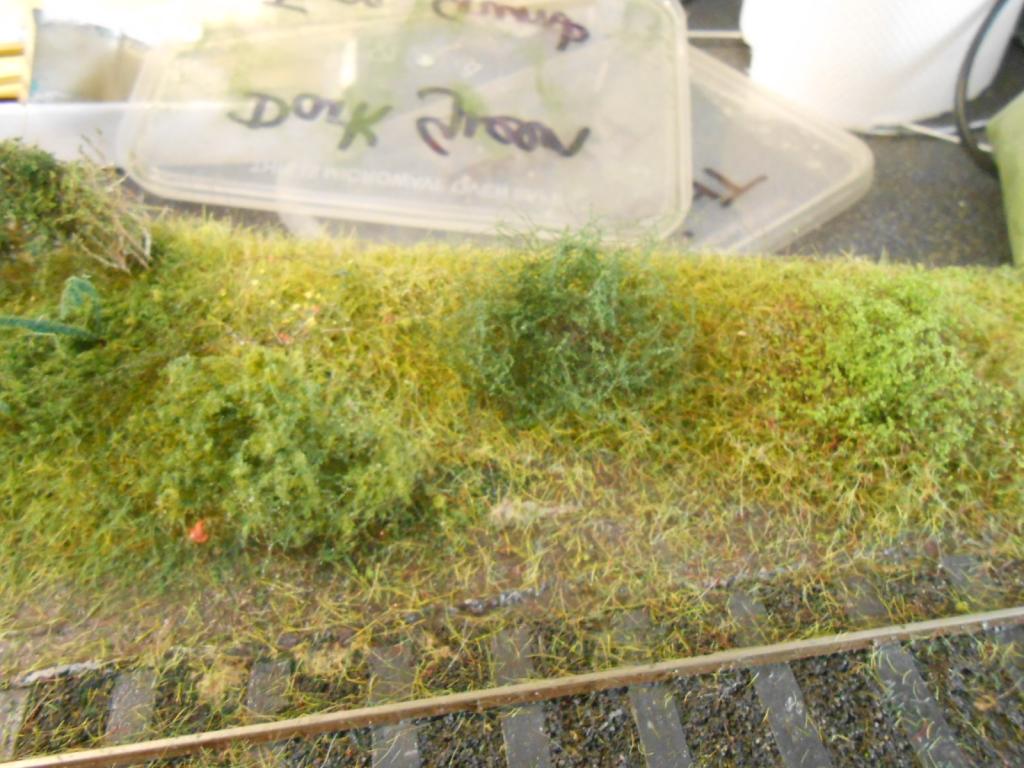
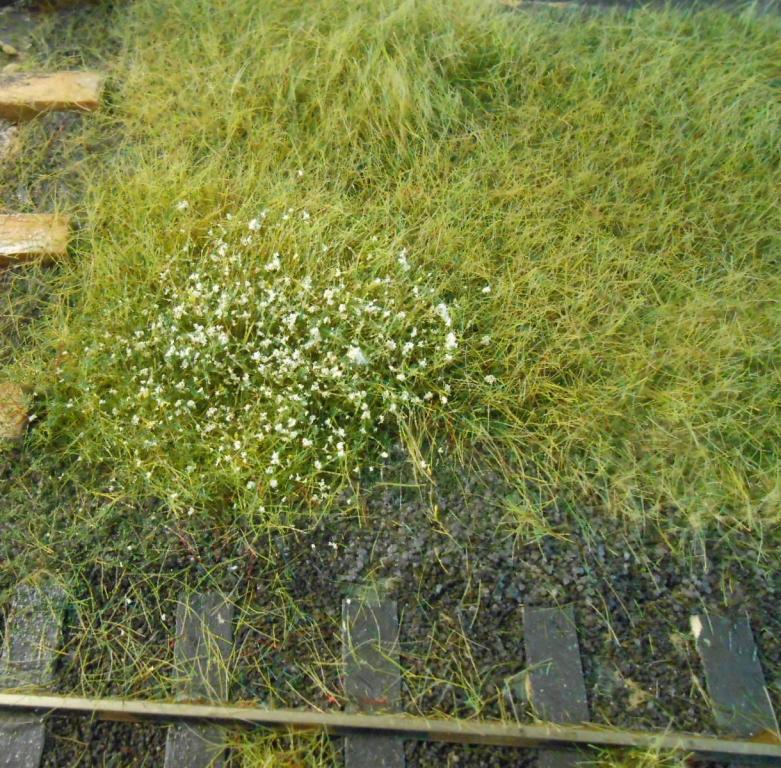
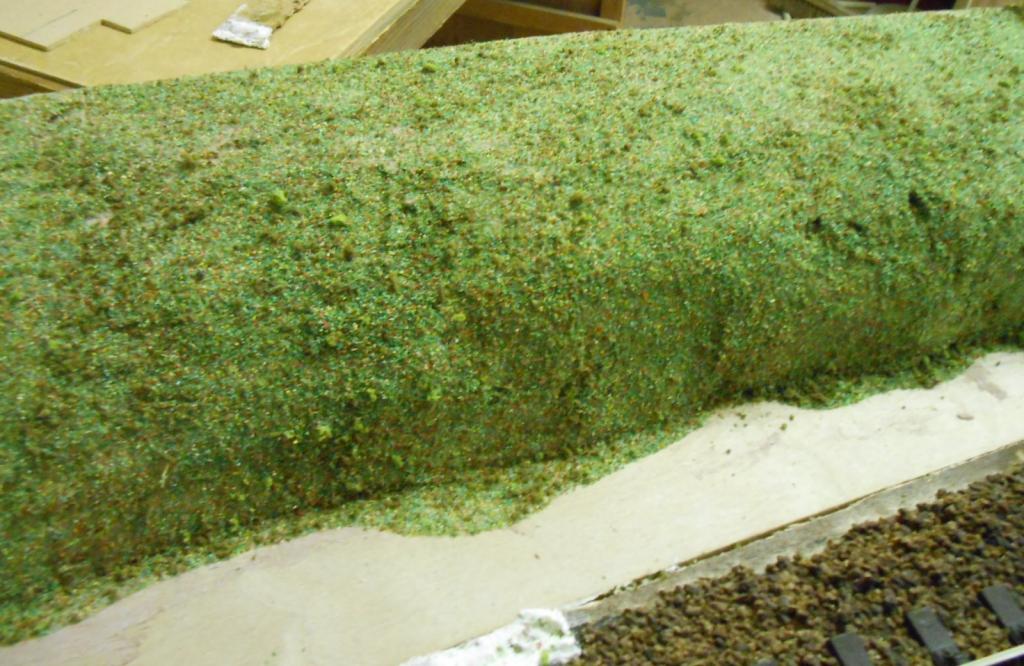
Not sure, but may have been running out of picture space, so here are a few more ideas. Most of this workshop has been looking at different types of grass cover, with Postiche or scenic matting for the larger shrubs. Have also used lichen to good effect for certain types of bushes, but make sure it is of a realistic shape and dust well with scatter before planting. More upright shrubs see us returning to old fashioned methods, i.e. there is no quick fix for these things. There is a variety of stuff we can use & again Woodlands supply a good range. The packets I've bought over the years seem to last forever, so are good value. Various shades of sisal make for longer grass/reeds & need to be laboriously planted as clumps in pva. More 'twiggy' strands can be dipped in pva [individually, or in small groups] and then dipped in fine scatter to produce a variety of plants, such as nettles and so on. You can find such things ready made too, but I find the colours are often too bright and making your own is cheaper & more fun anyway. By now, I'm hoping you are beginning to see that ground cover is really just a matter of experimenting with the various materials on offer. There really is no single 'best way', but I like to think recent ideas are a big advance on dyed sawdust! Aim to be subtle and pay attention whenever you are out & about [in town or country]. Digital cameras/phones are a great help in taking pictures of those details/cameos scenes you want to model back home/down the club. That is just about it for this series for now, though will aim to do something on man-made ground cover in a while, when I'll try to show you how I've done the road and yard surfaces on my layouts.
-
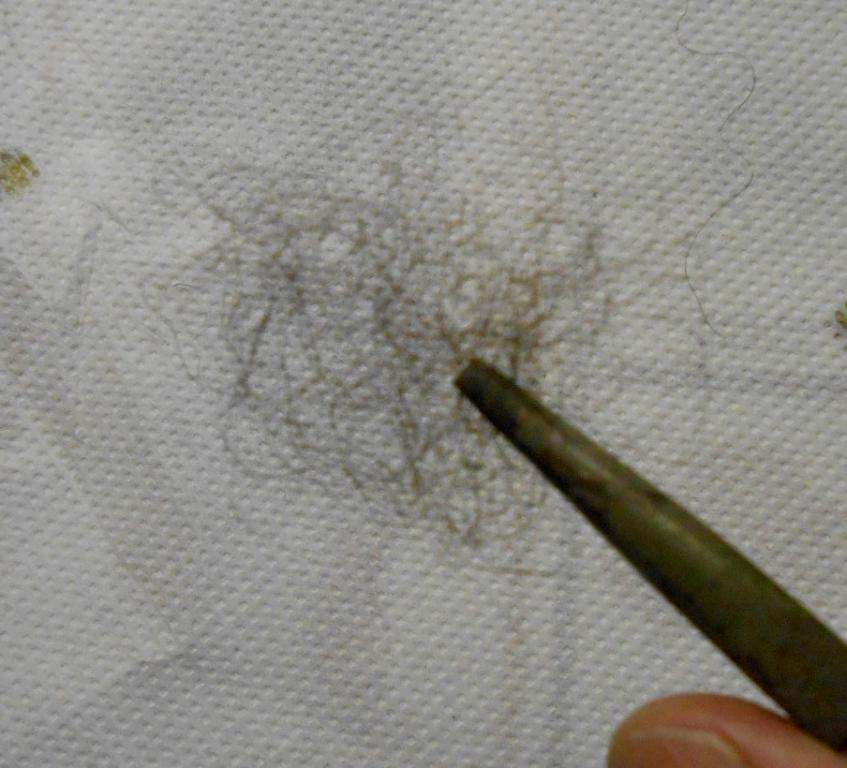
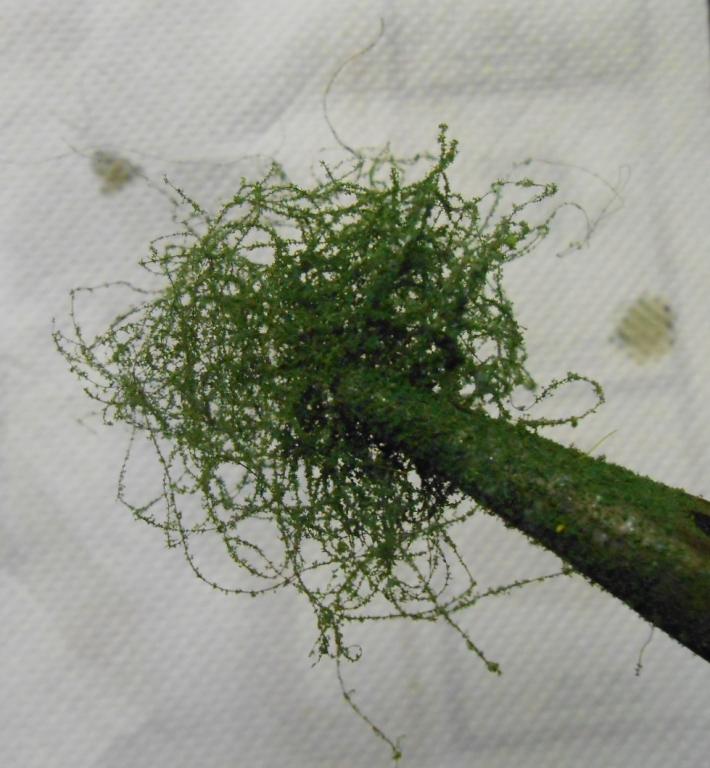
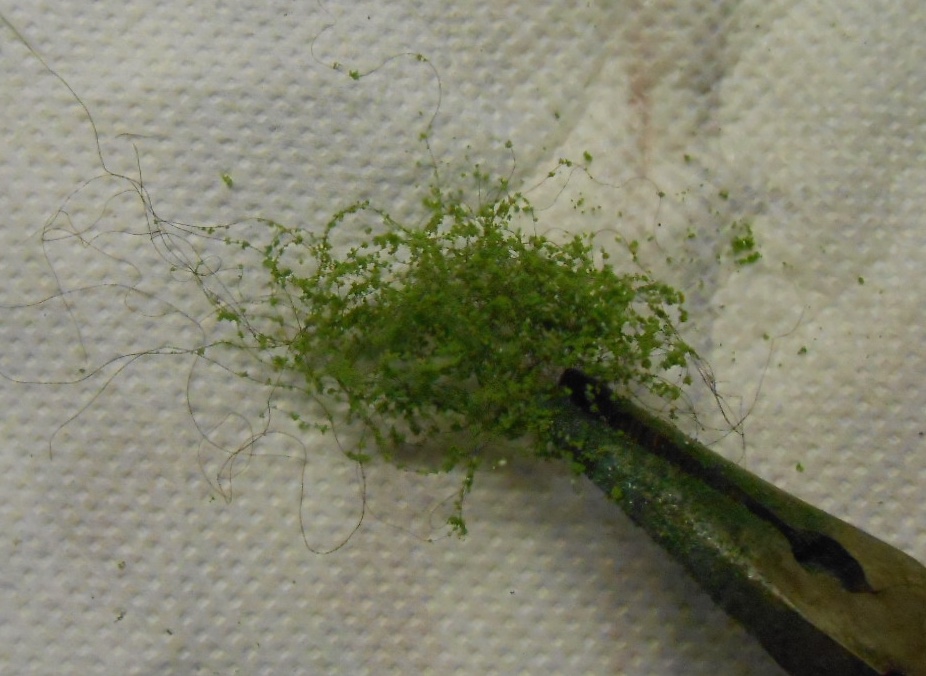
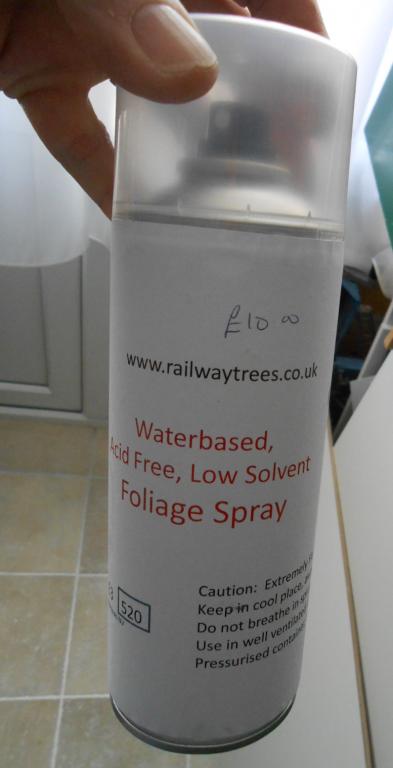
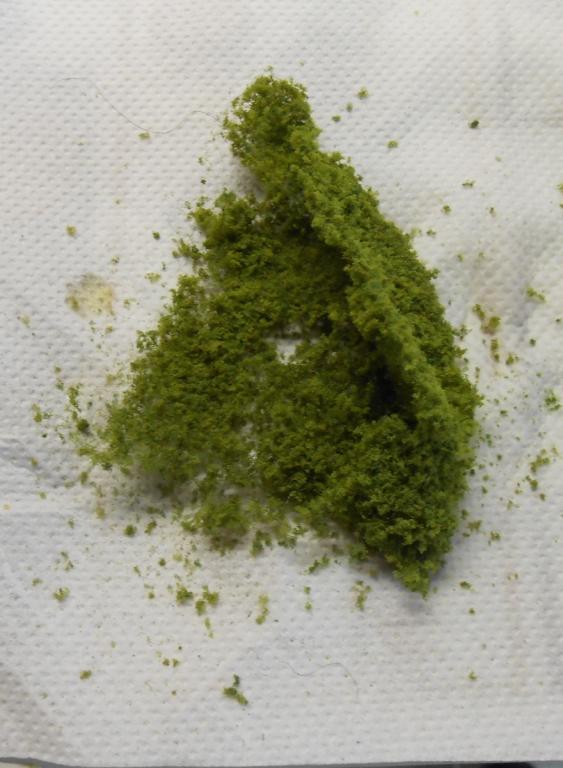
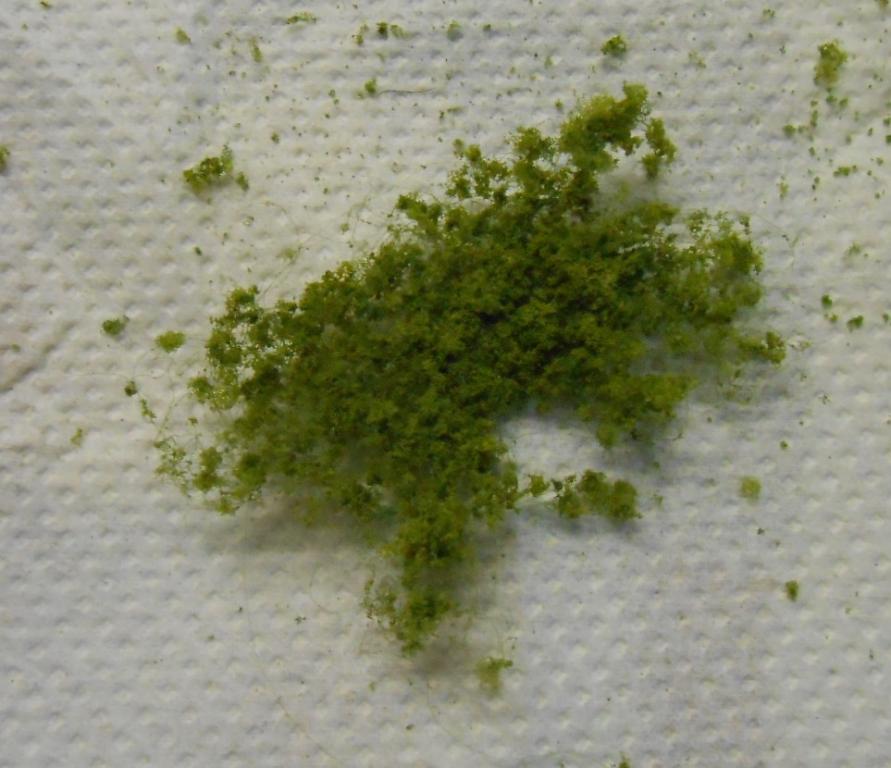
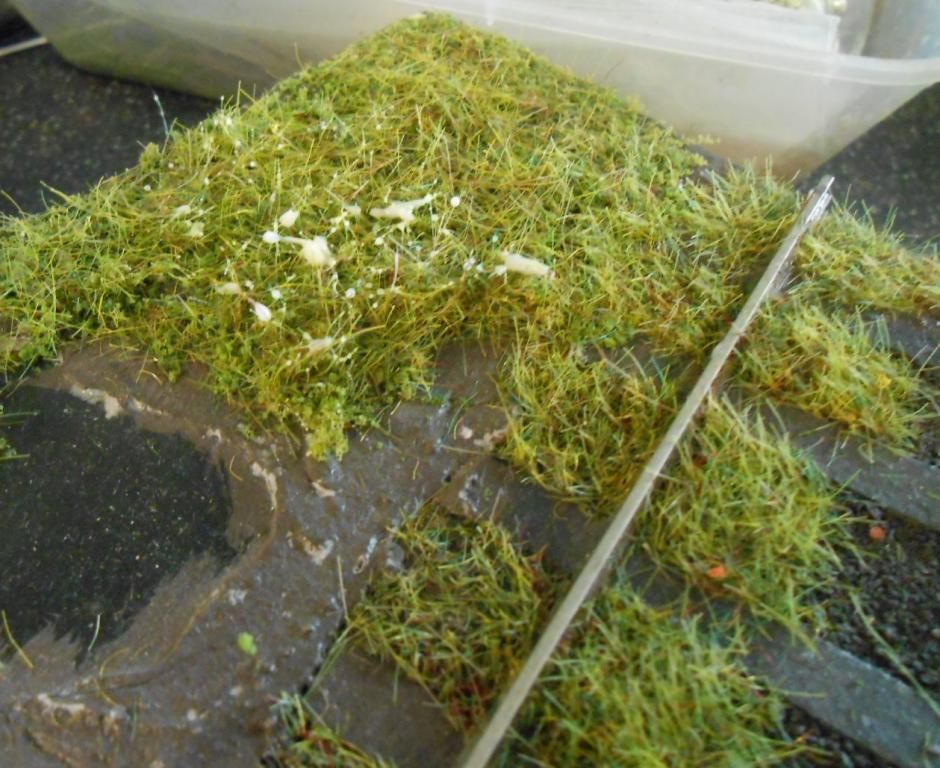
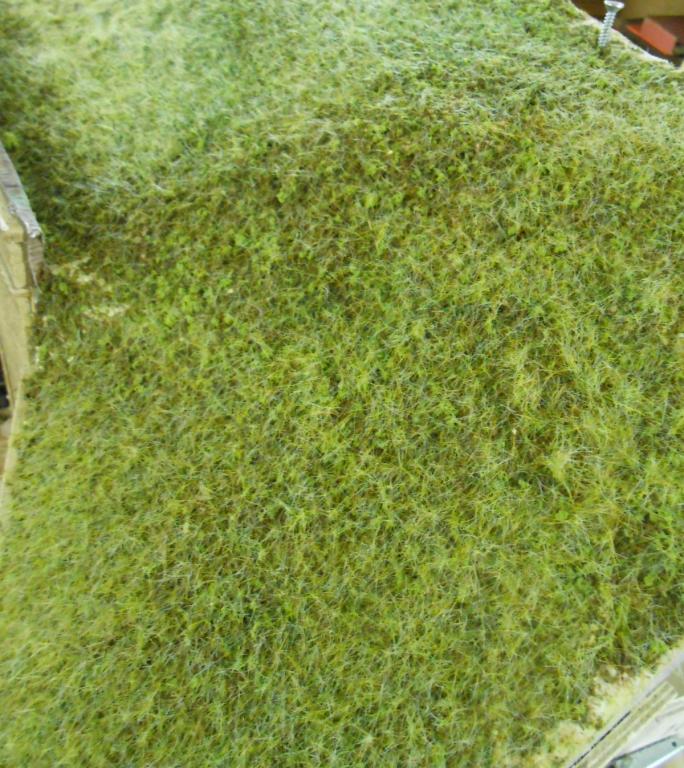
The way to use Pastiche is to first tease out a small tuft. Then, holding it in a pair of long nosed pliers or similar. spray with varnish/fixative etc and then lightly sprinkle with fine scatter. The effect of a couple of colours is shown below. As a matter of interest, the spray stuff I'm using at the moment was bought at the Tolworth show, a couple of weeks ago. As the label suggests, it is a bit less toxic than the usual varieties and therefore better for use indoors, especially if you work in confined spaces. If you can't get hold of Pastiche, then scenic matting sold by Woodlands is a good substitute . It tends to come in a mid green shade, but darker ones are available. The trick is to cut or tear off a small piece, no more than 2-3cm square and then tease it out as thin as possible. This works just as well when adding tree foliage as it does to creating ground cover. As before, then spray with fixative and add scatter of choice. The spray mount is also used to fix the shrub down, though PVA will work just as well. For certain types of weeds, then a light smear of pva across the tips of your grass, when dusted with fine scatter produces a nice effect. Have also included pictures of how to add flowers. Don't use the coloured scatter on its own, mix it 50-50 with green - it produces a more subtle effect I think. Speaking of subtle, there is one picture in there which shows a second covering of fibres [using the Grasstech], on top of the different colours I showed in the previous entry. The choice of 'undercoat' can have very useful effects on the overall scene. Check out the real thing and copy!
-
Couldn't agree more Eoin. One of the best aspects of our hobby is that [for layout builders in particular], one can have a number of very different projects on the go at any one time. Plus, after a spell of, say, loco building, it can be very nice to do a building or some scenery for a change, while simply sticking the model on the shelf and going down the pub/watching TV/doing nothing can also be useful as you suggest.
-
Thanks JB - felt sure you'd be able to help. Did coach No 9 in a somewhat pristine dark brown, as it did appear to get a repaint in the early/mid 50s. The new models will be much scruffier!
-
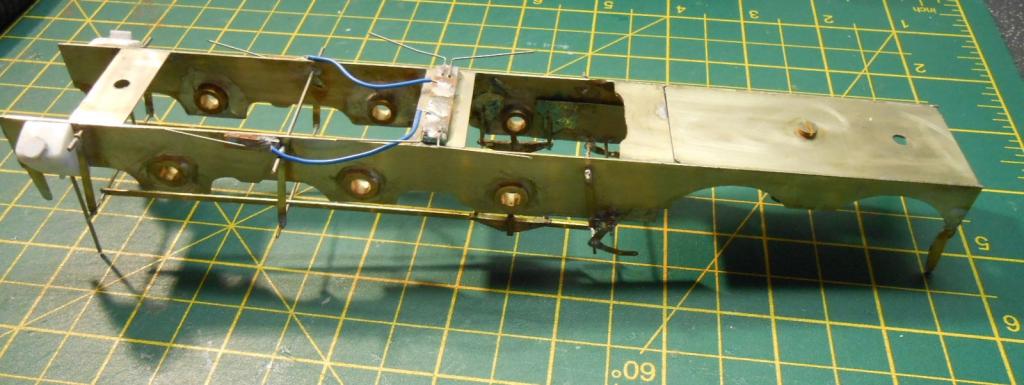
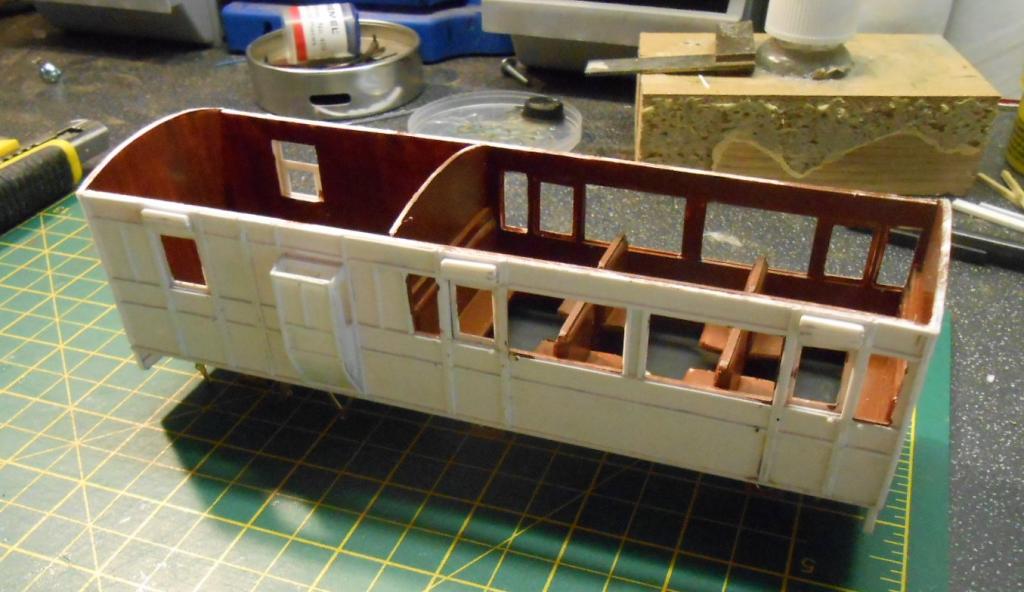
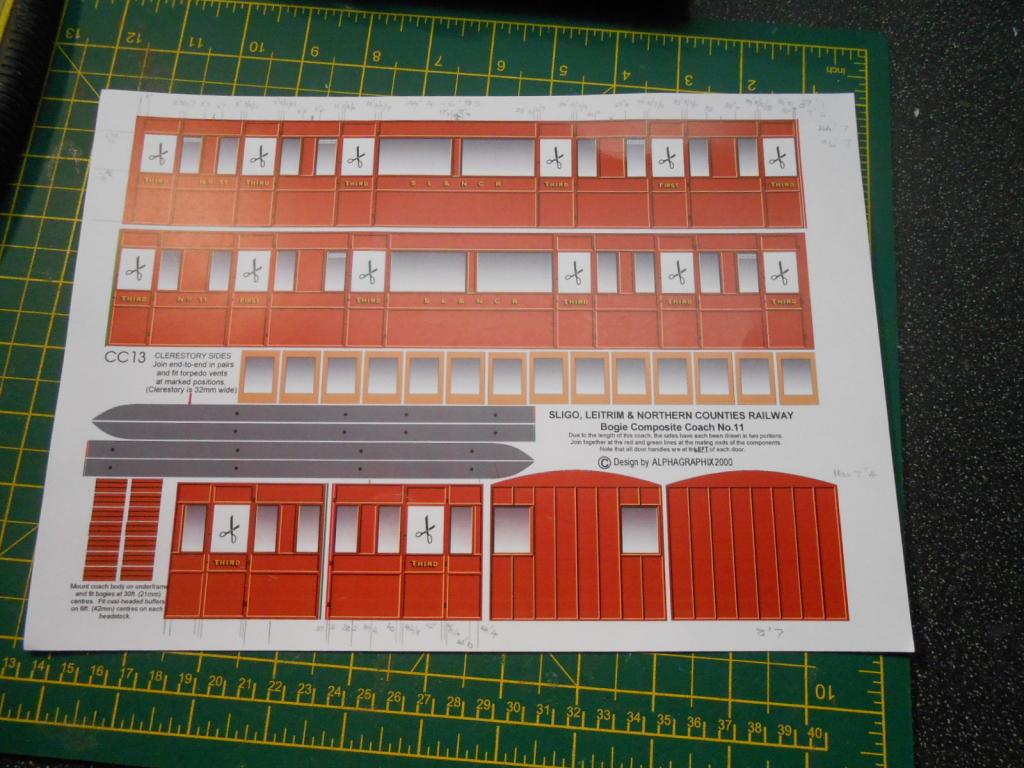
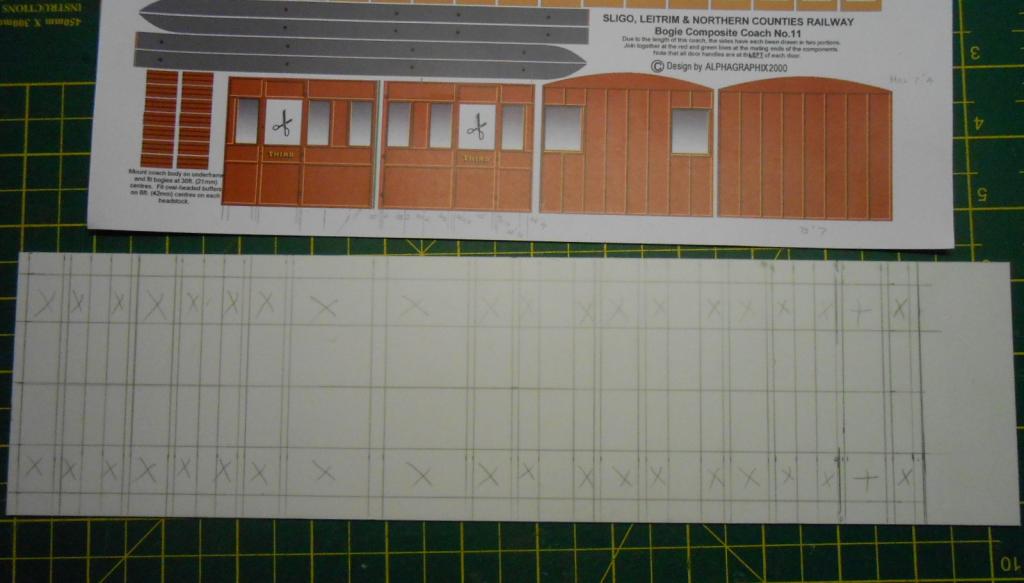
Work on Sir Henry has had to be put on hold for a while, until I can get to the Reading Trade Show in a couple of weeks time. Reading is a bit of a pre-Christmas Mecca [there's a metaphor mix for you] as traders large and small gather to show off their wares. Laurie Griffin Miniatures and Northants Model Supplies will be two of my targets. The former for a set of inside motion, chimney dome & safety valves, the latter for buffers. Also need to see Roxey and Eileens for other stuff, plus have a Clogher Valley 0-4-2T from Ragstone models to collect. Reading can easily get very expensive & that is just in terms of 'needs', allow that 'wants' to take over and am sure it would be now problem seeing spending go into four figures, if not five... Anyway, now stymied with Sir Henry as can't do any more work on the boiler till I've fitted the dome [which also places boiler bands] & the chassis is in the same place, though now complete apart from the inside motion, as I fitted pick ups and brake rigging recently, as pics show below. In the background, can be seen what I've recently been working on, namely a couple of new coaches for the train which Sir Henry will be rostered to on the layout. As ever, these began life with the purchase of two Alphagraphix card kits, one for SLNCR six wheel saloon brake No 4, the other for bogie No10. Bodywork on the saloon didn't take long. Essentially it is a 40 thou box, with over large cut outs for glazing, to which is overlaid a 20thou outer. This then has microstrip put on for the panelling. A Tyrconnel under frame has also been folded up & awaits Slater's wheels. As an aside, you can see what happens to solder/flux when you don't clean it off immediately! Yesterday afternoon, while listening to footy on the radio, marked out the sides for the bogie coach, which uses the same principals. These were originally outlined by David Jenkinson in his book 'Carriage Modelling Made Easy' Well worth getting if you do this sort of thing. Am hoping to finish the coaches in the typically 'well weathered' look of the SLNCR in the late 1950s. That will mean a base coat of bare wood, then a daubing of Maskol, before the top coat is applied. This should create a well weathered, peeling paint effect. SLNCR coaches were painted a shade of maroon, though what this weathered too is less certain. When you get to read this JB, would be interested in your opinion.
-
Arigna Town Exhibition Blog
David Holman commented on David Holman's blog entry in David Holman's Blog
Decent weekend at Tolworth. Was very lucky with the weather - it started raining about 10 mins after I got the layout unloaded on Saturday morning & began again soon after driving away on Sunday. There were some pretty big layouts there this weekend & all of a high standard. We were backing on to the Guildford club's 0 gauge Normandy layout, a vast tail chaser that could have easily held a small exhibition within it. They certainly kept things running, never less than 4 trains circulating all weekend. Made for some good train spotting when I wasn't busy, but very noisy at times, when 10 coach expresses were crossing 30 wagon freights. Hard to hear what people were saying. The rebuilt turntable crank eventually worked ok, though lost a screw from the chocbloc connector & the only substitute I had fouled one of the frame's fixing bolts. Hence the 'table clunked its way round till some judicious work with a file shorted the bolt... Had problems with the Y point to the cattle dock too. For some reason, the wire in tube became almost impossible to push & pretty stiff to pull. Hence took the decision to leave well alone on the Sunday and not run the cattle train. Better this than one end of the run round loop being put out of action, as this would have stopped everything apart from the railcar. Not a major issue in terms of running trains though, as the goods shed siding holds ten wagons, so we simply swapped 5 for 5 on each pick up goods. Generally, everything else continues to run well, though I notice some of the metal stock is beginning to show signs of bright metal appearing through minor paint chips. Chimneys and any sharp corners are always vulnerable, even after using metal black as a pre-under coat it seems. That said, the layout has had a pretty strenuous year. Starting with Orpington in January [60 mile round trip], then York [450 miles], Epsom [100 miles], Gravesend [30 miles], Sevenoaks [50 miles], Bexhill [120], Worthing [120], Beckenham [70] & Tolworth [110]. So, that is over 1100 miles travelling, being loaded in & out of the car 18 times & operated under the public eye for a total of 15 days. By & large, the layout [and indeed its operator] seem to have survived well. The baseboards have proved robust enough to withstand the extensive handling, as has the Ulysses sub-structure of beams & trestles. That is it for the year now, but 2016 promises to be even busier, with St Albans & Pontefract in January, then St Neots, Alexandra Palace, Reading, East London & finally Cultra, plus a coupe of others in between. Will aim to continue the diary as the layout goes even further afield in the new year. -
Superb, thank you sir. Have done a bit of resin casting myself and single sided stuff is pretty straightforward. Not mastered the doubles though! The resin I use joins well with cyano. Best if the surface is slightly roughed first, I find
-
Hells bells, did not realise it was large scale. Am even more impressed now. Never ceases to amaze me what is out there. Thesecbig models have such presence. At Ally Pally a couple of years ago the was an American G scale, standard gauge 'depot'. Around 10m long, it was enough for a decent number of box cars, plus a Budd for passenger traffic. Looked fab, ran really well. That was the same year I came REALLY close to G scale three truck Shay. The 121 is superb, well done sir! Am guessing it will be 45mm gauge.?
-
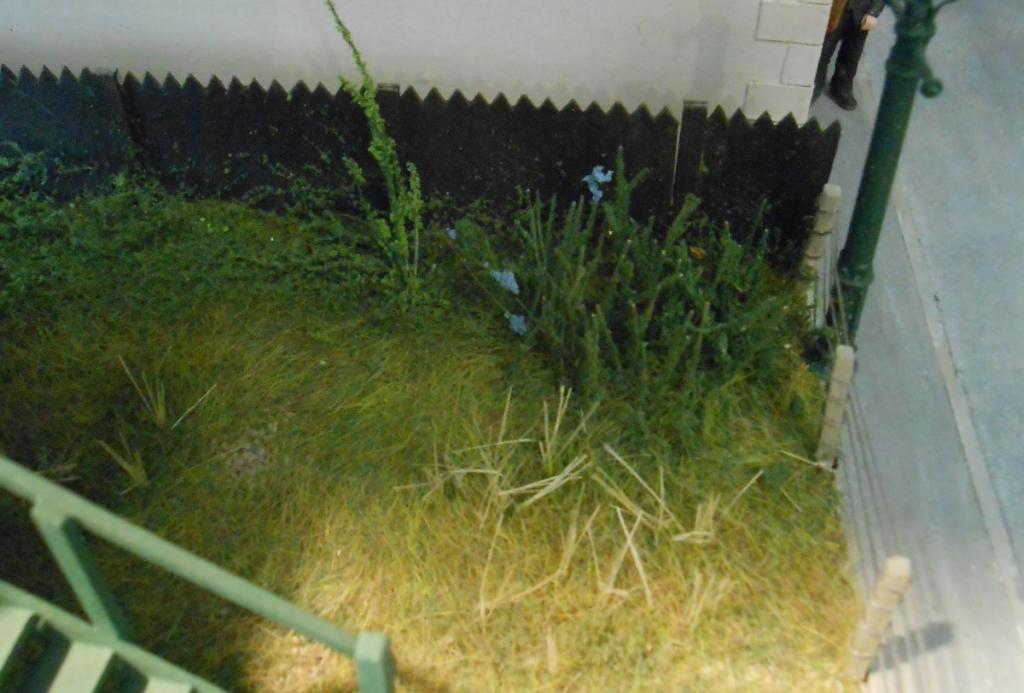
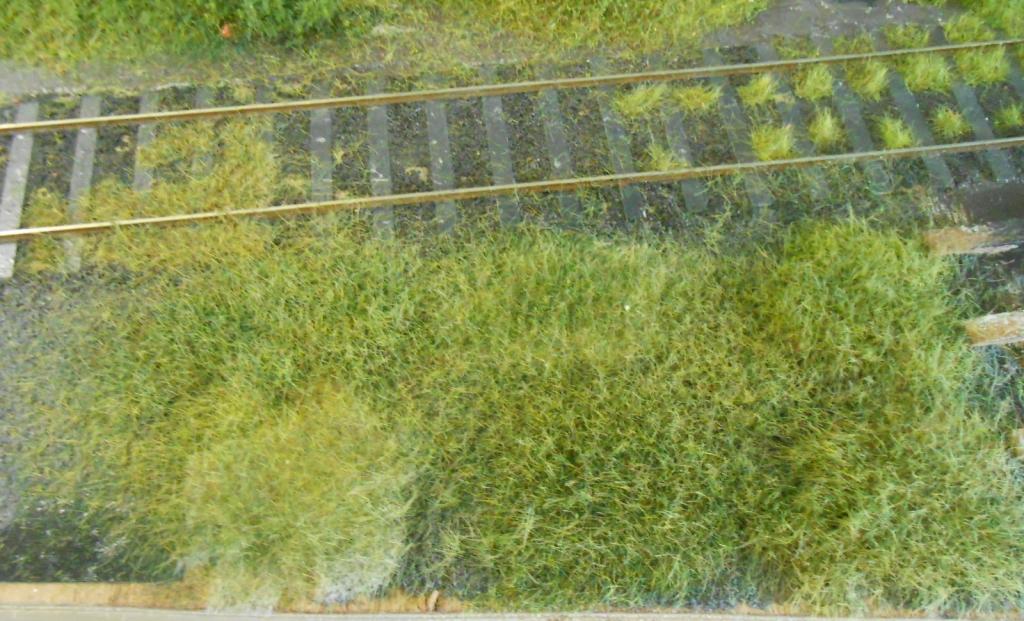
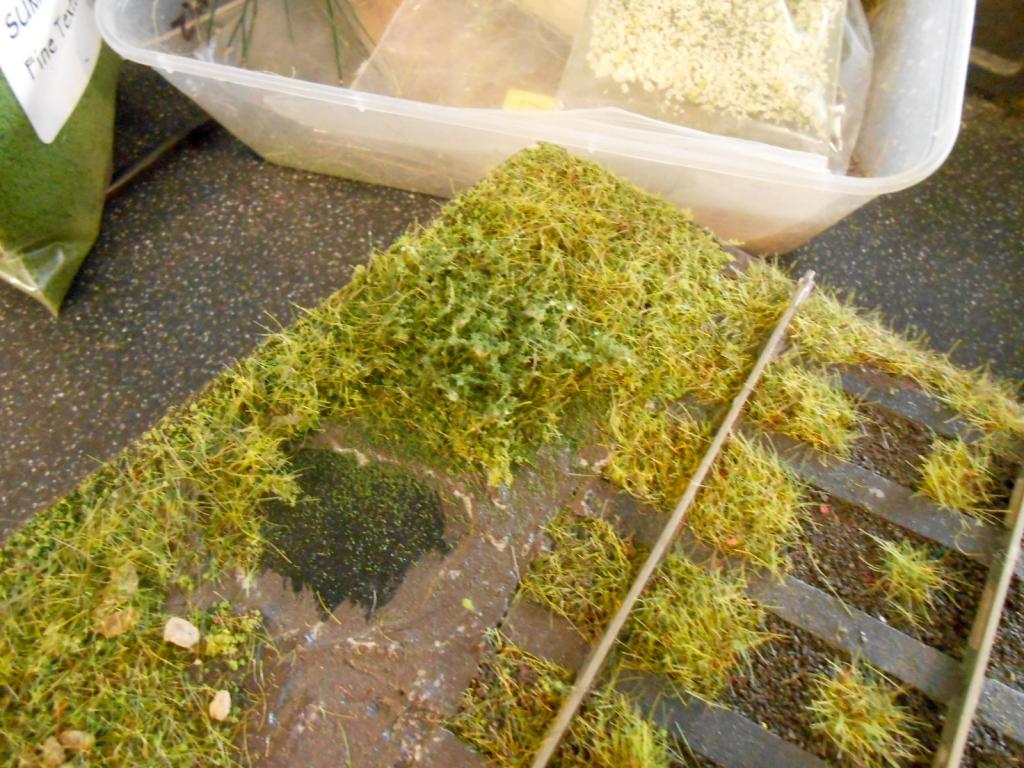
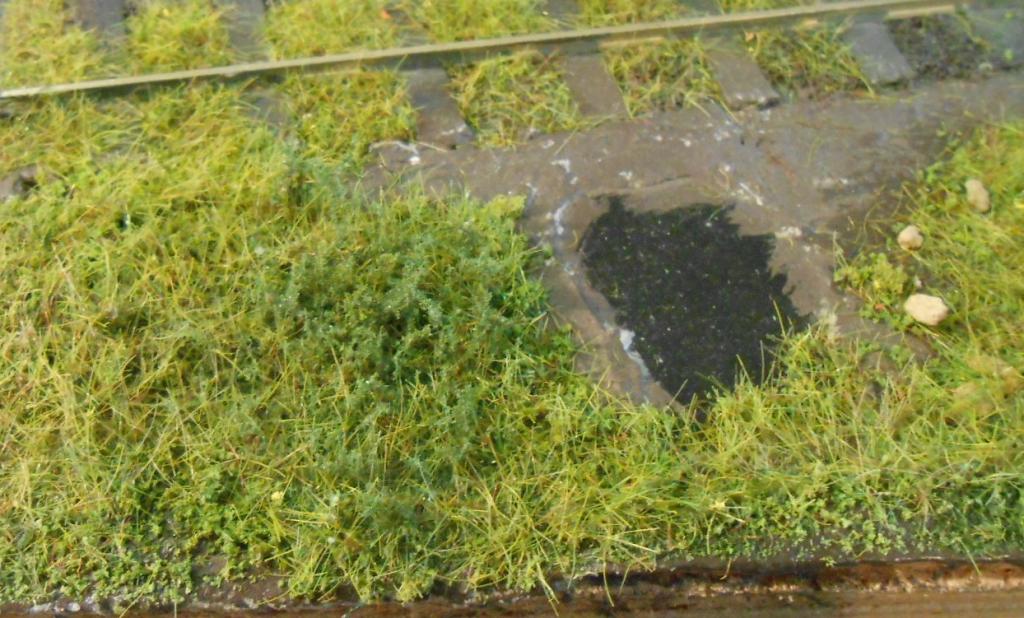
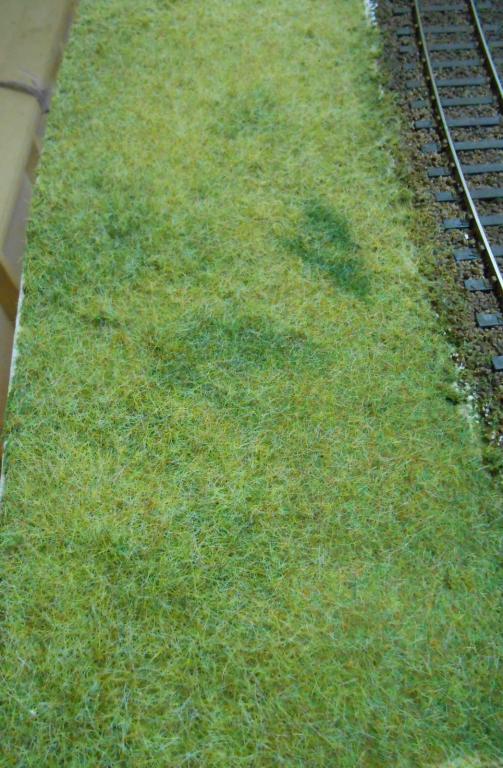
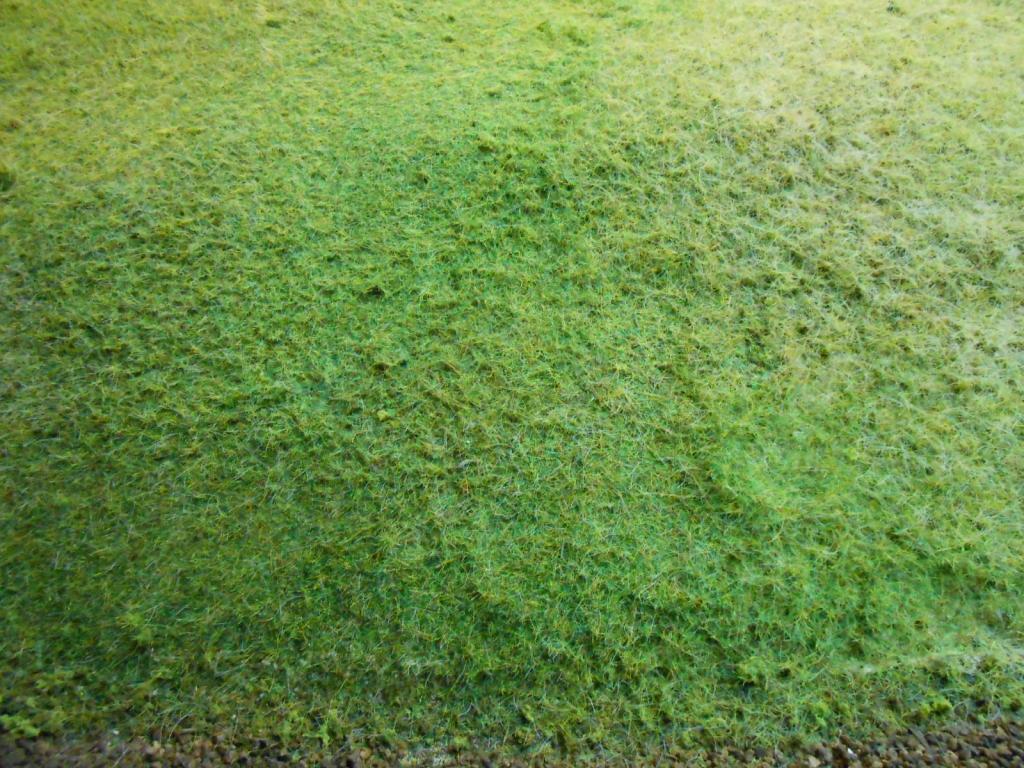
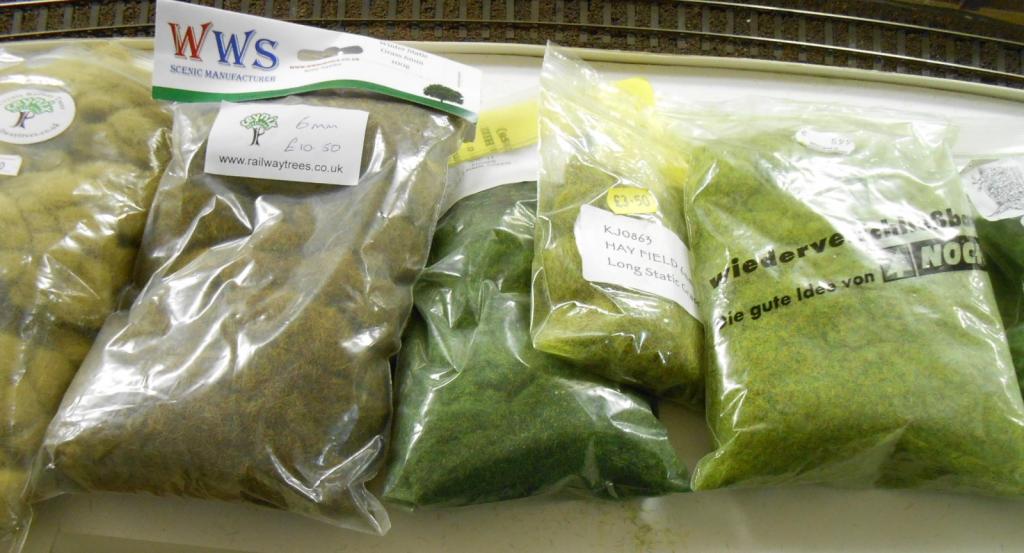
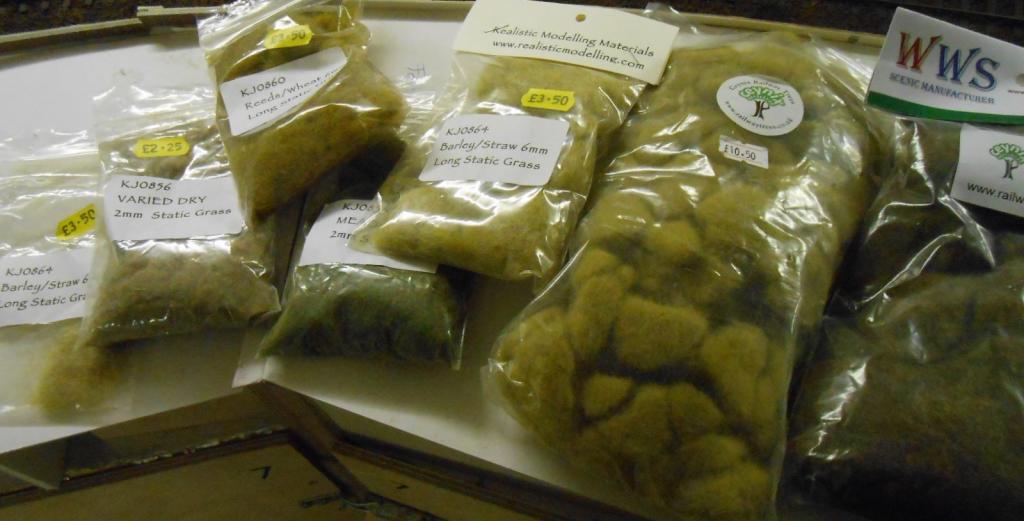
The first three pictures show the range of colours we have in the Club stores at the moment - not quite 40, but not quite enough either. For preference I need to get some more of the yellow/straw colours to capture that late summer/dry grass look I want on the linesides. The next three photos are back to front, as they show fibres on top of a scatter mix - which is the final photo. The latter uses Woodland fine and medium mid/light/dark greens, plus some fine earth too - essentially to create the base layer beneath the top layers of grass. The three middle pictures show fibres attached with both Spraymount and using the same [60/40] diluted PVA mix that the scatter was put down with. Either works well, though the PVA needs time to dry while you can add further layers with Spraymount [or matt spray varnish] immediately. Hence layers of varied colours can be built up very quickly. While the adhesive is wet, very fine, darker scatter can be sprinkled on to make the colours even more varied. Likewise change the colours of the fibres as you add layers - subsequent ones should normally be lighter, but as ever, think about what you are trying to do and check photos, the real thing etc. Beware lighting too, at the club we have fluorescents that are not that strong and colours looked very washed out compared to home - though this does not show too much in the photos. Ran of of Spraymount, so the Postiche and top layers will have to wait until next time.
-
Dimensions of Irish Prototypical points
David Holman replied to DiveController's question in Questions & Answers
Re hand made v commercial track, the middle ground is occupied by the likes of Marcway. Arigna uses their points, which can be very comparable in price to PECO if you buy off the shelf, though custom made is around 50% more. One particularly useful version in 7mm scale is their 6' radius Y point. From toe to clearance is just 12"/30cm. Would imagine the 00 version offers similar economy of space. A standand PECO Y in 7 mm is half as long again... Marcway points are copperclad construction and self isolating, so if you use wire in tube control, no additional switching is required. -
Have followed this with an interest & at times a feeling of smugness [petard already being hoisted!]. When I returned to modelling [early I'm married life having done my bit in pushing up the value of brewery shares and chasing women], for some reason [perhaps to impress my wife] I decided I was not going to become a box collector, but would aim to work at my modelling. Hence started in EM gauge, where there was nothing RTR & any new model came from a kit or needed adapting. Somehow managed to avoid collecting unmade kits too. Generally I'm happy buying something to build, so I have very little unmade, cluttering up drawers. Collections of raw materials are another matter, mind. Tools likewise. Moving into 7mm narrow gauge initially cleared out the spares box as was into a freelance phase and this scale enables all sorts of fancies. 7mm standard gauge soon limits your buying as a single wagon will cost 30 quid minimum and a loco kit soon passes £500 when wheels, motor gears are included. So, you make haste slowly and as it is [or at least was] more of a builder's scale rather than an operator's one 7mm can naturally rein in the spending. Or it used to. Those new Ixion and Dapol locos are endlessly tempting, but at shows I keep going back to my old maxim of 'needs or wants'. I may WANT that model, but do I actually NEED it? So far, that has helped me avoid buying a G Scale three truck shay, Heljan Deltic, the latest J15, D16, Black motor, Dukedog, etc etc in 4mm. Nemisis looms in the Alphagraphix catalogue and the new Ragstone Models Clogher Valley loco kit. These are not necessarily things that will always be available, though the Branchlines coach kits for the CVR are still there over 20 years since first introduced... Then advancing years brings disposable income [no mortgage or loans] and more spare time to do stuff. Arigna town is finished, so a new project is always on the horizon. Am sure you can see where I'll being going. So, guess that brings me full circle & my smugness at not having 'too much' has evaporated. Yes, not piles of RTR boxes, but drawers full of plastic sheet, card, metal strip, scenic stuff, tools etc etc AND a small, but growing number of 7mm NG kits for a certain CVR...