Jump to content

murrayec

Members
  • Posts

    2,608
  • Joined

  • Last visited

  • Days Won

    67

Everything posted by murrayec

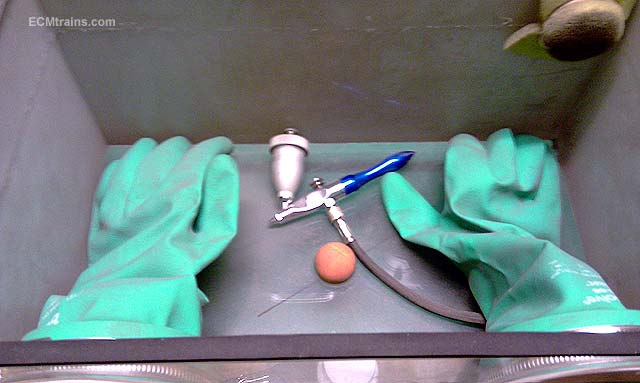
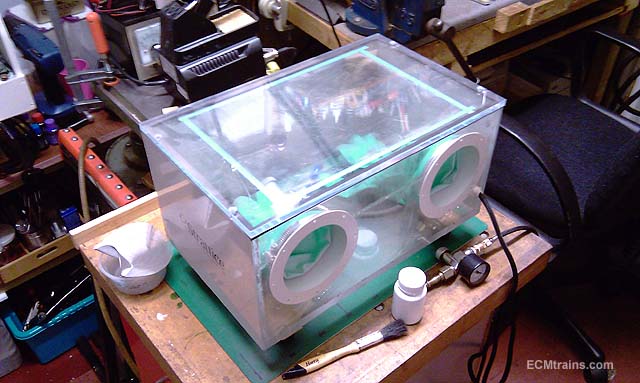
  1. Hi Noel A video here; http://irishrailwaymodeller.com/showthread.php/4121-Class-C-ECMCHAS-For-Silver-Fox-Kit?p=79227&viewfull=1#post79227 also slow running vid at start of the above thread Eoin
  2. Hi Noel, this one is for you I had taken this video and others some time back with fast, slow, stop/start running- but somehow this is the only one I can find. If I locate the others I will post up, otherwise I will shoot it again the next time the test track is up. Long curve points, short points, and double scissors at speed!! - all the points have the ECM check-rail mod. The little beast will be at Bray Show on Sunday??.... Eoin
  3. Hi All I picked up a Hornby Rocket Static Model kit last week at the Stillorgan Show, I plan to Live Steam it and have trawled the internet for photos and info- found loads but some things I cannot find;- If anyone can help it would be much appreciated 1. A copy of the Live Steam instructions. 2. Has anyone taken photos of the cylinder steam ports- the static model does not have these drilled out, I have worked out the approx set-up but it would be nice to know I'm on the right track. This may also be indicated in the instructions? 3. Has anyone got photos of the piston parts- these parts are not included in the static kit! The kit; The offending cylinders with no ports; Thanks if you can help Eoin
  4. Hi David All looks fabulous We are allowed to take breaks, it actually helps in a way because the projects are always in mind and with a break a better solution to a works detail is inspirational, setting us off again..... Eoin
  5. Hi All Thanks for looking in.... It is easy and gets easier as one gains more experience of the techniques to make it work! On the other hand its the time it takes, take the DART chassis parts in photo above;- There is 38 parts to make up a two car chassis, that's a total of 684 parts for 18 sets being worked on, I work on one mould at a time and there is 5 moulds to make parts for one set, it takes approx 45mins to mix, pour, dry, and clean up each mould = 3.7hours per set = 68 hours for 18 sets. And then all parts have to be hand processed, clean-up, jigged and glued...... Oh hell I cant think about it any more! Eoin
  6. .....and DART coloured plastic parts production line;- This is part of a replacement batch of plastic parts for the DARTs, I got caught out on the shelf life of the chemicals! I made the original batch about 6 months ago and stored it until required, when I went to use it a few months later it had gone all funny and discoloured! Eoin
  7. Hi Here is the update I promised in the first post;- I now prefer this material 'Fast Cast' from RPM, it lasts a little longer after mixing and its not as unforgiving as the other stuff if one gets the mix slightly wrong. In the first photo one can see the OXO measuring cups, two sets are required. Very handy for getting the correct quantities A & B in the mix. Though keep the acetone away from them- I did not and look at the state of the little cups!! it will melt in seconds. Tips;- Watch out for shelf life of the chemicals- use all at least 6 months after purchase, anything older will cause endless difficulty!! Use the old stuff for goofing.... If using colours- mix the colour into part A first, then add part B and mix thoroughly- thoroughly is very important, otherwise one can get oily residue in areas on the casting. Doing it this way gives more time to work after A&B has been mixed. One will have to play with the pouring the plastic into the mould to get it right- some work straight off but others do not, test it and see does air get trapped!, try different ways of pouring it in!, inject it!, squeeze it! stretch it! or use a blunt pin to wipe over the mould in the plastic to tease the bubble to the surface and lift it out. Keep notes on the mould storage bag as to how the mould works for later reference. The silicone moulds will degrade over use, small little bits of silicone get pulled away from areas- mainly where the silicone can flow into the glue joints of the master, paint priming the master can assist in filling these areas, which will help to minimise degrading. A complex mould will take about 30 to 40 goes, and then one has to make a new one- keep the masters!! Quick Moulds for Small Parts;- For this I use two part Moulding Paste and Supersil 20;- Mix two blobs of the stuff and lay it out as the base of the mould, push the master part into it half way and make indent register marks in it (to line up the two half's of the mould), when dry then set up moulding walls around it with styrene card and pour the Supersil 20 to make the second side, use release agent otherwise the mould will not open! When using this mould, one drops a blob, more than needed, of the mixed plastic onto the base of the mould (blue part) and then the topside is laid on top by kind of rolling it on from one side to the other- hopefully pushing the air out as one goes and squishing the excess plastic out. When the topside is down put a small weight on top and wait till set- a piece of 4mm MDF larger than the mould. Eoin
  8. Hi again Take a look at the footbridges I made for the Greystones layout and the Seapoint Martello Tower layout, the side rails of the bridge are cut from .5mm styrene, and all cardboard templates to cut the foam steps and other bits, were cut out on the Cameo. Eoin
  9. Hi I use the Cameo Silhouette for cutting DART body sheets, styrene, vinyl, and cardboard- absolutely a deadly machine! Draw it in CAD export a DXF file to the Silhouette software, which is not to bad and setup the cutting path, then send to the cutter... Deadly! It can cut parts out of .2 to.3mm styrene- that's the limit, but it can score card up to 1mm thick and then you have to do the rest. The system can actually be used to cut card kits- it just takes a bit of scanning, exporting a registration mark template from the cutter, importing into CAD, set up the registration marks in the cad drawing, set up the cutting lines in the cad drawing, export the cutting lines to the Silhouette, transfer the registration marks to the actual card kit your going to cut by exporting the cad template- you then test the cut on a spare print of the card kit to check it cuts on the line- you now have a template for cutting that kit out as many times as you like! as long as its sheets are mounted on the registration marked template that was made. Not up on the Curio but it looks very similar and its the same software- the Cameo does A3 and banner cutting on a backing card. http://www.mdpsupplies.co.uk/silhouette-cameo-packs.asp Buy it, the possibilities with a bit of planning are endless Eoin
  10. Hi scahalane Yes a bit of a home built thing, goes up to about 12psi vac and the box is about to collapse! that's enough to haul the air out but it would be better at a higher vac. The vac pump is from a medical vac dressing unit, run on 9volts, and takes about 8 seconds to get to 12psi, this is connected to a Woodie's best lunch box! Though I have a new chamber- its a SS cooking pot with a perspex sheet lid and silicone seal, I've not stuck it together yet but will post a pic when I do.... Eoin
  11. Hi Dave Cyano, epoxy, UHU, etc. Epoxy is about the best I get it from here;- http://www.rpmsupplies.com/ Eoin
  12. This is a list of stuff I gave to a forum member back in 2014, I have relocated this in this thread so its easier to find for people wanting to know about Moulding Plastic I will follow up later and give an update as I have some new tips........ but for now;- Here is the equipment, it seems like a lot but after you read down through it, it's not. Its like all things- once you have a go, you find how easy it is! Silicone Moulds;- 1. Supersil 20 Silicone Rubber Parts A & B. - Mixed by weight 10 parts A to 100 parts B. 2. Weighing scales. - Try and find one that does not switch off after 2 minutes, it's a pain! 3a. Mould casings- I made these from perspex with a 10mm alu angle stuck on, this gives variable sizes for moulding in. Use a perspex or glass base to set-up on. 3b. Mould casings made from plastic card- fixed size 4. Pipette - very important for adding Supersil 20 Part A, don't try to pour it from the bottle 5. Vacuum chamber- not fully necessary, Supersil 20 is quite good at getting air away from the master. This was made from a lunch box and a medical vac pump, though the box is not rigid enough! 6. Plaster-scene for sealing the mould casings sides and to the base with a fillet on the outside - ensure the base extends well beyond the casing for this job. 7. A DART bogie mould and its plastic card master. A mixing container and spatula is also required- go for a plastic kitchen mixing jug its easier to clean- let the silicone dry and then it just peels off. Mixing thoroughly is very important- cut the end of the spatula square so that you can wipe the bottom and sides of the jug. Sit the whole thing on a level surface to dry- it will take a good 6 hours to set completely and then carefully open the casings and trim off the outside edges with sharp knife. The master parts should be well stuck down to the casing base, ensure there are no gaps under the master or the silicone will find its way under and the the mould may tare when taking the master out- you cannot repair a damaged mould, nothing will stick to it! Just start again. Store the moulds carefully in plastic bags, do not stack them, they will deform over time if stacked. Put the in a box like this;- Two sided moulds are possible but master single sided first. With two sided the plastic needs to be forced in with a syringe and this can distort the mould. I support the moulds with MDF backing boards and light elastic bands. When making this type of mould a release agent (ambersil Formula 5) is required between the pouring of the second side- otherwise you will not get the mould open- silicone rubber will stick to itself. Plastic Casting;- I use polyurethane plastic, its not as dangerous as resin, and easier to use 8. Easy Flow 120 Parts A & B. Mixing is by volume 1 Part A to 1 Part B. 9. Mouldlife resin pigment. Mix no more than 5% of the plastic volume otherwise the plastic will react and bloat, or be very brittle. 10. Asatone- for cleaning syringe and fine Delux points, n other things! 11. ambersil Formula 5 non silicone release agent. Not fully necessary but it does help to let the plastic flow over complex moulds. 12. Gloves. Are necessary- this stuff is toxic 13. Sheet of plate glass for working on, small mixing spoon, chepo kitchen measuring spoons, syringe, and Delux fine feed points. I made cleaning sticks from NS wire to push through these to clean them. 14. Chepo kitchen measuring cup, these came in the same pack as the spoons, I use these for mixing the plastic in. The dirty one is the maximum plastic I use at a time- you only have about 2 mins to get the plastic fully into the mould. Any longer and it will be a mess! 15. Pots to keep your pigment mixes in. 16. Spirit level to set the plate glass working surface level. Mix the plastic equal and thoroughly, you have less than 2 mins to pour, clean every thing within 5 mins with kitchen towel. I keep a small jar of asatone ready to drop the Delux points into and suck up into the syringe immediately after the mould is filled. Clean the Delux points with the NS wire immediately. With the open moulds, for larg parts I pour straight from the mixing cup, trying to keep a constant flow into the mould. Its very hard to get the plastic level with the top of the mould because of the air pressure- just wipe the excess plastic across the mould lightly with a spatula onto a kitchen towel or onto the plate glass. If you create a depression doing this just spoon in a few drops to fill again. You can always sand the back on wet n dry paper when the plastic has hardened. For small parts and deep stuff I use the syringe- place the point deep into the mould and push, try to keep the point in the plastic at all times. With the syringe and fine points you have only about a minute before it gets harder to push. Do not empty the syringe into the mould, there will be air there and you will just push it into the plastic and ruin the cast. After 2 minutes do not use the plastic, it will only be a mess. The plastic will harden in about 20mins, but best to leave it for about an hour. When removing the parts flex the mould first, carefully pull the edges away from the plastic with your finger nail and slowly work the piece out. murrayec
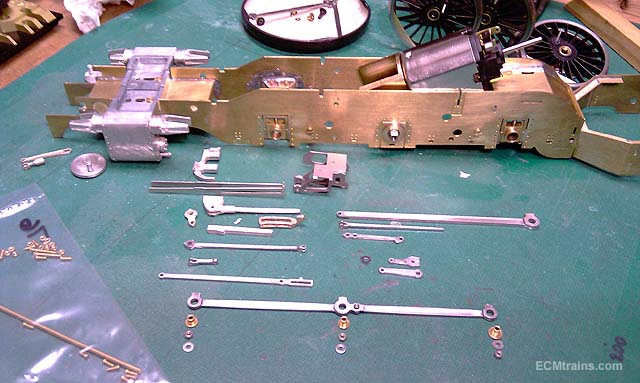
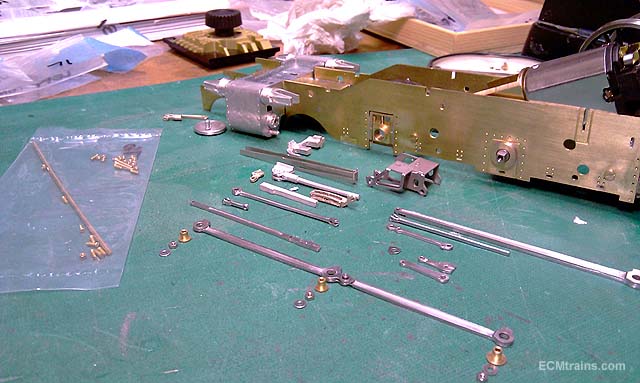
  13. Hi That's a 'Lantrin' roof light, I reckon its done in aluminium glazing bars like they use in conservatory construction which was coming in vogue around that time. Sometimes there was no glazing in the ends, just a solid panel, and it's all built off a roof up-stand of 150 to 200mm high that trims the opening in the roof... if that helps? Eoin
  14. Hi Dave Coming along very nicely, I love the low relief buildings their very neat, when that yard is populated its going to be deadly.... Still cant wait to see the Daf running out through the security/check point gate, and again wow- when the crane, ship and containers or on its going to be deadly... Eoin
  15. Just at the right time David Look at what I just bought the other day for the Greystones layout, baseboard Dave sells the fly zapper unit, I'm going to make the unit as per Boulder Creek youtube vids Eoin
  16. Hi David I recently got a copy of Geoff Holt's book Locomotive Modelling Part 1- at the end of the book he discusses Stephenson and Joy valve gear, stunning little mechs, he has a few tips, sketches, and photos of the stuff he built, and gives an build example of valve gear for the Signature Models. I cant imagine trying to make it in 3mm.... also cant wait to get Part 2 of his book Eoin
  17. Hi David, looking very nice, I'm going to steal that side spring idea on the bogie for the Scot job. The list never gets smaller! even after your done.... Eoin
  18. Yes, Dave I did think of that but a bit slow this morning and gave into doubt.... Eoin
  19. Hey Fran Try acetone to remove it, if the coating is compatible with SG I'd say it would remove it... Did you see in one of my previous posts that there was problems with the Scot kit and subscribers had to undo their work- that's fine with glue but a different story with solder! so I recommend you hold off construction until your in possession of the full kit before you commence building- maybe you thought of this already... Eoin
  20. Hi Wrennie No problem, you can borrow the set as they have to be used in pairs to get the hornblocks set at the ctrs of the coupler rods. Warbonnet No, this kit was clean brass. But I do not recommend gluing the main frames, in the build of the Scot I reckon some had problems with super-glue because regularly later on in the instructions they are advised in applying thick beads of glue to key chassis areas and epoxy to other areas- I'd say chassis were falling apart on subscribers and this was the remedy! A chassis should be soldered as its the main structure that is going to take the bangs and twists. Also as I was undoing what the client stuck with SG all that was needed was to get the point of a blade under the glue and suddenly the part popped off with the shock! Also there is very poor frame spacers in the kit, I'm going to add more.... JHB Cork harbour was the first place to have about 5, they were built 5 months before construction started in Dublin. Cork has the only tower that saw action- fighting off a band of Fenians in 1867. I'd say these could be seen from the railways as the rails came along? Wexford has two, and Rosslare Point had one which fell into the sea- no railway at that time! Drogheda had one Galway Bay had three River Shannon had three Donegal & Derry had two They all date between 1804 to 1818 when there was no railways, and I'm not sure which ones exist now and can be seen from the rails now...... Eoin
  21. Hi wrennie there are very good offers going on here for that type of thing;- http://www.themobilityshop.ie/gmi-day-time-adult-diaper.html
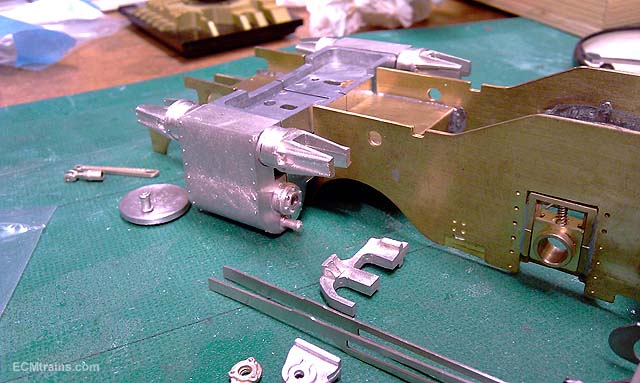
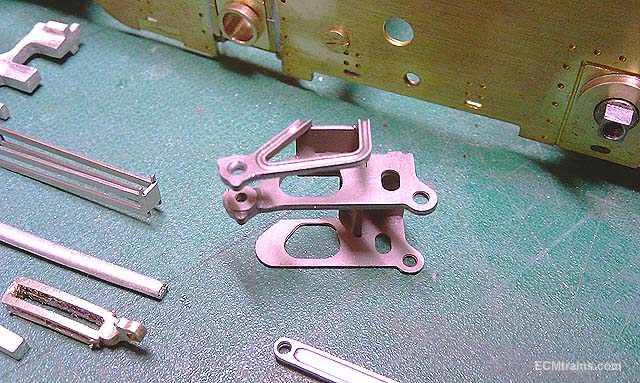
  22. So then, after a good clean up I started to look at the chassis, motor location, and suspension. The pictures show a dry assembly of the main frames, wheels, and motor plonked on top. The instructions have the motor on the centre drive axle, this is not the best location for a compensated chassis using the Mike Sharman 'Flexichas' system which I intend to use. Ideally I would like the motor on the rear drive axle so that it can be compensated with the pony truck but the rear frame spacer obstructs the gearbox! plus the compensation beam will have to come through the frame spacer!. I think a revised rear frame spacer is required, but main problem at the moment is the motor is to fat, it needs to swing a little and this wont happen wedged between the frames. More quiet thought to be done. Neither the bogie or pony carry any weight in the kit design, I intend to remedy this by including them in the compensation system so that they will be part of the loco and do the job of steering the chassis, every little bit helps! The bogie is a bit of a problem at the moment but in time a solution will present itself. I adjusted the front of the main frames for bogie wheel clearance as per an instructions 'mod' by removing 1mm around the arches but you can see in the photo the front of the frames are still a bit close, the splashers still have to be installed reducing the clearance further- more filing to be done. The coupling rods have been restored, as they will be required at this time to line up the hornblocks using chassis jigs, the two thickening parts had to be made again for one side, made from redundant etch frame. The kit provides white metal bolts to join the coupler rods!- how long would that last? so these parts will be steel riveted together instead. The Slater's brass hornblocks have been acquired, one is shown in the photos on front of the coupling rods.Very nice little brass castings with square slotted bearings and other little bits, 6 come in the pack. I'm now making up the chassis jigs- 3 of them to hold the hornblocks, and the bearings, with the coupling rods on the ends to solder the blocks in place and set the centres of the axles equal to centres of the rods....... Eoin
  23. Hi Kirley Lovely stuff, I like the laminates, very neat. Have to agree with BTB- the Sulzer is deadly... I meant to buy a few Beets at the Blackrock Show! but settled on books n tools, Beets next time? Eoin
  24. Hi Dave It looks brilliant, cant wait to see the video of the Daf truck running around on that- not to mention the cranes, the boat, containers and trains.... Great stuff Eoin
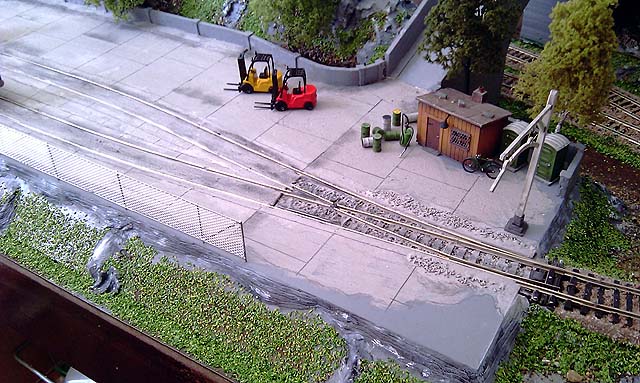
  25. Hi dave182 It's hand made- foam, styrene, cardboard & etched brass, and a lot of work! Here is a sketch of the landscaping idea we have for the layout, the sketch is not to scale but this kind of thing allows one to calculate numbers and type, we reckon this is the minimum! interesting to see how that pans out;- Eoin
×
×
  • Create New...

Important Information

Terms of Use