.png.c363cdf5c3fb7955cd92a55eb6dbbae0.png)


Colonel
-
Posts
300 -
Joined
-
Last visited
-
Days Won
3
Content Type
Profiles
Forums
Events
Gallery
Blogs
Everything posted by Colonel
-
Excellent progress! Single ply paper tissue for the curtains?
-
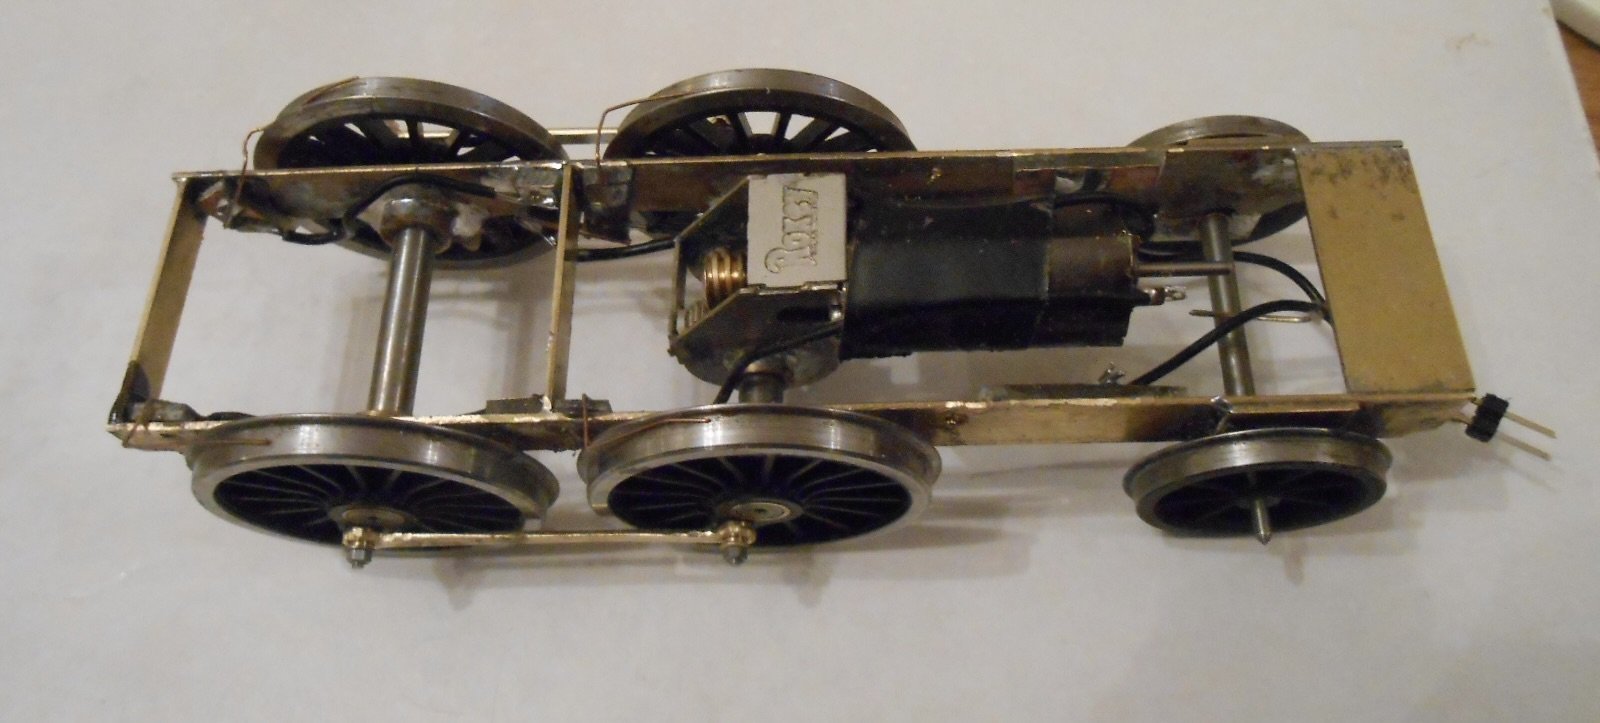
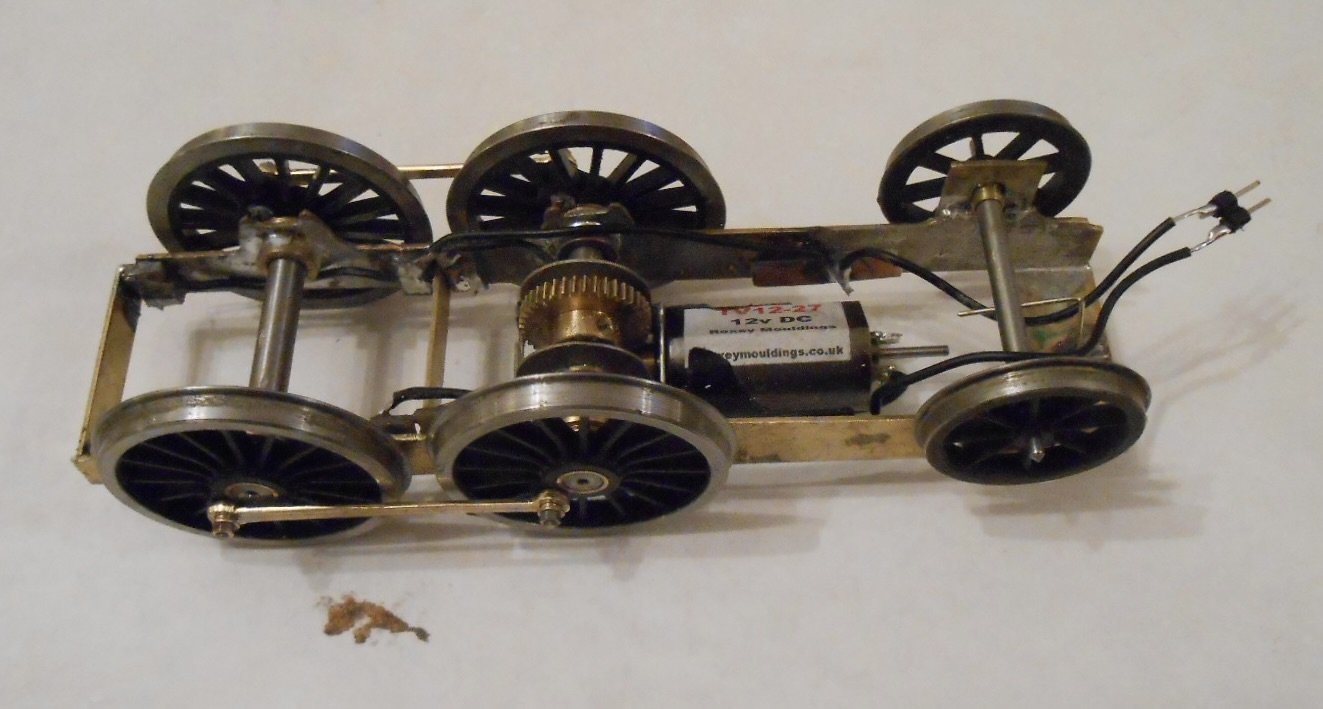
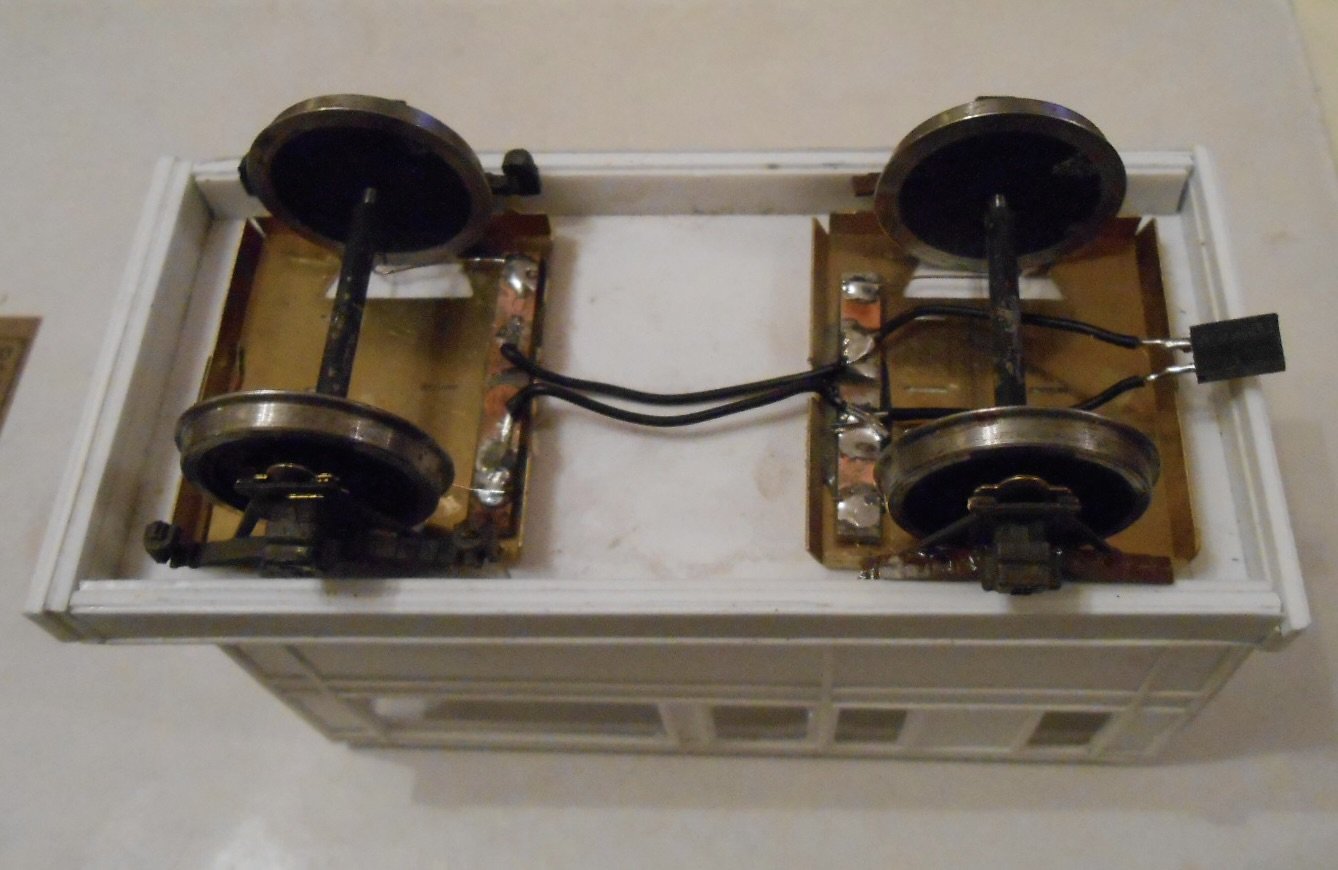
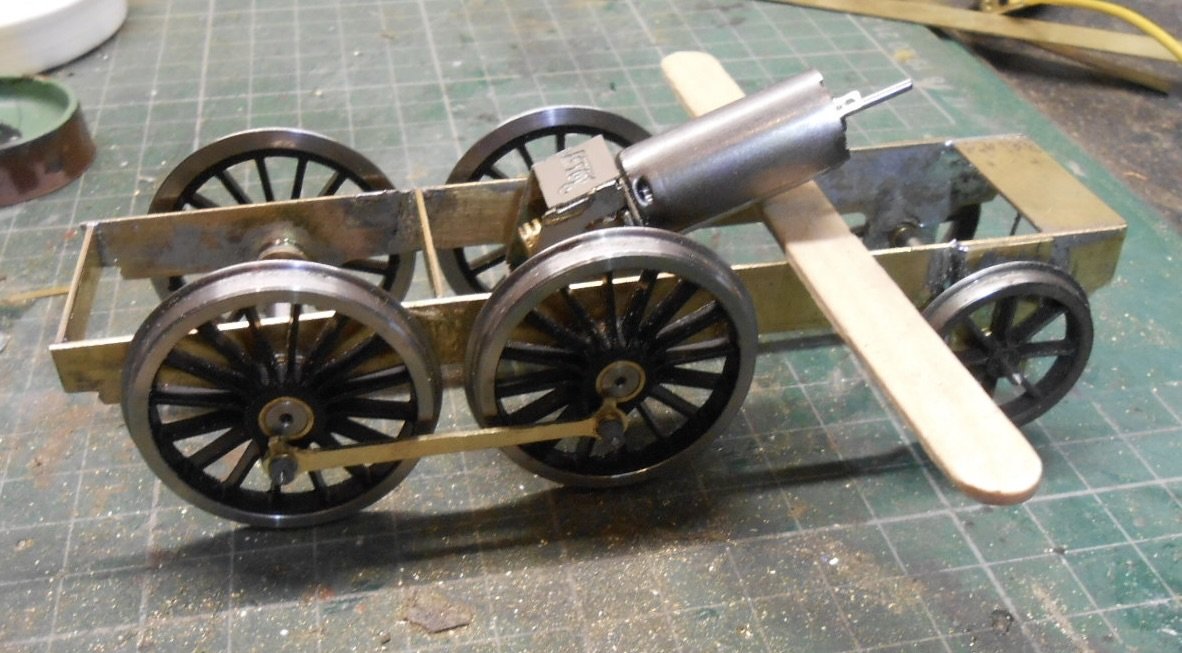
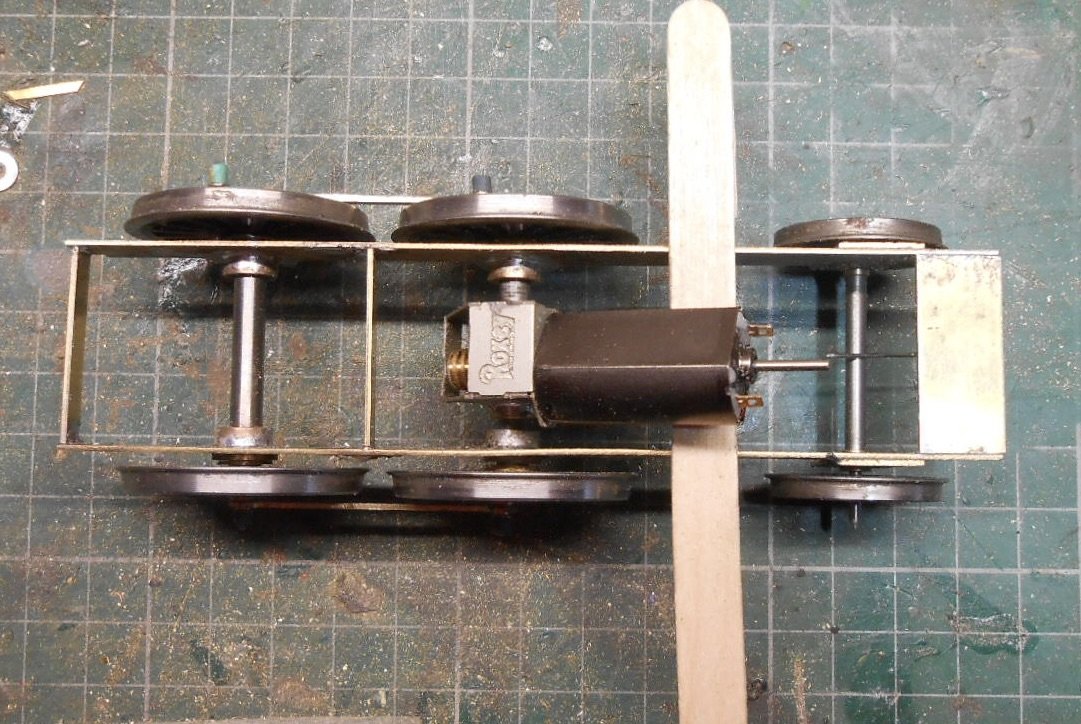
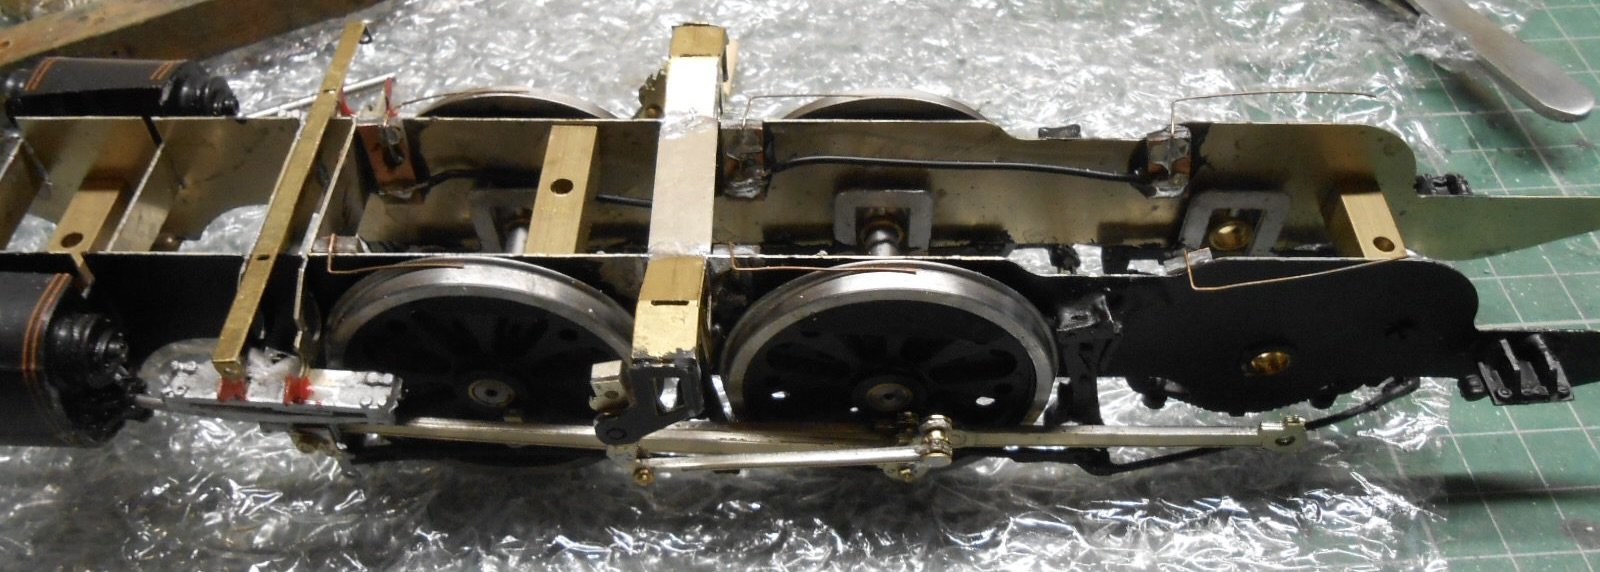
Now that's a very interesting toy! Buoyed up by at last having a rolling chassis, moved on to fitting the pickups this afternoon. Another of those fiddly jobs, especially with a loco as small as this. The usual copper clad strip epoxied to the inside of the frames, with 0.5 mm phosphor bronze wire for the wiper pickups themselves. Took a fair bit of thinking to work out the best positions, both to hide the wipers and wiring, but also to find room to fit them all. Couldn't find a way to fit ones to the trailing wheels, but have put some on the pay coach , so there are eight wheels covered. The model isn't going to have to do much more than shuttle on & off the layout but Initial tests show it is already able to pull itself along, though some lead [or maybe a lump of brass rod] in the the boiler should help matters, especially as it will be right above the drivers.

-
Visiting the Lough Swilly
Colonel replied to Patrick Davey's topic in Photos & Videos of the Prototype
They certainly built their structures to last. Really good to see how they have survived. -
Thanks Paul and Alan. A case of third time lucky - or actually third time marking. I'd done my usual thing of scribing a long centre line, then scribing two verticals for where the crank pin holes go. The first two attempts I'd used a punch to make a starter for the drill, but in both cases it must have moved slightly, so the holes weren't where they were supposed to be... This time, scribed the marks more heavily and started with a 1 mm drill and gradually worked up to the 2.5 required for the crank pin bearings. Then tested the rods on the loco as just blank rectangles and blow me down, they work - first (or third) time. So now all shaped up and on the loco, ready to fit the pick ups. When I take a layout to a show, there is a checklist to ensure I have everything I need. Am thinking I need to make one for chassis building, then laminate it and stick it on the wall above my workbench. While it is nice to have built up a whole range of skills to build everything from locos, rolling stock, signals, buildings and so on, when you don't visit them regularly (as you are flitting between projects), it is all too easy to forget some of the finer points in the enthusiasm of ploughing on with something new. Note to self: working chassis are never something to be rushed!
-
A lot of work, for not much apparent progress, together with quite a few rude words, sums up recent days. However, credit to both Slater's and Roxey Mouldings for their usual exemplary service - wheels from the former and motor/gearbox the latter. Thought I'd ordered three extended [34mm b2b] axles, but only one arrived and my fault. As it happens, I had a spare for the other driver and found I could use 6 spoke wagon wheels for the trailing axle. The prototype had 12 spokes, so hopefully not too much trouble to fit six more spokes in the spaces. So what I needed now was a chassis... Did the conventional thing and made up a pair of coupling rod blanks first: brass strip, soldered together and then drilled for the scale 5'7" wheel spacing. So far, so good. Then did the same with two wider pieces of strip for the frames and then positioned the rods on top of these, ready to be drilled out and reamed for the rod and axle bearings. Frames and rods were filed to profile, separated and then the former assembled with spacers to form the chassis. Unfortunately, at this point it started to be obvious that something had gone pear shaped with the coupling rods. Somehow, the drill bit must have moved when I was making the holes progressively bigger and when I tried fitting the rods to the wheels, they kept binding and successively reaming them out just led to the holes being too big - so there was no alternative but to make a new pair, because the originals were probably about a millimetre out! The Mark 2 versions are likewise giving me grief, because the chassis seems to roll ok without the motor, but with it, still keeps jamming. On the plus side, the chassis fits nicely into the bodywork and the Roxey 1227 motor gear box [40:1] slots into the underside of the boiler/firebox without too much of the latter needing to be cut away and will be neatly hidden when the model is finished. Am hoping I haven't made a mess of the gearbox - it runs ok without the rods on, but will have explore more in the next day or so. Just hoping I don't have to make a whole new chassis - and 3rd set of rods! The wheels certainly start to bring out the character of this little loco, so fingers crossed...
-
Always great to see more of this amazing model railway.
-
"Voiding the Warranty" - Mol's experiments in 21mm gauge
Colonel replied to Mol_PMB's topic in Irish Models
Great work and nice to see the 'photo plank' getting good use too. -
Excellent! Alphagraphix kits are also a great way into scratchbuilding. Have used them for years, because they are ideal templates for making wagon and coach bodies from plastic sheet and strip. Roger does whitemetal wagon chassis, which can be glued together, rather than soldered (5min epoxy or cyano with accelerator), while he also does an etched brass six wheel coach chassis when you feel able to move into soldering.
-
Thanks folks! Am currently leaning towards Sidhe as the name, which I now know is pronounced Shee and where Banshee also comes from. Delving beyond Paul's weblinks proved to be a fascinating insight into Irish folklore and clearly, it is a good idea to respect all the little people.
-
An absolute delight, Eoin. Catching up late on your threads, but a pleasure to do so. The dome and chimney alone are jewel like in their for and finish. While lots of proper engineering going on, simple things also stand out, like that wooden block to hold the body while it was being worked on. Am looking forward to reading more - probably several times!
-
As above Darren. You only learn by trying. That said, what you try makes a huge difference. Soldering can seem a black art at first and certainly requires care and practice. I suspect quite few of us, me included, have tried to build kits that were beyond our abilities at the time, a case of walk before you try to run. Maybe have a go at using plastic sheet and strip, which are much easier to cut and join - the old Airfix, now Dapol, kits are a cheap way to practice. Likewise any card kit, where all you need is a craft knife, steel rule and glue. From here it is a very short step to scratchbuilding in this material. Making your own stuff is very satisfying, so choose carefully and you'll be surprised how quickly skills develop and indeed new tools are acquired.
-
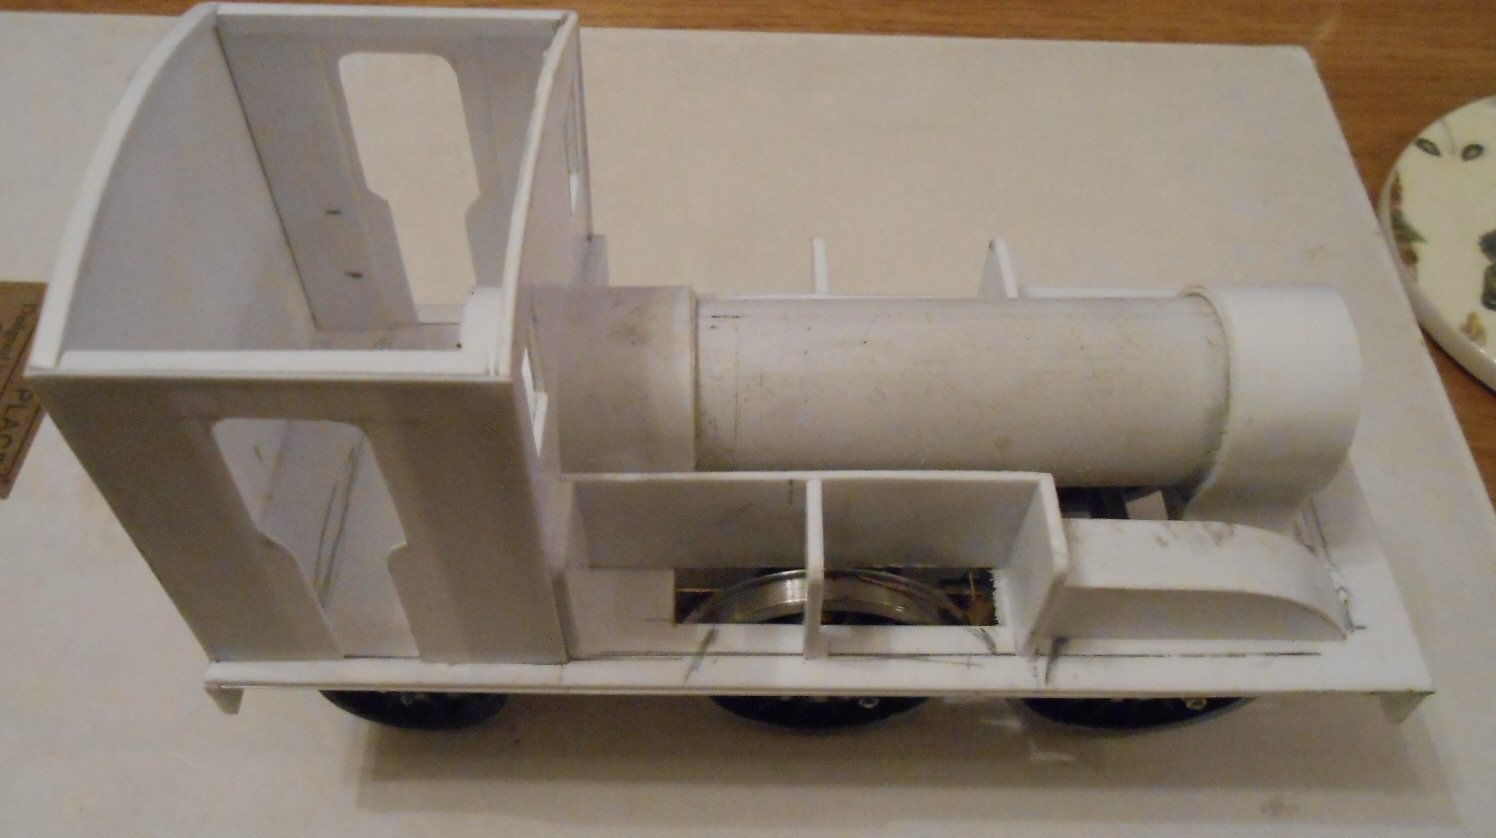
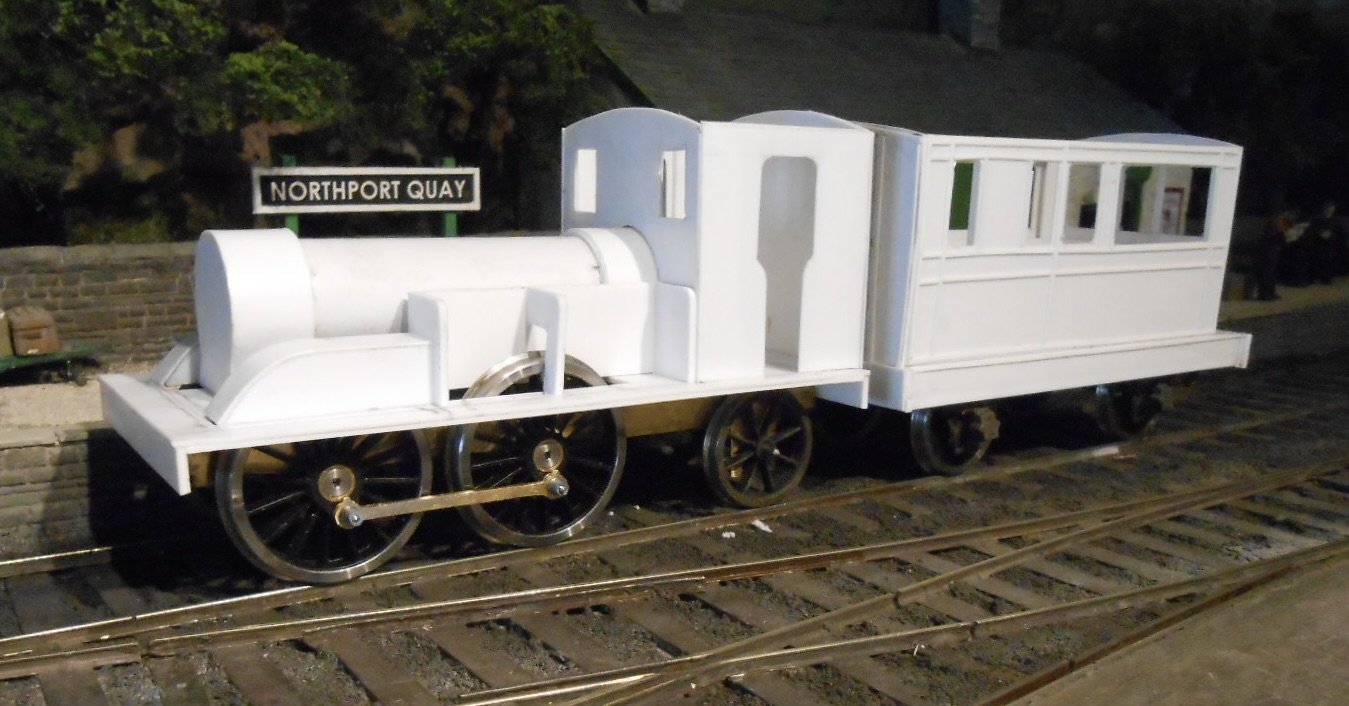
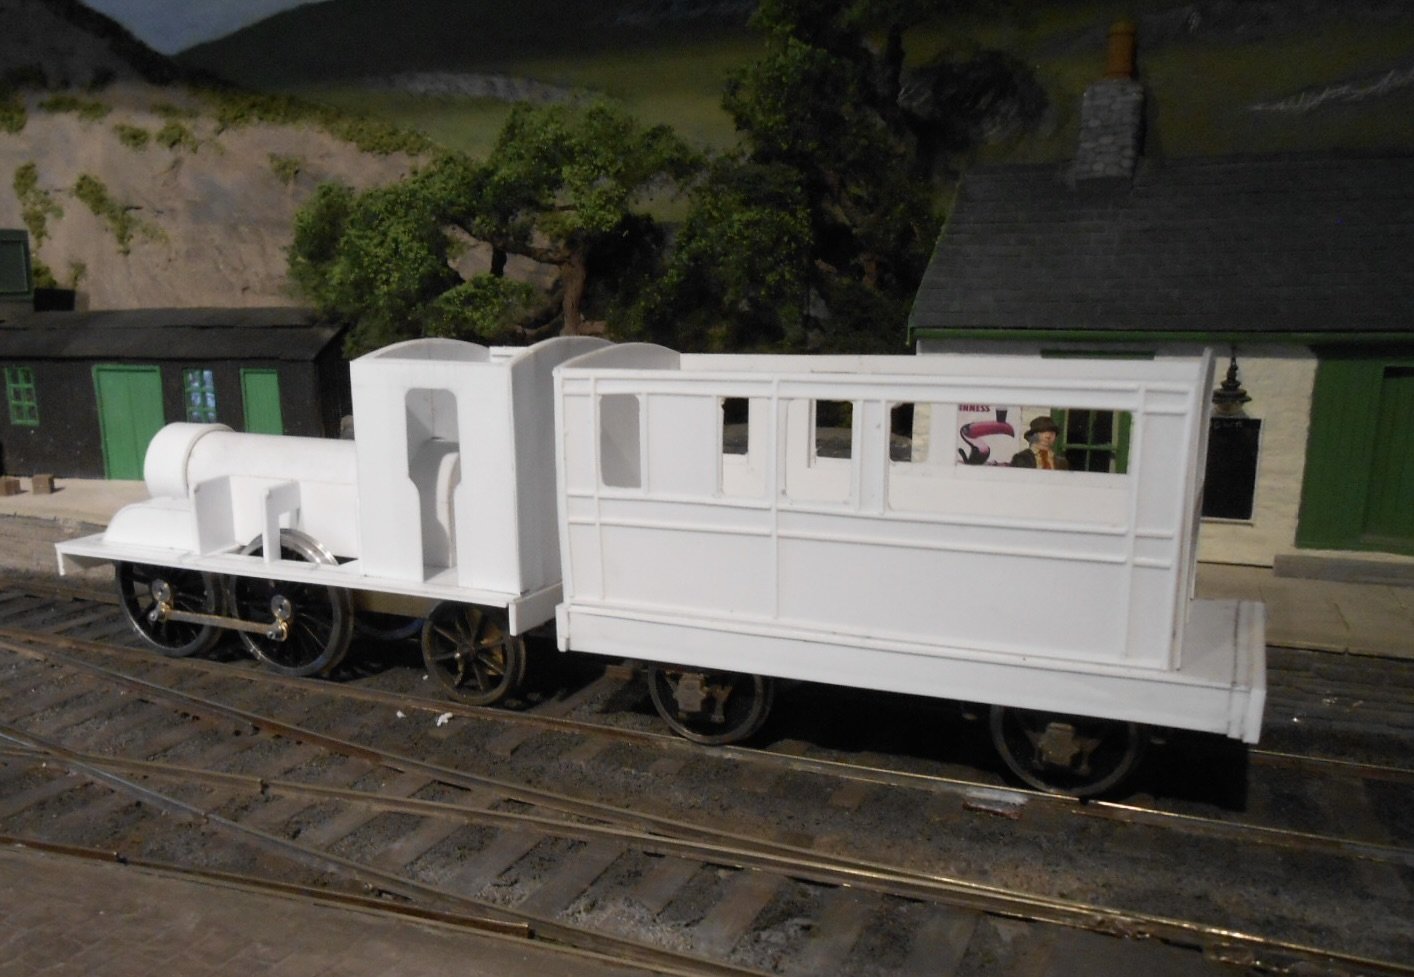
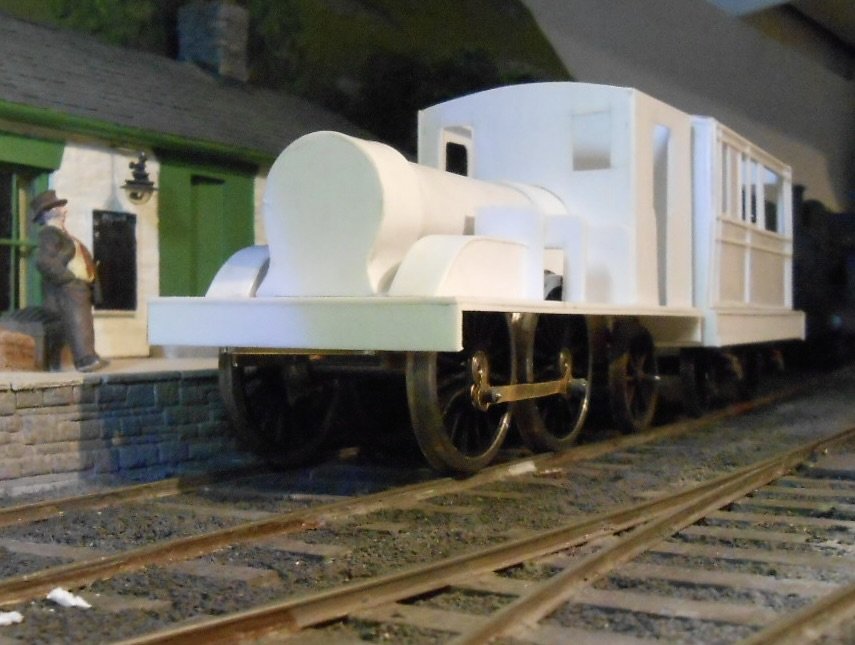
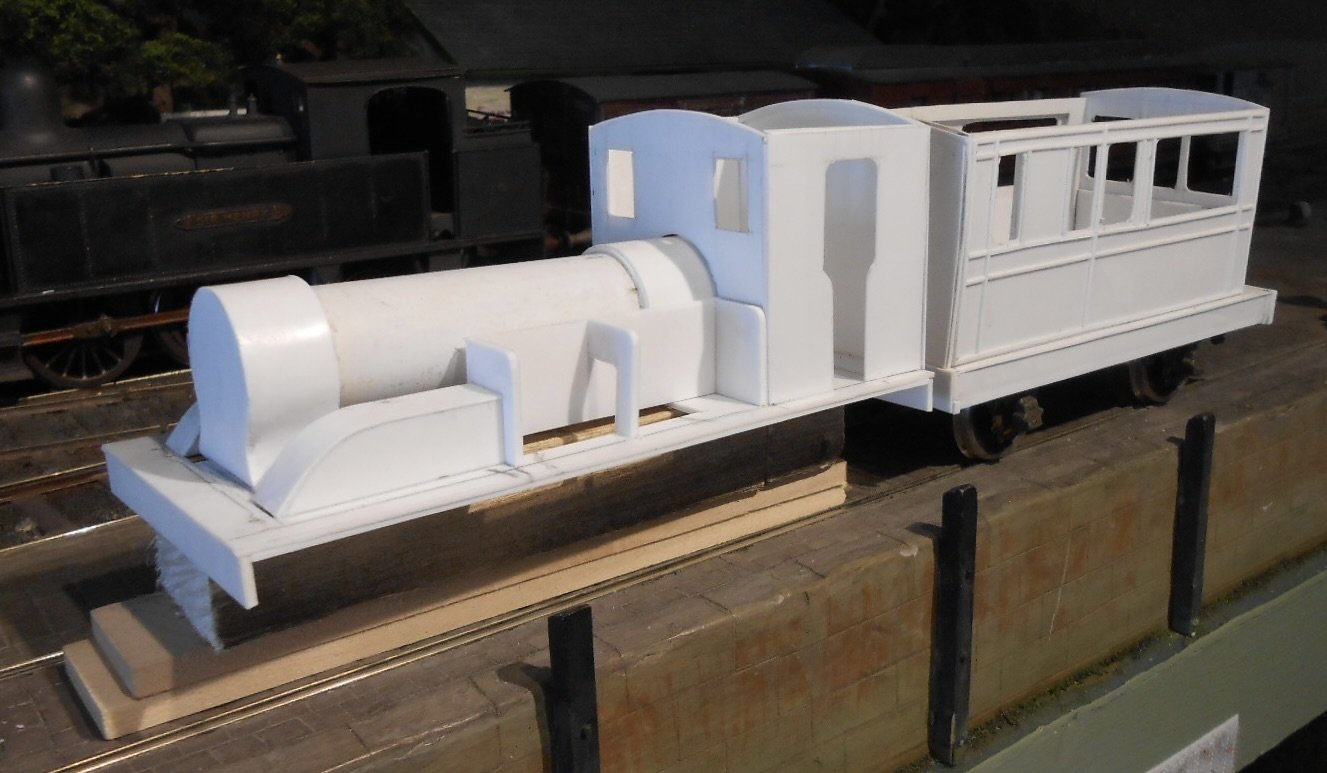
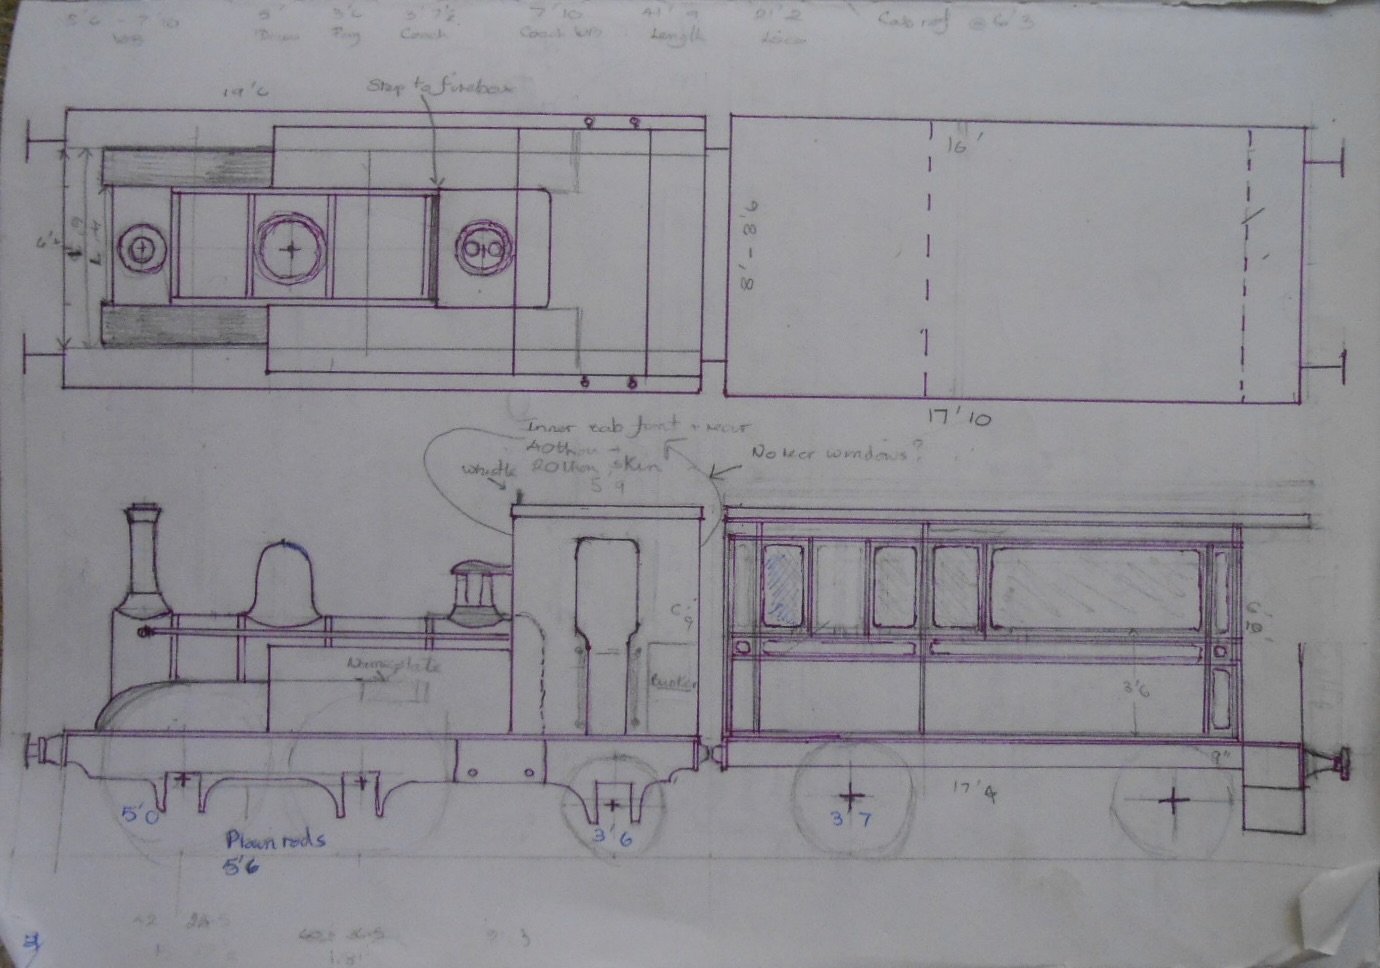
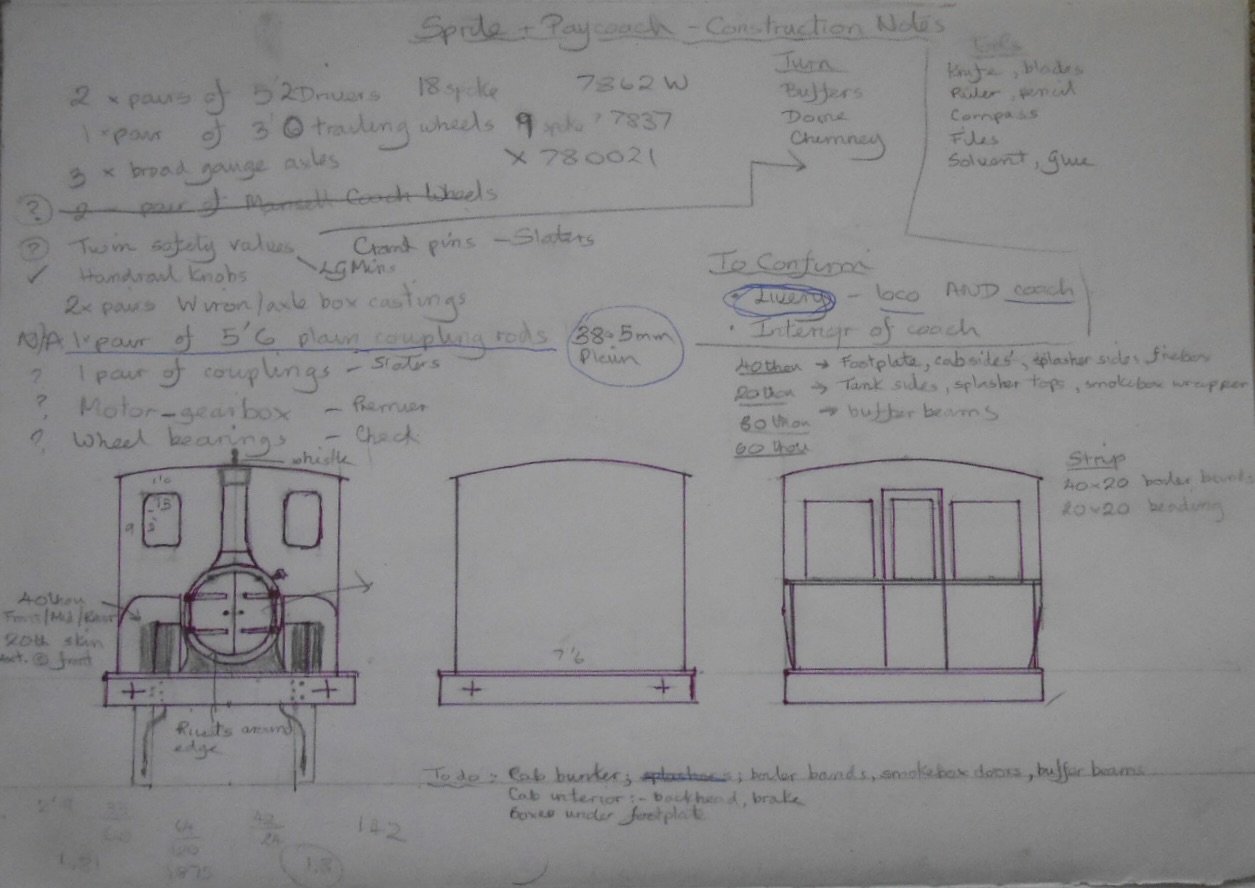
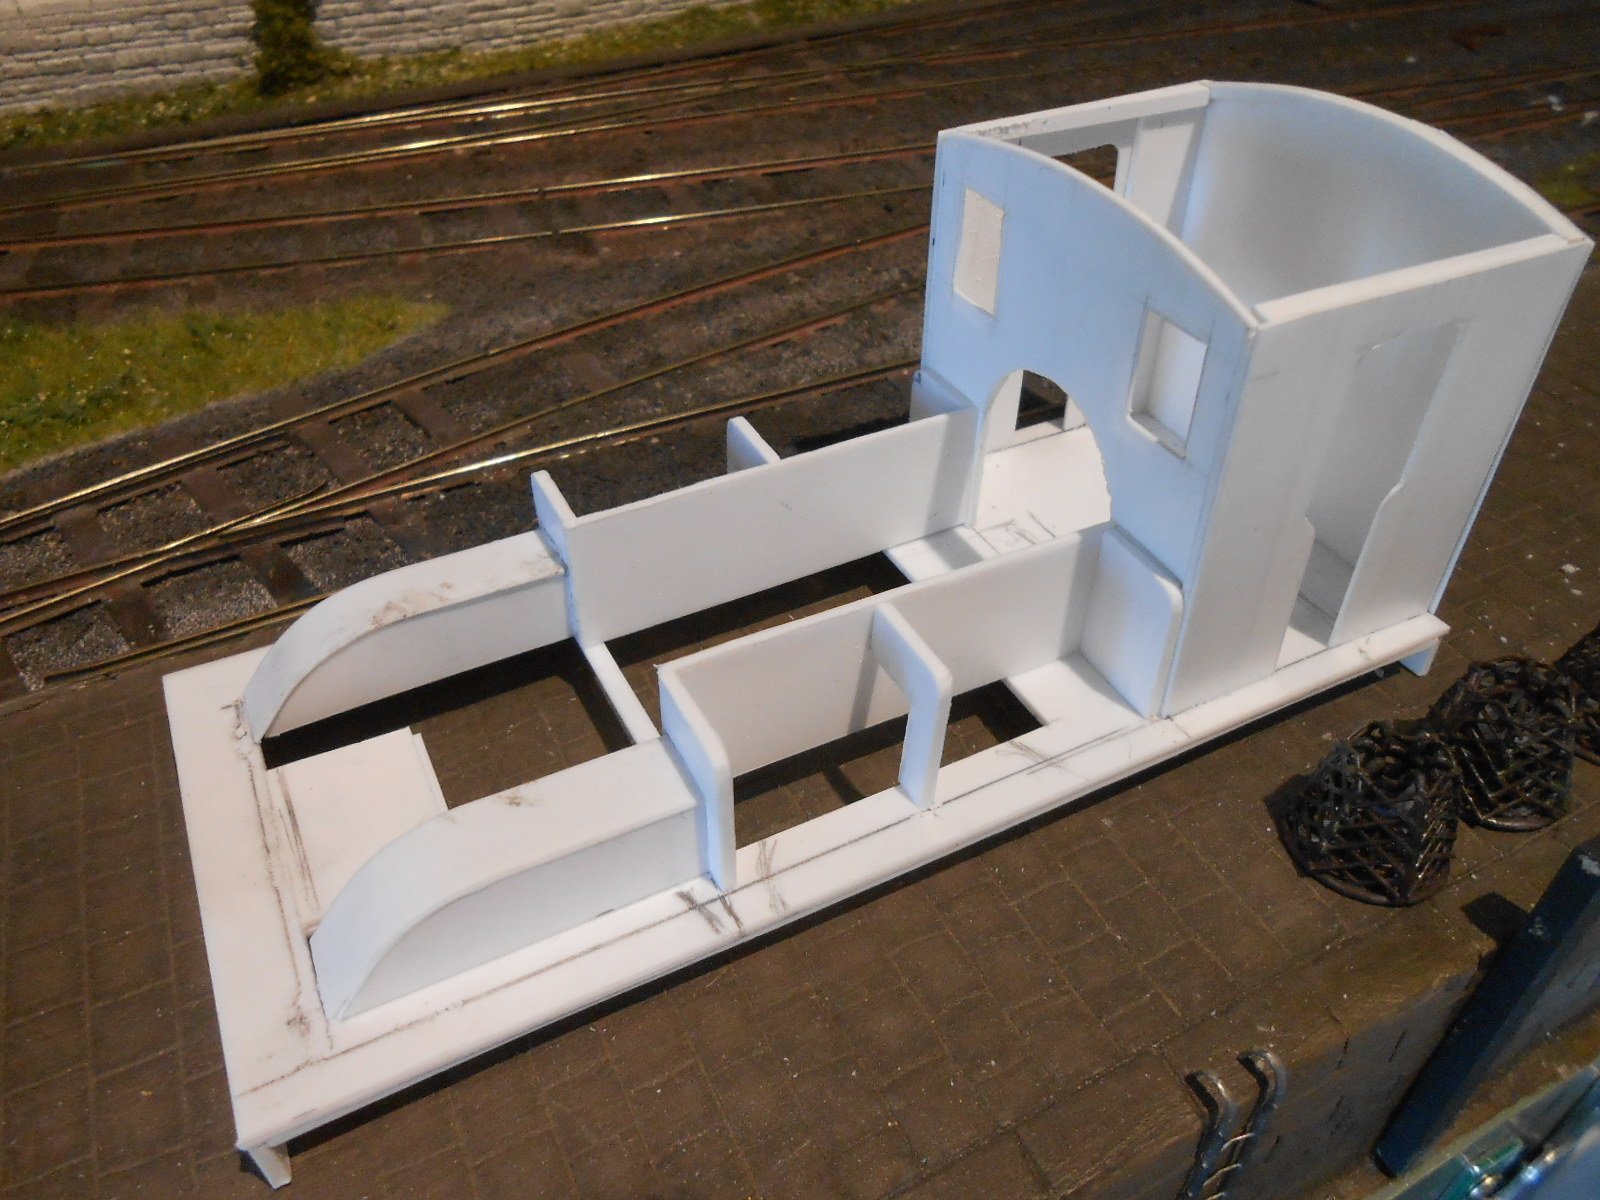
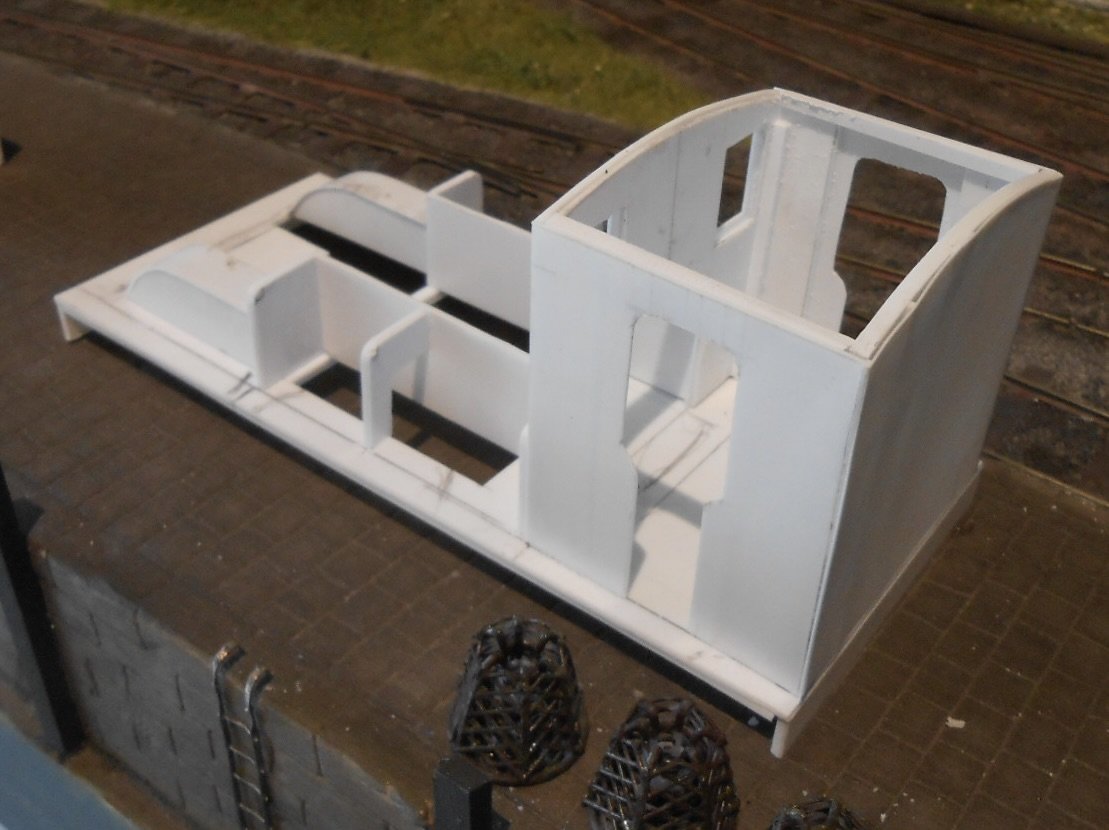
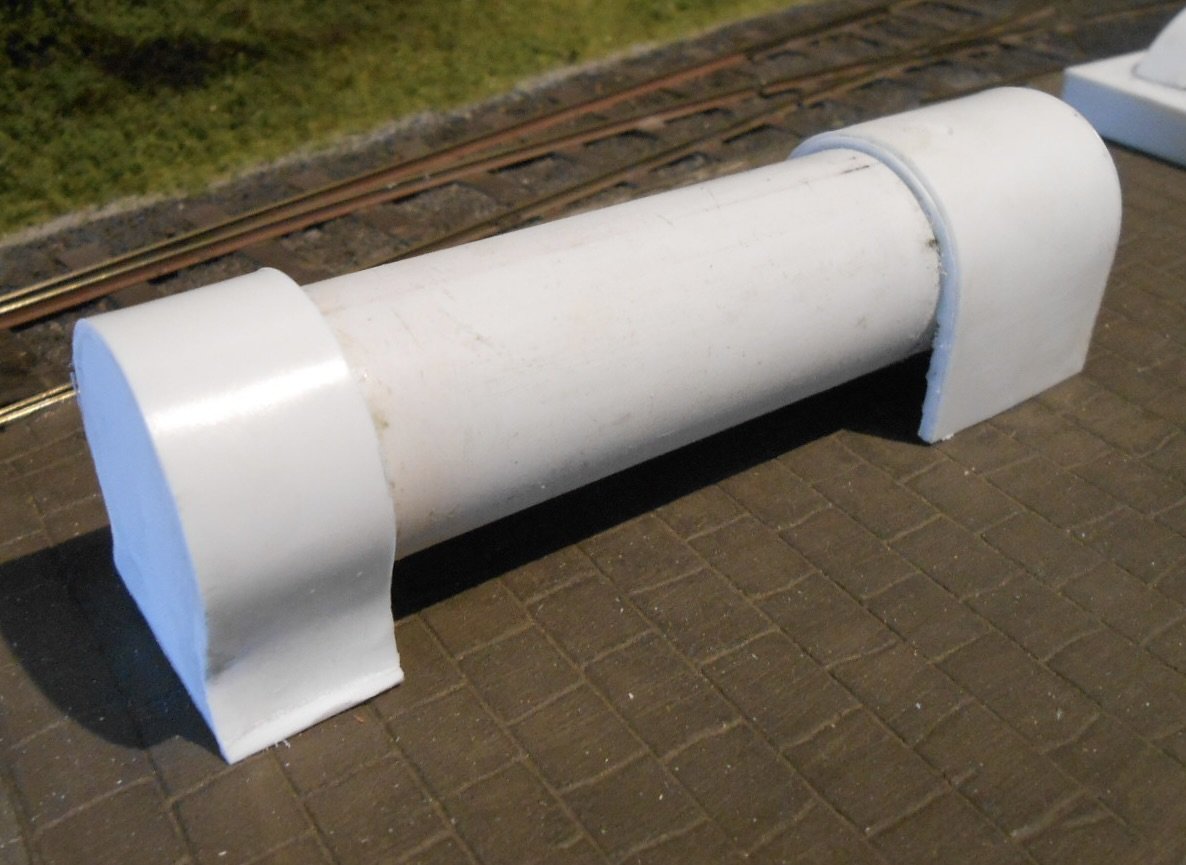
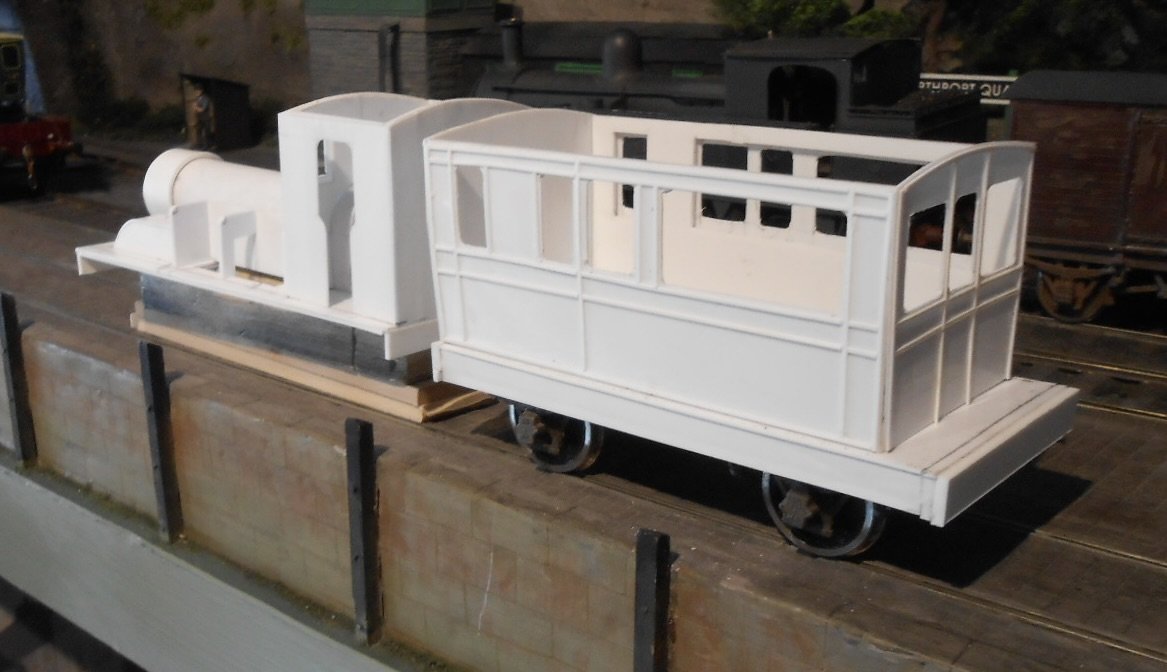
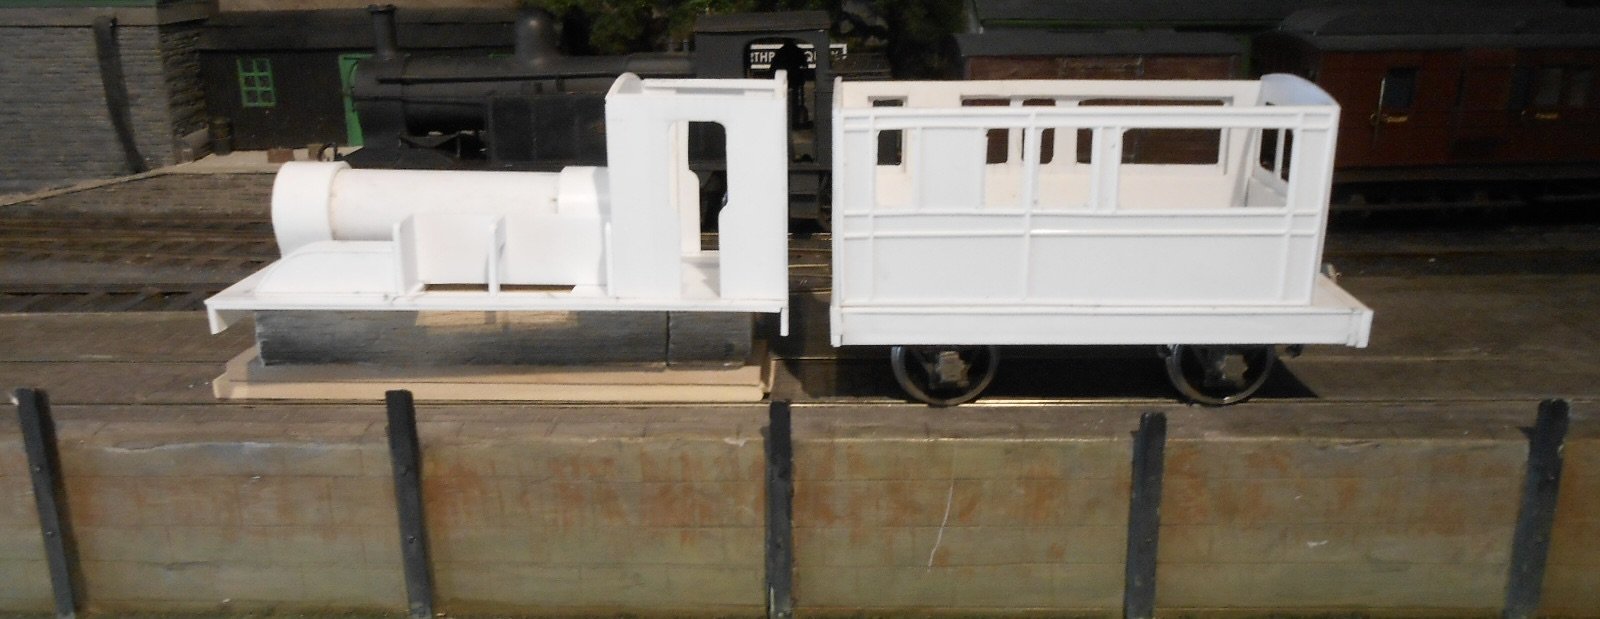
Another itch I've been wanting to scratch for several years now has been the Sprite and Fairy 'Pay Trains' and a moment of serendipity the other day actually got the project started again. You might remember I'd had a go at the pay coach, but the little loco [and other projects] had got in the way until I decided I needed something to do for a few days while we were away at my Mum's for Mothering Sunday. The serendipity came when I suddenly realised that a piece of plastic water pipe was exactly the right diameter for the boiler. Ergo, why not build the whole loco body from plastic - especially as I've got my eye in doing the Donegal railcar in this material. However, let me say that will not be an accurate replica. For one thing I can't find the right driving wheels. Size is ok, but both locos had 16 spokes, whereas 10 or 12 is the most available from Slater's. Also, photos are in short supply, while details of the coach interior aren't clear either. The two locos had subtle differences: Sprite had 5' drivers and 3'6 trailing wheels, while on Fairy they were 5'3 and 3'... So my model will be 'in the school of' - indeed, I'm looking for a different name, assuming that there was either a third Pay Train combo, or that the Midland had one too. All in all, it is really just a bit of fun. So, planning for this project goes back several years, starting with doing some drawings, which have been gradually added to as shown below. As already mentioned, the loco body is mostly plastic. 40 thou sheet for the footplate, 80 thou for the buffer beams, with a fair bit of 20 thou for where edges need to be thinner. For example the internal structure of the cab is 40 thou, but this is overlaid with 20 thou and the same goes for the splashers. The side tanks are complicated by their curved top, so 40 thou formers have been used, which will eventually be overlaid with more 20thou sheet, as shown below. The boiler is the plastic water pipe to which extra layers of 20 thou have been added to make the smokebox and firebox sections. These days, I mostly use Plastic Magic to weld pieces together, but had to resort to MEK to fix the first layer to the water pipe, which is made from a different type of plastic. So far, everything seems to have gone together ok, with the loco work being done over last weekend. The spares box will be raided to see what can be used for some of the fittings, though it may be that I'll have to turn the chimney and dome from brass. The chassis will be brass too and am hoping it should be fairly straightforward, albeit probably needing some of the boiler to be cut away to accommodate the motor. Two things where suggestions will be welcome: What livery would Sprite and Fairy have carried? Am assuming the locos would have been unlined black, with the coach that very dark crimson/purple lake. Sprite and Fairy are obviously mythical creatures, so what might a third loco have been called? Pixie [or Pisky] maybe? Elf perhaps - though not Leprechaun - not sure the tank sides are long enough!
-
Good stuff and love the sky. Maybe the scene just needs lowering a bit, so there is less land on show?
-
Back in the day, I seem to remember a starting point for building a kit was about three times its cost. These days, a big steam loco kit is usually well over £500. Motor gearbox £80 - £120, wheels around £200 (a single pair of Slaters drivers is now over £30). So, triple that and you are not far off three grand, which is also not far off what folk like Masterpiece models charge for their custom built short runs of bespoke models. If that sounds like a lot, remember that a big loco can easily take 100 hours or more to build and that won't include painting, lettering and so on. When you think that a Slaters wagon kit will be around £40 upwards, but a Dapol rtr wagon can be had for £60 or so, the latter is quite a bargain because even a humble wagon will take 10 - 15 hours to build. Which is why some many of us are happy to kit and scratchbuild our own stuff, for both the challenge and satisfaction it brings. Hats off though to the professional and semi pro builders who grace our hobby with their expertise - long may they prosper and likewise the manufacturers of components, kits, rtr and indeed the new band of CAD/3D printers. Where would we be without them?
-
Thanks Eoin - I wasn't aware of the Manufacturers thread on the Forum, so you've just opened a whole new window of modelling for me! Suspect I might not be the only one either. Looks like there's lots to inspire, not least from your own good self.
-
Wonderful - and what a railway!
-
Maybe someone could have a word at the open day and suggest a few of these folk might like to post on this forum. There's some mighty fine models in Eoin's pictures and it would be great to learn more about them. I've been a Guild member for over 30 years and very little has appeared in the Gazette in that time. Stuff like this needs a wider audience, methinks!
-
Yep, stunner.
-
Either a C or a 121 would work for me, though it is important to remember what a rtr loco costs in 0 gauge. Mainline diesels from Heljan are all north of £500, though Dapol seem to do smaller types for around half that. With steam outline, the perennial problem of splashers and outside motion raises its head, especially if the correct gauge is to be accommodated. That said, 36.75mm is proportionally less obvious compared to 32mm that 21/16.5 in 00. Diesels therefore the obvious choice, where drop in replacement wheels ought to be simple enough, as in 00. However, anyone contemplating Irish 7mm scale needs to remember that there is precious little rolling stock (rtr or even kits), available. ALL my stuff is hand built and Galteemore will tell you the same and am sure folk in this parish need no reminding that a lot of work is needed to convert British outline models to Irish ones. So, caveat emptor, as the saying goes. There again, 7mm scale can be very enjoyable and indeed, very addictive - in many ways arguably easier to do Ireland than in 4mm scale. So, as before, I'd still say: come on in, the water is lovely!
-
Worsley Works do a set of etches for the G class, Deutz shunter, while there are rtr options of other small, industrial type shutters such as a Sentinel and Rustons in 0 gauge too. Am assuming a 121 might be available as the original 'road switcher' on which they were based, though would be 1:48, not 1:43.
-
"Voiding the Warranty" - Mol's experiments in 21mm gauge
Colonel replied to Mol_PMB's topic in Irish Models
The paint jobs have finished things off beautifully. Subtle, understated and very much "baby bear porridge"! -
Pickups need to be different on every loco, it seems and though loads more room on a big one like this, the high footplate posed a problem in trying to keep them hidden. I think plunger pickups would probably be best, but not provision made on the kit and certainly not keen to strip the chassis right down to drill out holes for them! Fortunately the balances will just about hide what I've done, especially from normal viewing angles.
-
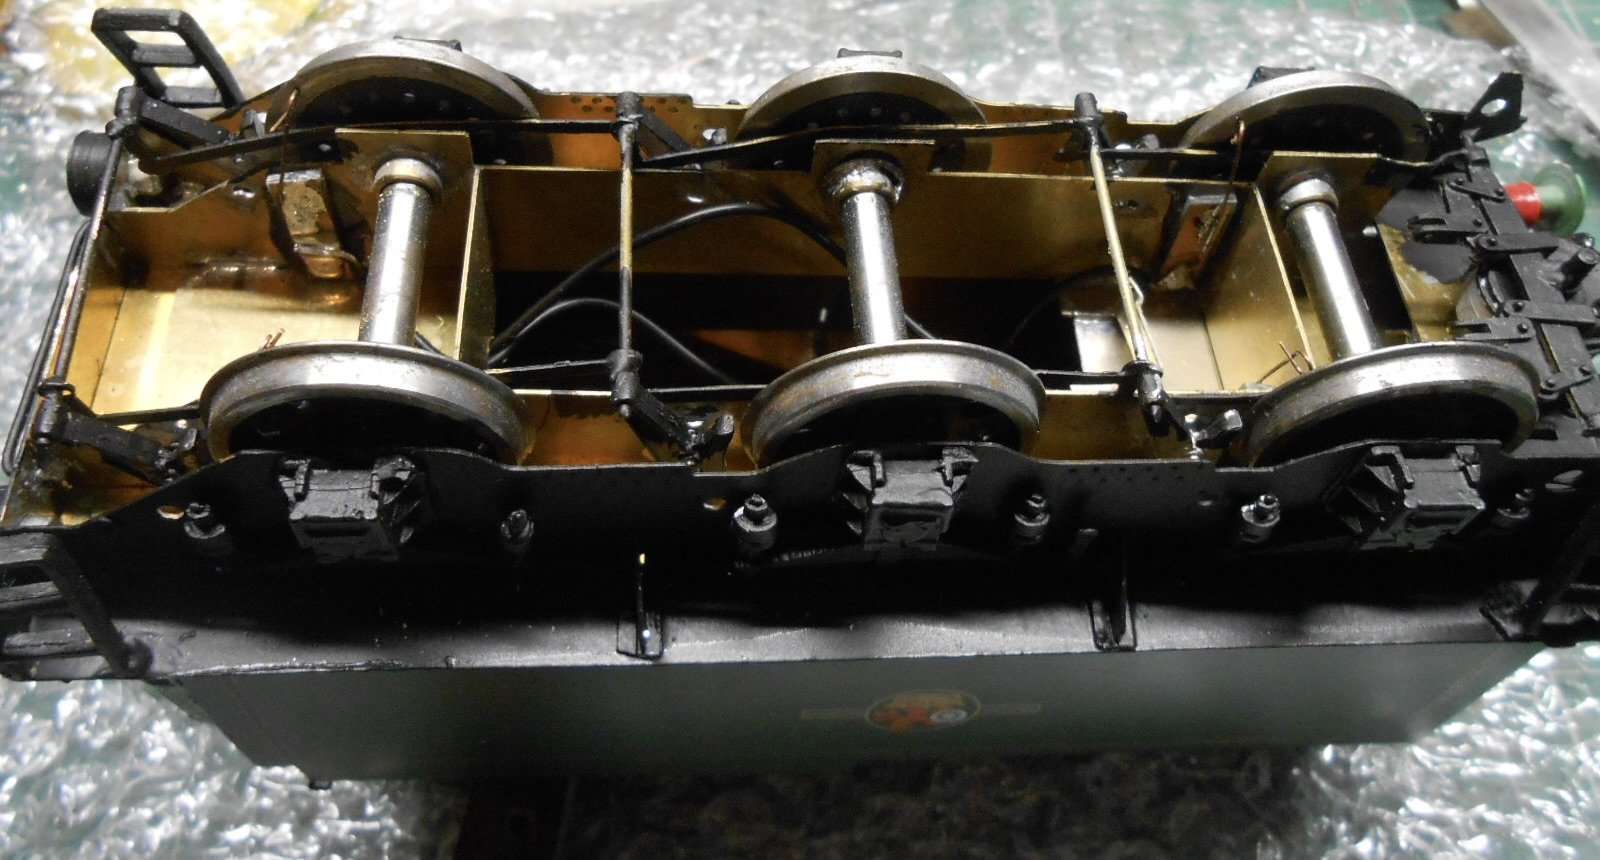
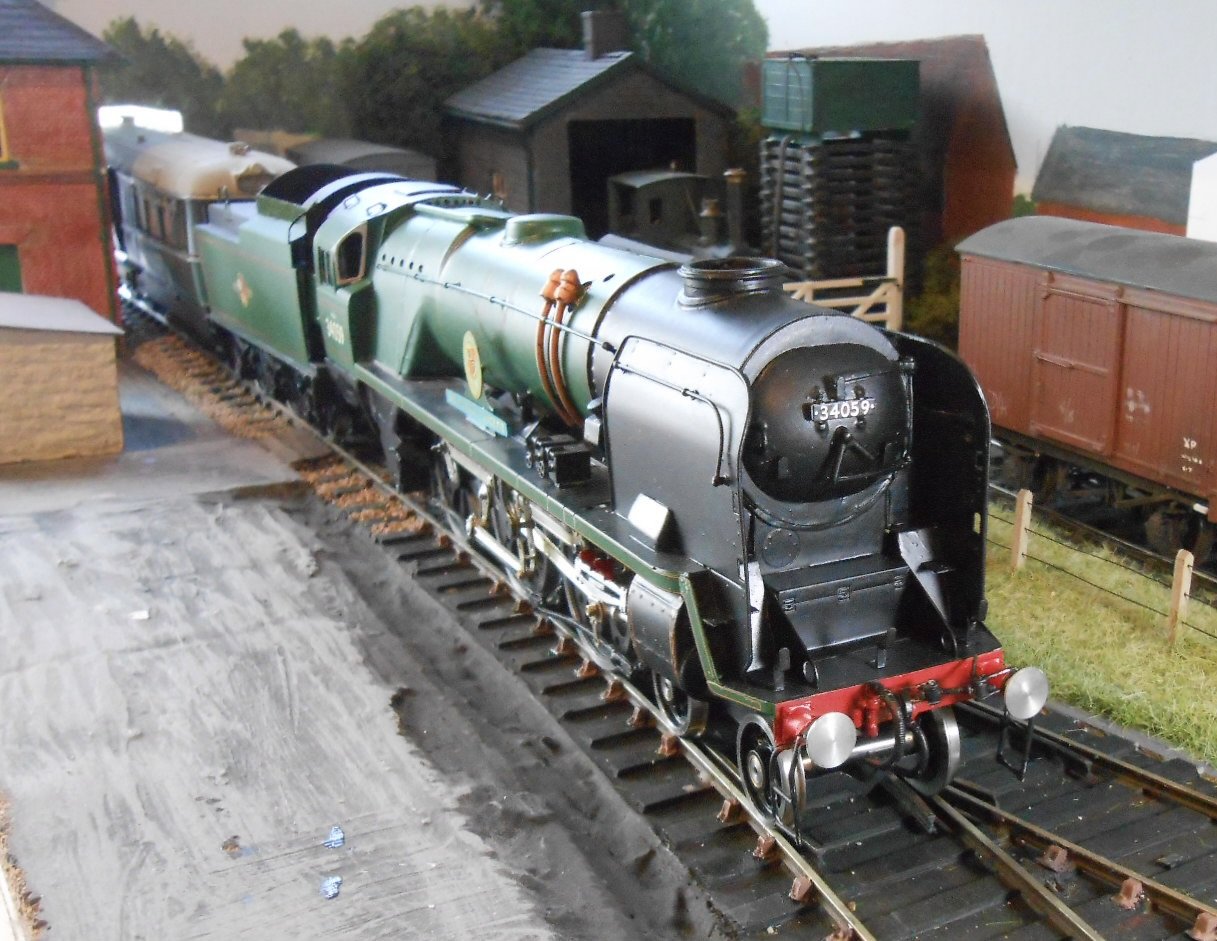
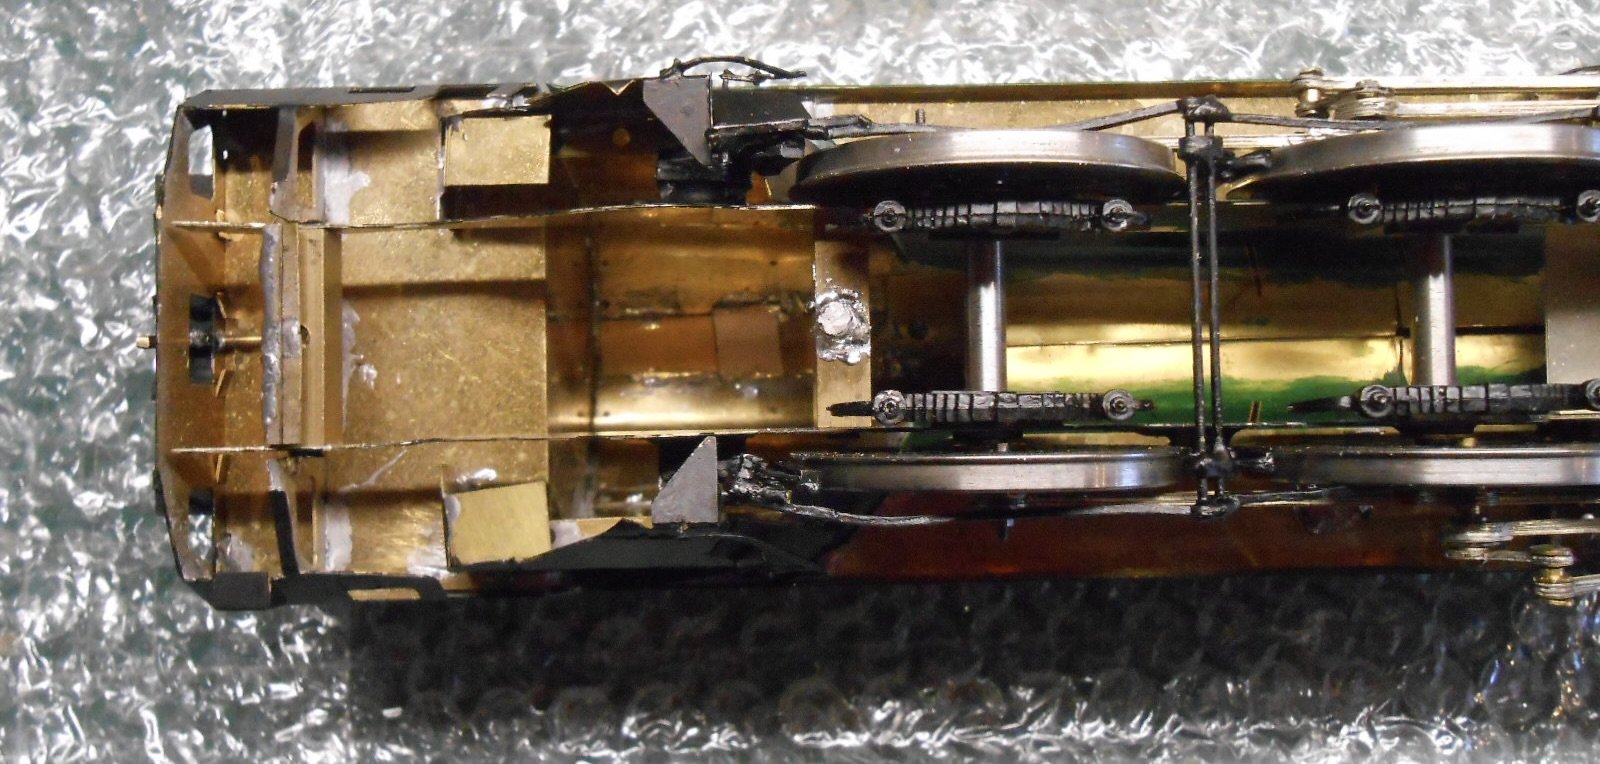
Ordered a motor/gearbox from MSC Models today. They supply robust, ready assembled products, priced for all needs and tastes. 0 gauge power can be expensive: my MGWR Wolf Dog loco needed one that cost £125, but it is a fine piece of engineering with helical gears. BoB Sir Archibald Sinclair is getting a mid range, two stage unit that will hopefully fit in the firebox, with room to spare. Managed to get the rear wheels off without disturbing the brake gear [result!], but looking at the valve gear, realised the top half of it is missing. Fortunately, Premier Components do a full set of profile milled valve gear for just £30, which is not only a bargain in terms of time saved not having to make it yourself, but they also run an excellent service which includes not having to pay up front - they send an invoice and you only pay once the goods are received. Very gentlemanly and very civilised. Can't do much until the parts arrive, but this afternoon managed to install pickups, using pieces of copper clad and 0.5mm phosphor bronze wire. Top wipers on the drivers and back scrapers on the outer tender wheels.
-
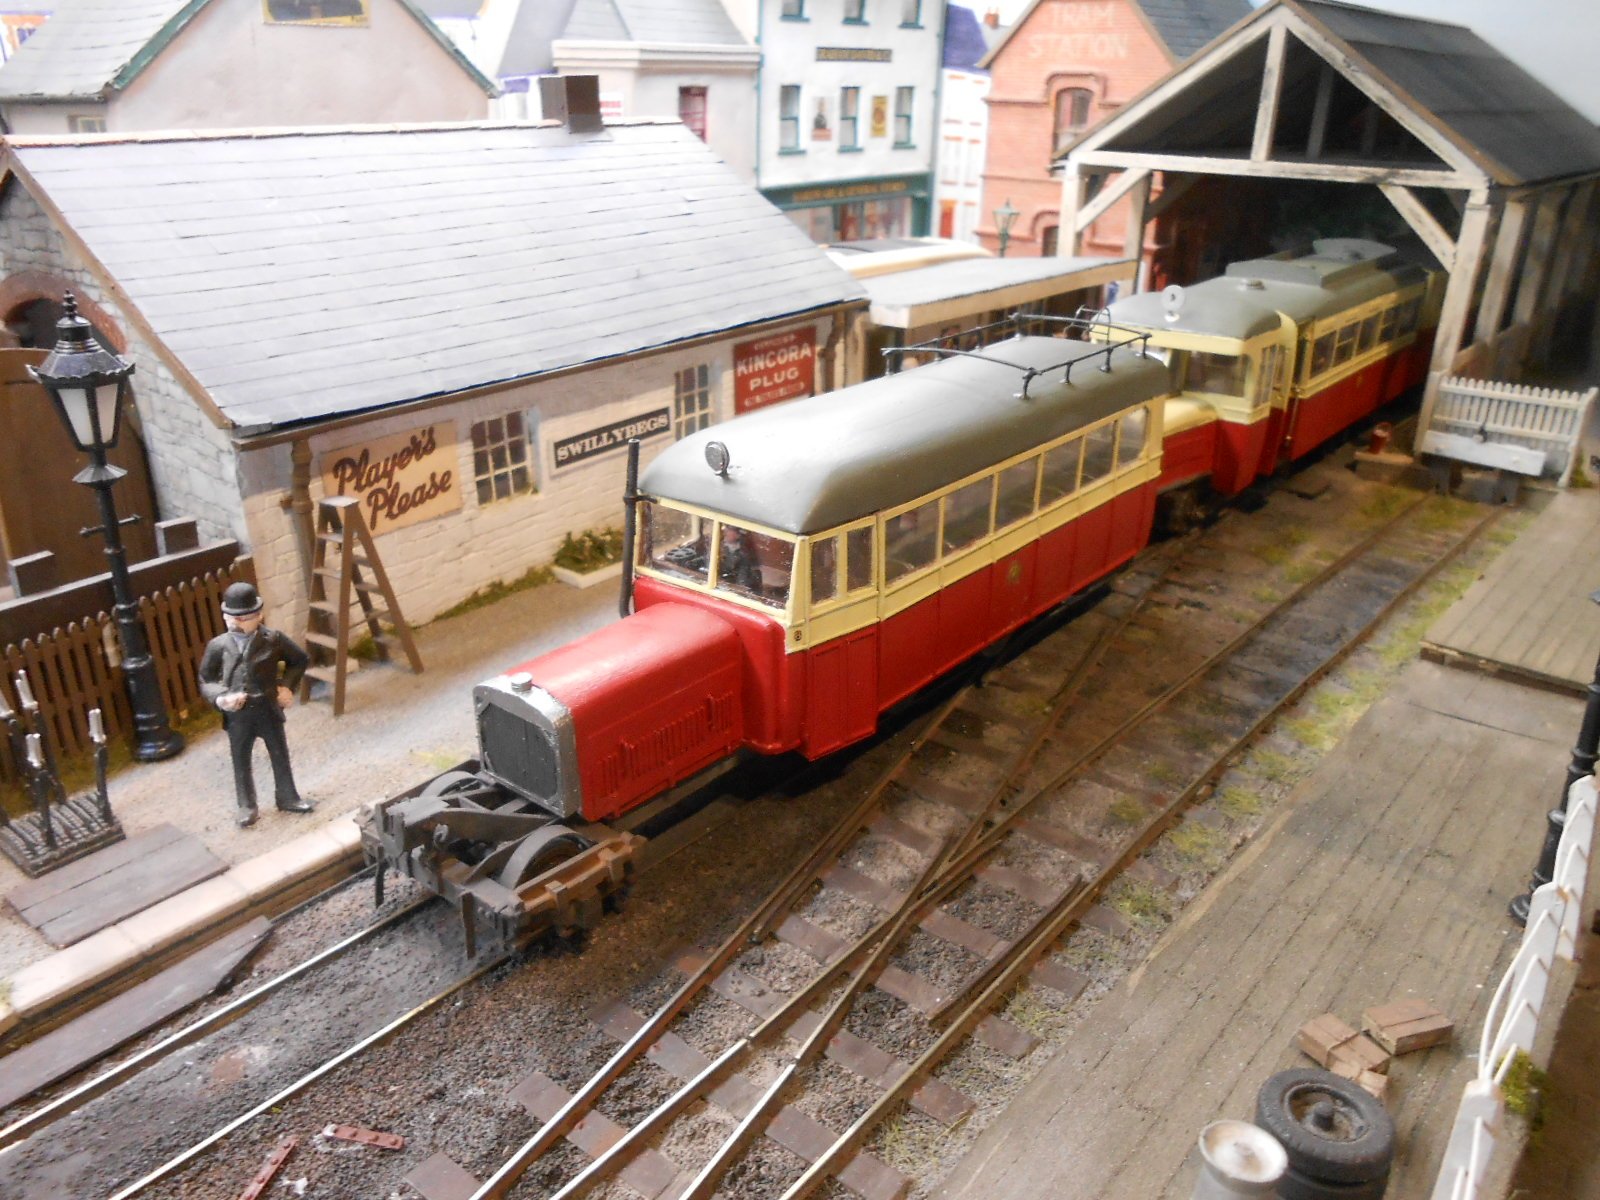
Right, I think that is about as far as I can go at the moment with Railcar 8. Rear ladder in place, transfers applied [the Donegal crest is actually a Midland Railway one], the roof has been painted to match Railcar 10 and a bit of weathering powder applied. Still needs luggage, which I'm waiting for from Skytrex, but for now the two railcars are posed as part of a 'Hills of Donegal' special, which will be joining the rest of the cavalcade at Strabane, heading for Ballyshannon. Such trains could comprise at least 4 railcars, plus trailers and bogie coaches and must have been challenging to work as all the railcars had separate drivers. Going over Barnesmore Gap must have been difficult, to say the least. So the workbench has been cleared and tidied, but not for long, because a very different beast has appeared in the form of a Bulleid Rebuilt Battle of Britain 4-6-2. Vaguely Irish of course, but am adding a motor gearbox for a fellow club member. He picked it up online as a [mostly] complete Acme kit. Seems nicely done, but part of a collection that the previous owner built up but never motorised any of them. At least I have a small 0 gauge layout to eventually test it on and an MSC two stage motor gearbox has been ordered. Am hoping that finding room for it shouldn't be a problem, because there's a huge space inside the firebox. Just that cross member between the rear wheels to worry about - it's not exactly moveable as it forms the mounting for the rear pony truck...
-
Great space, great concept and all looks very well built so far. Good luck with the railway side of the project and keep us posted!