Mayner
-
Posts
5,046 -
Joined
-
Last visited
-
Days Won
126
Content Type
Profiles
Forums
Events
Gallery
Blogs
Community Map
Everything posted by Mayner
-
 IE implemented the directive by opening up access to the rail network about 15 years ago, but apart from the Railway Preservation Society of Ireland no one appears to have been interested. https://www.crr.ie/economic-regulation/access-to-the-rail-network/. There was talk in the early 2000s of a UK "Open Access" operator entering the Irish Market to operate a rail borne distribution service using rail for "Line Haul" work with road delivery and collection, the business failed to take off in the UK or Ireland. The lack of heavy industry like steel mills, motor manufacture, large rail served quarries, and large coal/bio-fueled power stations in Ireland means there is little in the way of heavy profitable freight flows for rail in Ireland. Importing Bio-fuel (sawmill waste) through Scottish ports to burn in Power Stations in the North of England and transporting stone from Somerset to London by rail has not exactly got a lower carbon footprint than ESB burning oil and coal in its coastal power stations or Roadstone supplying stone by road to Irish cities from locally located quarries. DB Cargo and other UK 'Open Operator" success is based on serving heavy industry of a type that does not exist in Ireland and the UK Government subsidising rail access charges. Kingscourt is unlikely to be a runner for Gypsum traffic unless Cement Limited or Gyproc paid to extend the line from its current terminus to the mines near Carrickmacross and invested in a modern fleet or high capacity wagons.
 -
It would make more sense from an engineering and financial perspective to build a railway to serve Cavan. Monaghan or Donegal for that matter on an entirely new (more direct) alignment, than to attempt to re-open indirect routes that were abandoned over 60 years ago. It would be necessary to go through the planning process and obtain powers of compulsory purchase to acquire the right of way regardless of whether its intended to re-open an abandoned route or build a line on an entirely new route. The powers to build and operate a railway were extinguished when the lines were abandoned during the 50s and 60s and the right of way disposed of to adjoining landowners. The Government/NTA have to buy back Pace-Navan trackbed from the landowners before work can start on re-opening to Navan. Personally I think the re-opening of lines in the Border/Midlands Region unlikely to happen, relatively low population and the challenge of the Irish and UK Governments co-funding such a project, much simpler to provide subsidies for electric cars.
-
My first introduction to IT was during the late 70s when our company 'outsourced" our book-keeping to a business that had a Main-Frame computer as our business expanded. Previously among other duties I maintained the sales and expenses ledgers manually entering and coding invoices and payments in a big Kalamazoo Ledger, my job was now to approve and code the invoices for data entry on a paper form stapled to each invoice. Our provider sent out a "technical advisor' to our office after some unexpected glitches in the first data entry run and our "advisor" literally could not believe my working conditions in a site office on a busy construction project and he never came back again or heard of further problems with the standard of my coding. I usually carried out data entry or invoice coding in the quite and comfort of a show home or a back-office. We later took on a full time book-keeper and I shifted to a purely managerial and technical role and no longer had to code invoices
-
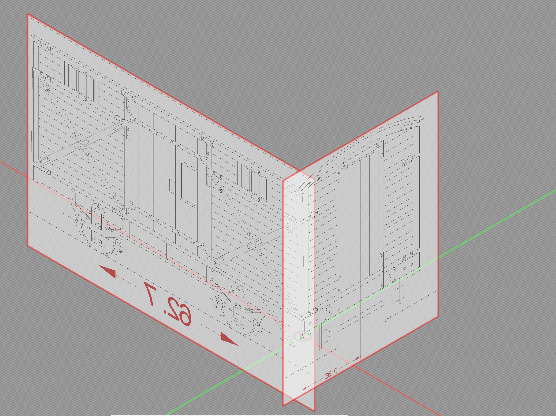
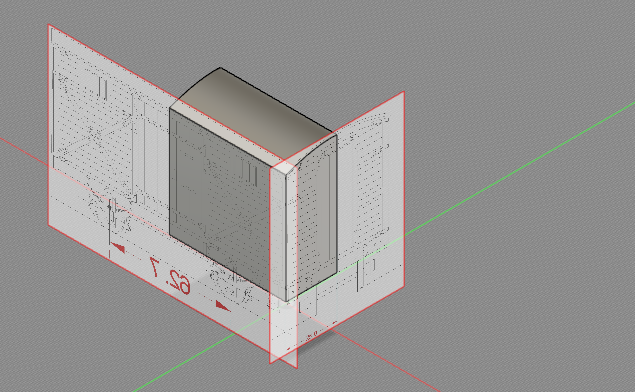
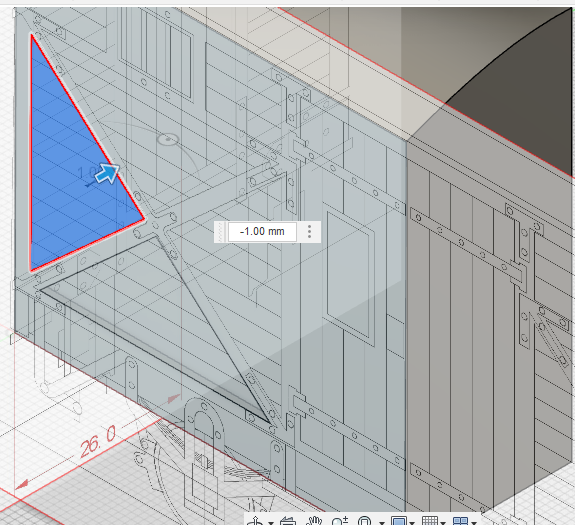
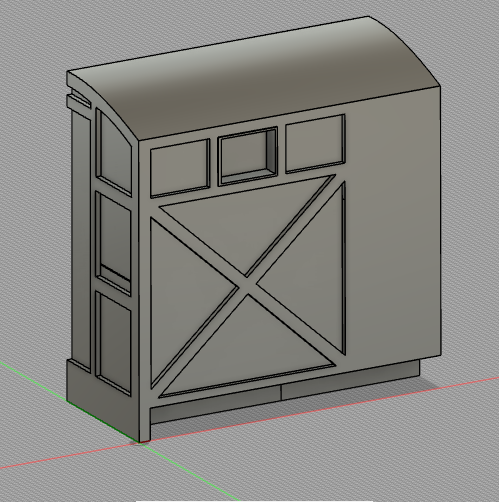
Some progress with the 3D model of the C&L Milk Van. Step 1. was to import 2D side and end sketches I prepared earlier as templates for drawing the 3D Model One of the quirks of my 2D CAD software is that the sketches appear as a mirror image when imported into Fusion 360 as a "Canvas' Step 2. 1/4 of the basic bodyshell extruded as a 3D model. The Milk Vans and most wagons are symmetrical so its only necessary to prepare a detailed 3D model of a 1/4 of the model and then complete by copying and producing a mirror image. Step 3. Extruding the framing detail, the basic extrusion includes the thickness of outside framing and I then cut away the excess material to model the depth of the framing, a process not unlike milling or routing metal or timber without sharp rotating tools, swarf and dust! Step 4. Outside framing modelled for 1/4 of Milk Van Planking, strapping and bolt head detail will be reproduced by extruding profiles on the model. The next step is to produce a test print, for planking, strapping and rivet detail using different widths, depths and material thicknesses before completing the Milk Van body detail.

- 403 replies
-
- 11
-

-

-

-
The South Eastern does not appear to have had the very low platforms commons on the Cork Line and older parts of the GSWR so coaches with lower footboards may have been un-necessary at least in DSER/GSR/CIE days. The GNR(I) also appear to have fitted (or removed) lower footboards from their 6w and older coaching stock.
-
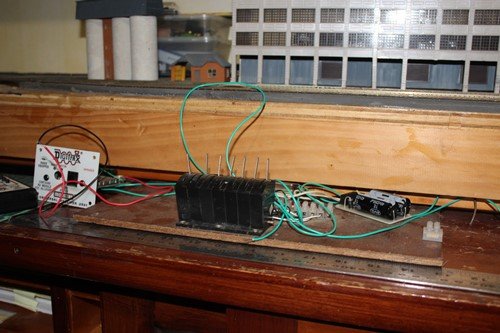
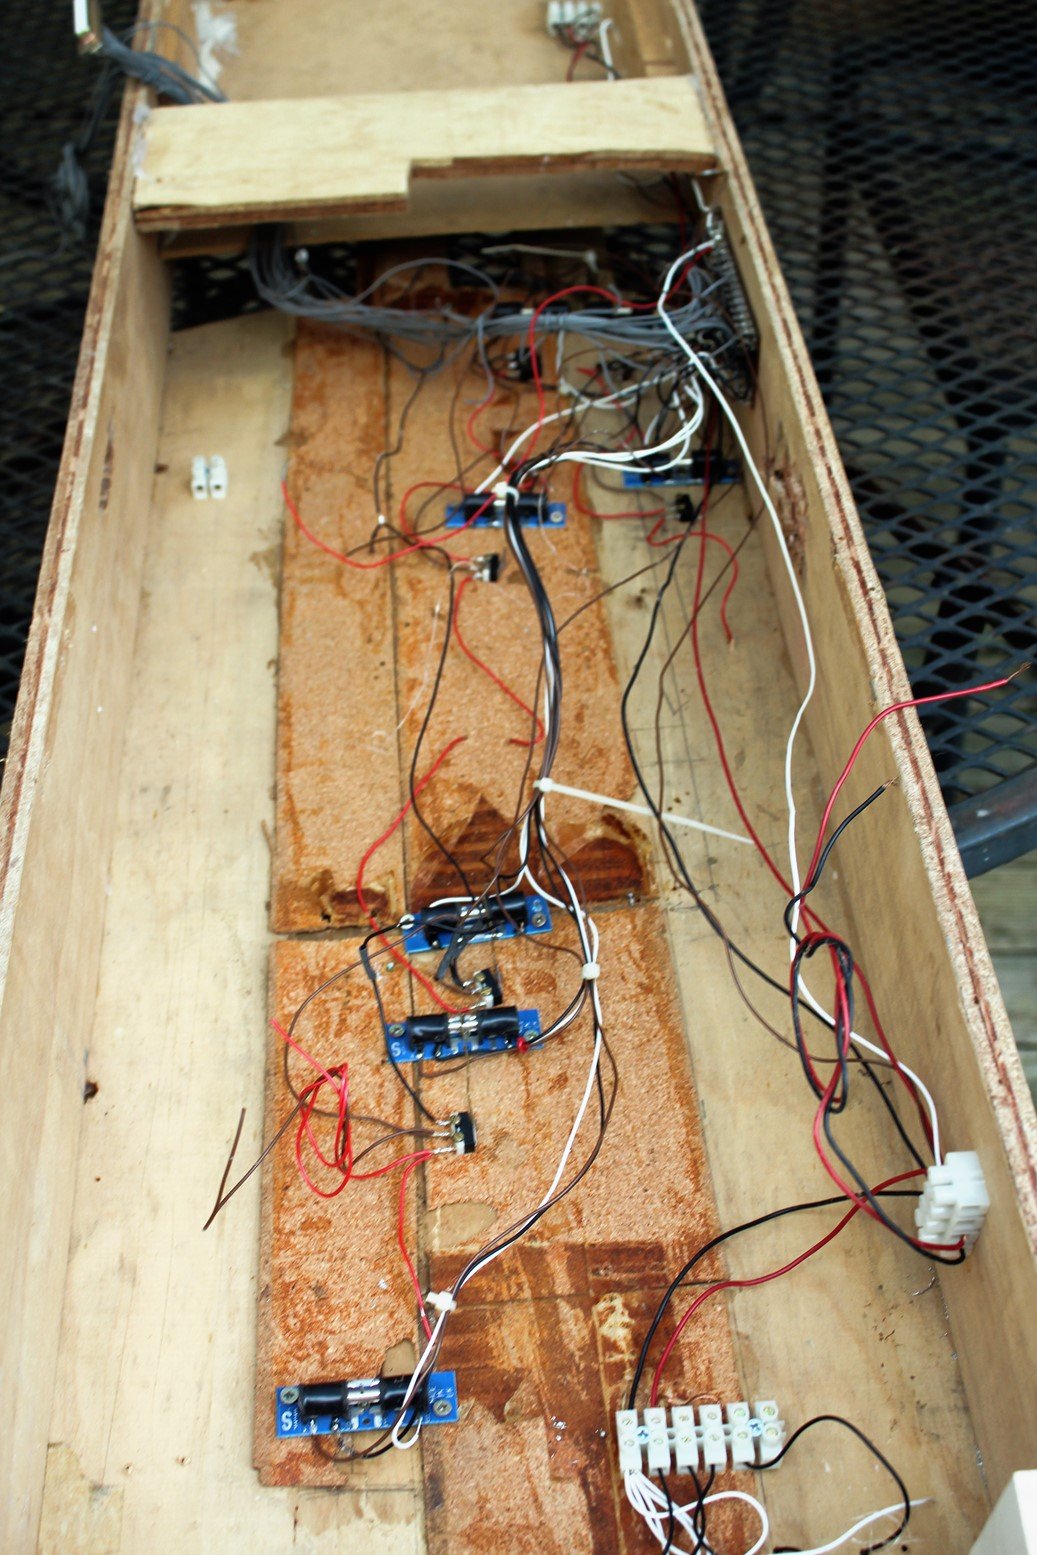
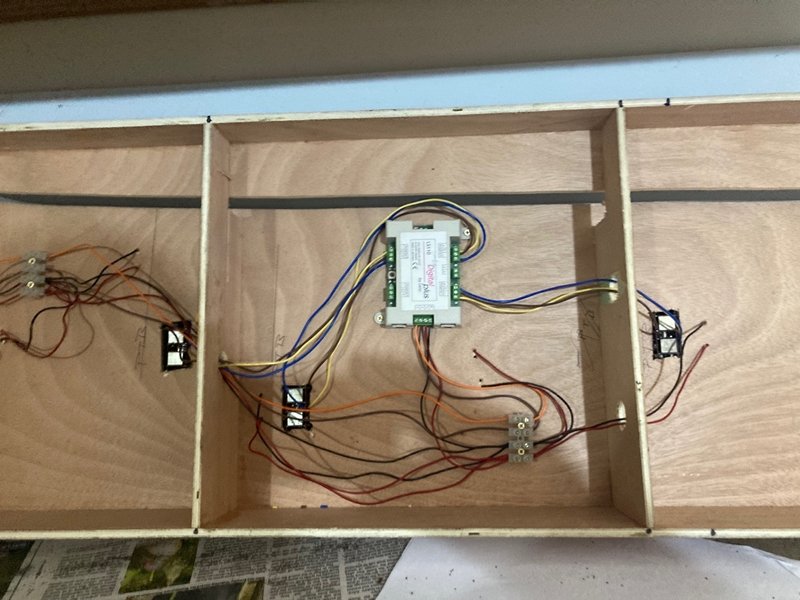
One single 15V source is adequate to power multiple point motors and capable of throwing two Peco point motors at a time such as in a crossover. There are three wires to each Peco Pl-11 and other solenoid point motors, one common and one to each coil fed through the point switch https://www.maurienne-trains.com/images/Image/Peco/PL-11 Instructions.pdf The common can be fed through a single bus wire to each motor, the switch wire have to be fed back to the point switches which can be located individually near the point or centrally in a control panel. The Peco point switches can be mounted singly on the layout or grouped in a lever frame. Although I had Peco switches, I ended up using old Tri-ang (Hornby) switches as I got them second hand for next to nothing and were fun to operate. Bank of Tri-ang (Hornby) levers used to control solenoid point motors on an N gauge layout. One wire from the power source ran to the lever frame, the second direct to the point motor. Wiring Seep Point Motors Black-Common White-Coil1 (Normal) Brown-Coil2 (reverse) on a portable N gauge layout Wiring from the point motors and track feeds was routed through a soldered tag strip to a multi-way cable connector (old style Printer Cable) between the layout and control panel. The layout was portable with three baseboards and two banks of Tri-ang point levers to control the points on two baseboards. DCC Wiring of Peco point motors using Lenz Stationary Decoders using colour coded wiring and screw terminal blocks. Points are fed through a separate 15V a/c supply (orange and brown)to the 15V a/c DCC track power/control bus (black and red) DCC simplifies the wiring leaving each baseboard essentially self contained, eliminating the requirement to run wiring from each point motor back to a separate switch or a control panel.
-
Had not heard of the grade before this trip was more interested in checking out the Clinchfield and remains of the Tweetsie narrow gauge which unfortunately did not come to pass Back in Aotearoa or the "Land of the long white cloud" in Mid-Winter (not too cold, but very damp), Some good stuff on operation in the early 90s when freight trains had cabooses and freight car grafetti was unknown, there is even a You Tube series on modelling Saluda Grade.
-
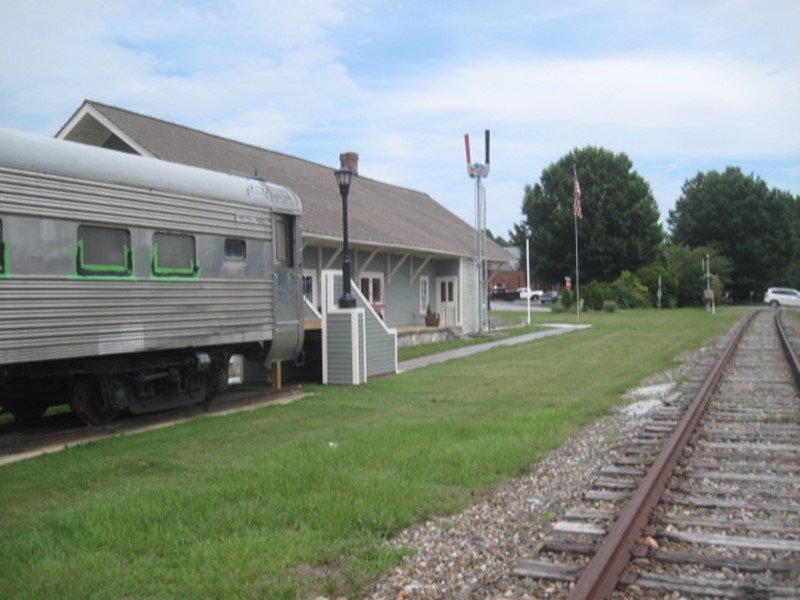
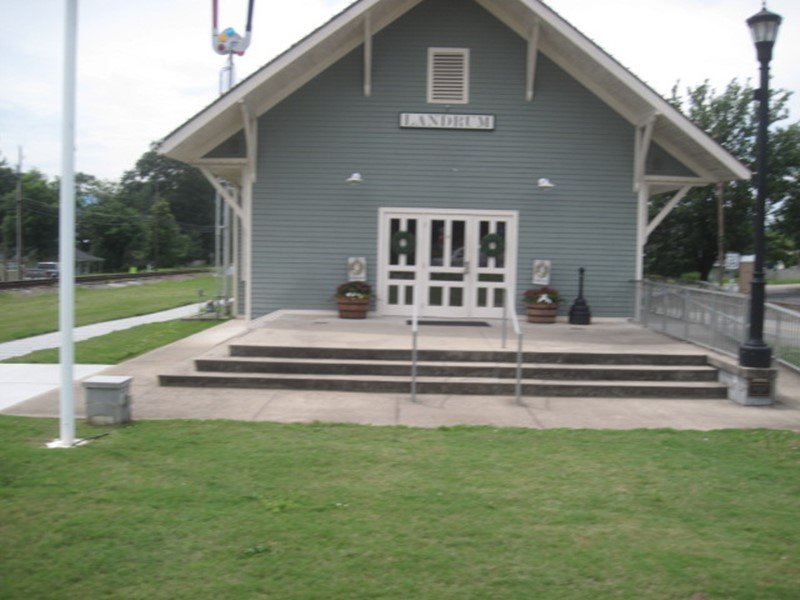
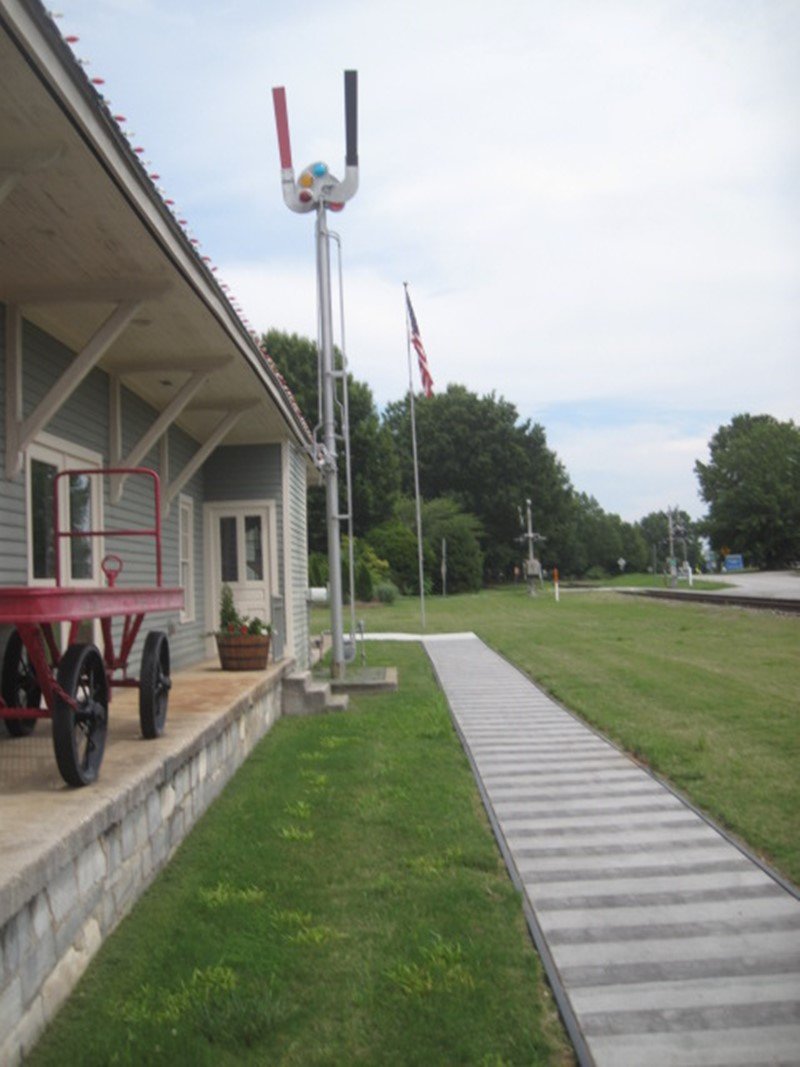
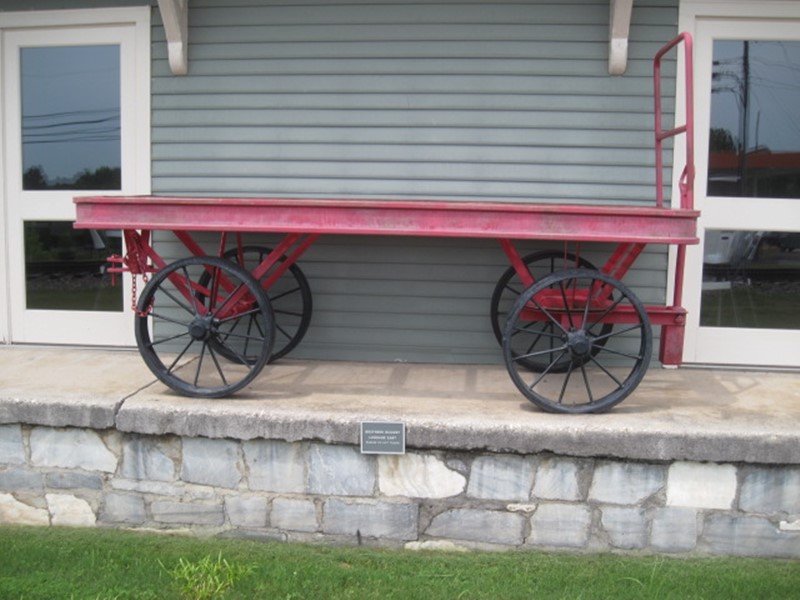
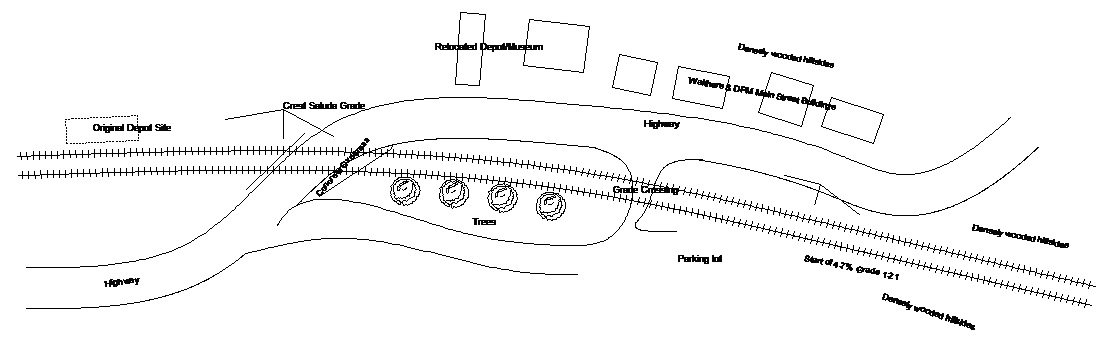
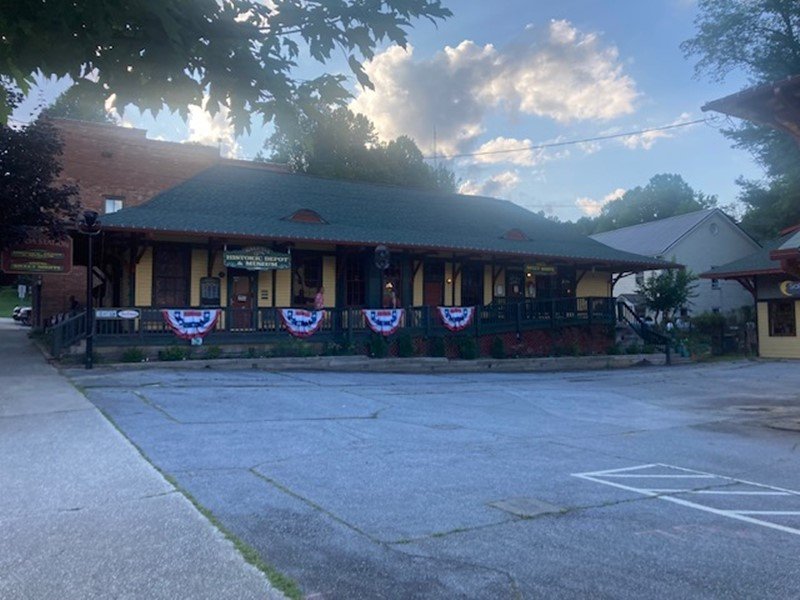
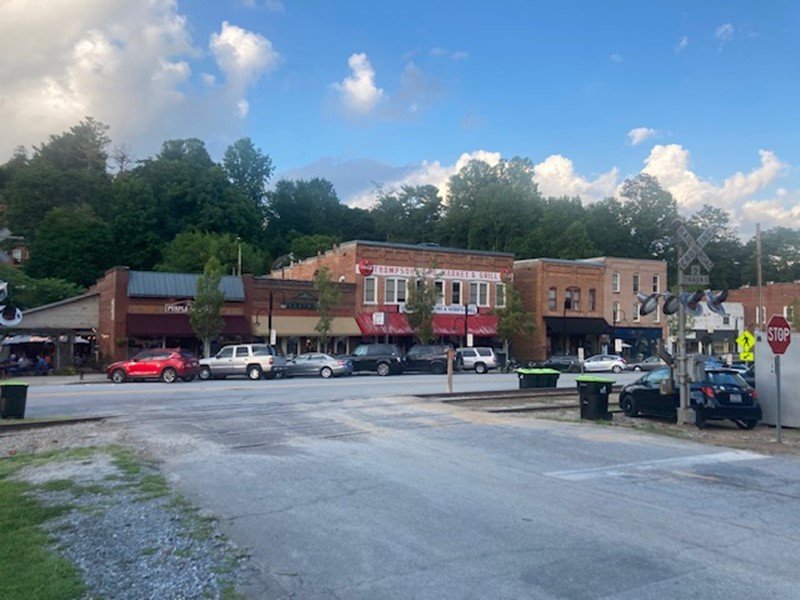
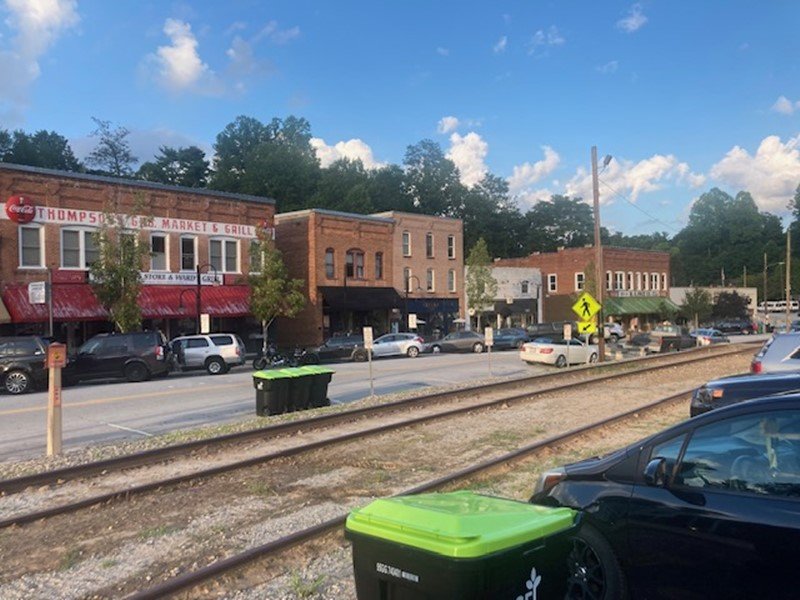
I did not get much of an opportunity to check out the local railroads during our stay in the Blue Ridge Mountain Foothills in North Carolina, but managed to check out a couple of towns on the disused Norfolk Southern ex-Southern Railway Saluda Grade Line and managed to sample some genuine and very good moonshine. With its mild (by US standards) climate the foothills has become a haven for retirees from the big cities of North East and Mid West and Climate Change refugees from California and Florida, the CBDs of the smaller cities (villages & towns) have been nicely restored for tourists and out of Stater's in contrast to the more work-day cities where business has shifted from the CBD to out of town malls and shopping centers. The Saluda Grade was the steepest grade on a US standard gauge main line at 4.7% or 1:21 and has been out of use since 2000 after Norfolk Southern diverted through traffic (including a 12,000Ton coal train) to other routes. My first glimpse of the route was the restored Depot at Landrum South Carolina, the City (Urban District Council) bought and restored the Depot as a Civil Centre after passenger services ceased during the early 70s The Depot appears to have been recently renovated as a function venue, though restoration work on the coach appears incomplete. There appears to have been great local pride in the Southern Railway and the amalgamation with Norfork and Western to form NS not exactly seen in a positive light! The Train Order Board(not a signal!) was probably erected for show, the Southern converted the Saluda Route to CTC control with colour light signalling . Telegraph and Train Order operation became obsolete and the role of the Station Agent redundant with the introduction of Track Warrant Control in the States during the 1980s/90s with Train Crews communicating directly with the Dispatcher (Train Control) using two way radio eliminating the Stations Agents role. Saluda at the crest of the grade is an almost perfect example of a city with the business and residential districts on opposite sides of the tracks and would make a visually interesting model in its own right The Depot was relocated from its original site and re-located and re-purposed as a museum in the CBD, the city centre buildings are similar in style to building kits available from Walthers, Kibri and Design Preservation models, the steep wooded hillsides are best modelled in poly foam with specimen trees in the foreground. Saluda Historic Depot Museum the depot is similar in architectural styling to surviving Depots at adjacent Towns, Landrum appears to be an exception with its simpler roof design. Main Street USA? The crossing signals are tilted upwards out of use. Visual quailty is not great, but a taste of the challenges of operating 13,000 Ton Coal Trains on the Saluda Grade Line in Southern Railway days during the 1990s, the Southern and Norfolk and Western preferred to run their freight diesels "long hood forward" apparently to provide better crew protection in grade (level) crossing collisions. Four locos on the head end, and three radio controlled mid train helpers.
-
Amazed at Alan's speed and consistent quality of build with BCDR No2 and No 29, building and actually completing locos from scratch in a fraction of the time it takes me to design and carry out the test build of a similar kit.
-
We tend to view our early railway experiences through rose tinted glass. Nostalgia for the past ignoring the realities of train travel. Those of us in our 60s hanker for the nostalgia of travelling in Supertrain, Craven and CIE built coaches during the 70s/early 80s, ignoring the high noise levels in conventional non-AC stock and the poor ride quality of the Cravens, the less said about the quality of CIE/IE track between 70s and early 2000s, travelling on a CIE/IE train was often a bone and ear shattering experience. I have a soft spot for British Railways first generation EMUs with their fast acceleration compared to loco hauled stock from weekend exploration and commuting on the Southern and London Midland during the 80s and curiously the Class 158 DMU for the way they revolutionised Cross-Country services in England and Wales and Intercity Services in Scotland.
-
A single power unit should be suitable for a small layout. Peco recommend 16V A/C at 2amp and SL26 Lever Switch for PL-11 motors https://www.maurienne-trains.com/images/Image/Peco/PL-11 Instructions.pdf A CDU (capacitor discharge unit) improves reliability of operation especially if you want to throw two or more points at the one time. https://www.heathcote-electronics.co.uk/cdu.html
-
Although I have done drafting for most of my adult life, 3D cad work or modelling is a relatively new ball game for me and the C&L & CVR vans first complete detailed models. The majority of my range of Irish Broad Gauge wagons were designed by a freelance designer, though recent variants/improvements to the "Standard Covered Wagon" are my own. Although the initial print was successful the CVR Van is on its second variant as the end steps were to thin on the original and tended to curl up! I am in the States and the moment and will post a photo of the completed van in approx. two weeks after we get back home. Once I sort out the 4mm versions the next step is to re-size to 7mm or larger to find out what happens. I will probably include some CVR vans in our next order from the Chinese supplier that prints our Broad Gauge wagons as the home printer is just not up to it for production printing in terms of consistency and quality of finish.
-
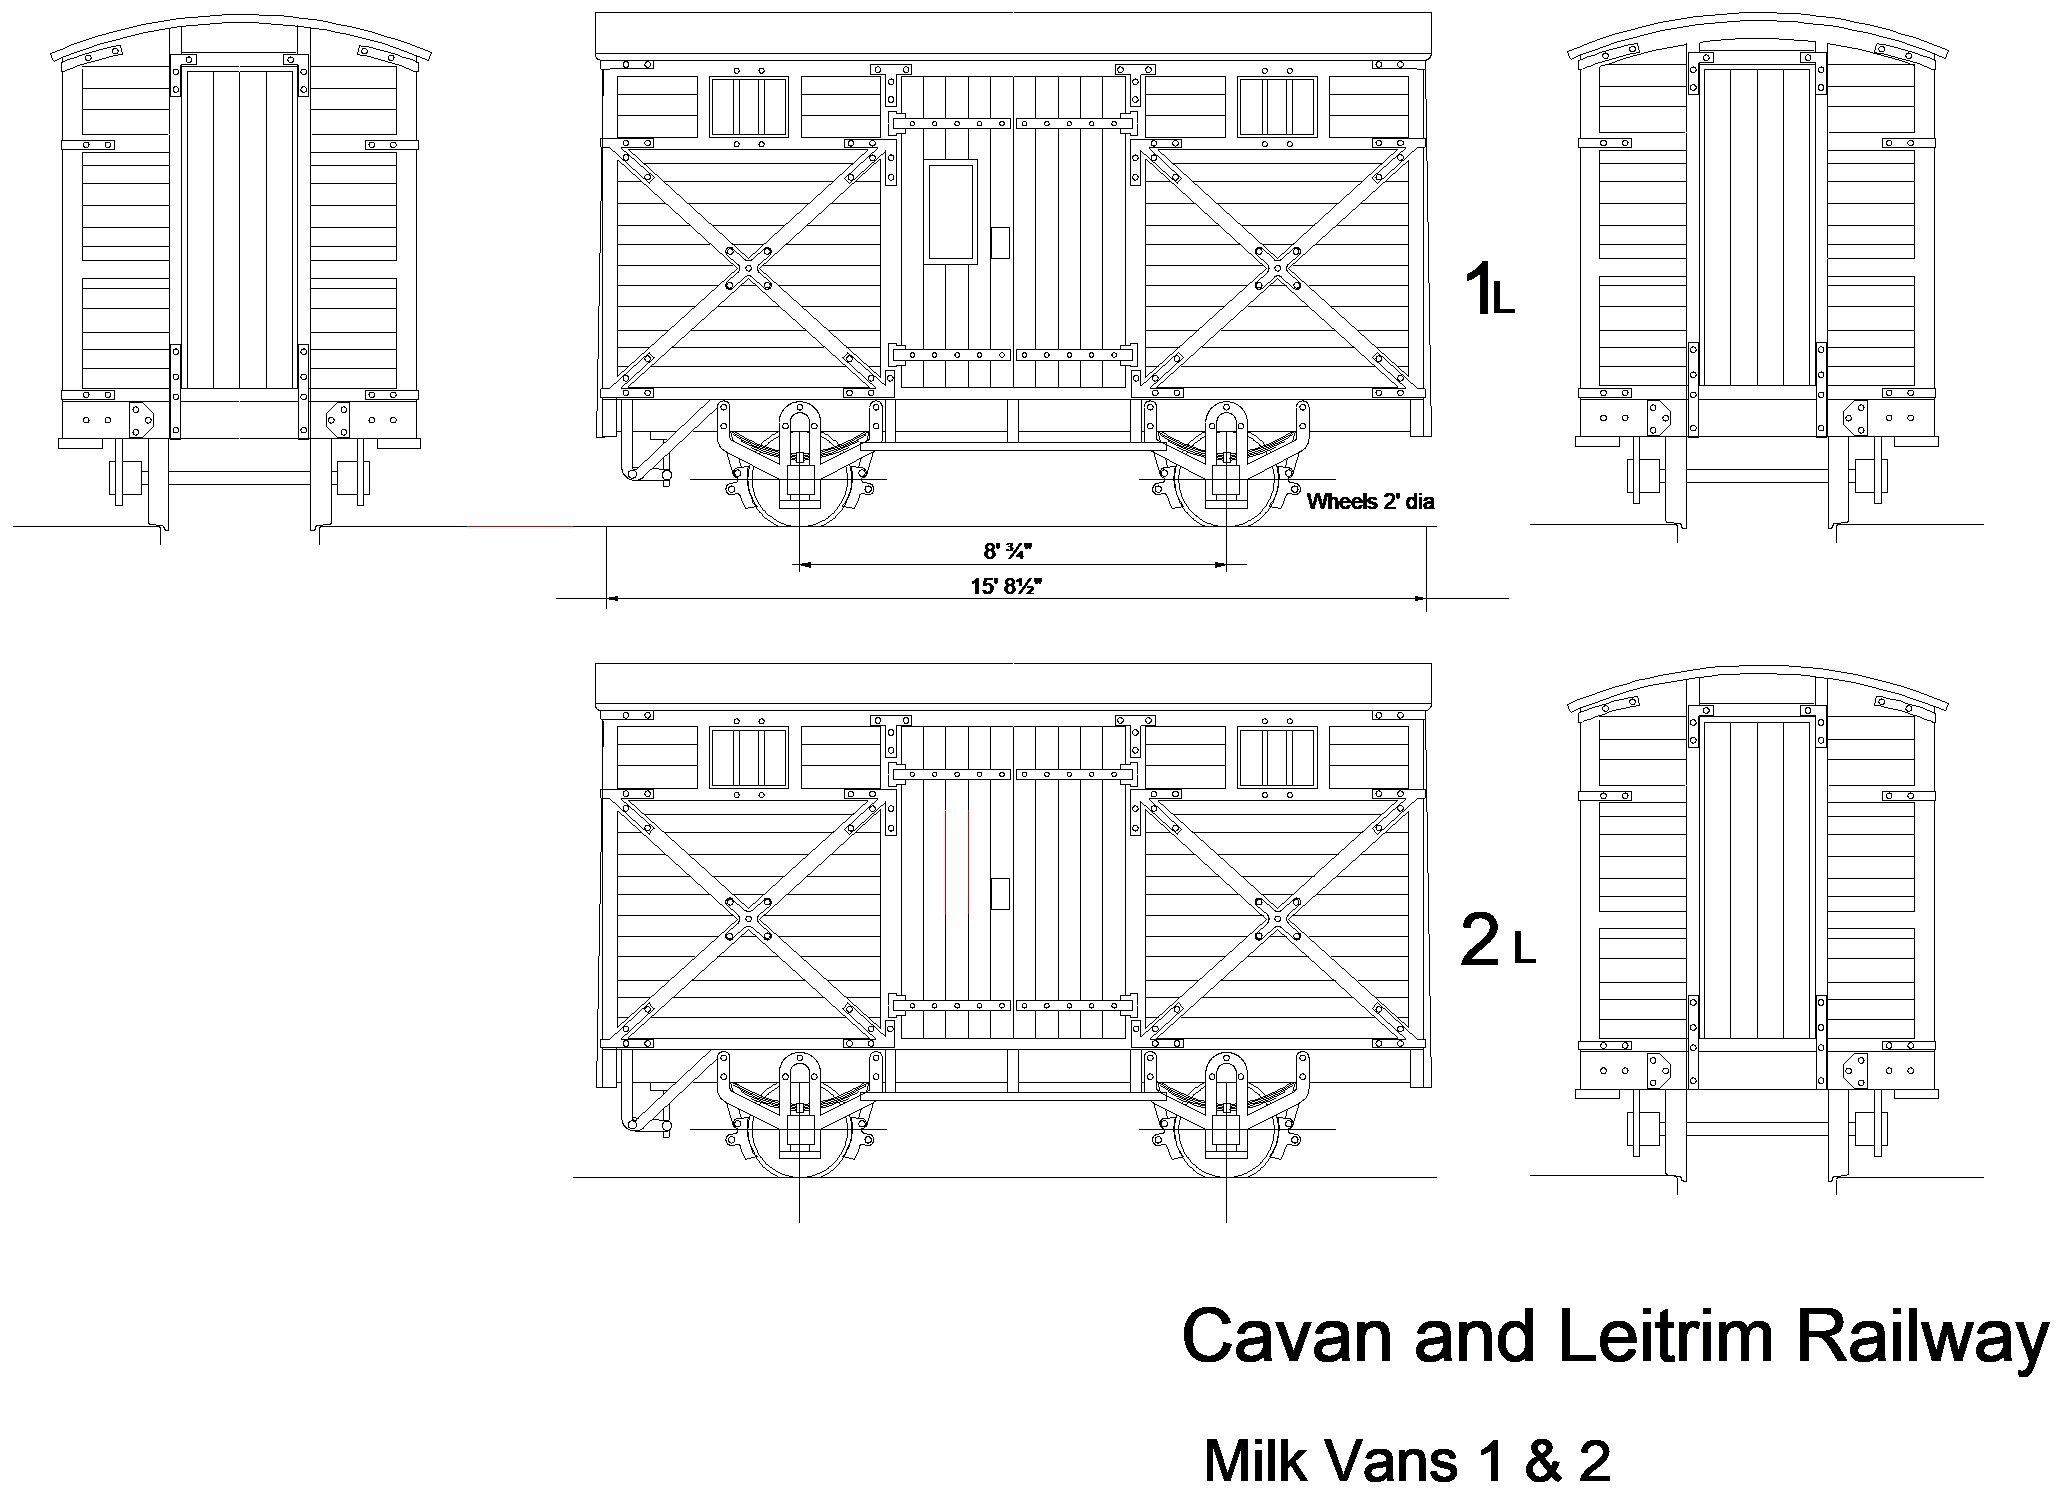
Interestingly DGCs drawing shows the brake cylinder end of the van with modified end detail, though I haven't found a photo showing both ends of 1L though 2L appears to have dis-similar ends. Possibilities for a chassis are Backwoods Miniatures (more straightforward to assemble than Foxrock Models (Simon/Iain Rice) or 3D print.
-
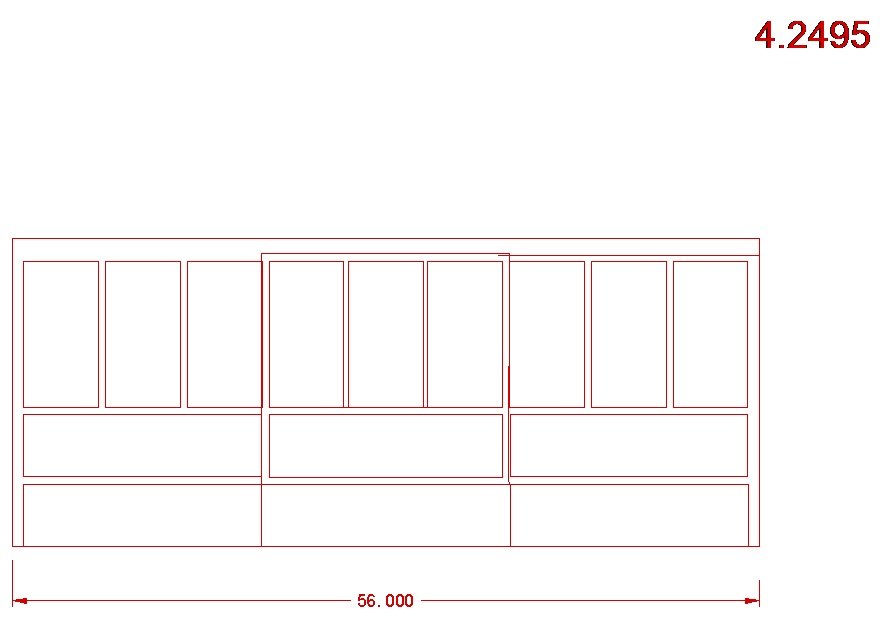
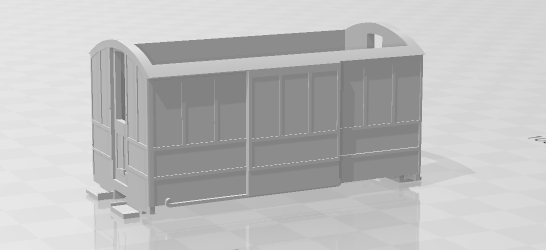
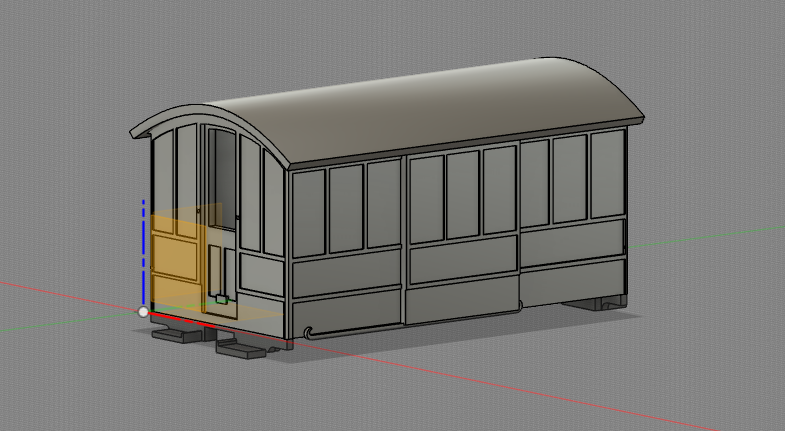
A Tale of two vans digital workshop. Clogher Valley Passenger Brake Van. I bought a pair of Clogher Valley Coaches and a Horsebox after Branchlines released the kits in the late 80s and later bought a pair of Backwoods Miniatures CVR Wagon/Van chassis and though it was time to complete the train by adding one of the distinctive 4w Passenger Brakes. The starting point was to find a suitable drawing in this case Dave Holman's sketch plans of the Passenger Brake and other CVR stock. Going down the 3D printing path, the first step was to prepare a 2D Cad drawing of the sides and ends from Dave's sketchs using the software I used for general Cad work including artwork for etched kits etc. The 2D drawings are then imported into a 3D modelling programme, in this case Fusion 360 as templates for designing the 3D model. Rendering of CVR Passenger Brake. Screenshot of Van body ready for printing. In all the 3D model took 2-3 days to complete, because of the small size of the 4mm model the bottom sliding door track is not really noticeable and the end steps tend to curl up! I found it necessary to use two different types of software because although my general CAD software has 3D capability its not really suitable for producing models for 3D printing and 3D modelling software has its limitations in terms of drawing 2D profiles, or maybe its just my age! Cavan and Leitrim Railway Milk Vans 1&2. Used as passenger brake vans on C&L Main Line trains in GSR and CIE days, these Ballinamore built vans were distinctly different in outline and appearance to the original Metropolitan Passenger Brake Vans. The starting point was to prepare a 2D tracing from DGCs 1961 drawing and photos from the IRRS Flickr Site. The research was interesting revealing considerable detail differences between the two vans during CIE ownership IL retaining its original side doors with droplights, while 2L lost its droplights, with different framing at (least)one end. The end posts on both vans had a distinctive inward taper from solebar to roof level a trap for the unwary The next step is to prepare a 3D model of the van which could take some time!
- 403 replies
-
- 13
-
-
-
Ernies Massive Irish 1930's to 2005 Photo Archive
Mayner replied to Glenderg's topic in Photos & Videos of the Prototype
Possibly BNM Moss Peat from Coolnamona or Kilberry for export through Waterford. Export peat from the two factories was an important traffic until BNM switched to road transport during the early 70s. The traffic was important enough for CIE to re-lay a section of the Portlaoise-Kilkenny line to serve the new Coolnamona factory after the main line was dismantled following closure in 1963. -
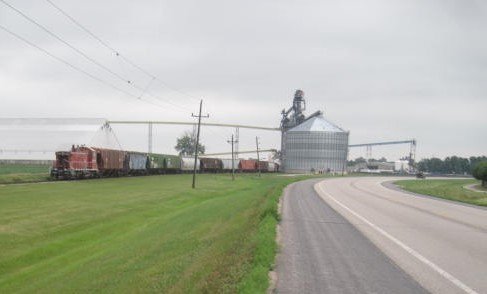
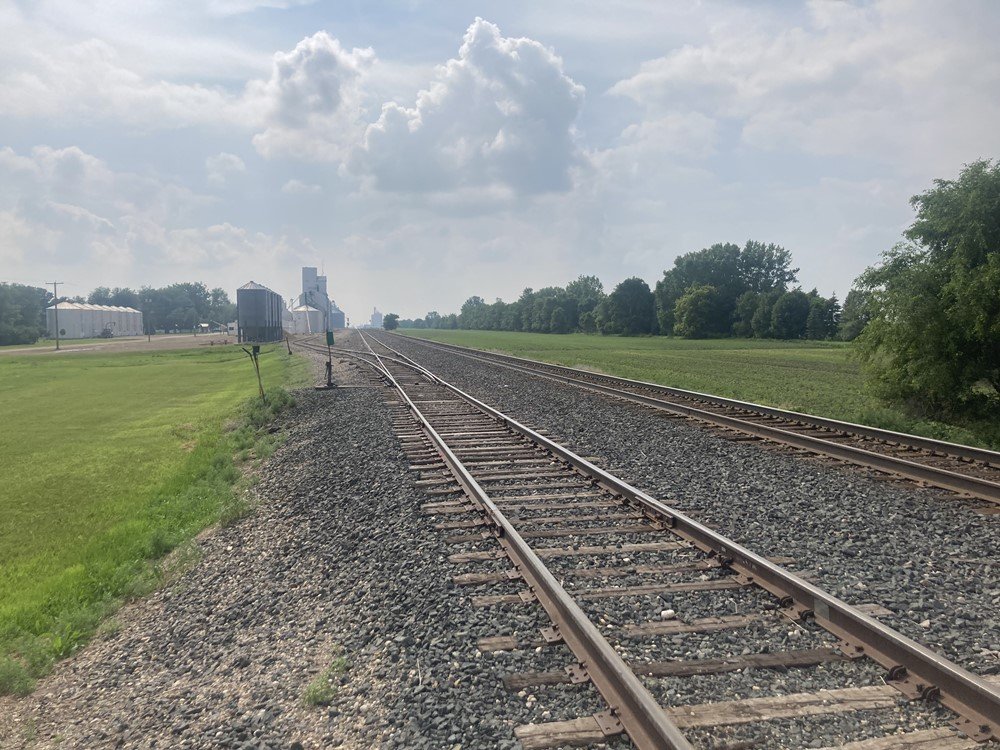
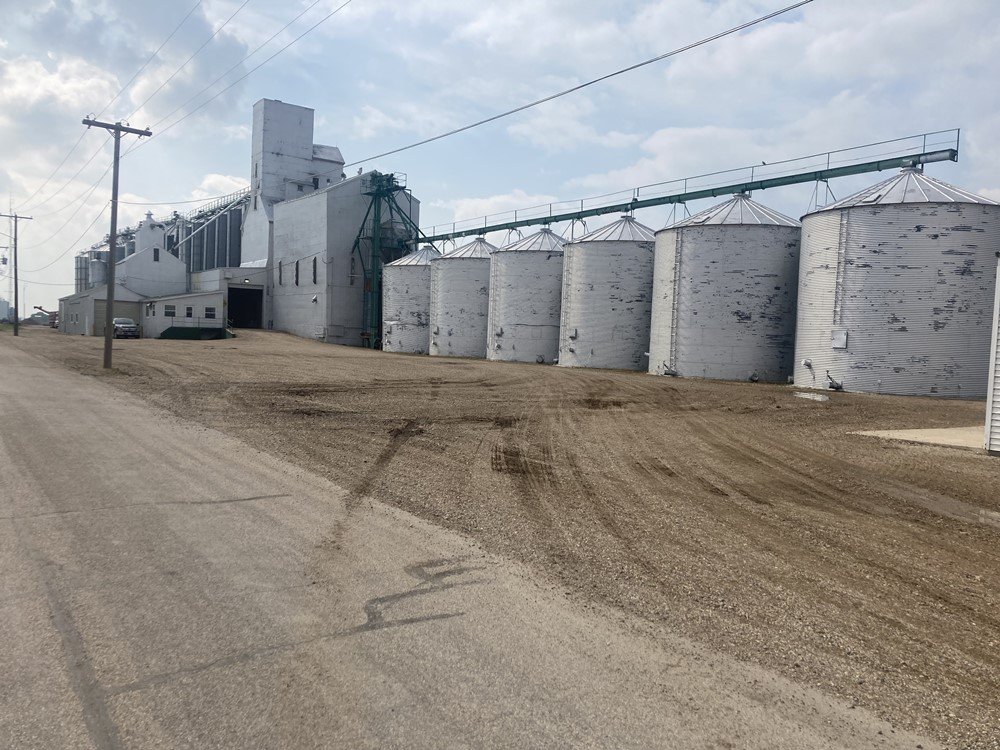
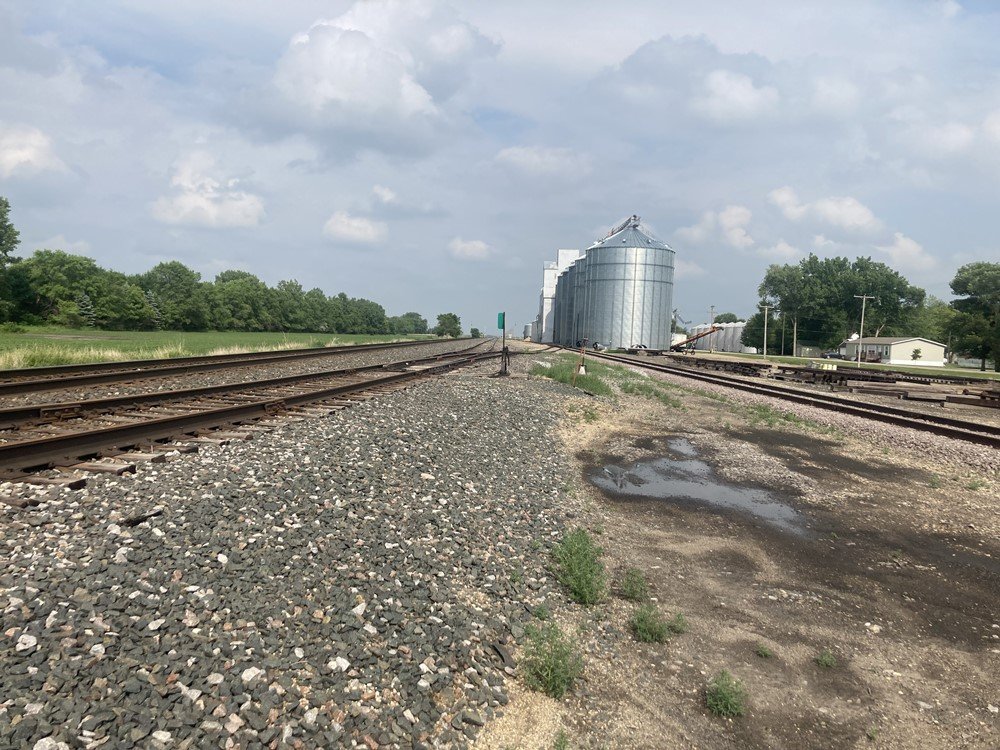
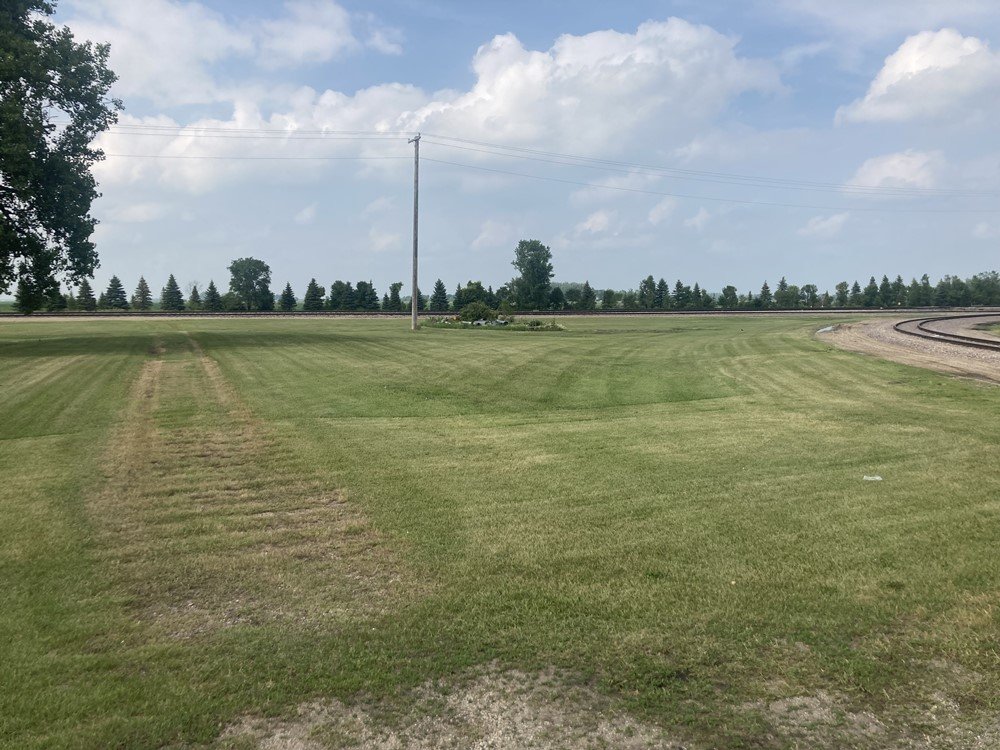
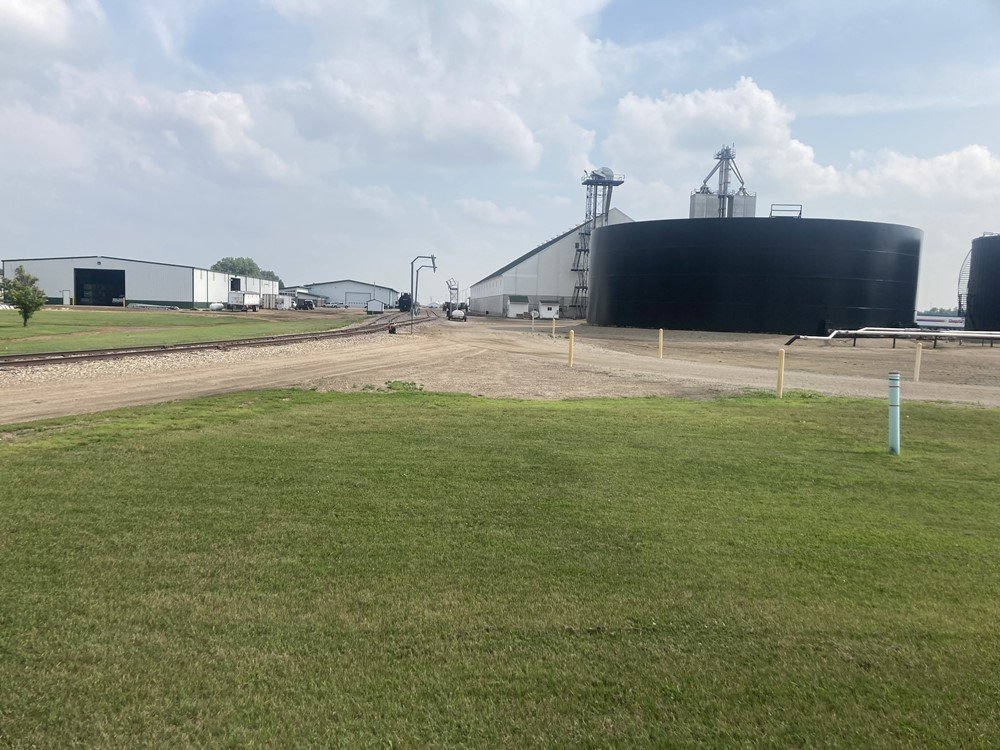
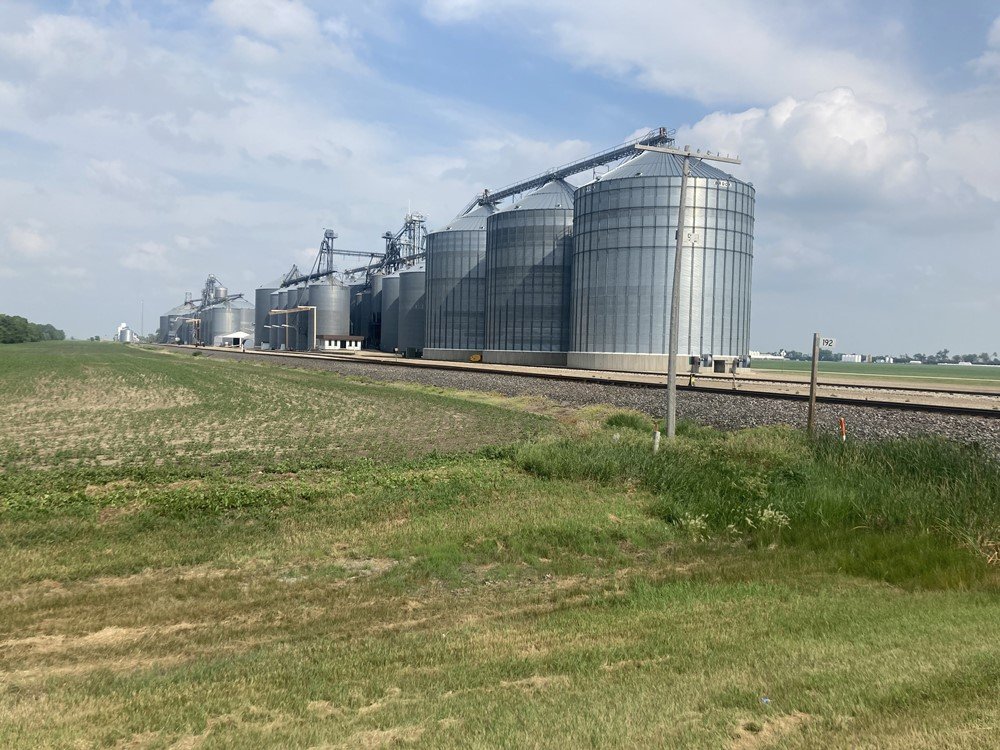
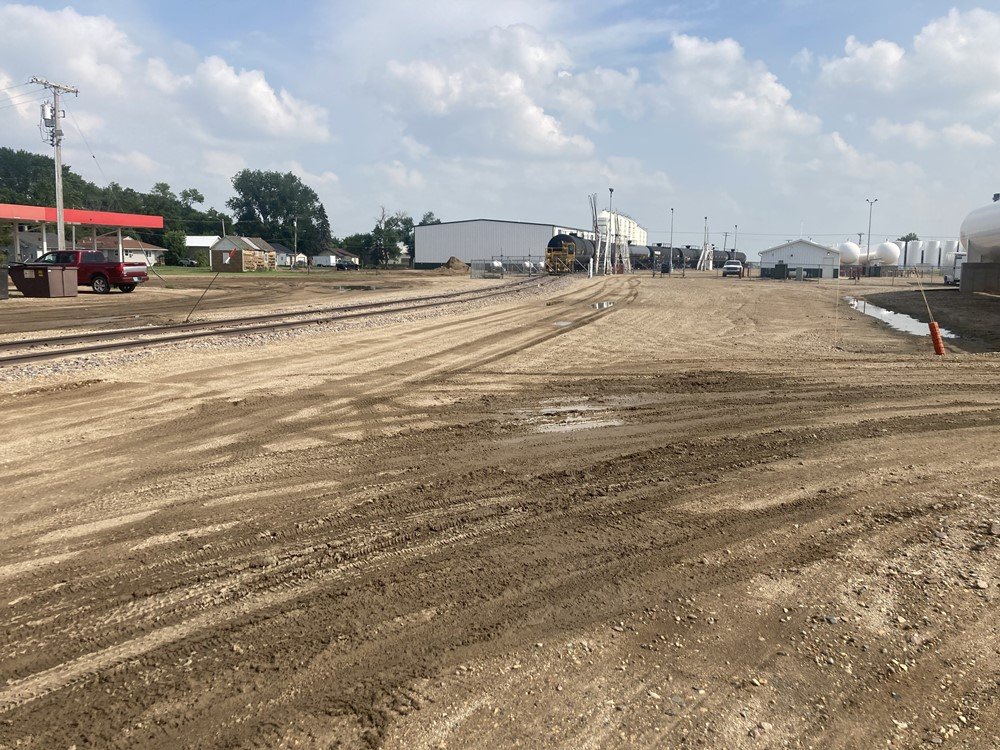
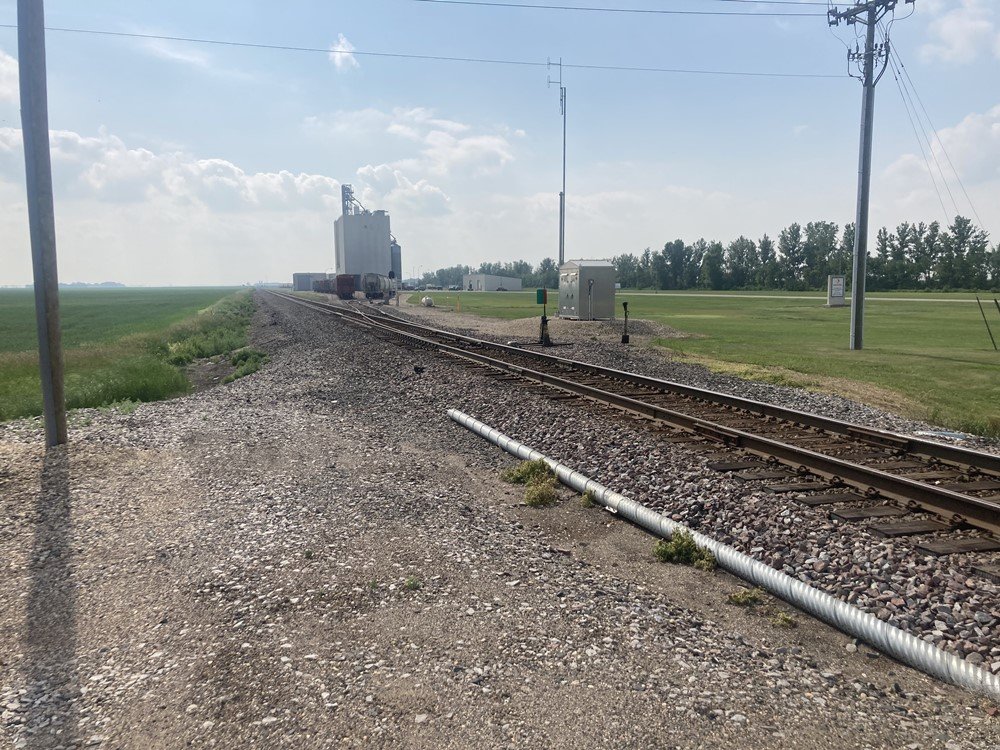
Visiting relatives and friends in the States at the moment, not much time to go walk-about/railfanning, but found time for some train/railroad photos while visiting my father-in laws home thursday last. An SW ?? and a cut of grain hoppers Kindred North Dakota. The Valley area of ND retains a dense network of branch lines to serve elevators in small Towns (railroad depot/yard) in this rich agricultural area. Kindred is on a former Northern Pacific line spun off by the Burlington Northern to the Red River Valley and Western a shortline that operates over 500 miles of track in North Dakota and Minnesota https://www.rrvw.net/. The RRVW basically operates as a feeder system to Burlington Northern Santa Fe at an interchange at Beckenridge MN on the former GN Main line from St Paul to the Pacific Coast. The SW appears to have been used to switch cars for loading at the elevator, most likely with grain stored (waiting for the price to increase) since last years harvest. Civic pride runs high in small cities (town or village) with mown lawns and roadside berms although homes and buildings in the CBD can be somewhat run-down. Fairmount ND. My father in-laws home town in South East ND close to the border with Minnesota and 10 miles from the border with South Dakota, a relatively prosperous city of about 500 folks and agricultural service center and one time railroad crossroads of the SOO (Canadian Pacific)main line from St Paul to the Canadian Border and the Milwaukee Road Fargo branch and junction with local shortline Fairmount and Veblen SD. Fairmount ceased to be a railroad crossroads following the abandonment of the Milwaukee Road Fargo branch during the 1900s, though some local trackage still exists to serve local industry, likewise a section of the Fairmount and Veblen exists to serve an ethanol plant and a elevator at Rosholt SD. The most significant change that has taken place during the past 20 years is the conversion of the Canadian Pacific (former SOO Line) from Track Warrant Control (a modern version of Train Order and Telegraph) to CTC with power signalling. Previously "Dispatchers" (train controllers) at a number of locations dictated Track Warrants/(Train Orders) to Train Crews using a two way radio system, (trains were required to be stationary while receiving orders). This was basically a modernised and simplified version of Telegraph and Train Order which existed before the widespread introduction of 2 way radio, where a Dispatcher transmitted a Train Order by telegraph or phone to a station "Agent" roughly equivalent to a signal man, who in turn handed the train crew a written copy of the Train Order and operated the distinctive Train Order signals. TWC was a boon to railfans listening in on a scanner for you knew what train to expect, loco no, sometimes locos crew and work taking place along the line! SOO line ceased to exist as a separate entity in the early 1990s, though locos and freight and service stock continued to operate in SOO colours into the mid 2000s. Didn't get to see any trains while in Fairmount though had a look around town. Fairmount looking East towards the Minnesota State Line and the Bois De Sioux River. First Europeans to have settled in the area were likely to be French Trappers though Vikings may have visited earlier. With the coming of the railroads settlers were mainly Scandanavian and German farmers who were already used to long cold winters. Track nearest the camera laid with ribbon rail and Pandrol clips is the main line, second track for local switching moves. During TWC days trains seldom crossed at Fairmount the second track was usually used for storing long trains of empty grain cars. Fairmount looking West. Track closest to camera typical North American construction with baseplates and spike fixing. Tall switch stand on switch (point) to yard tracks (at lower level) serving elevator and local industry trackage. Stand with scoop and brush for removing snow from toe end of switch to left of switch stand. 1st (possibly original) Elevator. A fairly typical set up with the original steel clad elevator, (possibly timber) flanked by grain bins on both sides. The elevator companies basically acted as brokers buying grain (cheaply) from farmers, to store in anticipation of a price rise before selling on the market, sometimes elevators were owned by a farmers Co-Op in the hope of returning the profit to the farmer. Looking East toward Elevator 1. The track on the far right is a local industry track which serves fertiliser and propane depots. Mid Town? There was a large dilapidated house with a vegetable garden in this area when I first visited Fairmount in the early 2000s, the curving track on the right is the spur to the fertiliser and propane depots. Fertiliser Depot. This area was developed during the last 10 years, The gantry arrangement over the track on the right is likely to be a safety harness anchor point for people accessing the roof walkways of covered hopper cars, the tank cars on the left may be transporting liquids (oil,mollasses?) to the tanks on the right of the photo. Propane & Ammonia Depots. Used both as a fertiliser and for mould control anhydrous ammonia is supplied in small bulk tanks for use on farms. A Trackmobile is used for switching tank cars containing anhydrous ammonia. https://www.trackmobile.com/ West end of town looking East! Elevators 1, 2 & 3 appear to be owned by three separate companies, so three separate grain shippers in one Town. The gantries over the tracks in the center section of elevators 2 &3 are safety harness anchor points, so its possible the Elevator 1 no longer ships grain by rail. Grain cars have to be positioned under the loading chutes/discharge points at an elevator during loading/unloading, sometimes a locomotive, Trackmobile, tractor or a loading shovel or gravity is used to position cars during loading. A loading shovel tends to be a favourite for positioning cars at smaller elevators, readily available without the cost of hiring a loco or trackmobile. Fairmount West End, Flour Mill. Possibly Fairmounts busiest industry the Mill both receives grain and dispatches flour using different types of freight car. Grain hoppers (on left) discharge by gravity , flour is transported in pressure differential hopper wagons https://www.progressiverailroading.com/railproducts/product.aspx?id=86 CP & RRVW at Fairmount Although Fairmount is on a CP line, its industries are mainly switched by RRVW trains as a result of a trackage rights agreement dating from the 1950s. The SOO and GN operated parallel lines for approx. 30 miles across MD and ND up to the mid 1950s when the GN abandoned its line and obtained trackage rights over the CP including the right to serve Fairmount. CP trains over this section tend to be run-through freights to and from Canada and its West Coast ports, the RRVW carrying out local freight work.
-
- 13
-
-
-
-
A bit of self-promotion JM Design produce models of the 1917 Open Wagon and Van in later GSR/CIE condition in CKD (completely knocked down) form. The principal differences are that the Open is on a later GSR design of underframe with open W Irons and both types of wagons are fitted with heavier self contained buffers. If anyone is interested I can supply the Open Wagon body with the GSWR van chassis for modellers interested in reproducing the opens supplied with "plate back axleguards" by Metropolitan and other builders to the GSWR, Bandon, Midland and other Irish companies following WW1. High quality spindle buffers with blackened brass heads are available from Dart Castings in their MJT range,
-
There is a lot to be said to be starting with a clear slate, starting a new layout/totally different from your GSWR and MGWR modelling Although I made a number of fresh starts, I always find it difficult to let go the (clutter) of the past still holding on to my American N gauge, British outline EM collection over 15 years since I was active in those scales, while I struggle to find time for my 4mm Irish and large scale American modelling. The forthcoming Accurascale "Buck" has me tempted to get rid of my Irish stuff and model an East Anglian coastal byeway minimum space shelf layout, big sky background single loco, 1-2 ex-GER Tram coaches, doz open wagons and vans, some Peco Bullhead track and points Will you be continuing in O or down-sizing to 4mm/OO?
-
Part 3 of what I presume is Stephens article "GNR (I) Steel Carriages: Others" appeared in May 2023 New Irish Lines (received yesterday in New Zealand) a fitting memorial to his work as a railway historian.
-
Been there dropped models, made a mess of the paintwork, one of the greatest advantages of brass or other metals unlike plastics and card is that you can almost always save the model.
-
Look like a model of one of the four 53'Tri-composites of 1900 the first MGWR bogie coaches introduced as 'through coaches" for trains from Broadstone to the Western Branches, initially would have run with 6w stock. Drawings prepared in 1897 coaches incorporated many Atock design features including window shape and paneling, quite different in design and outline for the 1902 Dublin-Galway Limited Mail Very nice models of a distinctive prototype built using traditional scratchbuilding techniques.
-
Its possible the GSWR had a small number of cresote tank wagons for treating sleepers. The MGWR originally bought a pair of rectangular tank wagons for transporting cresote in the early 1900s and later replaced them with a pair of cylindrical tank wagons in the early 20s. Both rectangular and cylindrical tank wagons would have been standard types bought from one of the large British Wagon Builders.
-
Tara mines "temporarily" stop
Mayner replied to Lev Pavliuk's topic in What's happening on the network?
Exploration for the "Tara Deep" mine was severely disrupted by flooding last year and which may be a factor in the decision to mothball the mine. The mining industry are past masters at manipulating governments to their own advantage. Every 3-4 years the New Zealand Government and Rio Tinto get into a ritual standoff over energy costs for Tiwi Aluminum Smelter in Southland, with Rio Tinto threatening to pull out and the Government claiming it cannot afford to continue subsidising the smelters energy costs. Public opinion is turning increasingly against the Government subsidising of the smelter as a very expensive way of supporting 1,400 jobs. https://en.wikipedia.org/wiki/Tiwai_Point_Aluminium_Smelter -
Sorry to hear of Stephen's passing, his contributions to the Newsgroup will be missed.
-
Ernies Massive Irish 1930's to 2005 Photo Archive
Mayner replied to Glenderg's topic in Photos & Videos of the Prototype
Not convinced its Wexford the South Eastern not a usual routing for bulk cement trains. Bedford TK with a tail lift is a must for late 70s-early 90s layout. Hint Hint! Used for transporting 10' "Uniload" containers carrying sundries traffic (deliveries to shops, pubs deliveries, Castol Oil, motor parts, tyres, deliveries and collections from local businesses, smaller yards likely to have 1 TK with Tail Lift, larger depots a fleet.