Mayner
-
Posts
4,916 -
Joined
-
Last visited
-
Days Won
119
Content Type
Profiles
Forums
Events
Gallery
Blogs
Community Map
Everything posted by Mayner
-
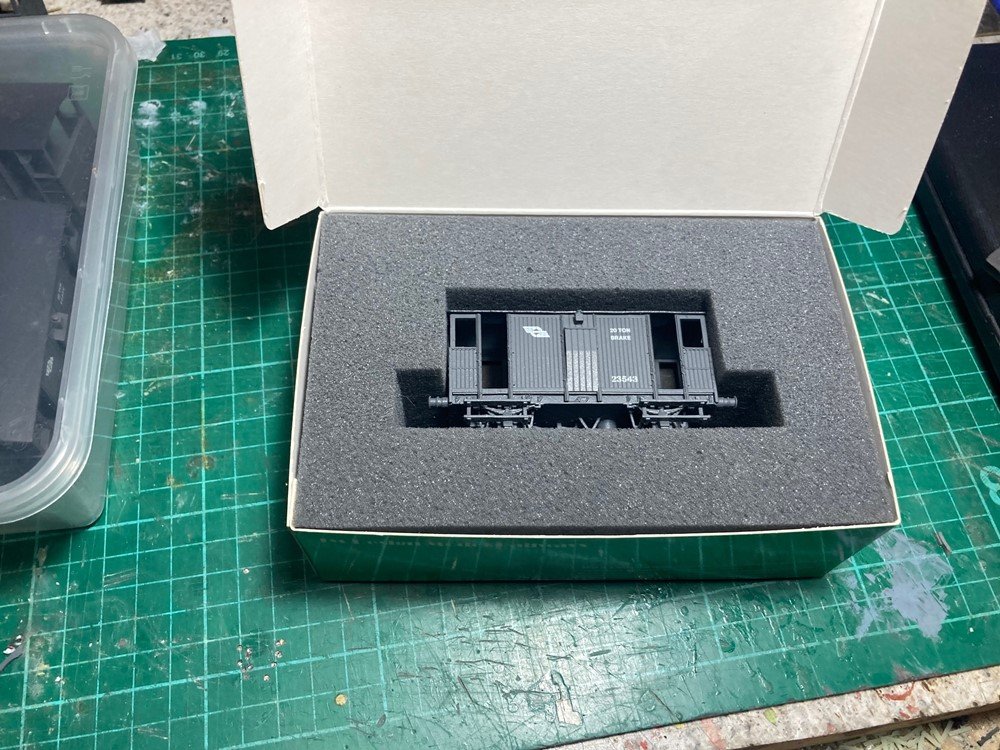
The first production batch of brake vans is substantially smaller than originally planned as a result of issues at the 3D printing stage which did not show up at the prototyping and test print stage. A small batch of 1950s vans is currently with our tampo printers waiting a slot in his production schedule. I am expecting to release the 1960/70s versions of the vans which are currently in the paint shop during September with transfer lettering as it would have been uneconomic to reproduce the ducket warning stripes using tampo printing. Pre-orders provides a reasonably accurate estimate of demand which will allow batch quantities to be increased/decreased as necessary. 23543 was lettered using tampo printing, alternative numbers would require a new printing tool and separate set up prohibitively expensive on small batch quantities. We are planning to finish the Ranks grain wagon with transfer lettering with running numbers (1-8) which may be applied by the customer (running numbers). We are not expecting to release the open wagons until the 1st quarter of 2022 and will certainly consider releasing these and other 'ordinary' goods wagons in fully decorated form with alternate running numbers or unlettered with a sheet of transfer lettering. Our 3D printing bureau is currently completing a number of test prints of the grain wagon to establish a representative sample of prints to identify potential production and quality assurance issues before we produce the production batch, we have also bought a high resolution desktop printer for prototyping and small batch production with a larger production machine expected late 2021 early 2022 which will give us greater control and predictability of our production schedules. I would forget speculating on our wagons we can always produce a batch of a particular wagon with minimal tooling and set up cost if there is evidence of sufficient demand.
-
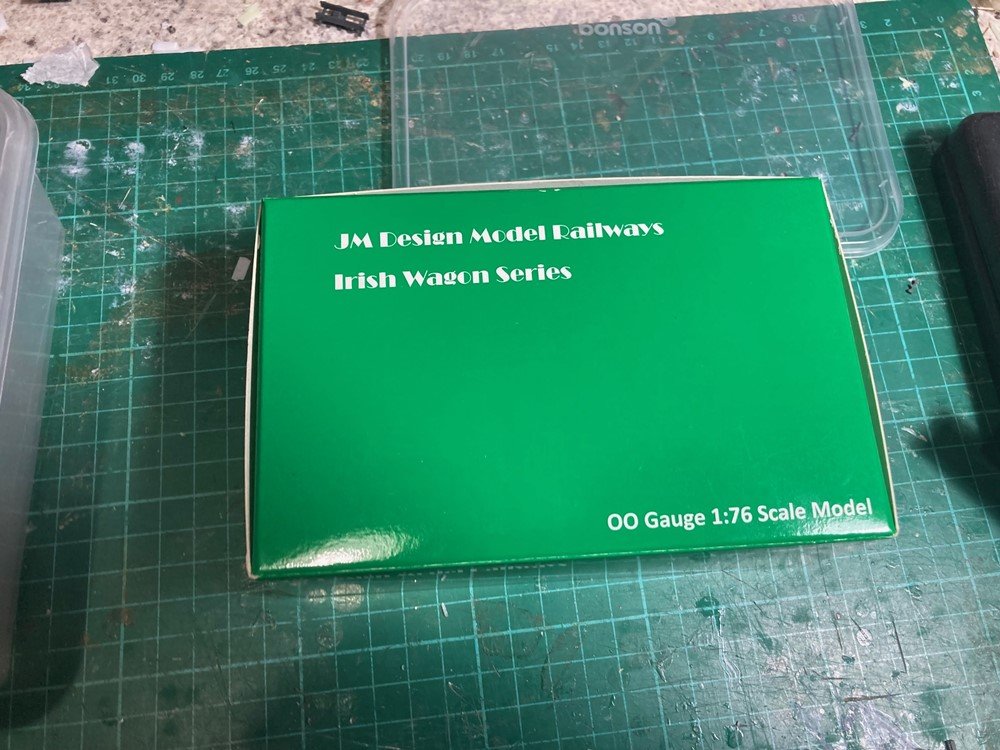
The models can be ordered/pre-ordered on our on-line shop https://jmdesignmodelrailways.com/. The first batch of Brake Vans in the 1950s grey are now sold out, the second batch (50s Grey)are currently with our tampo printers & we will start accepting orders once they are complete and assembled.
-
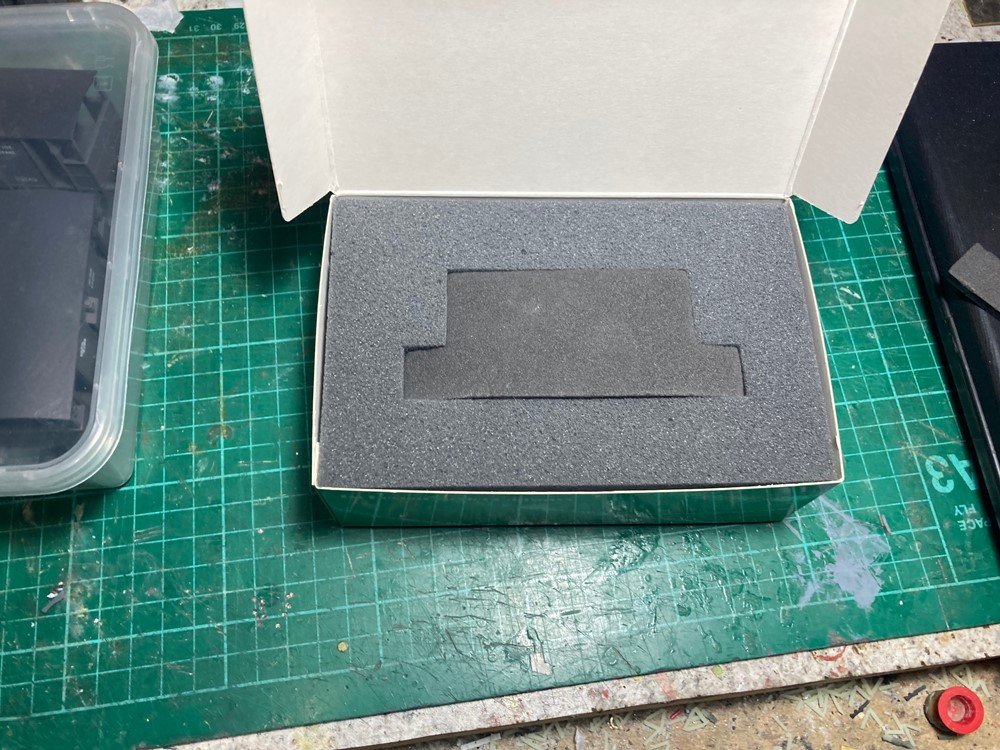
Generally 2-3 weeks at the moment, recently an Airmail package from Markits arrived within 7 days and one from Wizard Models took 4 weeks. Van is packed in a presentation box within a stout cardboard shipping box with foam or bubble wrap packing. Packaging was a challenge as the traditional model railway style box with lid were unavailable and a vacuum formed insert prohibitively expensive, we used a medium density foam rubber to secure and protect the model. so should be ok.

- 58 replies
-
- 13
-

-

-

-

Would you model in 21mm if RTR track and models were readily available?
Mayner replied to BosKonay's topic in Irish Models
One significant point if you intend to 3D print track and point bases Templot uses two different gauges for modelling Irish 5'3" track in 4mm scale. 21mm gauge for P4 standards and 20.2mm if you use EMF or OO gauge standards, Martyn Wynne did much the same to achieve improved running with rtr OO rtr rolling stock reducing the gauge from 16.5mm to 16.2mm or EM-2. I struggled with Templot for a small EM gauge layout and have gone back to blown up EM gauge paper templates for 21mm gauge track. 3D printed point-bases are likely to be challenging particularly if there is no provision for adjustment in the location of crossing vee and switch assemblies. Personally I have hand laid pointwork in 1:1, 1:24 and 1:76 scales using timber, copper clad and ABS sleepers, using fangbolts, spikes, and individual chairs and soldered assembly and did not find it particularly difficult or time consuming, the main difference was that I needed a lot more people and machinery in 1:1. Chaired assembly either slide on or individually placed is a lot more time consuming and technically challenging than spiked or soldered assembly. -
Complete with what looks like a solid rake of "Silver Princes" stainless steel coaches As they say paper never refuses ink or electrons to get excited!
-
Improved trading relations with the UK culminating in the Anglo-Irish Free Trade Agreement brought prosperity to rural Ireland in the 60s. My parents were surprised by the wealth of our "country cousins' when invited to weddings in County Galway during the 60s, wads of money was being splashed around like snuff at a wake, the women were dressed in the best Dublin & London fashion and the men driving new cars usually Mercedes, my mother and father felt like the poor city cousins instead! Most had shifted from mixed farming to dry stock which needed very little looking after, those with smaller farms usually had a part time job often driving for the local builders or agricultural merchant, most families were building a new modern streamlined bungalow to replace the old farmhouse. You can't go wrong with small black or brown Dexter cattle bred on farms in the West and shipped eastwards by rail for fattening in Meath or Kildare. Pilot loco from Galway working a short special to Athenry to connect with a main line goods from the smaller fairs or several A Class hauled specials with empty stock from Mullingar on the evening before the fair working the specials through to the North Wall for the bigger cattle fairs.
-
The C Class may have been used for operational convenience, the Cs seems to have been worked quite intensively on the West Cork with two main line goods trains each way daily & the loco of the "Drimoleague Goods" working some of the Skibbereen & Baltimore passenger/mixed trains & the loco of one-of the Up Goods swapping over with the Clonakilty C for its weekly examination and maintenance. The main draw back of using an A on a daily West Cork goods there wouldn't have been another A to take over and haul the goods when it broke down, when a C broke down they could always rob a C off the second goods, a branch passenger train or a beet or a cattle special. Certainly a C in its original or B233-4, B201/201 Class for would be an ideal follow up for the IRM A Class, as much as I like the Sulzers they did not have the same wide sphere of use or variety of liveries to support a rtr model as the Metrovicks
-
Talking to myself Opps!
-
Kevin You threw up a bit of a curved ball there with batch and pre-order quantities of rtr wagons w Because of the low level of demand minimum expressions of interest/order quantities applied to the production of etched loco and rolling stock kits. We are committed to manufacturing the 3D printed wagons on our website (in much larger batches than 10!), the number of pre-orders will obviously influence the number of wagons produced and the number of models may be increased in response to demand. One of the benefits of 3D printing over traditional manufacture is that its fairly simple to produce a repeat of a model or produce custom models or one-off prints, the main constraint is the time consuming nature of clean up process and removal of the support structure. The anticipated release dates on the website are indicative only and are based on the current state of knowledge and will provide regular progress updates beginning with the decorated samples of Grain Wagons and Brake Vans with wheel logo expected mid-late August. We are establishing in house 3D printing capability while our current supplier is working to improve print quality with test prints of the Grain Wagon in different resins for approval mid July. We are planning to install in a high resolution desktop printer for prototyping and small batch production later this month with a production machine due late 2021/early 2022. While there are likely to be teething problems developing in-house printing capability capability should result in greater level of control over production and quality of the finished models. The ability to print in house with an external supplier as a back up for large orders will allow for more reliable production planning and manufacturing time frames. Not bad considering I only had an "idea" of 3D printing models in May 2020.
-
I can understand OO Works not fitting PCB board/DCC sockets to their locos, it was a horrendous job fitting fitting a DCC socket to a MGWR 2-4-0. Not really suitable for small batch manufacture, best left to Chinese massed produced plastic injection molded models with the economies of scale and a young mainly female workforce with nimble fingers and sharp eyesight.
-
1. Currency: We have set up the option to display prices in Euro, Stirling, US, Canadian & Australian $ which should cover most customers under the Shopify Pay system, customers will be invoiced in NZ$, otherwise the banking and admin side of things becomes extremely expensive. 2. Duty & VAT: We originally planned to set up a DDTP system as an option for customers in the UK & Ireland and but have been unable to find a shipper who currently provides this service at a reasonable rate (for small shipments) to the European Union. Our shipper offers a relatively reasonably priced DDTP service to the UK and expect to have a DDTP option in place once we complete the UK VAT & EORI registration process, funnily enough we are already registered with the Irish Revenue but thats another story. 3. Consolidated orders: There should be no problem in consolidating orders or holding items until an order is complete. 4. Liveries and colour schemes: We are holding back on marketing certain models until the decorated samples are complete. I have prepared 5 different graphic schemes for the bulk grain wagon without considering the GSR period & 70s brown. The unlettered wagons will be in light grey just didn't have a suitable photo.
-
Our online store is now live!!!!!!!!!! https://jmdesignmodelrailways.com/ There has been a lot going on behind the scenes since the first batch of brake vans arrived from our suppliers in April, the main upshot is that the business is developing its own 3D printing capability while working with our supplier to improve consistency and quality of the models. This will lead to some delay in releasing models to market but should result in a better product. We have finalised the graphics for the next batch of brake vans and the bulk grain wagon with Railtec Transfers producing the transfers, we will probably use pad printing for the open wagon and more generic wagons in the pipeline. We are likely to start shipping the 52 Class loco kits in late July with the final detail parts and bearings arriving this afternoon, with shipping of 4w vans expected August/September.
- 58 replies
-
- 11
-
-
I had fun and games with the tender handrails and handbrake in 4mm let alone 2mm. It would be worthwhile to incorporate the ashpan into the main frames when you are cutting out the profile of the chassis, this will provide some added strength in the area around the rear driving axle the weakest part of the main frames.
-
No 14 the Tullow Engine is a 52 Class or D17 the first Class of Irish express passenger 4-4-0 No 63 is one of the slightly larger and more powerful 60 Class or D14. The 52 Class(introduced 1883) with their small boiler and firebox may not have been up to sustained high speed running & appear to have been mainly used on secondary main line and branch line duties following the introduction of the 60 Class in 1885. The 60 Class had a reputation for speed and continued to be used on lighter main line duties on the Southern & DSER sections and piloting Dublin-Cork Expresses until replaced by railcars and diesel locos during the mid-late 1950s. The 52 Class had a reputation of high speed 60+mph running on Galway-Tuam trains during the 1950s, while 60 Class No94 was recorded at 74.5mph between Mourne Abbey & Mallow while piloting the Cork-Dublin portion of the Enterprise.
-
You did a nice job on the sand boxes they are difficult enough in 4mm. I chickened out and used lost cast casting from 3D printed masters for the tender tool & sand boxes on the 52 Class kit. The MGWR K Class appears to have shrunk down nicely to 2mm, it will be interesting to see how the foldup elements fold up so to speak.
-
Up to the introduction of the 8 Hour day locomotives were usually allocated to individual crews who took a lot of pride in their machine. To a degree wages were performance related with bonuses for fuel economy keeping "their loco" in top mechanical condition, drivers sometimes accompanying their loco through the works during heavy overhauls. Cleaners pay was also performance related on the BNCR(MR NCC) dependent on driver inspection and sign off that a loco was cleaned to an acceptable standard. There is a story in the Ballymena Lines of a narrow gauge driver whoes usual practice was to place the Cleaners Form against the side tank of a loco before signing it, then throw the signed form into the fire box (in front of the cleaner) if there was the least spec of dirt on the rear of the form.
-
Its possible your grandfather built the locomotive with outside cylinders for practical purposes. There may not have been enough space between the frames to build the model as a working two cylinder inside cylinder cylinder loco with working Stephensons motion, there are some things you cannot scale down.
-
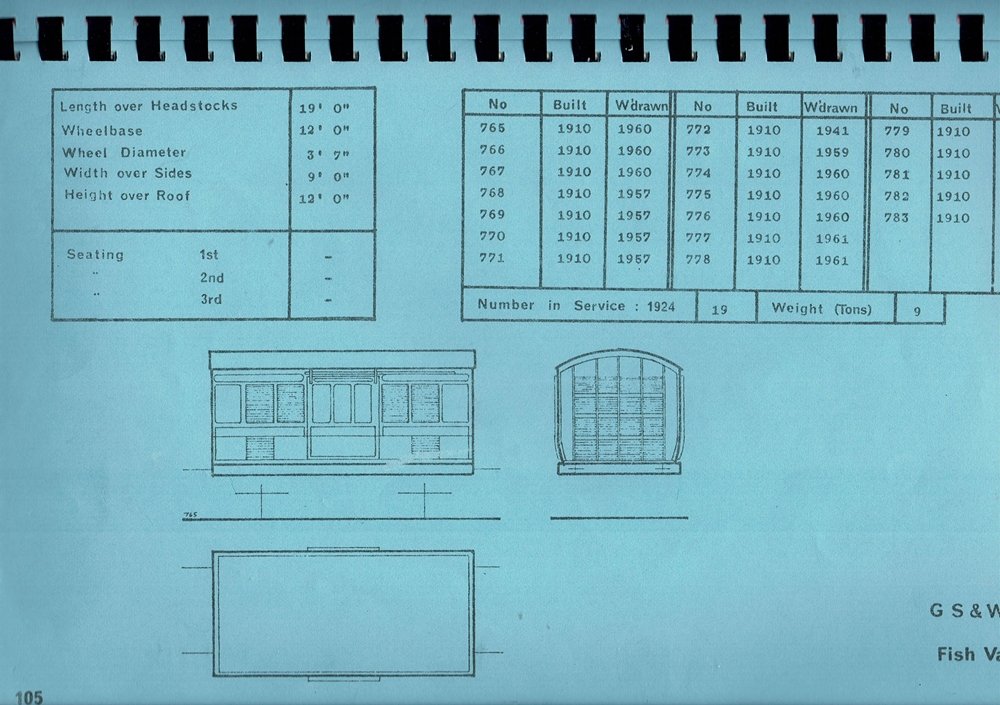
A bit modern for an early 1900 layout the GSWR built 14 4w Motor/Fish Vans in 1907 with similar styling to the LNWR 6w CCT https://www.flickr.com/photos/31890193@N08/8901746841/ followed by 19 Fish Vans in 1910. The majority of the Motor/Fish Vans had gone by the late 1940s 4 surviving to the late 50s, most of the Fish Vans survived into the late 50s the last 2 withdrawn in 1961. Its possible that salted or smoked fish was transported in ventilated or ordinary vans (Covered wagons) mainly 14' variety before WW1. IRCH Standard wooden Vans predominate in photos of Valencia Harbour up to the closure in 1960s, with lots of barrels possibly for salted fish on the platform. The Motor/Fish was built to the same basic design without the lower set of louvres and with folding end doors like the LNWR CCT There is a 1950s lineside photo of an F6 hauled Cobh-Cork with what looks like an ex- GSWR Fish Van in the consist I am sure that you can think of a way of adding that "salty fishy" smell at exhibitions.
-
Belmond Hibernian - Luxury Touring Train
Mayner replied to Broithe's topic in What's happening on the network?
Railtours Ireland are planning to start the Emerald Pullman from July using a dedicate Intercity Railcar set staying overnight in 4 Star Hotels https://railtoursireland.com/ -
Is the CVR coach Worsley Works or did Andrew Mullins produce a 3mm scale version of the Branchlines CVR coaches I am tempted to build a CVR 0-4-2T & a 4w Passenger Brake in 4mm myself to go with a pair of Branchlines Coaches & a Horsebox I bought/built about 30 years ago.
-
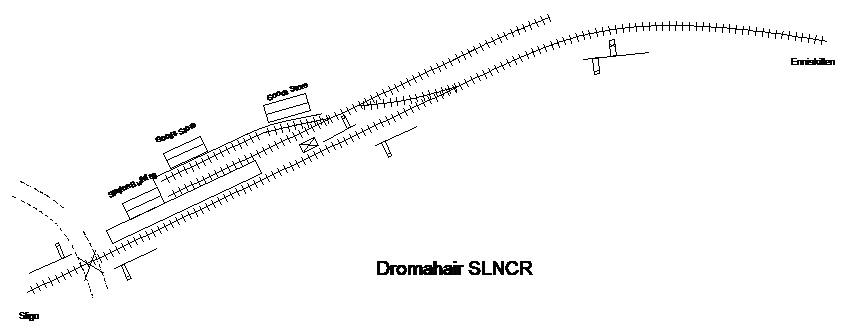
More Angus & Galtemore's territory Dromahair on the SLNCR is another station where trains crossed using a siding as there was never a passing loop. The layout was very simple with a running line two sidings and 3 points. The SLNCR made up for the simple track layout with an unusual two armed signal at the Enniskillen end of the station to facilitate trains crossing. The upper arm acted as an Outer Home signal to allow trains to approach from the Enniskillen direction while another train was at the platform. The lower arm which had an X on the sighting bar acted as an Advanced Starting signal permitting a train to enter the Dromahair-Manorhamilton section, the lower arm also acted as a 'Shunt Back Signal" to allow east bound goods trains to reverse back into the yard for shunting or to cross trains. Although small the station appears to have been fairly busy with goods traffic with two goods stores, one of the stores was destroyed by fire in the early 1950s but quickly rebuilt. Florencecourt 5 miles from Enniskillen was simpler still a goods shed and loading bank served bay a single siding connected to the running line by a crossover in the middle, single storey station building, level crossing, signal box and up and down running signals. Although more or less in the middle of the countryside the station served a Fermanagh County Council depot and received bitumen in 45gal barrels until the line closed. Glenfarne along with being a Free State and Republic of Ireland customs post appears to have handled Leitrim County Council bitumen traffic the loading bank is covered in tar barrels in most 1950s photos. I guess tar barrels are a must for a 1920s to 60s Irish layout before Councils started receiving tar and bitumen in bulk road and rail tankers.
-
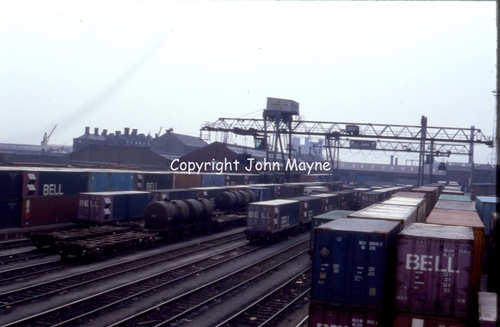
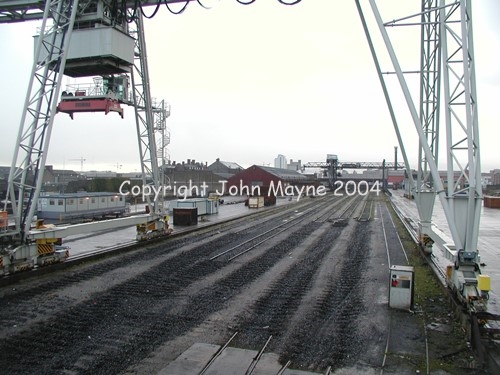
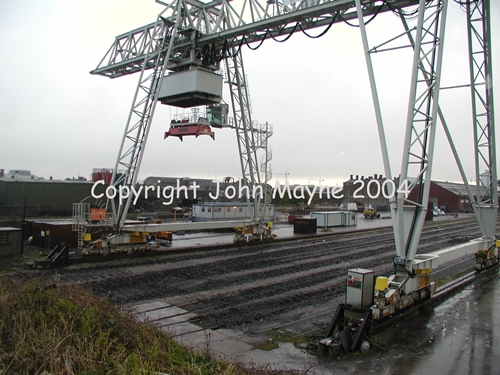
Holyhead Yard late 1980s & 2002/3
-
Dunsandle had a minimal layout in its final (post 1971) years a siding serving a goods shed and loading bank connected to the running line by a single point at the Loughrea end of the station. Curiously beet trains continued to operate on the branch for a number of weeks after the line closed to regular traffic in November 1975, there is a Walther McGrath video on the IRRS channel of a beet train shunting beet wagons at Dunsandle before continuing to Loughrea to run-round. http://eiretrains.com/Photo_Gallery/Railway Stations D/Dunsandle/IrishRailwayStations.html#Dunsandle_20100118_002_CC_JA.jpg Prior to 1971 the layout was more extensive with three points the goods shed and loading bank was served by a goods loop off the running line with a short siding off the loop at the Attymon end of the station, in MGWR days the siding apparently extended across a road into a ballast (gravel) pit. One of the oddities at Dunsandle was that locos and passenger stock were not allowed to pass the goods shed as the shed was built too close to the edge of the loading bank, an interesting rule to add to a shunting puzzle
-
The most significant "take away" from the Irish Times article is that the Dublin Port Company no longer want trains running into the port. Talk of a potential road transfer from East Wall Yard is a significant reversal in policy since the Port Company paid for the spur to the Ocean Pier and proposed extending the Alexandra Road Tramway into the Ro Ro Terminal. The article indicates that the Port Company even suggested that "cargo for the West could instead be shipped through Waterford, which also has a direct port link to Ballina". In a way keeping trains out of the Port helps the Government justify having spent €750m on a toll free HGV Port Tunnel.
-
The New Zealand GST (goods and sales tax) is a more accurate description of VAT as a sales and purchase tax. The recent international changes in how VAT/GST is collected is partially as a result of political pressure from retailers and locally based traders about business lost because of people importing small and large stuff from overseas without paying duty or GST. The former owner of the local equivalent of Mark's Models was literally fit to be tied because local railway modellers were increasingly buying their locos and stock from the United States and the UK. The move to international on-line platforms and electronic payments makes it easier & cost effective for governments to levy VAT/GST/Import sales tax on small purchases, than Customs Checks at the point of import. Basically before governments forced businesses like E-bay to collect VAT/GST on imports it was costing Customs services more to collect VAT on small purchases (<$100NZ) than it was earning in revenue despite various levies and charges.