Mayner
-
Posts
5,133 -
Joined
-
Last visited
-
Days Won
128
Content Type
Profiles
Forums
Events
Gallery
Blogs
Everything posted by Mayner
-

Class 99 electro-diesel locomotive order confirmed for GBRF
Mayner replied to spudfan's topic in Letting off Steam
https://www.stadlerrail.com/en/products/detail-all/eurodual/40/ Stadler is a Swiss owned rolling stock and loco locomotive manufacturer that expended rapidly from the 1990s onwards, their diesel locos appear to be assembled in the former Alstom Valencia Plant based on Caterpillar (EMD) technology. Stadler have developed a series of "standard" locos for use in Europe, Africa and Asian for use on narrow, standard and broad gauge systems with a recent order for New Zealand https://www.railjournal.com/locomotives/kiwirail-awards-stadler-locomotive-framework-agreement/- 1 reply
-
- 1
-

-
Eoin's thread is an excellent step by step in converting the Mainline/Bachmann J72 into a MGWR E GSR/CIE 551/J26 Class. Although the MGWR large and small tanks are similar in general appearance the J72 is closer in size and general proportions to the E/551/J26 Class than the P/610/J10 Class which were larger locos. The new Bachmann model is probably the best option for a OO model, but the SSM kit or a scratchbuild are likely to be the only workable options for a 21mm gauge model, in my experience clearance between crankpins and valences is very tight in 21mm gauge with the SSM kit.
-
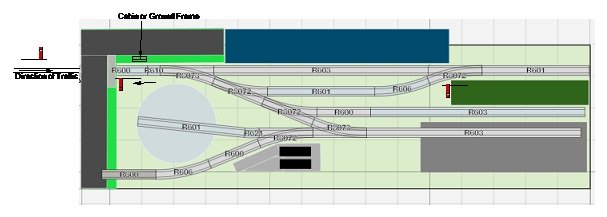
Technically there is no requirement for signals at a terminal station with One Engine in Steam working where the ground frame is locked by the Single Line Staff. I once volunteered as a Guard/Shunter on a UK Heritage line with one train working where all ground frames were locked by the staff, our (fully working) home and starter signals were mainly for show, the main function of the signals indicate to the driver (and fireman) that facing points were correctly set and locked. Traditionally the staff was carried on the loco, with the guard responsible for operating the frame and for controlling the run round/shunting movements. A more flexible arrangement would be for a porter/signalman based at Northport Quay to operate the frame and signals, there is no requirement to lock the frame with a porter/signalman present which would open the prospect of a second train with staff and ticket working or a loco shunting the yard while the Passenger/Mixed is off scene. Valencia Harbour is a good example of a station where the signal box was replaced by a ground frame (worked by the staff?) possibly with One Engine working to and from Cahirciveen during the 1930s A 4 lever frame should be adequate for Northport Quay 1. Down Home, 2 Facing Point Lock 3 Crossover Main line to Loop, 4 Up Starting signal. Movements from the main line to the loop could be controlled by hand signal, with a ground signal to control movements from the loop to main line. The crossover at the pier end of the station is likely to be controlled by weighted point levers or tumblers. Ground frames and working signals was pretty much an optional extra at goods only terminal stations such as Kingscourt and Foynes during the 70s and 80s, points were operated by hand lever or crow bar and padlocked for facing moves by special passenger trains.
-
The 47'6" wagons were introduced exclusively for keg traffic in 1978, beer traffic from Kilkenny and cider from Clonmel were important sources of keg traffic on the Waterford Line until the ending of Liner/Keg Traffic on the Waterford line in the mid 2000s. The cider traffic was transported by road between Clonmel and Kilkenny
-
Signalling requirements depends pretty much on whether the line carries passenger traffic or is goods only. Facing Points on a passenger carrying line (are fitted with locks to prevent accidental movement) and are either controlled by a mechanical Lever Frame or by remotely controlled point motors, fixed signals are usually provided to allow trains to enter the station or access the main line. Points on goods only lines and yards are often controlled by hand levers with no fixed signals, East Wall Dublin is a good example of a yard where all points are controlled by hand, Foynes is another example of a station where points were converted to hand operation after the ending of passenger traffic and the station upgraded to handle Oil, Barytes, Zinc ore and later Fertiliser, Bulk grain and Mollasses traffic. I have marked your layout up with the minimal signalling to handle passenger traffic. The Home signal that controls entry to the station is actually 'offscene" on the other side of the bridge to the station, this signal controls the main line to the station platform up to the buffer stops. I have shown two "starting" or departure signals one at the end of the platform and a second at the bridge before leaving the station though in practice only the latter was likely to have been used in full sized practice. The second starting signal theoretically allows a passenger train an a loco to wait at the platform while a train is departing the goods yard or loop Movements to and from the goods yard/loco depot would have been controlled by had signals from the Signal Man/Shunter rather than by ground signals mainly because of the lack of space. In theory the home signal would have been held at danger and the train brought to a halt, before receiving a hand signal to enter the goods yard. Signals could have been either semaphore or 2 aspect colour light, some stations such as Ballina, Drogheda, Kilkenny, Limerick were re-signalled with colour light signals and power operated points from the 1970s onwards, before entire main line routes were converted to CTC operation during the late 1990s/early 2000s

-
Prices for US stuff in the States tend to work out cheaper including customs charges because retail prices tend to be lower mainly due to the much larger size of the market and greater competition between retailers compared to EU, UK or other countries. Trainworld https://www.trainworld.com/ is one of the larger US retailers that exports World Wide United States Postal Service (USPS) is usually the cheapest option for shipping from the States. Irish vat at 23% is charged on the declared value of the item plus shipping An Post charge a flat processing/clearance fee. Couriers like DHL charge more but offer a faster service. Customs Clearance fees have come down since the Revenue went over to electronic customs clearance DHls charges appear to be based on a minimum charge €10.00 or 2% of the vat if higher
-
Manual uncoupling of Kadee Couplers is quite common among American outline modellers', some people use proprietary tools produced by companies like Rix Products or Kadee, others use tootpicks or interdental brushes https://forum.mrhmag.com/post/maybe-the-best-kadee-uncoupling-tool-for-me-anyway-12298153 Remote uncoupling is not really an issue with an American style Walk-Around layout where the focus is on the operators enjoyment as opposed to producing a visually interesting display for an exhibition.
-
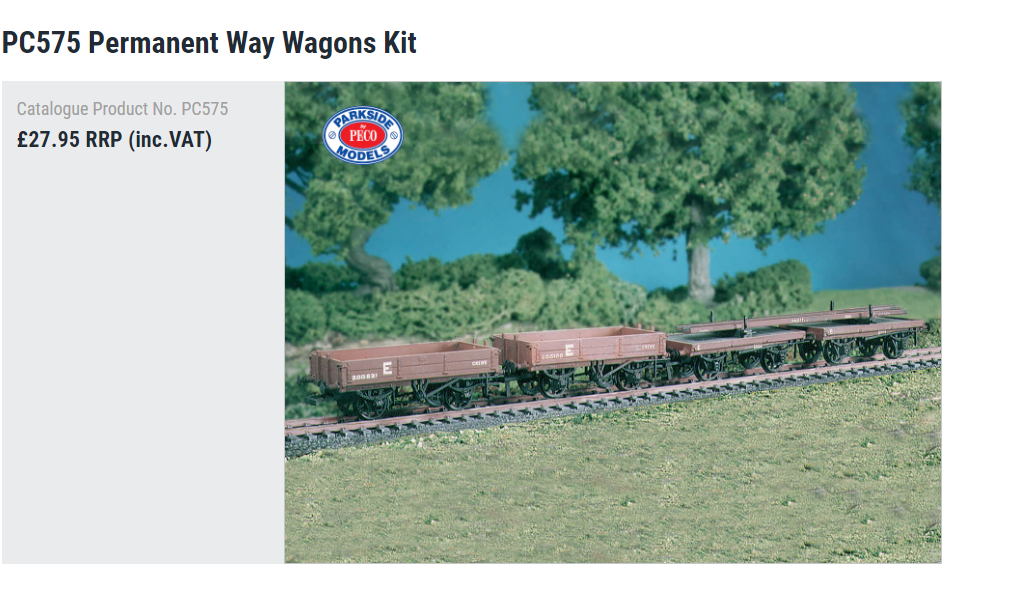
There is a General Arrangement drawing of a 10 Ton "Timber Bolster Truck" in the Compendium of MGWR Non Passenger Coaching Stock and Goods Vehicle Drawings which is available from the Irish Railway Record Society. The 10Ton Timber Bolster Truck is a short 13'8" -8' wheelbase wooden underframe flat wagon which is visually similar to the Single Bolster Wagons in the Peco/Parkside originally PC575 Permanent Way Wagons kit. The kit is good conversion material for Irish Wagons all wagons are supplied with single lever (similar to that used by the Irish companies) in addition to the gear used in mainland UK, the low ballast wagons look similar to those used by the GSWR. The underframe kit (2 sets) is available separately and a good start for scratchbuilt wagons and source of spare "Irish" Brake gear. Peco/Parkside also produce a pair of ex LNWR "Loco/Traffic Coal Wagons from the same source which look reasonably close to older (pre-1917) GSWR/GNR, but not MGWR coal wagons! I built both the PW and Coal Wagons, I will post some photos when/if I can find them.
-
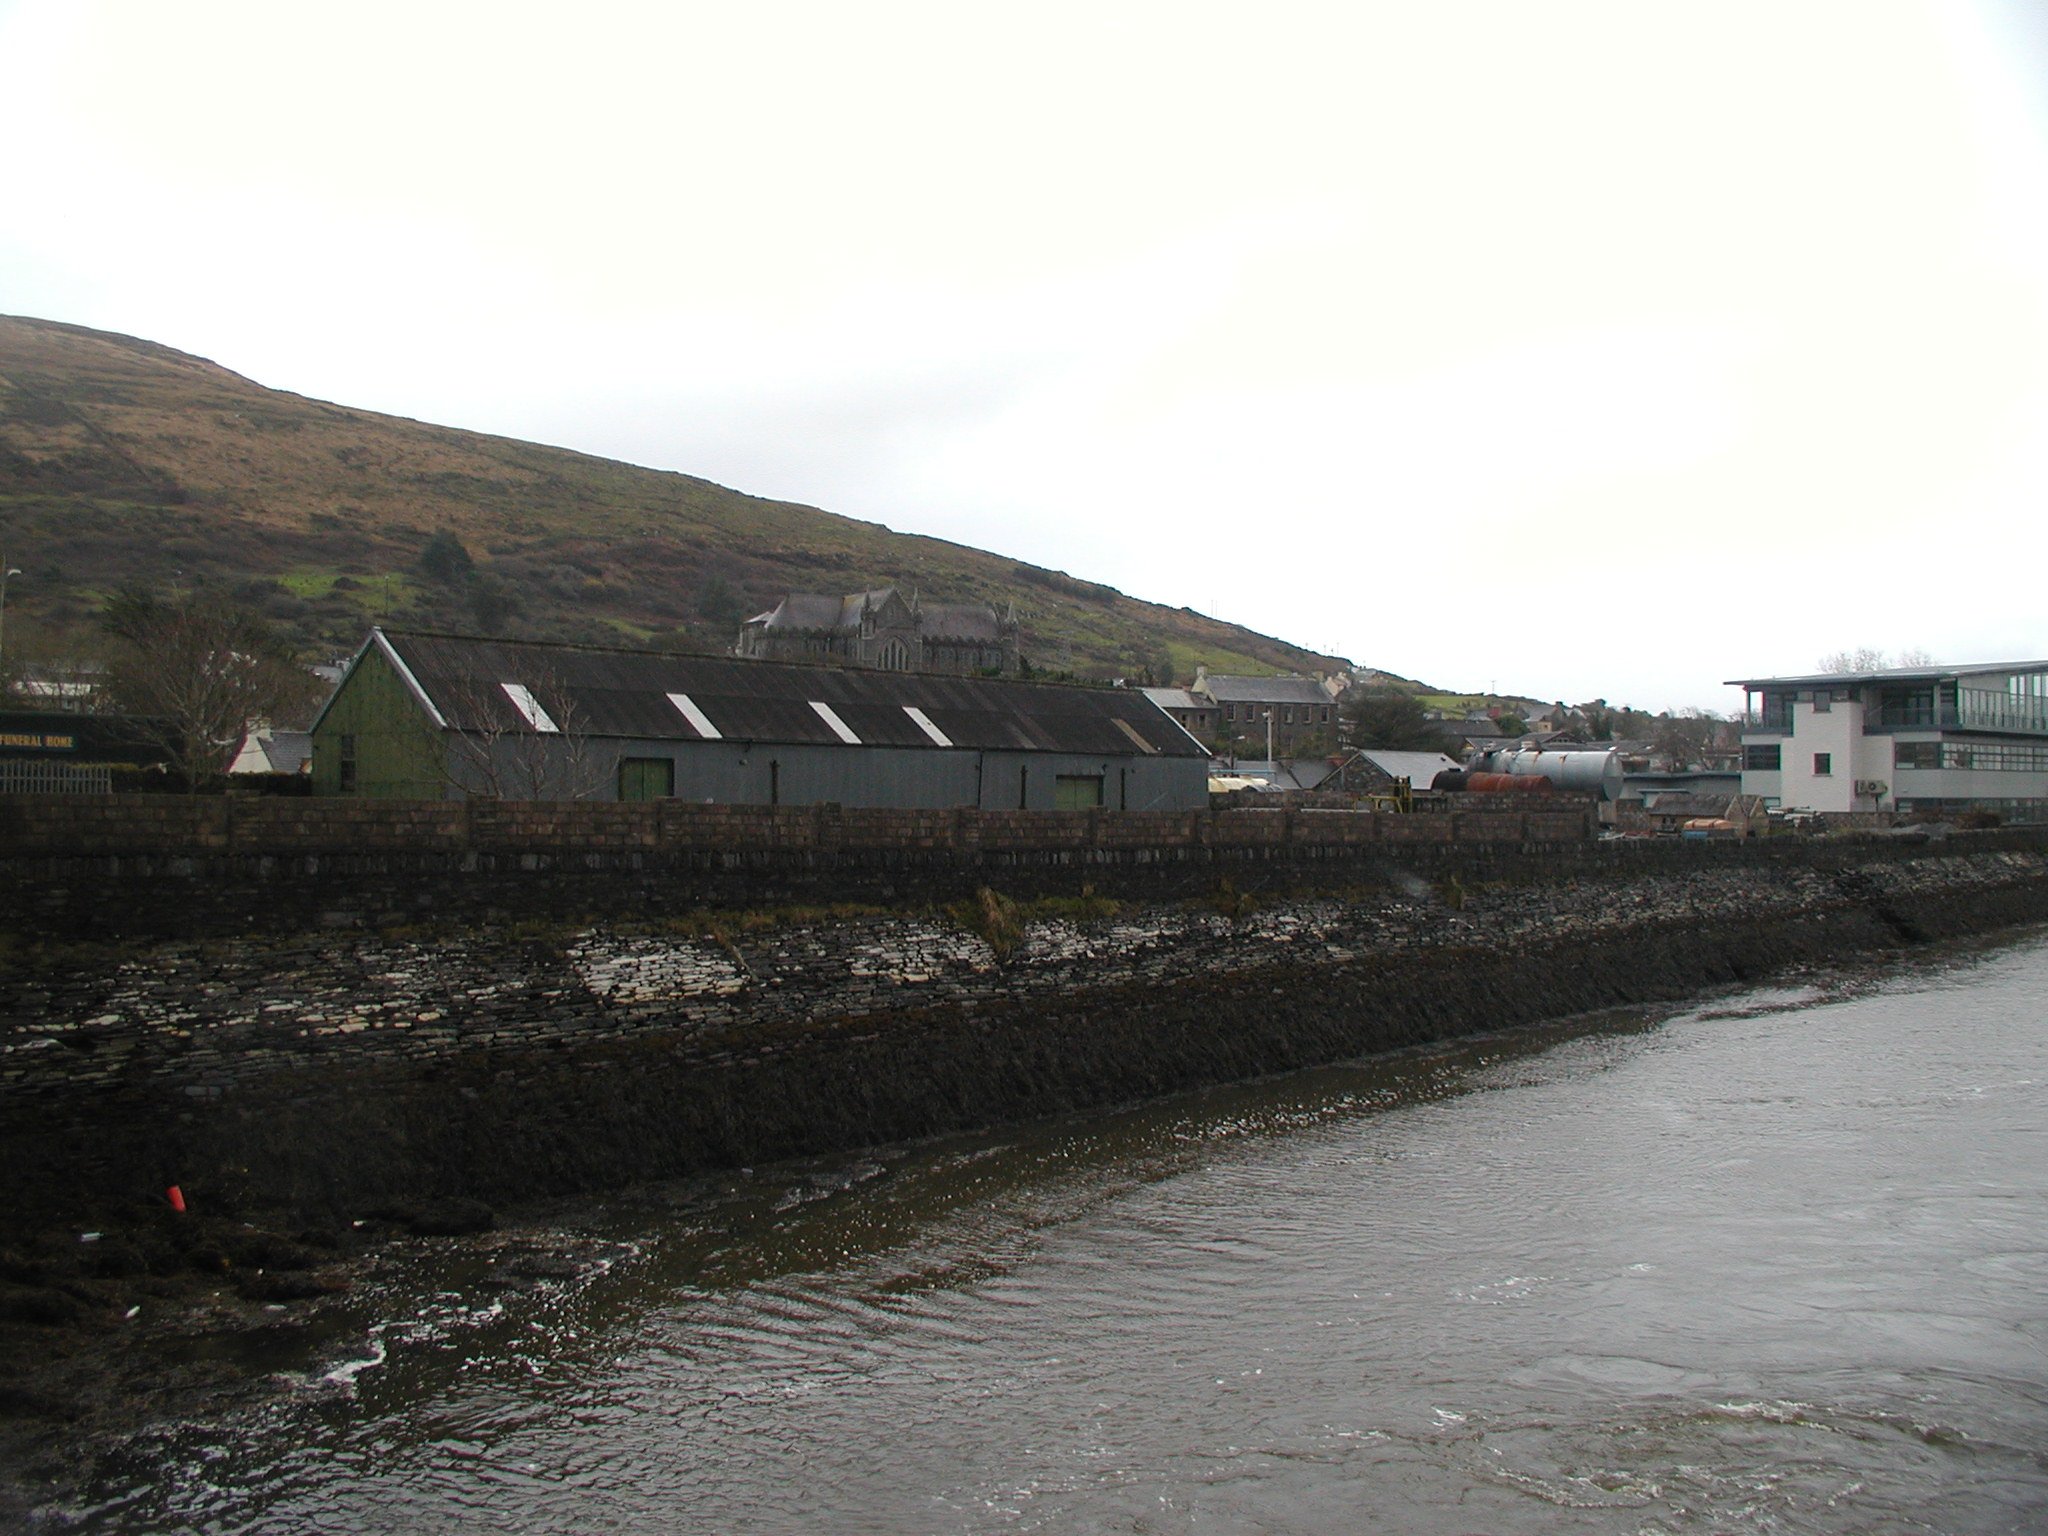
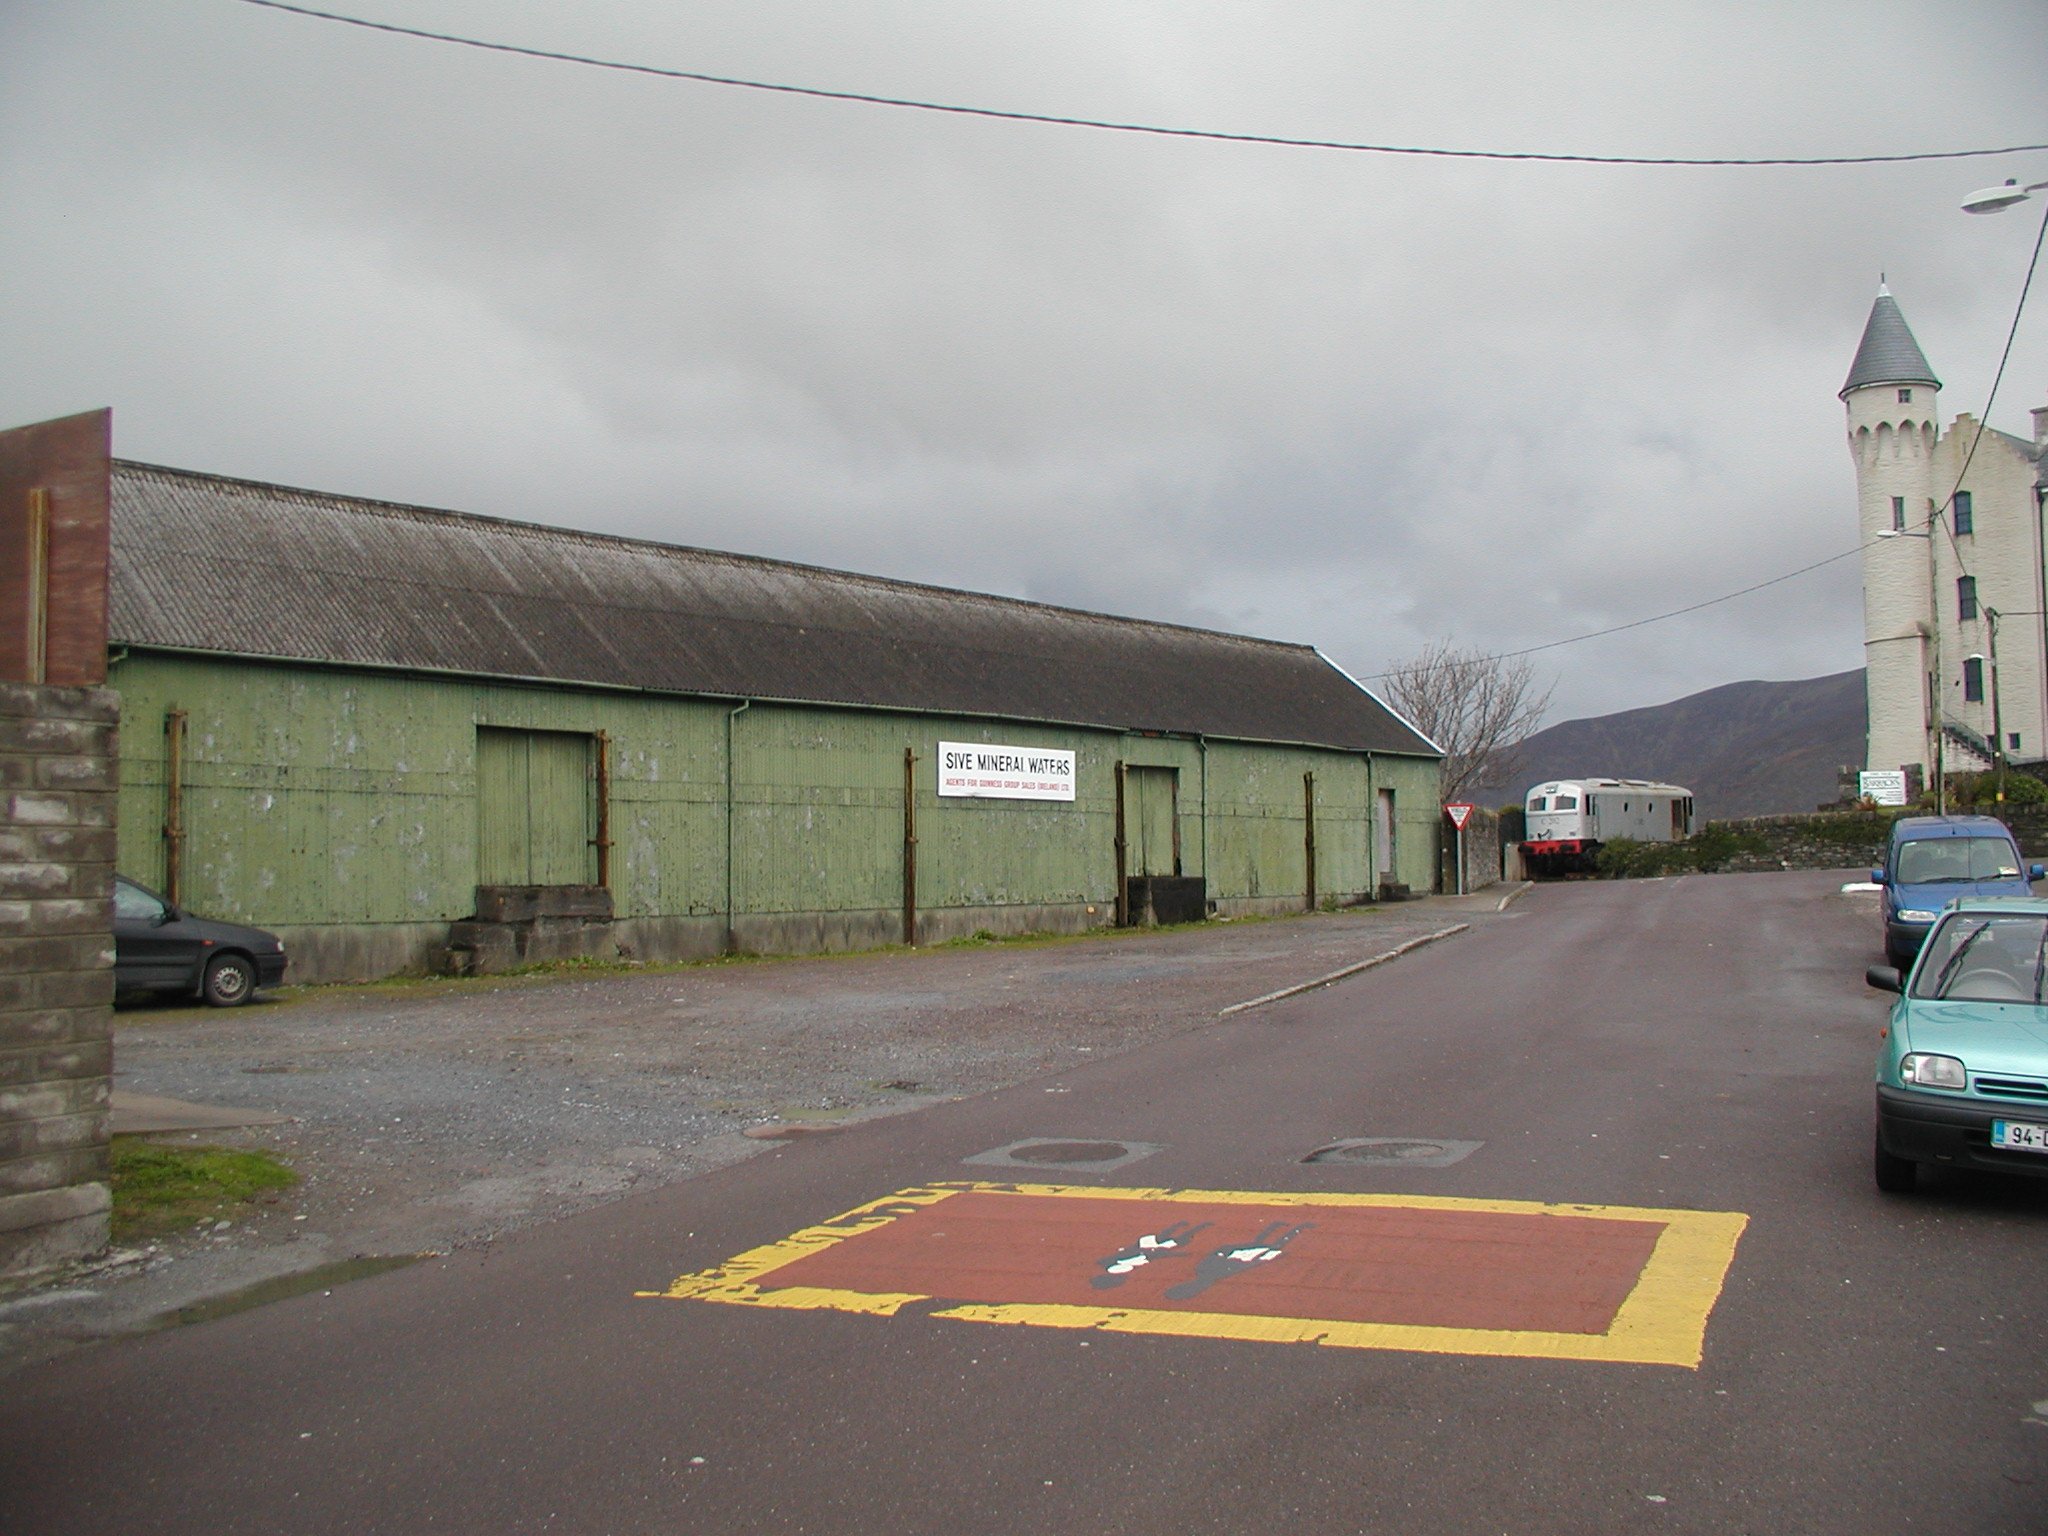
That Larass/Cahirciveen mock up has me mighty tempted though it does not fit in with my MGWR/WLWR interests. The way the goods yard and station is squeezed in between Quay Street and the sea wall makes a visually and operationally attractive model. Interestingly the railway era Goods Shed and Oil Depot were still in use nearly 20 years ago, the Legal Aid Board Offices are on the site of the station building and loco depot.
-
Intended for Electric Train Heating where C Class worked branch passenger trains, most likely Clonakilty, Skibbereen, Birr and Ballina. Largely redundant after CIE closed the Birr Branch and discontinued Manulla Junction-Ballina feeder service in 1963. Apparently CIE converted some (4) older GSR coaches to 'Self Heating' Carriages" by fitting underfloor generators in the 1950s, some Cs were fitted with jumpers for ETH operation as the generators were un-reliable, whether the ETH actually worked on any of these branch line trains is another question. The 'Self Heating" carriages and problems with the generators were reported in Irish Railfans News in the 50s. CIE fitted a Brake Standard and a Park Royal with storage heating when the Ballina Branch passenger trains were re-instated in the early 1970s.
-
I am probably as obsessed about authentic/plausible buildings and structures as JHB is about correct liveries. Wilkinson seems to have operated a major architectural practice from the mid 1830s to the mid 1880s primarily Government work designing Workhouses and Mental Asylums, his railway work seems to have dried up in (as money dried up?) the mid 1860s. The DWWR seems to have run out of money after reaching Enniscorthy in 1863 and did not complete its line to Wexford for another 11 years, Wexford Station is quite humble in nature compared with stations North of Enniscorthy, the DWWR turning to corrugated iron buildings on its New Ross Extension and smaller main line stations.. GNWR (Mayo Line) buildings became increasingly spartan (to keep costs down) as the line progressed westwards from Castlerea to Westport with plain rectangular stone station buildings (originally without canopies), wagons were loaded/loaded outside the goods sheds at Ballyhaunis and Claremorris unlike other major stations on the Mayo Road The most likely scenarios for a railway to Mountbellew are: 1. A locally financed scheme built in the 1860s or 70s taken over by the Midland when the local company ran out of money before or shortly after completion in a similar manner to the Ballaghadereen. One possible scenario is that the line was originally planned as a part of a line from Ballinasloe to Tuam and Ballinrobe to tap traffic from Joyce Country and Mayo rather than a simple dead end branch. It was originally planned to extend the Ballaghdereen line to connect with the Mayo Line at Castlerea to tap into cattle traffic from the plains of Galway and Roscommon. Spartan possibly Gothic buildings like Ballaghadereen, Ballymoe, Donamon (Mayo Line) or plain rectangular buildings (Clastlerea-Westport) 2. A Baronially Guaranteed Light Railway to Mountbellew built in the 1880s/90s similar in character to the Loughrea, Ballinrobe, Branches but with the station buildings and goods shed on a smaller scale. Its possible the Midland might have adapted the "English Cottage" style of architecture used on the Western Extensions if the line was built in the mid-late 1890s, the MGWR used this style of architecture at Ballyvary Station on the Ballina Branch http://eiretrains.com/Photo_Gallery/Railway Stations B/Ballyvary/IrishRailwayStations.html#Ballyvary_20040704_0003_CC.jpg A Baronial Guaranteed scheme would have had a greater chance of success than an 1860s/70s scheme as the company shareholders had a guaranteed return on capital and the County Council could take over and work the line if the project failed like to Tralee and Dingle and Schull and Skibbereen In the end anything is possible/dooable!
-
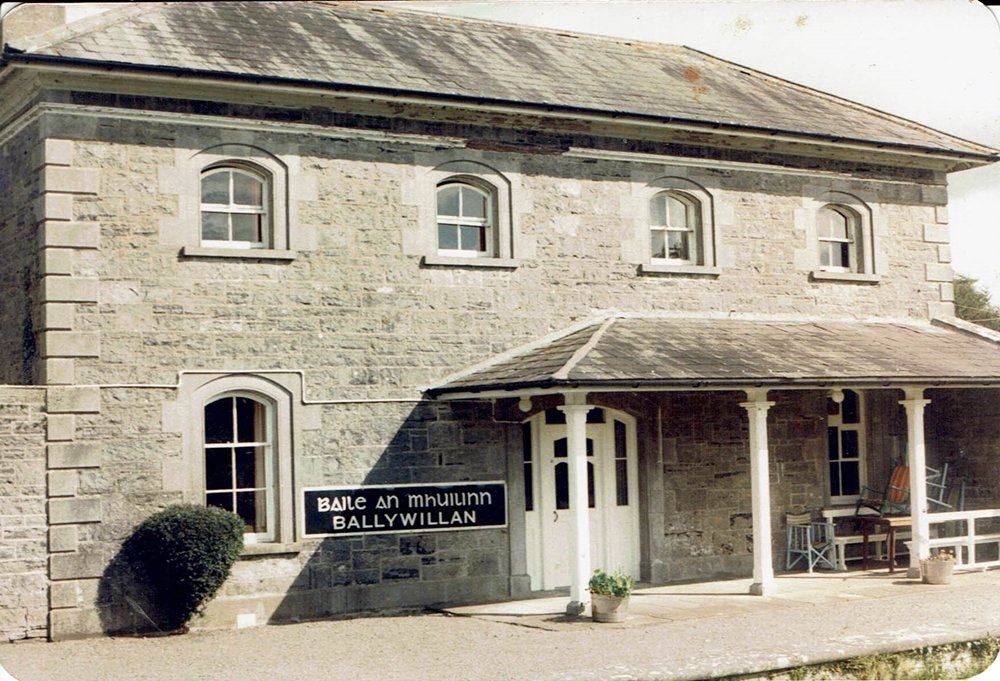
The other point to consider is that there was no longer a need for impressive architecture (to demonstrate the railway was a good investment) once the MGWR completed its trunk routes by the 1860s, the company preferred to sit back and let local companies or the Government take on the risk of building branch lines and secondary routes. Apart from the Great Northern and Western (Athlone-Westport & Ballina) the majority of these companies struggled to raise capital and cover their operating expenses, buildings tended to be plain in nature built from local materials generally coursed random stonework with brick rather than stone quoins and detailing used in earlier construction. Ballywillan Cavan Branch, stone quoins and detailing. Athboy brick quoins and detailing window and door openings, brick chimneys. Its likely that Mount Bellew station buildings would have been close in scale to Athboy, Kingscourt or Killeshandra as they were similar sized towns in the late 1800s, Loughrea and Ballinrobe are considerably larger towns.
-
Not strictly speaking the MGWR engaged firms of Architects and Engineers to design the buildings and structures on its Main Line and Sligo/Cavan Branches, its likely that the railway would have set out its requirements in terms of floor area and office/station accommodation. The same principal would have applied to lines built by worked companies like Loughrea, Ballinrobe and the Western Extensions, the MGWR seems to have developed its own standard designs for (brick) platform shelters and small goods sheds (Attymon) during the late 1890s early 1900s. The MGWR engaged different firms of Architects to design the buildings on the Dublin-Galway (G.W. Hermes) and Mullingar-Sligo-Cavan Lines (George Wilkinson). There was a lot more variation in design between station buildings on the Galway Line and Sligo/Cavan Branches. The Main Line was completed between 1847 & 51 and Sligo/Cavan between 1855 and 62, in the early days the company may have been more open to outside pressure than 10 years later. The Trench family at Garbally Park and Woodlawn House no doubt had an influence on Ballinasloe and Woodlawn Gothic station building and Goods Shed design Wilkinson was also engaged by the Dublin, Wicklow and Western (Harcourt St-Enniscorthy) and Great Southern and Western (Clara-Athlone and Nenagh, there is a stong "family" likeness between Wilkinson's station buildings and goods shed built for all three railway companies, including semi and circular good shed windows. Station buildings and goods sheds at stations like Athboy, Ballinrobe, Loughrea and Kingscourt are likely to have been designed locally as oppose to a detail design prepared by the MGWR.
-
Better still the Irish 3' gauge on 15mm on 45mm gauge track! A lot of Neil Ramsey's signal cabin is pure Lough Swilly I think John Campbell a prolific builder of Irish live steam locos built both a Swilly 4-8-0 and 4-8-4T
-
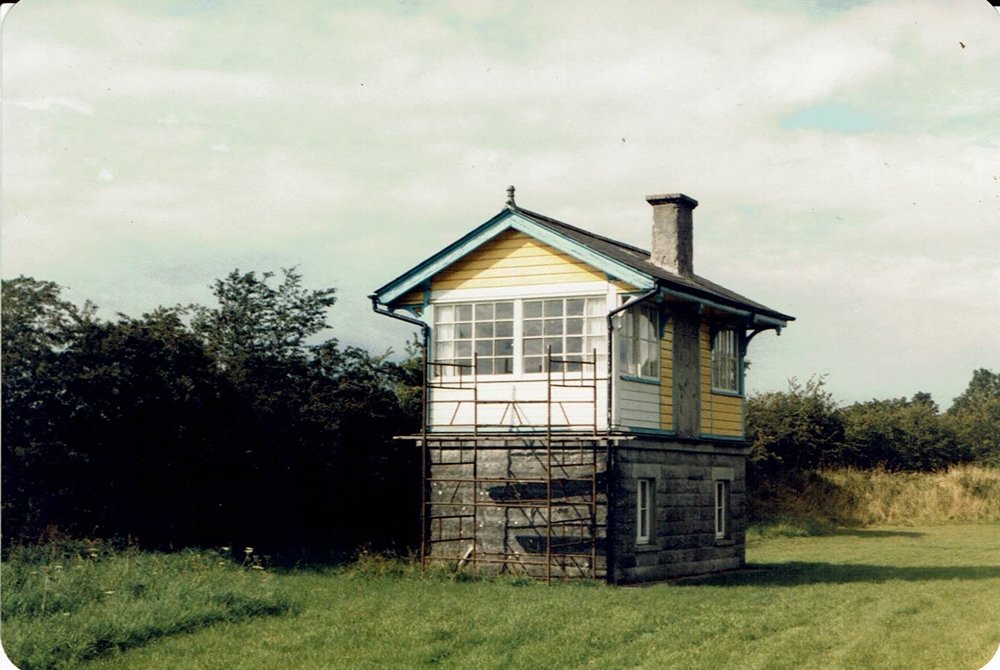
Moate Cabin looks like the original dating from the 1890s with modern replacement windows Post Civil War MGW Cabins were generally built on a "Rockfaced" concrete block base, the eaves overhang on the post Civil War cabins appears larger and the roof pitch shallower. Rockfaced concrete blocks possibly manufactured by Moracrete an Irish owned a public works and civil engineering company that appears to have carried out post Civil War infrastructure re-building work. The Peco/Ratio Platform/Ground Level Signal Box appears to be to a similar design https://peco-uk.com/products/platform-ground-level-signal-box. The Ratio model is based on Highley Signal Box an 14 Level McKenzie and Holland Box dating from the 1880s Signal box superstructures were basically modular in nature. Two Ratio Cabins could be combined on a brick base (Wills Scenic Materials) to provide an additional window bay and form the larger 24 lever Cabin used at Moate. Similar cabins were also used on the WLWR including some on timber (Listowel, Abbeyfeale) and some on brick (Tubbercurry) bases
-
Ernies Massive Irish 1930's to 2005 Photo Archive
Mayner replied to Glenderg's topic in Photos & Videos of the Prototype
I got to know the Meath Line shortly after closure during the 60s as a result of Sunday afternoon drives with my parents, we even walked a section of the line near Dunsany Castle shortly before the track was lifted. Some of my earliest modelling projects were based on the Meath Line including a 4mm balsa model of Dunboyne Station building and an N gauge layout based on Kilmessan Junction. I explored most of the station sites after I bought my first car in my early twenties. -
Ernies Massive Irish 1930's to 2005 Photo Archive
Mayner replied to Glenderg's topic in Photos & Videos of the Prototype
Possibly Bective on the Meath Road. 132 worked an IRRS special over the Meath Line to Kingscourt in June 1961. There is a Greg Child photo of 132 coupled to a grubby Luggage Van at Dunboyne in Irish Railways in Colour Tom Ferris 1992. Bective had a single platform on the down side with the sidings at the North end of the station. -
Its been a long term in the planning and construction I first heard about plans for a Westland Row-Grand Canal Dock layout nearly 20 years ago. Its nice to see the Sparrow and Arrow Railcars again, the single unit railcar was surveyed within days of its arrival (1997?) in Inchacore and the scratchbuilt model completed and in service on the Greystones layout a lot quicker than it took IE to commission the prototype.
-
The late Padraig Ó'Cuimín a recognised authority on the Midland wrote about the traffic and rolling stock on the Loughrea and Ballinrobe Lines during the pre-amalgamation era in his book The Baronial Lines of the MGWR Transport Research Associates 1972. Traffic on both lines was broadly similar, in pre-amalgamation days cattle and timber were the most important sources of outward traffic (6 Fair Specials Loughrea & 4 Ballinrobe lines in 1923 WTT), Loughtrea had cattle fairs in February (largest) March and May, sheep August. Pig traffic was most important after cattle from Ballinrobe, building stone was also shipped from Ballinrobe. Horsebox specials also ran in connection with the Ballinrobe Fair and Racemeetings. Inward traffic included domestic and locomotive coal, flour, bran, Guinness, bran, corn and sundries, domestic coal traffic. The Convertible or MGWR "Standard Covered Goods Wagon" was the standard wagon for livestock and general goods traffic up to the Amalgamation, the next most common were Swivel Timber Trucks (short trucks with single bolsters) usually used in pairs or threes to carry round or unsawn timber. Ó'Cuimín writes of a Martin Flood who used to work cutting timber for dispatch from Dunsandle, ending up unloading the same Dunsandle timber in Liverpool. The "Open Box" wagon used for domestic and loco coal was the third most common form of wagon. The MGWR had a small number of hard topped and open cattle wagons, but the short 14' "Convertible" was the predominant type up to the Amalgamation. The MGWR began building longer 17'6" covered and open wagons to an Irish Railway Clearing House design during and and after WW1, 150 or half of the IRCH Standard Covered Wagons ware built as "convertibles" to carry livestock or general goods traffic. Wagon Livery is described as: Standard colour for wagons: Dark Slate Grey Loco & Traffic coal trucks: Black P.W.D Wagons: Sand Beige (Yellow Clay) Passenger Train wagons: Brown Brake Vans: Generally Brown, 1874 Type Mid Green (1922-24) In summary (pre-Amalgamation) MGWR goods trains were mainly made up of the Companies 14' "Standard Convertible Wagon", Single Bolster Flats funning in pairs or trios, Open Box Wagons
-
Going back to Jb1911s original question there are no OO Scale ready to run models of MGWR locos or rolling stock. The Bachmann N or Murphy Models CIE version both discontinued appear on the second hand market. The Lima "Cattle Engine" is best avoided, part of Lima's first excursion into British Outline the loco was a HO/OO hybrid European HO viewed from the side OO head on as the loco and tender body were widened to clear the wheels and motor, best left as a collectors item not a running loco. A number of people have converted the original Mainline J72 into both the S (Small) and P (Large) 0-6-0 tank locomotives, the new Bachmann re-tooled version https://www.bachmann.co.uk/product/category/152/lner-j72-tank-68733-br-black-(early-emblem)/31-061 is probably a better option than a second hand Mainline version as the chassis is likely to be past its use by date and require replacement. MurrayEMC thread covers the conversion of an original Mainline J72 into a Midland Tank and problems with the original chassis. I produced brass kits of the MGWR K Class 2-4-0 in its post 1917 superheated form, the MGWR Meath and Fish Van and MGWR Horsebox which are really only suitable for experienced kit or scratch builders. I have no plans to re-release these kits, however the etched metals kits are available to special order. Studio Scale models produce a kit for the E Class in its original condition and a highly detailed whitemetal kit of the MGWR Standard Convertible Wagon http://www.studio-scale-models.com/img/k14.jpg, another supplier Jeremy Suter produced a similar high quality kit of the MGWR Standard Loco Coal wagon about 20 years ago but appears to have discontinued his Irish kits. If you want to get something running fairly quickly an option may be to focus on building the layout while using available ready to run locos and rolling stock while you develop skills and gain experience converting rtr models, kit or scratch building. Irish railway infrastructure and operating practices changed very little between the early 1900 and mid 1970s when freight handling was rationalised and CIE began upgrading track and signalling. Another option is to try something small in O Gauge Alphagraphix/Tyrconnell produce kits of 2-2-2T Fairy, the GSR version of the E Class, MGWR 6 Wheel coaches and card kits of the Horsebox and Convertible wagon.
-
Irish Houses in the Early 1900s - What Colour Paint To Use?
Mayner replied to 2996 Victor's question in Questions & Answers
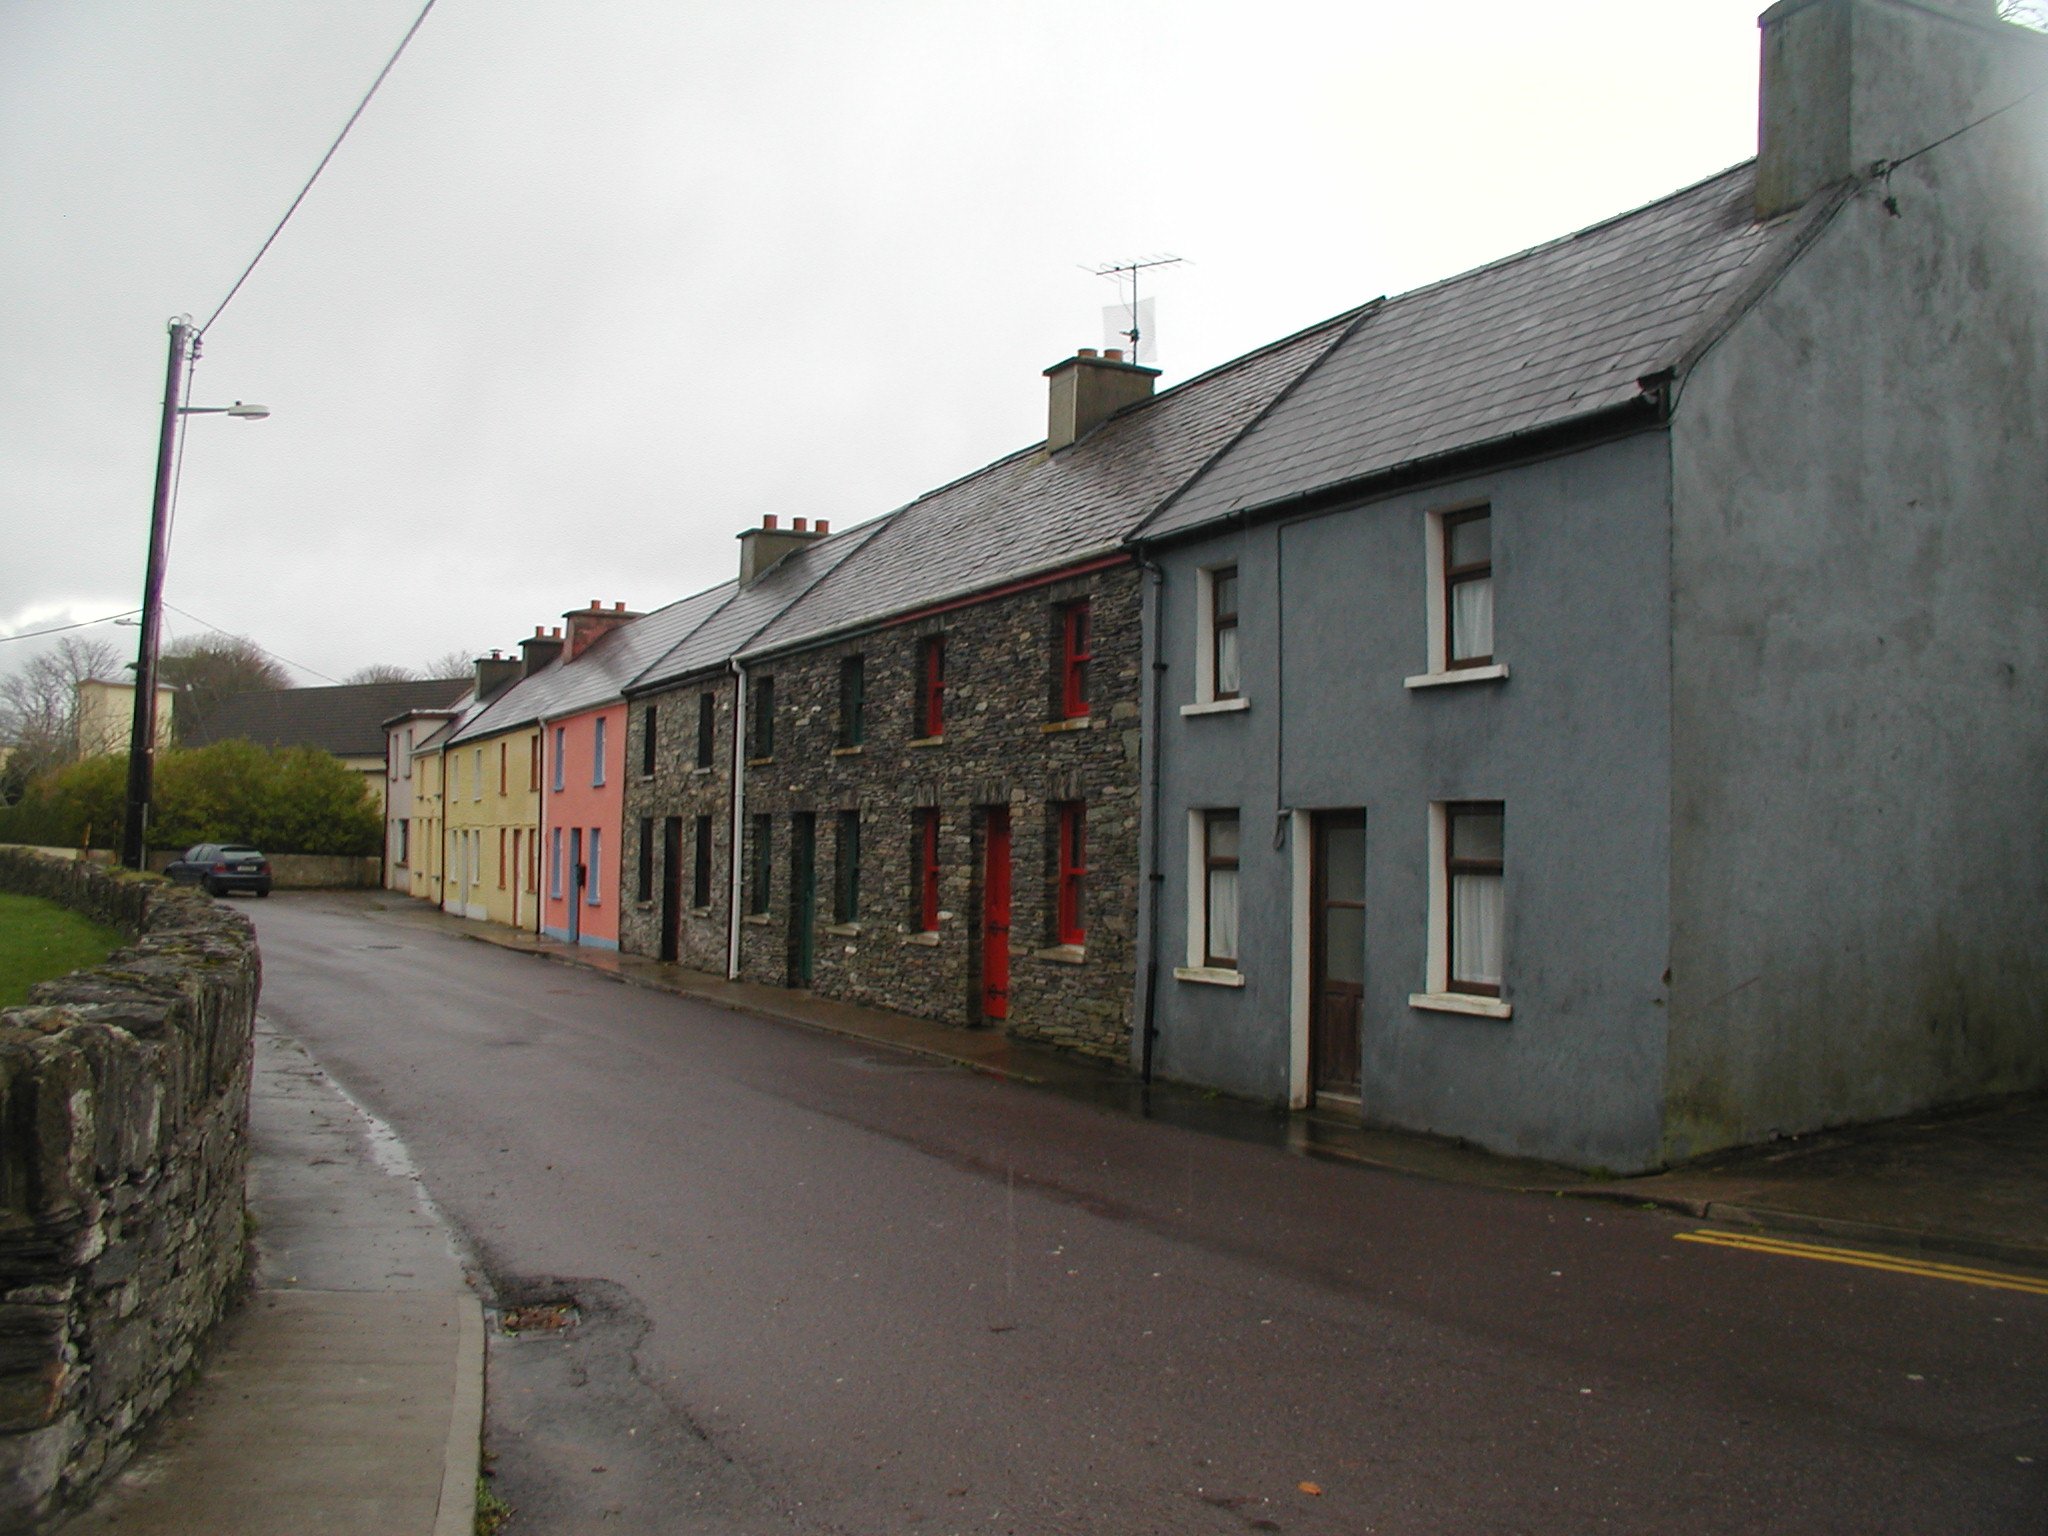
The colorful buildings are largely as a result of the "Tidy Towns" competition a 1958s Irish Government initiative to improve community spirit and promote tourism. The main objective was to improve the local environment with tree and flower planting and painting building https://www.tidytowns.ie/about-us/history/ . Cement rendering often tended to be weathered and unpainted, its main purpose was to protect the fabric of the building after the brick or stonework became porous as a result of driving rain Lead based paints used on wood and metalwork tended to be limited to white, cream, brown or dark green. Green often appears as an undercoat or primer when you strip back old woodwork. Red or grey oxide, black or unpainted zinc on corrugated iron on farm and industrial buildings. Tom Rolts has interesting cometary and photos on Irish villages and towns in the Midlands during the 1940s in "Green and Silver" when he explored the Shannon and Southern Canal Network in a converted life boat. -
Ballywilliam County Wexford about the minimum in terms of double ended terminus stations. The Bagenalstown and Wexford started building southwards towards the Wexford border in the early 1850s until the money ran out and the company went bankrupt upon reaching Ballywilliam in 1864, additional finance appears to have been arranged and the line extended eastwards to connect with the DWWR at Macmine Junction in 1870. The GSWR and DWWR divided the line at Ballywilliam each company buying its respective section, this arrangement effectively prevented the GSWR from competing with the DWWR for Dublin-Wexford traffic. The DWWR built a branch from Palace East to New Ross but continued to operate Palace East to Ballywilliam until the GSWR agreed to take over that section of line possibly as part of the horsetrading in connection construction of the Waterford-Rosslare Line, (DSER access to Waterford & running powers to Limerick). JHBs comments about short workings between New Ross-Palace East and Ballywilliam in the 1894 DWWR timetable prompted me to look at the station layout and timetable to try and figure out the actual workings of the timetable. Although there were two return passenger trains daily between Bagenalstown and Palace East in the 1894 timetable the GSWR and DWWR appear to have operated the line as two separate branch lines with passengers changing trains with a wait of between 5 and 44 minutes between connections at Ballywilliam. The GSWR worked its section of the line with two out and back workings from Bagenalstown that could be worked comfortably with a single trains set and crew (Pre-8hr day!) The DWWR worked its section of the line with a loco based at New Ross which started the day with a New Ross-Palace East Mixed before working a shuttle service of passenger and mixed trains between Palace East and Ballywilliam before returning to New Ross on a late afternoon mixed again likely to have been worked by a single train crew, the DWWR crew likely spending more of their time shunting, running round and coupling up than actually running. Operating a double ended terminus with a single platform, single run-round loop and very limited siding space would have been challenging especially at times when both GSWR and DWWR trains were scheduled to be in the station The station layout with the crossover (with diamond crossing) from the Loop to the Goods Yard appears to be a GSWR feature also used at Ferbane on the Clara Banagher Branch. The MGWR and GNR(I) considered taking over the SLNCR (when the company was bankrupt) ceasing to operate it as a through route and operating Enniskillen-Manorhamilton and Manorhamilton-Carrignagat Junction as two separate branchline. The SLNCR was bailed out by local interests to prevent the Midland establishing a monopoly in Sligo.
-
I was thinking of Ballywilliam as an interesting inspiration for a model in terms of the 1890s or earlier when it operated as a double ended terminus operated by the GSWR and the DWWR before the GSWR started running through to Palace East. The run round loop turntable and loco spur removed in later years, with a single ended siding remaining for goods traffic/sugar beet. I was thinking mainly in terms of an achievable project using handlaid track, scratchbuilt building, structures locos and stock, not unlike a contemporary Castle Rackrent which started out as a small branch line terminus, two locos, 2 coaches and several wagons before growing into a large system layout. The GSWR appears to have operated the Bagenalstown-Ballywilliam line with its Aspinall 0-4-4T tank locos with No75 the regular branch loco, the DWWR is likely to have used its 0-4-2 Goods locos on the Macmine Junction-Ballywilliam-New Ross Line on account of the lines roller coaster gradient profile. There is a great J P O'Dea article on the history and operation of the Bagenalstown-Palace East Line in the Carlow Historic Society 1973 Annual, including the saga of 0-4-4T No 75 and her train snowed in by drifts in January 1917 and rescue with two breakdown trains http://carlowhistorical.com/wp-content/uploads/2015/12/Carloviana-No-22-1973.pdf
-
It looks like Ballywiliam was the frontier station between the GSWR & DWWR systems at least up to the mid 1890s as Bagenalstown-Ballywilliam is shown as GSWR and Ballywilliam-Palace East as DWWR in the Timetable. Through passengers may have been required to change trains with a wait of between 5 and 44 minutes between arrival and departure at Ballywilliam. The timetable works in comfortably with a single loco and train set from Bagenalstown working the 09:22-10:06 & 12:00-12:55 services to Ballywilliam and 10:45-11:31 and 3:26-4:03 return workings. The DWWR appears to have operated its connection with a New Ross based loco which started its day with an 09:55 mixed to Palace East before connecting with the 09:55 Macmine Junction-New Ross before working the 10:20-10:30 Palace East (PE)-Ballywilliam (BW)Pass, 10:50-11:10 BW-PE Pass, 12:10-12:20 PE-BW Mxd, 1-1:10 BW-PE Pass, 3:16-3:26 PE-BW Pass-3:40-3:50 BW-PE Mxd. 4:00-4:20 PE-New Ross Mxd. It looks like the New Ross loco crew would have had a busy day shunting at Ballywilliam and Palace East and shuttling up and down between the two stations, Ballywillian was the sole interchange between the DWWR and the rest of the Irish Railway system up to the opening of the Loop Line in 1891 potentially with a reasonable level of interchange traffic from Mills and other industries in Wexford, Enniscorthy and New Ross. It looks like the GSWR and DWWR/DSER later came to an agreement for the GSWR to work through to Palace East, the Bagenalstown-Palace East line having lost any strategic importance (keeping the GSWR out of Wexford) with he opening of the South Wexford Line and the DSER having completed it line to Waterford and acquired running powers over the GSWR to Limerick. Still an 1890s Ballywilliam would make an interesting model small station, two competing companies, small locos short trains and distinctive liveries.
-
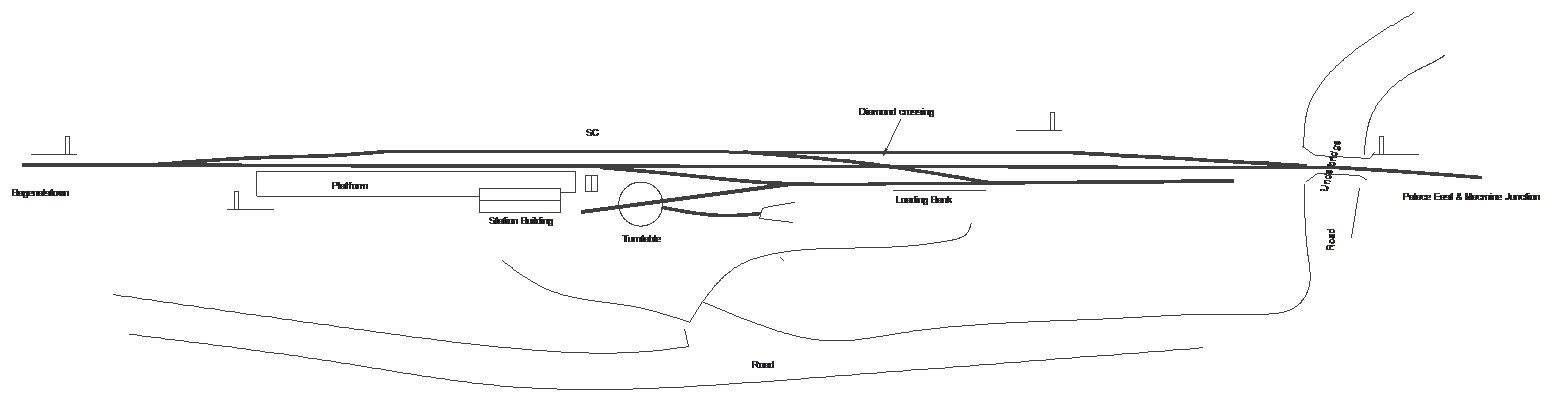
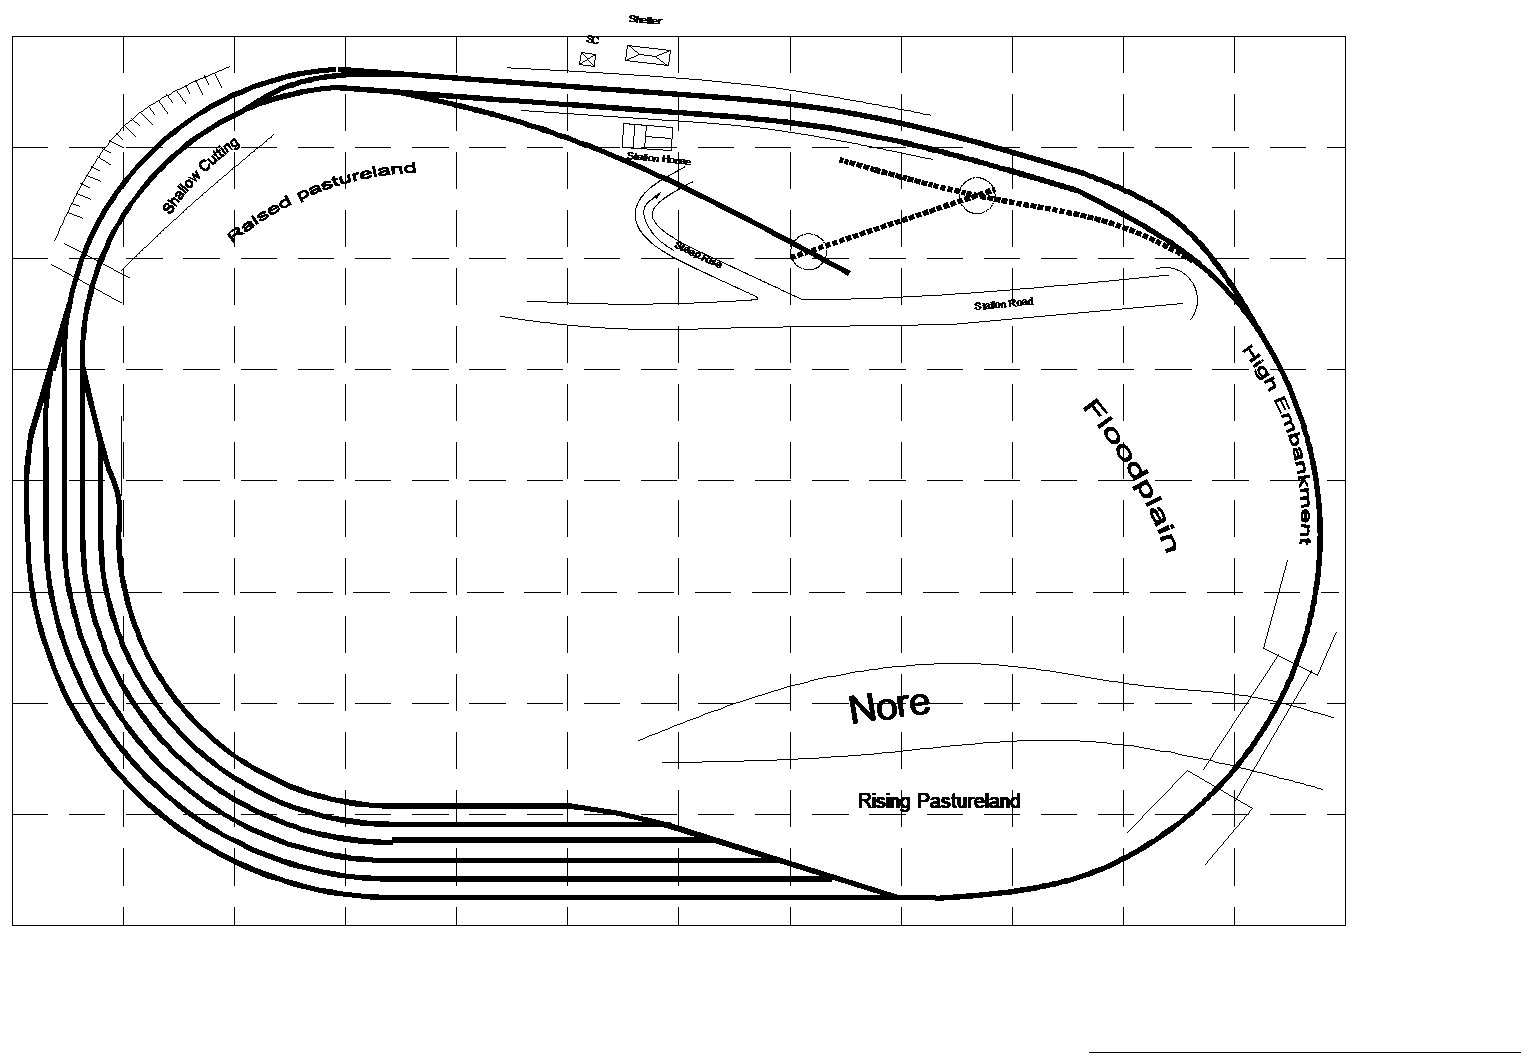
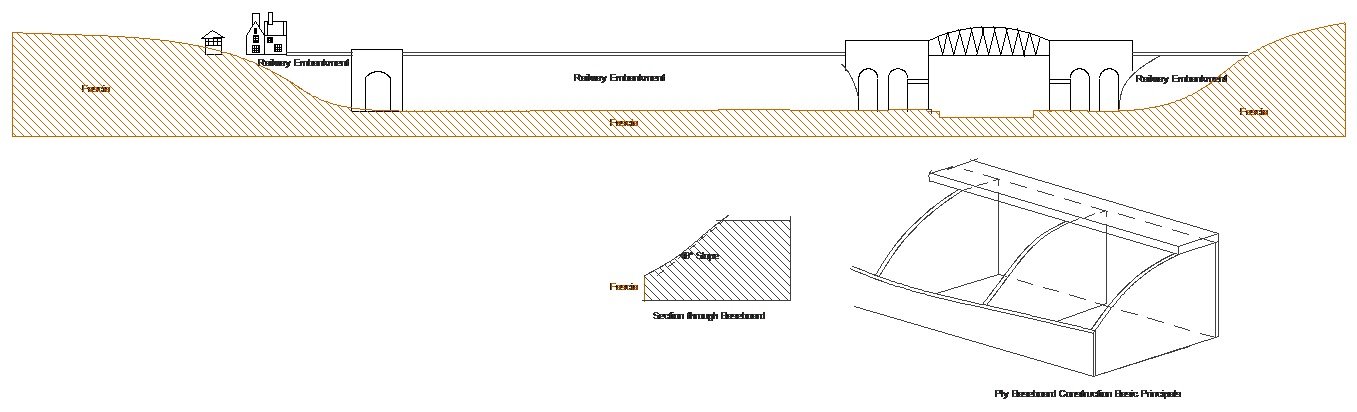
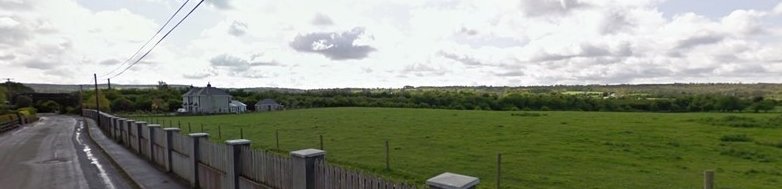
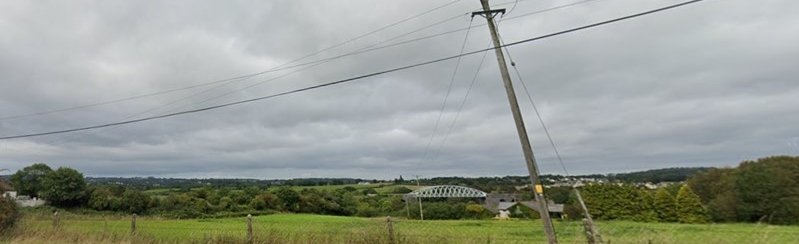
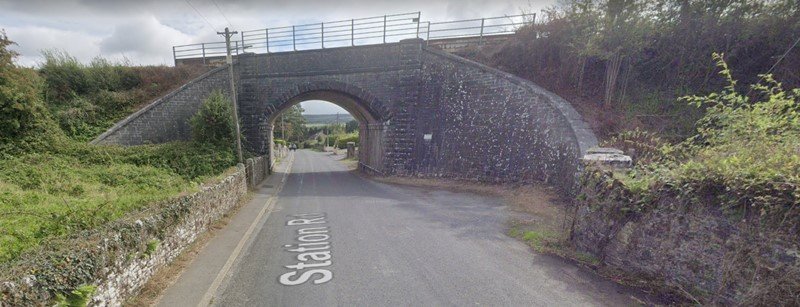
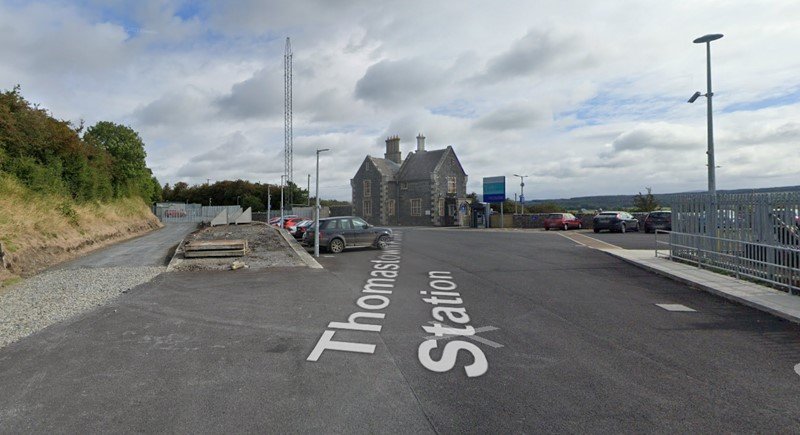
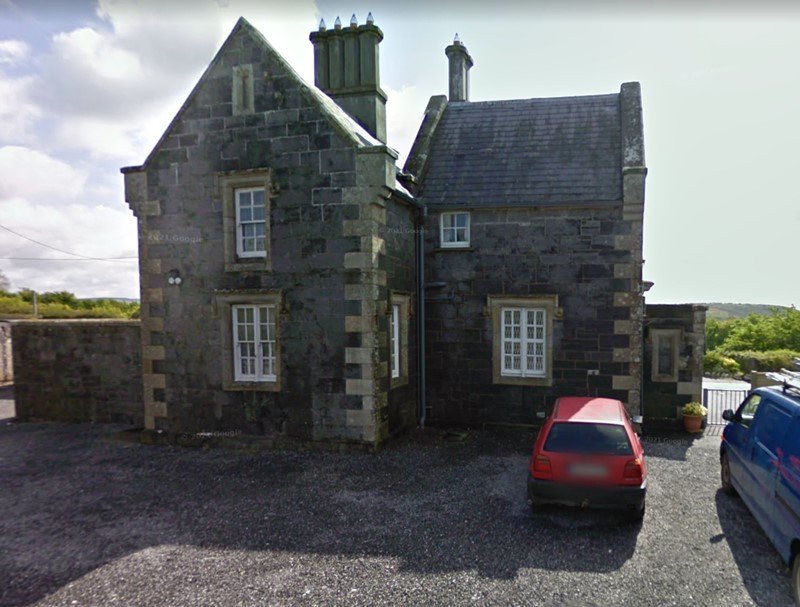
Mainly intended for watching trains go bye with IRM 001 on the Bell Liners and MM141s/181s on the Dolomite, if I ever have to give up on kit or scratch building Another look at Thomastown, I don't seem to have any photos of the station and couldn't figure out how to open Google Earth when I was preparing the drafting the scheme. The embankments are lower than I first thought, but still works visually with the embankment forming the horizon as the railway crosses a wide river valley, backscene very much 'Big Sky" with pastureland and trees on the horizon. In certain respects modelling a railway on the Central Plain is not unlike the American Prairie or East Anglia in the main feature is sky in the absence of hills or mountains. The station on a gentle curve is partially in a cutting and on embankment. The goods siding appears to have been on the station side of the loading bank (at one time included a goods shed), the driveway on the left may have been the cart road. The Waterford and Kilkenny station building has some interesting stone features, the valley gutter and gable between the two sections of the roof appears unusual. Some interesting features at the Railway Road underbridge, the gateway appears to be intended for railway workers accessing the embankment, the field on the station side (possibly used for the Station Masters horse in GSWR/GSR days!) is accessed by a normal wrought iron gate