Mayner
-
Posts
5,133 -
Joined
-
Last visited
-
Days Won
128
Content Type
Profiles
Forums
Events
Gallery
Blogs
Everything posted by Mayner
-
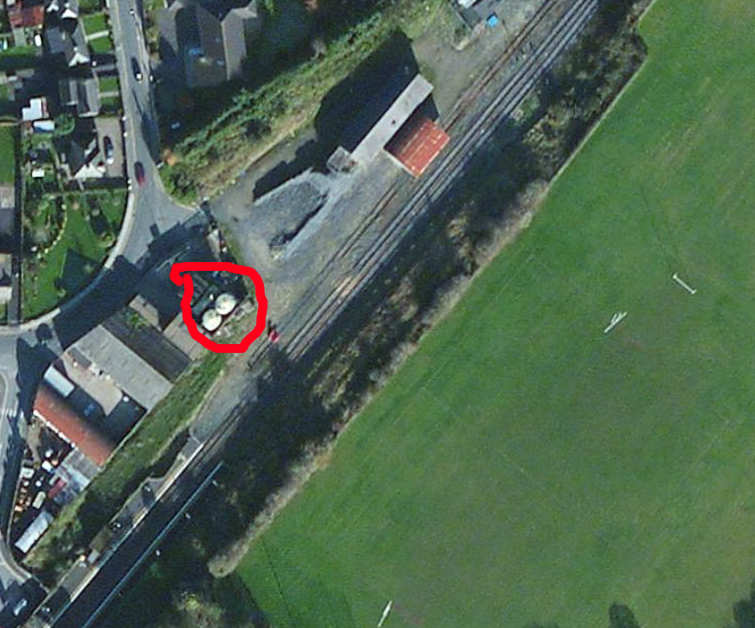
Briquettes from the Littleton plant were transferred from road to rail at Thurles
-

Ernies Massive Irish 1930's to 2005 Photo Archive
Mayner replied to Glenderg's topic in Photos & Videos of the Prototype
According to W (Bill) McDonnell in a "Decade of Steam" the J15b 710 Class had a reputation of poor steaming and the injectors gave trouble if the small GSWR tenders, probable reason for placing the injectors in an accessible place! -
The Z Boiler J15 conversion is on this years to-do list, its basically a matter of updating the CAD work to incorporate improvements identified as a result of the test build from the original artwork.
-
Some interesting photos. My family stayed for a week in the Roman Island caravan park on our summer holidays in 1975, Unlike JHB I didn't get to explore the railway or goods yard commercial shipping had ceased and the gates to the port entrance & the grain elevator locked The Limerick Steamship Company had a dilapidated wooden office/shed (not unlike the Dapol coal office https://www.petersspares.com/dapol-c011-hut-coal-office-water-crane-plastic-kit-oo-gauge.ir) at the Westport end of the Quay Road. Poloxfen's Grain Elevator was likely to have been built during the early 1900s, the RH Hall Elevator on Dublin's North Wall was built between 1915-20. The industrial buildings and tall chimney in the background behind the elevator may be the mill and power plant. Its possible bulk grain was loaded into MGWR convertible wagons through the roof and discharged through the side doors, American and Canadian Railroads carried grain in standard boxcars up to the widespread introduction of purpose built hopper wagons during the 1970s and 80s. Its good to see the photo of 001 hauling a tank wagon and CIE containers on flat wagons, there is a an excellent colour photo possibly of the same train shunting at Westport Quay in an IRRS Journal published during the late 80s early 90s, worth checking out by visiting the IRRS Library if in Dublin. The tank wagons were used for bringing in diesel to the CIE bus garage in the station yard, the 20' containers on 4w flat wagons were used as convention vans loaded/unloaded in the goods yard rather than for Lo-Lo collection and delivery
-
The Official Irish 'Might Have Beens' Thread
Mayner replied to minister_for_hardship's topic in General Chat
The "Ulster and Connacht" is mentioned briefly in P J Flannigan's Cavan & Leitrim Railway and in more detail in E M Patterson' Clogher Valley Railway. The Ulster and Connacht Light Railway was one of a number of schemes to link and amalgamate the Bessbrook & Newry, Clogher Valley and Cavan & Leitrim narrow gauge lines and extend the combined system into Roscommon & Galway. Ulster and Connacht promoters approached the C&L board for their support in the 1880 but nothing further is known. The "Ulster and Connacht Light Railways" re-appeared in the early 1900s and received parlimentary approval in 1903 to amalgamate and link the existing three narrow gauge systems, buy the mining rights to the Arigna Coalfield. The company issued a proposal in 1904 to build a line to extend the system through Strokestown, Roscommon, Mountbellew, Tuam with a branch lines to Galway City & Ballinrobe, the main line continuing through Cong into Connemara to Leenane on Killary Harbour to Clifden. The Dromod-Roscommon-Mountbellew section of the scheme are similar to light railway and tramway schemes of the 1880s which would have had a reasonable chance of success. The only actual construction carried out in connection with the Ulster and Connacht is/was an underbridge in a broad gauge railway embankment at Keadue in County Armagh built in 1908-9 to accommodate the Bessbrook-Tynan section of the U&C -
The GNR & SLNCR were the main users of peak roofed Railbus/Railcar trailers in Ireland. The main challenge is building the railbus/railcar to haul the trailers. Neil Ramsey has mastered the art in 15mm scale and David Holman 7mm scale SLNCR railbus and trailer has appeared on his Workshop, Arigna & possibly Belmullet layout threads. Neil Ramsey's SLNCR railbus and luggage trainer appears at approx 1:47 in his Irish Broad Gauge Diesel railcar video
-
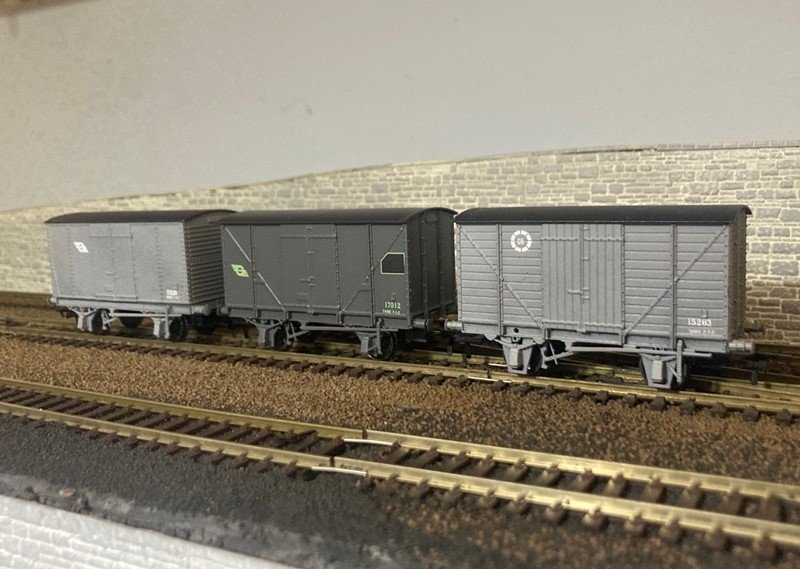
I am not the greatest at lining,. I usually paint coaches in 2/3 colours using spray can auto paint and masking using Tamiya masking tape which is available in a variety of widths. I don't remember whether I did the eau-de-nil strip using transfers (from Studio Scale Models) or masking. As a general rule I cut the edge of the tape against a straight edge with a sharp knife before applying the masking take to the model as the edge of the role may be damaged or not 100% straight. Carefully dress the tape around raised and recessed body detail before spraying the sides (and masking tape) with a light coat of body colour, this will stop the lining/second colour bleeding into the details ruining the model. The spray of hand paint the lining colour. I usually have 'livery colours" such as green, golden brown custom mixed by a local automotive/industrial paint supplier matched from existing models or colour samples. Starting from scratch the best option is to spray the body/side in the lining colour then mask for the body colour. The middle Tin Van has been spayed in white before applying the black and the tan as the livery colours, the van on the left is in silver livery colour, the van on the right in eau-de-nil primer before applying the light green livery colour.

-
A lot of current day releases model railway and die-cast vehicles appear to be intended to appeal primarily to the collectors market, relatively small production batches which tend to sell out rapidly. The golden rule is that the market sets the price when you buy and sell whether its crypto-currency, digital art, model train and diecast collections, or more conventional investments like property or stocks and shares. If you need to sell you are likely to receive less than you spent. I have some American large scale (1:20.3) narrow gauge locos and stock bought second hand from collectors and dealer, some of which were 'Shelf Queens" or were never un-boxed the prices paid were lower or similar to current manufacturers prices for new releases of similar items.
-
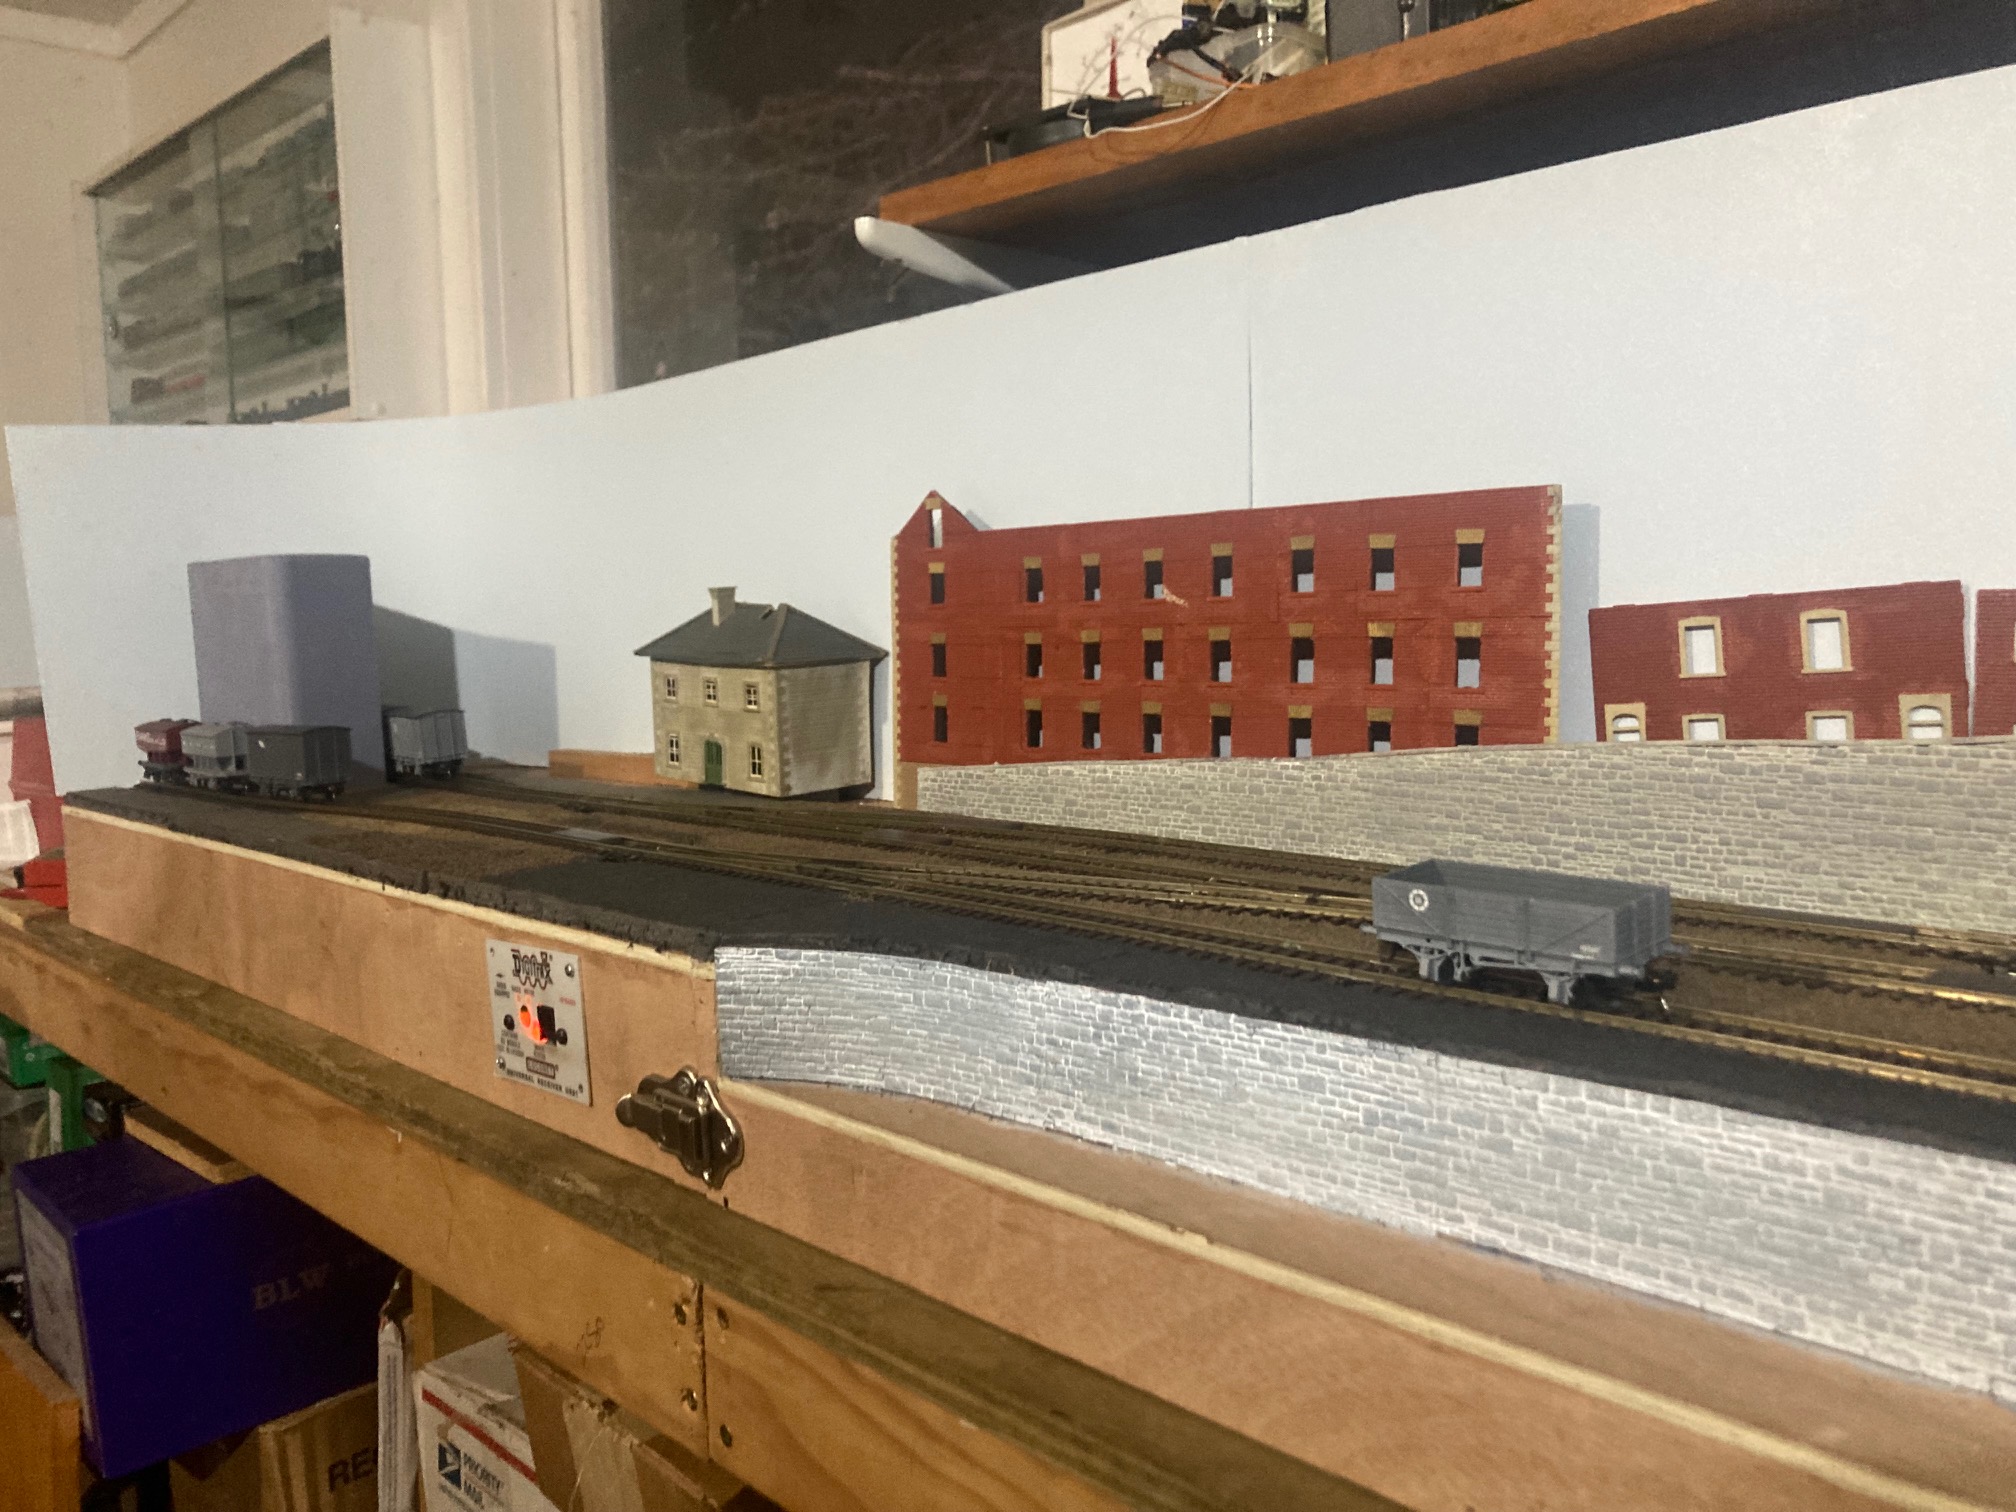
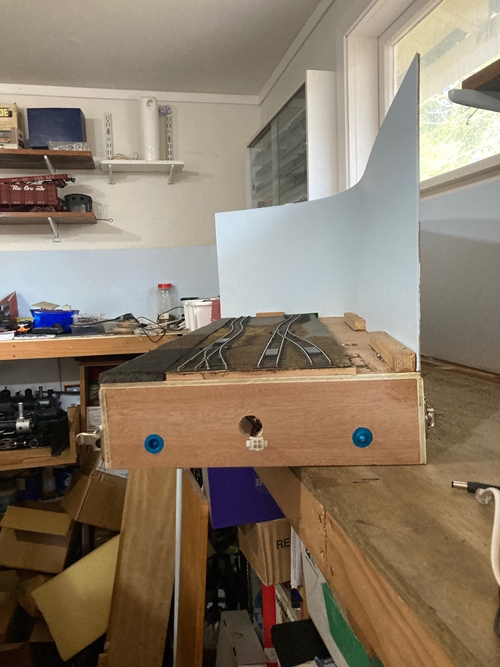
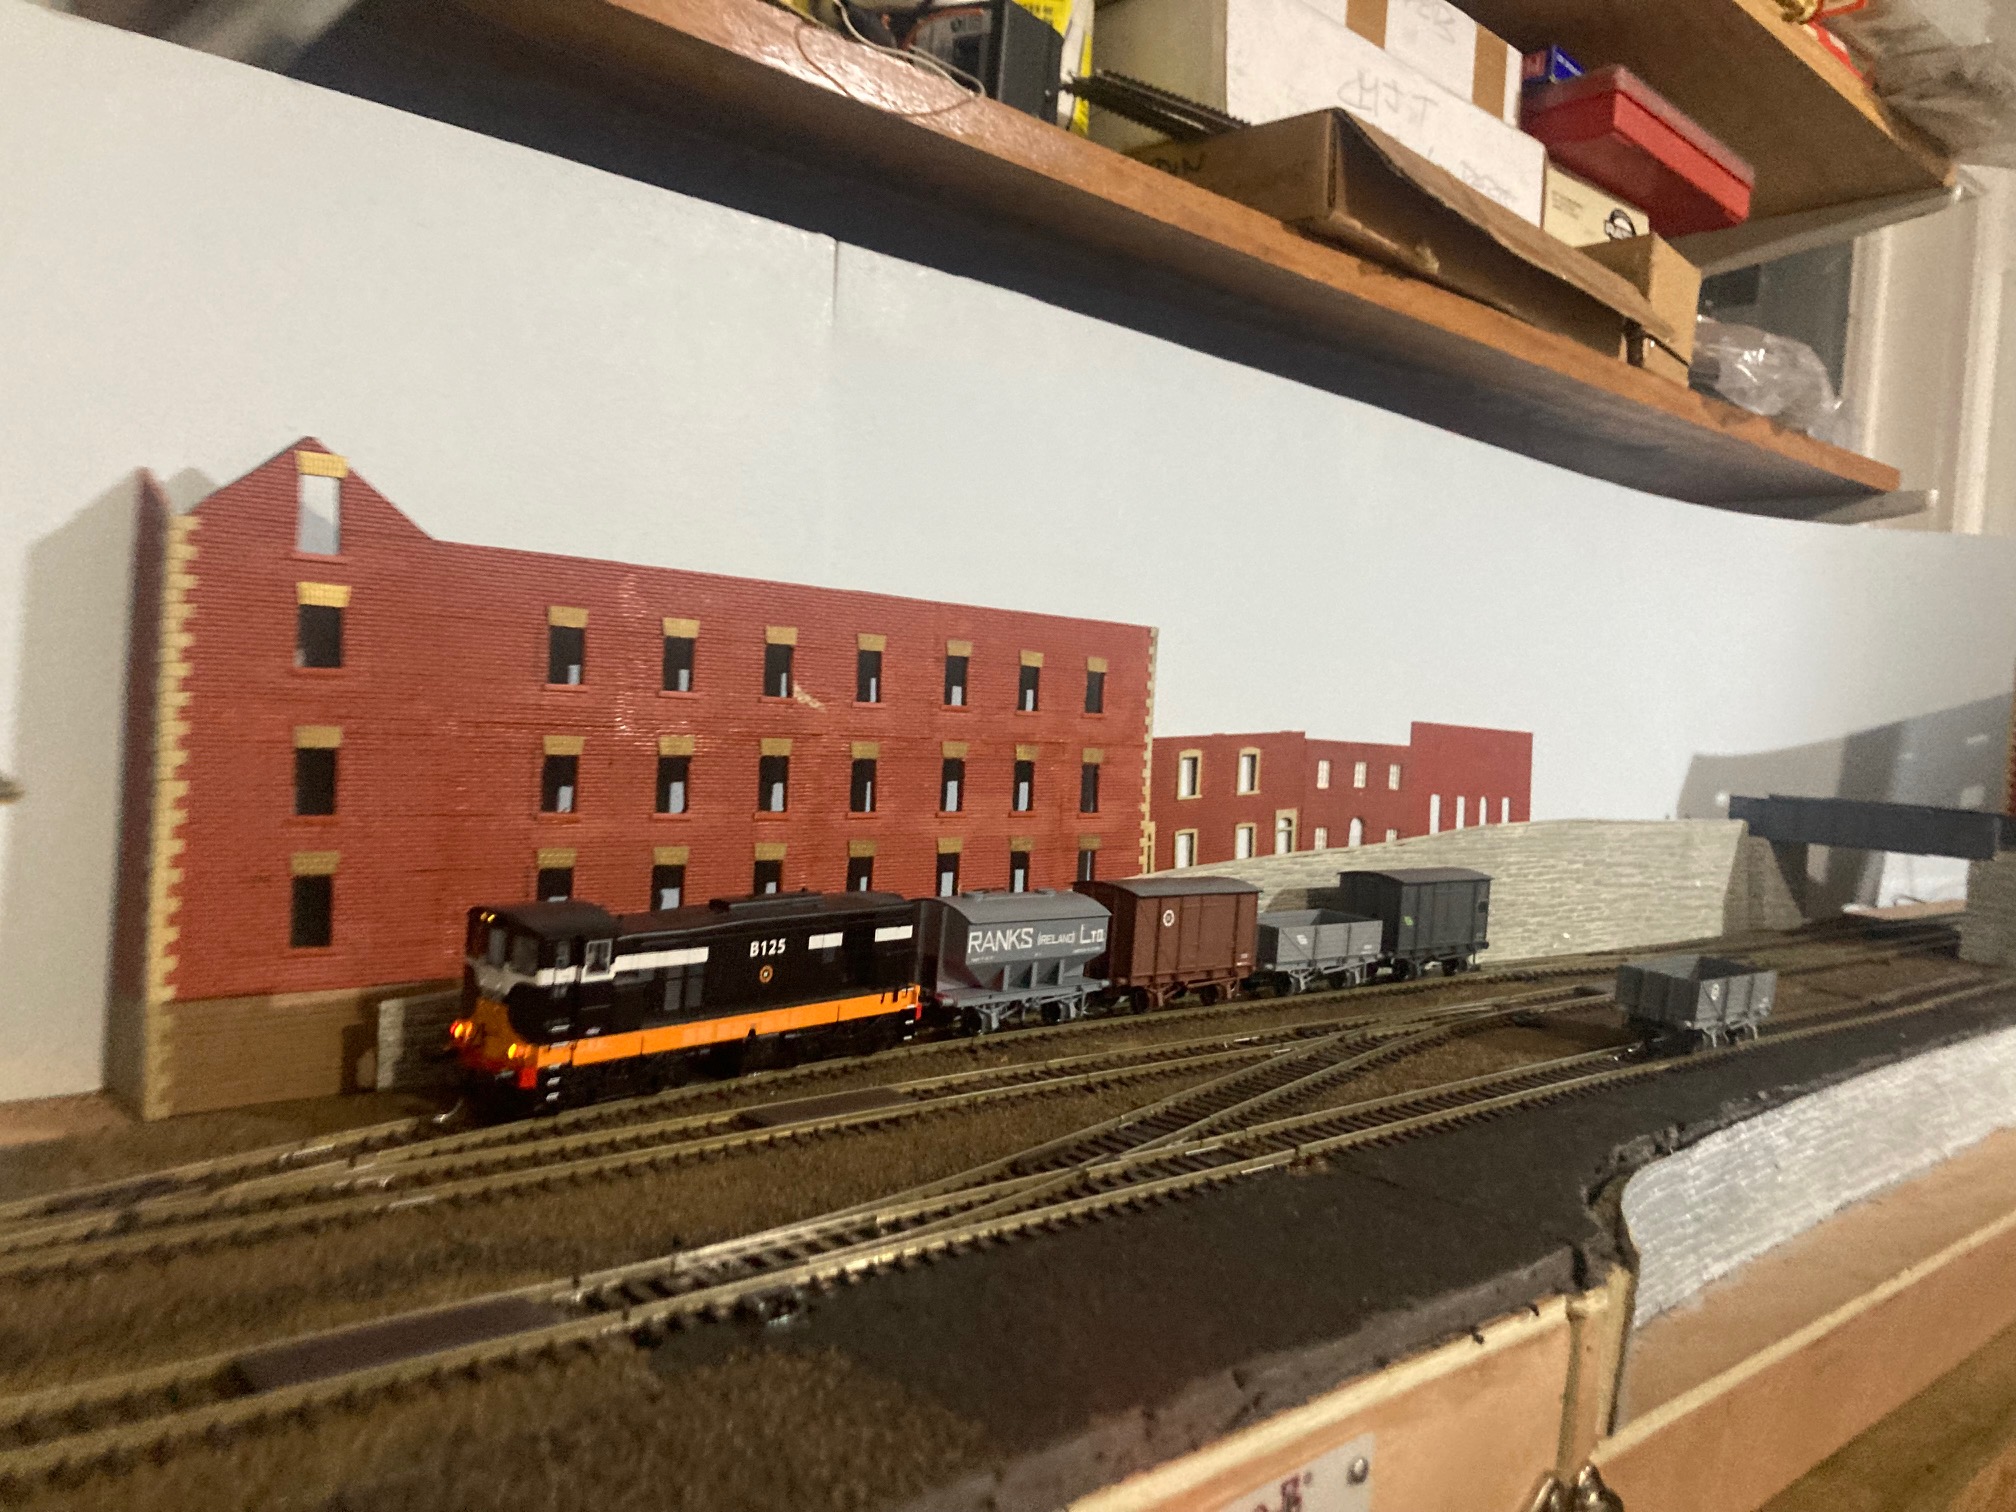
Having done nothing with North Wharf since February I painted the backscene with a "sky" blue undercoat and hooked up the radio DCC system, mainly because I need to move the layout out of the workshop/layout room to the home office! I will fit view blockers, fascia and pelmet once I complete the scenic works and possibly buildings The small Digitrix panel is a Radio/Infra-Red receiver allowing "hands free' operation with loco(s) and points controlled by DCC, remoter uncoupling with Kadee couplers and uncoupling magnets. I still need to finalise the buildings and structures in the Granary end. Complete terrace of houses between maltings and overbridge with semi-low relief malting building in corner behind bridge. The traverser/fiddle yard restricts train length to a small loco and 4 wagons. Baseboard end view showing DCC-Concepts baseboard alignment dowels and power connector (track and point power). The blue mixed at the local DIY store came out very close to the existing (2012-4?) backscenes. Backscenes screwed to stripwood strips.
- 78 replies
-
- 11
-

-
Up to the mid 1990 block fertiliser trains regularly operated from Shelton Abbey, Foynes, New Ross, and occasionally Galway possibly from Belfast and Cork to destinations around the CIE/IE Network the majority of depots were served by a loop or siding so a train could be unloaded clear of the Main Line. The 1980 WWT had 3 bagged fertiliser paths daily to and from Shelton Abbey which appear to have operated regularly two from Shelton to the South & West and One to Cabra which acted as a staging point for other destinations. An 09:35 Shelton-New Ross via Kilkenny path is listed in the WTT this may have been used for block fertiliser trains serving Carlow, Kilkenny or Waterford. I remember seeing a block fertiliser being unloaded in the yard on the north side of the running lines in Kilkenny in 92/3 while a bagged cement train was being unloaded in the yard in on the south side present station building. Albatros fertiliser traffic from New Ross is likely to have been covered in the "Weekly Notices" with no scheduled trains or paths listed on the New Ross branch where laden fertiliser trains were operated in two portions between New Ross and Waterford because of grades. The 1980 WTT lists one Galway-Farranfore (private siding) and two Shelton-Tralee paths.
-
An AEC 3-4 car railcar set particularly the GNR version would make a very attractive "Pocket Express" train. The GNR tended to run its AEC cars in 4 cars sets on Enterprise Duties and as 3 car sets on suburban and secondary main line duties. The relationship between commissioners such as Murphy Models and the Chinese factories has changed significantly since Kader/Bachmann produced the B141 with smaller minimum order quantities with a new generation of Chinese OEM manufacturers entering the model railway market. Needless to say the shift from selling through bricks and mortar retailers to on-line pre-orders/purchase has a significant impact on the cashflow situation during manufacture.
-
Like the IRM focus on block train wagons the MM Supertrain EGVs and Restaurant cars may have been viable because customers were buying complete train sets as opposed to an individual coach or wagon. If I recall correctly it took a long time for MM stock of Craven Coaches to completely sell out despite selling through both Irish & UK retail channels including Mark's, Hattons and Rails. It would make sense to market an AEC railcar set as a complete train complete with intermediate coach and buffet car, the main snag is that CIE and GNR/NIR used completely different types of trailing car requiring different tooling for a typical CIE or GNR railcar set. CIE originally built conventional timber framed "Bredin MK2" Open Coaches and Buffet cars to run with its AEC railcar sets, The Park Royals and "Laminates" were introduced during the mid-late 50s, there were no matching Park Royal or Laminate Buffet cars. While a steam or diesel loco with multiple livery versions is likely to sell out (A Blue Vs pretty please!!) as much from the collectors and modelers market, demand for individual coaches and wagons is less certain. One of the more interesting pieces of feedback received after sending samples of JM Design rtr wagons to Irish Irish Model Railway Clubs was that a lot of people "could not see the point" of buying a prototypical accurate model of an Irish wagon when the could buy a similar UK wagon cheaper from Hornby, Bachmann or Dapol a fact that has been borne out to a degree by actual demand.
-
There is an interesting RM Web post from Stephen on the minimum numbers in terms of sale Accurascale consider viable for producing a particular model https://www.rmweb.co.uk/topic/155786-more-model-ideas/page/66/. Difficult to see the sales of Irish individual locos, coaches or wagons reaching those levels due to the very small size of the market (1000 active modellers/collectors ) The forthcoming IRM Enterprise stock is based on a synergy with the Accurascale MK2, though whether the numbers stack up for an 80 Class or even IE MK2ac with Dutch Van only Accurascale and IRM know. While locos particularly prestigious ones (possibly railcars) and block train wagons are likely to sell, its difficult to see IRM or tooling up for a 'essential items" for the 1950-80s era such a Buffet Cars, Heating and Luggage Vans and TPOs let alone a GSWR Corridor or a MGWR 6w coach for Southern Modellers Modellers of Ulster's railways broad and narrow continue to show great resilience and determination continuing to scratch, kit and scratchbuild high quality models of locos stock and structures as opposed to waiting for rtr models or kits to appear!
-
22-----------26590-26611 Doyle & Hirsch Locomotives and Rolling stock of IR & NIR 1987. There is a note that 26594,26597/8,26601,26607 & 26610 were built as dolomite ore wagons and converted in 1997.
-
Great to see a layout with realistic modelled buildings, structures and signals, the bullhead track and point rodding adds to the realism.
-
I remember seeing them in Enniscorthy 92/93 while travelling around the IE system on a rambler ticket. For modellers outside the 1969-82 era possible scenarios including Pfizer/Quigley continuing operations into the IE era (plant converted to burn Kinsale natural gas similar to Marino point) or wagons re-purposed to carry a bulk traffic that had to be kept dry in transit such as soda ash, bulk fertiliser or other chemicals.
-
Matariki (ma-ta-ri-ki) considered the beginning of the New Year in this part of the world when the Pleiades become visible in Northern sky during late June after disappearing earlier in May-June. Not a lot to report on the model railway front: I currently have a very small number of decorated Brake Vans and Open Wagons in stock together with a small stock of undecorated Open Wagons, GSWR, LMA and early CIE H Vans available for immediate dispatch. I am currently planning to focus on supplying undecorated wagons to order with a 6-8 week lead-time as it is uneconomic to continue manufacturing decorated rtr wagons without a significant price increase. https://jmdesignmodelrailways.com/
-
- 2
-
-
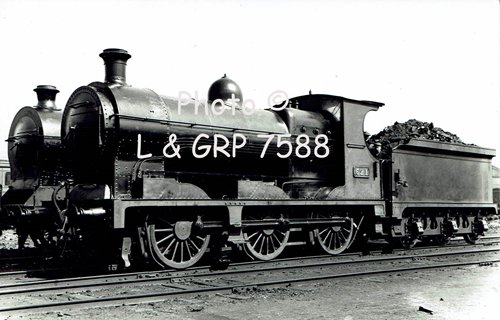
One of the more interesting transformations was the Midland Great Western re-building of four Avonside 0-6-0s dating from 1878 as practically new locos as the MGWR H Class from 1906 onwards. Ordered by the Waterford Dungarvan and Lismore, the locos were apparently rejected as a result of late delivery before being bought cheaply by the MGWR. In their original form the locos had an almost "Long Boiler" appearance with a high pitched boiler and conventional cab similar to the Hunslet Austerity re-build as opposed to the relatively low pitched boilers fitted to contemporary MGWR & GSWR locos. The Avonsides appear to have been restricted to banking duties because of insufficient boiler power until fitted with larger boilers following their first rebuild, the locos received a second rebuild between 1918 and 1922 during which they were fitted with superheaters and piston valves and large tenders, practically new locos apart from wheels cranks and frames. The high pitched boiler and firebox was largely dictated by the locos symmetrical 7'6" + 7'6" coupled wheelbase, I don't know whether this was driven by Avonsides Industrial heritage or the curves of the Waterford Dungarvan & Lismore line. Even in their final rebuilt form the Hs or J6 looked unusual for an Irish 0-6-0 with their high pitched boilers, small driving wheels, straight running board and rear overhang. I have got to build one some day!
-
Peco and Heljan settling on 1:120 rather than the established 1:100 for "British TT" is an interesting one. Like the original Code 100 Streamline (HO Scale) track system of the 60s Peco are also looking at the American and Continental 1:120 Scale TT market. While a nice intermediate size/scale between OO and N, its difficult to see the advent of the new track system and British outline TT 1:120 models having an affect on the Irish railway modelling scene. I cannot see IRM or Murphy Models introducing a range of rtr 1:100 or 1:120 scale Irish locos and stock, let alone a bespoke 5'3" gauge track system. Irish TT is very much a scratch/kitbuilders scale, I know of one MRSI member Brian McCann who modelled the Donegal during the 1990s in 1:100 on 9mm or N Gauge track, and of the Ballyconnell Road 5'3" gauge layout, Worsley Works supply Irish scratchbuilders parts in TT scale. While Irish 5'3" and 3' gauge is feasible in TT (1:100 scale) on OO and OO9/N gauge track and a way to get something running reasonably quickly, the track is a different scale to the model and as no suitable rtr stock is available you may as well follow the example of the Ballyconnell Road group and hand lay the track to the correct gauge as you already have to build the loco and rolling stock chassis. The existing Peco HOm track system is ideal for Irish 3' gauge in 4mm and in my opinion a more reliable track system than the Tillig H0m system. (I had to replace the Tilling points with Peco on my Irish 3' gauge layout).
-
Northern Ireland lignite traffic
Mayner replied to Bóithre Iarainn's question in Questions & Answers
The most striking aspect of converting Kilroot from oil to lignite burning would have been the requirement to burn over 6,000 tons of lignite daily while the station was operating at peak capacity. NIR/Northern Ireland Electric would have had to consider using heavy haul locos similar to the BR Class 56 or Foster Yeoman Class 59 to reliably transport such a high tonnage in order to avoid clogging up the NCC system and 'Antrim Branch" with Lignite Trains. Single B201 hauled lignite trains were likely to be restricted to 520 tonnes gross (333 net) and 11 CDA/HAA or 18 trains daily between Crumlin and Kilroot (based on their load limits between North Wall and Cabra and the South Wexford, while a 071/111 or pair of Bo Bos were likely to be allowed 630 tonnes (429 net )and 13 CDA or 13 trains daily. A more workable solution would have been to operate 3-4 1500-2000 ton trains daily with a dedicated 'heavy haul' loco and stock possibly owned by the lignite mine operator in a similar manner to Foster Yeoman/Mendip Rail during the 1980s and 90s or modern UK "Open Access' operators with the Northern Ireland Electricity and Transport Department responsible for providing and funding rail infrastructure. In the end it probably worked out cheaper and resulted in a lot less environmental damage run Kilroot on imported coal rather than locally mined (open cast) lignite. -
Northern Ireland lignite traffic
Mayner replied to Bóithre Iarainn's question in Questions & Answers
Transporting lignite by rail to Kilroot would have required significant investment by the promoters in a fleet of high capacity wagons and reliable locomotives as the operation had to be capable of operating reliably 365/24/7 in order to generate Northern Ireland's electricity. The scheme if it every got beyond the feasibility stage is likely to have fallen on the basis that it was cheaper to run Kilroot on imported coal, than mine and transport the lignite, recent schemes appear to be based on building a powerstation at the mine site. Our local power station Huntly of similar (coal burning) capacity to Kilroot receives up to 3,000 tonnes (2X30 wagon train loads) of imported coal daily to supplement locally mined coal while running at full capacity. https://www.nzherald.co.nz/business/tranz-rail-and-genesis-look-to-sign-coal-moving-deal/KZIRMVTNKGUHVHSO4OTNVT23LU/ Lignite appears to have a similar density a high capacity bogie wagon similar to the EWS HTA or a longer version of the IE Tara/Shale wagon would have been a sensible choice, the lower heat content of lignite (64% of coal) would have required a higher tonnage of lignite to be hauled than an equivalent coal burning operation, perhaps 4,500 tonnes daily between Crumlin and Kilroot which would have been pushing it from a motive power and timetabling perspective! B201s topping and tailing 8 wagon trains of hopper/tippler wagons (640 tonnes gross, 496 net) anyone? -
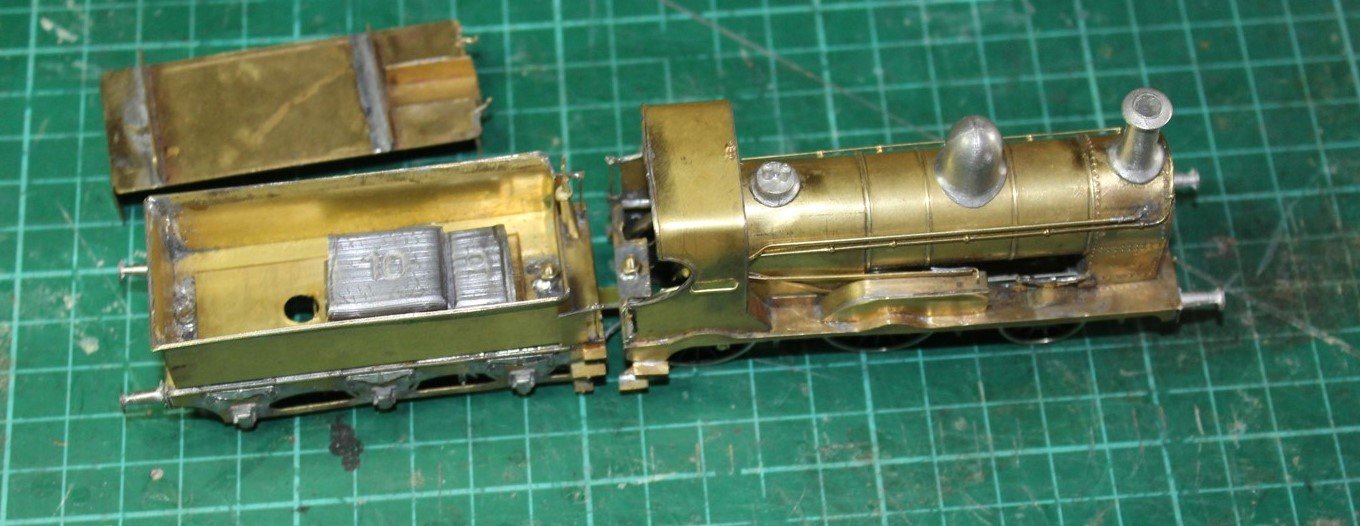
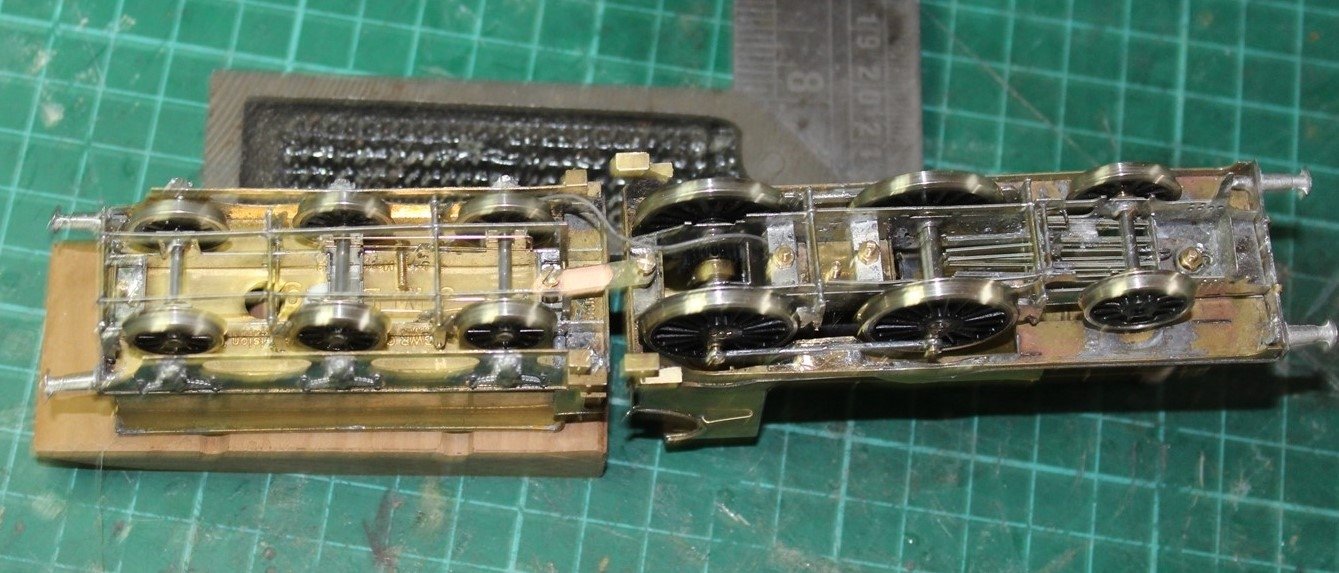
Same class of loco only slightly smaller. I use the "weighted tender" approach where some of the tender weight is transferred through the drawbar to the loco for balancing 2-4-0s and 4-4-0s. The center and leading tender axles running in slots are lightly sprung with phosphor bronze wire. I assembled this example (OO) with a rigid loco chassis and the loco proved capable of hauling 18 IRM wagons on test The loco is weighted with weights in the first ring of the boiler immediately behind the smoklebox and a smaller weight under the motor in the ashpan and a large weight in the tender. I replaced the lead weights with cast "Woods Metal" weights I avoided wiper or plunger power pick ups (too fiddly in 4mm) by using the American pick up system with the loco and tender picking up power on opposite sides using 'live axle' pick ups.
-
whats happening at gorey good yard?
Mayner replied to Sean's topic in What's happening on the network?
The arrangement of the goods shed loading bank and cattle dock at Gorey is not unlike Listowel, there are some interesting photos of the yard in its final years complete with stacks of pallets, cable drums and farm machinery on the loading bank in "Rails Through North Kerry, a good example of a typical CIE goods yard. It looks like the two stub ended sidings at the station end terminated in an end loading dock, the diamond crossing arrangement appears to be set up for attaching non passenger coaching stock (horseboxes, carriage trucks) or vans carrying urgent traffic to mail or passenger trains. This type of traffic would have largely died out by the late 1960s Its possible that the oil depot beside the goods yard was once served by rail, a common arrangement between the 1930s and mid 1970s when the railways accepted individual wagon loads In the 1960 WTT overnight Wexford goods was scheduled to call at Gorey 11:39-12:00 Down 2:18-2:39 Up and the day Enniscorthy Goods 11:00-11:30 Down 10:39-11:05 (a very busy time) Gorey appears to have closed to goods traffic except cement when the Wexford Goods went over to Liner train operation at some stage in 77/78?, in theory Gorey and Wicklow were to be served by road from Arklow in practice Sundries and Unit Load (container) traffic on the Wexford line was very light and the Liner was discontinued in the mid-late 1980s.
-
whats happening at gorey good yard?
Mayner replied to Sean's topic in What's happening on the network?
It looks like they have demolished the lean to office building at the south gable of the shed. The canopy/hayshed over the former goods loop was added in the late 1970s as a shelter for unloading Bagged Cement Trains until traffic ceased in the late 1990s, it looks like the goods loop was retained and all the remaining sidings were removed when Gorey The shed would have functioned in a similar manner to a modern logistics warehouse until the station was closed to freight traffic apart from bagged cement. High value traffic would have been stored in the goods shed for collection or delivery from the railway (sundries, cigarettes, tobacco, spirits, motor parts), less valuable goods would be loaded/unloaded by CIE staff or the customer on the loading bank. Customers sometimes bought a wagon load of (covered) cement or fertiliser (open) and used "his wagon" as a temporary store, unloading as the need arose as demurrage costs if charged were very low. -
The Adams radial conversion looks closer to the Kerry Bogie with its smaller driving wheels and less squiggly running board than the GSWR Express passenger 4-4-0s. Depends on how much carving/modification your prepared to carry out to the loco body, popular with crews originally had raised roundtopped boilers, re-built with belpair boilers by the GSR class withdrawn during early 1950s

.jpg.0c6dc871b8f6bd5ad86137ff18fb0b1e.jpg)
.jpg.5f51c6eb0d22cf321f8eca06c302229e.jpg)
.jpg.5bc6ca71b1172e89898c6754b38c27da.jpg)
.jpg.0d6cbdf0d4464e64a49cdc144355ac1d.jpg)
.jpg.0013b3c584733a653213d7a2d9f7d11a.jpg)